#free notion template
Text

The free Re: Dracula Notion template is now available! I loved working with the creators of Re: Dracula on this project, and you should absolutely check out their podcast if you haven’t already!
#notion#notion aesthetic#aesthetic#aesthetic notion#notion template#free notion template#roses#rose aesthetic#Dracula#re: Dracula#re dracula#podcast#audio drama#podcast Notion#podcast Notion template#vampire#vampires
378 notes
·
View notes
Text
coquette notion template

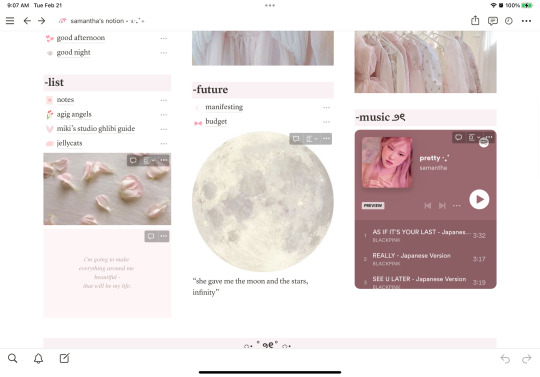


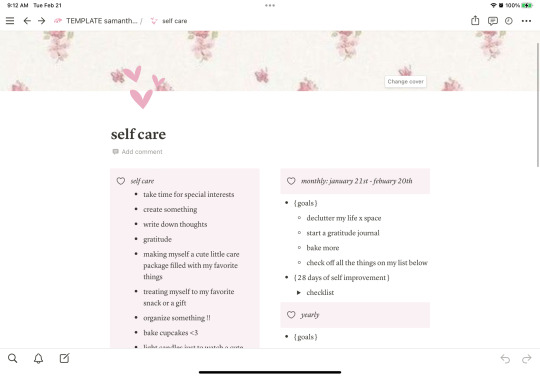
https://www.notion.so/TEMPLATE-samantha-s-notion-1a32d749a3de4ac99171d60a1ea28c07?pvs=4
#notion#notion template#free notion template#coquette aesthetic#coquette#dollette#dollette aesthetic#coquette template#coquette notion#coquette notion template#template#pastel pink#pink aesthetic#pink aura#pink notion#girly notion#girly aesthetic
422 notes
·
View notes
Text

Thank you for 100+ followers on Ko-fi!!! Please be sure to check out my new FREE Student Planner Notion Template :)
#notion#aesthetic notion template#free notion templates#free#free stuff#very stressed right now so I've been creating a lot of notion templates#help#go get this one tho#I'm quite proud#free notion template#student planner#digital planner#productivity#organization#student dashboard#student planner notion template#anime#anime cherry blossom#cherry blossom
87 notes
·
View notes
Text
Free notion templates
Hi! I'll be doing free customized notion templates (I'll do around 5 each month). I'm not a professional with notion, but I've learned some skills during the year, making templates and watching other peoples templates. Here you have my last one:
If you want a notion template, you should write me a message with this information:
Format: all in one or linked pages
Everything you want your template to have or (if you aren't soure of your specific template) the purpose of it
The aesthetic, color scheme, widgets or specific images (this one is optional, but advisable)
31 notes
·
View notes
Text

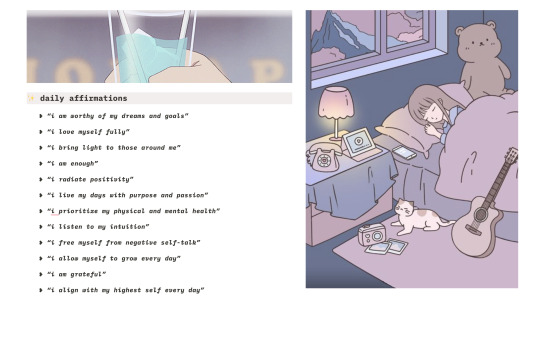
pretty pastel ‧͙⁺˚*・༓☾
pretty pastel is a daily habit tracking page with a cozy feel! it comes with (8) editable habits toggle menus to keep track of your progress monday through sunday & daily affirmations!
this template is free to use. please like and reblog if you use!
link to duplicate
90 notes
·
View notes
Text


🫧☆ notion collector page !!
⊹ 🪐 . . ݁ ࣪paginas inclusas
homepage;
wishlist (c/ prio, quero, sonho, a caminho, tenho)
controle de coleção (c/ infos sobre gom/seller, preços [card e frete], datas)
twitter | pinterest | template
#notion#notion page#notion inspo#template notion#free notion template#notion aesthetic#inspo notion#collector#pc collector#photocard collector#poca collector#template#notion collector page
8 notes
·
View notes
Text
my notion templates - a masterpost
below are all my templates i've released. i'm still working on some new products so be on the look out. all my templates are free, always but you're welcome to pay if you have the means.
buy me a coffee | support my work
templates are under the cut.

roseOS - my personal dashboard
grab the template here
features:
aesthetic minimal layout
daily, weekly, monthly, quarterly, & yearly databases
top priorities & to-dos on main dashboard
minimal schedule timetable
notes:
click "duplicate" in the top right corner to add it to your workspace and edit it.
read the template guide for additional info
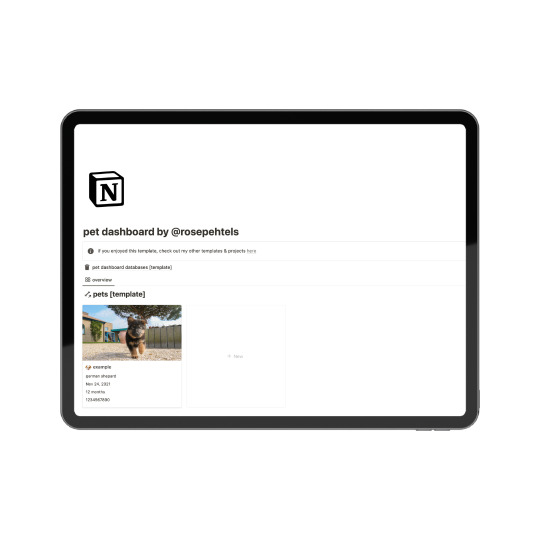
pet dashboard - pet organization system
grab the template here
features:
pet database with properties to add adoption date & birthdate. the formula will tell you the zodiac sign and age based on those dates
databases for tracking vaccinations, vet appointments, health issues, training etc
notes:
click "duplicate" in the top right corner to add it to your workspace and edit it.
read the template guide for additional info

medication tracker - all-in-one medication organizer
grab it here
features:
database to track your medications
properties for adding mg, next refill date and more!
notes:
click "duplicate" in the top right corner to add it to your workspace and edit it.
read the template guide for additional info

apartment search - notion template organizer
grab the template here
features:
database to track your apartment listing
properties to add features, rent, address, and other information you might need to know
notes:
click "duplicate" in the top right corner to add it to your workspace and edit it.
read the template guide for additional info
coming soon

worldbuildingOS - all-in-one worldbuilding system COMING SOON
grab the template here
how to get my templates for free
watch this tutorial for how to get my templates for free(put 0 as the price). please do not share my templates with anyone outside of yourself.
upvote my products on producthunt
** graphics created by me using canva **
tag me if you use my templates <3
redistribution and reselling even with modifications of my products are strictly prohibited. please credit me if you create a template based on my ideas. all my templates are original ideas.
read my faq here
#notion templates#notion app#notion.so#notion tour#notion setup#notion free templates#notion free#free notion template#free notion templates#template hub#notion template hub#notion inspo#notion#rpnotiontemplatemasterpost#rpmasterposts
3 notes
·
View notes
Text

Shopping List Tracker template!
Not me back again with the templates! Have a 100% free super simple and easy-to-use shopping list tracker (including a bonus "What's in Season?" page - you better be eating the healthiest of fruit!) which you can find here and if you're feeling particularly generous or inspired, then please donate to the cause here!
6 notes
·
View notes
Text
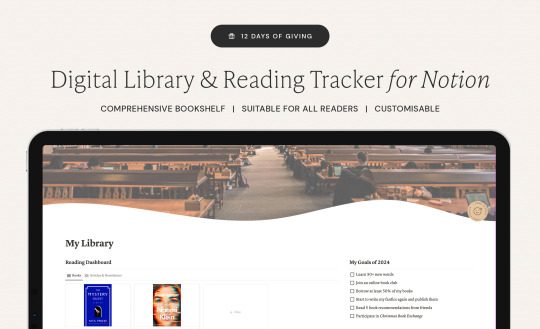

Free Digital Library & Reading
Tracker Notion Template
It's Day 5 of the 12 Days of Giving! As someone who always wishes they could read more, I thought a space to store all my owned books, finished books, to read books, etc would be wonderful.
This Notion helps to add detailed info to all your books and make organising and planning your reads manageable. Included fun features are built in genre & recommendations collections, and a "reread" suggestion date!
Download Free Here
Check back in each day for a new free item! Hopefully they're all useful and a fun way to end the year 🥰🎁
#download#free#studyblr#studyspo#emmastudies#studying#freebie#study girl#study goals#notion#notion template#notion aesthetic#notion app#reading#booklr#booktok#books to read#gn reader#book tracker#bookshelf#biblophile
622 notes
·
View notes
Text
How to write a novel using Notion
Hello, hello! Hope you're doing well.
Today I'm bringing you a step-by-step tutorial on how to get your novel done with this free notion template I've created.
So, first of all, imagine you have a bright idea. That's the first step.
Have a Bright Idea
There are many plot generators available out there for you to explore new ideas.
For this post, I'll be using RanGen.
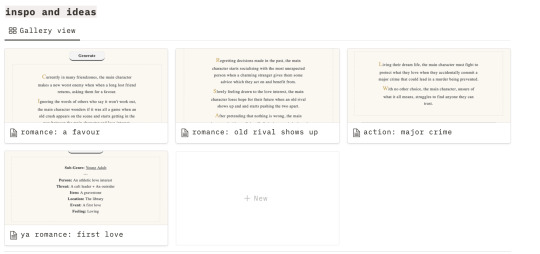
Now that I've generated a couple of ideas, I will write them down in the section "inspo & ideas", to, later on, pick the one that suits me the best.
After picking an idea, it's time to start developing it.
Brainstorm
On Notion, go to the section "my novels" and create a new one.
Go to the menu, inside the novel tab, and open "brainstorm". Now, you'll write small phrases and topics about your main idea. After you've done that, you'll brainstorm some possible titles, character names, and plot twists. Also, I've included a place for you to add images to create some sort of inspiration board - this will be helpful to keep you inspired and to visualize the type of vibe of your novel.
Here are my results so far:
Good, let's head out to the plot!
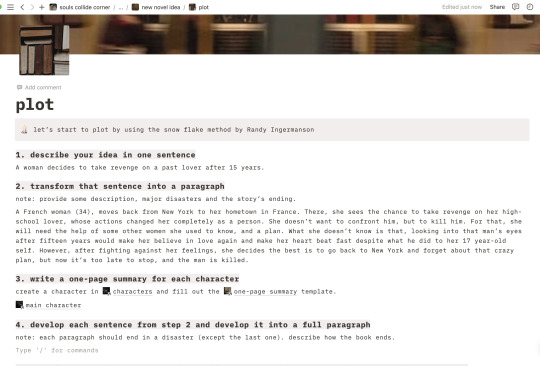
Plot
The plot page is divided into 10 questions, which will help you understand better how your story will develop. This method is called The Snowflake Method and was created by Randy Ingermanson. It consists in writing down a sentence that describes your main idea and slowly developing it until you have almost every detail to start writing the first draft.
Note: I didn't fill out everything in this questionnaire, since I am doing this as an example for the tutorial.
After finishing the Snowflake Method, you'll have almost every character developed, as well as the main scenes of the story. If you need to add something else, feel free to go to the section "characters" to create another character, "scenes" if you want to create a full outline of your book, or "world building" if you need to add places that will take huge importance in the plot.
When you feel satisfied, it's time to start writing your first draft, based on the "scenes" database.

That's everything for today!
Thanks for reading, I hope this was helpful or inspiring!
Get your free Notion template here!
Note:
If you're using my template to develop your story and feel like sharing it, feel free to tag me on your post or use the tag #AuthorsCornerTemplate so that I can see <3
#authorscornertemplate#notion#notion template#template#template for writers#gumroad free#free template#free resources#free write#write#writer#writers#writing#writeblr#writer tips#writerscommunity#writing advice#writing help#writing resources#authors#writers on tumblr#useful#save for later#plot#book plotting#booklr#writebrl#blog#blog post#tumblr
775 notes
·
View notes
Text
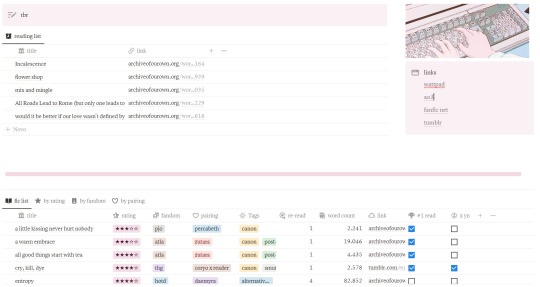
FANFIC LOG - NOTION FREE TEMPLATE
CONTENT:
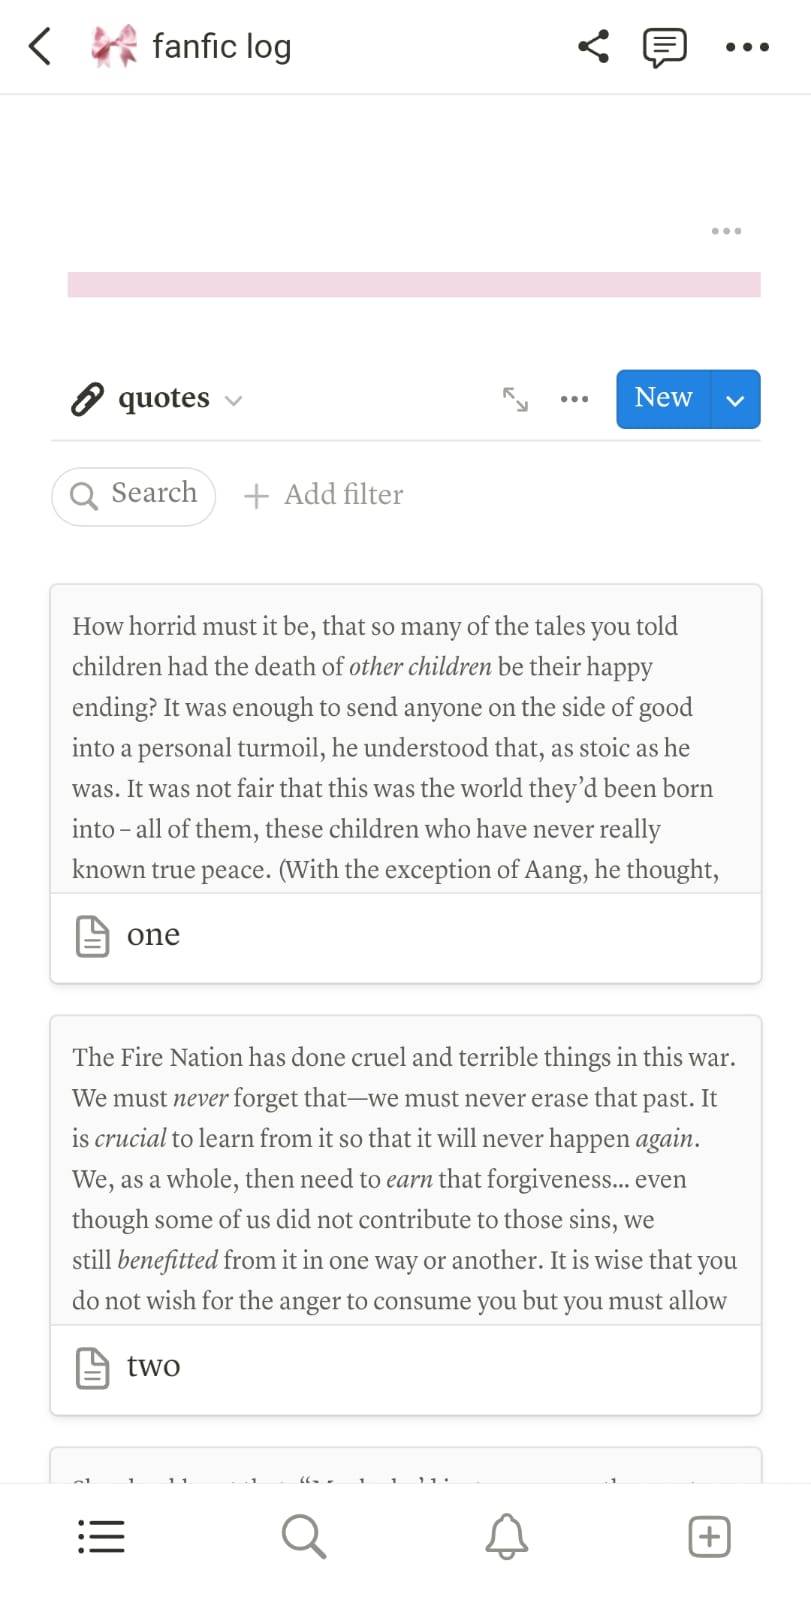
- reading list, division by fandom, pairing, rating, tags and quotes.
EXTRA:
- you can drag the item from the reading list to the fanfic list afte you've read it
- the list view can be altered according to your preferences
LINK HERE!! + (buy me a coffee?)
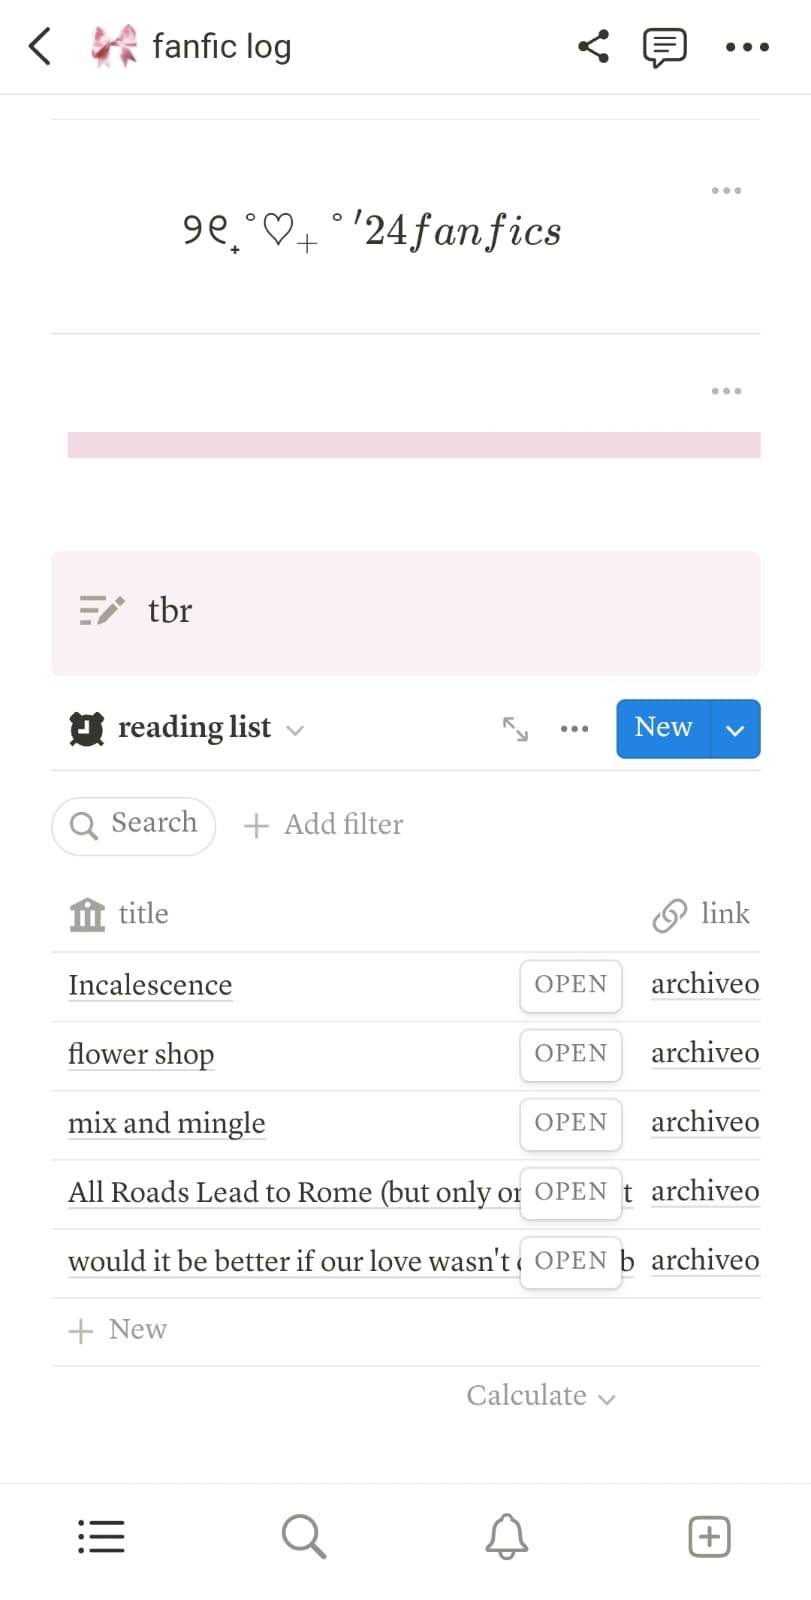
MOBILE VERSION


#template#notion#notion template#fanfic#fanfic rec notion#pink template#notion dashboard#fic library#fic tracker#media tacker#free template#free notion
62 notes
·
View notes
Text

Free Notion template! This one is for tracking your audio dramas, such as The Magnus Archives, and getting the most out of them! Available at the link below:
#Notion#free notion template#notion aesthetic#Notion template#podcast#Audio drama#aestheitcs#aesthetic#aesthetic notion
127 notes
·
View notes
Text
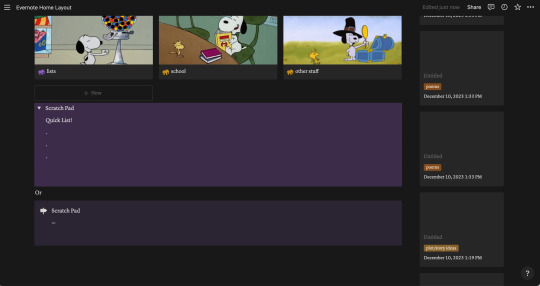
Evernote to Notion Tutorial!
As an avid Notion user whose first love was Evernote, I was also very upset at the sudden high charge and limit of Evernote to 50 free notes... I already had 565 notes in there, and was a fan of the simplistic yet useful mechanism for taking notes with a click, organizing them in notebooks, and being able to use tags, archived files, etc.
So I have taken it upon myself to recreate the mechanism as closely as possible.
This is my final result: easy to make into your own!

Template link, though I suggest looking over this tutorial most of all:)
I also have to say, I love how it is relatively great for the mobile option as well! Especially with my gallery views and button for new notes.


**I recommend using a computer/laptop for this!
Step 1: Importing all your notes
- Instructions directly quoted from the Notion website:
You can import all of your Evernote data into Notion in one go, and retain its organization.
From the import window, choose Evernote
Sign into your Evernote account.
Authorize Evernote to connect to Notion.
Once your Evernote account is linked, check the boxes next to the notebooks you'd like to move and click Import
Your Evernote notebooks will appear as pages in Notion's sidebar. Inside, you'll find your notes as items in a list database.
Each note can be dragged and dropped anywhere else within Notion
Step 2: Move notebooks into ONE database
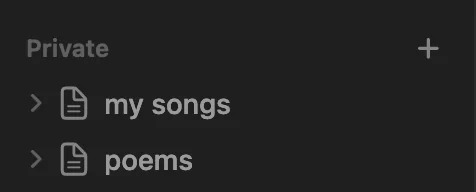
Let all your notebooks load correctly -- I personally checked the amount of notes each notebook had to match the ones in Evernote. The notebooks will go into the Notion pages on the sidebar like the picture, and each page will automatically add the notes into a NEW DATABASE table, which tells the amount of notes at the bottom.
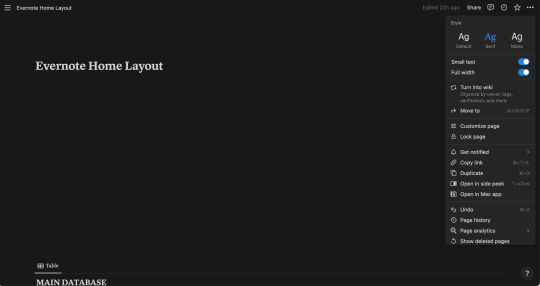
Create a new blank page: this will be your EVERNOTE HOME layout
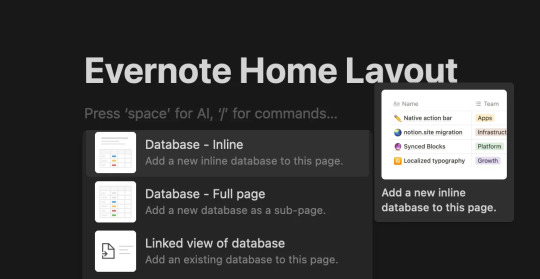
Inside this page, create a New Database (preferably in Table form)

This will be the MAIN DATABASE
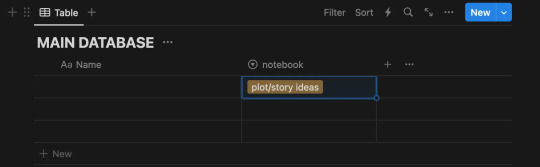
In this database, click ...
Then click + Add a new property and click Select.
I named the property "notebook". Then include in the options all the different notebooks you had in Evernote! Here is my specific example:

4. Add ALL the notes to the new database
Each "notebook" is automatically a separate database, we don't want that!
With tedious work, copy all the notes from the first notebook into the new database
Go into the first "notebook" (on the sidebar, just imported from Evernote) and press CTRL-A or Command-A to select all the notes. Then copy them with CTRL-V or Command-V.
Then go into your EVERNOTE HOME LAYOUT
Paste the notes into your MAIN DATABASE
Make sure the notes are inside the database, they will be part of the MAIN DATABASE table!
WARNING!!! BEFORE PASTING THE OTHER NOTEBOOKS' NOTES:
After pasting the First Notebook notes on the MAIN DATABASE, put the correct notebook property in each one!
I could not find a better way to do this than selecting a Single Note > Click on the "Notebook" property > Select the preferred notebook ("plot/story ideas") > click away > click back on the square until it is selected (the whole square turns blue) > then copy it (CTRL-C or Command-C) > then select the rest of the notes in that property column (like in picture 3) - and pasting the property to all of them at once.

(select property + CTRL-C or Command-C)
(select the rest of the notes - for ease, click on one, then press SHIFT and arrow down!)
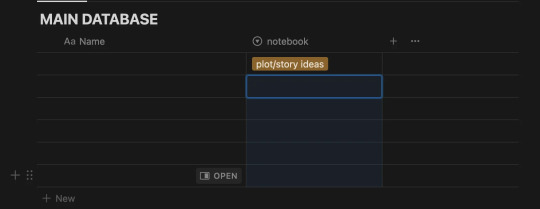
(Paste the property to the rest of the notes all at once)

-- Thank you @ myself for complicating a very simple procedure --
Continuing:
5. Next - copy and paste the notes of each note book into the MAIN DATABASE, each time making sure you add the "notebook" property as said in Step 4.
For ease: I found it helpful to sort the notes (... > Sort > Updated > Descending)
When this is done, you should have all your notes into a single database (MAIN DATABASE), organized by notebooks.
Make the Evernote Home Layout - 2 options
*If you're new to Notion, you will slowly get the hang of databases, don't worry. I am making this as detailed as possible:)
Option 1: Use my free template!
Please let me know if you have any problems accessing it.
Option 2: Follow my instructions and make your layout your own
You can follow my steps as I create my preferred layout, and change things around (magic of notion) to make this into your own.
I prefer to make my page Full Width, Small text, and change the font (upper right corner: ...)
With the space bar I give some space to the whole ordeal.
Now, what exactly am I saving from a normal Evernote Home Page?
Recent notes
Scratch pad
(Would be so very easy to get a pinned note, and recently captured as well, though I don't do this in this tutorial)

Notebooks Gallery Tutorial
Press anywhere on the page > Click + > Scroll and Click on Gallery View > Click New Database
It should look like this
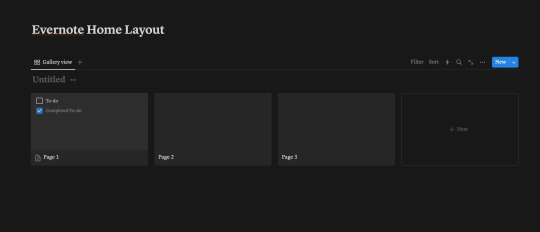
This here is a new database that we will call "Notebooks Database"
Each page shown there can be each notebook, and if you don't wish to show it in Gallery view, and instead have a simple list, you can!
For that Press ... > Layout > List
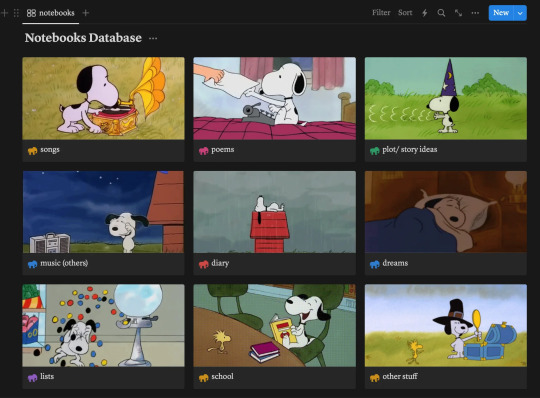
I will continue showing how to make the Gallery View like my own layout however:)

You can customize each page by clicking on it, changing the name (to each notebook you have), adding a cover and icon, however you wish.
Notion Tip: Instead of having to download images, you can Copy Image Link to almost any GIF of image on Google, Pinterest, etc, and then pasting the link!

Make sure you select "Page Cover" to be shown for your Notebooks Database Gallery View!
... > Layout > Gallery > Card Preview > Page Cover
My final result:
Notion Tip: To hide the name of "Notebooks Database", click the three dots ... next to it and click Hide Database Title
2. Recent Notes Gallery Tutorial:
To explain how to add the RECENT notes view I will make a video:
This is exactly what I do:
Make space after the title > Move a Block next to another Block to create 2 columns > Drag the Notebooks Database Gallery to Column 1
In column 2: Add a New Gallery View > Choose Main Database > Add whatever Properties you would like shown > Sort > By Created Time/ Updated Time (depending on preference)

For this one, make sure you put "Page Content" to be shown
... > Layout > Gallery > Card Preview > Page Content

3. New Note Shortcut Button Tutorial
To add a button so you can quickly add a new note like in Evernote, do the following (shown in the video below)
Click anywhere > + > Button > Add page > (Add page to) "MAIN DATABASE" > (Delete the name property) > + Add another step > Open Page > Select Page > New Page Added
Explore all the other features of this new button!
4. Finally, customize each Notebook Page:
Click on each Notebook page > Add a Gallery/List/Table view > Filter > Choose selected notebook tag > Sort > Updated time > Descendant
(video/gif tutorial shows how i personalized mine, I still have more stuff I want to add but those are the basics!)
BONUS: Add a Scratch Pad
Click anywhere > + > Add a Toggle List > ::: > Customize color
OR
Click anywhere > + > Add Callout > Customize color and Icon
Thank you for following this tutorial and I hope it was helpful and less daunting for new Notion users after the Evernote downfall:) Please send any questions, feel free to add your own ways to make things easier and other tips and hacks you may have!
#evernote#notion#evernote alternative#notion tutorial#notion template#notion free template#notion dashboard#organization#notes app#productivity#productive#notes#time management
43 notes
·
View notes
Text
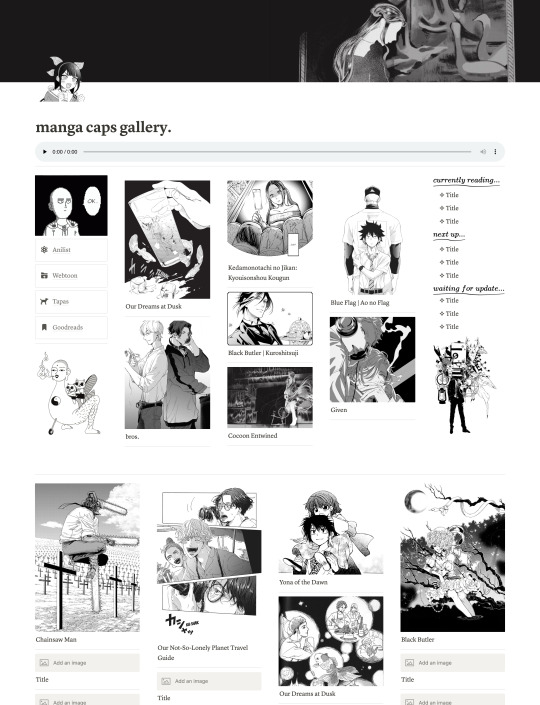
Want a fun, aesthetic way to organize your favorite manga caps/panels?
I just made a very simple, one page Manga Cap Gallery Template for Notion!
Get it for FREE on my Ko-Fi: https://ko-fi.com/s/977d529370
If you don't have Notion, just sign up with your email or Google account (registration is free), then come back to link you'll receive after checking out on Ko-Fi. Once you have opened the template in your Notion workspace, click "Duplicate" in the upper right-hand corner.
Notion is super customizable - you can easily upload your fave panels and swap the images I've used to decorate the template, change the banner, etc.
If you like it, please consider supporting me on Ko-Fi! (๑•ᴗ•๑)
#notion#notion template#notion templates#manga#manga caps#manga library#manga bookshelf#media tracker#templates#notion manga tracker template#aesthetic notion templates#monochrome#black and white#monochrome aesthetic#manga aesthetic#manga readers#manga reader#free#free notion template#free notion templates
76 notes
·
View notes
Text
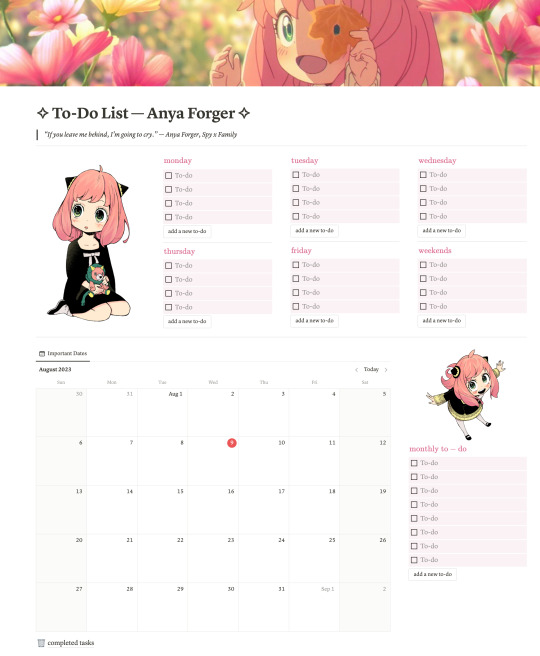
FREE | Weekly To-Do List Notion Template | Weekly/Monthly Planner | Spy x Family Notion Template | Weekly Spread Notion Template
Presenting the FREE Anya Forger Weekly (and Monthly) To-Do List Notion Template!
Ge the template HERE!
#notion templates#aesthetic notion templates#notion#kawaii#anya forger#spy x family#pink aesthetic#cute notion templates#to-do list#weekly to-do list notion template#spy x family theme#free notion templates#free stuff#free templates#to-do#weekly spread
48 notes
·
View notes
Text

TALES OF MOSS ‧͙⁺˚*・༓☾
tales of moss is a dark academia inspired library/reading list template. it includes a "virtual bookshelf" to leave a synopsis of finished books, a wish list, tbr table, and a dark academia spotify playlist to set the mood.
this template is available for $1. you can click here to purchase on payhip! please like and reblog if you use!
#notion#notion template#free notion template#studyblr#organization#aesthetic#commission#productive#productivity#study#reading#planner#planning#bookblr
75 notes
·
View notes
Last Seen Blogs

gyms17king
Untitled

sebastianstanbingo
Sebastian Stan Bingo

oyujin
Yujin o

miijiu
MIJIU IS HERE
muchoazul
Be Yourself