#i remembered how to open photoshop
Photo

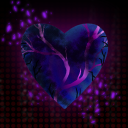
what smoking two packs a day does to a mf
#ffxiv#elidibus#themis#final fantasy xiv#final fantasy 14#ff14#smoking#in light of recent events#i remember folks tried to argue with me that he was neither elidibus#nor will he have that voice#:) well#also hi#i remembered how to open photoshop
1K notes
·
View notes
Text


HAPPY 45TH BIRTHDAY DEAN WINCHESTER ✨
#deansbirthdaybash#spn#supernatural#dean winchester#spnedit#deanedit#my stuff#myspn#dailyspngifs#spncreatorsdaily#cowboycoven#scottstiles#tuserpris#tuserjord#useranny#deanncastiel#useralison#spn 14x04 / spn 1x04 / spn 12x11 / spn 15x14 / spn 4x13 / spn 10x17#happy birthday to this little guy <333333#hey look i remembered how to gif after not opening photoshop for 3 months!
3K notes
·
View notes
Text

Carole Middleton - 6x07
(screencap credit)
#thecrownedit#the crown#carole middleton#eve best#evebestonline#mine#in a shocking turn of events I remembered how to open photoshop#in another shocking turn of events I started with the scene that was easiest to color#I wanna have words with the lighting department of this show
45 notes
·
View notes
Text
Jensen ackles get Dean Winchester out of that prequel show right now or so help me
#I am#so concerned#like I don’t actually get how people are excited about it tbh#like I can’t think of a single way in which he could pull it off without retconning spn#or worse just erasing the entire show#like just by him being in that photos they’ve opened so many plot holes#like he’s dean’s death was stupid lmao but surely he’s not gonna fuck over the entire tv show and timeline just bc he’s mad about it#like SURELY#I’m gonna have to watch the silly retcon show now aren’t I#someone please get Jensen away from the spn name the last 5 seasons were bad enough just let it rest now#also#then photoshopping sam out is funny until I remember spn was at its core about their relationship#so then like just pretending sam doesn’t exist kinda just makes it seem like no one involved cares about the original shows themes#god I need him to let it rest#spn#the winchesters
2 notes
·
View notes
Text
can’t believe I’m about to risk the anonymity of my secret danganronpa account (IF YOU KNOW ME IRL NO YOU DONT) but we had to cancel our sdr2 game night yesterday cos someone was busy so the rest of the group came round to help me decorate my christmas tree instead and it went normal
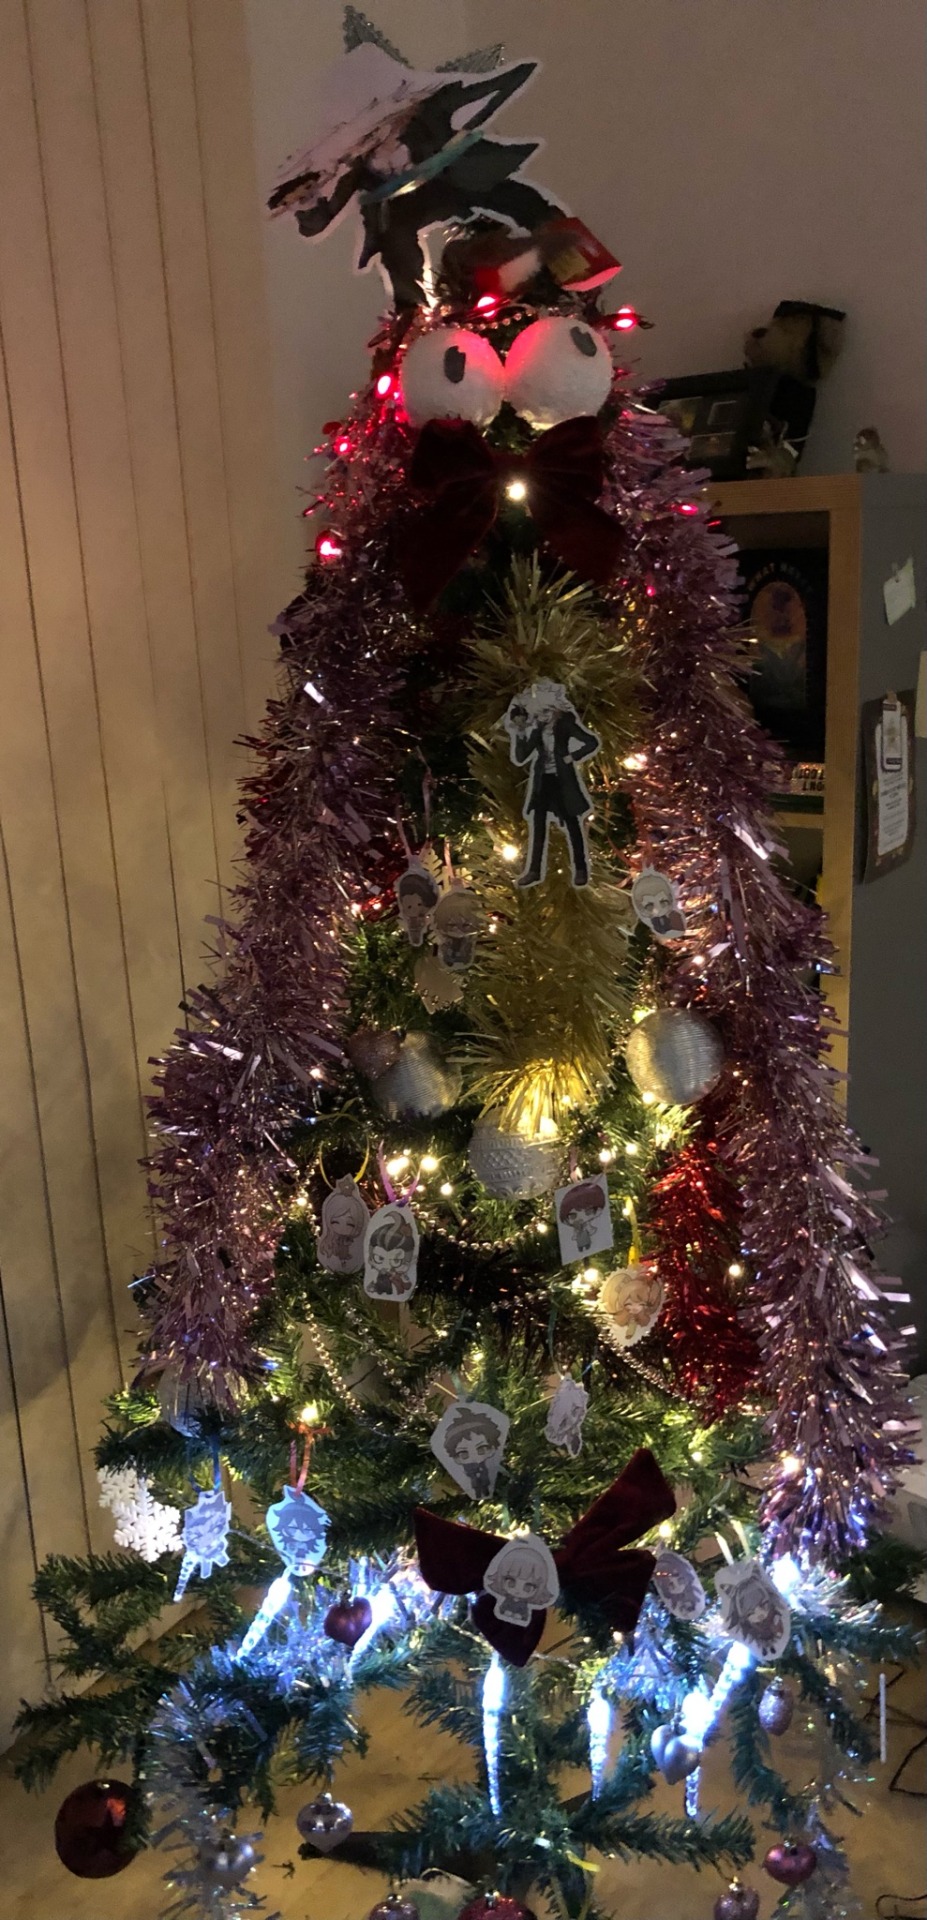

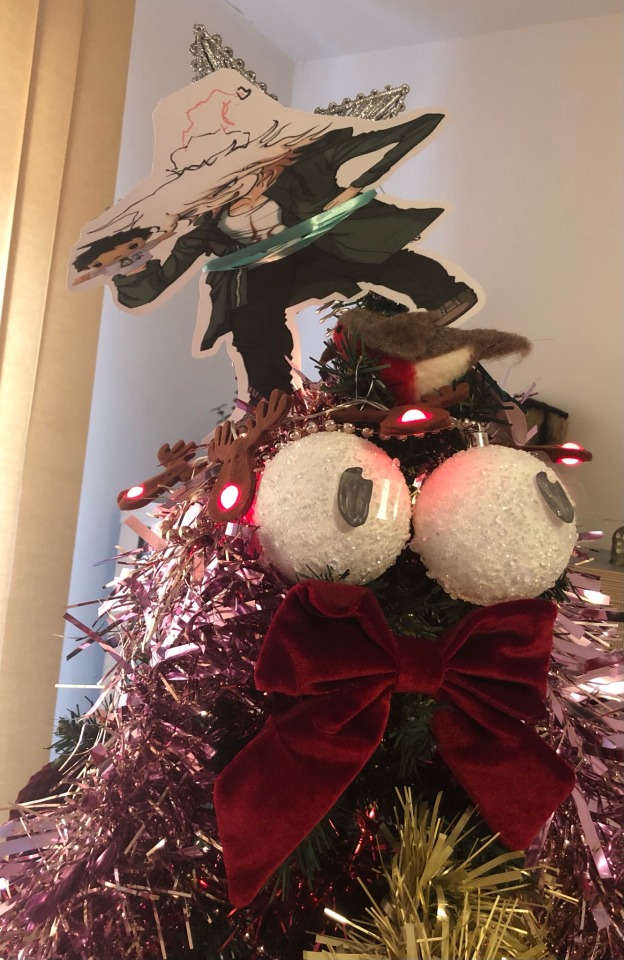


#I honestly have no idea what happened#turns out we shouldn’t be left unsupervised with a printer and some ribbon#I opened up photoshop for the first time in a year just to add Handjime to the Nagito decorations#if anyone wants Nagito with Handjime or any of the other Christmas sprites to print out let me know I guess lmao#there are normal baubles on there I swear we just had to put them on the back so the tree didn’t fall over lmao#w i d e Nagito tied to the star kills me every time I look at it#I wonder what young coco would say if I could go back in time and tell her this is what being in her mid 20s looked like#‘yes this is your first Christmas living by yourself with complete control over the decorations’#tbh she’d probably just be confused why it wasn’t pokemon#turns out adulthood is having to figure out how to avoid having your anime Christmas tree in the background of work video calls#in semi-related news I finally remembered to pick up my mood stabilisers from the pharmacy today#anyway anyone got any advice on how the hell I explain this to my Nan when she comes to visit soon lmao#oops rambled in my own tags again
5 notes
·
View notes
Text
Just a bunch of Useful websites - Updated for 2023
Removed/checked all links to make sure everything is working (03/03/23). Hope they help!
Sejda - Free online PDF editor.
Supercook - Have ingredients but no idea what to make? Put them in here and it'll give you recipe ideas.
Still Tasty - Trying the above but unsure about whether that sauce in the fridge is still edible? Check here first.
Archive.ph - Paywall bypass. Like 12ft below but appears to work far better and across more sites in my testing. I'd recommend trying this one first as I had more success with it.
12ft – Hate paywalls? Try this site out.
Where Is This - Want to know where a picture was taken, this site can help.
TOS/DR - Terms of service, didn't read. Gives you a summary of terms of service plus gives each site a privacy rating.
OneLook - Reverse dictionary for when you know the description of the word but can't for the life of you remember the actual word.
My Abandonware - Brilliant site for free, legal games. Has games from 1978 up to present day across pc and console. You'll be surprised by some of the games on there, some absolute gems.
Project Gutenberg – Always ends up on these type of lists and for very good reason. All works that are copyright free in one place.
Ninite – New PC? Install all of your programs in one go with no bloat or unnecessary crap.
PatchMyPC - Alternative to ninite with over 300 app options to keep upto date. Free for home users.
Unchecky – Tired of software trying to install additional unwanted programs? This will stop it completely by unchecking the necessary boxes when you install.
Sci-Hub – Research papers galore! Check here before shelling out money. And if it’s not here, try the next link in our list.
LibGen – Lots of free PDFs relate primarily to the sciences.
Zotero – A free and easy to use program to collect, organize, cite and share research.
Car Complaints – Buying a used car? Check out what other owners of the same model have to say about it first.
CamelCamelCamel – Check the historical prices of items on Amazon and set alerts for when prices drop.
Have I Been Pawned – Still the king when it comes to checking if your online accounts have been released in a data breach. Also able to sign up for email alerts if you’ve ever a victim of a breach.
I Have No TV - A collection of documentaries for you to while away the time. Completely free.
Radio Garden – Think Google Earth but wherever you zoom, you get the radio station of that place.
Just The Recipe – Paste in the url and get just the recipe as a result. No life story or adverts.
Tineye – An Amazing reverse image search tool.
My 90s TV – Simulates 90’s TV using YouTube videos. Also has My80sTV, My70sTV, My60sTV and for the younger ones out there, My00sTV. Lose yourself in nostalgia.
Foto Forensics – Free image analysis tools.
Old Games Download – A repository of games from the 90’s and early 2000’s. Get your fix of nostalgia here.
Online OCR – Convert pictures of text into actual text and output it in the format you need.
Remove Background – An amazingly quick and accurate way to remove backgrounds from your pictures.
Twoseven – Allows you to sync videos from providers such as Netflix, Youtube, Disney+ etc and watch them with your friends. Ad free and also has the ability to do real time video and text chat.
Terms of Service, Didn’t Read – Get a quick summary of Terms of service plus a privacy rating.
Coolors – Struggling to get a good combination of colors? This site will generate color palettes for you.
This To That – Need to glue two things together? This’ll help.
Photopea – A free online alternative to Adobe Photoshop. Does everything in your browser.
BitWarden – Free open source password manager.
Just Beam It - Peer to peer file transfer. Drop the file in on one end, click create link and send to whoever. Leave your pc on that page while they download. Because of how it works there are no file limits. It's genuinely amazing. Best file transfer system I have ever used.
Atlas Obscura – Travelling to a new place? Find out the hidden treasures you should go to with Atlas Obscura.
ID Ransomware – Ever get ransomware on your computer? Use this to see if the virus infecting your pc has been cracked yet or not. Potentially saving you money. You can also sign up for email notifications if your particular problem hasn’t been cracked yet.
Way Back Machine – The Internet Archive is a non-profit library of millions of free books, movies, software, music, websites and loads more.
Rome2Rio – Directions from anywhere to anywhere by bus, train, plane, car and ferry.
Splitter – Seperate different audio tracks audio. Allowing you to split out music from the words for example.
myNoise – Gives you beautiful noises to match your mood. Increase your productivity, calm down and need help sleeping? All here for you.
DeepL – Best language translation tool on the web.
Forvo – Alternatively, if you need to hear a local speaking a word, this is the site for you.
For even more useful sites, there is an expanded list that can be found here.
76K notes
·
View notes
Text
max's questionable knowledge of charles lore:
- when max quoted the incident video on more than 5 occassions unprompted
- when max was running around the paddock in baku with a pic of charles and him as kids that he happened to find and journalists were questioning why he's so happy all of sudden and then he started showing the pic
- when max remembered a niche chuck leclerc joke and had to explain it on a podcast
- when max started explaining how charles couldn't open the door to his flat for his gf because he was live on twitch
- when max ran behind charles to take off the red bull sticker like the down bad loser he is and had to play it cool because a ferrari employee did it firsr
- when he knew the incident vid by heart in a tiktok challenge
- when he remembered a specific charles radio from years ago
- when he quoted charles' "i dont think anymore"
- when he remembered what he tweeted to charles in like 2016
- when he named charles his rival when he was an experienced f1 driver and charles was a rookie in sauber
- max immediately recognizing charles' helmet from karting when he was like 5
- when he filmed charles on the mclaren camera for so long he had to be reminded to shoot oscar too
- when charles called him out and gave him a christmas gift of the f1 game with photoshopped charles 3x on the cover and wrote a note "for my biggest fan"
and more
1K notes
·
View notes
Text

midnights, 10.2 * mv1

you drop your head with a small smile. "only if you promise to pick me up?"
through his own tears, max laughs and throws his head back. it's a familiar line - one you said when he first asked you out all those years ago. he squeezes your hand and shakes it. "only if i get to send you home after."
but you sigh tiredly, resting your head in your hand. "are you sure about this, max? what if we only hurt each other more?"
"it's a risk i'm willing to take," he admits. "because it's you."
because he can't bear to watch you walk out of that door again without a fight. the pain he endured for months leading up to tonight felt like it could last forever - like he'd never get around to getting over you.
nothing in his life has ever been so clear: it's always been you, and it's always going to be you.
there's nobody else for him.
"and if we do, at least we know we tried," max whispers, dropping his head. "if it were up to me, i'd do this over and over and over again... if it means i get to be with you for the rest of my life."
“how sure are you of this, max?”
“i’ve never been so sure of anything in my life.”
"i love you," you smile, starting to feel yourself calm down. a weight has lifted off your shoulders and you instantly feel a tinge of churning in your stomach. "i missed you."
"i missed you more," max sighs, adjusting himself to wrap his arms around your smaller frame. "i miss the way you smell and the way you'd smile at me. i miss your bowl of scrunchies; you have a point making it the table's centrepiece, you know?"
you grin, leaning into his touch. "i'm an interior designer secretly."
"it's what made our home," he sucks in a deep breath, "a home. i hated being there when you were away."
"i hated my apartment without you in it," you confess, a hand holding onto his arm for dear life. “i missed you and the cats.”
you don't know how to convince yourself that this isn't a dream. you don't want to open your eyes and then realise that none of this is real and max is never yours again.
“we’ll do it right this time,” max mutters against your skin with a smile. “i promise i won’t give up on us. you're stuck with me."
"i wanna be stuck with you," you giggle, nuzzling your cheek into his skin. "i'm sorry i wasn't with you when you won the title this year."
"it's alright. we'll just photoshop a picture of us together," max presses a kiss to the top of your head and rubs the exposed skin on your arm, "and then we'll frame it as our biggest picture in the house. we'll tell our kids about it."
"how we photoshopped it?"
"no, how we most definitely celebrated my third title together. we had so much fun, don't you remember?"
"i must be having memory issues. i'm too young for that, max."
"i will take care of you, duh? i'll remind you every single day how much i love you, and you love me." he moves slightly, adjusting so that he can see your face. he brushes the hair away from your face and tucks it behind your ear. “just the way it should be.”
“i’m scared, max. what if we’re never the same again because of this?” it’s a concern that’s been eating at you for the past couple minutes. while being in max’s arms is an ideal situation, what if it’s different this time?
max knows what you mean. he’d also been scared of that. after all the words said, the hurt you caused each other, and those accusations that may never be fully solved — what if you never fall back into what you’re used to?
what if you fall into the same old routine where you’re just fighting again?
“we’ll figure something out, i’m sure,” max cups your cheeks, swiping away the tear stains on your face. “it won’t always be this way. it will get better, i promise.”
you close your eyes, leaning into his touch. a hand comes up to rest over his and you trace shapes on his skin. “i don’t want to hate you.”
“hey,” max’s stern yet gentle tone makes you open your eyes, meeting his cool blue eyes staring into yours with a glimmer you’re unable to fathom. “one step at a time. we will be okay. i will make sure of it.”
you nod and give him a small smile. “one step at a time.”
max smiles, squeezing your cheeks. “i love you.”
he pulls you in gently, one hand coming down to the back of your neck. “you are the only one for me,” he says against your lips, smiling before your lips touch.
you’re overwhelmed by the familiarity of his taste and the way he smells — his perfume bringing you back to a time where your relationship had been so simple. the way his hands feel against your skin and how his lips are moving along with yours fills you with unexplainable joy.
your hands clutch on the material of his shirt by his shoulders, having no idea how much you craved his touch and his sweet words.
he pulls away breathless, giggling dizzily when you lean forward to chase for his touch. he swipes his thumb over your lips to wipe himself off of you. he rests his foreheard on yours.
“do you want to go dance? i know you’re not much of it but we are at a party, after all.”
you smile toothily. you nudge your head to bump his nose. “only if it’s with you.”
taglist: @merchelsea @leclercdream @labelledejourr @laneyspaulding19 @lpab @graciewrote @hollie911 @thatsojasminesworld @mycenterfold @princessria127 @ironmaiden1313 @dl-yum @crlsummer @brekkers-whore @minkyungseokie @honethatty12 @barelytolerabled @vellicora @lokigoeschoki @avg-golden-retriever @lokigoeschoki @cherry-piee @eviethetheatrefreak @hrlzy @dear-fifi @telengraph
#disneyprincemuke#disneyprincemuke imagine#disneyprincemuke midnights#disneyprincemuke f1#max verstappen#max verstappen x reader#max verstappen x fem!reader#max verstappen x you#max verstappen fanfic#formula 1#formula 1 x reader#f1#f1 x reader#f1 x you#f1 fanfic
370 notes
·
View notes
Text
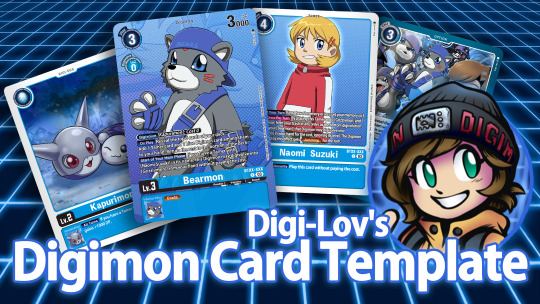
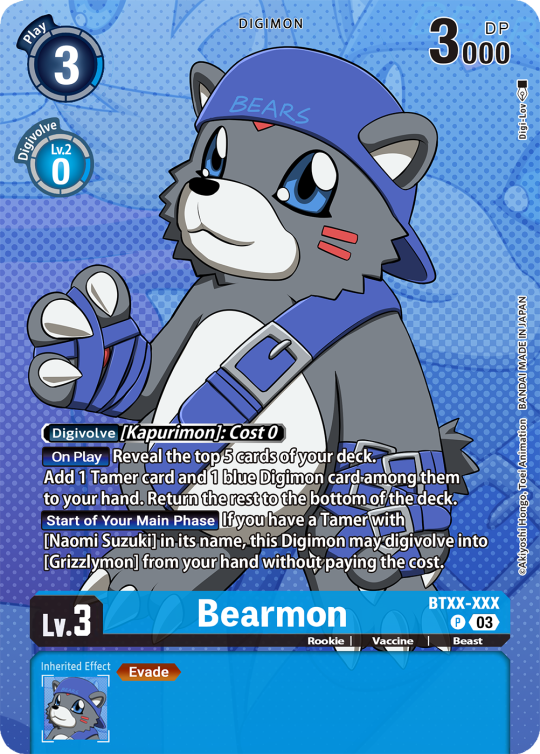
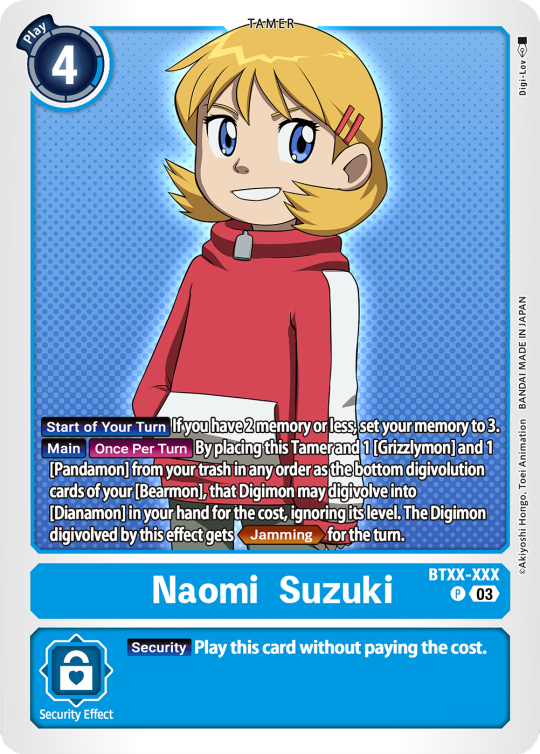
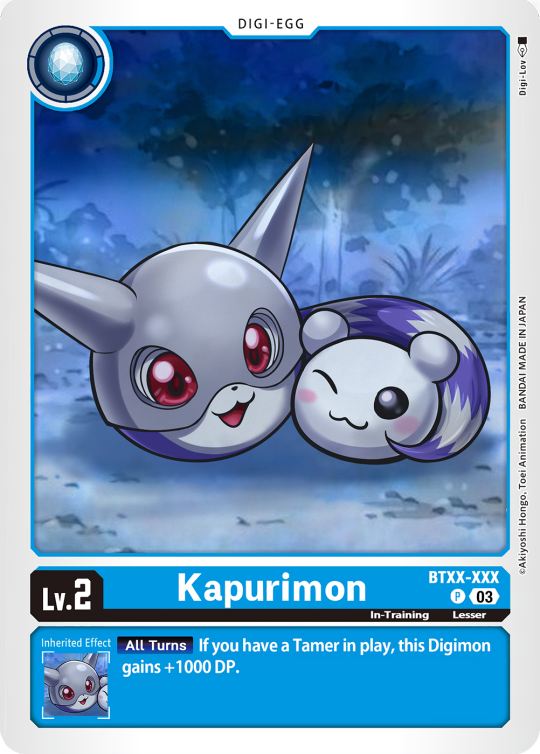
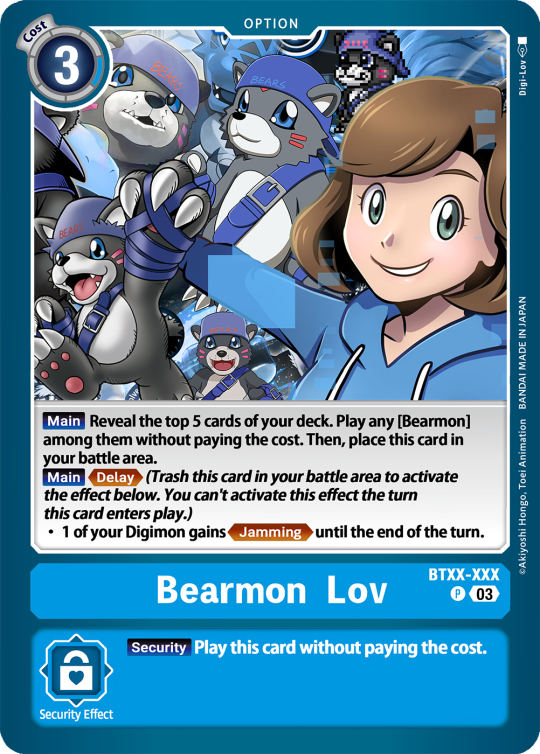
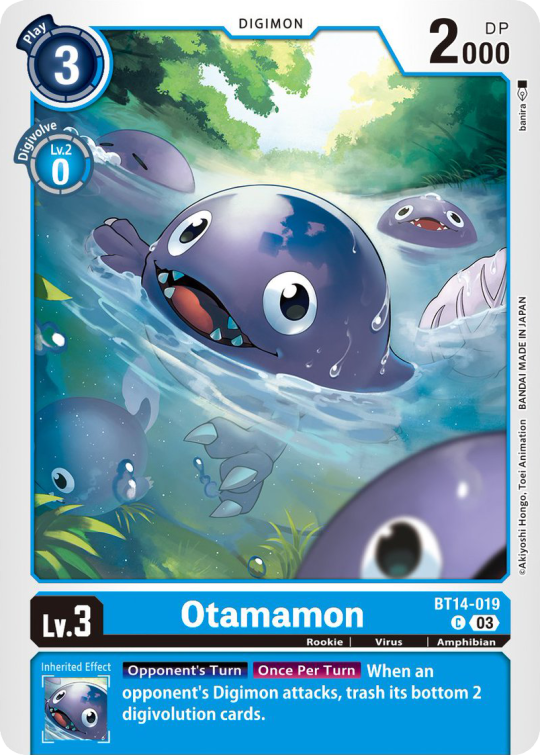
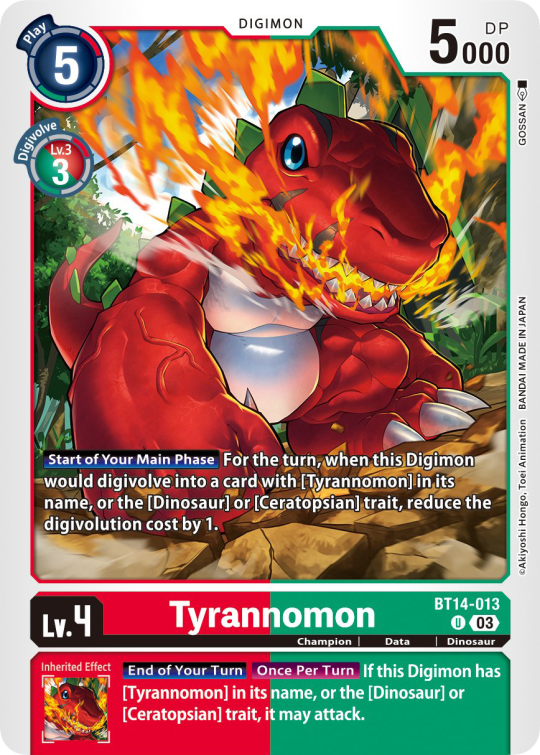
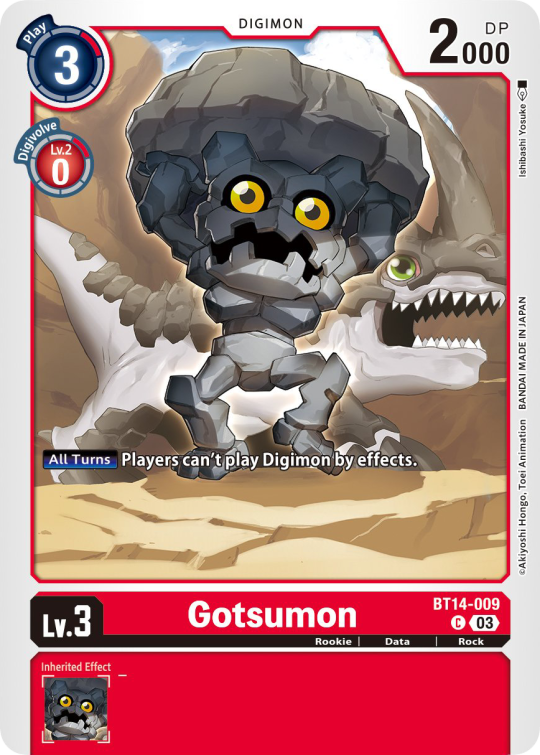
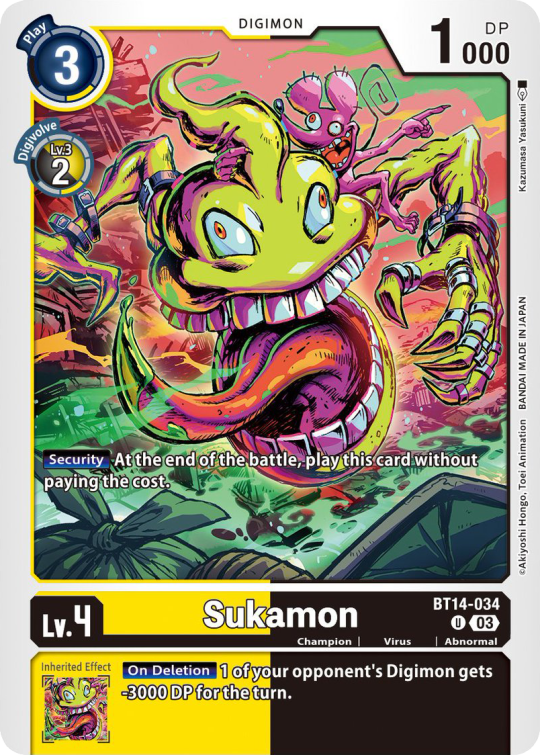
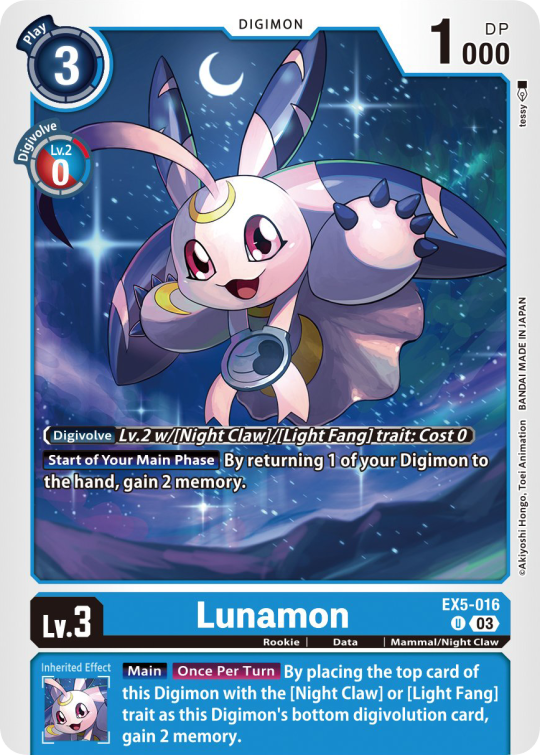
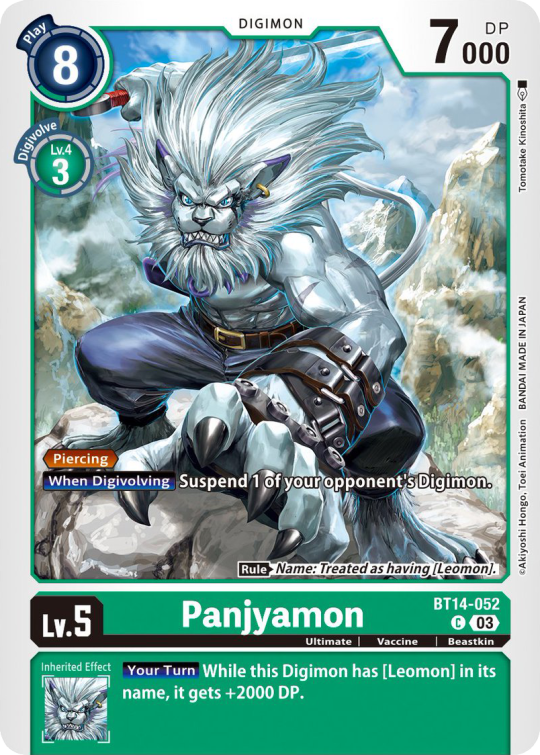
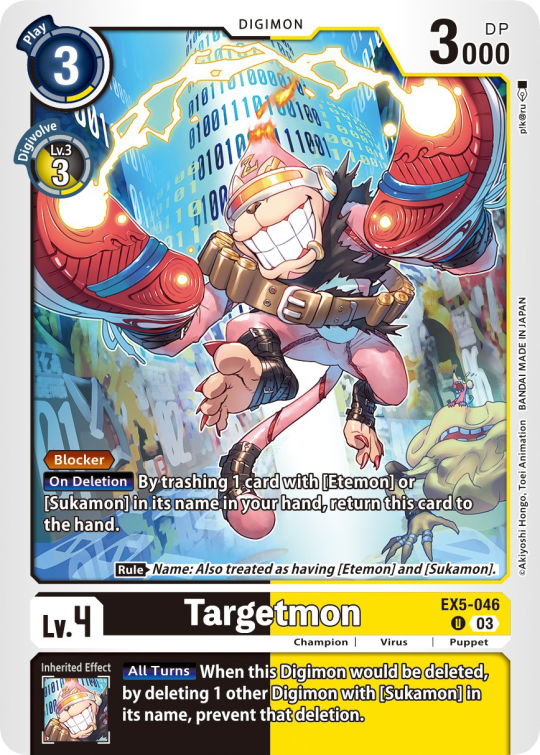
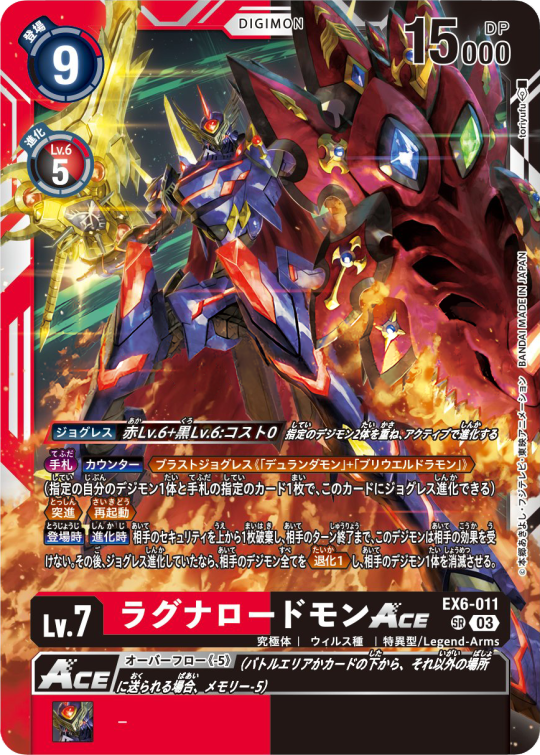
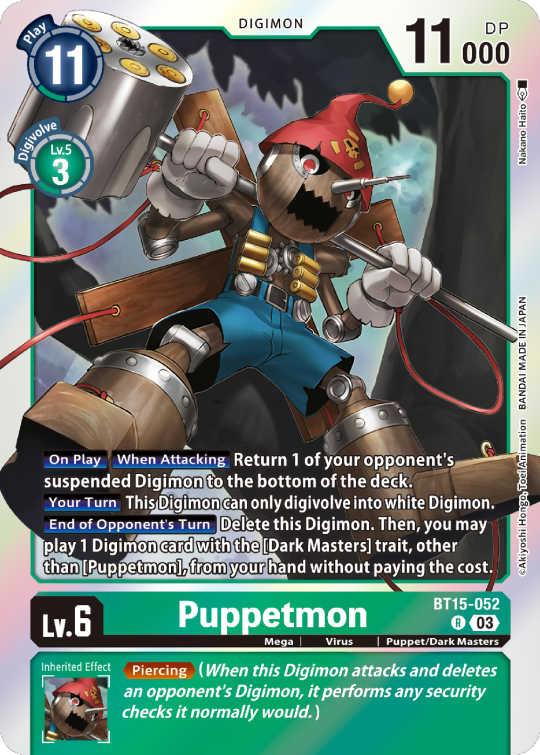
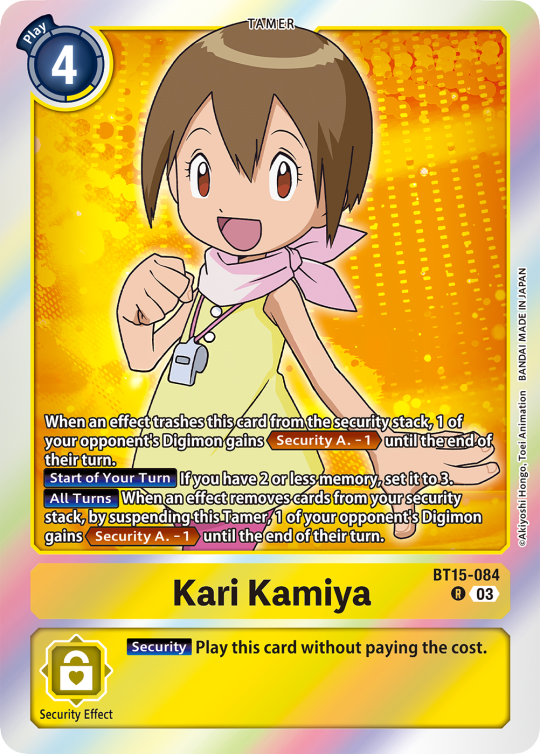
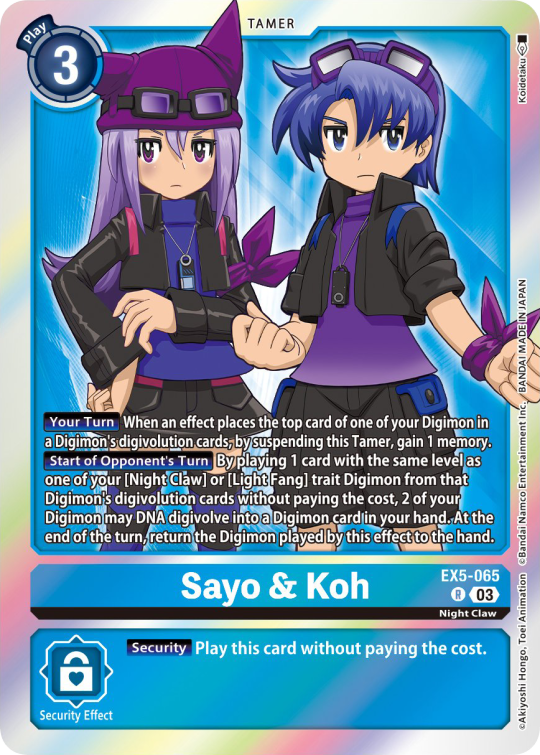
Digimon Card Template->
Hey guys, I finally finished the templates! A few words to read before using, and more words under the cut if you will.
I'd love to see any and all cards you create, so feel free to leave me an ask or DM!
Also if you feel like supporting me a little, feel free to stop by my ko-fi->
First off, all fonts you need for the template are in the "Card Template Fonts" rar file. Remember to install them first before opening the files.
Second, I recommend working with the PSD file in Photoshop, if you can. It has more and easier customization. If you use CSP, do use the CSP files. The PSD Text layers don't work in CSP, as well as certain other settings. I did my best to adapt the file to CSP, and it should work fine!
The Files have "HELP" layers in certain folders, I recommend reading them! Some of the Information I will repeat under the cut.
HAVE FUN! I wanna see lotta cards!
Okay, below the cut I'll leave some notes on how the Digimon cards are designed, as of the num <03> era at least.
Digimon cards have seven different colors. Red, Blue, Green, Yellow, Black, Purple, and White. White cards are rare and reserved for special Digimon/Tamers, and usually don't interact with other colors.
For easier reading, Yellow and White cards have black text in their colors, instead of the usual white text. On multicolored cards, card including Yellow (or white in theory) have white text with a black outline. (before <03> if Yellow was the first color, the text was black with white outline instead, but they unified it with the update)
The color on the left is considered the first color.
Since the design update, the Card color is displayed in a color wheel around the Play cost. The digivolution cost bubble also recieved a color wheel, as well as the buble being split into the differen colors. Imagining it like a clock, the top color is the first, and then circling clockwise.
Digi-Egg, or Lv.2 Digimon are always single color.
[tricolored cards have been introduced just recently and super rare. use sparingly]

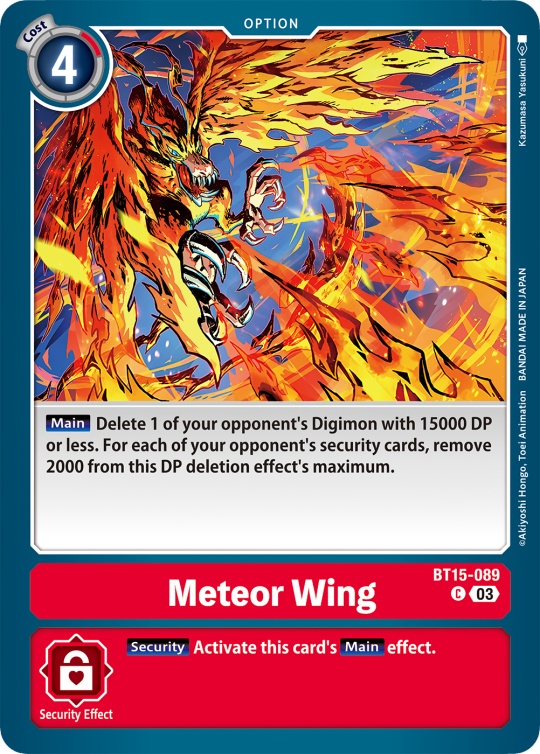
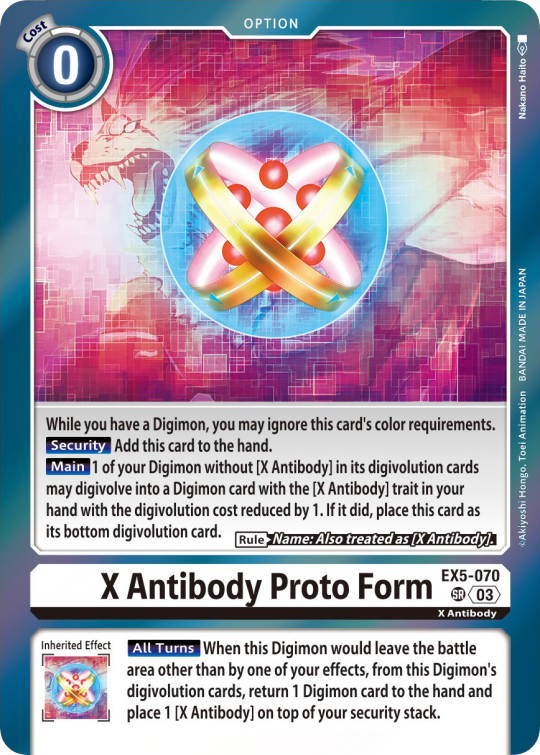
Now to the Effects.
The main effect is in white color with a black outline (also outlines on the keywords), while the Inherited Effect doesn't have outlines (unless it's a Yellow double color). If the Digimon has no Inherited Effect, there will be a small dash in the box.
Only white cards have black text in their main effect.
The effect text will start in the lower bottom of the image, not all the way at the bottom, and go down from there. If the Effect is too long it will move up.

Besides the regular evolution requirements, Digimon may have special "Digivolve" rules in their effect. This can make an evolution from a specific digimon cheaper, allow X Antibody Digimon to evolve from their normal counterparts, serve to overlook color requirements, or to allow evolution from certain traits, etc.
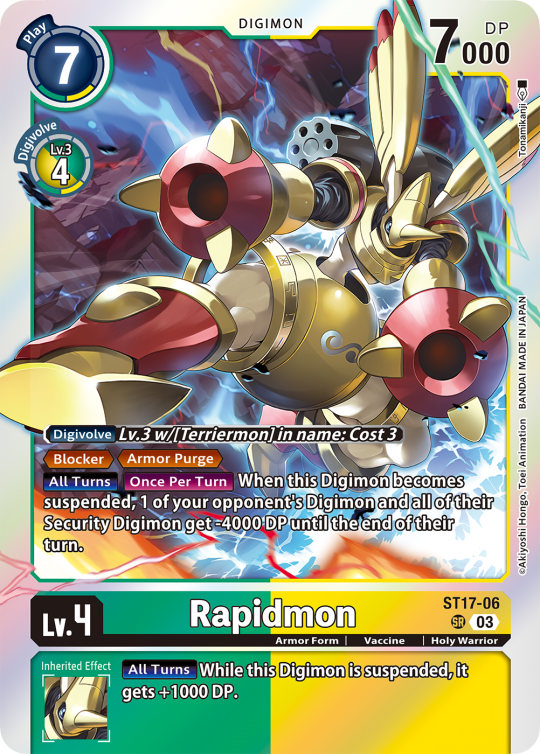

Some Digimon may also have an extra "Rule" in the bottom corner.

Ace Digimon will always have [Hand][Counter]<Blast Digivolve> effects. So far, they all had no inherited effects.
They also have a significantly cheaper play cost than comparable Digimon, but in turn have the Overflow mechanic. EX6 introduced Blast DNA Digivolution, which specifies the required Digimon by name, and not just Level and color.
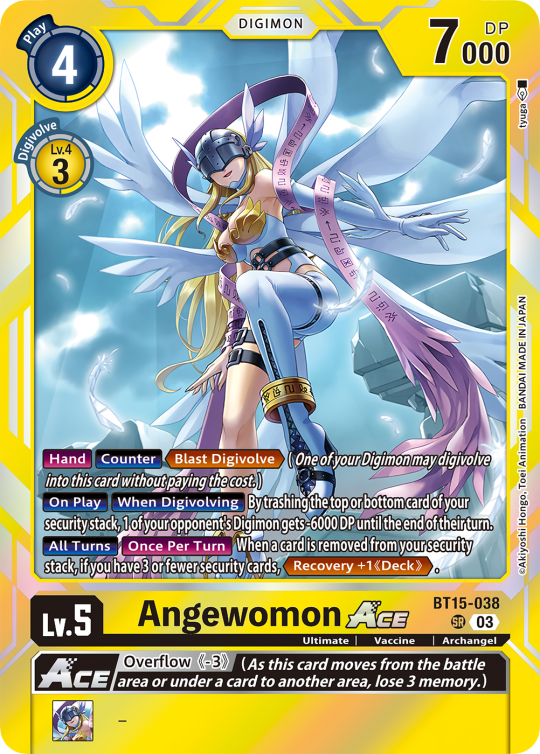
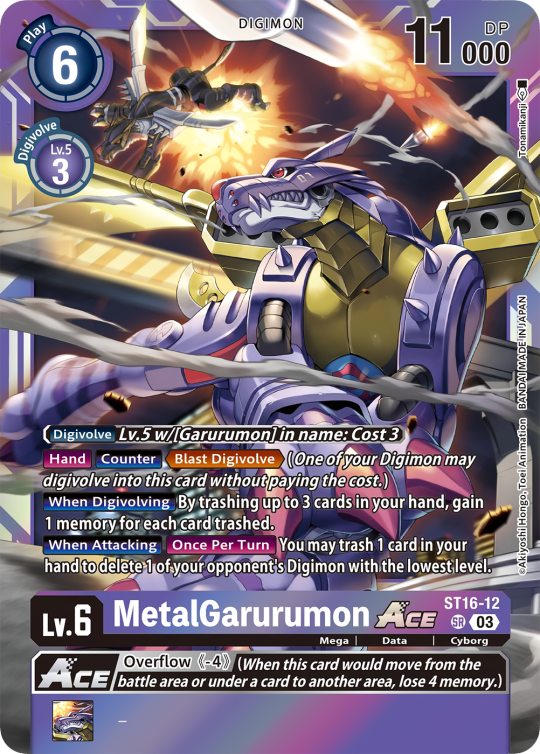
Lv.6 Digimon usually don't have inherited Effects, some might though, if they were made with Lv.7 evolution in mind.
Furthermore Lv.6 Digimon pop out of their frame, even on the normal arts.


Now Tamers originally had neither traits, nor inheritence effects. But certain Tamers now do! Tamers with Mind Link effects, or the kids from Frontier for example, will have Inherited Effects.

Option cards have a grey backdrop for their effects, and the effect text is black. This black effect text carries over to full/alt arts, regardless of color. The have a (use) cost instead of a play cost.
They can also have traits or rules, but it is rare.

#digimon#digimon tcg#digimon card game#digica#digisafe#デジカ#digimon card#digimon template#template#digi community#digi lov edits
181 notes
·
View notes
Text
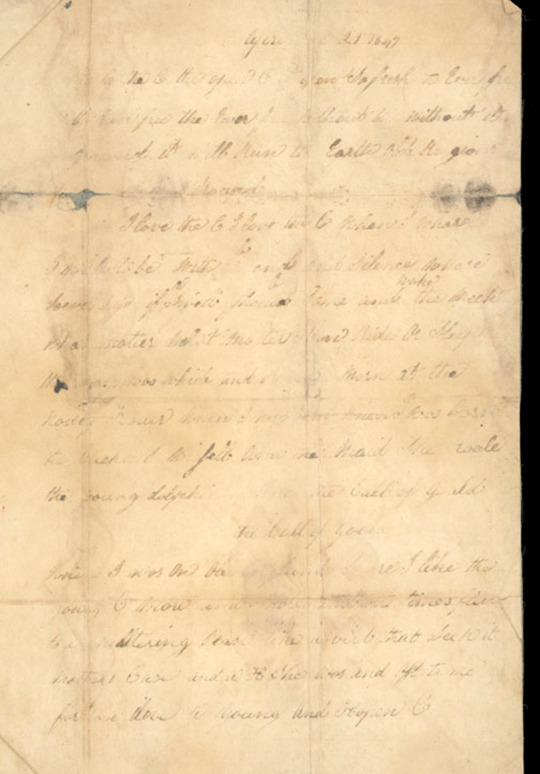

to the ghost of henry peglar, congrats on writing your poem down 177 years ago!!!
to the actual academic scholars who have studied the pages before me....
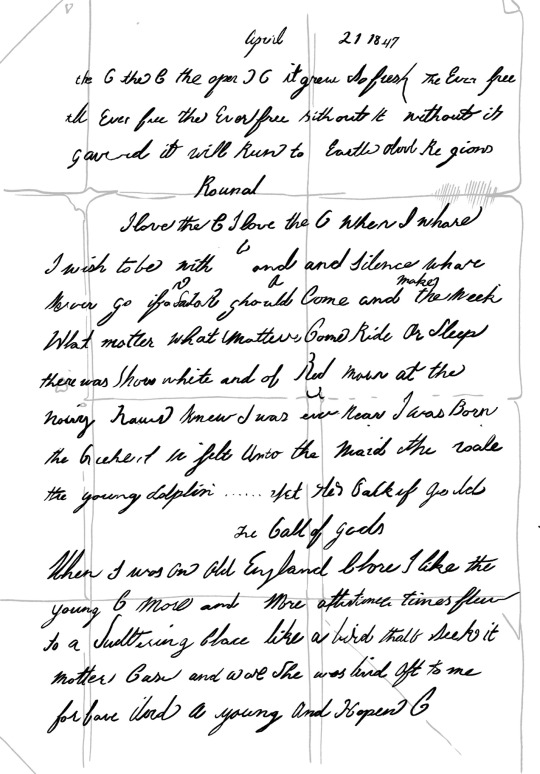
so I took the royal museum greenwich's scan of the poem page (which is available online hereeee) and screwed around with its light levels in photoshop until henry's script was darkened enough to see more clearly. then I digitally traced over the darkened letters as best as I could, while also trying to discern his handwriting, and type up how I was reading it & this process took me about a week to get done between like... living my regular day to day life lmao.......
so when it WAS done, the final isabel acheronist peglar papers ["the open C"] transcript seemed a bit different than how I remembered the readily available russell potter transcript going ? (the poem is on the last two pages of that pdf for those of you who don't spend a billion hours a week looking at it btw)
it felt like I was getting more/different information out of it, compared to the potter transcript, which was kind of stressing me out honestly. so THEN I compared mine with barry cornwall's original poem and found more words that matched up? particularly in the second and third stanzas?
so!!!!! almost two hundred years later here's what I've landed on:
April 21 1847
the C the C the open ) ( it grew so fresh the Ever free
the Ever free the Ever free without it without it
covered it will Run to Earth above Re gions
Round
I love the C I love the C when I whare
&
I wish to be with and and silence whare
Never go if a sailor should a Come and Make the meek
What matter what matter Come Ride Or Sleep
there was shores white and of red morn at the
noisy hours knew I was ever near I was Born
the [...] in felt Unto the Maid the wale
the young dolphin ...... yet thes back of gold
the Call of gods
When I was on Old England Shore I like the
young C more and more oftentimes time flew
to a sweltering place like a bird thats seeks it
mother Case and ware she was bird oft to me
for have I loved a young and Hopen C
so then after going thru All Of That, I wanted to have a version of the original poem with parts that Henry did remember clearly highlighted for comparison purposes:
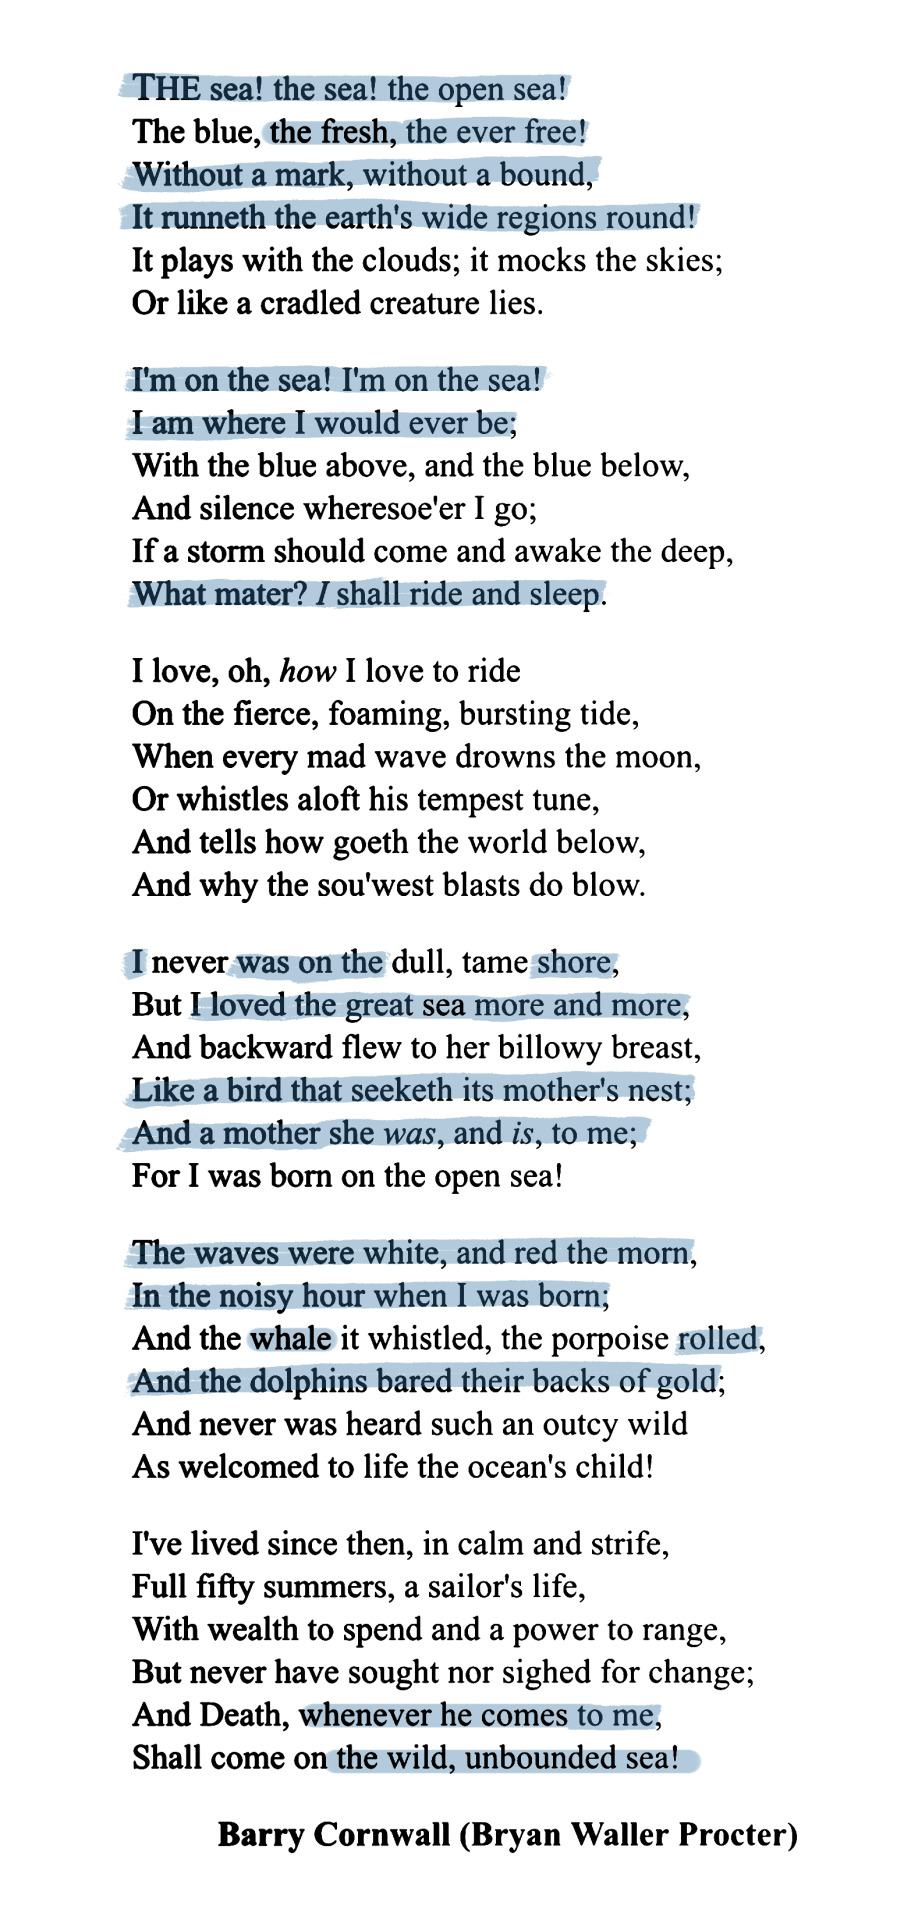
I know it's a popular theory that Henry was writing a dirty parody of the original poem? which if true, is funny as hell. me when i have to write cheeky victorian porn before i die.
But (serious voice) something about that hadn't ever seemed exactly right to me... IN MY HEART it seems more realistic that around 1847 he (and also by extension, the whole surviving expedition crew) were starting to experience confusion / brain fog symptoms from being ummmm quite physically unwell. the lead poisoning/scurvy combo would have severe effects on the brain's ability to function properly, and I started to wonder if Henry was trying to test his memory somehow? So he picked a widely known and popular Victorian era poem about being a sailor to see how much he could recall??? and he then got a little whimsical with it, and wrote in his own words to fill in the portions he couldn't fully recall, because it's his own diary and likely didn't expect anyone else to ever read it, much less have it turn into ONE of TWO surviving sources about the expedition?????
like... idk... this is probably the work of someone in the exact moment as they were starting to realize how bad things were, and then was trying to cope by using poetry. and That hurts my feelings enough as it is, but going through it was also just a very weird and haunting experience....... like, I can recognize all these tiny details in this dead guy's script and handwriting now. and to read his own account of his life in his own words, what stood out to him and what he recalled, what he wanted people in the future to know about him? insane. it literally felt like i was getting haunted by him for no reason. on top of knowing that Someone (#teamarmitage) loved this guy enough to keep his memory protected and safe, even though They Were So Totally Fucked And Going To Die There, unknowing if they'd ever be found again........
SIGHING + SIGHING + SIGHING + SIGHING + CRYING A BIT HONESTLY
anyways thanks for reading this all. I don't think that this is revolutionary franklin expedition news by any means, and idk if there's a better different transcript somewhere that i've not found that already covers all this? but it's consumed a lot of my life lately lol and i wanted to share. because its the anniversary of henry writing it, and it felt...... important....? 💌....????
#📜#henry peglar#this is my crazy person post i wanted to make two weeks ago#i really did do my best to follow his hand btw but let's all read this expecting a few mistakes#franklin expedition#peglar papers
158 notes
·
View notes
Note
dyin to know your thougts on the photo gate👀
My thoughts is 1.) I can't remember when I've last enjoyed twitter like I currently do. Like, I've been in a pretty bad place recently and I can't wait for Friday when my therapist asks me what's made me feel happy for the first time in weeks and I get to show her this:

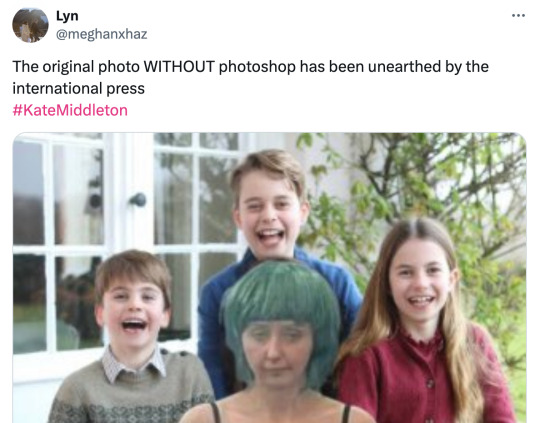

And 2.) It is not lost on me how for GOD KNOWS which time, the W&K stans and their prejudice are caught in 4k again.
NOW royals are entitled to privacy (something they still sneer at the Sussexes for wanting), NOW it's nORmAL to want to eNhAnCe photos (can't count the amount of times they've accused the Sussexes of doing just that – funny how only one couple has had numerous international news agencies RETRACT a photo because of manipulation 🥲), NOW a 42-year-old is a "young woman" (don't hate that ❤️) who is "being bullied" (but without fail every time Meghan opens her mouth, they have endless shit to spew about her being a gRoWn woman cOmPLaiNiNg – lest we forget when W&K stans dunked on her for writing an essay about her miscarriage 🤡).
As for the photo: I think the ridiculously obvious explanation is that they used a photo from November 2023.
Nothing strange or new about that, they often use archive photos for occasions like that. Many royals do. Look at Vincent and Josephine's birthday photo this year. KP's problem is that they wanted the public to think it was a new photo to sate the obsession with wanting to see Kate post-surgery. So the doctoring (not made by Kate, let's just get that settled 🤣) wasn't about enhancements or wanting the kids to "look their best" but about changing bits and bobs of the clothing so people wouldn't notice it's an archive photo.
So now W&K are in a pickle because someone in their staff made up entirely of dingdongs has the photoshop skills of an earthworm. And everyone's like "just release the original!" But they can't because then people will know they were trying to make an old photo look recent which will only add to the "where tf is Kate?" frenzy. And in reality, Kate probably has her reasons for not wanting to go on camera right now which is so legitimate. Meanwhile William's little army of Eton yes-men – whose entire job description up until now has been "1. validate William, 2. throw the Sussexes under the bus" – are literally so inept at actual communications work that with every single move, they make KATE'S situation worse.
154 notes
·
View notes
Text
GIFMAKING TUTORIAL: PHOTOPEA (for Windows)

Screencapping
Gif Width/Size Limit/Ezgif
Loading Frames
Cropping and Resizing
Rasterize/Make Frames
Sharpening
Coloring (not detailed. Links to other tutorials included)
Exporting
Obligatory Mentions: @photopeablr ; @miwtual ; @benoitblanc ; @ashleysolsen
Definitely check out these blogs for tips, tutorials and resources, they're a gold mine. Finally I recommend browsing the PHOTOPEA TUTORIAL / PHOTOPEA TUTORIAL GIF tags.
DISCLAIMER: English is not my first language and I'm not an expert on what I'm going to discuss, so if anything's unclear feel free to drop another ask.
1. SCREENCAPPING -> PotPlayer (the one I use) or MVP or KMPlayer
INSTALL PotPlayer (tutorial)
Play your movie/episode and press Ctrl + G. The Consecutive Image Capturer window will pop up. Click Start to capture consecutive frames, Stop when you got what you needed.
Where it says "Image Type -> Format" I recommend picking PNG, for higher quality screencaps.
To access the folder where the screencaps are stored, type %appdata% in windows search, open the PotPlayerMini64 folder (or 32, depending on your system) and then the Capture folder. That's where you'll find your screencaps.

Admittedly MVP is a lot faster but I prefer Potplayer because it generates (at least in my case) higher quality screencaps. MVP kind of alters the hue and it made it harder for me to color my gifs. Still, if you're interested in how to use it, I recommend this tutorial.
As for KMPlayer, every tutorial out there is outdated and I couldn't figure out the new version of the software.
2. GIF WIDTH/HEIGHT, SIZE LIMIT, EZGIF OPTMIZER
At this point you should already know how big your gifs are going to be. Remember the ideal gif width(s) on tumblr are 540 px / 268 px / 177 px. These specific numbers take into account the 4 px space between the gifs. No restrictions on height. Here are some examples:

You can play around with the height (177x400, 177x540, 268x200, 268x268, 268x350, 268x400, 540x440, 540x500, 540x540 etc) but if you go over the 10 MB limit you'll either have to make your gifs smaller/delete some frames.
OR you can go on ezgif and optimize your gif, which is usually what I do. The quality might suffer a little, but I'm not really (that) obsessed with how crispy my gifs look, or I'd download photoshop.

Depending on the gif size, you can decrease the compression level. I've never had to go over 35. It's better to start at 5 (minimum) and then go from there until you reach your desired ( <10mb) gif size. Now that I think about it I should have included this passage at the end of the tutorial, I guess I'll just mention it again.
3. LOAD YOUR FRAMES
File -> Open... -> Pick one of your screencaps. The first one, the last one, a random one. Doesn't matter. That's your Background.
File -> Open & Place -> Select all the frames (including the one you already loaded in the previous passage) you need for your gif and load them.
(I recommend creating a specific folder for the screencaps of each gif you're going to make.)
WARNING: When you Place your screencaps make sure the Crop tool is NOT selected, especially if you've already used it and the width/height values have been entered. It will mess things up - I don't know why, could be a bug.
You can either select them all with Ctrl+A or with the method I explained in the ask: "when you want to select more than one frame or all frames at once select the first one, then scroll to the bottom and, while pressing Shift, select the last one. this way ALL your frames will be selected".
WARNING: Depending on how fast your computer is / on your RAM, this process may take a while. My old computer was old and slow af, while my new one can load even a 100 frames relatively fast, all things considered. Even so, I recommend ALWAYS saving your work before loading new frames for a new gif, because photopea might crash unexpectedly. Just save your work as often as you can, even while coloring or before exporting. Trust me, I speak from experience.
Now you can go ahead and delete the Background at the bottom, you won't need it anymore.
4. CROPPING AND RESIZING
Right now your screencaps are still smart objects. Before rasterizing and converting to frames, you need to crop your gif.
Technically you can rasterize/convert to frames and then crop, BUT if you do it in that order photopea will automatically delete the cropped pixels, even if you don't select the "Delete Cropped Pixels" Option. Might be another bug, unclear.
Basically, if you crop your gif and then realize you cropped a little too much to the left or the right, you can go ahead, select the Move Tool (shortcut: V) and, after selecting ALL YOUR FRAMES, move them around on your canvas until you are satisfied. You won't be able to do this if you rasterize first and then crop, the excess pixels will be deleted. I don't know why, I found out by accident lol.
CROPPING
(Cropped pixels: the gray/opaque area outside of the selected area. That area disappears once you press enter and crop, but the pixels are retained, so you can move the frames around and reposition them as you like. In this case I could move the frames to the left and include Silver's figure [curly guy in the foreground] in the crop)
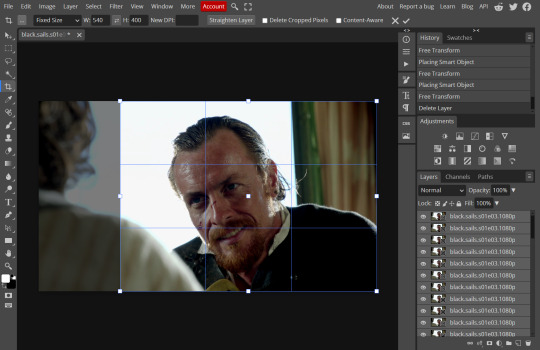
After deleting the Background, you will need to select all your frames (using the Shift key), use the C shortcut on your keyboard to choose the Crop tool. Or you can click on it, whatever's more convenient. Once you do that, a dropdown menu is going to appear. You need to select the "FIXED SIZE" option, as shown in the following screencap.
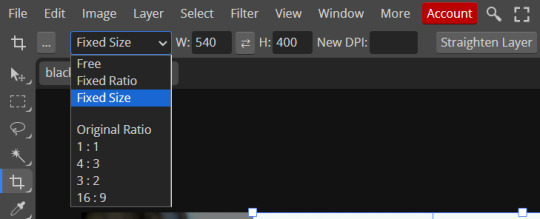
Once you do that, you can type in your desired width and height. Do not immediately press enter.

Your work area should now look like this. Now you can click on one of the white squares and enlarge the selected area until the edges are lined up. You can then move it around until it covers the area you wish to gif.
WARNING: to move the big rectangle around, you're gonna have to click on a random point of the work area, PREFERABLY not to close to the rectangle itself, or you might accidentally rotate it.

See? When your cursor is close to the selected area it turns into this rotating tool. Move it away until it reverts to your usual cursor, then you can start moving the rectangle. Press Enter when you're satisfied with the area you selected.
RESIZE
This isn't always necessary (pretty much never in my case) - and it's a passage I often forget myself - but it's mentioned in most of the tutorials I came across over the years, so I'd be remiss if I didn't include it in mine. After cropping, you'll want to resize your image.
IMAGE -> Image Size...

This window will pop up. Now, should the values in the Width and Height space be anything other than 540 and 400 (or the values you entered yourself, whatever they might be) you need to correct that. They've always been correct in my case, but again. Had to mention it.
5. RASTERIZE & MAKE FRAMES
Now that your screencaps are cropped, you can go ahead and convert them.
LAYER -> Rasterize (if you skip this passage you won't be able to Sharpen (or use any filter) on your frames at once. You'll have to Sharpen your frames one by one.
Photopea doesn't feature a timeline and it's not a video editor, which makes this passage crucial. When you select all your smart objects and try to apply a filter, the filter will only by applied to ONE frame. Once you rasterize your smart objects and make them into frames, you can select them all and sharpen them at once.
Unfortunately this also means that you won't be able to - I don't know how to explain this properly so bear with me - use all smart filters/use them in the same way a photoshop user can. For example, you can sharpen / remove noise / add noise / unsharp mask... but you can't act on those filters in the same way a photoshop user can.
When you work on smart objects you can change the blend mode - which is critical if you decide to use a filter like High Pass. If you simply apply a high pass filter on photopea you won't be able to change the blend mode and your gif will look like this (following screencaps). Or rather, you will be able to change the blend mode by clicking on the little wheel next to "High pass" (circled in green in the 2nd screencap), but you'll have to apply the filter to each frame manually, one by one.

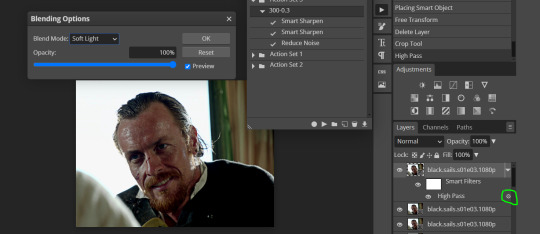
Then you can rasterize/make into frames, but it's extremely time consuming. I did it once or twice when I first started making gifs and it got old pretty soon haha.
Layer -> Animation -> Make frames. This passage will add "_a_" at the beginning of all your frames and it's what allows you to make a (moving) gif. As I said in the ask, if you skip this passage your gif will not move.
6. SHARPENING
Some people prefer to color first and sharpen later, but I found that sharpening filters (more or less) dramatically alter the aspect of your gif and already brighten it a bit (depending on your settings) and you may end up with an excessively bright gif.
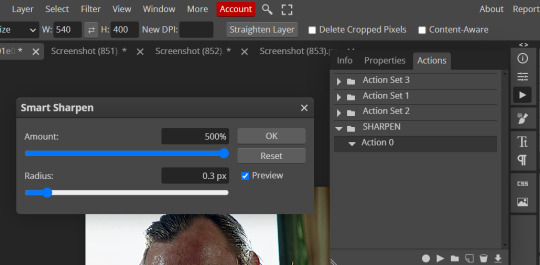
Now, sharpening settings are not necessarily set in stone. The most popular ones are 500/0.4 + 10/10, which I use sometimes. But you may also need to take into account the quality of the files you're working with + the specific tv show you're giffing. I've been using different settings for pretty much every tv show I gif, especially in the last couple months. Some examples:

followed by
OR
AMOUNT: 500% RADIUS 0.3px
followed by
AMOUNT: 20% (or 10%) RADIUS 10px
You'll just need to experiment and see what works best for your gifs.
Some gifmakers use the UNSHARP MASK filter as well (I think it's pretty popular among photopea users?) but it makes my gifs look extra grainy, makes the borders look super bright and it clashes with my coloring method(s), so I use it rarely and with very moderate settings. Something like this:

Again, depends on the gif and on what you like. I've seen it used with great results by other gifmakers!
REDUCE NOISE
Sometimes - and this is especially the case for dark scenes - your gif may look excessively grainy, depending on how bright you want to make it. Reducing noise can help. Keep it mind, it can also make it worse and mess up the quality. BUT it also reduces the size of your gif. Obviously, the higher the settings, the more quality will suffer.
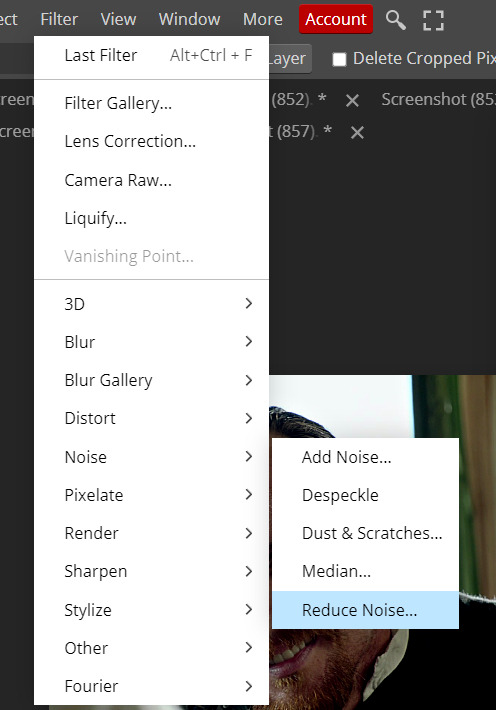

These are my standard settings (either 2/70% or 2/80%). It's almost imperceptible, but it helps with some of the trickier scenes.
ADDING NOISE
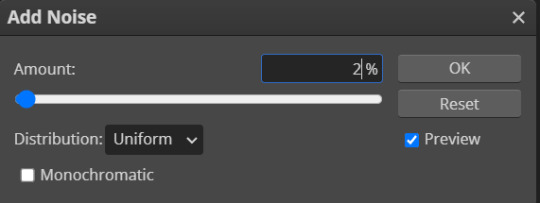
Adding noise (1% or 2% max) can sometimes help with quality (or make it worse, just like reduce noise) but it will make your gif so so so much bigger, and occasionally damage the frames, which means you won't be able to load your gif on tumblr, so I rarely use it.
You'll also want to create ACTIONS which will allow you to sharpen your gifs much faster.
HOW TO CREATE AN ACTION ON PHOTOPEA
The Action Button (shaped like a Play button as you can see in the following screencaps) may not be there if you're using photopea for the first time. If that's the case click on the magnifiying glass next to "Account" (in red) and type "actions". Press Enter and the button should immediately show up.
Once you do that, click on the Folder (circled in yellow)

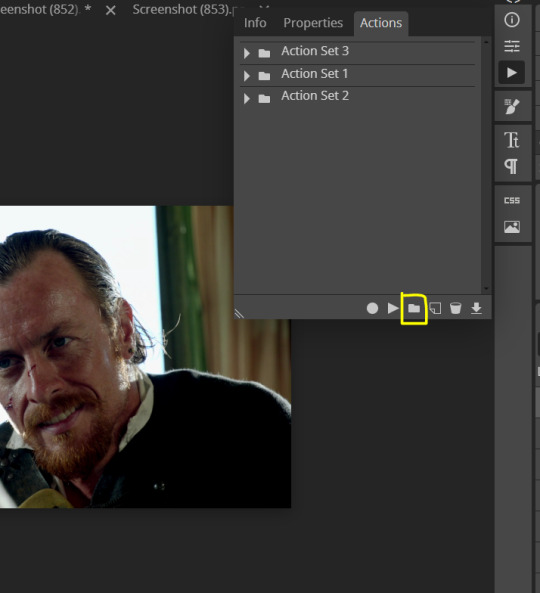
and rename it however you like.

now click on New Action (circled in red). now you can press the Recording button (circled in green)

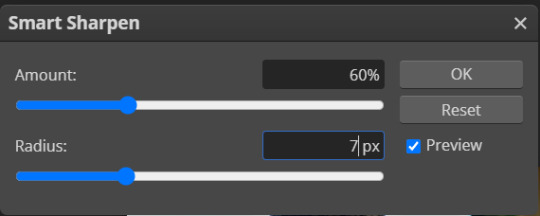
Now
FILTERS -> Smart Sharpen
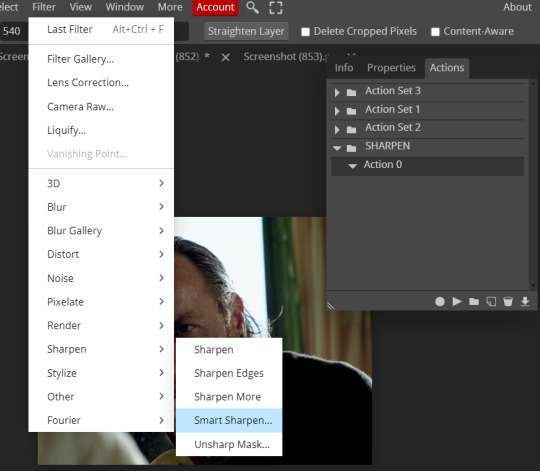
and you can enter your values. Then you repeat this passage (WITHOUT pressing rec, WITHOUT pressing new action or anything else, you just open the smart shapen window again) and, if you want, you can sharpen your gif some more (10%, 10px, or anything you want.)
Maybe, before creating an action, experiment with the settings first and see what works best.
When you're satisfied, you can PRESS STOP (it's the rec button, which is now a square) and you can DOWNLOAD your action (downwards facing arrow, the last button next to the bin. Sorry, forgot to circle it) .
You need to download your action and then upload it on your photopea. When you do, a window will pop up and photopea will ask you whether you wish to load the action every time you open the program. You choose "Okay" and the action will be loaded in the storage.
When you want to sharpen your gif, you select all your frames, then you click on the Play button, and select the Action, NOT the folder, or it won't work.

Actions can also be created to more rapidly crop and convert your frames, but it doesn't always work on photopea (for me at least). The process is exactly the same, except once you start recording you 1) crop your gif as explained in step 4, 2) convert into frames. Then you stop the recording and download the action and upload it. This won't work for the Rasterize step by the way. Just the Animation -> Make Frame step.
7. COLORING
Now you can color your gif. I won't include a coloring tutorial simply because I use a different method for every tv show I gif for. You normally want to begin with a brightness or a curve layer, but sometimes I start with a Channel Mixer layer to immediately get rid of yellow/green filters (there's a tutorial for this particular tool which you will find in the list I mention in the link below)
[Plus I'm not really an authority on this matter as my method is generally... fuck around and find out. Two years of coloring and I still have no idea what I'm doing. 70% of the time.]
Simple Gif Coloring for Beginners -> very detailed + it includes a pretty handy list of tutorials at the bottom.
8. EXPORTING
Now you can export your gif. Some gifmakers export their (sharpened) gifs BEFORE coloring and then load the gifs on photopea to color them. I'm not sure it makes any difference.
FILE -> EXPORT AS -> GIF
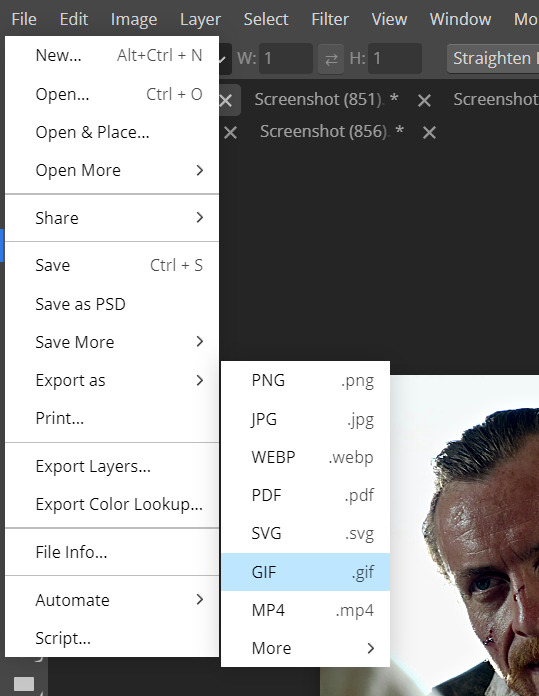
(not colored, just sharpened)
As you can see, unlike photoshop the exporting settings are pretty thread bare. The only option available is dither - it sometimes help with color banding - which, and I'm quoting from google for maximum clarity:
"refers to the method of simulating colors not available in the color display system of your computer. A higher dithering percentage creates the appearance of more colors and more detail in an image, but can also increase the file size."
SPEED
When you export your gif, it will play at a very decreased speed (100%). I usually set it at 180/190%, but as for every other tool, you might want to play around a little bit.
GIF SIZE/EZGIF OPTIMIZER (See Step 2)
And that's it.
P.S.: worth repeating
Save your work as often as you can, even while coloring or before exporting.
#photopea#my inbox is open if you have any questions <3#image heavy under the cut#photopeablr#tutorials#gif tutorial#allresources#photopea tutorial#completeresources#gifmaking
120 notes
·
View notes
Note
I remember this one time when Meghan said in her interview/podcast (or someone said this in her behalf) that Meghan was bullied relentlessly in school because everyone thought she was perfect, and I laughed my ass off at how off kilter someone's self assessment can be. Ifnwo deed then how she and why she was saying this. And now I think that was major projection because at some point she may done some reflection on why she has so many problems with Catherine of all people.
I think this photogate scandal explains that theory - that someone can be bullied because of their perfect image. A lot of other celebs are able to shake off major scandals of they have a perfect public image. For example, if someone came and said a horrible thing about Meryl Streep most people would simply ignore it. But it's because there is a huge PR machinery behind a celeb,and a huge celeb is a huge money making opportunity for those directly linked to them. So everyone from the agent to the associated brand goes into salvage mode.
When it comes to Catherine though, because her position she does not and cannot rely on a project created narrative. she is not an celeb, or a performer, she is a famous person. And even though she has been in the public eye for nearly 20 years, her role wasn't even constitutionally relevant till 8th Sept 2022, the day she became Princess of Wales. And even now, it is because of the constitutionally relevant role that her husband has.
This uniqueness of her position, the subltle nuance of that, is hard for the layman to grasp. Especially an American audience that culturally is very celeb and money centric. I say this because I do believe that controversial opinions and the wildfire of speculations about her are majorly coming from American commentators. American social media creators who rely on 40/20 sec clips on tiktok and insta have found that "where is Kate" is the biggest most lucrative click bait right now, and everybody and their grandma now has an opinion on it.
We live in a world of Charlene, Dubai princesses, Thai prinesses, North Korean dictators daughters/sisters/wife but we don't touch that with a 100 ft pole. Because it's uncomfortable. Because we know that noone is going to do anything to look into that.
But Catherine and husband's relationship is a free for all, all day buffet. Because she made herself available and catered to public's sensibilities. And when she drew a boundary she wouldn't budge. So everyone's sentiments get hurt now. The same people who gossip about her now would happily call her a step Ford wife and a clothes horse but ohh and ahh over her coat dresses and shiny hair and lovely shoes.
Noone stops for a second to think that maybe this woman is feeling unwell, is recovering from a surgery, has a serious medical issue and would like to recover at home without having to put on makeup and fake small talk with strangers.
We cry about feminism and equality and women's rights, but only applaud women who exhibit overt ambition. If a woman wants to stay at home, and is able to afford that, it's problematic. We want a woman to value self love and self care but if she prioritizes her health and care above public opinion she is dragged through the mud. Her health, her looks, her morals, her husband's morals, integrity, family values, privacy, her children's health, children's right to privacy....everything is open to discussion. And it's ok.
It's shameful and appalling that not ONE journalist, not one person with power, not one paper, publication or news Network has publicly spoken out in her favour and called out the bullying. This is not a Photoshop issue. It's just disguised as one. This gleeful gossiping about her "disappearance" is a gross violation of her rights.
Everything you've said is spot on. It is 100% American busybodies driving the criticism, controversy, and scandal. We/they don't understand what it's like to have someone who is above celebrity because our culture sees celebrity fame as the objective end-goal, so we demand for everyone to fit into our model of celebrity.
And while I have to give Meghan the benefit of the doubt and agree that she may have been bullied at school, I don't think it was for being perfect. That's Kate's story. All Meghan has done, since 2016, is portray Kate's life story as hers.
79 notes
·
View notes
Text

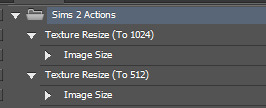
exactly what it says on the tin title! after watching @skittlesplays manually resize hundreds of recolor files on stream (and trying to do it myself...), i decided that the only solution when it comes to editing textures for ts2 was... photoshop! here are 9 photoshop actions geared towards 4t2 conversions, but hey, maybe you could use them for other stuff too 💖
i made these for personal use and have been using them on and off for the last few months, so i suppose you could say they've been sufficiently tested... the actions included aren't final though, i might go back and add a few more as my areas of expertise expand 😅 more info and instructions under the cut, long post warning! 👇🏽
DOWNLOAD: SFS | MF 📄
if you encounter any issues with these actions, please do reach out to me and i'll try my best to help! or if you'd like to add on to them, edit them, etc. in any way, please feel free to 😀
How to Install These Actions
open up photoshop and click on the big 'play' button in the corner. that's the actions tab. then click on the little down arrow and 4 lines in the corner of that subwindow.
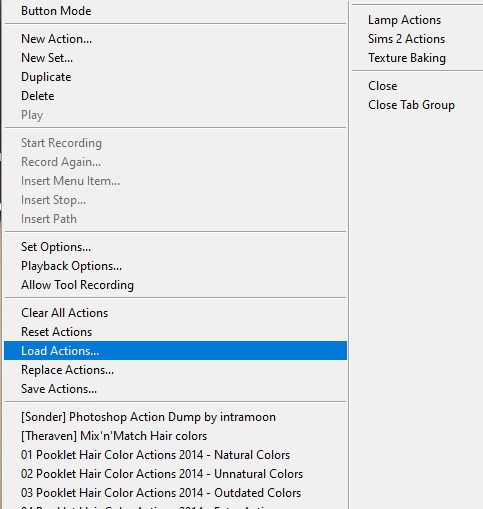
select 'load actions' from the list, and navigate to wherever you've installed my .atn file! then that's it, you've got them installed, easy-peasy.
How to Use These Actions (1 at a Time)
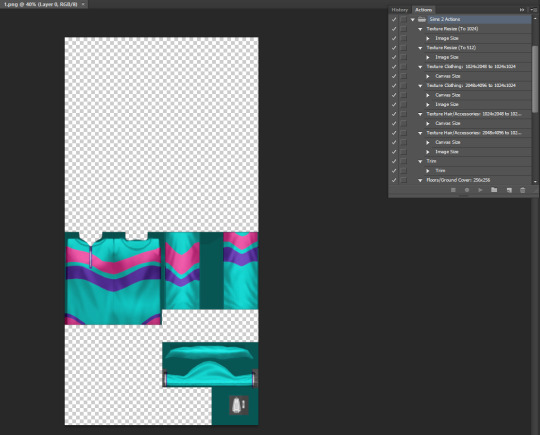
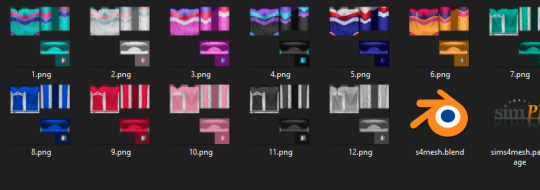
open up the texture that you want to edit in photoshop; for this example i'm using a dress i'm 4t2'ing from the throwback fit kit. now it's time to decide which action you're gonna use to make this texture compatible with ts2!
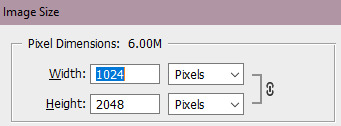
as the texture is 1024 x 2048, i'm gonna use the 'texture clothing: 1024x2048 to 1024x1024' action to downsize it.
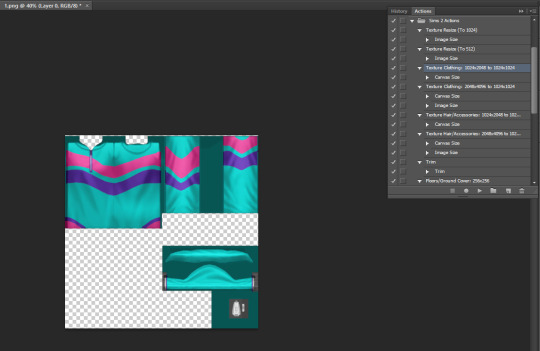
ta-da! now it's a reasonable size!
How to Use These Actions (Dozens at a Time)
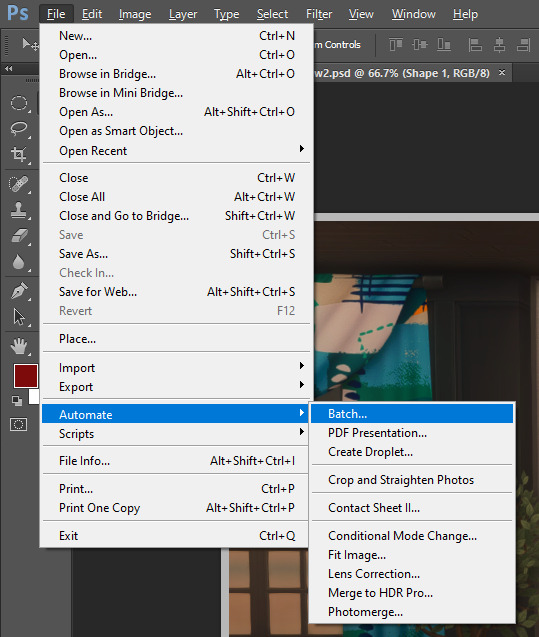
now for what this set was really made for: editing a ton of textures at a time! just go to file -> automate -> batch...

and navigate to the textures you'd like to batch-edit. here's a few things you should probably keep in mind:
- checking 'include all subfolders' will edit ALL the textures from that filepath onwards.
- if you set your destination as 'save and close' as pictured, all your files will be autosaved after the action has been run.
- so if you don't want to live on the edge, like me, and are afraid of running the wrong action, just open up one of the files you're batch-editing and check which action should be run on it before you do the other files.
and behold! all of my textures have been cut down, and a bunch of my time saved 😎
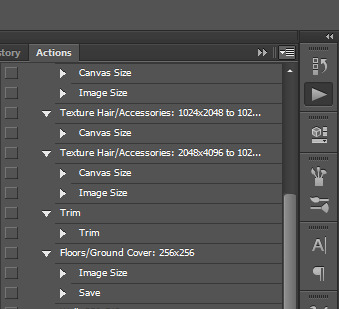
Examples of Stuff Each Action Can Be Used For
in case you were curious! the first two actions, i mainly use for objects. a lot of ts4 cc creators have their texture sizes set to 2048x2048 or even more, which is way more than (my) ts2 can normally handle. i mean, that much for a candle? geez! so these two actions are used to cut down those textures and not kill your graphics cards.

these are for cas stuff, like clothing, hairs, and accessories. alpha creators tend to have larger texture sizes, but ea's are almost always a cool 1024x2048. just make sure you check before you run the actions!

trim is... i honestly can't remember the last time i used trim, just... if you need it, it's there
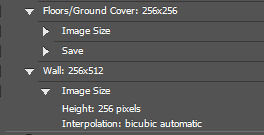
the last two actions are for floors and walls! floors are set to autosave as .bmp; walls are up to you. the texture sizes are made to match homecrafter's.

and... that's about it! lol. i know this isn't normally what i post, but i figured that since a lot more people are getting into 4t2 converting recently, these actions might help y'all.
have a great day, have a fun time simming, and keep being awesome guys 😘
129 notes
·
View notes
Text

some quick info:
↳ this is specifically for the screencapping method. i use mplayer osx extended to get my caps, but there are a few other programs you can use as well. i’ll specifically be going over mplayer here.
↳ i’m using ps 24.4.1 on a 2020 m1 macbook air
[tysm to @kyubinz for looking this over and adding some things ily]
☆ feel free to send me an ask/message with any questions you have! ☆
「 setup 」
1. finding videos
one big thing to remember is that the overall file size of your video will impact the quality of your gif. the larger, the better. i almost never use anything below 1080p, and try to use 2160p whenever i can. 4k video downloader is the program i use for downloading videos from youtube, it’s free to install and works great! because of how large some files can be, i always store any media on my hard drive. i highly recommend using one if you plan to keep lots of files on hand.
.mkv files are best, but .mp4 works fine as well (.mkv files are usually bigger aka better quality).
2. getting your screencaps
after downloading mplayer, go to the top bar and click file > open. open the video you’ll be screencapping.
you can either drag the little time indicator or using the arrow keys on your keyboard to move to the spot you want to capture. the > key can also be used to move forward frame by frame. to start capping, pause the video and press shift + cmnd (ctrl if you’re on windows) + s to take a screencap. i usually just hold it down until i’ve gotten all the screencaps i need.
by default, screencaps go right to desktop. you can set up a folder for them to go to automatically by going to settings > general and then selecting a spot in the menu under “interface”, but i just let them go to desktop and then sort them into individual folders so they’re easier for me to find while i’m giffing. in general, i try to stay under 80 frames so my gifs fit into tumblr’s 10mb image size limit.
3. importing screencaps into photoshop
to import your caps into ps, go to file > scripts > load files into stack. this window should open:

click browse, and navigate to the folder with your caps in it. select all of the caps you want to import, and then click open.
click ok to create a file with your caps, and then wait until it’s finished loading your caps into the layers tab. once they’re loaded in, this is what your screen should look like:

(if you aren’t seeing the timeline at the bottom of your screen, go up to the top bar and go to window > timeline)
click create frame animation, then go to the hamburger menu at the top right of the timeline and select make frames from layers. once your frames have loaded in, select the same menu again and click reverse frames. play through your gif to make sure everything looks good.
if you were to save your gif at the speed it’s set at now, it would be way too fast. to fix this, you have to set the frame delay. do this by selecting all your frames in the timeline using shift click, and then clicking (on any frame) where it says “0 sec”. select other from the menu that comes up, and you should get this popup:
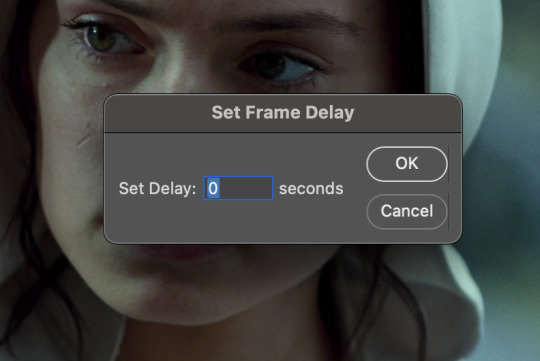
the general rule of thumb for gif frame delay is 0.05 seconds. there are some cases — certain animated movies or video games, for example — where other delays are best, but for the most part, 0.05 is what you want to use (0.05 can slightly slow gifs, and sometimes using 0.04 better matches the clip's original timing. this is really a "train your eyes" thing, and picking the best delay gets easier as you gif for longer). you can set this by typing the number into the text box and then hitting the ok button or enter on your keyboard.
at this point, i’d go ahead and save your file. you can go to file > save in the top bar, or just hit cmd/ctrl + s on your keyboard.
「 making your gif 」
1. sizing
after your frames are ready, the next thing is to size your gif. to crop your gif, press c on your keyboard to open the cropping tool. white borders will show up around your gif.
before doing anything, i would suggest making sure “delete cropped pixels” is unchecked. this will allow you to drag your gif around later if you want to reposition. you can find this option at the top of your screen. drag the borders on either side until you have the area you want selected. mine looks like this:
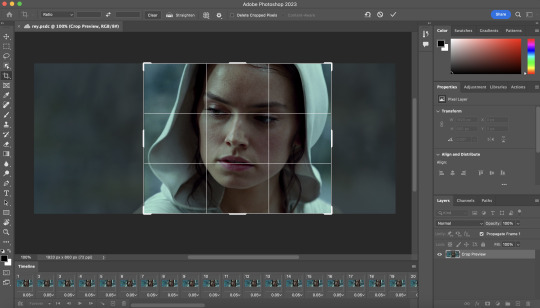
once you’re happy with your selection, hit enter on your keyboard to finalize it.
the tumblr image guidelines require gifs to be 540px across (here’s a post detailing this). to change your gif’s image size, go to image > image size in the top bar. you’ll get this popup:

instead of setting the width right to 540, i’ll be setting it to 544, and then trimming down the edges using canvas size. this makes the quality just a little better, and also prevents any weird borders being made around your gif on the off chance photoshop decides to add them. this isn’t necessary at all, you can absolutely size right to 540, but i just like doing this. if you choose to do this, open canvas size right after you set image size (image > canvas size in the top bar), and trim your width down to 540 and your height down a few pixels as well.
2. sharpening & other filters
sharpening is essential for good-quality gifs. the first step to this is converting our timeline from frame animation to a video timeline. select this little icon in the bottom left of your screen:
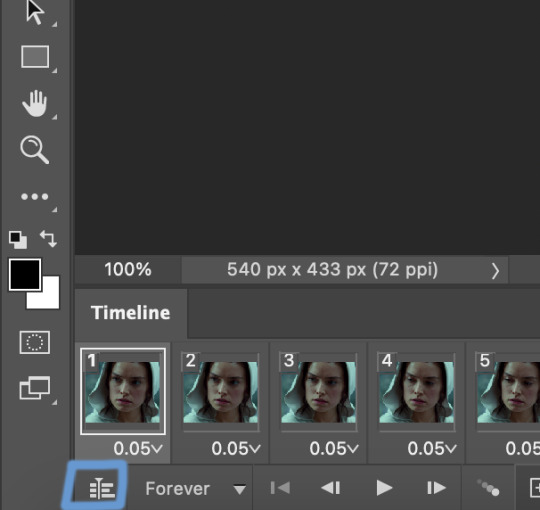
this is what your timeline will look like now:

you can use the little slider with mountains on either side to change the width of your frames in the timeline for easier access when editing. now that we’ve got all this set up, we can sharpen! i use this action pack to sharpen my gifs in addition to a few of my own settings (here is a video on how to install actions into photoshop). go to window > action in the top bar if you aren’t seeing the action tab.
i’ll be using the sharper action from the pack. to use an action, select it from the list and press the little play button at the bottom of the panel to apply it.
in addition to this, i usually also add unsharp mask at 50% amount with a 0.5px radius:


there are a few other filters than can be helpful when giffing:
a. add/reduce noise
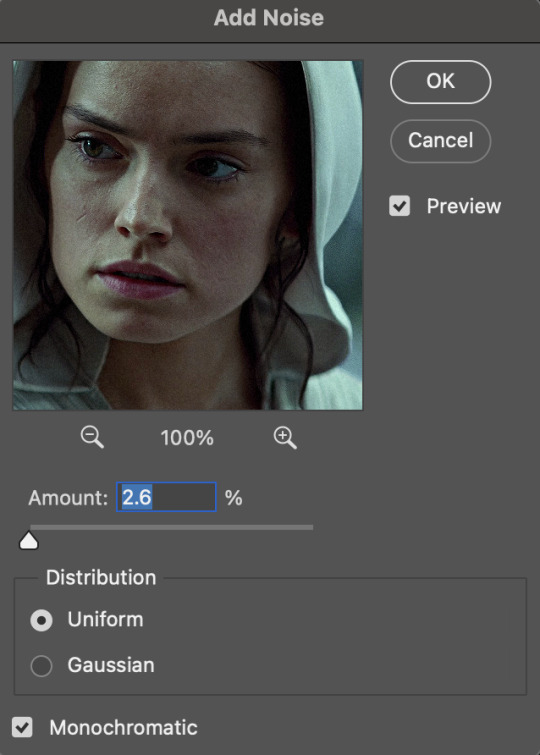
noise (aka grain) can be added with “add noise”. go to filter > noise > add noise.
these are the settings i usually use, but the amount depends on the gif (i don't ever go over 3.5 for the most part):
(if you want a grain effect but moving noise doesn't work for the gif, you can also add a grain overlay and then mess with blending mode and layer opacity until it looks how you want)
reduce noise can be used to remove some of the pre-existing grain on a clip. go to filter > noise > reduce noise. here are my settings:

leaving reduce noise on its own at 100% is a bit too much, so double click this icon and change the opacity (i usually do around 45):

b. gaussian blur
if your clip is a bit pixelated, gaussian blur can help with smoothing it out a bit. go to filter > blur > gaussian blur. my settings are 1 pixel radius w ~20% opacity (this changes based on the gif).
3. coloring
time to color! i want you to keep in mind during this section that everyone likes different colorings, and this is just my process! please don’t feel pressured to follow exactly what i’m doing, the best way to find what you like is to just mess around and experiment!
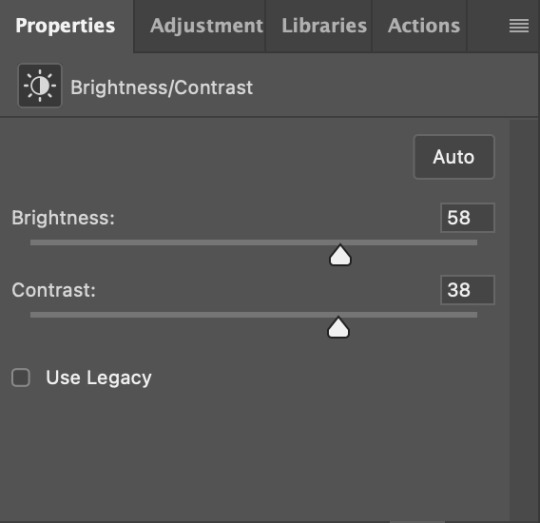
i like to start off with lighting adjustments: brightness/contrast, levels, exposure, and curves.
a. brightness/contrast
i usually start out with this first, just because brightening the gif right away helps me start thinking about how i want to color! here are my settings:
b. levels/curves
levels and curves can either be used interchangeably or together. i usually use levels to adjust lighting and curves to adjust color values, but i’ll go over using both for lighting as well as using curves for adjusting color values.
for both of these adjustments, i use the eyedropper tools to pick out white and black points. for levels, the top eyedropper tool to the left of the graph is used to pick out a black point. i do this first. use the tool to pick a spot on your gif that you want to be the base for black values. for me, that’s the shadow inside rey’s hood. the bottom eyedropper tool picks white point. use the tool to pick a spot on your gif that you want to be the base for white values. i chose the outside of rey’s hood. make sure you’re doing this on a new levels adjustment layer.
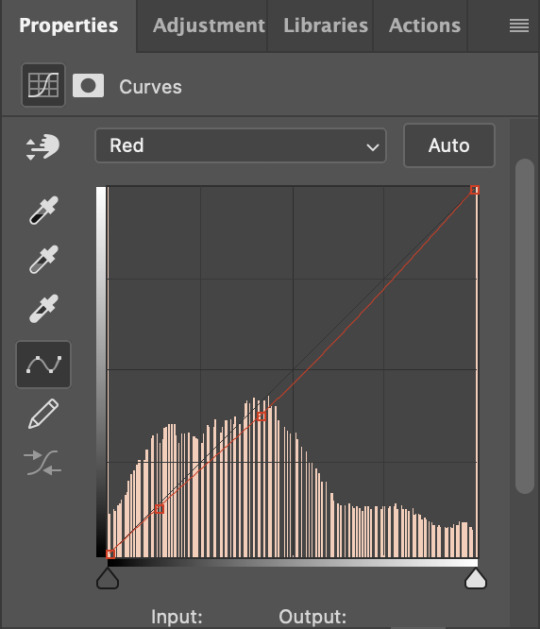
now, on to curves. you can either use the same eyedropper method or manipulate the graph directly. using the eyedropper is the same as levels, so i’ll just go over graph manipulation.
shade lightens as you move to the right along the x-axis of the graph — black is the far left, white is the far right, middle is the midtones. generally, i don’t work with midtones.
i’m going to use levels for this gif’s lighting, and curves to adjust color values. here’s how to do that:
curves can be used to adjust the amount of a certain color in different lighting areas of a gif. for example, i can specifically decrease the amount of green in the gif’s whites. to edit these values, select the rgb drop-down menu and adjust them one at a time. here are my final graphs:


c. exposure
this one’s pretty straightforward. the exposure slider adjust general exposure. the offset slider adjusts how dark your dark points are, and gamma correction can be used to lighten/darken scenes as a whole. here’s my settings:

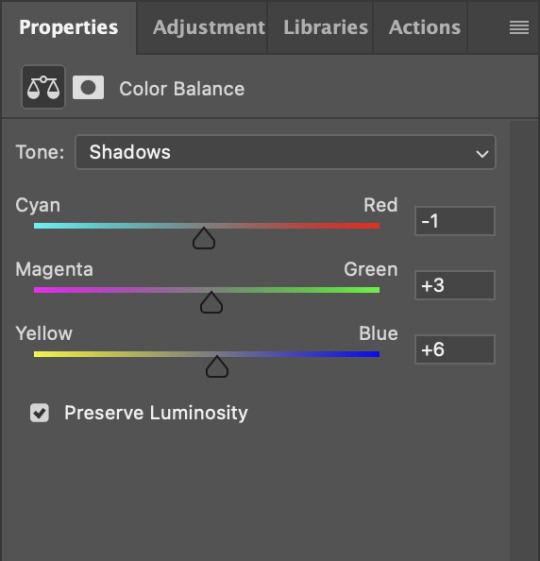
d. color balance
color balance is used to adjust overall tint of a clip. this is in general pretty simple, but i do want to point out that using the shadow and highlights tabs in addition to just the midtones can really help. here’s my settings:

e. channel mixer
channel mixer is one of my favorite tools in ps, especially for coloring scenes that are a pain in the ass without it. to avoid taking up too much space, here’s a great tutorial covering channel mixer. here’s my settings:


[at this point, i’m noticing my gif is still a bit darker than i’d like it, so i’m adding just a bit of brightness/contrast to fix it. there’s also a patch of blue over one of rey’s eyes, so i’ve used a hue/saturation layer to get rid of that bit and masked it to her eye. i’m not going to go over masking here, but there are lots of great tutorials out there!]
f. selective color
selective color can be used to adjust the amount of specific colors within a color. for example, if i were to go into the red tab and take out cyans, the reds would become more red. if i were to add yellows, the reds would become more orange, etc etc. this can be especially good for color manipulation. for this gif, i’d like to make the background more blue, so i’m going to use selective color to do this. here’s my settings:

g. color lookup
color lookup uses 3dlut files to remap gif colors (it’s a preset — think instagram filter or something similar). i don’t always use these, but when i do, i almost never leave them at 100% opacity. color lookup is great for giving gifs a film-type look if you want to do that, it’s got loads of different options. here’s my settings (adjustment layer is set to 20% opacity):

atp i’m pretty much done with coloring! i usually end up doing a few extra little lighting adjustments at the end. for this gif, i added some brightness/contrast at +8. i’ve also noticed that my gif’s looking a bit grainy, so i’ve added some noise to lean into it. this is usually the way i fix it, but you can definitely do reduce noise/gaussian blur as well if you don’t want a grainy look.
here’s my fully colored gif + a process gif (fast images warning):

「 saving gifs 」
1. frame rate
one thing you may have noticed is that my gif is looking a bit choppy. photoshop has a tendency to mess with frame delay after gifs are converted to video timeline. here’s how to fix that.
select all of your layers and convert them to a smart object (right click > convert to smart object). next, click on the hamburger menu in the top right of the timeline and go to convert frames > flatten frames into clips. now we need to change the timeline from video timeline to frame animation. click the little 3 boxes symbol in the bottom left corner of the timeline:

go to the hamburger menu again and select make frames (this is the same one you used earlier), then go through your frames and delete any duplicates. the first frame usually needs to be deleted specifically. once you’ve done that, set the frame delay back to 0.05 the way you did earlier.
2. exporting
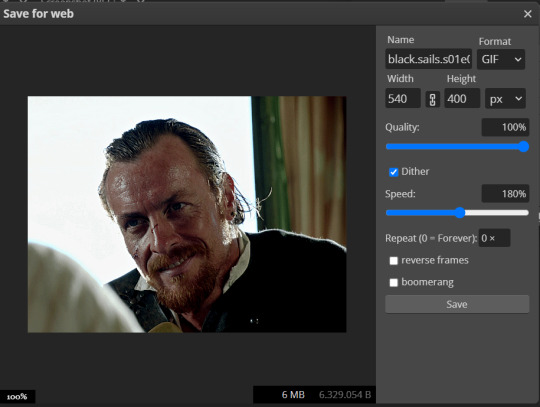
once you’re happy with how your gif looks, go to file > export > save for web (legacy).
these are my export settings, but feel free to experiment with the menus where i have selective and diffusion selected, different settings work best for each gif. in general, most gifmakers only use selective/adaptive and diffusion/pattern because they generally work the best for tumblr. before saving, make sure your looping option is set to forever:

gif size for tumblr has a 10mb limit. my gif is under this, so i don’t need to make any changes, but if yours is over, you can either delete some frames from the beginning/end of your gif and/or adjust the height of the gif (width needs to stay 540px so your gif doesn’t get stretched/compressed on tumblr, but height is fair game).
here's my final gif!

happy giffing, and please don’t hesitate to send me any questions you have! ♡
#*mine#gif tutorial#tutorials#allresources#usertheos#userzesty#userzaynab#usershreyu#rogerhealey#userabs#userhekaates#usermaria#userraffa#usermorgan#uservivaldi#tuserheidi
280 notes
·
View notes
Text
youtube
A Special Announcement~ | Yu-Gi-Oh! ARC-V Tag Force Special Re-Translation Project!
I've been itching to get around to posting about this for a few months now, but wanted to wait until I'd worked on enough for it, but also had the idea to create an announcement trailer to go with it for added good measure--after recording and editing clips for a couple weeks and leveling the audio last night, heremst we are! (For some clips, I forgot to turn off the PPSSPP emulator's DevMenu option so that shows up in the top-left, buuut I didn't feel like re-recording those, lmao.)
Details worth reading below the cut here, but tl;dr work has been in progress for over a year in between things, work will continue to be in progress for a while, and the release will happen when everything's ready, but stay tuned, fun's getting started etc etc~
So, I'm sure most of us are familiar with the as-yet-unlocalized-by-Konami TFSP, the seventh and last entry in the Tag Force series on the PSP that came out early in ARC-V's run (featuring the first five series which was a cool first), as well as the current translations out there originally worked on by the guys at XenoTranslations (omarrrio and ScrewTheRules/ClickClaxer01 at GBATemp handling the card and story/etc translations, respectively) and how there are... some issues with what's out there. Everything from the DM story mode being loaded with YGOTAS references (no shade to YGOTAS and much respect to LK/Martin for his ongoing work on it still making me laugh sometimes, ofc) to the off-the-cuff edginess of 2014-2015-era internet culture and the problematic (in some cases, derogatory) language that permeated it--though to its credit, some parts do have some level of translation attempted, but taken as a whole, it can definitely turn people off from giving the game a try and seeing what it brings to the table (which is still a good amount despite the corners Konami cut here/there compared to prior TF games).
I actually did attempt a translation of my own back in 2015 (if you've been following me for a long time, you might remember it lol), tackling the GX story text starting with Judai's heart events, but eventually put it on the backburner as I focused more on my GX subbing work and beginning to finalize everything (which I'm still doing). Sometime in 2022, a friend over on NeoArkCradle (the "anonymous YGO fan" in the opening screen) was poring over the story text and patching it up the best he could to remove the references and inaccuracies with more coherent work, and after a while of seeing what he was working with in the Discord, I was a bit blown away by just how inaccurate much of it was--so alongside him, and using the better tools available since then (including some really awesome work from both nzxth2 [who did a proper re-translation of 5D's TF6 not too long ago and was kind enough to release his tools for it] and our coding helper Xan1242 who we eventually reached out to for some help), I decided to *cracks knuckles* get involved and help give everything a more accurate and professional translation, much like I do with my GX subs, working directly off the Japanese text and files. I've been taking cracks at everything in between the GX episodes I've been finalizing going back to at least last January (and I'd used my little hiatus after finalizing GX Season 2's subs to really get at some other stuff throughout the game), starting with re-translating DM's story text but also properly translating other aspects of the game, from the character names (using the original Japanese names, including those of the TF-exclusive characters, partly since Konami made a whole mess of them in English TF1-5), in-duel dialogue, pack descriptions, and more to images with Japanese text (such as localizing the in-duel cut-in onomatopoeia as you see in the video above, or other little images throughout) using some Photoshop skills I've picked up. And it's been a joint effort, as said NAC friend and I have been bouncing off how we'd like to see this go between us to stay on the same page and all, while also checking with other translators there for second/third opinions as needed.
Our plan is to release two versions of a translation--one which uses the OCG [translated] card names in Story Mode, in-duel, and other text but not in the game's card system (mainly to deal with story-relevant notes like Osiris vs Slifer with the Gods or things like not-Utopia Hope being symbolic between Yuma and Astral, akin to how I do my GX subs), and one which uses the TCG card names in everything (like how the official subs go about it). While we're mostly working with the Japanese game files due to how the Xeno team went about decoding everything, we'll be using the card-system-related files from the fixed ISO provided by FLSGaming which fixed some issues that had been present there. And Xan has helped us with a plugin that will be used to apply our translations to the system files that were hard to edit otherwise (things like the character and recipe names, as well as the pack names pulled from for the Card Description screen), but more on how that'll work once this is ready for release, lol. At some point, I'd like to also look at HDifying textures and things, but that's definitely a bonus-level thing for after the main work here is done.
SO.
Currently, Story-Mode-wise, I've gone through everything up to Yusei's events--so Dark Yugi/Kaiba/Jounouchi/Ishizu/Mai in DM, Judai/Manjoume/Asuka/Misawa/Ryou in GX, and Yusei in 5D's have been fully retranslated, though I took initial cracks at Yuma and Yuya's events to get content for this video lol (I've also been intentionally holding off on as much ZEXAL as I can until I've properly watched the whole show so I have context). I haven't tackled overworld text yet, though (like pre-duel or the tournament-related text, which is all in the same file as all the story text). I've also been handling the in-duel dialogue as I go through the character stories, so also just up to Yusei, though I did take initial cracks at Aki's, Yuma and Shark's, and Yuya and Yuzu's for the video.
Other things tackled that were sprinkled into the video, along with some other notes:
Pack names and descriptions have been retranslated, though the descriptions may see minor edits closer to release for a little variety between worlds given the different characters at the shop. Character recipe names were also retranslated, with Yugipedia's translations for them used as an occasional second opinion, though ones based on pack names had to be abbreviated in spots.
Menu text, from the Options to Help screens and stuff in between, has been retranslated, as have in-duel text strings (so, you'll see a full "Activate Effect" instead of "Activate" or "Switch to Attack/Defense Position" instead of "Switch to ATK/DEF Position", etc--also fixed the "BATTELE PHASE" graphic typo, and NAC friend created a new translation for the "Turn Change" graphic for accuracy since ENG TF1-5 made that into "Next Player's Turn").
Database stuff, such as the Sound Test, Tutorials, Duel Missions, etc., have been retranslated closer to the Japanese text; originally I retranslated the Tutorial text via hex editor, with compromises done on quite a bit of it due to the space limits, but as Xan recently updated a text extractor tool of theirs to more cleanly pull out and reinsert that text, I've been going through and fleshing out those translations more (on my commutes to/from work mostly, to be productive lol).
As mentioned, I've been localizing/translating Japanese-text images throughout the game as I come across them, like with the in-duel onomatopoeia that come up during cut-ins or images in the shop/duel/etc screens using Japanese text, to make sure the game is fully translated.
The series logos, used during the title sequence and in the Series Select screens, were updated with translated fan edits shared on Deviantart (which we'll credit in the final release) for DM and GX, while the 5D's-ARC-V logos were edited to enlarge the "Yu-Gi-Oh!" text on them that was pretty hard to see originally.
The game's original opening sequence starts on an anti-piracy message before going into the Konami logo and then a "From Yu-Gi-Oh!..." screen before the opening animation for each series logo--the original team decided to use the first image to vent their frustration at Konami for not localizing this game, and while that's valid (to some extent), we thought we'd use the opportunity to dedicate this project to Kazuki Takahashi for inspiring our love for YGO and the place it's had in our hearts for all these years.
We'll be updating the names of cards that had TCG releases after the original patch was worked on/updated by FLSG to those corresponding names.
Xan has been working on many UI fixes for us to apply with this, among them 3-line dialogue box text as is used in the ENG TF1-5 games--once implemented for TFSP, I'll be going over everything to make full use of that extra space where needed, so things might not look as they do in the video by then.
Character bios will be worked on after I've done the story stuff, though I've taken initial cracks at it for Yuma and Yuya's bios for the video, along with translating the location/affiliation names ("Domino High School," "Satellite," etc).
Currently no release date is planned, as I'm working on this between my GX-finalizing work and actual IRL work, though we'll see how later this year looks as more work gets done--but as noted in the video, all things being equal, it will be released when everything is ready. I'll try to post regular updates or rambles now that this announcement's been made, lol, but do try not to constantly check in on a release date. 🙏🏽
All that said, I think that covers just about everything I wanted to put out there with this, lol. It's been fun to work on this so far and getting to see what I've re-translated in-game is definitely neat; looking forward to us being able to release everything when ready.
Stay tuned for more; the fun's just getting started!
#yugioh#ygo#yugioh dm#GX#yugioh gx#5D's#yugioh 5ds#yugioh 5d's#ZEXAL#yugioh zexal#yugioh arc v#arc v#tag force#tag force special#tfsp#ygo tfsp#ygo tag force#yugioh tag force#my work#tfsp retranslation#project rambling#[dunno who might've caught onto my slight hinting at this in some of my GX release posts lol but hey]#also you'd be surprised at how much text is recycled from the earlier TFs and TFSP that goes unused#maybe they planned to add more and didn't but who's to say#was also a shame they cut the unique field animations but may look into seeing if it's possible to restore 'em#but woot glad to put this out there lol
83 notes
·
View notes
Last Seen Blogs

jobedesign-blog
Untitled

pathauldren
Pat Hauldren
a-deciving-smphony
"I Used To Hear A Simple Song"
airiejynx
Airie Jynx

assamnews
AssamNews