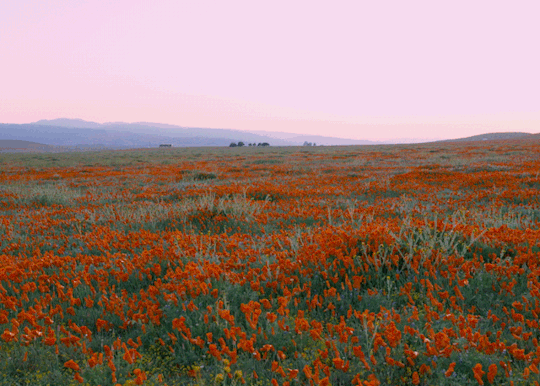
#i was just going outside to throw some kitchen scraps in the compost and the wave of bluebonnet aroma bowled me over
Text


figs, flowers, and felines ( ꈍᴗꈍ)
#i was just going outside to throw some kitchen scraps in the compost and the wave of bluebonnet aroma bowled me over#they smell SO DAMN GOOD!!!!#shebbz shoutz#shebbz irl#fig#fig tree#bluebonnets#cat#texas#springtime#flowers
51 notes
·
View notes
Text
if anyone's having a bad day, let me run you through what just happened to me. (content warning for rotten food.)
so, it's 1pm and I'm experiencing a wave of work-related procrastination that's enabling me to get chores done around the house, like empty the food waste bin in the kitchen into the bigger bin outside.
because it's been about a week since I last took the bins out, the food at the bottom has been in there long enough to rot causing the compostable bag its in to also start decomposing. no biggie, it happens: I grab another compostable bag, tip the bin on its head to avoid touching the icky rotting food, chuck a couple of very old bananas from the fruit bowl on the top, tie it off, and throw it in the outside food bin. great job me!
a little while later, I go to reassemble the kitchen bin and the lid's... not... there? it's not anywhere in the kitchen? the answer to the mystery where this lid has gone immediately presents itself to me, but I reject it and do another look, until I can't deny the obvious, and go check the outside bin.
to set the scene: it's a really nice, sunny day today. it feels like the first proper day of spring we've had all year. wildlife abounds: there are butterflies feeding on the cherry blossoms, the fish in the pond have come out for the first time since autumn. the bin is made of brown plastic that's warmed nicely in the afternoon rays. there's a little cloud of flies buzzing around me as I approach.
I open the bin and there, straining against the bags, is a corner of the lid.
there's nothing for it at this point, I'm not buying a whole new food bin because of my stupidity, so I rip open the first bag, BUT remember how I cleverly double-bagged the waste to avoid having to touch icky food? oh-hoho. I hate myself.
but fine. whatever. I rip open the next layer, like I'm playing the world's worst game of pass the parcel. this layer has been marinating in bin juices long enough to revert to a texture that's difficult to describe, but it's how I imagine an organ feels to the touch: slippery and wet and hot. at least it falls apart quite easily (along with my mental state).
I grab what I can of the lid and try to pull it out, but it only slides a few centimetres before jamming to a halt on the three rotting bananas that I added to the pile at the last moment. I try to wiggle them out the way but they aren't budging so I pinch one between my thumb and index finger. It's old enough that the skin slides away immediately, and my fingers sink into the meat of the banana. THIS is an easier texture to describe: it feels like warm snot. (I am reflexively crying at this point.) still, now that the skin it out the way, I can force the lid through the mucus. i have to repeat this process two more times before finally, the lid is free. (there's something on my finger, and I genuinely don't know if it's a grain of rice or a maggot.)
the saga's not entirely done, though, because the refuse collectors in my area don't take your food waste if it's not bagged, and I now have a bin full of scraps of plastic and a heap of rotten food. I use some egg shells to scoop up what i can and throw them into the gaping hole at the top of the bag and then it's I'm done.
obviously, I immediately run inside and start scrubbing my hands. something weird is happening, though: there are these spot of brown-and-yellow that just. won't. come. off. it's literally like I've super-glued rotting food to my hands?????
...I turn to look at the table.
...at the superglue I had been using thirty minutes earlier to fix a clasp on a broken box.
i am beyond tears at this point: the whole situation has gone past through horrifying into an absurdity so profound I must be dreaming.
I eventually scratch off the super-glued rotten food from my fingers (I don't know how long it takes me because I have detached myself from reality) and then wash my hands another hundred times before finally sitting back down at my computer because it's 2pm and a work day. I read half an email, before I'm interrupted by a strange noise that sounds like a gentle trickle of water. I turn around and my cat is in her litter box, butt positioned just on the edge, pissing directly onto the floor.
#i was just going to tell the groupchat but i decided it was so vile i had to inflict it on as many people as possible#when i promise you not a SINGLE bit of this is exaggerated#this is a factual retelling#long post#cw: rotting food
7 notes
·
View notes
Text
Earth-Friendly Witchcraft
Whatever religious or spiritual tradition they identify with, most witches agree that there is something sacred about the natural world. We draw our power from the earth beneath our feet, the sky over our heads, and the air in our lungs.
And yet, many of us live in societies that are actively contributing to the destruction of the natural world. Most developed nations have a linear economy, which means resources are extracted and then sent on a one-way trip to consumers who will use them and then throw them away. This leads to overflowing landfills, air and water pollution, and quickly disappearing resources. The World Economic Forum predicts that, if our habits don’t change, there will be more plastic than fish in the ocean by 2050. And I dearly hope that by now we’re all familiar with the reality of climate change and its devastating impact on global ecosystems.
I’m not trying to scare you, but I do want to point out the hypocrisy of drawing power from the Earth in our magic while simultaneously contributing to her destruction. If we truly want to consider ourselves spiritual allies of the planet, we need to make an effort to live our lives — and practice our magic — in ways that are less harmful to her.
You don’t have to become an environmentalist or switch to a zero waste lifestyle, but we can all make little changes for a more sustainable life. There’s lots of information out there about how to live a more Earth-friendly lifestyle, so in this post I’ll be focusing on how to apply that same philosophy to your witchcraft.
Steps to a more Earth-Friendly Practice:
Limiting your consumption will automatically lower your negative impact on the planet. Follow my previous guidelines for avoiding consumerism to start shrinking your carbon footprint.
Avoid plastic as much as possible. According to the WEF, 70% of our plastic ends up in a landfill or in the world’s waterways, and according to Julia Watkins, author of Simply Living Well, only 9% of household plastics get recycled. Plastic (unlike glass and metal) cannot be recycled indefinitely — it can only be recycled a handful of times before it becomes too degraded to be repurposed any further. There really is no way to make plastic safer for the planet, so it’s best to just avoid it altogether. Look for tools made of metal, wood, or glass instead of plastics, and try to order things shipped in paper and cardboard when possible.
Create spells that won’t leave leftovers. One of the big contributing factors to our current environmental crisis is that we just produce too much waste. You can avoid this in your magical practice by crafting spells that won’t leave you throwing away a big ball of candle wax, herbs, and paper. Kitchen magic is a no-brainer for this, since kitchen spells are meant to be eaten. If you want to do a candle spell, use small candles that will burn up completely — I find larger candles are more likely to leave leftover wax. Making magical bath salts is another great option for leftover-free spells — just make sure everything you include is safe to go down the drain and won’t contribute to water pollution!
Forage for your own spell materials. One of the best ways to avoid plastic packaging and cut down on emissions from shipping is to use materials from your backyard! Learn about the plants, animals, and minerals native to your area, and take regular nature walks where you can gather what you need. Remember to only take as much as you need and to be careful never to damage the plants you harvest from. Make sure to carefully disinfect any animals bits you pick up — you can do this by burying them in salt for a full moon cycle and/or setting them in the sun/under a UV light for several days. If you find a dead animal and want to strip and clean its bones for use in ritual, this is a much more involved process and will require special research, equipment, and lots of time. And, of course, never eat anything you have foraged unless you happen to have an advanced degree in botany.
Keep a magical garden. Another great way to connect with the planet and shrink your carbon footprint is to grow your own herbs, vegetables, and fruits. You can, of course, grow food for your kitchen if you have space, but even if you live in a tiny apartment you can grow a handful of magical herbs in pots. For a list of common houseplants and their magical associations, check out this post.
Shop for spell materials at a local farmer’s market. Buying local is a great way to avoid the environmental impact of shipping produce, and it allows you to support small farms. Farmer’s markets also typically carry seasonal produce, which can help you align your magical practice with the cycles of nature. Farmer’s markets are a great way to find seasonal fruits and vegetables for kitchen magic, but you can use the produce you find there for other types of spells as well.
Trade paraffin wax candles for beeswax or soy wax. Paraffin, the material used for most cheap candles, is a by-product of crude oil, which is not only highly unsustainable but contains carcinogens (chemicals that may cause cancer). Beeswax is a sustainable alternative, and beeswax candles produce a “clean” burn, meaning it does not negatively affect air quality. Soy wax is a slightly pricier, vegan-friendly sustainable option that also produces a clean burn.
Use undyed, unbleached paper for your written spells. The bleaches and dyes used in most commercially available paper have a toxic effect on the environment. Colored paper cannot be recycled or composted because it will contaminate everything it touches. Use plain, unbleached paper for your written spells, especially if you plan to bury them in the ground or dispose of them outside.
Make sure your essential oils are ethically harvested. Essential oils are tricky — although they are marketed as natural, many of them are produced through unsustainable methods. Because essential oils are concentrated, it may take thousands of pounds of plants to produce a single pound of oil. This can have a devastating impact, especially for endangered plants like white sage or palo santo. Look for ethically-sourced, wild-harvested essential oils — these are oils that are gathered from the wild in ways that don’t hurt the local ecosystem. Mountain Rose Herbs and Eden’s Garden are two brands that are committed to sustainable essential oil production.
Instead of burying a spell in a jar, bury it in a hollowed-out fruit or vegetable. Many traditions call for spells to be buried in the ground. Items like jar spells and witch bottles are traditionally buried on the witch’s property. The problem with this is that plastic and glass bottles do not biodegrade, and will remain in the ground for years. Instead of putting these materials in the ground, bury your spells in a hollowed-out fruit or vegetable. As a bonus, you can choose this item to support your intention. For example, you might use an apple for a love spell or a spicy pepper for protection. Just make sure everything inside the spell is also biodegradable!
Keep a compost pile as an offering to your local land spirits. Compost is an easy way to reduce food waste, and it gives your garden a boost! Even if you don’t have your own garden, you can give your compost to a fiend who does or look into donating it to a community garden. When composting, it’s important to maintain a balance between carbon-rich “brown” ingredients (leaves, undyed paper, cardboard, etc.) and nitrogen-rich “greens” (fruit and veggie scraps, coffee grounds, egg shells, etc.) — you want about four times as much brown as green in your compost. Start your compost with a layer of brown — preferably twigs or straw to allow good airflow. Alternate layers of green and brown materials as you add to the pile. Every time you add to your compost, verbally express your gratitude to the land spirits. Your compost should be moist, but not soggy — you’ll know it’s ready when it’s dark and crumbly and smells like soil.
Make your own tea blends with loose herbs and a reusable tea strainer instead of buying teabags. Witches and tea go together like peanut butter and chocolate, but the individual wrappers on teabags create a lot of waste. On top of that, since many of these wrappers are dyed, they may not even be recyclable. Keep your teas earth-friendly by buying dried herbs in bulk and blending your own teas. Making your own blends is not only better for the planet, but also allows you to choose each ingredient for a specific magical intention.
Find ways to use your trash in your craft. This one is pretty self-explanatory. Instead of throwing things away, find ways to use them in your magic! Use food scraps from cooking, like carrot greens and potato peels, in spells. Turn an old shoe box into a travel altar. Add your coffee grounds to spells to ground them and manifest results in the physical world. You get the idea. Be creative!
Research different models for Earth-friendly living, like the zero waste/low waste lifestyle, sustainability, and the solarpunk movement. This will give you more ideas for a sustainable lifestyle, as well as a sustainable magical practice.
The funny thing about Earth-friendly living is that, the more time you spend taking care of the planet, the more connected you feel to it. I encourage you to try some of the ideas on this list — you’ll be amazed by how quickly you develop a deeper relationship with the Earth and all her creatures.
Resources:
Of Blood and Bones by Kate Freuler
Simply Living Well by Julia Watkins
“By 2050, there will be more plastic than fish in the world’s oceans, study says” from The Washington Post
A Sustainable Mind podcast
Practical(ly) Zero Waste podcast
#baby witch bootcamp#baby witch#witch#witchcraft#witchblr#pagan#pagan witch#paganism#wicca#wiccan#green witch#green witchcraft#enviromental#sustainability#eco friendly#zero waste#low waste#solarpunk#magic#magick#my writing#long post#mine
5K notes
·
View notes
Text
Dreams, Chapter 16
If you haven’t read this series before, you might want to start on Chapter 1, or check out the Dreams Masterlist! Here’s the series description:
When Dean dies for good leaving Sam and his girlfriend (the reader) behind, they must figure out how to carry on without him. Alone, reeling, and unsure what to do next, trying to honor Dean’s memory and follow their hearts gets even more complicated when their nightmares become dreams that feel a little too real.
Title: Dreams, Chapter 16
Pairing: (past) Dean Winchester x Reader, (eventual) Sam Winchester x Reader
Word Count: 1754
Summary: Some of Sam’s efforts to ‘nest’ in their new life together reveal new possibilities.
Warnings: angst, FLUFF, swearing, s l o w b u r n

Water laps at the weather-beaten wood of the dock underneath you slowly and the rhythm feels like hypnosis with the sun beating down a blanket. You sense Dean at your side without opening your eyes.
“So…was he any good?”
You can’t help but laugh, hearing the echo go out over the small lake, and get up to your elbows. It’s bright enough that you have to squint over at Dean where he lays next to a couple fishing poles and a cooler, t shirt hitched up to show a sliver of his stomach with his arms behind his head. His smile is devilish, made even more smug with eyes closed against the sun so his lashes cast an inch-long shadow on the dusting of freckles across his cheeks. “You can’t ask that!” you giggle.
His lips flatten into a knowing line. “So that’s a no?”
“Jesus Christ, of course it’s not a n—you know what, I’m not talking to you about this,” you smile, laying back down.
“Ooh, so it’s a yes,” he teases as he turns on his side to face you. “Go Sammy. That mean you two are, like, going steady now?”
You let your head loll over to him and roll your eyes. “Are you done?”
“Not yet. Is he going to let you wear his letterman jacket? Take you to junior prom?”
“I’m giving you ten more seconds.”
Dean laughs, free and easy. “Fine, okay, I’m done. Wait—did he wrap it?”
“DEAN!” you yell, covering your face in embarrassment.
“Okay, alright, okay.” He’s still chuckling when you open your eyes to look over at him and reaches over to slip a piece of hair behind your ear. “You, ah, you seem happy.”
You search his eyes for any hidden anger and find only the softness of calm affection with a pinch of solemnity. Where his hand lingers in your hair you turn into it, pressing your lips to Dean’s palm. “I am.”
Dean smiles, straight teeth a perfect row of pearls so white you think for a second they might ‘ding’ with sparkle like a cartoon, and he looks relaxed enough as he puts his hands back behind his head that it calls up images of a kitten falling asleep in a sunny spot like this even as he keeps his eyes on you. “Took you guys long enough.”
“And you’re still okay with this?”
“Yeah, hell yeah. That’s the best I could ever ask for, you two happy. So, what do you say? Want to see if we can catch some fish?”

Spring was a blessing; clean greenness breaking through the grey and white purifying the air and breathing new life into you, Sam, and the community you’d come to be a part of. The cabin was that much nicer with the new hours of sunlight pouring through the windows and all the upgrades you had put into it, to the point that you began to feel truly comfortable there. You even invited the Kaisers over for dinner a few times, feeling more like equal partners in your burgeoning friendship with them.
You started to feel stable enough to get things; picked up a bookshelf at the combination flea/farmer’s market that happened in the K-12 school’s field every Saturday morning and got higher quality spatulas to cook with, the kinds of nonessential stuff you never would’ve bought before knowing you were going to stay in one place long enough to get good use out of them. Sam, in turn, kept building: changing the locks to sturdier ones and erecting a shed big enough to hold a lawn mower.
You’d been cooking on an early Sunday afternoon when Sam came home and crossed the cabin in a few strides, giving you a kiss on the cheek before setting a thick paper bag down on the kitchen counter. “Smells great, what’re you making?”
“Ratatouille!” you buzzed, placing a slice of eggplant carefully into its slot. “I’ve never had it, but I’ve always thought it looks so pretty. Hopefully it’s good. Where were you?”
“Hardware store. I thought maybe I could build a greenhouse; see if we could grow anything. Might be enough to work against the cold.”
You raised your eyebrows in appreciative surprise. “Look at you! What’re you thinking? Poppies? Platinum OG? Purple Haze?”
Setting a box of screws down, Sam rolled his eyes through a smile. “My plan was more along the lines of tomatoes or something, but I’ll, uh, take those suggestions under advisement.” You had a sudden urge to twist a gentle finger into the dimple that stayed on his cheek as he unloaded the rest of his supplies but didn’t want to embarrass him, instead sweeping some garlic skins into your hand to throw into the small bucket Sam kept under the sink to collect scraps for the compost pile. When the bag was empty he refolded it and took off his jacket, passing by you to put it on its hook by the door. “Want any help?” he asked, sounding about as breezy as you’d ever heard him.
“It just has to bake for about an hour. Does a late lunch work with your construction schedule?”
Sam leaned over to slip a hand around your waist and kissed the top of your head before grabbing an armful of stuff to take outside. “Definitely. Just yell when you’re ready for me.”
You giggled and waggled your eyebrows suggestively. “I’m always ready for you.”
He tried his best not to blush but bit his lip in spite of himself, looking up at you with a bashful twinkle in his eye. “I walked into that one, didn’t I?”
In response you held up a spare slice of zucchini that Sam readily accepted, opening his mouth like an obedient puppy and chewing as he went out the back door.
You loved watching Sam work on his greenhouse in the weeks that followed, getting so excited about the tiny shoots sprouting up from the soil that he sometimes woke up early to check on them before starting his day. After a few weeks he woke you up one morning with a cup of coffee, bare-chested under slightly sleep-tangled hair and the hems of his flannel pants sloppily half inside his boots. “I wanna show you something,” he said, throat still gravelly. You accepted the mug and got out of bed, following him drowsily and jamming your feet inside your shoes at the door, too tired to worry about the laces.
He led you into the greenhouse with its clear plastic walls and pointed down at a petite bud on top of a green stalk. It had the telltale waviness of a basil leaf, and when you bent down to look closer at it the plant already smelled herbaceous. “It’s so cute!” you hummed. Sam practically glowed with satisfaction, an unbridled smile the perfect accessory to the broad span of his chest where it was backlit by the fuzzy light through the greenhouse walls. You straightened and rubbed his back in congratulations, staring down at the plant together with your coffees like parents on Christmas morning. Tucked in the corner of the greenhouse behind the basil, a scattering of bitty white flowers caught your eye against the burnt umber soil.
“Wait, you already have stuff flowering in here? What’s that?” you asked, tiptoeing around the wooden stakes in the soil to get closer.
“Oh—I, uh—” he stammered behind you.
At arm’s length the flowers looked vaguely familiar and you stopped short. “Is that—?” You turned back to Sam, who seemed not to be able to come up with anything to say, his face the kind of blank surprise that indicated he didn’t know whether you were about to be upset. “Really? Where’d you even…how did you get some?”
He tucked his hair behind his ears to stall for even a half second. “I—well, I found a guy who got me—got us—some.”
“You still have an African dream root hookup?”
Sam’s lips pressed into a well-practiced silent ‘I guess?’ and he reached back to ruffle the hair at the nape of his neck, the movement stretching his side distractingly enough that if you hadn’t been so startled by the discovery of a plot of dream root literally in your own backyard you might’ve forgotten what you were talking about altogether.
You raised your eyebrows expectantly, waiting for him to explain.
“I made some calls, found someone in Milwaukee who got his hands on some and he mailed it here. I didn’t want to, uh, tell you in case I couldn’t get it to grow.”
All kinds of possibilities and frustrations raced through your head. “So you’ve had this for weeks? That’s why you built the greenhouse?” Sam didn’t answer fast enough. “Never mind, I don’t care,” you found yourself saying, and surprisingly, actually meaning. You took a deep breath to stop the words from jumbling together. “Do you think it’ll work?” you breathed, knowing he would understand the real question: would we be able to see Dean together?
“Only one way to find out.”
For whatever reason you’d gotten freshly showered, made up, and dressed before brewing the tea with Sam on your next day off of work. It felt like there should be some level of pomp and circumstance about it, this giant undertaking that might be able to change your whole life again, even knowing that your prep wouldn’t translate into a dream. You were giddy with anxiety and almost wished you could reasonably put it off, the idea of this new possibility being yet another dead end making you nauseous.
“Your place or mine?” you asked, trying to put a little sheen of humor on your nerves.
Sam chuckled but you could tell he was nervous too, rubbing his palms dry on the knees of his jeans over and over again. “You haven’t done it before, right?”
You shook your head. “Is there a learning curve or something?”
“Honestly it’s been long enough that I don’t really remember. Hold on—hold still.” He reached out and very gingerly swept a finger across your cheekbone, drawing back to show you an eyelash stuck to the whorl of its pad.
You straightened where you sat on the edge of the bed. “That’s as good a sign as any. Cheers, I guess.” Sam dropped the tiny hair into his mug and touched the ceramic to yours, his eyes hopeful and reassuring as you took tandem sips.
And then you were off.
-
Continue to Dreams, Chapter 17
Thanks again for reading! If you liked it, check out my Masterlist or send me a request!
Tags: @sams-sass @vxnderlindes @deanwinchesterswitch @akshi8278 @itsjensenanddean @flannellover67 @weepingwillowphoenix @tj-drinks-tea @whatareyousearchingfordean @winchest09 @winchestergirl2 @samwisethegr8 @nobxdy @nurse-sarahrn @lovers-in-japan-reign-of-love @deanwanddamons @stressedoutkitten @winchestershiresauce @tatted-trina6 @percico-heronstairs @downanddirtydean @queenoftheunderdark @lyarr24 @waywardwifey @wonder-cole @sergeantsea @peachyafshawn @tjfinnigan @calaofnoldor @that-one-gay-girl @daringvixon @fairlyspnfanfic @treat-winchesterswith-kindness @samfreakingwinchester @lovelyrocker @mrspeacem1nusone @theveridianmoon @underc0vercryptid @kpwatsonn
And as always, if you want to be on my taglist, were on the taglist and changed your handle, or I lost track of it, please let me know!
#dean#sam#sam winchester x reader#sam winchester#sam winchester fanfiction#sam winchester fluff#dean winchester#dean winchester x reader#dean winchester x you#dean winchester fluff#sam winchester series#sam winchester reader insert#dean winchester reader insert#spn fic#spn fanfiction#spn fluff#spn series#supernatural#supernatural fanfiction#supernatural fic#supernatural fluff#supernatural angst#sam fluff#sam angst#dean fluff#dean angst#sam x reader#dean x sam x reader#dean x reader#sam x you
71 notes
·
View notes
Text
March 28, 2019
It’s officially Spring Break week for me so I’ve been taking the time to focus myself on some projects and get things settled around the house. Among those projects is getting my plants settled and getting ready for the growing season!
Our apartment has nearly all South facing windows, and a South facing balcony, so I decided I wanted to turn our balcony into a food garden using containers. I started some seeds (minimally successfully) back at the end of February for early Spring crops and then later for a spread of flowers.
My kale seeds came up easily, and so I transplanted the four best seedlings into larger containers. After growing a little more in front of our big window that opens out to the balcony, I moved them outside. It’s still getting pretty cold at night, even as we’re starting to have some days in the 60s. We’re still having frost warnings too. But Kale loves it! I have one in a 10″ terracotta pot, one in a mushroom plastic container, and one in a gallon milk jug out on the balcony, and after the temperature dipped down, the plants look even more happy and resilient than before.
The spinach, not so much... From the seeds, I only had 2 of 8 sprout, and of those two only one survived transplanting. I put it outside with the kale, but the cold seems to have withered it significantly. However! I have a volunteer spinach plant that is doing fantastic! How do you get a volunteer plant, Kecheri? No idea! Last year I dropped lettuce seeds into a glass coke bottle just for fun and the lettuce grew as well as can be expected. Then I pulled it out, used it, and put the bottle away somewhere. Then this year, I happened to leave the bottle I assumed was empty sitting out while surveying my different planting containers for this years garden. Well, a few days later, something sprouted in my SUPPOSEDLY EMPTY bottle! It’s been growing very nicely since the bottle makes a sort of miniature greenhouse, and the leaves are pretty spectacular! It’s definitely a spinach plant by the shape of the leaves. I have no idea how it got there, but I’m definitely not complaining. So that spinach plant has continued to grow really well outside on the balcony and started filling out the little stem of the bottle. I’m not sure what the effect the confined space will have on it’s growth, but we’ll have to just wait and see.
Also successful is the German chamomile (the kind used to make the tea) seeds I bought in February. I’ve had close to 100% seed germination and the little stalks are looking pretty strong. I have some sprouted in my seed starter, pending a transplanting into a more permanent home, and some started in a mini greenhouse I made from a plastic clam-shell salad bar container. The ones in the salad container are doing particularly good, look strong and healthy. I’m excited they came up so quickly and so successfully, but I’ll have to figure out what I’m doing with them as e enter warmer weather. I don’t think they take particularly well (according to some google searching) to transplanting and would rather be planted in their final containers later in the season, but we’ll see! I still have plenty of seeds so I can always do that once the weather is warmer and I’m ready to do more work outside.
To no surprise, the catnip I planted in the seed starter and a salad bar container greenhouse like the chamomile has sprouted fairly successfully as well. Mint plants are particularly easy to grow and spread, so I’m not too surprised, but as this is the first year I’m trying to grow catnip, and my first year with a cat, I’m excited all the same.
I’m growing a number of other herb plants as well this year. In addition to the chamomile and catnip, I’ve picked up some starter plants from our small, local plant nursery. I have Italian oregano and a rosemary that I’ve transplanted into gallon milk jug containers, and a lavender still waiting to be re-homed. As much as I use spices in my cooking, the herbs are a must. (Even though I can get good herbs at the spice and tea shop where I work, nothing beats fresh.) Once weather gets a little warmer and I can start moving things outside, I think the herbs will really take off. So far, they’ve really been thriving in the big window.
I’m also focusing on growing vegetables this year since we’re in such a nice sun situation here. Already I have some potatoes that sprouted in our cupboards growing pretty well in five gallon buckets. My crop last year ended up rotting out after we got so much summer rain, and I’m not entirely positive the buckets have sufficient drainage. The first year I grew potatoes and had a really successful crop, I had mixed my soil with a lot of moderately sized rocks, which I didn’t do last year or this, so we’ll have to see how it goes. Good news is that if these rot similarly, I know how to correct the problem and will still have plenty of growing season to correct the problems.
Vegetables I have seeds for this year are cucumbers, zucchini, broccoli, cabbage, and bush beans. Some of the seeds are a little old, so I’m unsure about germination success, but others like the cucumber, zucchini, and beans are new. My mom is moving houses this year and has offered to lend me her self-watering planters for this summer, which will be great and I think will be enough room for one of these big vining plants. I also want to try my hand at tomatoes in buckets, but haven’t taken steps towards starting them yet.
I still have our living blue spruce Christmas tree outside on the balcony. I picked up a couple 15″ pots, one of which I plan to transplant the spruce into. Then, I can transplant my avocado tree (that I started from a pit two years ago) into the spruce’s current pot, and stick something else in the avocado’s pot.
I’ve gotten into researching and trying out regrowing plants from kitchen scraps this year too. I regrew a bok choi from the base in January or February, but killed it by harvesting leaves too quickly and not actually planting it in dirt. Even so! It lets me know that I can grow a bok choi NEXT time with some precautions. I regrew and transplanted carrot tops for the carrot greens, and those have been growing really happily in the kitchen since planting. At the moment, I’m going to try and regrow some leeks, and be sure to transplant them when new growth comes up. Growing from scraps is pretty exciting because I’m really into sustainability, and have been since I was a kid, and limiting food waste by replanting and growing more food is excellent.
Speaking of limiting food waste, I also have a compost going in the corner of our balcony. Eric’s sister gave me an empty, locking-top kitty litter plastic bin that I’ve been throwing shredded paper scraps, exhausted dirt, and food waste into for a few months now. It needs to be turned, and is pretty full since we eat mostly whole foods and generate a fair amount of scraps, but I think it’s doing what it’s supposed to, which is super exciting! It doesn’t smell much, and the food does seem to be breaking down. My mom has kept a compost since I was a little kid, and aside from the lack of grass cuttings that always made up a lot of her compost piles, my little kitty bucket compost looks like proper compost! I’ve been adding it into a few of my plantings already, like the potatoes that are heavy nutrient feeders. I think when I have the proper planters, the compost will really come in handy.
Some background here, my mom is a big gardener and I’ve been helping her in the yard and with the vegetable garden since I was a kid. We were part of a neighborhood sustainability club that focused on community beauty through gardening, sustainable practices, and environment friendly projects and events like Sweep the Creek. In high school, I helped to found a gardening club at my school in senior year, and we dug up a courtyard to install a vegetable garden to be used and maintained by the home ec and horticulture classes. I’ve always had strong beliefs in the value of food gardens and I have a significant love of plants in general. SO the fact I have the opportunity to take advantage of all South facing windows has been thoroughly utilized and my indoor plants have thrived through the winter. Now that it’s almost warm enough to star utilizing the opportunity to use a take advantage of a South facing balcony, not obscured by trees and the like? I am itching with excitement to start laying the garden out in my small space and planting things. I really want it to be successful, and we’ll just have to wait and see, but I have a good feeling about it.
April and May are really when planting season starts where we are, so I’m jumping the gun kind of significantly, but once the weather warms up and starts staying warm, I will really be able to launch into this project.
Stay tuned for more updates and some pictures!
-Kecheri
5 notes
·
View notes
Video
youtube
Transcription
[0:00:03-0:00:16]
Welcome to the Jungle podcast. I'm Sophie Renker, Environmental Science undergrad and I am Erin Beiter, Wildlife Science... Bachelorette... holder.
[0:00:18-0:00:19]
I graduated.
[0:00:21-0:00:39]
On our podcast today we decided to discuss the differences between sustainable lifestyle in an urban setting versus a rural setting and the different challenges and solutions that you can use and take.
[0:00:41-0:01:08]
So on the first segment of our podcast today we decide to discuss space. Obviously in the suburbs you have a yard, you have a big home. I'm sure [when] you were growing up in the suburbs of Buffalo can attest to that. Yeah, we had a pretty big yard and a little wooded patch where you could stash things like my neighbors did have a compost pile in there. Three of them in fact
[0:01:09-0:01:15]
And you just really can't do that in a city.
[0:01:16-0:01:32]
I've tried, it really doesn't work out that well. Yeah, a lot of college students and Millennials are living in apartment complexes or live in the city and they have, what? Like four rooms and a pet?
[0:01:36-0:02:01]
And yeah, if you do have some sort of semblance of a yard, it's not always up to you what you can do with that yard. Your landlord might have restrictions. So when it comes to discussion of things like compost or homesteading for people who live in urban areas, that's not an option. No, and it's a whole lot of work to
[0:02:02-0:02:11]
put together like a community garden if you don't already have one. If you do want to, like, reap the benefits of something like that.
[0:02:13-0:02:13]
or like, you know,
[0:02:15-0:02:16]
anything like that.
[0:02:18-0:03:00]
But there are different ways that you can do things inside. You can have like a lil herb nook on your counter. Yeah, or you could try doing some light composting maybe some aerobic composting or even in Manhattan they have places where you can drop off compost. But yeah, the city of Syracuse has one but I think you need to like pay people to take it. I know at least restaurants in the area need to pay to have somebody take it away or I don't know if you need to pay for it at the site but it is an option for people who can't afford it who want to take it to a facility.
[0:03:03-0:03:47]
If you're like me (who is insane), you can throw your vegetable scraps off the side of your porch and hope that the squirrels eat it. Yeah the squirrels do love of spare pizza. Yeah, they actually do. But not everyone can get away with that. And if your neighbors happened complain well you're out of luck. Mine haven't yet, so I will continue to do so. I think we have a couple of rotting pumpkins outside as we speak. They have holes bored into them so the squirrels can get into the inside. But I guess that's another thing is not everyone has the capital
[0:03:48-0:04:09]
to embark on different projects to be sustainable. Even those little composting boxes. Those can cost money. I don't know how much but I think when the latest like both like a good stainless steel one that you put on your counter that has a filter was closer to $30.
[0:04:10-0:04:26]
That's not too bad. But that's just the kitchen one, not including the huge ones that just look like an upside down trash can, those are like $100. Yeah, and they can get even more expensive from there. Especially if it's a tumbler [type of composter].
[0:04:30-0:04:31]
Yeah.
[0:04:32-0:04:41]
So if you don't have permission from your landlord to dig up your lawn, or you don't have a lawn at all, it can be very challenging to compost. Yeah.
[0:04:42-0:05:17]
One solution if you want to take this route (again, it's a little nuts) you could-- if you eat a lot of vegetables, you could feed them into some sort of animal that you keep with you in your house. Like a caged one. Such as a guinea pig or an herbivorous reptile. Rabbits? Rabbits. Rabbits are really great. You can toilet train them. You could change your diet, be on the same diet as a rabbit. How cute is that? Have you heard of red worm composting?
[0:05:20-0:06:05]
I have. I have. I feel like that would do well in a small area too. It still-- it takes up like one of those big plastic Tupperware containers, but you can kind of like tuck that away in a closet for dedicated enough. Yeah, that's true. And you don't have to put it like outside to get that good decomposition. You got little buddies to do it for you. You just have to be dedicated enough to pick out all the worms at the end of each cycle. Gosh, that's true. If you have kids maybe they would enjoy that. I’m sure that they would. At least I would have when I was a kid. I can see my parents roping me into something like that. Chores: sweep the kitchen; vacuum the rug; dig out the worms.
[0:06:11-0:06:45]
Oh, I like that a lot. I’m going to make my kids do that. And then use the composted it's to put more dirt in your herb garden. Your tiny miniature herb garden on your counter next door window. That’s another thing: grow lights are a rip-off. Grow lights CAN be a rip off. I, you got to just know the right websites. If you're looking to grow plants indoors.
[0:06:47-0:07:04]
You can find them. They're good. They're out there. We recommend LED lights from experience, the plants really like them. The plants really like them. Don't bother with the pink, blue, purple, red lights. They hurt your eyes and the plants don't even like him that much.
[0:07:06-0:07:26]
Yeah, just got like a gentle LED light and they'll be fine. Yeah, probably like 20 bucks for a panel. Yeah one foot by one foot. You could probably even like paste it under some cabinets. Oh yeah that’s a good idea. Definitely.
[0:07:28-0:07:40]
And you know, in these Syracuse winters like there's no way you're going to be able to grow any type of plants in the winter without one. Yeah. Yeah for sure. Extend that growing season.
[0:07:43-0:07:43]
That way
[0:07:46-0:08:28]
I don't know. I feel like I'm always buying herbs and throwing them away. Like you think that you're going to need to make something with them and they just rot in the fridge. Wouldn’t it be great if you just had them on your counter and they never went bad? That’s what saved me. I grew lettuce from a little Hydroponics kit that my mom got me for Christmas. It's fabulous. It comes with its own light, it like cycles the water through, all you need to do is like dump some nutrients in the water every so often. But it grew so much lettuce. And when I would always buy lettuce from the supermarket, and I would bring it home and I'd be like ‘Hmm
[0:08:30-0:08:52]
that lettuce has been in there for some time’ cuz I just haven't been feeling like salad! But you know, when it’s your own lettuce you’re just like ‘Wow. Look at that lettuce. Look at you go. I'm going to eat that. I'm going to eat that right now.’ And if I don't feel like it, it's just going to make more lettuce for when I'm ready for lettuce, man! I really like it. It was a good time.
[0:08:53-0:09:02]
And I think the hydroponic system was a pretty penny, it was like a hundred bucks, which is a little more than
[0:09:03-0:09:06]
I could personally afford but
[0:09:09-0:09:18]
If you really if you want to take on a project you could make your own pretty easily, and there's a lot of people out there who,
[0:09:19-0:09:59]
On the internet, could probably show you how. You know what’s another thing is time. Another thing that's kind of intimidating for people is not only space and money, but the time it takes to learn the lingo and watch all these YouTube videos and then browse online for what equipment you need, and what if you don't have any tools? Yeah it’s just so many trips to the store. Like honestly time is-- it's a real project like getting into more sustainable life cuz you do need to do a lot of research
[0:10:01-0:11:00]
about a lot of these things. Just like buying new like those sponge tampons. I went to a sustainable menstruation product table today at [SUNY] ESF and they had sea sponge tampons, and reusable pads, and menstrual cups. And you just kind of look at it and you go: ‘What the hell is this stuff?’ Yeah, and you're like, ‘I got to learn more!’ and then you're like ‘Shit. I don't have time to do more’. Yeah it’s like ‘I got a meeting in five minutes. Please explain to me what this sponge is and why I should put it up my vagina.’ Yeah. And like ‘I had a bad experience with the Diva cup, please tell me in-depth on how the Luna cup is better and won't hurt me.’ Oh no.
[0:11:00-0:11:29]
Like, I don't have time to dig deep and I know your customer reviews and, you know, snatch these little tidbits and, you know, actually work up the courage to spend the money on the thing and like ‘Ahh!’. It’s just a whole process. Gosh, the amount of time. The amount of time that I've spent in the Amazon customer review section must have been years off my life. Honestly. Honestly, yes.
[0:11:30-0:11:41]
I want to know what I'm buying is legit, like honestly. But I mean, unless you're just crazy, you don't want to spend that much time in there. Yeah.
[0:11:46-0:12:38]
The important thing is is that sustainability doesn't have to be perfect. Right? We're saying all these things, but we don't even do all of them. Not at all. We recycle. We've grown a couple things. We tried composting. It’s still kind of sittin and I don't know if it's actually composting, but you know we’re trying. It’s out there. We make efforts. Yeah, and that's the point is that you're not just kind of sitting around doing nothing consuming and hoping that everything will be okay. And at least feeling like you have some semblance of control over what happens to our planet. Like plastic waste reduced, just waste in general. I even like to think about single-use paper products sometimes.
[0:12:38-0:13:16]
I think about single-use plastics ALL the time. And I’m saying single-use paper like toilet paper and paper towels. How many years did it take for this tree to grow and then for us to cut it down and just use it in a second? How far has it traveled? Like, is it going to break down properly? How long is it going to take to break down? It's like a natural material but it’s going to a landfill. I don’t know. It’s just a rabbit hole. It’s a bit of an existential crisis sometimes.
[0:13:21-0:13:40]
So I guess the point of this podcast is to just kind of introduce normal folk --who don't have a lot of time, space, or money--to just kind of the concept of sustainability and how we can all have an imperfect version of sustainability... but in numbers we have strength. Yes indeed.
[0:13:41-0:14:41]
In numbers, we can influence the larger system I think. If 8 billion people try just a little bit in some ways, they have a huge impact. It’ll have a huge impact like--like if you really just gotta have take-out every week, that's a lot of plastic waste, but you know, like you can make up for it in other areas. Like you can do what fits your lifestyle best and it doesn't have to be everything. It really just doesn't have to. Even just carpooling is great. Even like carpooling, riding your bike if you are able and willing like it really does make a difference. What is it, 30% of Transportation carbon dioxide pollution in the United States is just single family
[0:14:41-0:15:11]
cars. It’s just people driving to the grocery store. It's just people doing normal everyday things. Driving to work every day. That is one third of all of transportation costs when it comes to greenhouse gas emissions. If all of us took a little bit of responsibility, then something amazing could happen. For real. And it is happening! Like this is a trend, like this is not going away.
[0:15:14-0:15:15]
Yeah.
[0:15:16-0:15:17]
And I like it.
[0:15:20-0:15:35]
I don't know how to fix the single family car thing cuz I personally own a car and boy I drive it alone SO many places... but... that’s just another example--
[0:15:37-0:16:05]
But that’s a product of two hundred years, maybe not 200 years, but at least a hundred years of the people before us the way that America was structured. So it you can't even blame yourself for the system that we are in but we can still try our best to change it in little ways to make it better. Yes.
[0:16:06-0:16:07]
Yeah.
[0:16:08-0:16:31]
It’s not your fault that there isn't like amazing public transportation everywhere we go. Yeah, we were born into this system and it's not like we have to fix everything overnight or make everything perfect. It's just making little choices, just try and being conscious about your actions. And like what you buy, and what you throw away, and how it will affect our planet. Yeah.
[0:16:35-0:16:43]
And when you put it that way it really does seem like anyone could do it. Literally anyone can.
[0:16:44-0:16:45]
Anyone can
[0:16:49-0:17:07]
Alright, that's about it for our introductory podcast of the jungle. Again I'm Sophie Renker, and I'm Erin Beiter. Have a good day. Thank you for listening.
1 note
·
View note
Text
Arplis - News: 15 decor items to spruce up your home for spring
— Recommendations are independently chosen by Reviewed’s editors. Purchases you make through our links may earn us a commission.
Spring is all about blossoming, new beginnings, and opening up the windows to let fresh air in. I look forward to a deep clean with a fresh playlist around this time every year, and things feel a bit more hopeful when the sun seems to be shining more—at least here in the Midwest. But, even if spring hasn’t quite gotten to your home yet, there are plenty of ways to spruce up your space with spring home decor.
From fresh-smelling candles to a new doormat, these home decor items are a surefire way to make your space anew. So toss your blankets in the wash, grab an extra bag of soil, pour some tea, and get ready to freshen up your home for the upcoming season.
1. A candle to set the mood for the season
Credit: Boy Smells
Start by making your home smell like fresh fruits and veggies.
Boy Smells candles have a cult following, and with good reason—they smell so good. I gifted one to my roommate and it brings a smile to my face every time she lights it. It’s still burning now several months later. To get your bedroom or living area ready for spring, I recommend pickup the Gardener scent. This candle is made of coconut wax and beeswax and combines notes of orange tree bark, tomato juice, honeysuckle nectar, petitgrain, and white tea to make the perfect aroma for those early spring days.
Get the Boy Smells Gardner Candle from Nordstrom for $32
2. A doormat that matches your personality
Credit: Olive Creative Co.
Show your guests what to expect with a sassy or sweet doormat.
With vaccines becoming readily available, we might be able to flex our hosting and entertaining muscles soon. So, now is the time to make sure your doormat is ready to welcome people into your home or make anyone passing by crack a smile. I’m a big fan of the “You Better Have Pizza” mat from Olive Creative Co. It’s humorous and lighthearted, and it’s perfect for a sleepover or getting pizza delivered. If that one isn’t your speed, check out other options like doormats that say “Homebody” or “Hey Sunshine.”
Get the Olive Creative Co. “You Better Have Pizza” doormat from Esty for $45
3. Fresh foliage in the shower
Credit: CAFlowerGrowers
Make your shower feel like a spa.
Whether you like to shower in the morning or take a late-night bath, a fresh bunch of eucalyptus in the bathroom will make your home feel like a spa. I love seeing the burst of green hanging in the shower, and the steam from hot water helps release the calming eucalyptus scent. Adding a bunch of the plant to your shower will help you start the day refreshed and unwind after a long day.
Get the CA Flower Growers Large Fresh Shower Eucalyptus Bunch from Etsy for $23.49
4. Adventure-inspired candles
Credit: Paddywax
Match your itinerary with a new scent.
While you’re planning your upcoming road trips, camping outings, and travel plans, consider getting inspired with a candle formulated after National Parks. The candle collection from Paddywax is earthy, textured, naturally fragrant, and a perfect aesthetic fit for your next visit. You can even strike anywhere-matches right on the vessel to make the candle feel like a blazing campfire. Pick your favorite park from some of the best sights and smells our nation has to offer: Glacier, Acadia, Yellowstone, Yosemite, Grand Canyon, Olympic, and the Great Smoky Mountains.
Get the Parks Candles from Paddywax for $34
5. Fresh towels
Credit: Nordstrom
Few things are as refreshing as plush, new towels.
Springtime means spring cleaning, and for some people that includes getting rid of their old, crusty bathroom towels and replacing them with fresh ones. The Hydrocotton towels from Nordstrom are the perfect replacement or can be added to your current rotation. The 100-percent cotton material is ultra-soft and ultra-absorbent providing gentle and thorough drying. Get both the bath towel and the hand towel to give your body and your hands the VIP drying experience.
Get the Nordstrom Hydrocotton Bath Sheet from Nordstrom for $55
Get the Nordstrom Hydrocotton Hand Towel from Nordstrom for $19
6. Wicker baskets
Credit: QVC
Store your blankets, toys, or plants in these gorgeous baskets.
With spring comes warmer weather, meaning it's time to put away all the excess pillows and blankets you brought out for the colder months. These wicker baskets are the perfect combination of stylish and functional, allowing you to store those blankets close by when you do get chilly instead of searching for the plastic bin in your basement stuffed them in. There’s also something about the wicker material that's reminiscent of spending time outside.
Get the Wicker Basket Set from QVC for $48
7. A countertop compost bin
Credit: Bamboozle
Keep your scraps out of sight with this bamboo bin.
I recently tested a range of compost bins on the market for both indoor collection and outdoor spaces. This indoor bin from Bamboozle was one of my favorites, and it was runner-up for the indoor bins. I loved that the materials (mostly bamboo) and shipping materials were plastic-free and recyclable. I now keep this bin on my countertop or hang it on a hook in my kitchen when the counter is a bit crowded. If you’re looking to reduce food waste and ready to start composting, this sleek bin is wonderful. I do recommend getting it in the darker color though since the cream color stains easily from fruit and veggies.
Get the Bamboozle Compost Bin from Amazon for $39.99
8. Plants for a pop of green
Credit: FloridaPlantsGardens
These ferns are light, airy, and quick to take up space!
A new plant is the perfect thing to welcome in the spring for obvious reasons. This asparagus fern is a great addition to your indoor plant collection or a good one to start with for beginners, especially since it is relatively easy to take care of. Despite its name, it is not related to vegetable and is more pleasing to the eye than the stomach. Based on my experience these little guys grow pretty rapidly, adding plenty of green to your home.
Get the Florida Plants Gardens Asparagus Sprengeri Fern from Etsy for $12.97
9. A textured throw
Credit: Urban Outfitters
Doesn't this texture make you want to stay on the couch?
Spring is a bit of an in-between season. My roommate and I have been debating whether 40-degree weather is winter or spring—but we do agree that blankets, especially cute and cozy ones, will keep us at the right temperature until we can open the windows and let fresh air in. This tufted-throw blanket from Urban Outfitter is the perfect size for wrapping yourself up on the couch or adding on top of your duvet for another layer of warmth. The throw comes in natural colors that will complement midcentury, bohemian, industrial, and minimalist decor.
Get the Aden Tufted Throw Blanket from Urban Outfitters for $69
10. A hammock chair
Credit: Highwild
Add this comfy chair to your porch or backyard.
Warmer weather means more opportunities to sit outside on your front porch or in your backyard. When the time comes, you’ll want to be prepared with a comfortable place to sit like this personal hammock chair swing. This is the perfect spot to bask in the sun and let time pass you buy as you read and sip on an iced tea or write in your journal. If you don’t have any porch or yard space, don't worry. You can still enjoy this hammock. It’s easy to move and can be hung from a tree in a park or indoors to turn your room into a zen oasis.
Get the Hanging Rope Hammock Chair from Amazon for $42.99
11. Bright, versatile dishcloths
Credit: Anthropologie
Add some color to your picnic basket.
I love kitchen items, especially multi-purpose ones. I don’t use paper towels in order to reduce waste and be more sustainable, so I have a large collection of tea towels and dishcloths for cleaning, eating, and cooking. This six-pack of dishcloths is bright and charming. You can use them to dry dishes, wipe down counters, dust surfaces, and keep your hands clean during picnics. I can’t recommend these enough, and reviewers agree that they are of great quality and just as vibrant as the photos show.
Get the Woven Geo Dishcloths, 6 Pack from Anthropologie for $24
12. A whimsical recipe card tin
Credit: Rifle Paper Co.
Keep your recipes in one place.
Though I have an extensive Pinterest board of recipes, nothing compares to a handwritten recipe card. I have a few from my grandma and mom’s collection, and I’ve started to write my go-to recipes out on large index cards as well. The cards are easier to keep on the counter than my laptop or a cookbook, and you can laminate them to make them last. But you’ll need a place to store your recipes, and no tin is better than the floral ones from Rifle Paper Co. The tins are practical and whimsical, and if you’re a fan of the pattern you can match it with other accessories like your apron, phone case, and more.
Get the Recipe Tin from Rifle Paper Co. for $34
13. Air plants
Credit: The Sill
You can display air plants any way you like.
Air plants are little pops of life that you can display in a variety of ways. You can place them in glass globes on the wall, in a basket or tray on your coffee table, or add them as accents to your bookshelves. They don’t take much work, just a weekly soak to keep them perky. They’re a great alternative to potted plants if you don’t have much space or have pets who dig in the soil. This pack of six air plants is only $30, and the plants range in size so you can mix and match them as you decorate.
Get the Air Plant Assortment from The Sill for $30
14. A bag for pretty much everything
Credit: Urban Outfitters
Keep this bag right by the door.
Market bags are pretty popular and you’ve probably seen your favorite influencers carrying one as a purse or grocery bag. They’re common in zero-waste bundles as well, and for good reason. A good market bag can be used to carry fresh produce, flowers, or your daily essentials like your water bottle, purse, and phone. In addition to being transporting your goods, you can use it to store produce once you get home by hanging it a nail or hook or store it in the fridge. This bag can also be folded up to fit into a tiny purse so you’re prepared for any shopping emergency.
Get the To-Go Market Bag from Urban Outfitters for $9
15. A tray to improve your baths
Credit: Royal Craft Wood
Take longer baths with a tray for your wine and books.
I love taking a bath to wind down, especially since Daylight Saving Time has me a bit off my routine. Though I love relaxing, I tend to get bored and prop up my laptop to watch a TV show or awkwardly hunch to read a book. If you’re in the same boat, upgrade your baths with a tray that’s made to hold all your things. A mug of tea or glass of wine can sit in the coaster area. You can place a candle, lotions, face masks, essential oils, a vase of flowers, or bath salts to keep everything you use within reach. And the tray has several ridges to keep your phone, book, or tablet in place (and dry).
Get the Bathtub Caddy Tray from Amazon for $49.97
The product experts at Reviewed have all your shopping needs covered. Follow Reviewed on Facebook, Twitter, and Instagram for the latest deals, product reviews, and more.
Prices were accurate at the time this article was published but may change over time.

Arplis - News
source https://arplis.com/blogs/news/15-decor-items-to-spruce-up-your-home-for-spring
0 notes
Text
Garden Reflections
GardenJen 2018:
This is a reflection on the trials and errors of 2017, and the plans and dreams for 2018
Back to Eden
In 2016 the chicken brooding for the communal coop pre-occupied too much of my time and delayed spring planting. 2017 there was a good, early start on both the chicken brooding for my own personal flock and the execution of the garden plan. The kids co-operated by doing all their gardening in the opposite corner of the yard as opposed to invading my space. And they are learning – they did use deer fencing and even weed barriers. And they built their own strawberry tower from logs we still have in abundance curtesy of Hurricane Sandy. We had a friendly competition for growing competing potatoes in buckets, and not too bad a harvest. The biggest mistakes were using fresh chicken poop as fertilizer which burned the roots, and forgetting that deer like to eat potato vines.
The cool, wet weather took a toll on the tomato crop, although the peppers (just because they are contrarians) did exceptionally well. The sweet pea crop was phenomenal, parsley and basil held up nicely. I grew rows of beautiful purple shouldered turnips only to discover at harvest that the wet weather had rotted all the bottoms below the soil level. Likewise, the carrots looked superb until I tried to pull them and discovered the critters had tunneled below them and eaten them from the bottoms up! I lost all the squash and zucchini to the squirrels and the deer. Squash and melons must be germinated indoors or the squirrels will dig up and eat the seeds. And the plants themselves have to be well protected because the deer, rabbits and ground hogs will eat them even after they get spiny.
The herb garden was very robust, as was the rhubarb. I am now fully carpeted with Egyptian walking onions so I had to dig some up and give them away. The oregano has started popping up everywhere. I moved some around. As usual, the rosemary did not survive outside. However, all the windowsill herbs I had in the kitchen over the winter transplanted successfully to the garden, and all but the rosemary (!) survived being dug up and moved back to the kitchen this winter. I am doing a “cloche” experiment with gallon milk jugs; I have covered a thyme plant, a rosemary plant and a parsley plant with milk jugs, caps off, for the winter to see if they survive and green up quicker in the spring.
Yes, the weeds inevitably caught up to me by late July and I mostly missed the second planting. Given how cool and wet it was, I should have re-planted everything that I had planted in the spring. It would have been great – didn’t happen. I have a stunning crop of second year burdock that I mostly left in the ground and will dig up in 2018 spring. I did well with landscaping cloth in the cabbage patch and under the broccoli, kale and Brussel sprouts. The sky blue petunias and the dill plants companion planted with the cabbages and cauliflowers not only looked stunning, they did their job and we had no cabbage moths at all. And this year the cauliflower was a success. Lucky us since cauliflower is our new rice. I am certainly going to try to grow it again. It did have to be cut and eaten in very short order because the rain mildewed some of the heads before we could consume them. Burpee has developed a loose headed/branching cauliflower that I will give a try. But I am also going to try an early heading variety. Broccoli – I am very pleased with small, re-heading/branching broccoli, it is the only way I can justify the space it takes up. However, once again the Brussel sprouts did not produce anything bigger than pea sized sprouts. They need more heat and more space. And since the cole crops are over-due for a rotation this year, I may just focus on collards and broccoli. Grew no collards at all in 2017 and the kale crop was competing with the useless Brussel sprouts so it did not reach its potential. The Toscana kale (sort of like kale palm trees) performed best. The Portuguese kale (which is like a giant, loose cabbage leafed rose) failed entirely.
So this year, aside from fencing in the new garden space, I am going to try the Back to Eden weed barrier method of gardening. I have spent all winter hording up cardboard boxes - easy to do because I have Amazon Prime. I will sheet compost with chicken manure, used coop straw, green material, twigs and branches, and any kitchen scraps the chickens don’t consume (mostly avocado and citrus peels), cover that with a layer of cardboard, weigh the cardboard down with a foot of last autumn’s leaves which I have in several giant piles. This will become a sort of like a giant hugle/compost pile/weed barrier. I will wet the whole thing down (or wait until we’ve had a nice soaking rain) then dig holes or trenches in the leaf layer, fill those with garden soil, and plant in those holes and trenches. This should give me a weed free garden for 2018. We shall
Of course, covering everything is going to necessitate removing the perennials. This year I will be re-locating the asparagus bed. Eight years it has been taking up prime real estate in my fenced in garden. Waste of space – asparagus is a weed and nothing but idiot humans will eat it. So off it goes to a new spot along the western wall of house where it will be planted in bunches, instead of rows. Also to be removed are the black raspberries and horseradish. Horseradish is a companion plant to asparagus so it will go to the same spot. Black raspberries get gnawed by the deer so they will have to go to a separate fenced in area. The strawberries, also companion to the asparagus will go to the very successful strawberry tower in the children’s garden.
The seed list this year is another challenge. Too much of my seed inventory meant to be planted in July never made it into the ground. And I have so many seeds that this will be a grow-from-seed year, instead of order plants. I have also gotten myself into a couple of garden plant swap groups so, I will plant only what I either have seeds for or can get through exchange this year. There will be NO seed or plant ordering, with a few exceptions such as a rosemary plant, a lavender plant, marigolds and petunias, and some other things I have run out of, as detailed below.
In other greening endeavors, my house plants are on their last legs and need some serious attention. It’s been a couple years since they were re-potted, and they haven’t summered outside in at least 4 years, so they need some serious re-hab. They are an eclectic collection, none of which I purchased and all of which are at least 15 years old, and some are more than 20! I am also determined not to just throw away my Christmas poinsettias this year. I am going to attempt to save them and get them to re-bloom next Christmas. Wish me luck. And I have several glass containers with gravel left over from last year that I am going to recycle to force some spring bulbs to bloom. I have already set up and seeded my countertop aquaponics herb garden. I planted another 200 daffodil bulbs in the lawn in late November. I have a large art glass globe that Dan gave me as a terrarium a few years ago that needs to be replanted. And did I mention that I am thinking of taking up bee-keeping…?
Legumes (follow the Root crops)
Grew no beans in 2017, so I have multiple packs of beans to plant this year. Beans are an important stage in crop rotation that I have not been rigorous enough about in the past few years. So I need to plant a lot of beans this year. Noodle beans, or Yardlong beans are great space savers because they climb and they grow so long that you only need one per person per meal. They need more support than I typically provide, so I am going to try to make bean pole teepee’s this year. I know I’ve said it before, but this year we will do it! I also like Runner beans. They are my fava bean substitute – I have failed to grow favas after numerous attempts. I have a high-yielding, scarlet blossomed variety in inventory so I will find an empty fence to grow them on! My third and most dependable pole bean variety is Violetto. These are the variety I use in my Three Sisters corn-bean-squash planting. And I have two packs in inventory as well as some popcorn seeds, so I will grow them together in the squash and pumpkin patch. I don’t usually plant bush beans, unless I do, and then I plant too many. Since I didn’t plant any last year, I have a lot to plant this year. Soy beans are great tasting, as well as hardy and vigorous as long as you keep the groundhogs away. I have saved lots of seeds, so I will plant them since they too count in the “legume” stage of crop rotation. And last but not least, there are peas. 500 pea vines is the magic number for us in order to have enough peas that the kids and all their friends can raid the garden every day for fresh peas and there will still be enough for the occasional adult. I’ve given up the idea of cooking them at all. They taste better raw anyway. The spring was so cool and wet that the pea season last year dragged on and on and consequently, we ate almost all of them. I may actually have to buy peas to plant, for the first time in at least 5 years!
Brassica – Cole - Green Crops (follow the legumes)
I love all members of the cabbage family. But they also like space. I would give up on the Brussel sprouts because I never get more than pea sized sprouts. But I have 500 seeds!! So I will find space for them. I love growing cabbages. Quote of the decade is: “But always to her the red and green cabbages would be jade and burgundy, chrysoprase and porphyry; life has no weapon against a woman like that!” So, I grew all my cabbages and now have no cabbage seeds. The dilemma – order some seeds? Or buy some plants? If I can/pickle/preserve nothing else, I always manage to pickle some red cabbage. And I only need 2 or 3 heads. Hardly seems worth buying seeds and starting them myself when a six-pack of seedings is less than two dollars. But we can always eat more cabbage than I can grow, and the chickens love cabbage too. So I will buy seeds. I will be buying cauliflower seeds this year, the branching variety and early variety. I will be buying branching broccoli seeds as well. I have too many bok choi, tatsoi, kale and collard seeds in inventory so I may have to grow some as mirco greens just to use them up. I have spinach, strawberry spinach, arugula, claytonia, romaine lettuce and orach seeds. I will likely order some endive, mache and escarole. And I need more lettuce seeds.
Fruits (follow the Brassica and Greens)
This is a grow from seed year. I saved so manytomato seeds, and melon seeds from the heirloom tomatoes and melons we ate in 2017. And I never got around to planting the eggplant, peppers and cucumbers so I have a lot of those to start indoors in the next two months. Zucchini were eaten by the squirrels which dug up all the seeds I planted. I will have to buy seeds and germinate them indoors. Same with the pumpkins. I have plenty of watermelon seeds, and all kinds of winter squash seeds. I am going to do a big mixed patch of melons, pumpkins, squash around the hills of popcorn and beans but I am going to fence it in so the deer don’t get in!
Roots (follow the fruits)
As with most root crops, I have had relatively little luck with beets. I will not use a mixed variety because if they don’t grow at the same rate, the slower ones will just all get thinned out. I happen to have some red and some gold seeds. I will plant them earlier as the cool wet summer we had in 2017 delayed their growth until fall when the voracious field mice ate them along with my carrorts. Carrots, like the beets, need space and rigorous, ruthless thinning. I will plant all the seeds I have, but I must harvest them earlier to beat the mice to them. Radishes are unicorns in my garden history. I just cannot grow them! They defy me, mock me, grow 3 feet tall, flower and pod like weeds with a hair width little pinkish tap root. And we so enjoyed the giant watermelon radishes from the farmer’s market this summer! I have radish seeds, so I will plant them. Turnips are easy to grow. I like the tops sautéed in butter; the bottoms make wonderful pickles and I have 1000 seeds. Rutabaga is susceptible to rot, like turnips, and requires rigorous thinning like beets, weirdly likes to be grown with the legumes, and I have 500 seeds so I will companion plant it with the bush beans this year. Celeriac does not germinate for me in the garden. I still have seeds so I will try to start it indoors. Parsnips are an oddity that need to winter over. So I will plant them but not plan on attempting to harvest them until next spring. Scorzonera and salsify are two crops that like celeriac, do not germinate well, and like parsnips need to winter over. I am going to try two methods this year, planting half in buckets, started indoors, and the remaining seeds in the garden to harvest in 2019. The burdock are just waiting to be harvested. Milk thistle is another root I want to try, and I have the seeds, so I may try them started indoors, in buckets.
Potatoes are going in buckets again this year, but the buckets need to be secured behind fencing so the deer can’t get them. I also intend to try sweet potatoes this year, also need to be secured behind fencing so the deer don’t eat the vines.
I have started some leeks and scallions indoors already. I will put the scallions in the cabbage patch and put the leeks into the carrot patch since they are supposed to be companionable.
Flowers
We are working on smothering the lawn in several large swaths and planting wildflowers. While I have annual wildflower mix seeds for these patches, I want to enhance them with echinacea (cone flowers), milk thistle, comos, sunflowers. I will also put some sunflowers into the corn patch (the chickens love sunflower heads). I always plant nasturtiums under the peas. I like to eat nasturtium leaves and flowers in salad. I put calendula into the herb garden because I have fantasies of using the blossoms for soap or tea. And I companion plant marigolds and petunias in my vegetable garden.
Herbs
I attempted to grow a mint garden in 2017 with 6 different types of mint. Disaster struck in the form of black spot fungus which is in the soil and gets absorbed into plants, causing them to break out in a sort of black measles. It destroyed the mint, killed the blossoms on my honey berry bushes, infested the lemon balm which, because it is truly invincible, simply outgrew the infection. Unfortunately, the fungus resides in the soil and thrives on wet, dark conditions, so it will likely resurface this year, despite the fact I have doused the entire shaded herb bed with neem oil. So I am going to create a new mint garden to the front of the house which has a nice, damp and dark moss patch which is of no other use. I will plant the angelica there as well, and some chives (although the chives were completely unaffected by the black spot fungus).
After 5 happy years, the hyssop died. I think its roots were oversaturated and rotted. So I need a new hyssop plant, but rather than plant it in the herb garden, I am going to pot it and put the pots in the squash patch to attract bees. It has been several years since I have successfully grown sorrel so this year I will try again. I have a lot of seeds for black cumin, Indian geranium, borage, and chamomile so I will start those inside.
1 note
·
View note
Text
Making and Using Compost for Your Garden
“Well, my favorite manure is horse, followed by goat or rabbit….”
I was on a call with the members of my HOMEGROWN mentorship program and those were the exact words that came out of my mouth right as a friend walked through door. I wonder what on earth he thought? ?
And this is why us homestead folk are our own breed of weird…
But yes, I do indeed have a favorite manure, because I believe manure is one of the very best garden fertilizers there is.
As I’ve done a deep dive into soil health, structure, and gardening amendments this year (this book is one of my favs right now), I’ve started to see compost and organic matter as more important than ever before.
Here’s why and how you can make your own garden gold:
What is Compost?
Quite simply, compost is decomposed organic matter. The best part? You can make your own compost. It’s basically free plant-food created by you for own your plants. Even if you live in an apartment, you can buy small compost buckets and create composted matter for your plants.
A healthy compost pile creates an environment where bacteria, fungi, worms, and insects can break down materials naturally to create a beautiful nutrient-rich material that you can add to your soil and garden.
Reasons Why You Should Use and Make Compost
Buckle up– there are LOTS!
1. Composting reduces the amount of garbage you send to the landfill.
Making compost is one of the easiest ways to do your part for the environment. According to the EPA, 28% of the garbage sent to the landfill is made up of food scraps and yard waste, which are key components to compost.
Instead of throwing them away, you can keep them for your compost pile and create something beneficial for your garden AND beneficial for the earth.
(Side note– feeding scraps to your chickens (if you have them) is another excellent way to put food scraps to good use.)
2. Compost saves money & boosts your sustainability
Compost is an almost universal answer to garden issues. Have poor garden soil? Add compost. Need to mulch your garden? Compost is an ideal choice. Want to give your plants a boost of nutrients? Make compost tea (here’s how to make compost tea).
If you want to make your own potting soil, guess what you need? Yep, compost again. And if you have raised beds like we do, those beds usually need to be topped off with additional soil or compost almost every year due to soil compression over time.
Good-quality compost from the store ain’t cheap. And if you have a large garden, the price tag on additional soil and compost might make you wince, especially if you have any sort of gardening budget.
Therefore, making your own compost makes the most sense if you need compost in any quantity at all.
3. Compost improves soil health
Instead of purchasing synthetic fertilizers and gunk, reach for homemade natural compost when your garden needs a boost. Commercial fertilizers, even organic ones, do not provide the amount of nutrients that you can get with good-quality compost. Compost gives out nutrients gradually, over a long period of time, while fertilizers are usually a “quick fix” action that only works for a limited time.
Compost also improves soil structure. Most gardeners don’t start out with great soil and compost improves your soil’s texture and boosts your soils ability to hold on to nutrients and water. Compost is loaded with beneficial microorganisms, earthworms, and other good stuff that leaves you with the perfect material to produce a healthy garden.
How to Start Composting
In order to compost, you’ll need a way to collect yard waste and food scraps. The easiest way to do this is to have both an inside composting bucket and an outdoor composting pile. Simply gather up your food scraps for the day in the inside bucket and then add that bucket of scraps to the outdoor compost pile along with your yard waste.
Selecting an Inside Composting Pail/Bucket
It doesn’t have to be fancy and a basic bucket (with a lid) under your kitchen sink will absolutely suffice. The only downfall to this method is the potential attraction of fruit flies or other bugs. (And, if the lid gets loose, it can stink up your kitchen.)
Therefore, if the simple bucket doesn’t work for your home, there are also specific compost pails for your kitchen. Lehmans has a number of designs, from wooden compost pails to vintage-styled pails and even stainless steel ones. The handy thing about kitchen compost pails is that they usually have some sort of odor-free additions with charcoal or filters, so they can look cute in your kitchen, keep the bugs away, and won’t smell bad.
Creating an Outside Compost Pile
There are many ways to keep a compost pile outside, and you can be as creative or budget-friendly as you’d like.
Here are just a few options:
Get a composting bin.
Lehmans has this composting bin, which is the perfect size for small yards or homes with strict HOA rules. A bin like this makes your composting adventures tidy and does a great job at keeping critters out of the compost. Many composting bins rotate in a way that speeds up the process, too. The downfall to the fancier bins is that sometimes they can be on the expensive side and often hold only a small amount material at a time.
Make a composting container.
As I mentioned in my Chicken Power on the Homestead article that we recently created a pallet structure in our chicken run to hold compost materials. You can make a similar composting container out of cinder blocks or other materials you have around the house. The most basic composting structures are squares with three sides of walls and the fourth side open so you can toss your composting materials in there and get them out later with relative ease.
Just make a big ol’ pile somewhere.
This is the perfect option for those with big homesteads with a spare area where you can make a huge pile of composting materials. It will look a bit sloppy, but it’s the easiest and least time-consuming way to make your own compost. The downside to a gigantic compost pile is that, depending on how big it is, it can be hard to mix it up (and mixing helps speed up the process), so it can take longer for that compost to be ready to use.
Where to Put Your Outdoor Compost Pile
In brainstorming your outdoor compost pile, it should be:
Close to your garden (so you don’t have to carry heavy loads of compost a long way to your garden)
In decent proximity to your kitchen (so you don’t get tempted to be too lazy/busy to bring your food scraps to the compost pile)
Easily accessible for your yard waste (make it easy to drive your lawnmower with grass clippings right up to the compost spot, etc.)
Depending on where you live, you might have other considerations too, such as putting it somewhere the neighbors won’t see it.
Types of Composting
There are two main types of composting you can do at home: cold and hot composting. Cold composting is a casual and slow approach to composting and hot composting is a serious and faster way to compost.
For cold composting, simply gather up your compost materials in your pile, and ignore it. (I excell at this method, hahaha) Over 1-2 years, that pile will naturally decompose. You will be doing pretty much zero additional work on your homestead and as long as you can be patient, it will eventually decompose and be ready to use.
Hot composting is for more serious gardeners or self-sufficient folks. It is a faster process, but it is also requires more work. If done properly, you will have compost ready to use in just 1-3 months. Basically, there are four necessary ingredients for hot composting: nitrogen, carbon, air, and water.
When those four ingredients are properly balanced, your compost pile gets hot (the goal is around 140 to 160 degrees Fahrenheit) and the hotter it gets, the more quickly your compost will decompose and be ready to use.
The nitrogen and carbon come from the materials you add to your compost (mentioned more below). For air and water, turn the compost often and keep it somewhat moist. If you experiment with keeping the nitrogen, carbon, air, and water ratios correct, you can feasibly get compost for your garden within a year.
If you want to get super serious about hot composting, you can probably find some local connections in my Local Food Source article. A local Master Gardener course or even local compost company that might have tours can be super helpful for getting the bigger picture about how to compost with the correct ratios of the four ingredients.
What Can You Compost?
“What can I put in my compost pile?”
I get this question from y’all quite a lot, so let’s take a closer look at composting matierals.
There are two categories of materials that you can add to your compost: Greens (aka nitrogen sources) and Browns (aka carbon sources).
If you are just casually composting (cold composting), you can add these materials freely to your compost pile. If you are more serious about your compost (hot composting), try to go for a ratio of 3 or 4 parts brown materials to 1 part green material.
Composting Tip: Whenever possible, layer the pile with lots of browns, then some greens, and repeat. Layering the materials helps aerate the pile and encourages more earthworms, which helps your compost break down more quickly.
Ideal green (nitrogen) materials for your compost include:
Fruit peelings and scraps
Vegetable peelings and scraps
Coffee grounds and coffee filters
Egg shells
Grass Clippings
Animal manure (from herbivores)
Seaweed
Fresh leaves
Tea bags
Nut shells
Spent cut flowers
Brown (carbon) materials for your compost includes…
Cardboard (includes empty toilet paper tubes. Try to rip them up into small pieces)
Newspaper
Dried leaves
Pine needles
Paper materials (shredding the paper first helps)
Straw
Hay
Sawdust and wood shavings (from untreated wood)
Cornstalks
Small twigs and small branches
Dryer lint
What You Should NOT Compost
There are so many amazing things that you can compost, but there are a few items that you should avoid adding to your compost pile. The items that you should probably NOT add to your compost can be divided into two categories:
Things that will make your compost unsafe/bad for your food-garden, and
Things that will make your compost smell and attract pests or animals.
Here are a few examples of things you should not compost because it can contaminate your future garden:
Sawdust or wood chips from chemically treated wood
Straw or hay from chemically sprayed fields (here’s what happened to my garden)
Diseased plant materials
Weeds that have gone to seed
Manure from domestic pets (like cats and dogs)
There are also things you probably should not compost because it can attract pests or animals (rats, raccoons, etc.), plus these items usually take longer to decompose and/or can make your compost very smelly.
If you are getting pretty savvy with hot composting, you can add small amounts of these items correctly. However, if you are a newbie or if you are worried about attracting pests or making neighbors angry due to the smells, I suggest avoiding putting these things in your compost pile:
Oils, fats, and cooking grease
Animal meat, scraps, and bones
Dairy products (I do think adding whey to any compost pile can be beneficial, though)
How to Care for Your Compost Pile
Don’t forget: you can always just do cold composting (aka lazy composting) if you want. It’s still a great way to keep trash out of the landfills and use your waste to eventually make free compost for your garden.
However, if you have the spare time to care for your compost pile, you’ll get rich-nutritive compost available for use much quicker.
Here’s how to care for your compost pile:
1. Add Layers of 3 or 4 parts Brown Materials to 1 part Green Material
Every time you dump your kitchen compost bucket into your outdoor compost pile, add huge scoopfuls of brown materials at the same time. You can have a pile of brown materials (such as leaves and twigs) available next to your compost so you have easy access to them.
Composting Tip: Work on getting the compost pile about 3 feet deep before you stop adding new materials and start focusing on getting it to decompose. It’s smart to have a few compost piles (3 is ideal) so you can always have one pile that is ready to use, one pile that is partially decomposed, and one that you can still add materials into.
Composting Tip: If your compost pile looks too wet and/or smells really funky, add more brown materials and turn it more often to add more air. If it looks extremely dry, add green materials and more water to get it more moist. It’s a balancing act where practice gets you closer to perfection over time.
2. Occasionally Water Your Compost Pile.
While you don’t want to over-water your compost pile, it is important that your compost does not get too dry. If you’re going through a hot and dry summer, check the pile to ensure it’s not overly dry.
3. Aerate Your Compost Pile.
Oxygen is vital to the decomposition process The more you turn your compost, the more quickly it will decompose. If you’re on a mission to compost as fast as possible, I’d recommend turning your pile at least once a week. Otherwise, once per month is fine (or whenever you remember!)
Turn compost with a garden fork or a shovel. Simply scoop up some of the material and turn it and mix it up. While mixing and turning, it should be evident if the pile needs more green or brown materials or if it needs more moisture. Also watch for earthworms and other bugs in your compost as you turn it. The more worms, the better.
Composting: Frequently Asked Questions
How long does composting take?
This depends on the type of composting you are doing. With cold composting, it will probably take 1-2 years for your compost pile to properly decompose. If you are doing hot composting and adding 3 parts brown materials to 1 part green materials as well as turning your compost often and keeping the pile moist, the pile may decompose in as early as 1 month.
You will know when your compost is ready to use because it will have become mainly dark earthy soil, instead of pieces of veggie scraps and yard waste. You can help speed up your composting process by cutting up the materials into smaller pieces.
How can I use my compost?
Remember that compost is not a replacement for your soil. Instead it is a natural fertilizer addition for your soil to help nurture your plants.
Use compost like mulch as a top layer on your existing garden beds
Make homemade potting soil
Make a compost tea for fertilizing your plants
Add it to your garden beds before planting
Top dress landscape, flower gardens, and vegetable garden halfway during the summer for a nutrition boost
Help! My compost pile smells bad and it’s attracting pests!
If your compost pile smells bad, this means your ratio of brown and green materials is off-balance. Stop adding green materials for a few weeks and add large amounts of brown materials to the compost pile. Start turning the compost pile often and wait until it stops smelling before adding your green materials again.
Do you have a good example of what to include in a perfect compost pile?
Layering 3 or 4 parts brown materials and 1 part green materials is all you really need to make your compost pile. This will depend a lot on what materials you have around your home. Here’s a sample of a good compost pile: 3 parts dry leaves, 1 part fresh grass clippings, 1 part food scraps. Layer this in 4 inch layers, turn once a week, and add water if the pile is dry.
What is vermiculture?
Vermiculture is the process of making compost with worms. Worms are not only beneficial for normal compost piles, but you can also compost solely with worms, if you have the proper container and worms. Worm castings are amazing nutritional additions for your garden soil.
If you are interested in vermiculture, I suggest reading a book or finding some online tutorials on how to do it properly. Worms are not happy with temperatures that are too hot or too cold, and you also need to use a watertight container and feed them correctly. Once you have learned how to care for them, you can purchase red worms for composting online.
More Gardening Tips:
Natural Weed Control for the Organic Gardener
How to Extend Your Gardening Season
8 Ways to Prepare Your Garden for Winter
Preparing Our Raised Beds for Spring Planting
What We Learned By Testing Our Garden Soil
The post Making and Using Compost for Your Garden appeared first on The Prairie Homestead.
from Gardening https://www.theprairiehomestead.com/2020/06/making-and-using-compost.html
via http://www.rssmix.com/
0 notes
Text
16 Simple Ways to Stop Wasting Food in Your Kitchen (and Save Money)
Have you ever really thought about the afterlife of your leftovers?
A once-edible meal lies defeated and unpurposed as it falls into the trash, never to be thought of again.
Those forgotten food remnants add up to some pretty alarming numbers.
In the U.S, an estimated 30% to 40% of food is thrown away.
Who’s thinking about a hunger crisis when there’s a bountiful food supply at the edge of your fingertips? Tossing a few scraps seems harmless, right?
How Bad Is the Food Waste Problem?
Food waste happens in such little bits here and there that people don’t even realize they’re doing it, according to Dana Gunders, a former senior scientist at the National Resource Defense Council and author of “Waste-Free Kitchen Handbook: A Guide to Eating Well and Saving Money By Wasting Less Food.”
“Consumers waste more food, collectively, than restaurants or grocery stores,” Gunders said. “And the average household of four spends about $1,800 on food they never eat.”
A whopping one-third of ALL food grown for human consumption on Earth is lost or wasted.
“Growing food and getting it to our tables is a huge investment in resources,” Gunders said. “When you throw out one hamburger, it’s like taking a 90-minute shower in terms of the water it took to produce that hamburger.”
Really scary questions loom about feeding future generations, landfills and how common — and easy — it is to squander precious resources.
Can you imagine how much money and food everyone would save if they bought only the food they’d actually eat?
Gunders said that once people open their eyes to the problem, they naturally waste a little less.
“I find it interesting that people can be swayed by 5 or 10 cents when in the grocery store, but that math goes out the window when it comes to wasting food once they’re home,” she said.
There’s a lot we can’t control, but there’s a great deal we can control about our kitchens, plates and trash cans.
16 Tips for Reducing Food Waste
Before you take up dumpster diving to rescue forgotten-about food, consider some of these tips for how to reduce food waste at home.
1. Make a Grocery List and Stick to It
Overbuying leads to food waste. Planning your meals for the week, making a list and sticking to it can prevent impulse buys and limit the vegetable carcasses not even good intentions could revive.
Gunders suggests thinking double duty. If you need fresh cilantro for a meal, can you plan a second meal that will use it, too? This not only saves your budget, but it eliminates casual food waste.
2. Buy Frozen Instead of Fresh
The bright, beautiful colors of fresh fruits and veggies tempt me every week. Then I remember how quickly fresh produce can spoil.
Now, I’ve turned to stocking my freezer with produce. I call this the Too Many Avocados Left Behind Act. I don’t freeze my avocados, but I do buy most fruits and veggies frozen now. I can thaw them in a flash and count on having a random assortment of ingredients on a whim.
3. Plan for Surprises
It’s so easy to get tempted by the events of the week, from an unscheduled lunch to a surprise happy hour. Leftovers get abandoned as you nosh on an unplanned (and unbudgeted) meal out.
You can plan your meals for the week and allot some wiggle room for spontaneous outings. By having a backup recipe or frozen meal you will always have on hand, you can accept a last-minute invitation and not fritter away a thing.
4. Rethink Expiration Dates
Sell-by, use-by and expiration dates all mean different things. Most often, the dates serve as a freshness, quality or display indicator, not a marker for when the food will actually go bad. Many people throw out perfectly good food because of date stamps. Use common sense, and research what the date on your packaged or canned food really means before you toss it.
5. Make Your Freezer Great Again
Good intentions can’t reverse rotten tomatoes or spoiled meat. That steak you meant to eat on Sunday looks questionable by Tuesday.
You can extend the life of your meats, bread and vegetables by freezing them.
Gunders said almost anything can be frozen: Milk, shredded cheese, sliced bread and even raw eggs (out of the shell) can go in the freezer.
It’ll all be there when you’re ready, thus, it will save you future cooking time, money and food waste. Don’t you feel better?
6. Store Items Where You Can See Them
Some produce slips into the crisper abyss. Out of sight, out of mind. Keep items where you can see them. You’re more likely to use items that you can physically see.
Additionally, learn how to store each type of vegetable. Some ripen faster and can speed up others nearby. Consider investing in special airtight containers that keep produce firm and fresh longer.
Washing the pieces of fruit or vegetables you plan on using will also keep the whole bag from going bad before you get a chance to enjoy their deliciousness.
7. Clean Your Fridge and Organize Your Pantry
Expired items hide, and mold lurks on the edges you can’t quite see. Having a tidy fridge helps you see exactly what you have and inspires you to use it.
Same goes for the pantry: Keeping it tidy allows you to see what you have at a glance and prevents items from getting lost behind the castles of steel cans.
8. Try Composting
Skip the landfill, and start composting. Everything from your coffee grounds to celery ends can find their way into your bin. In turn, you can eventually use it toward your next home gardening adventure.
9. Learn to Preserve or Can Foods
Pickle? Preserve? Can? They’re all options gaining popularity. But these practices have been around for centuries and have helped folks survive harsh winters and economic downturns.
With a little upfront investment of time and money, you can acquire the tools necessary to preserve your excess foods. This can prolong their shelf life and reduce food waste and costs.
10. Donate Extra Food
If you know your family won’t eat something, donate it. Many local pantries and food banks welcome donations, however, consider friends or families in your community who might appreciate a little extra food. There are restrictions and rules at some charities about what can be donated, so check before making any contributions.
11. Eat What You Have
Plan recipes around what’s been sitting around for a while or what needs to get used before it expires. Keeping your fridge and pantry clean and organized helps you see exactly what you have and what you should cook before adding more supplies to the mix.
12. Mix It Up
Leftovers you’re tired of eating can be repurposed into new recipes. Some fruits and vegetables that are a little too ripe can be baked or mashed into a casserole. Ripe bananas make great banana bread, and soft strawberries can be added to smoothies.
Other scraps can be made into stocks or added to a compost. I’ve put coffee grounds in my soil, and a friend of mine makes corn silk tea. There’s a practical use for almost any piece of food you might throw away.
13. Host a Potluck
I’m a picky eater, yet I love to cook. Sometimes I acquire ingredients for recipes that I don’t end up using again, or I try something and end up not liking it. So, I’ve hosted potlucks to use said ingredients. Invite friends over, and have leftover lunches for days. You’ll help everyone else also clean their cabinets. Win-win.
14. Get an App
There are a few apps on the market that try to put a dent in the global food waste problem. Here are a few to consider:
The USDA FoodKeeper app aids in best practices of food and beverage storage to maximize quality and freshness.
Too Good to Go makes surplus restaurant food available for pickup before it gets thrown out.
Waste No Food helps food-based establishments, from farms to restaurants, to donate excess food to charities and and shelters.
15. Channel Bob Ross
Ever wish you could make art with your food outside of Instagram posts? Let the bright colors of your leftovers become the colors of your clothes or the paint on your canvas.
Yup, your peels and ends from scraps of everything from beets, spinach and lemons can be made into permanent fabric dye that could double as watercolor paint.
16. Life’s a Garden… Dig It!
Even the brownest thumbs can turn green. Try regrowing your food scraps, and see what happens. Put seeds in the backyard, or try sprouting them over a cup of water.
The Lesson: Waste Not, Want Not
It’s simple math: Buying less food means more money in your pocket.
It’s not going to happen overnight.
But with a few small adjustments and active intentions of how to better store, buy and cook food, you can start a ripple effect that will save time, money and food in the long run.
Who knows — maybe others will catch on. Look at Denmark. It reduced its food waste by 25% over a five-year period, and it didn’t happen without a real effort and cultural shift to address the problem.
Learn what works for you. Maybe you’ll grow a new habit if you just plant the seed.
Stephanie Bolling is a staff writer at The Penny Hoarder. Her cat never wastes any food.
This was originally published on The Penny Hoarder, which helps millions of readers worldwide earn and save money by sharing unique job opportunities, personal stories, freebies and more. The Inc. 5000 ranked The Penny Hoarder as the fastest-growing private media company in the U.S. in 2017.
The Penny Hoarder Promise: We provide accurate, reliable information. Here’s why you can trust us and how we make money.
16 Simple Ways to Stop Wasting Food in Your Kitchen (and Save Money) published first on https://justinbetreviews.tumblr.com/
0 notes
Text
How to Raise Chickens without Breaking the Bank
Would you like to know how to raise chickens on the cheap (without breaking the bank)? Well, it is possible! Fresh chicken eggs don’t have to cost you an arm and leg! Many people mistakenly think raising chickens will help them save money on groceries. They don’t realize how expensive it can be. But there are ways to save money and make raising chickens on the cheap a much more affordable project.
Here are 20 tips to help you save money. Not all of them will work for you, and some of them you might not want to do at all. But, everything you do to save money will bring down the cost of your fresh backyard eggs and make chicken keeping more affordable and practical for you.
Get Creative with the Coop
The biggest upfront expense in raising chickens is the coop and run. There are ways to save money, however (and even have something you really like in the end).
Use recycled materials.
Instead of investing in tons of new supplies, used recycled and re-purposed materials whenever possible. Yes, this MIGHT mean you can’t build a coop exactly like you planned, but it gives you a chance to be creative as you build around the supplies you have or acquire. For example. The first coop I built, I started with one old used window (I was saving for an art project). I bought a used play structure off Craigslist and even scored some old used shutters from a neighbor who was remodeling his house. I found some great ‘coop red’ paint in the mis-mixed section at the local paint store for $5 and I was ready to go. Yes, I had to make adjustments based on the supplies I had on hand, but in the end, the coop turned out perfect for me and was made from nearly 90% used and re-purposed supplies (and was even featured in a backyard coop calendar one year).
You don’t have to build a work of art
Downsize your expectations. A coop needs to be big enough for your flock, with enough roost space and nesting boxes. It should be wind and water proof and have ventilation. Beyond that, it’s all fluff.
Of course there are things that you will probably end up having to purchase, and maybe even new supplies at that. But with a bit of effort and creativity, you can build a functional coop for a fraction of the cost of building it with new supplies or buying a new pre-made coop (which is the most expensive option of all).
Search for Used Coops (for Cheap or even FREE)
You might not think they exist, but they do. My 2nd coop, I found on Craigslist. It was $40 and didn’t need any repairs. And that first coop I talked about above? When I moved, I offered it for free and someone came, took it apart, and dragged it home. You never know what you can find if you look.
Re-purpose something you already have
I’ve had a great coop (for a small city backyard flock) made from a large dog house. My third (and current) coop started out as a child’s playhouse before we modified it to be a chicken coop. Look around and see what you’ve already got on hand that you can use or modify to make a coop on the cheap. You might have to think outside the box a bit, but you could end up with a great (cheap or free) coop in the process.
Share Your Food
After housing expenses, feed comes next. There are things you can do to save money on feed.
Share your table scraps
If you get into the habit of sharing your table scraps and other food with your hens, it will save you from having to feed them as much chicken feed. My chickens love leftovers (and so do I, so I just give them the ones I’m about to throw out). That questionable kale that’s getting a bit stinky? The chickens will LOVE it. I keep two containers in the kitchen. One for compost (the stuff to nasty to feed to the chickens, or containing things they shouldn’t eat) and one for the chickens. Here’s a list if you’re wondering what you should AVOID feeding your flock.
Feed them egg shells
In addition to feeding your chickens table scraps, you can also feed them egg shells. This is a great way to boost the calcium in their diet without having to buy calcium. Added bonus, they’ll love the egg shells more than the calcium you have to pay for. If you want to know how to prepare your shells for them to eat, here’s how.
Let Them Feed Themselves
Here are some additional ways to save on feed costs.
Let them free range
I understand that this is a topic up for debate in the chicken world, but I’m a believer in free ranging. If you have a place to free range your flock and you’re comfortable doing it, DO IT! The chickens will love it and they will forage around and find their own food. When they feed themselves, they will have to rely less on you to feed them. (Yes, I still feed my hens layer feed, even in the summer, but I cut down the amounts drastically when they have the ability to find food on their own).
If you don’t feel comfortable allowing your hens to roam around on their own, even letting them out for ‘recess’ when you can be there to monitor them will allow them to do some of their own grazing.
Let them dig in the garden or compost
I don’t let my hens in the garden during the growing season, but before and after is a great time to let them in. They help me aerate the soil, get rid of bugs, and clean up scraps. They also help turn compost into dirt faster if you let them have at it. And in the process, they’ll help you cut down on their feed bill by all the things they’re eating.
Plant a chicken garden
I do this every year and my hens LOVE it. Essentially, plant a garden full of plants and grains that chickens like to eat. Just like a garden for humans saves us money on fresh vegetables, a garden for chickens will save you money on feed. If you’re interested in growing a chicken garden, here’s more information.
Give them bugs
Okay, I’m not a big bug fan, but the chickens are. And, I help them collect bugs. Around here we have issues with stink bugs. Ugh. But, thankfully, stink bugs are big, awkward and slow (in both speed and brains), so they’re easy to catch. I collect them in a jar and take them out to feed to the chickens. If we’re having an especially horrible time with them (ie they’re EVERYWHERE), the chickens and I circle the house daily. I flick the bugs off the walls with a stick and they fight over who gets to eat them. I get less bugs and they get a belly full of good protein. Win/win.
Change How You Feed Them
Feed them just enough
I used to have this VERY COOL big self feeding chicken feeder that I could fill up every other week. The problem was, the hens wasted a ton of food and then the rats discovered it, too. So, I switched to feeding my flock the old fashioned way by spreading feed out in the run and letting them gobble it up until it’s gone. Just enough food for the day. It saves money on feed by avoiding the waste that comes with feeding in a feeder. It also saves money because the only animals I’m feeding are my chickens.
Before I started the ‘scatter’ method, there was always wasted pellets everywhere. Now, however, they find every little piece and eat it up. (No, my birds are NOT suffering. They get plenty to eat every day.)
Use chicken pellets
With my first flock, I switched from chick starter to layer crumble and didn’t realize how much waste was happening that I could have avoided. Then one day when I went to buy more chicken feed, the feed store was out of crumble. I was forced to buy pellets. It took me about ONE DAY to realize that there was a TON less waste with pellets than with crumble. And I haven’t looked back since. (Of course now that I scatter their food instead of put it in a feeder, this wouldn’t be a problem anymore, but I still use pellets anyway).
Don’t Buy Chicks
Okay, that seems almost mean, doesn’t it? I LOVE chicks! But buying them at the feed store or via a mail order house is not the best way to SAVE MONEY.
Let your hens hatch out their own chicks
There are so many good reasons to do this, not just for savings. First, it’s a wonderful experience to watch a mama with her baby chicks. Second, you don’t have to integrate them into the flock, mama will do it for you. And yes, third, you will save money. You won’t have to buy chicks. You won’t have to set up a brooder. Mama makes life much easier. And, you get new chickens added to your flock for pretty much free.
If you don’t have a rooster, check at your local feed store for local chicken people that will sell you some fertilized eggs. Usually locally, you can get fertilized eggs just for the regular cost of a dozen eggs (unlike buying them mail order and having them cost a TON).
Buy pullets
While I love starting with chicks, buying older, teenage chickens is a better use of time and money. They will cost a bit more than a baby chick, but for the difference in how much you have to feed them to get them to this nearly grown state, you’ll save money. Plus, pullets are almost to egg laying age, so you will be saving your feed costs for animals that are laying or are nearly laying, instead of spending 6 months feeding and raising chicks. You’ll also save money on brooder costs and other costs related to having babies around (heat lamps, little waterers, their own feed, etc.)
Watch for free hens
There are always free hens to be had if you pay attention. Check Craigslist or other online local market places. People have to move or get sick or get tired of having chickens and want to get rid of them. I have a friend who exclusively collects free hens for her flock and never buys any at all.
Keep Them Healthy
Healthy chickens lay more eggs, take less time and require less money. Being proactive with chicken health is a much better option than trying to deal with a sick chicken.
Use apple cider vinegar in their water (and change water daily)
This is good for overall health and aids in keeping the flock healthy (and the chickens like it). You just need a bit–around a tablespoon per gallon of water added to the waterer 1-2 times per week (or one straight week in a row once per month). ACV also cuts down on the bacteria and other nasty stuff that wants to grow in the waterer.
Use essential oils (with caution and in small doses) as needed for health
Using natural solutions to help in situations where they’re needed is less toxic and cheaper than other alternatives. Here’s a place to start if you haven’t used essential oils with your flock.
Use food grade Diatomaceous Earth
Diatomaceous Earth (DE) is a natural product made up of crushed up fossils (find out more about it here including seven ways to use it). It kills bugs and parasites and is even known to increase egg production.
Change How You Clean the Coop
Another big cost with chickens is the bedding they need for their coop and nest boxes. But there are ways to save here, too.
Use Deep Litter Method
You can save a ton of money (and time) on coop bedding if you use the deep litter method. If you’re not familiar with this method, it works like this: Spread a thin layer of bedding on the coop floor (4-5 inches) and every week or so, add another thin layer over the soiled parts (especially under the roost). Let it build up (hence the DEEP litter). What happens as you do this is that you’re starting your own compost of sorts in your coop. If you do it right (add a fresh thin layer of bedding regularly), is shouldn’t smell bad (unless you don’t have enough ventilation).
Besides saving money, there’s other good reasons for this method. In the coop composting environment, good bacteria builds up and bad bacteria is better kept under control. Also, as the hens peck around in the litter, it increases the vitamin B-12 levels and is anticoccidial.
AND! You have to buy a lot less bedding in the long run (as you’re not completely cleaning out and refilling your coop with bedding on a regular basis).
Make your own DIY coop cleaning supplies
Don’t buy cleaning supplies for the coop (or even for your chickens!) Make your own natural solutions at a fraction of the cost (and with no toxicity)! Basic products like white vinegar and essential oils can make excellent cleaning alternatives (and are even good for things like fly control and other things)!
Sell Eggs
Anyone who has eaten a fresh backyard egg knows that the store bought alternative isn’t even close. As a result, fresh backyard eggs are in demand. During the summer, when my flock is heavy into their laying season, I make more money from those eggs than the hens cost me to take care of. If I had a bigger flock, I could sell even more. Everyone wants my eggs. The same is probably true EVERYWHERE. Even if you only have a small flock, chances are, you have a surplus of eggs and can sell them to family, friends and neighbors as a way to off-set chicken raising costs.
Rotate the Flock
If you’re serious about saving money, know that the first 2 years are the optimum years for a hen to lay eggs. After that, their production goes down some every year until it stops all together. What this means is that you’re feeding a hen $6-12 worth of food per month for little to no eggs in return.
So, what do you do with hens that are past their prime? If you’re like me, you let them retire and live the good life of a freeloader out in the coop. But this is NOT a cost effective way to run a flock.
The money saving solution is to remove them from the flock when their egg production slows down. To do this, you can cull them, eat them, sell them or give them away, but keeping them isn’t a way to save money.
With over 20 ideas on how to raise chickens without breaking the bank, you’re sure to find at least some solutions that work for you. In the end, you have to balance your money saving practices with who you are, how you tick and what you want in having a backyard flock. But with some simple tweaks, you can easily make those backyard eggs less expensive.
How to Raise Chickens without Breaking the Bank was originally posted by My Favorite Chicken Blogs(benjamingardening)
0 notes
Text
Constructing The Ideal Decking - An Asset To Any Garden
And it is so easy to get started just by creating your personal natural compost. Nothing fancy required. If you do not fancy making your personal composting bin you can pick one up cheaply and go from there. You do not even need a big garden to put 1 in. A extremely little space will suffice. Channel your regular household squander in to your composter rather of it going to the dump and you are on your way.
Can I discover on the job? If you can, try it. But, don't danger it if it's a major money enhancement venture on your house or a significant landscaping work that requires significant construction or engineering expertise.
Do not allow the absence of area be a reason or an excuse to not have a vegetable garden at your house. 1000's of individuals are in the same situation as you and that is the area they have available to develop new fruits, vegetables and herbs from seeds is extremely restricted.
The organic Landscaping maintenance checklist enjoys to recycle. You would be shocked at what you can use in the backyard that arrives out of your home just by living your life. For example kitchen area scraps and food squander can be great to use to make natural compost to use on the backyard and save you money at the exact same time as you do not have to go to the garden middle for the costly stuff. Believe about that. Natural gardening can save you cash.
Check before you mild.your hearth if you're in an area with mandatory hearth laws. They started this in my region two many years ago, and whilst admittedly it used to annoy me, I do jump on-line and double verify to see if I can appreciate a fire prior to I go and start a one.
It may sound a little twee nevertheless the organic gardener is much more at one with nature than the chemical reliant Landscaping maintenance checklist. Instead of throwing the chemical things all over the place and waiting for the garden to grow the giant proportions as if by magic, rather function with character using all-natural ingredients and options which also help to place back again in to the atmosphere what you have taken out.
Time to be bored? This may audio strange coming from an extracurricular activities examiner, somebody who encourages and follows after college activities and sports throughout the yr. Nevertheless, time is exactly what children will have more than the summer and it is exactly what they require.
Now a vital factor that you would need to ask your self is what the primary purpose of this shed is: for work/gardening tools or perhaps just a location exactly where you can store some of your kid's outside toys? Your answer here would determine how you would actually develop the shed. But hey, a storage area is a storage area so as log as it is large sufficient (and sturdy sufficient) you can store anything that you require to in it.
Playfulness can also be accomplished by various the peak of the plants and pots, and combining contrasting colours. Nevertheless, be sure to create small groups of comparable plant or height, instead than placing everything haphazardly. This grouping appears planned and cared for, instead than jumbled and tossed with each other. Place at least two of any given plant in an region of the little red wagon, preferably three.
The initial step is to established up your complete spending budget and to determine out your complete price of the arena building venture. To do this, you will need to get estimates from various builders. Your total spending budget should consist of the subsequent: Permits, website excavation, construction of indoor arena by itself, arena flooring, electric and sealed drawing. Other expenses may consist of: land perk, generate way, landscaping and might be even a water operate-off system. And I'm certain, if you dig even dipper, you may discover more expenses related with arena construction.
Not sure you want to build your greenhouse all on your personal? That's completely fine. Where there are greenhouses and materials there are greenhouse kits. A quick search on the web will unearth --no pun intended-- some classic, stunning, and highly functional greenhouses for your ecological requirements. But also be cautious of which type of package you buy. Not only are these more expensive, they're extremely specialised and will not allow for any errors. Be conscious of what you're purchasing at all occasions. Personally although, if you have a weekend to spare, I usually recommend building your personal greenhouse. With a distinct set of ideas they're extremely easy to make (basically just the cost of supplies), and that adds up to becoming a fraction of the price of a kit or prefabricated greenhouse any day.
Sometimes it is just much better to transfer on. In the marketplace today, home costs are either on their way down or at minimum stagnant. To have a retail salable house means you have experienced to make the home almost pristine with updates like new flooring, appliances, landscaping and even wall plugs and plates.
Bring back the feeling of newness by upgrading your house's exterior style as nicely. It's not difficult to do. There are a number of techniques that you can integrate into your house's exterior design that will additional your entire home. Consider adding a new fence. Before you condition that a huge venture like that would certainly exceed your spending budget, there are companies in the Dallas region that will bring your large concept to life. Incorporating fences at your Dallas house doesn't have to be a hard job.
0 notes
Photo
I want to just talk about waste disposal, just for one minute if you will.. some eyebrow raising points below I promise 🤗🙏🏽 (more exciting than this photo anyway) For the last year exactly, Melody and I have been running #Airbnb through our home in #Cairns, we live there full time, and we have three bedrooms that we let out, and we are booked, back to back, and have been all year round. We have had over 400 people come through our gates and stay in our home so far. I’m in the process of starting a piece of #writing titled “I’ve had more housemates than I’ve had hot dinners this year” but that’s a story for another time.. During our first month of guests I was becoming more and more alarmed at the amount of times our bins were becoming backlogged, full and overflowing, and full of nonsense too, half of which could be #recycled but was lazily thrown in the trash, along with food, clothes, handfuls of carrier #bags, everything, a #disposable mindset of #travellers was highlighted to me. I then decided we were going to #eco brick. I first saw eco bricks in a small town in #Mexico where a hostel was making bricks out of the backpackers #rubbish to help build a school. We would sort out #trash accordingly and put wrappers, packets, soft loose debris rubbish into glass bottles. Once stuffed completely full, the bottles were collected and used as bricks in a wall, and the wall, it looked phenomenal. A simple idea that means that resources are not taken from the ground to be used for a wall, and also a hole is not dug in the ground for our “single use” #resources to be thrown into. However here in #Australia we had no school asking for our bottles of rubbish, no hospitals wanting to build out of trash, so what would we do with the waste?! OHS safety something or other.. 😏 Think about this.. You line your kitchen bin with a #plastic bag, either “reused” from the store or a store bought bin bag, or perhaps even no bin bag. You open a packet of pasta and a tin of tomatoes and a packet of mince to make a bolognese, You throw the tin the #packets and all the onion peel and carrot tops in the bin, eat the pasta, and scrape your plate clean into the bin. You sort trough some paperwork after dinner and chuck some bits and bobs in the bin, the #coffee cup from the #takeout you got at lunch, the grocery store receipt and an old bag with a tear in it from the apple you had to put in a bag only to take back out and eat 5 mins after purchase, your old socks have a hole in them and theres a clump of hair from your hairbrush that just has to go now, it’s also new toothbrush time, so toss the old one out! Next morning, you finish the box of cereal, chuck it in the bin.. the cornflakes went soggy in your bowl so you leave some behind, the bowl with milk juices and soggy flakes gets turned upside down into the bin.. even in the UK climate, those milk juices and those onion peels are smelling FUUUUNky by that evening, so, you take the trash out, and run too, cause the milk is dripping out the bottom of the bag and it stinks!! Sound familiar? That’s you. And that’s your waste story for 48 hours. That’s also 6billion other people’s 48hour waste story too. Imagine that, but for a household of 8-10 people. I know some of you may have kids, babies, toddlers, but I’m not even debating that TEN BACKPACKERS are worse than your two children. We decided we would try having no bin, and using a bottle instead, and it worked, incredibly actually. I throw one of these bottles out each week, sometimes two bottles depending on what bottle I’m using, those big 2L juice ones, they last 2 weeks easy! All plastic, tin, glass and paper is recycled in the recycle bin, Our house is a #meatfree house and so all food scraps are #composted in our garden, and some turned into dog food.. And all general waste, from cotton buds to noodle wrappers to dead batteries and chip packets, every single thing goes in here. I then came across people asking why, of course, it’s an unusually #conscious and mindful way of throwing things out, and take a little getting used to, and I’d find myself rattling in about hundreds of pros for this rather than a bin bag.. when in summary I guess the main point is that; after you chuck that stinky soggy bag into the big bin outside, it sits till tomorrow or the next day when you take the trash out again, and then it’s chucked into the back of a lorry that crushes it all and the bags that contained your juice and wrappers are now torn open and just another bag in the mix of trash you already threw out. The trash you threw out is now not contained in a bag with a neat little knot in the top, it’s now just a few pieces of the millions of loose pieces of plastic, wrapping and other items just loose and flying around in the back of the pick up, where pieces are flying out each time the back is opened for a new bin to be tipped, each bit getting taken eventually to the storm drain, to the waterways and to our #seas . Those little bits are the bits that make up 7 garbage bags full of rubbish on little #islands like #fitzroyisland where we were just a few days ago doing a #beachclean up with @parley.tv and the bits that make it to “landfill” ? Theyre tipped into an incomprehensible sized hole in the ground left to rot for the next few thousand years.. ever piling ever growing.. With the bottles I know that the rubbish I put in there is contained and makes it to landfill in one piece, and will stay inside that bottle forever causing no harm to wildlife, and is now just one piece of solid trash as opposed to hundreds of loose flying free spirited wrappers and packets that I all too often pick up from the beach. I urge you to try it, it’s easier than you may think, it just takes a little #consciousness and #mindfulness and I guarantee you a cleaner, fresher smelling, BIN-JUICE-LEAS & fly-less kitchen and the guilt of perhaps harming #oceanic creatures with your trash, to be lifted! 🙏🏽💙🌼🐢♻️💕 @ Cairns, Queensland, Australia
#mexico#cairns#plastic#travellers#bags#trash#resources#recycled#writing#rubbish#eco#disposable#airbnb#australia
0 notes
Text
Getting a head start on the growing season, is an important part to turning your backyard into a free organic grocery store. It’s also a good time to employ some helpful tricks to minimizing your gardening budget. The first big step is to start pawing through your garbage like some starving racoon, looking for trash that can be recycled into a big money saver, and this starts with kitchen scraps.
Having eggshells that are 2/3rds in tact is preferable, but beware of sharp edges
Make sure to tamp down as much dirt in there as you can.
Eggs are a great natural source of protein, and like most humans I go through scores of dozens of eggs a year. Most people throw these egg shells out. But if you can be mindful enough to crack the eggs on the top third portion of the shell, the empty calcium-rich shell can be used as a container for your seeds. These eggshell containers prevents the need to buy plastic containers from the big box stores, (and container plants for that matter), and will nourish plants with much needed calcium, when you got to plant them in the garden and bust their shells up into the soil.
Don’t fret over thinning the crop. Mixed sprouts are just the first harvest of the season.
When starting plants in this eggshell setup. There are a few costs that need to be considered. The most costly is lighting. Full Spectrum bulbs and fixtures usually run a little over a hundred bucks, and can last quite a long time. It is also important to purchase soil, from a store every year as well. In the past, I’ve tried to make my own compost, or a mixture of some other real high quality stuff. The problem becomes sanitation. Inevitably seeds from the outside get into my soil mixture, and begin to sprout alongside of my infant vegetables, making it hard to discern friend from foe. I guess I could start microwaving soil my home-made soil, or baking it in the oven. But I’m happily married, and would like to stay that way. So I’ll splurge six bucks for a cubic foot of garden soil caulk full of nutrients.
Stay away from the lazy-man six pack of vegetables, that they sell at nurseries and hardware stores, unless they’re perennials herbs. These plants are not only expensive, but they also tend to be prone to disease (having begun life in a big industrial sweatshop like greenhouse), but often they are grown far away from where they are to be planted. So for instance, it’s not surprising to see tomatoes offered for sale in mid-April that are already two feet tall. Tomatoes like heat, and considering the frost date in New England is typically May 15th, it behooves the frugal food-maker to wait until Memorial until planting tomatoes.
Not time to turn the garden over just yet.
Two weeks ago, I started my cold season crops: Kale, lettuce, chard, leeks, and cabbage seeds. These have begun to sprout vigorously, and I’ve already thinned them out once. Some novice gardeners sometime view it as a waste, to kill so many baby plants that could emerge. But all of the above-mentioned crops can be cut, and the sprouts eaten in a nutritious salad, shake, or sandwich.
Occasionally, I will delicately transplant some of these seedlings, to ensure that there is one healthy plant per egg. This is a delicate operations, that usually necessitates nourishing the little plants with extra water, and finding a specially designed doo-hicky, that can pop the plant out with surgical pernicious without disrupting the soil.
In a few weeks, I’ll look to start my warm winter crops: tomato, cucumbers, peppers, etc. Some other stuff, I can directly seed into the garden, as soon as the snow gives way, and the soil can be worked over, stuff like carrots, beans, radishes, and later in the year corn and squash. For the time being, a good growing season starts with the first domino falling into place.
Things are starting to gear up.
How to Save Money Starting a Garden. Getting a head start on the growing season, is an important part to turning your backyard into a free organic grocery store.
0 notes
Text
Okay, so it’s not that slow. It’s happened all at once. I would say that my transition into being a crunchy hippie started with the decision to use cloth diapers with Lily. I’ve talked about that before on the blog, but it more or less came out of a desire to save a pretty good hunk of change in the long run, but also from a previously absent desire to save the planet. I felt a huge pang of guilt every time I threw a diaper away, because I knew it was going to be tossed into a landfill, never to decompose. I know that cloth diapering isn’t for everyone, and Josh and I were very doubtful at first that it would be for us.
I asked the all-knowing mothers of Facebook about any tips for getting started with cloth diapering, and I’m about to give a shameless plug for one of my favorite stores ever. They all recommended I do a “cloth diaper trial” at The Natural Baby in Athens (this shameless plug is for people who live in my area and are thinking about trying cloth diapers but aren’t sure if they want to commit. Allison with take care of you!) Basically, she let us try different styles and brands of cloth diapers for three weeks. After doing that and deciding what I liked and what I didn’t, we made the plunge! We exclusively cloth diaper after building our stash up over time. We have 24 cloth diapers now, and that amount allows us to do it full time, without needing disposables.
It’s surprisingly easy to do, at least, the way we do it. We got the “all in one” style diapers, which are very much like a disposable. You take the whole diaper off and slap a new one on, without the need for stuffing or liners. Then, I throw them in a wet-bag until they need to be washed! The hardest part for me, and I suspect for a lot of people, is staying on top of the laundry. But, when these are the only diapers that we have, it’s hard to forget to wash them, because then Lily just won’t have diapers. The other slightly annoying thing about cloth diapering is that they need to hang and/or line dry, which takes time. I have to schedule enough time to get them washed and then air dried before I’m going to need them. All in all though, I really love cloth diapering and I’m so glad what we made the switch.
FYI, those are indeed diapers drying on our couch. Since things have been blooming, I feel weird about all of the pollen getting stuck in the diapers outside so I’ve been putting them inside for the time being. Don’t worry, they’re very clean.
Okay, so, that’s how it all started. Then it moved on to the decision to recycle. As a matter of fact, recycling was Josh’s idea, but I was very much on board with it. It’s seriously the easiest thing to do out of all of this. It’s as simple as keeping our trash separated. I put all of our cardboard in one bin, plastic in another, and cans in another. We don’t use enough paper or glass to constitute me creating an entirely separate space for them, but I do generally put them aside if we use them. Then, once I have a few bags, they go to the recycling place. In all honesty, for as long as we’ve been doing it, my dad has taken all of our stuff to the place. I actually don’t even know where it is. I have a vague idea, but I probably couldn’t get there without someone helping me.
Pay no mind to the Krispie Kreme and Papa John’s boxes. We’re very healthy eaters around here.
For me, the next logical step from recycling was composting. Honestly, I thought it was simply throwing all of your kitchen scraps into a pile outside and..leaving it there? I don’t know what I thought it was. Turns out, it’s a little bit more involved than that, but once you get going it’s not that bad. Basically, I save all of our veggie and fruit scraps (and things like eggshells and coffee grounds), in a bag, and when it gets to a certain point, I take it out to our compost bin. The way to start composting, according to the internet, it to make a layer of “brown stuff,” (dry leaves and stuff like that), then a layer of “green stuff,” (kitchen scraps, lawn clippings, etc.), soil, and moisture, and repeat until you have a pile about three feet high. Then you leave it for a while, then stir it. This process is repeated until you have “sweet-smelling brown stuff.” That brown stuff is what you put into gardens, to help things grow.
It took me a while to get it set up, as I mentioned, but now that I’ve got it going it’s more about maintaining. I just started a couple of days ago, so nothing is really happening yet, but basically I just have a plastic storage tub baking out in my backyard.
The jury is still out as to whether or not I’ll be successful with this, but I followed all of the directions I found, so I’m feeling hopeful.
Aaaaaaand finally, the most recent installment into my Hippie Saga, the beginnings of our garden. Growing things has always been pretty easy for me, so I feel a little guilty when I buy a lot of veggies at the store that I know I could grow. In the past I’ve grown tomatoes, cucumbers, squash, zucchini, rosemary, basil, mint, and cilantro. I would say that’s a pretty basic Georgia garden, and most of those things grow really easily in our climate without too much upkeep. I haven’t had a garden since we lived in Hartwell, and now that we have such a nice big yard with plenty of sunlight, I figured it was time! My dad is going to build us a raised bed (he’s also making me some window boxes for flowers for the front of the house), but I was tasked with preparing the yard for the raised bed. I pretty much just measured out a 5×8 plot, then took a shovel and dug up all of the grass. It only took about 45 minutes, but good grief, I must be terribly out of shape, because my arms felt like jelly. A bonus to that, though, is that I dug up plenty of worms, which I added to my compost because worms are, apparently, a great thing for compost. I don’t question it.
I’m really quite excited about planting my herbs and veggies again, and I’m excited about the new territory of window boxes! I’ve never had flowers before, but I love them and the color they add, so I’m really looking forward to caring for them.
So there you go. I’m really pleased with how things are going as far as our sustainability practices, however small they may be. It’s mostly just very tiny changes, but I reckon that if we make enough small changes, over time, it will amount to a big difference!
My Slow Descent into Hippie-hood Okay, so it's not that slow. It's happened all at once. I would say that my transition into being a crunchy hippie started with the decision to use cloth diapers with Lily.
0 notes
Text
Start this Weekend | 10 Ways to Become More Self-Sufficient
New Post has been published on http://thepursuitofhappiness.me/10-ways-to-become-more-self-sufficient/
Start this Weekend | 10 Ways to Become More Self-Sufficient
Did Human Planet get you thinking about how to become just a little bit more self-sufficient in your current circumstance? We’ve compiled a list of 10 ways that can help jump-start you on the journey to self-sufficiency.
Vegetable Gardening
Creating your own vegetable garden can be quite fulfilling, especially when you eat your first salad with fresh and tasty ingredients from your very own garden. A nice side-effect is the savings in the produce department at the grocery store. Assuming of course you don’t kill your crop of spinach, like I did the first year I tried to grow spinach… and broccoli – but we won’t be getting into that.
Reading resource:
Herb Gardening
Tired of that same ole’ flavor of oatmeal and eggs in the morning? Check out these recipes with herbs from your very own plants! In my experience, Herbs are generally easy to grow and require much less maintenance than growing vegetables. I have Oregano and Rosemary that I’ve neglected for a couple years now and they are still producing more than enough flavor for my family.
Planting Fruit or Nut Trees
While not as immediately fruitful (#haha) as vegetable or herb gardens, this is a great way to not only supplement your grocery bill but have some of the freshest produce for years to come. My three lemon trees produce more than enough lemons (I have well over 100 lemons each season) for this freshly squeezed lemonade recipe:
Yummy Lemonade
3/4 cup Brown Sugar
3/4 cup Granulated Sugar
2 cups squeezed lemon juice (about 9-11 large lemons depending on your squeezing skills)
5 cups cold water
Plant a Medicinal Herb Garden
I have Aloe Vera planted randomly around the yard or in pots and use it for burns (especially Sunburns). I remember as a child my grandfather walking me around his farm pointing out various plants and describing their medicinal uses – unfortunately I don’t remember most of the details but thankfully knowledge like that is lost because of books like Magic and Medicine of Plants. I purchased this book when looking to further my very limited understanding of how this whole get-better-from-plants-thing works. It seems like everything good originally comes from plants! Who would have thought…
Reading resource:
Reducing Electrical Consumption
We found out that not using our dryer saves us approximately $600 / year on our electrical bill, all things considered. Sources: Sticker on my dryer + A/C Manual + Electric Bill + A little bit of math. Instead we use this drying rack to accomplish the same goal and as a side effect our clothes are seemingly lasting longer. What savings! Yes, and furthermore you are now reliant on one less electrical appliance. Welcome to freedom from the dryer and a suddenly more spacious laundry room.
Start a composting bin
Food waste. It happens, even as much as we try to avoid it. Since we don’t have any farm animals where we are currently living (thanks HOA from hell) we can’t just give our food scraps to the Geese and Ducks we’ll have on our Rural Property. We didn’t want to just throw the remaining nutritional value away in the trash can and send it out to the curb to be hauled off to a dump, so we started composting to supplement our garden’s nutritional content. There are many options to choose from but we ended up with this composting container that we use in the kitchen. When full we tote it out to are composting area housed by 1 X Geobin Compost Bin. It has worked well for us so far. New to composting and don’t know where to start? Try this book for quick reference.
Reading resource:
Raise a few Farm Animals, Anyone?
Chicken, Lamb, Duck, Geese, Rabbit. Since our hands are currently tied due to HOA bylaws, we don’t have any of these. I did however recently purchase this book from Amazon to being my study of how to properly prepare the animals. A friend of mine, who lives about an hour or so outside of town (and is not bound by the #evil HOA) has a dozen or so chickens that produce more than enough eggs to share, and a little bit of meat when the time comes. Since he free ranges his birds there is no feed cost so he comes out ahead. Anyways, we’ll be utilizing the methods learned for the birds over the course of the summer. I’ll let you know how it goes – yikes!
Reading resource:
Bake your own bread
We just got our very own bread-maker and I am so excited to try it out this weekend. Hopefully, there will be no more trips to the grocery store to buy their fresh-frozen (I still don’t know why this is a thing) bread. Definitely looking forward to flavoring with our very own herbs too! If anyone has any killer bread recipes you think we should try let us know in the comments!
Harvest and replant your own seeds
Tomatoes are one of the easiest to do this with, assuming you’ve planted an Heirloom variety in your Vegetable Garden. Or you could be like me and plant the seed from an Avocado you bought from the grocery store outside of your son’s bedroom window and hope it fruits Soon™. We are on year two and while the growth is tremendous (10 feet tall now) we don’t yet have any fruit. Maybe this year will be the year?
Harvest and heat via Firewood (maybe even cook with it too)
We don’t do this currently as our place doesn’t have a fireplace or a wood stove or any open flame source BUT we are incorporating both a fireplace and a wood stove into our Homestead Design. We’ll publish the designs Soon™, ya know.. once we’ve figured them out.
I've started my journey to self-sufficiency and living more #sustainable Click To Tweet
Closing
So there you have it, not even close to a comprehensive list but 10 solid things that can be implemented to aid your journey to self-sufficiency. What do you plan on implementing first?
Like this post? Help us and others by Sharing!
Share List
SGMB_URL = "http://thepursuitofhappiness.me/wp-content/plugins/social-media-pro/"; jQuery(".dropdownWrapper").hide(); SGMB_GOOGLE_ACOUNT = "UA-88059982-3"; jQuery(document).ready(function($)var widget = new SGMBWidget();widget.show("id":"1","title":"Share All","options":"currentUrl":"1","url":"","shareText":"I really enjoyed this, I think you will too!","fontSize":"20","betweenButtons":"1px","theme":"pen","sgmbButtonsPosition":"bottomCenter","socialTheme":"minima","icon":"pen","buttonsPanelEffect":"No Effect","buttonsEffect":"No Effect","iconsEffect":"No Effect","buttons":"\"facebook\":\"label\":\"Share\",\"icon\":\"pen-facebook\",\"twitter\":\"label\":\"Tweet\",\"icon\":\"pen-twitter\",\"via\":\"\",\"hashtags\":\"\",\"googleplus\":\"label\":\"+1\",\"icon\":\"pen-googleplus\",\"linkedin\":\"label\":\"Share\",\"icon\":\"pen-linkedin\",\"email\":\"label\":\"E-mail\",\"icon\":\"pen-email\",\"pinterest\":\"label\":\"Pin this\",\"icon\":\"pen-pinterest\",\"whatsapp\":\"label\":\"WhatsApp\",\"icon\":\"pen-whatsapp\",\"tumblr\":\"label\":\"Post\",\"icon\":\"pen-tumblr\",\"reddit\":\"label\":\"Reddit\",\"icon\":\"pen-reddit\",\"line\":\"label\":\"Line\",\"icon\":\"pen-line\",\"vk\":\"label\":\"Share\",\"icon\":\"pen-vk\",\"stumbleupon\":\"label\":\"Share\",\"icon\":\"pen-stumbleupon\",\"mewe\":\"label\":\"Share\",\"icon\":\"pen-mewe\",\"twitterFollow\":\"twitterFollowShowCounts\":\"on\",\"setLargeSizeForTwitterFollow\":\"on\",\"followUserName\":\"TPOHappiness\",\"fbLike\":\"fbLikeLayout\":\"box_count\",\"fbLikeActionType\":\"like\",\"fbLikeUrl\":\"https:\\\/\\\/facebook.com\\\/TPOHappiness\"","roundButton":"","showLabels":"on","showCounts":"on","showCenter":"","showButtonsAsList":"","sgmbDropdownColor":"","sgmbDropdownLabelFontSize":"14","sgmbDropdownLabelColor":"","showButtonsOnEveryPost":"on","selectedOrExcluded":"","showButtonsOnEveryPage":"","textOnEveryPost":"Like this post? Help us and others by Sharing!","showButtonsOnCustomPost":"","textOnCustomPost":"","showButtonsOnMobileDirect":"on","showButtonsOnDesktopDirect":"on","sgmbSelectedPages":[""],"sgmbExcludedPosts":[""],"sgmbSelectedCustomPosts":[],"showButtonsInPopup":"","titleOfPopup":"Please share it!","descriptionOfPopup":"Go ahead and share our site if you liked it!","showPopupOnLoad":"","showPopupOnScroll":"","showPopupOnExit":"","openSecondsOfPopup":"","googleAnaliticsAccount":"UA-88059982-3","buttonOptions":"facebook":"label":"Share","icon":"pen-facebook","twitter":"label":"Tweet","icon":"pen-twitter","via":"","hashtags":"","googleplus":"label":"+1","icon":"pen-googleplus","linkedin":"label":"Share","icon":"pen-linkedin","email":"label":"E-mail","icon":"pen-email","pinterest":"label":"Pin this","icon":"pen-pinterest","whatsapp":"label":"WhatsApp","icon":"pen-whatsapp","tumblr":"label":"Post","icon":"pen-tumblr","reddit":"label":"Reddit","icon":"pen-reddit","line":"label":"Line","icon":"pen-line","vk":"label":"Share","icon":"pen-vk","stumbleupon":"label":"Share","icon":"pen-stumbleupon","mewe":"label":"Share","icon":"pen-mewe","twitterFollow":"twitterFollowShowCounts":"on","setLargeSizeForTwitterFollow":"on","followUserName":"TPOHappiness","fbLike":"fbLikeLayout":"box_count","fbLikeActionType":"like","fbLikeUrl":"https:\/\/facebook.com\/TPOHappiness","button":["facebook","twitter","googleplus","linkedin","email","pinterest","whatsapp","tumblr","reddit","line","vk","stumbleupon","mewe","twitterFollow","fbLike"], 1, '', 'http://thepursuitofhappiness.me/wp-content/plugins/social-media-pro//img/no-image.png', '', ''); );
jQuery(".socialMediaOnEveryPost").addClass("sgmb-center")
(adsbygoogle = window.adsbygoogle || []).push();
0 notes
Last Seen Blogs

kimsiever
Kim Siever’s Political Blog

jrderego
Crap

choice-az
st34k&ch33z

drama-is-for-youu
Is anjuman mein aap ko aana hai baar baar

exoischocolate
EXO-L WORLD