#historical sewing patterns
Text

The last pattern in this book!
It's a Men's Sack Coat circa 1884
#victorian sewing patterns#late victorian#historical sewing#historical sewing patterns#victorian menswear#sewing patterns#victorian fashion#victorian#sewing
25 notes
·
View notes
Photo
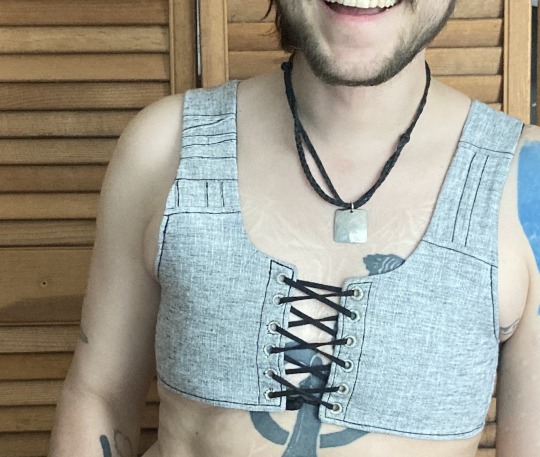
summer binder picture tutorial
this is the third binder ive made for myself recently and the first one i’m writing up. it’s designed to do a few things: 1) allow me to put it on by myself without dislocating my shoulders 2) allow me to breathe well enough to partake in normal activity 3) be cool enough to wear throughout a muggy 90-100F summer 4) not constrict my ribs in a way that aggravates my lack of connective tissue and causes intense pain.
this has become necessary even though i had top surgery many years ago, because when i had it i was extremely skinny and since then i’ve increased in size by about 50%. this has been really fucking good for my health in every single way* except that when my chest is squishy or moves at all it’s So Goddamn Triggering for me. but also since ive had top surgery ive developed and/or been made away of a plethora of chronic conditions that make every single commercially available binding option medically impossible. unbound, my chest is pretty much what you’d expect for a chubby cis guy but venturing out into the world in just a tshirt no longer works for me
*anyone who badmouths weight gain or fat bodies in the notes WILL be blocked
under the cut are a bunch of process pictures and explanations of what they all mean:
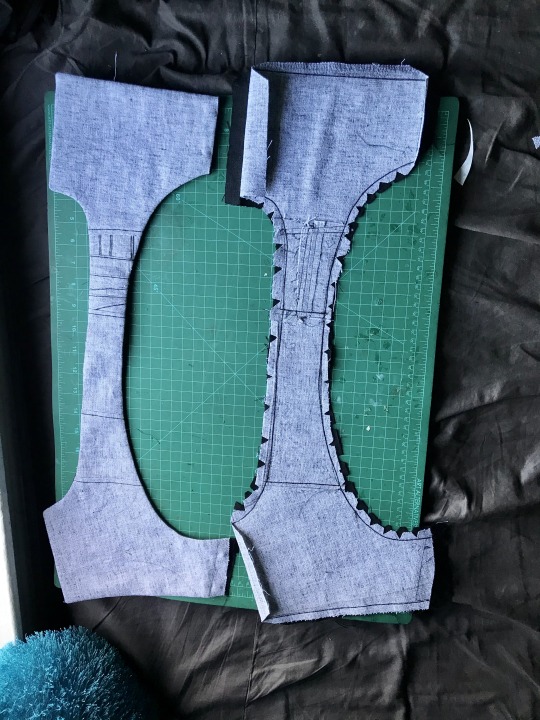
first i’ll give you a look at the pieces and measurements:
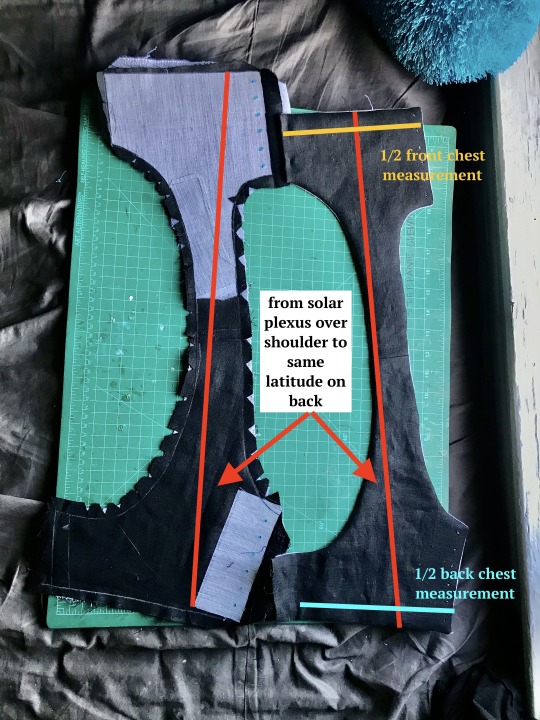
most of the seams are sewn in this picture and one half is turned inside out, allowing you to see both the finished dimensions (right) and the placement of the fusible horsehair canvas that gives this lil scrap of linen any structure at all (left)
to get your chest measurement, you’re gonna have to do some math:
first measure above and below what you want to bind. average these numbers. mine are something like 32 and 34, which average to 33. subtract a few inches--this is to allow the air movement between the laces at center front and back, critical in the summertime. i deleted 3 inches bc i like that number but you can go bigger if you want. the more inches you subtract here, the more youll be able to ratchet all your chest material down later, but at the same time you need to leave enough fabric for a sturdy garment. let’s say a range of 2-6 inches/5-15cm. by taking your measurements this way, you’re essentially measuring the chest you would like to have. that + the horsehair canvas work together to compress any squishy tissue/force anything that doesnt compress up and to the outside (basically into the armpit/lower shoulder--the chest might stick out but it will give a very puffed chest captain america pectoral silhouette)
you can also see how ive clipped my curves and pre-drilled my lacing holes. i used the marlin spike on my knife to open up the holes on the interfacing side, mainly as a way of marking them. this worked well bc the interfacing’s glue kept the linen from raveling
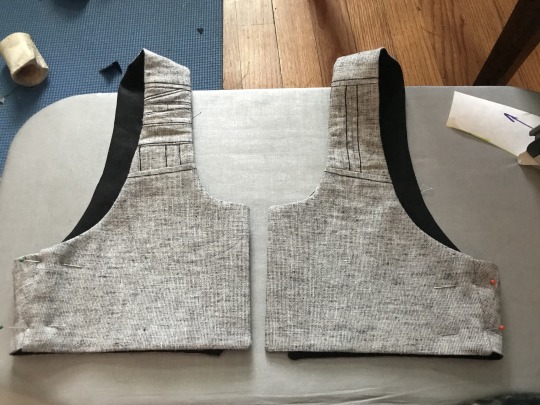
this is the same stage but looking at the non-interfaced grey linen/cotton blend (the black is some 100% linen from my cabbage stash). you can see ive broken the solar-plexus-to-back measurement up into a bunch of pieces to save on fabric but that’s not necessary. my original pattern was just two pieces (front and back) and chopping the straps into thirds on both sides was aesthetic
in the following picture you can really see how this is really just overgrown regency stays:
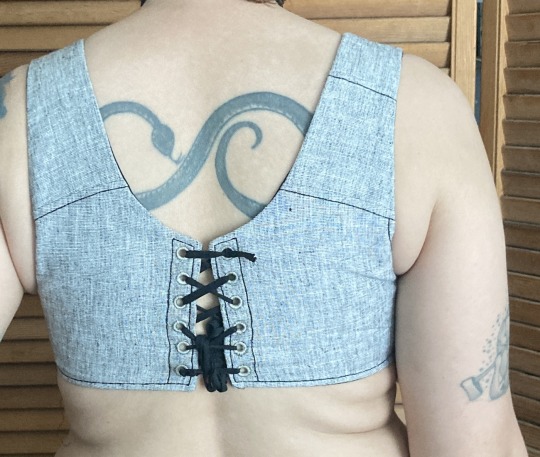
i thought about doing side lacing but didn’t think that would be comfortable for me. on the front, the side seam allowance was pressed inwards before turning to create a finished looking slot. on the back the side seam is left unfinished with an extra wide seam allowance, and is inserted into that slot.
here’s a closeup on it pinned in place (you can adjust the angle of the side seam and the fit during this pinning stage):
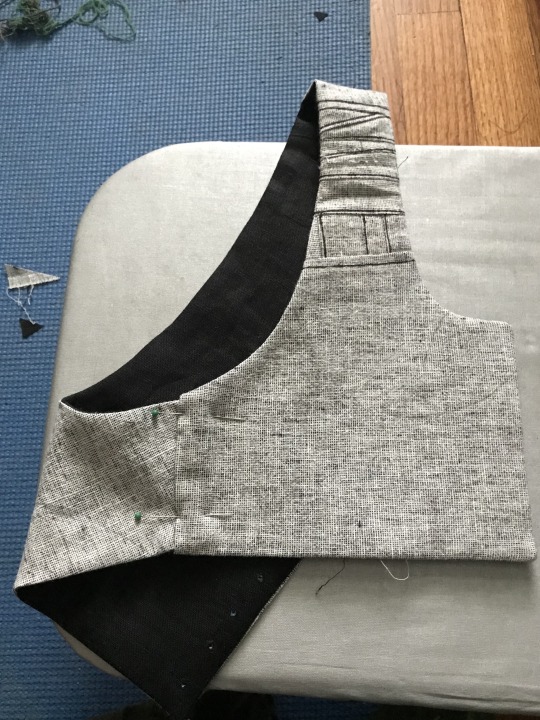
that side seam was just topstitched in place once i had the fit how i liked it, and the armhole was reinforced with more topstitching
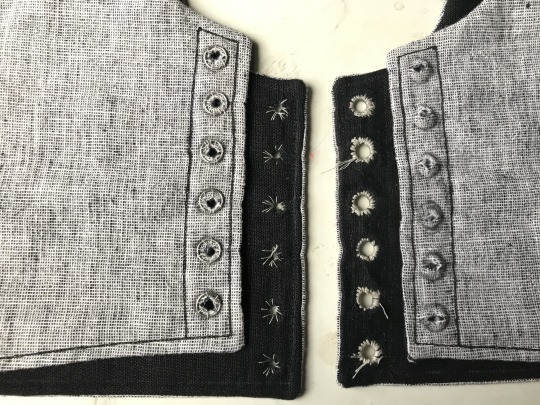
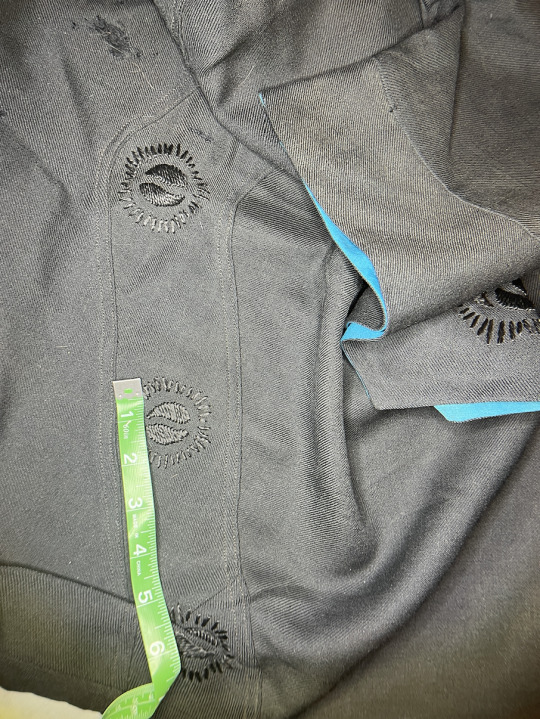
alright, time for eyelets: first, you can see how well the marking worked:
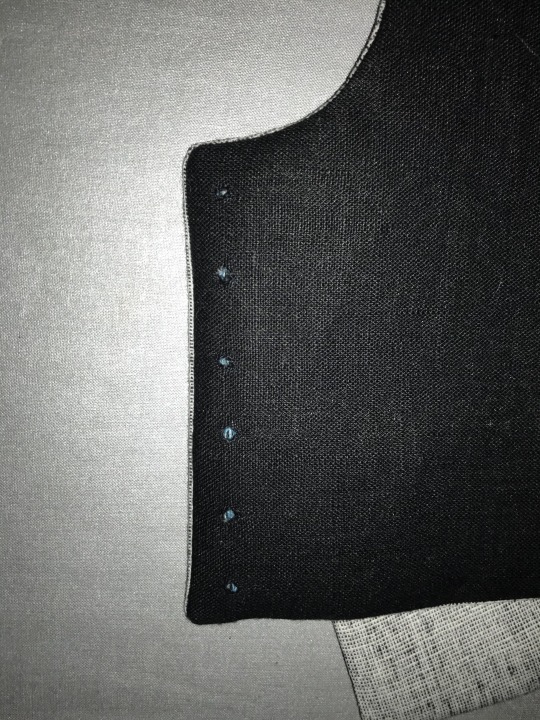
next, two rows of basted eyelets (left), one row of eyelets sewn with a doubled and waxed cotton thread (center right), and one row of eyelets opened and stainless steel rings placed (right).
next time i’m going to mark the eyelets same as i did above, but do this step differently--i’ll mark and baste the steel rings in place BEFORE widening the eyelets. this is bc i had a lot of problems keeping the eyelets on center
eyelets half done on this one! on the left are eyelets sewn with doubled and waxed cotton thread and on the right eyelets sewn with quadrupled and waxed thread. the center is basting again. i was able to force the holes back in line while sewing the eyelets but it was kinda annoying. adding a second picture that doesnt have great focus but hopefully shows how that process worked and shows the spike clearly
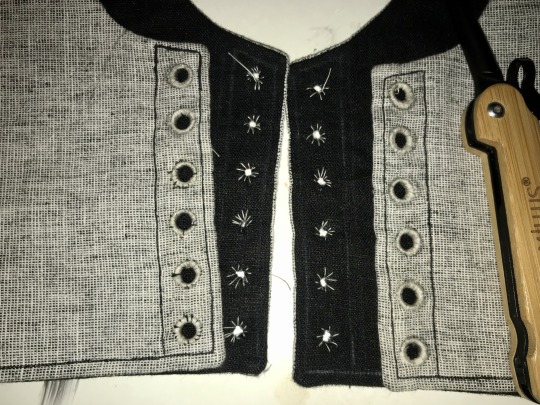

i ended up using this white cotton thread because it’s stronger than my black cotton thread (which the rest of it is sewn with). [eta: after this was first posted, i pressed the whole thing heavily, which effectively de-waxed the thread, and i dyed the whole thing a medium charcoal grey, the thread blends in perfectly on the lighter side and isn’t such a sore thumb on the darker side]
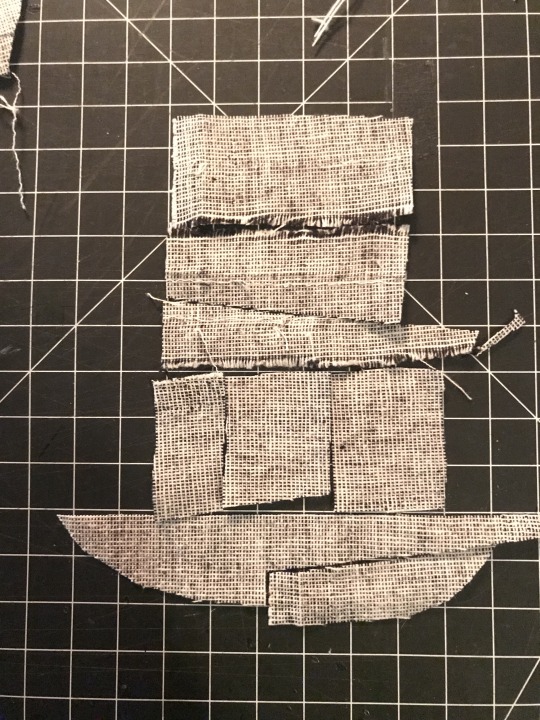
bonus: the piecing layout for that little piece of strap. the whole light gray half of the binder was made from 1/2 of one of the legs i cut off some linen suit pants to make slutty camping shorts last year and i really really didn’t want to break into any of the other three halves for this garment--i have Plans for it
overall the fit of this is incredible. it DOESNT hurt my ribs which every zip-up garment ive been able to find (and it is difficult) does due to really thick elastic at the base. it doesnt aggravate my sensory issues with the synthetic fibers that every commercial option is made of. i can walk up a hill or stairs, or go to pt, without getting too out of breath. i can eat with it tight, or loosen the front easily and without taking it off to make eating easier and less nausea-inducing. it is reversible!
best of all the lacing at the back gives the garment enough movement for me to get it on without dislocating, and the interfacing and steel rings give it structure once it’s on. the shaping comes only from fusible horsehair linen canvas and stainless steel rings like youd use for chainmail, there’s no boning at all, which makes it very quick to sew (except the eyelets, but metal grommets would be sturdy and quick provided theyre of good quality)
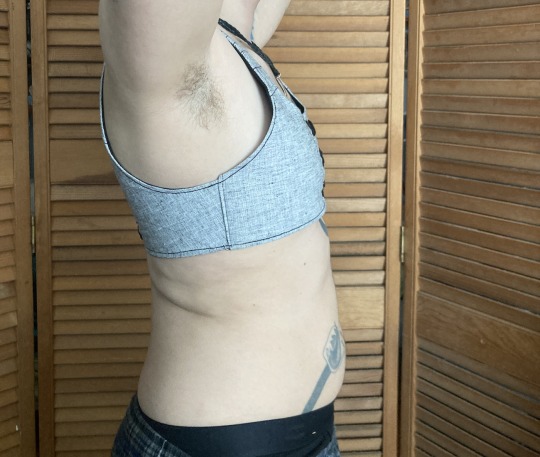
there’s a small amount of gaping on the outside of the shoulder strap, which i plan on fixing with a tiny tiny dart in the armpit, i want to add pockets to tuck the laces into, and i need a better lace for the back, but it’s completely wearable in time for the 90 weather next week which is all i wanted. i’ll do a reblog when it’s perfectly finished with an update on the fit but for now it is done enough
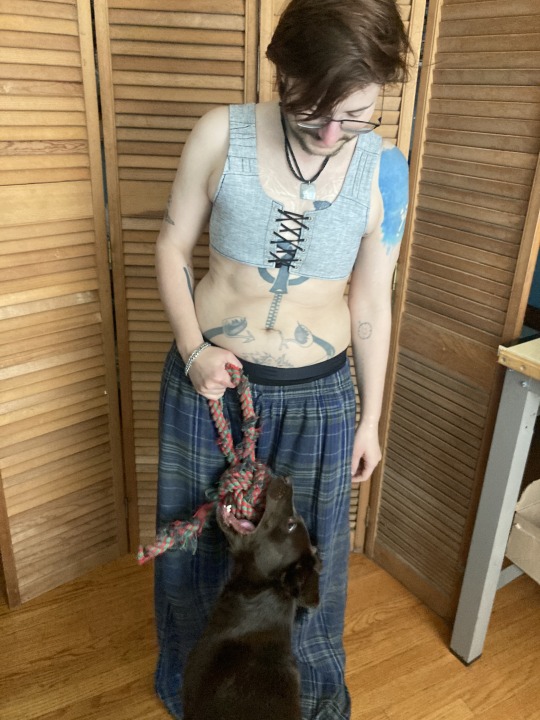
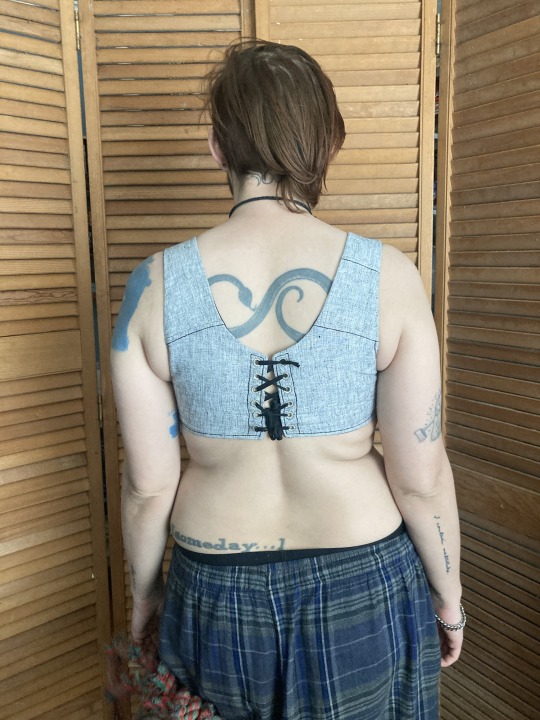
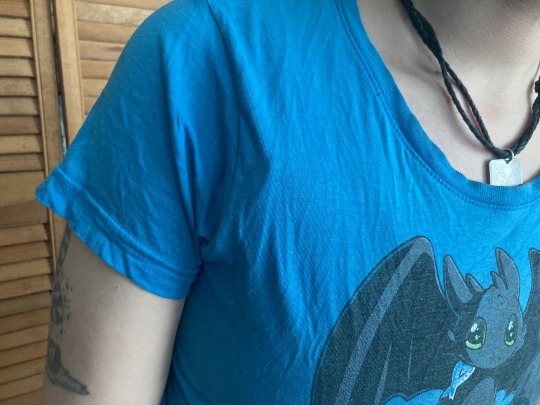
the little ridge where it doesnt lay flat against the shoulder is most visible with just a single t shirt over it. with a flannel or a sweater, it disappears, and by itself, it’s hidden in movement
eta: after dyeing this, i relaced it a bit looser in the back and that gape mainly disappeared. ive decided to leave it in instead of smoothing it with a dart because the loose fabric gives space for my chest to expand when breathing and shapes my silhouette in a way that emphasizes my shoulders
#sewing#trans#trans man#binding#body shaping#cotton#disability accommodations#physical#sensory#eyelets#fusible interfacing#historical fashion#regency#horsehair canvas#lacing#linen#lining#new build#drafted pattern#picture tutorial#piecing is contemporary too#stainless steel#stashbusting#stays#structured garment#treadle machine
1K notes
·
View notes
Text
FREE POETSHIRT PATTERN
Some assembly required
Ok so. I made a sewing pattern that involves a lot of maths on the end users part - this is the only way I, a complete pattern making novice, can make this 100% size inclusive. Luckily it’s super simple and it just a whole bunch of rectangles.

Yes it’s written in cm. Bite me.
So to elaborate a bit:
It’s pretty straight forward. You plug in your own measurements in the places it’s needed.
Body x2: should be twice your either shoulder width or your widest point (if you’re more pear shaped you might want to use your hip width) by the length from your shoulder to about mid thigh* (you can make it as long or short as you want. This could probably also work as a shift pattern in a pinch). In one of the pieces, you should cut a slit in the middle, which as shown above should be about from your neck to your sternum.
Sleeves x2: these should be 2-3 times your bicep measure (this will determine the poofiness of the sleeves), by your arm length. Adding a few cm to the length can be a good idea here. I usually just round up to what seems most logical.
Cuffs x4: your wrist measure + 3-4cm of ease, by how ever long you want them - 5-10cm is a good place to start.
Collar x2: your collar measure** by however tall you want your collar. Keep in mind that it will be folded over.
Gussets
Oh glorious gussets. The whole reason this pattern works! But also where it gets a bit mathy
Sleeve gussets: these are square. The diagonal should be about 1/6 of your total armscye (all the way around). Rather a bit too small than too big - it can fuck up the fit (it did for me)
Shoulder gussets: these will depend wholely on how buff your trapezius muscles are. If your neck/shoulder is at a right angle, they’re not strictly necessary, but if you’re super buff, they’re very necessary. I’d say an average shoulder gusset is about 5-7cm, but it’s up to you.
Reinforcements
Again, these aren’t strictly necessary, but if you want your shirt to last it’s a good idea to put them in. You can choose to use between 5 and 10 total. These don’t need to be very big, they just go at any split in the fabric. About 2,5cm is good.
Instructions
I used these videos for assembly instructions
youtube
This is going to be hard without pictures…
youtube
youtube
*you can also keep the body as one piece, which should then be twice the length you want it. The slit at the neck will also have to be cut in the middle of the piece.
**your collar measure is the measurement at your neck going over your collarbone rather than tight to the neck.
304 notes
·
View notes
Text


The past week's work: three digitized patterns from antique garments!
- The 1840s bodice is 34/36" bust - 31" waist (pattern HERE)
- The 1880s is 44" bust - 32" waist (pattern HERE)
- the 1920s dress is 47" bust - 48" waist (pattern HERE)
All three patterns are currently with testers for the next two weeks and after that I will be able to put them up on Etsy!
I have seven other antiques waiting for patterning (and two more on the way) - just have to decide what to work on next....
#historical dress#historical clothing#antique garments#23.4#23.5#21.2#plus-size sewing#plus size patterns
239 notes
·
View notes
Text
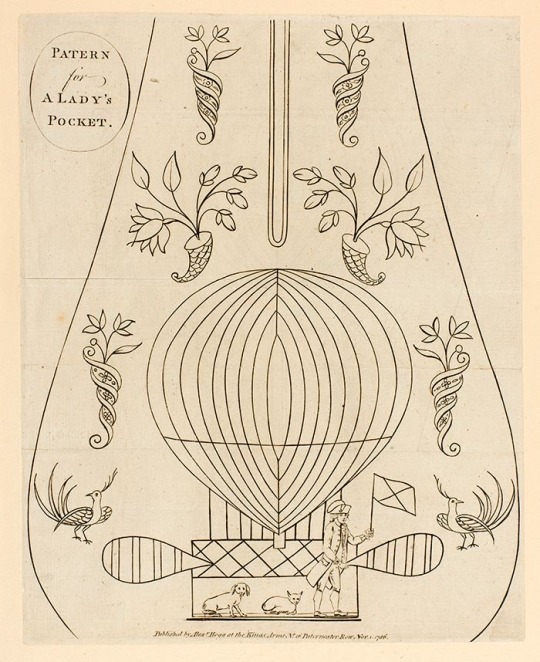
#historical fashion#fashion#historical#history#historical clothing#historical dress#pockets#sewing#historical pattern#patterns#18th century fashion#18th century#fashion dress#textile#textiles#art#1700s
157 notes
·
View notes
Text
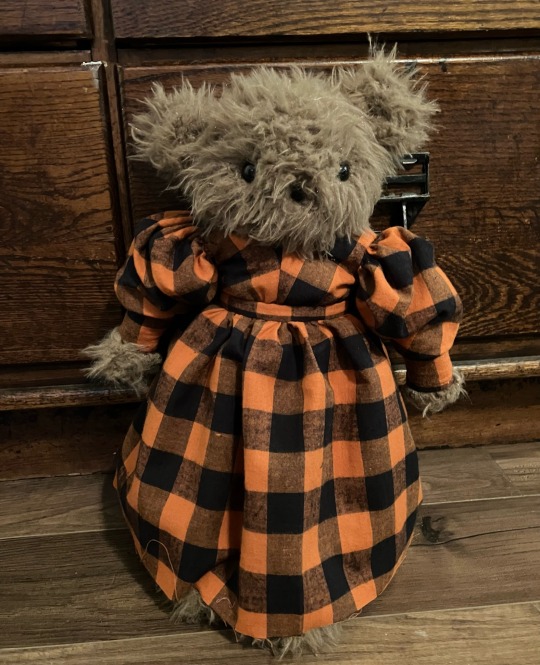
Miss Beatrice Bear’s new dress is almost done! I just need to hem the bottom
#sewing#handmade#sewing wip#miss beatrice bear#historical doll clothing#sort of! idk that the fabric is but the pattern I used for it is#Miss Beatrice doesn’t look like it but she’s the same size as an American Girl Doll#well. plus some fluff#I am going to make a black cat to wear this dress!
161 notes
·
View notes
Text
looking into rebuilding my pattern collection and it's just
how do I rebuy 7 years' worth of patterns all in one go?
when it's a pattern or two here and there over the years, it's negligible cost-wise. when I need them all back at once, though...
(this brought to you by: the realization that it would be over $200 just to buy back all of the Truly Victorian patterns I had. I could defray that significantly by rebuying the Prior Attire Victorian Dressmaking book, but...that's out of stock right now)
(some things I can get out of pattern books that a friend very generously donated me, but they unfortunately don't have what I'd need to remake the Lucille park dress, for example)
it's just. it's a Lot and I feel very overwhelmed, to be honest
96 notes
·
View notes
Text
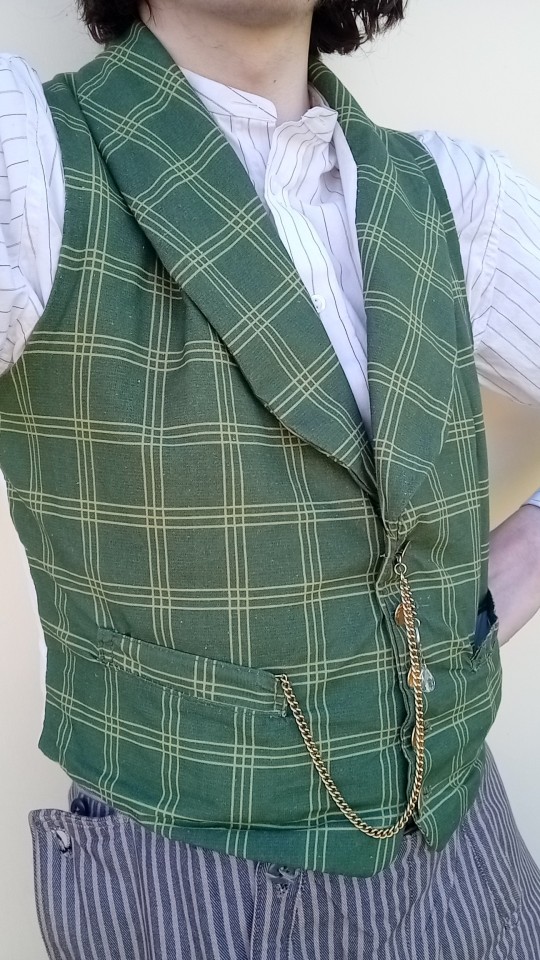
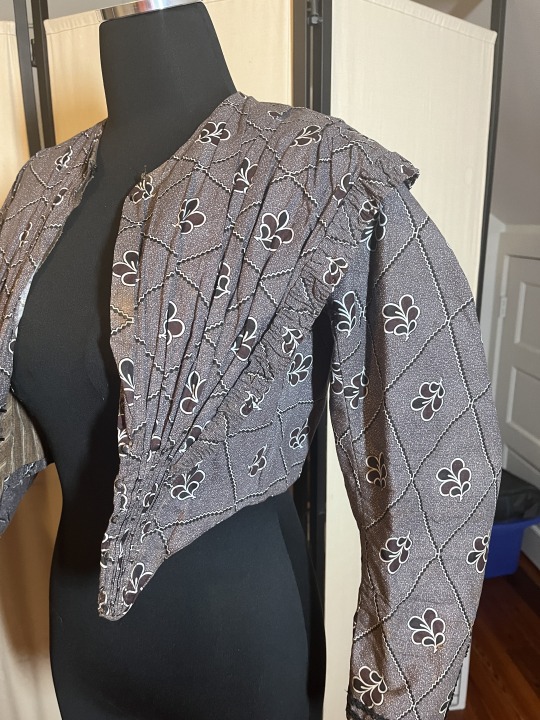
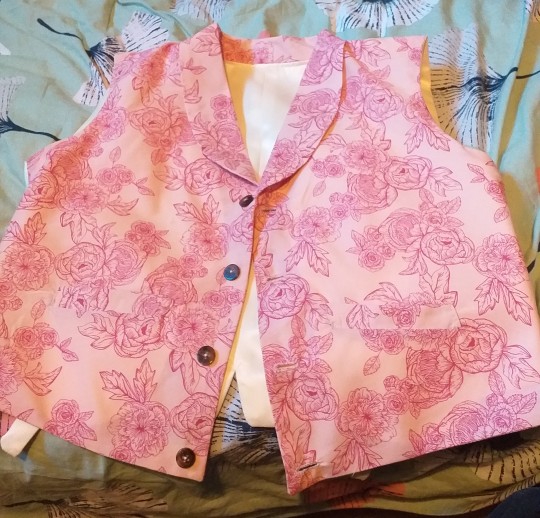
the waistcoat I mentioned in my last sewing projects post! since this has a lot more moving parts and involved some more complex work than the shirts, this was something of a practice exercise, so I did it with a kinda cheap print from a quilting fabrics store. since I had a lot of fun with this I plan to make more in blue and red/gold fabrics that I have, which will hopefully, unlike the print, not leave little white marks everywhere a needle pokes through.
big note for next time is to try and pay more attention to the pocket welts (the little strips that cover the opening), since the pattern doesn't quite match up on either of them & the attachment is a bit shoddy.
...but a very exciting note for next time, or the time after, whenever I use the red/gold fabric, is that I will be using these:

these brass buttons were dated to the late 1830s by the antiques store I bought them at (a cursory Google suggests that button enthusiasts concur.) there are seven in total, which is a couple more than I need for the front closure, so I might see about making that one double-breasted and keep the seventh around for a spare or memento or what have you. hang it off my watch chain maybe.
also, it's a bit too dark to get a good image of it right now, but soon I'll have a picture to share of my "new" sewing machine! I mostly plan to use it for seams and other concealable structural elements--hand finishing is too much fun & provides too neat of a finish for me to give it up.
#sewing projects#historical fashion#the pattern is Black Snail Patterns' c. 1830 waistcoat if you're interested!#also re: the other clothes in the 1st photo: the shirt is one I bought & the pants are loaned. nothing else exciting today unfortunately#though the watch (not pictured) on the end of the chain (pictured) is mine & it's pretty cool. maybe i'll post a photo of that tomorrow
12 notes
·
View notes
Text
Dinosaur dress!!!
She’s finally finished!!! Also the sharktooth rosary i love her
The skirt is just two large rectangles (1meter x 2 meters each i think?), gathered up like you would do with a 18th century petticoat. The top is just something i made up and if anyone cares i could post the pattern!
Its entirely handsewn, by me, from old bedsheets
#outfit#historical costuming#ootd#sewing#dinosaur#dress#trex#80s pattern#dressmaking#vintage#nonbinair#nonbinary outfit#help what tags do i use#history bounding#historybound
40 notes
·
View notes
Text


more menswear from this book circa 1884!
#victorian#victorian menswear#1880s fashion#historical sewing#1880s#victorian sewing patterns#victorian boy's clothing#late victorian#historical sewing patterns#shirts#drawers#undergarments#historical undergarments
9 notes
·
View notes
Photo
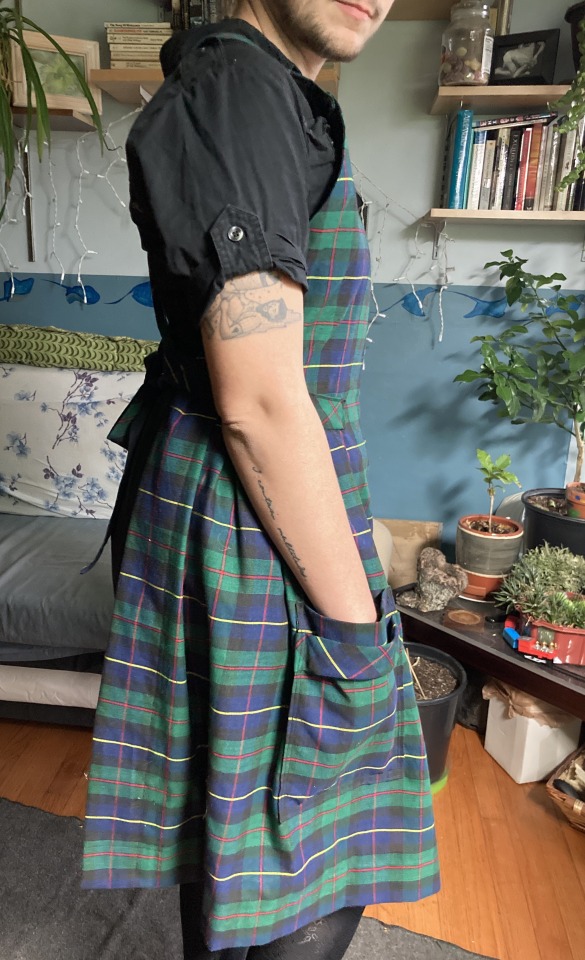


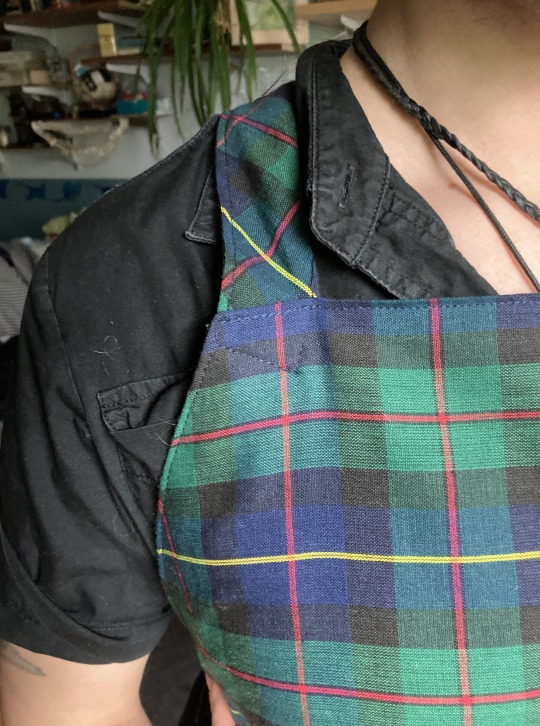

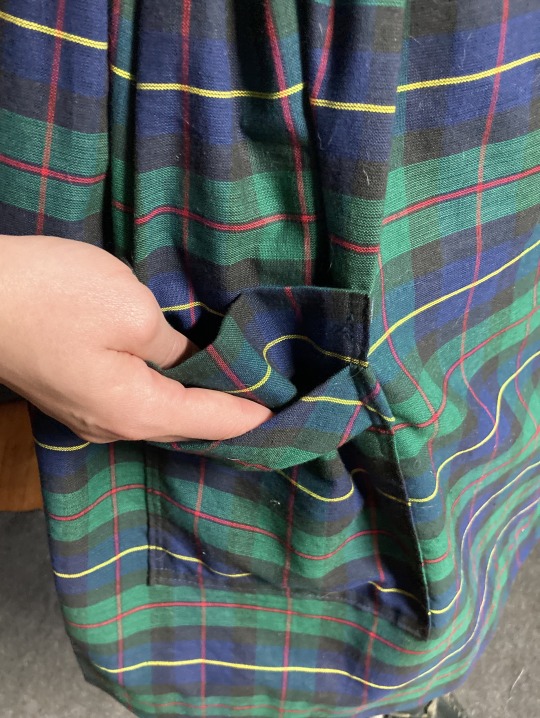
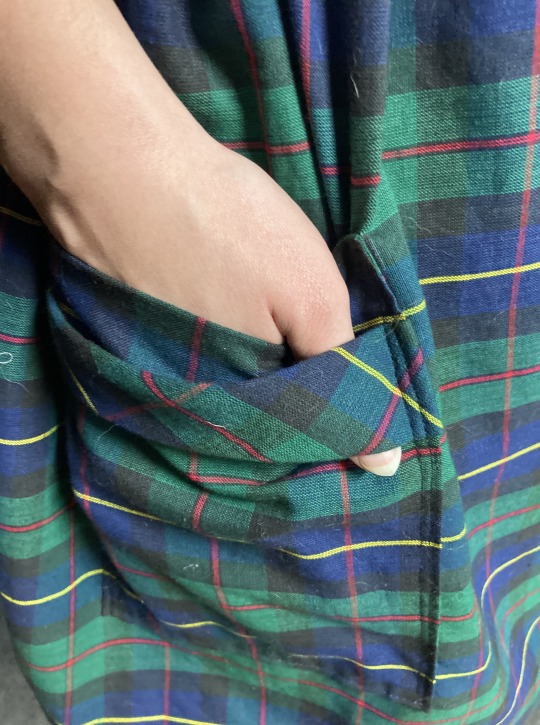

i made this apron a couple years ago more or less as an excuse to get as deep into plaid matching as i could. the pattern is an original draft based on 1930s-1950s aprons in mail order catalogs. the side gathers in the hips (detail in last picture) especially is a 30s design detail. the bias straps on the pockets are for hanging a towel from
#sewing#plaid apron#apron#historical fashion#vintage fashion#1930s fashion#new build#drafted pattern#pattern matching#pockets#patch
139 notes
·
View notes
Photo
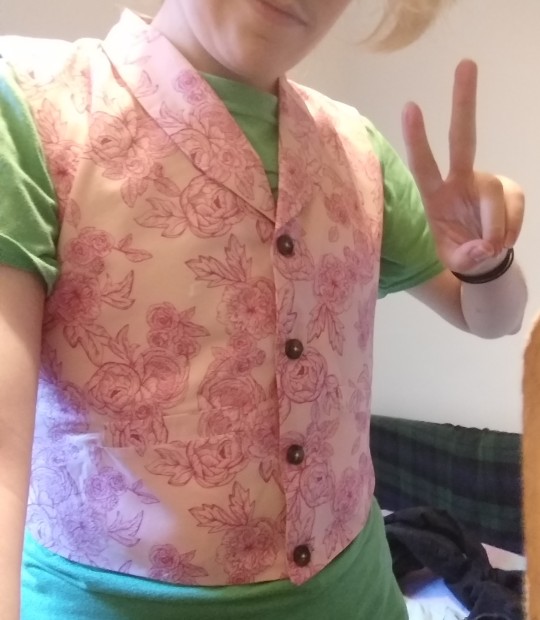
I made myself a floral-patterned victorian-inspired waistcoat as the first step to the lovecore suit I eventually want to make for (my dragsona) Valentine
#sewing#drag#steampunk#lovecore#waistcoat#living history#base was from a pattern I then had to majorly adjust cause despite cutting out the like tiniest men's size according to my measurements it#was still way too big and we had to take it in on literally all sides plus adjustments to actually make it more victorian-appropriate#cause the og pattern advertised itself as historic(-inspired) but was fully cut like a modern waistcoat smh#AND I learnt how to sew button holes!!!!!!#the way I ended up doing the shoulders fits a bit questionably but I can move and it doesn't pinch too much in the armpits so it's fine x'D#it's my first try at proper tailoring after all doesn't need to be perfect#as long as it's wearable
113 notes
·
View notes
Text

The two newest patterns that I have in testing right now, based on antique plus-size garments...
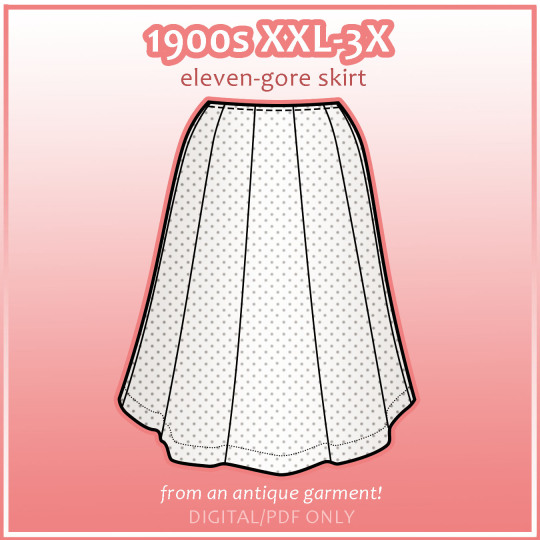
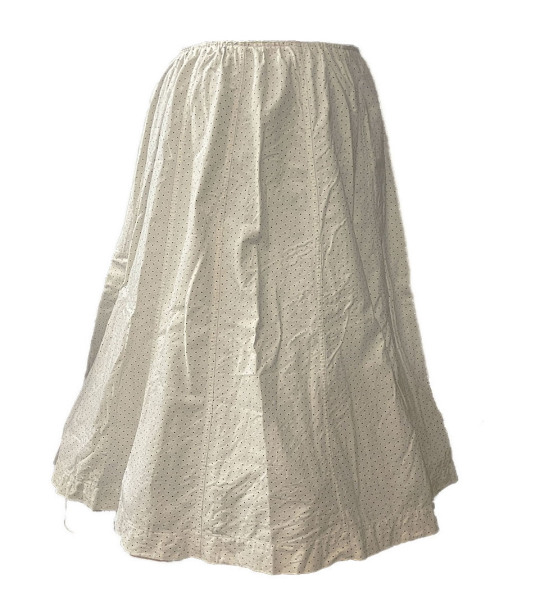
c. 1909 eleven-gore polka-dotted cotton day skirt
The size as-is is a 37”/94cm waist with 60”/152cm+ hips, and ungathered it’s a 46.5”/118cm waist. It was made for a very short person, so I’ve provided the original length (32”/81cm) as well as an extended version (40”/102cm) on the pattern for whatever you need. On Etsy here.
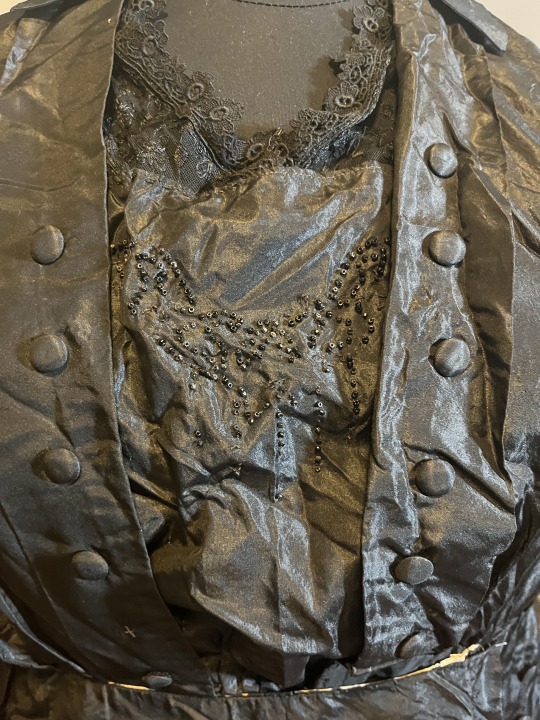
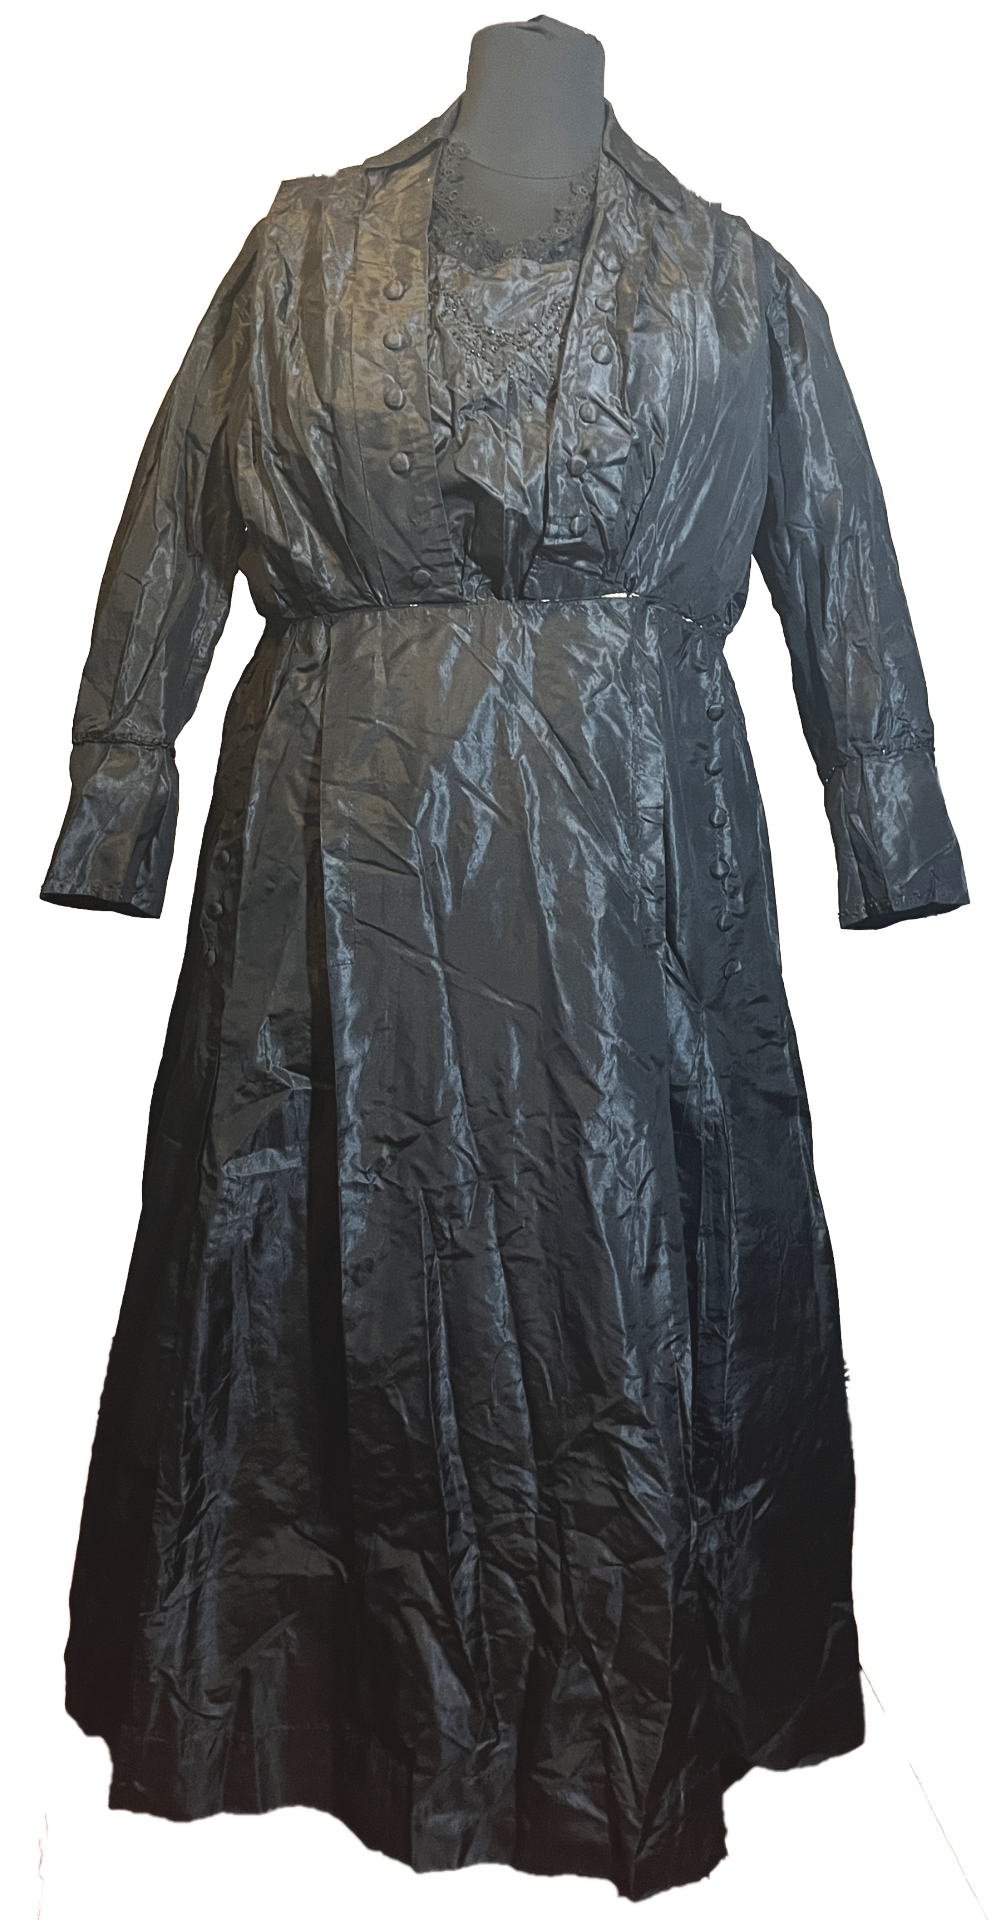
c. 1915-17 silk day dress with beading
This has a 60” (152cm) bust and 45.5” (116cm) waist and was made for a relatively tall person. On Etsy here.
Both are now up on Etsy!
50 notes
·
View notes
Text

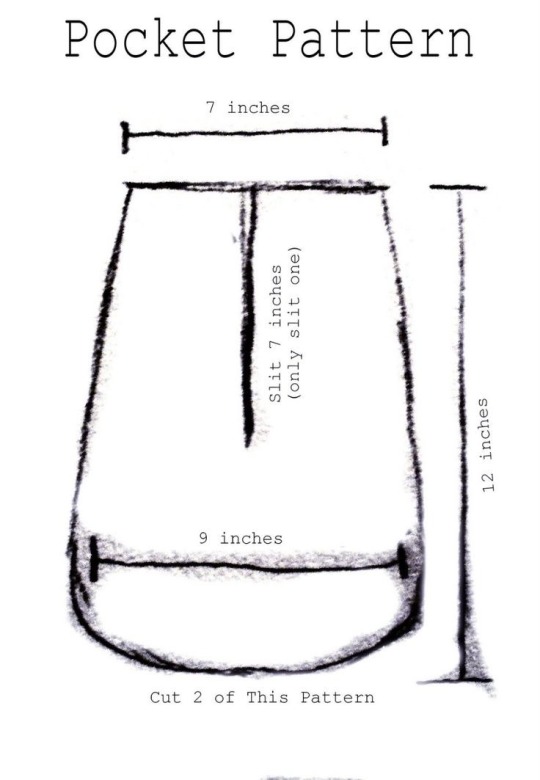
Sewing Pattern For Pockets
#historical fashion#fashion#historical#history#historical clothing#historical dress#long dress#victorian#victorian era#victorian fashion#pockets#18th century fashion#18th century#19th century fashion#19th century#textile#textiles#sewing#sewing patterns#historical pattern#victorian pattern#patterns#pattern#art
82 notes
·
View notes
Text
SewFast Dye Young YouTube
This year I really want to get my channel to 1000 followers.
I am at 676. (nice palindrome!)
I know I need to do more regular content, which has been hard with work. (I love my day job, but I am also exhausted by it...)
I am also trying to produce some tiktok content alongside to help bolster the channel and find a following...
I don't 100% know where I want to go with this. I keep thinking about writing sewing/craft books or other ways I can make this something that could be a career... And maybe it will only ever be a side project, that's okay too, but sometimes I just really want to work for myself or go back to designing costumes and I need a steady but flexible thing to balance that...
Done rambling. Go follow my channel please!
#sewing#diy#youtube#sewist#signal boost#sewing projects#seamstress#sewing pattern#costumes#crafts#nerdy girls#nerdstuff#theatre#historical fashion#retro fashion#fashion design#vintage fashion#craft
86 notes
·
View notes
Text
Area Woman Buys Soutache Braid In Continuing Act Of Eternal Optimism That She Will One Day Actually Put Soutache On A Garment
#sewing#historical costuming#historybounding#I've done it on a doll skirt okay!#...in a very simple freehanded pattern#BUT STILL
83 notes
·
View notes
Last Seen Blogs

iselsis
whump and grammar

mysterioussylph
Sylph's Aisle

chaostheoryinpractice
Chaos theory in practice

spazztastickiwi
SpazztasticKiwi

dotorixdotoli
Dotori