#fusible interfacing
Photo
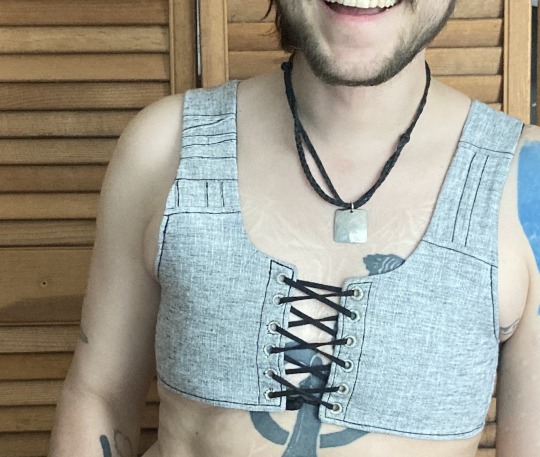
summer binder picture tutorial
this is the third binder ive made for myself recently and the first one i’m writing up. it’s designed to do a few things: 1) allow me to put it on by myself without dislocating my shoulders 2) allow me to breathe well enough to partake in normal activity 3) be cool enough to wear throughout a muggy 90-100F summer 4) not constrict my ribs in a way that aggravates my lack of connective tissue and causes intense pain.
this has become necessary even though i had top surgery many years ago, because when i had it i was extremely skinny and since then i’ve increased in size by about 50%. this has been really fucking good for my health in every single way* except that when my chest is squishy or moves at all it’s So Goddamn Triggering for me. but also since ive had top surgery ive developed and/or been made away of a plethora of chronic conditions that make every single commercially available binding option medically impossible. unbound, my chest is pretty much what you’d expect for a chubby cis guy but venturing out into the world in just a tshirt no longer works for me
*anyone who badmouths weight gain or fat bodies in the notes WILL be blocked
under the cut are a bunch of process pictures and explanations of what they all mean:
first i’ll give you a look at the pieces and measurements:
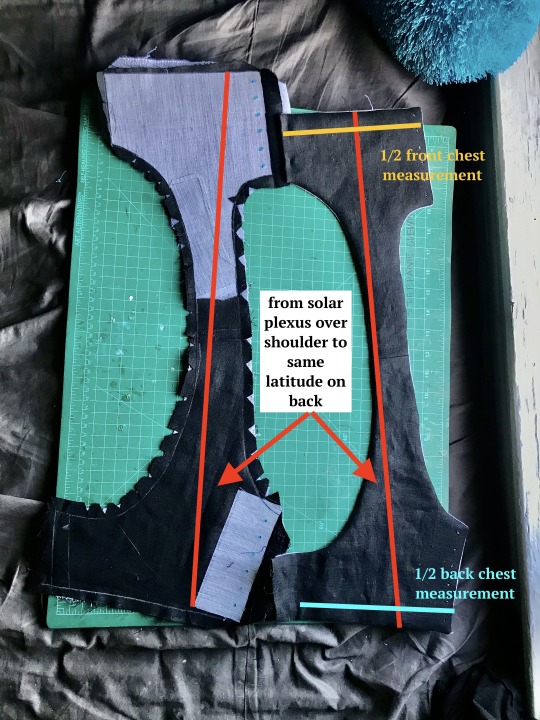
most of the seams are sewn in this picture and one half is turned inside out, allowing you to see both the finished dimensions (right) and the placement of the fusible horsehair canvas that gives this lil scrap of linen any structure at all (left)
to get your chest measurement, you’re gonna have to do some math:
first measure above and below what you want to bind. average these numbers. mine are something like 32 and 34, which average to 33. subtract a few inches--this is to allow the air movement between the laces at center front and back, critical in the summertime. i deleted 3 inches bc i like that number but you can go bigger if you want. the more inches you subtract here, the more youll be able to ratchet all your chest material down later, but at the same time you need to leave enough fabric for a sturdy garment. let’s say a range of 2-6 inches/5-15cm. by taking your measurements this way, you’re essentially measuring the chest you would like to have. that + the horsehair canvas work together to compress any squishy tissue/force anything that doesnt compress up and to the outside (basically into the armpit/lower shoulder--the chest might stick out but it will give a very puffed chest captain america pectoral silhouette)
you can also see how ive clipped my curves and pre-drilled my lacing holes. i used the marlin spike on my knife to open up the holes on the interfacing side, mainly as a way of marking them. this worked well bc the interfacing’s glue kept the linen from raveling
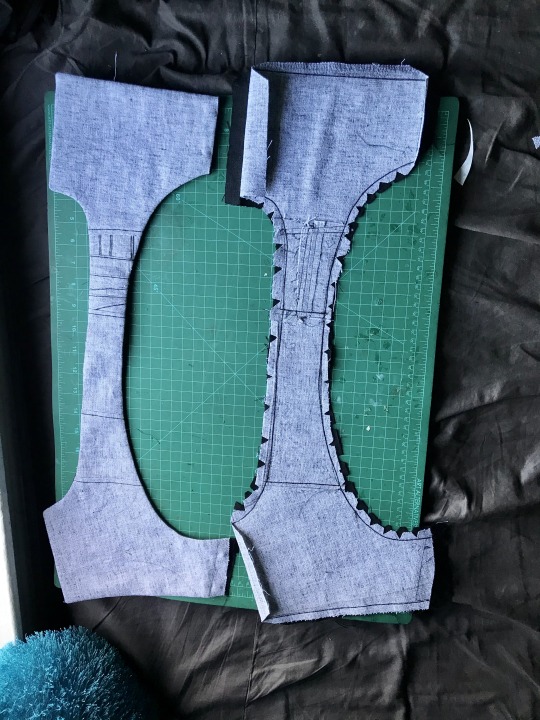
this is the same stage but looking at the non-interfaced grey linen/cotton blend (the black is some 100% linen from my cabbage stash). you can see ive broken the solar-plexus-to-back measurement up into a bunch of pieces to save on fabric but that’s not necessary. my original pattern was just two pieces (front and back) and chopping the straps into thirds on both sides was aesthetic
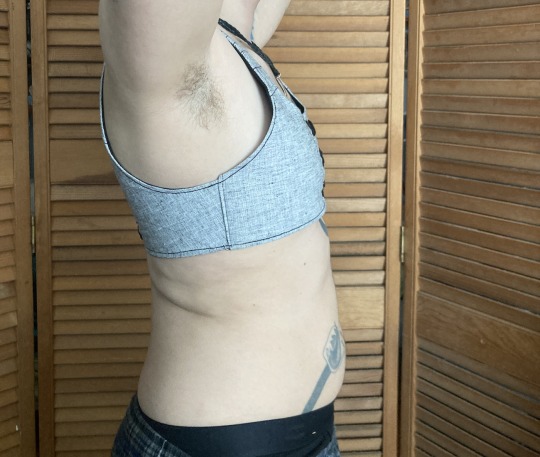
in the following picture you can really see how this is really just overgrown regency stays:
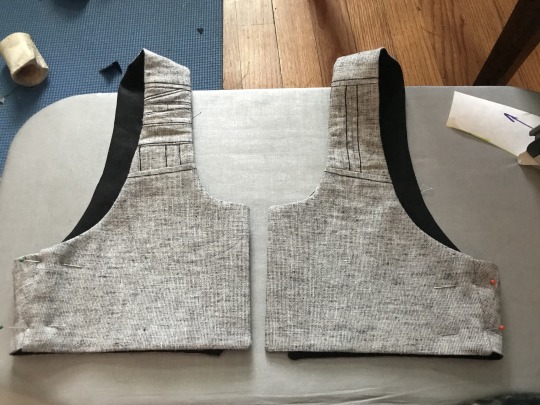
i thought about doing side lacing but didn’t think that would be comfortable for me. on the front, the side seam allowance was pressed inwards before turning to create a finished looking slot. on the back the side seam is left unfinished with an extra wide seam allowance, and is inserted into that slot.
here’s a closeup on it pinned in place (you can adjust the angle of the side seam and the fit during this pinning stage):
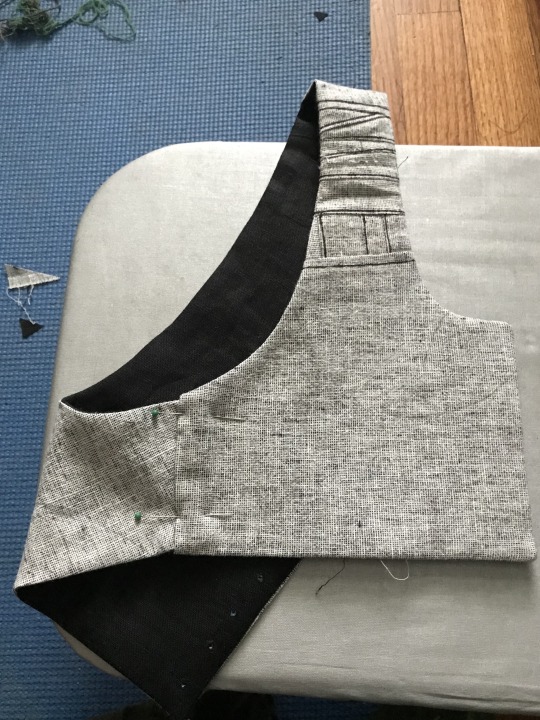
that side seam was just topstitched in place once i had the fit how i liked it, and the armhole was reinforced with more topstitching
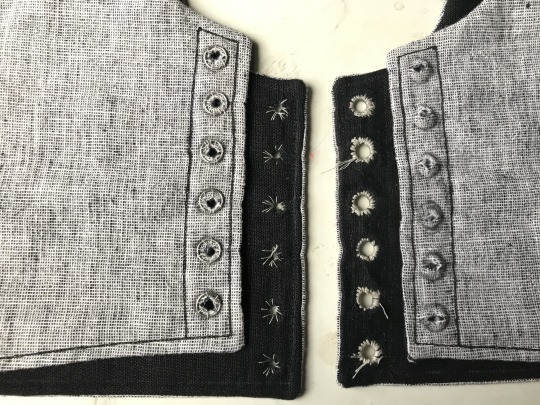
alright, time for eyelets: first, you can see how well the marking worked:
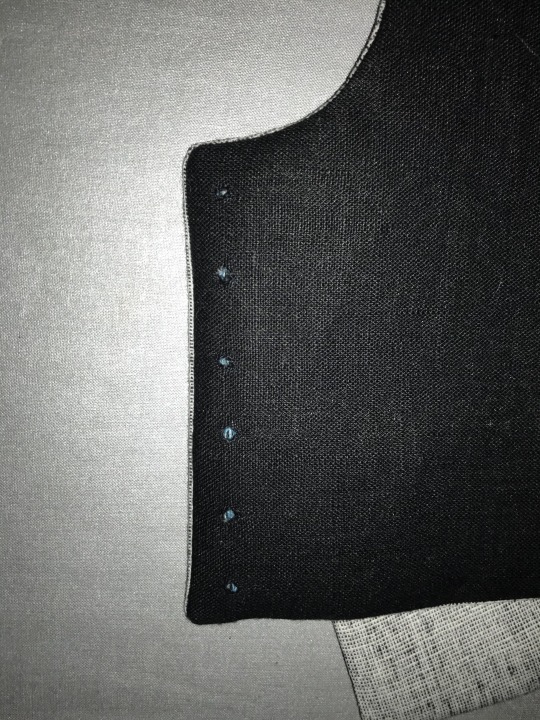
next, two rows of basted eyelets (left), one row of eyelets sewn with a doubled and waxed cotton thread (center right), and one row of eyelets opened and stainless steel rings placed (right).
next time i’m going to mark the eyelets same as i did above, but do this step differently--i’ll mark and baste the steel rings in place BEFORE widening the eyelets. this is bc i had a lot of problems keeping the eyelets on center
eyelets half done on this one! on the left are eyelets sewn with doubled and waxed cotton thread and on the right eyelets sewn with quadrupled and waxed thread. the center is basting again. i was able to force the holes back in line while sewing the eyelets but it was kinda annoying. adding a second picture that doesnt have great focus but hopefully shows how that process worked and shows the spike clearly
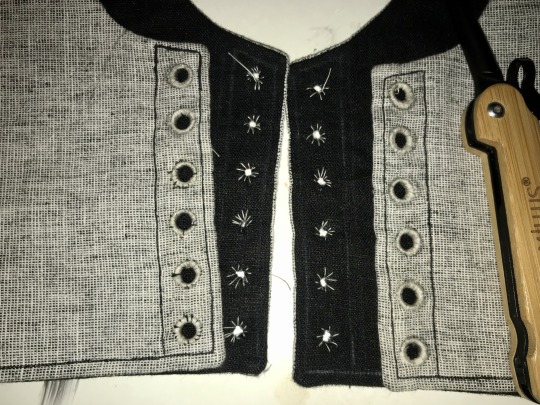

i ended up using this white cotton thread because it’s stronger than my black cotton thread (which the rest of it is sewn with). [eta: after this was first posted, i pressed the whole thing heavily, which effectively de-waxed the thread, and i dyed the whole thing a medium charcoal grey, the thread blends in perfectly on the lighter side and isn’t such a sore thumb on the darker side]
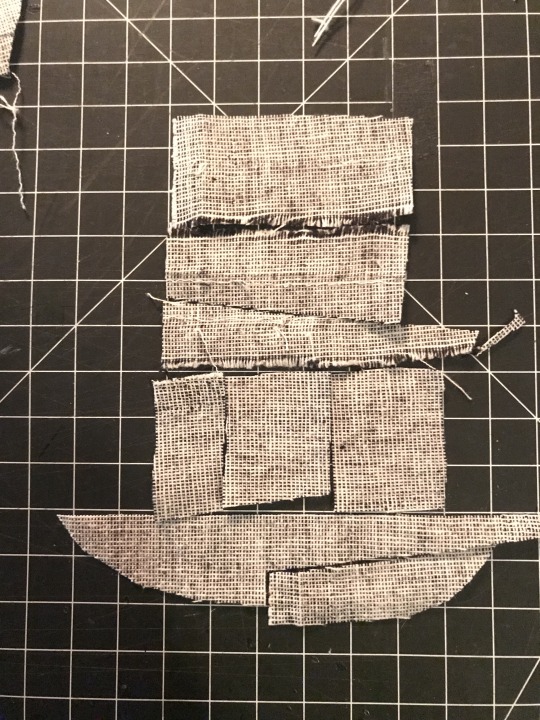
bonus: the piecing layout for that little piece of strap. the whole light gray half of the binder was made from 1/2 of one of the legs i cut off some linen suit pants to make slutty camping shorts last year and i really really didn’t want to break into any of the other three halves for this garment--i have Plans for it
overall the fit of this is incredible. it DOESNT hurt my ribs which every zip-up garment ive been able to find (and it is difficult) does due to really thick elastic at the base. it doesnt aggravate my sensory issues with the synthetic fibers that every commercial option is made of. i can walk up a hill or stairs, or go to pt, without getting too out of breath. i can eat with it tight, or loosen the front easily and without taking it off to make eating easier and less nausea-inducing. it is reversible!
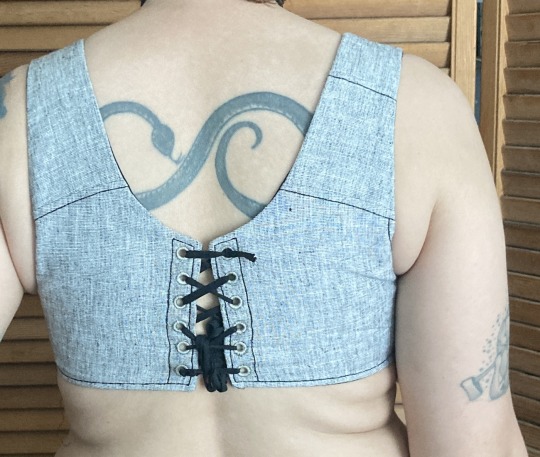
best of all the lacing at the back gives the garment enough movement for me to get it on without dislocating, and the interfacing and steel rings give it structure once it’s on. the shaping comes only from fusible horsehair linen canvas and stainless steel rings like youd use for chainmail, there’s no boning at all, which makes it very quick to sew (except the eyelets, but metal grommets would be sturdy and quick provided theyre of good quality)
there’s a small amount of gaping on the outside of the shoulder strap, which i plan on fixing with a tiny tiny dart in the armpit, i want to add pockets to tuck the laces into, and i need a better lace for the back, but it’s completely wearable in time for the 90 weather next week which is all i wanted. i’ll do a reblog when it’s perfectly finished with an update on the fit but for now it is done enough
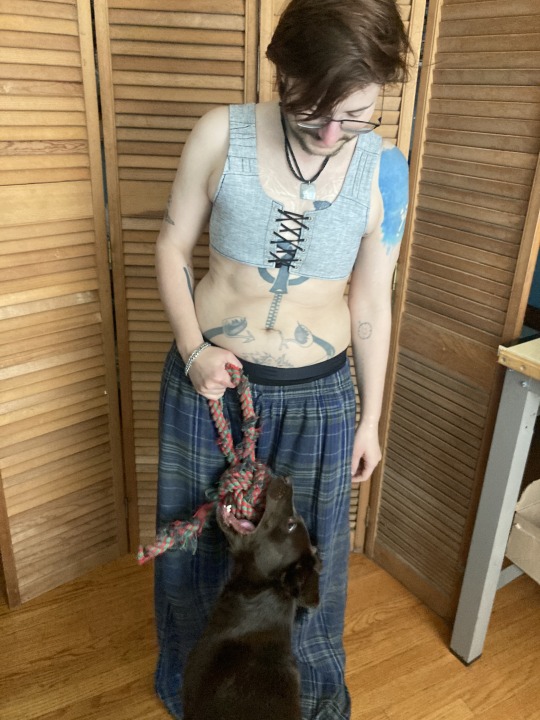
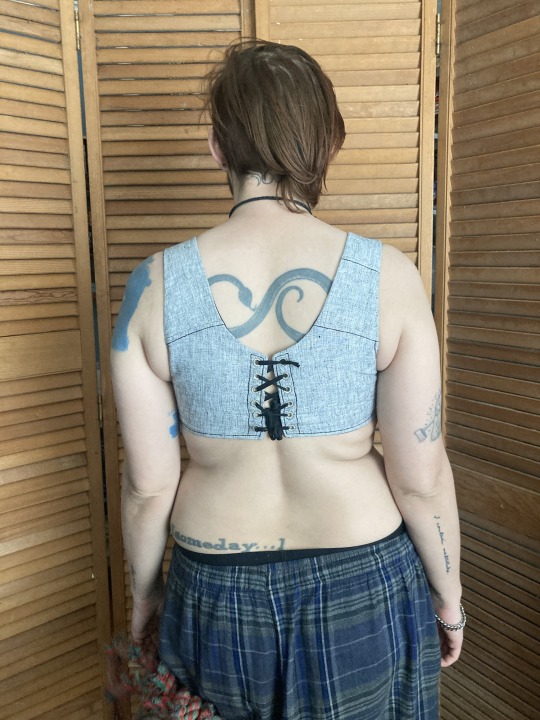
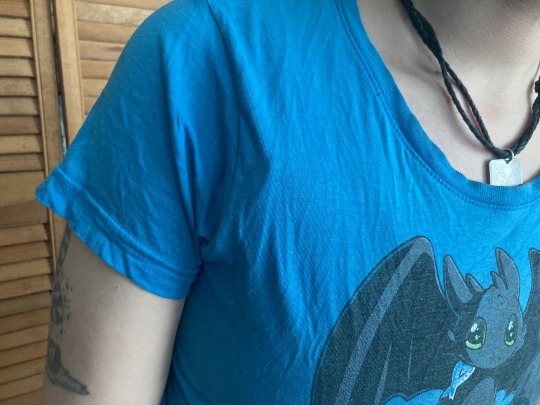
the little ridge where it doesnt lay flat against the shoulder is most visible with just a single t shirt over it. with a flannel or a sweater, it disappears, and by itself, it’s hidden in movement
eta: after dyeing this, i relaced it a bit looser in the back and that gape mainly disappeared. ive decided to leave it in instead of smoothing it with a dart because the loose fabric gives space for my chest to expand when breathing and shapes my silhouette in a way that emphasizes my shoulders
#sewing#trans#trans man#binding#body shaping#cotton#disability accommodations#physical#sensory#eyelets#fusible interfacing#historical fashion#regency#horsehair canvas#lacing#linen#lining#new build#drafted pattern#picture tutorial#piecing is contemporary too#stainless steel#stashbusting#stays#structured garment#treadle machine
1K notes
·
View notes
Text
big news
winter soldier embroidered jacket is finally happening
#ive ripped the sleeve off & added fusible interfacing !!!!!!#now i just need to draw the pattern and start embroidering hehe#its gonna have beads & sequins and its gonna be soooooo pretty#ely.txt#ws jacket
11 notes
·
View notes
Text
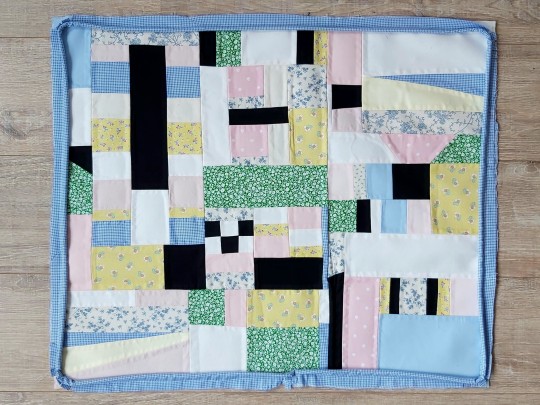

the front side all done now with the patchwork + fusible interfacing at the back to keep the seams in place + piping around the edges. now all that's left to do is add a backside. it's going to be a pillowcase 🦋
#some of the smaller patchwork pieces got scrunkled up when i ironed on the fusible interfacing :/ but oh well#the piping looks rather messy now but i hope that once i've added the backside it will look really tight & clean#sewing#patchwork#quilts#quilting#stuff i make
17 notes
·
View notes
Text

New project! I’m going to make these fabrics into a tote bag (using this pattern). I’m thinking the stripey fabric will be the straps, the ghosts will be the middle fabric (because it’s the heaviest-duty fabric option and the one I have most of), and I have not decided on the other fabrics yet
#fabric#halloween tote bag attempt#this is because I want to make a copper moth themed bag#but i don’t have enough coordinating fabric for the strap#and I promised a friend a fish themed bag but I want to practice first (and also this is the wrong pattern for that)#but halloween fabric should work!#ah hell interfacing. I forgot the interfacing#I think I have some fusible interfacing left?#but I might use quilt batting instead#and just quilt it a bit#maybe I’ll take a break from the bag and finally finish the quilt top#who knows lol
38 notes
·
View notes
Text
sewing so many coasters rn. I can afford 1.5 yards of fabric on sale at the craft store, so everyone who expects gifts from me is getting coasters for christmas. very exciting gift, the gift of table protection.
5 notes
·
View notes
Text

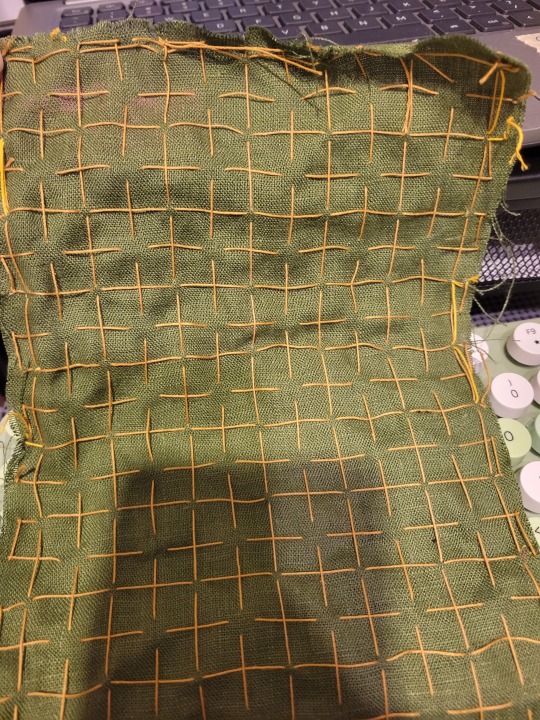
Debating whether I even want to finish this sample, because while this design is very pretty, it's basically all floating threads and I'm much too snag-prone to use this for anything.
#San sews#If I do finish it I'll probably seal the back with fusible interfacing#But it'll still be snaggy from the front
3 notes
·
View notes
Text
when you get creative with the scraps from hemming your pants
10 notes
·
View notes
Text
trudging along in the costume creation process, weather-induced headache and joint pain be damned

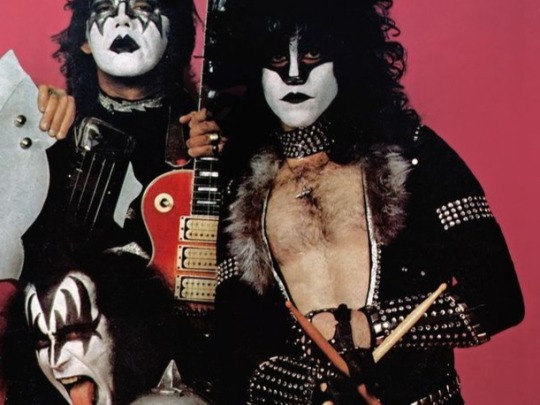
rough pattern for the cuffs, armbands and collar,, inspired by this fox outfit in particular:
---
will I be able to finish everything in time for the concert on Sunday night? no one knows but here's to hoping!
#cuffs will get a bit of fusible interfacing to stay sharp n pointy at the top#everything else gets the fashion fabric + lining fabric treatment after bedazzling is done#i'm putting more effort into this than into most of my cosplays so far lmao i'm insane#robin's sewing adventures#anyway time for dinner. some dessert. a couple stretches to combat the joint pain#and then it's off to bed for another early day tomorrow orz
4 notes
·
View notes
Photo


i will accept modern interfacing for one (1) purpose only: to avoid starching collars. sub-purpose of being amused that the collar can stand up on it’s own is just a bonus.
#sewing#the adventures of sewing goblin#1920s sewing#it was An Adventure to find interfacing that was a) not fusible and b) not polyester#this and the cuffs put my shirt into the 'complete but buttons' pile
3 notes
·
View notes
Text
Remember when I said I will have zero spare time next month and probably shouldn't be participating in #Capetember 2022 but I was probably going to do it anyway?
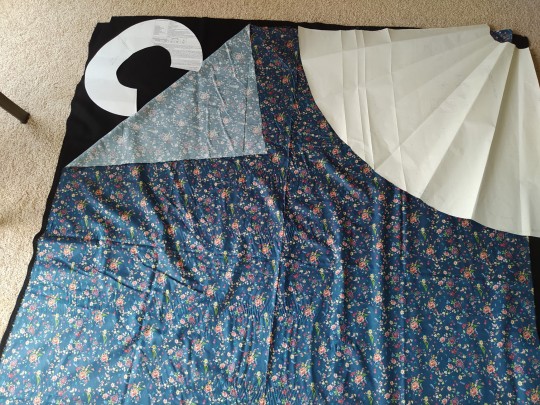
Well this is the current state of my living room...
Yep, I'm going to try to self-draft and hand sew an entire cape, with zero prior cape making experience. While I will be working 80 hours a week running the inpatient hospital service, starting next week and for the next 5 weeks 🤦♀️
#tricia sews (kind of)#sewing#hand sewing#who put me in charge of me?#why did i let myself talk myself into this?#(yes i draft my patterns on old junk mail don't judge me)#the quarter circle you see there is my old circle skirt pattern that i drafted on gift wrap#the c shaped thing is the yoke that i self drafted and didn't make a mockup for#i hate doing mockups because i have to hand sew everything#and i based the yoke off the two edwardian blouses that i drafted recently#so i know it will fit fine#i got the black wool at a great discount#and the blue floral fabric is some cotton sateen that I'd used to make a birthday present for a friend#i still have a bunch of it leftover and i think it'll be enough for the lining#i think I'm going to put fusible interfacing into the yoke because I don't know which grain to cut it on#not in love with the fact that none of the edges of it will match with the straight grain
7 notes
·
View notes
Text
using my knowledge of suit construction to become insufferable
#found a great brocade last month and i’m trying to find a reasonable jacket pattern#picked one up today. possibly didn’t read the back as thoroughly as i should have but *even so*#its only interfacing is fusible and inside the collar.#no canvas. no lining.#i understand that sometimes jackets are made unlined for ease of tailoring#sure#but no canvas??#one piece of fusible interfacing?#you’re going to compromise the structure!!#it’s not even half-canvas! why don’t i just cut the brocade into a sack and wear that!#(the pattern was $2 on sale so i’ve not lost anything. just comically frustrated)
3 notes
·
View notes
Text
fucking help tumblr’s shown me three ads for fusible interfacing in a row. no other topics, only heat bond
#I DO VERY MUCH DESIRE FUSIBLE INTERFACING#hello world#embroidery#but that means i’m doing projects requiring fusible interfacing#which is certainly…. a step#hmmmmmmmmmmmmmmmm.
4 notes
·
View notes
Text
i made a little qingxin patch to cover up a stain on one of my shirts :3
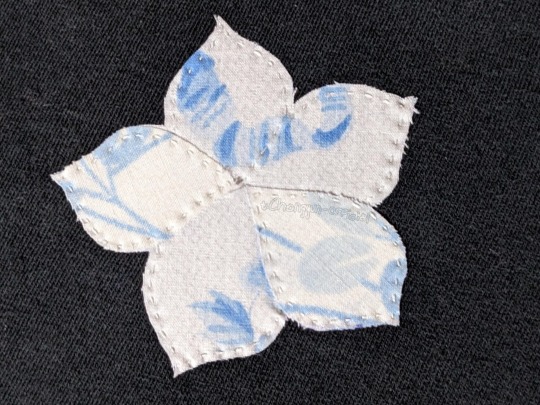
#asterworks#i didn't have any fabrics with green on white so i went for blue on white instead#i used. fusible interfacing i think it's called?#i thought it would stop it from fraying but it didn't really but it did keep the patch in place while i was sewing so that was good :3#originally i was gonna machine sew it but it's only 3in and i didnt want to deal with my machine tbh
0 notes
Text
deciding to embroider on black fabric is already a huge mistake because pattern transfer my beloathed
#no i do not have ~white carbon transfer paper~ i have a window and a pencil#also no i do not have fusible interfacing to spare what do i look like?#like someone who woke up before dawn and whose brain wouldn't stop thinking about project?#at times planning wildly at times saying it's a waste of time?#and who has since spent the whole day#and not had lunch yet#(but that was because simply breathing in my mother's direction made her yell at me so i Noped)#because i've been working on pattern transfer from computer to paper?#because i do. i do look like that.#my hands are so tired#i am so hungry#randomness
1 note
·
View note
Note
are you still looking for suggestions on what patterns to work on next :D?? if so, would you be interested in making a coffee cup with legs?? (sort of like the jellycat amuseables)
I am absolutely looking for suggestions of what to make next! And a coffee cup with legs sounds adorable, and like it would go really well with the teapot I made last year
#ask away!#milfspiggy#thanks! I think I've seen the one you're talking about#I'll have to give it some thought to figure out how to make the shape and not have the 'coffee' escape#fusible foam interfacing might work but I don't particularly like working with it#hmmm....more thought is needed lol
4 notes
·
View notes
Text
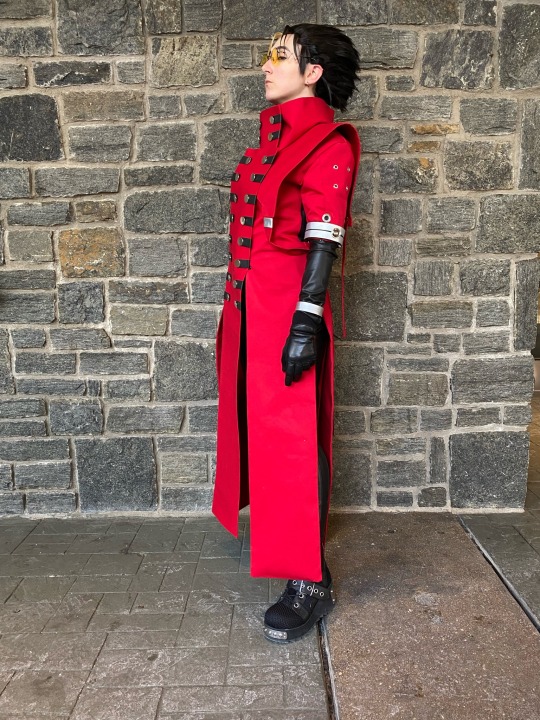
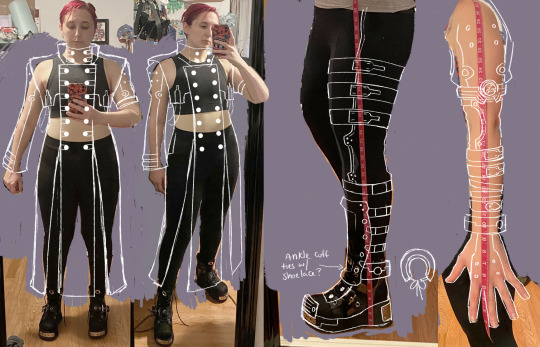
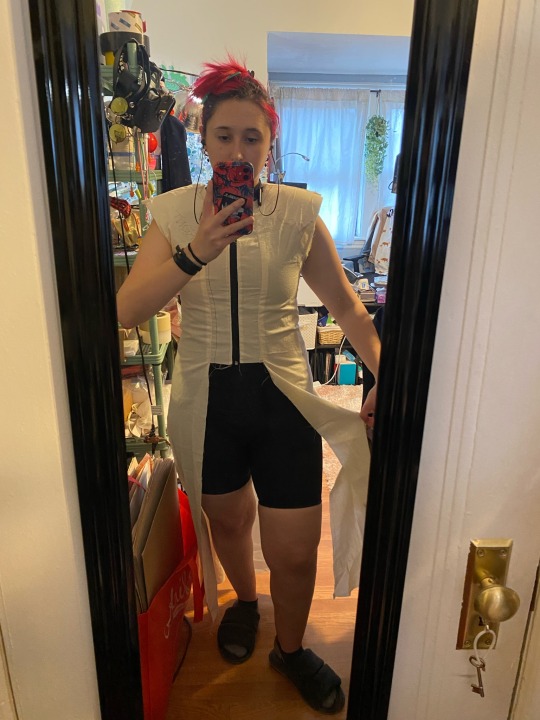
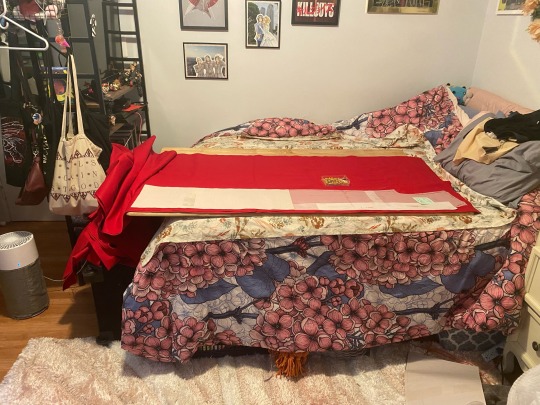
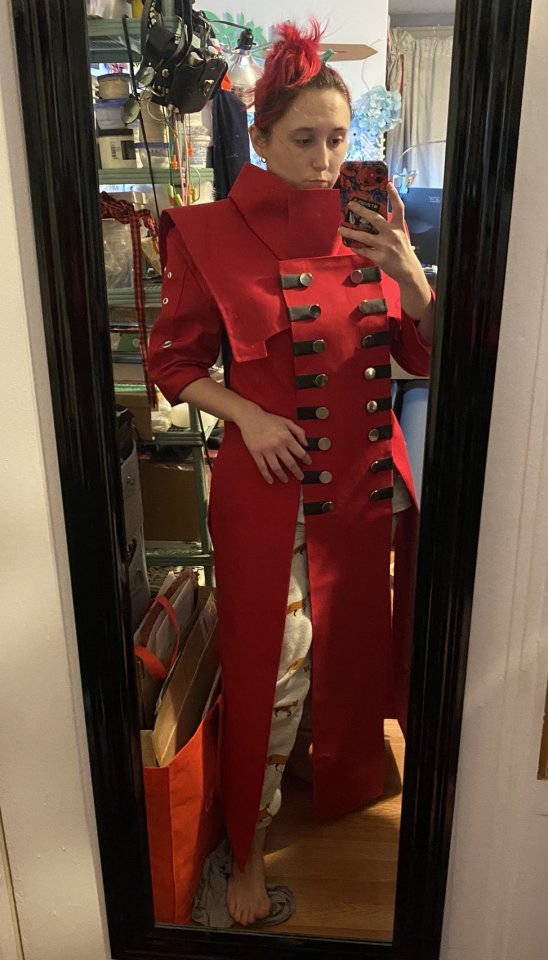
I made a volume 10 trimax vash cosplay for MAGfest and I am SO proud of how it came out :) Some process stuff below! Warning for image and text heavy.
Truthfully this cos is only about 85% complete—I’d purchased a bunch of hardware to really go in on a volume accurate version of his undersuit and belts, but simply ran out of time before the con. It was the first cosplay I’ve sewn since 2017 and the first wig styling I’ve done since 2020, so I’m not gonna beat myself up too much!
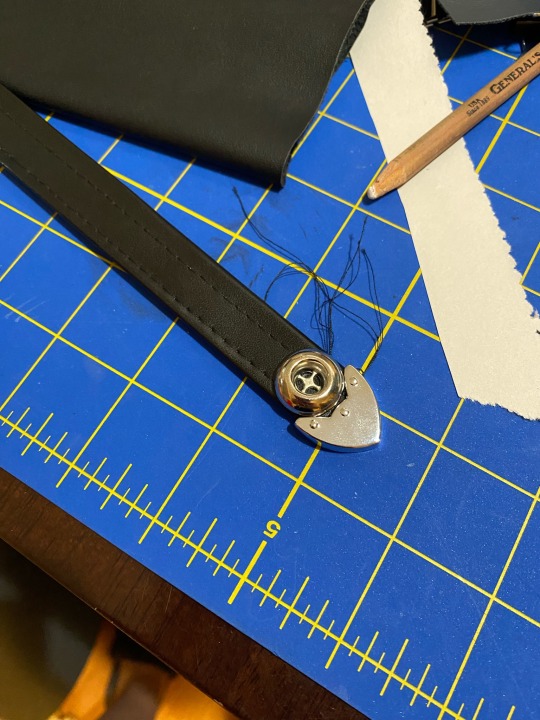
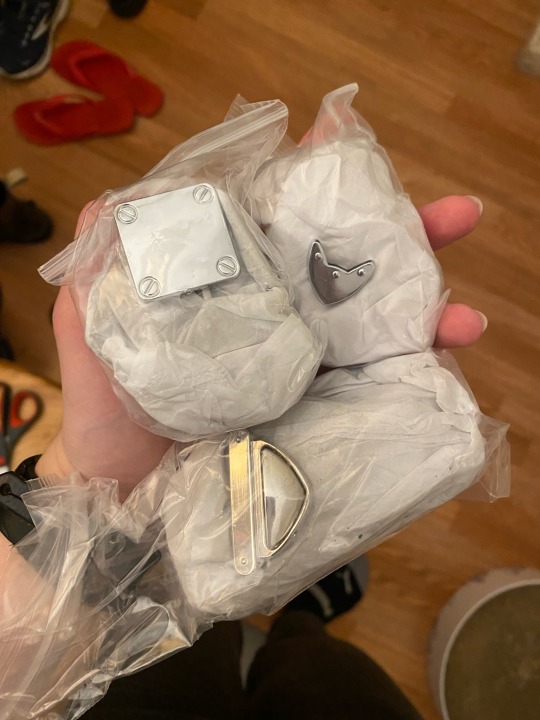
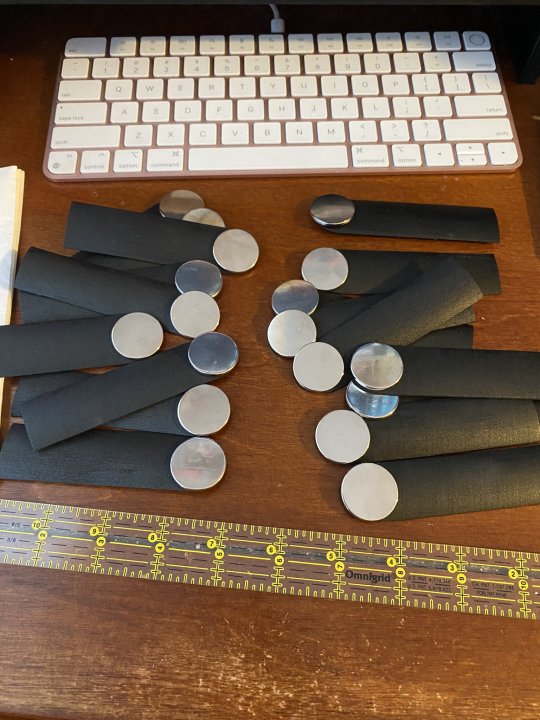
(This is all purse hardware off Etsy and some buttons from M&J trim)
This was my first time ever making a muslin mock-up, but I knew it was going to be necessary to get the coat to lay the way I wanted it to. I really wanted to try and create proportions that elongated the legs/torso and widened the shoulders by placing the coat tail splits appropriately and raising up the shoulders with some padding. And of course arm and leg details that I’ll get to someday lol.
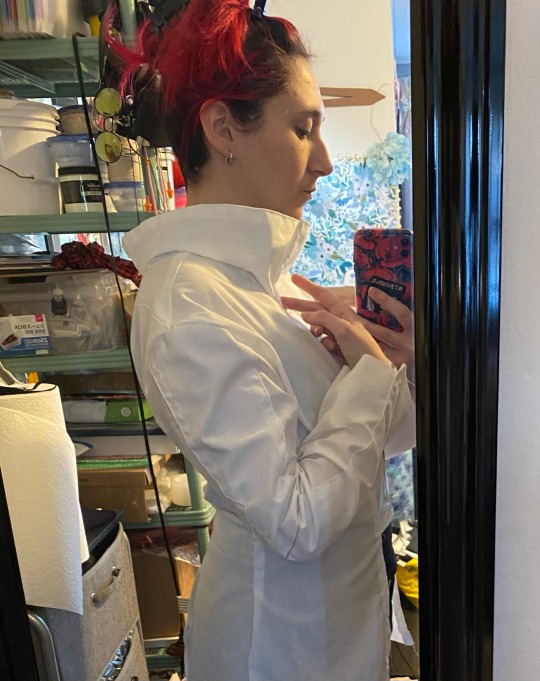
I created two mock-ups. One of basic muslin that helped me go from an existing pre-bought pattern to something more Vash-shaped, then a second one on a slightly sturdier scrap fabric with my finalized torso proportions with padding so I could accurately pattern out the sleeves and collar.

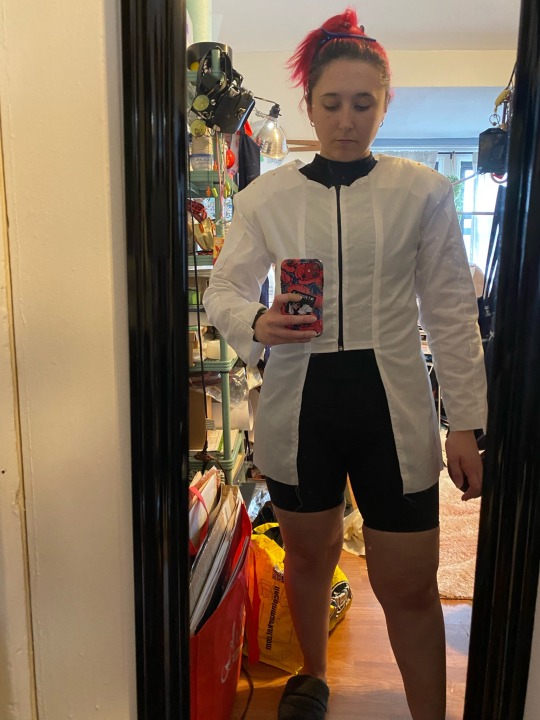
I was tracing my pattern pieces onto newsprint and vellum as I went, so once all of those were finalized, it was time to cut my fabric! I used a heavy cotton twill from B&J fabrics and two kinds of fusible interfacing from Mood (I’m spoiled by being local to the fashion district these days). A smarter person would have bought a thinner fabric to line the inner torso with, but I did not feel like getting that complicated with my first ever muslin-drafted AND lined project, so I simply cut double of every pattern piece in order to create a lining.
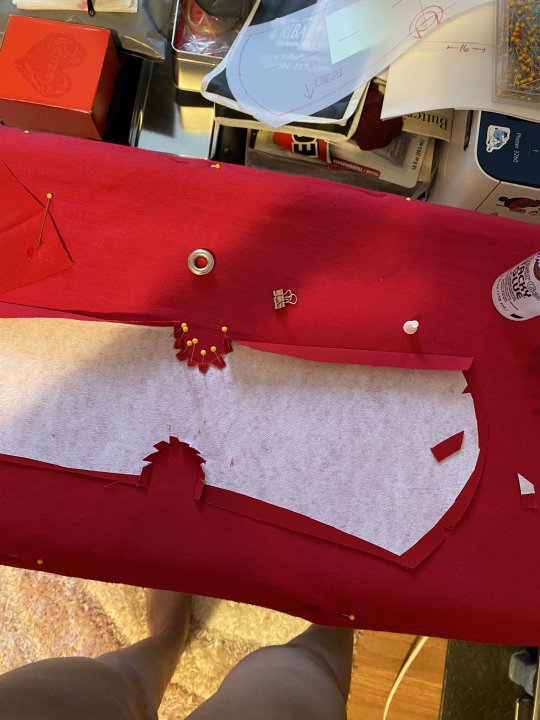
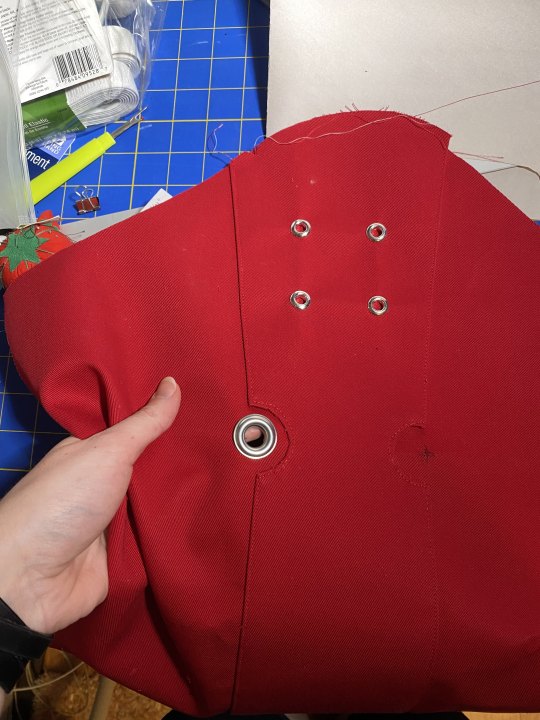
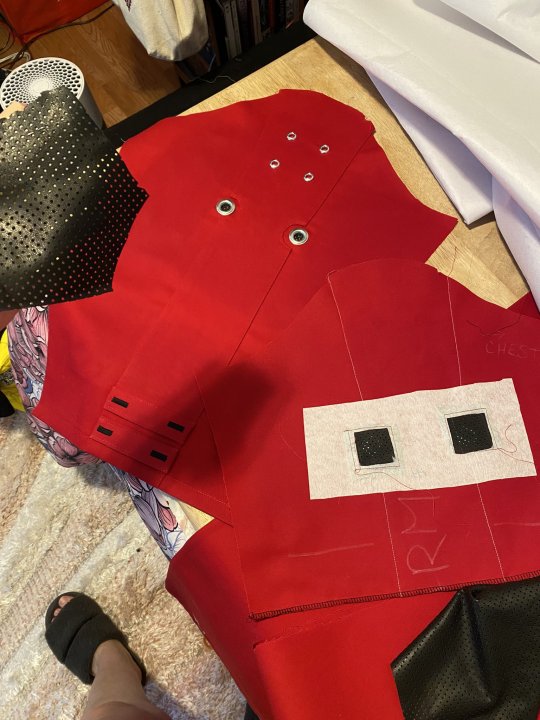
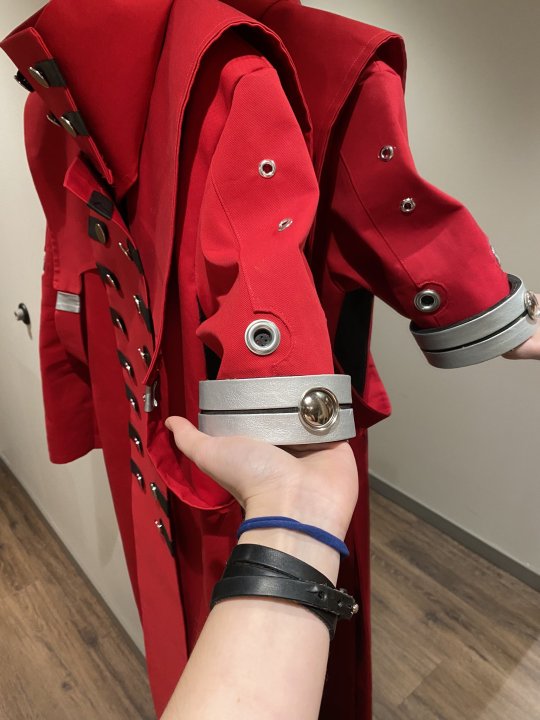
Sleeves were done by interfacing and cutting into a top panel, carefully snipping at the cutout portions, ironing and fabritacking in place, and then top stitching the whole piece to the main sleeve. I later added some leather backing squares and interfacing behind the larger eyelets for aesthetic while keeping the ventilation in tact. Ideally in the future I'll also add a strip of fabric to the gun arm that creates a slight bunching effect since that sleeve is a little more ruffled over the cuff. Photos below also include three shoulder pads pinned together on each shoulder, but I ended up forgetting not using them on my final wear.

Unfortunately at this point I was approaching con time, so I started cutting some corners that I made easily replaceable for future upgrades. The coat tabs are just painted craft foam cut to the size of the buttons, tacked in place where the button pierces through the tab and where it wraps around the edge of the front panel. The straps that attach to the lapel and wrap under the arms also were just decorated with some silver trim instead of hardware, and I skipped the side button panels at his hips for pattern-making simplicity and time. They'll be added later! I'd also love to do some weathering, but don't think I can quite bring myself to riddle the coat tails with bullet holes as some people do haha.
Gun arm attachment was also a quick and dirty addition, just some vinyl trim on eva foam attached with contact cement and a decorative button. First time working with contact cement somehow, but I look forward to also being able to upgrade this at a later date to a more accurate shape with the full belt attachments!
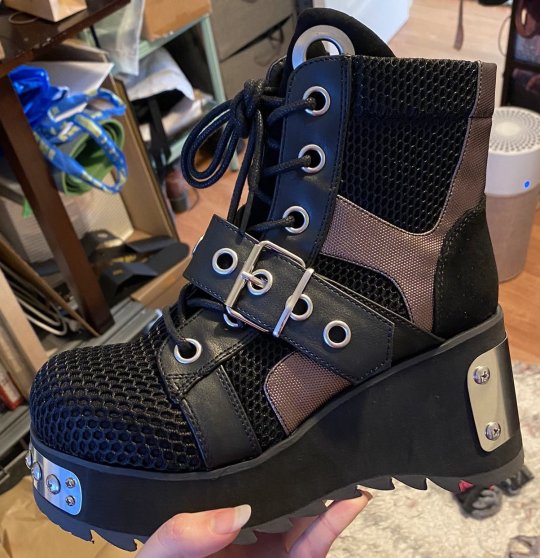
I was also hoping to update the shoes a bit by making some boot covers for them and rub-n-buffing the soles to disguise the platform a bit, but I love my pick for the cleat-look that Vash has! Some good ol' Demonias in classic vash fashion :)
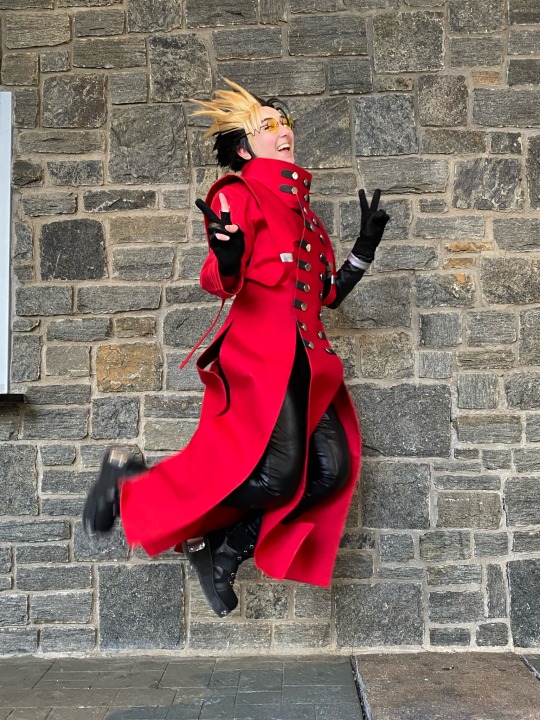
Last but not least: The Wig. My pride and joy.
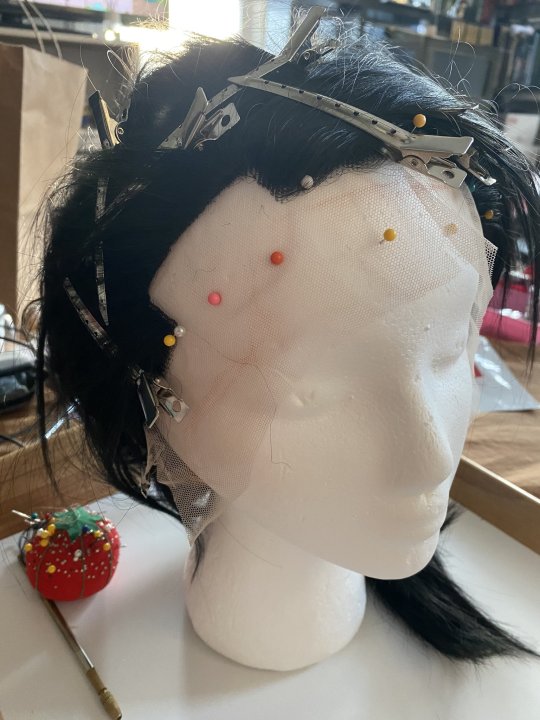
I got lucky enough to nab an Arda sale, I think right before Halloween, and picked up the Morpheus lace front in black, along with some extra wefts in pale blonde. (I also bought a whole separate pale blonde Morpheus wig, boldly thinking I could swing a normal trimax vash wig lol. It made for a convenient Eriks wig in the mean time.)
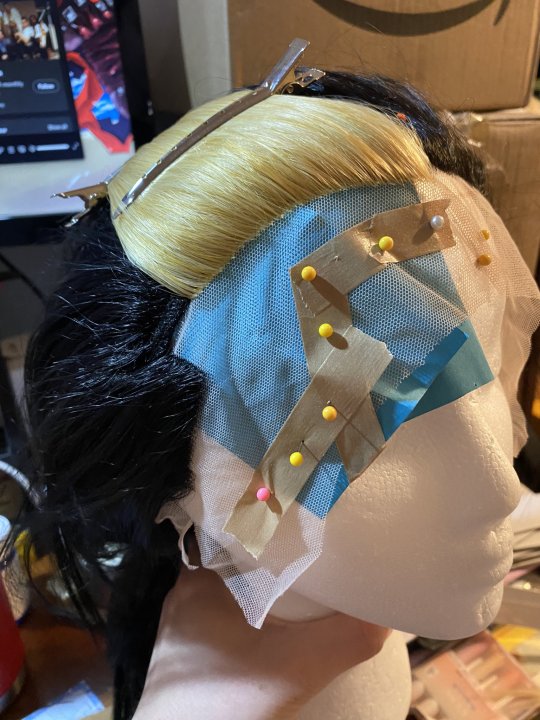
Since I was aiming for the end of volume 10 post-Wolfwood death look, I started by trying on the wig, roughly tracing out my hairline, then gently unweaving that portion of black in order to re-ventilate it with blonde.
After I replaced that whole strip of plucked hair, I tried on again to finalize where I needed to ventilate to cover my own hairline, and completed my outline with both blonde and brown-black wefts (i had them on hand lol). All in all, I ventilated more than 4 square inches of blonde, and at least a solid centimeter extension of the black hairline across the whole front of the wig. Probably close to 30 hours of work in the ventilating alone, but I am a little slow since I haven't ventilated in a few years and didn't keep clear track of time.
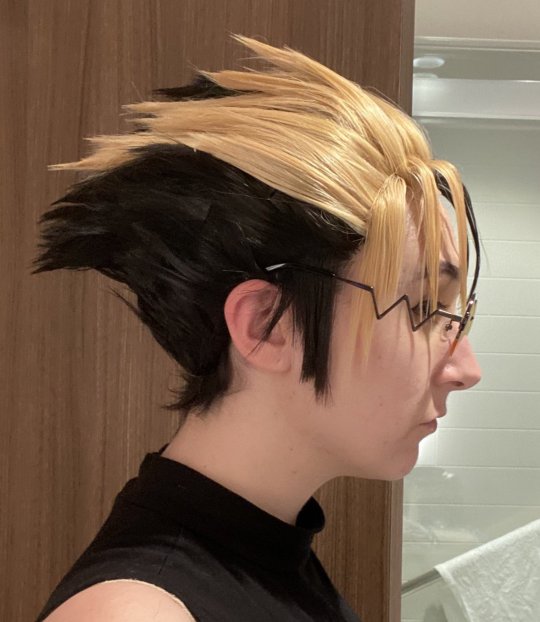

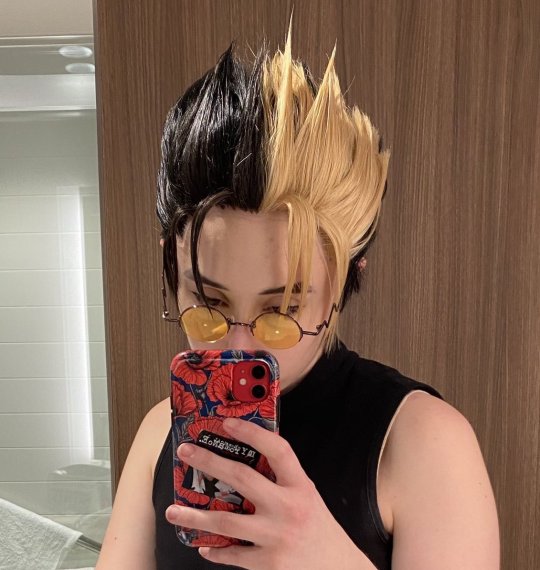
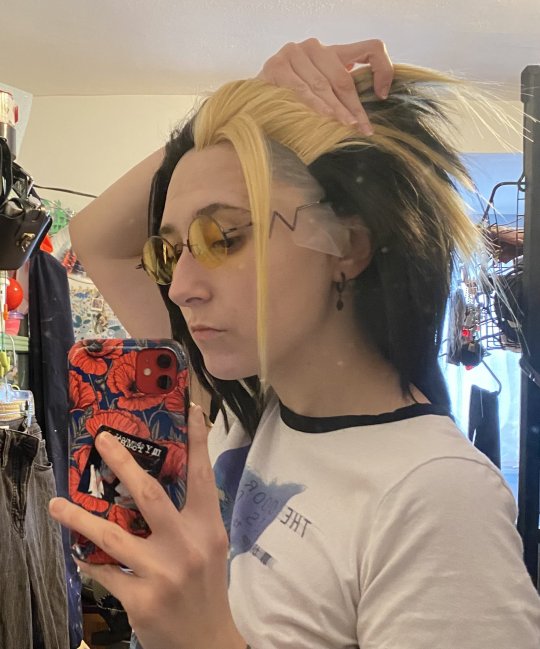
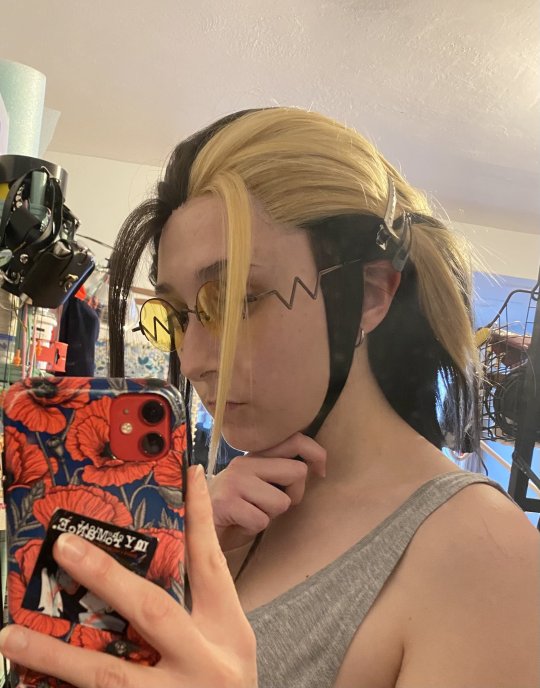
If there's one thing I should be used to by now about Arda wigs, they are THICK. There is zero teasing in this wig. None. Just got2b, a blowdryer, and a prayer. And a good load of bobby pins. The wig was also sadly a last minute hotel room mad dash, and I do hope to restyle it under less duress, but I do think I successfully achieved the Trimax swoop and am very proud of it! It was unbelievably windy on the walk from our hotel room to MAGfest, so the photos in the start of this post show a bit more droop than my initial styling, but I think I'll be able to touch things up next wear.
And of course, shoutout to my partner for gifting me the official glasses for Christmas :) And thank you to my roommates who barely saw me for a month and a half except for when I needed help with a hem lol.
All in all, I am unbelievably proud of this cosplay, I can't wait to put some more love into it and wear it again!
157 notes
·
View notes
Last Seen Blogs
changetyre
PitStop
turbinepaints
turbinedivinity paints and makes noise

toutplacid
tout placid
glorianaregali
ɢʟᴏʀɪᴀ ʀᴇɢᴀʟɪ

moonman-09
Untitled