#hand sewing
Text
yk when you see someone share a finished handmade item that they clearly spent a lot of time and money on and it's just. The absolute tackiest thing you have seen in your life. And then you ask yourself why someone would waste all those resources on such an eyesore.
(no, of course you can't relate to that because you're a much nicer person than me)
In any case.
BEHOLD!
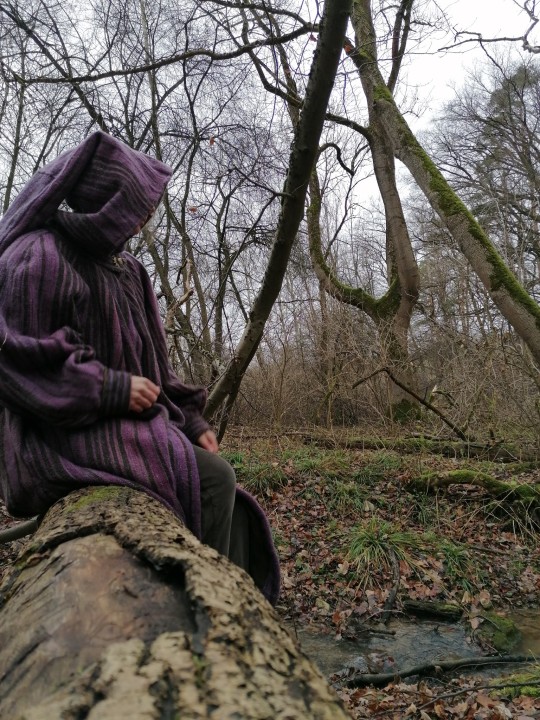
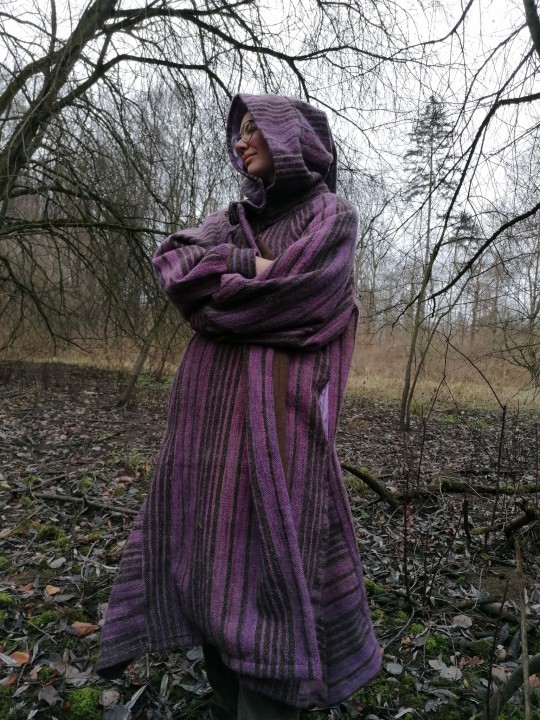
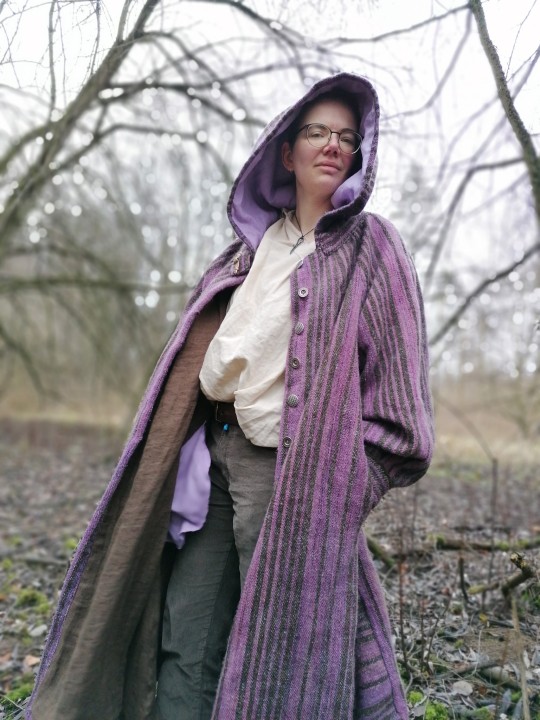
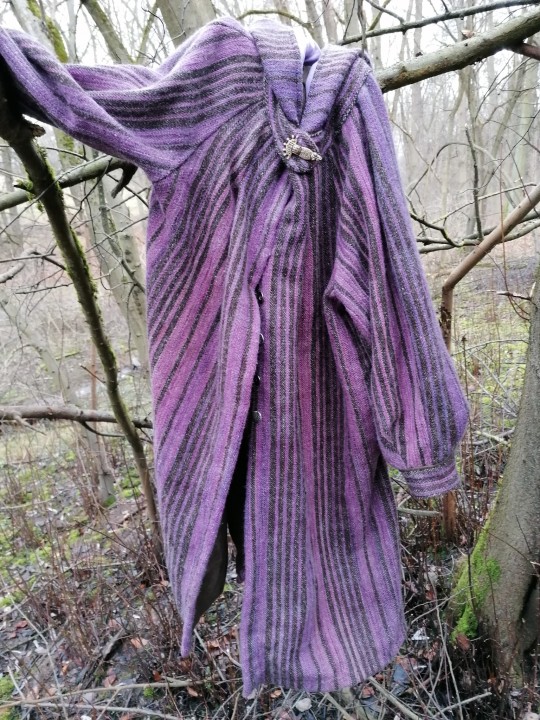
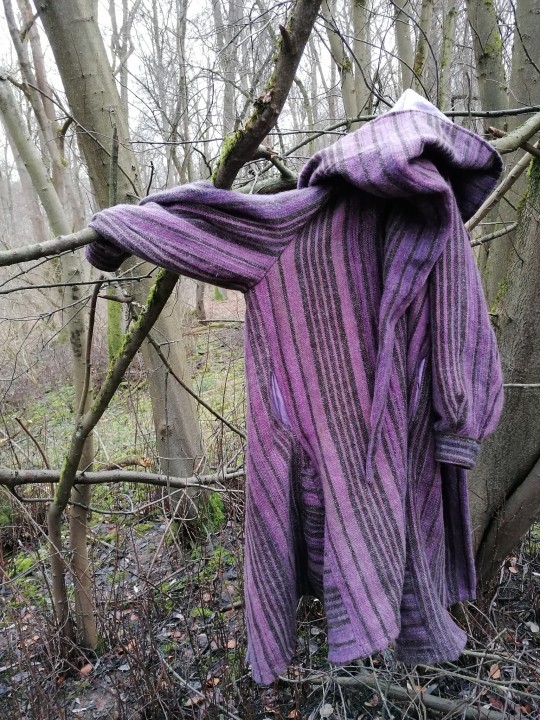
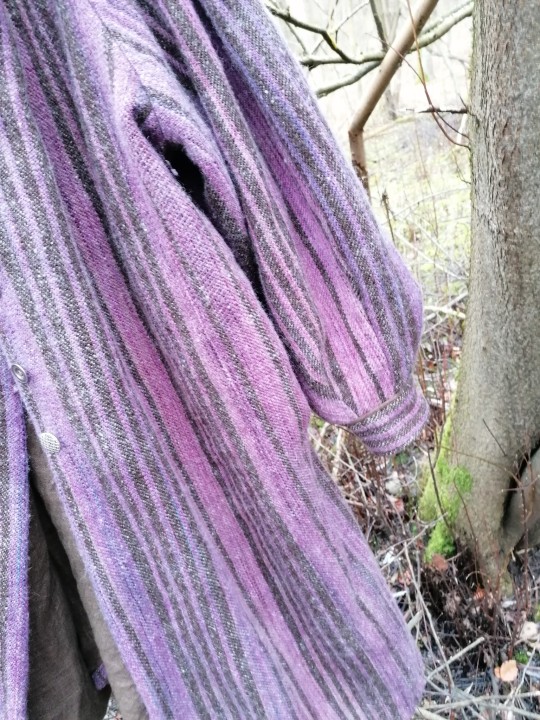
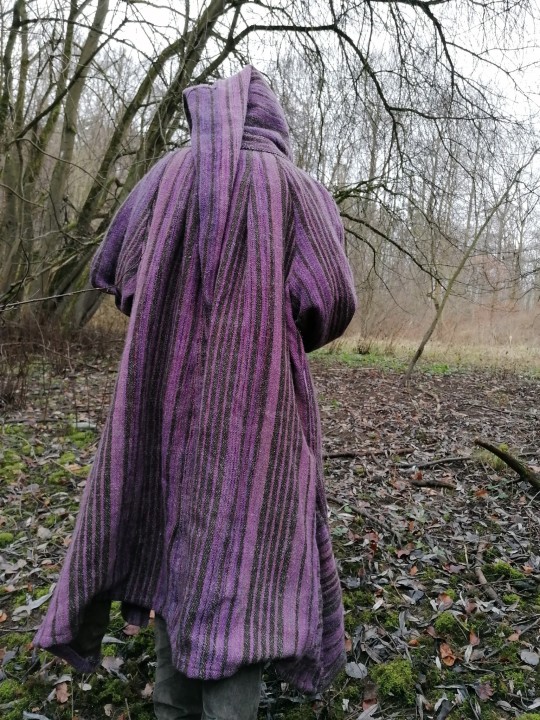
A wool coat!
The top fabric is handwoven and handspun, the whole thing is sewn by hand, too.
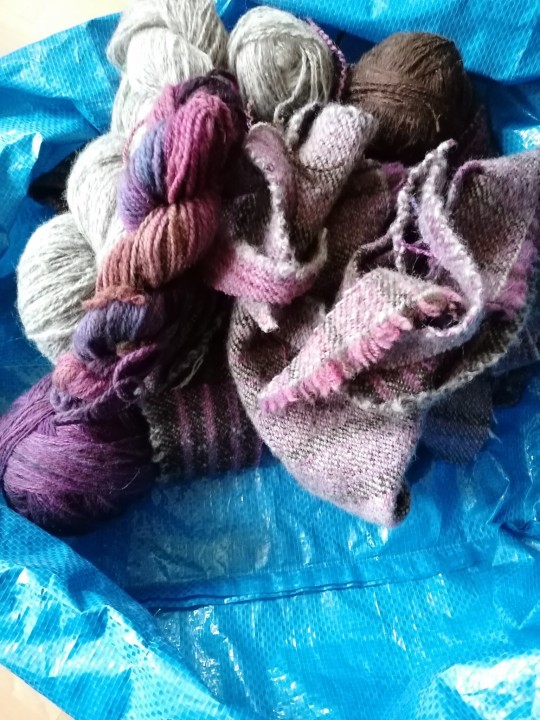
Leftovers. Barely anything, all things considered, which is very satisfying.
This thing took me well over 3 years to make, on and off. And now I'm done.
Thank you for your attention.
#carry on XD#i hope y'all realize that when I say tacky it's with nothing but love in my heart#yes it's ugly. that's the whole point.#everyone should have an item in their wardrobe that will get Looks and raised eyebrows#it's good for you#anyway can't believe I'm done! this is a huge boost to my crafting hubris I CAN DO ANYTHING#wizard bathrobe adventures#handweaving#handspinning#hand sewing#look what i made#crafts#overall I'm happy with it even though there's. things that aren't ideal#the pockets are set a bit too low#and i should have made it a tiny bit longer not much but maybe like 5cm#anyway#overall it's a nice coat i think#Now That's What I Call Slow Fashion
4K notes
·
View notes
Text
there is something very beautiful about the irresistible human desire to create
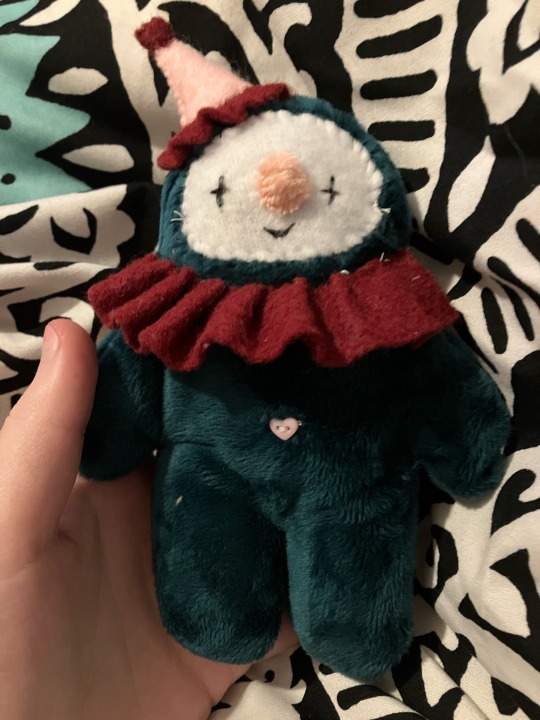
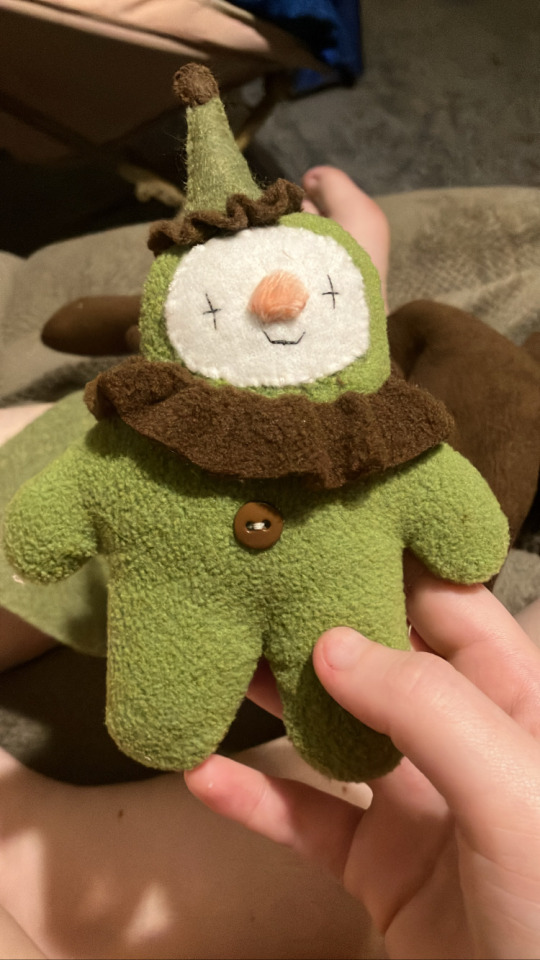

clowns like these will be on etsy very soon <3
UPDATE: etsy fucking banned me lol. currently selling these via cashapp within the united states only
#clowns#clown#clown plush#clown posting#plushies#sewing#hand sewing#they have names#because there is also something beautiful about#the human desire to name and pack bond with anything and everything
4K notes
·
View notes
Text
We all know existential dread, but I propose (and please tell be if this is already a thing) existential awe.
Sometimes when I handsew or weave or something I get this immense feeling of connection to humanity. People for thousands of years all over the world have sat down and sewn a garment. Archeologists find needles and awls all the time. When I'm tablet weaving I have the same frustration at the arduous process of threading the tablets as the person 2600 years ago must have felt when they made the bands that were found in a celtic man's burial mount not far from my home. They probably also felt their back after a few hours of this.
#thought of the day#existential musings#hand crafted#handmade#hand sewing#hand weaving#tablet weaving
3K notes
·
View notes
Text
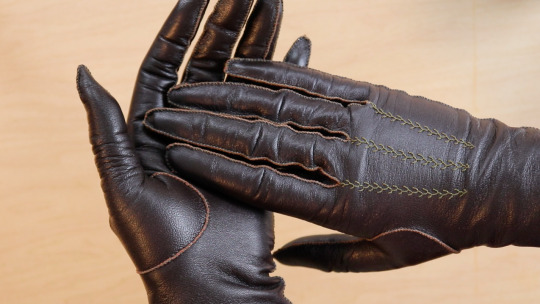
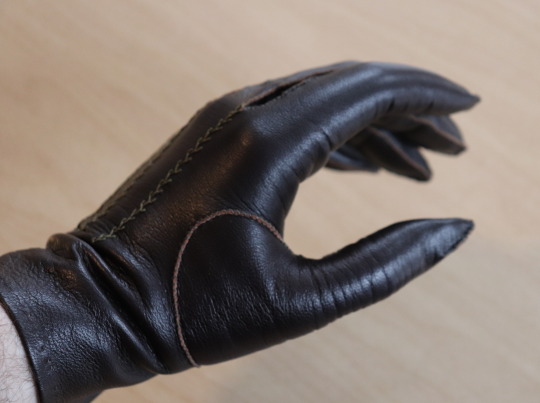


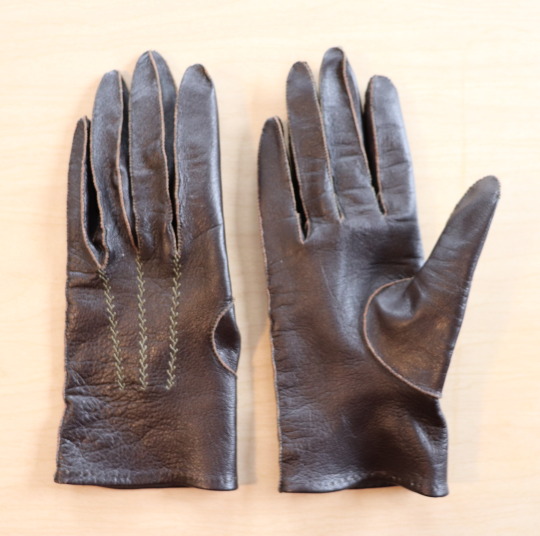
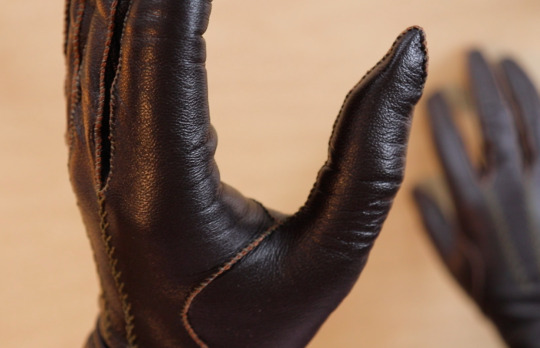
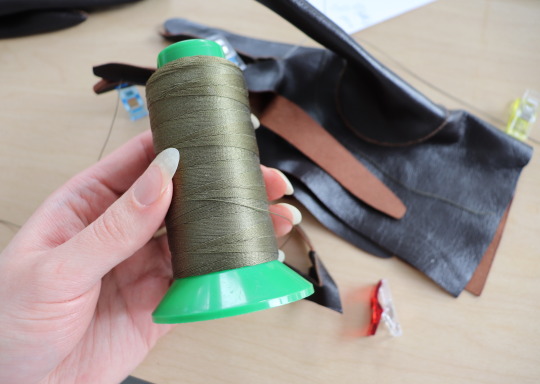

Finished another pair of gloves last week, this time in dark brown leather from ItalianSkins and sewn up with some olive green silk thread that was a very lucky thrift store find. (It was in a mixed baggie and I didn't know it was silk until I got home!)
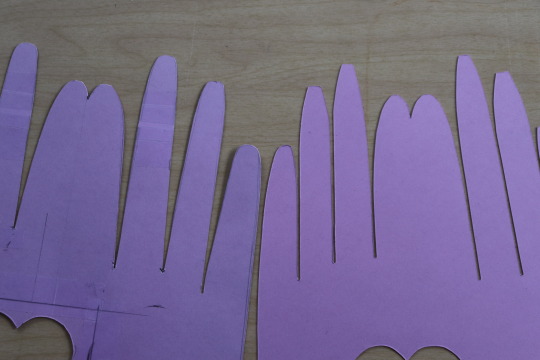
In my glove video I mentioned wanting to re-draw my pattern so the fingers are angled in more tightly, and so the thumb piece is longer, and I did that for these. The thumb fits much better, and the bases of the fingers are no longer too loose.
I also tried the straighter style of fourchettes, but didn't like them as much as the V shaped ones. I think the curved edges put a bit too much material onto the backs of the fingers and made them wrinklier. (Though this particular leather is not the stretchiest, so it may be better with a stretchier one.)
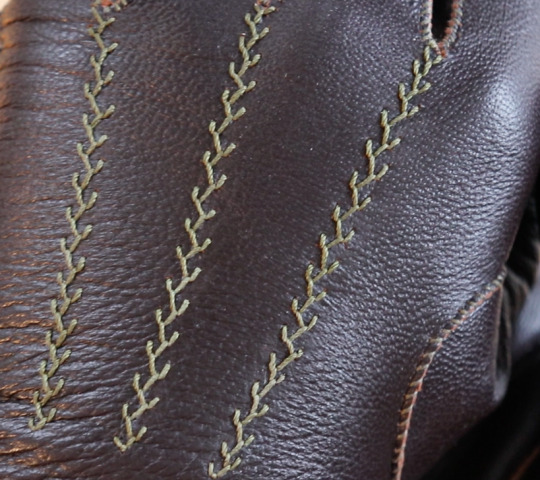
I did 3 rows of feather stitch on the back of the hand, since I'd seen that on an extant pair and thought it looked nice. I used a regular needle for that part because I was worried a leather needle would damage the thread.
1K notes
·
View notes
Note
Any tips on learning to make buttonholes? I've been putting it off for.... *checks notes* like three years.... but better late than never and all that. I don't have any fancy machines so I gotta do it by hand but that seems right up your alley.
Thanks!
It IS up my alley, yes, I do most of my buttonholes by hand!
I'm actually part way through filming an 18th century buttonhole tutorial, but I expect it'll be a few more weeks before I finish that and put it on the youtubes, so in the meantime here's the very very short version. (The long version is looking like it'll probably be about 40 minutes maybe, judging by how much script I've written compared to my last video?)
Mark your line, a bit longer than your button is wide. I usually use a graphite mechanical pencil on light fabrics, and a light coloured pencil crayon on dark ones. (I have fabric pencils too, but they're much softer and leave a thicker line.)
You may want to baste the layers together around all the marked buttonholes if you're working on something big and the layers are shifty and slippery. I'm not basting here because this is just a pants placket.

Do a little running stitch (or perhaps a running backstitch) in fine thread around the line at the width you want the finished buttonhole to be. This holds the layers of fabric together and acts as a nice little guide for when you do the buttonhole stitches.

Cut along the marked line using a buttonhole cutter, or a woodworking chisel. Glossy magazines are the best surface to put underneath your work as you push down, and you can give it a little tap with a rubber mallet if it's not going through all the way.

I'm aware that there are some people who cut their buttonholes open using seam rippers, and if any of them are reading this please know that that is abhorrent behaviour and I need you to stop it immediately. Stop it.
Go get a buttonhole cutter for 10 bucks and your life will be better for it. Or go to the nearest hardware store and get a little woodworking chisel. This includes machine buttonholes, use the buttonhole cutter on them too. If you continue to cut open buttonholes with a seam ripper after reading this you are personally responsible for at least 3 of the grey hairs on my head.
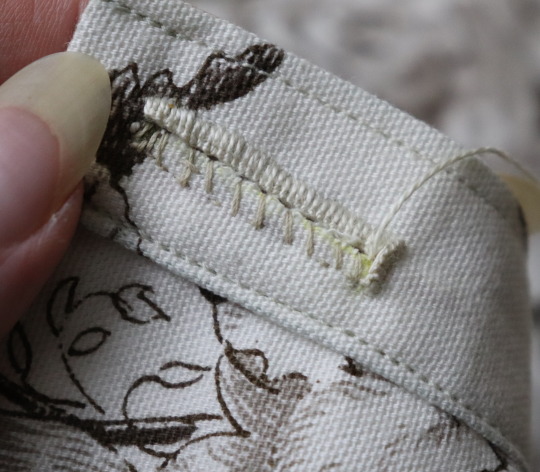
Do a whipstitch around the cut edges, to help prevent fraying while you work and to keep all those threads out of the way. (For my everyday shirts I usually do a machine buttonhole instead of this step, and then just hand stitch over it, because it's a bit faster and a lot sturdier on the thin fabrics.)

I like to mark out my button locations at this point, because I can mark them through the holes without the buttonhole stitches getting in the way.
For the actual buttonhole stitches it's really nice if you have silk buttonhole twist, but I usually use those little balls of DMC cotton pearl/perle because it's cheap and a good weight. NOT stranded embroidery floss, no separate strands! It's got to be one smooth twisted thing!
Here's a comparison pic between silk buttonhole twist (left) and cotton pearl (right). Both can make nice looking buttonholes, but the silk is a bit nicer to work with and the knots line up more smoothly.

I've actually only used the silk for one garment ever, but am going to try to do it more often on my nicer things. I find the cotton holds up well enough to daily wear though, despite being not ideal. The buttonholes are never the first part of my garments to wear out.
I cut a piece of about one arm's length more or less, depending on the size of buttonhole. For any hole longer than about 4cm I use 2 threads, one to do each side, because the end gets very frayed and scruffy by the time you've put it through the fabric that many times.
I wax about 2cm of the tip (Not the entire thread. I wax the outlining/overcasting thread but not the buttonhole thread itself.) to make it stick in the fabric better when I start off the thread.
I don't tend to tie it, I just do a couple of stabstitches or backstitches and it holds well. (I'm generally very thorough with tying off my threads when it comes to hand sewing, but a buttonhole is basically a long row of knots, so it's pretty sturdy.)

Put the needle through underneath, with the tip coming up right along that little outline you sewed earlier. And I personally like to take the ends that are already in my hand and wrap them around the tip of the needle like so, but a lot of people loop the other end up around the other way, so here's a link to a buttonhole video with that method. Try both and see which one you prefer, the resulting knot is the same either way.


Sometimes I can pull the thread from the end near the needle and have the stitch look nice, but often I grab it closer to the base and give it a little wiggle to nestle it into place. This is more necessary with the cotton than it is with the silk.
The knot should be on top of the cut edge of the fabric, not in front of it.

You can put your stitches further apart than I do if you want, they'll still work if they've got little gaps in between them.
Keep going up that edge and when you get to the end you can either flip immediately to the other side and start back down again, or you can do a bar tack. (You can also fan out the stitches around the end if you want, but I don't like to anymore because I think the rectangular ends look nicer.)
Here's a bar tack vs. no bar tack sample. They just make it look more sharp, and they reinforce the ends.

For a bar tack do a few long stitches across the entire end.

And then do buttonhole stitches on top of those long stitches. I also like to snag a tiny bit of the fabric underneath.

Then stick the needle down into the fabric right where you ended that last stitch on the corner of the bar tack, so you don't pull that corner out of shape, and then just go back to making buttonhole stitches down the other side.
Then do the second bar tack once you get back to the end.

To finish off my thread I make it sticky with a bit more beeswax, waxing it as close to the fabric as I can get, and then bring it through to the back and pull it underneath the stitches down one side and trim it off.


In my experience it stays put perfectly well this way without tying it off.
Voila! An beautiful buttonholes!


If you want keyhole ones you can clip or punch a little rounded bit at one end of the cut and fan your stitches out around that and only do the bar tack at one end, like I did on my 1830's dressing gown.

(I won't do that style in my video though, because they're not 18th century.)
Do samples before doing them on a garment! Do as many practice ones as you need to, it takes a while for them to get good! Mine did not look this nice 10 years ago.
Your first one will probably look pretty bad, but your hundredth will be much better!
Edit: Video finished!
youtube
And here's the blog post, which is mostly a slightly longer version of this post.
#ask#buttonholes#sewing#hand sewing#sewing tutorial#I've been procrastinating on the video this week#I want it done! I don't want to work on it I want new projects! I want to cut out more gloves!#currently forcing myself to do the last few buttonholes on these pants and then maybe I can cut out new gloves? as a treat?#but I hope I get some filming done tomorrow too
3K notes
·
View notes
Text

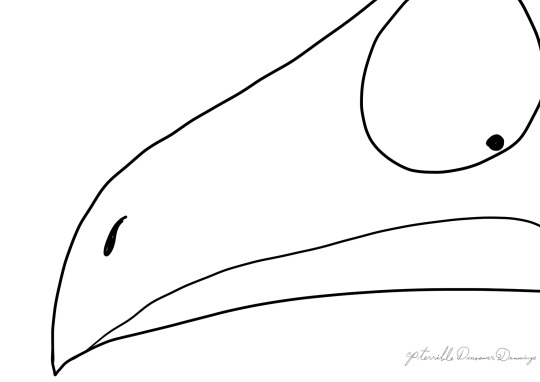
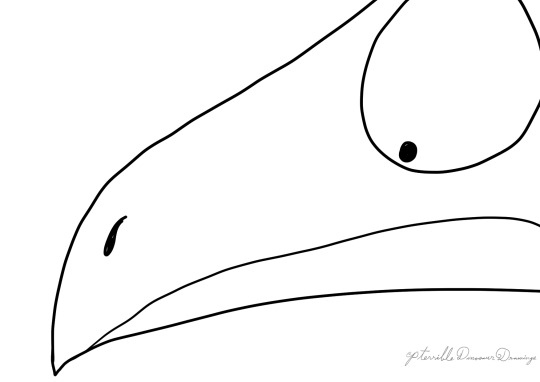
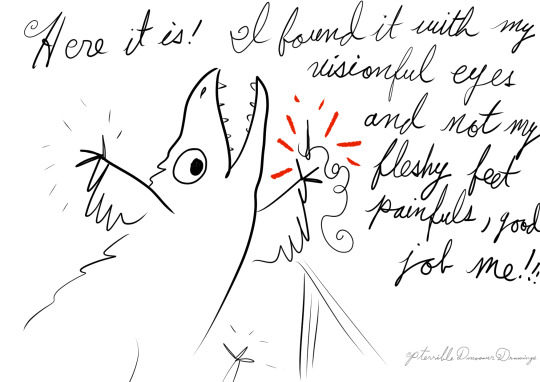
triumphant sewing dinosaur.
7K notes
·
View notes
Photo
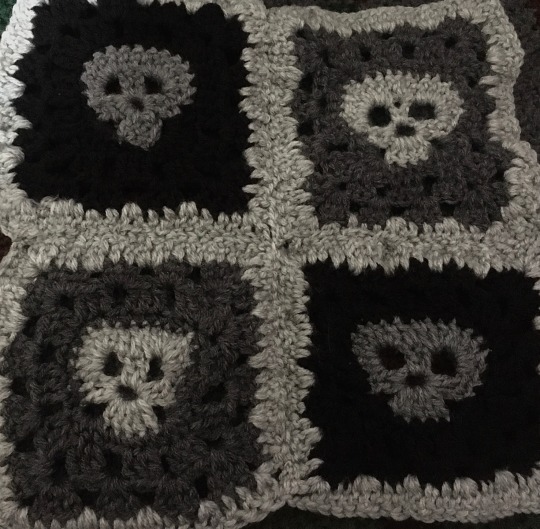

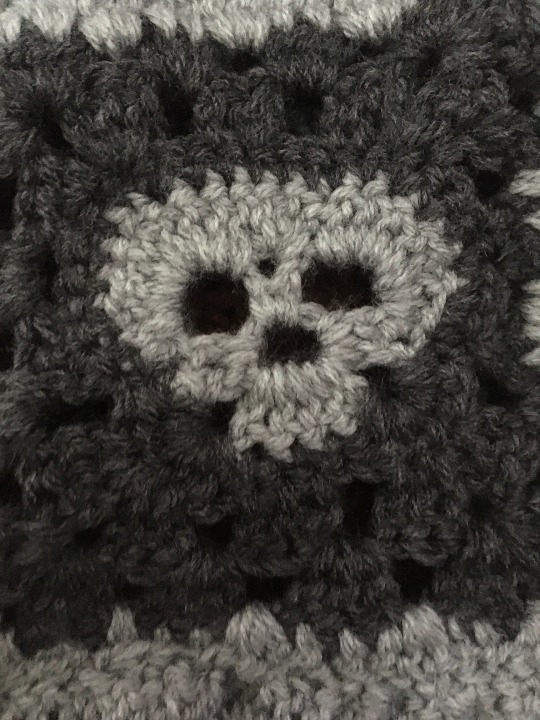
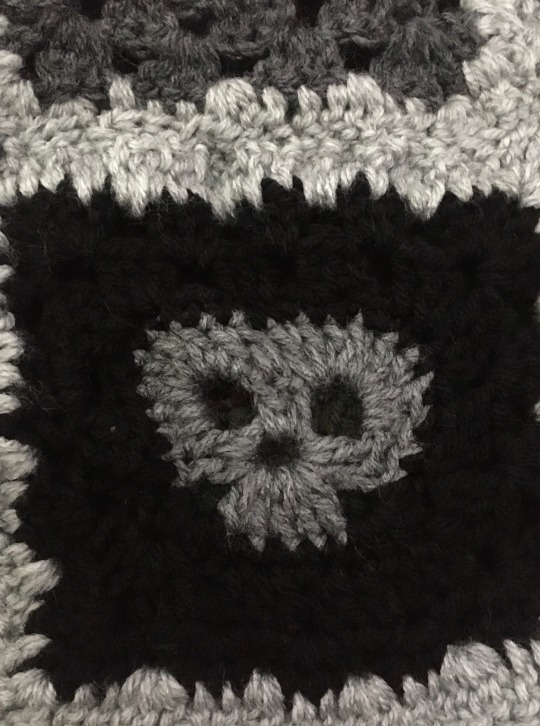

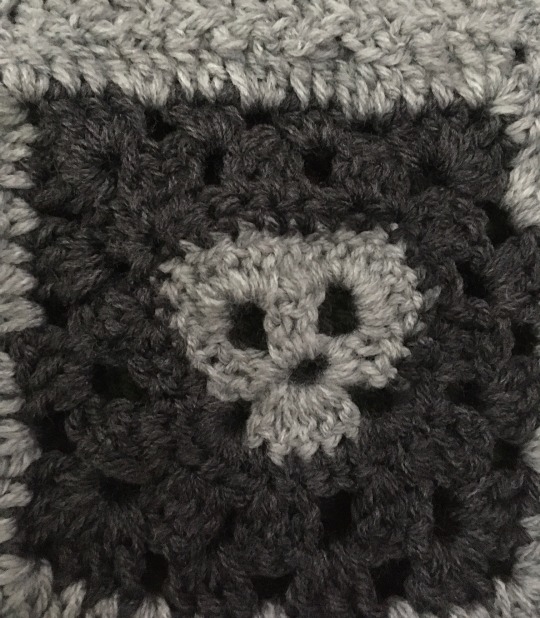


A few more pieces of my greyscale blanket. Some more of the granny stitch, hearts, crescent moons, and I even kind of made up my own version of a skull square! <|:^D
#crochet#crocheting#crochet blanket#granny square#my crafts#my post#my photos#yarn#handmade#sewing#sew#handsewn#hand sewing#cozycore#mothcore#moth aesthetic#grandmacore#crowcore#corvidcore#warmcore#fiber art#crescent moon#mooncore#forestcore#fairycore#cottagecore#cottage aesthetic#goblincore#autumn aesthetic#fall aesthetic
3K notes
·
View notes
Text

Complete cornflower blackwork.
This represents approximately 50ish hours of work.
#craft#crafts#sewing#maker#stitching#blackwork#traditional#traditional sewing#sewn#embroidery#traditional embroidery#embroider#hand embroidery#hand sewing#embroidered#blackwork embroidery#cross stitch#cross stitching
845 notes
·
View notes
Text
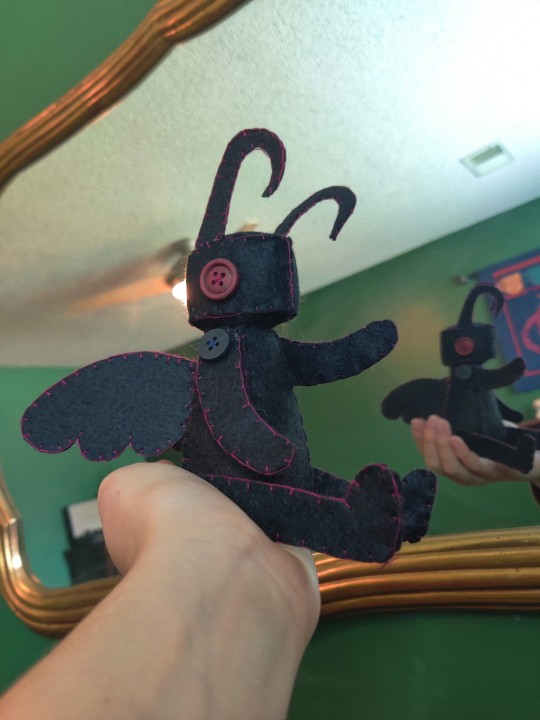
I just realized I NEVER shared this little mothman doll I made back in fall, he was a one day project and has moveable limbs plus removable neck fuzz! To weigh him down I used various small bells so he also jingles :)


#i may have the pattern somewhere if anyone is interested#sewing#plushies#handmade#mothman#cryptids#cryptidcore#moth#hand sewing#my projects#my art
2K notes
·
View notes
Text
Quick reminder on why it is never a good idea to piss off a fiber artist:
Go ahead. Insult a crocheter. Say their craft is somehow inferior. Remember a crocheter can use their hooks go Ancient Egyptian on you and rip your brains out through your nostrils, except we won't bother to mummify you first.
Knitters will not stab you with their needles because some of them are rather fragile, but they will knit you a fetching sweater...a CURSED sweater...THAT cursed sweater...and purposely make it about 5 sizes too small and strangle you with it. It will hurt, but you'll look amazing.
Embroiderers and any sort of seamsters use a sharp object to stab something thousands of times to make it pretty. Do you want to be made pretty? Do you? We WOULD REALLY LIKE TO MAKE YOU PRETTY...
Weavers can make your death shroud from scratch. We're talking sheep to fabric. All they'll need to do is make sure you are in the proper state to be buried. Know that it takes only a moment to make that happen.
Spinners make what is varying thicknesses of rope. Do you know what can be done with rope? Do you really want an answer to that question?
Here is the True Golden Rule: Thou shalt not demean those who work the fiber and expect mercy, for we shall have none. Your destruction will be made of ten thousand knots and each a curse upon your name and your house.
And, we heed the call to protect one of our own with the ferocity of angry bees.
Just be nice to your local fiber artist.
Chances are you'll get something warm out of it.
704 notes
·
View notes
Text
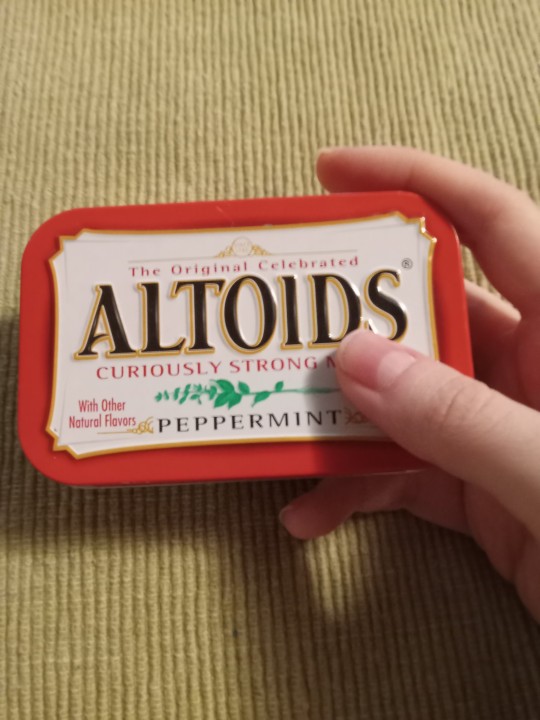
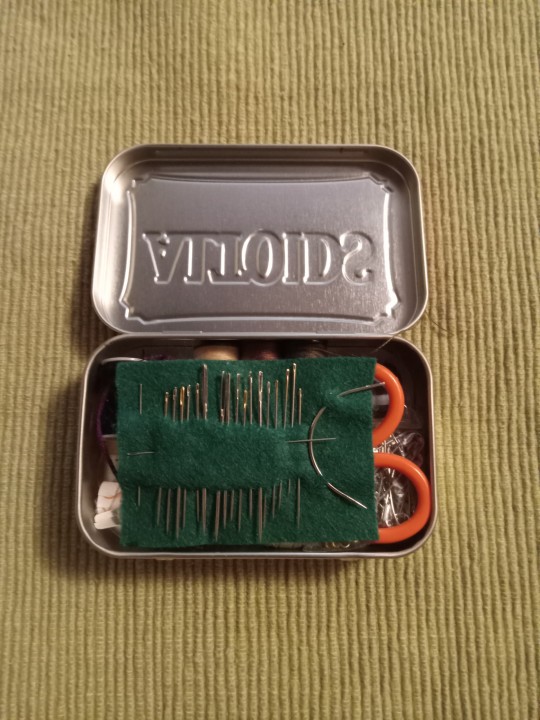
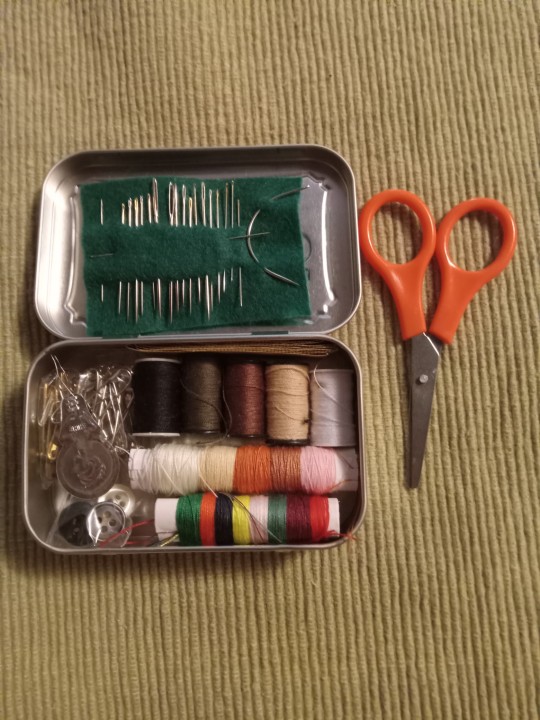
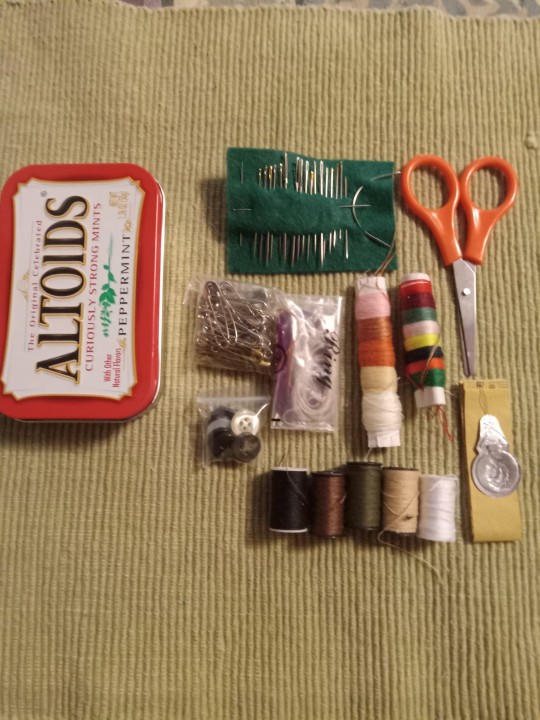
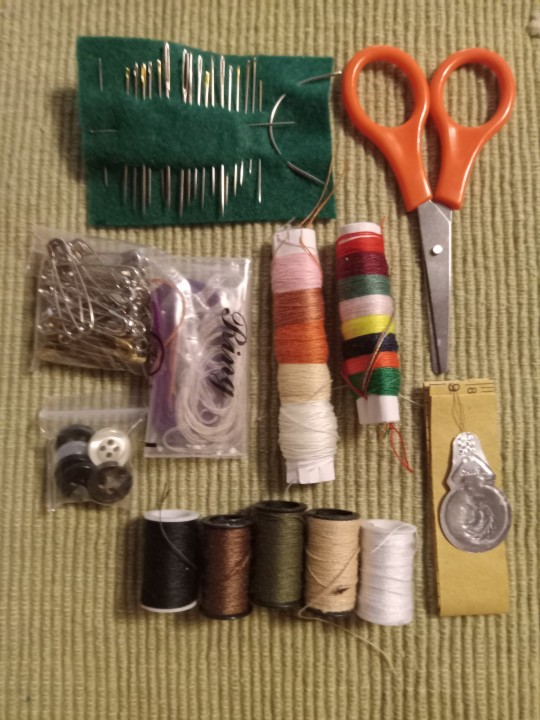
I upgraded my altiods tin sewing kit! (More details are in the image ID)
I added more needles, safety pins, thread, and a sharp pair of thread scissors just small enough to fit inside the tin. There's usually two needle threaders in here but one is in use atm. And there's enough stuff inside to fit perfectly so that the lid can close all the way and nothing slides around so that's nice
I am gonna post my little altiods tin emergency chronic pain/migraine kit within the next few days as well so keep an eye out for that if you're intrested
[ID: various pictures of a metal altoids tin, about 3.5 inches by 2 inches, with sewing supplies inside. A little bag of silver safety pins, varying colors of thread on 5 small spools, more colors of thread wrapped around two small rolls of paper and inside a small plastic bag, a folded piece of paper measuring tape, a small pair of orange thread scissors, a needle threader, and some buttons inside a little bag. There are varying sizes and types of sewing needles that are stuck in a small rectangular piece of green felt that fits on top of everything inside the tin. It has sharps, darning needles, embroidery needles and one curved needle.
The colors of thread included are: light pink, a muted rusty orange, white, a few shades of light brown and off white all wrapped around one piece of rolled paper. The other paper rool has more vibrant saturated colors including red, blue, yellow, dark green, and orange. The little bag had extra recycled pieces of thread i salvaged from other projects that are long enough to still be used. And the colors on the 5 small spools are black, dark mossy warm green, dark brown, light brown and white. End ID]
#solarpunk#solarpunk diy#solarpunk aesthetic#punk#punk diy#sustainability#recycling#upcycling#hopepunk#ecopunk#diy#hand sewing#sewing#hatchet makes stuff
524 notes
·
View notes
Text

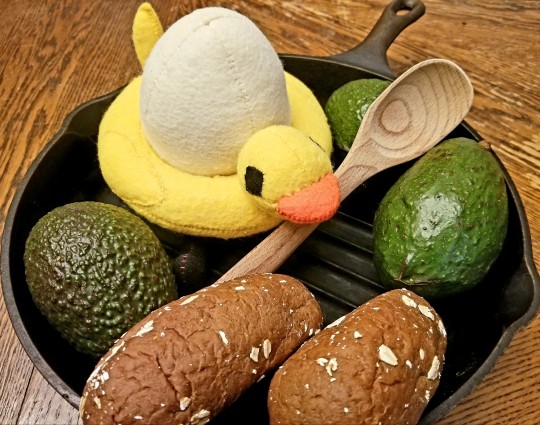
CHAAAYAAAAAAAAAANNE!!!!!!!!!!
He's making AVOCADO TOAST!!!!!!!!!!
#THE LITTLE CHEF#Chayanne!!!#chayanne the egg#qsmp chayanne#qsmp art#custom plush#felt plushie#hand sewing#qsmp fanart#qsmp eggs#qsmp#crowmancerx
296 notes
·
View notes
Text

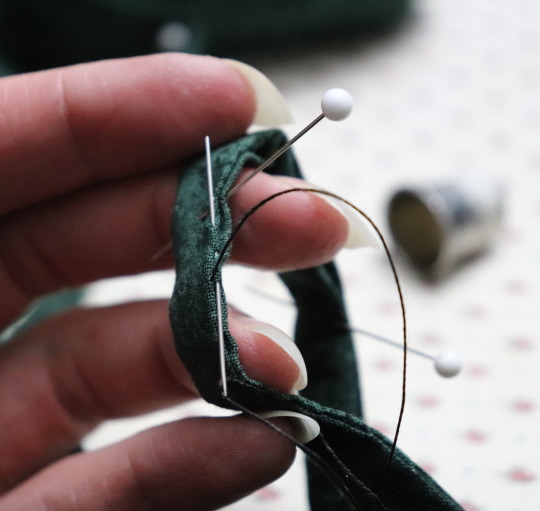

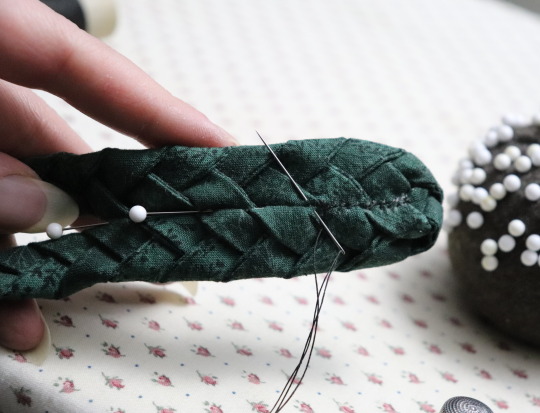
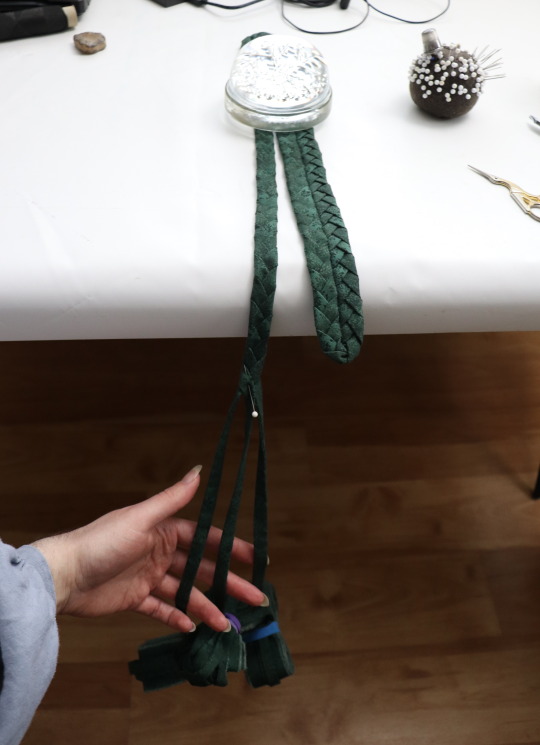

I started working on a braided rug earlier this month, using some of the quilting cotton that I have too much of. It's inspired by some very old rugs that my grandparents had.
I'm tearing the fabric into 4 cm wide strips, double folding it and slipstitching the edges together, then braiding it and whipstitching the edges of the braid together, around and around. I also pressed the fabric strips carefully after tearing them, and have been pressing the rug every time I go around the ends to prevent it from warping. It's coming along slowly and is currently 16 cm wide. I've used up almost one metre of fabric so far, and am about to switch to a different piece of green cotton.
2K notes
·
View notes
Text
Better pictures and post coming, but she is done.

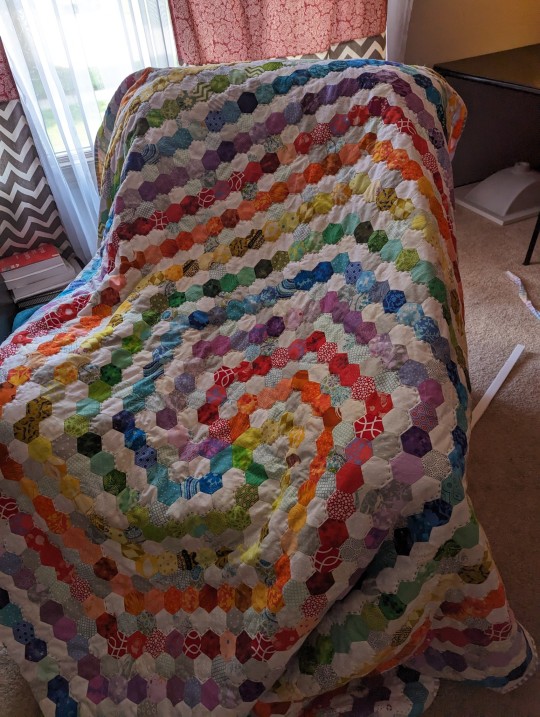
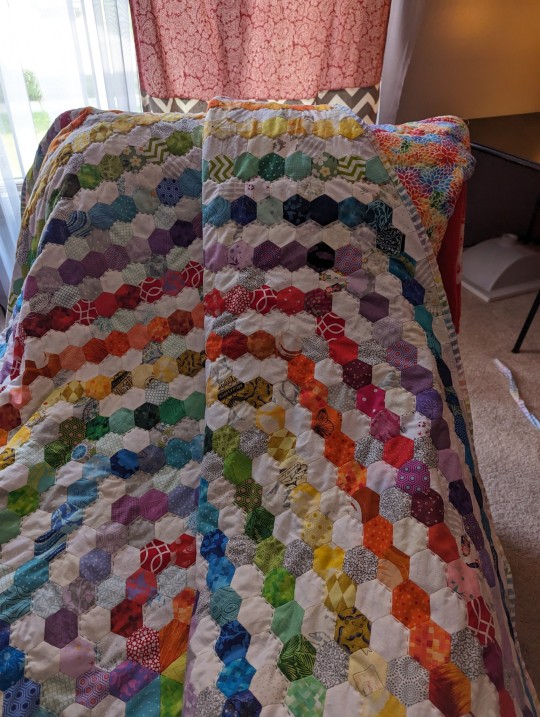

#i love a good rainbow quilt#quilting#fiber artists#fiber arts#quilted pupper#quilt#english paper piecing#rainbow quilt#rainbow swirl#sewing#hand sewing#rainbow
928 notes
·
View notes
Text


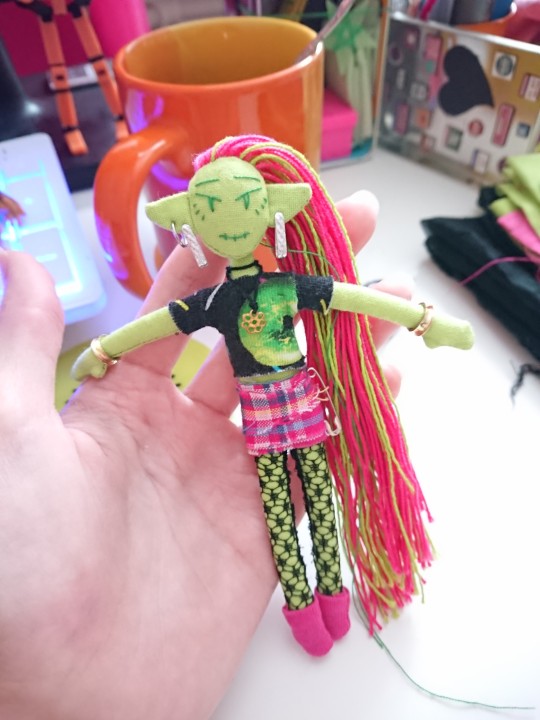
G3 Venus really caught my eye buuut looking at local prices for MH... Im sad to say that if her price is gonna be this bad (or worse) then I wont be able to justify spending so much...
So I decided to do what I always do and make my own <.<
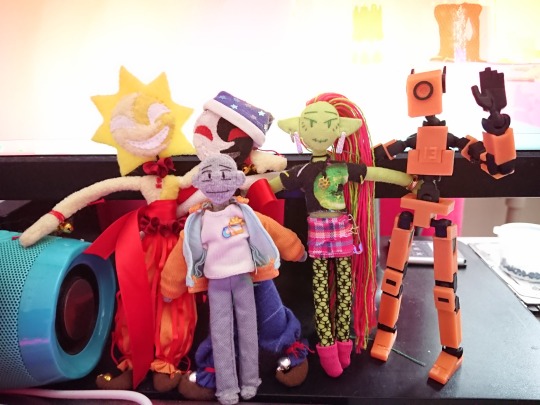
Tiny Venus joins my desktop buddies group ><
Work-in-progress under the cut!
I wanted to mix elements from both original and new design so I made them both in a dressup app

I like left one's color pallete sliighly better so thats what I aimed for


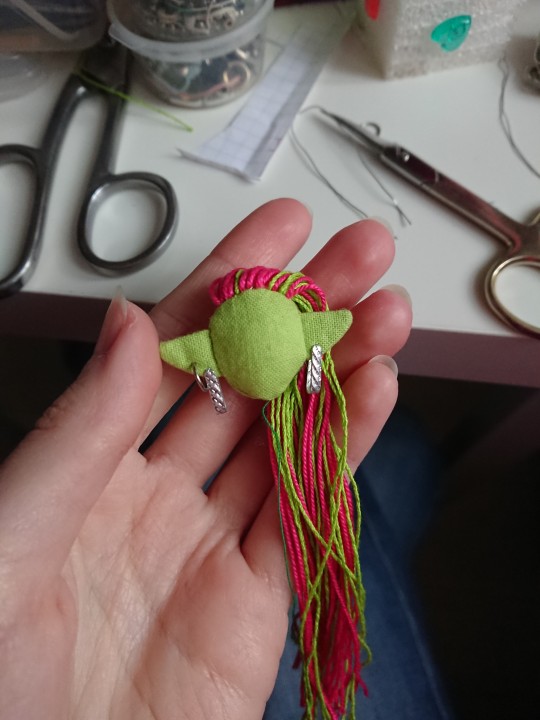
I reused my last doll pattern (y/n doll) with some modifications (different fabric = different stretch) bc I wanted to get same cartoonish proportions. It took several tries bc I kept messing up limbs-torso ratio >.>
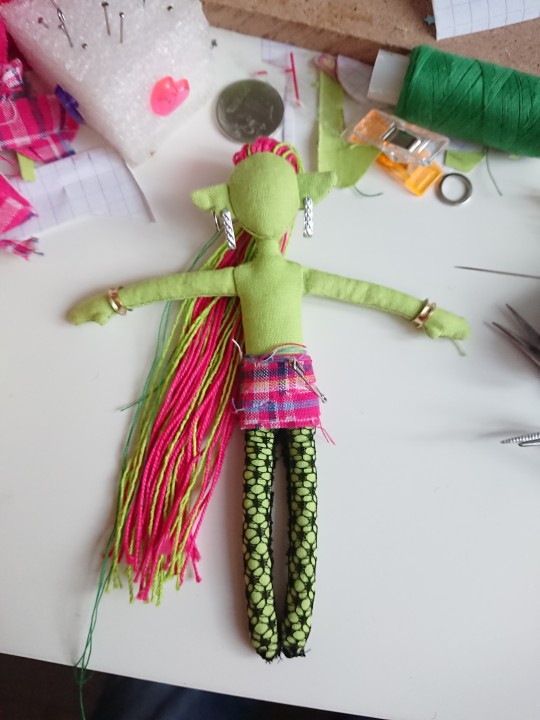

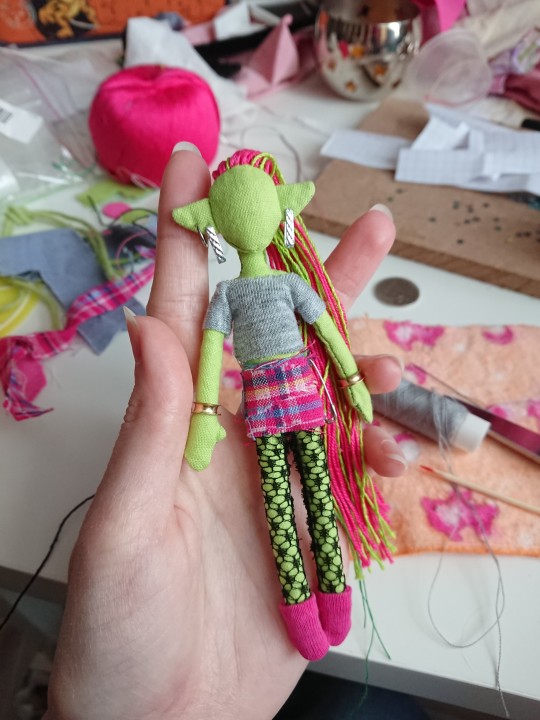
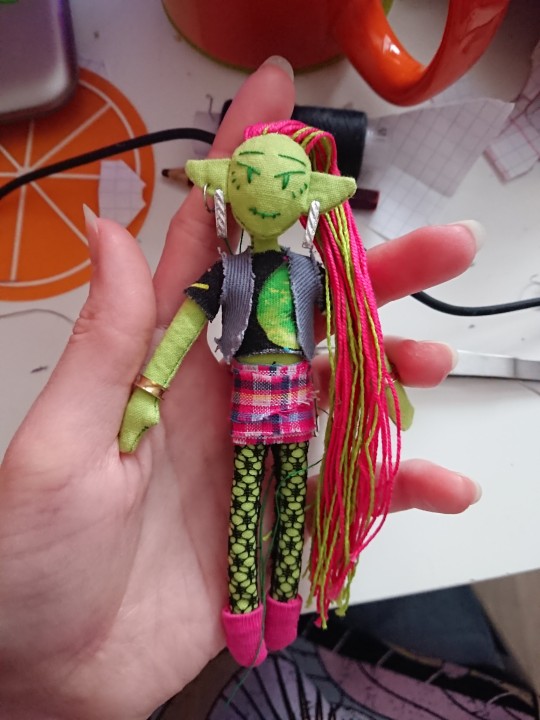
Her clothes and jewelry are supposed to look upcycled (bc they are!)
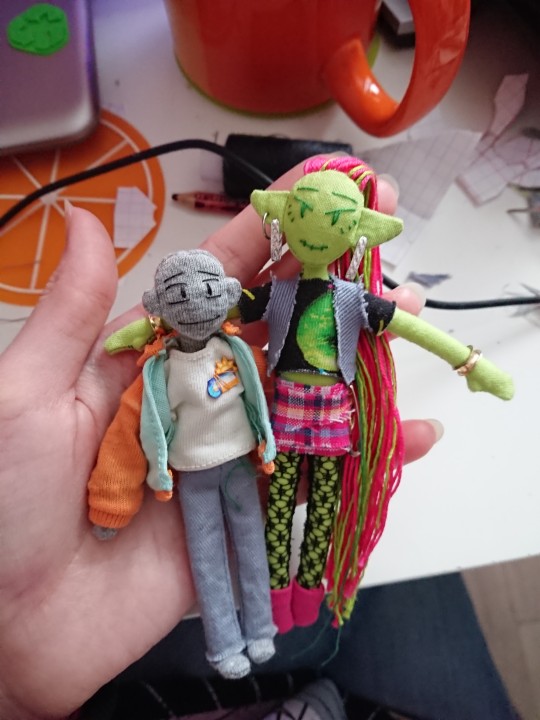
Pattern bros!
#monster high#venus mcflytrap#doll#dolls#dollblr#art doll#custom doll#ooak doll#handmade#sewing#hand sewing#textile doll#plush#plushie#Julik makes stuff#2023
399 notes
·
View notes
Text
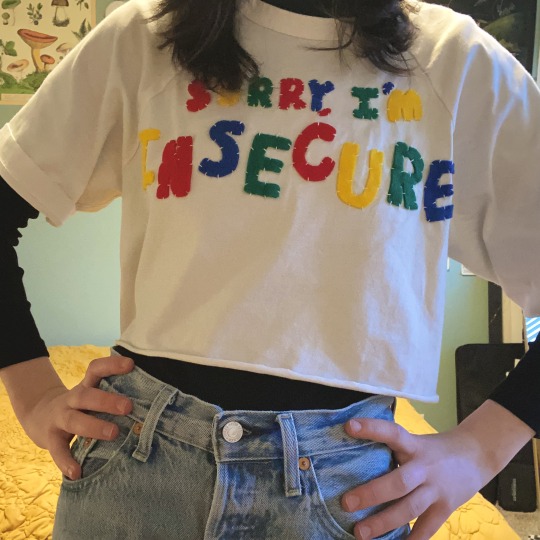

Another shirt I made! Felt letters stitched onto an old shirt I cropped :] ❤️💛💙💚
171 notes
·
View notes
Last Seen Blogs

studio-inkwell
Shifting Ink

carah-gutib
Carah Gutib

romanlynch
icons sideblog

thatotheraaron
the-aaron

derancodey
May we all get what we want and never what we deserve.