
tweedlebat
Tweedle's Trove
{haunted by 13 Cats, an anxiety Possum, and a bunch of critters in a trenchcoat}
199 posts
Don't wanna be here? Send us removal request.
Last Seen Blogs


Text
Decided to migrate the Resource Pages from Blackbirds.rest to this blog.
I tend to use this blog more often and I find I enjoy not having quite so limited a scope with stuff I post.
Expect page updates to come rolling in. I plan on taking this opportunity to expand the resource page links and organize them by category on the state pages!
Until they're finished updating however, the buttons will redirect back to the blackbird's rest resource pages.
1 note
·
View note
Text
Been running some experiments
with Feather wiki on how to be able to upload pdfs and optimize them along with images and videos for the smallest possible file size. I don't want to sacrifice all the image quality as they are instructional, but I do need to try and pack things in as small as possible so that things don't take eons to load and can fit on a typical usb stick or sd card.
So far I've been running tests with two pages from this 1886 book and trying to figure out how to adjust the colours to trim down the file size. Affinity's web safe dither works meh, so I decided on a whim to try this palette shader app by greenf0x I downloaded the other day for free from itch.io. Lo and behold it works amazingly well, shrinking the cover image from 5.27 MB down to 567 kb as a jpg and 693kb as a png file. I've pasted the before and after. I decided to go with black and white because colour requires a different kind of dithering and the app is limited to colours either preconfigured or manually added to a custom palette.


For reference the custom palette is the last one, as you can see it's just a colourized version of the page with dither.
Then came the big question, Text. The text page saved from Archive.org was already really small at 951kb but with the dithering it managed to push it all the way down to a tiny 305kb, and still maintained clarity.
I'm debating how I want to do this as There are times where I don't want to sacrifice colour. I know there's plenty of dithering web apps out there however, but this little gem that I found works amazingly well for the monochrome conversions, so I may wind up seeing if I can't repackage PDFs into tinier versions specifically for the wiki so that it comes with public domain book downloads and links to the colour versions on archive.org.
I welcome any suggestions on how to do this, and what readers would likely prefer from a tiny library!
0 notes
Text
Decided to try and swap out the text editor on this for suneditor, like is discussed here on the feather wiki website
it's actually surprisingly easy, following the instructions from the website you just Save the SunEditor extension file that is a small script downloaded off the website to the same folder as your Feather Wiki file and add <script src="./suneditor-replacement.js"></script> to the "Custom Head" text area in Wiki Settings.
After that go to the github repo of SunEditor and download the suneditor.min.css and suneditor.min.js codes and put them in the same folder as feather wiki as well.
The hardest part which wasn't terribly hard at all, open up the suneditor-replacement.js script in notepad or notepad++ and go to where it says css.href= and replace the link in quotes with this "suneditor.min.css"
Then go to where it says script.src= and replace the link in quotes with this "suneditor.min.js"
the whole lines should look like
css.href="suneditor.min.css";
and
script.src="suneditor.min.js";
respectively, the punctuation is important and so is the capitalization!!!
after that save the script, make sure the wiki page is saved and reloaded and it should be up and running, but in order to enable video, you'll want to modify one last thing in the script.
Look for where it says buttonList in the code, and you'll see a sort of list where it shows the options for the text editor that you want enabled, like ['undo', 'redo'], and so on.
you can highlight all the options and replace them with this chunk:
['undo', 'redo'], ['font', 'fontSize', 'formatBlock'], ['paragraphStyle', 'blockquote'], ['bold', 'underline', 'italic', 'strike', 'subscript', 'superscript'], ['fontColor', 'hiliteColor', 'textStyle','lineHeight'], ['removeFormat'], ['outdent', 'indent'], ['align', 'horizontalRule', 'list'], ['table', 'link', 'image', 'video', 'audio'], ['fullScreen', 'showBlocks', 'codeView'], ['preview', 'print'], ['save', 'template']
So the whole thing should look like
buttonList: [ ['undo', 'redo'], ['font', 'fontSize', 'formatBlock'], ['paragraphStyle', 'blockquote'], ['bold', 'underline', 'italic', 'strike', 'subscript', 'superscript'], ['fontColor', 'hiliteColor', 'textStyle','lineHeight'], ['removeFormat'], ['outdent', 'indent'], ['align', 'horizontalRule', 'list'], ['table', 'link', 'image', 'video', 'audio'], ['fullScreen', 'showBlocks', 'codeView'], ['preview', 'print'], ['save', 'template'] ],
Remember, punctuation is important. If anything borks it's likely you accidentally erased a comma or parenthesis. Don't panic. You can always just redownload the vanilla script and try again as there's not a lot to modify in this code.
If you've done it correctly however, it should work as soon as you save and reload, so you should be able to embed media like this:
An amazing little personal wiki doodad
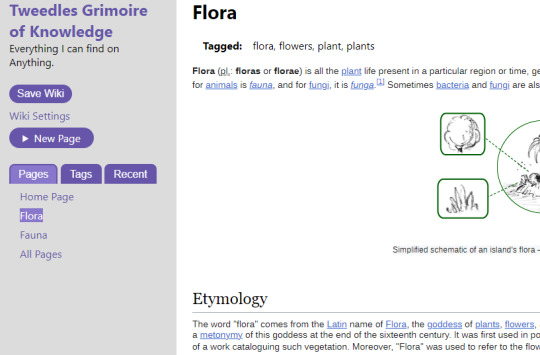
Once again trawling itch.io I came across another amazing thing, this time it is a wiki framework called Feather Wiki that loads up and can be edited on your browser, pretty much no more tech skills needed than being able to use tumblr.
Here's a test page that I made copying some content from wikipedia to see how it works. The hyperlinks all lead to wikipedia straight from pasting in, but I could easily change it to my own nested pages.
It took all of 5 minutes to figure out and get up and running. It's super lightweight and fast as well. I'm planning on using it to put down all the accurate info and stuff I come across on the web so I can at least have something to reference back to for when my memory loss gets worse.
My wiki is completely offline and hosted on my desktop. I just click on the shortcut and I can edit, so I do like it a lot, but it can also be hosted on a web server according to the info page.
Tbh in an age of disinfo and misinfo, having your own personal wiki where you can log accurate information you find may not be a bad idea. Especially if it's something not only free but simple and easy to run, and useable offline to ensure privacy.
6 notes
·
View notes
Text
An amazing little personal wiki doodad
Once again trawling itch.io I came across another amazing thing, this time it is a wiki framework called Feather Wiki that loads up and can be edited on your browser, pretty much no more tech skills needed than being able to use tumblr.
Here's a test page that I made copying some content from wikipedia to see how it works. The hyperlinks all lead to wikipedia straight from pasting in, but I could easily change it to my own nested pages.
It took all of 5 minutes to figure out and get up and running. It's super lightweight and fast as well. I'm planning on using it to put down all the accurate info and stuff I come across on the web so I can at least have something to reference back to for when my memory loss gets worse.
My wiki is completely offline and hosted on my desktop. I just click on the shortcut and I can edit, so I do like it a lot, but it can also be hosted on a web server according to the info page.
Tbh in an age of disinfo and misinfo, having your own personal wiki where you can log accurate information you find may not be a bad idea. Especially if it's something not only free but simple and easy to run, and useable offline to ensure privacy.
#tweedle's link dumps#tweedle's notebook#tweedle talks#programs#wiki framework#feather wiki#educational content
6 notes
·
View notes
Text
stumbled across an interesting and useful little program today trawling itch.io. its a sort of note taking app with alarm functions to remind you of stuff + mp3 player + a LOT more.
0 notes
Text
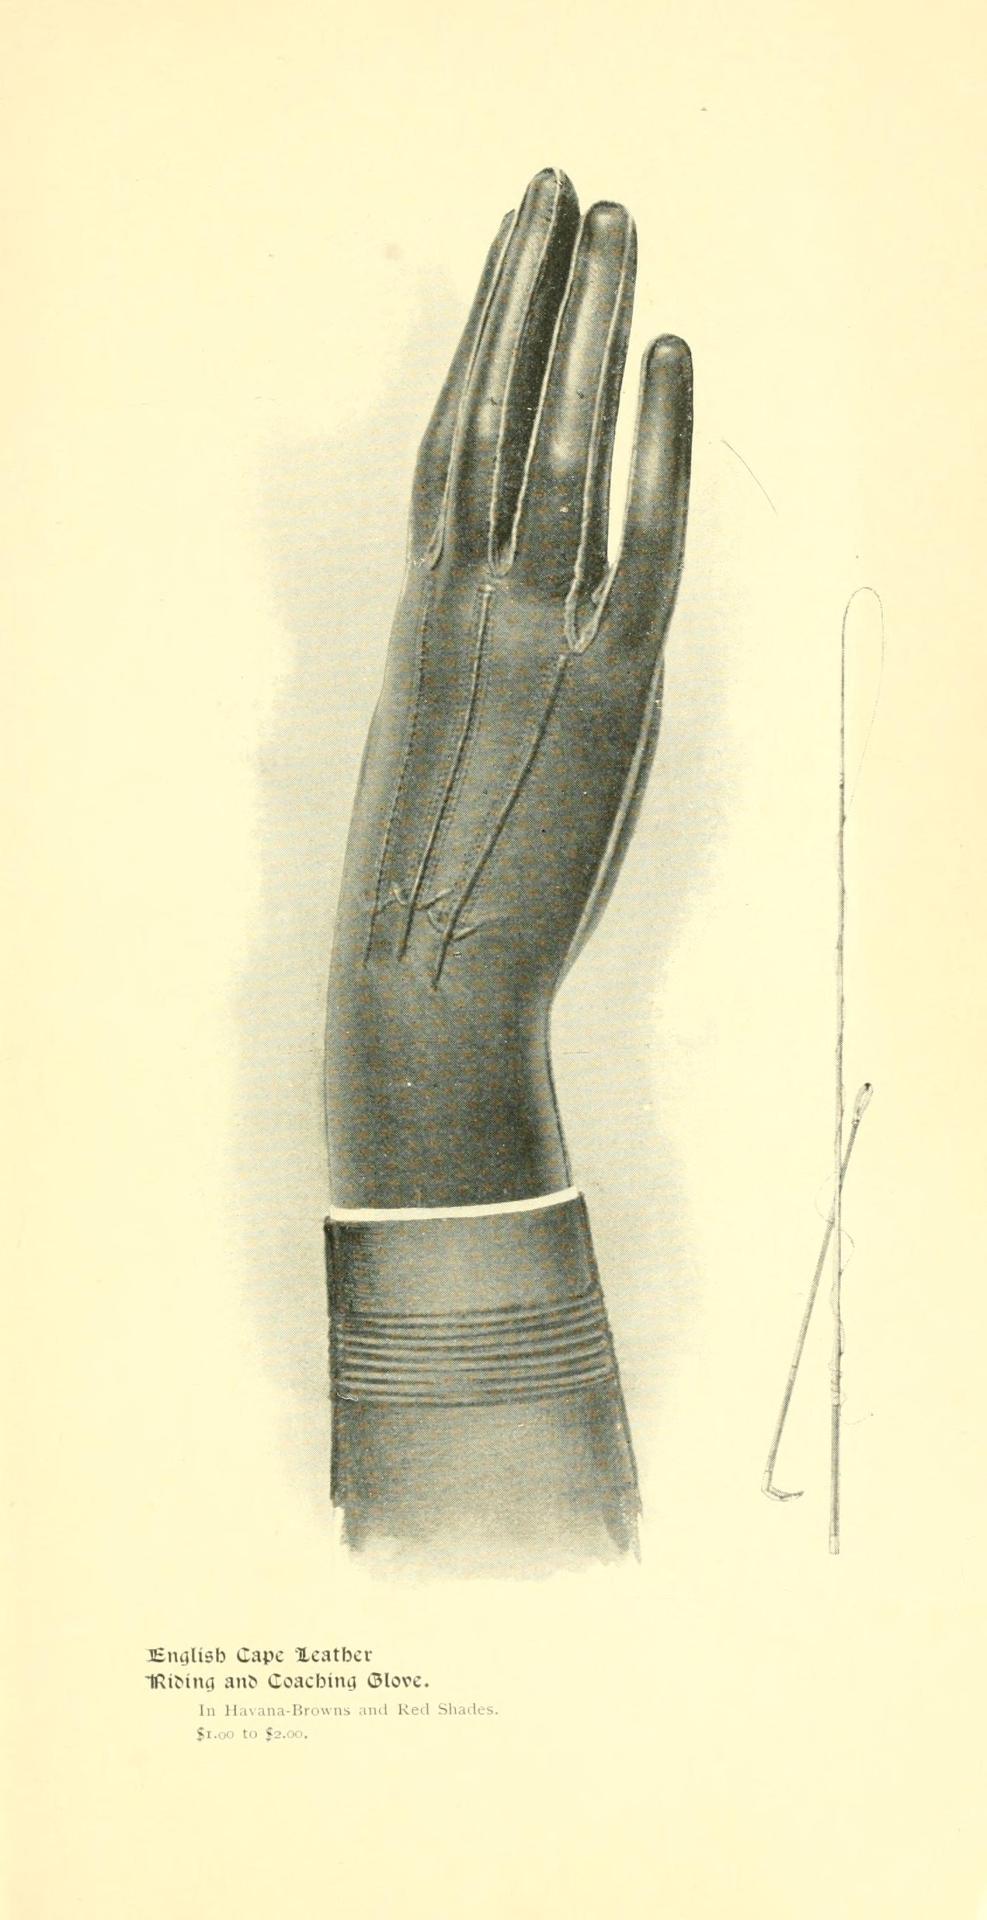
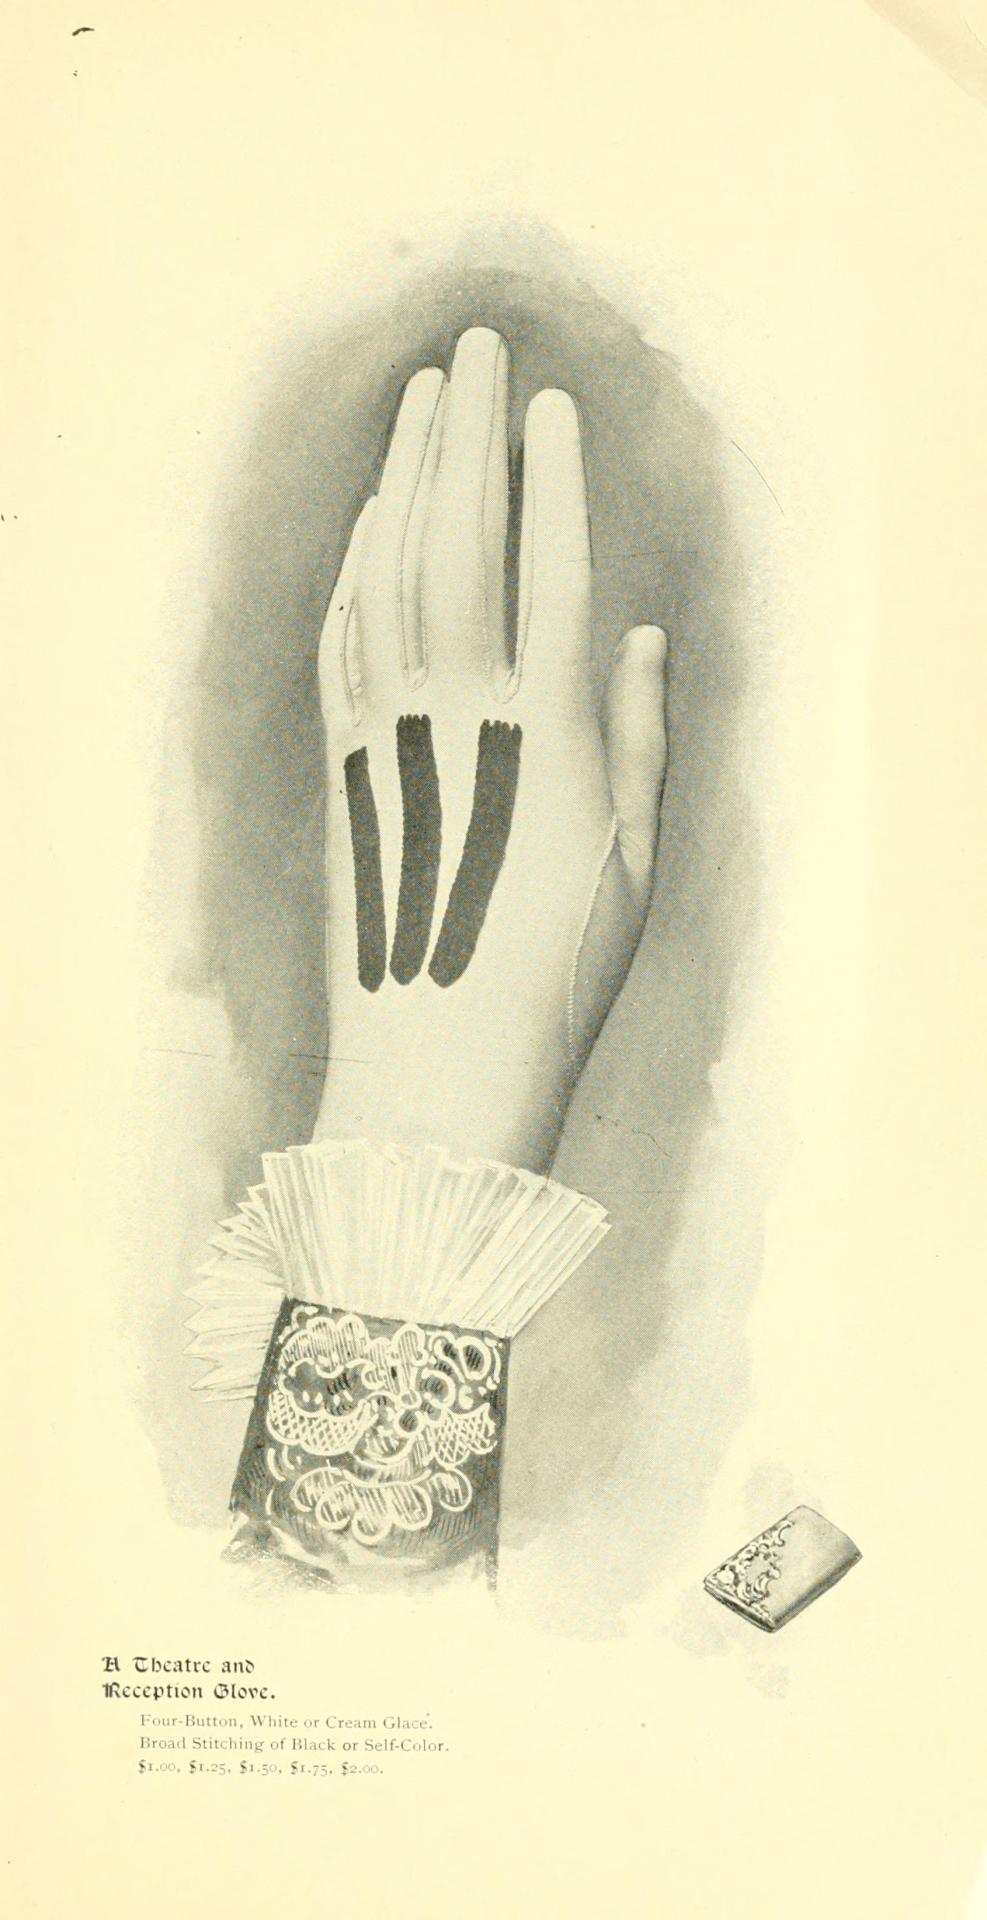
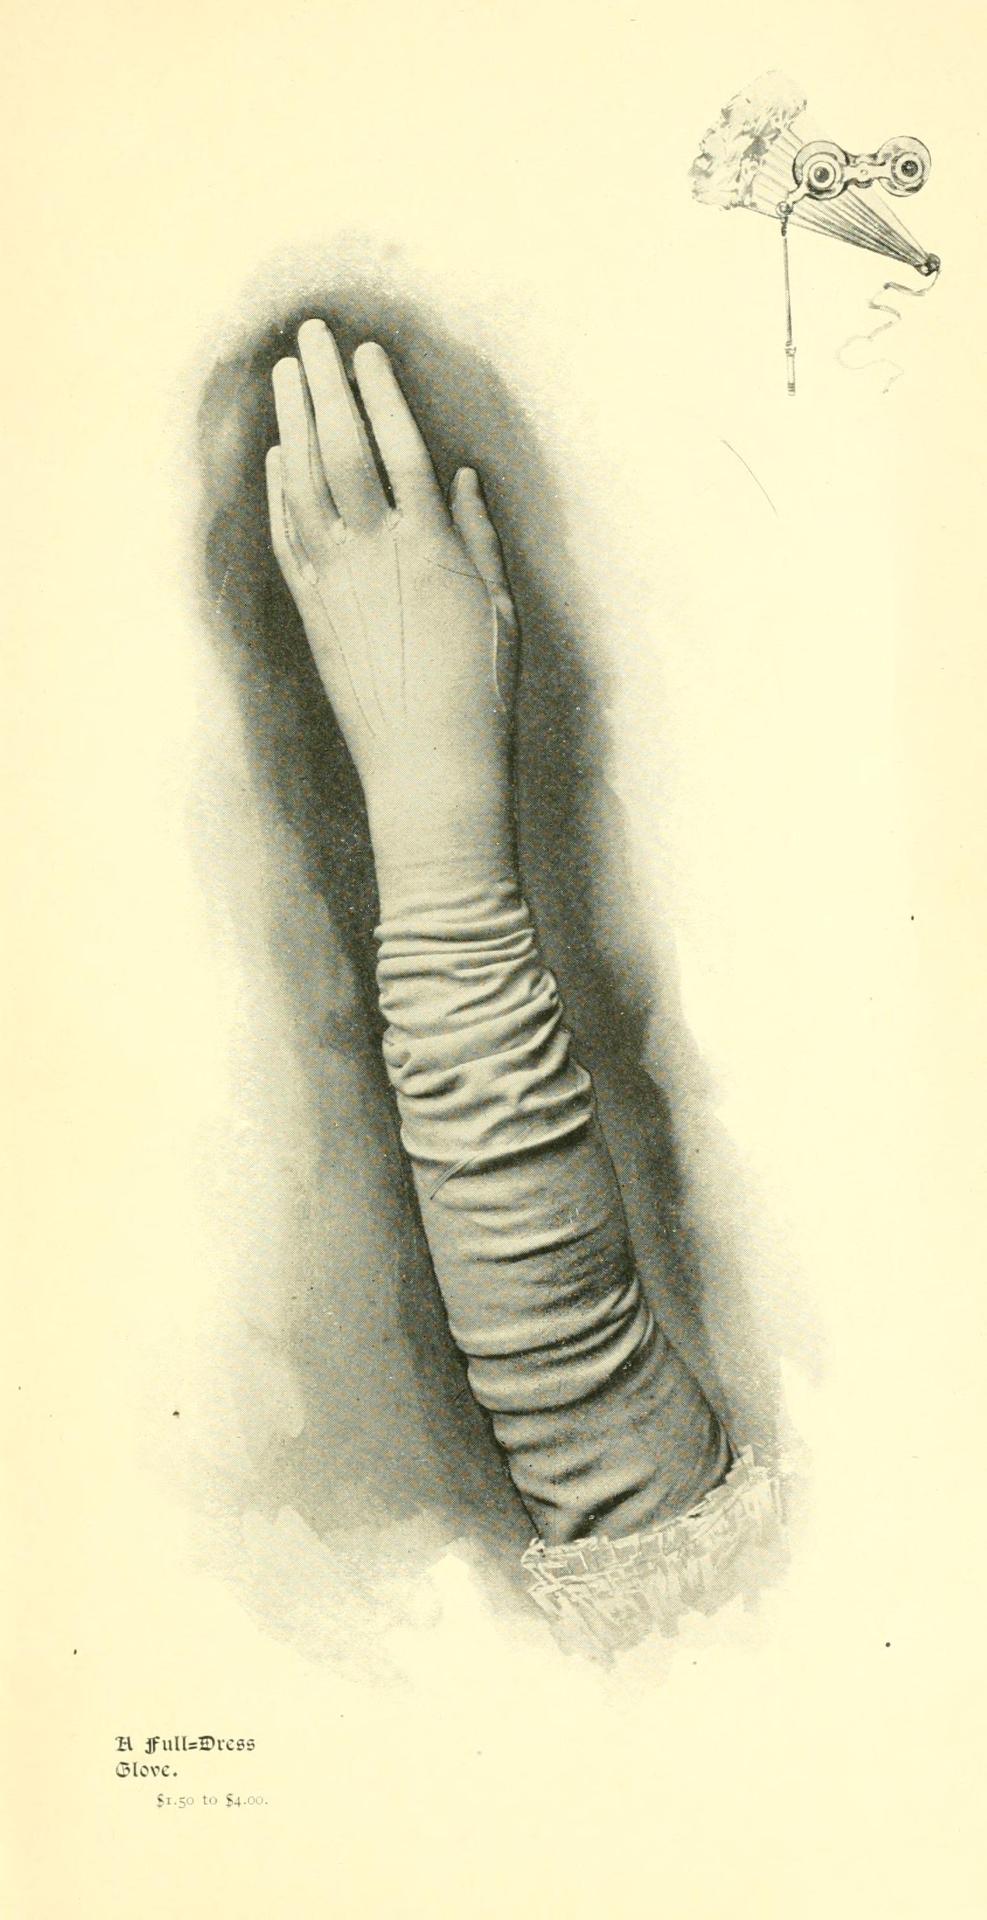
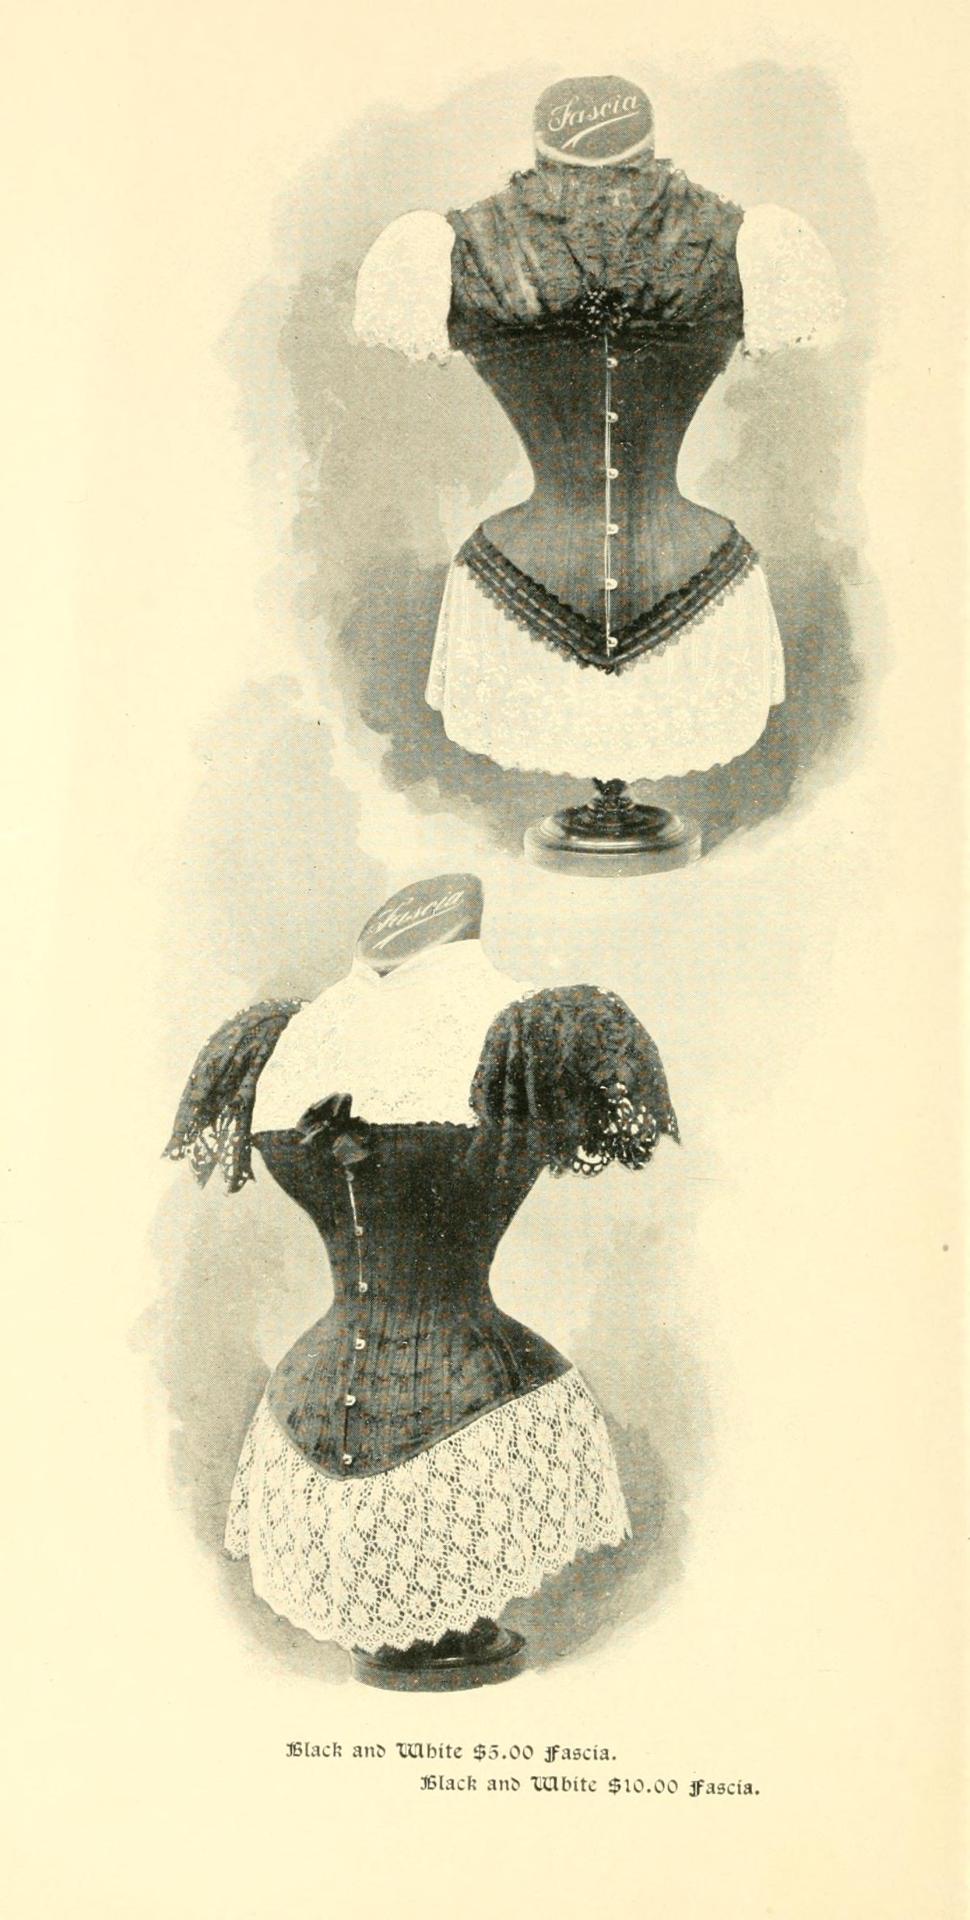
Glove Lore
By Otis H. Kean, S. W. Laird, and Buffalo & co.
Published in 1897


Note: I didn't include all the pages from this book as I'm focused on the clothing illustrations and not the texts this time. However I will be posting links to the topics the texts talk about that are more up to date, as well as related topics if you're interested in that rabbithole. If you wish to read the original, here is a link to the archive.org copy :} The native audio function works well for this particular book.
I did not wish to transcribe all the texts is that it comes from a VERY Western-centric Victorian point of view. So instead I'd like to link to various articles and exhibits with a wider scope that can be found in many of these older books.
So here's some more accurate info on Gloves and mittens from Wikipedia and National Geographic, as well as specific information about the customs of perfumed gloves and Episcopal gloves.
There is a lot of focus on English Medieval Clothing and an entire article on Evening gloves available on Wikipedia. The book also discusses gauntlets and some historical gloves
This book also includes an illustration of Queen Elizabeth the first's Gloves done in watercolour, next to it is a photograph of the same gloves from the Ashmolean Museum in Oxford.

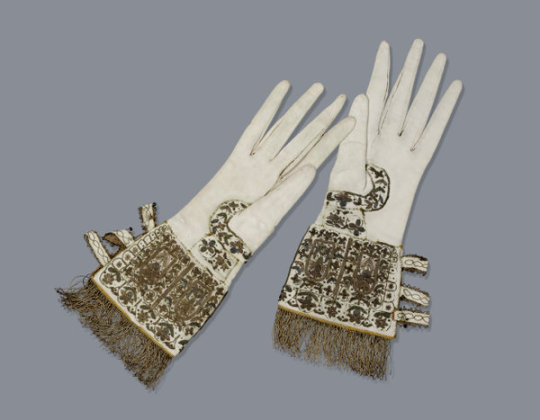
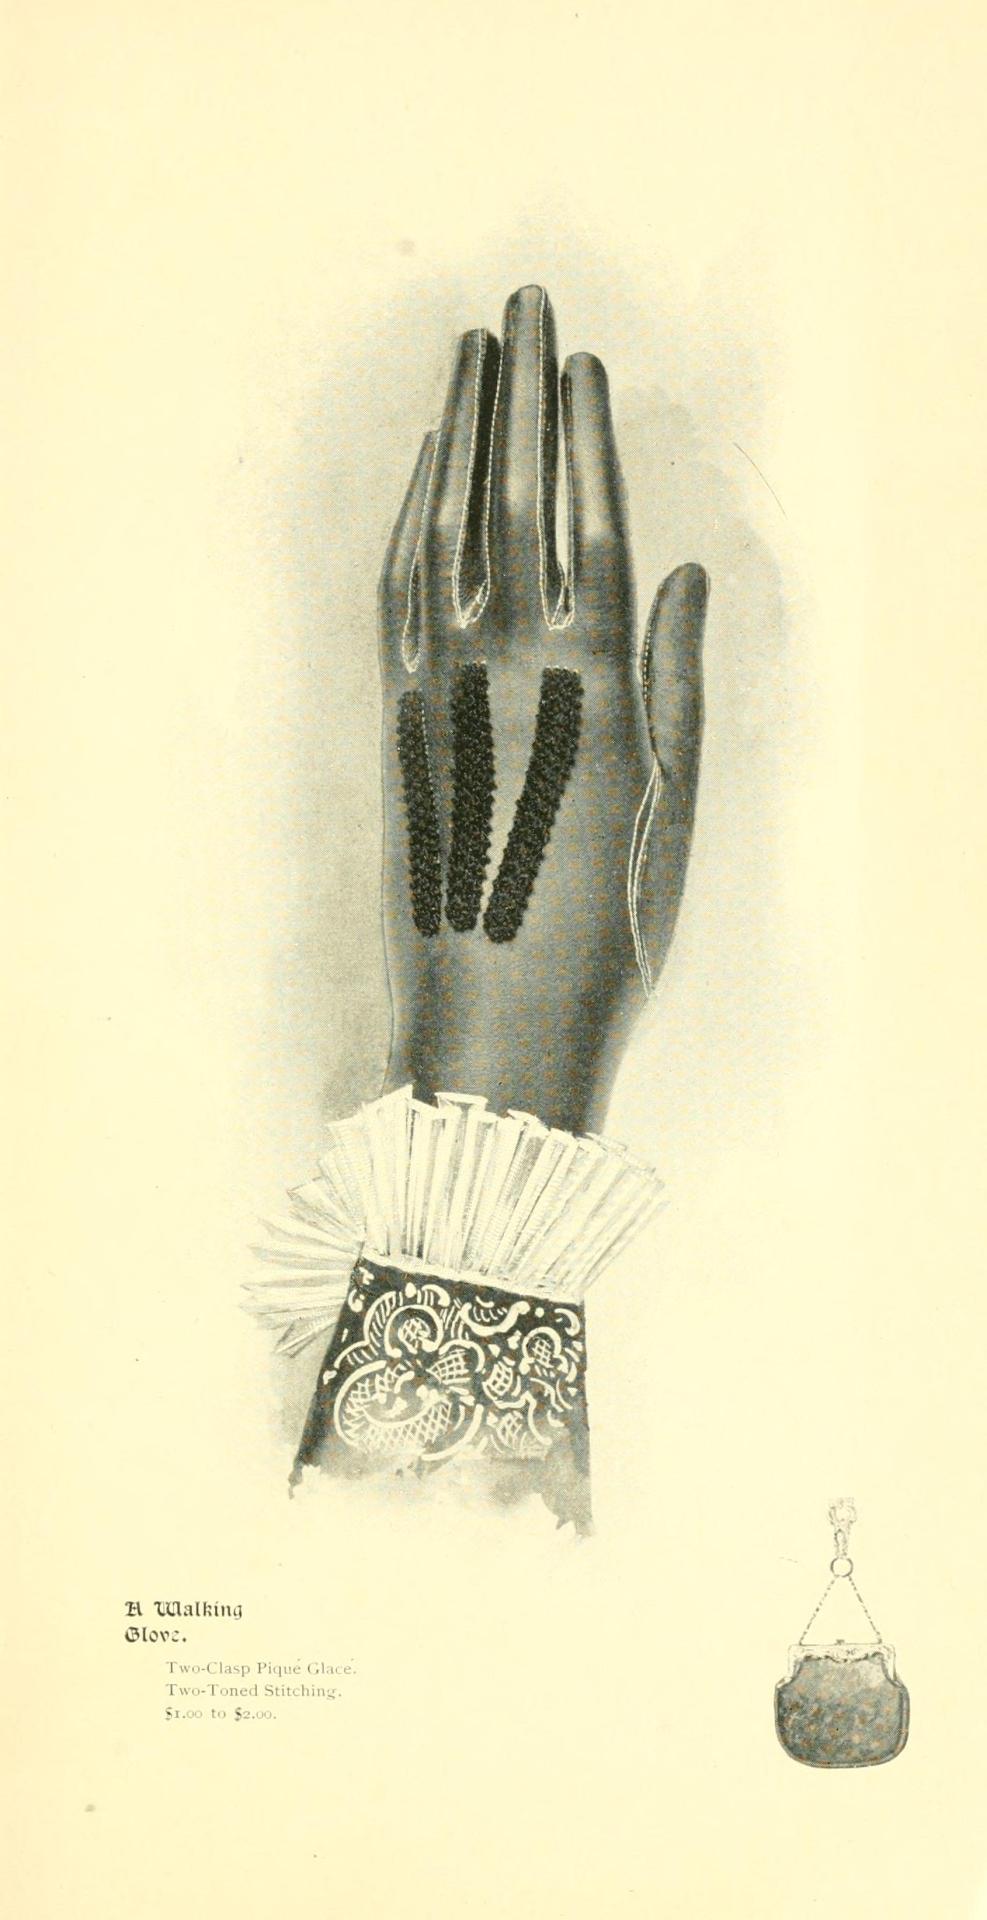
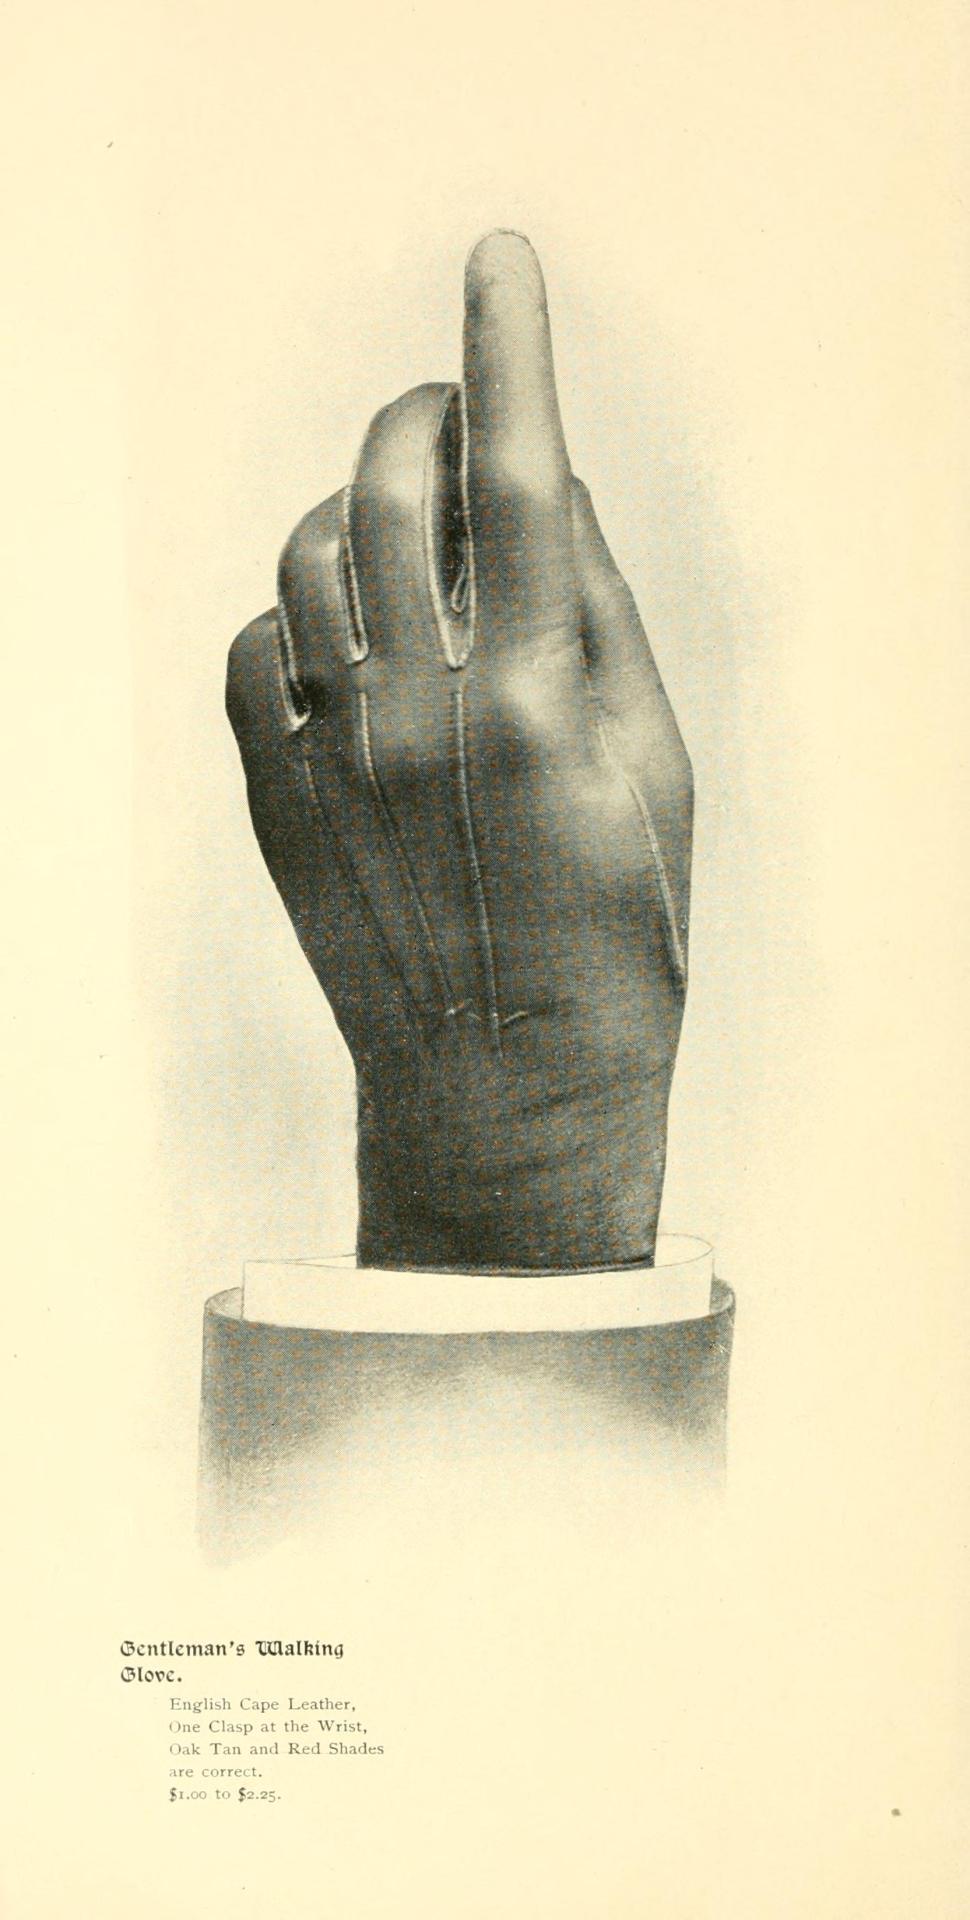
Additional images pulled from some of the pages. There are a few more, but I prefer to focus on the ones with gloves for references.


#victorian#victorian fashion#historical fashion#historical clothing#gloves#1890s#1890s fashion#1897#victorian menswear#victorian womenswear#accessories#historical accessories
9 notes
·
View notes
Text
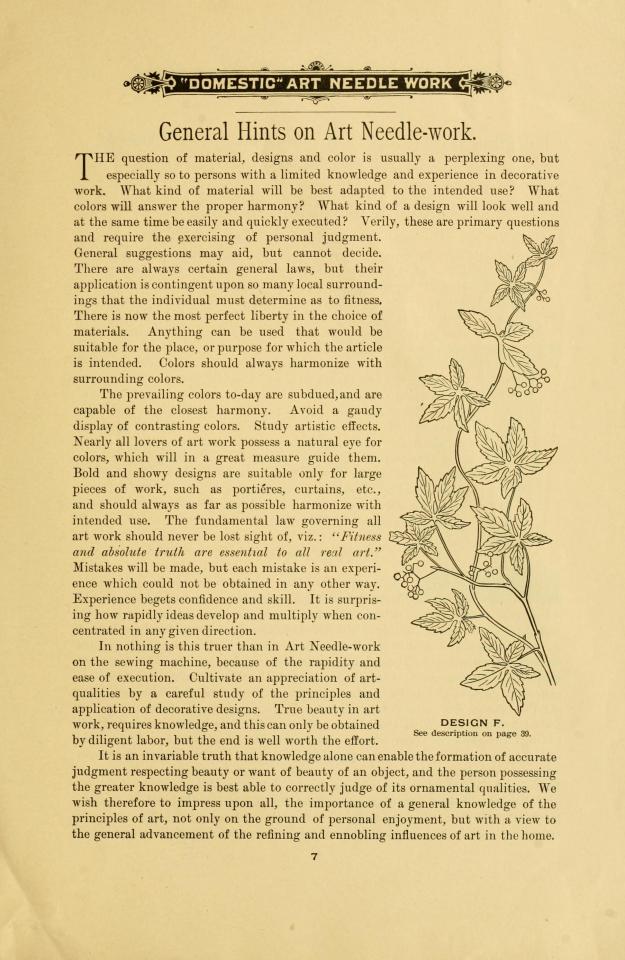
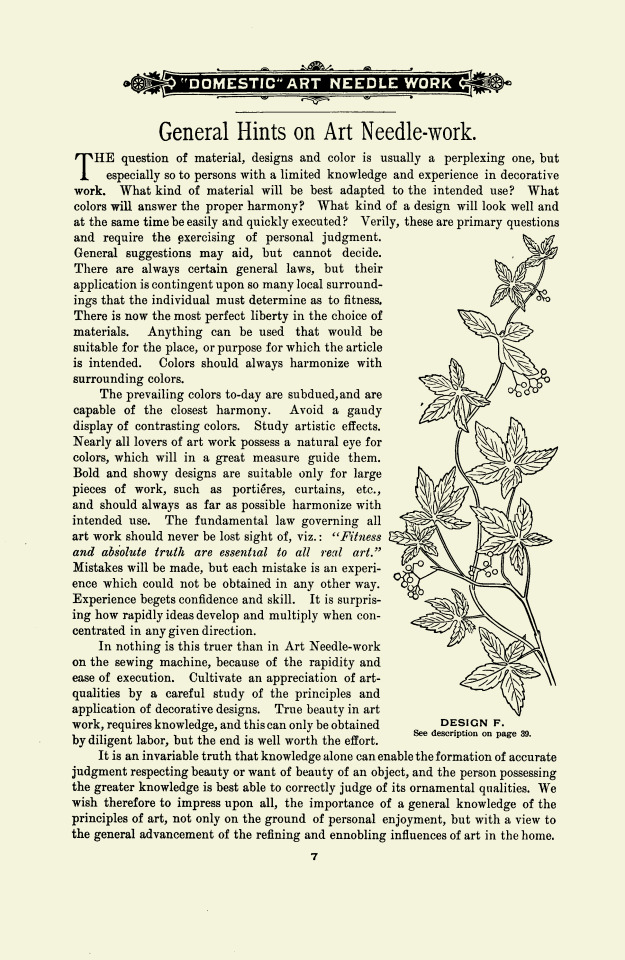
Part 13 of A Treatise of Embroidery, crochet, and knitting with illustrations
By George C. Perkins, Anna Grayson Ford, and M. Heminway & Sons Silk co circa 1899
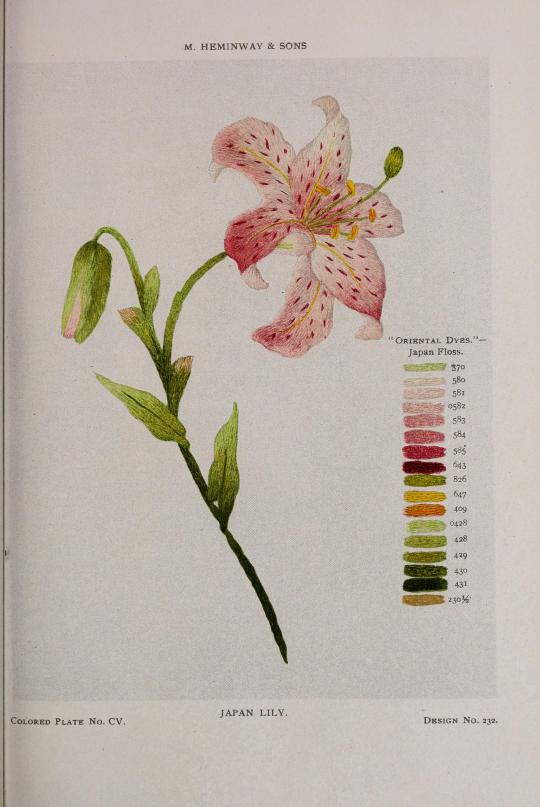
Please note, this book was written in 1899, and as such uses a racist term to refer to the dyes that were used for the thread. If you'd like to read more about this period in time, the term, and the stereotypes that the Victorians had, I've actually linked the wikipedia article here that goes more in depth. It's not the end all be all of it, but it's a good starting place for anyone wanting to educate themselves on the topic.
So the lily that is shown on this page, when I looked it up is called Lilium Speciosum. This lily is native to Southeast China, Japan, and Taiwan, and was introduced to English Gardeners in 1830. Trying to find the common names for it by the way has been a nightmare. In English it took me longer than it should have to find that it's called the Japanese Lily, Japanese show lily, or Rubrum Lily nowadays.
Japanese Wikipedia when translated gives me Kanokoyuri, Doyou Lily, and Tanabata Lily as common names and much more information on the background than I can find on any of the English language websites I came across, so I've included a DeepL translated version of the Japanese Wikipedia page below.
"Kanokoyuri (scientific name: Lilium speciosum) is a perennial herb in the lily family, Liliaceae. It is also known as the Doyou lily and the Tanabata lily.
Characteristics:
The distribution is Kyushu (mainly from the Satsuma Peninsula to the coast of Nagasaki Prefecture), Shikoku (in the mountains of Ehime and Tokushima Prefectures), northern Taiwan, and Jiangxi Province, China, with the highest density of native plants in Japan in the Koshijima Islands. The grass is 1 to 1.5 m tall, and the flowering season is from July to September. The flowers, which are about 10 cm in length, are beautiful and have been cultivated for ornamental purposes since ancient times. The Japanese name is derived from the petals, which are spotted with a fawn pattern.
In the Edo period (1603-1867), Philipp Franz von Siebold brought bulbs of the canary lily out of Japan, and it is said to be the first Japanese lily to become known in Europe. During the Meiji period, the bulbs were boiled and dried and exported to China as a confectionery ingredient. In the Taisho era (1912-1926), bulbs were exported to the United States and used as fresh flowers for Christmas and Easter. In the postwar period, demand for lilies as ornamental flowers increased overseas, and during the period of rapid economic growth, breeding efforts were made to produce high-quality lilies, but from the 1970s onward, overseas demand declined.
Translated with DeepL.com (free version)"
I also translated the Chinese Wikipedia page, which gave me a common name of Deer Lily due to the spots. The translated Chinese Wikipedia Page via DeepL gives me a ton more information so I've also included it here:
"also known as Lilium glaucum (Taiwanese: iām-hông lo̍k-á pik-ha̍p), Lilium beautifulum, Lilium medicum, Lilium glaucum, Lilium magenta, Lilium septuagenarianum, Lilium hyacinthum, and Lilium speciosum, is a species of lily in the family Liliaceae. It is a plant of the genus Lilium, with the species addition speciosum meaning "beautiful", and is found in Kyushu and Shikoku, Japan, Taiwan, and southern China, and is named for its flowers, which are covered with brilliant spots that resemble deer stripes. In Taiwan, there is a variety of red deer lily (Lilium speciousm var. gloriosoides) covered with reddish spots, which is endemic to Taiwan, and is also the curatorial flower of the National Museum of Natural Science in Taiwan, and is regarded as "the most beautiful lily in East Asia".
The bulbs are nourishing, strengthening, diuretic, cough suppressant, antipyretic and anti-inflammatory. In Japan, the flower language of the Kagoshima lily is "solemnity" and "compassion".
Growth:
It grows in the low altitude mountains of northern Taiwan, on rocky, exposed, sunny slopes."
"Uses:
The bulbs are edible, rich in starch, and taste like potatoes. Deerberry lilies are so popular that there has been a lot of research into breeding them, and as a result there are cultivars of deerberry lilies in many gardens. People have crossed Deer Lily with Lily of the Valley to produce some valuable varieties, such as the "Imperial" series, and in 1964, the Japanese selected and bred the "Uchida" deep pink flower disease-resistant varieties from the Deer Lily.
Problems"
The red deer lily is currently endangered, with a small growing area, few breeding sites, and a decreasing number of growing areas and populations."
I've included the translations as is, but as we know, translation programs are dubious at best and unfortunately I lack the language skills to make sure that it translated properly. So if anyone who speaks Japanese, Chinese, or any of the other languages of the different areas this plant is native, can verify if the translation is accurate, tell me other common names of these lilies, and/or give me more information if possible, it would be much appreciated!
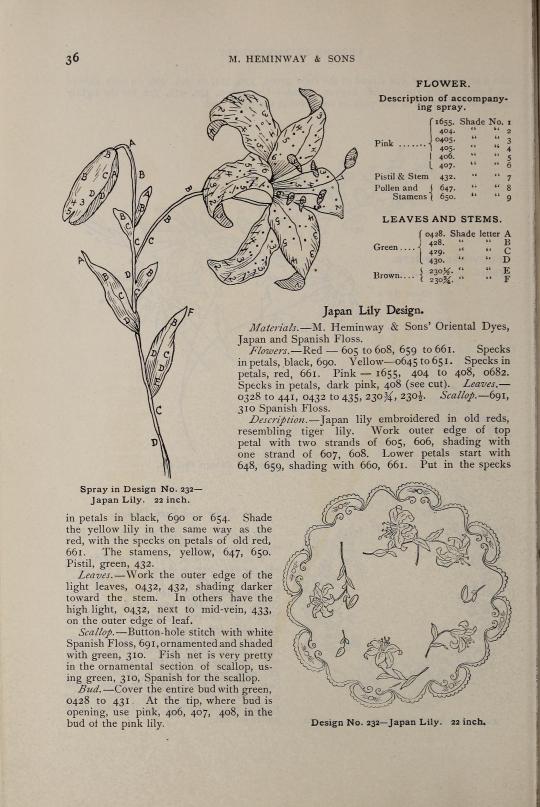
Onward to the diagram description:
Flower.
Description of accompanying Spray.
Pink:
1655 = Shade number 1, 404 = 2, 0405 = 3, 405 = 4, 406 = 5, 407 = 6.
Pistil & Stem:
432 = 7.
Pollen and Stamens:
647 = 8, 650 = 9.
Leaves and Stems.
Green:
0428 = Shade letter A, 428 = B, 429 = C, 430 = D.
Brown
230 1/2 = E, 230 3/4 = F.
A graceful stem with alternating leaves going up it has a single speckled lily branching off to the right and further up a larger bud is bowed over facing the left.
The stem starts with D and changes to C as it reaches the first leaf on the right side.
Leaf 1: Starting from the bottom of the leaf and going row by row upwards, E, D, D C, B, F.
Leaf 2 is slightly higher on the stem and roughly the same size, but this time is on the left side.
Leaf 2: D, C, B, A.
Leaf 3 is a tiny leaf on the right side slightly higher up.
Leaf 3: C, B.
The main stem is done in D, and changes to C higher up. The stem branches off to the right, and ends in the lily blossom.
Stem Branch:
C, B.
The lily has 6 petals that are randomly speckled. We will be starting with the petal closest to the stem, which is horizontal with the tip of the petal curling under to face right.
Petal 1 starting from tip and working our way back to the center in columns as the petal is horizontal, we will be going from the bottom up to the top in each column.:
Column 1: 3 (petal underside), 2 (petal topside), 3 (Petal Topside)
Column 2: 4, 5.
Column 3: 5.
Column 4: 6.
Moving Clockwise to the next petals:
Petal 2, going by row now instead of columns, left to right:
Row 1: 2, 3.
Row 2: 4 (petal underside), 4 (topside), 3 (topside)
Row 3: 5, 4.
Petal 3:
Row 1: 1(underside).
Row 2: 3.
Row 3: 4.
Row 4: 5.
Row 5: 6.
Petal 4 is horizontal pointing to the right, row one is also going horizontal up the petal from left to right, starting from the top down.
Petal 4:
Row 1: 5, 4, 3.
Row 2: 6, 3, 2.
Petal 5 is going in rows from center to tip:
Row 1: 5, 4.
Row 2: 5, 3.
Petal 6 emerges from under petal 5 and also goes in rows from center to tip:
Row 1: 4, 3.
Row 2: 3.
Row 3: 2, 3.
Row 4: 2.
The stamens are done in 8 and 9 with the ones closer to the center of the flower being 9 and the ones further out being 8. The pistil and stems of the stamens are done in 7.
Moving on to the other fork on the original stem, we have a tiny leaf alternating left and one alternating right. The left leaf starts at C and ends in B at the tip. The right leaf starts at B and ends in A at the tip.
The stem continues up and then bows steeply to the left in a gradient from B to A. It ends in an oblong bud that starts in rows from top to bottom:
#historical embroidery#embroidery#embroidery pattern#victorian embroidery#historical sewing#sewing#needlework#needlecraft#fiber arts#fibre arts#fibre crafts#fiber art#fiber crafts
11 notes
·
View notes
Text
a link to a tutorial by Naomi Pankhurst on how to make a really nice hexagon mesh. This blog also has a lot of interesting tutorials, patterns, and other stuff in it that are worth checking out as well.
23 notes
·
View notes
Text
Part 12 of A Treatise of Embroidery, crochet, and knitting with illustrations
By George C. Perkins, Anna Grayson Ford, and M. Heminway & Sons Silk co circa 1899
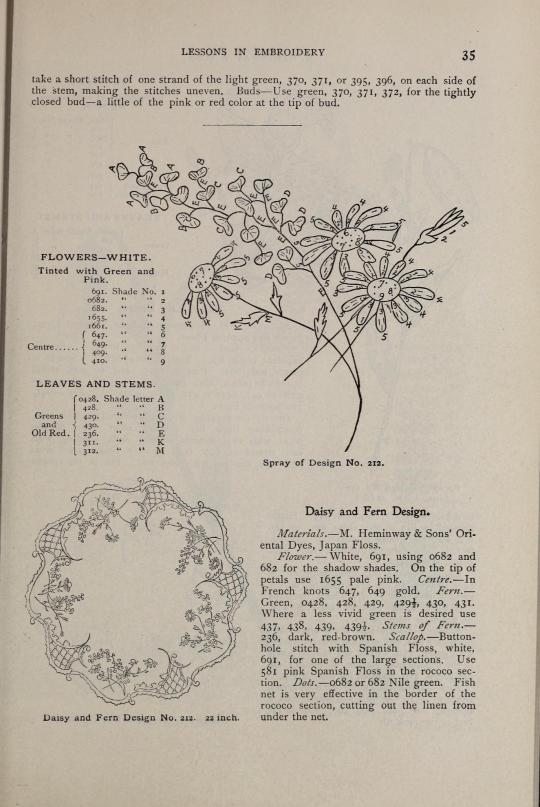
Please note, this book was written in 1899, and as such uses a racist term to refer to the dyes that were used for the thread. If you'd like to read more about this period in time, the term, and the stereotypes that the Victorians had, I've actually linked the wikipedia article here that goes more in depth. It's not the end all be all of it, but it's a good starting place for anyone wanting to educate themselves on the topic.
The description for the diagram is as follows:
There are three daisies in a floral spray, one on the left being viewed at a 3/4ths angle so that half of the petals are hidden, and two on the right side of the image viewed in full, a fern with heart shaped leaves being a divider between the right and left, and on the farthest right is a daisy bud with three petals seeming about ready to emerge. The stems of the left daisy and the fern appear to be joined in a graceful swoop at the bottom, while the stems of the other flowers in the spray cross the center of the piece in straight lines, like flowers gently scattered on the page. The fern's leaves are just a continual series of forks and branches in a sort of random order that tapers up and bows over.
All the stems are done in E while for the fern, the leaves at the bottom are scattered D's moving into E as they go further up, then C is sprinkled into the E's the further up we go, then B replaces C, and A's are the tip. Overall the leaves form a sort of bowed cone shape over the left daisy.
Daisies:
Leftmost Daisy:
Petal 1 starting from the left, going from tip to center = 4, 1, 2.
Petal 2 = 4, 1, 3.
Petal 3 = 5, 1, 2.
Petal 4 = 5, 1, 2.
Petal 5 = 5, 1, 3.
Petal 6 = 5, 1, 3.
Petal 7 = 4, 1, 2
Center = 6 & 8 above and below each other respectively with 7 on the right.
Center Daisy:
Petal 1, the leftmost petal at the 9 o clock position, going from tip to center on each petal and then moving clockwise to the next = 5, 1, 3.
Petal 2 = 5,1,2.
Petal 3 = 4,1,2.
Petal 4 = 4,1,2.
Petal 5 = 4,1,2.
Petal 6 = 5,1,2.
Petal 7 = 5,1,2.
Petal 8 = 1,3.
Petal 9 = 1,3.
Petal 10 = 5,1,3.
Petal 11 = 5,1.
Center going clockwise from left =7,6,8.
Rightmost Daisy:
Petal 1, starting from the noon position and moving clockwise tip to center = 4, 1, 2.
Petal 2 = 4,1,2.
Petal 3 = 4,1,2,1.
Petal 4 = 4,2.
Petal 5 = 4,3.
Petal 6 = 4,3.
Petal 7 = 5,3.
Petal 8 = 5,1,3.
Petal 9 = 5,3.
Petal 10 = 3.
Petal 11 = 5,2.
Petal 12 = 1,2.
Flower Center going clockwise from top = 7,8,9.
Flower Bud tip to center = 5, 1, 2.
There are two leaves, one on either side of the leftmost daisy stem done in K at the tip to M at the base. There is another leaf on the base of the stem for the bud that runs behind the rightmost daisy done in 1.
#historical sewing#historical embroidery#embroidery#embroidery pattern#victorian embroidery#1899#1890s
13 notes
·
View notes
Text
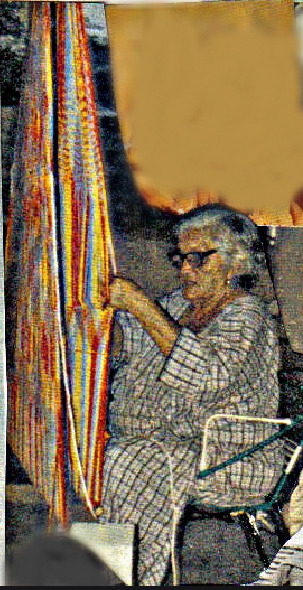
For all the people excited about weaving via my earlier post
tbh you can make a loom out of just about anything. you just need something to hold the warp and something to separate the sheds, a shuttle, and something to beat the weft with (like a really long shuttle or a separate stick)
Below is a picture of my great grandmother weaving a chinchorro (hammock). Wayuu weaving is a little different than what you're probably used to, but the basic thing to understand is the same. There's a bar at the top and a bar at the bottom, she's using her hands and small balls of yarn to wind the weft through, and tie warps together to make patterned gaps. No shuttle is involved.
But if you wanted to you could easily add pickup bars (basically a long stick and shuttles to this type of setup and weave that way. It'd basically be a tapestry loom setup, but tbh you can weave just about anything, you just have to get creative with how you manage the sheds.
I'd look up backstrap looms and translate the way the different bars are set in place for this kind of a setup. All you'd need is dowels or sticks of some sort for it. You could figure out a mini one on a box or a picture frame. Abuela had a floor to ceiling setup on one of the walls that was just basically a frame.
I wish I had photos of some of the chinchorros she made, they were beautiful. My uncle has a video somewhere of her weaving one with a horse on it and the artistry to it was absolutely gorgeous. I wish I'd gotten the chance to learn from her tbh, she was a brilliant artist from the work I've been able to see. I think it was cos of her that I inherited my love of weaving and textiles so much.
24 notes
·
View notes
Text
youtube
A really good, more intermediate knitting tutorial on how to knit gloves with fingers by beginners LUCKraft!
6 notes
·
View notes
Text
found this tutorial on how to make a 4 shaft weaving loom out of cardboard boxes, tape, glue, skewers, string, and a few other odds and ends.
it may not look pretty, but as an introduction to multi shaft weaving this could be a fun project that doesn't break the bank.
388 notes
·
View notes
Text
something I've been working on today, a quick and rough animation test of yours truly with some REALLY bad audio. My fingers are numb, but it was worth it.
Transcript: Ah!...Oh! *laughter*
1 note
·
View note
Text
Something very imporant now more than ever,
This is the news literacy project, it helps teach people how to spot media disinformation and disinformation and I highly encourage everyone, no matter your age, to take a few mins and just check it out.
There's all sorts of helpful infographics to teach you, and it's definitely worth it.
1 note
·
View note
Text
Part 11 of A Treatise of Embroidery, crochet, and knitting with illustrations
By George C. Perkins, Anna Grayson Ford, and M. Heminway & Sons Silk co circa 1899


Please note, this book was written in 1899, and as such uses a racist term to refer to the dyes that were used for the thread. If you'd like to read more about this period in time, the term, and the stereotypes that the Victorians had, I've actually linked the wikipedia article here that goes more in depth. It's not the end all be all of it, but it's a good starting place for anyone wanting to educate themselves on the topic.
6 notes
·
View notes
Text
Part 10 of A Treatise of Embroidery, crochet, and knitting with illustrations
By George C. Perkins, Anna Grayson Ford, and M. Heminway & Sons Silk co circa 1899

briefly emerged to quick add this page since it's making reference to the one from the previous embroidery update here
Please note, this book was written in 1899, and as such uses a racist term to refer to the dyes that were used for the thread. If you'd like to read more about this period in time, the term, and the stereotypes that the Victorians had, I've actually linked the wikipedia article here that goes more in depth. It's not the end all be all of it, but it's a good starting place for anyone wanting to educate themselves on the topic.
Page 33.
Lessons in Embroidery
continued from iris pattern on page 32:
372, 373, 374 in a darker one, using in these the light and dark brown, 230, 230 3/4 shades.
Scallop. — Button-hole stitch with Spanish Floss, 691, 310. In the scroll above the scallop use Nile green, 310.
This entire design is not illustrated entire. Can be seen at Art Embroidery stores. This description is applicable for any iris design.
Violet Decoration.
Flowers.
this is the shade number/letter chart for the design
0475 is shade No. 1, 460 is 2, 461 is 3, 462 is 4, 463 is 5, 464 is 6.
Centre.
609 is 7.
Leaves and stems. 0428 is Shade letter E, 428 is G, 429 is H, 429 1/2 is I, 430 is K, 431 is M.
On the right is a diagram captionedSpray in Design No. 214. 22 inch which will be described further below.
Violet Design.
Materials. — M. Heminway & Sons' "Oriental Dyes," Japan Floss.
Flowers. — Purples — 1475, 460, 461, 462, 463, 464. White, 691. Nile, 0C82, 682,1475.
Centre. — 609, 429.
Leaves. — Greens — 436, 437, 438, 439; or 0428, 428, 429, 4291/2, 430, 431.
Scallop. — Spanish Floss — White, 691 ; also, 310. Green Japan Floss.
Description. — In the flower use 460, 461 for the light petals; 462, 463, 464 for the darker ones. If the white flower is desired, work first the petal with white, 691, then shade with 0682, 682, to give the green shadow effect, 609 and 429 are used in the centre of the flower, as 609, 429
Leaves. — 436 and 437 are used on the tip; 438, 439 toward the "mid rib." Vein with 439.
Scallop. — (691) White Spanish Floss. In the open scroll use the Honey-comb stitch, of white Japan Floss. French knot of 428 Japan Floss.
In sections of the border the fish net can be inserted with effective and satisfactory result. This entire design is not illustrated. Ask at stores for No. 214.
The diagram for this image is a spray with 4 flowers, 3 of which have 5 petals each, one that is just blossoming, and 2 leaves with rounded ends.
The bottom has a series ofstems that form the spray as well as two extra stems without anything on them just sort of intersecting the first. These are all done in I.
The rightmost stem forks into two and the leftmost one leads up into the two leaves, one slightly further up on the stem than the other.
The lettering on the leaves goes as follows from bottom to top:
Rightmost Leaf:
Row 1: M.
Row 2: I, K, I.
Row 3: H, H.
Leftmost Leaf:
Row 1: E, I.
Row 2: E, G, transitions into the I from row 1.
Row 3: H, K.
A stem done in I branches off from the leftmost leaf base and slopes upwards into another fork, the rightmost of which has a tiny leaf, and then a 5 petaled blossom.
Starting from the petal connected to the stem and working clockwise from petal tip to the center which is H.
Flower 1
Petal 1: 3, 5.
Petal 2: 2, 3.
Petal 3: 2.
Petal 4: 1, 2.
Petal 5: 1, 2, 3.
Back to the earlier fork, this time going along the left, the stem branches in a graceful drooping arc, starting with I and ending with H, before being tipped with a just slightly open Violet blossom hanging downward from the end. Starting from top to bottom:
Violet blossom.
Row 1: 6, 3, 2.
Row 2: 2, 3, Gradiates into the 3 of the first row.
back down to the beginning where we initally forked left into the leaves, this time we'll take the rightmost fork of the stem which travels upward under said leaves. There is a very tiny leaf on the journey upwards, and then the stem emerges from under the leaf, slips under Flower 1, and ends under Flower 2.
Flower 2 starting from the petal connecting the stem and working clockwise from petal tip to the center which is H:
Petal 1: 3, 5.
Petal 2: 4, 5, 7.
Petal 3: 4, 5.
petal 4: 3, 4.
Petal 5: 3, 4.
Now we go back to the very beginning, before the initial branching at the base of the stem, and there is a third branch heading out to the left of the stem with the leaves. It is done in I and does not have anything on it.
the next stem to the left of that intersects the previous stem and then slips up under the leftmost leaf, into a graceful sweep beyond done in H and then into a slight bow done in G topped with Flower 3.
Flower 3 working from the petal connected to the stem and then clockwise, petal tip to center which is H:
Petal 1: 3, 4, 6.
Petal 2: 2, 3, 4.
Petal 3: 1, 3.
Petal 4: 1, 2, 3.
Petal 5: 3, 4, 5.
Lastly there is a random stem that intersects the base at almost a right angle as if a clipping fell halfhazardly onto the spray.
#historical sewing#sewing#embroidery#victorian embroidery#victorian#victorian sewing#embroidery pattern#historical embroidery#1890s#1899
0 notes
Text
Emerging from the abyss to quickly share this amazing video series on tatting by Bryce Adams!
youtube
youtube
youtube
49 notes
·
View notes