#sewing patterns
Photo


(via Biba: McCall's Patterns)
85 notes
·
View notes
Text


Fun, easy-to-follow sewing patterns by RosieTaylorCrafts
1K notes
·
View notes
Text
Wednesday, November 29.
You reap what you sew.
Never have truer words been spoken. But they come as good news for Tumblr's sewing community, however, who have been sewing some absolute delights. Some real œuvres d'art. Some winner-winner chicken dinners.
As luck would have it, #sewing is trending. And it's trending right now, so we have reaped a selection of these very dinners for your eyes only. We have then asked ourselves just what did we do to deserve y'all, and your resplendent talents.
#today on tumblr#sewing#sew#sewblr#crafts#sewing machine#crafting#sewing project#textile arts#crochet#sewing patterns#sewing tutorial#sewing tag#craftblr#contemporary art#artists#artists on tumblr
1K notes
·
View notes
Text
Here are some sharks I made out of felt. They were mostly sewn during my Psychology and English classes
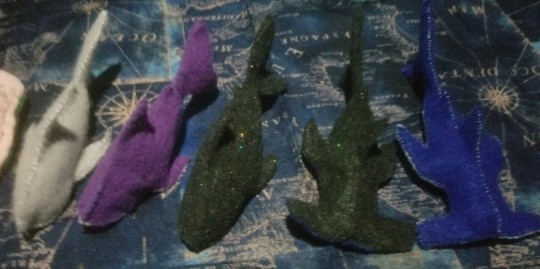
[Image ID: felt sharks lined up on a nautical themed tablecloth. Right to left: grey great white, purple great white, sparkly black great white,sparkly black hammerhead, blue hammerhead. End ID]
And heres the pattern

[Image ID: sewing patterns for sharks cut out of graph paper. One for a great white shark, the other for a hammerhead. End ID]
#sharks#shark toys#sewing#sewing patterns#hammerhead shark#sea creatures#artist described#image id#art#free sewing pattern#shark sewing pattern#marine life#marine biology
1K notes
·
View notes
Text
Lolita Accessory tutorial pages from Japanese mook “Gothic & Lolita Patterns”, 2004
Included are: head dresses, hair clips/ties, camisole pattern, drawers pattern, sock stoppers, multiple bag patterns, detachable collars, and jewelry.
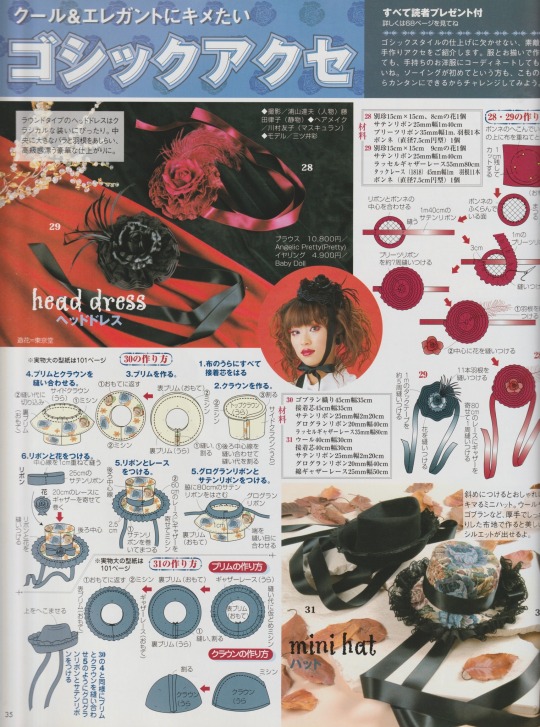
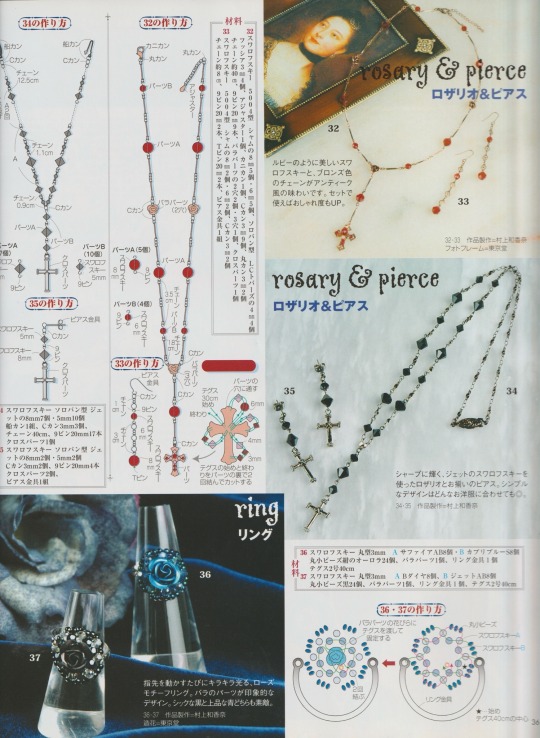
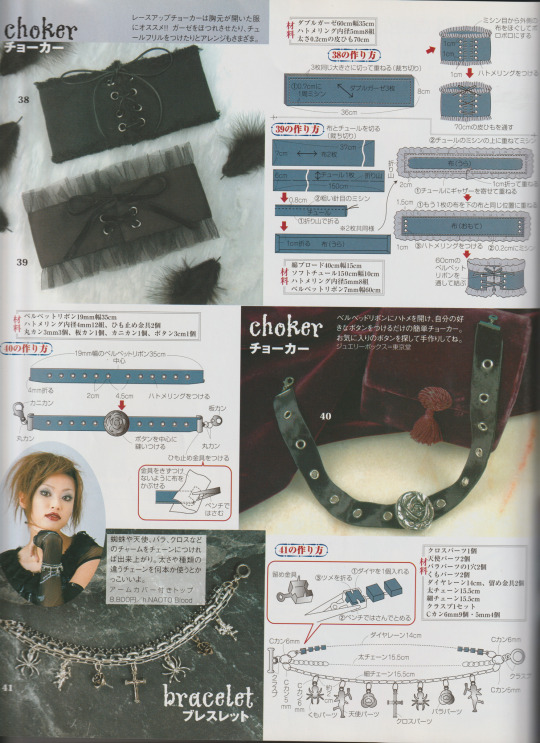
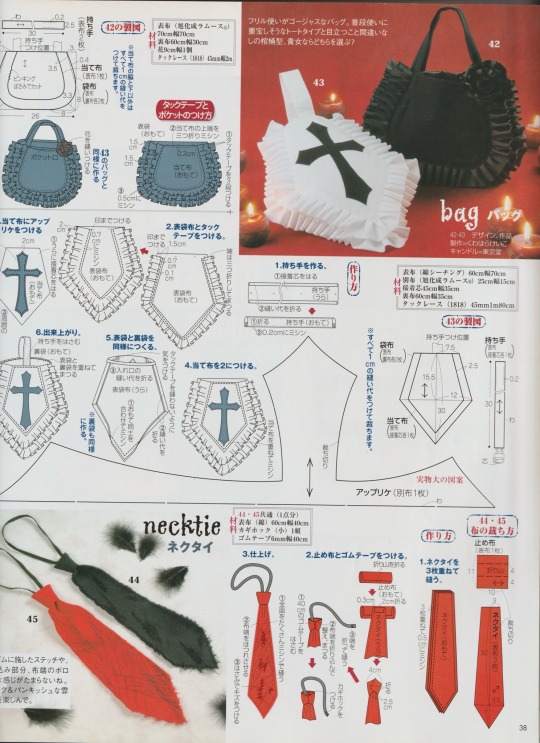
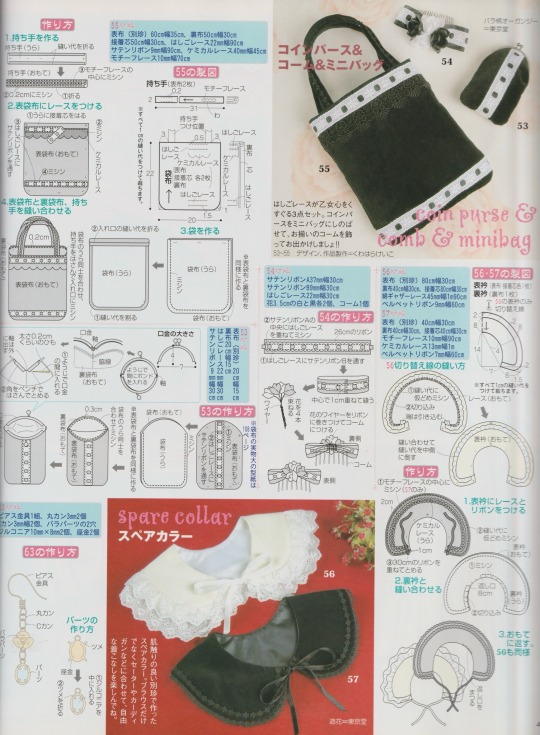
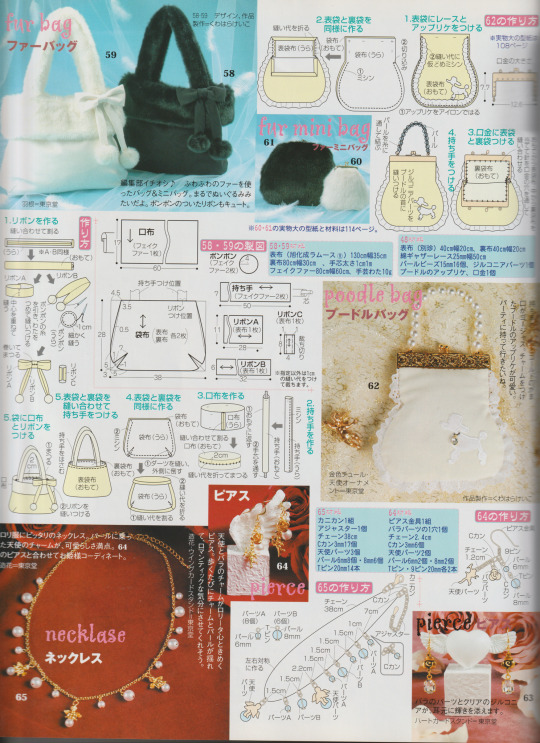
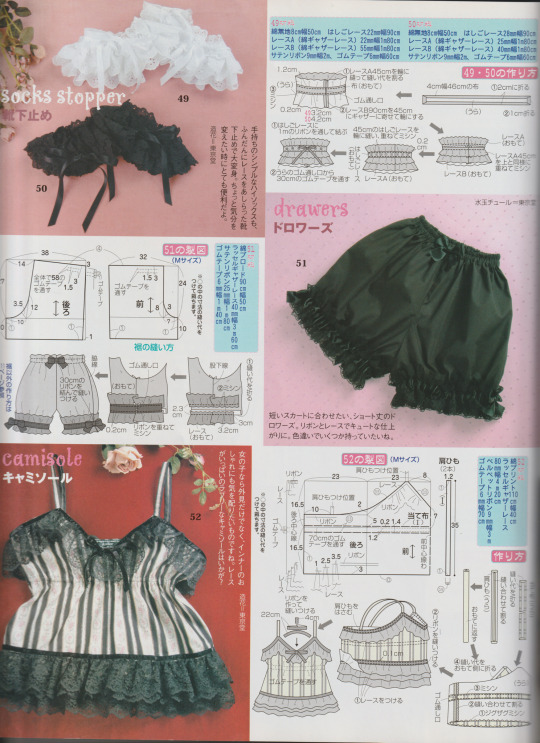
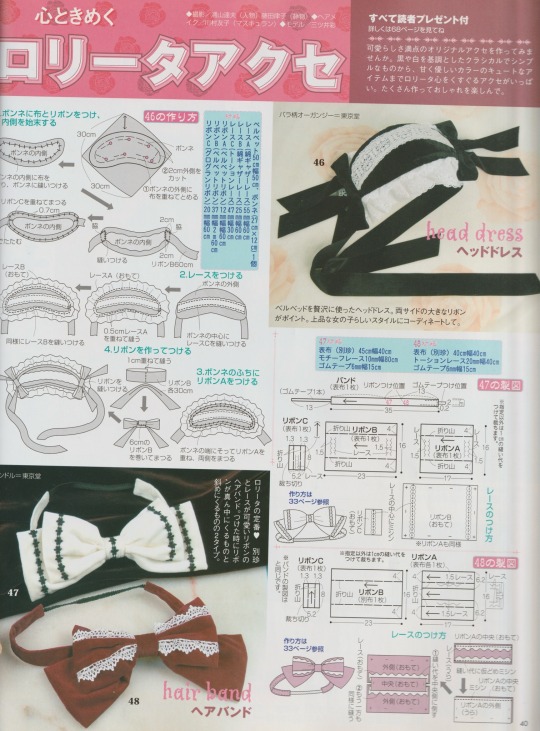
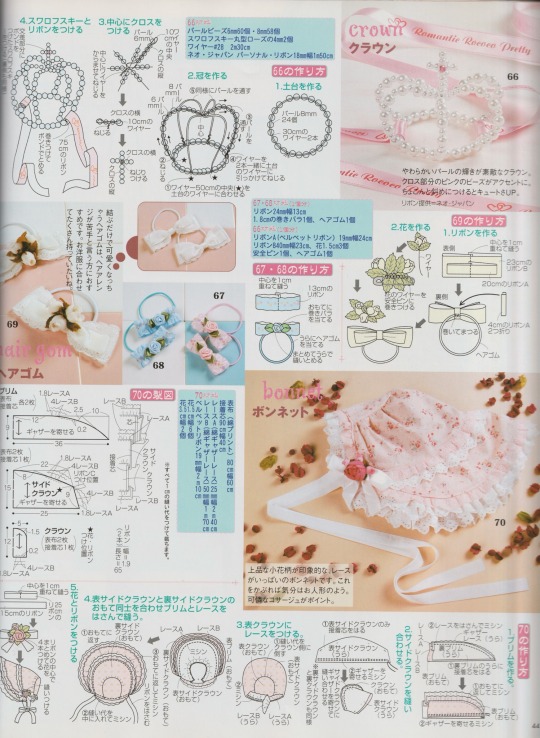
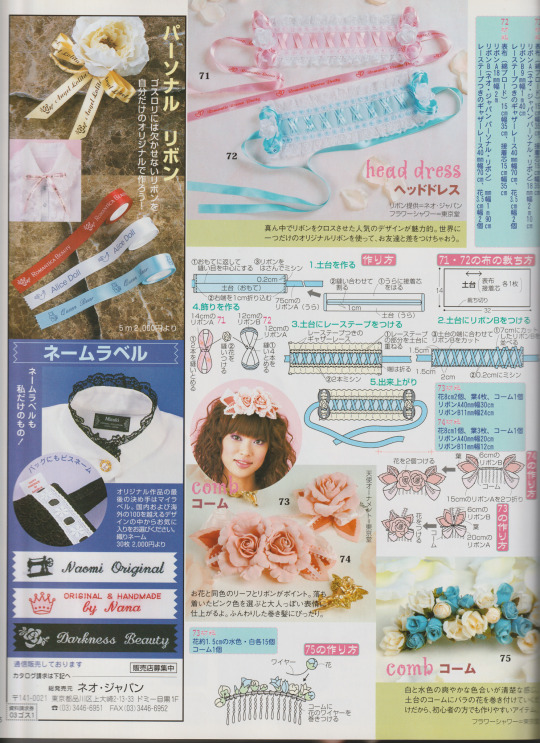
Consider this as my Valentine’s gift to you guys!! Thank you for being very kind about my post ^-^
*Also* If you would like the patterns to some of the tutorials (ie: the mini top hats, pattern 62) let me know so I can make a post later!
#gothic lolita#lolita fashion#j fashion#old school lolita#egl#egl fashion#coord#fashion#tutorial#magazine#sewing patterns#jewelry#goth#archive#my scans#happy valentine's day
690 notes
·
View notes
Text


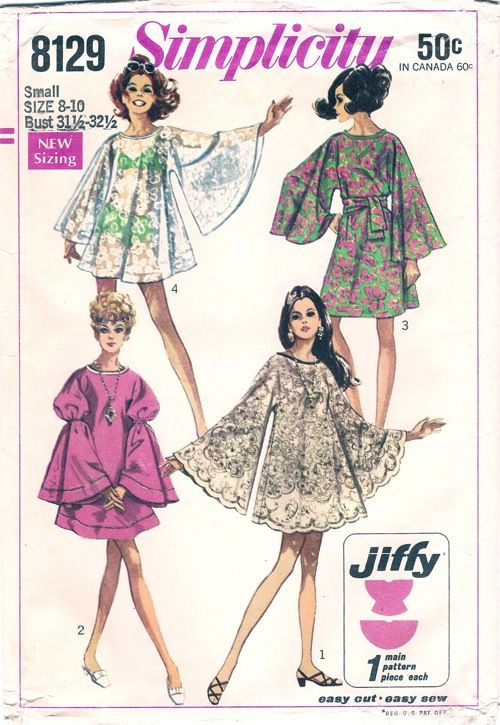


Sewing Patterns 1960s-70s
1K notes
·
View notes
Text

70s fashion sewing patterns
221 notes
·
View notes
Text
FREE POETSHIRT PATTERN
Some assembly required
Ok so. I made a sewing pattern that involves a lot of maths on the end users part - this is the only way I, a complete pattern making novice, can make this 100% size inclusive. Luckily it’s super simple and it just a whole bunch of rectangles.

Yes it’s written in cm. Bite me.
So to elaborate a bit:
It’s pretty straight forward. You plug in your own measurements in the places it’s needed.
Body x2: should be twice your either shoulder width or your widest point (if you’re more pear shaped you might want to use your hip width) by the length from your shoulder to about mid thigh* (you can make it as long or short as you want. This could probably also work as a shift pattern in a pinch). In one of the pieces, you should cut a slit in the middle, which as shown above should be about from your neck to your sternum.
Sleeves x2: these should be 2-3 times your bicep measure (this will determine the poofiness of the sleeves), by your arm length. Adding a few cm to the length can be a good idea here. I usually just round up to what seems most logical.
Cuffs x4: your wrist measure + 3-4cm of ease, by how ever long you want them - 5-10cm is a good place to start.
Collar x2: your collar measure** by however tall you want your collar. Keep in mind that it will be folded over.
Gussets
Oh glorious gussets. The whole reason this pattern works! But also where it gets a bit mathy
Sleeve gussets: these are square. The diagonal should be about 1/6 of your total armscye (all the way around). Rather a bit too small than too big - it can fuck up the fit (it did for me)
Shoulder gussets: these will depend wholely on how buff your trapezius muscles are. If your neck/shoulder is at a right angle, they’re not strictly necessary, but if you’re super buff, they’re very necessary. I’d say an average shoulder gusset is about 5-7cm, but it’s up to you.
Reinforcements
Again, these aren’t strictly necessary, but if you want your shirt to last it’s a good idea to put them in. You can choose to use between 5 and 10 total. These don’t need to be very big, they just go at any split in the fabric. About 2,5cm is good.
Instructions
I used these videos for assembly instructions
youtube
This is going to be hard without pictures…
youtube
youtube
*you can also keep the body as one piece, which should then be twice the length you want it. The slit at the neck will also have to be cut in the middle of the piece.
**your collar measure is the measurement at your neck going over your collarbone rather than tight to the neck.
304 notes
·
View notes
Text

Ampharos!
Sewing pattern here
502 notes
·
View notes
Text
1998 Furby Pattern (Tail Version)
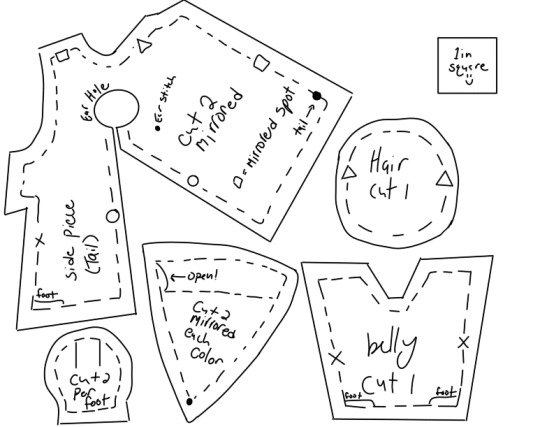
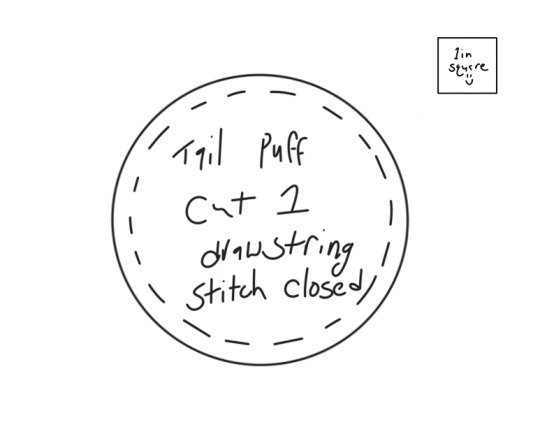
1998 Furby Pattern (Mane Version)
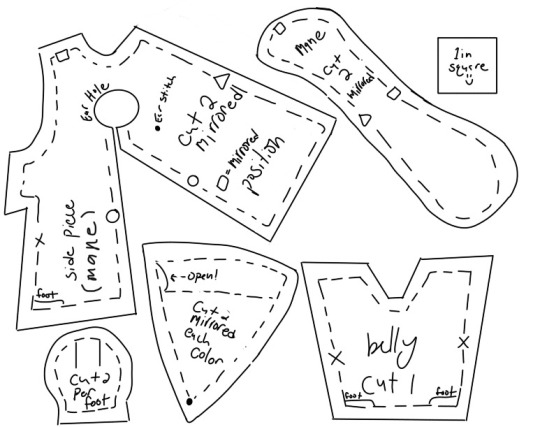
Do Not Crop Or Resize!
This pattern will print out proportional to a regular piece of printer paper (8.5in x 11in)! This pattern includes seam allowance! I have marked in where the ear gets sewn on, where the feet go, and to leave a portion of the ear open. Otherwise, just match up the markings! There is a note on the side piece to match squares with their mirrored position. For the ears "2 of each color" means the inner color and the outer color.
I guessed on the hair puff, so it may not be entirely accurate. However it seems to be about that size and based on the funky sewing on the inside, its a circle. PLEASE CORRECT ME IF IM WRONG AND I WILL ADJUST!
I dont yet have a pattern piece for the tail bc that requires disassembling one, which i will do when I begin my next custom.
I hope to make patterns for 1998 babies, 2005 adults, and connects before the end of the summer.
Edit: I have added the mane pattern! please note that the mane and tail version of the side piece are DIFFERENT!! You cannot use the tail side piece for a maned furby, or the skin will be too big.
Edit 2: Please don't forget to add the fabric at the bottom for the zip tie/elastic!! The band is about 1/2 inch wide, so I would suggest making the strip you cut 1 1/2 to 2 inches wide. I dont have a measuring tape on me rn, so I can't measure how long it is :/
Edit 3: Tail added! You might need to resize the tail one a bit bc for some reason the 1in reference square doesn't look the same size? Hope this helps! :)
#safe furby#furby#furby fandom#all furby#furblr#furbies#furby community#furby love#furbycore#custom furby#furby 1998#1998 furby#furby pattern#patterning#sewing patterns#tech stuff
705 notes
·
View notes
Text

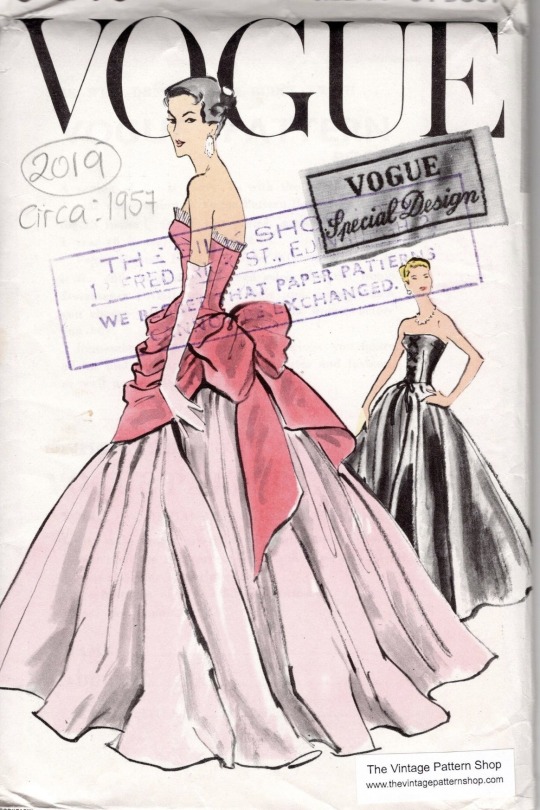
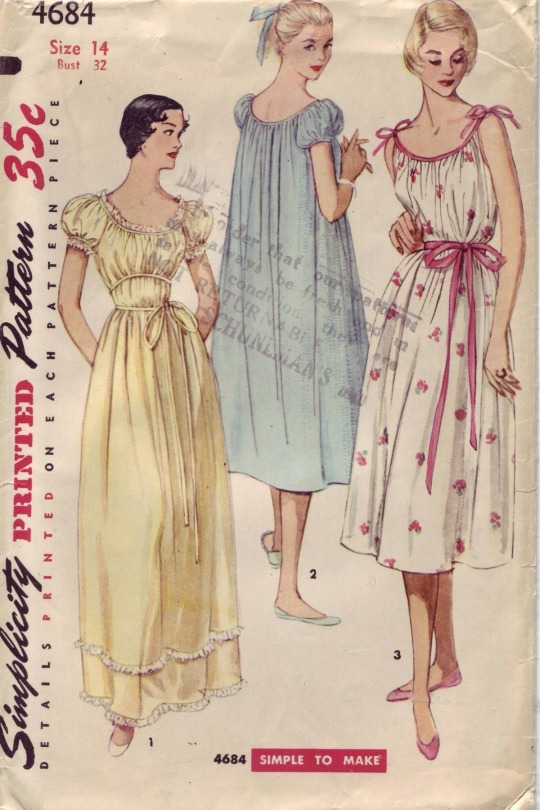
vintage sewing patterns 🪡 ₊˚⊹♡
#vintage sewing pattern#sewing patterns#coquette#dollette#this is a girlblog#girl blogging#lana del rey#lizzy grant#50s fashion#fifties#50s aesthetic#pink coquette#baby pink#pastel colours#this is what makes us girls#the virgin suicides#libson sisters#baby doll dress#vintage fashion#ocean blvd
202 notes
·
View notes
Text
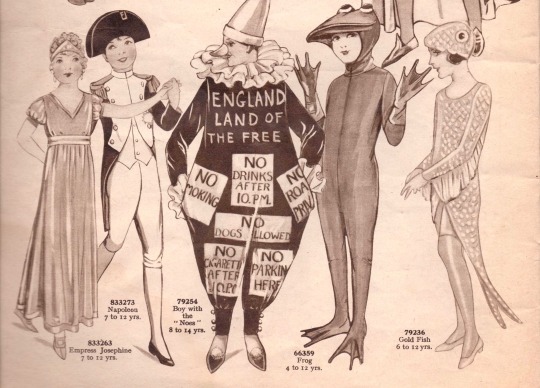
Frog and fish costume from Weldon’s Sewing Pattern magazine’s Fancy Dress For Children. 🐸🐟

Source
If anyone is having difficulty thinking up a costume for Halloween.
#meme#cute#frog#fish#frog meme#frog memes#halloween#halloween meme#Halloween memes#memes#halloween costumes#costume#costumes#sewing pattern#sewing patterns#vintage#vintage patterns#vintage sewing#vintage sewing pattern#animals#nature#green meme#ecological
2K notes
·
View notes
Text
The Vintage Patterns Wiki has over 83,500 sewing patterns dating until 1992. Browsing by decade, it's fascinating the see how fashion evolves over time. (Link below.)

679 notes
·
View notes
Text

8th February is a small festival Hari-Kuyo day in my mother country Japan. We give thanks to our broken pins and needles and make a wish for our skill up of sewing.
For celebrating Hari-kuyo, I want to have a mini sale like every year. Popular patterns are special sale price 8-9th February(CET). No discount code required!
Happy sewing!
**********************
follow me! Instagram /// Facebook /// Shop /// Pinterest //// Etsy Shop /// Newsletter
99 notes
·
View notes
Text

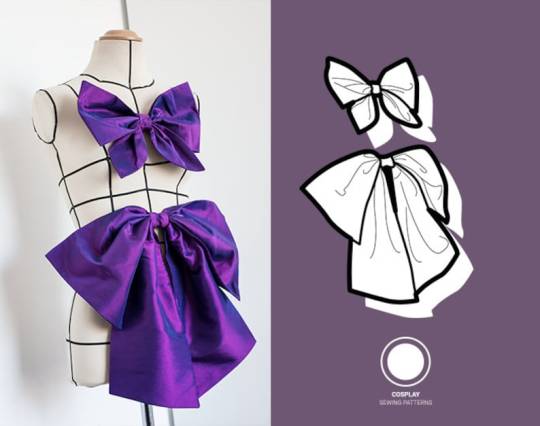
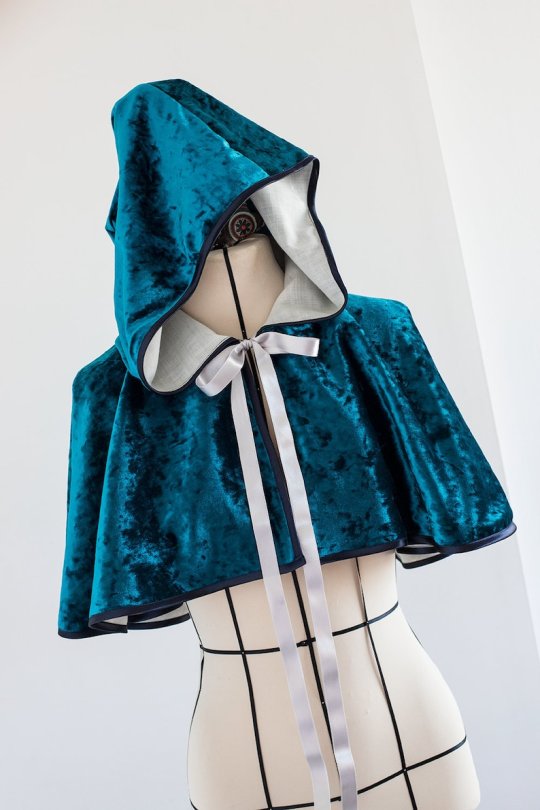

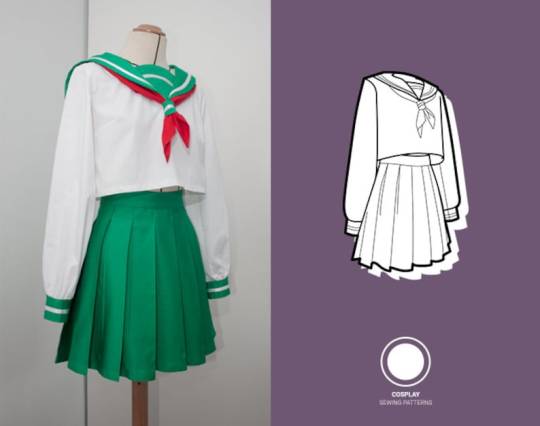
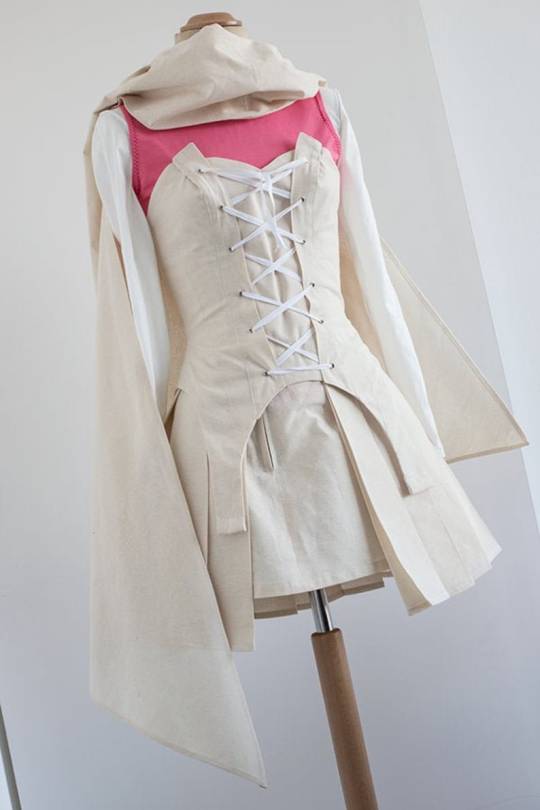
Cosplay Inspired Sewing Pattern PDF Downloads by PatternCosPatterns
#PatternCosPatterns#sewing pattern#sewing patterns#pdf download#pdf#pattern#sewing pattern download#cosplay#diy#craft
200 notes
·
View notes
Text

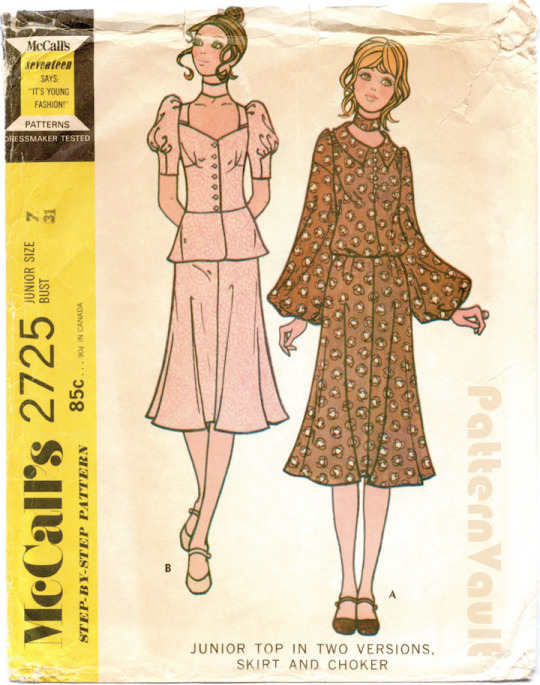
1970s clothing pattern illustrations
#vintage#70s#1970s#1970s fashion#clothing patterns#sewing patterns#vintage fashion#vintage art#vintage coquette#valentines day
324 notes
·
View notes
Last Seen Blogs

le-ging
Jus Courtney.

overseass
"Mustafa"

mypencilshavings
My Pencil Shavings

eccjrtamuracho
ECCジュニア田村町教室の先生ひとり言(続)

boygeniusnumberonefan
boygenius number one fan