#sewing pattern
Text


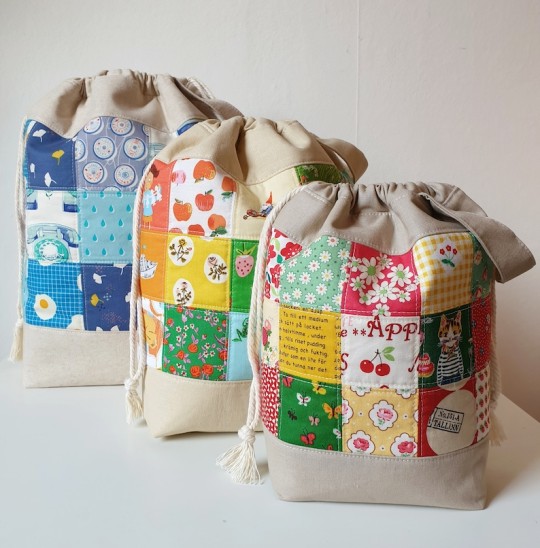


Fun, easy-to-follow sewing patterns by RosieTaylorCrafts
1K notes
·
View notes
Text

Trainer sized Mew! I had always wanted to make a big boy!
Pattern to make one yourself, I scaled it 150%:
https://dollphinwing.com/products/alien-plushie-sewing-pattern
743 notes
·
View notes
Text
youtube
Watch the American Climate Leadership Awards 2024 now: https://youtu.be/bWiW4Rp8vF0?feature=shared
The American Climate Leadership Awards 2024 broadcast recording is now available on ecoAmerica's YouTube channel for viewers to be inspired by active climate leaders. Watch to find out which finalist received the $50,000 grand prize! Hosted by Vanessa Hauc and featuring Bill McKibben and Katharine Hayhoe!
#ACLA24#ACLA24Leaders#youtube#youtube video#climate leaders#climate solutions#climate action#climate and environment#climate#climate change#climate and health#climate blog#climate justice#climate news#weather and climate#environmental news#environment#environmental awareness#environment and health#environmental#environmental issues#environmental justice#environment protection#environmental health#Youtube
3K notes
·
View notes
Text
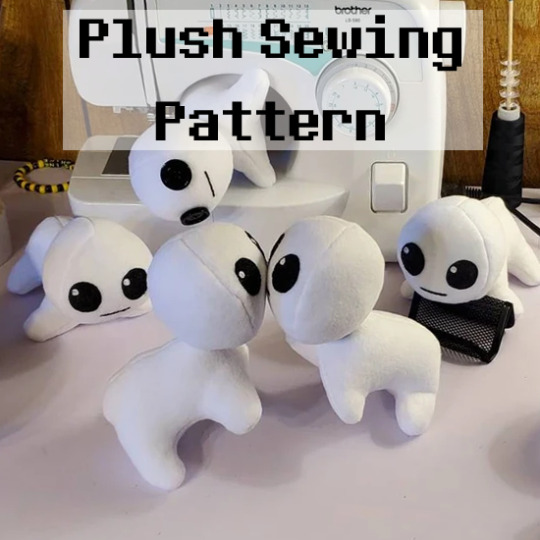

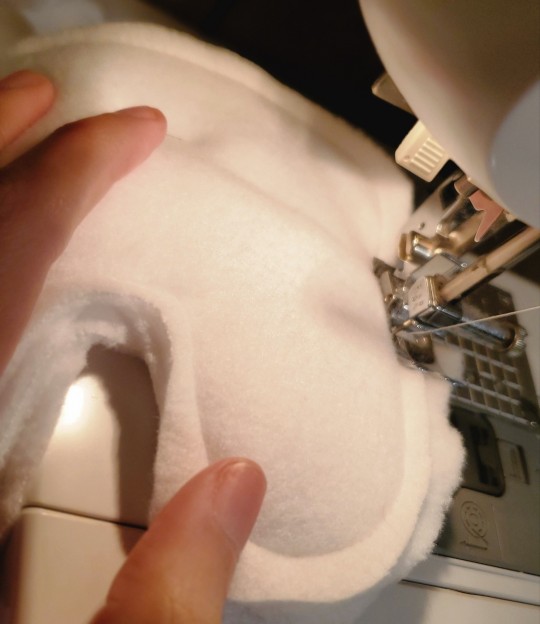
I just released a full tutorial and sewing pattern for my TBH creature plush toy designs! Its got step-by-step instructions, 19 pictures, and my heart in it~!
If you're interested in snagging the PDF for yourself, check it out on my Etsy, or get it for a liiiittle cheaper through my Ko-fi! Yippee!
#tbh creature#tbh#yippee#yippie#autism creature#artists on tumblr#plush#plushie#soft toy#plushblr#toywave#kidcore#pattern#sewing pattern#creature#art#daylikescookies
2K notes
·
View notes
Text
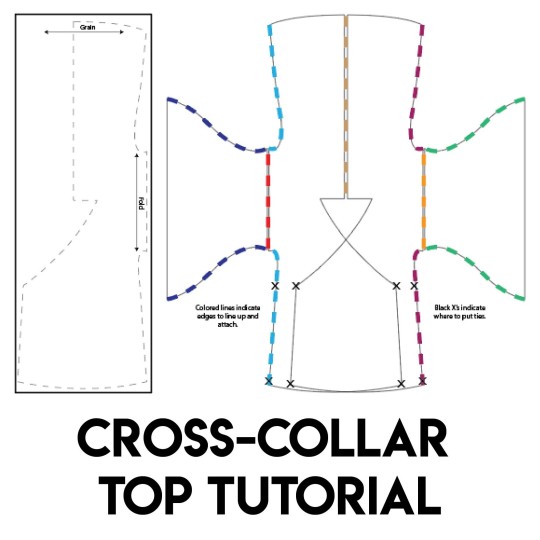
hello to the two people following me :) I haven't shared any patterns I've created before for sewing, but in making some period c-drama and danmei inspired cosplays and my resurging Hanfu fixation realized there aren't many good English resources for sewing cross-collar tops for zhongyi and other pieces so I made my own!
there are three pages but I tried to pack a bunch of information into it and you can download it via Gumroad for free :) I'm also entirely down to help out with patterning for anyone (if any lol) who might want to use this little pattern tutorial.
✨download link✨
219 notes
·
View notes
Text
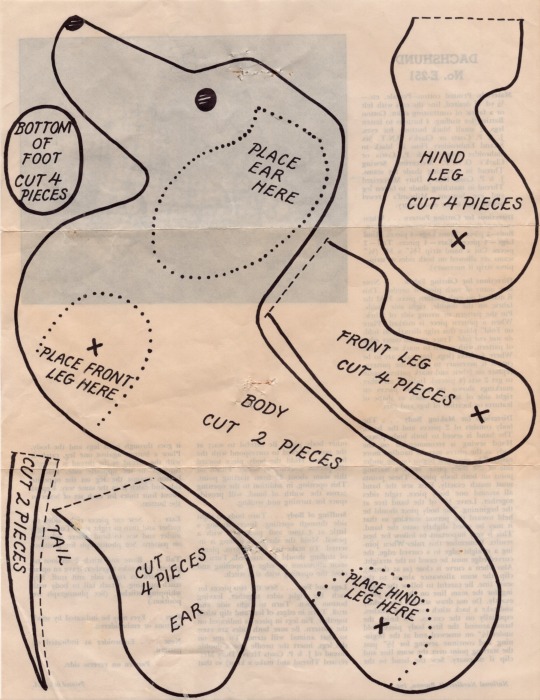
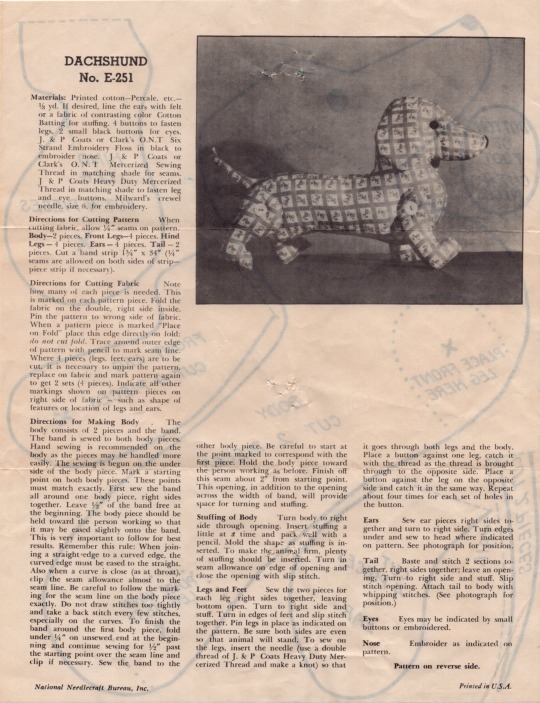
DACHSHUND No. E-251 pattern mailed out in letters by the national broadcasting company in august 1946
258 notes
·
View notes
Note
Where can I buy patterns for plus sizes?
So the big 5 patterns companies are basically all now owned by the same company. They have never had great plus size options, however this year the Know Me by Mimi G line has started and it not only has some awesome interesting plus size stuff it also features bipoc designers. So far these patterns have not been on extra sale which is annoying, but hey the other good plusize patterns out there and not going to be cheap either.
Mostly you want to look for independent pattern companies and makers. Places like Etsy are great to get pdf patterns in all sizes. Below is a link to a plus size site that has links to other patterns as well and the link for the website I've used to get patterns printed from pdfs relatively affordable. You also can invest in a projector and set up to trace your patterns directly onto fabric even. However steer clear of the ditto, because for everything I have read it only let's you use proprietary patterns.
359 notes
·
View notes
Text
youtube
[creating this for pinning purposes]
The 3 Free Stick Figure Plush patterns I've been working on since fall are finally done!
I'm so excited to release them out to the public!
I created a Stick Figure Chibi Plush, a Stick Figure Cuddle Plush, and a revamped Virabot Plush!
To access them you can either follow the links in the video description or you can visit the individual tumblr pages created for each project! (links below)
Happy Sewing everyone! 8D
Sammy8D's Chibi Stick Figure Plushies
Sammy8D's Cuddle Stick Figure Plushies
Revamped (Fanmade) Virabot Plush
87 notes
·
View notes
Text
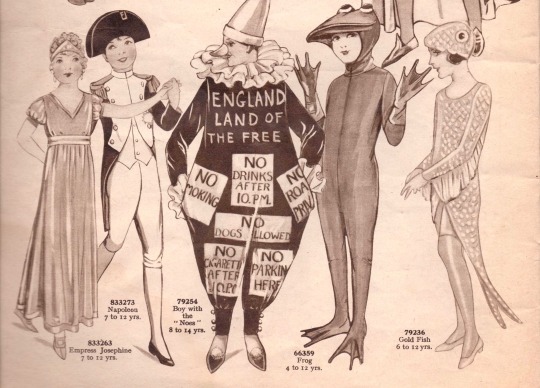
Frog and fish costume from Weldon’s Sewing Pattern magazine’s Fancy Dress For Children. 🐸🐟

Source
If anyone is having difficulty thinking up a costume for Halloween.
#meme#cute#frog#fish#frog meme#frog memes#halloween#halloween meme#Halloween memes#memes#halloween costumes#costume#costumes#sewing pattern#sewing patterns#vintage#vintage patterns#vintage sewing#vintage sewing pattern#animals#nature#green meme#ecological
2K notes
·
View notes
Text
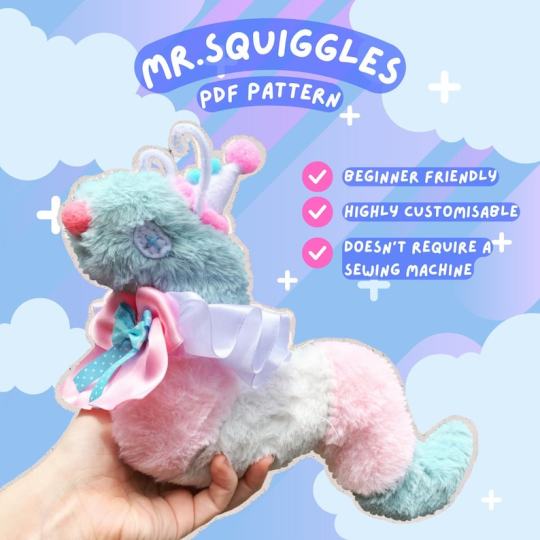
MR SQUIGGLES - Clown worm caterpillar Sewing pattern // AzakaiArts
111 notes
·
View notes
Text
(casually looks in on the Miraculous fandom)
(takes in the sudden (and understandable) butterfly frenzy)
I'm just gonna leave these patterns that would look so cute in Hesperia's colour palette here for anyone who's interested in sewing.

#miraculous ladybug#hesperia#betterfly#gabriel agreste#sewing pattern#this isn't sponsered or my etsy I just really like this person's patterns#and also encouraging fandom related plushie shenanigans
177 notes
·
View notes
Text

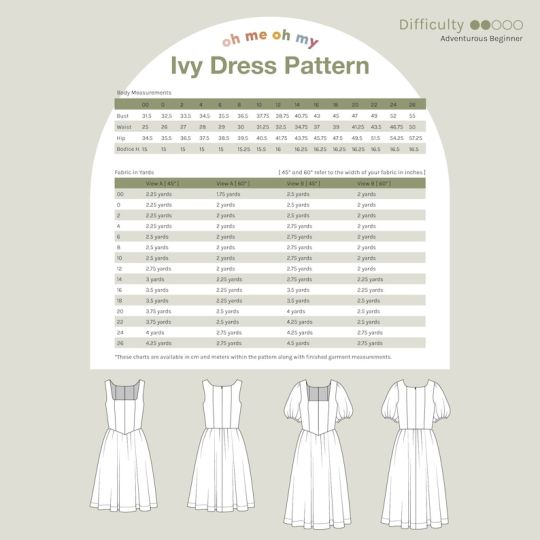
Ivy Dress PDF Sewing Pattern by OhMeOhMySewing
#OhMeOhMySewing#pdf#pdf sewing pattern#sewing pattern#sewing#sewing pdf#pdf download#sewing download
144 notes
·
View notes
Text
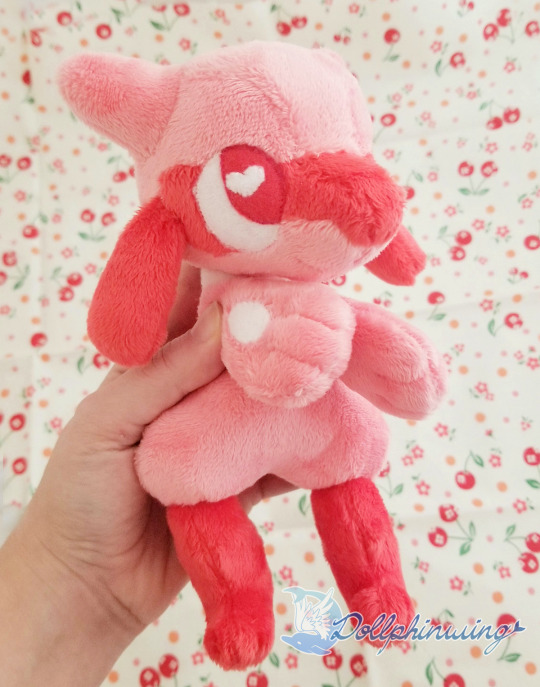
He just wants some love 🥺
Free sewing pattern available!
271 notes
·
View notes
Text
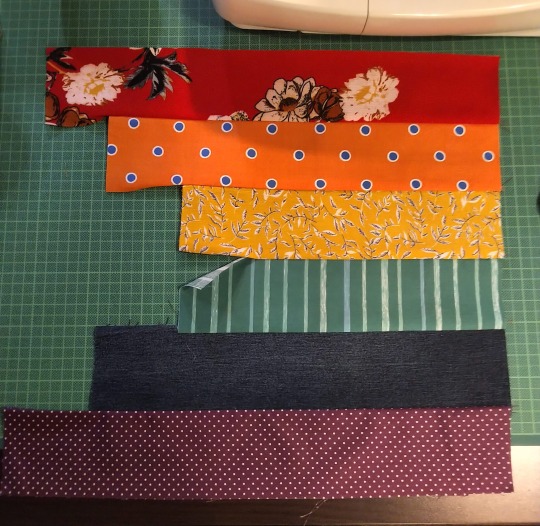
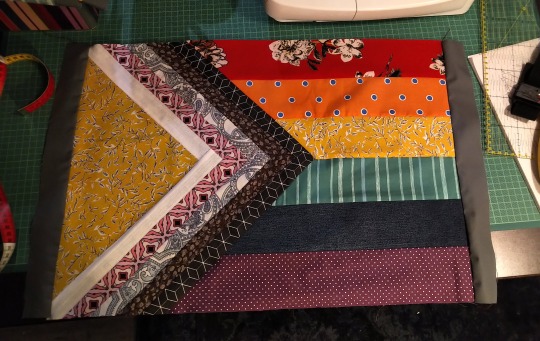
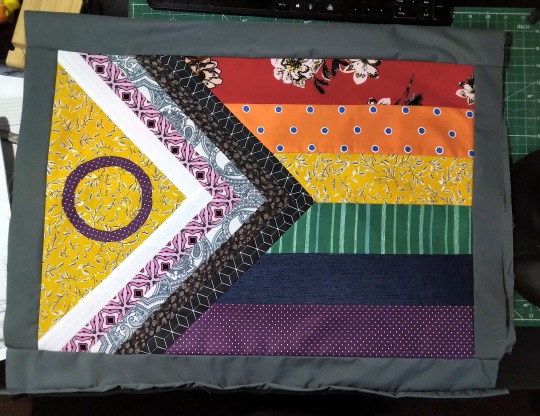
Progress Pride Flag Quilt Block Pattern & Tutorial

Don't you just love the flag of our people? Do you have an inner grandma that years to make stuff? Do you want to combine these two things and make a queer quilt?
Well, I've got you.
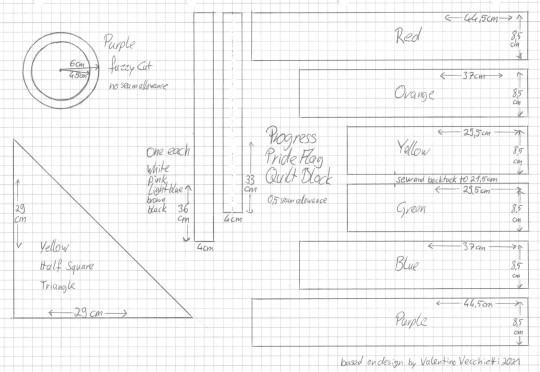
Behold the pattern! And my lack of graphic skills, so I drew it on paper!
Basically it's a bunch of rectangles, one half square triangle and a fuzzy cut circle. I don't know shit about quilting and I was able to come up with it. Why Centimeter, you ask? Because I'm German and that's what I'm familiar with. Why weird measurements and not jelly rolls and layer cakes and stuff? Because I'm German and quilting is not really a thing here.
Onto the tutorial!
You'll need:
A scrap of fabric of red, orange, yellow, green, blue, purple, black, brown, light blue, pink, white each
additional fabric for the border
Cutting mat, quilting ruler, roll cutter
sewing machine
thread
pins
double sided interfacing
iron and ironing board
fabric sheers
compasses
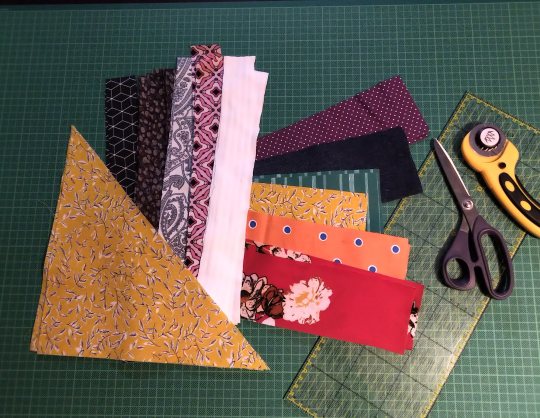
Step 1: Cut everything. Duh. We'll take care of the circle later, don't worry about that now. The half square triangle is exactly what it sounds like. A square and then you cut it diagonally. That's why I didn't give the length of the hypotenuse.
(Note: I'm making two blocks at the same time, that's why there's so much fabric. Also this is a middle of the night project, hence the lighting.)
I'm using all kinds of different fabrics, different weights and drapes, some stretchy, some transparent, so I needed to interface some of them.
Step 2: Sew the rainbow together. 0,5cm seam allowance on everything, that's exactly the edge of the foot on your machine. Double and triple check that everything is facing the right direction before sewing. The seam of yellow and green does not get sewn fully, only 21,5 cm! That's important later! Also backtack there. Don't forget to iron.
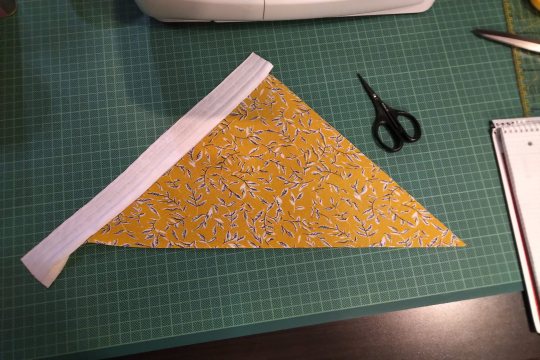
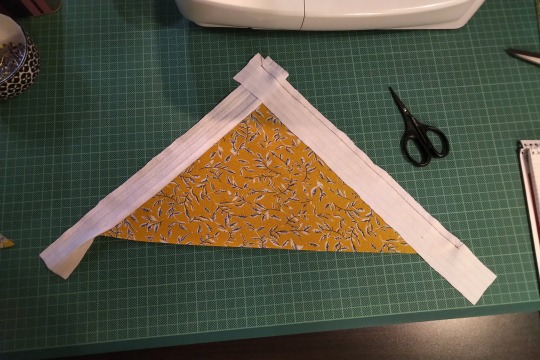
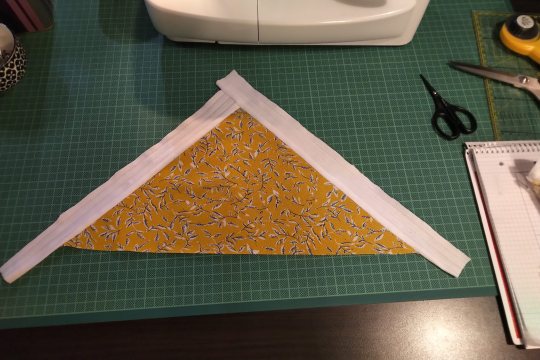
Step 3: Sew the strips to the half square triangle. For this you have to switch between the sewing machine and the ironing board constantly. Attach the shorter strip diretly to one side of the HST, iron it open. The second strip of the same colour gets attatched to the other side of the HST and the first strip. Look at the pictures closely if you're unsure how that works. Also the strips are longer than the triangle. We'll square that up later.
All strips attatched will look like this. See how the two strips meet at the tip!
Step 4: Cut the rainbow part to size. The seam between yellow and green is 22cm long. The shorter seam from before and some seam allowance. The outsides of red and purple are 44,5cm long. You will cut a little triangle from every single colour. Do this slowly and carefully. Maybe your fabrics have stretched a bit (mine did). Don't worry, it will be ok.

Step 5: The Y seam, part one. Y seams are tricky, but there's only one for this block. So put your straps part on your rainbow part and line them up so that the tip of the strip part overhangs the seam between yellow and green. Remember that it's not about the edges of the fabric, but where the seam will be. So position the strap part so that the 0,5cm seam will meet the yellow-green seam.
But don't sew all the way! Leave 0,5cm at the tip!
Step 6: The Y seam, part two. Now, fold both the rainbow part and the strips part in half and if you've done the last step correctly, the remaining two edges will allign. Pin and sew.
I can't explain it better than I've done here, I'm sure there are tutorias out there. Good luck!
Step 7: Square up. Iron your block to that everything is nice and straight and flat. Then use the fabric edges of the red and purple to cut the remaining ends of the strips. Use the HST to cut the white. Be careful, the long side of the triangle is on the bias and likely stretched a bit.
I already added borders here. I'm making a pillow case.
Step 8: Fuzzy cut and raw edge applique. Double sided iron on interfacing is essentially double sided tape. It has two types of glue, one gets activated by 2 seconds of heat, the other by 5 or so (depends on the product). The second side is also covered with a paper that needs to be removed before the second glueing. Read the instructions of the product you are using!
Use your compasses to draw a circle on the protective paper side of the interfacing. Cut it out roughly. Then place it with the rougher side on the backside of your purple fabric and iron for 2 seconds on middle heat. If you've just ironed your fabric before and the ironing board is still hot, wait for it to cool down. Also let the fabric cool down after applying. Then cut out your circle. The interfacing will have stiffened the fabric, so that shouldn't be a problem. Then remove the protective paper, place the circle on the yellow triangle where you want it and iron for 5 seconds. Let cool.
And you're done! The applique at this point is only secured with the interfacing, but it should hold fairly well. The quilting will secure it further.
And that's it. BTW, did you know that this design was made by Valentino Vecchietti for Intersex Equality Rights UK in 2021? Now you do. Happy quilting!
#lgbt+#lgbtq+#lgbtq community#pride flag#progress pride flag#valentino vecchietti#quilting#quilt#quilt block#quilt pattern#quilt tutorial#sewing#sewing machine#sewing tutorial#sewing pattern
106 notes
·
View notes
Text

interested in making your very own YIPPIE? the power is in your hands.
#plush#plushie#daylikescookies#plushies#artists on tumblr#plushcore#kidcore#tbh#tbh creature#yippee#yippie creature#yipeeee#yippy#yipee#yippie#yipppeeee#sewing tutorial#sewing pattern#sewing
248 notes
·
View notes
Text

[Image ID: felt nudibranches. One is yellow with black spots, one is blue with orange stripes, and one is pink with black spots on top and green on bottom with green antennae. End ID]
The pattern for this was just an oval cut out twice but on the top oval, I cut diamonds out of the "corners" and sewed them back together. The antennae were just from scraps.
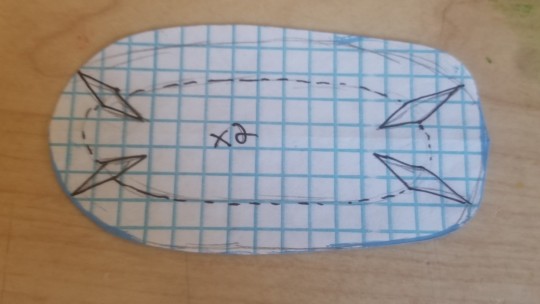
[Image ID: nudibranch sewing pattern. It's an oval cut out of graph paper. End ID]
#nudibranch#sewing#sewing pattern#free sewing pattern#artist described#image id#art#sea creatures#ocean#marine life#marine biology
119 notes
·
View notes
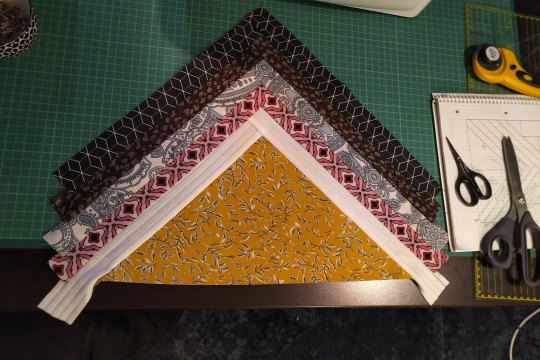
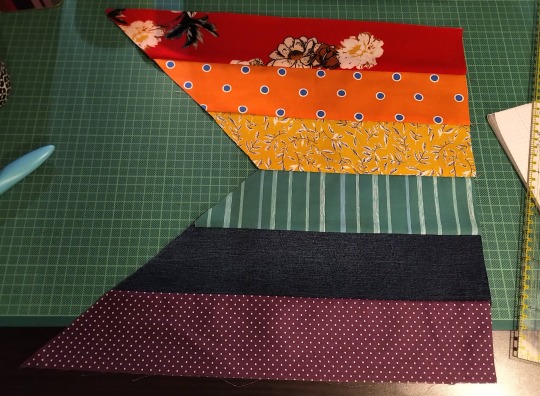
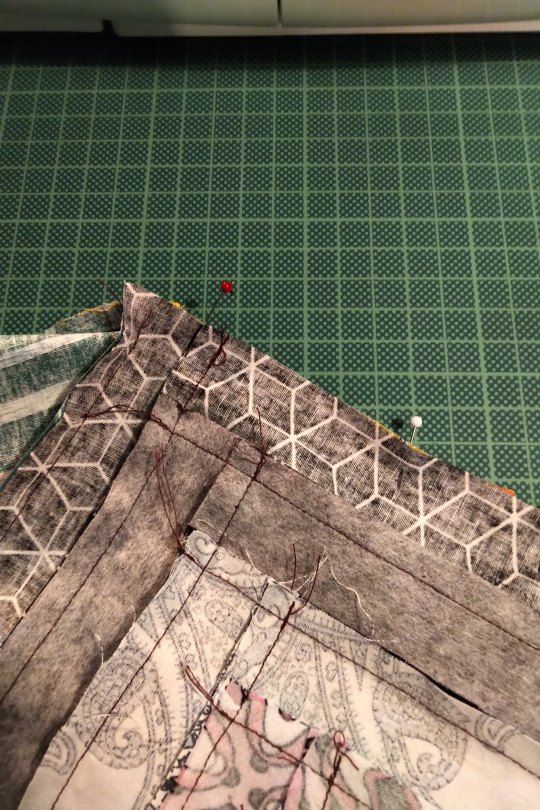
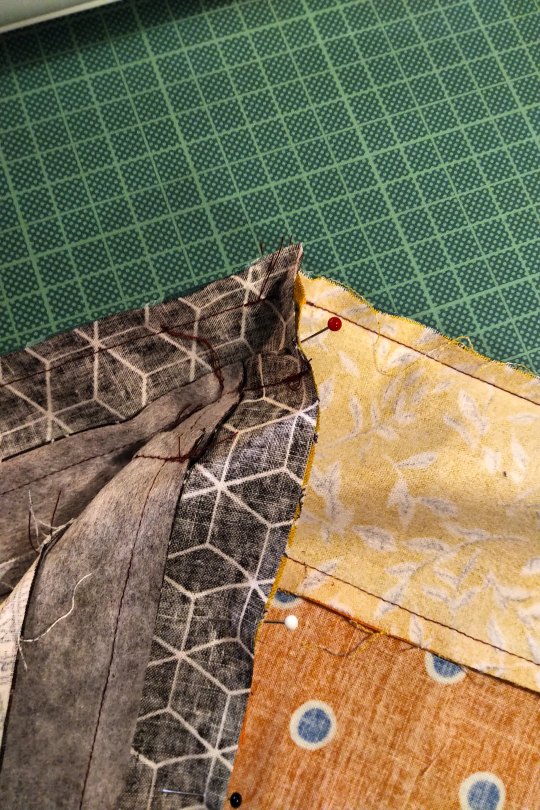
Text

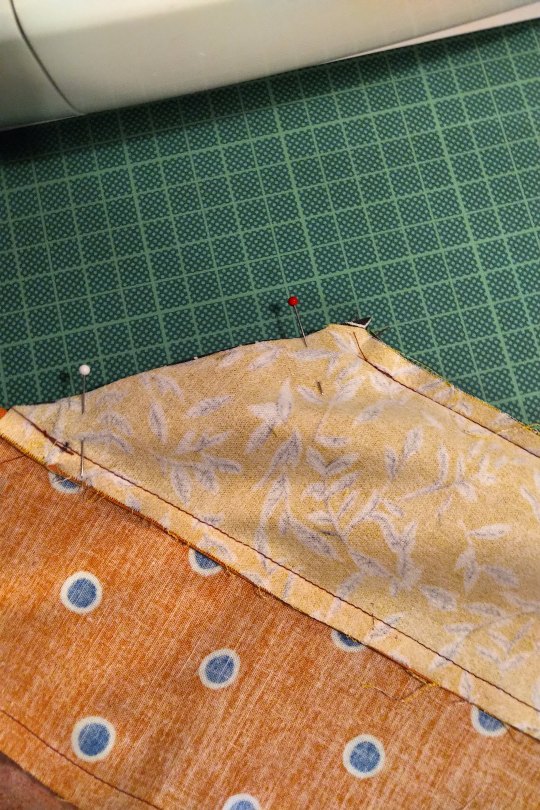
Finally feeling like myself and getting some sewing done. I cut this out last year and I am finally going to make my Our Flag Means Death inspired Stede Bonnet as a flapper costume. I have a wig and found a flapper dress that I think would be perfect. My cocoon coat should come together fairly quickly, though with plenty of cursing over silk and velvet...
#sewing#youtube#diy#sewist#seamstress#sewing pattern#costumes#crafts#costume#cosplay#Ofmd#stedebeard#steddy#blackbonnet#stede bonnet#edward teach#born on a beach
270 notes
·
View notes
Last Seen Blogs
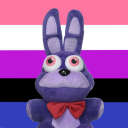
confessions-but-fnaf
INACTIVE
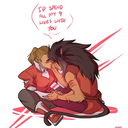
squakamole2018
Squak's ShitPost BlogSpot

ceogene
CEO GENE
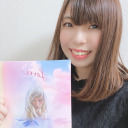
tayum13
Ayumi Love(r)s Taylor

casinobeo
คาสิโน BEO