#vegan buttermilk recipe
Text
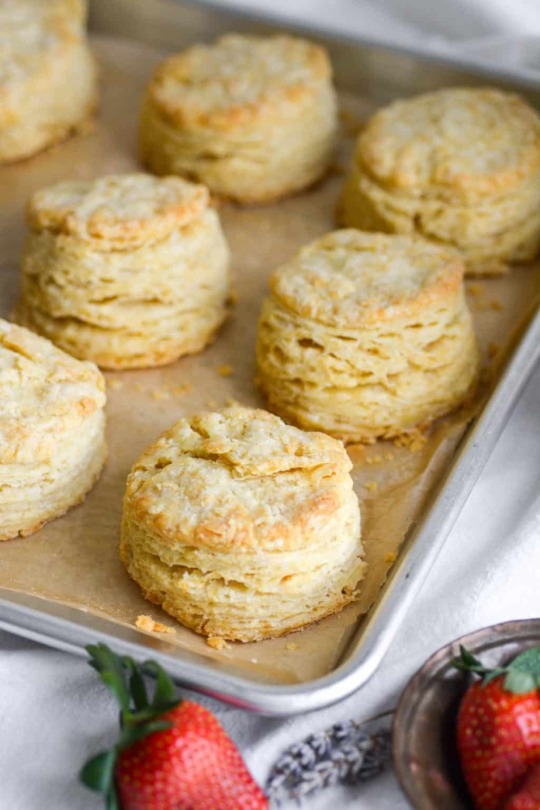
Vegan Buttermilk Biscuits
#vegan#buttermlik#biscuits#bread#baking#recipe#dairy free#egg free#breakfast#earthly provisions#https://earthly-provisions.com/vegan-buttermilk-biscuits/
140 notes
·
View notes
Text

Vegan Buttermilk Pancakes
#vegan food#vegan#buttermilk#pancakes#almond milk#breakfast#recipe#food#delicious#food blog#recipes#yummy food
59 notes
·
View notes
Photo

Easy strawberry pancakes
#pancakes#breakfast#strawberry#buttermilk pancakes#food#maple syrup#sweet food#sweet tooth#strawberry pancakes#vegan#vegan pancakes#strawberries#breakfast food#tasty#foodporn#delicious#cooking#food photography#foodgasm#recipe
771 notes
·
View notes
Photo
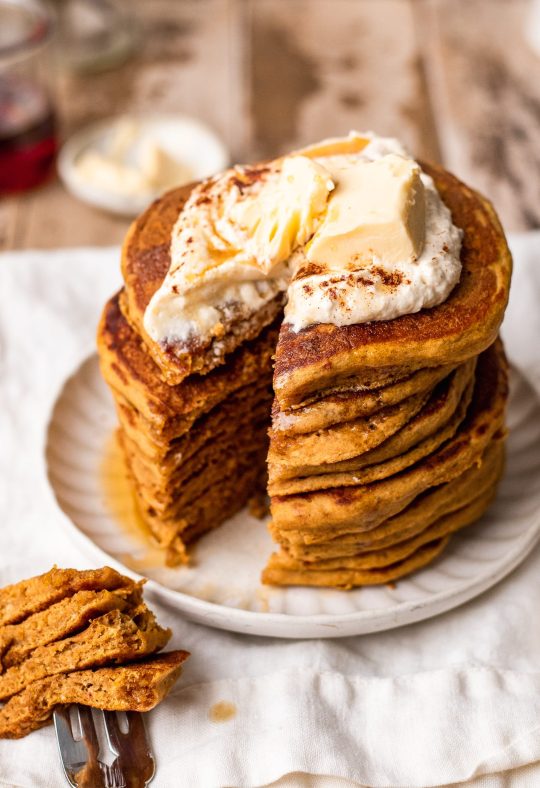
Super Fluffy Vegan Pumpkin Pancakes
#food#recipe#breakfast#pancakes#pumpkin#pumpkin spice#squash#buttermilk#vanilla#vegetarian#vegan#gluten free
156 notes
·
View notes
Text

Vegan Maple Cheddar Buttermilk Biscuits
#savoury#savoury biscuits#recipe#recipes#vegan#veganism#vegetarian#plant based#makeitdairyfree#maple#cheddar#cheese#buttermilk#thanksgiving#food#foodporn#food porn#sides#maple syrup
4 notes
·
View notes
Text
Você Sabe quais são Os pratos mais Difíceis do mundo?
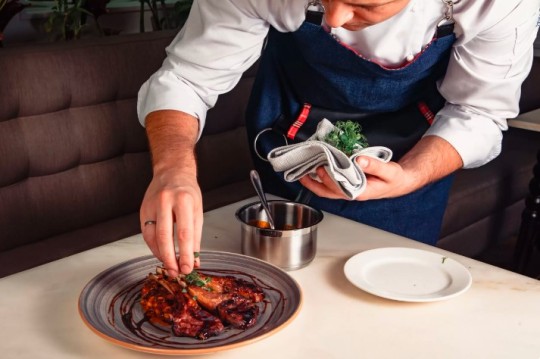
Conheça os pratos mais difíceis de serem elaborados: A culinária é uma forma de arte que requer paciência, habilidade e prática. Existem muitos pratos que são considerados difíceis de preparar, devido à complexidade da receita, à técnica exigida ou à raridade dos ingredientes.
#vegan#food#recipe#banana#what vegans eat#vegetarian#gluten free#cheese curds#appetizer#fried cheese#ranch#buttermilk ranch#steak#meat#beef#churrasco#chimichurri#main course#meal#beef steak#dinner#garlic#parsley#tasty#foodporn#delicious#cooking#food photography#foodgasm#steak recipes
2 notes
·
View notes
Text
Pear Upside Down Cake - Vegan
Searching for a vegan dessert that not only tastes heavenly but also looks stunning on the table? Look no further than this Vegan Buttermilk Pear Upside Down Cake. Rich in flavor, light in texture, and 100% plant-based, this dessert will become your new go-to recipe for special occasions.
Vegan Pear Buttermilk Upside Down Cake
“Mom – Can you make that cake you used to make?” – That was all that…

View On WordPress
1 note
·
View note
Text
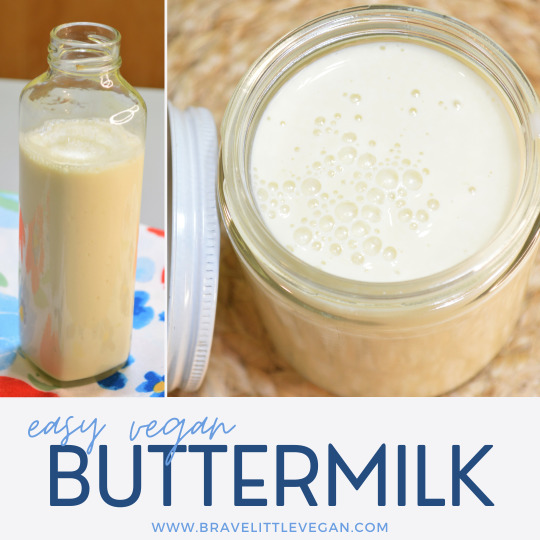
Easy Vegan Buttermilk (Only 2 Ingredients!)
how to make vegan buttermilk (only 2 ingredients) #veganhacks #veganbaking #buttermilk #soymilk
View On WordPress
#10 ingredients or less#5 ingredients or less#baking#buttermilk#buttermilk recipe#buttermilk substitute#buttermilk using soy milk#condiment#dairy alternatives#dairy-free#dairy-free buttermilk#dairy-free milk#easy vegan baking#easy vegan cooking#food substitutes#how to make buttermilk#how to make vegan buttermilk#ingredients#milk-free#non-dairy#non-dairy milk#plant-based#soy milk#vegan#vegan baking#vegan baking recipes#vegan buttermilk#vegan buttermilk recipe#vegan cooking#vegan tips and tricks
0 notes
Text
Recipes below 300 kcal (Youtube edition)
Was lurking on youtube and thought why not make a list of low cal recipe that i found, and here it is!!
129 kcal ice cream
124 kcal creamy vegetable soup
190 kcal flourless chocolate brownies
265 kcal lasagna
( 1 / 2 )
175 kcal buttermilk chicken
157 kcal keto chicken dumpling
98 kcal everything bagel
189 kcal chicken soup
172 kcal warabi mochi (without topping and syrup)
low calorie bubble tea (two types of drinks, the pearl is 0 kcal)
136 kcal (per slice) cheesecake
107 kcal spring roll, 126 kcal carrot snack, 157 kcal chicken kelaguen
271 kcal mushroom soup
292 kcal vegan veggie burger
267 kcal vegetarian one pot spaghetti, 375 kcal taco quinoa, 238 kcal one pot pizza pasta
110 kcal sweet potato soup, 193 kcal minestrone soup, 201 kcal coconut chicken curry soup
126 kcal roasted cauliflower soup, 254 kcal sweet potato soup, 145 kcal beet soup
33 kcal pepperoni pizza bite
136 kcal cheesecake
36 kcal chicken meatball
261 kcal apple fritter
134 kcal mac and cheese (there’s three version of mac and cheese in the vid)
253 kcal honey garlic cauliflower
45 - 150 kcal pizza (6 varieties of pizza)
222 kcal air fryer cauliflower wings
You can always find substitutes for the ingredients to lower the calorie count.
If you made any of the recipe, feel free to share it with us ❤
Stay safe lovelies ❤✨
1K notes
·
View notes
Text
once again i’m here to report that it’s sooo ridiculously easy to veganize popular recipes esp in baking
i made a chocolate birthday cake today from a sallysbakingaddiction recipe and veganized it
which feels like too much credit already bc literally all i had to swap was—i used an egg replacer (i had aquafaba/white bean liquid ready to use but i ended up having a powdered egg replacer and even if i hadn’t had those i’d have used a flax egg or any other of 10 kinds of alternatives for binders) and then in place of buttermilk i just put 1 tsp lemon juice in 1 cup of soy milk and it was flawless
that’s IT. i had to substitute 2 things. that is fucking it
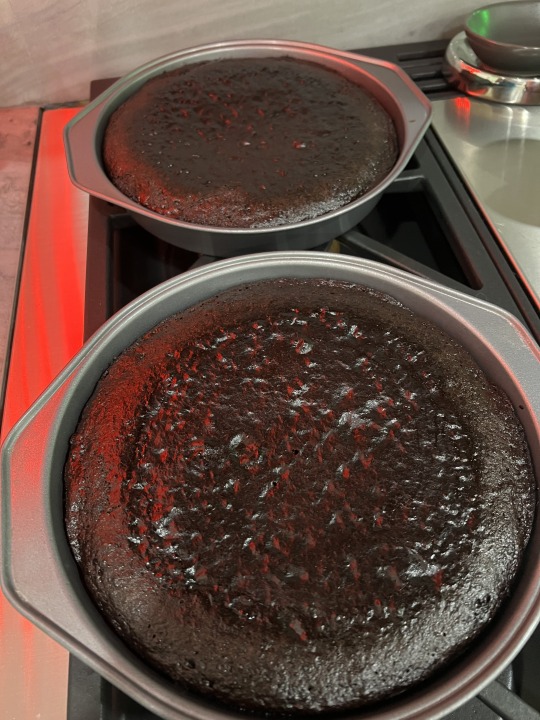
the cake is insanely beautiful and i haven’t even frosted it yet. it baked up gorgeously (it’s a super thin batter and a delicate cake even prior to substitutions). i even plucked a small bite off the top of one layer and i almost DIED it was so delicious and i can’t wait to eat it tomorrow (i will report back afterward)
but my point is it’s so stupidly easy to make things like this vegan without sacrificing a single taste or texture difference. at most it takes 3 seconds of googling how to replace a whopping 2 ingredience smh
#btw powder egg replacer is cheaper than eggs by fucking far lmfao#the alternative to 34 eggs in a shelf stable bag. hello#why would you ever use anything else for baking#v#vp
29 notes
·
View notes
Text
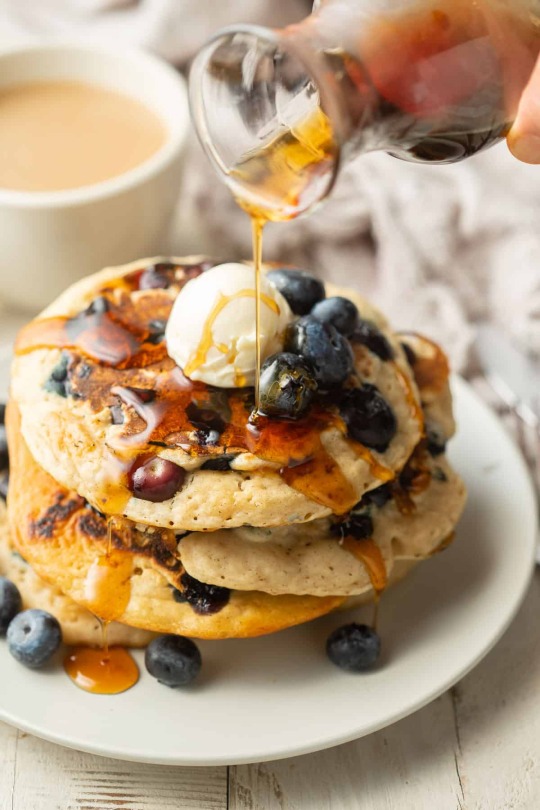
Vegan Blueberry Buttermilk Pancakes
#vegan#blueberry#buttermilk#pancakes#food#breakfast#dairy free#berries#fruit#egg free#kids#summer#recipe#connoisseurusveg
239 notes
·
View notes
Note
Do you have any specific tips on learning to keep kosher? Advice like what dairy substitutes work best or a reliable place to get recipes would be great. I grew up in a house that mixes dairy and meat for most meals so any help would be greatly appreciated. If you've already answered this, could you give a link to the post? I couldn't find one, but that might be because tumblr's search function doesn't work.
Sure! Here is a post I made about keeping kosher.
Substitutes are your best friend. If a recipe calls for butter, using vegetable oil instead could be better if you're eating it with a meat meal. Margarine is also a great substitute when making baked goods. Mixing lemon juice with a nut milk gives you buttermilk.
In brownies, using orange juice instead of milk makes the flavor really pop. I love doing this on shabbat so I can have a dessert after a meat meal. You could also just use any other nut milk, or oat milk (just make sure it has a pareve symbol on it, I've seen some oat milks that are still OU D because it's sometimes manufactured in dairy machines or factories). Pareve chocolate is a miracle to be appreciated. Using egg noodles or zucchini noodles are great when you want to have a meat-based dish, and pareve bread for meat-based sandwiches.
I love using vegan or vegetarian plant-based meats in my dishes.* For example, I use vegan ground beef in my lasagna, so I can still use regular noodles and cheese. Plant-based chicken is also great for skillets or pasta. You could also just use fish instead, as it's considered pareve. I don't like the taste of vegan cheese, so I'd much rather use real cheese and vegan meat, but it's always an option. If you don't have meat but still want a filling meal, using grains such as quinoa, or starches like potatoes, can help with that.
As for finding recipes, there are a few kosher cooking blogs online. To find things I usually just search whatever food I want followed by "kosher" and it's usually there. If I can't find a recipe for it, I use a regular recipe with the above substitutes to make it kosher. Buying kosher cookbooks is also a good idea. I don't recommend just searching for "jewish cookbooks" because sometimes those include non-kosher dishes, so search specifically for kosher cookbooks.
*Some Jews have customs that don't allow them to eat vegan meats due to abiding by the spirit of the law, and the fact that the appearance of eating something not kosher could mislead others. It is best to discuss this with your rabbi if you think this may be an issue.
58 notes
·
View notes
Text
@wanderingbasilisk replied to your post “my totally biased opinion is that the black moss...”:
...do you perchance have that recipe, and would be willing to share it? 👀
I do (thanks past me for never deleting my texts), and have asked permission to share, and it has been granted.
2 c flour (all purpose)
1 c sugar (white granulated)
1 stick (8 tbsp) butter
3 tsp baking powder
2 eggs
1/2 c cocoa powder
1 tbsp heavy cream
1 c beet juice
matcha powder (straight matcha powder - not sweetened matcha latte powder) and turmeric to taste; I believe the recommendations were 1 tbsp matcha and 2 tbsp turmeric.
The recommendation was to do a matcha creme patissiere for frosting but for some reason creme patissiere consistently eludes me so I'd do a matcha-flavored, light on the sweetening version of your go-to cupcake frosting. I think I did a not-very-sweet whipped cream, honestly. The recipe he recommended, if you are a better pastry chef than I and wish to try, is this one (matcha pastry cream only although if you feel like making pate a choux as well, I support this endeavor)
Edited: realized I did uh. not provide any details on the making thereof bc they were not in the screenshots. basically, standard cupcake rules:
Cream together butter and sugar
Beat in eggs
Add the dry ingredients, mixed together, a little at a time; alternate with the remaining wet ingredients (ie, the beet juice and cream). Essentially, find and follow a normal butter-based chocolate cupcake recipe except put matcha and turmeric in with the flour and sub in beet juice and cream for the milk/buttermilk.
Bake at 350 F (180 C) for 20-ish minutes, do the toothpick test as needed.
Notes:
You do want straight up beet juice that isn't mixed with various other fruits, and this can be a pain in the ass to find. I don't have a solution here, just a heads up.
Once you have used a cup of beet juice, you will have a bunch of beet juice left over. You can either use this to make even more cupcakes, or you can make a very lazy borscht (which is what I did) or you can just drink it. I don't know your life.
You can leave out the heavy cream and swap butter for margarine if you are dairy free, which my brother and his friend did test, but egg-free versions were not tested so if you are vegan/have an egg allergy you'll need to play around with your go-to substitutes.
Similarly, should play well with your go to gluten-free all purpose baking flour.
Recipe was developed prior to Jester's Isharnai cupcake scene (hilariously, in looking back through my texts, I received the recipe the Friday after that episode aired) so no guarantees on efficacy re: hag distraction
43 notes
·
View notes
Text
Jumbo Cinnamon Rolls (Vegan)
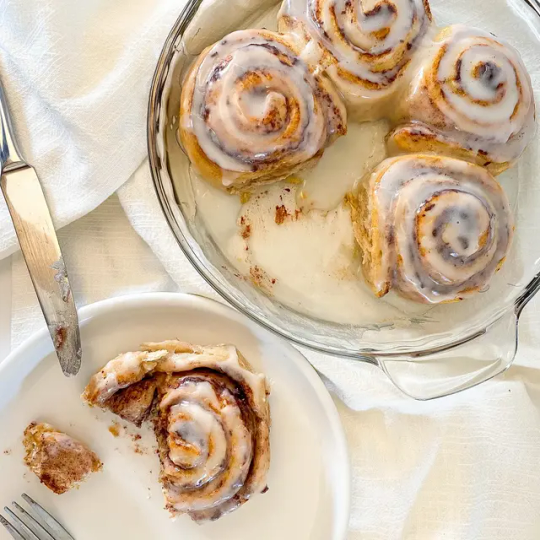
Yield: 5 buns | Prep time: 1 hour | Cook time: 35 minutes | Total time: 3 hours
------------------------------------------------------------------------------
Sticky, sweet, fluffy, and VEGAN! These vegan cinnamon rolls are perfect for breakfast or dessert. They are warm and gooey on the inside, topped with an easy homemade icing. While this recipe does take a long time, half of it is waiting for the dough to rise. You can take that time to prepare some other breakfast or dessert foods, or take a break on the couch like I do. This recipes comes together to create 5 large cinnamon rolls that are so delicious you will have people guessing if they are really vegan. Wink wink.
Dough Ingredients:
1 ½ cups buttermilk (1 ½ cups unsweetened nut milk + 1 tbsp lemon juice)
2 tbsp vegan butter, melted
2 tbsp granulated sugar
1 packet (2.5 tsp) active dry yeast
3 cups of flour
½ tsp salt
Filling Ingredients:
5 tbsp vegan butter, melted
½ tsp vanilla extract
½ cup brown sugar
2 tbsp cinnamon
Icing Ingredients:
1 cup powdered sugar
2-3 tbsp unsweetened nut milk
Directions:
Lightly grease a bowl and a pie dish. Set aside.
In a microwave-safe bowl, combine the together the almond milk and lemon juice. Set aside for 5 minutes until it begins to curdle slightly. Once it's curdled, microwave for 2-3 minutes until slightly warm.
Add the melted butter and sugar to the buttermilk.
Next, add the yeast to the buttermilk and give it a quick stir to combine. Let it rest for 2-3 minutes to activate the yeast.
In a large mixing bowl, combine the buttermilk mixture with the flour and salt.
Carefully mix with a wooden spoon until just combined. If it's too dry, add a splash of plant milk. If it's too wet, add some more flour.
Once the dough has come together (it will be sticky and will not form into a perfect ball), transfer it to your lightly greased bowl
Cover with a warm, damp kitchen towel and let it sit in a warm place for 1-2 hours to rise, or until it has doubled in size.
While the dough is almost done rising, make your filling.
Melt the vegan butter, and add in the vanilla extract, sugar, and cinnamon.
Preheat your oven to 350˚F.
Once the dough has risen, transfer it to a floured surface.
Knead the dough for a few times to deflate it. If the dough is too too sticky to roll out, add some more flour and knead it a few more times.
Roll the dough into a square, about 1/2 inch thick.
Brush the filling evenly onto the dough.
Carefully roll the dough up into a log, then slice into 5 even pieces.
Transfer the rolls into the pie dish. Place one in the middle, and the other 4 around the edges. It's okay if they're slightly touching.
Loosely cover the pie dish with plastic wrap and let the rolls rise for 30 minutes.
Bake for 25-35 minutes or until golden brown on the top (I like my rolls slightly undercooked, so I cook them for about 25 minutes).
Once they have finished baking, remove from the oven and place the pie dish on a drying rack to cool.
When the rolls are cooling, prepare your icing.
Combine the powdered sugar and plant milk in a bowl. You want the icing to be a thick consistency so you can spread it with a spoon or knife. If it is able to be drizzled, it is too thin and won't create a thick frosting. Add more powdered sugar if this happens.
Once the rolls have cooled slightly, spread the icing evenly on top.
Slice and enjoy your sticky, sweet, vegan cinnamon buns!

Tips and Tricks:
You can make the dough the night before for a quick breakfast. Make them all the way through the steps until right before baking. After you let the rolls rise for 30 minutes in the covered pie dish, place then in the fridge overnight. Then in the morning, you can immediately bake them. If they have deflated a bit in the fridge, let them rise in a warm place for 1 hour before baking.
#breakfast#vegan breakfast#go vegan#vegan#veganism#sweets#vegan food#vegan recipe#cinnamon roll#cinnamon buns
25 notes
·
View notes
Text
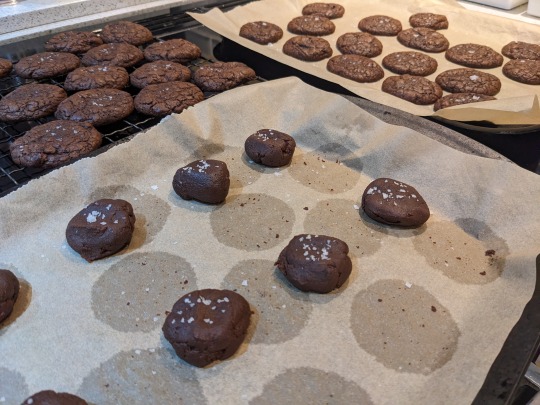
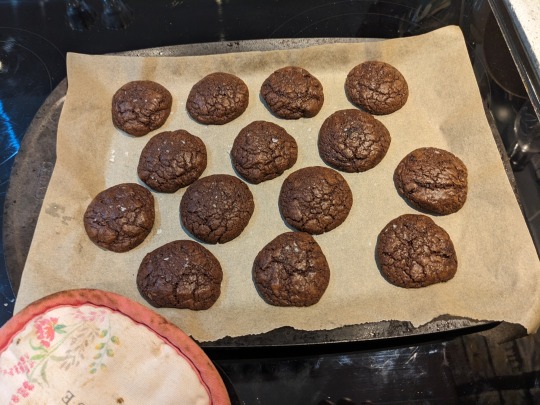
Vegan & Gluten Free Brownie Cookies
by Rachel (sort of)
Adapted myself from the ingredients of my favourite vegan & gluten free brownies, and my favourite brownie cookies. Credits at the end.

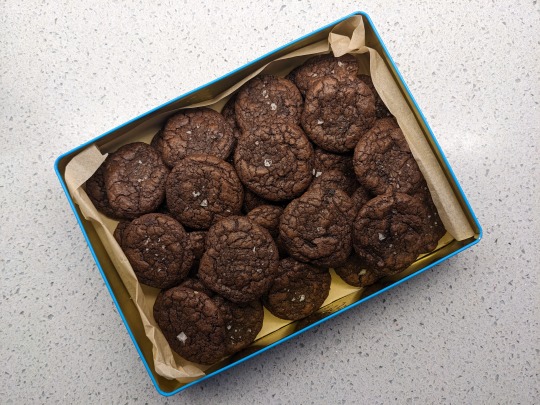
Ingredients (makes 35-40 21g cookies)
262g gluten free flour (I use Doves Farm/Freee brand, #notspon)
187g golden or light brown sugar
32g cocoa powder
¾ teaspoon baking powder
¼ teaspoon salt (a small pinch)
150g dark chocolate (I use dark cooking chocolate from Tesco that is soy based and dairy-free)
112ml vegetable oil
112ml vegan “buttermilk” (15 parts soy milk + 1 part lemon juice, details below)
Coarse/flaky salt for sprinkling (optional, so damn good)
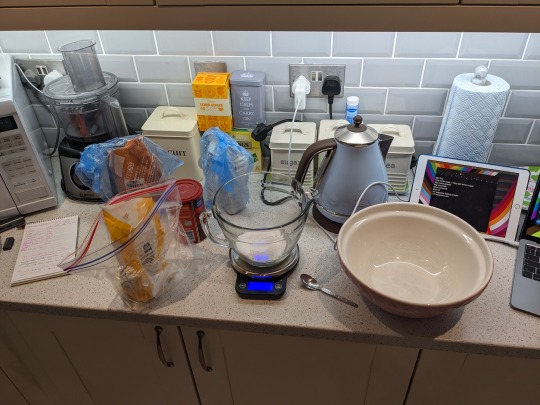
Tools (and I don’t mean the one writing this)
Large mixing bowl
Medium bowl for dry ingredients
Smaller bowl for melting chocolate
A saucepan of similar size to your small bowl if melting chocolate on the hob
Wooden spoon (or if you have one of those fancy silicone spatulas, they’re perfect)
Dinner plate
Baking tray + baking paper
A few teaspoons for scoopin’
Measuring spoons (optional but very helpful for accuracy)
Recipe
So when I was a lad… just kidding. I do have stories about how I learned to bake, but this is my own recipe, so those stories are pretty irrelevant here.
Step 0: Don’t preheat your oven.
I usually don’t preheat my oven until shortly before I’m ready to bake, I don’t know why recipes always start with that.
We will not be baking anything for at least an hour, as the cookie dough requires chilling for at least 45 minutes once mixed, ideally longer. This helps prevent spread on the baking tray, and makes it easier to form into dough balls.
Step 1: Measure your dry ingredients.
I am very inclined to forget one as I go, so here’s a checklist:
Flour: 262g
Cocoa: 32g
Sugar: 187g
Salt: ¼ teaspoon
Baking powder: ¾ teaspoon
Add all the dry ingredients, except the sugar, to the medium bowl. Pop the sugar into the large bowl.
Step 2: Vegan buttermilk. Wait, that’s not an instruction!
We’re going to curdle some ‘milk’, for chemistry reasons I don’t really understand. Add 105ml of soy milk to the large bowl, then add 7ml (approx. 1 teaspoon) of lemon juice. I know, these measurements are pants. Don’t stress too much over the precision. The milk should ‘split’, and look gross! If it doesn’t, that’s fine too.
Add the vegetable oil, and observe hydrophobicity in action.
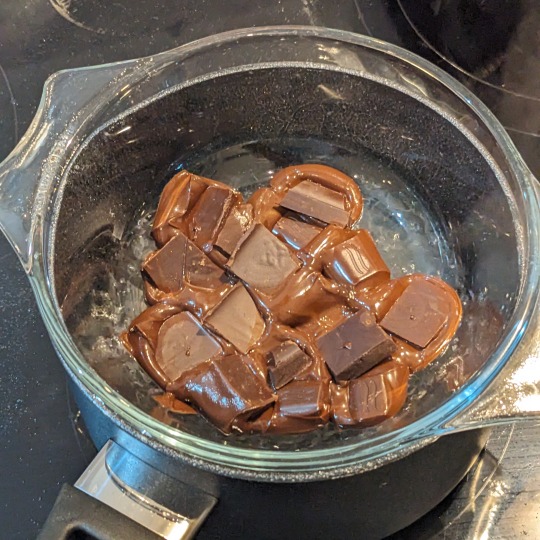
Step 3: Melt the chocolate.
I like to do this in a ‘double boiler’, which is a fancy way to say melting it in a bowl over a pan of simmering water. Feel free to do this in a microwave. If you do, be careful not to overheat it, do it in bursts until the chocolate has a silky consistency.
It’s harder to get wrong with the double boiler, for physics reasons, but it should only take a few minutes with a steady simmer. Once a knife can be pushed through the chocolate with no resistance, turn the heat off and stir the chocolate to ensure it has melted all the way through.
Add the melted chocolate to the large bowl, and stir until combined.
Note: This is the one time before baking that we are adding heat to the mix. Before baking, I highly recommend the dough is cooled completely, so the hotter the chocolate is at this stage, the longer the mixture will need to cool.
Step 4: Add the dry ingredients and mix.
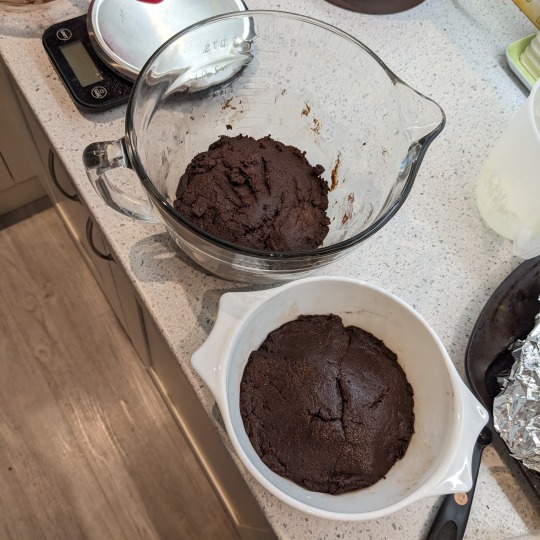
Shake or spoon in the dry ingredients gradually, stirring a couple times between each addition to avoid making a dust cloud. Once you’ve added them in, stir to combine, taking pains to scrape down the sides of the mixing bowl and incorporate large lumps of flour/cocoa powder. Small lumps (smaller than a pea) will bake out, so don’t worry about those. Your dough should be smooth, firm, and probably looking the way the cookies will look a day after you eat them. Sorry.
Step 5: Chill out.
Cover the bowl and stick it in the fridge. 45 minutes is the absolute minimum I would suggest, but if you can give it an hour or two, or overnight, even better. The next step is to scoop the dough into little balls, and that will be less messy and less of a f***ing nightmare if you just chill it for a while.
Pro tip: Put your dinner plate in the fridge with the bowl. I wished I had done this every single time.
Step 6: Okay, I lied to you. The next step is actually to preheat the oven.
180°C conventional, 160°C fan. I don’t know what that is for gas ovens, sorry.
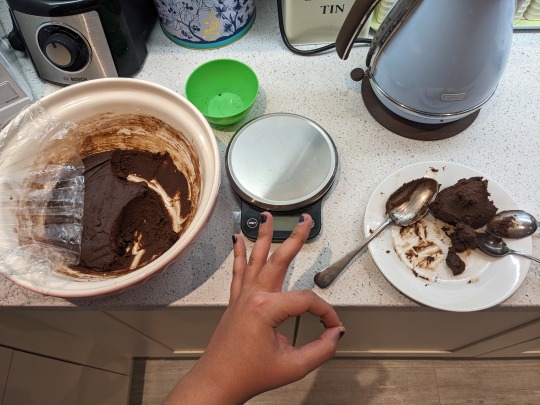
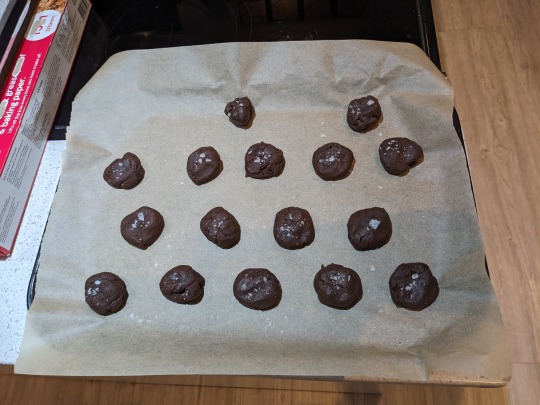
Step 7: Balls.
Using a spoon, maybe two, and your hands (unless you’re a magic space wizard who can do this with just the spoons), scoop a lump of the cookie dough out of the bowl and weigh it. My control weight for this recipe is 21g, but you could go larger if you wanted to.
This makes a cookie of approximately- where’s my ruler? 5.5 cm diameter. I weighed each ball, because I’m a really fun person, but you can just weigh one and make the rest about the same size. Or weigh none of them, and guess the baking time adjustment! You feeling lucky, punk?
If it’s taking you a while to get through this, and it probably will, I suggest covering the balls and returning them to the fridge for a few minutes before baking, as they’ve probably warmed considerably from being handled. Tee-hee.
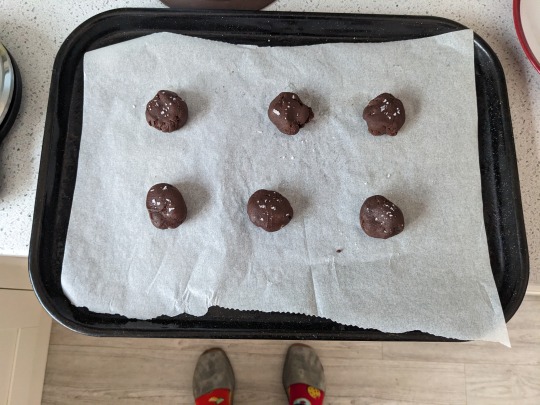
Step 8: Prepare for baking.
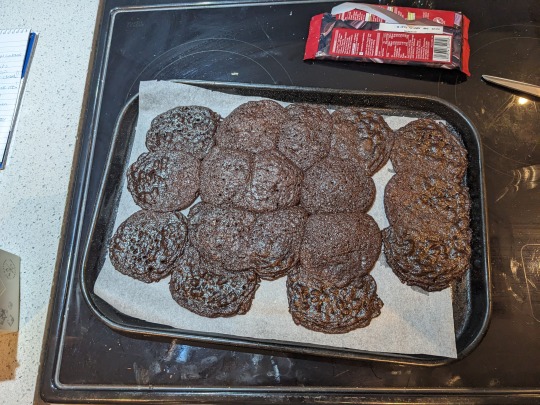
Cover your baking tray with parchment. Put your balls on the tray, spaced 3-4 cm apart to avoid creating a colossal, all-consuming cookie mon- uh, beast. Unless you want that. I did this by mistake once, and don’t recommend it. Squish the balls down slightly into pucks, maybe 1.5 cm tall but I didn’t measure, this just makes it easier to sprinkle some coarse, crunchy salt flakes on top. Yum yum!
I don’t know if I need to say this, but don’t overcrowd your tray. If you have more balls than you can fit on the tray, use another tray or wait until the first batch are baked and reuse this one.
Step 9: Bake.
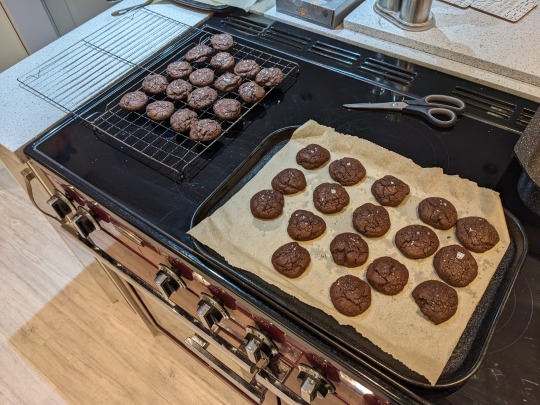
Stick that mofo in the oven, for 8 minutes if you made them 21g like I said, or longer if you made them bigger. They’re done when they’ve spread out and the tops have dried up and cracked, revealing a darker, cakey interior. I’m drooling right now.
If you poke them at this stage (careful, they’re hot, duh), they should give with little to no resistance. This is good! If they’re completely solid straight out of the oven they’re overcooked, and will be rocks by the time they have cooled down. I’m sorry if this happened to you! Take the next batch out just a little bit sooner.
Let the cookies cool on the tray until the tray is cool enough to touch. This will take longer if your tray is thicker, but I promise you it’s worth the wait. Once the tray is warm but not hot, the cookies should be solid enough to transfer to a cooling rack. If you’re nervous, use a metal fish slice or a fork, slid underneath each cookie to avoid breaking them up.
Step 10: There were no more steps. This is the end.
You can eat them now! Alternatively, allow to cool and eat within… okay I don’t know what the shelf life is, but they’re cookies, they shouldn’t last very long. Anecdotally, when I did my last batch, I had some in the tin from three months ago, and they tasted fine, but I don’t recommend eating three-month-old baked goods!
And now: pictures.
Captions (and alt text) in the alt text.
Credits
Do recipes have credits? Not in my experience. This recipe however borrows heavily from:
Alison Andrews at Loving It Vegan: https://lovingitvegan.com/vegan-gluten-free-brownies
Janine Ratcliffe at Olive Magazine: https://www.olivemagazine.com/recipes/baking-and-desserts/classic-chocolate-brownies
/u/dundundah at reddit dot com: https://reddit.com/r/Baking/comments/97ag96/brownie_cookies/e46zinq
I’m Rachel. That’s as much detail as you’re going to get about me. K bye!
6 notes
·
View notes
Text
11 Proteínas Vegetais que Podem Substituir as de Origem Animal

Conheça quais Proteínas vegetais podem substituir a carne nas refeições.
#vegan#food#recipe#banana#what vegans eat#vegetarian#gluten free#cheese curds#appetizer#fried cheese#ranch#buttermilk ranch#steak#meat#beef#churrasco#chimichurri#main course#meal#beef steak#dinner#garlic#parsley#tasty#foodporn#delicious#cooking#food photography#foodgasm#steak recipes
1 note
·
View note
Last Seen Blogs

serbga
serbga
internetdruid
The language and sentiment of flowers

foodcorner-cz
Food Corner

promptgenerator3dot7
The normal place for weird ideas

facade
...