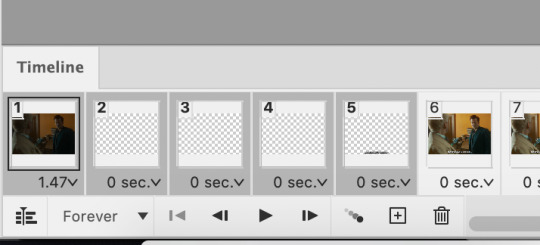
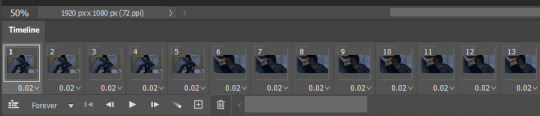
#i figured out how to use video frames to layers
Text
TILE TRANSITION TUTORIAL

a couple of people have asked me for a tutorial on how I did the penultimate gif in this set, so here goes! this is my first tutorial, so please feel free to reach out with further questions if anything's unclear.
note: this tutorial assumes you know the basics of gifmaking, can create the base gifs, and are familiar with timeline mode.
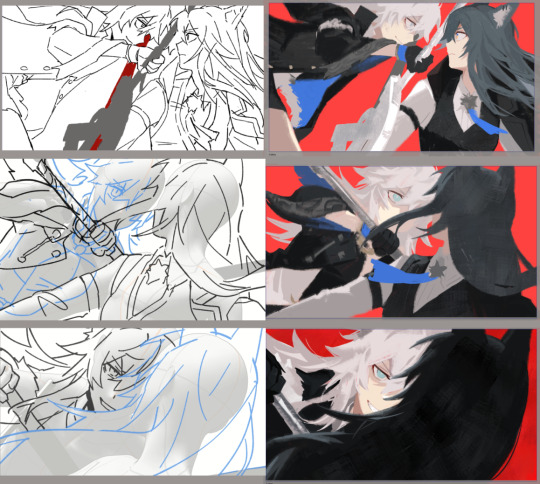
STEP ONE: create the base gifs! I'd recommend staying between 25-40 frames for each gif, since the transitions we'll use later tend to increase gif sizes. these are the ones I'll be using for this tutorial:


STEP TWO: create the guide layouts for both base gifs. for this panel, I chose a 4x4 grid — I would recommend keeping the number of "tiles" low because it can get tedious, but have a minimum of 9 (3x3 grid).


now your canvas should look like this:

STEP THREE: create the tiles. this is where the going gets rough; there might be easier ways to do this that I couldn't think of 😭 if there are any please send me an ask!
essentially, in this step we'll cut up the base gifs into smaller squares so that each tile can be manipulated separately when we put both gifs together. to do this, first create a square using the rectangle tool and the guides. then duplicate the base gif, move it above the square, apply a clipping mask, and then convert the clipped gif and square (selected in the image below) into one smart object.


ALTERNATELY: you could duplicate the original base gif and use layer masks to isolate tiles. create a layer mask for the duplicated gif layer and, with the layer mask selected, drag your mouse over a square (using the guide layout) and press delete. then press ctrl/cmd + i to invert the layer mask so that the gif only shows in the square of your choosing.
now repeat until you've got the entire gif in tiles, and do the same for the other gif!
since the transition effect is achieved by staggering the crossfades for each tile of the final gif, you can cheat by having multiple tiles "flip" at a time, ideally no more than four. this means you need to cut the base gif up into fewer pieces. to do this, simply draw multiple squares instead of one and then merge the shapes, before duplicating and clipping the gif onto them.


if you do this, it's essential to remember that you have to divide both gifs up in the exact same way. each piece of the b/w gif has to correspond to a piece of the purple gif!
this is what the layers look like for each gif once I'm done:


I have them lettered so that it'll be easier to match them up in the next step.
STEP FOUR: this is the complicated bit that took me two days to figure out. I'll do my best to explain but don't hesitate to reach out if something isn't clear!
to begin, open up a new psd and import both base gifs into it. (remember to click "create video timeline" and ensure that your gifs are all in order before proceeding.)
now, the trickiest part about this transition is ensuring that all the little tiles sync up so that the larger gif is coherent. so first we'll create some markers (just empty layers) to ensure that everything lines up as it should.
— marker 1: at about halfway through the first gif (b/w in this case)
— marker 2: at about a quarter of the gif length
— marker 3: close to the end of the gifs

at this point we're ready to start bringing in the tiles. I'm going to delete the base gifs from this new psd just to keep things cleaner!
first thing to do is import my b/w tile. move the timeline slider over to marker 1 and split the first gif. (if it helps, rename the split gifs and add (start) and (end) to the two halves.) then, move the (end) half to the beginning of the timeline, and the (start) half to line up with marker 3.
the purple tile is easier to manage. simply import it into the psd and line it up with marker 2.
your timeline should now look like this:

notice the overlap between the gifs at their beginnings and ends — this is where you'll be able to cascade the tiles flipping, so it helps to have a significant amount of overlap.
crop the three gifs for this tile as you see fit! since this is the first tile I want to flip from b/w to purple, I'll crop gif 1a (end) all the way to the current position of the timeline slider (red line with blue tip) and leave the beginning of gif 2a uncropped. for the flip from purple to b/w, I'll crop both gifs a bit.
once that's done, drag all three gifs onto the same level in timeline so they form a video group. your timeline should look something like this:

now you just repeat the process for all the other tiles! as long as you made sure that all the tiles in one gif correspond with tiles in the other gif in step three, this should be a fairly painless process. make sure to crop the starts/ends of the gifs separately so that they don't all flip together.
this is what my layers look once I've done all the tiles:

and the gif!

STEP FIVE: transitions! click on the half-white square (top right of the left column in the timeline, beside the scissors) and select the crossfade transition, then drag it between two gifs in a video group. it should create a two-triangle symbol and shorten the overall length of the video group.


apply the transition to all the tile flips, ensuring that the duration of all transitions is constant. this can sometimes be tricky because ps likes to change the duration of each transition, so right click on the transition symbol and manually change all your transition durations to be the same.
your layers should now look something like this:

STEP SIX: draw the grid. bring back the guide layout from step two and using the line tool (I like 2px thickness), trace the grid. adjust opacity as you see fit (50-80% is usually a good idea), so that the canvas looks like this:

STEP SEVEN: export and celebrate! you're done!
I hope this tutorial made sense and was easy to follow, and happy giffing! my inbox is always open for any questions <3
#tutorial#ps help#ps tutorial#userace#alielook#userabs#usercats#userhella#userfaiths#tuserabbie#usershreyu#usertreena#tuserlucie#uservivaldi#usertj#usergiu#userroza
610 notes
·
View notes
Note
I can't believe you forgot the five thousand dollar HDMI cable! That's the most important part! Never mind the fact that most HDMI cables do basically the same thing and have very few specialized features, don't think about it. Never mind the fact that gold plating is worthless on a digital signal. Spend five thousand dollars on a gold plated HDMI lead, right now!
You can never go wrong with AudioQuest. If you want overpriced cable nonsense, they got you covered.
Meet the Dragon "10K" HDMI cable.

For a cool $2300 you can get "Level 7 Noise Dissipation."
LEVEL 7!!!!!
Check out this totally scientific description of this feature...
"Traditional “100% shielding” is not enough to guard against the increasingly prevalent effects of Wi-Fi, cellular, and satellite radiation. In AudioQuest HDMI cables, all 19 conductors are Direction-Controlled to minimize the RF Noise that damages performance by “directing” or draining it away from the most vulnerable circuits. In Level 7 Noise Dissipation, high-loss graphene is added to the carbon layer sandwiched between layers of metal around the 4 FRL + eARC pairs, a "global" high-loss carbon layer is placed around all conductors, we incorporate our patented 72v Dielectric-Bias System, and even the drain wires are 100% Perfect-Surface Silver."
I'm sure all of that would hold up to scientific scrutiny.
I mean, sure, you are just transferring 1s and 0s back and forth, and as long as all of the 1s and 0s get where they need to go, your picture will look exactly the same with a $10 cable as it does with a $2300 cable... but I really do need that Level 7 dissipation. My house is constantly flooded with satellite radiation.
Yes, there are shitty HDMI cables. And some of them struggle to meet the bandwidth they claim on the packaging. This will cause no picture or sound or it will cause dropouts or skipped frames. Sometimes you will get crazy artifacts that pop in and out. But you cannot improve video or audio quality with a fancy cable.
You will not see magical colors so bright you cum in your shorts.
You will not hear indescribably intense bass that will violently vibrate your testicles--killing your sperm. That was microplastics, okay?
You will get the data that was encoded into the media file.
You just need a cable that can pass along that data without incident. Buying a "good" cable is actually recommended. Blue Jeans Cable is a great brand that has high quality control standards and a good warranty. They are a little spendy, but everything is a good value.
Their website is built on ancient GeoCities technology...
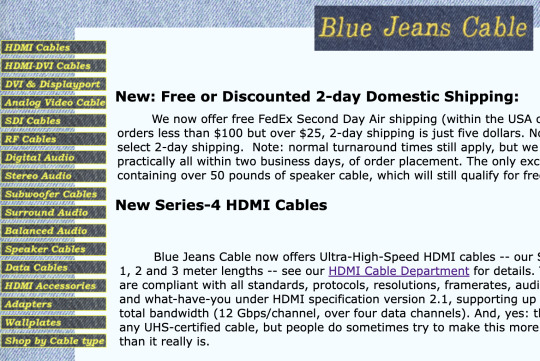
So you know they prioritize their budget toward R&D and product design over graphic designer or a subscription to Squarespace.
I buy their cables because they always meet the data bandwidth they claim and they can take abuse due to using tougher materials that last.
My best advice when buying an HDMI or other data cable is to figure out how much bandwidth you need, and then make sure in the product description they mention the data rate.
So if you want 4K resolution at 60 Hz, you will need a cable that does at least 18 gigabits per second. If you need 4K/120Hz/4:4:4/12 bit, then the bandwidth should be 48 Gbps. And if you get more bandwidth than you actually need, the cable is backwards compatible.
Here is a handy chart...
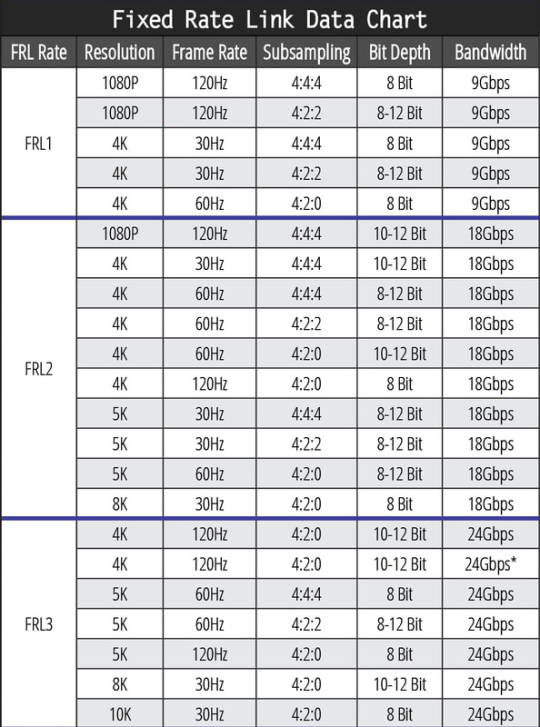
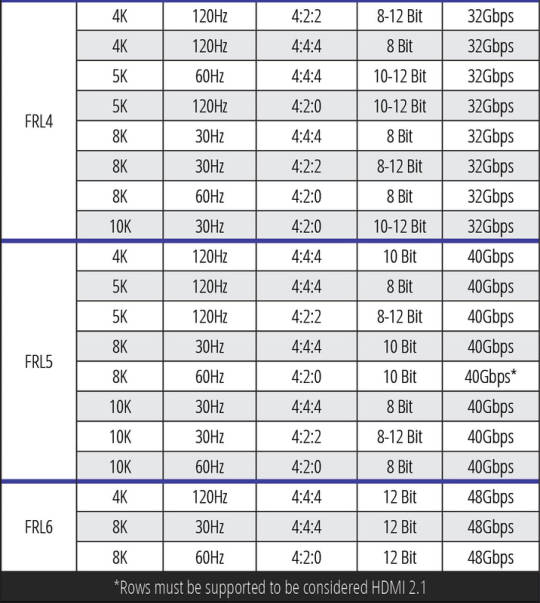
USUALLY, if they list the actual data rate (Gbps) in the product description, you can trust they certified it can pass that much data through. It's when you don't see any Gbps rating in the product description that you should move on to another cable.
(USB standards are insanely confusing, but the same advice applies. Try to find out the data rate you need and research to make sure the cable is capable of that.)
I'm afraid all of this cable nonsense goes back a long way. When I turned 16 I immediately applied for a job at Best Buy selling computers. And I really loved that job. So many people were clueless about computers back then and I was very good at assessing their needs and making sure they went home with the equipment and accessories that would suit them within their budget.
And if they tried to buy the eMachines computers, I would tell them they might as well set their money on fire.
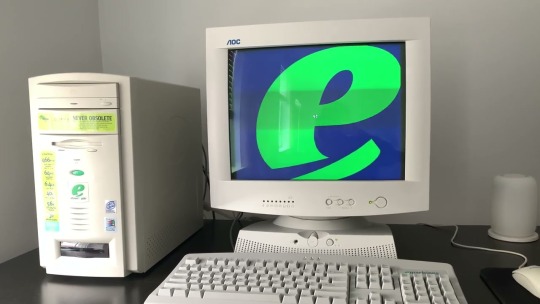
Throw directly into trash because this is some hot garbage.
Unfortunately my managers pressured me to sell warranties and accessories that I didn't really believe in. The hardest thing they asked me to do was sell people gold-plated printer cables. This is back when printers still used a parallel port connection.
They wanted me to sell these for $40 to $60 (depending on length).

Even though these bad boys did the exact same thing for only $20.

I could actually see on the store's computer how much markup these cables had. The cheap ones cost Best Buy the exact same amount as the gold ones.
Maybe they weren't as aesthetically pleasing, but those cheaper cables were built like fuckin' tanks. I probably still have some of these in my basement that would function just as well as they did 25 years ago.
The ONLY difference was the "gold" contacts on the ends. But my managers told me to lie to customers. I was to tell them you would get much faster print speeds, better colors, and more DPI (dots per inch). But both cables sent the same 1s and 0s. They either worked or they didn't. The only tiny advantage is that gold contacts are slightly less resistant to corrosion over time. But I have yet to see that happen within the lifespan of any cable.
So I would tell customers it was a waste of money and lie to my managers saying the customers weren't interested.
"Did you tell them it was faster?"
"Yes." (A lie.)
"Did you tell them it made the colors better?"
"Yes." (Also a lie.)
"Well, we're going to have to work on your sales presentation skills."
"Sounds good, boss." (Whatever, dude.)
351 notes
·
View notes
Note
i rlly like ur composition, i wanna know about your process :D
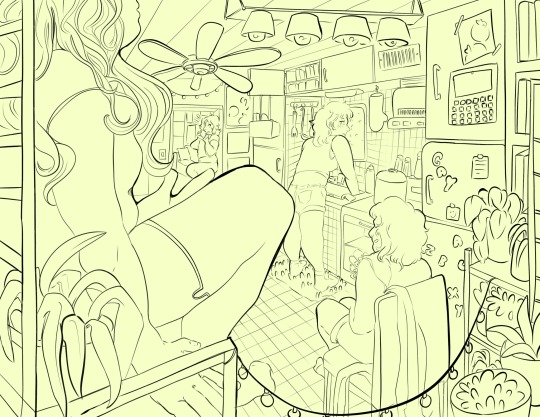
thank uuu !! yeah so like. composing a scene for me generally begins with a vague idea that i want to get down as quickly as possible- and for me that usually starts with finding a setting. I knew that i wanted to draw a) a group of roomates gossiping in a crowded kitchen and i wanted there to be b) one figure in the extreme foreground and c) lots of plants. i do use some tools to figure out perspective, mainly the csp perspective ruler. Usually i start by finding a picture i like similar to the vibe im going for- but instead of referencing anything else- im purely interested in perspective. sorry to anyone who is shocked i dont generate all of my perspective purely by myself- i can draw in perspective fairly well but i struggle to make straight lines and this is easier to make grids with than the line tool lol ^_^ i try to use it kinda more like spellcheck on typos than like something to fully rely on. this is the video i learned this trick from:
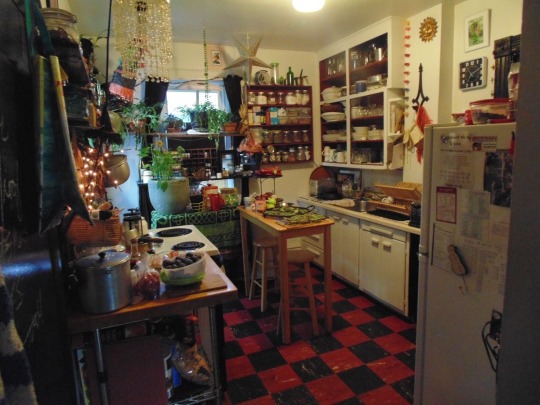
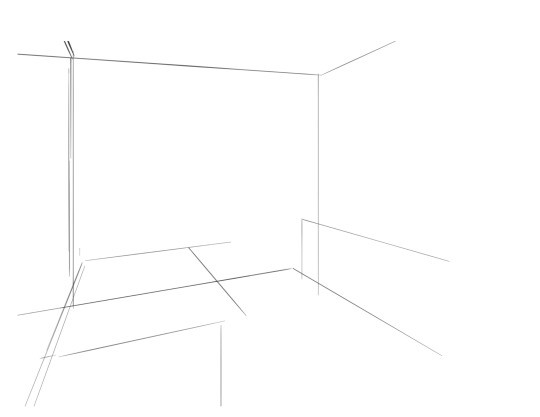
i saw the left photo and realllly loved how the cabinets alligned with the wall- so i used my ruler tool to draw out my inital plotted points from the image- basically the linear movements i was most interested in and then i turned off the image layer and worked with those lines and the ruler tool to move on. eventually i had this:

which was enough for me to put my characters in for the inital round. if you notice- i made a looot of further adjustments as i go on. this sketch is not a final layout, its so my characters have somewhere to be! i cannot draw someone standing on a floor if theres no floor, nor leaning on a table that doesnt exist. i can’t draw my characters without a background, but i also cant finish my background without accounting for how my characters can comfortably exist in it!!

this was the like.. very basic start. i knew the positions of two characters- but i needed to change a lot not only to fit them better but to allow for the other two figures i had planned.
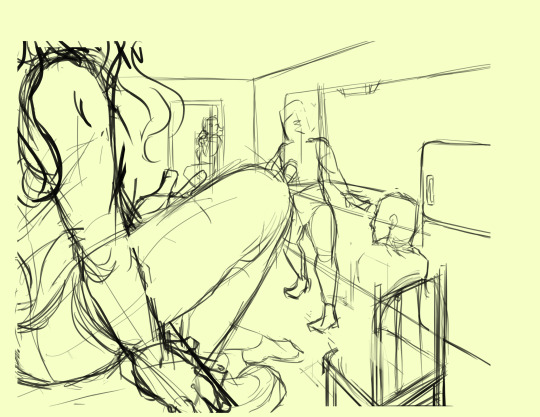
okay.. a little better. i widened the kitchen, closed the fridge door.. added a chair and fit in all the figures.. but this is waaay too dramatic. only two figures are actually interacting- and they are at wildly different energy levels!

this is where things started to make a little more sense characterwiss, so i was ready to refine backgrounds and figures and unite the two.
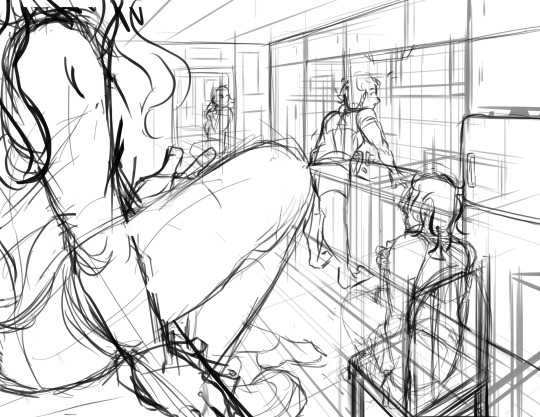
inital base sketch. much better layout.
okay- this is where im getting my footing but things seem.. really really off. You can see me working on my framing here- theres some good linear movement from left to right here- but not vertically. It’s hard to notice the figure in the far back, so i need to redirect the viewers eye to move upwards as well!

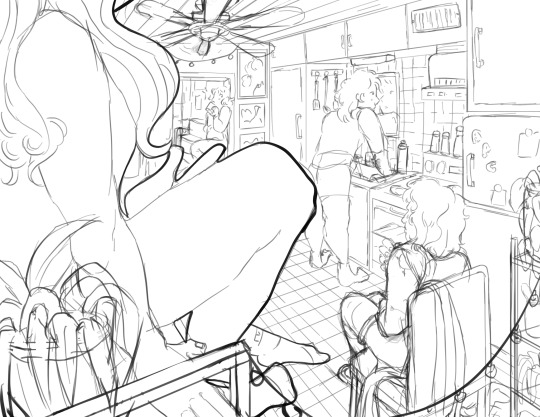
this is where i decided to zoom out, add an interesting vertical element to the left of the image and make it clearer whats happening in the foreground. i had to account for some stuff by adjusting the cropping, but i paid attention to that as well.
annnd- thats what a clean sketch looks for me! i have all the elements of my scene accounted for, and things are clean enough to read.
the next step for me would be transfer! essentially- I print the image of my sketch out, resizing and taping pages together so my sketch matches the size of the paper i want to paint on, and then i use a lightboard to transfer my sketch with pencil onto my paper. Then i refine the sketch a few times on paper before stretching my watercolor paper (essentially just prepping for painting) and inking with a brush and colored ink before going in with watercolor, gouache and ink, then usually finishing with marker, colored pencil, pastel and ink. it’s a lengthy process but a lot of fun lol. but sketches for me can be like.. 15 layers of different roughs until im happy with just the sketch. there were more images but im on mobile and theres a 10 image limit 😭😭 im a bit masochistic but i believe that if i dont have a good sketch i dont have a good painting!!
62 notes
·
View notes
Text
GIF Tutorial
This is going to be a long post, so I'm going to place the majority of it under the cut.
Disclaimer - There are many ways to make gifs, and this is just one way to make them - it's the process that I have figured out works best for me. I am in no way claiming that this is the "definitive" or "best" way to make gifs. There are probably other, better ways to do things, but because people have asked how I do it, I am sharing my process.
Introduction
I use a Mac. I am assuming most of this will also be applicable to those of you using Windows as well. This tutorial is divided into three parts. Here is a video of the following process as well:
https://www.youtube.com/watch?v=lBRbWC-iMOM
Actions
I use three Actions, that you can download here through my Google drive, if you want. A tutorial for how to install Actions in Photoshop can be found here.
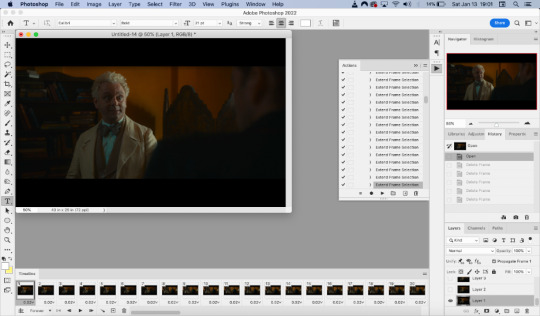
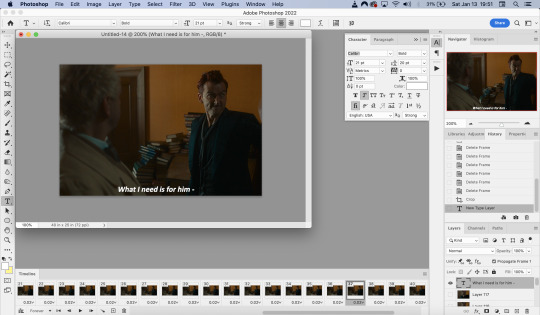
Photoshop Layout
I use Photoshop CC, but I used Photoshop CS5 for years, got used to it, so when I upgraded to CC, I arranged it to resemble what I was used to.
I have the following windows open:
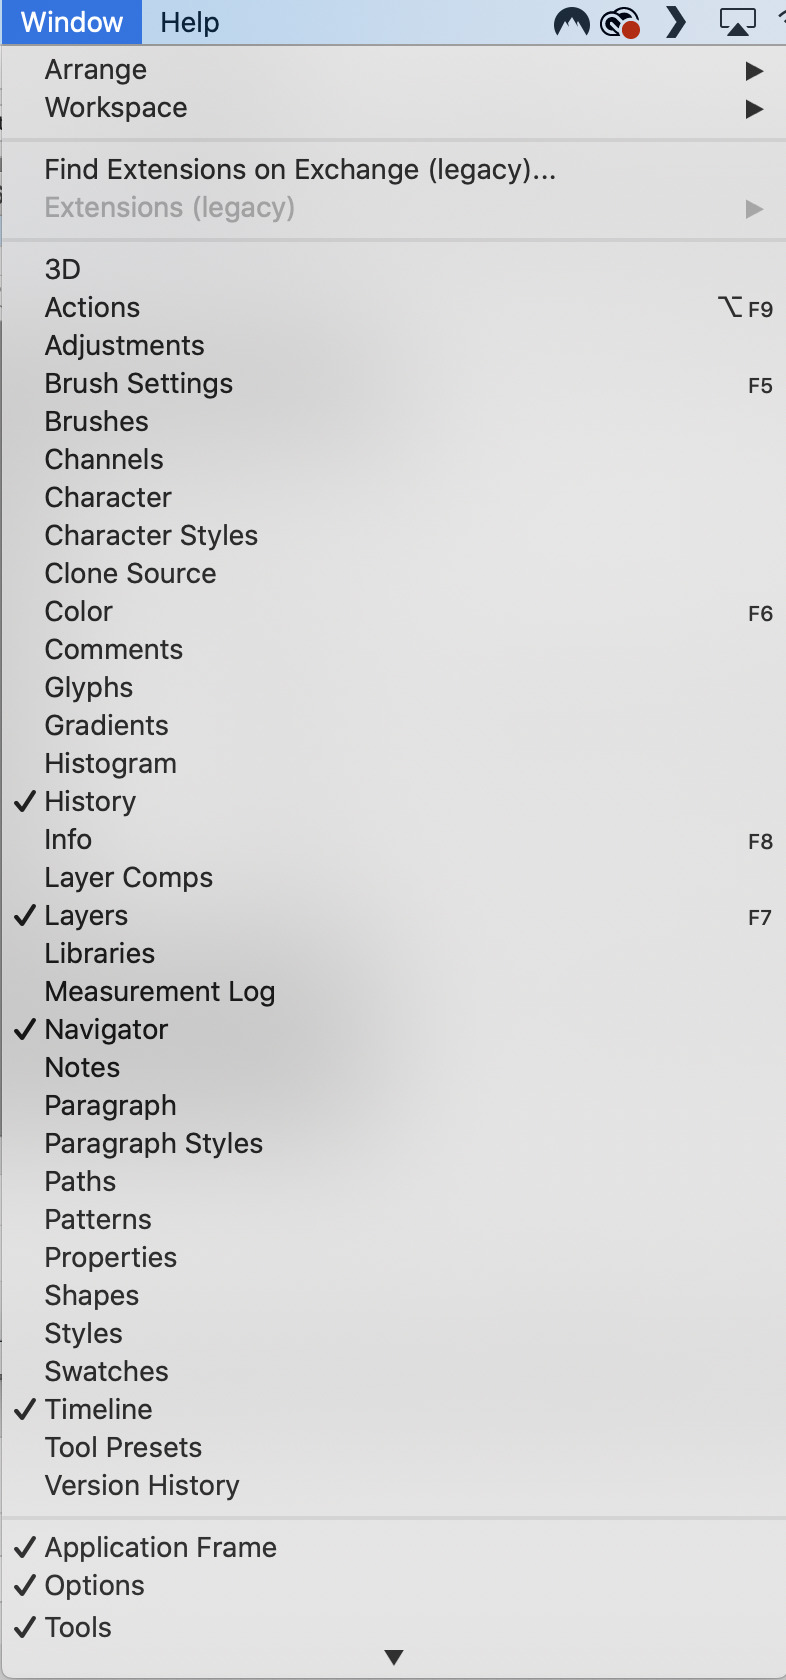
And they are arranged like this:
PART ONE - CLIPPING
Part 1 consists of using a screen recorder (i.e., Quicktime) to make short clips of scenes or parts of a scene that you want to make gifs of. I have a Mac, so Quicktime is what I use. For Windows users, I’m sure there are equivalent alternatives that are just as good. Years ago, when I was first starting to make gifs, I frequently heard people refer to KMPlayer as what they used, so that might still be a good option for you if you are a Windows user. The most important part is that it takes high-quality recordings, with as little detail and quality loss as possible.
With this screen recording method, you can make screen recordings of video files that are stored locally on your computer (I use VLC to play videos), or streaming on sites like YouTube, Amazon Prime, Hulu, Disney+, HBO, etc. No downloading of the video is necessary. For some of those websites, if you have trouble with getting it to work, you may have to disable your browser’s hardware acceleration. This process is described here (https://www.theverge.com/23715928/netflix-amazon-prime-screenshot-mac-windows-how-to).
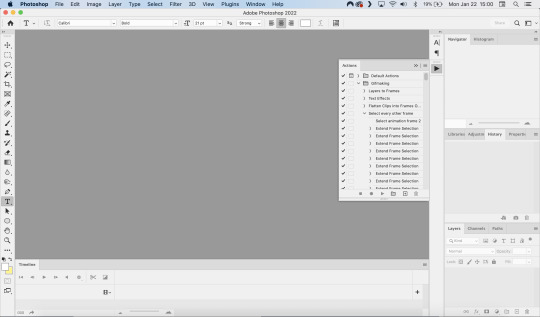
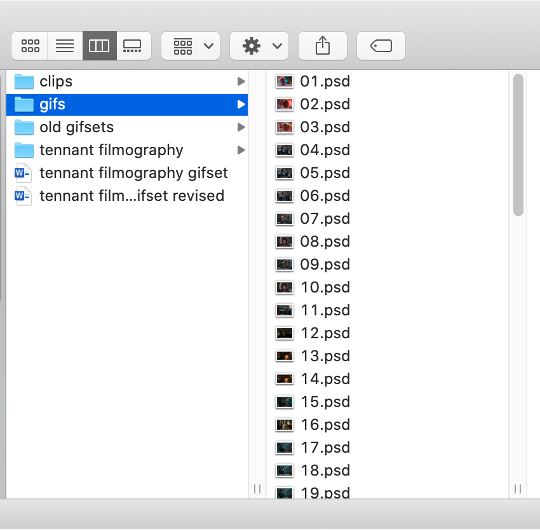
I record the clips with sound, to make it easier to transcribe/write out the dialogue in Photoshop later. When I have recorded all the clips I want, I put the clips into my folder where I store all my clips, and into another folder that is labelled with the episode number so I can remember where each clip came from in order to properly label them later when the time comes to upload them to Tumblr.
Example: A folder containing clips from Good Omens 2x01
PART TWO: EXTRACTING/MAKING GIFS FROM THE CLIPS
Open video file in Photoshop
To do this, click on File > Import > Video Frames to Layers
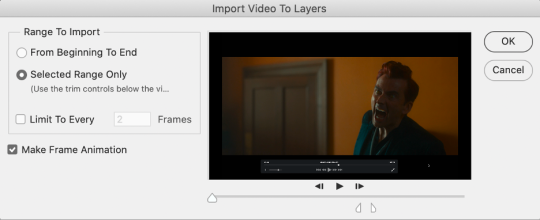
Use the markers to select roughly where you want the gif to begin and end.
With videos that have been clipped with Quicktime (not sure about other programs), the vast majority of the time there are twice as many frames as needed – every other frame is a duplicate. For a smaller gif size and smoother playback, I delete every other frame in the timeline box at the bottom of the screen. I used to do this manually (very time consuming), but now do it with the use of an action that I created that will automatically select every other frame. Downloads and installation instructions for all the actions I use are available above.
To use an action, click on the title of the action, then click the play button at the bottom of the window.
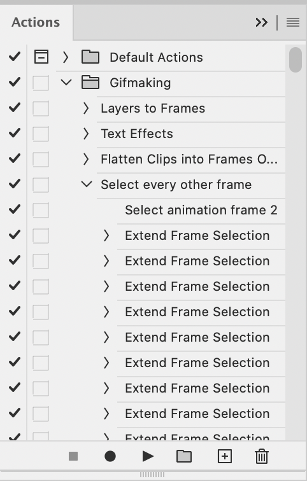
I often get an error message that says “The command ‘Extend Frame Selection’ is not currently available”, but it still works. Just click “stop” and every other frame will be selected.

Click the trash can icon in the timeline window to delete the selected frames.
At this point, you will have half as many frames in your timeline as you did before. You will also likely have extra frames at both the beginning and end of the timeline that you don’t want to be part of the gif – from the previous shot, for example. You can delete those now.
This next step is optional: There will still be some duplicate frames in the timeline that were not deleted earlier. It is not strictly necessary to delete these, and I see many gifmakers who don’t get rid of them. It’s usually not all that noticeable. However, because I’m a bit of a perfectionist, I always go through the timeline frame-by-frame and delete each duplicate. This ultimately will reduce the gif’s file size and make the movement in the gif appear much smoother. I usually find that every fourth or fifth frame is a duplicate. Unfortunately, it’s not always consistent, so using an automated action would not work to make this process go faster.
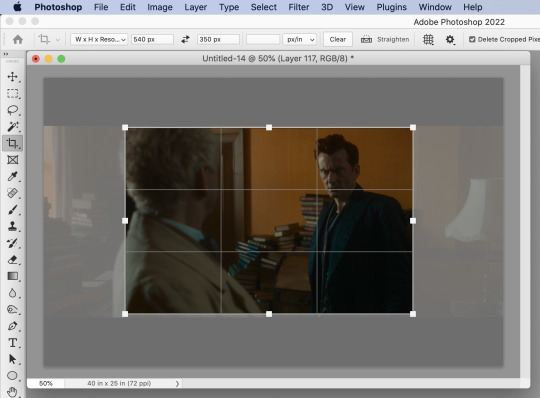
Cropping
Once this part is complete, I select the crop tool. I usually make my gifs 540px wide by 350px high. You can change the height to whatever you want, but Tumblr’s max width is 540px. I find the aspect ratio of 540x350px usually allows gifs to feel large, while at the same time not cutting off too much of the sides. Depending on the type of gif I’m making I may adjust this, but generally, if I’m giffing a scene from a TV show or movie, I stick with my standard 540x350px dimensions.
Adding Text
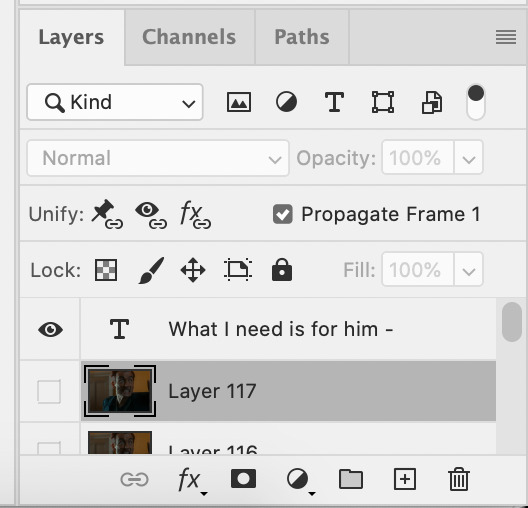
Next, I add text. Select the text icon. In the layers window, make sure the top layer is selected, otherwise the text will not show up when you start typing.
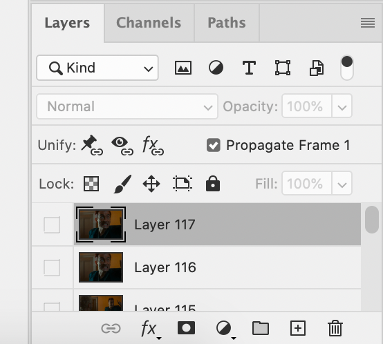
The top layer is selected
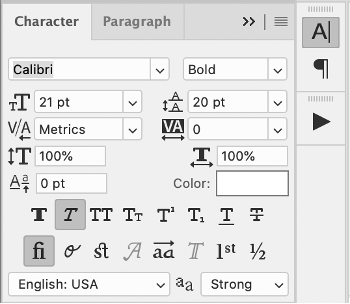
These are the font settings I currently use:
If I am just making one gifset, or one or two gifs, I’ll go straight on to the next steps. However, if I’m making a large amount of gifs, I save the gif right now, close out of it, and repeat the steps in this section for the next gifs, so I eventually have an entire folder of “raw” unedited photoshop files that have been cropped and captioned, and just need to be colored, have text effects added, and be sharpened. For me personally, I find I make gifs more efficiently by doing it in this “batch” style process.
All cropped and unedited gifs (psd files)
PART 3: COLORING, EFFECTS, & SHARPENING
Coloring
I do plan on making a separate tutorial on this at some point, but will include a brief summary here. When it comes to coloring, I generally tend to go by a “less is more” attitude. I am not by any means great at coloring, but nonetheless I’ll explain the types of adjustment layers I typically use.
Note: Before making any adjustments, make sure you have the layer directly underneath the text layer selected, as shown in the screencap below, otherwise it will also apply those adjustments to the text, which makes it look weird.
I start with a Curves layer to change the overall brightness/contrast, then a Levels layer to adjust the shadows and highlights, and then a Brightness/Contrast layer to do some final minor tweaks. The only time I ever reuse gif coloring is when they are from the same scene with the same colors, lighting, backgrounds, etc. Every other time, I tailor the adjustment layers to the specific gif.
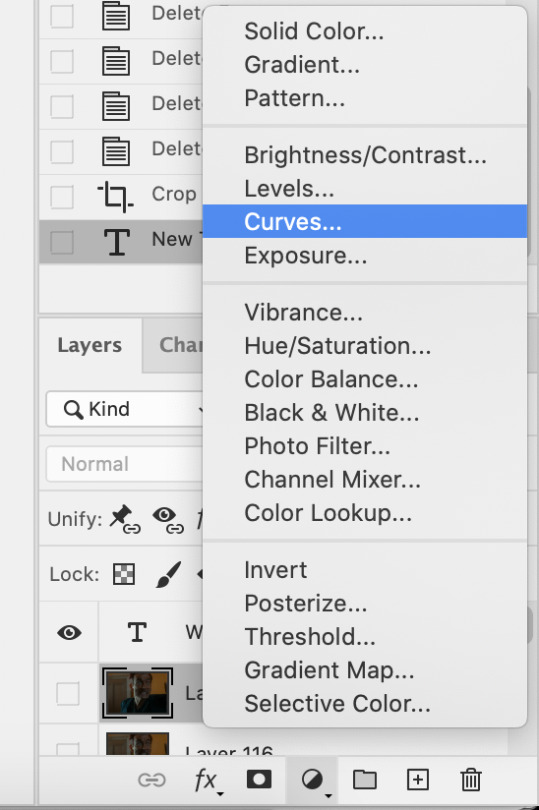
You can add adjustment layers by clicking the half light/dark circle on the bottom of the Layers window.
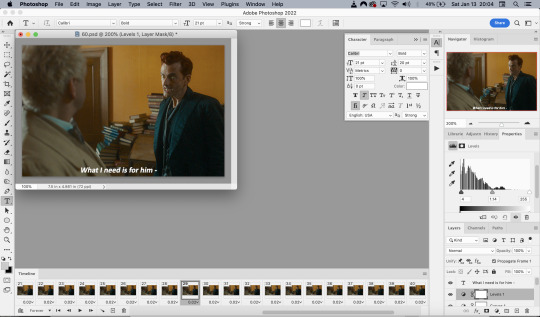
How the gif looks with both a Curves layer and Levels layer
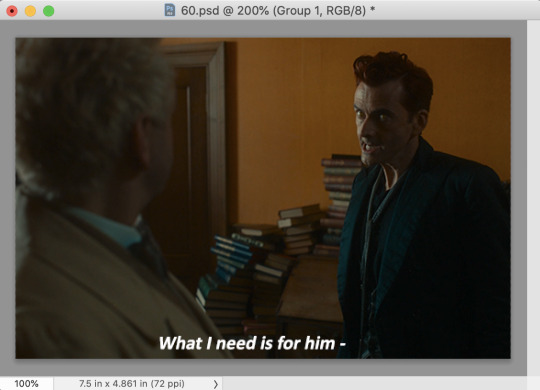
Before adding the adjustment layers
After adding the adjustment layers
A lot of the time, I'll just stick to adjusting the lighting. However, if the colors look gross, or if they are over/undersaturated, I’ll add a Color Balance layer and play around with the settings on that, or use a Hue/Saturation layer and increase/decrease the saturation of specific color channels. It really depends on what you’re going for, and what you think looks good. There is no one “right” way to color a gif.
Text Effects
If you are using the Actions I included in the download, you can just run the "Text Effects" action with the text layer selected, and it will do the following automatically. If not, you can do it manually by doing the following.
Right click on the text layer in the Layers window and click on Blending Options.
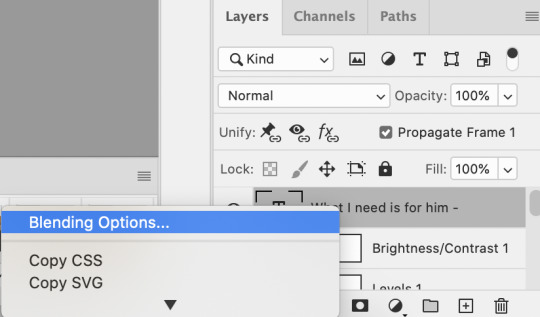
I use a stroke and drop-shadow on my gifs. Here are the settings I use.
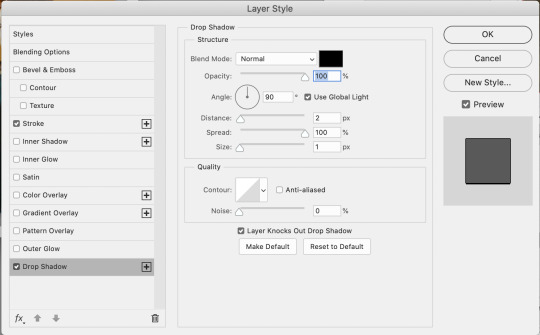
Drop Shadow settings
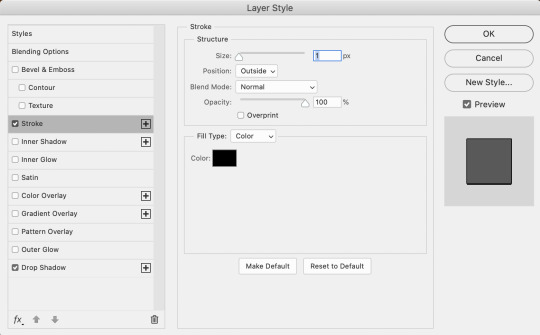
Stroke settings
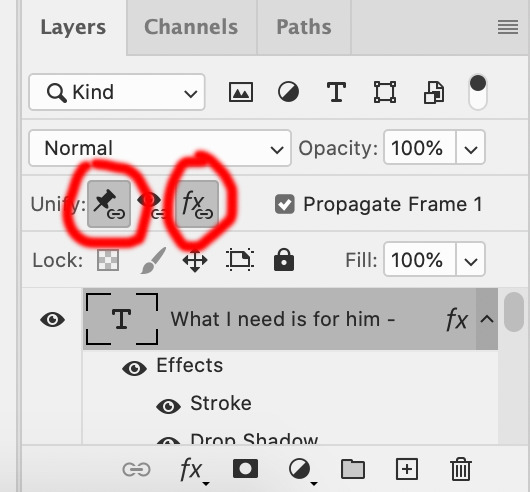
Next, to center the text, click on the text layer. With the text layer selected on the Layers window, Select All by clicking ctrl+a (Windows) or command+a (Mac). Then click on the "Align horizontal centers" icon in the “Move tool” option menu.
Important – in the Layers menu, make sure the buttons “Unify layer position” and “unify layer effects” are clicked an enabled for the text layer.
Sharpening
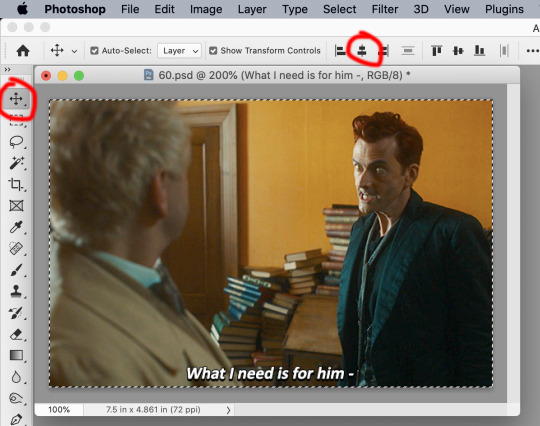
Select all the frames in the Timeline window. Then in the lower left-hand corner click “convert to video timeline.”

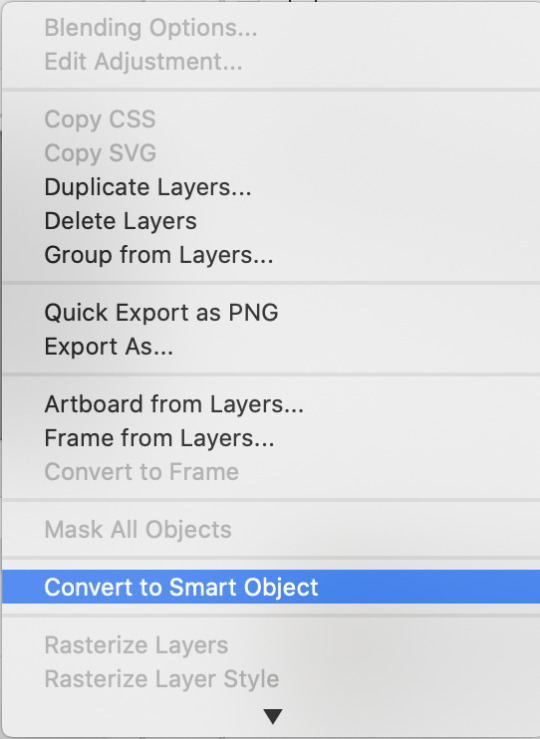
In the Layers window, select all of the frame layers (do not include the text layer or adjustment/coloring layers in the selection) and right click on it. Select “Convert to smart object.”
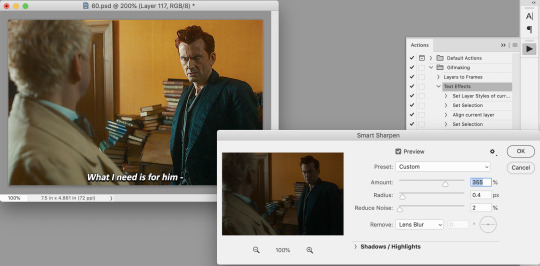
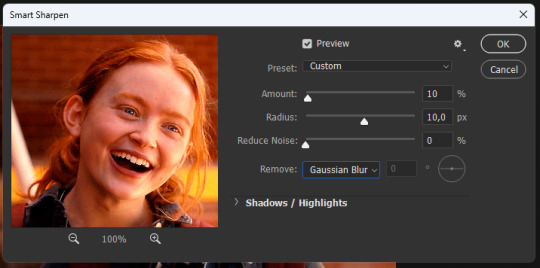
Select Filter > Sharpen > Smart Sharpen. In the same way that coloring can differ depending on the gif, the ideal settings for sharpening can also differ from gif-to-gif. It can really depend on the quality of the source of the gif, like whether it’s HD or not. These are the settings I’m using for the current gif:
If you are using Actions, you can run the "Layers to Frames" Action. If not, do the following:
Click on the button circled in red
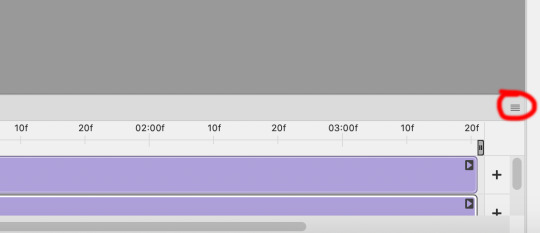
It will open up this menu. Click on "Flatten frames into clips"
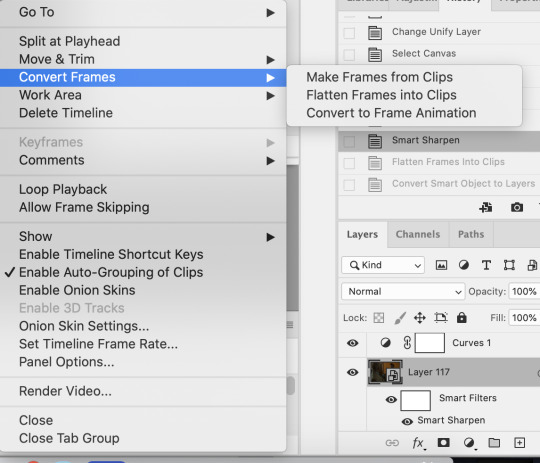
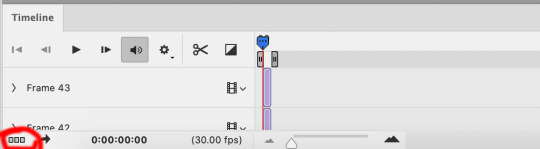
Click the button circled in red, then click "Make frames from layers"
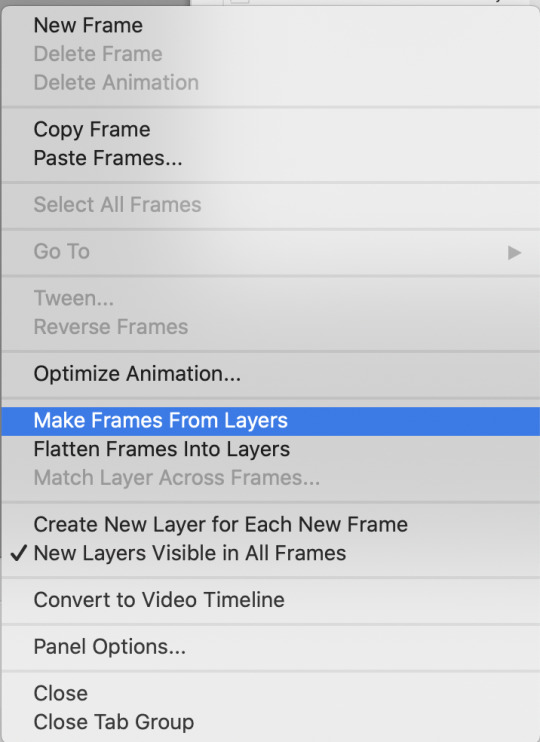
Delete the first couple of "junk" frames
Select all of the frames. Right click on the "0 sec." to change the frame rate. I usually use 0.05, but it might depend on the gif itself.
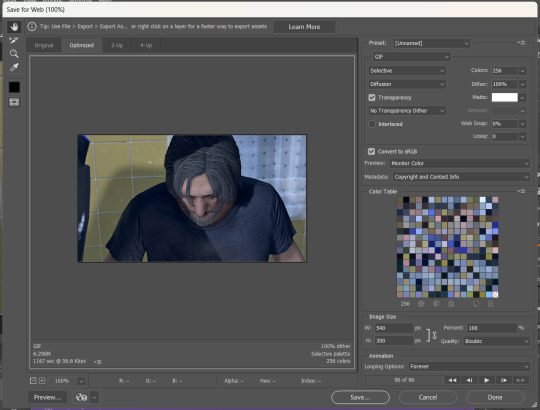
Exporting
Click on File > Export > Save for Web (Legacy)
I cannot add another screencap because I've reached Tumblr's max for this post, but here are the settings I use:
Selective
Diffusion
256 Colors
Dither 100%
You may find that when you try to export your gif, the file size is too big. Tumblr’s gif file size limit is 10mb – try to make it under that – even anywhere in the 9.9mb range. As long as it’s under 10mb, it should work.
To get gifs that are too large to fit under the limit, I usually end up deleting frames from the beginning or end of the gif. If you’re using the 540x350px dimensions, I typically find that the average number of frames I can fit into one gif is between 80-90. Depending on the colors in the gif, it’s sometimes more, sometimes less.
59 notes
·
View notes
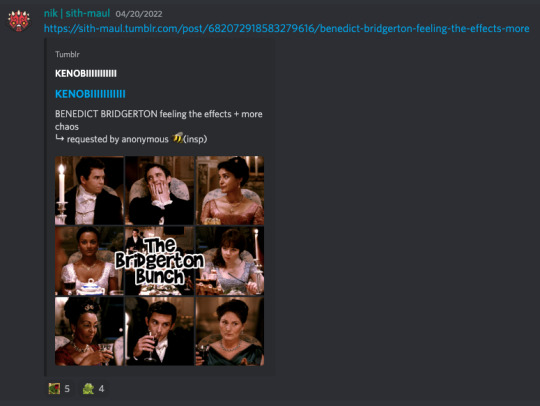
Photo


HOW TO: MAKE HIGH-QUALITY GIFS
Hi! A few people have asked me about my gif-making process and an anon asked about my coloring on a specific Bridgerton set. So, I decided to make a tutorial combining both! This is a very in-depth tutorial but there’s also nothing groundbreaking here. If you enjoy seeing how other people work like I do, this is for you <3 very long tutorial under the cut!
tech:
★ laptop: macbook pro (13-inch, M1, 2020)
★ external hard drive: seagate one touch ssd 1TB*
tools:
★ adobe photoshop 2022
★ mpv 0.29.1**
★ windscribe (vpn)
★ qBitt⚆rrent (for tv & film)
★ 4k video downloader (for music videos, trailers, interviews, etc.)
★ rizz’s action pack by @anyataylorjoy (highly recommend!)
resources:
★ resource directory by @usergif (a source blog I created for gif effects!)
* I have 2 externals, one dedicated just to storing all my 4k Star Wars files and another for Bridgerton and everything else
** I use this version of MPV bc the other ones weren’t compatible with my laptop for some reason. This one works well for me and doesn’t create duplicate screencaps which I’ve heard is a problem with other versions
PHASE 1: Prepare Your Base Gif
1.1 – Download video files.
I personally like not having to do this regularly for 2 reasons: (1) I t*rrent (I use r@rbg — make sure to use a VPN if you t*rrent!) and (2) I mainly work with 4k files which can take forever to download, especially old media, and I’m not trying to waste my life away. That’s why I keep my files on an external hard drive, so I only need to download when new content drops.
TIP A: Footage Type & File Size
As you saw in the header gifs, I work with HDR footage. You may have heard some gif-makers talk about HDR or 4K screencaps looking like the colors are faded or washed out. They are:
(I don’t have examples of the Mandalorian because I only have that in 4K which is always HDR — so I’m going to stick to using this Bridgerton clip for examples. Also, I made the Mando header gif a long time ago and I’m not letting it go to waste now lol.)
Some people don’t like working with HDR as a base, which is understandable! There are ways you can make your screencap software fix the coloring automatically. But my mentality is: I’m lazy, I’m used to it, I’m already coloring it anyway, and the muted coloring gives me a sense of control over the entire palette — instead of fighting with the existing colors from the original color grading. (I also talked to a videographer at work about this and he mentioned he prefers to color grade with this faded/washed-out look as a base too!)
For the sake of the demo, I tried to color these two scenes as equally as possible in black and white so you can decide if there’s a difference:

Ultimately, the file type you use is up to you! Hopefully this demo helps you make that choice easier. This tutorial is going to focus on HDR footage though.
The size of your file matters too! 4k (2160p) isn’t always better than 1080p (but it typically is for me which is why I prefer to use 4k footage when it’s available). But the main thing is to look at the GB size of your file.
1.2 – Make screencaps.
I use MPV which works great with 4k .mkv files (PS can’t read .mkv files if you try to Import Video Frames to Layers). Check out this tutorial for the basics on getting MPV set up and how to make screencaps.
1.3 – Import screencaps.
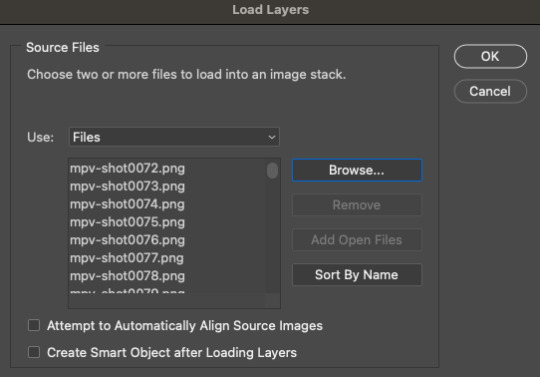
Load your caps into PS by going to File > Scripts > Load Files Into Stack. Some people upload using Image Sequence because it loads faster, but idk. I don’t really care because I’m never uploading that many caps at a time that I need it to go any faster. This is what the Load Layers window looks like:
1.4 – Make Frames from Layers.
Recently, I’ve been using the Script Action in Rizz’s Action Pack (linked at the top of this tutorial — if you use it, be sure to like and reblog Rizz’s post!) with some actions of my own added to make it perfect for my process. Actions are huge timesavers because all you do is press play!
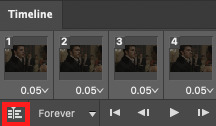
But to do this manually, you can simply select all the layers, click Create Frame Animation, click the menu in the Timeline tab (upper right), and click Make Frames from Layers. Click Reverse Frames in the same menu so your caps are in the correct sequential order and set your frame delay to 0.05 seconds.
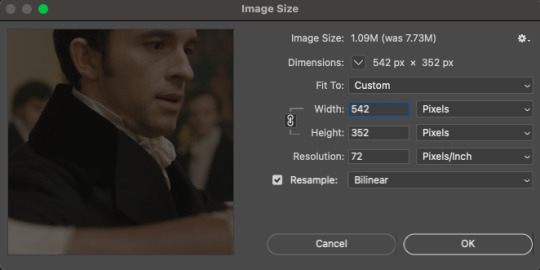
1.5 – Crop and Resize.
For this gif, I want my dimensions to be 540px wide x 350px tall. Do this to your liking but remember, Tumblr’s max width is 540px (here’s a guide for other dimensions). Any width smaller will be stretched and look bad. Any width larger will be compressed, make your gif file huge, and look bad.
P.S. RESAMPLE SETTINGS MATTER! Check out this resample experiment to figure out which one you prefer. I tend to stick to “Bilinear”
TIP B: Preserving Cropped Pixels
Have you ever cropped something, done all your coloring, then wished you could nudge your image just 5 pixels over only to realize you can’t because you’ll have 5 pixels of transparent space on the side? Uncheck “Delete Cropped Pixels” so you can change your image positioning later if needed!

TIP C: 2-Pixel “Buffer”
Something I do (and some gif-makers I know do) is resize with a 2-pixel “buffer.” Gifs sometimes have a slightly transparent border or “halo” effect. You can see it a lot when viewing Tumblr in dark mode. To get rid of it, I resize a tad bigger and then crop out the extra pixels. So, for example, since I’m making a 540x350 (w x h) gif, I’ll resize it to 542px width first. After I’ve converted to a smart object (Step 1.6), I’ll crop out those extra pixels so it’s a perfect 540x350.
(Btw, you can also do this in the export window by setting “Matte” to none. I guess I’m old school for doing this? Idk I haven’t properly tested and compared both methods.)
1.6 – Convert from Frame Animation to Video Timeline.
The sharpening action in Rizz’s Action Pack does everything in one go: converts from Frame Animation to Video Timeline, converts frames into a smart object, and sharpens your gif.
If you’d rather do this step manually, just select all your frames and click “Convert to Video Timeline” in the Timeline menu panel OR click this button:
Then, select all your layers in the right panel, right-click, click “Convert to Smart Object,” and add your sharpening filters.
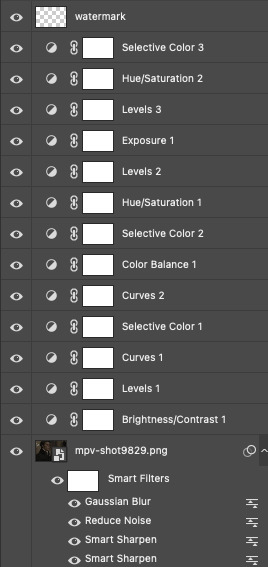
Again, I’m a huge fan of actions, so I’d rather just hit play on Rizz’s action. It includes two sharpening presets and is super easy to tinker with if you want to add more sharpening or put other filters like Gaussian Blur, Reduce Noise, or Noise on top.
I’ve been using Rizz’s “Sharper” Action and occasionally throw a Gaussian Blur filter set to a radius of 1.0 pixels at 20-40% opacity (or sometimes a Reduce Noise filter), depending on the gif. Here are my usual Reduce Noise settings which I typically set to around 40% opacity:

In this gif, I used Reduce Noise at 40% and Gaussian Blur at 20% lol.
If you prefer using your own sharpening settings but want to use this action for the converting steps, just right-click the Smart Filters under the smart object and click Clear Smart Filters. Then, apply your own sharpening settings.
If you followed TIP C, my 2-pixel “buffer” trick, from Step 1.5, go ahead and delete those extra pixels now! I go to Image > Canvas Size and type in the gif dimensions I want there, 540x350 in this case:

If you had “Delete Cropped Pixels” unchecked, you can move your gif around until you like how your gif is positioned. Your gif should be looking sharp and perfectly sized now, with no weird borders hanging around the edges.
Let’s move on to the fun part!

PHASE 2: Coloring
Disclaimer: this is MY process for coloring, not the be-all and end-all. Everyone has their personal favorite adjustment layers and unique styles, and it’s all preference! The only wrong way to color is by whitewashing, redwashing, etc.
These steps are also just my typical steps, but I always color from scratch and my adjustments always depend on the scene. A dark, yellow-tinted scene from Narcos will be a completely different process from a bright, outdoor scene in Star Wars.
Because an anon asked for it, I’ll be demonstrating my coloring on the gif above from this Bridgerton set. It’ll be a little hard to explain because it’s like a method-to-my-madness, lives-in-my-mind-untranslated thing — but I’ll try my best and mostly use screenshots to demo!
MY LAYERS PANEL OVERVIEW:
2.1 – Brighten + Color Correct
My go-to adjustment layers: Curves, Levels, and Brightness/Contrast (set to screen).
So, like I said, I use 4K/HDR footage which gives me a pretty washed out starting point coloring wise, but I actually love this as a base for coloring! I’m repeating myself but a videographer I work with said he films low-contrast because it provides the best base for natural-looking color grading. And I trust him and myself because I’ve been coloring like this for a long time lol.
ADJUSTMENT 1: Brightness/Contrast 1
When it comes to brightening, I’ve found myself starting to do this neat trick someone from usergif taught me! Literally just slap a Brightness/Contrast layer down, don’t move the sliders, set the blending mode to “Screen,” and lower the opacity to your liking so you don’t start out with a blindingly bright and pixelated gif.

Then, I pretty much always go in with a Curves and Levels adjustment. And I actually do a hint of color-correcting with them too!
ADJUSTMENT 2: Levels 1
In the RGB channel, I don’t add too much darkness just yet but I definitely bump up the highlights (right slider) a lot. I lift the reds in the Red channel a bit, especially when I’m working on a gif with people. It helps bring back some life to the otherwise washed-out coloring of HDR footage. In this one, I also lifted the greens and blues a bit too! When I say “lift,” I just mean I’m bringing those colors forward or emphasizing them.
ADJUSTMENT 3: Curves 1
I only tinkered with the RGB and Red channels this time — and no fancy S-curves here. But sometimes, I’ll also go into the Green and Blue channels if I didn’t do enough in my first Levels layer. You can see here that I barely even nudged that Red curve up lol. Why do I make such minor adjustments? My brain can’t explain. I just move things, decide if I like it, and stick with it. 🤷🏻♀️

2.2 – Basic Colors + Extra Brightness
My go-to adjustment layers: Selective Color, Curves, and Color Balance.
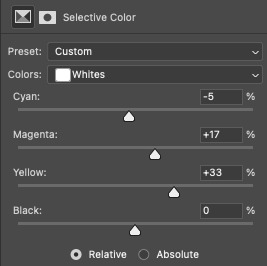
ADJUSTMENT 4: Selective Color 1
Since my gif didn’t have any true green, cyan, blue, or magenta colors, I didn’t play with those channels at all. But there’s a lot of yellow in the background and a variety of reds and yellows in the people’s skin tones which is why I adjusted those two color channels.
You might notice that I increase the blacks in my Red and Yellow channels. I actually do this almost all the time. I kind of think of coloring like makeup?? Idk if that sounds weird. But the blacks kind of add some dimension the way contour would, and my HDR footage naturally lacks this.
Something else I almost always do is bump up the whites in the White channel. I love really bright whites and, with an ideally lit scene, it acts as the highlight makeup lol. It gives me some good dimension on nose bridges, cheekbones, and high planes of the face
I do some overall adjustments in the Neutrals and Blacks channels, but very minor since I have more coloring to do!

ADJUSTMENT 5: Curves 2
Just a teeny tiny curves layer with an itty bitty S-curve (for contrast and so I can see what I’m doing lol)

ADJUSTMENT 6: Color Balance 1
I never really know what I’m doing with color balance. There’s no formula I follow or pattern of adjustments I always do. This step is literally the epitome of push the buttons and hope it does something good.
2.3 – Adjust Skin Tones and Other Colors
My go-to adjustment layers: Selective Color and Hue/Saturation.
ADJUSTMENT 7: Selective Color 2
Again, I’m only focusing on the Red and Yellow color channels, adding more blacks to each again. Then, bumping up Whites and doing super minor adjustments in Blacks.
ADJUSTMENT 8: Hue/Saturation 1
Here’s where I do a lot of my skin tone correction. I try to be hyperaware of representing skin tones accurately and naturally, while still having that HQ-looking dimension. By no means am I saying I’m perfect at coloring skin tones, but I do my best using this adjustment.
Again, there aren’t other colors in this scene besides Reds and Yellows, so that’s what I’m tweaking. I do sort of follow a pattern here which is:
Reds Channel: slide down the hue slider a *tad* and I’ll sometimes lower the lightness (I didn’t do that here but I do in the next Hue/Saturation layer)
Yellows Channel: slide down the hue slider so any overly yellow hues move closer to a neutral-magenta hue AND lower the saturation so the skin doesn’t look sallow.
2.4 – Shadows & Light
My go-to adjustment layers: Levels and Exposure.
ADJUSTMENT 9: Levels 2
This is super simple. I’m just adding back some contrast. That’s kind of my trick for HQ-looking gifs. I bumped up the highlights (right slider) a lot again and darkened the shadows (left slider).

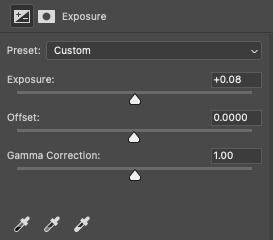
ADJUSTMENT 10: Exposure 1
I only do this sometimes when I want the light parts of my gif to be extra bright, and even then, I barely push the exposure up (I’ve only increased it by 0.08 here lol). Exposure can totally mess up your gif, so be sparing with this if you decide to use it.
2.5 – Repeat as Needed
These are my go-to adjustment layers for basic coloring (i.e. no fancy color palettes or major color manipulation — if you want a tutorial on color manipulation, I made one on usergif right here!). And I tend to add several (but not too many) layers until I get it where I want. Usually, the only additional step I’d do for a color-focused set is add a few Gradient Map layers!
Here are my remaining layers and their settings:

ADJUSTMENT 11: Levels 3
Some final contrast gets added here and some last-minute color correction. For example, if I find I’ve made my subjects’ skin tones too red or yellow, I’ll pull down the left slider in the Red channel to bring back some cyan or bump up the Blues.

ADJUSTMENT 12: Hue/Saturation 2
Only in Reds and Yellows again, I pretty much follow the same principles of my first Hue/Saturation layer. This time, I did lower the lightness in Reds. Their skin was looking a bit too saturated with Red, so this helped me bring it back to a slightly more natural-looking but still high-contrast state and I reduced saturation.

ADJUSTMENT 13: Selective Color 3
Idk why I did this originally... I didn’t bump up the whites and I didn’t touch any other color channels. But I guess my highlights were looking a bit too green-blue, so I bumped up the yellows and magentas a lot and pulled down the cyans.
And here are all the adjustments in action, step by step:

You can see how the middle adjustments were making them look quite red, but the final coloring is more neutral imo.
Now, time to save your gif!
PHASE 3: Exporting the Final Gif
3.1 – Convert Back to Frame Animation + Fix Frame Rate
If you can avoid it, DO NOT export your gif then reopen it to adjust the frame rate. Reopening your gif adds an extra, unnecessary compression step when you already have to go through the unavoidable steps of PS optimizing your gif for web and Tumblr compressing gifs over 3MB.
I love Rizz’s Action Pack mainly for the “Save” action which takes all the guesswork out of this step! Just hit play and your gif will be ready to export in seconds. If you prefer to convert back to frames manually, I’ve written all the steps out here!
Remember to set your looping option to “Forever” and then fix your frame delay aka frame rate (the speed at which your frames play). The generally preferred frame delay among gif-makers is 0.05 seconds (in fact, I’ve heard some blogs won’t reblog your gifs if they don’t appear to be set to this speed!).

But the speed also depends on the FPS of your original file! For example, when I gif video games (like Jedi: Fallen Order) which I believe are at 60 FPS, I tend to make my speed 0.04 (or sometimes faster).

I know that seems like such a minor difference, but as you make more gifs, you’ll be able to tell which speed looks the most natural!
Before exporting, just always be sure to play your gif back, check that you like the speed, and delete any accidental duplicate frames! (Duplicate frames can happen if you animate using keyframes.) They may seem minor, but it’s something I personally can notice even if it’s just one duplicate frame... and it can throw off the entire smooth flow of your gif.
TIP D: MARKETING FOR DISCORD USERS (lol) 🤡
If you share your gifs in a creator server, here’s a fun tip that totally exposes me as a marketer. While you’re in Frame Animation, move your frames around before saving it so that your best-looking frame is Number 1. THIS is the frame people see in your embedded preview link when you share your gifs on Discord. (If your selected frame is in the middle of your gif, just be sure to move all the frames after it too so your gif still loops properly. Like, if you have 10 frames but want frame 5 to be featured in the Discord preview, move frames 5-10 before frames 1-4. Now, your frame sequence is 5, 6, 7, 8, 9, 10, 1, 2, 3, 4 — #5 being the featured frame.)
Your gifs loop anyway, so your first frame doesn’t have to be the first part of your scene :) By being purposeful with your “first” frame, you have control over the still image people see in the server. And if you choose a really good frame, who knows? Maybe more people who aren’t in that fandom will be curious enough to click it because it looks so good and enticing lol
See this preview? That’s actually the end of my gif, but it’s the best part:
(also, not me just realizing I posted this set on 4/20 lmao that was so unplanned a;lsdjk)
3.2 – Save For Web
Go to File > Export > Save for Web (Legacy) to get your gif ready to export!
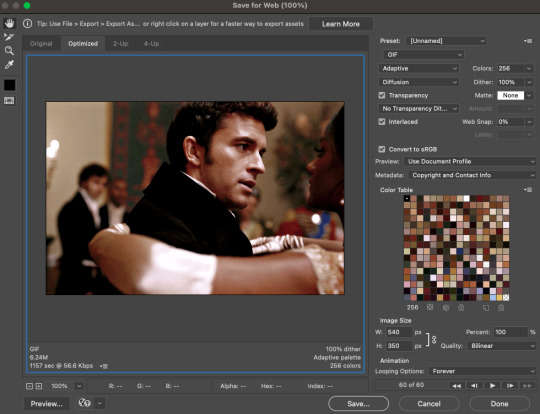
There are still some extra settings to play with here, mainly the Color Reduction Algorithm:
And the Dither Algorithm:

Typically, gif-makers only use Selective or Adaptive and Diffusion or Pattern.
Again, these settings are going to be up to your personal preference. My usual is Adaptive-Diffusion.
On occasion, I’ll go for Selective-Diffusion. And I don’t usually prefer the Pattern dither because I hate seeing the grid lines it produces. But there have been some gifs (like the first one in this set) where I have a solid background color and Pattern yields the best-looking gif. So, I’ll always toggle through the options to see which one I think looks best!
Check out this guide that shows all the setting side by side!
TIP E: How to Keep Your Gif Under 10MB (Tumblr’s current max gif size)
Try to to keep your number of frames as low as possible. I think my average is 60 frames or so. Sometimes I can get away with more depending on the scene.
Make your gif smaller. Obviously, if you’re making a full-width gif, you can’t make it smaller than 540px wide. But you can shorten the height of your gif if your composition allows it!
Add more blacks to your coloring. Idk why this works but it usually does for me. More contrast or something
Try not to use too many adjustment layers (I say this but I don’t usually do this a;slkdjf)
This isn’t my personal preference and I’ll avoid it when possible, but you can add Lossy which is a compression setting that’s available when you do Selective color reduction. It helps reduce the file size, but I’d never go over 10 on Lossy:

3.3 – Upload to Tumblr
Use the Photo Post option not Text Post. Gifs uploaded in a Text Post may look okay on the dash, but they can get very wonky on different themes, create size inconsistencies, and make the gutter wider than the 4-pixel default. (Plus, if you share your gifs in a Discord server — your embedded preview will be all tiny!)

Contrary to some beliefs, uploading to drafts does not mess with the quality of your gif anymore than publishing it instantly. So, go ahead and put your gifs in the drafts so you can see how it’ll all look before posting!
I tend to leave my gifsets in drafts for at least a day so I can criticize myself more 🤡 kidding... a little... but I’ve also heard that keeping your sets in drafts helps them appear in the search/tags faster. I’ve never had problems with my stuff showing up in tags, so maybe that’s true!
And that’s it!
Thanks for reading my dissertation on Tumblr gifs lmao. I hope it was clearer than it was long and ramble-y... and I hope it’s helpful for some beginner gif-makers out there! If not, here are some of the best basic giffing/coloring tutorials I know:
giffing and coloring tutorial by sashafierce
giffing 101 by msmarvel
gif tutorial by kylos
gifmaking for beginners by hayaosmiyazaki
coloring tutorial by magnusedom
and check out usergif’s resource directory here for more help!
[You can also find my other tutorials/resources here]
Before I go, let me just say a few TUMBLR/GIF ETIQUETTE things:
Clearly gif-making is a process. And it is art, whether you use fancy effects or not. So DON’T STEAL GIFS, don’t even use them as a base for your own adjustments. Use this tutorial if you need help making your own gifs from scratch!
Another thing: give credit when credit is due! Trends come and go in gif-making, but you absolutely should link “insp” in the caption of your post (not in the source link and not in the tags). The caption is the most visible and intentional spot, which means it’s the most deliberate acknowledgement of your source of inspiration. If you didn’t come up with a concept yourself (be honest with yourself), just link it! It doesn’t make your post ugly or cluttered. It helps spread awareness to other talented creators that some of your followers otherwise may not encounter in their fandom. And doesn’t it feel good when more people see what you’ve made and celebrate it with you? Give that same feeling to the source of your inspo!
Lastly, remember: don’t let anyone tell you that the gif styles you like aren’t right or aren’t beautiful. Gif-making is about having fun and creating art! As long as you like what you’ve made and it doesn’t harm any person/community or perpetuate problematic behaviors (i.e. whitewashing), then do what you want! It’s your blog!!
Have fun! <3
#photoshop tutorial#gif tutorial#completeresources#dailyresources#userkosmos#usershreyu#uservalentina#useralison#usernums#tuserkay#usercim#userk8#tuserrex#userannalise#useryoshi#userelio#tuserabbie#uservivaldi#resource*#myedit*
2K notes
·
View notes
Text
Lappy fancam animatic blogging/production notes
now that wolfgirlyaoi is out on global its rambling time about my powerpoint presentation
Concept
Originally I wanted to do an (Tex & Lapp) animatic with the boss theme (broken wall/Signore dei Lupi .mp3) ever since the event dropped but I thought
1) by the time I finished anything someone else would have probably already done it first (lol, lmao even)
2) I remembered the song exists and how much i looped it then while listening to the group's new album drop and thought the lyrics fit Lapp a little too well and also doesn't end abruptly like the boss theme + was shorter so yea
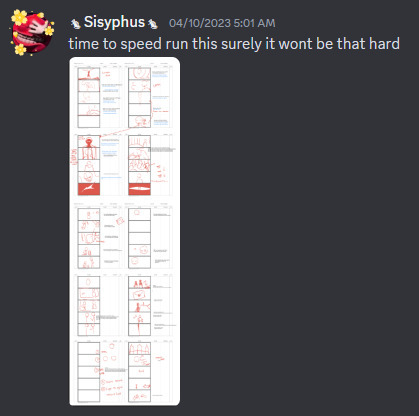
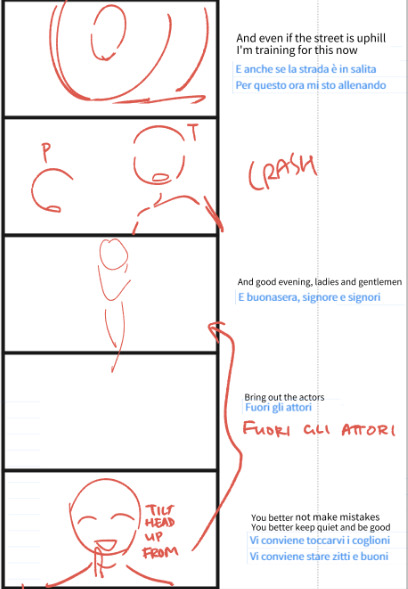
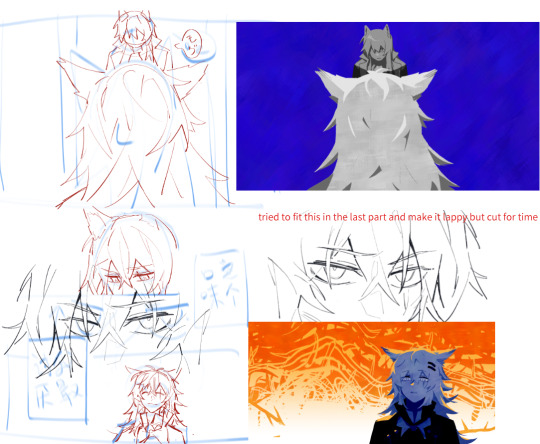
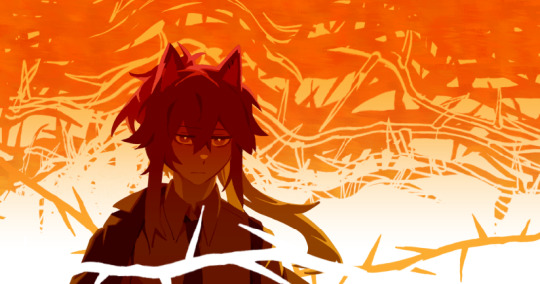
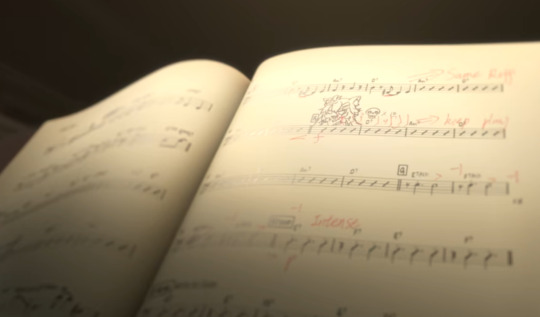
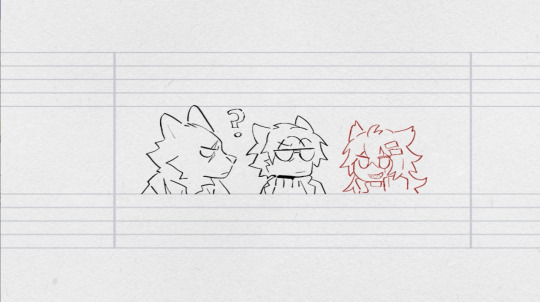
initial stickman storyboard where i put down the lyrics with event dialogue/happenings that i felt would fit nicely together > hastily scribble the images that form in my head
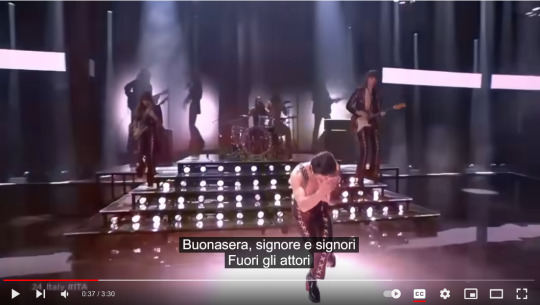
storyboards were basically what i wanted to see (same rule as my comics) lol especially if they weren't shown in the event CGs, eg. there's a CG of the truck crashing into the courtroom so I didn't do that but they didn't mention her physical acting in that scene + the song I used has a bow/salute at that exact part in their live choreo with the very similar line so I wanted to do a homage even though-
-I was like it's going to be such a pain to figure out an economical hand twirl and bow but I have to do this I need to transplant the image in my brain onto the screen because official media did not do a—
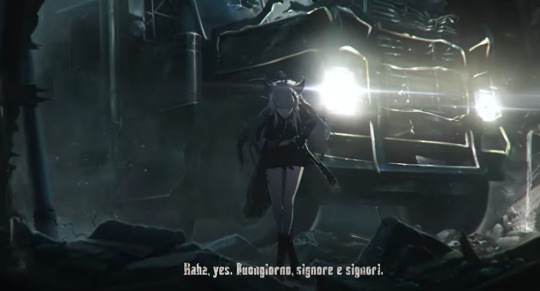
Honestly still don't know if its a common phrase and action combo because I was having so much trouble finding external references that wasn't just scrubbing the live video over and over anyway
part of the storyboards were 'recycled' from comic drafts I did (of the chocolate scene because ofc) when the event was running on CN
Originally I wanted to draw Lapp feeding Texas for The Girlyaoi Funny but I wanted to reference the plaque you get which is a Creation of Adam reference right but I also saw people saying it's referencing the scene from Silence of the Lambs lol so...peel the layers to your liking!!

(The chocolate flavour choice was from asking my Columbian friends what the worst chocolate flavour they ever tried which was white coconut)
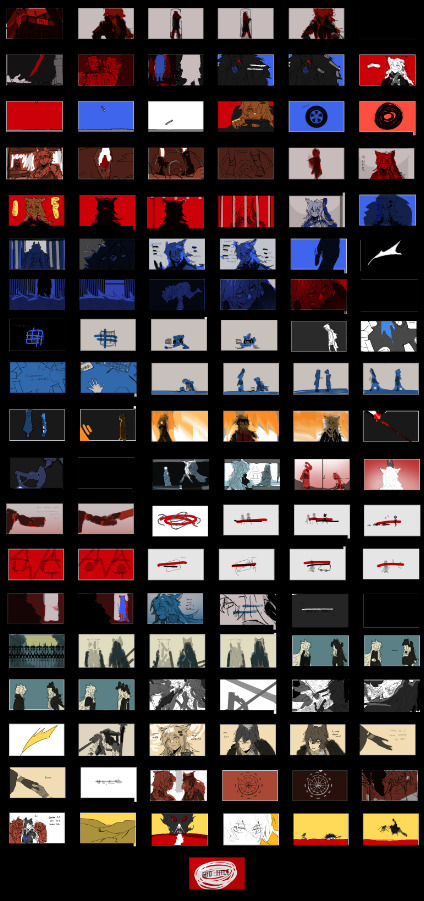
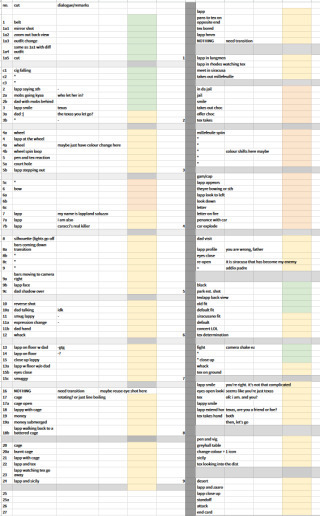
my sorry attempt at colour keys > final spreadsheet to keep track of progress and paste all the dialogue i put in
Art Direction
A bunch of shots/colour schemes are references to Måneskin's stuff or other media tehepero I'll just put a few here
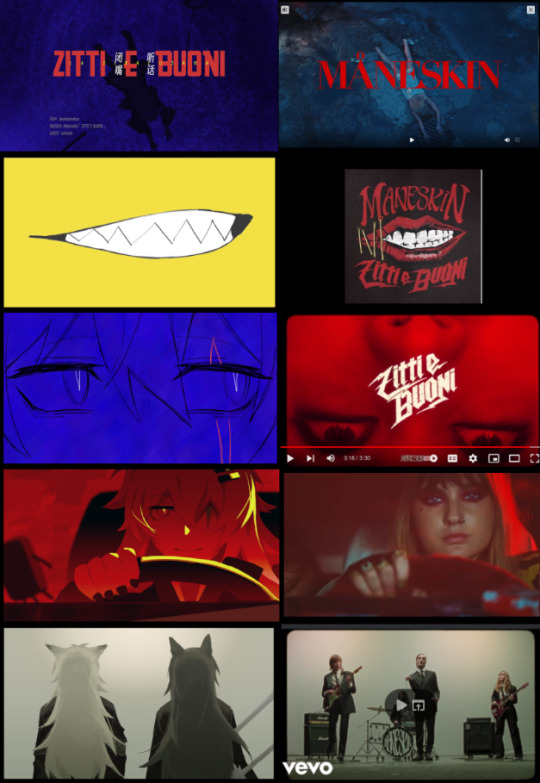
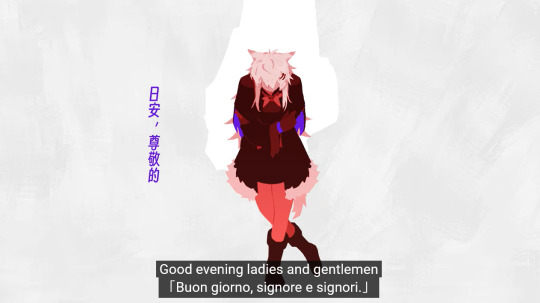
At first I was going to limit red/blue to tex/lapp respectively but since Omertosa is blue I just did away with that rule and lapp gets to have both (and more!) these two colours have pretty obvious emotional readings I think but also
red = self
blue = society Siracusa
or: red = yaoi & blue = yuri
for the others:
Purple = Alberto/Saluzzo, its not orange like the fruit he keeps holding because see below; I needed the colour for something else LOL Also the Saluzzos are iirc nobility or whatever and they have purple hints in their clothes so I think it was a good fit anyway
Yellow/Orange = Its supposed to be representing the last word in the story which apparently, yostar went with 'Savagery' which is Correct I guess but (laments again about how nuance is lost in localisation because imo savagery has a more derogatory kind of connotation while I think 蛮荒 in context of the story also has a 'nature/untouched by civilisation' side to it) which is why Texas setting the house on fire was not (entirely) red but orange (and it complements the blues both visually and thematically) and it's yellow at the end when they're frolicking(?) in the wilderness lol

(these colour rules don't apply to the penglog shot and technically a few frames like the shot with shocked penance, the one right after and 'im just lappy' because...i forgor my own rules lol)
The greens/teals were just a reference to the shades in the 3DPV I think
The silhouette/general style was inspired from the 3D teaser thing they had at the beginning of the 3.5 anniversary stream and the card suits that I..forgot to move to the other layers which is why only the green one had them (supposed to be 1 per set 💀)
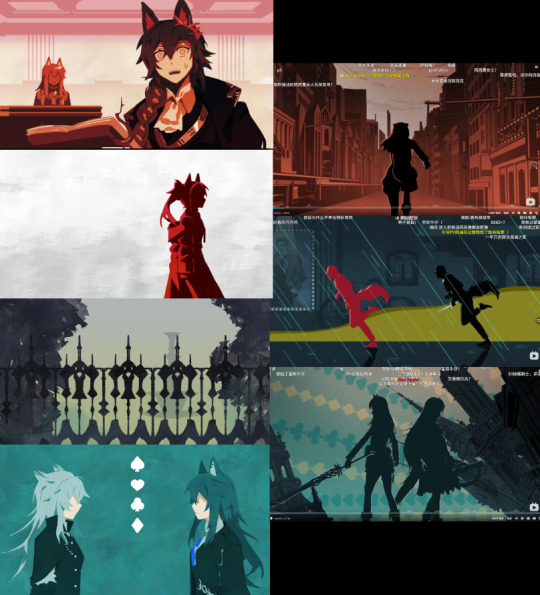
The clash bit is basically the same as the event CG but with a flipped camera/POV sorry for world's worst screenshot lmao. Couldn't imagine the poses in my head so I ended up posing 3d models in CSP pretty good posing practice
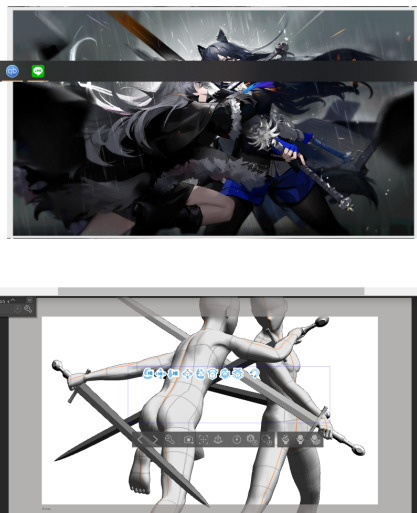
These shots got rendered extra because..they were the first frames I started on and I was still figuring out how much to simplify lol
I also posed the chairs shot for some inexplicable reason…my file was lagging so bad
Headcanon part (kind of)
The childhood flashback scene is probably the part I took the most liberties (headcanon) on since it's not explicitly canon like the rest...the sequence/how I connected the scenes itself to fabricate a timeline of her childhood was kind of inspired by some weibo post musing about how (iirc) texas's sweet tooth maybe came from when she was being fostered at casa Saluzzo and Lapp treating her like a pet essentially and giving her a lot of treats since...you know what happened to her actual pet hehe except maybe texas offered her a stick first and then Lappy just reciprocated endlessly because its one of the few 'acts' she knew that wasn't violence haha yeah this section was basically a stealth doujin sorry
It's mentioned that she was brought up as the ideal Siracusan or whatever and she does the cute doodle in the 3DPV so I thought she probably had the Forced Music Lessons as a kid (The music sheets are Bella Ciao and of course)
The bow choreo was the one thing i really wanted to animate but the music sheet segment (based on that one split second shot above) ended up being my favourite part even though compositing the motion was a mini hell on it's own (ended up compiling a long png to scroll by with the red doodles layered over)

Other things
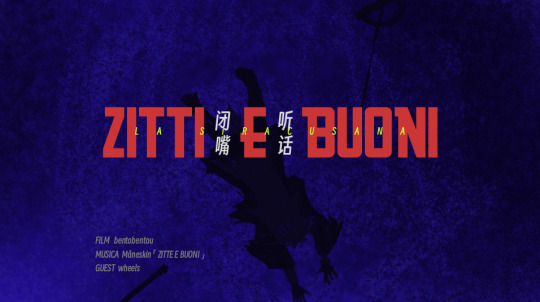
I will never live down my (self-imposed) shame of misspelling the title (I fixed the title on youtube but its why the ending shot in the upload says ZittE e Buoni instead of ZittI e Buoni) don't rush your fancam in 10 days 😔
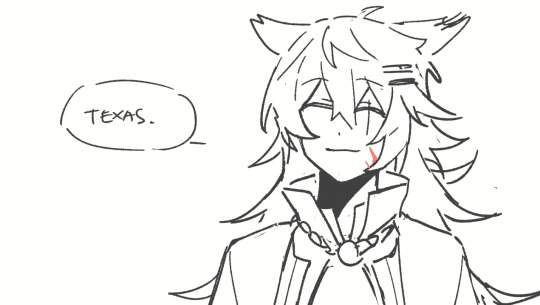
I didn't look through the entirety of the EN loc but Idk why they had Lappy say 'Then go.' to Texas when it's supposed to be more like 'Let's go.' as in, 'let's go together' as opposed to 'alright off you go to the greyhall alone' lmfao also her saying goodbye forever padre when addio is right there
I don't think I'm insane enough to do another ppt soon but man this pair really makes the 'imagines a whole music video while listening to music' part of my brain go wheee like first it was Starset's Manifest then Signore de Lupi then this and while working on this one i was thinking how Måneskin's Torna A Casa would be another good track
ok ty for reading #GIRLYAOIREAL
#arknights#Il siracusano#bentodraws#bentotexto#I was going to have this post as a reblog but tumblr broke my copypaste so here's a completely separate post#feel free to ask me about anything else i didn't cover in here
151 notes
·
View notes
Text
I got an ask about my gif making process, and my reply started getting way too long so I figured I'd make an updated gif tutorial/a rundown of what my giffing process looks like today. I hope this is helpful!
The anon mentioned how they really want to start making gif posts but they don't know how to, and I really was in that same spot three years ago, seeing all the pretty gifs people were making and wanting to do the same thing but just not knowing how.
I taught myself to make gifs from many different tutorials I found on here, and now years later my method is a mix-match of all of them. In this post I’ll go through my personal process but first I will link some great resource blogs that have more in-depth tutorials and resources on all different aspects of gif-making.
Both @usergif and @completeresources have great organized tutorial pages that I check all the time for different techniques. They’re so helpful! For beginners I’d recommend *these * *tutorials* for example.
For a walkthrough of my giffing process, keep reading!
First steps
Alright, let's start with the basics: I make my gifs on Photoshop and I currently have the 2023 version, so keep that in mind when looking at the screenshots I included, since there can me small differences between versions.
There are really two main ways to start out the giffing process on Photoshop. You can take consequent screenshots of the scene you want to gif and then use ‘Scripts’ and ‘Load Files into Stack’ to load them into Photoshop. I used to use this method before, and my previous giffing tutorial explains all the steps for it, as do the gif tutorials I linked.
But these days I use the other method, which involves making a shorter clip of the scene you want to gif and then using 'File' > ‘Import’ > ‘Video Frames to Layers’ to import the clip into Photoshop.
The difference between the two methods isn’t really that big, just up to personal preference and what fits your workflow best. I think the reason why I switched over was just cause I found it annoying dealing with all the screenshots.
My current process starts with opening a clip I want to gif with ‘Video Frames to Layers’. In the window that opens, I use the little arrows to select the exact shot I want to use. Here it's good to include a couple frames from before and after the exact shot you want to gif. That way you can make sure to get the whole shot included.

When the frames load up, this is what my set up view looks like. It might look different depending on the version of Photoshop, and also depending on your personal customizations, but this is what my workspace looks like. In order to get this view, make sure you have 'Timeline' selected from the 'Window' menu from the top bar.

Real quick to help make the tutorial more clear even if you’re not that familiar with Photoshop yet, the three main views I’ll be talking about are the frames, the layers and then the adjustments. Frames are the little film-reel-looking horizontal row on the bottom, and the layers are the vertical stacked row on the right. I have the adjustments on the right above the layers.
To start off, we’ll be working with frames. Since I selected some extra buffer frames from the clip in the import phase, now I'll first delete those frames that I don’t need by selecting a frame and then clicking the little trash can icon under the row of frames. When you are left with the shots you want to use, go to the menu of the three little lines on the top right of the frames view and pick ‘Select All Frames’.
Now that they’re all selected, you can set the frame delay. This basically just means how “quick” your gif will be. There are different preferences to this, but generally you’d want to pick a delay from 0.05 to maybe 0.1 for really short gifs that you need to be slower. My go-to is a frame delay of 0.07.

Whichever number you go with, you’ll chance it by clicking the tiny downward arrow on one of the frames (with all the frames selected). From the window, pick ‘Other’ and then type in your number.
Resizing and cropping
After this it’s time to resize and crop your gif. Here there are again some different methods you can use, in my previous tutorial I used the Crop tool and then resized the image. But these days I do this in a different way. Again, what way you use is all up to preference.
So what I do is make sure that all the frames are selected, and then from the menu I pick ‘Copy Frames’. After copying the frames, I make a whole new file from ‘File’ and ‘New’. This will be the canvas where I’ll make the final product of the gif, making it the exact size I want the gif to be. I prefer this method because with it you can alter the cropped area easier to see what looks best. Also this way if you’ve initially loaded a lot of unnecessary frames that you deleted previously, this way only the layers that are left transfer over and it’s less bloated in the layers panel.
In the "New Document' window pick your gif size (keep in mind the Tumblr dimensions of 540 pixels wide for big, all-across gifs, and 268 pixels wide for side-by-side gifs). With today’s gif I went with the dimensions of 540x450.

When the new file opens up, select ‘Create Video Timeline’, then from the bottom left corner click ‘Convert to Frame Animation’ and then from the three-line menu select ‘Paste Frames’. After your frames load in, you can delete the first blank frame.
Now you will resize and crop your gif. Make sure to select all frames again and then press CTRL/Command + T to activate the Transform tool. Use the guide lines that appeared to drag and resize the gif to fit your canvas. Play the gif by clicking the play button under the frame row to test how it moves within the canvas and move it around until it looks right. You can also go and change the canvas size from ‘Image’ and ‘Canvas Size’ if you want to.
At this point my gif looks like this:
When you’re happy with the cropping, it’s time to start adjusting the gif!
Lighting
For coloring and lighting the gif, we’ll move over to the right to the Layers panel. Make sure you have the top layer selected. We will be using Adjustment Layers to change the appearance of the gif, and they will change the layers below them, so this way we make sure the changes apply to all layers.
There really are so many ways you can edit and adjust your gifs, these are just the methods I use the most. So, open up the Adjustments view and let’s get started!
(side note: Lighting dark scenes is a whole different topic, so for this basic tutorial I picked a well-lit shot so we won’t have to worry about all of that when lighting it.)
I usually start with the Curves layer. Pick the bottom eyedropper tool on the left, with the white tip. With this, click on the brightest part of the gif to set the white point. This is especially useful with gifs that have some kind of a color tint (for example the green hue in the Hawkins Lab flashback scenes). By picking the white point, it will adjust not only the lighting but also the hues of the gif.
After picking the initial white point, you can go in and adjust. From the RGB dropdown menu, pick the individual color channel (Red, Green, Blue) and drag and adjust the curve until the colors and lighting look good to you. Here again, it’s all up to your personal preference. I personally prefer coloring that is more on the warmer side, so in this phase I usually strengthen the reds in the gif and tone down the greens. Remember, this is just the first phase of coloring, it doesn’t have to look perfect right away.
Next, go back to Adjustments and make another Curves layer on top of the first one. This time pick the top eyedropper tool with the black tip. Then click on the darkest part of the gif to set the black point. I don’t always do this, especially with dark scenes, but in neutral lighting like this, it can help with the contrast and make the coloring more vivid. Here you can once again adjust the RGB curves individually until you’re happy with the result. Oh but don’t think we’re done with the Curves layers just yet! After the white point and black point layers, I usually open a third Curves adjustment layer for lighting the gif. Here I usually stick to the overall curve, not going into the individual color channel ones. I drag and adjust the curve to make the lighting of the gif look good. And here’s what my gif looks like with all the Curves layers:

The brightness is starting to look pretty good now, but I’ll just add a couple more adjustment layers that I usually use. Again, this is just my process, all the layers aren't always essential and their usefulness really varies depending on the specific shot you’re working with. My advice, especially when starting out with adjustment layers, is to try out different adjustments to see what they do and how they make the gif look. If it looks bad, no worries, just CTRL/Command+Z it away!
So at this point I usually apply a Levels layer to brighten a little and then to deepen the shadows a bit to up the contrast. Then a Brightness/Contrast layer and maybe an Exposure layer to help do the same thing. I find that by using the different tools and making small adjustments in each one, it makes the lighting look nice. After these layers, here’s what the gif looks like:
Coloring
Now it’s time for the actual coloring! My favorite part! There are a billion different ways to color a gif and a billion different styles to go for. Here I’ll be doing a pretty neutral, natural coloring, but I also love my exaggerated, color-themed sets. Let me know if you’d like to hear my tips for those in another post!
With my workflow, I usually begin coloring with a Selective Color adjustment layer. And on there, I tend to always go straight for the Yellow view. There my go-to is to drag down the Cyan slider, since like I mentioned, I usually go for a warm-toned look. Here again my advice is to just mess around with the different sliders, see what they do, test them out to find a coloring you like. You can do the same thing with the Hue and Saturation layer, picking different colors in the gif and adjusting them to how you want them to look. The shot we’re working with doesn’t need a ton of color manipulation, so I won’t be doing too much with these layers, but they allow you to make some really cool colorful stuff!
The Color Balance adjustment is up next, and it’s great at unifying the colors and also making the color shades look nicer after lighting. Especially with dark gifs, brightening a scene can make the darks look a bit muddy, so editing the Shadows of Color Balance can help with that.
And lastly when I’m done with all the coloring layers, I apply a Vibrance layer on top, usually to up the Vibrance and Saturation, since I love my bright saturated colors. This shot is pretty bright on its own so I won’t have to tweak it a lot.
Once I’ve got all the adjustment layers in place, I’ll usually group all of them together. You can do this by selecting all the adjustment layers and then pressing CTRL/Command+G to put them into a group folder. I like to have it organized like that and it also makes it easier to look between the original gif and the adjusted one by toggling the little eye icon on the left of the folder. This way you can check if there’s something you still want to change, or if you want to tone down some adjustments. With today’s gif I went and lightened the shadows a little. But after that I was happy with the coloring, and the gif looked like this:
Sharpening
It’s almost time to export the final product! But before that I'll sharpen the gif. I know many people like to sharpen their gifs before coloring them, that’s a pretty common way to do it. This is just the order I learned to do this in. I think it’s fun to sharpen last so that it’s kind of like a final polish to the gif!
To prep the gif for sharpening, go to the bottom left of the frames and select ‘Convert to video timeline’. Now go back to the right and select all the layers in the layers view, the adjustment layers and all. Then with all of them selected, right-click to open a menu and from it, pick ‘Convert to Smart Object’. Now your layers are all in one object.
From the top row menu, pick ‘Filter’ then ‘Sharpen’ and ‘Smart Sharpen’. In the window that opens, pick these settings:

Then repeat the same thing, with the Smart Object still selected but now apply these settings:
(I have made these steps into an action, so I can do it with a simple click)
Exporting
With the sharpening done, our gif is ready!
To export it, go to ‘File’ and ‘Export’ and ‘Save for Web (Legacy).

A window opens up showing you the export settings. The first thing I do in this window is check the size of the gif, which can be found in the bottom left under the preview image. The Tumblr gif size limit is 10MB, so you need to stay below that. If the gif is bigger, I go back and make it shorter by deleting frames from the start or end of the gif. There are other ways to reduce the file size, but this is usually what I do. With today’s gif the size is around 5MB so we’re all good!
If you want to preview the gif in a moving form, click ‘Preview’ from under the file size, and it will open in your browser.
On the right of the preview image in the Export window you can see a bunch of different settings. In the screenshot you can see the settings I use, you can test them out and then tweak them to your liking. I usually keep them the same, though sometimes if there’s some pixelation in areas of the gif I test switching out ‘Adaptive’ to ‘Selective’ or ‘Diffusion’ to ‘Pattern’. But these are the settings I use in 99% of my gifs, and what I have found give the nicest end result for me.
When you’re all set with the settings you can save your gif into its folder and then you’re all done!

So there we have it! A basic rundown of my giffing process. I tried to keep it as clear and informative as possible, but I know I can get rambly so I hope this was helpful! For more details and tips, please refer to the tutorials I linked. There really are so many useful tutorials on here to learn from.
Lastly I'll add that making gifs is a creative art form and a skill like any other. You aren't going to be perfect at it on your first try, it takes practice and trial and error. When I look back on my first gifs I can see a hundred things that I would fix now that I have more experience. And the same will for sure be the case if I look at my current posts a couple years from now.
Figuring things out, learning what you like to gif and developing your style is what I find the most fun about the whole gif making process. I've been making them for three years now and I can say that I've developed a style that feels my own. And I swear, every time I see someone leave a tag to my post saying that they like my coloring and the style of my gifs, it always makes me so happy.
If you're thinking of starting to make gifs, I say go for it, give it a go, and have fun with it! 💛
#kaisa talks#tutorial#gif tutorial#gif resources#answered#this turned into a mile-long post#but i hope it can be helpful!#long post
156 notes
·
View notes
Note
Hello! I love your gifs! How do you make yours so clear and high quality/What's your process? <3
Hi!! Thank you so much!! I've never really had to explain out my process to anyone and I don't know how much detail you need, but I'll try my best and try to be as thorough as possible just in case!!
For my D:BH gifs, the process starts out with recording my own game play. I have a gaming computer that already had the GeForce Experience app downloaded, so I use that to record my game play. It records at 1920 × 1080p, 60 frames per second, so the files can get... rather large 😅 The video of my playthrough of the Russian Roulette chapter (~11 minutes long) was just under 4 GB. So its not light...
From there, I figure out what in particular I want to gif (for the timestamp roulette series, I let a random number generator figure out whereabouts I'm looking). Once I know that, I open up VLC and use it to isolate that particular shot + a little more on either end.
After I have the shot(s) I want to gif isolated, I open up Photoshop. I use "File" > "Import" > "Video Frames to Layers" and choose the video I want. You can do this straight from the video of your playthough, but I find that the shorter the video is, the easier it is to work with in this step. I trim my video more, to about a click or two outside of the specific shot I want. Like so:

From there I delete any extraneous frames from the "timeline" section that comes up.
Then is cropping: my go-to crop uses the "W x H x Resolution" option - I put 540 px in the first box, 300 px in the second and leave the third blank.

After that, I have an action in Photoshop that does the next steps for me (to make things quicker), but what it does is sets the frame rate (which will have to be done again after saving the gif because Photoshop hates everyone apparently), converts all the layers into a single object, and sharpens the gif. I've only been gif-ing for about a year and a half, and before that I had exactly zero experience with Photoshop at all, so all the numbers from these steps are still the same as the numbers I pulled from the tutorial I used when trying to figure everything out. For those, you can look at this absolutely AMAZING tutorial, by hayaosmiyazaki, specifically steps 7. gif speed and 8. sharpening.
From there, I start adjusting the colors. From what I've noticed, I seem to do a good bit less color adjustment than some, or maybe even most, other gif makers. It's honestly all about personal preference, so play around with it and find what you like! I personally like to stick as close as possible to the original colors, while still brightening the image up enough to make it clearer and more legible. So, for a majority of my gifs, I only apply an "Exposure" layer, a "Brightness/Contrast" layer, and a "Hue/Saturation" layer (from the "Layer" > "New Adjustment Layer" menu.) The numbers here change dependent upon the lighting in the shot.
For example, here's a before and after of this shot I just did so I could type this out and make sure I got every step 😅 For this one, I did Exposure +1.0 (no change to Offset or Gamma Correction), Brightness +20, Contrast +10, and Saturation +5 (no change to Hue or Lightness).
Once I'm satisfied with my coloring, I go to "File" > "Export" > "Save for Web (Legacy)". I watch the gif there to make sure it looks how I want, maybe go back and do a few tweaks to the coloring if I'm not quite happy, check the file size and then save it!
Tumblr's maximum file size is 10MB so if your gif is over that, you won't be able to use it on tumblr - in order to fix that, you may have to delete a few more frames. Or you can crop it to so there's less pixels in the "Save for Web" pop-up by changing the numbers in the "Image Size" section
And now, once I have my gif named and saved. I go back to "File" > "Open" and open up that gif. From there, I go to the little three lines icon in the top right corner of my "Timeline" section, click "Select All Frames" and then click the three dots on one of the frames and change the frame delay. For my DBH gifs, I do 0.02 seconds cause it looks best to me. Depending on how many frames per second your recording software does/what you personally like speed wise, this may be different for you. This is also different for gifs from live action or other media (for those, I prefer 0.05 seconds - it looks the most realistic to me.)
Then, I just save again, overriding the file from before I changed the speed, and voila! That's my process!
I hope this helps; if you have any more questions, my ask box is always open!! And again, thank you so so much 🥰 I'm so glad you like my gifs!!
21 notes
·
View notes
Text
Book Review 22 - The Employees: A Workplace Novel of the 22nd Century

This was a fascinating book. Another one I probably appreciate as an art object more than as a story, per se, but in this case that’s not really a knock on it. Or at least, I believe the whole project began as the written accompaniment to an actual visual art display. Which I really rather wish I could have seen, it seems like the right sort of setting and accompaniment would have made this a lot more affecting.
Anyway, the basic synopsis of the book is that, sometime in the future, a massive space vessel called the Six Thousand Ship is launched from Earth and ends up in orbit over an alien world, where strange and vaguely eldritch objects are retrieved and brought on board. The story is told through a series of anonymous employee testimonials to some silent and anonymous survey/study/HR board. Crucially, some large fraction of the crew is not human but humanoid, synthetic workers created and programmed by the organization who own the ship.
The entire thing is perfectly designed to convey a very particular sense of corporate alienation, right down to the polite euphemisms used for murder. Especially at the beginning, everything from obsession to grief and nostalgia over never seeing Earth again is always framed as how it might effect ones productiveness as an employee, and to figure out everything that really happened in any given statement you usually have to first decipher the thick layer of corporate HR-ese its buried under. The packaging provides a sort of antiseptic distance that kind of clashes interestingly with what is actually happening at any given point.
Which is, I’m sue, all making a point of the alienation and inhumanity of the modern workplace and the absolute horror of a life that is nothing but work – I think I first heard this book mentioned in the context of people discussing Severance, and I can absolutely see the relation between the two. I’m sure it’s incredibly uncultured of me, but the whole framing device (especially as things moved towards the climax) also just seemed incredibly reminiscent of the audio logs and scraps of text you would find in a video game, providing the backstory of how whatever environment you’re exploring collapsed into the ruined state you found it in. Which is, certainly, an interesting effect to go for in a book.
The objects themselves are almost certainly weighted with deep symbolic meaning that flew entirely over my head, but the effect they had on the various employees is definitely interesting. Things definitely do happen, but in terms of page count the inner musings and angst over the human(oid) condition and how interaction with the objects effects different individual psychologies is what the book is actually really interested is. Being allowed to care for the objects in the way they seem to like becomes an intense preoccupation for some of the crew involved, even moreso than the allocated time with holographic recreations of children the organization starts providing as an incentive at a certain point.
I’m not entirely sure it really does anything with it, but all the ways the book gestures at transhumanism is at least interesting. The humanoids themselves, with their probably immortality and regular mental reuploads and lack of anything outside the Work to contextualize or complicate their life (at least until the objects show up), as well as plenty of mentions of add-ons that the Organization provides its human workers as needed. And just very oblique mentions of ‘transfers’ to positions with very different mental architecture or sense of self or physical/mental autonomy. It’s all a great/creepy vibe, at least.
On the whole book left me slightly cold, but that’s really a me problem more than the book problem. Short enough to be worth a read if it seems interesting, at least.
79 notes
·
View notes
Text
I might start posting these edits I make more often?
I post this video knowing full well that only 5 people will actually understand the Ham joke. Even then, they won't likely find it even half as funny as I do, even if they DO know what it's from.
Anyways gonna talk about the process it took making this as I ended up learning more about video editing doing this.
So I had to mask out the object Luz was picking up for this, so what I did was split the video into single frames & used the frames where Luz was kneeling down & the frames where she's out of the way, and spliced together the shots of the background together to mask out the object via like 3 layers of the same shot with various parts being erased & whatnnot.
I've never actually tried this kind of editing, & I'm willing to bet most people are like: "Yeah no shit, Einstein. This is basic editing stuff. You're just figuring this out now?"
Well, yeah. This was new to me. But I was really proud of how it turned out. & it also resulted in me making a fully blank version of this background as a byproduct of making this silly edit.
I know this probably isn't THAT impressive & I'm sure someone else could do this way better than I did. But I'm still proud of how well this ended up turning out. It was a learning process for me but I feel like I made progress with learning video editing stuff & even art stuff. Idk man, I felt proud.
THAT BEING SAID THIS WAS FAR LESS PAINFUL THAN HOW MUCH OF A NIGHTMARE MAKING THAT AMPHIBIA GREENSCREEN EDIT FOR THE ANDRIAS SHITPOST WAS.
HOLY FUCK THAT SUCKED.
#the owl house#shitpost#toh#toh shitpost#luz noceda#toh luz#owl house#daniel fossey art#daniel fossey#gecky#edit#video editing
14 notes
·
View notes
Photo


GIF REMAKE CHALLENGE! ✨
📩 remake someone’s else colouring, sharpening, slowing, and resizing. do your best to get close to the original and share how you did. make a new gif to challenge those you tag to recreate. share the source video if possible! try not to tell those you tagged anything to help them; see what they can figure out and how close they get on their own! if you’re tagged in several, you can do one or all, whatever you like! if they have a giffing tutorial, shared actions, etc., you can use that to aid your recreation!
i was tagged by the lovely @agibbangs 💖 i think i got pretty close. i couldn’t figure out how to get rid of the red undertones on chan’s face. i sat in front of my computer for a good 30 minutes mumbling, “how did lau do this... how did she make his jacket so black... mine is so BLUE!” i did manage to find lau’s gif tutorial and i added some adjustment layers to get his jacket to a black i like, but man it was a struggle 😂 i think i have a few extra frames, but i got there somehow 🥲
my challenge, if you wish to attempt, is a felix facecam from 2021. my favorite felix fancam actually, the vampire THUNDEROUS performance! the time stamp is around 0:07–0:19. and i actually made this gif special for this tag, it’s not part of any actual set.
if you’ve already been tagged, don’t feel obligated to try to recreate mine 😂 i shall tag: @juiceofmoons, @yonglixx, @haenglixie, @jinniebit, @snug-gyu, @changbeens, and @skz-films, no pressure of course! i know this is difficult!
#tag game#this was so hard lmao one of my bff's listened to me complain over the phone while i was trying to do this#recreating someone else's coloring is so hard and weird when you just wanna follow your own way of coloring#EDIT: it bothered me that i didn't sharpen the gifs... but i noticed that i must've sharpened lau's bc i went back to sharpen it...#and it looked worse lol and there isn't a HUGE difference in my gifs but i uploaded the sharpened one!#anyway if you don't want to sharpen it; it won't make a huge difference!
64 notes
·
View notes
Text
lovely anons have been requesting a gif tutorial, and while there's plenty photoshop ones out there I think there's only a couple photopea ones (if you dont know photo pea is like an internet photoshop basically) so I thought I'd make a little tutorial on how I do my gifs!
first you're gonna want to use any gif making platform to actually turn your video clip into a gif. I personally use giphy but I know there's a bunch of other platforms for this. then you're just going to open the gif in photo pea either by clicking "open from computer" on the home page or dragging it in from finder (Mac) or files.
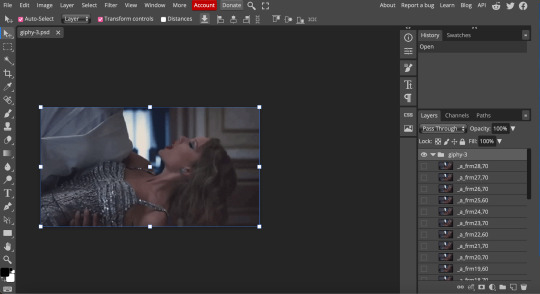
IF YOU'RE MAKING A GIFSET: the first thing I do is make sure all of my gifs are the same number of frames. its important to do this if you want all of your gifs to restart at the same time! to do this I just go to the side where all the frames are listed - this one has 29 frames (note: it says 28 on the top frame, but the very first frame is listed as 0, so always add 1 to the top number to know now many frames there are). what I do is find the gif with the least amount of frames and then make all the gifs the same number - depending on what part of the gif I want to keep/delete I'll delete frames from the beginning, end, or both which usually requires some basic math
next, I click on the top frame, press shift, and then press on the bottom frame to select all (unfortunately there's no keyboard shortcut for this I don't think). then I'll click filter -> sharpen -> smart sharpen that way I can freely customize the sharpness of each gif depending on it's original quality. usually I do 200% at 0.5 pixels but I'll adjust if necessary.
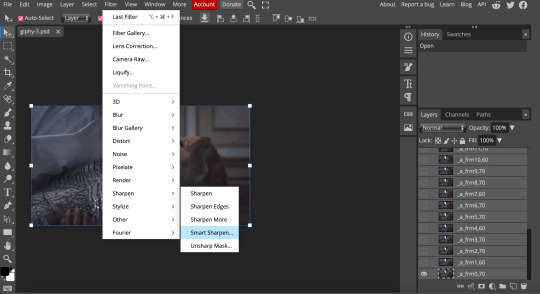
now comes the actual coloring of the gif! all of these will be adjustment layers (layer -> new adjustment layer).
first I'll select the brightness/contrast layer and play around with those settings until it looks good to me.
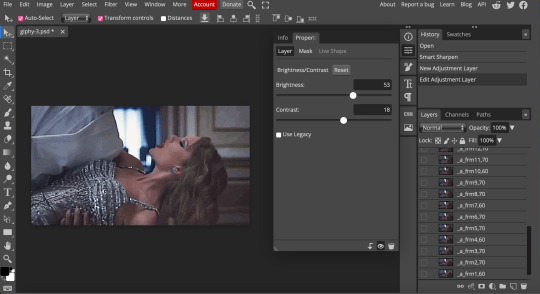
next, I'll play around with the levels and curves layers until it looks how I want it.

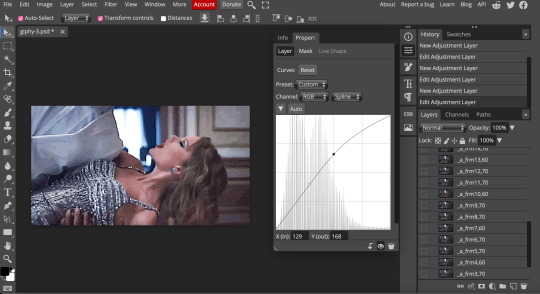
sometimes I'll stop here if it looks good, sometimes I'll play around with the saturation adjustment layer, or in this case I'll edit the color balance to deepen some of the shades that aren't popping out how I want.
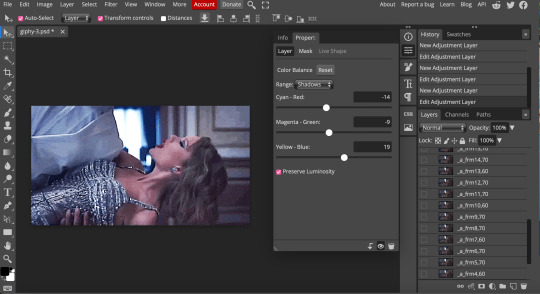
IF YOU'RE MAKING A GIFSET: the easiest thing I've figured out for coloring multiple gifs to save time is duplicating these adjustment layers to each gif in the set (layer -> duplicate layer into; it'll prompt you to select the psd you want to add the layers to). when I do this I turn off the visibility for each one and one by one turn them back on (starting with brightness/contrast) and adjust them if necessary.
if I'm not adding text this is where I'll end, but sometimes I like to add texts to more of my creative gifts. usually I'll follow a tutorial (@usergif resource directory has a bunch of good tutorials that can be adapted to photo pea, or I'll just look them up on Tumblr itself). sometimes I like to do things a little simpler, which is what I'll show here.
you're going to click on the T towards the bottom on the left sidebar, type put your text, change your font (photopea has a ton and I'm not too picky but you can download fonts from the internet and upload them), as well as color and size (don't forget to select all of the text when you do this!!) then click on the cursor icon to move the text to your desired placement.
then click on the layer in the right sidebar and select blending options.
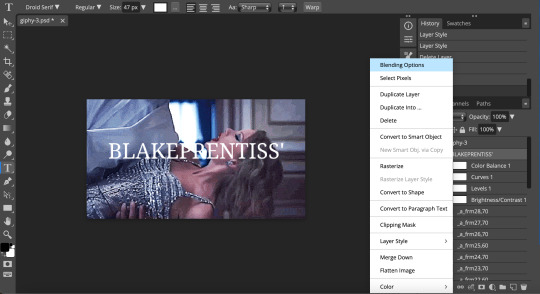
I'm going to add a stroke of 1px in black to my text and position it to the center. I do this on every text I add to gifs (even if the text is black, which I ended up changing this one to) to add some extra size/detail.
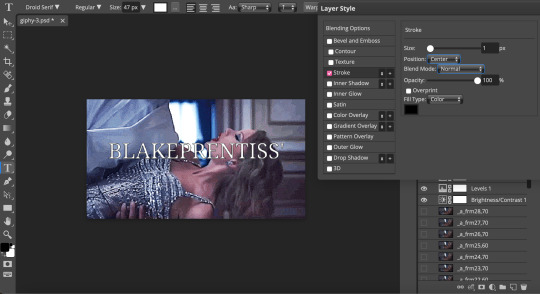
you're more than happy to stop here, but I like to play around with some of the other blending options until I'm satisfied. sometimes I'll lower the fill to 0-30%, or in this case, I changed the blending option to overlay to get the desired effect. (both under blending options)
I followed the same steps with my second row of text, except I changed the font and then warped the text a bit after placing it where I wanted by T -> warp -> arch and changing the settings.

and you're done! file -> export as -> gif to save it! I also like to do this periodically throughout the process to make sure the gif is giffing if you know what I mean

#gif tutorial#photopeablr#photopea#photopea gif tutorial#mine*#tutorial*#tutorial#gif making tutorial#gif making
11 notes
·
View notes
Note
your gifs are always so crisp and clear. how do you make the magic happen??
thank you! i i've answered this question before but my process has changed a little since then so here's an update!
first and foremost, i start with the highest quality video possible. i only work with 1080p or higher, and the largest file size i can find.
once i've picked my scene(s) and imported the files into photoshop, i always follow the same flow: crop | color | sharpen | tweak | export.
i won't go into too much detail about color but one thing to keep in mind is that it's likely you will lose quality with drastic color adjustments. i prefer to make several minor adjustments as opposed to drastic changes because they're much easier to undo if you find you've lost your way. i use the eyedropper tool and/or the individual color sliders on my base layers (levels and curves) on almost every gif. these layers do a lot of heavy lifting to even out coloring (curves are especially helpful in decreasing the yellow/orange hue that is so common in a lot of media these days). then i follow up with a combination of contrast, exposure, channel mixer, selective color, hue/sat and vibrance, as needed. i hand color all of my gifs so the layers i use vary greatly from gif to gif. in the sample pics i've included below, you will see that the only color layer i used is hue/sat. the rest of my color adjustments were made in the first curves layer. i'm also using a gradient map to adjust the background color of the scene, which is important to keep in mind when you're doing your coloring.
next up, sharpening! i use the sharper action in this pack as a base, which applies two layers of smart sharpening. next i add a high pass filter (filter | other | high pass) which i think adds an additional pop of refinement to a gif on top of the smart sharpening. you can read all about high pass here. i typically use a radius between .5 and 1.0, then set the blending to soft light. finally i add a noise reduction layer (filter | noise | reduce noise), set the strength 3-5 and preserve details to 15-20. i usually set the opacity of this layer to 40-60% but again, it varies from gif to gif. i know some other gifmakers who like to add a gaussian blur at this stage instead, so i'd suggest playing around with both settings to find what works best for you.
and that's basically it! i may make a few color or brightness tweaks to the final gif but otherwise it's ready for export.
here's a look at my layers panel and a frame from a gif i'm working on for an upcoming set at various stages in the process.
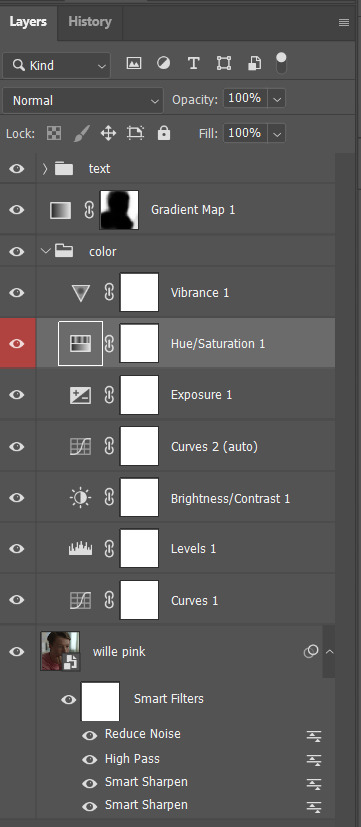
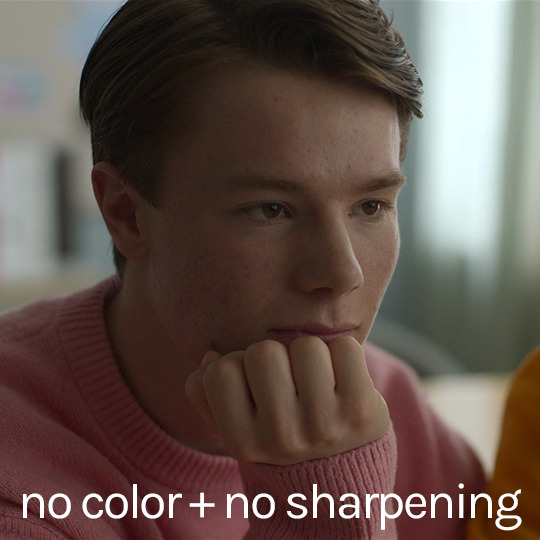
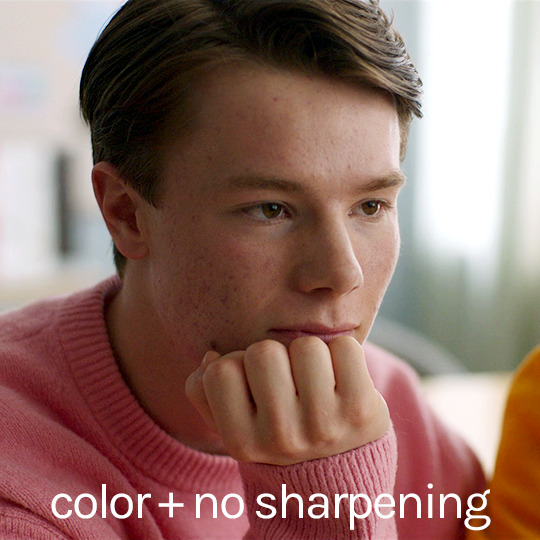
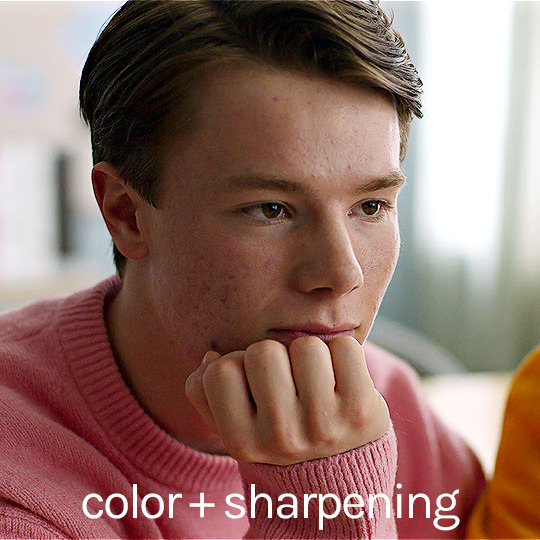

this all may feel like a lot of steps but once you figure out what works for you, it becomes second nature and part of the fun. sorry for the delay in answering and thanks for the ask! feel free to message me again if something isn't clear. 💜
9 notes
·
View notes
Note
hi kelli ♥ firstly, i need you to know the bts social media series is perfect, and you should feel very proud of yourself. second, may i ask how you wonderfully did the photo slide on your gifs? thank you ♥
hi, thank you! i had to figure out how to do that myself, so i'll try my best to explain it. but i can only do so while assuming you have basic gif making knowledge with timeline in photoshop and know what keyframes are. i'll put my explanation under a read more in case this gets long. the gif set we’re referencing.
HOW TO CREATE A “SWIPE EFFECT” IN A GIF

i had to do two different methods of this depending on whether or not one of the slides was a still image or if they were both videos. i’ll show you both scenarios!
if both “slides” were videos, i simply made each gif separately at the exact same size (540px) and with the same amount of frames (70), colored them, converted each of them to a smart object, then layered them together on one canvas.
i just stretched my canvas of the stigma gif by 540px to the right and ended up with a 1080px width canvas to add the first love gif to, right up against each other.
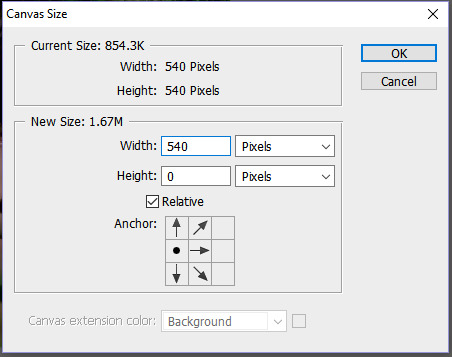
if i played the gif, it’d look like this:

and my timeline like this:
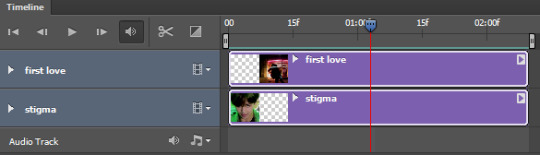
since these gifs are 70 frames, i had to keep in mind that i was going to crop this back down to a 540px square anchored to the left and then insert keyframes to make it pan in that direction about halfway through the gif. so while choosing my scenes, i had to know which gif was going to be on the left or right and remember that the first 35 or so frames of the left gif were the only ones that would be seen, while only the last 35 or so frames of the right gif would be seen.
for example, once i crop it and add the effect...you won’t see the person walk up and shove taehyung against the garage and you won’t see those first couple seconds of yoongi picking up the rock before he throws it. so the frames of each respective gif that are gonna be seen still need to have impact in a short amount of time!
to keep track of exactly when i want to insert the swipe effect, right before i converted the first love gif to a smart object and layered it onto the stigma canvas, i selected the 35th frame so that the red playhead would automatically be in that spot once it was converted and layered on top of the stigma gif in timeline mode. that red line is my placeholder!
once i had them stitched on a canvas like that, i selected both of them and converted them into one smart object. so now i’m working with one timeline and the red playhead is still holding my place. this is when i changed the the canvas size back down to 540px to the left so i would only see the stigma gif. the gif on the right doesn’t go anywhere, it just doesn’t show.
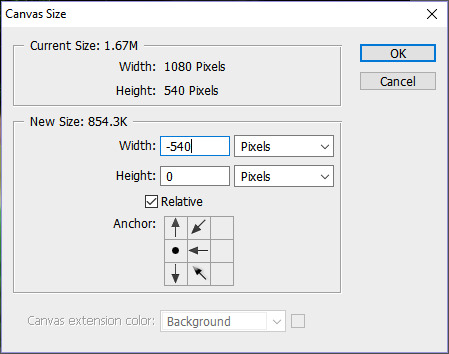
so now with the red playhead still in the middle of the gif already marking my spot on the 35th frame, i immediately lay down a keyframe by opening the group on the timeline and clicking the clock next to “transform”. it lights up that yellow diamond to the left of it and places one under the playhead on the timeline. this is basically going to keep a record of any movement i make with my canvas now until i make another one.

next, i used the right arrow on my keyboard to move the red playhead about eight spots. the number is up to you, but i decided i wanted the swipe effect to last about eight frames from start to finish. keep in mind though that the lower the number, the faster it’ll look.
then i hit Ctrl + T to enable the free transform tool. you’ll see the transform box show up around the invisible part of the canvas where the right gif is. at the top of the menu, you’ll see where it says 540px. we want to subtract that exact amount, so change that to 0px.

you’ll see the canvas suddenly showing the gif on the right. this is because i just moved the whole thing to the left by perfectly subtracting those first 540 pixels of the 1080px canvas. hit enter or click the checkmark.

and now there’s a second keyframe eight spots from the first one.

if you play the gif now, the effect takes place right between those two keyframes.
technically, it’s just panning the gif like this:
but since we cropped it back to a square, the end result looks like it’s swiping between two slides! and of course, we lose those last few seconds of the left gif and gain the last few seconds of the right gif.
this is when i converted the gif to frame animation and set my speed to 0.05.
note: those keyframes tend to add half the amount of frames as you choose to take up the swipe effect. so since i made it last eight frames, it added four frames to the end of my gif. so i just deleted two frames from the beginning and end to narrow it back down to 70. the swipe effect starts at around the 33rd frame in the final result, but it’s close enough. it doesn’t have to be perfect. i then converted it back to timeline again and all my layers to a smart object one more time and this is when i added sharpen and duplicated it onto my instagram template. i used the free transform tool to size it down. by sharpening it very last as a smart object, it kept the quality in tact at a smaller size.
if the first “slide” was a still image, i did all the same steps above except i’d have to make my still image a 70 frame gif too by duplicating the image 10 times, making them frames, then copying and pasting the frames after the selected ten frames six times.
like so:

selecting “make frames from layers” on the frame animation timeline:

selecting all the frames, then copying them:

repeat the above step, but click “paste frames” instead and then “paste after selection” in this window:
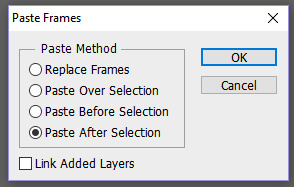
do that step repeatedly until you have your desired amount of frames, set the speed to 0.05, then convert it to timeline animation and your layers into a smart object, which you then can layer your other gif onto and go from there with the stitching and canvas adjusting. as long as everything is always the same length.
with an image first, i would put the first keyframe at around the 20th frame instead of exactly halfway so there were more video frames than image frames. just always keeping in mind how many video frames i didn’t mind losing in that time.

here’s what the complicated ordeal looked like with only still images and several swipe effects.
my canvas stretched to fit as many images as i needed:

of course, i made this into a 70 frame gif like above.
then i cropped it back down to a square to the left around namjoon and made keyframes that stretched about six spots after every ten, using the free transform tool to subtract the width of the image from the current pixel count as i went until it reached 0 and the crop was just around jungkook. this was a 4200px canvas with 600px wide images, so i subtracted 600 from that number in the box at the top of the menu each time. this was not as perfectly executed as a two-panel example, but i did my best. the more images to swipe through, the less keyframes i could use. so it goes a little fast, but you get it.
my timeline with all the keyframes.
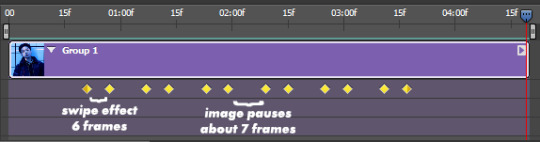
what it’s doing:

the finished result:

i hope this made sense!
73 notes
·
View notes
Text
"One In The Same"
A Blitzwing x Mech!Reader fanfic
Word count: 1.7k
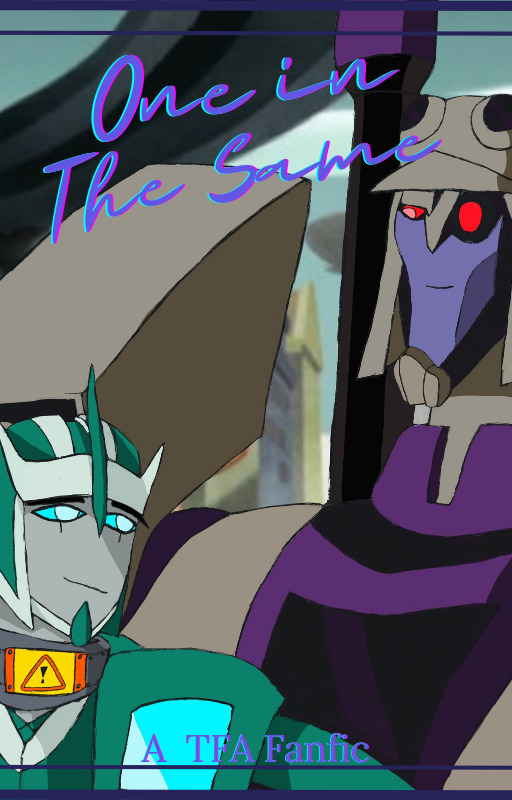
Chapter 1: Two Cats In An Alley
“Ugh Ratchet come on!” I whined as the medic messed around with some cables connected to the back of my helm. “It's itching really badly.”
“Hold still, Y/D.” Ratchet scolded me. “I'm almost done making adjustments to your stabilizing collar.”
“Yeah um, you never really explained what that thing does?” Sari commented as she sat on my pede and watched the medic work.
“It keeps me from going crazy!” I cackled as my optics turned orange. “Which is just crazy to think about!”
“Hey!” Ratchet huffed as he lightly whacked my helm with a wrench. “Quit moving! Don't want to cross wires.”
“Sorry docbot.” I said meekly as my optics returned to blue.
“As Y/D was so eloquently explaining,” Ratchet said with a thick layer of sarcasm. “The stabilizing collar helps control his changing mental states. They used to be far more volatile than before, so I know I'm going in the right direction with these adjustments.”
“How bad?” Sari asked with a sympathetic look.
“He used to switch states around every 5 to 10 earth minutes.” the medic explained. “Now it’s mostly under control.” Ratchet finished the adjustments and reconnected the 3 cables to the collar, my frame stiffening for a second before relaxing. “There, that should do it. And don't you think about trying that stunt again!”
“Hey! It was Bumblebee’s idea to go drag racing in the mud!” I laughed.
“DON’T BRING ME INTO THIS!” Bumblebee yelled from where he was playing video games on the makeshift sofa.
“Aww, you're still mad I beat you?” I teased.
“Only because I didn't calculate how slippery mud is.” Bumblebee countered.
“Heh, sure, Bee, whatever you say.” I snickered before looking at Ratchet. “Can't promise I won't ask for a rematch.”
“I mean it, Y/D.” Ratchet scolded. “No more dangerous drag races. You almost ripped your processor out.”
“Yeah yeah I know.” I sighed, my tone becoming more meek and somber. “Thanks for fixing it, though.”
“It's not a problem, Y/D. You just need to be more careful.” Ratchet said.
“No promises. But I'll try.” I chuckled.
“Hey Sari!” Bumblebee called over to the girl. “Wanna play that stick game with the wheels and the little black plastic thing?”
“you mean street hockey?” Sari laughed as she hopped off my pede. “yeah! Let me get my gear.”
I watched the little organic run off to her best friend, and a small smile crept up on my dermas.
“It's crazy to think we'd end up here.” I said to Ratchet. “Thousands of light years from Cybertron on an organic planet filled with such variety to defend the very essence of Cybertronian life.”
“It is… quite a different experience.” Ratchet said. “Certainly not one I'd expect for myself.”
“Y/D, are you ready for your patrol?” Optimus asked as he entered the makeshift medbay.
“Yeah, if uh, it's okay with you, Ratchet.” I asked the medic.
“Just don't do anything stupid.” Ratchet said.
“Yeah yeah I won't.” I chuckled as I strode out of the base and shifted to my ground mode, taking to the streets with a slight roar of my engine.
My patrols were usually uneventful since I wasn't really supposed to go far from the Autobot base. But that didn't stop me from occasionally breaking my routes when necessary.
And today was no exception.
“Optimus.” I called over the comlink as two red streaks of light rushed by me overhead, followed by the sound of something massive crashing not far ahead. “We've got a disturbance downtown. I'm going to investigate.”
“Be careful, Y/D.” Optimus said.
I headed towards the crash site and saw a billow of smoke rising up out of a massive crator. News report drones buzzed about the impact site and were no doubt broadcasting the whole thing. I shifted forms, and using some tricks Prowl had taught me, I carefully crept my way closer to the edge.
I saw two massive figures climb up from the crater, and I instantly dove for cover. I rolled to the side and pressed my back against a shipping container that was sitting next to a bunch of construction equipment.
“Optimus.” I whispered over the comlink. “We have 2 big baddies here. Lock on my coordinates. Hurry.”
“Zis can't be those miserable Autobots!” A voice snapped, followed by the sound of crunching metal. “They're far too small!” I then heard some sort of transformation noise that I couldn't identify followed by a new yet similar voice. “But look at zat one!” It cackled, followed by heavy pedesteps dangerously close to where I was hiding. “It's big, it's bold, it's sassy!”
‘The frag?’ I thought to myself. ‘Who is this bot?’ I peeked around the side just in time to see a massive purple and green mech throw another that I didn't get a good look at to the side, his singular crimson optic fixating onto one of the wrecking ball machines.
“YOU!” He bellowed. “WHAT HAVE YOU DONE WITH OUR BELOVED LEADER, MEGATRON? TALK!”
‘Megatron?’ I thought. ‘Oh scrud! They're Decepticons!’
“Optimus, I'm a sitting scraplet out here!” I hissed over the comms. “Wherever you are, you'd better get here quick bef-”
“What was that?” The purple and green mech snarled as his attention was shifted to my hiding place.
“Scrap!” I whispered as I hid from view, my spark thundering in my chassis as if it were going to explode at any moment.
Suddenly, the shipping container I was taking shelter behind was flung away, the jolt from the movement throwing me onto my side. I looked up to see a massive tan and violet Decepticon with broad shoulders, double barrel cannons, wings, and… tank treads?
I scrambled to my pedes as my optics went absolutely wide in awe. Was I seeing things? Was I really seeing another one like me? I had to make sure.
Cautiously, but curiously, I circled the Decepticon, his blue faced helm, and crimson optics following my movements with equal curiosity.
“You.” I whispered. “You're… you're like me?” Before the other triple changer could answer, the green and purple mech turned around and spotted me.
“YOU! AUTOBOT!” The mech bellowed as he stormed up to me and grabbed my smaller frame in his massive servo.
“LET ME GO!” I begged as I squirmed in his grip, panic flooding me and tears pooling in my optics.
“WHERE IS MEGATRON!?” He barked, his grip tightening onto my frame and slowly crushing the metal of my armor with sickening crunching sounds. I screamed in pain, and the tears fell, my vents rasping as i struggled to get air. “TALK!”
“S-stop!” I begged, the mech squeezing again and forcing a shriek out of me.
“I SAID TALK!”
“Lugnut.” The triple changer said coldly. “Give him to me.”
“Why?” The mech, Lugnut, questioned. I heard the sound from before and saw a new face appear on the triple changer, this one red and very angry.
“YOU CLAMBERING CLANK CLUTZ! GIVE ME ZE AUTOBOT! OR I'LL POUND YOU TO SLAG!”
“Not until he tells me where Megatron is!” Lugnut's grip tightened even more, and I felt two of my four helicopter blades snap. I screamed, and my optics went wide with tears that poured out like waterfalls.
“I DON'T KNOW ANYTHING!” I sobbed violently. “PLEASE STOP! STOP! IT HURTS IT HURTS!”
“Zat's enough Lugnut.” The cool tone of the triple changer said.
“He's hiding the truth Blitzwing. I know it.” Lugnut growled. I looked over to the triple changer with a pleading and pain filled gaze. Blitzwing swapped back to the angry red face and growled at Lugnut.
“GIVE THE AUTOBOT TO ME! NOW!” He barked. “OR I'LL BREAK YOUR ONLY OPTIC AND MAKE YOU EAT IT!”
“Y/D!” I heard Ratchet call as he and the others finally rolled up onto the scene.
“Ohohoho!” Blitzwing cackled as his face shifted to a black screen with a red jack-o-lantern like intake and optics. “Zere are more of them!”
“Let him go, Decepticon!” Optimus barked.
“As you wish.” Lugnut sneered before throwing my extremely damaged frame to the Autobots. I yelped in pain as I tumbled and bounced on the hard ground, eventually sliding to a stop.
“Kid!” Ratchet cried out as he quickly ran to my sobbing side as the others attacked the Decepticons.
“It… it hurts.” I sobbed with rapid vents as panic took over.
“Hey hey look at me.” Ratchet said calmly. “It's okay, I'll get you out of here.”
“Ratchet. I-I-I…. Can't vent! Can't vent can't vent!” My audials rang loudly, and my internal systems blared with alerts, my vision going staticky as everything siezed up. I could barely see Ratchet say something to me, but the ringing in my audials drowned out what he said.
Then everything went black as one last warning displayed.
[Initiating Shutdown]
—--------
“Ratchet, is he going to be okay?” Optimus asked as the medic laid my damaged frame onto the medical berth, the other Autobots gathering around me with varying expressions of worry and concern.
“With Sari's key, he should be fine physically.” Ratchet said. “But… I'm not so confident in regards to his mental condition.”
“What do you mean?”
“He went into a serious full system shutdown. It's happened before.” The medic said as he looked to my oddly peaceful expression.
“He'll come out of it, right?” Bumblebee asked with a sad waver in his voice.
“I… I hope so. But we need Sari's key if we are to find out.”
“I'll go get her.” Bulkhead said. As the big green mech left Bumblebee and Prowl followed close behind, leaving Optimus and Ratchet behind.
“Ratchet,” Optimus said. “When you did this happened before… what do you mean?”
“He's had full system shutdowns before when we were still figuring out how to get his mental states under control.” Ratchet explained. “They… are difficult to deal with and… I fear with each one he has the longer and longer it takes for him to come out of it. The last time this happened it… i thought i lost him forever.”
“Y/D's a tough bot.” Optimus said as he placed a reassuring servo on the medic. “He'll be okay.”
“That's what I keep telling myself.” Ratchet said quietly. After a long silence, a quiet whine left me as my optics cracked open.
“R… Ratchet…” I whispered.
“Hey kid.” Ratchet sighed with relief.
“H…hurt.”
“I know, Sari will be here in a moment, and you'll feel better, okay?”
“O…okay.”
---------
Previous chapter
Next chapter: Click Here
#transformers#transformers animated#tfa#tf fanfic#tfa fanfic#tfa blitzwing#blitzwing#male reader#x reader#reader insert
13 notes
·
View notes
Text

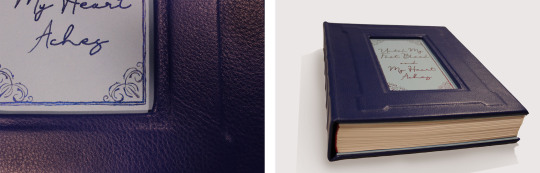

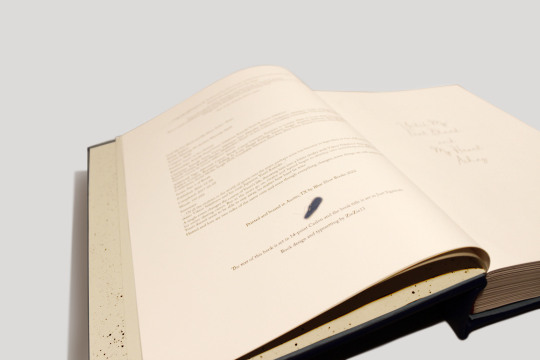


My first completed fanbinding! There were so many fun typesetting elements I had trouble narrowing the photos down but I didn't include everything. My favorites are definitely the music QR codes and the meta AO3 fics.
Until My Feet Bleed and My Heart Aches by @kazliin
‘…Of all the rivalries in the world of sports over the years, perhaps none has become so legendary as that of Russian figure skater Viktor Nikiforov and his rival, Japanese Yuuri Katsuki…’
A single event changes the course of Yuuri’s life, throwing him into a bitter rivalry with Viktor Nikiforov that spans across his entire skating career. But as the years go on, rivalry and hatred begin to develop into something very different and Yuuri doesn’t seem to be able to stay away, no matter how hard he tries.
Hatred and love are two sides of the same coin and even though everything changes, some things are still meant to be.
Technical stuff and bonus photos below the cut.
General
197,692 Words / 11 x 8.5 Paper / 500 pgs
Title Font & Chapter Number Font: Just Signature
Chapter Title & Body Font: Adobe Caslon Pro
Misc Fonts: Georgia, Lucida Sans, Zilla Slab, PT Serif, Segoe UI
Designed, typeset, and bound by me.
Programs used: InDesign and BookletCreator.
Anyone who knows me knows I am a sucker for enemies to lovers and this fic executes the trope beautifully. It was one of my very first fics on AO3 and since then I have read it countless times. The fic diverges from canon in a single moment and what proceeds is one of the best Victuuri fics of all time.
Materials
This was the first ficbinding project that made it off of my computer. The original plan was to keep the book thinner by scaling the page size up to 11 x 8.5, but obviously that didn't work. I ordered short grain 11 x 17 sheets from Nicole Nikolas Modern Paper Goods and printed with my large-format inkjet printer (which used more cyan and magenta than I would have expected).
Once my signatures were printed I realized just how massive this thing was, and in that moment I decided the casing was going to be leather. I ordered Royal Blue leathers from Peggy Sue Also Leather's Dutchess Collection. And while I waited for that to come in I hand-painted the chapter numbers using Dreamland Watercolor's Beta and a fluid writer. The color changing effect wasn't as dramatic as I hoped but it still turned out gorgeous.
I decided not to complicate things too much and left the spine flat and the edges deckled. I used the basic method of sewing tapes and spaced five of them out across the spine. The headbands are actually Vintage Petersham Grosgrain Magenta ribbons from Fini Ribbon that I folded over some string I had laying around. I also made my own endpapers from Strathmore drawing sheets and more of the Beta watercolor which I sprayed over the sheets using a cheap paintbrush.
I created an embossed frame on the cover by layering chipboard on top of the 0.098" Davey Binder's Board I ordered from Talas. Then I cut out a window so that I could do the title out of watercolor. I didn't have a pairing knife for the leather so I tried sanding down the edges to help minimize the thickness of the folds. I am actually not sure if this helped or not but the leather turned out better than I thought. The only issue was that I didn't have enough of an overlap at the top and bottom on the inside of the book board, and the endpapers couldn't cover the seam properly. I came up with the solution of adding a second layer of chipboard that I covered in light blue construction paper. I made it to the same dimensions as the Davey Board and then glued everything together with pva. I really like the effect it has and it also worked out as a base to paint the title onto.
Typesetting
Typesetting this fic was a lot of fun because of all the social media aspects included in the fic. This included articles, Reddit threads, Twitter posts, Instagram posts, Youtube videos, Tumblr posts, and even meta AO3 fic summaries. I did my best to match the real-life counterparts as best as I could. I ended up using Segoe UI for most of the social media typesetting. The articles used Zilla Slab for the title and PT Serif for the body. The AO3 summaries were the most complicated as they used Georgia and Lucida Sans fonts and jpeg graphics.
The other really exciting element I incorporated was the music. Kaz used music throughout the fic as a very imporvictant part of the storytelling. Yuuri and Victor communicate through their skating and their routines and the music is what brings those routines to life. I placed QR codes in the margins at the start of each routine. It is so cool to hold your camera up and suddenly have the music playing from your phone as you read! I also included an appendix of the music so that when QR codes become obsolete the music is still accessible.

277 notes
·
View notes
Last Seen Blogs