#punk diy tutorial
Text
Easy Paper and Tape Stencil Tutorial
made one for reddit so I might as well post it here as well
Materials
writing utensil (pen, pencil, marker, etc)
paper (i usually use plain printer paper but most other scrap paper works fine as well, just be aware that thicker paper makes it harder to trace existing designs/logos)
clear packing tape
scissors and/or exacto knife (those little scissors you can get in cheap nail care kits work great
Optional Materials: Device w/ screen of your choice, printer

Step 1:
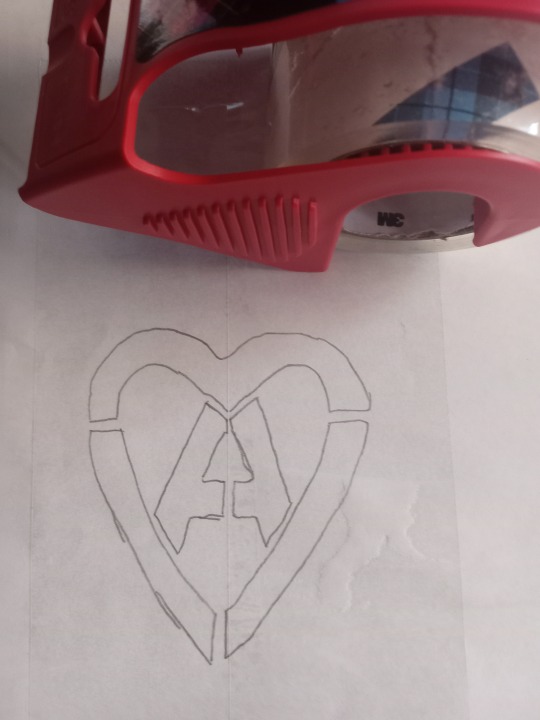
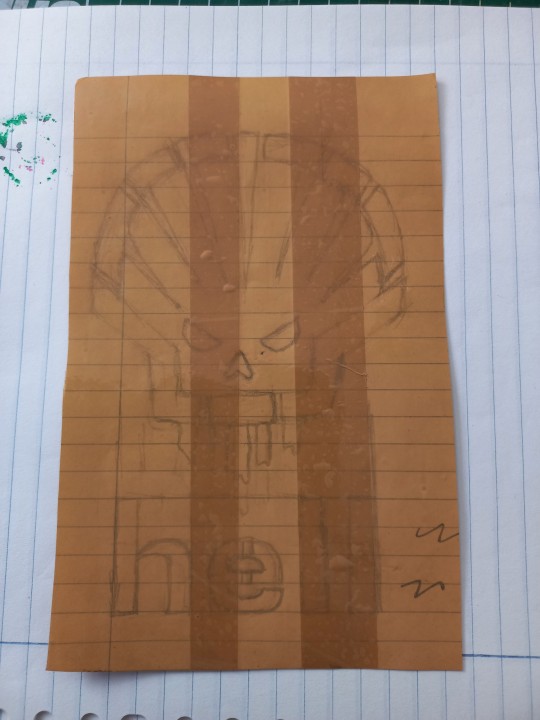
Draw out your design, trace from device, or print out design
(in example image I am tracing from a screen)
r/AnarchoStencilism (Deviantart link if you prefer) is great for free stencil designs

Step 2:
Cover both sides (front and back) of the design in packing tape
Step 3:
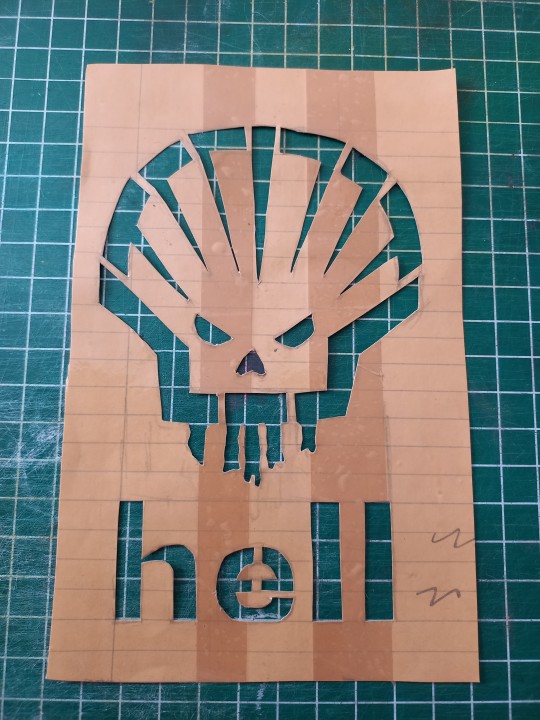
Cut it out
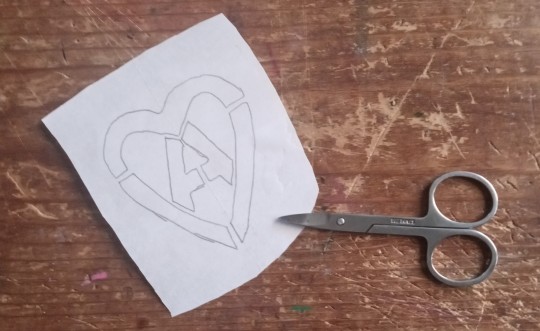
Step 4:
Use your exacto knife/scissors to cut out the design

Step 4:
Apply to whatever you want!
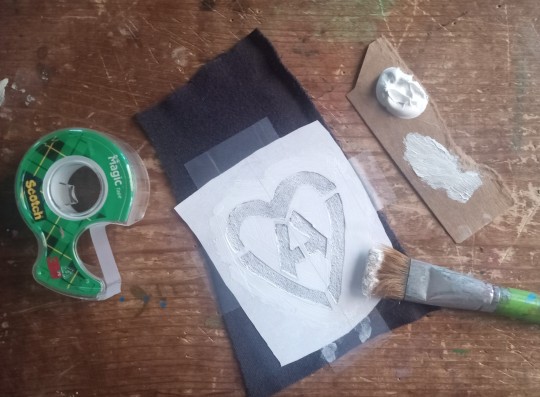
Happy DIYing!

#kahvi draws#patches#stencil#diy stencils#diy tutorial#punk diy tutorial#stencil tutorial#punk diy#folk punk#diy patches#pat the bunny
241 notes
·
View notes
Text
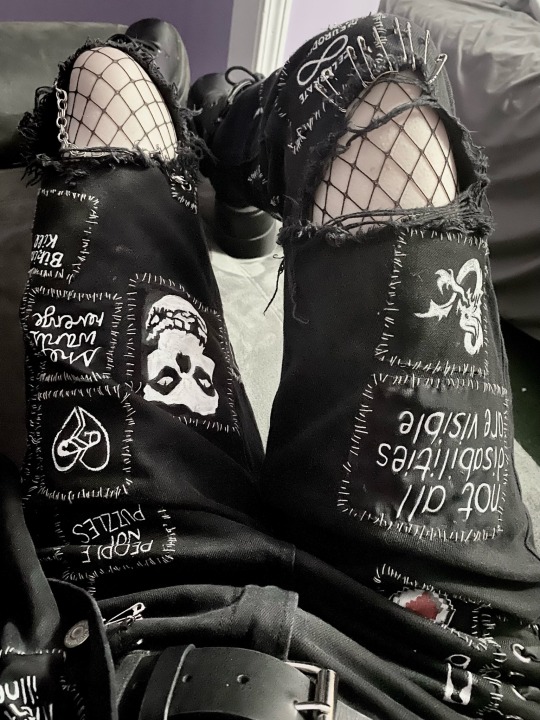
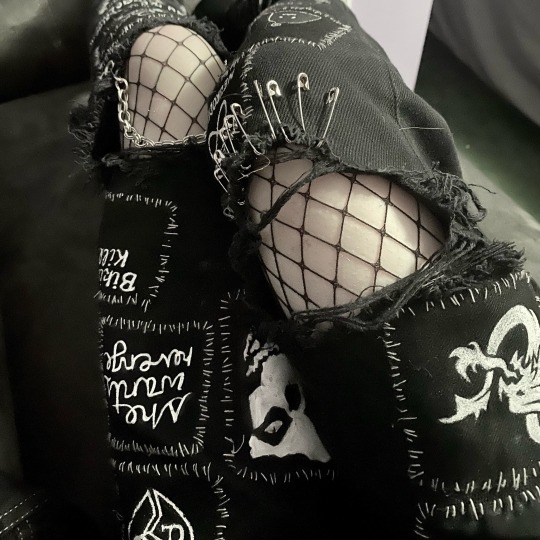
diy shoe lace crotch on crust pants tutorial from a punk named @reptil_diy whos been patching his crust pants for 17 years
I went out of my way to ask this guy on instagram for permission to reupload his stuff heer and he says its all good :3 he actually liked my pink patch pants which is great :3!
#punk#diy#folkpunk#folk punk#patches#diy patches#patch pants#crust pants#crust punk#crustpants#punk fashion#crust core#crust pants diy#punk diy tutorial#diy shoe lace crotch#diy shoe crotch
232 notes
·
View notes
Text
Had a few folks interested in how I made the patches I posted for Solarpunk Aesthetic Week, so I thought I'd give y'all my step-by-step process for making hand-embroidered patches!

First, choose your fabric and draw on your design. You can use basically any fabric for this - for this project I'm using some felt I've had lying around in my stash for ages.

Next, choose your embroidery floss. For my patches I split my embroidery floss into two threads with 3 strands each, as pictured. You can use as many strands in your thread as you prefer, but for the main body of my patches I prefer 3 strands.
Next you're going to start filling your design using a back stitch.

First, put in a single stitch where you want your row to start.

Poke your needle up through the fabric 1 stitch-length away from your first stitch.

Poke your needle back down the same hole your last stitch went into so they line up end-to-end.
Repeat until you have a row of your desired length (usually the length of that colour section from one end to the other). Once you have your first row, you're going to do your next row slightly offset from your first row so that your stitches lay together in a brick pattern like this:

Make sure your rows of stitches are tight together, or you'll get gaps where the fabric shows through.
Rinse and repeat with rows of back stitch to fill in your patch design.

When you're almost to the end of your thread, poke your needle through to the back of the fabric and pull the thread under the back part of the stitching to tuck in the end. Don't worry if it looks messy - no one's gonna see the back anyway.
This next step is fully optional, but I think it makes the patch design really pop. Once your patch is filled in, you can use black embroidery floss to outline your design (or whatever colour you want to outline with - it's your patch, do what you want). I use the full thread (6 strands, not split) of embroidery floss to make a thicker outline.

I use the same back stitch I used to fill the piece to make an outline that adds some separation and detail. You could use most any 'outlining' stitch for this, but I just use back stitch because it's just easier for me to do.
Once you're finished embroidering your patch, it's time to cut it out!

Make sure to leave a little border around the edge to use for sewing your patch on your jacket/bag/blanket/whatever, and be careful not to accidentally cut through the stitches on the back of the patch.
If you have a sturdy enough fabric that isn't going to fray, you can just leave it like this. If not, I recommend using a whip stitch/satin stitch to seal in the exposed edges (I find that splitting your embroidery floss into 3-strand threads works best for this).

And then you're done! At this point you can put on iron-on backing if you want, or just sew it on whatever you wanna put it on. Making patches this way does take a long time, but I feel that the results are worth it.
Thanks for reading this tutorial! I hope it was helpful. If anyone makes patches using this method, I'd love to see them! 😁
#solarpunk aesthetic week#sewing#tutorial#sew on patch#punk diy#diy punk#punk aesthetic#handmade#solarpunk#handcrafted#embroidery#embroidered patch#how to#how to make a patch
17K notes
·
View notes
Note
Patch making tutorials?
and here i am once again, with a patch making tutorial
how to make stenciled patches:
i'll post a part two in the future which will cover freehanding and stamping ur patches
-
first some general info that might be useful:
i get my patch design inspo from pinterest, etsy, and tumblr. if sell your patches make sure you arent ripping off another artists patch design when using etsy for inspo. anarchostencilism also has tons of stencils both on deviantart and reddit which are free to use.
i use acrylic paint for my patches, but if you can afford it id advise fabric paint. to seal paint into the fabric iron the patches, it helps em last longer. some acrylic paint survives very well in the washing machine, but wash your stuff by hand the first time to see how well it holds up.
if you make your patches multiple colors, dont first make the whole patch one color and then paint over it with the other colors. if the paint starts cracking the base color will show through. (if you like that however then dont mind this)
i paint my patches on jean fabric, cause it makes the patches sturdy yet flexible. but shirt fabric or canvas both work very well too. anything except really plasticy/slippery or textured fabric can be used
i pin my patches down with pins onto multiple layers of taped together cartboard, to prevent the fabric from moving around and distorting the print
-
there's two ways in which i make my stencils
1. with paper covered in tape
2. with the plastic folder you put in your binders
-
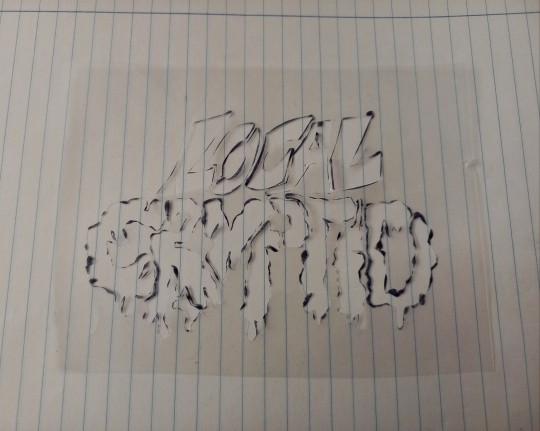
option 1:
draw out your design onto some paper, make sure there arent any "loose" parts in the design that will get lost when cutting out the stencil

cover the paper in tape front and back, make sure you can still see your design through the tape
cut out your design, i use scissors and an exacto knife
-
option 2:
draw out your design (you can also draw the design directly onto the plastic folder)
cut a piece of plastic out of the folder big enough to cover your drawing and tape it down.
trace the design onto the plastic with pen or marker (any mistakes can be wiped out)
cut out your stencil
-
continuation from both option 1 and 2
after finishing your stencil you can pin them down on some fabric
dap on your paint with the point of a big brush or a sponge, depending on the paint it'll take 2-3 layers.
make sure your previous layer dried completely before adding the next one

after the paint has fully dried you can carefully take off your stencil.
!!dont unpin the patch before it fully dried, or the drying paint may cause the fabric to warp!!

thats it, questions are always welcome, now go and make stuff!!
#punk diy#diy fashion#punk#queer punk#diy punk#punk clothes#punk style#punk patches#patches#tutorial#my stuff
2K notes
·
View notes
Text

Look at this weird little bitch I made. He’s a crocheted rucksack named Jorgé and he exclusively eats horse meat.
Just thought y’all needed to see
#diy or die#punk diy#punk rock#diy tutorial#diy craft#diy ideas#diy#crochet diy#diy projects#diy punk#crochet#yarn crafts#yarn#yarnblr#goblincore#goblin girl
121 notes
·
View notes
Text

i make my zines by putting this guy in canva :)
(on canva, you can rotate text by turning the little turning arrow symbol next to your text)
192 notes
·
View notes
Text
DIY Punk Mods and Updates
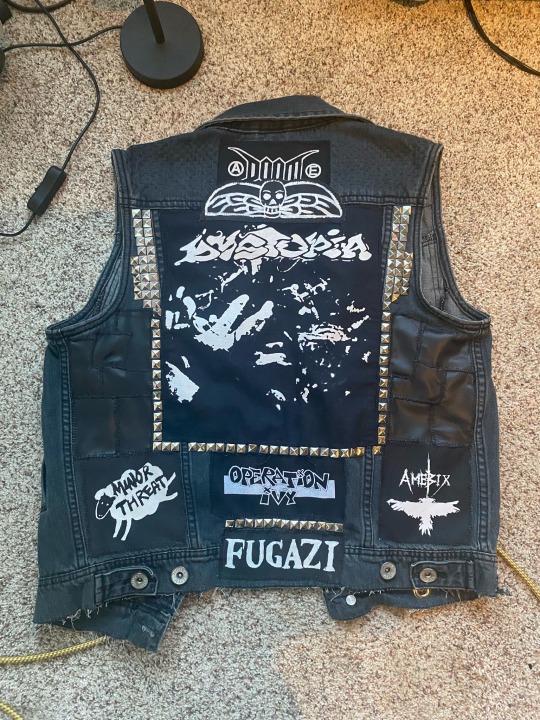

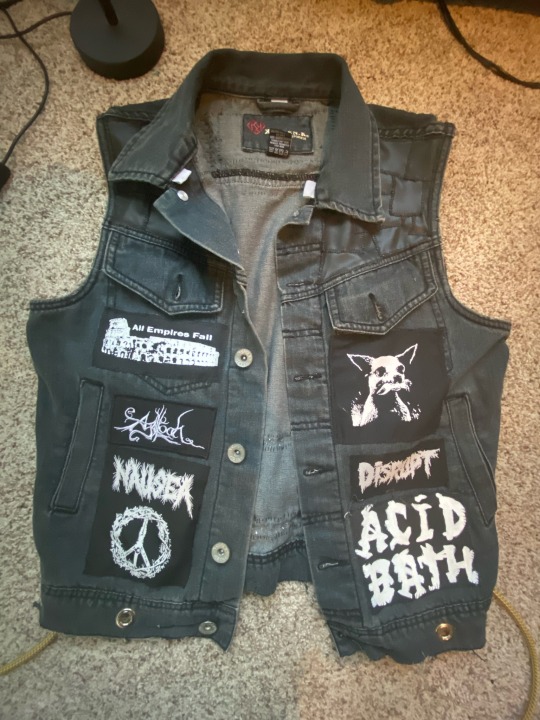
I started beefing up my battle vest!
I cut off the hem for a more flattering look
Added pleather patchwork to the front and back
Added a decorative patch below the Doom patch
Added sashiko stitching so it matches my pants
Added grommets at the bottom for keychains
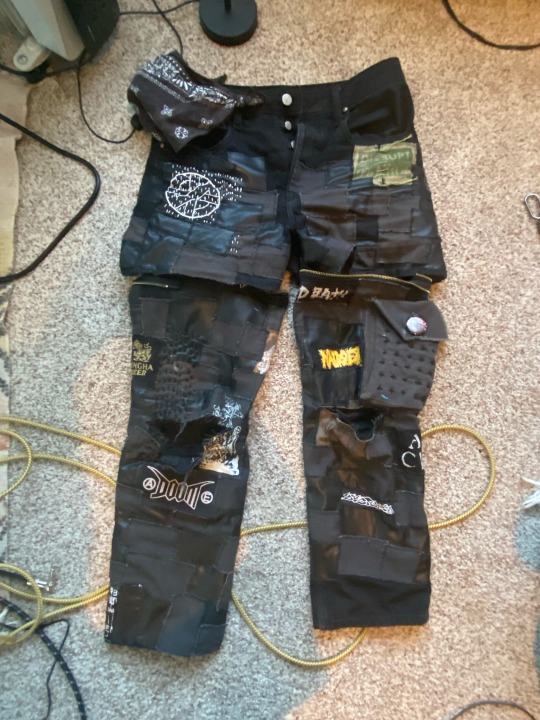
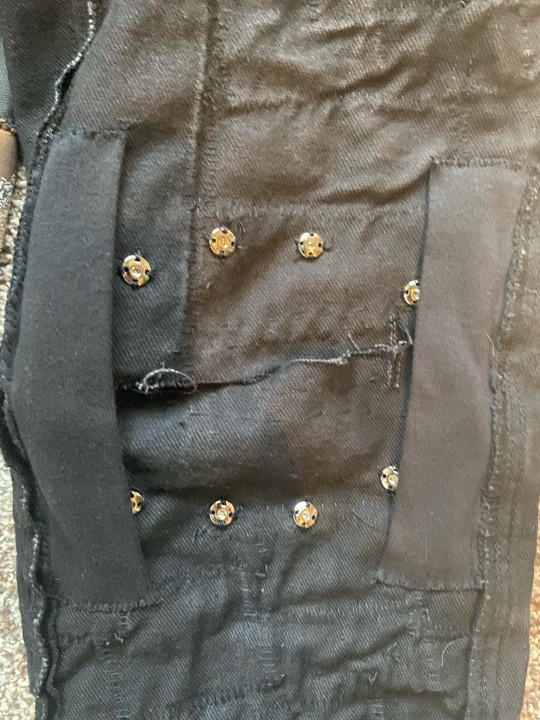

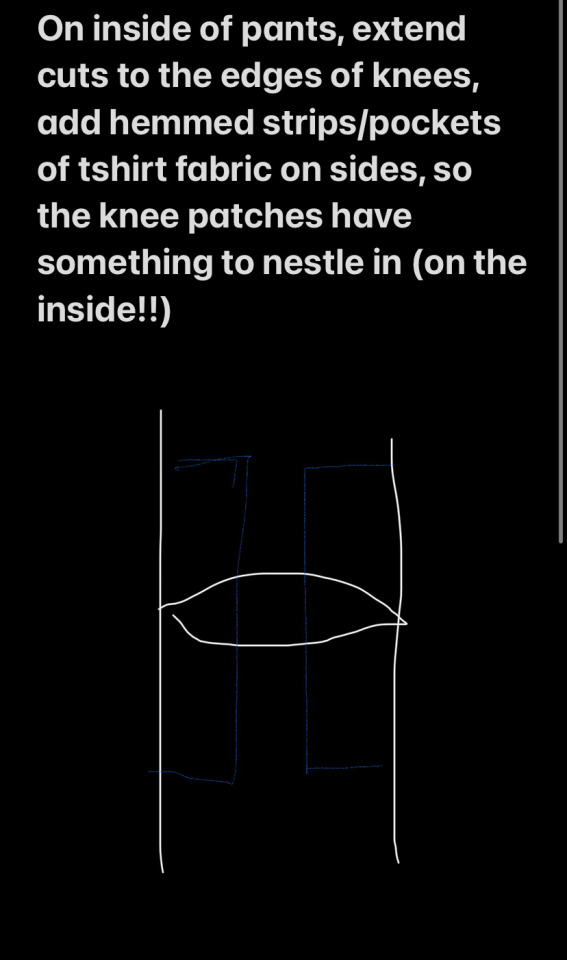
This was a big gamble for my pants, but I’m glad I went through with it. My pants were getting stiff from the amount of patchwork that went into it, so I cut the knees so I could actually bend my legs lol. The issue is that my legs will get cold, so I bought some elbow pads from the craft store, and converted them into knee pads. Using button snaps, I made them removable (last pic). I lined the pads with old t-shirt fabric so my knees won’t chafe, and secured it with fabric glue and a border stitch. The strips of fabric on the inside of the pants are there so that the cuts I made don’t fully expose my legs when it’s cold.
(The half-ass pattern I made at work)
This took me a total of two days, with the sewing, measuring, and all that.
#diy punk#diy or die#punk#punk pants#patch pants#punk fashion#crust punk#anarchopunk#diy tutorial#sewing#punk style#punk aesthetic#crust pants#patches#battle vest#punk vest#spechpunkshit
351 notes
·
View notes
Text
cool patch making tip if you paint with acrylic!
something i just never see in patch making tutorials and that is absolutely essential to me as somoene who has been making patches for some years:
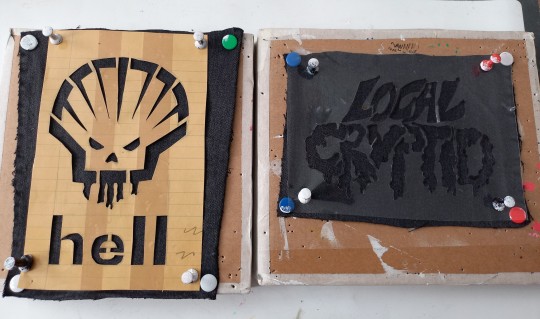
buy the cheapest clear nail polish/top coat at a drugstore and go over your acrylic paint when you're finished with the design. especially if you use lighter colors. it will last SO MUCH LONGER.
proof: two patches from my jacket, both made at the same time around 1.5 years ago
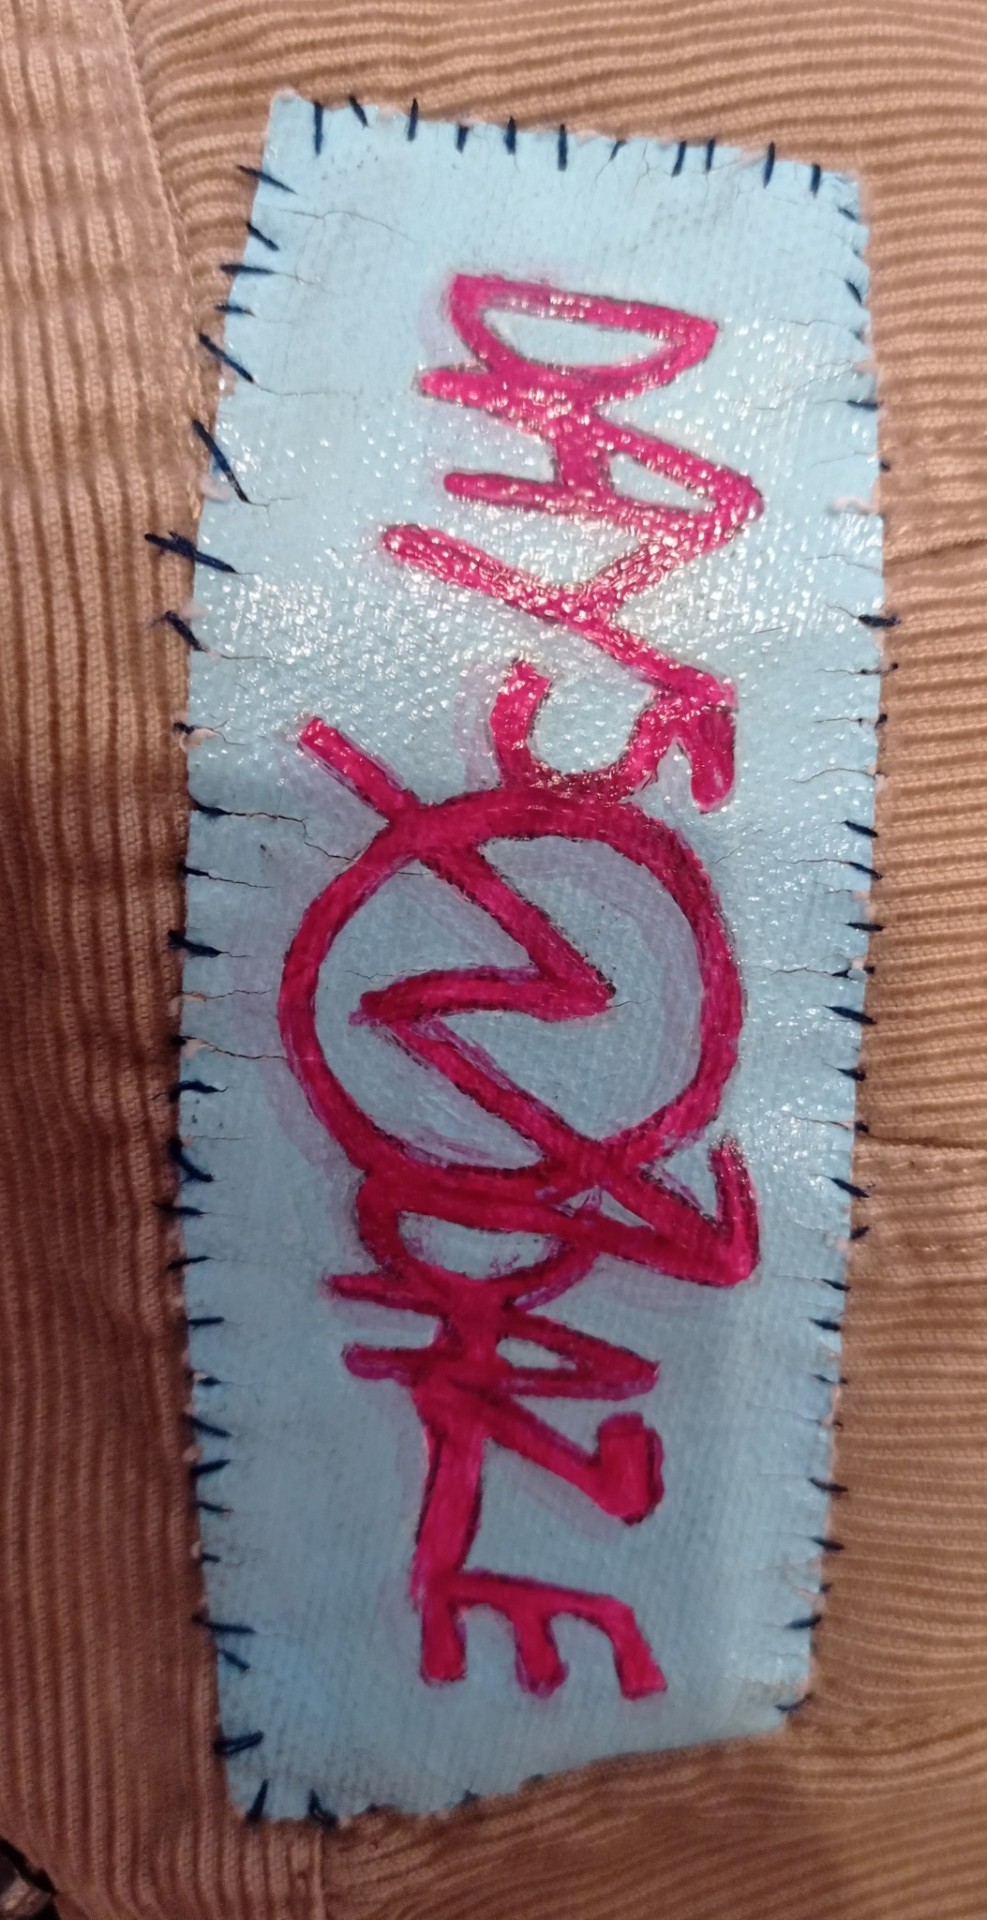

ngl i think the difference is pretty visible. the jacket has been dragged through hell and back, drenched in mud, buried, burnt and the days n daze patch still looks pretty much the same as when i first made it.
disclaimer: they might crease and crack after some time but thick layers of acrylic will do that on their own too
#alt diy#punk diy#punk fashion#crust jacket#crust pants#battle jacket#battle vest#patch inspo#diy patches#tutorial#crust punk#patch jacket#diy or die#goth diy#tags to reach ppl that can benefit from the info
287 notes
·
View notes
Note
Hellooo! How do i make patches? I want to make some very badly but I have no idea how to make them
the only things you really need are scissors and fabric! other things like glue, tape, thread/floss, needles, hardware (any kind of chains, safety pins, added objects) are great but optional.
i start by cutting the shape i want from my fabric. this can be any scrap fabric; canvas and denim are good if painting on a flimsy layer bothers you, but a thinner or silkier fabric may help you achieve more detail and a cleaner look. depending on your fabric, you may need to seal edges with glue so they don’t fray.
i use masking tape to secure the fabric to a surface as i paint it, and then freehand my design. you can also sketch out more complicated patterns with a white jelly roll pen, but i am lazy and usually don’t. i do touchups with black acrylic paint since my fabric is black.
hope this helps :)
120 notes
·
View notes
Text
How to Make a Printing Screen from Home
I wanted to share a quick cute little tutorial for how I made my own screen for making patches (and other things that don't require exact measurements). Cute lil how-to under the cut >:)
Disclaimer: I have absolutely no idea what I'm doing at any given moment. There could be a better tutorial out there for you. I'm just guessing for a lot of the things I do and this is no exception. With that out of the way:
THE SUPPLIES YOU DEFINITELY ABSOLUTELY NEED:
a small/medium canvas (depending on what you have and how big your design will be)
paintbrushes
a tight-woven sheer fabric (preferably not stretchy and STRONG)
a fine-tip pen
water-resistant gloss of some kind (mod podge works, but make sure it's a waterproof kind if you want to make more than one print)
paint that won't come off in the wash (acrylic/spray paint work)
good strong tape
a good sturdy card-like thingy
an easy/cool design for your print :)
THE SUPPLIES THAT ARE RECCOMENDED BUT NOT NECESSARY (aka things I like to use):
a good canvas fabric/thick cotton for printing on
fabric paint (will stay on the fabric best duh)
a 1/2in, 1/3in, and fine tip paintbrush for details (depending on your design)
some company for fun :)
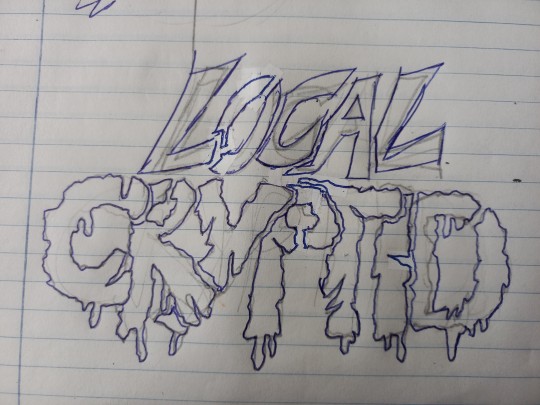
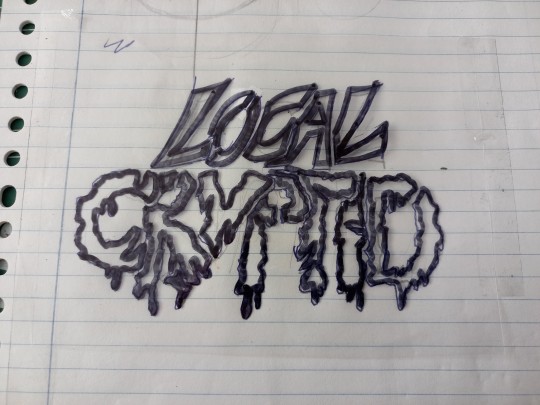
Alright, so first you'll want to figure out the design you want to print out and get a good sketch over it. I'm a detail freak so I like sketching out my design then going over it in a black pen. The ideal is hard contrast and clear and discernable lines/fill-in spots, like pictured below:
(Note how I emphasized which spots were to have thicker lines, which parts of the stripes were to be printed, etc. I tried to think a lot about which portions I wanted to show up on the finished design and how they would look on the fabric as a whole.)
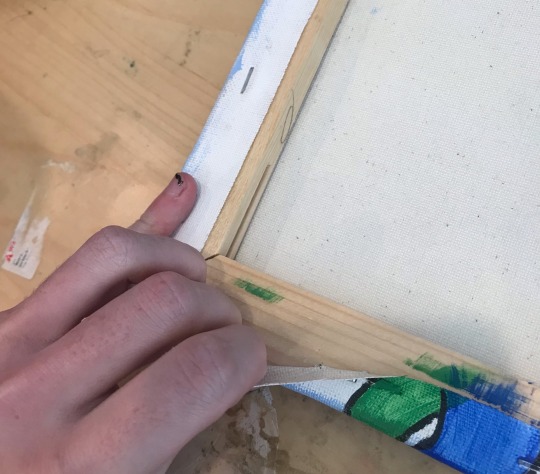
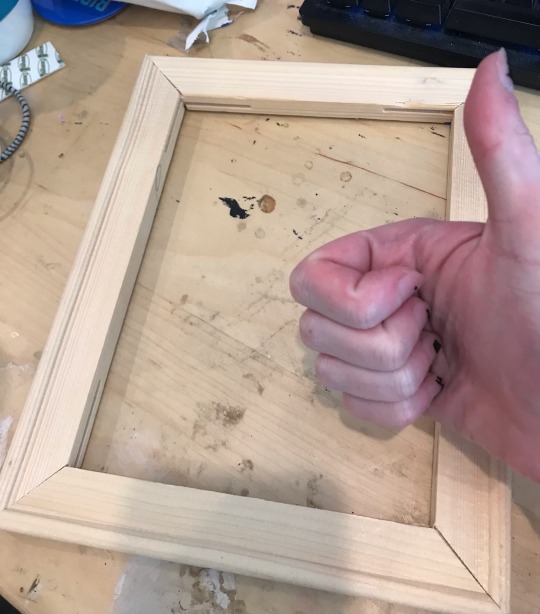
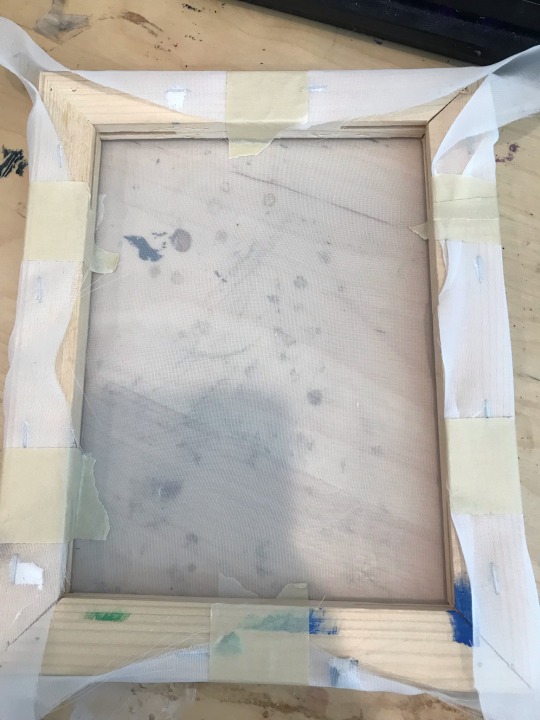
So you've got your design. Great! Next step is a fun one: Grab a canvas you are willing to part with (this one was a painting I made when I was 16. I hate it), and rip all the fabric off of that fucker!! If you pull off some staples in the process, don't worry. Just make sure you can retain the shape of the frame, since that's the part you'll need to keep. You don't need to take off every single bit of the fabric, but as previously stated, I'm a freak, so I did. You'll come out with something like this:
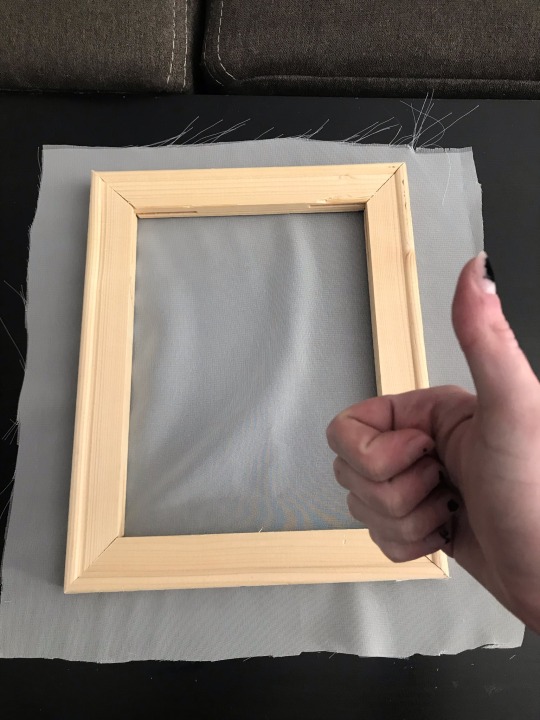
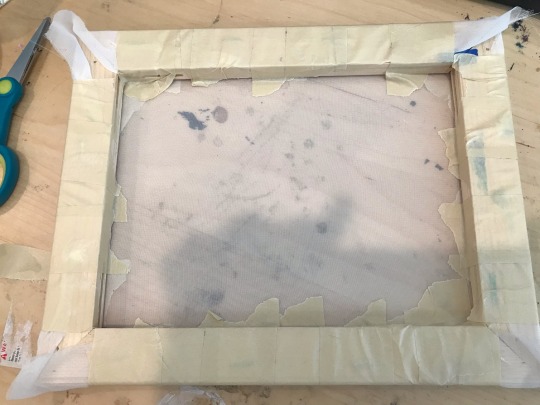
For the next steps you'll need a good pair of scissors as well as your pen and your sheer fabric. You're going to want to set the frame on your fabric and cut about an inch and a half around it so there's extra to wrap around the frame and tape down. You can draw a guideline for where to cut if you want, but once again, I'm a freak:
Now lay the front of the canvas frame (the part without staples on it) face down on the fabric and grab your tape! Now we're going to tape down each end of the frame so the sheer lays taut on the frame. I like to put one or two strips of tape on the ends parallel to each other and pull them tight, then do the same with the other side, then continue adding tape until the whole outside of the frame is covered. See below:
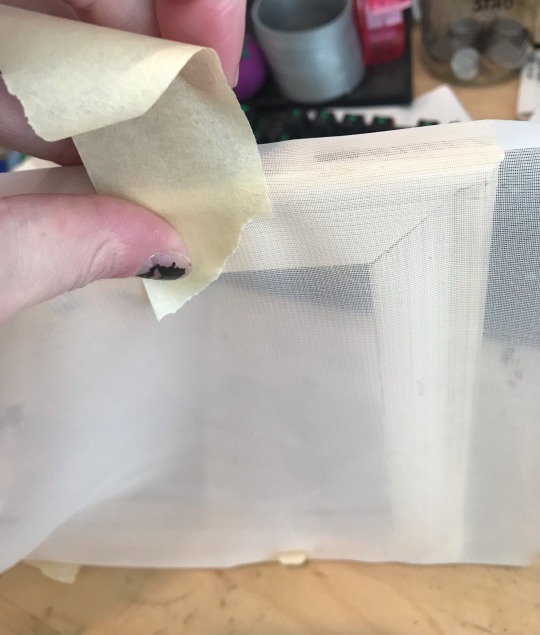
(Note: your goal in this step is to stretch the sheer as tight as it can comfortably go so there are no wrinkles or depressions in the fabric.)
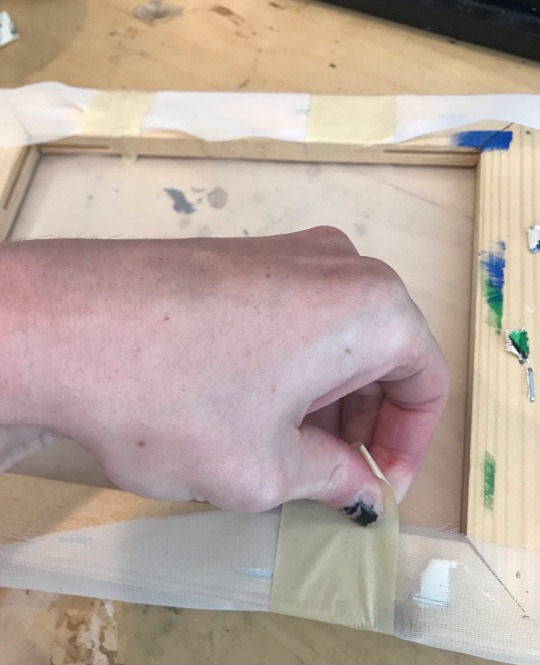
So now you have you're frame. Fuck yes!!! Go ahead and grab the design you came up with as well as your pen (you can use a pencil too, but the pen shows up much better through the fabric so I definitely prefer it), and put the frame front side down onto the sketch.
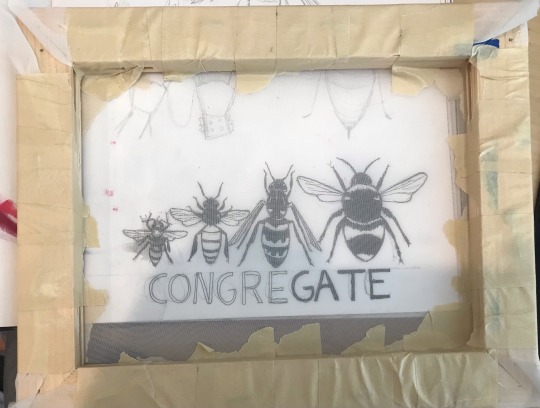
If you're worried about keeping the frame steady, feel free to tape the frame down and go ahead and trace over the design with your pen. Make sure to fill in all the dark parts enough that you can differentiate them from the light parts.
Once you have your sketch copied to the frame, now you can grab your gloss!!! Hurry!!! You're almost done!!!!
With this step I like to start big and go into the details once all the larger portions of the sheer are covered. Pretty much you're going to paint over every part that isn't the black of the pen with your waterproof gloss. This ensures that once you start printing, the only parts that are going to bleed through the fabric will be the black parts that weren't painted over with gloss/varnish/mod podge/whatever you used as long as it's waterproof!!! Take all the time you need, it's not a race. Once you're done and the gloss has dried, your screen is going to look something like this when put up to a light:
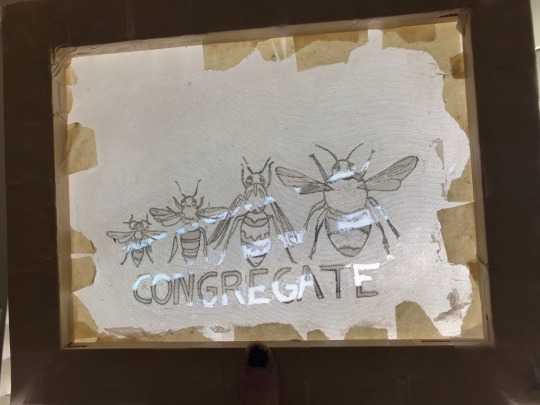
Now that this step is over with, congratulations - you have just made a mesh screen!!! Keep reading to learn how to use it lol
So for the patches that I make I just went with black and white paint, and black and white fabric to keep it traditional, but you can use any colors of paint and fabric you want, truly! The world is your oyster! I do not care! That being said, we're keeping it simple today.
Grab your screen, a piece of fabric that can cover the design and leave at least an inch of space around it, and a surface you won't mid getting paint on on accident. You'll also want to grab that card-like thingy for this as well. It can really be anything that can provide a sturdy, even pressure across the screen consistently. Go ahead and pick up that fabric paint too, I guess. We'll probably need that.
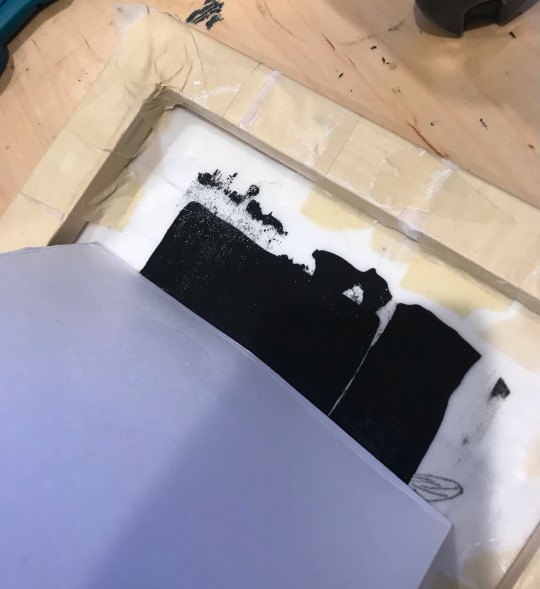
At this point, this is what your workspace might look like:

Next up you are going to center your design onto your piece of fabric-

-and grab your fabric paint. put a thin little stripe over the top (start slow and add more - as you can see I added a little too much and kinda fucked up my design) then grab your card thingy. Make sure you have even pressure on it and swipe it down at a medium speed so you're dragging the paint down the screen:


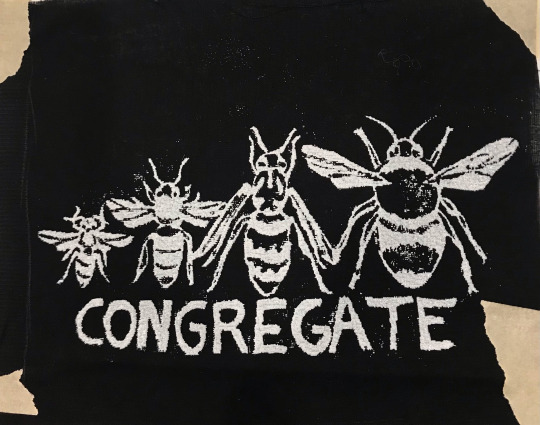
Once you've got everything covered I like to go over it a few more times for even coverage. Then you pull it up from the screen (which you might want to rinse off so no paint sticks to it!!!), wait for that bitch to dry, and you're done!! Congratulations, you have your very own fun silly patch! Go sew it on something! Or not! I do really do not care!!!!!!

#blog post#cant-shake-it#patches#homemade#punk#punk diy#punk patches#tutorial#how to#screen printing#diy#fashion#if i get hate for this im prepared bc i ride life on the seat of my pants#there are no rules and i am so inefficient
141 notes
·
View notes
Text
[ DANNY'S TUTORIALS: BOTTLECAP PIN ]
Hi there!! I'm gonna teach you how to make a bottlecap pin since I've gotten a lot of questions about where I got mine from baby punks and others who just find them cool! I've found that a lot of people buy their pins online from companies that overprice and over-process their designs, and often times steal them from smaller businesses. Punk has been gentrified over the years, so this tutorial acts as a way to reconnect to the roots of DIY fashion made by people with limited resources and time. This is a great way to show your interests, pride in your community, and pretty much anything else you want even if you don't have a penchant for traditional art. Don't worry about it looking good, just try to have fun! At the end of the day, the shittier the job, the more punk it is.
[ Step Count : 6 ]

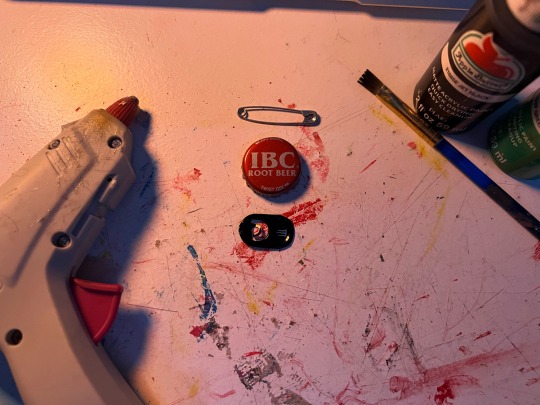
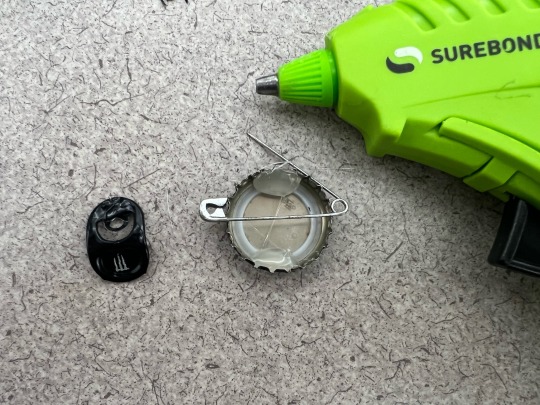
Here's what you're gonna need! (optional materials have a star next to them instead of a regular point):
-> hot glue gun (in replacement of pliers)
-> safety pin
-> bottlecap (unbent, preferably a twist off)
-> can tab
✮ pencil/pen
✮ sandpaper
✮ paint & paintbrush/posca pens
✮ regular Elmer's glue
STEP 1:
Gather your all of your materials and place them on your workspace. I'm going to paint mine, so I got the sandpaper, paintbrush, and paints as extra materials.
STEP 2:
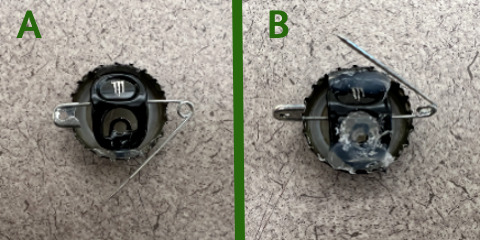
If you're not going to paint yours, go ahead and skip to step 3. Otherwise, get your sandpaper and your bottlecap, then sand down the surface (A). Paint your base, draw a design with the pencil/pen, and fill it in with your paints/posca pens (B)! After I'm done painting I'll usually seal it in regular Elmer's glue to make sure it doesn't get messed up anytime soon (C). I chose a little green skull since the person I'm gifting this too likes and spooky stuff and green is their favorite color :]

[ Also sorry for the change of scenery, I had to finish at the library cause I was studying. Visiting, donating, and helping your local library is Punk As Fuck. ]
STEP 3:
What you're going to do now is set your bottlecap aside, and take out your can tab. I have joint problems and I can't use pliers, so I bend it over the edge of a table by holding it half over the edge and pushing down to bend the metal. But try not to bend it too much so your safety pin stays in place!
STEP 4:
Okay, here comes the tricky part. Like I said, I have joint issues, so I can't use pliers because they hurt my hands. Instead I'm going to set aside my now bent can tab and bring back my bottle cap, then flip it over. Place 2 hefty drops of hot glue on the bottom and top of the pin, then get your safety pin and open it so you can place it on the back horizontally.
STEP 5:
Now, place your bent can tab on the back of the pin and over the open safety pin, pressing it into the hot glue drops and letting it dry for a little bit (A). If you like, you can also put two more drops of hot glue on the tops of the bent can tab for extra security (B). I also put some hot glue in the middle of the tab's opening for extra security on the safety pin. Please pardon the absolute dogshit photo quality it wasn't cooperating for some reason LMAO
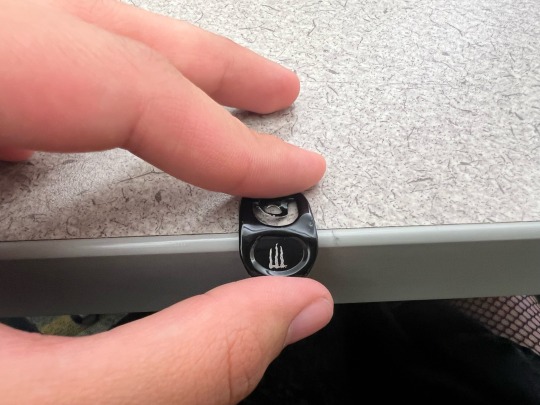
STEP 6 [FINAL]:
Wait for it to dry, then you're all done!! Your very own bottlecap pin. You can attach this to bags, jackets, shirts, pants, and pretty much any material that a safety pin can glide through.

Here's the finished product, as presented by my friend D at the library (everybody say thank you D for modeling)!!
[ -> Next (coming soon:]) ]
#punk#diy punk#bottle cap pin#diy tutorial#punk rock#bottlecap#bottle caps#punk tutorial#diy#diy jewelry#diy accessories#danny's tutorials
476 notes
·
View notes
Text
youtube
I promised this video to a few people, so here it finally is! You can see the other parts here. Thanks for watching!
25 notes
·
View notes
Note
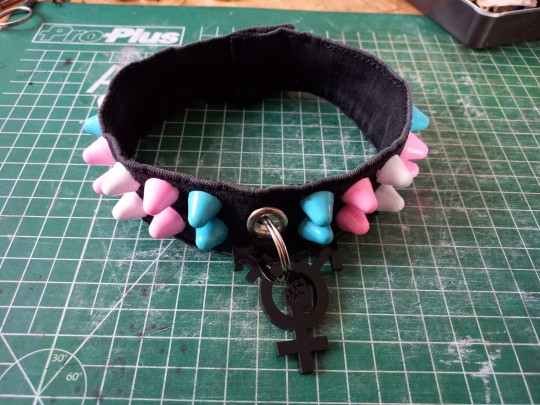
Do you have a tutorial for the denim choker and/or the bat keyholder you made?? They're so cool :0
a tutorial on how to make chokers from some old pants!!


you will need:
-some old jeans
-a button
-strong thread, for these i used emboidery thread
-spikes and/or other decorative stuff you wanna put on the choker
-scissors
-pliers
-sewing needle
-seam ripper or small scissors
•
first get your pair of pants, and cut of the waistband. you can remove the belt hoops with seamrippers (or keep em and sew them on as extra decoration) i always use the part with the buttonhole, it saves on sewing
the band should be a large enough to wrap around your neck plus some extra space


measure and draw on where your button will be placed (on the end where the buttonhole is not) then about 5cm from there, make a small cut in the band and fold the ends in, press together and sew closed. there should be around 2-3 cm of band left next to where youre gonna attach the button (where i drew the white line)


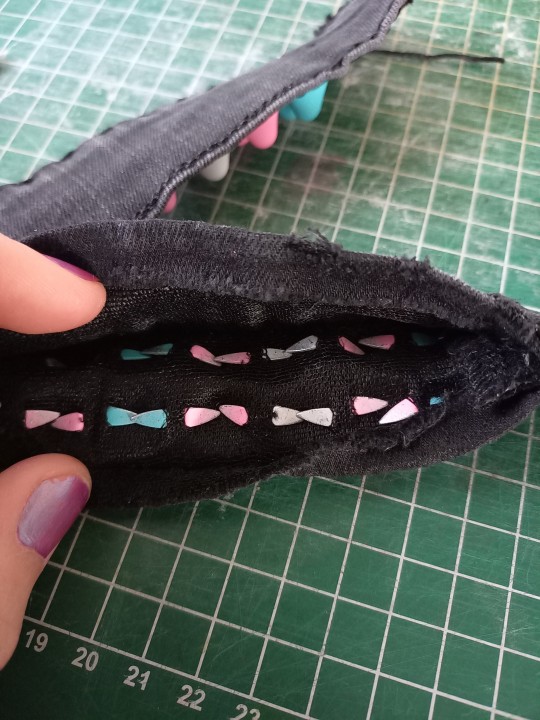
time to gut em!! open the seams on one side (not fully till the ends) and attach your spikes, this prevents the point or screws from pressing/poking into your skin. (i made this part the next day hence the lighting change)
sew em back up and attach your button
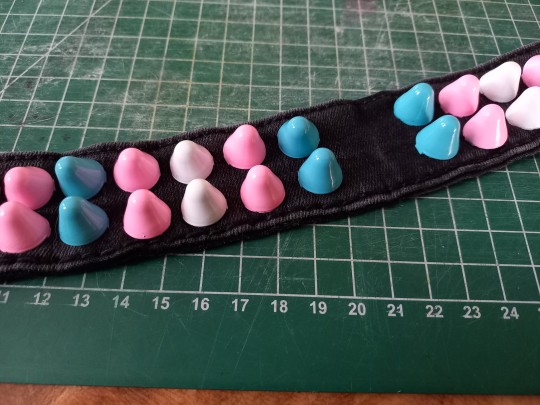

i added an eyelet so i could attach charms to the choker, but you can also attach chains, soda tabs, embroidery or whatever on there. after that youre done! you can also use this exact method to make cuffs, just make the band shorter.
#punk diy#diy fashion#diy punk#punk clothes#punk style#queer punk#tutorial#my stuff#queercore#punk#punx
465 notes
·
View notes
Text

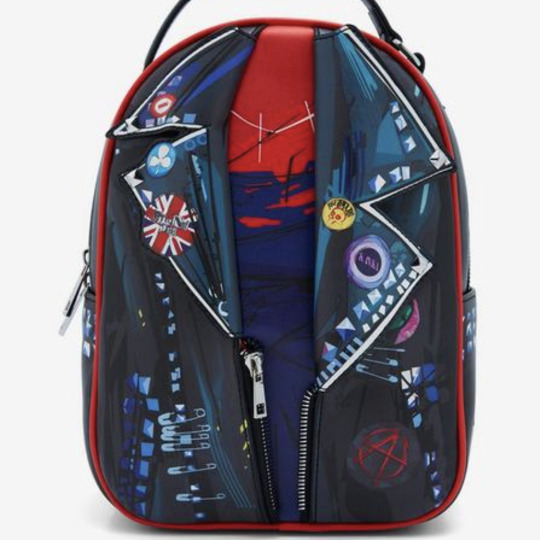
so you wanna make a spiderpunk backpack, huh? what's the profile on this guy? @/_oddlycute_ on TikTok, 25k followers, top post with 1.5M views. alright, let's get started.
Here's what you're gonna do.
First, go to the thrift store and the craft store. Pick up a small leather jacket, small backpack, red fabric, blue fabric, white fabric paint, spikes, safety pins, whatever else you need, alright? Get as close to the original as ya want, it's punk so we're not gonna be pickey.
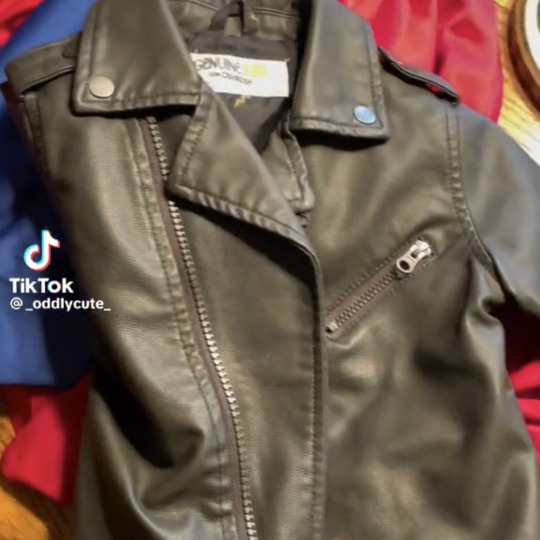
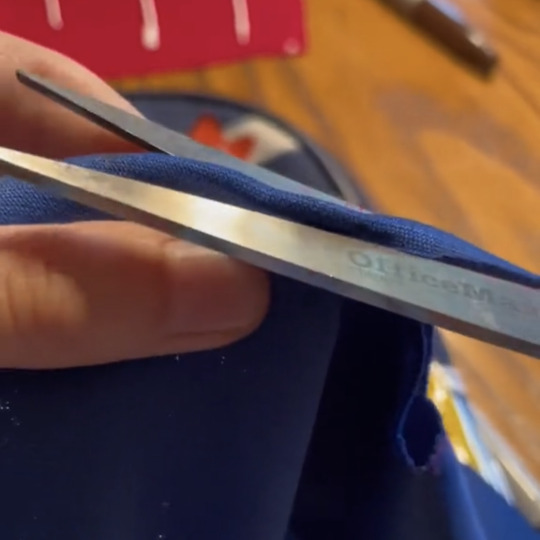
Now start cutting. Cut the jacket down to size, cut the red fabric for the base, cut the blue fabric for the shirt. You're gonna wanna cut up the blue fabric a bit more, give it some wear and tear, just like the photo. Got it?
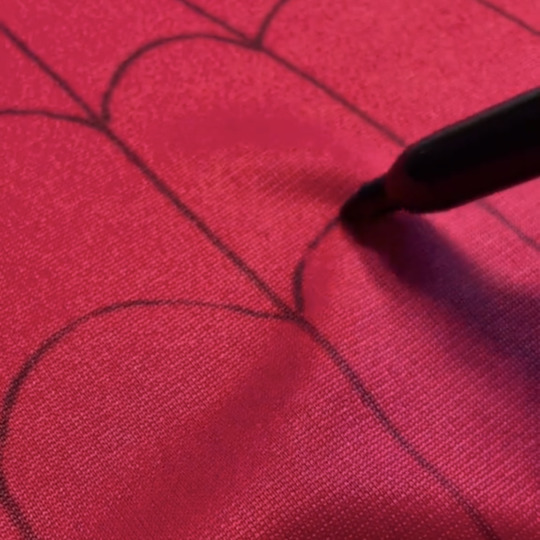
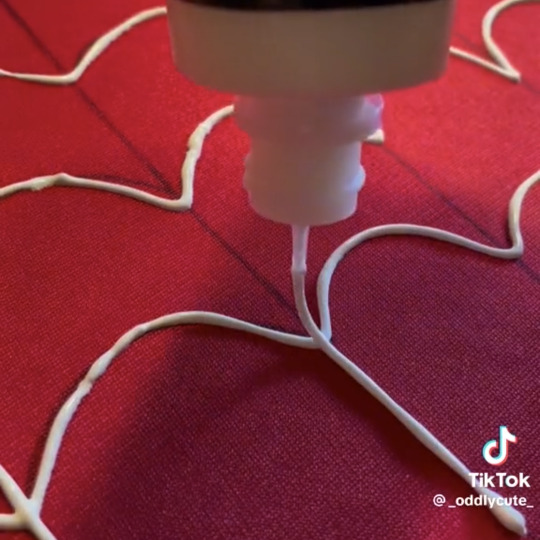
then get artsy. You want it to look like spiderman, you're gonna wanna make some webs. I suggest drawing them out first so you don't look stupid, but I'm not gonna stop ya kid, it's up to you. This is where the white fabric paint comes into play.
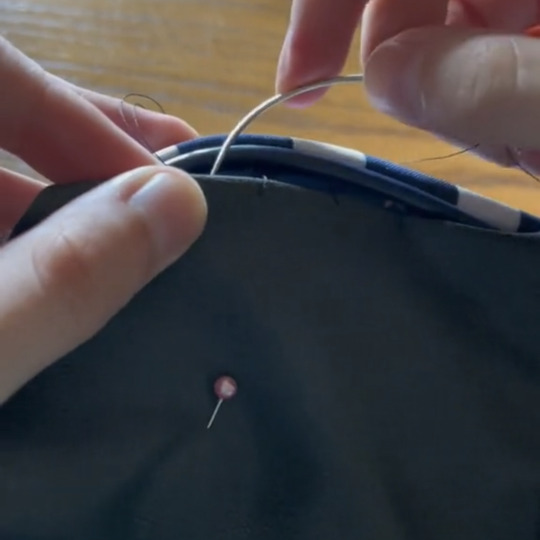
Now you're gonna have to put it all together. You can sew them, best to use a hook needle like they did, or you can glue it, like I would.
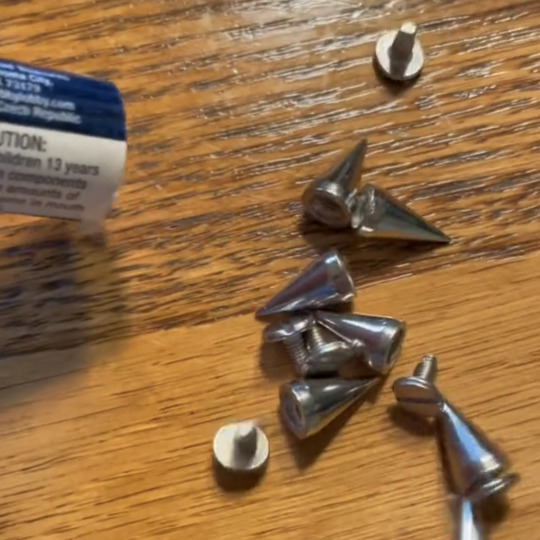

Now finish the job. You got spikes? Safety pins? Patches? Whatever you're gonna do, do it now.
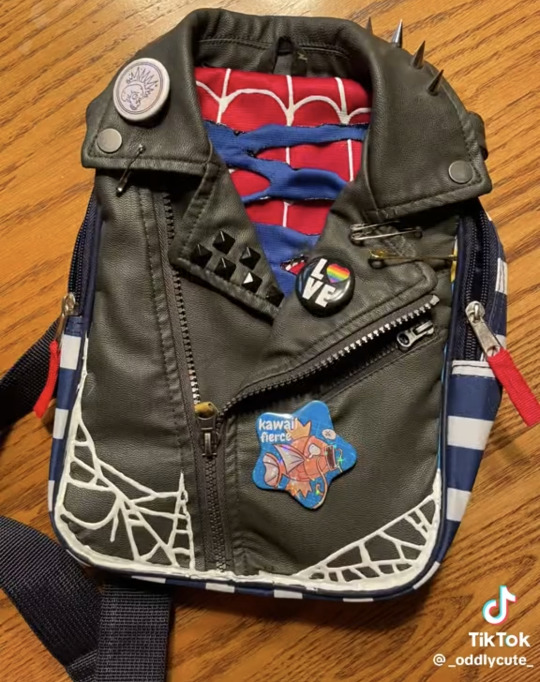
There. Jobs over, you're done.
#mike erhmantraut#mike breaking bad#mike#diy#tutorial#my tutorial#written tutorial#tiktok tutorial#how to#spiderpunk#spider punk#hobbie#hobbie brown#into the spider verse#spiderman diy#spider punk diy#backpack diy#my post#mine
80 notes
·
View notes
Last Seen Blogs