#punk clothes
Text
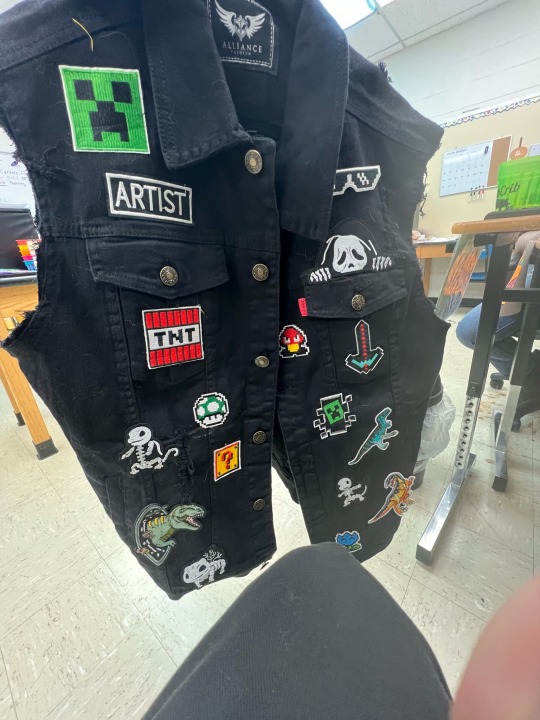
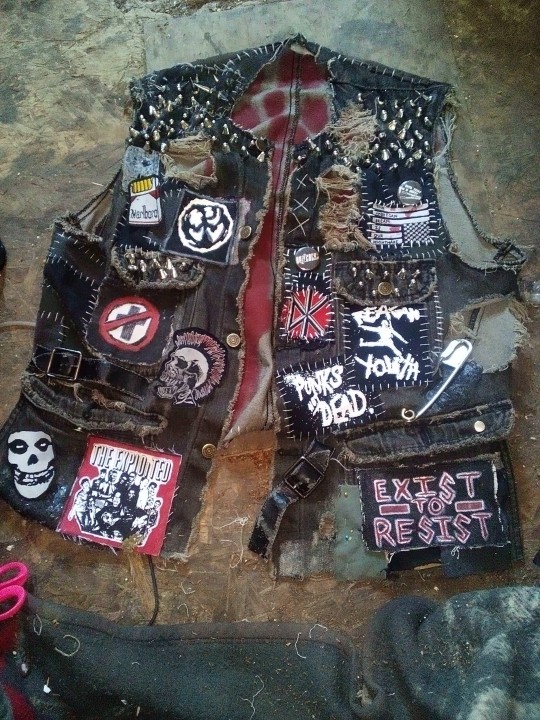
Y’all, my little nephew, who’s nickname is “Cabbage,” wanted a “punk jacket,” like Uncle Kade’s. (EMPHASIS ON LITTLE, be nice)
So, I asked him what kind of patches he wanted on it, and this is what we came up with. Just need to sew the patches down and line the vest. I can’t wait to finish it and send it to him.

49K notes
·
View notes
Text
new tutorial, this time for "fake" medals you can use to decorate your jacket or any stuff really.
give yourself a weird award you yourself came up with, coorperations do it all the time!

stuff you will need:
-scissors
-variation of pliers
-a stencil, the shape you want the fabric part of ur medal to be, make it a bit bigger so youll have room to sew
-piece of fabric two times the size of your stencil
-sewing needle
-sewing thread, i use dental floss
-safety pin
-paperclip, or just iron wire, around 1 mm Ø
-bottlecap
start with cutting out the two pieces of fabric for your medal using a stencil

pin em to eachother, with the sides you want to be on the outside, facing inwards.
sew along the side but keep the top open, so you can flip it inside out.
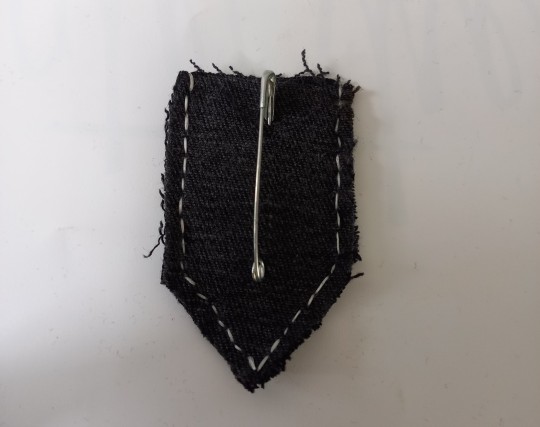
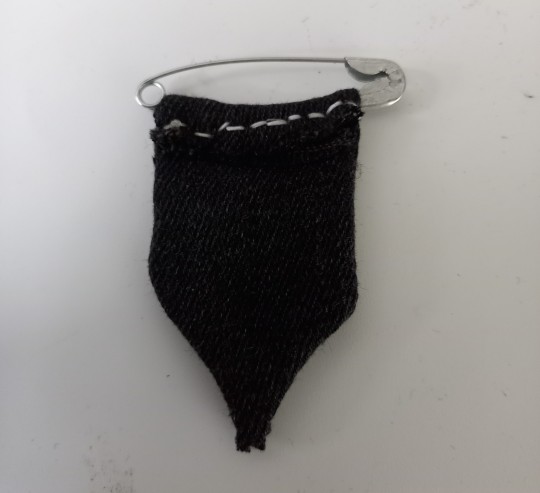
now you can flip in inside out, and fold the top around the safety pin, and sew it down
make sure the side of the pin that doesnt open is the one being sewn down. the opening part should be on top.
bend the paperclip into something resembling the shapes in the pic below using the pliers, doesnt need to look good, mine sure dont
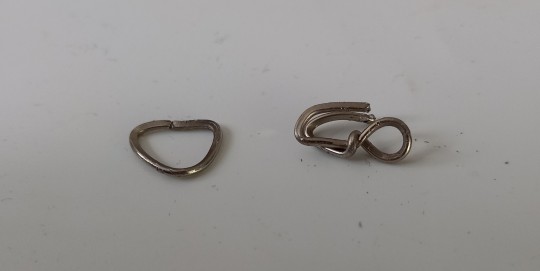
bend the edges of the bottlecap to the inside, and pin the hook part of the right iron wire thing down under the edge
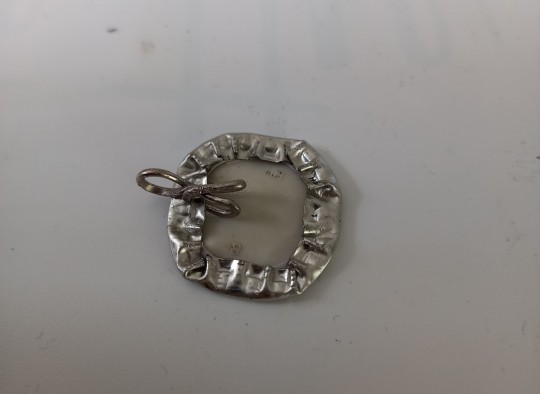
connect the iron wire hoop you made (left in picture) to the piece of iron wire on the bottlecap. fold the point of the fabric part of the metal around the hoop and sew it down.
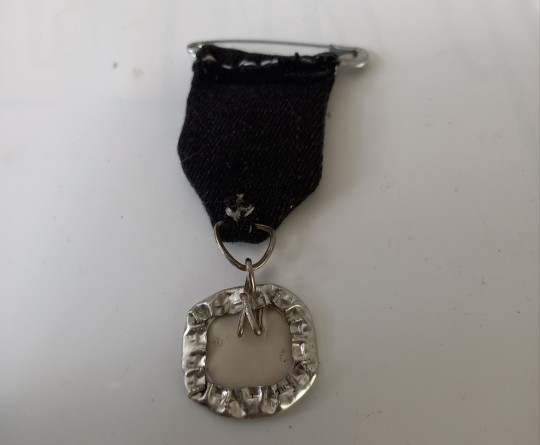
should look something like this.

now you can add decorations, you can paint the cap aswell as the fabric part, using patterned fabrics can also make ur medals look nicer.
ive seen people advise using modgepodge to seal the painted cap, instead of nailpolish, i dont have modpodge where i live but use that if youre able to get ur hands on it.
i hope this was clear, let me know if you want tutorials on any other stuff. i like doing them a lot.
3K notes
·
View notes
Text
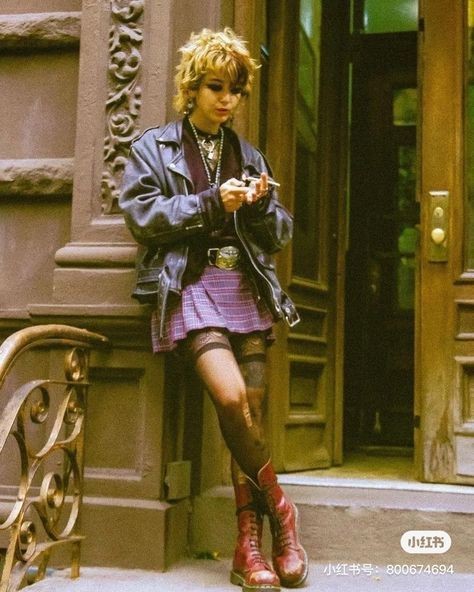
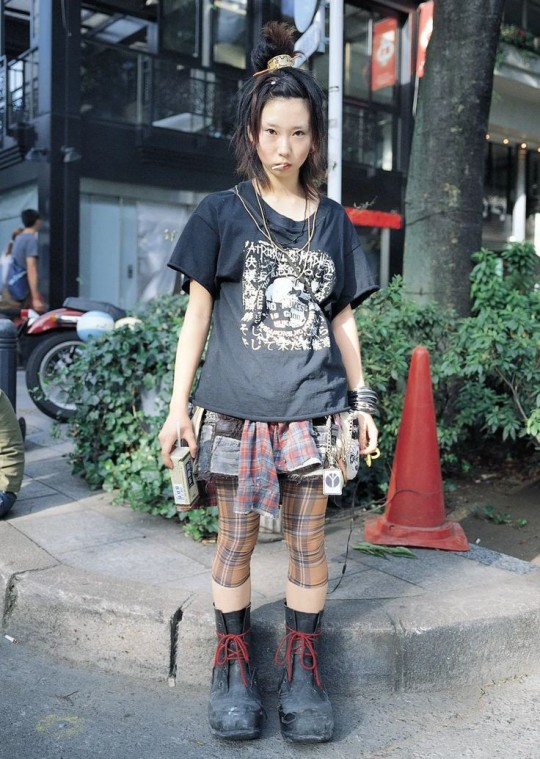
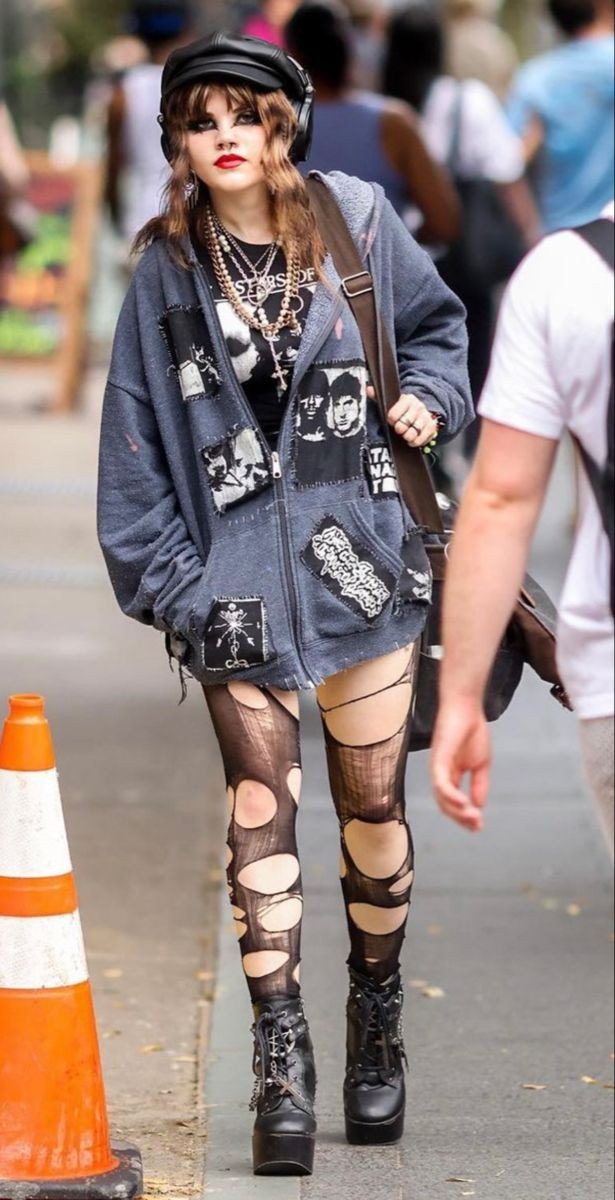


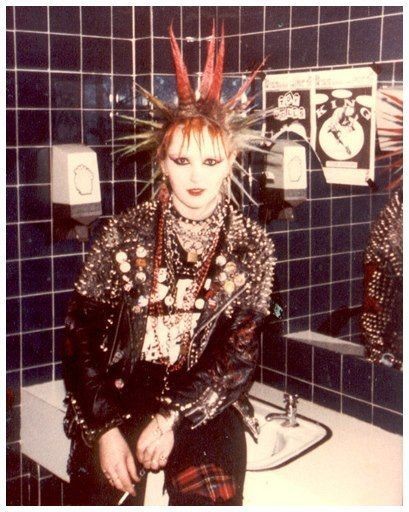
Punk outfits ideas
#aesthetic#rock#punk#punk rock#punk culture#punk clothes#punk style#punk fashion#punk music#punk moodboard#70s#80s#outfit#outfit ideas#cigarrete#rock music#2014 tumblr#hell is a teenage girl#moodboard#feminism#pinterest#punk is not dead#punk outfit#punk princess#punk aesthetic#punk girl#punk goth#punk gf#punk vibes#punk makeup
613 notes
·
View notes
Text


my og punk pants <3
#punk clothes#punk rock#punk#punk patches#punk style#punk pants#patch pants#crust punk#crust pants#punk diy#diy punk#mine
609 notes
·
View notes
Text
All these posts about how punk fashion is actually SUPER accessible and affordable because DIY is the heart of punk are ABSOLUTELY TRUE AND IMPORTANT, but also i think you guys are missing another way of afordably obtaining things from (BIG CORPORATE) stores that is extremely in the punk spirit and tradition. ya know.
#legally a joke#punk#punk clothes#punk fashion#LARGE CHAIN STORES ONLY OBVI#Time honored tradition#again legally a joke#live from the musain
416 notes
·
View notes
Text
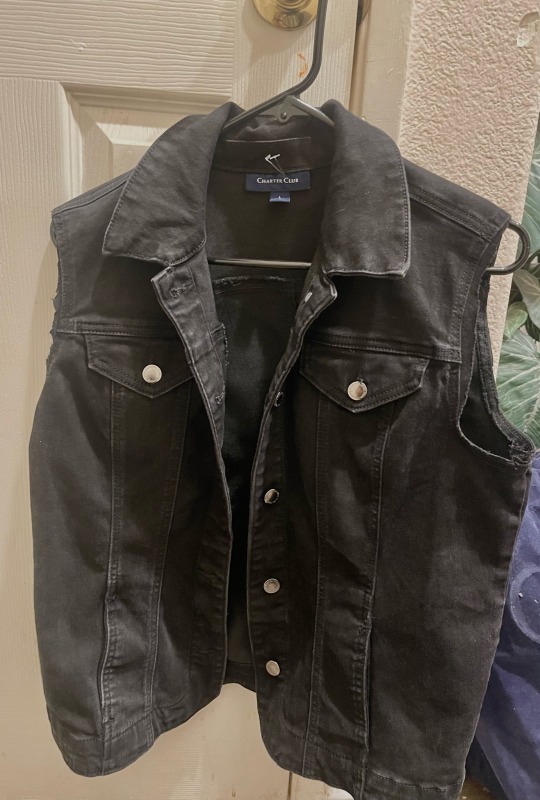
MY PUNK BASE JACKETTT!!! gunna buy supplies tmrw to totally deck it out
193 notes
·
View notes
Text

New pin!
#punk rock#punk aesthetic#punk fashion#punk jacket#punks not dead#punk music#punk rock music#punk is not dead#punk posting#punk style#punk shit#punk diy#punk girl#punk kid#punk clothes#punk vibes#baby punk#punk#riot grrrl#girlblogging#riot girl#punk pins#bikini kill
194 notes
·
View notes
Text
Battle vest update
327 notes
·
View notes
Text


We went to a cool exhibit about Punk on the local museum this weekend! 💜
208 notes
·
View notes
Text
Making a Work-Appropriate Punk Shirt for Under $5
Because the company I work for is rolling out new dress code that bans any sort of graphics/logos/etc. except for the actually store logo/graphics, that leaves my wardrobe a little bare for what I will and will not be able to wear. Because of that, I’ve decided to kick my DIY skills into gear so I can have something that’s alternative and yet work-appropriate to wear.

I started by buying this black t-shirt which is currently on sale in our store for under $3. With my discount and tax it came out to $2.24, but we’ll round it to $3 since not everyone is going to be getting an additional employee discount.
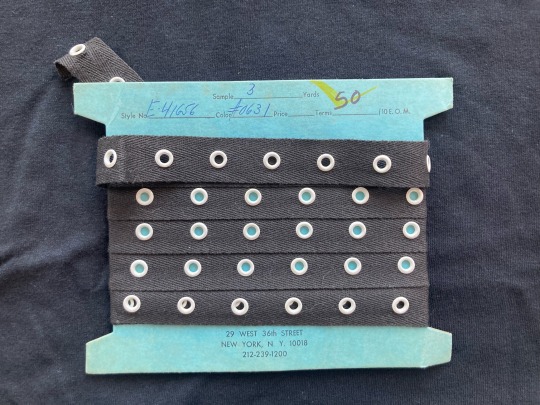
From there I took this grommet-filled ribbon that I bought at the thrift store my grandma works at. This was a few years ago, so I don’t remember the price really, but it was somewhere around $1. We’ll round it to $2 just to be sure.
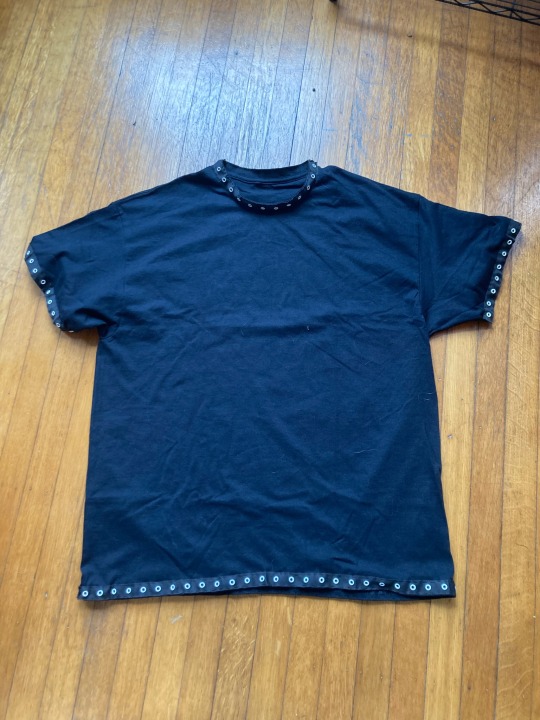
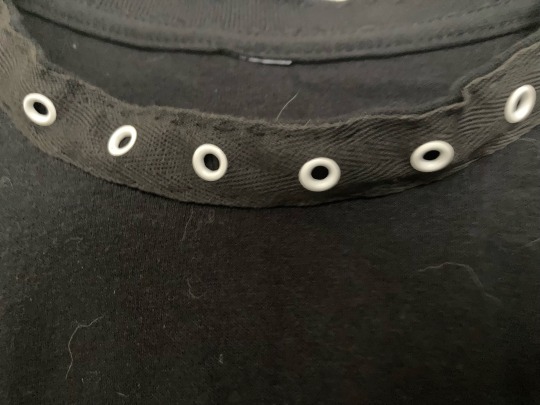
From there I hand-sewed the ribbon around the hems of the shirt. While still being a plain black shirt with no sort of logos or graphics, it now has a DIY alternative touch that doesn’t go overboard.
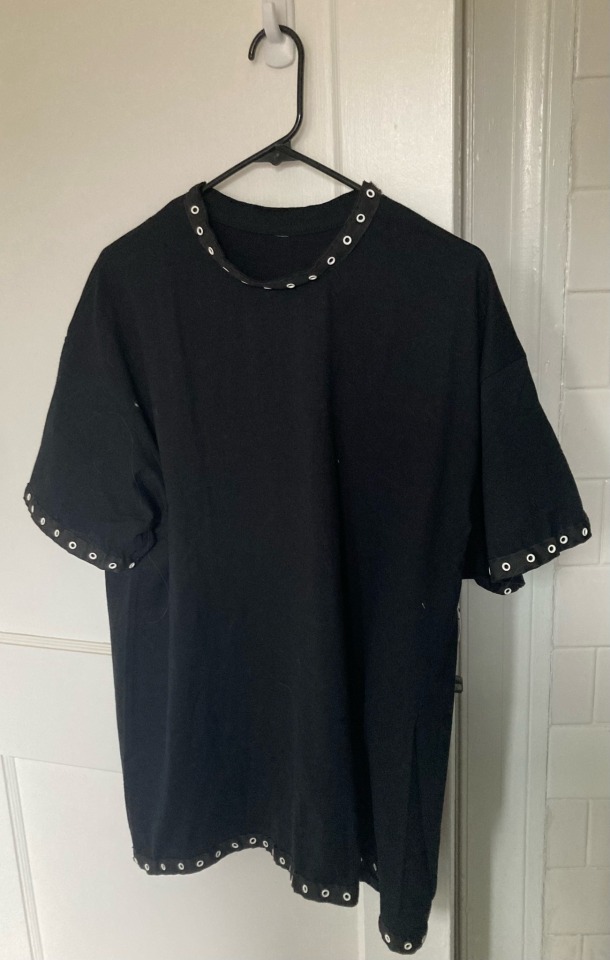
And here’s the finished product! I’ll try and remember to post a picture of me in it when the new regulations kick in!
121 notes
·
View notes
Text
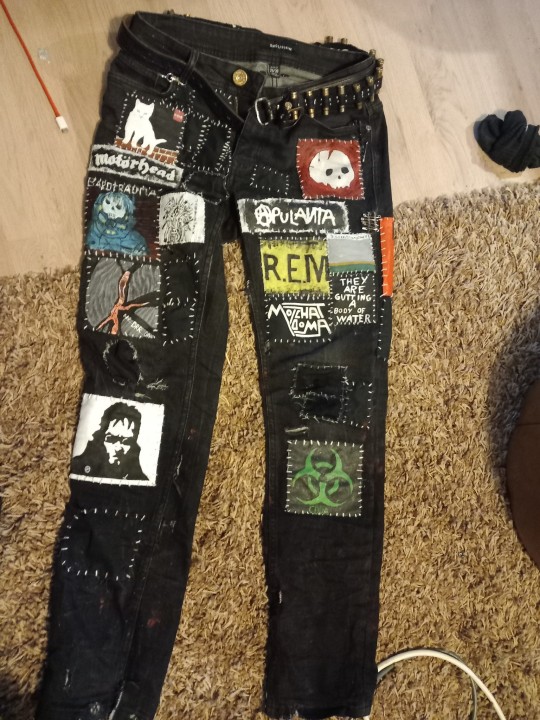

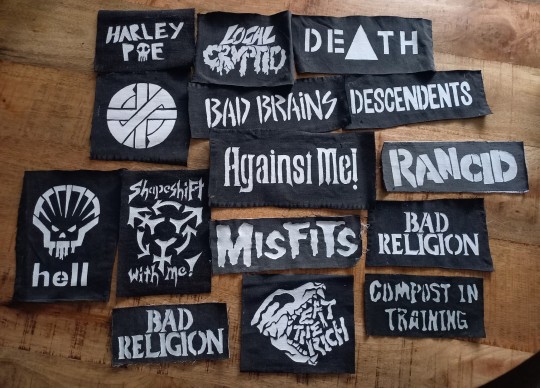
Full crust pants. I REALLY need to make more patches for the back cuz it looks way too bald
#punk clothes#patches#jacket patch#diy clothes#diy#custom clothing#clothes#crust pants#crust punk#painting#acrylic#sewing#rem#motörhead#blue smiley#postal dude#the enigma of amigara fault#duster stratosphere#duster#apulanta
74 notes
·
View notes
Text
I love every single person that posts their punk diy stuff on here. I look for it every day. Y’all are amazing, please keep creating sick gear for yourself and dopamine for all of us.
861 notes
·
View notes
Note
Patch making tutorials?
and here i am once again, with a patch making tutorial
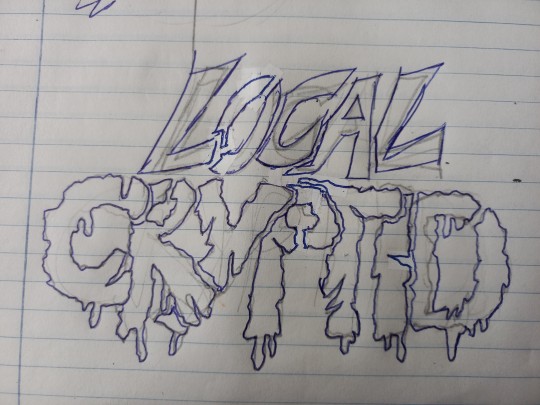
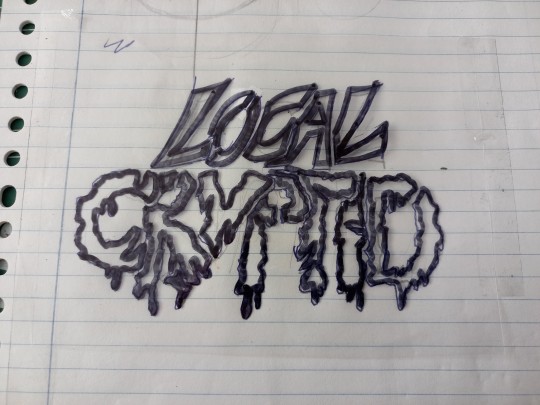
how to make stenciled patches:
i'll post a part two in the future which will cover freehanding and stamping ur patches
-
first some general info that might be useful:
i get my patch design inspo from pinterest, etsy, and tumblr. if sell your patches make sure you arent ripping off another artists patch design when using etsy for inspo. anarchostencilism also has tons of stencils both on deviantart and reddit which are free to use.
i use acrylic paint for my patches, but if you can afford it id advise fabric paint. to seal paint into the fabric iron the patches, it helps em last longer. some acrylic paint survives very well in the washing machine, but wash your stuff by hand the first time to see how well it holds up.
if you make your patches multiple colors, dont first make the whole patch one color and then paint over it with the other colors. if the paint starts cracking the base color will show through. (if you like that however then dont mind this)
i paint my patches on jean fabric, cause it makes the patches sturdy yet flexible. but shirt fabric or canvas both work very well too. anything except really plasticy/slippery or textured fabric can be used
i pin my patches down with pins onto multiple layers of taped together cartboard, to prevent the fabric from moving around and distorting the print
-
there's two ways in which i make my stencils
1. with paper covered in tape
2. with the plastic folder you put in your binders
-
option 1:
draw out your design onto some paper, make sure there arent any "loose" parts in the design that will get lost when cutting out the stencil

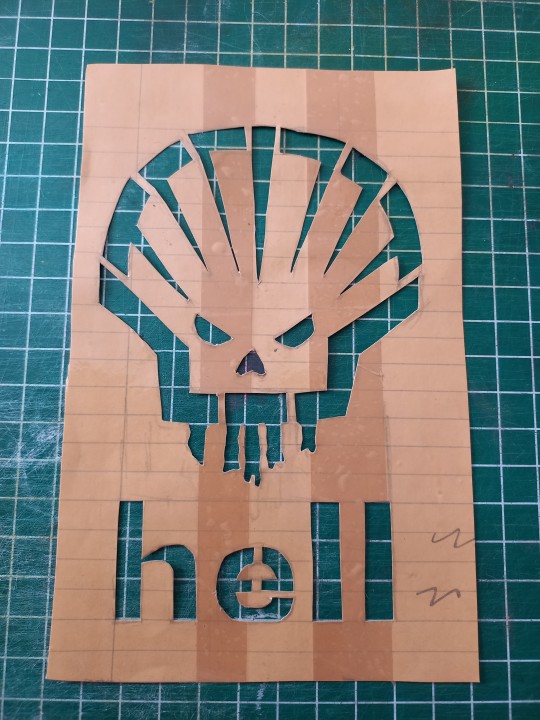
cover the paper in tape front and back, make sure you can still see your design through the tape
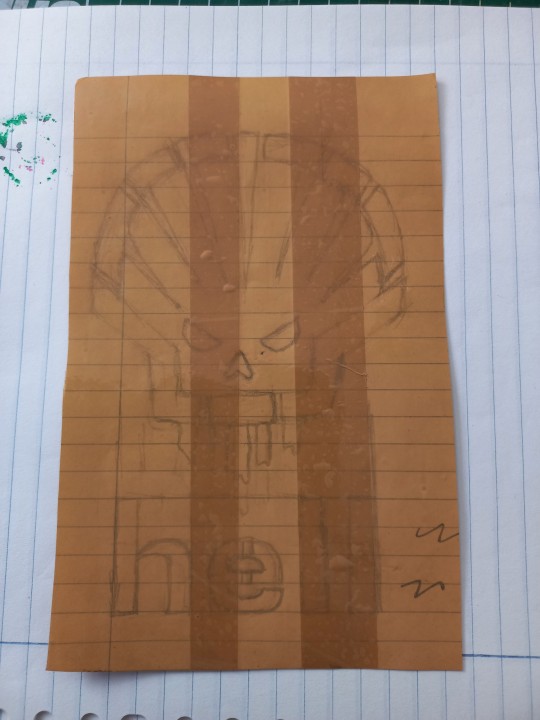
cut out your design, i use scissors and an exacto knife
-
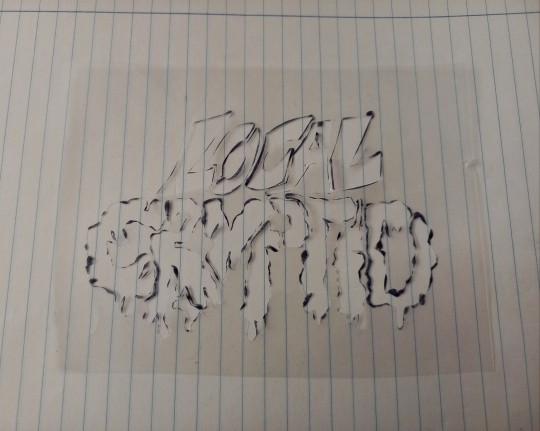
option 2:
draw out your design (you can also draw the design directly onto the plastic folder)
cut a piece of plastic out of the folder big enough to cover your drawing and tape it down.
trace the design onto the plastic with pen or marker (any mistakes can be wiped out)
cut out your stencil
-
continuation from both option 1 and 2
after finishing your stencil you can pin them down on some fabric
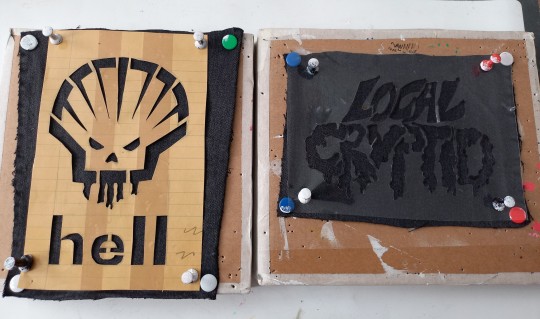
dap on your paint with the point of a big brush or a sponge, depending on the paint it'll take 2-3 layers.
make sure your previous layer dried completely before adding the next one

after the paint has fully dried you can carefully take off your stencil.
!!dont unpin the patch before it fully dried, or the drying paint may cause the fabric to warp!!

thats it, questions are always welcome, now go and make stuff!!
#punk diy#diy fashion#punk#queer punk#diy punk#punk clothes#punk style#punk patches#patches#tutorial#my stuff
2K notes
·
View notes
Text


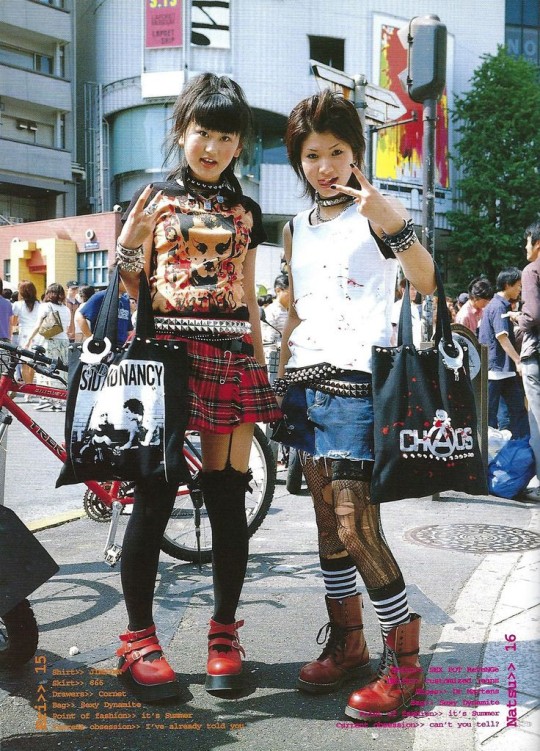
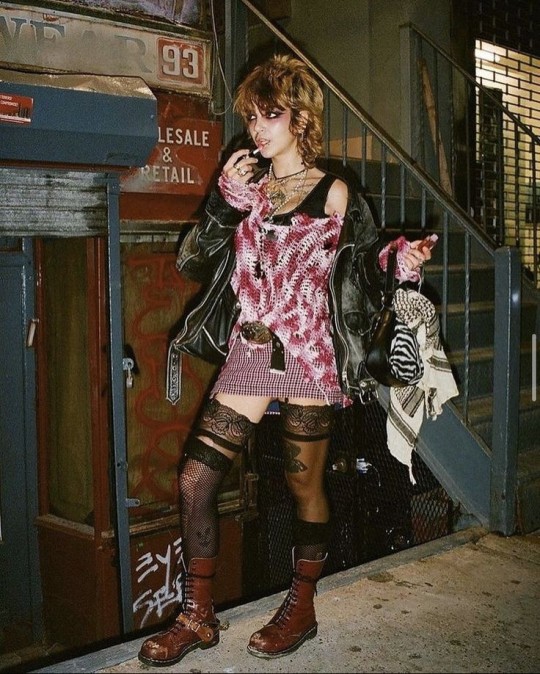
More punk outfit inspo
#aesthetic#hell is a teenage girl#rock#grunge#punk style#punk fashion#punk music#punk rock#punk#punk is not dead#punk outfit#punk posting#punk princess#punk aesthetic#punk subculture#punk goth#punk gf#punk jacket#punk clothes#punk community#punk culture#punk vibes#punk moodboard#inspo#outfit ideas#outfit#outfit inspo#outfit inspiration#riot grrrl#goth
395 notes
·
View notes
Text
Patch Hoodie!!
ive been putting off posting this until i added more patches but it's definitely gonna take a while to get to where i wanted to get it lol 😅
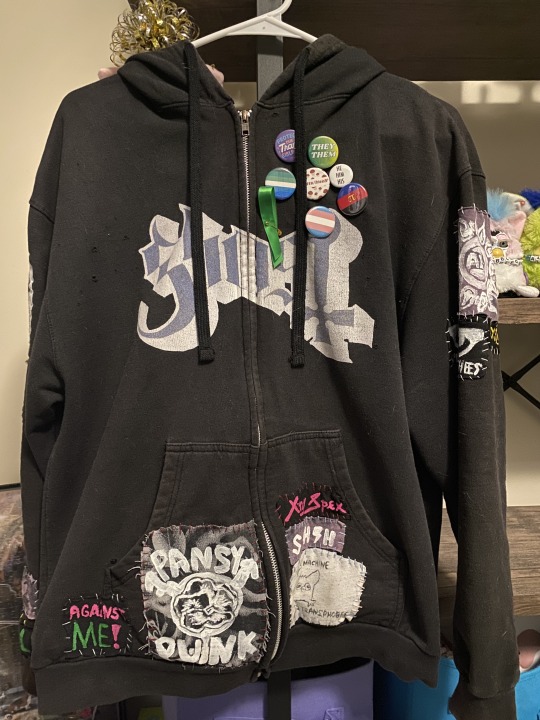
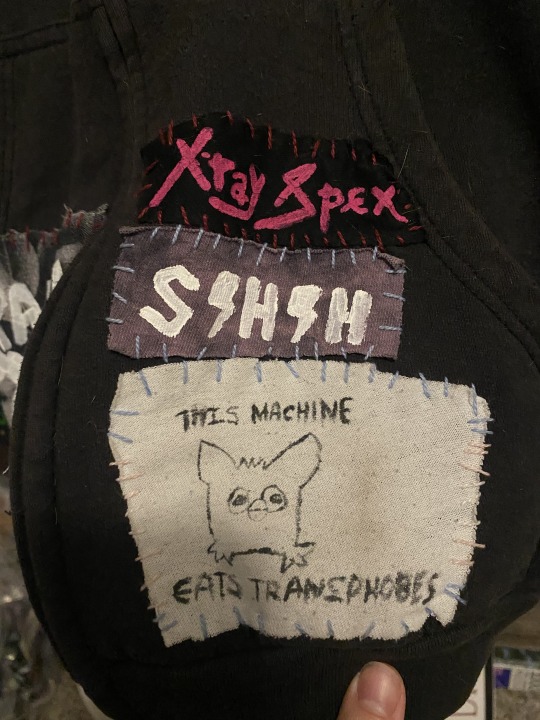


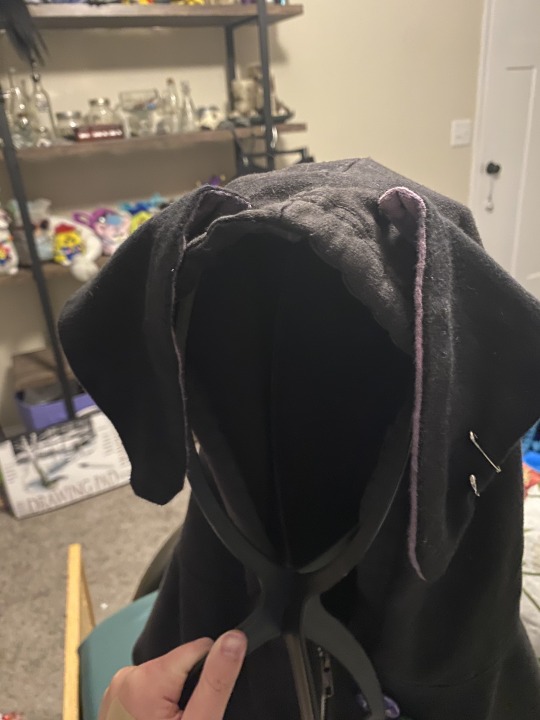
All patches were hand painted by me and all of those pins except for the he/him one (including the mental health awareness ribbon) came from my local lgbt center! the he/him one i got from pride lol. i sewed the ears myself (with a machine) and it is attached with snaps so i can easily take them off.
#punk clothes#punk rock#punk#punk patches#punk style#punk pants#patch pants#crust punk#crust pants#punk diy#diy punk#ghost band#the band ghost#papa nihil#glamrock freddy#fnaf security breach#fnaf sb#mcr#my chemical romance#the foundations of decay#idles band#1312#acab1312#x ray spex#she/her/hers band#siouxsie and the banshees#alice in chains#days n daze#against me!#mine
207 notes
·
View notes
Text


The jacket is coming along. Another reminder you don't have to have talent to diy!
#punk#diy#punk clothes#art#punk culture#punk diy#punk fashion#sewing#patches#diy patches#diy punk#arts and crafts#denim#battle jacket
62 notes
·
View notes
Last Seen Blogs

jjjjjjj
jj

corcooo
Sin título

the-mod-hq-duck
Quack?

shelbbswrites
shelby elpers

hotspothutspot
Hotspot Hutspot