#I might try and make an actual printable version of these later or just like
Text
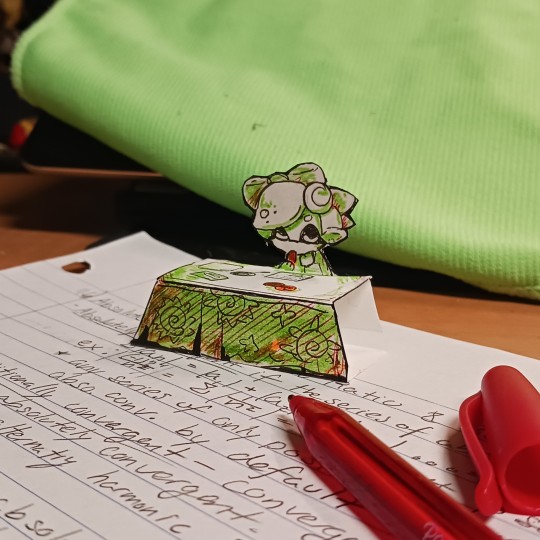
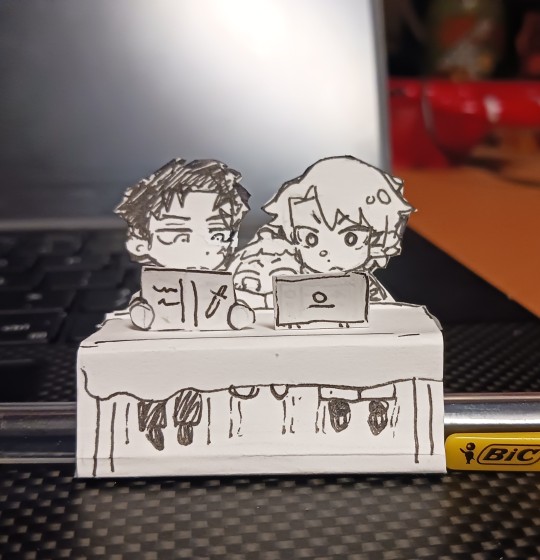
some quick portable study buddies ^^ I have an exam tomorrow (;;;・_・)
#v#scribbles#splatoon#kagurabachi#yeah sure i'll toss the main tags in there#I might try and make an actual printable version of these later or just like#a template#it's p simple to make tho so go ham if anyone else needs a study buddy (maybe im getting ahead of myself but im tired so)#good night
366 notes
·
View notes
Text
Official Dreamworks Digital SPOP Releases


I put a bunch of these in other posts I've posted before or things I queued up to post later when i was archiving everything form the Twitter account but since we were talking about this I might as well collect them all in one post...
The She-Ra Page on the Dreamworks activity center links to many (some of the links are broken) of the official digital merch they made.
There are Zoom backgrounds, watch along bingo cards, recipies, and some printable paper craft things like the mini-figs from Roll With It, the She-Ra Sword, and the valentines (which also include a papercraft model of Bow's arrow).
The She-Ra virtual reality room which is kinda boring but props to them for trying, I guess.
For use with VR set ups, obvs, but you can view it in a browser as well.
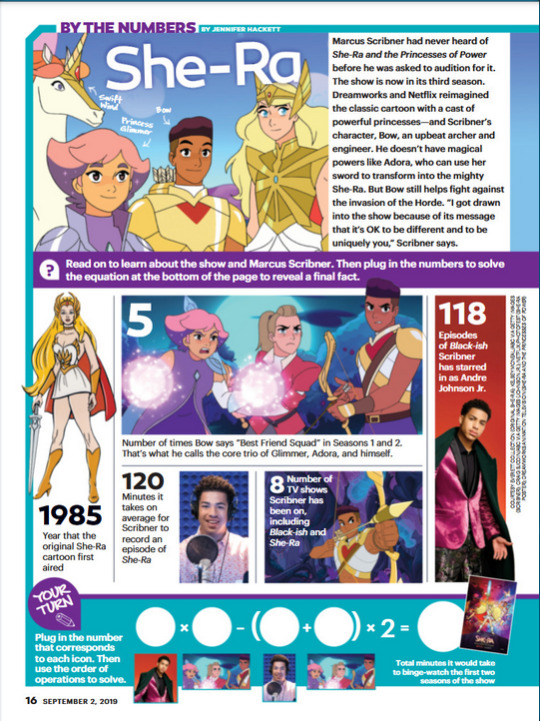
Want something really random? Scholastic had a math handout they did as part of their newsletter for schools featuring Marcus Scribner as Bow. Brand synergy is a mysterious thing.

The text version is here if you prefer to read
Lastly, there was a handout on how to read First Ones language also done by Scholastic to cross promote the books...
There was also a paper hand out they had at the Scholastic booth at cons and I actually own that but I don't have time to find / scan it at the moment.
There was an official She-Ra Instagram filter (beloved of my children) which is alas no more but you can see their IG story about it here (assuming that link works?)
And, of course, there is the sticker app which is still available in an app store near you and I uploaded most of the stickers from it to Tumblr a while ago as well.
Lastly, a lot more of the printable crafts they did can be found on @dreamworksshera which is the official tumblr of the show. There's a pattern to make Bow's shirt, Spinnerella themed pinwheels, a Sea Hawk flag, Netossa net and Mermista smoothie that I remember off the top of my head. Unfortunately, whoever ran that account did not understand tagging at all so they are very hard to find but such is life!
cc-ing @n7punk and @clarenecessities just since this conversation is all over the place and confusing as hell
#spop#shera#she ra#marcus scribner#dreamworks#scholastic#official merchandise#bow#long post#i am nearly positive there are more scholastic handouts but I haven't been able to find them
46 notes
·
View notes
Note
Hey, are you participating in NaNoWriMo? Have you ever? And what was your experience like? I'm considering it but I feel so intimidated because I know I won't be able to commit to it wholeheartedly. Lowering my expectations and pacing myself would seem like the perfect solution but work kills my creative brain cells by the seconds. I wouldn't be surprised if by the end of November I've only written half of page of alien language. Any advice? Also does Nano have to be a new project?
Oh man, Nano. I’m well familiar with Nano, and I’ve participated a few times (to varying degrees of success). This got very long, so I’m putting a cut.
The first time I attempted Nano was in 2006 for my novel Seerking. I had heard about it from a friend who was in an LJRP I was in, and she encouraged me to try it. I was still in high school at the time, and very frankly I did not have the dedication necessary to complete it. I got a lot of worldbuilding complete, but very little writing. I got about two pages of prose, and three notebooks of character and setting history, as well as a fairly detailed outline. I still have all of this.
The second time I attempted was in 2009, for a story that is based heavily on the Iron&Wine song ‘Boy With a Coin’. I got a little bit further, but I got stuck in a few places. I think it’s because my idea was bigger than my life experience, and I also got stuck in a lot of small details. Additionally, my first Word document (where I got about two chapters in?) was destroyed when my laptop’s hard drive just straight gave up on life - I did buck up and rewrite quite a bit, though it didn’t sing quite the same notes, and I have this handwritten copy still. (It’s possible I tried again with this same project the year after? I don’t remember tbvh)
My third attempt was in 2011, about a goverment operative and a faun. This one I got the furthest, and I still have the original handwritten draft and the typed copy. I pantsed this one, 100%. To this day, I still don’t know how this story ends, but I’d love to attempt a rewrite someday.
Then, unfortunately, from around 2012 until Fall of last year, I stopped writing period. I was in a real bad situation, and just didn’t have the energy for anything, let alone a novel. My most recent experience with Nano as an organization was Camp Nano, which is a much looser structure, and it is in May and July. Rather than the hard and fast 50k, you set your own goal when you announce your project.
I can understand your hesitance to participate, honestly. Nano is a beast of a project – to reach the minimum goal of 50k in the 30 allotted days, you have to produce 1667 words of new content every single day. This is approximately 3 pages, maybe a little more – which is a lot when you’re already stressed! And if you miss a day you have to adjust your daily totals for every following day, and the pressure starts to mount! It’s a lot, even if it is only meant to be a neat little challenge (mostly, I’ll cover benefits a bit later).
Now, my recommendations are going to follow two paths: planning, and pantsing. If you are naturally a planner – that is, you like having rough outlines, refined outlines, you like having character data, history, etc – then I recommend you have as much of your novel planned ahead of time before November 1st hits. Whatever notes or files you need to have set aside before you begin writing those first words, have them ready – read over them, refine them, and have them memorized front to back so that you know what your story is meant to be. If you are a natural planner, and you have not done this by today’s date (it’s 30 October where I am), then I do not recommend participating this year because it will stress you the fuck out and you might even make yourself sick.
The other popular option is called pantsing – essentially, you have a rough idea, and you’re flying by the seat of your pants. (This is literally what it is called on the Nano website, by the by – there are badges for it and everything.) If you are a pantser, then I still recommend a little preparation, but of a wildly different degree and type: find your story’s ambiance. If you are a pantser, think about what sparked the idea for your story? Try to put yourself back in the place (emotionally or physically) where you had the most intense version of the idea, and hang onto that feeling with both hands. This is incredibly important, because it will allow you to harken back to that feeling without chasing the high of first being hit by that feeling. If you are a pantser, focus heavily on the feelings you want to evoke with your story, and let your heart guide you.
Now the third option (I know what I said, I lied all right) is if you are a combination planner-pantser; you don’t want to have the rigidity of the outline, but you also like having a little bit of structure, or at least a direction to go in. If you are a combination planner-pantser, I recommend doing very soft preparation for yourself in the week leading up to Nano. So things like building yourself a playlist, maybe doodle what your main looks like in your head, or small details like character names and short dossiers. If you’re able, I recommend coming up with an ending, so you know what the end-goal looks like and you are able to track your story’s completion in your head.
For all three, I would recommend deciding ahead of time how you want to write your novel – are you going to type it up in a word processor (please make so many backups, do not live the heartache that I had to)? Are you going old school and hand writing it? Are you feeling like a boss that day and maybe want to dictate it into an app on your phone? Pick one, and make a dedicated space for your novel. You can mix them up, certainly, but make sure that you are able to consolidate effectively or you’re going to stress yourself out.
Now, you asked whether or not it has to be a “new” project. There are actually a few answers to this, depending on what you mean. Now, if we are to assume that “new” strictly means a brand new, fresh idea that you have just come up with specifically for National Novel Writer’s Month 2020, then the answer is no; it does not. Back in the day, there were a few purists that insisted you had to have a designated project every year, but like most purists, they’re just being assholes about it.
As a matter of fact, it does not even have to be a brand new project that you have not written any words for at all – however, if you do have an idea that you have already written for, you are not permitted to use any of your previous word count toward your goal. This is definitely a no-no. Personally, I’ve tried this, and I found it rough – I liked having the designated project, and I liked the buildup to it.
If you have, though, an idea that you’ve worked over and you are simply ready to start putting words on a page, this, I think, is Nano’s sweet spot.
Now, I know most of this 1000+ answer has been cautioning and reminders that Nano is tough – because, well, it is. It is a huge undertaking, and I feel like every participant has their horror stories to tell about their experience. But I want to reassure you that it isn’t 100% a hard slog to a dreary end; there are so many tools that Nano themselves provide you, as well as user-run communities and workshops, and even some benefits after the fact. These are the things I want to wrap this post up with.
Firstly, no matter how tired or stressed you are, if you register for nanowrimo.org, you’ll begin receiving daily emails from published authors and past participants. These range from silly and tedious, to incredibly comforting. My favorite one, which I cannot remember a lot of specifics from, was from a man who detailed his experience and reassured everyone that the work doesn’t have to be good – it just has to be 50k words. That’s it. You can have typos and errors all over the place, plot holes of all shapes and sizes, and a main character who doesn’t make any sense at all; it doesn’t matter, because the point of the event is simply to finish. Neil Gaiman has also said a time or two that your first draft’s only purpose is to exist. Just get the words out; you can fix them later.
Additionally, when you are completing your profile, you can enter in your location and there are designated forums for participants in your area. In the past, there have been meetups for group-writes and workshops as well, though I imagine they will be more along the lines of Discord calls this year. If you are a social person who needs a pair of eyes to help you work through a scene, Nano’s got your back. They will also send you statistics for your area for the average word count, daily word count, past winners, etcetera. It can sometimes feel like you are very alone during this difficult project, but a lot of these things bring a very human element to the event.
Finally, what comes after you have completed. A lot of these benefits are newer than my time, but I browsed through them when I did my Camp Project. When you complete the goal in the allotted time, you get a neat little badge for your webpage and a printable certificate for the immediate boost of dopamine. But you will also get discounts to some neat shit, like different word processing applications (I got 50% off of Scrivener when I finished Camp), as well as things like The Great Courses, discounts in the swag store, etc. But more than that, there are partnering websites who want to help you on the road to being published. Wattpad is in this group, but I believe also big name publishers (I might have seen Penguin on there at one point) are willing to work with winners to get their works distributed.
All that said, I recommend every writer attempt Nano at least once in their writing career. Even if I personally have not done so stellar in the past, it is a fantastic learning experience for all of the work that goes into producing a novel from start to finish – it forces you to know your limits, and sometimes to overcome them. I don’t think I will be participating this year – I have so many side projects that I want to get done, but I will very likely drop everything to do it next year. I have two novels that are real roughly built up that I could do for this, though, and I would love the dedicated time to spend on them.
#asked and answered jim#red-write-district#writeblr#writing advice#nanowrimo#i'm actually really fond of every nano project i've ever done#even if i didn't finish any of them#i still go back and read them sometimes#and i still have a lot of like plot details in my head for them
13 notes
·
View notes
Note
hiiii i saved your "alone zone" post for reference, but also i was wondering if you could breakdown the setup? ive got an almost 2yo who's definitely starting to get feelings that are too big for him. he's a bit delayed in his speech right now, though, and obviously can't read, so i know ill have to make some adjustments
Okay, I spent a good chunk of the morning on this because I am very passionate about social-emotional learning at a young age, but I feel as though I need a disclaimer:
I am young, but I have been a teacher for nine years going on ten. I speak from my own personal experience. I am by no means the only source of information, but I do speak informatively and with research as well. I have worked with many types of kids from all walks of life and ability, and I do feel my information is accurate to my own experience. I am not, however, certified in special education and I am always learning. Take this as it is-my advice from experience, trial-and-error, and a passion to continue learning new things.
The most important thing I’ve found with an Alone Zone is to introduce it slowly, and by example. It’s going to take a little while to actually have the child be able to use the Alone Zone by themselves, but with practice and patience it can and will happen! I think too that a lot of observation is helpful-if you see things in the Alone Zone that your child isn’t using, or doesn’t gravitate to as much, I’d take them out and try a different tool. So a background: I’m in a classroom, I’ve been teaching for 9 years, and I’ve been observing and putting things in and taking them out depending on the group of children I have. The first year, we did not use the alone zone frequently. Last year, my Alone Zone was full almost all day. This year, I have one or two students that use it regularly, and some that use it as needed. Also, I’ve worked with twos and threes, and although I’ve been with threes for five or six years now, I did spend a good chunk of time with the twos. I also did have an inclusive classroom last year, where this Alone Zone actually ended up being one of my best tools.So, thanks for your patience with the rambling, here’s a break-down.
First off, I really recommend this be set up in a place where your child knows they won’t be disturbed-where they can go and have their moment of privacy. Of course, you’ll be there to help them learn how to use the area and all of its tools properly, and you’ll still have an eye on them, but it’s important that your child feels safe in this space, and that they know they can come to it and have a moment to sort things out for themselves. It’s also important to never use this area as a form of punishment or discipline. It’s important to frame your words so that they know that the space is a way of coping and not a way of “time out.” I always use the term “let’s take a break” when having children step away, and if I’m directing a child to the alone zone, I’ll tell them “we’re going to come here and let our bodies take a break. We can use these things to help ourselves calm down. When you’re ready to talk about it, I’ll be here.”
I also think it’s important to let the child come to you when they’re ready. There are very few times I have set a timer and gotten that specific-it’s a case-to-case scenario…sometimes a child will need a timer so that they’re able to give themselves time to calm their bodies, and other children will be intuitive and know how long they need. Sand timers are a good investment because then the child can see how long they have left, and it’s in a framework that makes sense to them. Digital timers are not recommended because the concept of numerical time is not developmentally appropriate for young children to understand, but a sand timer gives them something they can see. They also come in packs of one minute, three minute, and five minute intervals from what I’ve seen, so if you feel your child would benefit from having a set amount of time in the Alone Zone I’d recommend that!
Second, there’s the emotional learning: I like to use the characters from Inside Out to help my children discuss their feelings. They’re relatable, and they cover the base emotions. I use all except disgust, because I don’t feel that disgust has a place in this zone; but I do use Joy, Anger, Sadness, and Fear (which I typically label using the words nervous or upset, because I have had a lot of experience with children facing anxiety). I suggest finding an emotion chart to start the area off-this helps the child express themselves, and especially with a child who is speech delayed, these charts can help with self-expression and bridge that gap, because speech delays cause a lot of heartache in children who are just trying to express themselves, and feel frustrated when not understood. Here’s some I really like!https://www.totschooling.net/2017/03/emotions-printable-activity.html
https://childhood101.com/helping-children-manage-big-emotions-printable-emotions-cards/
https://innovativeresources.org/resources/card-sets/bears-cards/
(as your child is two, I recommend sorting through the cards and keeping the emotions as simple as possible-happy, sad, angry, upset- as the more complex, compound emotions will begin later on in their development.) This will also help your child learn and understand the language; they may not be able to communicate to you using words, but they will pick up on the vocabulary as they’re using something like a clothespin to pin their feeling, a finger to point, or Velcro to stick their feeling onto a board…this is so important to developmentally delayed child, as I’m sure you’ll see improvement as you’re giving them a way to communicate.
Third: Tools.
*Now, I’m a simple person. I really really love something like a sensory bottle. They’re super easy, and can be made at home and tailored to your child’s interests. Do they love dinosaurs? Stick in some teeny tiny dinosaurs in that bottle. Princesses? Princess confetti, crowns, etc. Tailor it to their interests and it’ll just help them gain more interest in using the tools! Here’s a good base recipe to get you started
http://www.acraftyliving.com/diy-baby-and-toddler-discovery-bottles/
I also recommend some stress toys, if you can in varying textures and density. Sometimes it’s just about a sensory craving; they need something for their sensory output, and squeezing a stress ball can help them get their negative energies out without hurting themselves or others. I keep Silly Putty on hand but not in the zone (because of the hazard) and that is one of the top things my students will ask for.
I also keep a set of yoga cards in there as well-my children love yoga, and we work daily on poses. There are a few of my students who choose to go into our Alone Zone when they’re feeling anxious and just do a little bit of yoga. I have a box of cards I bought as we got more into yoga, (https://www.amazon.com/Yoga-Littles-Lana-Katsaros/dp/1683642392) but these printable ones are awesome as well https://pinsviews.com/pin/492229434266737881
I keep a pair of headphones in my alone zone as well; last year, I had a student who faced a lot of social anxiety as well as transitional difficulties and difficulties with anger management. The tool he loved most was the headphones. He’d come to the alone zone angry or upset, ask for the headphones, and sit with his eyes closed listening to classical music or ocean sounds. This was his escape; upon observation I began to notice that this is where he felt safe; he’d often come to Alone Zone after an argument, or after a friend told him they didn’t want to play, and just sit with his thoughts.
I also recommend trying a weighted lap pad, depending on your child’s sensory needs. Some children do not like the added weight, and others crave it. There’s versions with sewing, but this is a no-sew, relatively easy option. https://diyprojects.com/weighted-blankets-diy/
One thing I added last year is just a pair of cut out handprints on the wall. This was a surprisingly largely used thing; I took a class in guided discipline, and discovered this tool from discussion with other teachers who had students with sensory integration difficulties. It’s simple; the pair of handprints on the wall is something you can direct your child to push, and push as hard as they can. This is something I use often with children who have a hard time keeping their hands to themselves-I direct them to the handprints (or, if we’re outside, to the fence) and instruct them to push the hands as hard as they can to “move the wall.” This works to help their sensory output in a way that is not hurting others, and they feel magical when you tell them that they’re working hard to push that wall.
On -the-go tip: Sensory bags.
Sensory bags can be a life saver. Especially because they’re so portable, and are so easily tailored to the child’s interest. I tend to take these out in moments of transition-when one child is done their snack and the rest are not-it’s a good tool to use when you need a few minutes, or your child seems like they might be teetering on the edge of a meltdown. Here’s a pretty good resource with some easy DIY ideas
https://www.growingajeweledrose.com/2012/07/fun-with-sensory-bags.html
One last tip: Daily routine cards
Because you mentioned that your child is non-verbal, I highly recommend a Daily Routine chart of some sort; either something you hang on your wall, or take with you (using Velcro and a small clipboard, a file folder, a Ziploc bag, a soft pencil case….) Last year, I used a daily routine chart with pictures to outline our whole day from start to finish; one of my boys with autism would go to the chart and take down whatever task we just accomplished, and look at the next. He was then able to anticipate what was to come, and accomplish the tasks knowing that he could remove them from the wall as the day went on. A longer, daily chart also helps children with anxiety to be able to see what’s to come, and help that ease-of-transition.
The benefit of a first, then chart is learning the sequence, and helping them to put a picture to a task instead of just a word. This is an opportunity too to practice speech with simple words!
Here’s some printable daily routine pictures
http://www.littlelifelonglearners.com/product/daily-routine-cards/
and here’s a chart I’ve used in the past, and the toddler teachers I work cooperatively with use currently with some of their verbally delayed students. A First, then chart teaches the child to anticipate what’s next, and often helps us to get through the daily routine. We often use it to say things like “Potty first, then you can play.” Or “snack first, then outside.” Communication with transitional words, and not as many words, helps tremendously.
https://i.pinimg.com/originals/99/00/f5/9900f508314bbeaef6ffb00bc57e0a49.png
http://theadventuresofroom83.blogspot.com/2013/11/integrating-pecs-outside-of-pecs-book.html
11 notes
·
View notes
Note
Hi! Do you have any must-haves for college? Like planning and stuff? thanks xx
Hey! Here are the things I’d recommend:
a backpack - the best solution for carrying around a lot of things! I tried going with a shoulder bag on my first day of university and it was the worst thing ever!!!! Never again will I do that to myself! Get yourself a sturdy backpack with strong straps! You, your back and your shoulders will thank me later! I use a 13″ laptop version Fjallraven Kanken, it is really awesome. Very practical, comfy and waterproof. My only dislike is how the zips go so far around the whole bag. I always get nervous that someone behind me will unzip it and steal my purse or whatever it sitting at the bottom.
a 4 ring binder (and plastic sleeves) - any brand will do really! I would recommend getting one per subjects since it saves running out of space if you try to fit things into one. It is also sometimes cheaper to purchase several at once! This stay at home though.
notebooks - I use a single Arc Notebook for all my subjects and love it. I find it easier to have a single notebook with dividers, rather than carrying several individual books. However, any notebook(s) would be fine. You can decide if you’d like spiral, A4 or A5, etc.
OR a tablet for digital notetaking - this depends on how you plan to do your notes but I’ve recently been using our family iPad Pro for university and absolutely love it. It is so convenient, easy to use, and fun! Writing with the pencil is so smooth. I can change colours, mistakes, placement so fast. I think it has helped me be much more productive than any other semester! Here are some digital things I have on my Etsy!
planner - this can be any you like or even digital version! I tend to go for smaller planner if I’m actually taking it to uni. Here is are some recommendations. Here is a review on the Mossery Co planner. Here is my 2017 bullet journal. Here is a detailed pros and cons list of a planner vs bullet journal. There is also my printable or digital 2018 student planner or 2018 weekly planner :-)
pens - I would recommend getting a pack with a selection of colours. I usually recommend the Staedtler 432 pens since they’re well priced, easily accessible, come in packs and don’t smudge. I don’t see the point in buying huuuuge packs with a million pens but 10 to 12 is more than enough. I really like the Zebra Sarasa though - they’re so nice but are gel pens! Other pens I like are the Pilot G2 and Juice, Staedtler Triplus Fineliners, Muji Gel Pens. Obviously, you don’t need a million different packs! To be super simple, I’d say the Zebra Sarasa are a great start. Here is a more detailed comparison though!
highlighters - I use the cool, warm and light packs of the Zebra Mildliners. I’ve used the Stabilo Swing Cool in the past and they were good! I think having a selection that matches your pens is so helpful when you’ve organised a colour code.
pencil case - I only take a few pens to uni so my pencil is only small. I don’t think it’s necessary to take a huge pencil case so just any will be okay! I have one from Muji and one from Emma Bridgewater. The Muji one irritates me though because when it’s not full, it makes so much noise..
etc - this goes for post-it notes, page flags, etc! I love to-do list pads and post-it notes to help keep me organised!
Additionally, here are a few printables that might help you get/stay organised:
2018 student planner - includes loads of student-related printables (study, finance, etc) and undated daily, weekly and monthly planners.
ultimate student organiser - 47 pages of printables to organise your upcoming semester! Covers things like your individual classes, reading schedule, essay planner, etc.
college packing list - not necessary if you’re still living at home, but if you’re moving into a dorm this might be beneficial for making sure you remember everything!
curve of forgetting planner - a simple way to mark off topics in each subject and make sure you’re revising them regularly.
grade and assessment planner - it is always important to track how your grades are doing and this is a quick way to do so. Also, should make find problem areas relatively simple!!
student financial planner - an easy way to monitor your spending, set a budget and reach savings goals!
student reading journal - great if you have a lot of required readings each week!
there are loads more though! I also have lots of things for GoodNotes is you do have an iPad.
Here are some additional links that could help:
advice for the first day
things (personal, academic, etc) to do every week
10 small ways to improve your productivity
10 small ways to improve your motivation to study
dealing with stress
how to improve your sleep schedule
how to improve group assessments/projects
dealing with competitive people
how I stay motivated
how to study during the semester
I hope this helps and good luck! xx
2K notes
·
View notes
Text
Time for another FAQ

In recent days/weeks I have been asked a lot of questions and many of them boil down to the same thing so I thought it would be a good idea to combine them to make a sort of FAQ. Some of my replies will most likely contain a bit of speculation (which I usually tend to avoid), I will try to keep it to a minimum.

What are your future plans for this blog?
Don’t worry, I will pretty much do the same as always. I will continue to spread the Kalafina love. Kalafina is a gift that keeps on giving. We have ten years worth of awesome music, gorgeous pictures and fascinating interviews. There is still a lot to discover for many people who only recently became fans. There’s also so much to re-discover for fans who have been part of the fandom from the get-go. Aside from the usual stuff, I will of course post about Wakana’s and Hikaru’s solo acitivities. I am eager to see what’s in store for them and I will 100% support them along their chosen paths. The same goes for Keiko (obviously!).
Finally, if there is certain content you are dying to see on my blog (any particular scans, translations, pictures, etc), I will do my very best to provide it.
Will I change my blog name?
No, this is and will always be a blog dedicated to “Everything Kalafina”.
Why do I continue to tag everything as Kalafina?
I guess this question mostly refers to Wakana’s and Hikaru’s solo stuff. While their solo activities might be unrelated to Kalafina I will most likely continue to tag those posts as Kalafina. First of all, in my eyes there will always be a connection to Kalafina when it comes to Wakana, Keiko and Hikaru. No matter what they do next, Kalafina took up more than ten years of their life so there is no way I cannot associate Kalafina with them. Also, so far it seems like they are not trying to cut ties with their past. Both Wakana and Hikaru are fully aware of their past and treasure their time as part of Kalafina, they have openly talked about this and neither Wakana nor Hikaru have shied away from performing Kalasongs. So yeah, using the Kalafina tag seems fitting to me. Plus, I think it’s easier for casual fans to find my posts because they are more likely to check out the Kalafina tag.
Thoughts on Wakana’s debut single being released under Victor Entertainment?
It’s no surprise actually, Back in 2017 Kalafina were moved from SME Records to SACRA MUSIC - a label specialising in anison music. Of course that wouldn’t be suitable for Wakana’s solo career especially since she is not doing anything anime-related as of right now. I am definitely glad she is not going back to SME Records since they have always been quite restrictive. I think Victor Entertainment was the next best choice. After all, Victor Entertainment (JVC Entertainment/Flying Dog = the anime division of Victor Entertainment) has been releasing Yuki Kajiura’s music for almost 20 years now. There are also lots of other noteworthy artists releasing under them directly (or one of their many record labels) so I think it’s a pretty good label for Wakana. I am kinda hoping she will go on a similar route as KOKIA who has been releasing her music under Victor Entertainment since 2001.
What activities can we expect from Wakana in the future?
I doubt she will do much for her solo debut single (but maybe there will be some fan club exclusive events). I think we can expect a tour following the release of her solo album this spring (and I will definitely do my best to attend one of those lives). I also hope she will do something for Christmas this year (a few acoustic lives for example - maybe she will be joined by an orchestra again?). And like I said before, I would really love her to take a similar route as KOKIA. Maybe she can travel to Europe and have a few concerts here? Maybe she can release a cover album? The possibilties are endless.
Thoughts on Wakana’s new blog being restricted to Harmony members?
I don't mind actually, I am a member after all and I will continue to be one as long as Wakana remains under Space Craft. Plus, from a business point of view, it’s a smart move so I understand why they are doing it. It’s their way of trying to bribe/draw in/win back members. Most Harmony members probably didn’t intend to renew their membership coming April but taking this and possible other exclusive content into account, they might rethink their decision. Whether this actually works remains to be seen. At any rate, I doubt her blog will permanently be member exclusive but we can probably expect it to stay like that until April at the very least.
Some fans fear that this will make it harder to promote Wakana as solo artist but quite frankly I don’t think it will make much of a difference. Wakana’s die-hard supporters among Kalafina fans will buy her releases either way and aside from that Wakana doesn’t really have much of a fanbase yet.
Thoughts on Kalafina’s fan club “Harmony” being turned into Wakana’s fan club?
It makes sense. Why waste effort and money to create something new if you already have an existing fan club? It has taken them some time but they have changed quite a bit already (the header doesn’t feature Kalafina anymore, all past videos related to Kalafina or Hikaru are gone, Wakana has her own blog and is no longer posting on Kalafina’s LINE blog etc). There is still a lot to be done though, they should change the name (Harmony just doesn’t fit) and remove the remaining Kalafina parts. Right now the look of the fan club suggests that Wakana is the “only remaining member” of Kalafina and that’s just not how it is. A change of name would maybe help get rid of that misconception.
When is Wakana going to leave Space Craft?
Who knows. Judging from what we have seen in the past year it’s obviously not that hard to leave Space Craft. Yes, she might just be waiting for her contract to expire but I really doubt her contract would expire that much later than Keiko’s or Hikaru’s. To sum it up, I believe she chooses to remain under the agency for the time-being, I very much doubt anyone or anything is forcing her to stay...She probably feels safest in a familiar environment and once she has tested out the waters she might move on.
What will happen to Kalafina’s Official LINE blog?
Hikaru has chosen the best route possible by starting her own twitter and I think it’s a good idea that Wakana now has her own “blog” as well, that line just had to be drawn and it would have felt weird for her to continue using the Kalafina blog all by herself. Plus, it might have forced them to delete all the Keiko and Hikaru content. As of right now the blog has pretty much lost its purpose and there is no reason to continue it. While I really hope they will not just delete it, I am not ruling out that possibility. At some point they might have no choice but to shut it down...In the past few months I have been preparing for the worst case. Aside from saving all the pictures to my hard-drive I have been working on a printable version of the blog that contains each and every single blog post by Wakana, Keiko and Hikaru (as soon as that’s done I will provide download links of course - still need to work on the formatting but everything is already copy/pasted). A fan on weibo has also compiled static html pages of each blog post so even if anyone decided to delete the LINE blog, we are safe. It would be a real shame to see almost 9 years worth of Kalafina blogging suddenly disappear.
Do you think “Kalafina” should be used to promote Wakana’s single in the media?
I can’t believe there are still people out there who think Wakana shouldn’t be allowed to use her “Kalafina fame” to promote her solo career. They are accusing her of riding the wave of success and not being able to stand on her own two feet. I am sorry for my language but that’s utter bullshit. No matter what happens in the future, Kalafina will always be a significant part of her life and that is not something she should hide or be ashamed of, quite the opposite actually, it is something she can be proud of.
Do you think we will hear anything from Keiko soon?
We don’t know why she went AWOL but I believe it was her choice and not some sort of work ban or whatever. We also know that she is doing well and for me that’s the only thing that counts. IF Keiko chooses to return to the public eye (which I really hope she does) then I think this spring or early summer would be a good time for her. It will be exactly one year since she disappeared and we all know that April is always the perfect time for a big change or a new start (at least in Japan). Let’s wait and see.
When can we expect any announcements from Hikaru?
Hmmm, I don’t know, I have a feeling it might be soon. Aside from posting cute selfies and food pictures Hikaru is often tweeting wordly wisdoms related to making decisions in life so I feel like like there is a lot going on behind the scenes right now. Her new profile pic and header might also be a sign for a big change. The picture looks like it was taken professionally, possibly for some sort of promotion? Maybe it’s just me but Hikaru’s photo reminds me a lot of Sayaka Yamamoto’s pictures promoting her upcoming solo career. I randomly came across her pictures the other day and I can’t help but feel like there is a similar vibe.
Hikaru also recently followed Koji Saito on twitter, he is the producer of Animelo Summer Live. While I wouldn’t say it’s out of the ordinary for Hikaru to follow him - after all Kalafina have worked together with him a couple of times in the past - I think it could be a sign of future collaborations. I could definitely see Hikaru taking part in an event like that to push her solo career. Oh well, we will see...
Will Wakana, Keiko and Hikaru ever work with Yuki Kajiura again?
It’s certainly possible but I don’t think it will happen any time soon (especially when it comes to Wakana and Hikaru). For the time-being it really seems like they want to focus on fulfilling their individual dreams and Yuki Kajiura obviously wishes for them to do their own thing. Many fans mainly see Kalafina as Yuki Kajiura’s project, a “tool” to bring her music to life and to a certain extent, that’s what they have always been. Yuki Kajiura is aware of that and Wakana, Keiko and Hikaru know it as well. It’s nothing bad per se, YK and the members of Kalafina have profited a lot from this arrangement, they have mutual respect for each other. But it’s about time Wakana, Keiko and Hikaru get a chance to freely express themselves in order to realise their full potential
This part of YK’s interview summarises the situation perfectly and it showcases how iimportant it is for everyone to go their separate ways for a while.
――After becoming independent from your agency, you have distanced yourself in your role as Kalafina’s producer. What do you think of your ten years working together?
[Kajiura]I feel nothing but gratitude towards them for continuing to sing so well for me up until now. Being stuck as part of the same unit, not being able to express a single wish (regarding songs), not able to do anything except sing the songs they are given with all their strength. Under conditions that are extremely inconvenient for a singer, they have been singing for ten years, not once getting the chance to sing the songs they wanted to sing. “They are so easy to work with…” “They are really amazing...” For ten years straight, they have always taken their work seriously and their singing has become progressively better. I am sure it was difficult for them to sing genres they had never listened to before. On top of that, I have treated the three of them mercilessly with all my demands; I think my demanding nature caused quite the internal struggle for them.
I hope I was able to answer most questions. If you feel like your question didn’t receive a reply, please don’t hesitate to send an ask/a message.
22 notes
·
View notes
Text
3D Printing Mega-Post (with links!)
Being a member of the maker community means I am surrounded by people who are totally in love with 3D printing. There’s no other group with whom I can have a 30 minute discussion about bed adhesion, lol. While the cosplay community is also generally supportive of the technique, every now and then I will come across somebody who thinks it is akin to cheating. Most recently it happened on a blog I really enjoy. When I read posts like that, I can only shake my head and assume that person must not really understand all the work that goes into 3D printing. Even in the best case scenario where you find a ready-to-print model and own a printer large enough to accommodate it, there is still tons of work that goes into taking a raw print from... well, a raw state to something beautiful. Hence I have decided to type up an overview of 3D printing; what it is, how it works, and all the steps it takes to create a cosplay prop. This is not a detailed tutorial; rather, it’s a high level scope of all the steps. Without further ado, here’s 3D Printing 101!
*12/20/17: Updated with new information on the latest printing technology plus even MORE links!
How does 3D printing work?
3D printing is an additive manufacturing process used to create three-dimensional objects; think of it as the opposite of sculpting where you start with a block of material and cut parts away (subtractive manufacturing). There are actually many types of 3D printing technology, but the most common for hobbyists by far is Fused Deposition Modeling—or FDM for short. In plain English, FDM means the printer head is essentially a hot glue gun that “draws” the cross-section of a model, building it up one thin layer at a time. After tens or hundreds of layers, ta-dah! You have a 3D object! You can check out this link for more info on other types of 3D printing.
The workflow for printing looks like this: find/make a 3D model, optimize that model for printing, convert it to G-code with a slicer, and send it to the printer. Once printing is complete, you need to assemble any separate parts, fill major gaps, fill/prime/sand the surface, and then paint. If any of those terms are confusing, don’t worry! I will explain them all.
Finding, Modifying, or Making a Model
Sourcing models is one of the topics where I see, “Cheater!” start to sneak in. There is a misconception that you can find just about any model you want, download, and hit print. This can be true depending on what you’re trying to build; popular cosplays like Iron Man, Halo, and Star Wars do have a plethora of models available for free, and many are already optimized for printing. Once you get outside well known characters, however, it gets much more challenging. If someone has 3D printed components in their cosplay, it’s never safe to assume the person just downloaded them.
Downloading Models
It’s always worth hunting around for the files you need even if the character isn’t well known. Even if you want to build everything from scratch, it is nice to see how someone else tackled the same challenge. There are a couple websites I like for searching for printable models:
Thingiverse: Run by Makerbot, Thingiverse is a huge collection of models designed specifically for 3D printing and all of them are free! This is where I always start my search for 3D printing files. Most come with some degree of instruction and suggested optimal print settings.
GrabCAD: I don’t use this site as frequently for costuming since the focus is engineering, but it’s very possible to find some cosplay goodies there. Other than scaling, most models should be ready to print.
SketchFab: While this was originally a place to share 3D models, some users also make theirs available. If you need a file for printing, be sure to search through the Downloadable section. (and even if you can't download the file, a 3D reference beats 2D refs any day!)
When selecting a model, try to find something that specifies it was made for 3D printing. Otherwise, you may need to do some manual cleanup and that can be challenging. Just FYI, game models are never ready to be printed but if you want to start with them, Source Film Maker has hundreds to select from. it’s also worth Googling to see if anyone has offered ripped models for free, but be aware that these should NOT be used for profit. Steriolythography (or .STL for short) and Wavefront (.OBJ) are the two most common file types, but get an STL if you can. OBJs will often come with texture files (.mtl), but those are not needed for printing. Aim for highest resolution you can find unless you want the low-poly look. Trust me, you don’t want to be filling in faceted planes with heaps of Bondo later.
There are a few products and processes that allow for multi color printing, but for the most part FDM machines are limited to one or two colors. If you are bound and determined to have multiple hues, you can check out Prusa’s new Multi-material upgrade, the new Da Vinci Color, or the Palatte Filament Splicer. I suspect that multi color printing is going to be one of the next major features to hit hobby printers, but for the time being most methods are either rudimentary or really expensive. It can also be fun to print with multiple materials such as combining rigid and flexible pieces, but that is best reserved for a dual extruding printer. When it comes to cosplay, I would either suggest printing in the object’s final color or preparing to paint. Even if you choose to paint, try and pick a filament color that will make sense if it is revealed through wear and tear.
Modifying Models
If something wasn’t specifically made for FDM, how do you know if it’s printable? Most commercial 3D modeling or CAD software have tools to check and correct issues with models—sometimes automatically. Unfortunately the easy-to-use, open source options in this area are a little barren but there are still ways to do it. Here are some free options for both checking and repairing mesh issues:
MakePrintable is an online paid service, but it will let you repair a set number of models per month for free. In my experience, this is best for basic issues but it couldn’t get any easier.
Microsoft STL Repair: Similar to MakePrintable, but unlimited and free. The downside is that you have zero control in the process, and files need to be opened with Microsoft’s free 3D Builder (from there you can export as an STL).
MeshMixer: An Autodesk product that has a number of capabilities for manipulating meshes. It’s more complex than MakePrintable and Microsoft 3D printing, but you have way more options.
Meshlab: Ah, Meshlab. This program has been around for a long time, and in many ways it is incredibly capable. Unfortunately, it’s also somewhat unstable and has bad documentation, so tutorials are hard to find.
Blender: A popular open source 3D modeling program, Blender also has a 3D printing add-on with some mesh analysis tools. This is the most robust option I have tried, but Blender has a steep learning curve and it can be intimidating for newbies.
Making Models
There is a good chance that you won’t be able to find ready-to-print files, so you might need to heavily mod or even make your own from scratch. Unfortunately, you will need to jump into 3D modeling software to make this happen. There are two major categories of software types: engineering (computer assisted drafting, or CAD for short) and artistic. In a nutshell, CAD is usually meant for objects (cars, wrenches, buildings, etc) and offers tight control over dimensions, surfaces, and shapes. Artistic software can be used for just about anything from trees to characters to spaceships, but it can be more challenging to make precise mechanical objects. I use both depending on what I need to create. There are actually a ton of free 3D modeling tools, so I will list the ones I have experience with and can recommend.
TinkerCAD: This is probably one of the most popular free CAD programs, and for good reason. It’s browser-based and very intuitive to use, thus it has become popular in schools. The entire thing revolves around building objects out of primitives, so if you need something complex it might take a little creativity to get there. TinkerCAD also has its own library of downloadable objects and it can export items for 3D printing (or even send them to a printing service!).
Google Sketchup: Available in both free and paid versions, SketchUp is a lot more complex than TinkerCAD but still very approachable. For some reason, it would drive my professors nuts when anyone used this software for homework. Be sure to check out the hefty list of extensions as they can significantly increase the program’s capabilities.
Autodesk Fusion 360: I will admit that I haven’t used this one very much, but it has been getting very popular very quickly. Fusion 360 is a fully-featured, professional CAD program meant for industry use, but it is available for free to students, startups, and hobbyists. If you want to grab the bull by the horns and work with maximum potential, get this software. It can be intimidating for someone who has never set foot in CAD before, but it is one of the most approachable fully featured CAD suites I have ever seen.
Sculptris: And now for something completely different! Sculptris is the baby brother of Z-brush, an industry standard software for digital sculpting. It’s actually very capable, and if you need to model something organic or CAD just isn’t making sense, give Sculptris a whirl.
MeshMixer: MeshMixer’s site calls itself, “a Swiss Army Knife for 3D meshes,” and that’s pretty accurate. It has some CAD capabilities mixed in with artistic tools and a few unique things to boot. It’s reasonably easy to use, although there could be more tutorial support in my opinion.
Blender: Ah, good ole’ Blender. Completely free now and forever (unlike many Autodesk programs), it’s the most capable and robust open source software I have ever used. Blender is definitely on the artistic side although it has add-ons that make CAD a little less painful. The major downside is the interface; simply put, Blender is incredibly unintuitive. Thankfully, Youtube has tons of high quality tutorials to get you started.
Slicing
Once you finally have a printable model in your possession, it’s time to send it to a 3D printer. If you are using a 3D printing service, congratulations! You can send them your model and call it a day. The rest of us will need to use a Slicer. Remember how the printer moves a hot glue gun around to draw a shape? Well, the computer needs to tell the printer head where to move, how fast to move there, and when to start and stop drawing. It uses a language called G-code to do this. A slicer’s job is to convert a 3D model into G-code so the printer knows what to do.
I use a free slicer called Cura from Ultimaker, but Slic3r and Repetier Host are popular options too (although more advanced). If you want ultimate control, cutting edge features, and don’t mind paying for it, Simplify 3D is considered the best slicer on the market. Cura is my slicer of choice due to its friendly interface. In the photo above, you can see how it has made layers out of a model (hence the name “slicer”).
The first thing to do will be properly scaling your print. Cura assumes your units are millimeters by default, so you may need to convert to your original modeling unit (inches, my my case). Unless you are printing a small prop or have a very large printer, your parts will probably be too big to fit on the print bed. If this is the case, return to your modeling software and split into smaller pieces.
When it comes to 3d printers, you get what you pay for. The more expensive models ($1500+) offer the closest thing you can get to plug-and-play experience, but even they will have failed prints, clogged extruders, and other common issues every now and then. The rest will need some degree of hand-holding. It took me about a week to get my $200 Monoprice Select Mini printing to the best of its ability, and that involved a lot of fiddling in Cura and 18 test prints. Spend some time optimizing your software for the fastest, highest quality prints; you’ll be grateful you did once you get to the sanding phase.
Update: After 10 months of regular, reliable performance, the board on my Monoprice Mini has died. At $160, I definitely got my money’s worth and other users have had theirs much longer. I am upgrading to a Prusa i3 MK3 kit, but I would still recommend the Select Mini v2 as a good gateway machine.
Printing
With your slicer ready to export G-Code, now is the time to set up your printer! A 3D printer’s “ink” is spools of plastic string called filament. There is a variety of plastics to choose from, but Polylactic Acid (PLA) and Acrylonitrile Butadiene Styrene (ABS) are the most common. PLA is cheap, readily available in many colors, and is made from plant starch. For most people, it’s the go-to choice but it is not the strongest material. ABS can provide better structural integrity, but it’s a little more finicky to print and the fumes are noxious and require ventilation. This link has a good summary on various types of filament on the market.
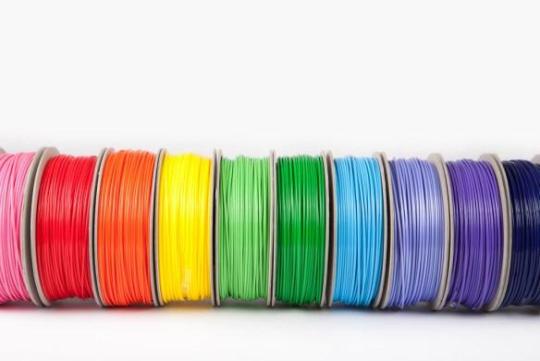
If you search Amazon or Google for 3D printing filament, you will get approximately 82376483456978938 results. Be sure that you are searching for the proper diameter filament; most printers are 1.75mm, but some are 2.85-3.0mm. Reliable brands of PLA that I have worked with are Hatchbox, Matterhackers, ProtoPasta, and ColorFabb. Be wary of no-name brands off places like Ebay or Amazon; not all filaments are created equally and I have definitely wasted money trying to be thrifty on Amazon.
With your filament loaded in the printer, it can be a good idea to extrude some and make sure everything is working properly. Next, verify you set the proper export settings in the slicing software. Different plastics need different speeds and temperatures, and often the packaging will give you a good suggestion. When all is ready, slice the model and send the G-code to your printer!
I always stick around to watch the first few layers of my print because most mistakes happen at that point. Bed adhesion in particular can be troublesome. My solution of choice for PLA is a layer of blue painter’s tape with a light misting of hair spray. Others have used glue sticks, but that didn’t work well for me. If you notice any problems, pause immediately and try to fix the issue. A small clog can turn into a major problem if plastic goops all over your extruder.
When the print is done, it can be tempting to pull the model off the bed but have a little patience! The plastic can warp while it is still warm, plus your printer will still be hot. Let it cool down slightly, then pop it off the bed.
Surfacing
Now comes the tedious part! First of all, remove any supports (or if you have a dual extruding printer, dissolve support filament) with pliers. Depending on the support type, a box knife or X-acto can be handy. I have also heard that deburring tools are handy for this. Next, assemble separate parts with glue. CA or epoxy are good choices, or you can get fancy with friction welding. If you printed with ABS, acetone can help glue pieces together and even smooth your model.
Next you will need to fill any major gaps such as those found along seams or where errors may have occurred in the print. Bondo Glazing and Spot Putty is a popular option for large holes and epoxy can be used as well. You can also use wood filler although I would reserve this for parts that will not be subject to a lot of handing or strain as it can be a little brittle.
Now you have to do something about all those layers.
Your options are sanding, smoothing, or a combination of the two. In the past I have wet sanded the plastic starting from 120, 220, and 400 grit wetdry sand paper. The “wet dry” part is important because PLA will heat quickly from friction and then you have to wait for it to cool again. If I wanted the plastic to show, then I would take it to 1000 grit or even a bit higher. 220 is the minimum for a matte appearance and slightly rough feel whereas 1000 starts to approach injection molded plastic. Bear in mind that dark filaments will show scratches and need sanding at finer grits to look clean. If you intend to paint, 400 grit paper is high enough. Then you will need to spray your model with primer. Allow to thoroughly dry (no longer cold to the touch) and sand with 600 or 800 grit paper. Reapply primer and continue sanding until you are satisfied with the surface. I have found 3 or 4 coats to be sufficient. Paint will hide very few defects, so you can’t take shortcuts with this step.
You can circumvent some obnoxious sanding by filling the layers first. Automotive filler primer works wonderfully although the fumes are terrible and it will need be to used in a well-ventilated area. Filler primer is much thicker than normal primer and with enough coats, it will fill in all those grooves. I found that 3-4 light coats built up a good base to start sanding, and then another 3 coats with sanding between each application gave an excellent finish. This might sound tedious (and it is, to be honest) but the primer sands much easier than PLA. I was satisfied with the finish 220 grit sandpaper provided.
I have heard that CA glue is also good for filling grooves, and Smooth-On makes a self-leveling product called XTC-3D that you paint over your model. I haven’t tried either of these, but they get good feedback from others. Finally, if you have printed in ABS you can try vapor smoothing your part; just be careful playing with acetone, and don’t do it too long or you’ll melt your piece.
Now with all that said, my experience with finishing 3D prints was with the intention of creating a production-quality model (aka something that looked like you bought brand new it from the store). Every print needed to be practically flawless when viewed at close range. For cosplay, this is unnecessary. Nobody is going to hyper-analyse your work from inches away; rather, you can rely on the 10 foot rule. Also, weathering will hide many defects
Focus your efforts on pieces that will show the most. For Soldier 76, this means I will be spending many hours making his mask smooth and pristine, but I’m not even going to paint the brackets on his boots.
Painting
Now you are on to the last step! Unless you wish to control texture through brush strokes, I always recommend spray painting or airbrushing. Rattle cans are available in a myriad of colors these days, but if you have an airbrush they are handy for detailed work. I had a professor who wouldn’t let a can of Rustoleum in his classroom and demanded we use Krylon, so I guess you should also use Krylon? The artists I know who use spray paint swear by the Montana brand, and they have a huge range of colors to select from.
Anyway, all your spray painting should be done outside or in an area with plenty of ventilation. I always wear a dust mask--not because I’m worried about paint fumes (dust masks don’t stop fumes anyway)--but because I don’t want to breath in teeny paint particles. Even if paint is non-toxic, it doesn’t belong in your lungs. I also like to tape down a huge backdrop so I don’t get any over-spray surprises. Your coats of paint should be incredibly light, almost like dusting the model with pigment. It will take many coats, but the slow buildup guarantees even application. I promise the effort is worth it, plus thin coats of paint dry quickly anyway.
Sealing
Last step! I have always used rattle can clear coats to seal my models. This step should not be skipped because your paint job can be marred very easily, but the sealer will help protect it. Always, always, always use the same brand of sealant as your paint or test on scraps first. I cannot reiterate this enough; not all products will get along together, and nothing ruins your week (or month) quite like destroying a detailed paint job. If your model will be going through a lot of wear and tear, you may consider coating it in clear resin for durability.
Conclusion
So as you can see, there is a LOT more work to 3D printing besides downloading and hitting print. I didn’t even go into detail and the post is huge. Any of these topics will have more information if you search on Youtube or Google, plus my Ask is always open. I hope this helps somebody!
69 notes
·
View notes
Text
What to do in the Quarantine: An internet guide for your mind, body, and soul

As we move into what seems to be a longer-term period of social distancing and quarantine, I thought it would be helpful to share a few things to help you stay mentally active during this season.
First, a reminder of why we are doing this: We are social distancing not as a protection for us as individuals, but more as a protection for the larger community as a whole. The goal of Christians is not self-preservation, but for the well-being of all people. With that in mind, we can see that social distancing, which helps to flatten the curve, is the most Christ-like thing that we can do in this time.
I want to remind you, though, that distancing physically does not mean distancing emotionally and relationally. We still can care for one another, and we are perhaps given even more time in this situation to do so.
There is a point in the book of Jeremiah in the bible where God is talking to the people who are in exile. They had been pulled out of their homes in Jerusalem and taken to live in Babylon. They prayed to God to be set free, and God responded in one of the most famous verses in the bible: “I know the plans I have for you. Plans to prosper you and not to harm you - to give you a hope and a future.” You have likely heard that one before. It’s really encouraging. But God then goes on in the next verse to say part of that plan is that the people are going to be stuck in exile for another 70 years. So settle in. Build houses and get married, work to the blessing of those around you, because the plan involves this time of exile.
What was seen as a curse to the people of God had been reframed by God as a blessing - take this time and bear fruit. Things will go back to normal, but not for a while.
I’m not trying to say that this “exile” is going to last 70 years, but some reasonable predictions are saying we are 18 months away from a vaccine (at least) and without a vaccine, we are sill susceptible to this virus. So life is going to be different for a while. For some, it really is a major hardship and it is one the church and our society as a whole to care for the most vulnerable among us in this season). For many of us, though, this is an opportunity for time and presence that we don’t usually have. We can see that as a curse or a gift. We can lament the loss of what we had, or we can find new opportunities in what we have been given.
But know that throughout all of this - God is still there, empowering the helpers, working in each of us to do whatever we can to bring life to the world.
Now onto the resources:
Here is a list of several simple things that you can do for self-care:
Get dressed - it may be nice to stay in your “house pajamas” for a bit, but it’ll be more draining on you over time
Go outside - Self Distancing is not house arrest. Go for hikes, play in your yard, garden. Enjoy the weather (when it’s worth enjoying). We shouldn’t get within 6 feet of others, and should avoid places where there is a lot of contact like playgrounds, but hikes, bike rides, and other outdoor activities with out family.
Have a Plan - We are going to be settled into this for a while, so plan out your day and your week in a way that feels productive. This isn’t vacation, and treating it like vacation isn’t going to be helpful in the long run. We will appreciate the extra time more when we have a plan for getting the things done that need done first.
Be intentional - find things you’ve wanted to do, but perhaps didn’t have time to before now, and select certain things to do. This isn’t an opportunity to do everything you’ve been putting off, but it’s a good time to take on one or two things. Also be intentional about how much of everything that you do - especially things like social media. It can feel like you are staying informed, but it can quickly overwhelm you in ways that aren’t always helpful.
Connect with friends and family - We have time to be together. Even if you don’t live with family, we have time now to connect. Especially if you live alone, make sure that you are reaching out to friends and family, both to get some help and to receive help. Reach out to neighbors and friends who may be alone to be sure that they have what they need.
This video below tells us a bit about best ways to protect ourselves against the virus - namely, washing your hands:
youtube
Next, a very thorough Q&A about what we know about the virus so far as of 3/18/2020. This video is incredibly helpful as a doctor answers questions about the virus and the situation we are dealing with. It’s over 30 minutes long, so maybe come back to this one later (but you really should watch it to get a better sense of what we are actually dealing with:
youtube
Tons of ways to keep your mind, spirit, and soul active!
Now that we are rounding out our first week of social distancing/quarantining, I thought it might be helpful to share with you some resources on that I’ve found helpful to keep young minds (and even older minds) active.

Learning Stuff
CrashCourse – this is a tremendous site for probably middle school on up (it’s content appropriate for all, just academically probably for 12 & up). It provides super engaging rapid fire lessons on History, Science, Math, and dozens of other topics, with each video about ten minutes long. A great way to keep your mind engaged and excited while indoors. https://www.youtube.com/crashcourse
CrashCourse Kids – remember how I said that Crash Course is academically for probably 12 and up? Well they made a version that’s on par for probably ages 7-12.
https://www.youtube.com/crashcoursekids
PBS Kids – If you have kids between ages 3 and 12 and you haven’t gone to PBSKids.org yet, you’re in for a treat. Great programming, and a really great website with lots of good games and printable activities. And all the shows are educational, so it’s a pretty guilt free parenting spot. I highly recommend the show Odd Squad, which is a hilarious show that’s secretly about math.
https://pbskids.org/
ABC Mouse – ABCmouse.com is a great site for preschoolers that teaches them lessons like they are in a classroom, but does so with a really engaging interface that is super fun. It started as a program that helped prepare kids for school, but they have expanded it for grades up 5th grade, which each grade getting a specific track that is grade appropriate. They have a month free right now, or if the code below still works, they were offering free access during the duration of this self-distancing time.
https://dealsea.com/view-deal/1567224
How to Dad – These videos are just funny. An New Zealander dad makes funny videos about how to take care of his baby daughter. Not really educational, but very funny and creative (two things that a valuable commodities right now).
https://www.youtube.com/playlist?list=PL_txf_nR4fNOHJoWAVpHSqpDvkuecwpxw
Vihart maths – fun with math & doodles. And math.
https://www.youtube.com/channel/UCOGeU-1Fig3rrDjhm9Zs_wg
Mister Chris – This is a show for younger kids from Vermont public television that is essentially Mister Rogers set in Vermont. It’s really delightful and moves at a Mister Rogers-like pace even though it was made in the last few years (which is incredibly refreshing).
https://www.youtube.com/channel/UCpKdaJ7UgatnRUG6JHTS-fA
Soul Pancake – SoulPancake is described as a channel that “tackles the universality of the human experience. We are the dreamers, misfits, artists, activists, and innovators who have the power to positively change the world. Our content opens minds and hearts by joyfully exploring and celebrating the many ways in which we seek connection, love, hope, truth and purpose. We believe all questions are worth asking, and all human lives are worth exploring. Simply put, we create stuff that matters - because you matter.” It was co-founded by Rainn Wilson (Dwight from “The Office”) and it’s really great. It offers several series of videos (one, “Kid President,” is great for kids of all ages) and just general videos that are engaging and thought provoking
https://www.youtube.com/channel/UCaDVcGDMkvcRb4qGARkWlyg

Science
Health Care Triage – a very helpful and creative channel that helps to explain the often difficult to understand world of Health Care. It’s particularly helpful right now in the midst of trying to understand COVID-19. From the makers of CrashCourse! The big Q&A video above is from here.
https://www.youtube.com/channel/UCabaQPYxxKepWUsEVQMT4Kw
SciShow – the makers of CrashCourse made a show that’s just about science!
https://www.youtube.com/user/scishow
SciShow Kids – the makers of SciShow made a show that’s just about science – for kids!
https://www.youtube.com/user/scishowkids
Mr. Wizard – This channel is made up of clips of the fantastic kids’ science show from the 1980s, Mr. Wizard’s World. Think Bill Nye the Science Guy, but hosted by a slightly grumpy Canadian septigenarian. The experiments are still really cool, and it’s surprisingly engaging watching these Canadian kids do science with this grumpy teacher helping them.
https://www.youtube.com/channel/UCx_J_aSKyWaNcEjK-eS4Jxg
Smarter Every Day – Destin Sandlin is an engineer from Alabama who is also a dad, and is just curious about how the world works. So he uses science to figure it out, and makes really engaging videos that take us along for the ride.
https://www.youtube.com/user/destinws2
NASA – The official NASA YouTube. NASA puts up really awesome videos which are a wonderful thing to get lost in. They do a great job of education, and this channel shows that.
https://www.youtube.com/channel/UCLA_DiR1FfKNvjuUpBHmylQ
Videos From Space – Another fantastic site with videos from space, largely from the International Space Station. I particularly recommend the videos from Commander Chris Hatfield, which was in the Space Station for over a year and made some great videos that show simple science experiments in space (like how you sleep in zero gravity, weather you can cry in space, and more fun stuff).
https://www.youtube.com/user/VideoFromSpace
Pittsburgh Zoo – many zoos are doing lots of live streaming and educational videos to get to see the animals and learn more about the life of caring for animals. Our local zoo is pretty good, but there are loads of other great ones out there, too.
https://www.pittsburghzoo.org/bringing-the-zoo-to-you/

Bible Stuff
Bible Project – Probably the most helpful bible resource that I’ve found online. Really great, well presented and scholarly videos that are super accessible and engaging. Loads of videos that walk you through each book of the bible, helping you to know the larger story of the bible. If you have long wanted to read through the bible and see this time as a great time to get started, this is the resource I would say you should use.
https://www.youtube.com/user/jointhebibleproject
BioLogos – a great site that talks about the beautiful connections between faith and science, and how wonderfully those two things are symbiotic. Good for a deep dive.
https://www.youtube.com/watch?v=fxQpFosrTUk
Bible for Normal People – Resources for reading and understanding the bible while breaking down some of the misconceptions and problematic interpretations of the bible that we have inherited over the generations.
https://www.youtube.com/channel/UCrLeEfeGaJakbVMj8e6NKWQ
What’s in the Bible? – From the makers of Veggie Tales, this is a pretty great series that uses puppets to walk kids through the stories of the bible, and actually takes it pretty seriously (even though it’s still really goofy and funny). A great resource for teaching kids about the story of the bible.
https://www.youtube.com/channel/UCiFIuW5SWY2HwVi878DVdug
Bible App for Kids – This is hands down the best bible app for young kids that I have seen. It’s probably best for ages 3-6, and it presents bible stories in an interactive storybook way, helping kids to know the larger story of the bible. Free app for phones and tablets.
https://bibleappforkids.com/
Guardians of Ancora – I just got this one, so I haven’t played through it all the way, but it seems like a pretty fun app that would be good for upper elementary ages to walk through the story of the bible. Free app for phones and tablets.
https://guardiansofancora.com/
LifeKids – This is the children’s ministry from LifeChurch (which is not really a church that I’d recommend fully), but their kids’ stuff is pretty great, and really fun. If you were looking for at home “Sunday school” this is a good place to go.
https://www.youtube.com/user/LCLifeKids

Staying active
Go Noodle – this is a site that is just filled with short videos to get kids moving. A lot of elementary schools use them, so your kids may already be aware of them. Great for getting little ones to move around and burn some energy (and for adults to get up and move, too).
https://www.gonoodle.com/
Cosmic Kids Yoga – This is a channel where a yoga instructor from Australia walks kids (and adults) through yoga exercises while telling a story. A great way to “trick” kids into doing yoga, and a great way to calm down at the end of the day.
https://www.youtube.com/user/CosmicKidsYoga
Yoga with Adriene – This is a great yoga channel that is more targeted toward adults (though kids could do it, too). Like taking a free yoga class. She’s really engaging and a great instructor. And she has a dog, which makes regular cameos.
https://yogawithadriene.com/

Creativity
Flippy Cat – This is a fantastic channel that is just incredible dominoes displays being set up and then knocked down. A beautiful example of creativity, and it could (as it did in our house) get kids on a domino kick, which is a great creative outlet when stuck indoors.
https://www.youtube.com/channel/UCuO06egvl5yE__rR_02WUZw
Hevesh 5 – Another great dominoes channel, this one with Hevesh5 who is an awesome host. Her builds are inventive and really inspiring.
https://www.youtube.com/channel/UCxJsQFhb8PFjtuN5gdOV6-w
PBS Ideas Channel – This is an all around engaging channel about ideas, with random topics on the history of pizza, why cocktail glasses are different, and the similarities between Santa Claus and pro wrestling. Put on by PBS, so it has some rigor to it, but largely a collection of random thoughts considered seriously. It’s a fun rabbit hole that will make you think and perhaps learn a thing or two.
https://www.youtube.com/channel/UC3LqW4ijMoENQ2Wv17ZrFJA
Lunch Doodles with Mo – This is one of the best things to come out of this whole situation. Children’s author Mo Willems has started regular live streams where he teaches you how to make doodles of his characters from his books (Piggy & Elephant, Pigeon, and more). Even if you aren’t familiar with the books, it’s a fun engaging way to watch someone create something in real time, and it’s even fun to join in and draw along.
https://www.kennedy-center.org/education/mo-willems/
Hopefully those are relatively helpful.
Let me know other ways to stay engaged with the world, and to keep our minds and spirits active during this season.
See the change in this season to be a source of love and joy.
Help one another. Learn, live, grow.
And wash your hands.
0 notes
Text
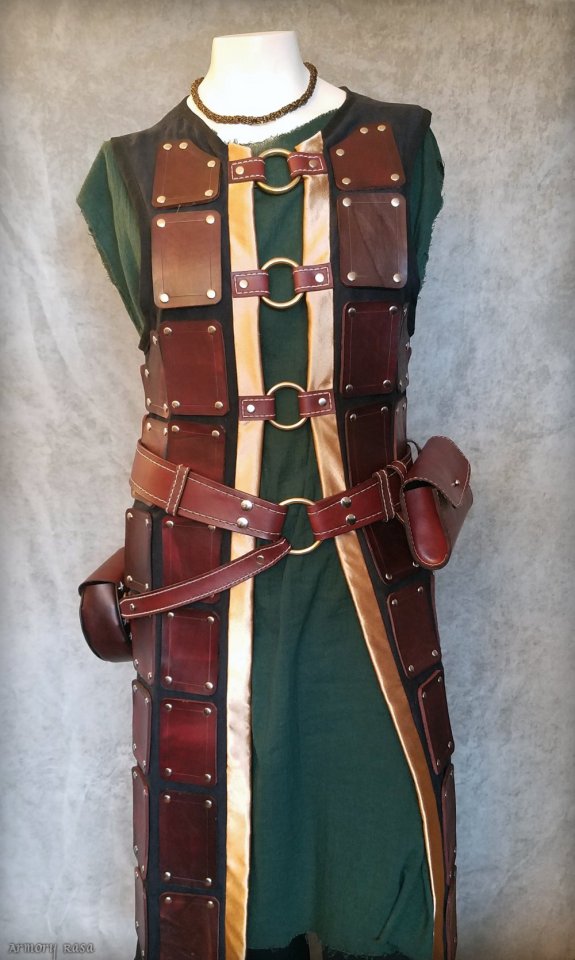
Leatherworking with gremble: the Anders brigandine
Alright, Anders fans -- let's talk brigandine.
PART I: SEWING
So most of the other Anders cosplays I've seen have done a quilted effect for his coat, which can also come out looking quite nice, but when I look at his outfit, I see brigandine. Brigandine is an armoring technique in the subset called "coat of plates" because it consists of small plates -- metal or heavy leather -- riveted to a garment of leather or heavy fabric. Since that's more in line with my skillset anyway, and considering that I've been hoarding scrap leather like some scrap-leather-hoarding dragon for just such an occasion, brigandine it was.
If Anders' coat is indeed meant to be brigandine, then it wasn't rendered right because it doesn't have enough rivets -- each rectangular plate needs 4 rivets (one in each corner) to attach it to the coat.
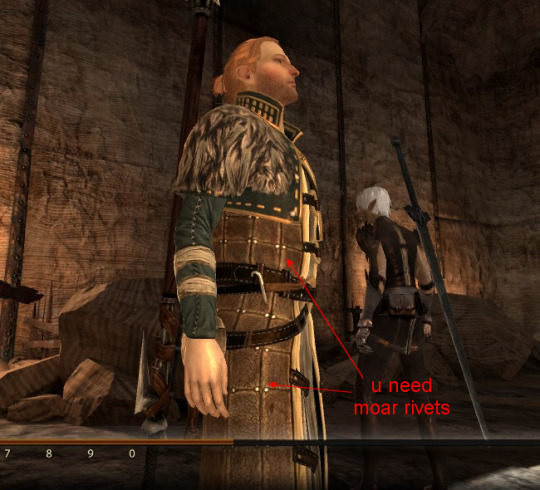
It distresses me when I can't be screen-accurate, and distresses me even more when I can't be accurate because their costume doesn't actually make sense, but such is life.
**
So the first step is to make the coat that will form the backing onto which you rivet your plates. It's pretty basic; I took the pattern from a coat I'd done for an unfinished Thrall cosplay, which I believe had itself been adapted from an inquisitor coat. Original:
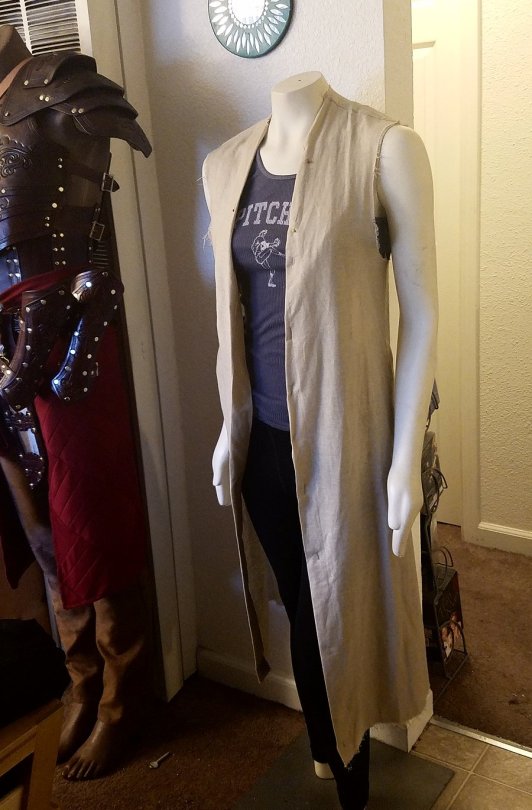
Pattern laid out:
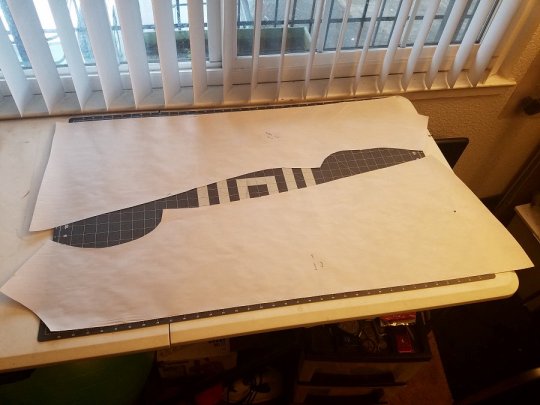
Sorry I can't give you something printable, but it's just too big for that. =/ (Not to mention that you'll be adjusting it to fit you anyway.) You shouldn't have too much trouble drafting your own though, and it is a very forgiving pattern.
The piece in the foreground is the front, and the further-away piece is the back. The front looks considerably bigger, but only because I fold the center edges over like three times. Remember that the edges are not actually supposed to meet in the front -- he's got that line of O-rings over his chest, so you're going to be leaving like 3"~4" of space down the center. I think I might also have wound up dropping the neckline a bit, I'm not sure.
It's also worth noting that the hem on this pattern makes a pretty dramatic dip in the front -- rather than being the same length all around, it's shorter in the back and comes to a point in the front. This is not accurate to what Anders wears in-game, his coat is indeed all squared off, but guess what looks better? And guess what gremble cares about more?
Anyway, cut out your fabric:

I used a black microsuede, because I bought a metric fuckton of microsuede when Hancock was going out of business and it was cheaper than dirt, and now I have microsuede for days (weeks. years) and I use it for anything I can. However, you can use any material that is (A) sturdy and (B) fray-resistant. You're going to be putting rivets through it later, so tight, sturdy weaves are your friend.
And even if you can put the back pieces on a fold, cut 'em apart anyway, because we want to put a vent in the back:
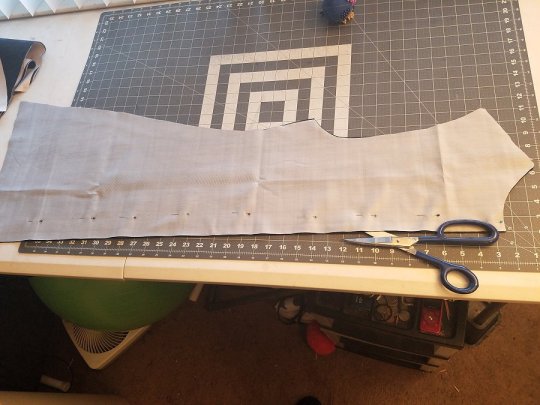
Sew the seam down the center back, stopping about 12~14" from the bottom, and crossing over that point a couple times with like your buttonhole function to make the endpoint strong. Seriously, that point is going to have a lot of stress put on it later, you want it to hold.
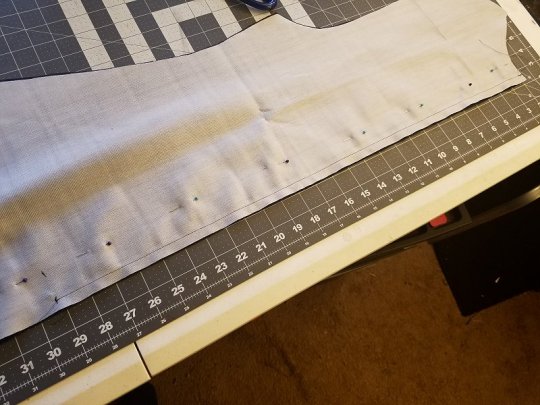
Fold your seams over:
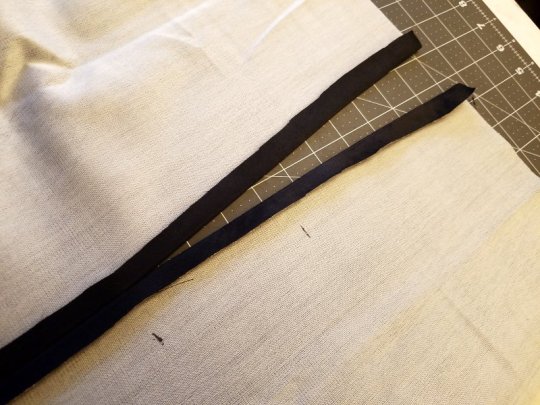
Stitch your seams down:
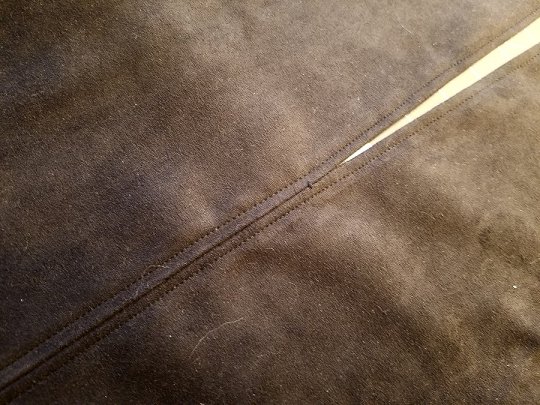
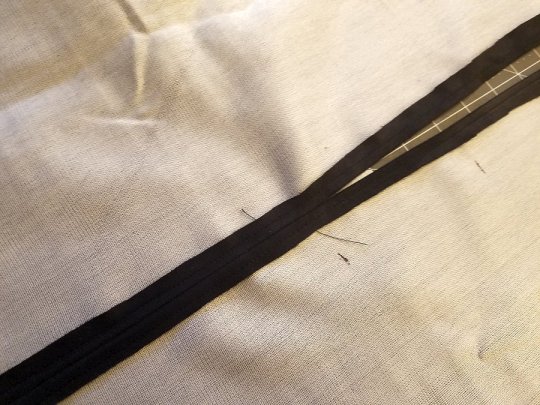
And yeah, there's where you can tell that I'm not actually all that good at sewing. Parallel, what is parallel?
Anyway, keep going and attach the front pieces to the back pieces along the sides. I can't remember if I did the same seam as above, or if I did flat felled seams for these. It doesn't really matter, either way:
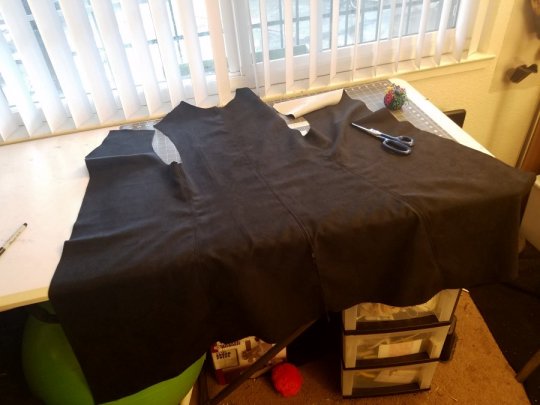
But considering that I then felt the need to document how to make flat felled seams on the shoulders:
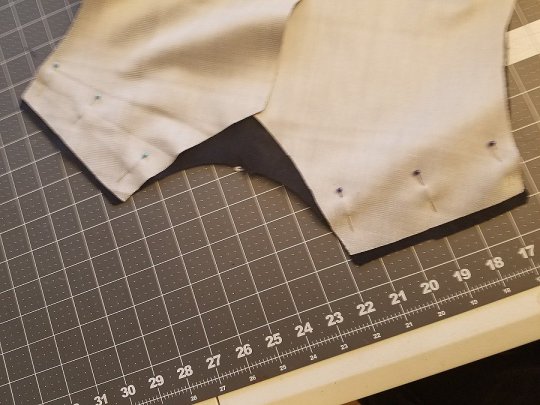
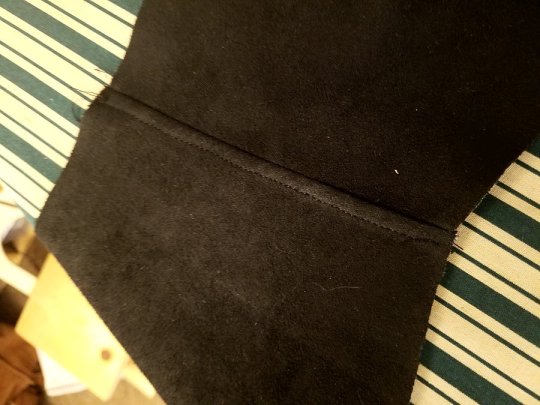

So now you get to try on the coat and make sure that it's not completely off base:
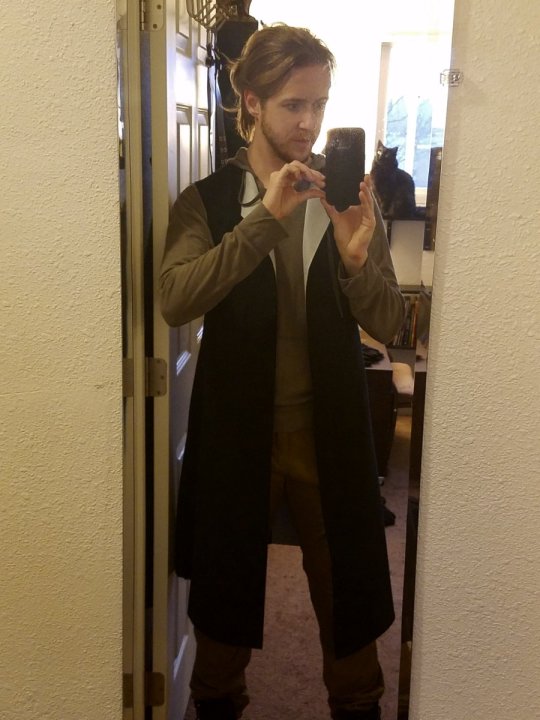
Is good to me.
Next I edged the neckline and the armholes with bias tape. Goddamn do I hate bias tape.
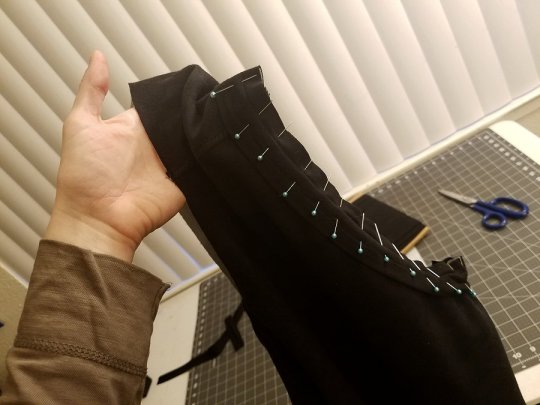
But it makes it pretty tidy:

Alright, now it's time to do the center-front edges. We are making them VERY THICK AND VERY STIFF. I have seen too many Anders costumes where the weight of the O-rings drags down the edges of the coat, it is not a good look, but it's pretty easy to avoid if you plan ahead. So when I was making my coat I (1) folded the edge over twice (2) ironed some interfacing into it and (3) sandwiched a strip of felt into it. And I'm still not sure it was enough -- if I had it to do over again, I'd probably work a strip of 5-6 oz veg-tan in there instead. Truly, I don't think it's possible to make this part TOO stiff, while on the flip side, it's not going to look sexy if your coat is sagging under the weight of the O-rings.
So here is my felt and interfacing, both of which were 1" wide:
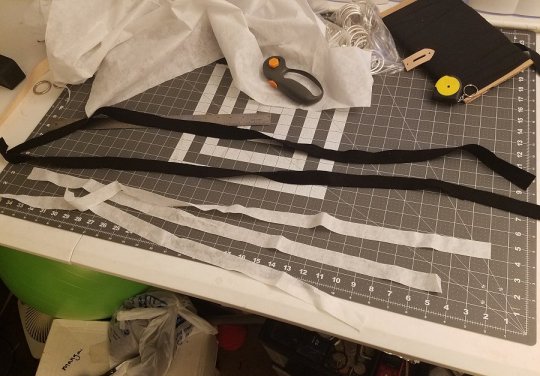
Iron on the interfacing:
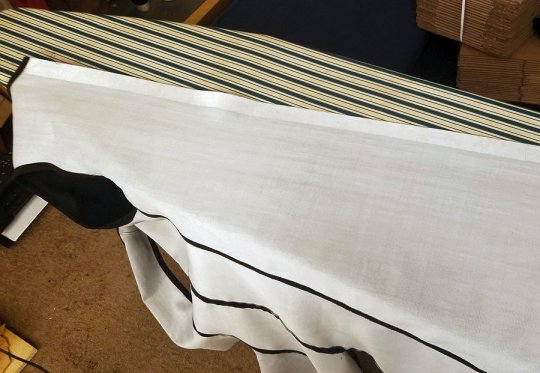
Fold the felt into the edge:
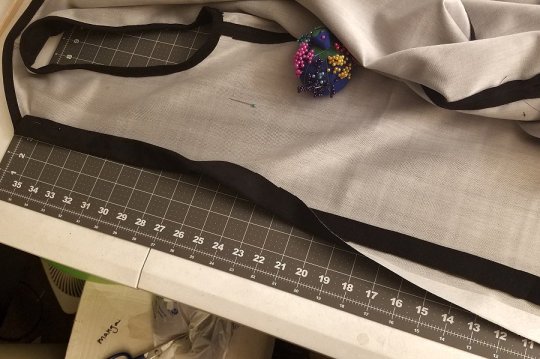
Pin it, check how much of a gap it leaves down your front:
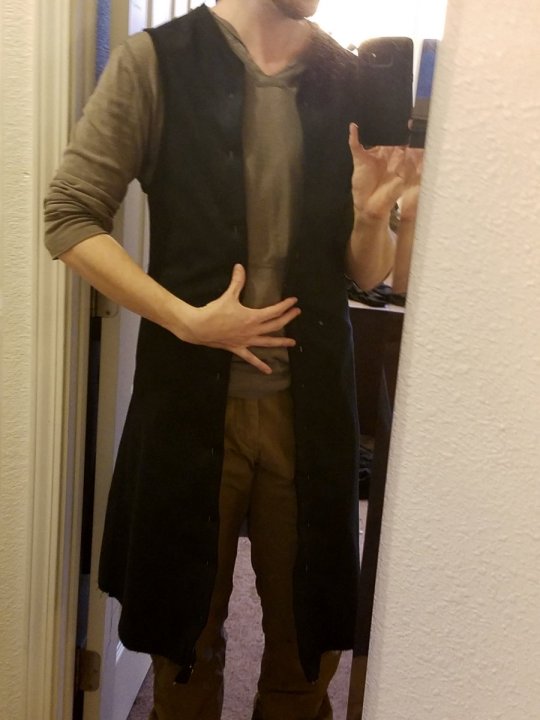
(This coat, for the record, is not the slightest bit adjustable. You make it, and then you don't gain or lose weight, ever.)
If the sizing is all good, then sew it down.
Time for your O-rings -- three of them are attached to the coat, the fourth one is on the belt, but needs to be spaced proportionally to the other three. Here is the spacing that worked for me (a 5'10" dude):
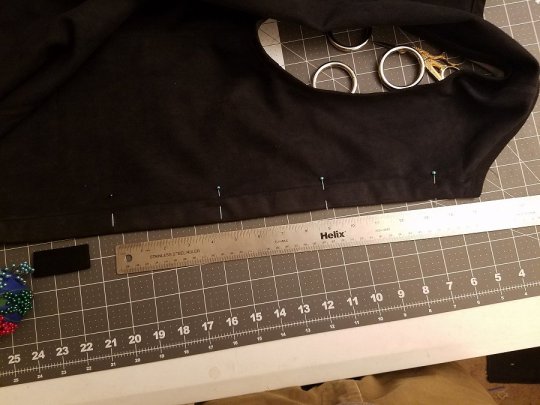
Test, 1, 2, 3...
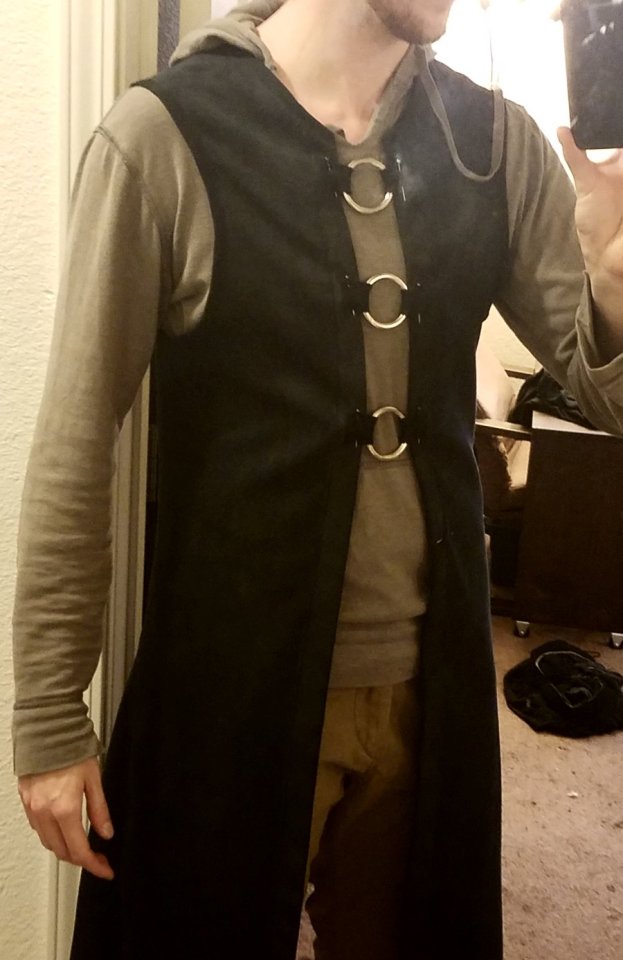
You can see how the O-rings are too heavy for the straps holding them up, with more of their weight on the bottom instead of being distributed evenly -- that is okay. For this test I just snipped off some lengths of the bias tape I'd used on the neck & arms, so it's very thin fabric, but for the final version I use Legit Actualfax Leather (tm) and it is sturdy enough to hold the rings correctly.
Okay, time to put the gold edging down the center.
Full disclosure: I HATE bias tape. Like, everyone who knows me has at some point accidentally let themselves get cornered into having to listen to me rant about bias tape, how I hate it, let me count the ways. I get why it's used in cosplay so much -- so many costumes for the small-screen, be it anime or panels in a comic book, where you don't have much space for detail, add visual interest to a costume by putting contrast edging on it -- which, irl, is achieved with bias tape. But look the fuck around you, how many people have bias tape on their clothes?? Fuckin none, is the answer. So when I see bias tape, it feels strikingly cartoonish. It looks like cosplay; it doesn't look like something that anyone would ever actually wear out and about.
...and then there's Anders with his fucking gold bias tape down the center of his fucking coat, and all over the edges of his cute lil bolero jacket.
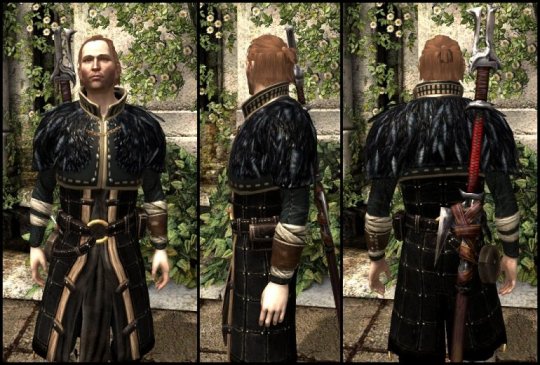
Sir, you should be ashamed of yourself.
Anyway, I wound up doing gold piping on the jacket--
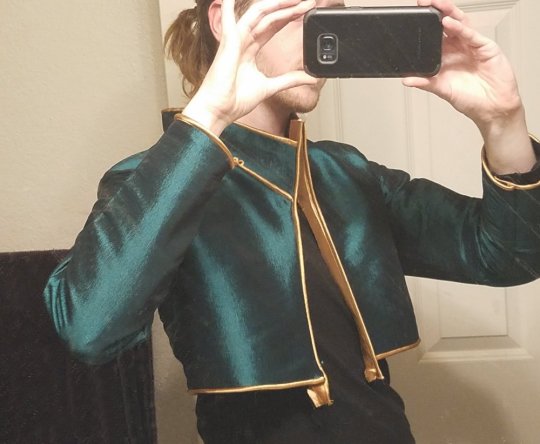
--because it looks so much less shit than bias tape, but there really was no choice but to do a very wide band of gold fabric for the edging of the coat. This is, strictly speaking, not bias tape since I didn't do it on the bias -- it was wide enough that I thought bias tape might pull weird, and straight enough that I could get away with doing it on the grain, so I did. Oh yeah, and I put interfacing on it to keep it smooth, so I guess the center edges actually have THREE layers of interfacing to keep them sturdy:
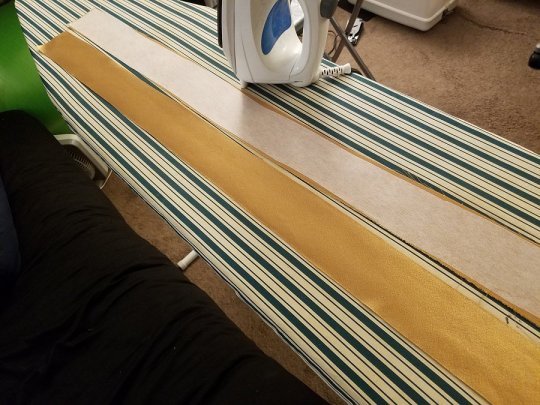
Ignore the plates -- I will explain how to do the plates later, but I am encouraging you to do as I say not as I do and put the gold edging on it now, not after you've already riveted the plates, FOR THE LOVE OF GOD, DO NOT PUT THIS STEP OFF UNTIL YOU'VE ALREADY PUT THE PLATES ON IT.
If you can incorporate the gold-edging step into the hemming-the-edges step you can probably make something tidier than what I came up with. I did a zigzag stitch along the edge to keep it from fraying and then tucked it under and stitched it down by hand, but it was not fast, and the underside is not pretty, so I am not exactly holding this up as the definitive way to do it.

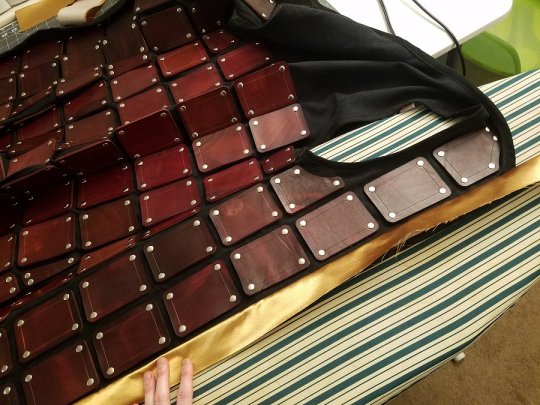
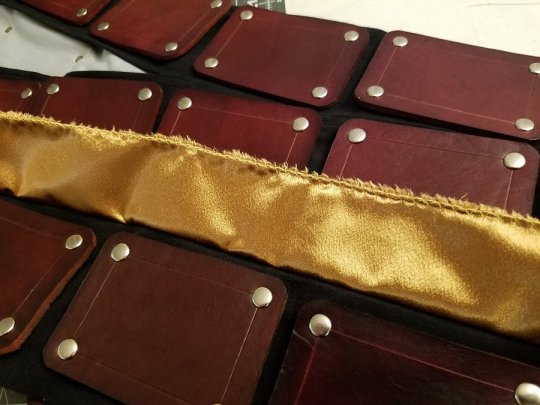
And when it was done, I hated it. It looked like cheap shit, just like all things made of bias tape. So gross, why oh why did I try to make it look like the screencaps instead of doing something more realistic, o god I hate bias tape so much.
Luckily, it turns out that when you pile on the rest of the costume, the bias tape on the coat looks less awful. ‘ “It looks less awful now,” I said grudgingly’ is pretty much the story of this cosplay.
PART II: LEATHER
So now that you've got the garment that's going to be your backing, you need to figure out how the leather plates are supposed to fit. I sized mine based on the screencaps, assuming Anders was my height (5'10"), so the top 7 rows came out to 3.75" L x ~2.5" W and the bottom two rows are 4.5" L x ~2.5" W. (I can't tell what width they were supposed to be, but they come out to about two and five-eighths inches.) Since some of the pieces have to get trimmed to fit around curves, I started by making a bunch rectangles out of graph paper and pinning them where the plates are going to end up:
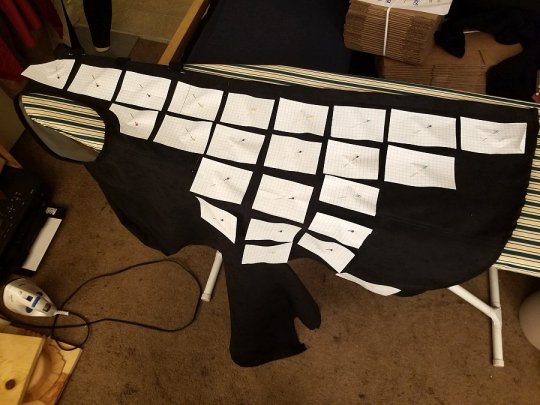
TAKE A PICTURE OF THIS STEP. You will need it later when you've got your plates all done and you're trying to remember how to arrange them.
I did the front half from beginning to end, and then went back and did the back half later, but it would probably be easier to do it all in one go. I just didn't have proof that it would work as intended, so I was holding off on doing the whole thing.
This is my box of scrap leather that I'd been saving for a rainy day, and since it was literally flooding in Sacramento during this project, I decided to take that for a sign. The coat uses 90 plates of leather, all told, and I managed to get 79 of them out of this box, yay.
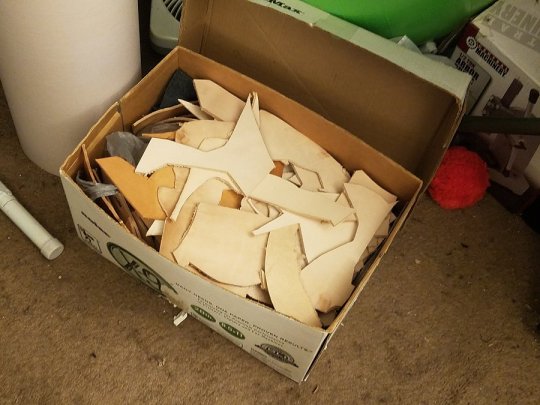
This is veg-tan leather in the 8~10 oz range, and you can't really tell once it's all put together, but I was using the werrrrst shit for this project, we're talking the dregs and weird ends that got rejected for everything else. Lumpy leather will mess up your tooling and won't shape well, but guess what, we're not tooling or shaping here! :D
(I think it turned into a false economy, because it was pretty time-consuming to find & fit the scrap leather to the pattern pieces, whereas it's insanely quick to cut strips of rectangles out of a full hide, but hey.)
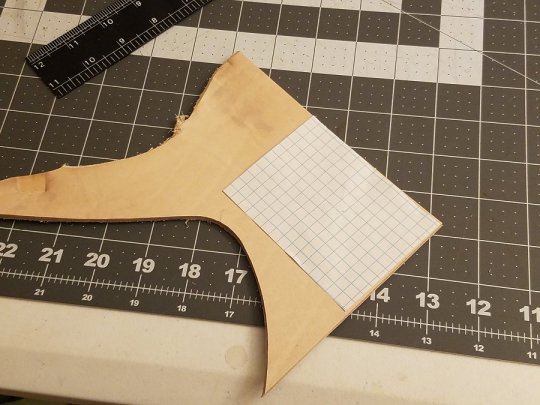
Tracing the pattern onto the plates. Don't do this, make your pattern out of cardstock, graph paper is too bendy. If you're using a pen/sharpie, trace it onto the BACK of the leather, because we're not beveling the edges down and you don't want pen lines along the edges of your plates.
Edge rounding tool, you can get 'em at Tandy and they will save you so much time and heartbreak:
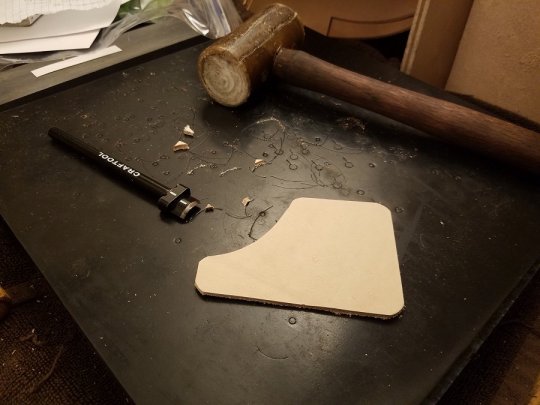
Time to DYE. I like Angelus alcohol-based dyes, they are versatile and inexpensive and waterproof. Water based dyes will run if they get wet; oil based dyes will bleed and ooze oil onto everything they touch, forever. Alcohol based dyes are great, but Fiebings (the Tandy alcohol-based brand) is prohibited under California's chemical laws so I buy Angelus instead. (And they send me weird swag, it's great.) Dilute it like 1:3 or 1:5 with acetone for dip dyeing:

(Okay so the color I used for this project can't really be replicated, because I went nuts one day and bought a 3 oz bottle of every shade of brown Angelus had, like 15 different colors, made a bunch of test swatches, and went, "Huh, the only one I really like is the dark brown." So I dumped the rest of them all together in a tub and added about three quarts of acetone. Pro-tip: your tubs for dip dyeing HAVE TO be hermetically sealed, because alcohol really really likes to evaporate, it will escape through the crevices and leave you with sludge. Granted, I think I can reconstitute this sludge with more acetone.)
Also note how all my pieces are different colors -- that's the range that natural, undyed veg-tan leather can come in. And they WILL take the dye differently, so if you have a project (not necessarily this one) where the pieces need to match in color, you HAVE TO cut them from the same hide, and ideally dye them at the same time.
So here's them all freshly dyed:

Apparently I didn't take a picture after they'd dried, but they looked awwwwfulllll. Sure enough, the different leathers had wound up different colors, weird and blotchy. Some of them I gave another dunk in the dye bath to make them darker, but mostly I just crossed my fingers and forged ahead.
Good news, they will look much better after you put a clear topcoat on them:
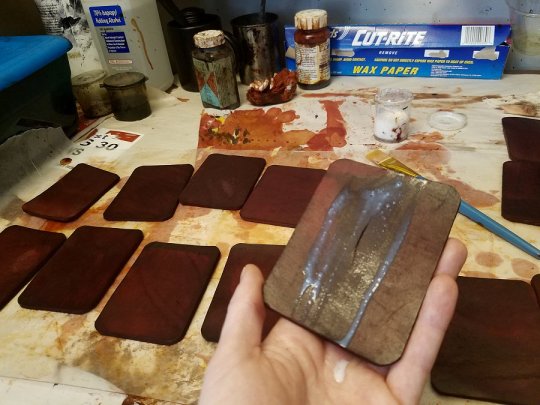
50/50 mix of resolene (which you can buy at Tandy) and water. I've messed with other topcoats before, but this is your best bet. It dries quite water-resistant; one coat will leave you with a matte finish and if you want it shinier you can add more coats.
They will also look better after you add lines along the edges. I forget what this tool is called, but you want one, it is invaluable, lets you put lines parallel to the edges of your leather very quickly and very neatly. The lines I did were 3/8" from the edge:
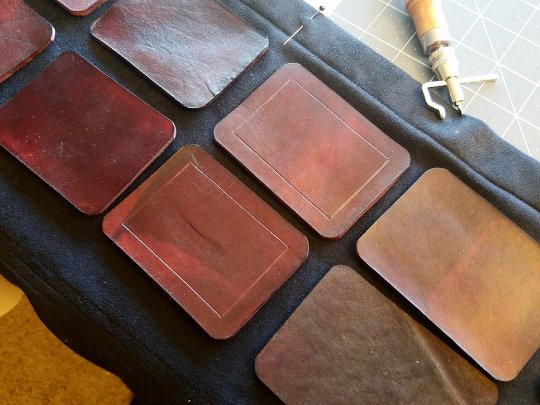
And now you have also conveniently marked where to punch your rivet holes:
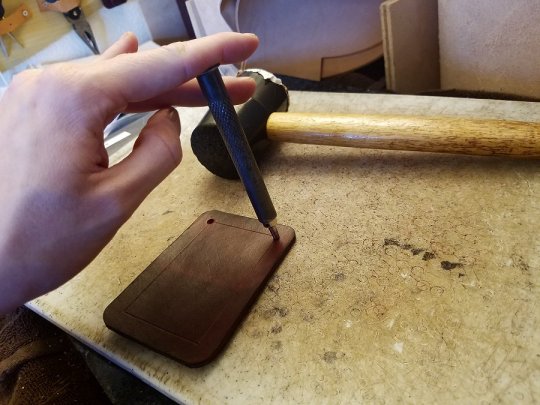
Lay 'em out (I was eyeballing this, not measuring it):
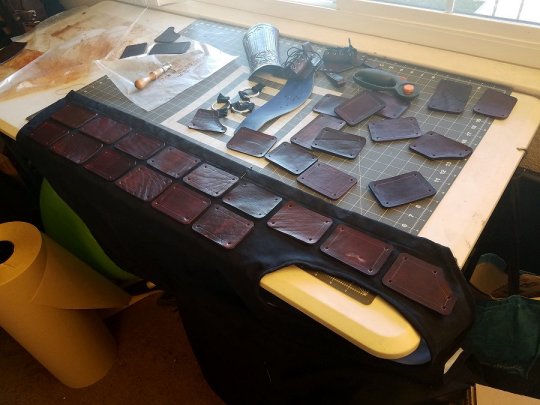
With a gel pen or something, mark where the holes are:
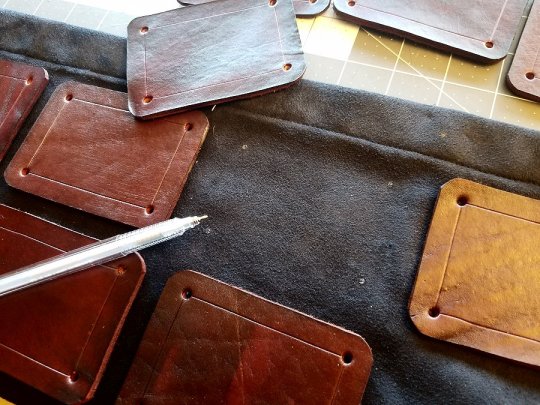
I debated whether I wanted to use small or medium rivet caps, went with medium. These are what's called double-cap rivets, because there is a cap on both ends so it looks clean and finished on both sides of the project, but rapid rivets (the ones where the post end does not have a cap) would work fine here. Tandy sells rivets in lengths XS, S, M, and L -- the post length you need for this is S, but you can mix and match the posts and the caps, so I paired small posts with medium caps, which I felt were better proportioned for this project.

Use a burnishing awl to poke holes in your fabric, wide enough that you can push a rivet through. You will break some threads doing this, which is why you want your base fabric to be fray-resistant:
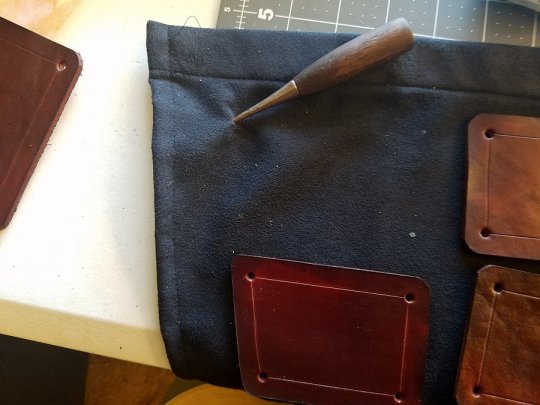
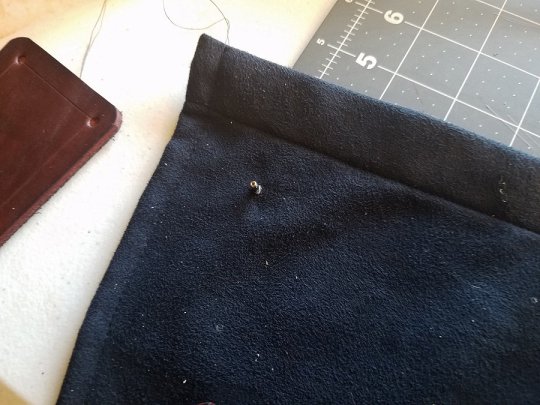
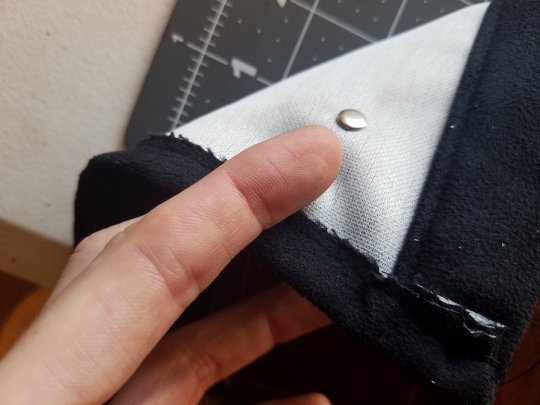
Add plate:
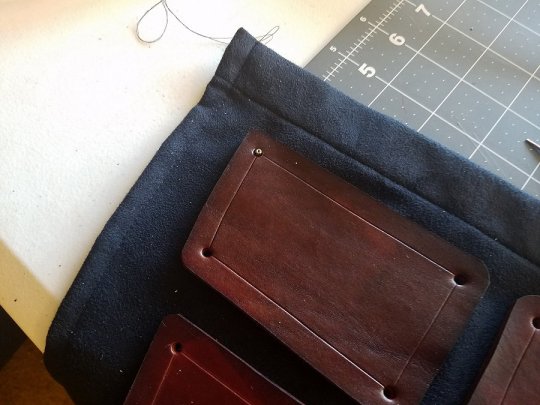
Add rivet cap:
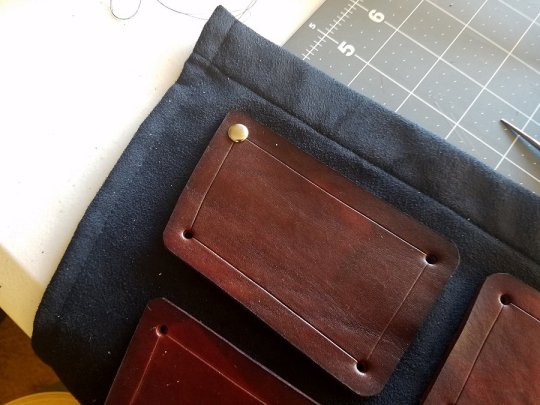
Grab your rivet setter, apply hammer:
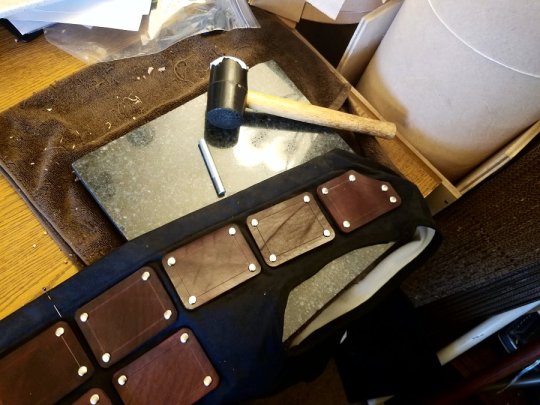
Yessssssss:

That was the point when I said, awww yeah, son, this might actually work. I'd been kinda iffy about it til then.
Alright, doing the rest of it. Here's where the patterning for the plates gets weird, because the coat is not a tube, it's narrower at the chest than at the hem, so some of them are going get cut at angles along the side seam. You can see that I labeled the plates this time because the assembly was getting kind of crazy, but it wound up not mattering because the acetone in the dye bath stripped off my labels. ;_;
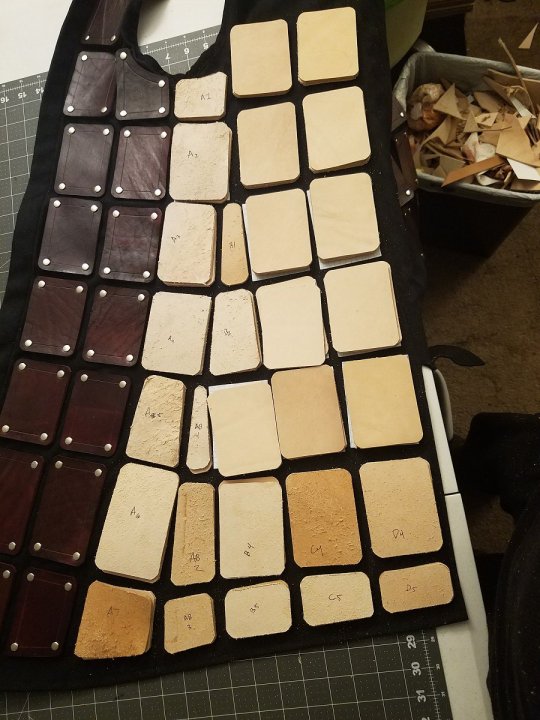
So I labeled them again when they came out of the dye:
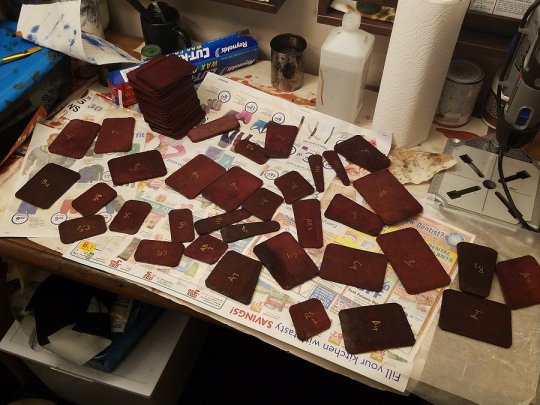
And repeated the same process as above. Aww yeah:
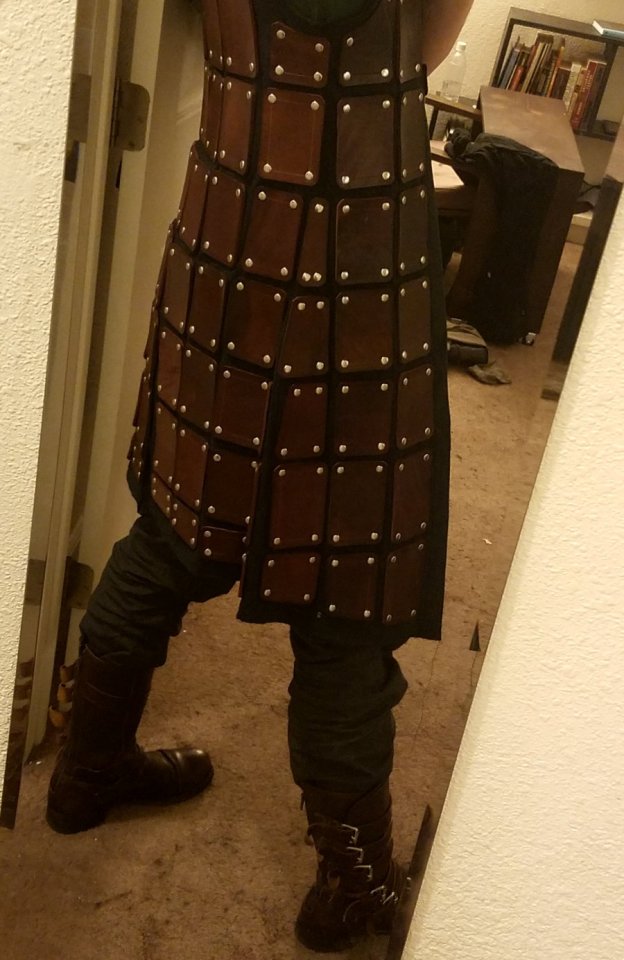
By the way, I did not make boots for this costume; I bought those boots in Harajuku like ten years ago and they turned out to be one of the best investments I ever made, because I wear them all the time and they blend seamlessly into so many costumes -- including Anders.
Anyway, you're not done yet, time to put the O-rings on it. I cut some tabs out of 5 oz leather and cut stitching grooves about 1/8" from the edge. That is the same tool I used above for creasing the lines along the edges of the plates, you just swap out the head to carve a groove instead of leaving a crease. Also I should have cut the grooves before I dip-dyed them, because I wound up having to go back and put dye in the grooves:
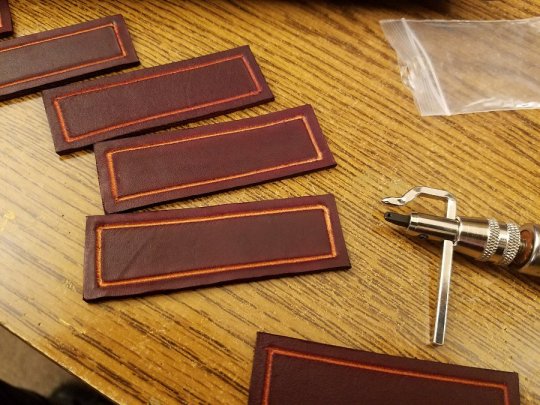
Mark your stitching holes (rolling wheel is great) and punch your stitching holes:
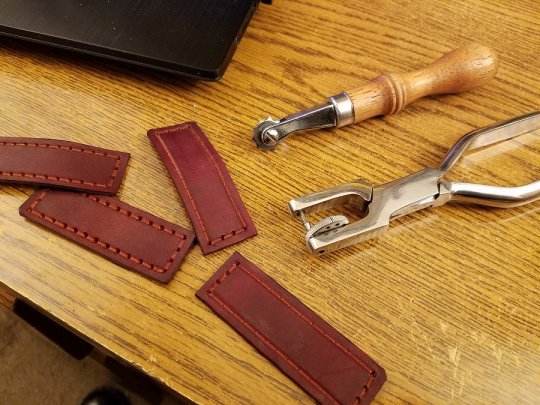
Punch your rivet holes:
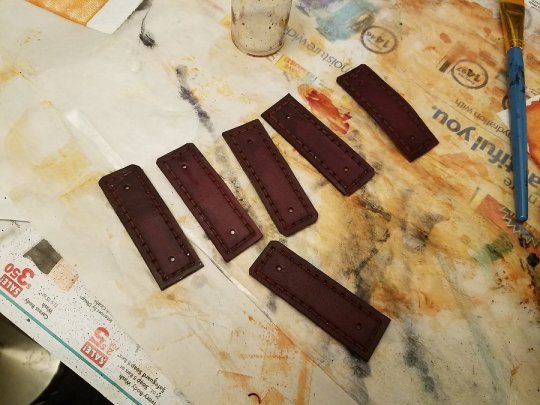
I clipped the corners on the underside of the tabs so they wouldn't be poking my chest.
Same MO as attaching rivets to the coat, use your burnishing awl to poke a hole through the front edge and attach your tabs. (Hearkening back to the picture waaaay above, where I measured where you want to attach your O-rings.) While I'm stitching, I hold it in place with a brad, not the actual rivet. Stitching:
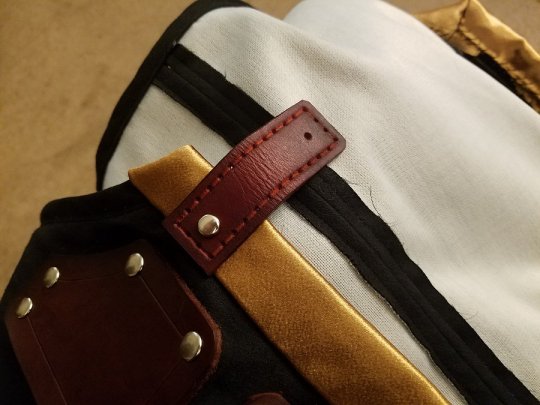

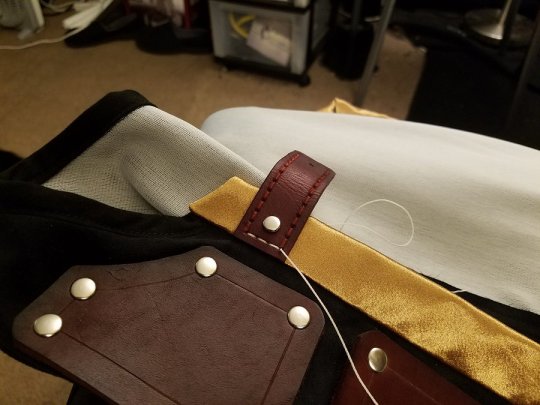

This is waxed nylon cord, by the way -- you can buy it at Tandy, or you could probably substitute dental floss, it’s about the same weight.
So one side of tabs is stitched & riveted shut and holds the O-rings, the other side consists of snaps so that they can come on and off the O-rings easily.
I hate snaps almost as much as I hate bias tape, but sometimes they're unavoidable. At Tandy, you have the option of glove snaps, segma snaps, or line 20/line 24 snaps -- they are all terrible, but glove snaps are your best bet for this operation. Segma snaps and the line 20/24 snaps are too heavy-duty for putting in fabric, they will slide sideways when you try to set them and you will have to pull REALLY HARD on them to make them release, and you'll end up stretching your fabric out of shape. Glove snaps will also slide when you try to set them, because all snaps are assholes, but once you get them installed they will work well.
(Except for when it popped off the morning of PAX, and I was out of town so I didn't have access to my workshop, and we had to swing by Tandy with me in my Anders costume to buy a new bag of snaps and beg use of their tools to set it. It took like fifteen minutes of swearing, because snaps are assholes, but I did make some kid's morning ("IT'S A WIZARD!!!") so there's that.)
Snaps:
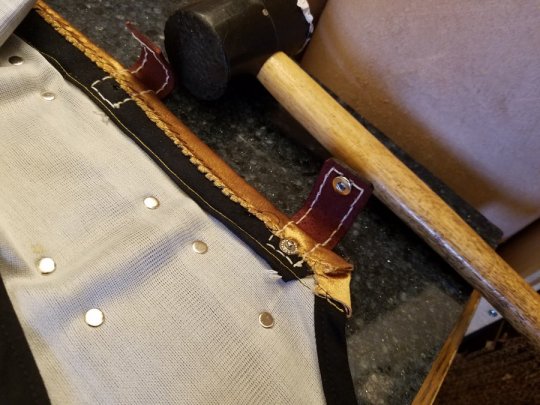
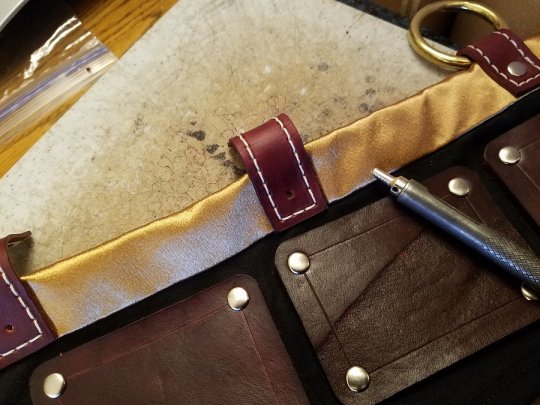
Bias tape, looking less awful once the O-rings are added:
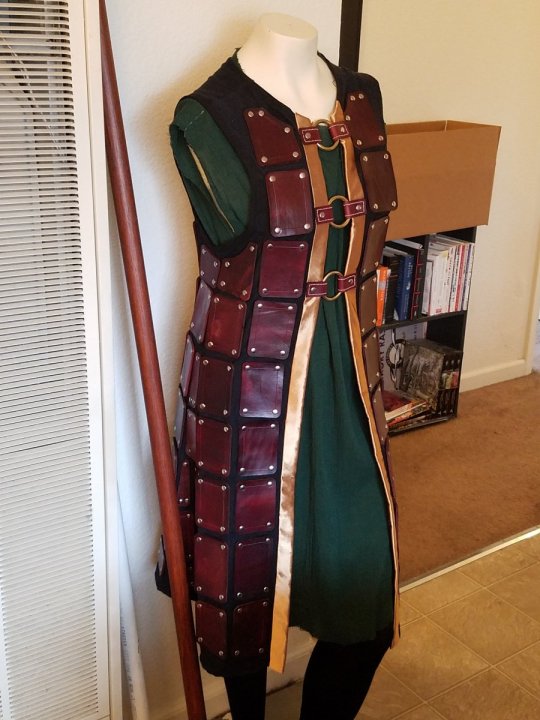
Here is a picture that better demonstrates how the rings are attached:
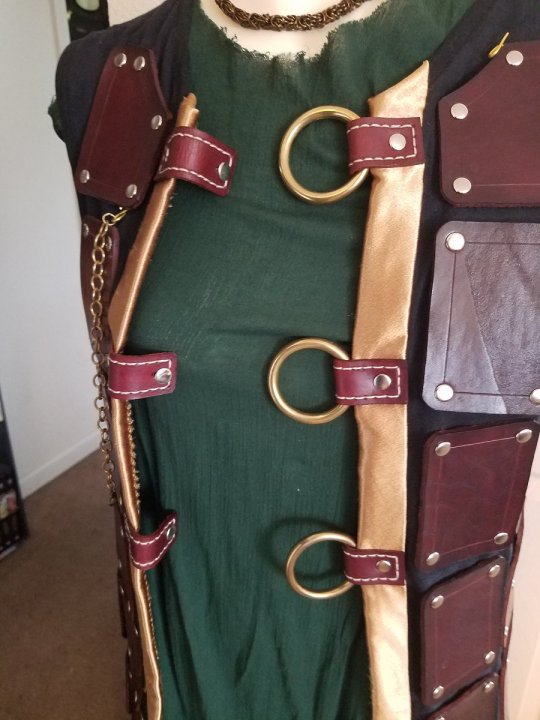
You’ll need medium-length posts for the rivets holding the O-rings on.
There are also a couple tabs lower down that are purely decorative. Initially I was going to skip those, but the other story of this costume is me going, "Eh, good enough. .........NO, NOT GOOD ENOUGH, MUST BE PERFECT" so I added them later. I'm glad I did, because anything to break up that line of stupid bias tape is a plus:
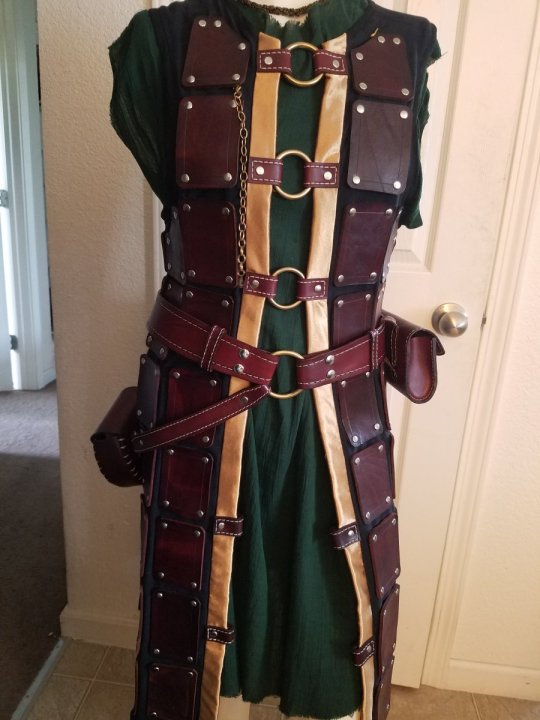
And more random rings on the sides:
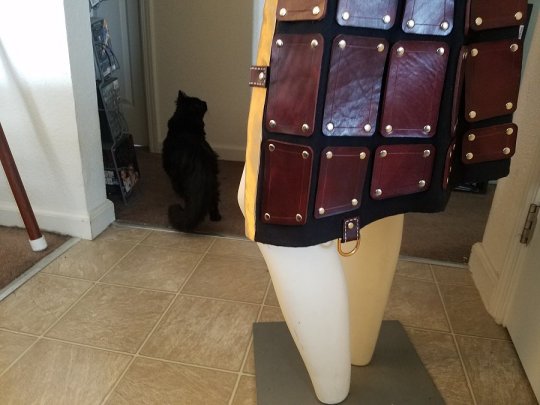
Technically those should be O-rings, not D-rings, but I have a gratuitous number of brass D-rings just kicking around, so I used them instead of buying more O-rings.
The rings you can buy from Tandy -- solid brass, they look and feel great. The top three are 1.5" interior diameter, the rings on the belt are 2".
**
And I think that's it. Happy Anders'ing!
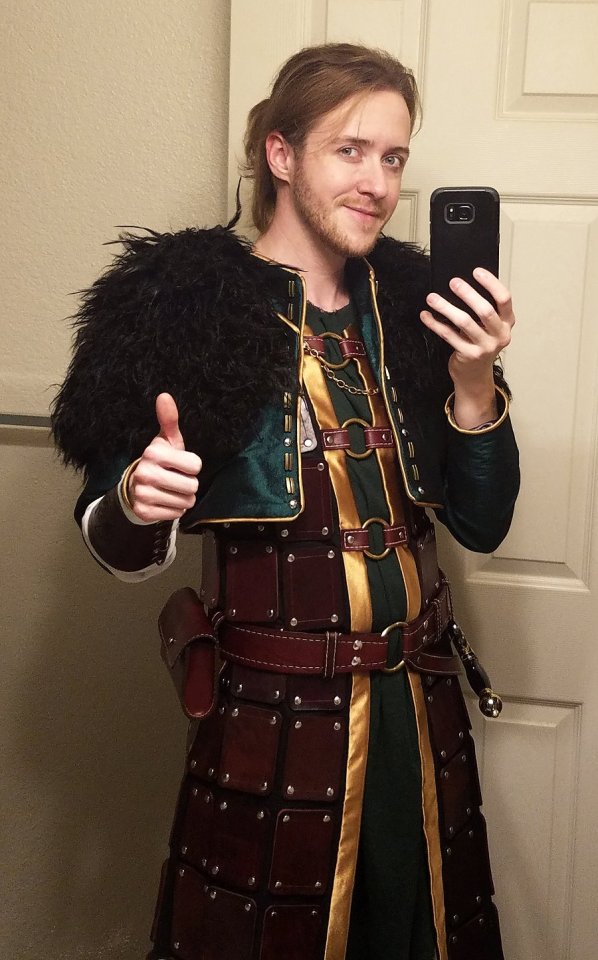
(And the glamour shot)
199 notes
·
View notes
Text
What does Your Journaling Process Look Like
It has been a minute since I wrote about journaling in this blog. I have been busy prepping this blog for a transformation: I am moving to SiteGround. More on that as I prep for the move. I am making a small announcement, and so far, I like what I see of the hosting site.
Today is about your journaling process, which is something that not too many people think of. I was going to finally give you your first writing prompt of the year (even though by the time you are reading this it will be March), but it is more important that you think about how you process. There are, in my opinion, two types of processes, one is how you write and one for writing routine. It is the second one that I am talking about today. Next week, I hope to get into the actual process, or what is your style of writing.
I will talk about this as we go along on this journey together. Now on with today’s topic.
This post may contain affiliate links, which means that if you click on one of the product links within the post, I may receive a commission for your click and purchase. You do not have to make a purchase to enjoy this post, I only highlight products to help with the cost of running the blog, and I only post links to products relevant to the topic in that post and to companies I use and trust.”
What is your Journaling writing process?
First off, there is no right or wrong way to write in your journal. Ok, I stand corrected. The only wrong way is not doing it in the first place. It is better to put something on paper, or in my case, computerize paper.
Your writing process goes beyond putting words on paper. You may, in fact, have a whole routine surrounded by writing in your journal. These are in particular order but think about these things as you write this writing prompt:
Location: A little corner in your bedroom and a full-blown She-Shed? Yes, your environment has a lot to do with how you write. It is best to be in a completely silent place, no kids, no spouse. No internet, and most defiantly no social media. Notice I did not say, no music. Soft music is required for your choice. Nothing loud or harsh, like head-banging music unless you like thinking in that environment. No trying to tell you what type of music to listen to, but you do want something to quiet your mind as you formulate your words. My location at the moment is one of two places: my bedroom, propped up against my pillow or at my computer desk in my little craft corner.
Time Limitations: a quick 5-minute write up or 2-hours? Again, no judging here. If you want to jot down a few notes, go ahead, but for writing prompts, you want to devote at least 15 minutes. Same thing with any story you are trying to develop for book publishing. It also depends on what time of day you decide to write. There is no wrong way to the time: morning, noon, or night. The wrong way is not being consistent with your time routine. I suggest that you do not write when sleepy. I have gone back to look at some of my prompts and wonder what the heck was I thinking when I was writing while sleepy, but my routine lately has been for both my personal journal prompts, as well as blog posts is after midnight when everyone is asleep. That way, I get no distractions, and all my work is done for the home and my business.
Libations: a little wine with your prompts or a full course meal? Yes, it is ok to eat and drink during this time. It also depends on what you like. In the mornings, I love me a good cup of coffee, but if I write around dinner time, I eat my meal. Sometimes, I have a plain glass of water. Since the for mentioned late night writing schedule, I have been known to have a soothing cup of tea with my writings, lol.
Seat: Comfy chair or in bed. Your seat of choice depends on your location and the setting up of your location. In the case of having a She Shed (Man Cave for women), you would pick your favorite things to have in there, including your seating arrangements. I have seen she sheds where there are couches (Oops, the correct term is sofa) for some guests, a lounge, or a big comfy chair. Some people have a desk from their childhood (repurposed, of course). Whatever makes you comfortable when you write. One thing is for sure, I will say this in bold letters: LADIES, YOU ARE ALLOWED TO HAVE A SHE SHED, NO MATTER WHEN THE HUBS AND CHILD SAY!
With that being said, here is my version of the writing prompt today, January 29, 2019:
What is my Journaling Process? (feel free to change the title word from “Your” to “My”)
As a person who decided only 10 years ago to write for a living, I have been journaling longer than that. I have officially been journaling off and on for 20 years. I have said many times how I got started, which was through a friend of mine, who passed in 2002.
I have many routines when it comes to writing, but the one that stands out is the one I am doing now. I write at night when everyone has gone to bed. This is my routine.
I write in my journal mainly to clear my head and to process the events of the day. At least that is the way it was when I first got started. I still do that for the most part. It does not matter if I am mad at someone, upset with myself, contemplating something, or to write just to write, it is the same way: I wait until the end of the day to write in my journal. It is my way of getting out anger issues, find inspiration from it, and for the first time in a long time, try to find a lesson in the problem. I want to devote a time where I do not carry my anger to bed with me, maybe not to solve that situation at that time, but to go to bed, empty, ready to tackle what lies ahead, good, bad, or indifferent. If the writing does not help, and sometimes it does not, I have extra assurance in I go to God in prayer for that situation.
Now, everything is not always a problem. It might be something that I want to do, and the journaling helps me brainstorm it. I write out what I want to do, write about the steps that I might have to take, how much money I may need to save in order to achieve it, and so forth. Like for instance, I have been planning this trip to Disney World for the longest. I type out what an ideal day at the Magic Kingdom, Animal Kingdom, Hollywood Studios, and Epcot would be with my family. Also, where we would stay, what we would eat, and how we would get around. Other things I have journaled about in the past were: buying a new house, a new car, and how my business would run (the latter, I now have a dedicated business journal for that).
As for the actual routine, like I said, I mostly journal at night. I have some coffee or water. Sometimes I eat a little snack. Not much, since I am heading to bed after I write. Sometimes, I will try to write in it with my mini Ipad, but I find that sometimes the file will not sync with my desktop so I can note some changes (made by me), and I will not lose my place. I now have a habit of re-reading my entries for clarification, and to keep me from doing the “what the heck was I typing” face before I go to bed. If you can tell, I am sort of a “Grammar police” type of writer. I may not catch everything, but if I re-read my post before posting them to my blogs, I am going to re-read my journal entries.
After that, I save the file entry, which is automatically saved thanks to the new feature Microsoft programmed into the office programs (best feature ever), in case I forget. I turn out all the lights, say goodnight to Gizmo, my niece-cat, and go upstairs.
As for my writing space. No, She Shed. I want one, but this condo does not allow me to have one. No space for it, when you have 3 people and a cat living here. I am lucky I have a corner for both my journaling and crafting space. It is made for a dining room, but my table is in the corner of a “bowling alley” shaped living room. This is also where I do other business things, such as design graphic design products, such as business cards, letterheads, and invitations; scrapbook and card products, and my newest obsession, planner products (stickers and printables). I look at social media and make and watch YouTube videos in this corner. Yes, one day I will have a She Shed.
So now it is your turn. If you are looking to answer this question in your own journal, Do it. It is not required that you send me a copy, but if you want to, send it [email protected]. (No pressure). If you have your own prompt for this week, that is OK too, as long as you write something, anything, even if it is a simple “Hello World, it’s me”. You have taken a baby step.
Some prompts I will come up with like this one. Others will be from the internet or this book I got from Target yesterday called 300 Writing Prompts, but it is also available at Amazon if you want to follow along. If there is a writing prompt or a question you have, please put them in the comments below. In the meantime, thanks for being a part of today’s prompt, and I will talk to you later.
from Blogger http://bit.ly/2IEXYoF
via IFTTT
0 notes
Text
3D Printing Strong and Sturdy Models
Sometimes a digital 3D design looks great in your software, but just can’t make it in reality. Here in the real world, a 3D model can only be so thin or fragile; models with very skinny wires or delicate parts might break after printing, or worse, not be able to 3D print at all. In this post, we’ll examine how auto-checks, human checks, and prototyping can help you design models that print successfully and are sturdy enough to handle repeated use or handling.
Auto-Checks
Shapeways provides guidelines and auto-checks to ensure that your uploaded models are printable in each material. For example, models created at Shapeways in Versatile Plastic are 3D printed in a durable nylon material in large batches using an industrial Selective Laser Sintering (SLS) printer. Versatile plastic has an intense post production process that includes extraction from powder and other models, cleaning and polishing, and even dying in different colors. Thin or narrow models can be easily broken or separated during post production. You can refer to the Design Guidelines for Versatile Plastic to determine how thin you can make the wires in your model. Here’s what those guidelines say about two success parameters, wall thickness and wire thickness:
In the guidelines above, “walls” are flat surfaces in your model and “wires” are more like strands. Notice that the recommended minimum for supported wires (those that connect to your model nearby on both ends) is 0.8mm. Processed models are put through a polisher, and Premium models are polished even more, so their minimum is higher: 0.9mm. Finally, the minimum for unsupported wires (which don’t inherit as much stability from the rest of the model) is even larger, at 1.0mm.
After you upload your model, Shapeways will perform a series of auto-checks to measure the thickness of walls and wires, among other things. If you click on “View 3D Tools” (or “View Issues”, if your uploaded model failed any checks) from within any Material view of your model, Shapeways will show you the results of these auto-checks. Here’s what that looked like for an early demo version of our Deltoidal Icositetrahedron model:
Although this model passed the Wire Thickness check, it fails the Wall Thickness check. The flattened notes at the vertices, and even some of the long wires, are considered “walls” here, and they aren’t thick enough to get over the 0.7mm minimum thickness requirement.
Checking and Fixing Thickness Issues
You can check the thickness of your model in whatever design software you used to create it. Or, another easy way to determine the minimum thicknesses of your design is to import your model to Meshmixer and use the Thickness tool in the Analysis menu. You can then use Meshmixer to make your design thicker, if needed, by selecting the model and then using Edit > Extrude (using the Normal Direction) or Edit > Offset to expand your model outwards or inwards. To thicken only selected parts of your model, you can take the more targeted approach described in our previous article Tutorial Tuesday 50: Using Meshmixer to Make 3D Models Thick Enough to 3D Print.
Prototyping
Even if your model passes printability checks, it’s worth printing a demo model to make sure that everything is okay. Sometimes, weak geometry can’t be determined until a model is actually printed and in your hand. Even if the print comes out successfully, it may be too delicate to hold up to its intended use. After our example model failed printability checks, we redesigned it so that it would just barely pass the checks and print successfully. It was a beautiful model, but it wasn’t long before it broke and warped:
I guess the moral of this story is: For best results, don’t try to just *barely* meet the print requirements; rather, make sure you are safely above them.
It’s worth pointing out that the size of the model itself matters as much as the thickness; the two go hand-in-hand. In the image above, the smaller model has the same wire thickness but is actually quite sturdy. The larger model is weaker because the wires are longer and have to hold up to greater stress when the model is handled. This means when prototyping, you can’t always get an accurate impression of the strength of your model by shrinking your model down, or designing a smaller version. Think about it this way: a wireframe model the size of your head will need a larger wire thickness than a model the size of your pinky!
In the end, we decided to thicken up our Deltoidal Icositetrahedron model significantly. The final version looks like the blue model on the right in the image below. It’s much stronger, and the cost of printing was only increased by a few dollars.
Human Checks
Sometimes models pass the online checks at Shapeways, but then fail a secondary check when they are actually ordered for printing. That’s because actual human beings at Shapeways check your model manually while they prepare it for 3D printing. They check for things that require a lot more expertise than the automatic computer checks, like how large your model is, how the different pieces of it fit together, and a lot of things that you or I might not think of. If they notice a problem then they will email you, and try to suggest ways that you can modify your model to increase the likelihood that it will print successfully.
Keep in mind that the printing engineers at Shapeways want to make sure that your model can print correctly not just once, but over and over. A model that passes the auto-checks and listed guidelines may have weak areas that may not break on the first print, but are likely to break the second or third time. This means that even if your print comes out well in a “Print it Anyway” situation, it still might not be stable enough to offer as an item in the Marketplace. Variations in print stability can arise from small differences in the printing and finishing process, like how the models are packed or oriented in the machines, or how it interacts with other models in the polisher.
As an example, consider our Hoop Knot Earring:
According to the Design Guidelines for Silver, we needed to make the wires at least 1mm in diameter. However, it’s best to exceed that significantly; consider that Silver models from Shapeways are 3D printed in wax, cast in Silver using lost wax casting, and then finished and polished. All of those procedures could damage a model with weak geometry. When we uploaded our Hoop Knot Earring for printing, it passed all of the auto-checks. But when we tried to order a print of it in Silver, the kind and knowledgeable human engineers at Shapeways said that the geometry of our model was too weak. They suggested adding connectors and even emailed me this helpful illustration:
Of course, in this case I couldn’t add connectors since that would have ruined the design; instead I had to make the wires thicker to give the model more stability. That resulted in the print shown below on the right. Later I tried to make a larger version, shown on the left, but an interesting thing happened; since the wires had to travel further, they were more prone to bending and becoming misshapen when I opened and closed the earring. Even though the larger model had thicker wires, in the end it didn’t work as well as a functional item.
In the end, you’ll have to use a combination of your own design analysis, automatic printability checks, manual printability checks, and physical prototyping to successfully print delicate or geometrically complex models. If you’ve got your own tips and tricks that help you through this process, let us know!
The post 3D Printing Strong and Sturdy Models appeared first on Shapeways Magazine.
3D Printing Strong and Sturdy Models published first on https://getyourprintingcompanies.tumblr.com/
0 notes
Text
Marking The Studs
With the onset of things like Instagram, it’s kinda rare that you see really short updates on blogs anymore. But something happened recently that was funny enough to warrant its own archive in my blog’s history.
To give you some background, I’ve been working on a new plan for better organizing my garage. With my home becoming a space where I’m no longer fixing drywall and can make more of my own furniture, I need room to create a little sawdust. With K moving in, he has a few of his own tools that need a new home as well.
Between all of the outdoor tools and the mower, I’m hyper aware of how much extra space I could use if I moved all of the outdoor equipment to its own space. It’s the main motivation behind getting the new shed built. Also, I have an awesome new set of battery powered outdoor tools thanks to my partnership with STIHL (more on that very soon!), and I just don’t have the space anymore.
I am trying, little by little, to get small corners of the garage improved, such as the small expanse of wall immediately to the left of the door from the kitchen. It’s about 14 inches from the door casing, so I created a narrow workbench table that fits in the nookish space and runs the full length of the wall. If you saw my DIY power carving post or video, then you will have already seen glimpses of it in use. Nothing like a project to immediately confirm that I need to make more improvements! It was SO nice to not be working on the floor!
So, that’s what I’m setting out to do: one tiny organization project at a time, and mostly with scrap wood. I casually asked K if he would help me out by marking the studs along the same wall while I ran to the store. The goal is to cut and hang French cleats for battery chargers and long clamps that take up too much space on my pegboard wall.
I asked him for this favor, and then totally forgot, distracted by whatever it was I was already working on. It was DAYS LATER that I walked back into the garage to find what K actually did:
Oh, he marked the studs, alright. Every. single. one. of the studs are marked this way. That takes some dedication, for sure. If you watched that carving video, you might have even seen them and not realized what they are. They’re curling a bit from the humidity now, but I plan to keep them up a little longer.
That, my friends, is just one small story about the boy who now lives in my house. Because he’s pretty good at a clever prank. I’d like to repay the favor, though. So:
I’d love your stories about some really good pranks you’ve pulled (for coughcough, ideas and such)
I’ve created this handy stud-marking downloadable for those of you who would like to be extra and mark YOUR home’s studs in the same way.
Since marking them with K’s face is super weird, I took some images from a free photo database instead and created two versions. One is for those of you who don’t like beefcake; one for those who are my level of crassness. I named both the horse and the dude Mark (get it?).
Mark I printable
Mark II printable
If anyone takes me up on this offer, please tag me on Instagram at @uglyducklingDIY when you use it, along with the hashtag #myUDH. This is just for funsies, so I will laugh my ass off if anyone actually does it.
Enjoy.
The post Marking The Studs appeared first on Ugly Duckling House.
More Where That Came From
Blogs, Breakups, and DIYing Solo
A Christmas Story: Uncle Knick-Knack
The Life of a Scatterbrained DIYer
Texts from Bloggers
.yuzo_related_post img{width:170px !important; height:170px !important;} .yuzo_related_post .relatedthumb{line-height:14px;background:#ffffff !important;color:#454747!important;} .yuzo_related_post .relatedthumb:hover{background:#ffffff !important; -webkit-transition: background 0.2s linear; -moz-transition: background 0.2s linear; -o-transition: background 0.2s linear; transition: background 0.2s linear;;color:#454747!important;} .yuzo_related_post .relatedthumb a{color:#102a3b!important;} .yuzo_related_post .relatedthumb a:hover{ color:#113f5e}!important;} .yuzo_related_post .relatedthumb:hover a{ color:#113f5e!important;} .yuzo_related_post .relatedthumb:hover .yuzo__text--title{ color:#113f5e!important;} .yuzo_related_post .yuzo_text, .yuzo_related_post .yuzo_views_post {color:#454747!important;} .yuzo_related_post .relatedthumb:hover .yuzo_text, .yuzo_related_post:hover .yuzo_views_post {color:#454747!important;} .yuzo_related_post .relatedthumb{ margin: 0px 6px 0px 6px; padding: 0px 0px 0px 0px; } jQuery(document).ready(function( $ ){ jQuery('.yuzo_related_post .yuzo_wraps').equalizer({ columns : '> div' }); });
Marking The Studs published first on https://bakerskitchenslimited.tumblr.com/
0 notes
Text
Marking The Studs
With the onset of things like Instagram, it’s kinda rare that you see really short updates on blogs anymore. But something happened recently that was funny enough to warrant its own archive in my blog’s history.
To give you some background, I’ve been working on a new plan for better organizing my garage. With my home becoming a space where I’m no longer fixing drywall and can make more of my own furniture, I need room to create a little sawdust. With K moving in, he also has a few of his own tools that need a new home as well.
Between all of the outdoor tools and the mower, I’m hyper aware of how much extra space I could use if I moved all of the outdoor equipment to its own space. It’s also the motivation behind getting the new shed built. Also, I have an awesome new set of battery powered outdoor tools thanks to my partnership with STIHL (more on that very soon!), and I just don’t have the space anymore!
I am trying little by little to get small corners of the garage improved, such as the small expanse of wall immediately to the left of the door from the kitchen. It’s about 14 inches from the door casing, so I created a narrow workbench table that fits right in the space and runs the full length of the wall. If you saw my DIY power carving post or video, then you will have already seen glimpses of it in use. Nothing like a project to immediately confirm that I need to make more improvements!
So, that’s what I’m setting out to do: one tiny organization project at a time, and mostly with scrap wood. I casually asked K if he would help me out by marking the studs along the same wall while I ran to the store. The goal is to cut and hang French cleats for battery chargers and long clamps that take up too much space on my pegboard wall.
I asked him for this favor, and then totally forgot, distracted by whatever it was I was already working on. It was DAYS LATER that I walked back into the garage to find what K actually did:
Oh, he marked the studs, alright. Every. single. one. of the studs are marked this way. That takes some dedication, for sure. If you watched that carving video, you might have even seen them and not realized what they are! They’re curling a bit from the humidity now, but I plan to keep them up a little longer.
That, my friends, is just one small story about the boy who now lives in my house. Because he’s pretty good at a clever prank. I’d like to repay the favor, though. So:
I’d love your stories about some really good pranks you’ve pulled (for coughcough, ideas and such)
I’ve created this handy stud-marking downloadable for those of you who would like to be extra and mark YOUR home’s studs in the same way.
Since marking them with K’s face is super weird, I took some images from a free photo database instead and created two versions (one for those of you who don’t like beefcake; one for those who are my level of crassness, hehe). I named them both Mark (get it?).
Mark I printable
Mark II printable
If anyone takes me up on this offer, please tag me on Instagram at @uglyducklingDIY when you use it, along with the hashtag #myUDH. This is just for funsies, so I will laugh my ass off if anyone actually does it.
Enjoy.
The post Marking The Studs appeared first on Ugly Duckling House.
More Where That Came From
Blogs, Breakups, and DIYing Solo
A Christmas Story: Uncle Knick-Knack
The Life of a Scatterbrained DIYer
Texts from Bloggers
.yuzo_related_post img{width:170px !important; height:170px !important;} .yuzo_related_post .relatedthumb{line-height:14px;background:#ffffff !important;color:#454747!important;} .yuzo_related_post .relatedthumb:hover{background:#ffffff !important; -webkit-transition: background 0.2s linear; -moz-transition: background 0.2s linear; -o-transition: background 0.2s linear; transition: background 0.2s linear;;color:#454747!important;} .yuzo_related_post .relatedthumb a{color:#102a3b!important;} .yuzo_related_post .relatedthumb a:hover{ color:#113f5e}!important;} .yuzo_related_post .relatedthumb:hover a{ color:#113f5e!important;} .yuzo_related_post .relatedthumb:hover .yuzo__text--title{ color:#113f5e!important;} .yuzo_related_post .yuzo_text, .yuzo_related_post .yuzo_views_post {color:#454747!important;} .yuzo_related_post .relatedthumb:hover .yuzo_text, .yuzo_related_post:hover .yuzo_views_post {color:#454747!important;} .yuzo_related_post .relatedthumb{ margin: 0px 6px 0px 6px; padding: 0px 0px 0px 0px; } jQuery(document).ready(function( $ ){ jQuery('.yuzo_related_post .yuzo_wraps').equalizer({ columns : '> div' }); });
Marking The Studs published first on https://vacuumpalguide.tumblr.com/
0 notes
Note
hey emma i am an upcoming freshman (college) and i really have no idea what school supplies i need to prepare. if it's not a bother, may i have a list of college essentials that you use? especially for taking notes. thank you so much for answering. ❤
Hey! How exciting :D Here are the things I’d recommend:
a backpack - the best solution for carrying around a lot of things! I tried going with a shoulder bag on my first day of university and it was the worst thing ever!!!! Never again will I do that to myself! Get yourself a sturdy backpack with strong straps! You, your back and your shoulders will thank me later! I use a 13″ laptop version Fjallraven Kanken, it is really awesome. Very practical, comfy and waterproof. My only dislike is how the zips go so far around the whole bag. I always get nervous that someone behind me will unzip it and steal my purse or whatever it sitting at the bottom.
a 4 ring binder (and plastic sleeves) - any brand will do really! I would recommend getting one per subjects since it saves running out of space if you try to fit things into one. It is also sometimes cheaper to purchase several at once! This stay at home though.
notebooks - I use a single Arc Notebook for all my subjects and love it. I find it easier to have a single notebook with dividers, rather than carrying several individual books. However, any notebook(s) would be fine. You can decide if you’d like spiral, A4 or A5, etc.
OR a tablet for digital notetaking - this depends on how you plan to do your notes but I’ve recently been using our family iPad Pro for university and absolutely love it. It is so convenient, easy to use, and fun! Writing with the pencil is so smooth. I can change colours, mistakes, placement so fast. I think it has helped me be much more productive than any other semester! Here are some digital things I have on my Etsy!
planner - this can be any you like or even digital version! I tend to go for smaller planner if I’m actually taking it to uni. Here is are some recommendations. Here is a review on the Mossery Co planner. Here is my 2017 bullet journal. Here is a detailed pros and cons list of a planner vs bullet journal. There is also my printable or digital 2018 student planner or 2018 weekly planner :-)
pens - I would recommend getting a pack with a selection of colours. I usually recommend the Staedtler 432 pens since they’re well priced, easily accessible, come in packs and don’t smudge. I don’t see the point in buying huuuuge packs with a million pens but 10 to 12 is more than enough. I really like the Zebra Sarasa though - they’re so nice but are gel pens! Other pens I like are the Pilot G2 and Juice, Staedtler Triplus Fineliners, Muji Gel Pens. Obviously, you don’t need a million different packs! To be super simple, I’d say the Zebra Sarasa are a great start. Here is a more detailed comparison though!
highlighters - I use the cool, warm and light packs of the Zebra Mildliners. I’ve used the Stabilo Swing Cool in the past and they were good! I think having a selection that matches your pens is so helpful when you’ve organised a colour code.
pencil case - I only take a few pens to uni so my pencil is only small. I don’t think it’s necessary to take a huge pencil case so just any will be okay! I have one from Muji and one from Emma Bridgewater. The Muji one irritates me though because when it's not full, it makes so much noise...
etc - this goes for post-it notes, page flags, etc! I love to-do list pads and post-it notes to help keep me organised!
Additionally, here are a few printables that might help you get/stay organised:
2018 student planner - includes loads of student-related printables (study, finance, etc) and undated daily, weekly and monthly planners.
ultimate student organiser - 47 pages of printables to organise your upcoming semester! Covers things like your individual classes, reading schedule, essay planner, etc.
college packing list - not necessary if you’re still living at home, but if you’re moving into a dorm this might be beneficial for making sure you remember everything!
curve of forgetting planner - a simple way to mark off topics in each subject and make sure you’re revising them regularly.
grade and assessment planner - it is always important to track how your grades are doing and this is a quick way to do so. Also, should make find problem areas relatively simple!!
student financial planner - an easy way to monitor your spending, set a budget and reach savings goals!
student reading journal - great if you have a lot of required readings each week!
there are loads more though! I also have lots of things for GoodNotes is you do have an iPad.
Here are some additional links that could help:
advice for the first day
things (personal, academic, etc) to do every week
10 small ways to improve your productivity
10 small ways to improve your motivation to study
dealing with stress
how to improve your sleep schedule
how to improve group assessments/projects
dealing with competitive people
how I stay motivated
how to study during the semester
I hope this helps and good luck! xx
362 notes
·
View notes
Text
Marking The Studs
With the onset of things like Instagram, it’s kinda rare that you see really short updates on blogs anymore. But something happened recently that was funny enough to warrant its own archive in my blog’s history.
To give you some background, I’ve been working on a new plan for better organizing my garage. With my home becoming a space where I’m no longer fixing drywall and can make more of my own furniture, I need room to create a little sawdust. With K moving in, he also has a few of his own tools that need a new home as well.
Between all of the outdoor tools and the mower, I’m hyper aware of how much extra space I could use if I moved all of the outdoor equipment to its own space. It’s also the motivation behind getting the new shed built. Also, I have an awesome new set of battery powered outdoor tools thanks to my partnership with STIHL (more on that very soon!), and I just don’t have the space anymore!
I am trying little by little to get small corners of the garage improved, such as the small expanse of wall immediately to the left of the door from the kitchen. It’s about 14 inches from the door casing, so I created a narrow workbench table that fits right in the space and runs the full length of the wall. If you saw my DIY power carving post or video, then you will have already seen glimpses of it in use. Nothing like a project to immediately confirm that I need to make more improvements!
So, that’s what I’m setting out to do: one tiny organization project at a time, and mostly with scrap wood. I casually asked K if he would help me out by marking the studs along the same wall while I ran to the store. The goal is to cut and hang French cleats for battery chargers and long clamps that take up too much space on my pegboard wall.
I asked him for this favor, and then totally forgot, distracted by whatever it was I was already working on. It was DAYS LATER that I walked back into the garage to find what K actually did:
Oh, he marked the studs, alright. Every. single. one. of the studs are marked this way. That takes some dedication, for sure. If you watched that carving video, you might have even seen them and not realized what they are! They’re curling a bit from the humidity now, but I plan to keep them up a little longer.
That, my friends, is just one small story about the boy who now lives in my house. Because he’s pretty good at a clever prank. I’d like to repay the favor, though. So:
I’d love your stories about some really good pranks you’ve pulled (for coughcough, ideas and such)
I’ve created this handy stud-marking downloadable for those of you who would like to be extra and mark YOUR home’s studs in the same way.
Since marking them with K’s face is super weird, I took some images from a free photo database instead and created two versions (one for those of you who don’t like beefcake; one for those who are my level of crassness, hehe). I named them both Mark (get it?).
Mark I printable
Mark II printable
If anyone takes me up on this offer, please tag me on Instagram at @uglyducklingDIY when you use it, along with the hashtag #myUDH. This is just for funsies, so I will laugh my ass off if anyone actually does it.
Enjoy.
The post Marking The Studs appeared first on Ugly Duckling House.
More Where That Came From
Blogs, Breakups, and DIYing Solo
A Christmas Story: Uncle Knick-Knack
The Life of a Scatterbrained DIYer
Texts from Bloggers
.yuzo_related_post img{width:170px !important; height:170px !important;} .yuzo_related_post .relatedthumb{line-height:14px;background:#ffffff !important;color:#454747!important;} .yuzo_related_post .relatedthumb:hover{background:#ffffff !important; -webkit-transition: background 0.2s linear; -moz-transition: background 0.2s linear; -o-transition: background 0.2s linear; transition: background 0.2s linear;;color:#454747!important;} .yuzo_related_post .relatedthumb a{color:#102a3b!important;} .yuzo_related_post .relatedthumb a:hover{ color:#113f5e}!important;} .yuzo_related_post .relatedthumb:hover a{ color:#113f5e!important;} .yuzo_related_post .relatedthumb:hover .yuzo__text--title{ color:#113f5e!important;} .yuzo_related_post .yuzo_text, .yuzo_related_post .yuzo_views_post {color:#454747!important;} .yuzo_related_post .relatedthumb:hover .yuzo_text, .yuzo_related_post:hover .yuzo_views_post {color:#454747!important;} .yuzo_related_post .relatedthumb{ margin: 0px 6px 0px 6px; padding: 0px 0px 0px 0px; } jQuery(document).ready(function( $ ){ jQuery('.yuzo_related_post .yuzo_wraps').equalizer({ columns : '> div' }); });
from Home Improvement https://www.uglyducklinghouse.com/marking-the-studs/
via http://www.rssmix.com/
0 notes
Text
Spring Cleaning Your Bedroom
Use this step by step guide to spring cleaning your bedroom for a fresh, clean space from top to bottom! Grab your free printable spring cleaning checklist to help keep you on track.
Spring Cleaning Your Bedroom
I love a good spring cleaning and the bedroom is the perfect place to start. After a long winter, it always feels so nice to open the windows to that crisp, spring air and freshen things up. For a full step by step plan to spring clean your bedrooms, just follow the tips below. You can even grab a free printable bedroom spring cleaning checklist at the end of the post to help keep you on track.
Remember that you don’t have to do all of the tasks in one day. The tasks can easily be split up into more manageable chunks, so do whatever works best for you.
NOTE: This post contains affiliate links. This means that I may receive a small commission {at no cost to you} from items purchased directly through the links provided. Thank-you for your support!
Gather your supplies.
Make sure that you have everything you need before you start cleaning – every time you have to leave the room is another opportunity to get off track! Open up the windows for some fresh air. Even if it is still a little chilly outside, you will be working hard so the cooler air will feel nice.
If you have a basic cleaning kit, you probably have most of your cleaning supplies all ready to go. You can read more about my favorite green cleaners HERE}, but here is a general cleaning supply list to get you started…
microfiber cleaning cloths {these will bring up dirt and grime much better than standard cloths}
all-purpose spray {I usually just use a water bottle with 50/50 vinegar and water and some lemon or grapefruit essential oils}. I also love the Watkins all purpose cleaners {especially the grapefruit and the coconut scents!}
microfiber polishing cloth {I love my Norwex one}
dusting mitt or other duster
dish soap {I like Dawn} – I use this to wipe down the walls if needed using just a few drops of dish soap in a small bucket of warm water.
toothbrush
baking soda {I keep mine in a shaker bottle}
vacuum and vacuum brush attachments
mop or steam cleaner
garbage bag{s}, donation bin/clutter bin
Quick Tidy-Up/Declutter.
While the focus of these spring cleaning guides is on the actual cleaning process, you do need to have things relatively tidied to be able to get in and do a good cleaning. Before you officially start your Spring Cleaning, grab three bags, boxes or laundry baskets. Place everything that does not belong in the bedroom into one of the baskets, place anything that you will be donating in another, and place all garbage in the third. Take any dirty laundry down to the washing machine and put away anything that is left in the room. NOTE: This is just a quick tidy looking at things that are on the floor, obviously out of place, or that you know that you want to get rid of. Save big organizing projects for later!
Clean all surfaces.
In general, you always want to start cleaning at the top of the room and work your way down, and move from one side of the room to the other rather than going back and forth. This is the fastest way to get things done and will cut down on dust and debris falling down on areas that you have already cleaned.
Dusting
When you are doing a big spring clean, I find it easiest to remove everything from surfaces, dust and/or clean the surfaces well, and then dust or wipe down the items as you put them back. If you are dealing with a particularly dusty area, you might want to mist the area with water before wiping down to minimize the amount of airborne dust. Dust or wipe down everything including furniture, lamps, above the door frames, knick knacks, etc. Don’t forget to dust in your closet too!
Walls
Wipe down any marks on walls with some warm water, a little dish soap, and a microfiber cloth. If it looks a little streaky afterwards you can use a microfiber polishing cloth to get rid of them. For any stubborn stains or scuffs, try using a baking soda paste by mixing water and baking soda until it has a toothpaste consistency or give it a scrub with a Mr. Clean magic eraser {just test it on an inconspicuous area first to make sure it does not lighten the paint}.
Extras
Starting at the top of the room, vacuum up any cobwebs that may be lurking in the corners. Vacuum any upholstery and lamp shades using the upholstery attachment on your vacuum. A lint brush also works well on lamp shades to remove dust and other little particles.
Clean Light Fixtures and Switches.
Use a microfiber cloth to wipe off any loose debris. If there is still grime, spray with the 50:50 water/vinegar spray {or multi-purpose cleaner} and wipe dry. Polish any shining surfaces with the window cloth and change out any light bulbs that need replacing. Spray a microfiber cloth with vinegar spray and wipe down the light switches and outlet covers.
Clean windows and window treatments.
Take down and launder any window treatments and wipe down your blinds. If your blinds are really dirty, it might just be easier to take them down and put them in the bath tub to soak {I will actually be talking about this more in a later post}. Clean your windows {this is even better if done on a sunny day so you can see all of the streaks and grime} using a microfiber cloth and polishing cloth and just plain water or a 50:50 water/vinegar mixture for some extra cleaning power. Don’t forget about opening the window as well and cleaning the window tracks. I use our steamer to clean these but if you don’t have a steamer you can use a cloth and a toothbrush to get into those corners.
Flooring.
Thoroughly vacuum the carpet {or wash the floor} making sure to get underneath all furniture {especially the bed!} and into the corners. If you can move the furniture around a bit to completely vacuum underneath, that’s even better. I’m always amazed at what collects behind our bed and night stands! Remove {and wash} the vents and vacuum down them with the vacuum hose. Wipe down/dust the baseboards.
Steam clean the carpets or consider hiring a professional to give your carpets a good clean if they are really dirty and/or stained. If you are concerned with general carpet odors, try this DIY carpet and upholstery refresher. For those of you that live in a very humid climate, you may just want to give the carpet a light misting with white distilled vinegar as the baking soda can be difficult to get out of the carpet if damp. If your vacuum is not performing up to par, you might need to give it a good cleaning too {find directions on how to clean your vacuum HERE}.
Clean your mattress and launder all bedding.
Strip down your bed to the mattress. Wash the mattress cover and all of the bed linens in hot water {or the highest temperature setting indicated on the manufacturer’s directions} to kill any dust mites. Depending on the size of the duvet, you may need to take it down to the cleaners for the industrial-sized machine machines, but a queen size will generally work in most standard machines. When you are washing your pillows, it is best to do two at a time to keep the washing machine balanced without overloading it.
Wipe down the bed frame with a damp cloth to remove any surface dirt. Finally, you should clean your mattress {you can find detailed instructions HERE} and try to place in direct sunlight {or you can even try take it outside if it needs a good airing out!}. Make sure your mattress is completely dry before putting your sheets back on when your laundry is completed.
Relax and Enjoy.
Whew! You’re done! Take some time to relax and enjoy your clean and fresh space.
Bedroom Spring Cleaning Checklist
You can find the printable bedroom spring cleaning checklist for you below – just click on the links to download. I also left a few open spots for “other” in case you had a few extra tasks to add. There is a version with and without the border around it, so pick whatever you would like. For those of you that are doing The Household Organization Diet with me, I also did another version with “The Kitchen” in blue so it will match your printables. I just thought that the green was more “spring cleanish”.
GREEN WITH BORDER HERE
GREEN WITHOUT BORDER HERE
BLUE WITH BORDER HERE
BLUE WITHOUT BORDER HERE
The post Spring Cleaning Your Bedroom appeared first on Clean and Scentsible.
from Home Improvement https://www.cleanandscentsible.com/bedroom-spring-cleaning-checklist/
via http://www.rssmix.com/
0 notes
Last Seen Blogs

krysten-itscalledwhiskey-ritter
Krysten Ritter

mekamechanic
Dva and Brigitte

drivemesocrazy
ST!CKS N BRICKS

rockchickatheart
Drifting Away

siickwithsadness
✨️💛 rosie, ceo of sapphic ships 💛✨