#each pic had dry glue covering. them
Note
am i allowed to put your art on a poster and then put it in my room as a shrine i will worship and then put candles around that poster and pray to it every night.
sure why not
#reminds me of that one guy who had a bunch of photos of clay on their wall.#each pic had dry glue covering. them#funky stuff man#ask#anonymous
52 notes
·
View notes
Photo
After that nice soft quilting project, I had to get out my thimbles for the next one:
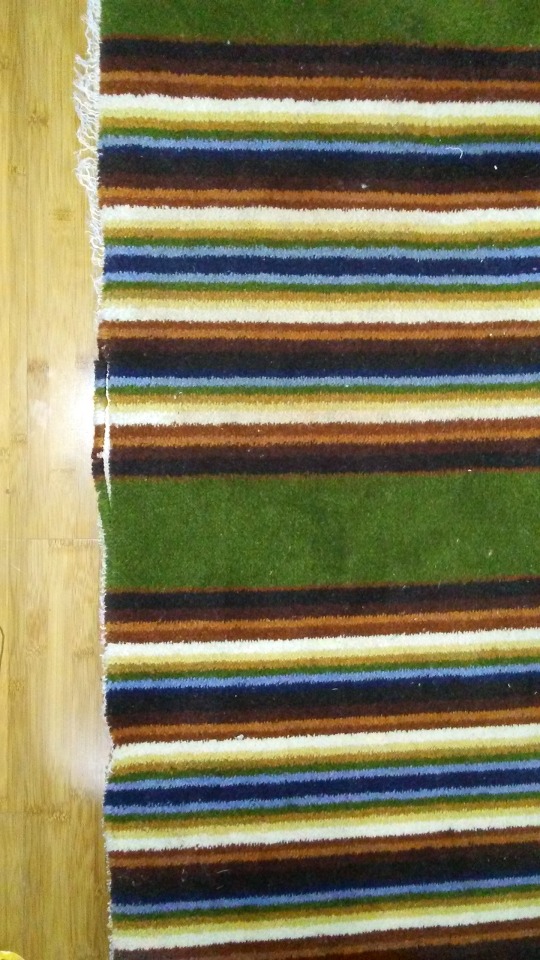
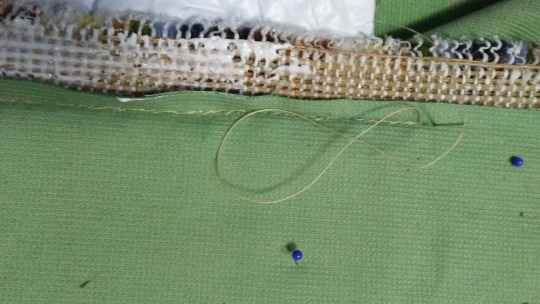
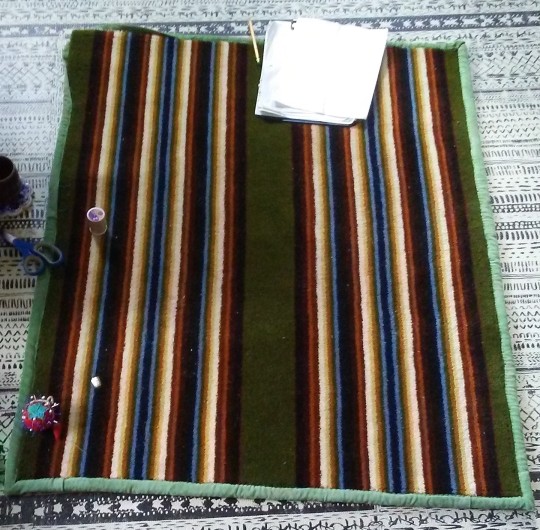
Binding the edges of my throw rug (ok it’s a chunk of carpet runner cut up with an exacto knife) because it’s been shedding yarn bits as it slowly unravells. over the years it’s lost a few inches so it’s definitely time.
I decided to bind all four sides even though only two sides were cut, because it’s striped and i thought it would look weird to have a bar of color perpendicular to the stripes on each end. It will look better if the border goes all the way around.
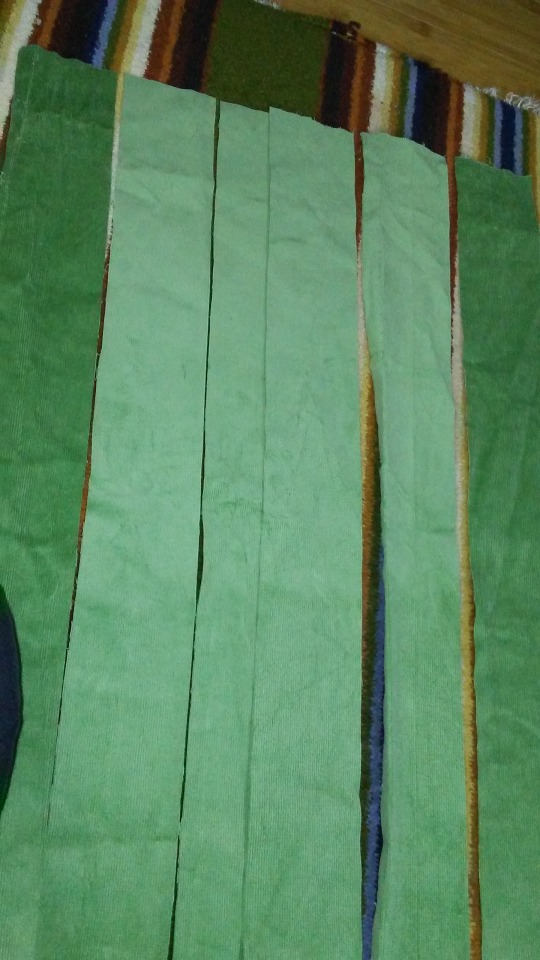

I got out more of that sage green stretch corderoy, which i’ve been getting so much use out of--I thought corderoy would be a nice binding and the stretch would make it easy.
Cut it into strips and sewed the strips together into one long piece.
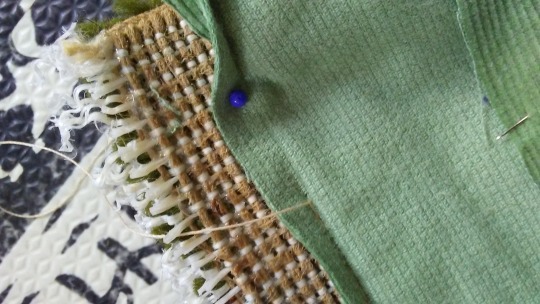
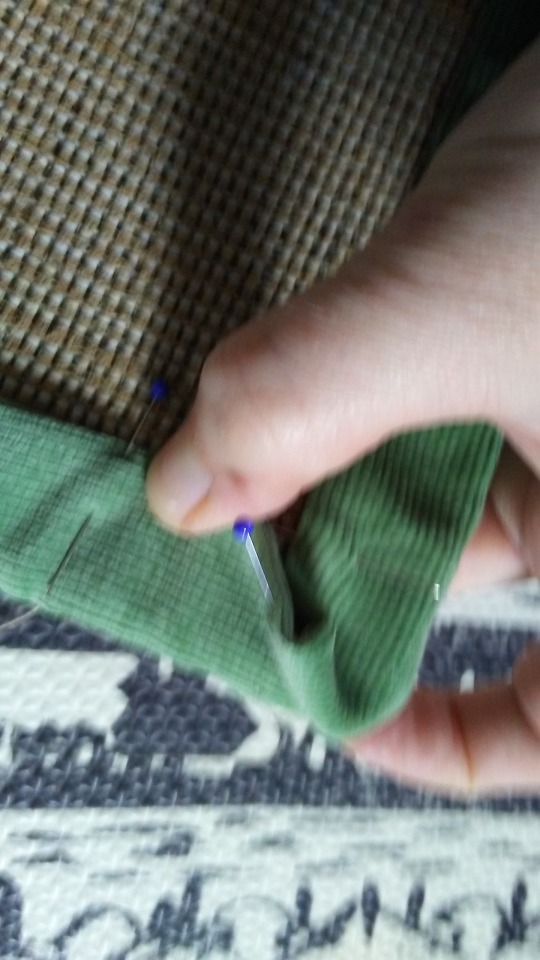
I laid the strip down along the backside of the carpet, front side down, and backstitched it to the carpet with upholstery thread. Then folded the corderoy up and over the raw edges of the carpet, tucking the cordery raw edge under as I did so, so that all the fray-able bits were inside. Hard to explain. Will try to show:
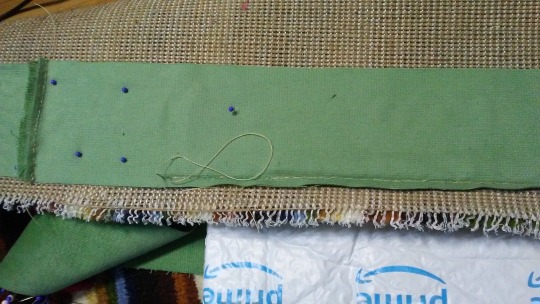
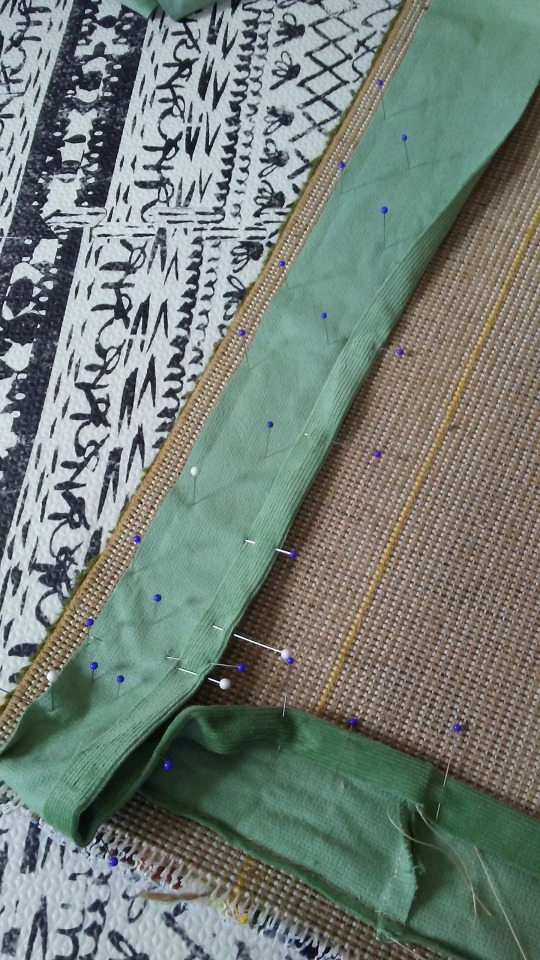
i was able to line everything up using the handy corderoy lines and the carpet grid. Made it so easy!
for extra stability, i spead some glue on the fraying edges and let it dry before I wrapped the fabric up over them.
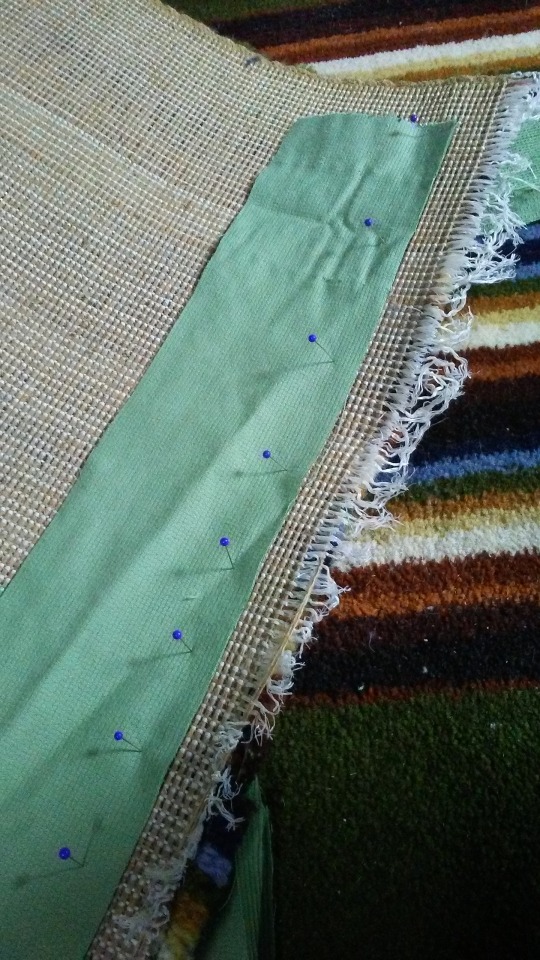
Then i flipped the carpet rightside up, folded in the raw edge of the corderoy:

and wrapped the whole thing up over the edge of the carpet
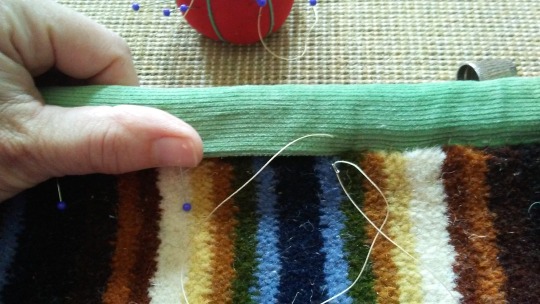
(pulling far enough to cover the marks from the backstitching from earlier)
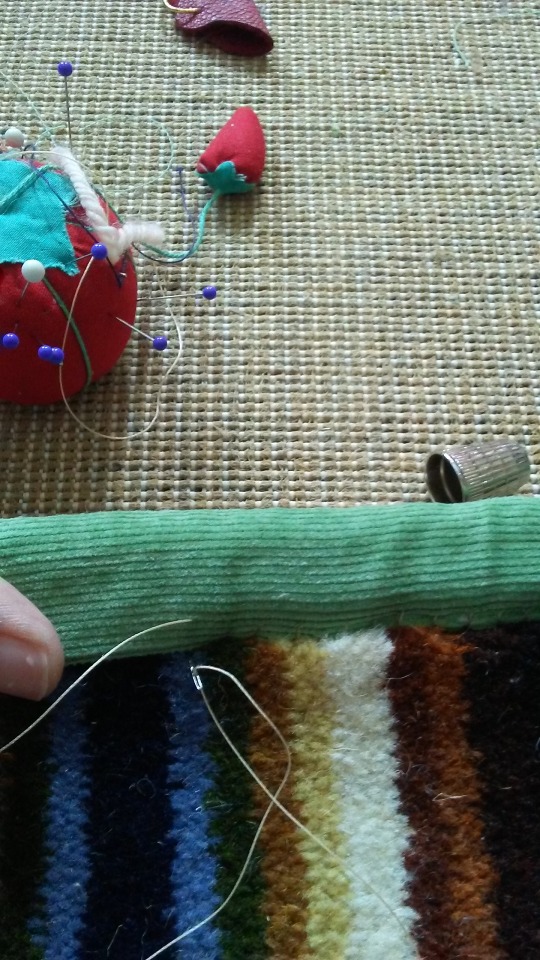
i left the corners for last and im not sure i can explain.
here are the pics i took:
^i sewed in to the the pin
^then folded the strip over so that the fold reached the edge of the carpet in either direction, and started backstitching again at the white pin, leaving the corner for last.
here you can see the strip can reach the edge of the carpet:
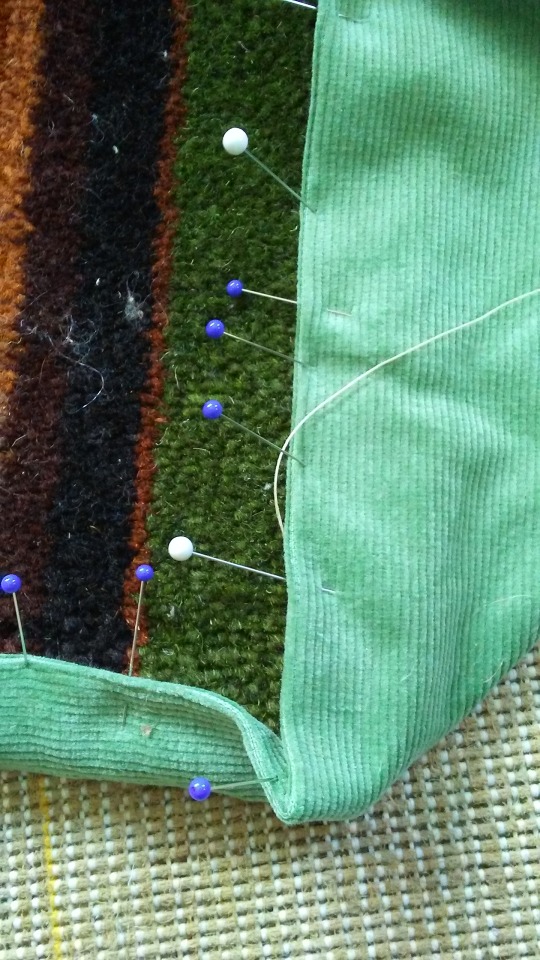
I tucked the middle in to make a neat diagonal fold and stitched it down:

and then flipped the carpet over and scured the underside of the corner folds:
i used a modified whipstitch for securing the binding all the way around, one that went all the way through the carpet and caught the binding on the underside each stitch.
I think it looks great:
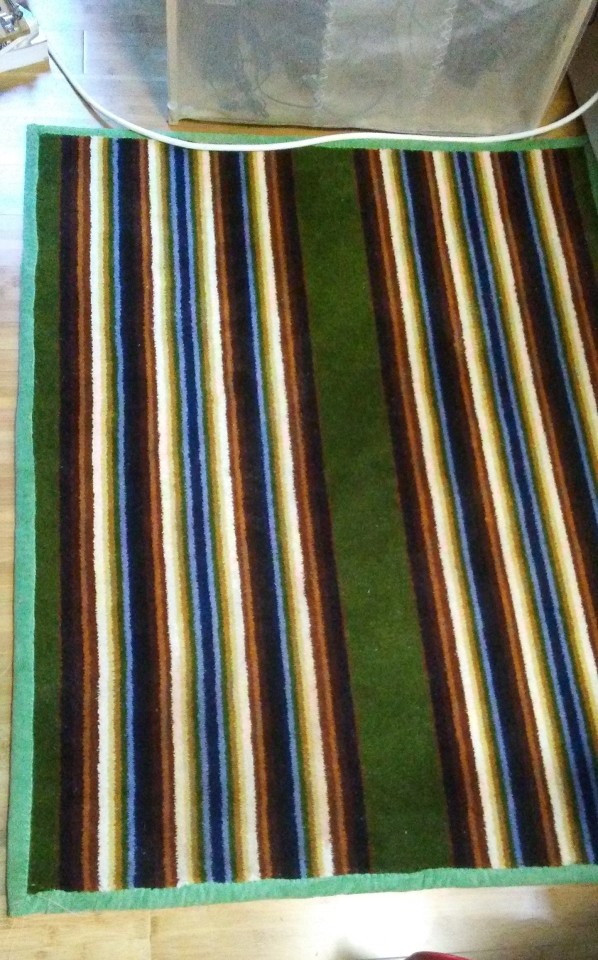
And now i can vacuum much more easily, and don’t lose bits of my carpet each time!
#don't throw it away#repair#carpet repair#zero waste#70s style#sewing#anything to make cleaning easier#reblogs welcome
6 notes
·
View notes
Text
Hello again. Today i will show next piece of my Boba Fett costume.
Second thing i started making is the torso armor.

During this part i unfortunatelly forgot to takie more pics... But i'm going to describe each step.
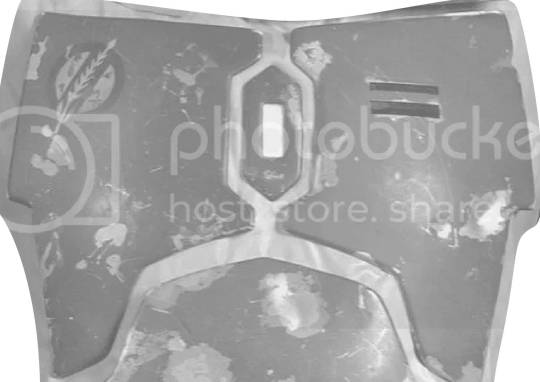
So first i printed out the pattern that you see above. I cut out each piece of the armor and used them to trace the shapes on a cardboard and then cut it out.
On every edge i glued a 5mm strip of cardboard to create this kind of border and make it stand out . At this point i had to make it curvy, so it would comfortably fit me.
When the pieces dried they were strong and stiff and the curves were preserved. I then cut every shape again and glued each to create pairs. But before i did that i had to plan out the details of the armor. It had some bullet holes, scrches, other holes and signs.
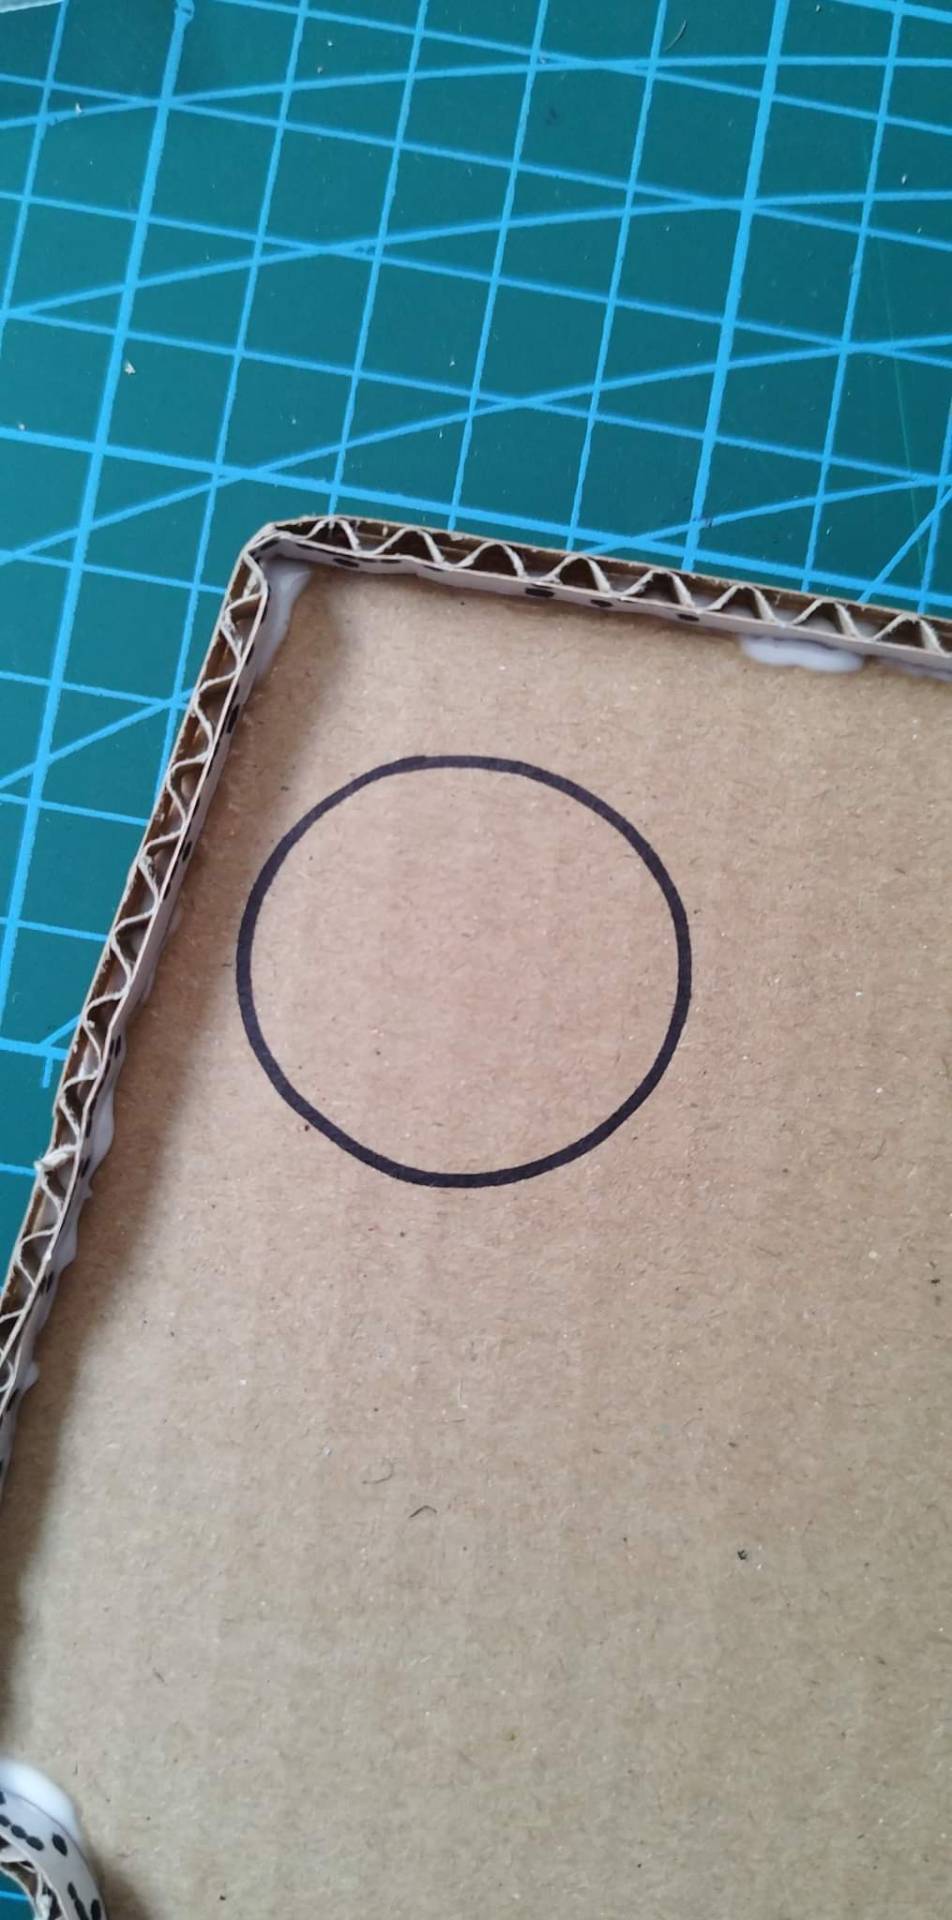
I found the only picture i took during the making proces. Its an almost perfect circle for one of the signs i did by hand and i wantet to flex.
When it also dried i started covering every piece with small pieces of paper and mixture of glue and water, exactly the same as i did with the blaster. It's my way to go with finishing my creations. It makes them even and kinda smoothes it out.
I had to wait for it to dry again and then began to pain. Again using spray. I used silver for the base, then dark green on top, and when it dried i used silver and yellow for scraches and details along with acrylic paint.

Here is pre details

Here is almost finished
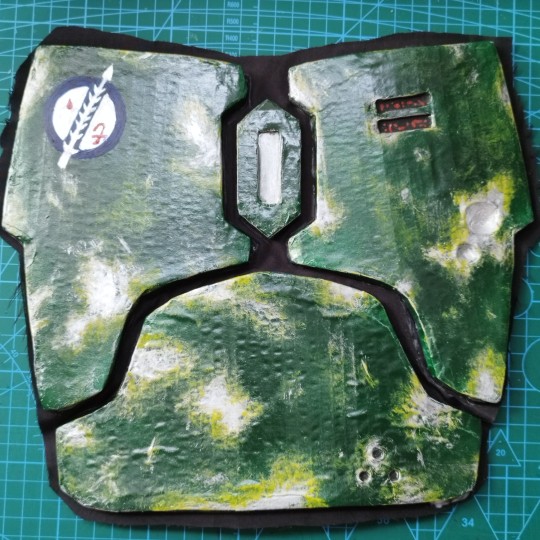
And there it is. The cardboard sucked a bit of water and spray so its not perfectly smooth, but it adds to the realism again and im not complaining. Everything is glued to a piece of fabric so it can hold it in place and give a little bit of movement.
Later i added some rubber... elastic.. strips? Bands? To hold it in place on my body. Yknow i just created a backpack thingy.
So this how its done. Of course, there are things i could have changed, but there is no going back now. Id have to start all over again. Main problem? The pieces are not curved enough and i hoped i will be able to bind my stuff more but.. yeah. I cant afford binder for now so if you have any suggestions or advice id be very happy.
See ya
2 notes
·
View notes
Text
SanRen by Kyogre - a Rogue Cultivator!WWX fic


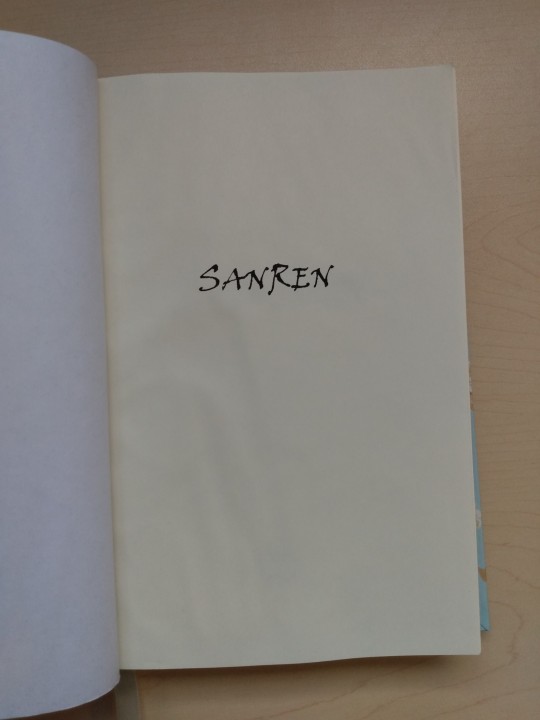


Title: SanRen [AO3 link]
Author: @kyogre-blue | Kyogre [AO3 link]
Fandom: MDZS | Mo Dao Zu Shi
Length: 87, 825 words | 344 pages total
Leaving YunmengJiang in an effort to curb the tensions in the Jiang family, Wei WuXian becomes a rogue cultivator.
Even without the support of a sect, he is a rare genius whose name will become known across the cultivation world and whose techniques will influence the course of a war.
However, what influences his own fate is a chance meeting that becomes the first step toward love.
Title font: Viner Hand ITC
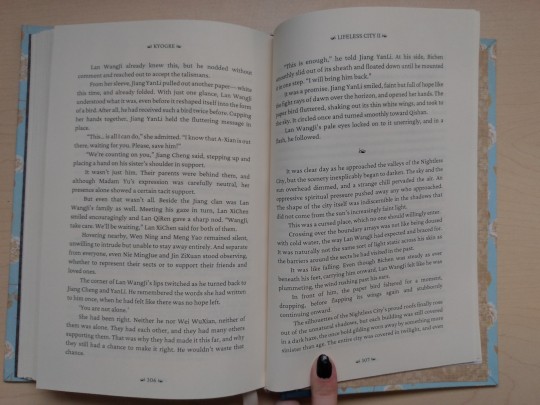
Body font: Crimson Pro, 11pt
.
Loved this fic! I also may or may not have a weakness for genius![character] fics...
Pics of the process and rambling beneath the cut.
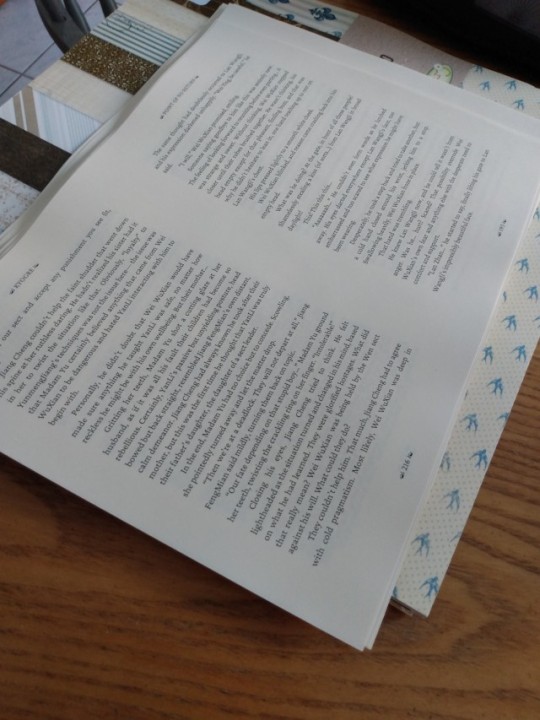
Printed and folded! (13 signatures of 6 sheets each, with one last signature of 2 pages.)
Paper used: Domtar Earthchoice Multipurpose, cream. 11x17 cut down to 8.5x11 for short grain.

.
Into the press overnight.

.
Removed from press and holes punched!


.
Stitched up! (French link stitching with waxed linen 30/3 thread, and three 3/8" linen tapes)

.
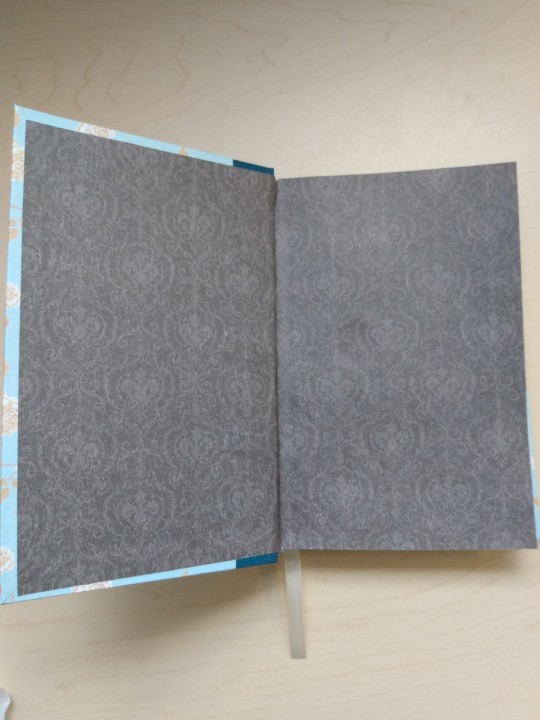
Cut endpapers to size and tipped in with a bead of PVA glue.
Paper from a pad from the dollar store. The colour and pattern are nice, but it’s thinner than I’d like. Tears and wrinkles too easily when pasting things together.
.
Ran out of PVA and made some wheat paste. (Flour, water, heat. So easy, so much cheaper, so much easier to get!)
.
Glued (using wheat paste now unless otherwise stated) and rounded spine. Added bookmark (3/8" satin ribbon) and mull.
It always takes longer than I think for the glue to dry enough for rounding...

.
Endbands sewn! (3 colours, embroidery floss. Core of leather cording, 1.9mm)
My favorite part! Doing 3 colours was new, and I had to redo them a few times before I figured out how to manage more than 2. (Which is exactly the same way as 2 colours. Why didn't I just try that from the start?) Went in blind through the ribbon, couldn’t see where I was putting the needle in. Thought I might break my needle trying to go through ribbon, paper, glue, mull, and more glue... but I didn’t! [No needles were harmed in the making of this book!]

.
[Forgot to take progress pictures from here onwards. Again. 🙃]
.
Trimmed off excess cording on endbands, with a dab of glue at ends (to prevent thread from slipping off the core).
.
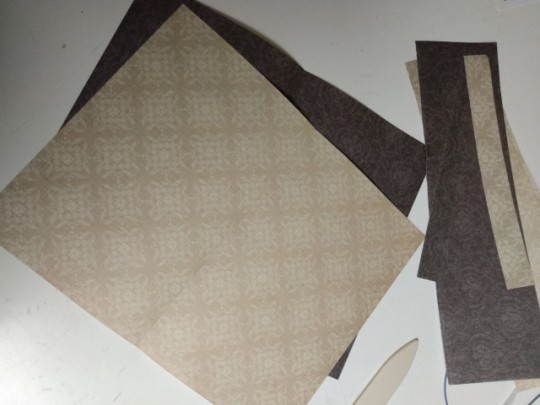
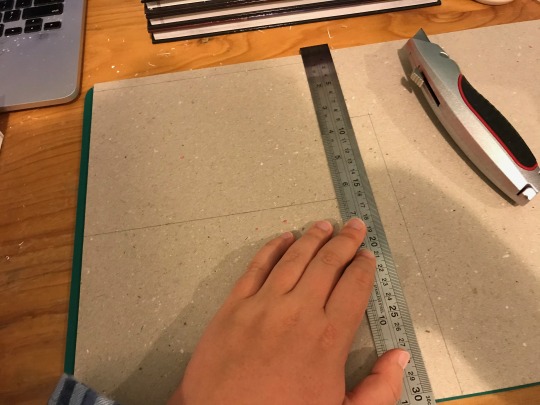
Materials for the case: measured and cut to size! (2mm binder's board for covers, decorative paper for covers, and bookcloth for spine.)
Paper for the covers is also from a dollar store find, but it’s a heavier paper than the endpapers. A lot nicer to work with.
In the tea-dyed notebook I made, I've written down formulas and standard measurements for the things I bind. The only thing needing to be measured this time was the spine thickness!
.
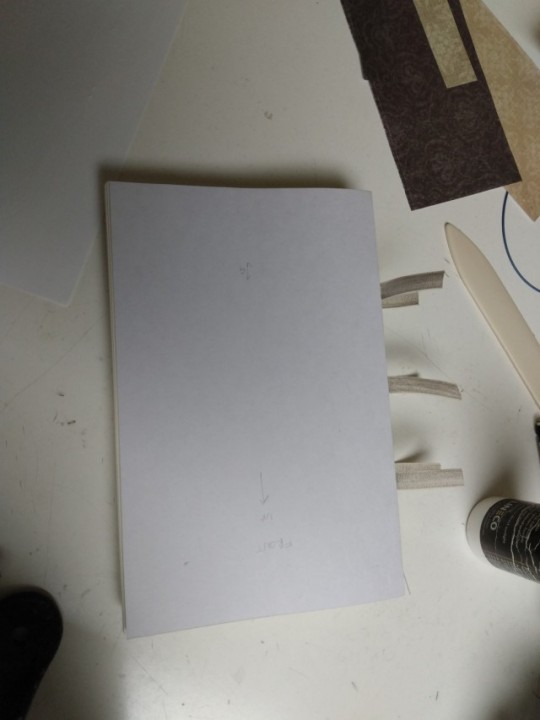
The spine stiffener: tried something new.
Not liking how the spine of my last rounded book turned out (it was 600+ pages), I decided to try something new: an Oxford hollow spine. Retrospectively, a regular spine would have been better in this case, but I wanted to try it.
Measured the spine of textblock by wrapping a bit of scrap paper around spine, marking it's width. No futzing around with rulers and measuring tapes. For the spine stiffener I just used some cardstock with the grain running parallel to the spine.
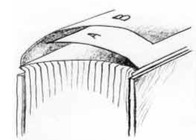
Oxford hollow spine stiffener (diagram above and more info here). A is glued to B.
I glued the spine stiffener to the textblock first and to the bookcloth later, rather than just to the bookcloth like I usually do. I think that was the right way, but I ended up having a difficult time casing in. (Though that could just be because I was trying something new for the first time)
.
Made the case! No issues here, thankfully. Glued book boards to bookcloth, glued decorative paper onto boards. Left overnight to dry, flattened under weight to prevent warping.
.
Casing it in: mistakes were made.
I made the mistake of applying glue to all places at once instead of one at a time like I usually do. End result of wrinkled and torn endpapers, and a spine where bookcloth is not actually glued to spine stiffener. 🙃
.
Slipped in scrap paper between glued endpaper and rest of textblock (moisture barrier), put book under weight overnight.
Note to self: either use something else as a moisture barrier, or use more than one sheet of paper. Moisture still got through and affected a bunch of pages. Maybe my wheat paste was too watery?
.
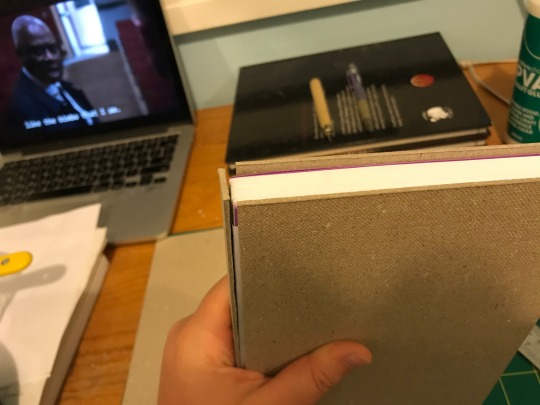
Next day: a book is in my hands, and soon, on my bookshelf!
#fanbinding#ficbinding#bookbinding#mdzs#mo dao zu shi#the untamed#grandmaster of demonic cultivation#wangxian#rogue cultivator wwx#genius wwx#sanren
72 notes
·
View notes
Text
Simplified Bookbinding: Buy Good Glue
In the first post in the Simplified Bookbinding series (How to Make a Cheap First Book), I explained the four steps to binding your own book. Because it was a crappy first-effort practice book and I didn’t want to ask you to buy anything special, I used Elmer’s school glue. You can see what’s already happening to the book. The end papers are pulling off the cover; the cover is coming off the boards; even the binding has split and pages are going to start falling out.
The most important bookbinding supply to upgrade immediately is the GLUE. In this post, I’ll go through the four standard steps of bookbinding and talk about what kind of glue you need for each step. Here are the steps:
Step 1. Format the text and print it. (No glue required.)
Step 2. Create the text block. (The glue is incredibly important for this step and I will tell you exactly what to buy.)
Step 3. Create the case. (You need a decent craft-strength glue. I’ll explain some options, but there’s a lot of leeway in this glue choice.)
Step 4. Attach the case to the text block. (I’ll give you a couple of pointers, and then you can choose your own glue as you develop the technique.)
If any other bookbinders @renegadepublishing want to reblog and add glue comments, please go ahead. There are so many glue tips and tricks, and what you can get varies with what part of the world you’re in, so the more perspectives, the more helpful it is.
Long post with pictures and astonishing amounts of glue geekery under the cut.
Step Two: Create the text block.
To put the pages together, whether you’re perfect binding or sewing signatures, you must use PVA bookbinding glue. The description should also say things like “archival quality” and “acid-free” and “PH neutral” and “non-toxic.” There are several brand names of PVA bookbinding glue. I bought Lineco brand from Amazon.
Step Three: Create the case.
The glue to create the case is basically any glue that permanently sticks paper and cloth and cardboard together. I watched Sea Lemon’s glue video and went to a craft store with my list of glue brands she recommended and couldn’t find any of them. So I picked up a bottle of Aleene’s Tacky Glue and an Elmer’s Craft-Strength Glue Stick mostly because that was all the store had. They’ve worked out great and I’ve never tried anything else.
Check the glue descriptions for those important words like ‘archival quality’ and ‘non-toxic.’ I figure any glue that claims it’s safe for photos is safe for bookbinding.
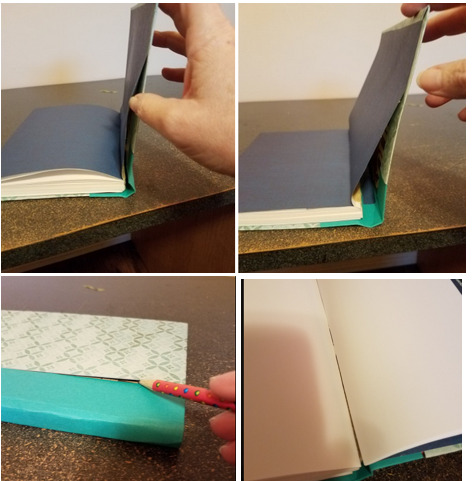
A case for a book is made out of cover boards (stiff, strong and thin cardboard) which are covered in either bookcloth or cardstock (See Simplified Bookbinding: Cardstock Covers). Those things will all warp if they get wet. Glue is wet. Creating a case means using enough glue to stick it together without using so much glue that your cover warps.
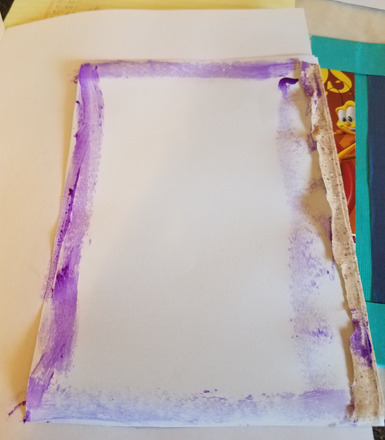
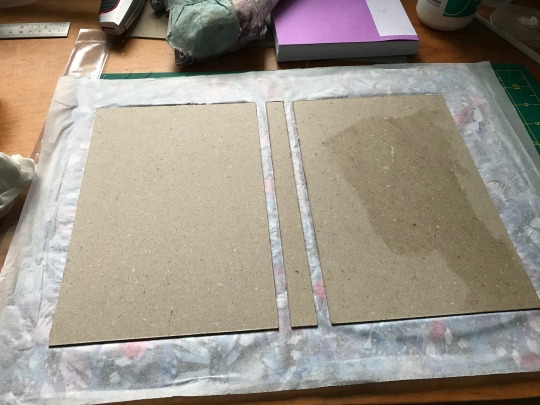
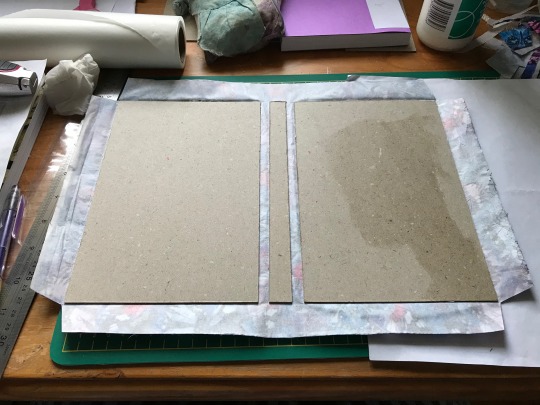
This is one of my first books, in which I spread liquid glue over the entire cover board. I think I was still using chipboard for the cover boards at this point. You can see how badly it warped:

Then I figured out you should only put glue on the edges of the board, and my covers warp a tiny bit or not at all:

I do not use the PVA bookbinding glue on the covers because the PVA bookbinding glue is very runny/wet. The Tacky Glue is thicker. The glue stick is thickest of all. I know some people are leery of using a glue stick, but I’ve had great results. The craft strength glue stick says it was formulated to use on photos, so I figure it won’t turn yellow and rot ordinary paper either.
Step 4: Attach the case to the text block.
There are two places you use glue in Step Four. One is to glue the end paper to the text block. For that, I use the PVA bookbinding glue, applied with one of these methods.
Method 1:
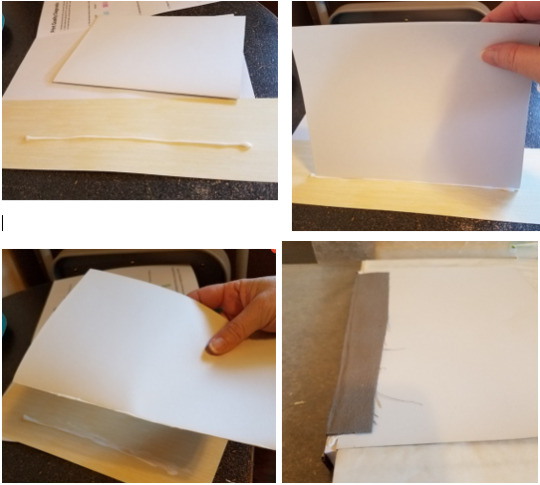
Dipping the end paper in a line of glue gives you a nice thin and consistent line of glue on the crease.
You can also apply the glue directly to the text block, but that risks getting a glue blob somewhere, and then that spreads out and glues a bigger area than you wanted to glue.
Method 2:
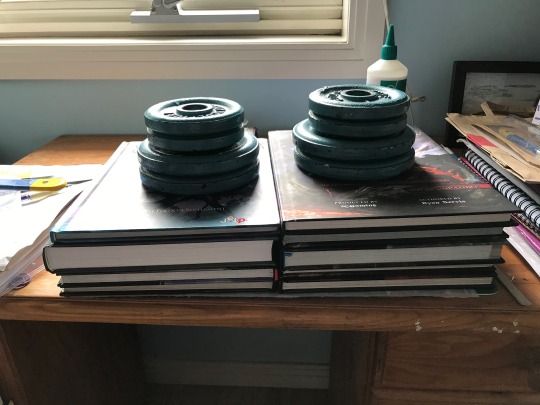
Put some trash paper and wax paper between the end papers, and between the end paper and the first page of the text block (so you don’t glue pages together). Set wax paper on top of the text block, put some heavy books on it, and let it dry.
Is it dry? Moving on.
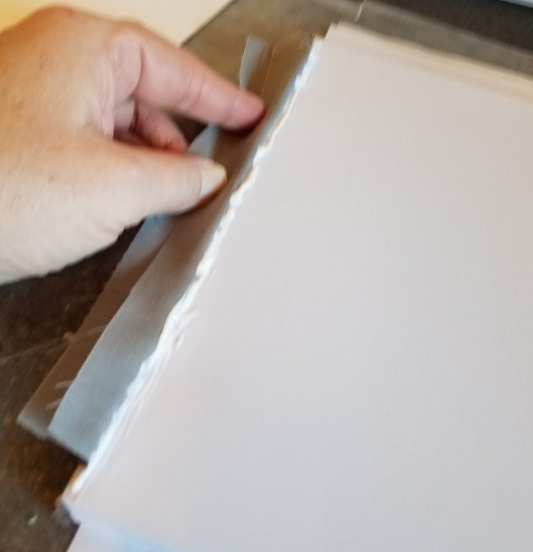
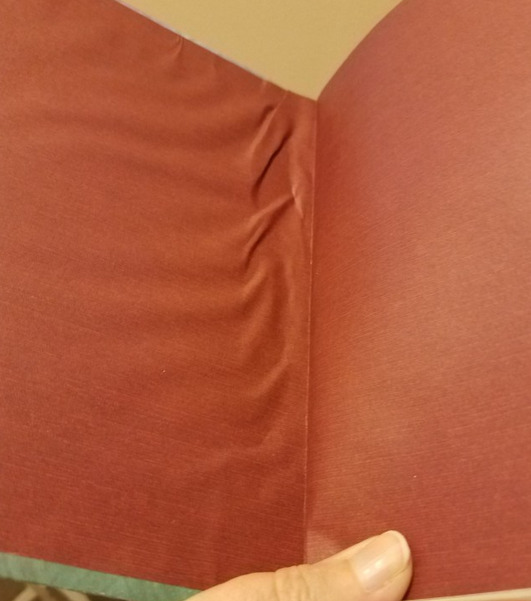
The second place you use glue in Step 4 is to attach the end paper to the case. In the pic on the right, I used liquid glue spread only at the edges. Maybe you can’t see it very well, but the paper is wrinkled like any paper gets if it gets wet and then dries. If you put a piece of paper in between the end papers while it dries, it absorbs some of the moisture, but I still get wet wrinkles sometimes. The one on the left was glued with a glue stick, and you can see how smooth it is.
I apply the glue stick only to the edges. (Notice I cut off as much of the spine cloth as I could.) Any glue on the end papers, whether glue stick or liquid glue, should only be applied around the edges:
Glue sticks dry really fast, so two sides are already drying out while I took this picture. One drawback to using a glue stick is you have to work fast. It might be easier to practice with liquid glue so you’ve got an extra few seconds to get the text block set straight in the case. Otherwise, you may have nice smooth end papers, but your entire text block is crooked. If the end papers are bad enough, you can always cut them off and start over with Step 4.
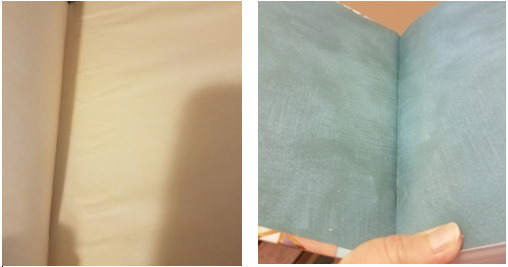
And just to keep glue in perspective, if the end papers get really screwed up, it probably isn’t the glue’s fault. This one is me not smoothing out the end paper very well before putting it under a heavy stack of books to dry:
Summary: Find good craft-quality glue and experiment to learn how to apply enough glue to stick your case together without applying so much that it wrinkles. That’s just a matter of practice, which is why I suggest making a few blank practice books before trying to bind something that really matters to you.
Good luck and have fun with it!
#simplified bookbinding#bookbinding#renegade bookbinders#renegade bookbinding#glue#lindstrom2020#op#renegade publishing
207 notes
·
View notes
Text
Show your process
To continue supporting content makers, this tag game is meant to show the entire process of making creative content: this can be for any creation.
RULES - When your work is tagged, show the process of its creation from planning to posting, then tag up to 5 people with a specific link to one of their creative works you’d like to see the process of. Use the tag #showyourprocess so we can find yours.
Thank you Anni @whatagreatproblemtohave for the tag! This is even more fun because this is her notebook I’m making.

Planning
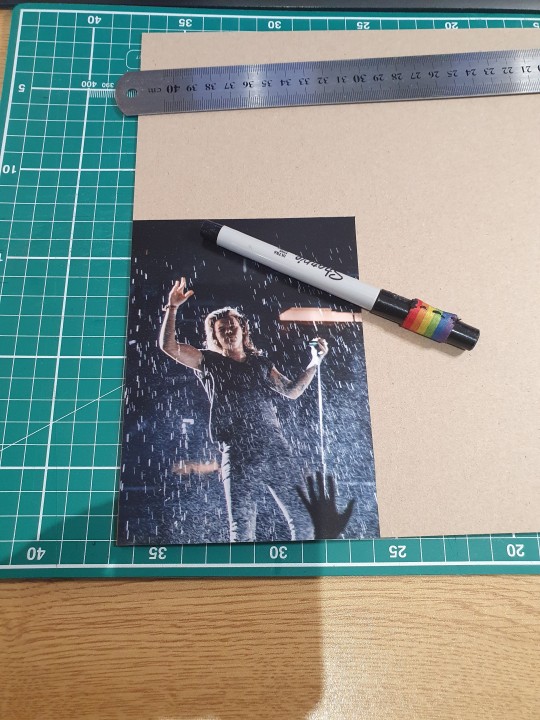
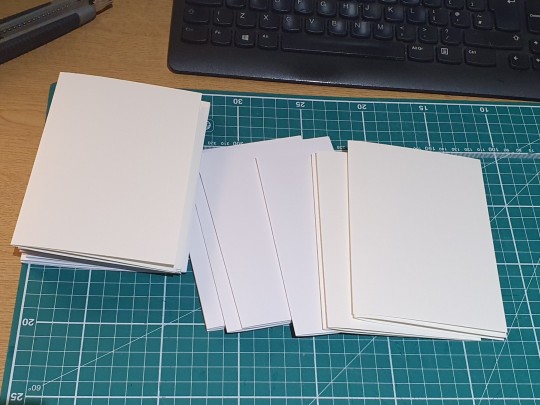
Well, I’m a terrible planner, I don’t really plan things. I feel like they happen by accident and luck most of the time lol it started when I was using some leftover dyed paper to make a junk journal, and I’ve realized that making signatures with A5 paper was about the same size as a photograph and they would make nice covers. Then by luck I found some really cool A5 acrylic/mixed media and watercolor papers at the dollar store (I was there to get something else, but I always go through the whole store because I might find something cool) and I’d printed some of my favorite Louis/Harry/Liam pics, inspired by my desire to own copies of the House of Solo outtakes. It all sort of came together and I just had to make these.
Materials
# Cover:
Kraft board 935gsm 1.5mm
Black paper A5 220gsm
Strong glue stick
Strong clear glue
Sandpaper
Picture
# Interior:
White paper A5 160gsm
Watercolor paper A5 190gsm
Acrylic/mixed media paper A5 190gsm
# Binding
Waxed cord 0.5mm
Awl
Curved needle
Scrap cardboard
# Etc
Cutting mat
Metal ruler
Craft knife/box cutter
Fine tip pen/marker
Making
I’ve been a subscriber to SeaLemon’s channel for years, and while I only started book binding this year, I always found it very relaxing watching her videos. I’m using her old Coptic Stich videos for these journals, both for how I make the cover as well as the binding method itself.
I started by cutting the cover boards. I’m making two notebooks at once, so I cut 4 boards by first tracing the picture, then using the ruler and box cutter to cut it to size. I sand any stray bit of the cardboard I don’t want it, or any uneven part.
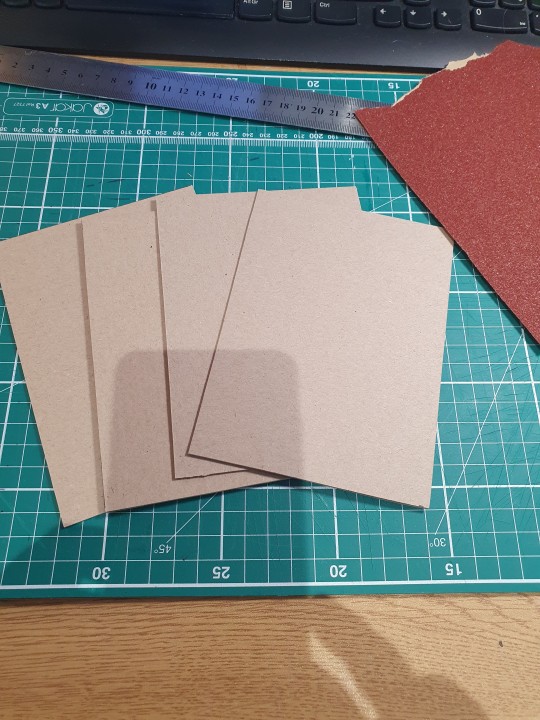
This board is thick enough that I could just paint it, and I tried that at first with acrylic paint on my test notebook (Louis drinking milk), but the first and last page were getting a bit of transfer from the paint and looking dirty. I tested on a scrap piece of board painting and doing a clear coat, but the even when the can said “matte coat”, it still came out shiny and I didn’t like the look, so I decided to go with the paper wrap path.

It’s important to use a glue that is not very wet, or else the board warps, so I do as much as I can with the glue stick and set the board the dry under heavy books (or a book press, if you have one of those). I use the clear glue to glue the inside as it’s a bit stronger and the edges that are exposed need to really stick down. To make sure nothing warps, I use a glue brush so the layer is very thin, and set it to dry under the books to make sure everything is flat.
While that is drying, I fold my signatures (paper folded in half and stacked in groups). For the white paper, as it’s a bit lighter, I do 3 pages per signature, and the thicker watercolor and mixed media paper I do just 2. For each notebook I do 5 signatures of white, 3 of mixed media and 2 of watercolor paper, giving me a total of 50 pages per notebook. It’s not a big journal, and I don’t know how practical it is to really paint on them, but I’m using the coptic stich, which makes sure every page opens completely flat without harming the other pages, and I also saw videos of Slew painting a full oil painting on his notebook, so I know it’s not impossible. I still think the writing or sketching experience will be pretty good on this because of the paper type. Also, they get to look at those pictures, that’s always a plus.

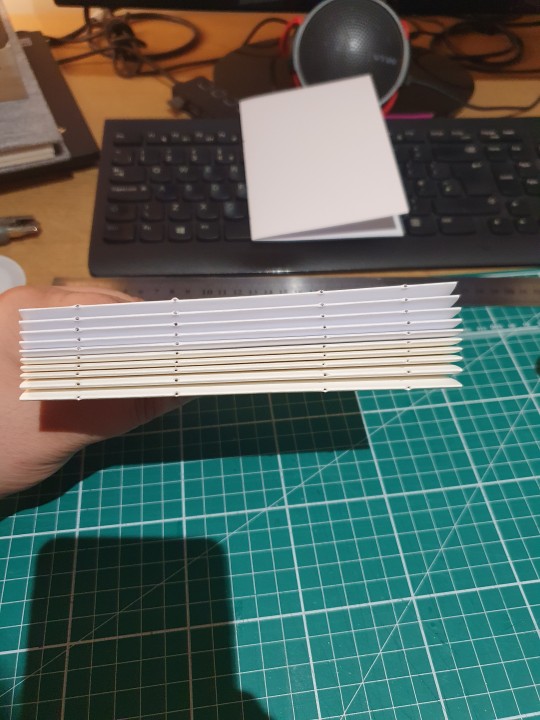
Once the signatures are all stacked, I create a template using an extra paper to measure where the holes will be. I use the spare cardboard in a V shape as a punching cradle, and with the help of the template I pierce through all the signatures.


This is where I’ll diverge a bit from the pictures. Initially, I bound the signatures and cover first, then glued the picture over the cover stitch, and let it dry at least a couple hours under the heavy books to make sure there was no warping or bubbles. Looked pretty cool because the thread I’m using is very thing, and it didn’t really show under the picture. However, because the thread is very thin, I didn’t like how it opened and closed. The thread feels strong and I didn’t think it would snap, but I decided to cut the binding and redo it with a double thread. As the picture was already glued to the cover, I had to pierce the picture to do the binding. I ended up liking the look better with the exposed thread anyway, so it wasn’t a big deal. Also, not shown here is Evi's final notebook, because I've decided to redo it. I had an issue with the cover (used a different folding technique for the paper and it was bulkier than I wanted to, so her cover is currently under very heavy books drying right now. So the final picture I chose will be a surprise for when she gets her mail in a week or so.
Not counting all the drying time, the whole process takes me about two hours per notebook.
Posting
Well, I shared it on the Larry Library, but I didn’t post it here until now. It’s not original art or an edit so I just didn't 🤷🏻♀️
☆ • ☆
I haven’t seen if these were done, but I really liked them, so I’m tagging it.
@sunsmile-lou for this moodboard. Moodboards fascinate me and I want to learn how to make them.
@whatagreatproblemtohave for her Tired Tired Sea art. I feel like I was there for some of it, but it’s just one of my favorites.
@killmygoldenn for the Faith in the Future edit
@essercipertuttienonperse for the Livestream tickets or her rainbow series which I love so much
@evilovesyou for A Song Not for Whispering
20 notes
·
View notes
Text
Kyidyl Explains Bones Part 5
(These are under the KyidylBones tag.)
How to dig up dead people.
So, in my Kyidyl Does Archaeology series I talked a bunch about how digging up places was different than digging up people. And you don’t have to read that to understand this, but it might be a little easier for you because I’m not going to re-address the same basics I covered there.
Ethical Stuff: So is digging up dead people ethical? I mean, I think so if strict rules are followed, but honestly the POVs here are as different as people themselves are. Some cultures routinely dig up their own dead and do all kinds of things with the remains. I wish they wouldn’t but, hey, that’s just me. I respect that their culture and choices aren’t the ones I’d make. It’s part of being an anthropologist of any flavor. And, like that one post implies, there really isn’t much of a different between grave robbing and archaeology. The biggest difference is the care we take, the respect we try our best to show, and the purposes to which we put the remains. However, there is a difference between exhumation and archaeology. General rule of thumb: if there’s someone living still that would have first-hand experience of them or if they still exist strongly in cultural memory, it’s exhumation. There’s no hard and fast number of years where it moves from exhumation to archaeology. Sometimes it’s the context that makes the difference. For example, Richard the 3rd’s bones were excavated from that carpark. If they were removed from where they were reinterred, then they’d be exhumed. But the TL;DR of it is that digging up people is incredibly ethically complex and you have to do your best to be respectful. If you aren’t the type of person who can really put yourself in someone else’s shoes and be ok with respecting the desires of a specific culture regarding their own dead...then archaeology is not the right area for you, and that goes double for bioarch. These people had lives and were loved and valued by those around them, and you need to be sensitive.
The legality of digging up human remains also varies wildly from country to country. In the US, we adhere to NAGPRA. If you want a primer on what NAGPRA is and how it works, you can check out this post that I made.
Also a quick reminder that we don’t name the individuals. They had names and you don’t get to give them a new one.
Beyond this cut there be pictures of human remains.
How do you know where to dig? Sometimes, honestly....we don’t. We’re just making educated guesses based on migration patterns and known settlements and research into local history. Generally, if there’s a group of people who lived somewhere, they also did something with their dead. So if you have a settlement, you’ll probably find bodies in it or near it at some point. Sometimes people find remains and are like “uuuuuhhhhh....” and we come and dig ‘em up. This is especially true on private property. Farmers are notorious for this. Construction, too, obviously. Sometimes we look in caves, because very old caves have lots of dirt on the floors and a lot of times if it’s a good cave there’ll be bones in it. Sometimes people threw their dead in bogs and now we have stuff that isn’t skeletons but is really old.
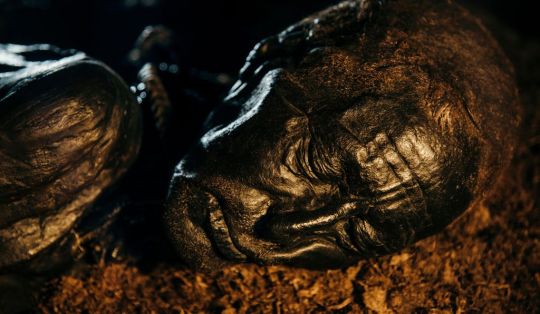
(Source)
That is a whole ass human dude. He’s around 2000 years old. You can still see his facial hair.
So there’s a lot of science behind how and why different environments preserve bodies differently, and I couldn’t possibly get into the detail of that here, but it’s definitely a factor we consider. A swamp in Florida isn’t a good place to expect to find remains, you know? General rule of thumb is: more water = less body, unless there water isn’t standard water (it’s very alkaline, very acidic, or very frozen.). Dry, cold landscapes like the Andes are great for preserving bodies.
So what you find when you go looking is going to vary wildly depending on the environment. My personal experience, though, is in graveyards. Graveyards are an easy thing to dig because it’s not uncommon to just like...know where one was. But graveyards aren’t the orderly things you’d expect them to be, not even modern graveyards. People bury their loved ones on top of other people, graves intersect, and sometimes people would sneak bodies into the consecrated part of the graveyard when the priests/monks/etc. said they couldn’t be buried there. So you can have bodies mixed with other bodies or under other bodies or just like random parts of people that were dug up, someone said “oops”, and then they were re-buried in a different spot. So when we dig a graveyard, we keep complex records of where all of the remains were found, including in-depth drawings. This is one way in which it’s similar to digging up a settlement. It’s...pretty much the only way in which it’s similar. Because part of the reason we do this is so we don’t mix up peoples’ body parts. Graveyards aren’t what you expect - when I was digging in one we thought we’d gotten most of the bodies out so we were using a mattock to make sure and the site director missed cracking the skull of an intact child by about a centimeter. Luckily the swing tore up a little bit of dirt and exposed it, but if it hadn’t? The next swing would have gone right through and inflicted heavy damage. So you have to be careful even in a graveyard.
Another thing about graves is that it doesn’t take long for the wood of a coffin to decay, so when you dig them up you will often just find the body and sometimes some nails. The nails are good, because they show you the outline of where you can expect to find parts of the same individual. This is one of the ways we show respect - we do everything in our power to NOT mix up the remains of different individuals and to separate them when we can.
Let me sidebar here for a minute to explain. See, your bones fit together. I don’t meant “ah yes, everyone’s shin bone connects to their thigh bone”. No, I mean that those bones have grown together in the same space for YEARS and they fit exactly. They have the same texture and thickness, they go together like puzzle pieces....at the spots where the bones touch. Or, as we say, articulate with each other. See, if I were to take, say, my cuboid and try to trade it with someone else’s, it wouldn’t articulate right. But something big like a tibia and femur will not be as easy to piece back together. That, and we don’t always have complete bodies. So we have something called “MNI” meaning “Minimum Number of Individuals”, and the maximum. So...three left femurs mean at least three people. Four right humeruses mean at least four people, so the minimum is 4. However! We don’t know if any of those left femurs or right humeruses belonged to the same person because they don’t articulate with each other. So the maximum is seven people. We have between 4 and 7 people in that set of remains. This becomes really important when you’re dealing with intersecting graves, mass graves, etc. Any time the remains are what we call comingled (mixed). This is what we’re really meticulous when recording where we found a given bone or set of bones.
Ok, back to the main thing. So...how DO we dig up dead people, anyway? It’s generally done in three stages:
Exposing - This is where we dig down just enough to cleanly expose what we believe to be the margins of the grave. We dig to the edges of the grave, not to a set square size like you would with a settlement. This is where we dig really cleanly, expose any grave goods, take pictures, etc. And it looks like this:
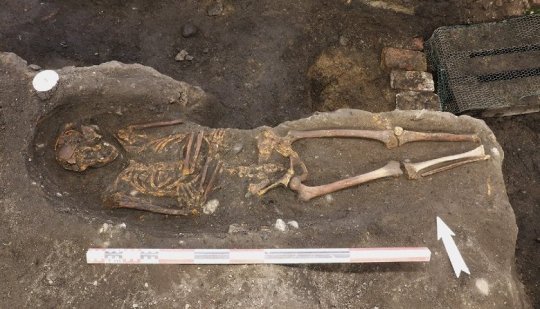
(Source. Was super frustrating searching for this bc I have several of these pics on my phone of the graves we dug and can’t use them for privacy/ethical reasons.)
Pedestaling/Cleaning - This is when we dig down around the skeleton and the grave goods, and then we start digging under the bones in preparation for the last stage. This is time consuming, detailed work. When I was doing this with the child we found, I used a mini trowel the size of my thumbnail and a dental pick. It’s *especially* important with juveniles because their bones aren’t fused and those unfused pieces are *tiny*. They literally look like clods of dirt. Most archs - rightfully - can’t stomach the idea of throwing pieces of a human body into the spoil heap, so we’re as careful as we can be. This part, when done right, takes days. It’s a difficult thing to get a picture of, but this one is close:
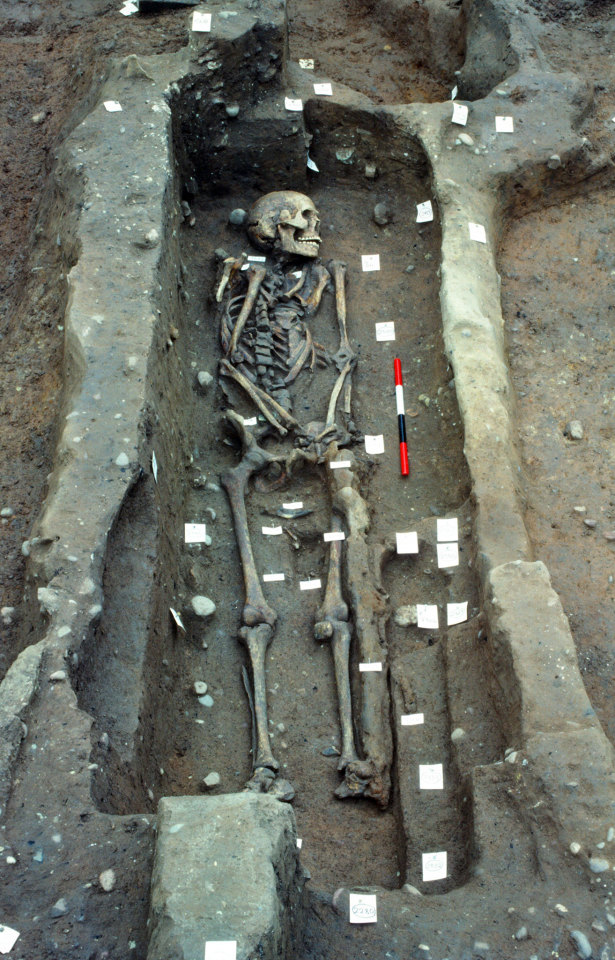
(Source)
The tags aren’t something I was taught needed to be done, but I can see why someone would. They’re basically just grave goods and features of the grave. They’ll be used to make a map of what’s what later on when the writeup is being done.
Lifting - We never just pull a bone out of the ground because it damages them. So we dig around them until they’re ready to come out on their own (and in the case of a large set of broken bones like you see above in that person’s skull, we’d just take the whole pile - dirt and all - for processing in the lab later. And no, it’s not normal to have the skull glued back together. We don’t glue remains together.). If one piece comes out before the others, it is bagged and tagged. We try not to have them come out separately, but it’s better to do that then to lose one. When we’ve cleared all the dirt out, we “lift” the skeleton, IE, remove it from the grave. If I included a pic of this it would just be an empty grave. :P
We make sure to take all of the grave goods and any soil samples with us, all carefully labeled. Fun fact about soil samples BTW. The soil around the bones and especially in the abdominal cavity can retain molecular traces and bacterial from the flesh that tell us about their gut flora and diet or about any parasites they had (parasites were super common back in the day.). It’s....really cool. So a sometimes, if we suspect that there might be money for that kind of analysis, we’ll take soil samples of the gut region.
We are...well, we’re very ritualistic about all of this. It is, of course, for scientific rigour. But part of it is that we’re systematically dismantling these peoples’ final resting places. They had lives and loves and spiritual beliefs that we are disturbing. This is sacred ground for so many cultures. So it always feels a bit like we’re doing these things in a specific way to show respect to the resting dead. That’s why in my 4 types of anthropologists post awhile back I said that archs are chaotic outside the pit but anal inside it. We want to learn from the dead, and it all feels a bit ritualistic if I’m being honest. And there’s this juxtaposition of digging in the dirt, in the chaos of earth and time, in a very structured, clean, orderly way.
Aaaannnyway I think that’s it for this installment. Ask box is open, I check comments and tags and whatnot. Tomorrow I think I’m gonna do age determination. How old were they when they died? Hmmmmm...
19 notes
·
View notes
Text
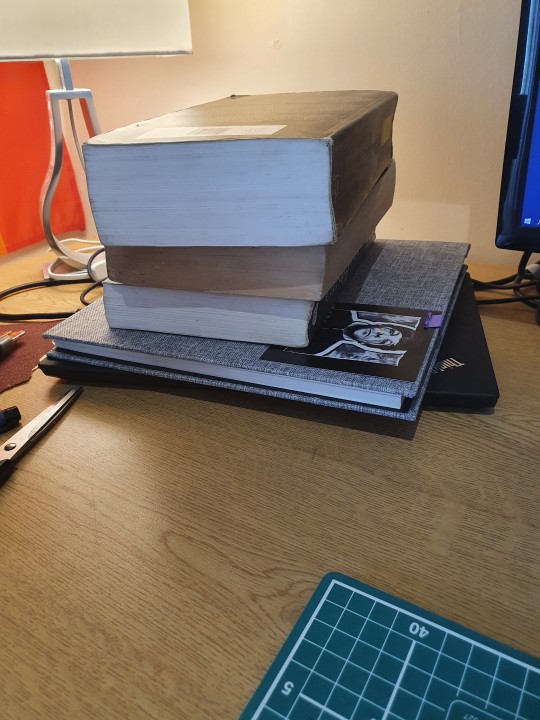
When I’m not writing stories, I’m making books.
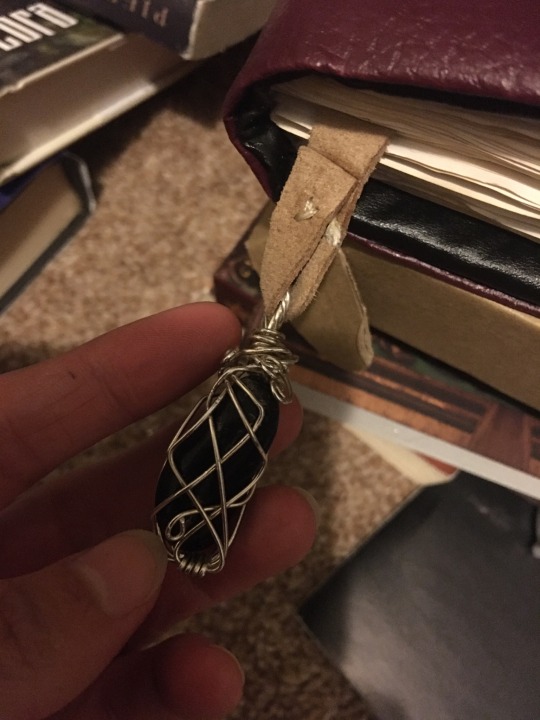
My friend from work has been having a rough time, but also his birthday was very recently and he just got his first tattoo. So, to both celebrate and as a “hope things get better soon” gift, I made him a journal. I already tied it up and put a wax seal, so I can’t show you the inside because unfucking fortunately I don’t apparently think ahead very well, but this is it:
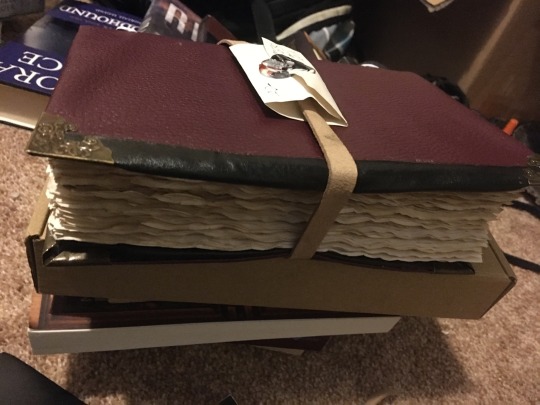
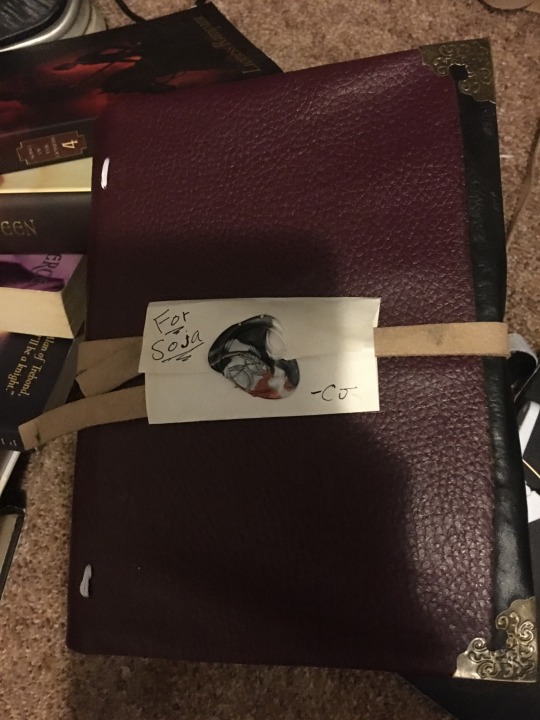
I spent about five hours, give or take, tea-dying and drying each page by hand (I used the oven to dry them faster, but you gotta watch that shit like a hawk or you will have a Fire). I sewed together two layers of faux leather, maroon on the outside and black on the inside, and slid foam board between the layers to make it a hardback. Then I superglued another strip of black to close the last open edge, because I’m dumb and didn’t leave enough room to stitch it closed. I hand-stitched all the papers together using the Kettle Stitch method (I will link below) and used “Natural pH Adhesive” brand PVA book glue by LineCo to adhere everything together. I used a dip-feather pen that my friend gifted me a couple weeks ago to personally write the words “For (his name)” in a script/the closest I can get to calligraphy on the inside cover. The bookmark is made out of the same cord I used to tie it closed (I don’t know what exactly the material is, I got it from Etsy forever ago and it is what they used to wrap around what I had bought from them. Reusing!) with a tumbled Onyx that I hand-wrapped in sterling silver wire a while back. The corner protectors are just generic brass-colored corner protectors I got off of Amazon a while ago, when I bought a pack to make journals for my other friend weeks ago. I used like half a bottle PVA glue total, but I also am a perfectionist who wants to make sure that everything NEVER COMES APART EVER. That spine is there to STAY DAMN IT!
So yeah. My life apparently revolves around books, either writing stories for them or physically binding them together stitch by stitch.
Tutorial I used wouldn’t link, actually (damn it!) but the title is:
“DIY Kettle Stitch Bookbinding Tutorial | Sea Lemon” from four years ago. I have always used this video, and I still use it to refresh my memory of how to stitch books whenever I forget something. There are tons of ways to book bind though, so find whichever method you like most if you wanna try. I personally love this method, only I use actual waxed bookbinding/embroidery thread instead of normal sewing thread.
Thank you for coming to my Ted Talk.
Edit: here’s the bookmark bc I just noticed you can’t see it in the other pics
56 notes
·
View notes
Text
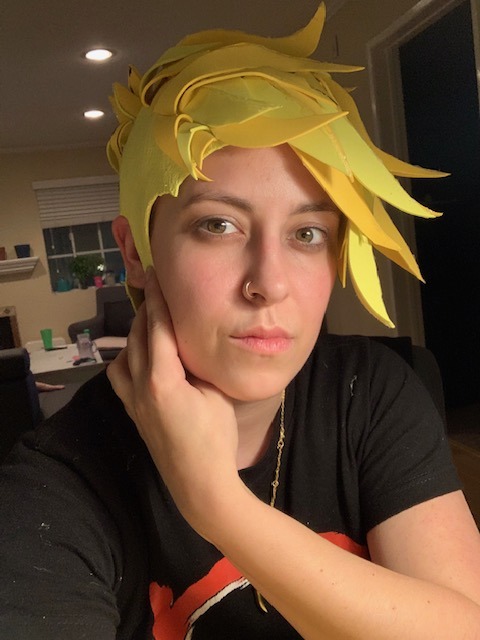
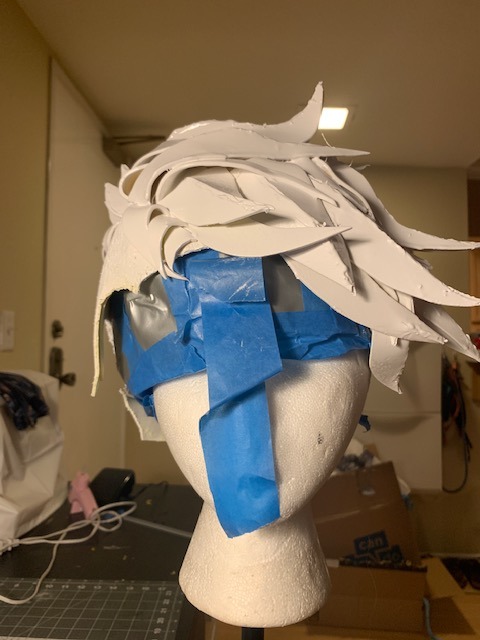
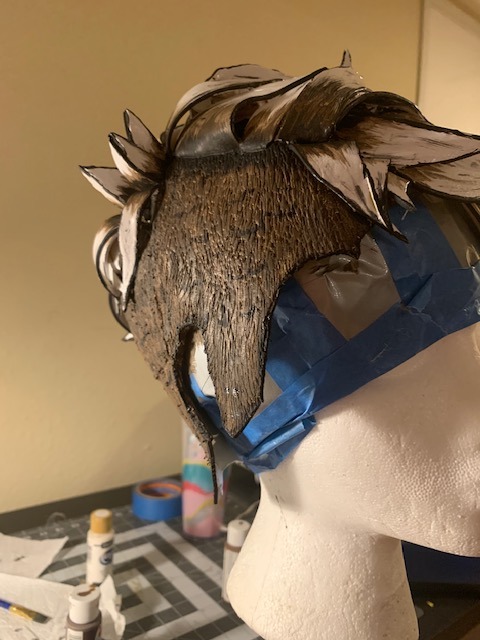
Borderlands Foam Wig Tutorial (Tyreen)
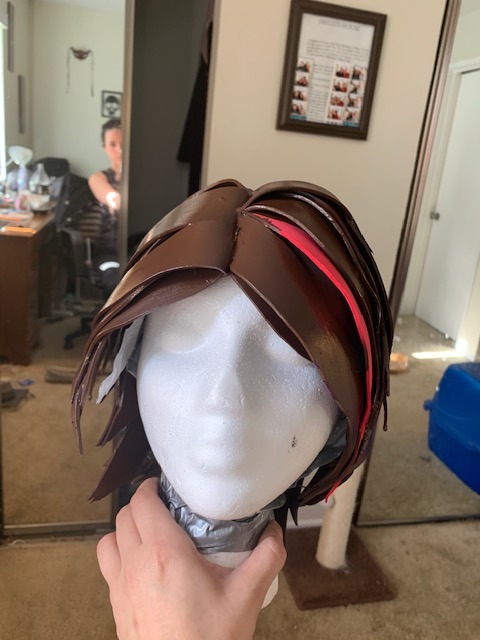
I was chatting with the lovely @void-noises-exe and it eventually circled around to offering to make a wig tutorial because you don’t see too terribly many, just thought I’d throw mine out ( especially because It was next to impossible to find good references of a foam version of Ty’s hair.) So this will be for foam wigs in general but Tyreen’s hair specifically (with a few pics of my Fiona wig from tales as well because they better accentuate my points) I didn’t plan on making this so I am missing a few pictures that might be helpful but here we go. This will not be short.
Supplies:
-Craft foam (ideally, in small and XL sheets, but you can make do with whatever size you have available)
- Spray paint as close to the BASE color of the wig you need (for Ty I used white, for Fiona a medium brown) ideally in a matte.
- a FUCKLOAD of paints (i use cheap acrylics from the craft store ) in Black, and then several shades of the colors in the hair. (For Fiona i used i think four browns? Tyreens shaved sides have three browns, and the top had an additional yellow-brown i mixed) try to vary them in darkness levels to add depth.
- multiple paint brushes. I like to use around four or five of varying sizes and hardness levels.
- plenty Hot glue, and a hot glue gun (note: you COULD use other typres of adhesive, I like hot glue because its got great hold on foam, it sets FAST and worst case scenario I can take a hair dryer to it and melt it again if I need something to be undone.)
- scissors
- duct tape
-plastic wrap
-sharpie
-wig head
-Plenty of reference images
(optional supplies include a rotary cutter and or exacto-knife [trust me, itll make your life so much easier] , and patience. )
SO to start
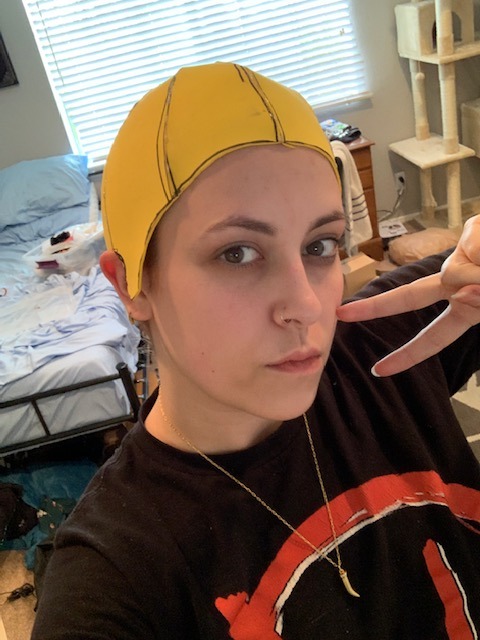
1) Put your hair in a wig cap or however you plan on wearing it under your wig. Wrap your whole hair bit of your head in plastic wrap. Make sure you get over your ears and the baby hairs on your neck if you want to keep them.
2) Wrap all the plastic covered bits in duct tape. This is easier for a friend to do on you, but not impossible to do alone, just make sure to get it all. It should be snug. Make sure you get as far down the back of your neck and down your sideburn area as you can. (Most characters have a bit of fringe hanging down in the back so its not the BIGGEST concern for them, but Ty’s got nada so you’re gonna want some good coverage for your hair line.)
3) Take your sharpie and draw an outline of where your ear is, and along the hairline you’d like your wig to have. For short haired characters you dont want to cut too far behind the ear or your hair will peek out, so I like to underestimate how big my ear is and adjust as needed later. Dont make your wig hairline too high either, particularly if you’re making a wig for a character who has no fringe in the front.
4) Take that bad boy off and cut along your outlines. Try it on again, adjust lines as needed. rinse and repeat.
5) once you reach a semi-accurate mold of your head, you’re gonna wanna take it off and cut AT LEAST 4 (front, back, and both sides (I like to do 8, it will lay flatter) sections,coming to a point at the crown of your head. It should come out looking something like this. NOTE : they’re all still connected in the middle. If you’re doing 8, cut each of these 4 in half. )
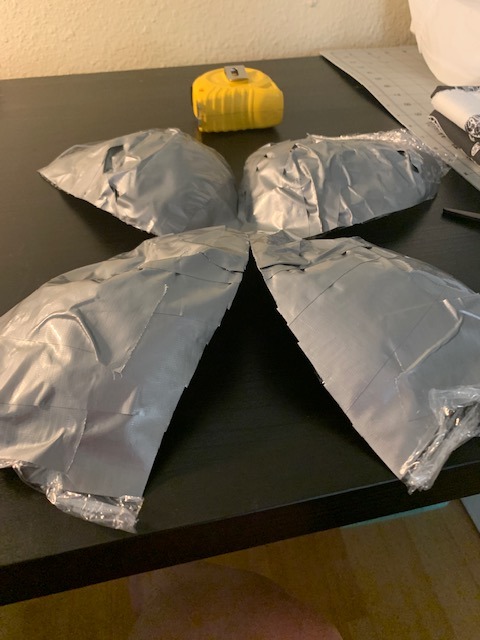
6) Lay out your foam beneath this. If you dont have a piece of foam big enough to trace this bad boy onto, what I do is literally just break out the hot glue gun a bit early, glue a couple pieces together along the edges, until i get a nice big connected surface. Trace this guy on there as accurately as you can, cut it out, and then glue all your sides together. Now you should have a foam version of your duct tape hat.
(Dont worry if the sides wont stay down, if you’re doing a character like Ty where thats an issue, we’ll get to that part later. )
7) (Optional but VERY helpful) Grab your wig head, and your duct tape head. Tape the duct tape back together and put something in it to make it hold shape, I use poly-fil. Tape the head-form to the wig head, and put your little foam cap on top of that.
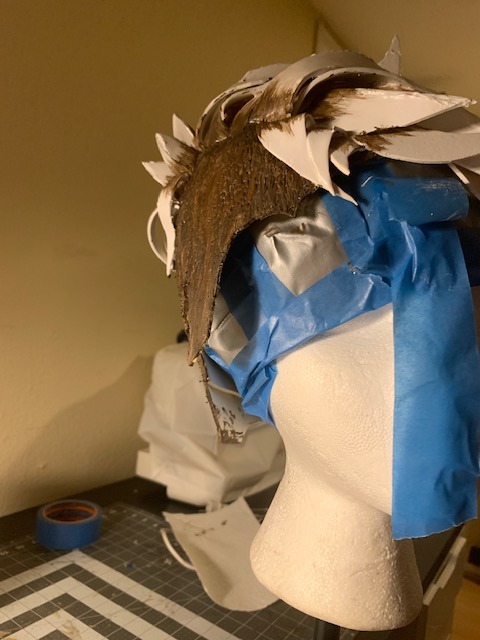
8) Time to get creative. You’re gonna want to start from the bottom layers first. For Tyreen that’s the long fringe and her undercut. The strategy I decided on was to take a few large rectangular strips of foam, and lay them out everywhere I wanted the undercut to be and cut along the edges to match the hairline. I don’t have a picture of this exact point in the process but I have one from the beginning of the next step. Really the only thing to note at this point is obviously, your head is round and rectangles are not, for the curves where it sticks up along the edges, cut down where it sticks up in a little triangle and hot glue the ends together (you can sort of see this at the top left in the picture below). Dont worry about seams at this point, we’ll hide them later.
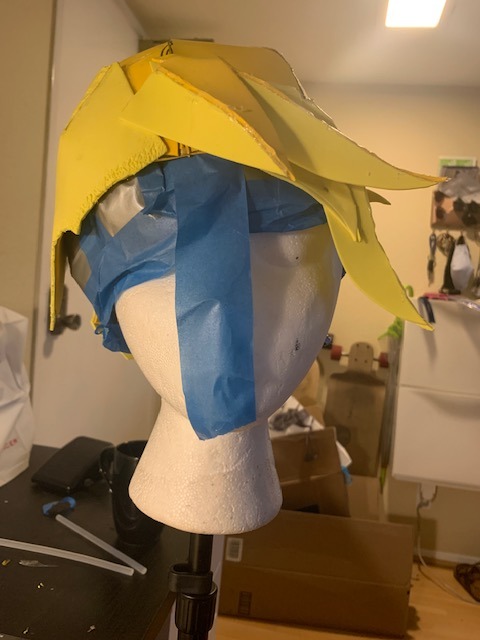
9) This was not the case for Fiona who has very flat hair ( especially because of her hat) but Tyreen has a lot of volume especially towards the front of her head. For hair pieces that need volume, such as the ones that are glued down here, cut two of the exact same foam piece (i like to do them in little waves like the side, but also just a little arch is good for volume without flips such as the front piece) and glue the matching edges together. Make sure the hair triangle is facing the way youd like it to! Then Flatten out the top as much as you can, the bottom will keep the volume and the top ill be able to be covered by “2D” hair pieces.
(NOTE: Honestly, it’s REALLY difficult to end up with an exact copy of cannon, and I ALLLLWAYS get carried away with the spikes. In the end, go by your reference images, but also follow your heart. Cosplay is half about having fun creating. )
10) Once youve started gluing, make sure to keep in mind where your part is (if you have one). For Fiona i didn’t trust myself so I glued in the hair at the part BEFORE anything, and left them ready to be glued down while I worked my way up to them.

NOTE: All the hair at the parts of BOTH wigs is a single piece of foam.You want a nice wide base whenever possible to cover up the seams of all of the other edges of the hair. For your part, Carefully glue along the very end of your strip of foam and stick it down. It will be the last piece to be glueddown on top of everything else to make it look nice and clean.
11) Slowly start working your way around the head, gluing down first anything that will need to be covered (3D pieces and bottom pieces) before getting towards the top where youll need to be more strategic about what is going down and what can cover your edges. I’d definitely recommend mixing 2D and 3D pieces if that’s something you want to experiment with, otherwise, such as in the pic below, it is possible to get volume from a 2D piece, simply by gluing it in a way where it wont lie flat against the head.
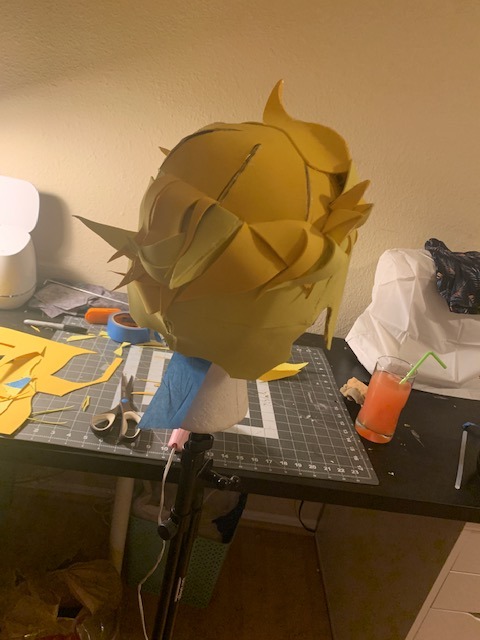
12) in the picture above you can also catch a glimpse of Ty’s cow lick. Those are done exactly the same as our 3D pieces from before, only you trace the edges of the open end, and should end up with a triangular third side to be glued in, then just glue along the edges just like the hair part.
13) Dont feel you have to overdo how many pieces the hair has, remember you may also paint in pieces and designs when it comes to the line-art!
14) Once you’ve added everything from the bottom that you’d like to, go ahead and glue down your hair-part.
15) So, obviously, I wasn’t a big fan of Tyreen’s undercut just being flat foam across half my head. So I took an exacto to it for what felt like years. REALLY over-do it on the edges, it’ll get rid of that harsh foam line and give it a little more of a natural blend. Also pay special attention to all of your seams in the foam. The more distressing there is there, the less youll be able to spot lines later.
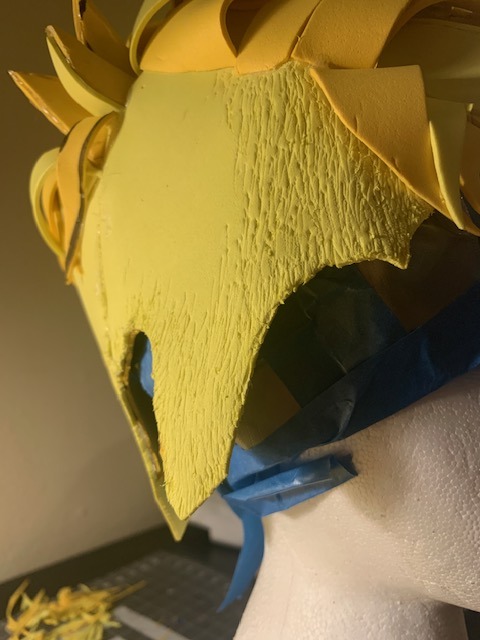
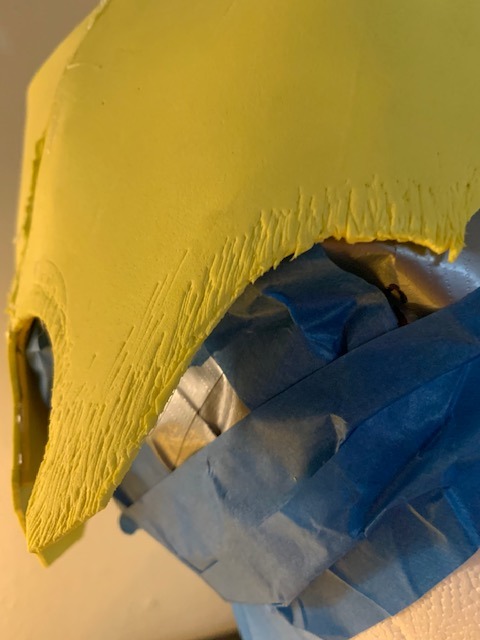
16) So once you have the overall structure of your wig and you’re thinking you might be happy with this, its spray paint time. (I’d recommend disposable gloves for this, you’re gonna need to maneuver it every which way to get the pain in every cranny and that paint does NOT like to come off easy.) Theres really not much advice I can offer on it, just be patient, and do a couple layers, spray it from every angle and let it dry completely before moving on to the next step unless youre as impatient as I am and dont mind ruining a few paintbrushes.
17) So, like the Fiona pic a few back or this one here, you should have a fairly flat evenly painted foam sculpture. Now is around the time you might start seeing all the inaccuracies in what you’ve made. You gotta push past that it’ll look great I promise. Time to get really creative.
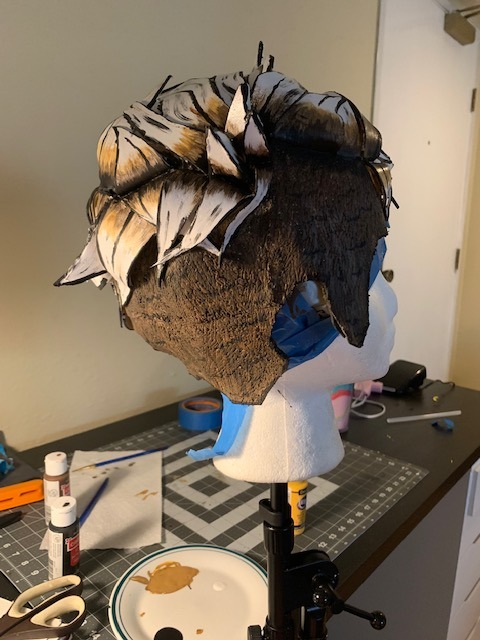
18) for Ty I started by painting the buzzed bits in a base brown, and started in on the line art and her roots while i waited for it to dry before going in with two more colors of brown for depth.
19) For her roots I ended up using three colors. Black at the very bottom (which blends into the line art) a dark brown that matches more or less the buzz, and then after the fact, a custom yellowed-brown to blend better into the white and give us a little more texture. For this and the rest of the cel-shading in the hair, dab your brush before painting and try to mostly stick to light strokes in one direction (OR: if you have one, a particularly hard bristled paint brush does wonders for this) you don’t want the ends of your strokes to be too defined.
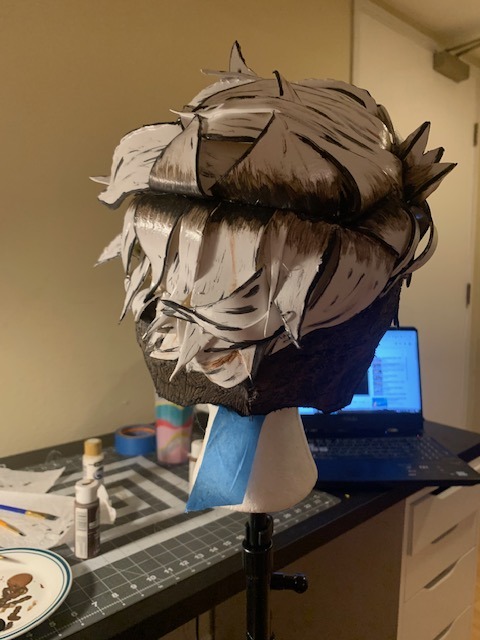
20) Outline the edges of the hair and all prominent pieces, particularly the hot-glue seams, itll make them less noticable. (dont forget the little animation squiggles for Ty’s sides) and beyond that-- honestly, black out to your hearts content. These pics are from when I thought I’d finished. I really felt I’d over detailed. The next day I looked at a picture and realized there is always WAY more texture and outlining than I feel like I see. Honestly, you cant really over-do it, especially with fine solid black lines.
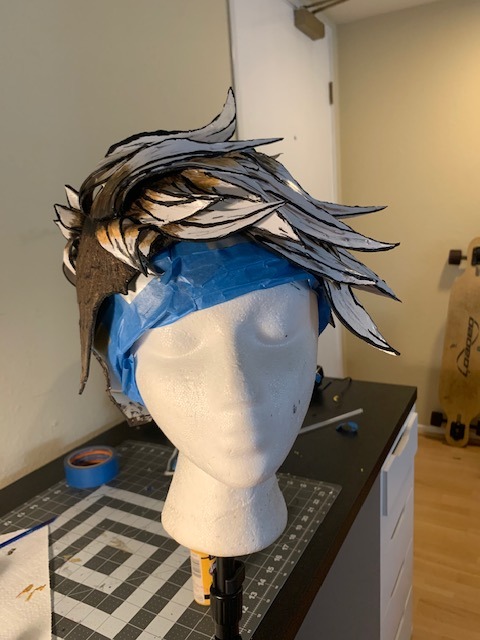
21) The next day I came back at it with the yellowed-brown and LOTS more solid black lines. (Currently in the process of taming down where I got too excessive with the spikes on the side)
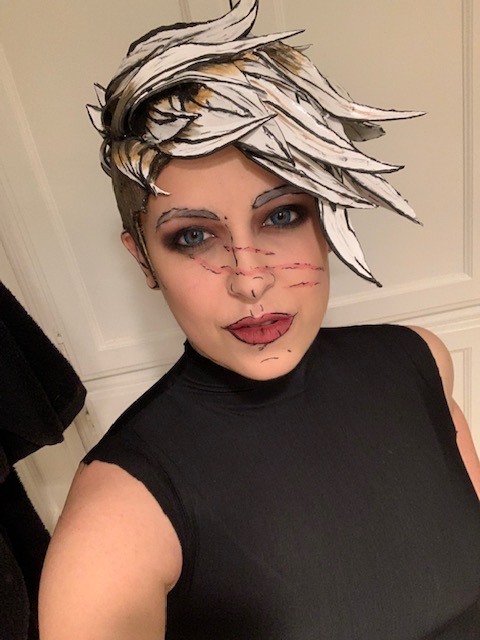
22) Once it’s all dried, time to try on. Here’s where we address if you have a short haired character, and the edges of your wig just wont stay down -- invest in a little theatrical grade spirit gum. It’s not too terribly expensive, and unfortunately, I tried the cheaper halloween makeup kind, and it just wont hold how you need it too (and please for my sake, also make sure you get spirit gum remover) I took some hair gel (you could also use elmers glue) just to glue up as much of my hair as I could on the sides and the back of my neck to keep them from the spirit gum, and dabbed it along all of the prominent edges of the wig (namely, side and back) wait for it to get a little tacky and stick that MF-er down good.
Aaaaand Voila???
Let me know if I missed any steps? Its fairly simple, once you get going -- just time consuming.
58 notes
·
View notes
Photo
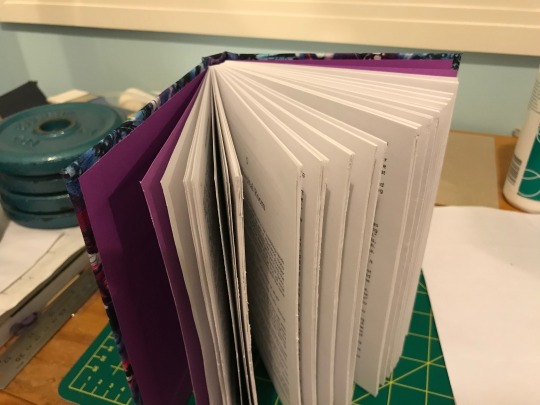


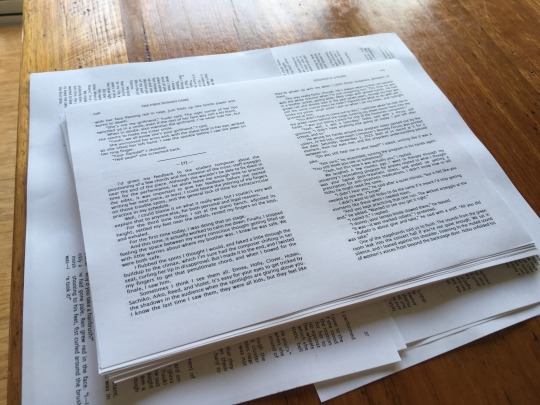
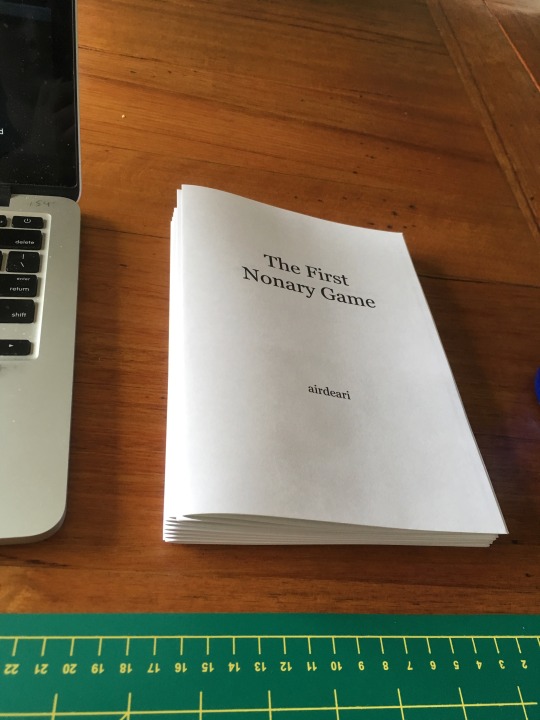
About a week ago I finally finished bookbinding @airdeari‘s beautiful Zero Escape fic The First Nonary Game. It took about a month (between all the waiting for glue to dry and also several days each week when I was unable to work on it), and was so much fun! It’s so satisfying to just... hold this book in my hands.
Details about how I made it, along with additional photos (and commentary) below the cut.
So I came across this post on Tumblr, which immediately inspired me to try bookbinding myself. I spent a few days watching so many tutorials from the youtube channel linked in the post (I’ll link the specific tutorials I used in this post), and googling how to actually manage to print pages so they form proper signatures, because the inbuilt booklet creator in Word doesn’t exist in my Word apparently so that’s fun.
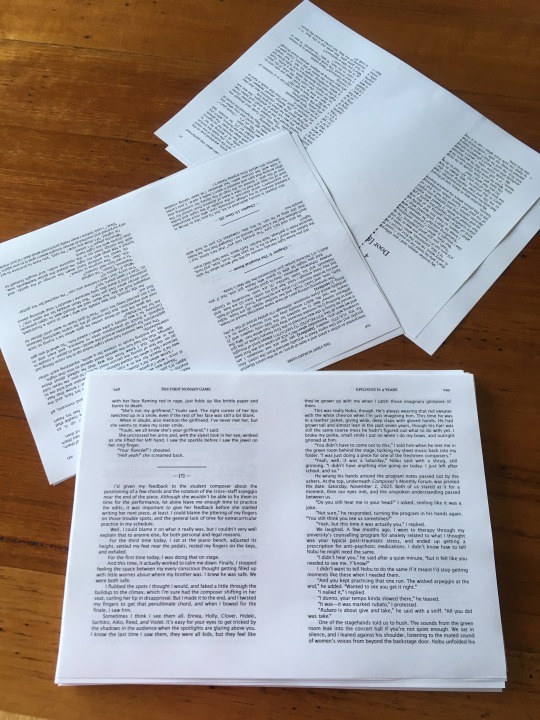
Anyway, once I started, I asked @airdeari for permission to print and bind his fic, and he immediately said yes, so that was good. Then I spent a good couple of days copying the entire fic into a Word document, and fiddling with formatting so it would look like an actual book (section breaks, page numbers, headers with the fic title on the left page and chapter title on the right page (this took ages to work and I kept on stuffing it up), and making sure things just... looked nice. I added in the art After The War that @keycrash created specifically for the fic (third pic above), and an “afterword” containing credit and links and the author’s notes from AO3 (because even if I’m the only one who will ever see it, it still feels weird to not add the credit stuff in so it’s there).

I then saved the document as a PDF, and used CheapImposter to correctly shuffle (impose, hence “imposter”) the pages so when folded into signatures, each page would be in the correct order. This program was the first free one I could find, and was great because you could specify the number of sheets you want per signature, rather than stuck with a default. I chose to have 11 signatures of 6 sheets of paper, since that was the amount that would have the least blank pages and the end of the book. The file was 261 pages, so with two pages per side, and two sides per sheet, you divide the number of pages by 4 to get 66 sheets of paper
I then printed. There was only one (1) paper jam in the process, which was great. Unfortunately, I realised after I printed that one of the headers for one chapter was wrong (I hadn’t properly disconnected the two chapters), but fortunately that only involved reprinting 4 sheets of paper.
I used the following tutorials to make the books: DIY Textblock, a general “how to make a textblock” tutorial; DIY Kettle Stitch, a specific look at the stitching for a textblock, since the first tutorial doesn’t focus on this; DIY Book Cloth, since I chose to use fabric for my cover; and DIY Hardcover Book, how to put all those pieces together.
So then I started folding all the signatures. I was watching so much Brooklyn Nine-Nine during both the folding and stitching sections, since it was repetitive actions I didn’t need to concentrate on that lasted hours.
It was at this point that I sliced each signature one by one to make the end smoother and less pointy. In future I recommend not doing it at this point - wait until the very end. Instead, move straight onto stitching.
I don’t have any photos of the stitching portion, since my phone died the morning I started the stitching, and I wasn’t able to replace it until after all the stitching was done. In fact, originally all the photos from before the stitching were lost too. It was only about two days ago that magically the My Photo Stream thing kicked in and brought back all the photos - if it had worked two weeks earlier I would’ve had more. As it is, all photos from September to January are gone forever, unfortunately. But that’s another discussion entirely.
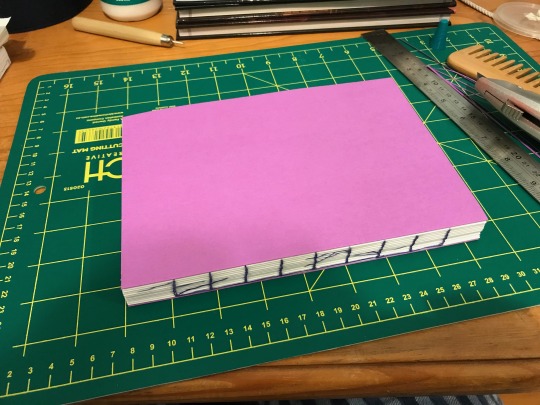
The above is the first book photo on my new phone, so as you can see, all the stitching was completed, the spine was glued, and the purple paper attached. I couldn’t buy two A4 sheets, so instead I had to buy one A3 sheet and cut it in half. Which was difficult cycling home from the city with an A3 sheet that didn’t fit in my bag on account of being A3 and not A4, but oh well.
I don’t have a book press, so I used a pile of DND books and my brother’s weights instead, as shown below.

I then had to re-slice the book after this point bc my first go wasn’t even, on account of slicing each signature separately. Next time definitely I’ll just do it at the end like this. I then also sanded it to make it smoother. It’s still not perfect, but it’s something that’ll take practice and patience so.


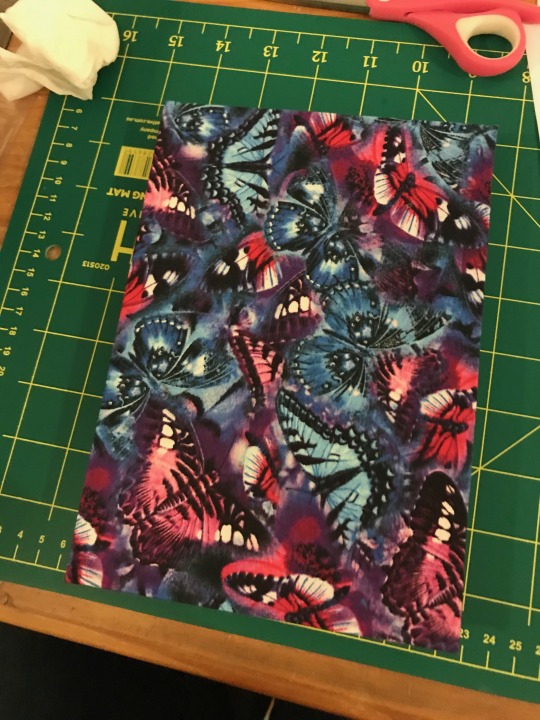
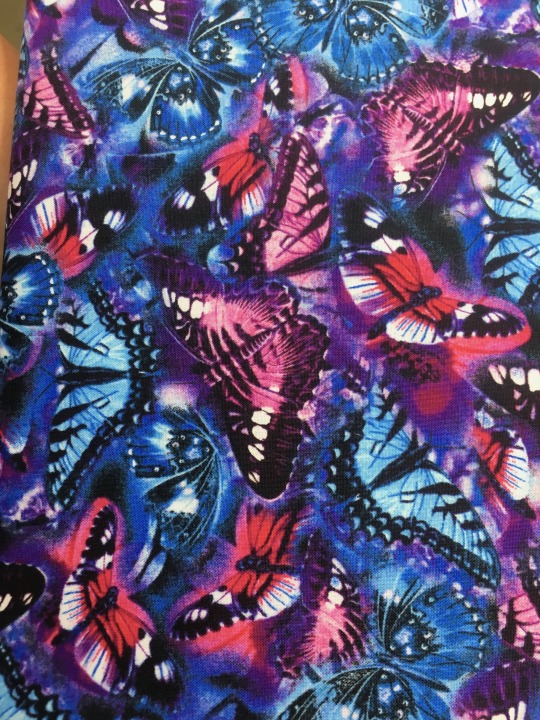
Next I made the book cloth, which involves using appliqué sheets to combine cotton fabric and tissue paper. But first I want to talk about the fabric I chose for the cover, because I’m quite proud of it. I spent ages wandering around the shop, trying to find something that fit the feel of the book. Spoilers for the content of the fic if you haven’t read it yet, and also for the source material (999/Zero Escape). I was thinking about some sort of blue swirl thing, because of the Gigantic sinking. I found that, but hesitated because it didn’t fully fit, and my favourite colour is blue so I always pick blue. I also considered flames/fire because of the incinerator thing, but couldn’t find any. I can’t remember if I just couldn’t find any four leaf clover fabric, or if I’ve just since thought about that as a cover. But instead I chose the butterflies below. They fit in several subtle ways that I’m proud of. The colours of blue and pink(/red) matching the receiver and transmitter coding all throughout 999, as well as the moments of purple as well (I don’t think I need to get into that, I’m sure it was analysed to hell and back when the game first came out). The butterflies also point towards the butterfly effect, and in turn the different timelines present in the series. So together it just works. /spoilers over
It’s also just a pretty fabric.
Now the making of the book cloth. I had to make it twice, because I was too impatient the first time, so the iron was too hot and it steamed, which wrinkled and warped the tissue paper, so the fabric was all wrinkly too. The second time took ages and was a worse quality appliqué sheet, but worked well enough anyway.


(My parents: did you have the iron out? what were you ironing? you never iron)
And then I cut the book board to size, using the measurements from the tutorial video. I’ll repeat them here: front and back cover: width = width of textblock minus 3mm, and height = height of textblock plus 6mm, and spine width = width of textblock spine, spine height = same height as covers
I then glued the board onto the book cloth, and put it under the book press. The dnd books are not large enough to cover the whole thing, and also I really wanted the board to stay flat and not curl, so I grabbed way more dnd books and way more of my brother’s weights. I also accidentally started putting the glue on the wrong side of the board (bc one side is smooth and the other is rough), hence the colour difference as well.
The corners were cut and folded and glued over...


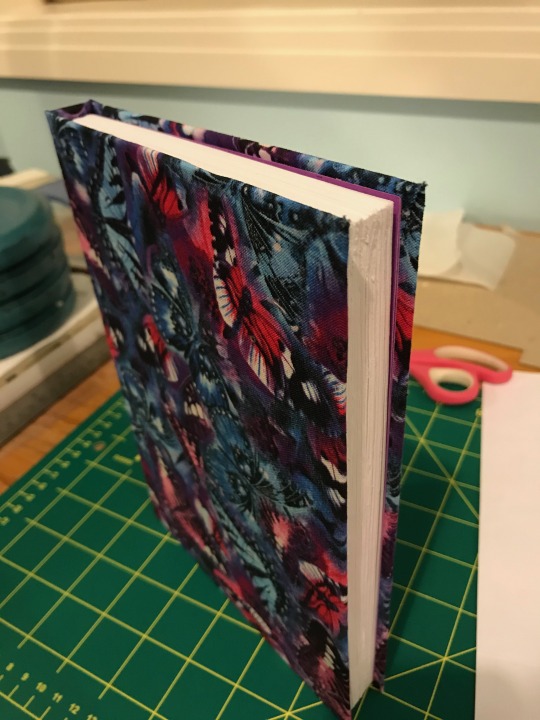
And then the textblock was glued in, and put in my book press for a whole weekend. I added a sheet of paper to absorb the glue so the pages wouldn’t become wrinkly, but instead the sheet I added was fine and every other page in the book is wrinkly. So I dunno what happened there. After the weekend I took it out and looked at it, and then put it back for another week to be sure.

And then the complete book is shown at the top of the post!
As I was starting I was talking a lot about it, like about the process I had to go through, or how I was going to obtain what I needed, etc. Mum asked if she could read the story. I froze, like a deer in the headlights... because this is a fanfic. She saw my fear and immediately backed down, explaining she only wanted to read it because if the story was that important to me that I was going to literally turn it into a book, she wanted to read it to yknow like know me better or something? Which makes sense. And when I got over my initial reaction, and remembered that indeed it was technically my dad who introduced me to fanfic, and thought about it more, I said okay. Because since the fic is technically a prequel to the first game, and most of the characters are technically OC’s (like, from the first game we know that all eighteen children must exist, but most of them don’t have names or anything so they are effectively OC’s), then knowledge of source material isn’t strictly necessary. This fic can probably be enjoyed on its own. I mean I’ll probably have to explain the concept of morphogenetic fields, and the last four chapters might not make sense? But I’m okay for my mum to read it. So when she’s less busy at work I’m going to download the epub onto her phone for her - we’ll see how it goes.
Anyway, this fic is a masterpiece, extremely well written and I highly recommend it. As said, most of the characters are effectively OC’s, and yet they are all given such rich histories and personalities. All of them have access to the morphogenetic field, so I’m just so glad that @airdeari explores nine unique relationships with the field - nine unique sibling dynamics, and esper powers and abilities. It’s just so good.
#bookbinding#zero escape#999 spoilers#999#the first nonary game#airdeari#i forgot to mention the most essential step of making the book#before i printed the pages i read the entire fic again through word#its still so beautiful#i cant wait for my first read of the fic using my physical book#if youre in the ze fandom and still have not come across this fic yet#first of all who are you and what rock have you been living under#and second of all please read this fic bc its anything and everything you could ever want from a fng fic#feel free to ask more about this and what i did btw#it was so fun binding this book#i want to do more of my fav fics now haha#this fic is 100k and it was like the perfect size for a fic to print#most of the other fics i really like are much much longer so i'd probably have to split them in half#and idk if i could do that#too much pressure to split between the right chapters#oh well uni has started so i have a while to think about which one to do next#ive already promised a version of this fic for a friend who wants to draw her own cover#so we'll see how that goes!
172 notes
·
View notes
Text
Bike Touring and Bikepacking
13 June 2021
I was really happy with my bike and my gear for the ride back from San Francisco. I had considered taking my Surly with the touring gear, but opted instead to take the Warbird and the bikepacking gear. Both would have worked, but I think the latter was simply more enjoyable.
The distinctions between bike touring and bikepacking are nuanced, debated, semantic, and sort of irrelevant, but to me touring implies riding long distances over many days on the road, whereas bike packing suggests more an off-road bicycle equivalent to backpacking. But the line between these two pursuits is blurry. In addition, bike touring and bikepacking are associated with different types of bikes and different ways of carrying gear - a touring bike with paneers versus a mountain bike with soft luggage. But again, the lines are fuzzy.
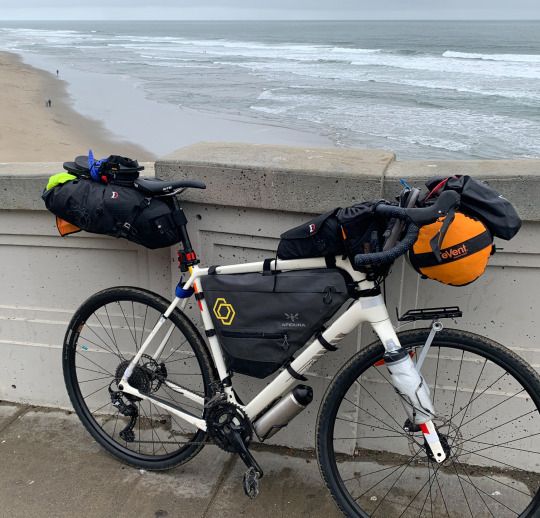
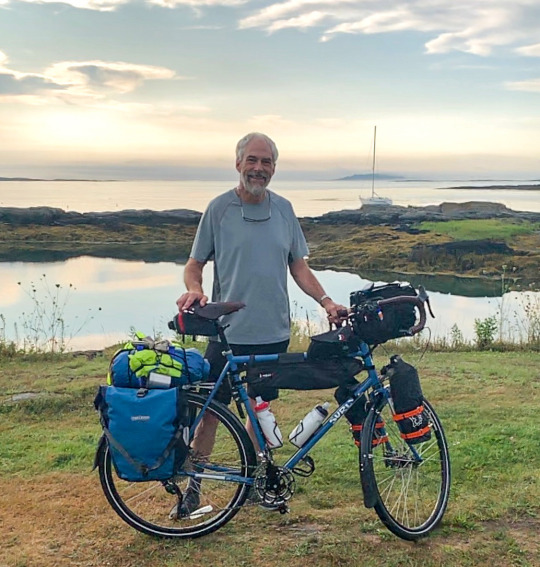
My 2019 cross-country trip was pretty classic touring. My Surly Disc Trucker is a classic touring bike and I was loaded with panniers, duffels, and a handlebar bag. But during the past year and a half, my Salsa Warbird has become my go-to bike for both day rides and 3-4 day overnight trips. It’s a lot more fun to ride than the Surly. It’s lighter, it handles better, and frankly, I really like indexed shifting at my fingertips. The Salsa is very much a gravel bike with wider tires and is comfortable on both pavement and on rough gravel roads. On the other hand, the bike requires a completely different approach to packing.
One of the things that makes the gravel bike/bikepacking setup work is that you can’t carry as much stuff, so it’s lighter (it helps that the bike itself is much lighter, too). This not only makes pedaling uphill easier, it makes it easier to maneuver the bike around obstacles or carry it up steps. Combine this with the way the weight is distributed - higher and narrower - and the fact that the bike itself handles more nimbly than a touring bike, and the result is a much more fun and versatile touring rig.
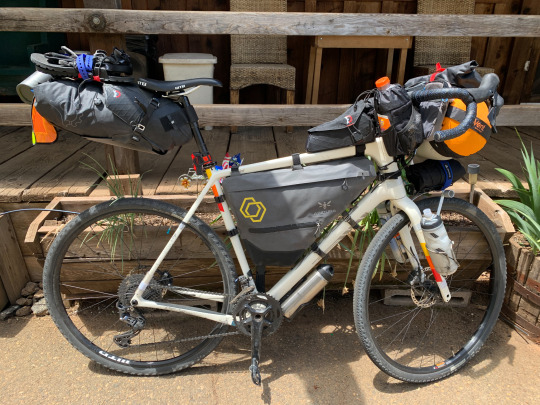
BIKE
The bike is a Salsa Warbird with a 61cm carbon frame. It has Shimano GRX components with 2x11 gearing. It came with an 11-34 rear cassette, which I've swapped out for an 11-40. This gives me a much-needed granny gear for steep, loaded climbs. I had to tighten up a loose derailleur hanger early in the trip, but besides that the only problem was noisy gears as the grit and the crud built up on the chain, the pulley wheels, and the chain guides. Occasional attempts to clean things helped, but it was hard on the road to do a very thorough job.
TIRES
The tires are 700x42s. The front tire is the Teravail Cannonball that came with the bike (4000+ miles), still with the same tube. The rear tire is a relatively new Teravail Washburn set up tubeless. They both worked well - no flats and and few signs of wear over the 1200-mile trip. I topped off the air a couple of times (larger tires means I run fairly low pressure - maybe 45psi).
ATTACHMENTS
A Wahoo Bolt bike computer (and a cadence sensor on the crank). A rear blinker. I had a good headlight, but kept it stowed the entire trip, since there were no night rides and no tunnels. I have bottle cages on my forks and under the down tube. A Salsa Cradle is mounted to the handlebars, to which I strap my sleeping gear. I have an improvised porteur rack above the front wheel (the carbon forks are not intended to carry a traditional front rack) that provides some extra stowage for light stuff and a mounting location for the headlight. All the other luggage is soft stuff strapped to the frame.
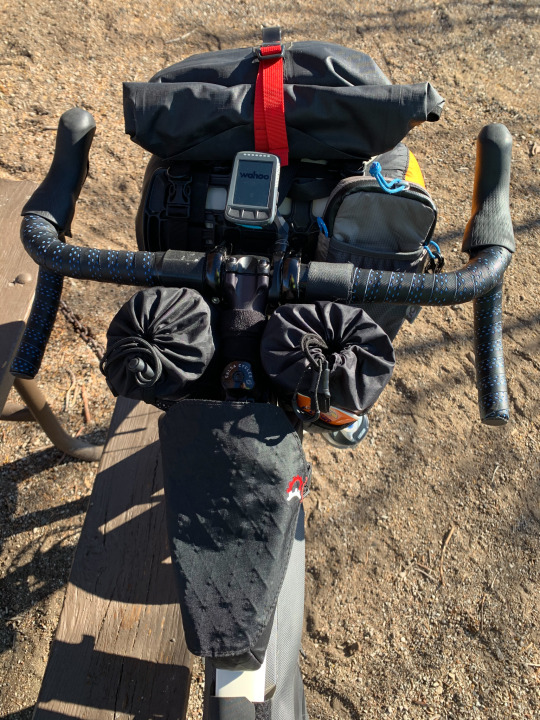

LUGGAGE
Handlebar roll. A good compression dry sack holds my 'sleeping system.' It straps into a cradle on the bars.
Utility bag. Easy to unclip and bring with me when I'm away from the bike. Holds electronics, toiletries, spork and knife, other odds and ends. An additional pouch served as a holster for my iPhone.
Two stem/feed bags. Easy access to snacks, layers, and a little spare space for a bottle of Gatorade, a defrosting burrito, or in one case, a chocolate milk shake.
Gas tank/top tube bag. Small camera, handkerchief, buff, face mask.
Seat bag. Clothing, outerwear (when not strapped on elsewhere), a small cook set, a little food. I strap on a pair of sandals which serve as camp shoes, town shoes, and for potential water crossings.
Frame bag. Tools, spare tube, parts and supplies, water filter, stove, tent poles/pegs, a small daypack, a small towel, and so forth. It’s a good place to stuff frozen burritos, extra napkins, sweaty arm warmers, and other stuff during the day.
GEAR
It’s impressive how much stuff I squeezed into a pretty compact suite of luggage. This photo shows everything I took off the bike when I got home, including the clothes off my back, the helmet and glasses off my head, and the shoes off my feet.
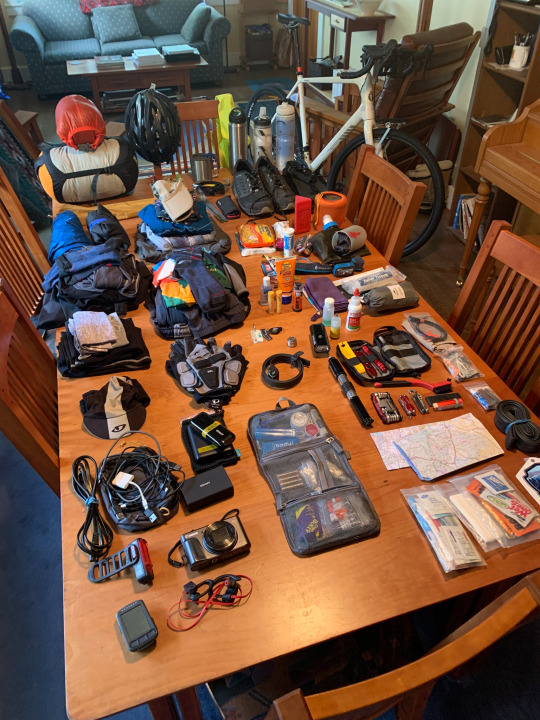
Shelter/Sleeping. My ‘sleeping system’ fits in a small dry bag on the handlebars. It includes a lightweight tent, a down quilt, and an ultralight air mattress. The combination works to the mid-30s and if it’s colder, I can wear my down jacket. The tent poles and pegs live in the frame bag.
Clothing. A change of bike shorts and socks, a short and long sleeve jersey. A set of lightweight clothes for off the bike. A rain jacket, rain pants, and a light down jacket. I’ve got both fingerless and full-finger gloves. Two headbands, one for sweat, the other for warmth. Arm warmers. Leg warmers. A rain cap. A baseball cap. When I'm on roads and not wearing my rain gear, I usually wear a lightweight yellow vest - both for visibility and as a windbreak.
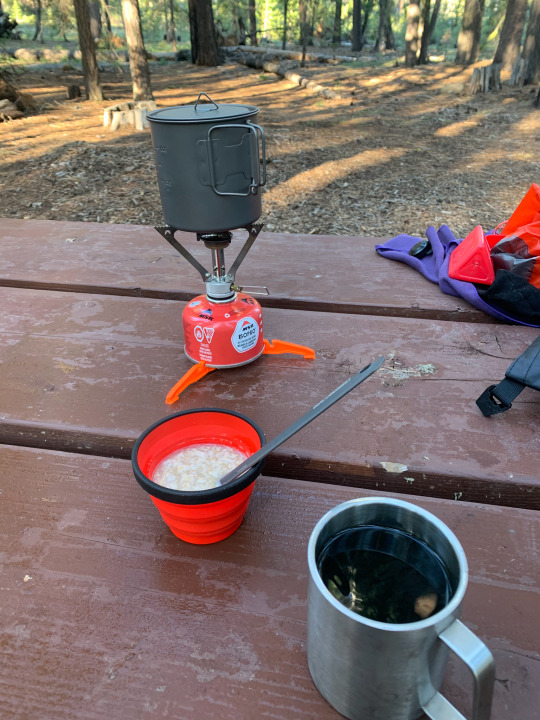
Cooking. I have an MSR pocket rocket stove in my frame bag and a compact cook set in my seat bag (small titanium pot, fuel canister, lighter, rubber scraper, and a stove stand). I don’t cook much, but mornings are better with boiling water for coffee and oatmeal. I occasionally cook a dinner, such as a dehydrated backpacking meal.

Food. Unlike backpacking, where you carry food for days or weeks, biking involves resupplying as you go. When expecting to camp, I tend to buy a sandwich or packaged burrito earlier the day, though I always have some sort of backup meal in my gear. I carry instant oatmeal packs and instant coffee for mornings. I keep an assortment of snacks - nuts, string cheese, pepperoni sticks, candy bars, gels, energy bars, fig newtons. Things that cover a range of cravings and nutritional needs and that can be easily restocked at gas stations and general stores.
Drinks. I carried three water bottles, one on each side of the fork and another under the down tube. Whether I use all of them depends on conditions and availability of water. I can typically make room in a stem bag for more water or a large bottle of Gatorade when I expect a long dry stretch. I have a small collapsible water bag and a water filter so I can resupply from natural water sources.
Tools and supplies. The lower portion of the frame pack holds bike tools, supplies (Gorilla tape, super glue, a patch kit), and spare parts (brake pads, chain link, zip ties). An extra tube, a small pump, tire sealant, and a small bottle of chain lube. I keep my good bike multitool and a small knife/scissors in a pocket on one of my stem bags for easy access.


Electronics. iPhone. Bike computer. Rear blinker. Headlight (not used). Canon SX720 camera (small camera with a good zoom). All USB rechargeable. A good 13mAh battery (I can go three days on phone, blinker, and bike computer with this). And a spare 6mAh battery, just in case. A corded five-outlet USB charger/adapter. An SD-lightning adapter to load camera pics to phone. And several microUSB cables and a lightning cable for phone (this can fail and is critical, so a spare makes sense). Cables and charger live in a pouch in the utility bag. It didn’t happen on this trip, but on long days I can charge phone and bike computer while I’m riding.
Other Stuff: First aid kit, TP, a small fast-dry towel, shower wipes (wish I’d discovered these years ago). Wallet (in jersey or shirt pocket), a bunch of quarters for showers and car washes. A few paper maps for old times sake and souvenir stickers I pick up along the way. The mesh pockets on the stem bags hold a bike multitool, a small knife/scissors, a small bottle of DEET, hand sanitizer, and sunscreen. I have two sticks of Burt’s Bee’s Wax - one is for chapped lips and the other is for my pedals to keep my cleats/shoes from squeaking (I try to keep the two straight). It’s nice to have this stuff easily accessible and not buried deep in larger bags.
5 notes
·
View notes
Text
Santa’s favorite Elf Part 2: Ch 3: Pre-production
Santa’s fav elf ch 1, Santa’s fav elf ch 2, Santa’s fav elf ch 3, Santa’s fav elf ch 4
Santa’s fav Elf Part 2 ch 1, ch 2, ch 3, ch 4
warnings: A dash of angst

“Time for our fitting day, käraste.”
You woke groggily to Bill kissing your bare shoulder. Turning you reached for him before flickering eyes opened to see him smiling down at you. “How long do we have?”
He kissed your nose. “Enough time to throw on some cloths. I let you sleep while I showered. Joe will bring us coffee.”
You stretched and sighed as he got up. When you came out of the restroom dressed, he was on his cellphone texting. Seconds later there was a knock on the door. It was Joe.
“A caramel macchiato for the lady and a black coffee with two sugars for the gentleman”
You took the venti hot drink. “Just what I needed. Thank you.” Setting it down for a moment you bundled up for the walk to the car.
Bill slides his coat on with a red hat and scarf that covers most of his face. You follow Joe to car. You look out the window quiet as you sip your coffee just thinking about being “friends.” with a man you wanted so much.
“Are you ok?” Bill put a hand on your shoulder.
You sighed looked over at him. “Yeah, it’s just early.”
“We have an interview after our fitting.” He took your hand in his which confused you a little.
“You should have told me.” You whined. “I don’t think I’m dressed well enough for today. I’m not even wearing make-up”
“You can always grab an outfit from costuming and have the make-up department do what you want.” He added. “I think you look great as is.”
“Thank you.” You threw him an uneasy smile.
When you get to the staging site there are vans with equipment galore and the crew are hard at work putting set pieces together. Your driver that you have figured out is also a bodyguard ushered you over to one of the buildings on the premises. He walks farther with Bill when some ladies tell you to follow them to your fitting.
“Good morning Miss. My name is Carol.” one of the ladies said as she started measuring you. “Looks like you stayed about to same so no big costuming changes at this point. We have three wardrobe choices for you to try on today. You will get a bit of hair and makeup over with Tamera for different looks also. Then we will take some photos and show them to the director and producers. After they decide which look they like best, you and Santa will get some promo pics taken for the awaiting press. Lastly the two of you will do a few interviews together in the same PR tent you pose for photos. And that is all that is on the agenda until Monday.”
“Sounds like a full day of fun and games.” You finish your coffee. “I’m done with this. Ready to go.”
“You are going to be great.” She smiled. “if you want another coffee, water or anything else just say the word. Tamara will take you in make-up as me and Sara bring your first look out.”
“How are you doll?” The make-up girl fusses over you. “You do, you do, you look like a doll baby. We are going to give you a porcelain complexion like you have been in this cold climate. Then rosy up these adorable apple cheeks.”
“Whatever works” You smile. “Sorry I am still a little tan.”
“No need for sorry.” She began to lighten the skin tone on your face first. “People come in with full dark tans for movies like this sometimes. I have no problem with it. You do you. I provide some of that Hollywood magic to create your character.” She rubbed the makeup down your arms next. Then yours legs. We let that sit for a half hour before we apply your rosy cheeks and a dash of eye make up for your first look. By that time, you can try on your first costume.”
“Sounds good.” you strip your coat off hanging it on the back of your seat. The heaters in the room make it warm enough. “May I get a bottled water and a bagel with cream cheese? I haven’t had breakfast yet.”
“Of course, doll.” She goes out coming back minutes later with what you asked for. “I am going to put these plastic gloves on your hands for you to pick things up without getting the makeup everywhere.” She applied the gloves. “Anything else?”
“I’m good.”
As you ate careful not to get the makeup off your face before it dried you face timed Bill. Your phone was on a standing charger, so you didn’t have to hold it. He was in the same base porcelain color you were. Both of you waiting for it to dry.
“You were a little to tan too, I see.”
“Just a little.” he chuckled. “How are you doing. Did you see the art concept for your character? I hope you will still want to kiss me as this evil looking Santa. We are supposed to have this love that last beyond the grave or some shit like that.”
“I might have to do some heavy duty acting but I think I can pull it off.” You laughed.
“I have to go. Getting the wig and beard glued on in stages.” Bill told you. “FaceTime again in an hour and you can see the progress.”
“Sure thing, Bill.” You wave on the video. I should be on my second look by then. I have three to try.”
“I just have this one, but it will take a while.” He waved. “Talk to you later.” He hung up and you hung up just as Tamera was coming back.
She ran her index finger over your forehead. “All dry so we can start phase two.”
She put some basic make-up on you, and you went back to costuming. The first thing you tried was a green elf dress that looked very much like the original one you wore in the first movie with white fur trim. Cute, short and flirty. Thigh high white boots this time. Red and green fleece lined legging and green gloves with the white fur. Your scenes would be outdoors, so they wanted you to be as warm as possible. You stood for the photo with a plague with the movie title.
The next outfit was very much like the first except it was red. It also included a short cape over your shoulders. Another picture was taken. You thought you would need a coat over each if they were chosen. Something to just keep you warmer when not filming. You filmed indoor for the last movie, so the short skirt was fine. From the script this would be all outdoor shooting mostly when the darkness hit at 2p.m. You shivered just thinking about it.
The last outfit seemed way more reasonable for the weather in your opinion which didn’t count for much you thought. It was a long velour red dress with long sleeves with some gold designs at the bottom. It had a long red coat with fur white edging. It was held on with a thick black belt. Then a short cape that came up in a hat that matched. They added a curly blond wig, black chunky heeled boots and to top off the whole look a white mask made to look like Snowflakes around your eyes. Tamera darkened your lips in candy apple red lip stick.
You twirled around smiling loving how it looked and felt. A truly great look for someone so in love with Santa they would do anything to have him back. You felt similar about Bill. A few pictures were taken with the plaque.
“Back in your regular cloths until the higher ups decide which look they like better.” Carol said as her and her assistant took the costume off you.
“I really hope this one.” You beamed. “It seems it would be warm enough for in outside in cold weather.”
“Not my call but I agree.” Carol’s assistant carefully hung the outfit. Then she took the photos printed from the digital camera in an envelope to give to the powers that be. “What would you like for lunch? We have subs in turkey, beef and hand with chips or fries. Cold pasta salad. Coffee, tea, water and soft drinks. My assistant will pick them up on her way back.”
“Pasta salad and a caramel latte, please, thank you.” You asked politely.
As you waited on a comfy plush sofa you checked in on how Bill was doing. Dirty white long hair, beard, and mustache was drying when he answered the phone looking up at you.
“You doing okay Bill?”
“Yeah, I just have to lay back until this dries.”
You could barely see his smile as he attempted it.
“Then I get to put on the extra tum tum and suit.”
You giggle. “Tum tum, that is so cute. I tried on a few different looks. They are showing some pix to the producers and director.”
“Yeah, they just got here.” He scratched the corner of his ear where some of glue was dripping. “I’m an executive producer so they put an envelope on the table here. I will have to look when I can sit up. Which outfit did you like best?”
“I loved all of them but since we are shooting outside the longer dress with all the layers is the one I won’t freeze to death in.”
“I will keep that in mind and pass it along to the others.” He glanced away from the the phone a second and then back. “Michael is coming in to check if this is dry enough. See you soon.”
“Looking forward to it.” You hang up.
This whole process had already taken four hours. You expected to be in your costume dealing with the pr photos and interviews by now, but it would be another hour before you heard that you would get to wear the longer dress. A half hour after that you were escorted to meet Bill at the door to another building. Joe was there to watching over the situation, so people did not attempt to touch or get to close either of you.
“Just take a breath my favorite elf.” Santa (Bill) suggested. “I’ll tap your back to turn where the cameras are flashing. Smile with your eyes not your mouth. Try to keep your face relaxed.”
You nod fidgeting a little. Your eyes wide. Nervousness runs through your body. You have watched enough of these photo shoots with characters sure but being on this side of it was different. Bill took your hand and kissed your knuckles as Joe opened the door and flashes from cameras started going off.
“Don’t forget to breath.” He murmured before walking with you to your first mark.
The camera flashes went off as multiple photographers told you to look towards them for a perfect shot. You could not look both ways. You looked up at Bill trying to breath without hyperventilating. He looked to you eyes sparkling. His pinkened lips in a small smile. You smiled back as the cameras flashed.
“Twirl for us (YN)”
Bill twirled you away from him. He moved to another mark. Some cameras followed him. A few stayed on you for separate pictures. You stood in place getting your Barings trying to keep your eyes smiling and face relaxed as Bill told you. All the cameras moved to him. You waited until he held out a hand for you to join him again. He escorted you back through the exit.
You took a deep breath. “That was a little claustrophobic.”
“It always is.” He hugged you the best he could in his Santa suit. “Are you going to be okay with the interview part of our day? We just sit and answer some of the same questions over and over. I think only five reporters but could be more. I will be right at your side the whole time. “
“I guess after a small break I will be ready.” You walked back to the costuming building where you parted with Bill again to get your costume off.
You glanced through the clothing finding a cashmere sweater to go with the jeans you wore today. It looked better than the bulgy sweatshirt you wore. Tamara toned down your make-up for a natural camera-ready look. Bill had a lot more to deal with to get back to himself, so it took him a bit longer. You waited patiently with a Christmas chocolate chip cookie and bottled water.
Joe opened the door. “It's time.”
#santa's fav elf#pre production#movie making#bill skarsgard#bill skarsgard fanfiction#au#fiction#x-reader
8 notes
·
View notes
Photo


WIP dump, inventory as follows:
- An entire month’s very late Mermay set based on fruits
- More Cubes
- Some Ghibli-related doodles & draws
- I took a ton of screenshots while watching all of the Ghibli movies & I wanna choose 2 shots from each movie & do screenie redraws
- Remember that KK Slider album cover art challenge? Yeah I started one & then my laptop screen broke & I had to order a new one & I forgot about the KK Slider album art challenge until I found it in my WIPS while taking these photos today OTL
- A somewhat ambitious doll mod that I started while waiting for some glue to dry on the project listed below this. Just realized I also have another doll mod to finish but I already uploaded the max amount of pics so uuhh off-camera there’s a half-finished Hornet from Hollow Knight doll mod pffb
- A 2-sided wall that I’m making to take pics of my dolls in front of, with a bunch of plants on one side & a personal library with cozy fireplace on the other
- Some amateur embroidering using the wrong kind of thread & the wrong kind of base fabric
- Furby face molds made from one of those little furby keychains from mcdonalds in the 90′s that I got off ebay, which I will use to make a Furberos
- A Trish Una cosplay that I’ve been severely slacking on since the convention I was gonna finish it for got postponed indefinitely due to the Backstreet Boys’ reunion tour
- Scripts for 2 more haunted doll comics that I thought of forever ago & just haven’t been able to draw yet, thx brain
- Notes for a silly dressup photoset idea where I see how many styles I can put together using my existing wardrobe
I’ve been all stressed lately & when I’m stress’t’d I can’t like, focus on one thing to completion. I have been cursed to bounce around between projects for a while so I just gotta ride it out. I decided to put together this WIP dump to remind myself that just because I haven’t finished any of these doesn’t mean I haven’t been working on them.
#nardacci art#nardacci crafts#wips#wip dump#I'm like preeetttyy sure I have adult ADHD but have not been properly diagnosed#also the Backstreet Boys' reunion tour just means the coronavirus & is a reference to the Game Grumps#ah heck I forgot I was also doing a pride pic- it's a clear teapot with a rainbow flowering tea#there's prolly more things that I forgot too
6 notes
·
View notes
Photo
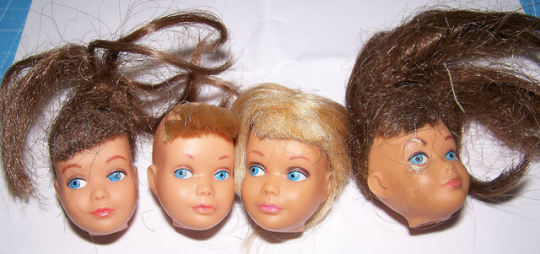


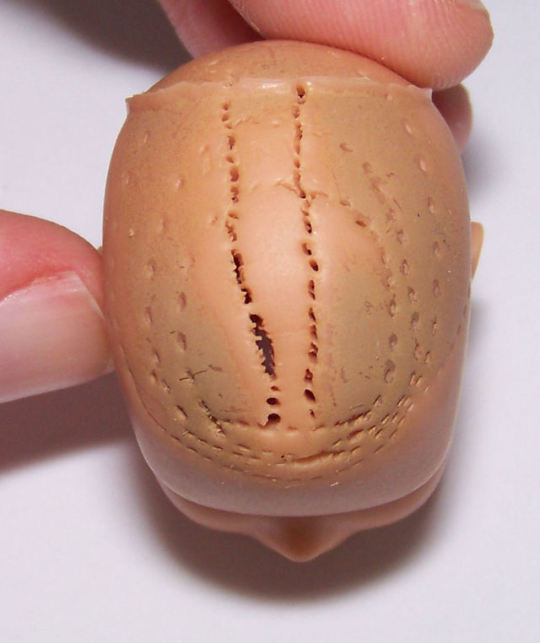

I went ahead and got the Skipper batch with my last doll bucks at the mo’ (I was going to get scooter too and do some surprise wig parcels but i’m out $30 for that lost parcel.) because I mean look at them: all four have so much personality and differences despite being the same screening. The sweetest looking one after a quick face wipe is lil miss angry at the right end.
Here are some quick notes about removing the hair from a vintage doll who’s hair has felted/melted together and rerooting a swiss cheese head safely (from my time working on 1969 Julia)
Cover the faces with tissues when ever you’re working with them as friction from your hands could damage the vintage paint
Alternate between tough nail scissors and thinner sharper blades to pracically shave the hair as close to the head as possible: any plugs melted together will rip open a hole so slice between partings and clumps until you can see each individual plug. This is really messy, there will be hair dust everywhere but it’s worth it. You can’t compensate for all the holes the vintage rooting will have left but you can avoid making any more.
Resist the urge to use your hemostats and tweezers to yank on the hair: prefer scraping motions even if it takes longer for a cluster of hair (glued of felted together on the inside) to dislodge from the vinyl.
Take detailed photos of problem areas before boiling just the tops of the head on a thick chopstick [and again do not touch the face, let it dry off naturally.]
The top of the head can be wiped with acetone just don’t put huge amounts on the cotton wipe so it won’t drip anywhere near the face, take as many wipes as you need to do this slowly and safely.
wiping the faces with water + a plain cotton wipe is enough to remove the grime. repaint work is done after rerooting.
If the plastic tears are too wide, put a layer of UHU glue down inside the head and let it dry for 48 hours as a sort of second coating of plastic.
fill the head with tiny pieces of sponge to avoid squishing anything open and wrap the facial area in tissue before beginning rerooting work (obviously do this AFTER you’ve drawn the new hairline, not like me who had to undo it all then redo it LOL)
Here’s a sneak peek of miss “wonk eye” #1 top pic/#3 on baldies pic.
and no I couldn’t resist the urge to do fantasy colours and modern hairlines I am not a legit restorer, i’m a sacrilegious scavenger.

37 notes
·
View notes
Photo
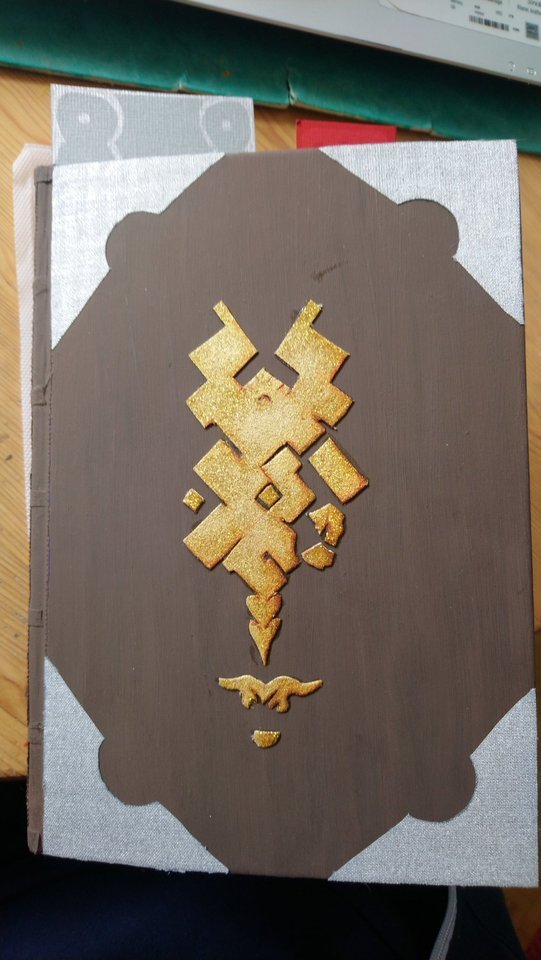
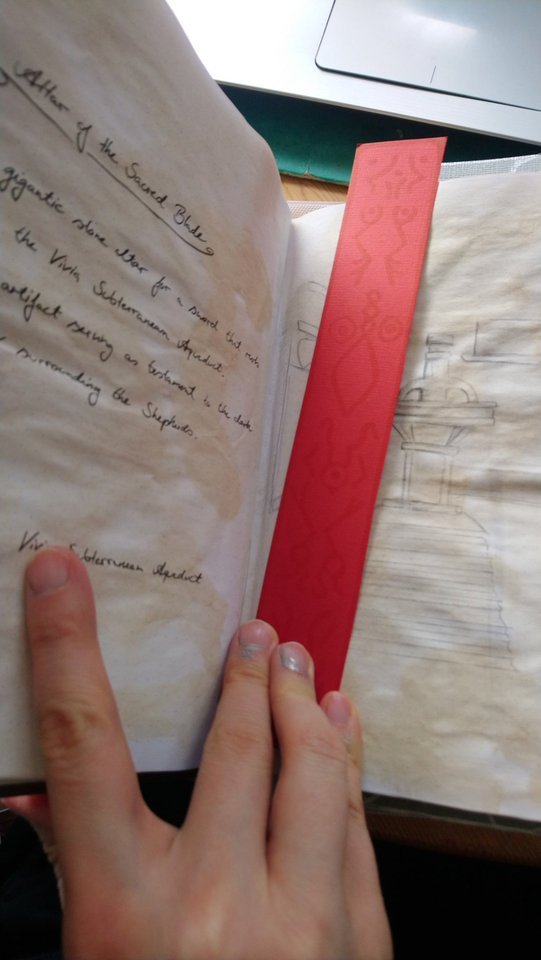

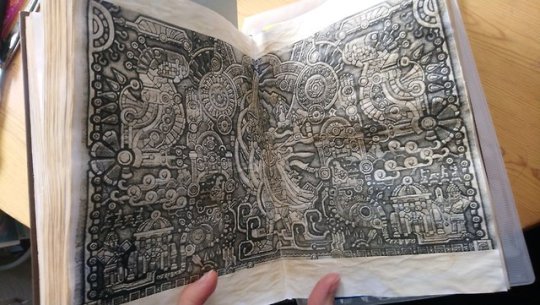
It is done!
Celestial Record cosplay prop!
More to how I did it under the cut!
You are interested in how I did it? Here goes!
What you need:
- two blank notebooks (or one if you can find one in the right thickness)
- black tea, lots of it
- sponges
- adhesive tape
- lots of patience
- a hair dryer
- one water-proof ink pen
- optional: print out of the mural found on google
- some gold/silver colour, brown colour
- some extra material for the cover (you can choose which material to use), some cardboard paper for your bookmarks
- hair-dryer
- cutter
- hot glue
- ironing board and iron
1) creating the book itself
For making the actual book I got two notebooks and cut off one cover from each of them, fitting them together to form one bigger book.
I basically glued them together with hot glue and created the spine with adhesive tape. Don’t worry if you have to re-apply glue later on.
2) filling the book!
I then started to fill my book with entries - I based mine on the discovery locations in the game. My entries consist on text on the left side and a little sketch on the right.
As you will dye the pages later make sure you use waterproof ink or your writing will become illegible. Of course filling it is optional - you can leave it empty if you want.
3) dyeing the pages
For dyeing it I used black tea. I put three teabags in one normal mug.
Let it cool down a bit before starting. I used a sponge to soak up the tea and then spread it over one page at a time. You can use the teabags as little “brushes” to add droplets of tea here and there, making the pattern more unique!
Make sure you dry each page with a blow-dryer thoroughly before continuing.
Count in a lot of time - this takes ages!
(3.5) covering up the part where the two books become one
Because the page where my two books join didn’t look too pretty I glued in the picture of the mural, which I had printed out and dyed and dried the same way as explained in 3.!)
4) Doing the cover
The cover isn’t exactly hard to do - paint the front and back in a brown you like.
For the gold part I looked for the symbol on google, flipping it vertically and transferring it to your material. Either use something golden from the very beginning or use anything you want (cardboard paper, adhesive paper, even foam rubber should work!). With scissors or a cutter you can cut it out and glue it on :)
The same goes for the silvery parts!
5) The bookmarks
The easiest of the whole prop - just cut out cardboard stripes in the shapes you want. No need to draw on them - I just did because I was in the mood for it. ;)
6) - will probably add some protective layer later on.
Writing this I realize I should have taken progress pics...next time I shall try to remember!
But if you want to try yourself or have questions with the reference pics/entries I used don’t hesitate to ask!
57 notes
·
View notes
Text
Raven Branwen’s Sword: Omen
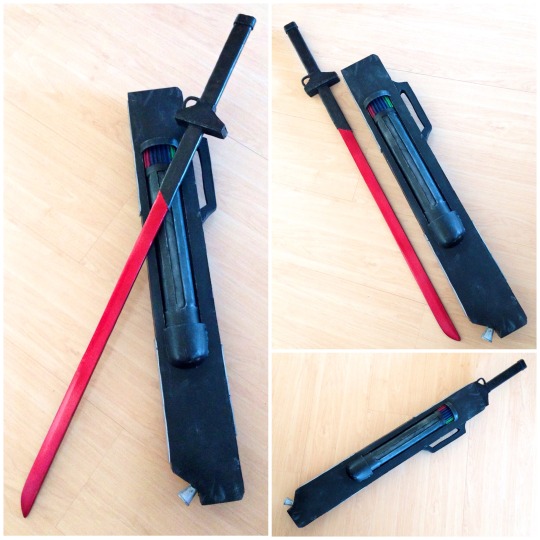
So I’ve finally got around to posting how I made an Omen prop for my Raven Branwen cosplay (from RWBY)
Details under the cut! (will be fairly long and pic-heavy)
For materials I used foam core, paper towel rolls, corrugated cardboard, 3mm craft foam, a length of baseboard, jewellery wire, masking tape, high-temperature hot glue, plasti-dip/flexidip, metallic red and silver spray paint, a semi-gloss clear sealer and various colours of acrylic paint for details and weathering.
Tools used were a high-temperature hot glue gun, a belt sander, a heat gun, a utility knife to cut the foam core, and a scalpel to cut the craft foam.
All craft foam used in this project is 3mm thick, and all glue is high-temp hot glue.

I started out with a screenshot taken from RWBY that I (tried) to edit into a semi-decent profile for Raven’s weapon. I then scaled it up to the size I wanted it to be in real life and printed it out to use as a proportion guide.
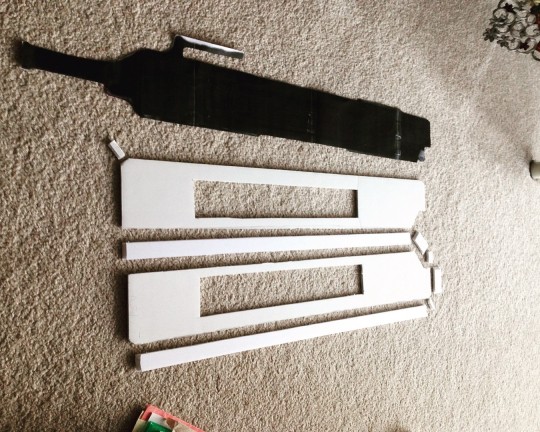
I then traced the pattern out onto foam core (foam board) and cut out all the pieces, angling (beveling) any edges so I would have a “seamless” fit when assembled. I then test fit the pieces together with some masking tape to make sure everything lined up correctly. I then glued one side together with high-temp hot glue, while leaving one face off so I could later add in the “rotary chamber” part, as well as taped any open foam edges with masking tape.
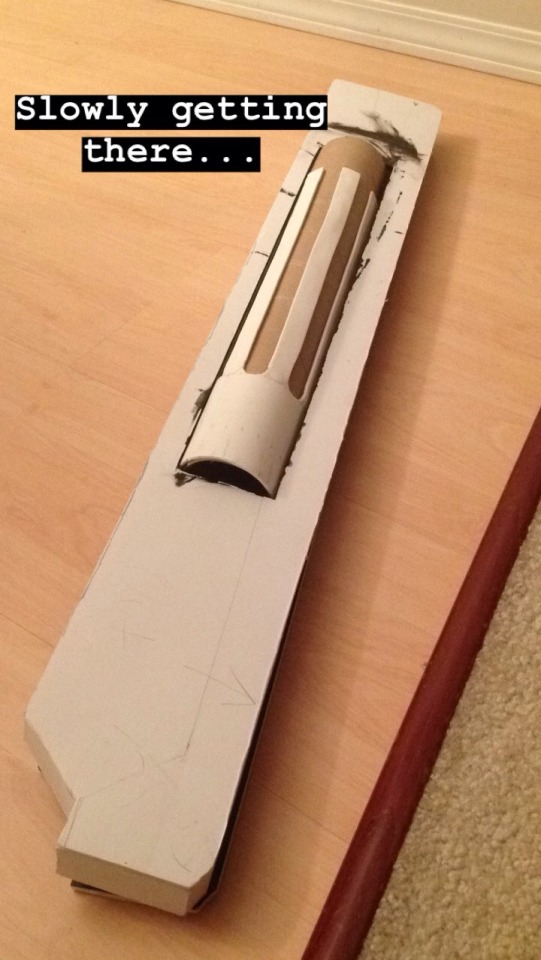
(sorry for the tall pictures)
For the rotary part, a pop can ended up being the perfect reference size, so I took two paper towel rolls, cut them to the correct length, and then cut a slit down one side of each of the paper towel rolls, so I could interlock them. I taped them together and slid a pop can through to make sure I had the correct circumference, and then Very Carefully glued them together with hot glue to make a single cylinder.
I then measured out where I wanted the dips to be on the rotary chamber, and cut out some 3mm craft foam and glued that on with hot glue. The dust cartridge part (the coloured part on the chamber in the next photo) is a strip of corrugated cardboard with the top layer of paper cut off so you could see the corrugations.
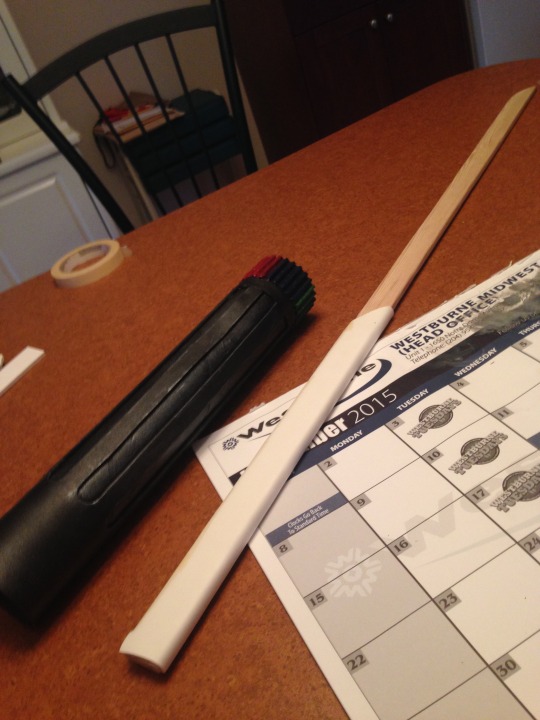
I then sealed the rotary part with plasti-dip, and then painted the dust cartridge part with acrylic paint and dry-brushed silver paint on the edges to weather it.
The blade is made from a piece of baseboard I got from a local hardware store. I used a belt sander clamped into a workbench to sand down the baseboard until I got the blade shape that I wanted.
I then measured and cut out some 3mm craft foam, test-fit it around the wood using masking tape, and then glued it (with hot glue) around where I wanted the hilt to be.
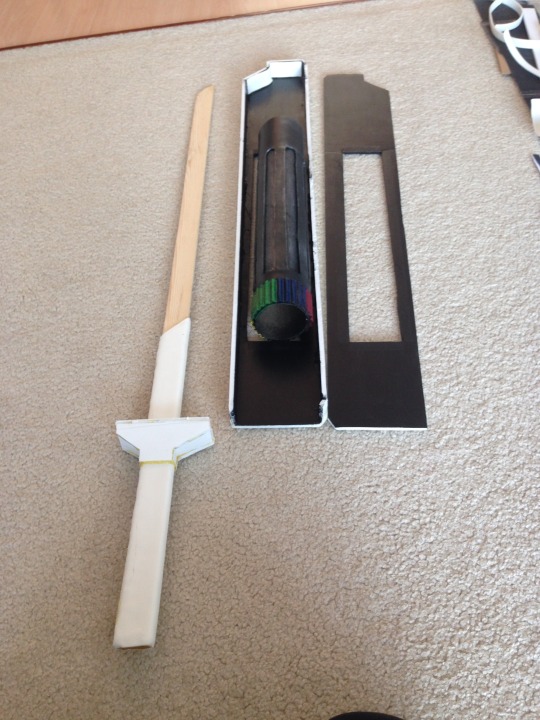
(I painted the inside of the sheath black just in case you would be able to see inside but it turned out that it probably wouldn’t have mattered much)
The hilt was measured and patterned out in relation to the sheath, so that the faces would match when the sword is sheathed. I cut out each panel out of foam core, and then test fit the pieces together with masking tape, angling any edges that needed to be angled to achieve a nice fit. I then glued it together with hot glue.
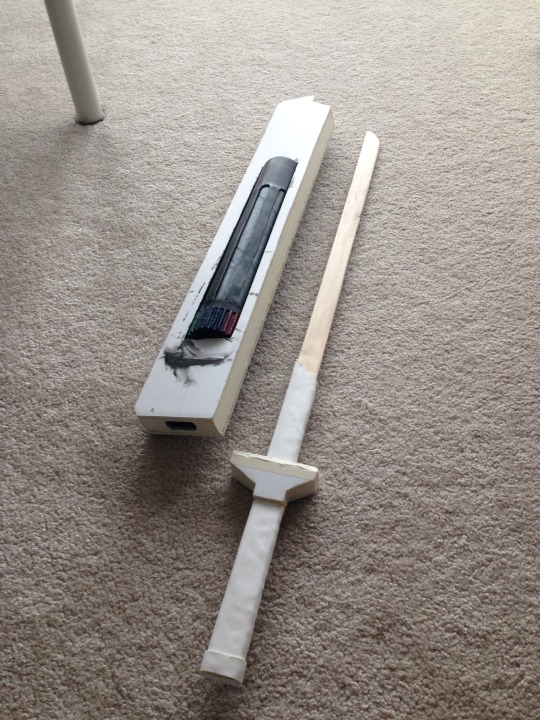
By this point the rotary piece was fully dry, so I was able to glue it in place inside the sheath, and then glue the other side of the sheath closed. I also finished off the pommel on the hilt of the blade. On both the sheath and the cross-guard I taped any edges where the foam from the foam core was showing with masking tape.
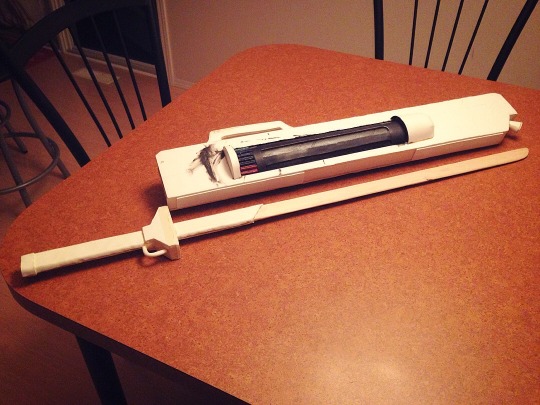
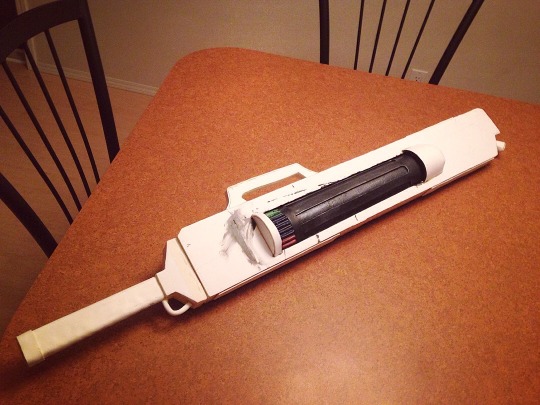
Adding the finishing pieces. The “trigger” part on the hilt of the blade is a piece of thick jewellery wire covered in craft foam, and then poked into the cross-guard and glued in place.
The handle on the sheath is 3 pieces of foam core cut out and stacked together. I covered the top of the handle with a piece of craft foam, and the bottom with masking tape. It was then glued on with hot glue.
The flat end covers for the rotary chamber are an almost-semi-circle piece of foam core with a strip of craft foam and glued in place. The curved end caps were a bit more difficult. I used the top of a plastic toy baseball bat I found (that just happened to be the perfect size) to pattern out a rounded end cap. I then cut the pattern out of craft foam, and glued it together, and then glued it to the sheath.
The little cone shaped part on the end is some craft foam shaped into a cone with a circle foam core glued onto the end, filled with hot glue, and then glued on.
The rectangular panels on the top and bottom of the sheath are strips of craft foam that are glued on.
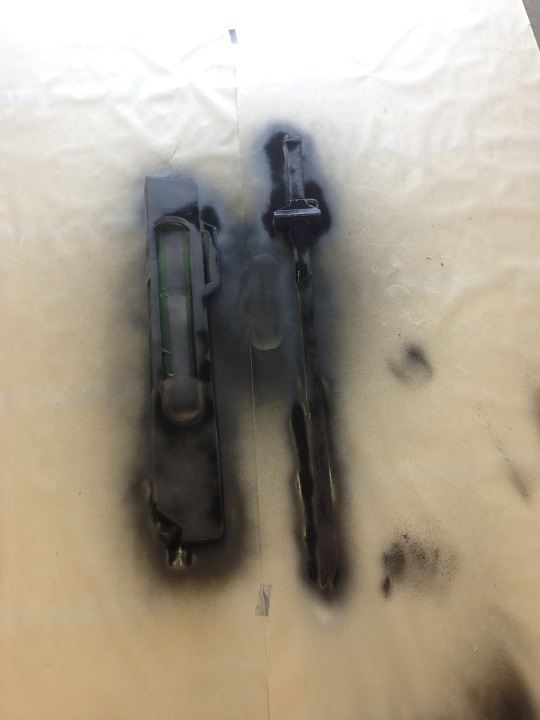
(I don’t have as many photos of the painting process, as I was a little rushed while doing this part especially)
Time for sealing! After heat sealing the foam parts with a heat gun, I masked off the rotary part since it was already painted, and then sprayed everything with multiple layers of FlexiDip, which I ended up not liking how it was reacting to some parts of the build, so I then switched to plasti-dip.
Once everything was sealed, I very lightly misted the black sheath and hilt of the sword with silver spray paint. I then masked off the hilt of the sword, and painted the blade with the red metallic spray paint. I also masked off the sheath and painted the panels on the top and bottom and the little cone on the end with silver metallic spray paint.
After the paint dried, I weathered the sheath and hilt with silver acrylic paint on the black parts, and black acrylic paint on the silver parts. Then I gave everything a couple coats of clear coat.
Overall I took me about a week to make this, mostly because I left it until the week before the convention to finish it. Here’s some more photos:
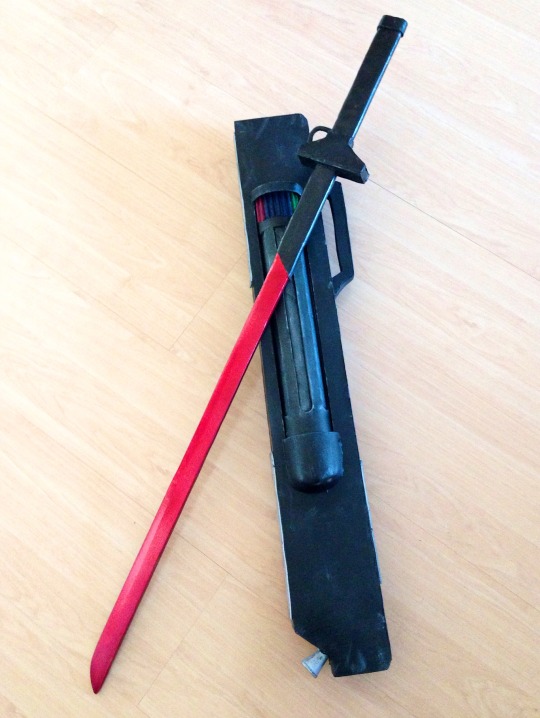
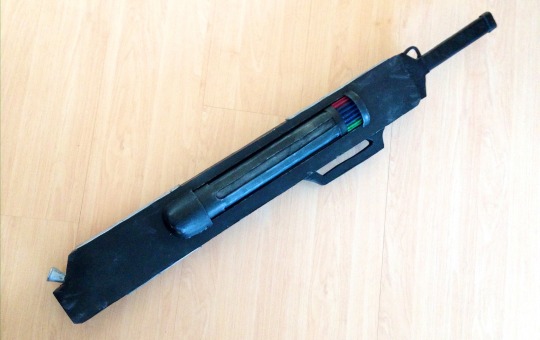
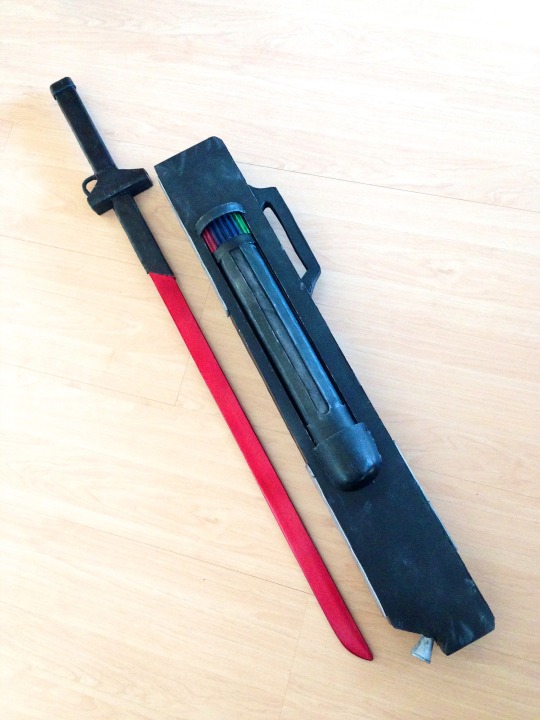
#raven branwen#raven branwen rwby#raven branwen cosplay#rwby#rwby cosplay#prop making#prop#rwby prop#cosplay#raven branwen prop#raven branwen weapon#sword#morncrist#prop build#build guide#chasma cos
369 notes
·
View notes
Last Seen Blogs

khaoticvex
🔪 INKED 🔪

wpgrabber
Настрою ленты WPGrabber

rna-art
rna_art

lunemetterram
Moon and Earth

detroitairportmetro
Untitled