#fanbinding
Text
My bookbinding tools and stuff
I started binding in July 2023, so I'm certainly no expert, but in case you're interested in what I use to create my binds…
I use Adobe InDesign to typeset and Illustrator for graphics
I print on an old Canon laser printer for black and white and an Epson ET-3830 inkjet for color
I purchase my shortgrain paper from Church Paper (for folios) and the long grain paper I use for quartos is just whatever (nothing special)
I love my punching cradle and guide that I got off etsy.
I use this thread (that I wax with beeswax) for sewing signatures
I love this cardstock for endpapers (Craft Consortium ink drops)
I like this bookboard (in black specifically)
I use these tools for spacing and squaring when creating covers
Everything gets stuck together with this glue. (GET THE POINTY TOP!)
I have an old Silhouette Cameo for cutting vinyl and applying foil to bookcloth (with this pen)
I use this foil quill for freehanding
I apply laser toner foil with this Scotch laminator
I have a thermal binding machine from Amazon and I use these glue strips with it
I have this guillotine (but I don't recommend black for visibility reasons)
I have purchased bookcloth from Hollander's, Colophon, and Amazon
Get this head and bond if you want to make your own bookcloth
I make ribbon bookmarks with charms like these and these crimps.
I get positive feedback and help and kindness from @renegadeguild
Caveat: These are just the tools and supplies I use. I am not an expert. I'm a hobbyist who is relatively new to it. Some of the things I use might be "wrong" but every book I've made works, so who cares?
If you want to see what it looks like when I bind something, here's a short video.
159 notes
·
View notes
Text
Fellas, fellas
Why on earth are you BUYING PHYSICAL BOOKBOUND COPIES OF FANFICTION????
ACTUALLY WHY ARE YOU EVEN BOOKBINDING FANFICTION TO SELL?!?!?!
IF ANY OF YOU DO EITHER OF THESE THINGS, GET OUT!! I AM NEVER SPEAKING TO YOU AGAIN.
In all seriousness though, authors on AO3 have begun to pull their works off of the site to avoid getting sued by people stealing their works to make a pretty bound book for profit. Entire accounts could be shut down as well.
Listen, I’m all for saving favorite works by printing them out and putting them in a binder, or learning how to make a bookbound copy yourself and/or assembling one with a pre-made and purchased fancy binding for a fanfic FOR YOURSELF or AS A GIFT to someone, but making bindings with and putting fanfiction in it TO SELL is where I draw the line.
Literally the entire point of AO3 is that you can read it FOR FREE.
It is DISRESPECTFUL for people to make money off of hardbound copies because guess what, the original creators of these fics get nothing. We are literally only writing fanfiction for our own pleasure.
Buying and selling book-bound fanfiction is also ILLEGAL YOU DUMB SHITS. People who are selling content while claiming to be a book binder is a misconception of their services. Book binders make the covers and all that, not the actual content of the book. Selling fanfiction is also an immediate violation of copyright law / Creative Commons licenses. The original fan work will get erased from the internet.
Fanfiction is already a legal grey zone since they are works being written about are protected by copyright. Copyright holders can in fact go after writers as well as the person who sold the fanfiction.
This also goes for people who steal fanart and, claim it as theirs, and put a price on it.
Don’t make it worse.
rest assured, we can still write our fanfics and make our art.
Buying a binding for you to assemble onto your own fanfiction or fanfiction you printed for PERSONAL USE is fine.
HOWEVER,
Bookbinding fanfiction for profit is literally ruining things for everyone. DON’T.
If I see any of them on Etsy, I swear to god-
10K notes
·
View notes
Text
Listen to your elders
So last week I posted abut the importance of downloading your fic. And then three days later AO3 went down for 24 hours. No one was more weirded out by this than I was. But while y’all were acting like the library at Alexandria was on fire I was reading my download fic and editing chapter eight of Buck, Rogers, and the 21st Century. And also thinking about what I could do to be helpful when the crisis was actually over.
So first off, I’m going to repeat that if you’re going to bookmark a fic, you really need to also download the fic and back it up in a safe place. I just do it automatically now and it’s a good habit to get into.
But let’s talk about some other scenarios. Last October I lost power for over a week after hurricane Ian. Apart from not having internet or A/C I did find plenty to do, I collect books so I had plenty to read, but maybe, unlike me, your favorite comfort reads aren’t sitting on a bookshelf. So let’s do something about that, shall we?
In olden times many long years ago around 1995 we printed off a lot of fic. It was mostly SOP to print a fic you planned to reread and stick it in a three ring binder. And that’s totally valid today too, but you can also make a very nice paperback with a minimum amount of skill and materials.
Let’s start with the download; Go to Ao3 and select your fic, we’ll be working with one of mine. This method works best with one shots, long fic tends to need a more complicated approach. Get yourself an HTML download

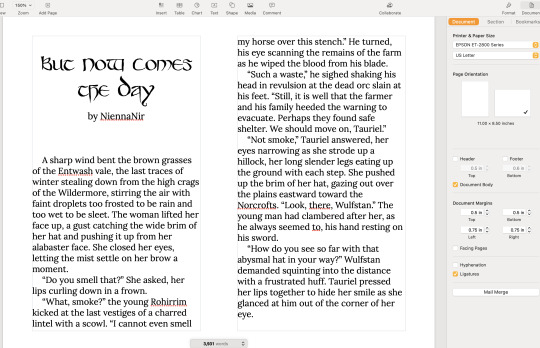
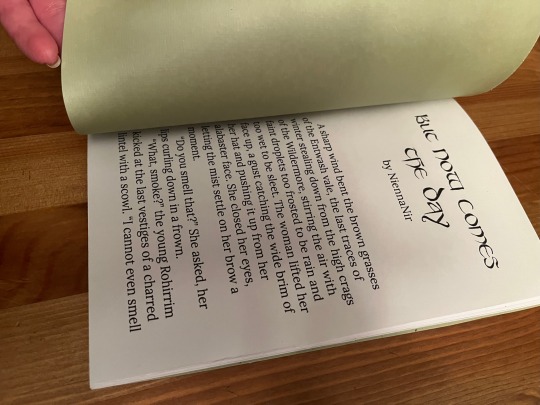
Open up the HTML download and select all then copy paste into any word processor. Set the page to landscape and two columns, then change the font to something you find easy to read, this is your book, no judgement. This is all you have to do for layout but I like to play a little bit. I move all the meta, summary, notes to the end and pick out a fun font for the title:
No time like the present to do a quick proofread. Congratulations, you’ve just created your first typeset. On to the fun part.
Now you’re going to need some materials:
8.5x11in paper
ruler
one sheet of 12x12 medium card stock (60-80lb)
scissors
pencil
pen or fine tip marker
sheet of wax paper
white glue
two binder clips
2 heavy books or 1 brick
butter knife
You’ll also need a printer, if you’re in the US there is almost a 100% chance your local library has a printer you can use if you don’t have your own. None of these materials are expensive and you can literally use cheap copy paper and Elmers glue.
Print your text block, one page per side. Fold the first page in half so that the blank side is inside and the printed side out:
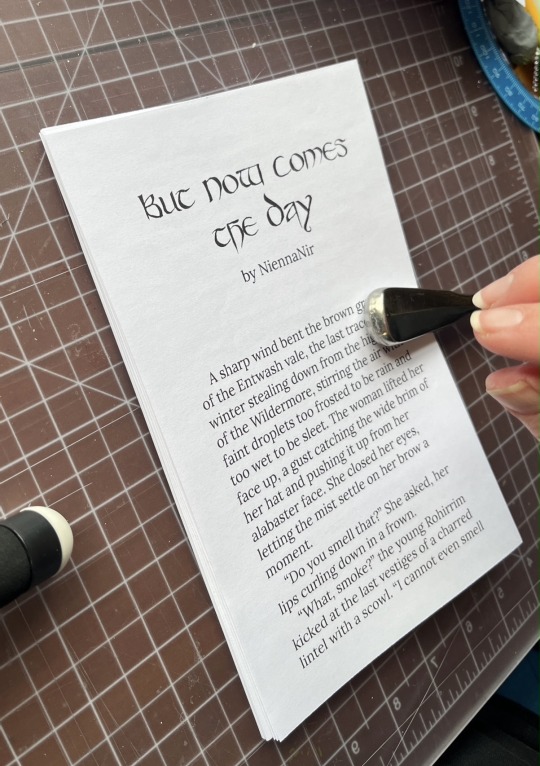
use the butter knife to crease the edge. Repeat on all the sheets. When you’ve finished, stack them up with the raw edge on the left and the folded edge on the right. I used standard copy paper, because you’re only printing on one side there’s no bleed to worry about. Take the text block and line everything up. Use the binder clips to hold the raw edge in place.
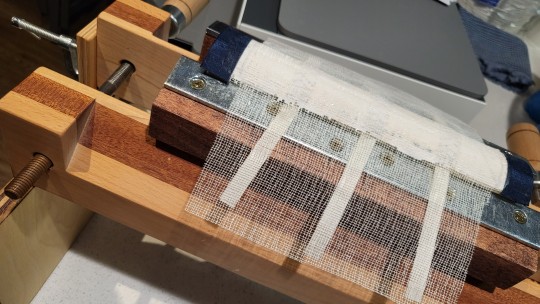
Wrap the text block in the wax paper so that the raw edge and binder clips are facing out. I’m going to use my home built book press but you don’t need one, a brick or a couple of books or anything else heavy will work fine.
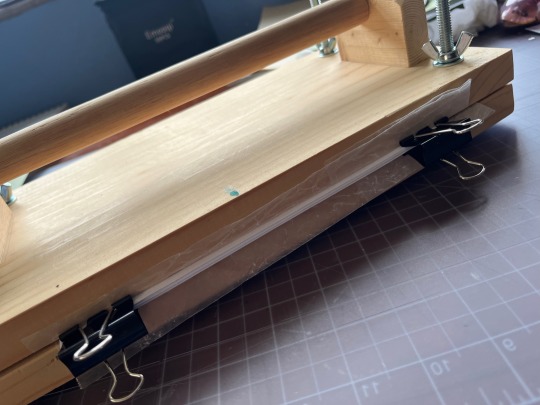
Once the text block is anchored down, take off he binder clips and get out the glue.
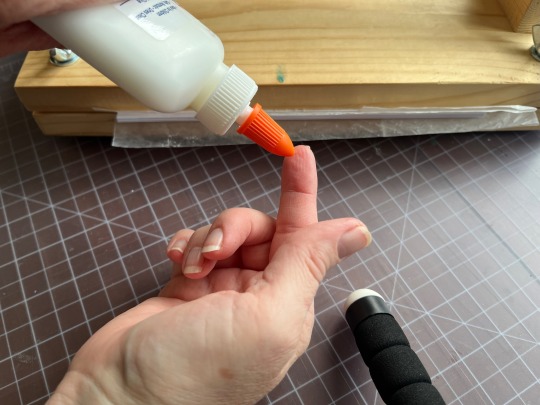
You can use a brush but you don’t need one, smear some glue on that raw edge.
Go make a margarita, watch The Mandalorian, call your mother. Don’t come back for at least an hour
In an hour smear some more glue on there and shift your brick forward so that the whole book is covered. This keeps the paper from warping. While glue part 2 is drying we’ll do the cover. Get out your 12x12 cardstock
Mark the cardstock off at 8.5 inches and cut it. Measure in 5.5 inches from the left and put in a score line with the butter knife (the back edge not the sharp edge)
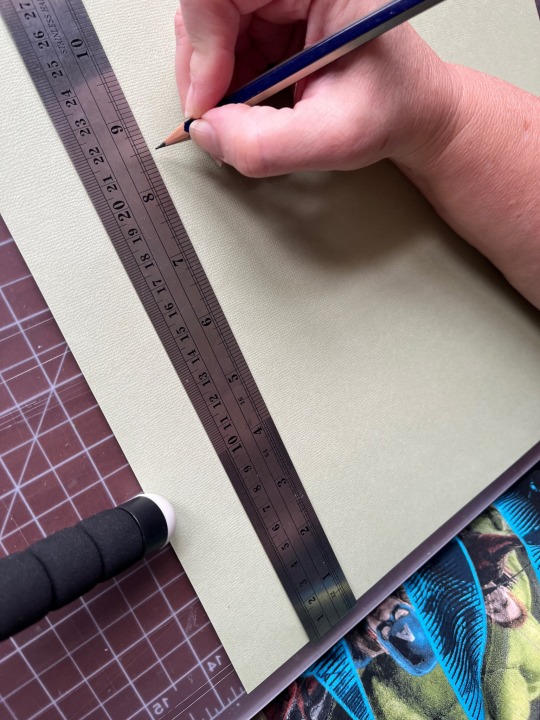
Carefully fold the score line, this is your front cover. You have some options for the cover title, you can use a cutting machine like a cricut if you have one, you can print out a title on the computer and use carbon paper to transfer the text to the cardstock. I was in a mood so I just freehanded that beoch. Pencil first then in pen.
Take your text block out from under your brick. Line it up against the score mark and mark the second score on the other side of the spine
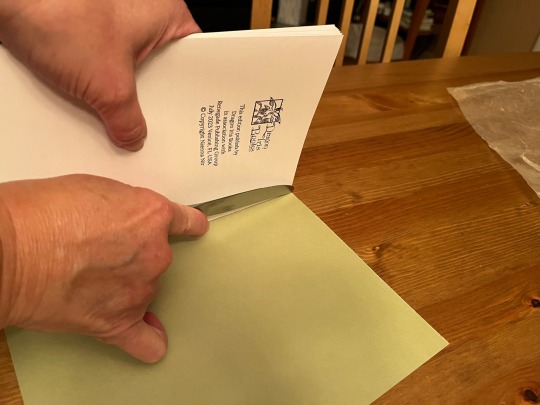
Fold the score and glue the textblock into the cover at the spine. Once the glue dries up mark the back cover with the pencil and then trim the back cover to fit with your scissors.
Voila:
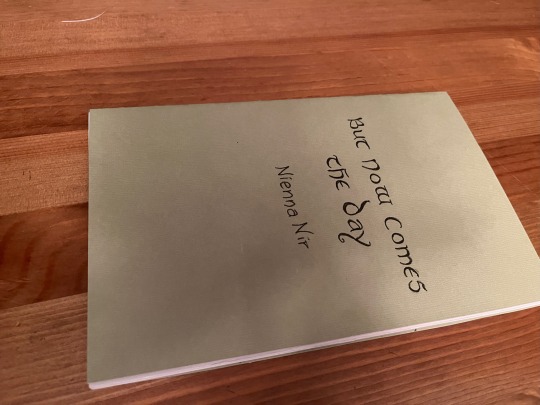
I’m going to put this baby on the shelf next to the Silmarillion.
The whole process, not counting drying time, took less than an hour.
If you want to make a book of a longer fic, I recommend Renegade Publishing, they have a ton of resources for fan-binders.
21K notes
·
View notes
Text
saw a post this morning that got me thinking about bookbinding and the inherently transformative and collaborative nature of fandom, so:
edit: i guess i should have clarified: hand-bound books for PERSONAL use, not for profit or resale! i think that's something obvious to me as a bookbinder but not to writers/artists so i thought i'd clarify
6K notes
·
View notes
Photo
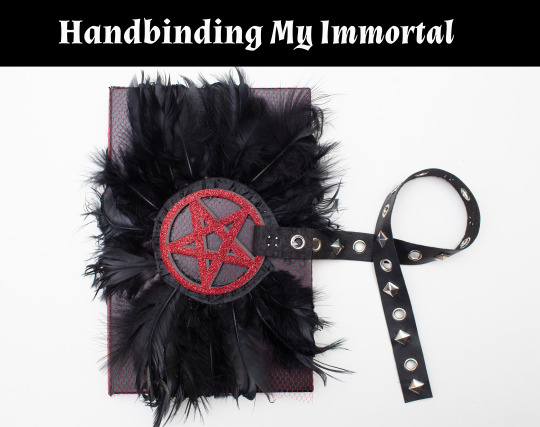


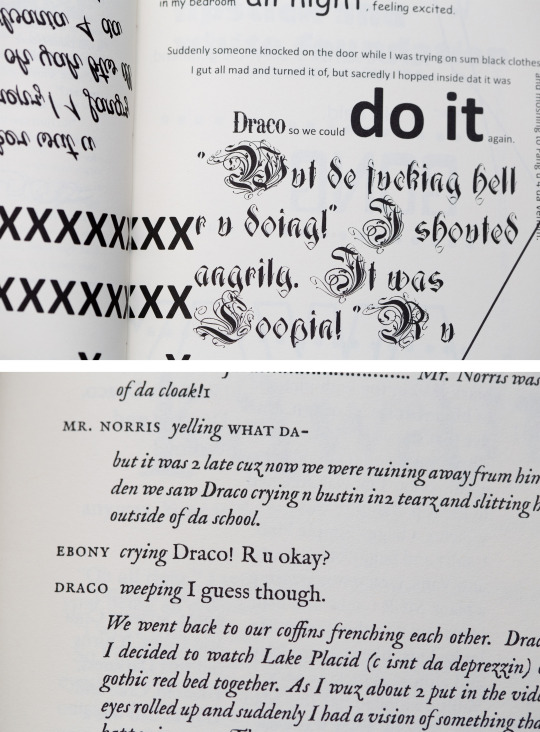
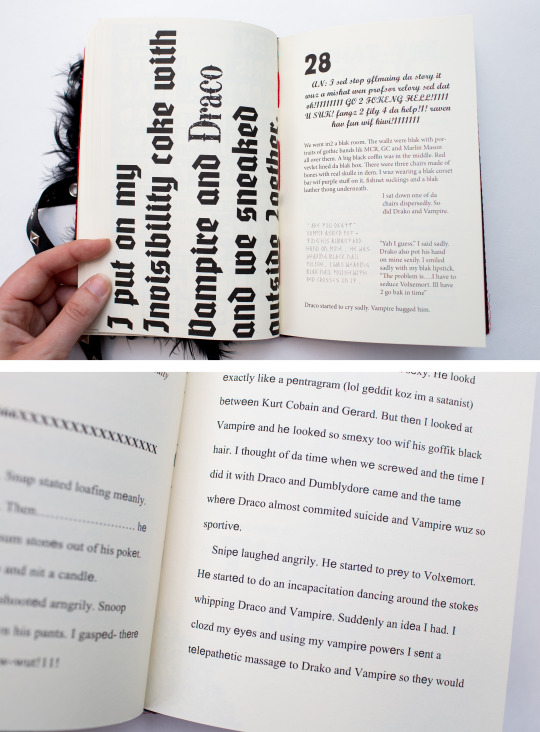
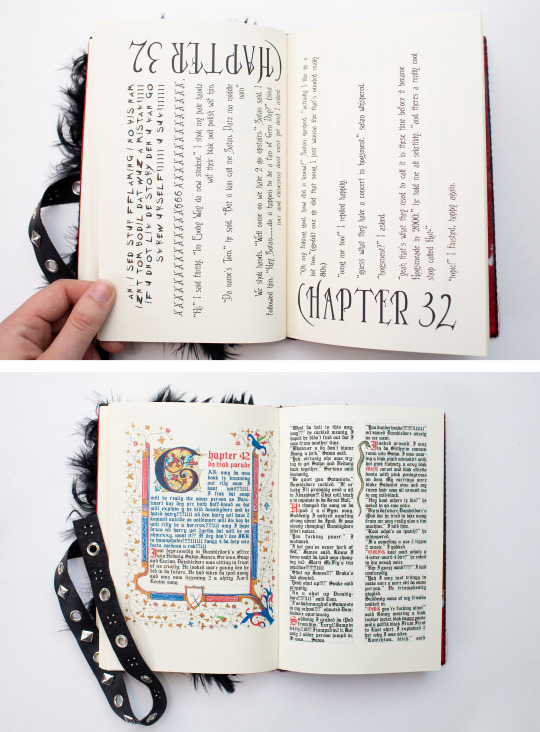

Handbinding Project: My Immortal by Tara Gilesbie
This really started over a year ago, with a project started in the Renegade Bindery server: people would format different chapters of My Immortal, without knowing what anyone else was doing, and we would put them together into one file. It was agreed upon that everybody would disregard both good design and good taste.
(If you click on each image, the caption lists who designed the page in question. I couldn’t include them all here, but every page is basically a work of art. Horrible, typographically hellish art.)
After raiding a Joann’s of materials I thought belonged in Hot Topic circa 2005 (before it just became Think Geek II: We Don’t Light Our Store,) I almost immediately tested positive for covid. So I made most of this over the last four days, and with varying levels of coherent thought and common sense. The process is documented in a thread here
#handbinding#fanbinding#my immortal#bookbinding#art#or something like that anyway#op#what am i supposed to do with my life now??#my job??#my bookbinding#fic printing
66K notes
·
View notes
Text
Want to fanbind? Need davy boards/book boards and low on funds? I have an excellent hack for you:
Repurpose shitty books
"But!!!" You may say, "no book is shitty! All human experiences are worth putting to paper!"
You're right! But, also, Counterpoint:

I went to my local thrift shop and got these for the low price of $5 for all 10. ("Getting into politics?" The lovely ladies behind the counter asked me. "In a manner of speaking," I replied.)
Once I got home, it was easy to turn them into this, their component parts:
("Please stop saying you're skinning them," my partner begged. Too late!)
[EDIT TO ADD: Here's a guide! Also on my tumblr. Also - when thrifting, bring a piece of paper folded or cut into the minimum size you need for boards: this way you can make sure you're getting big enough material!]
While these are just book boards, diligent deconstruction can even yield headbands, I'm pretty sure - I'll report back on my next trial run. [EDIT TO ADD: yup, you can!]
I cannot overstate the delight I have in giving these covers new life for binding fanfiction, particularly the queer kind.
Happy binding!
#adventures in fanbinding#fanbinding#fanbinding on a budget#reduce reuse recycle#bookbinding#book binding#the art of book butchery
5K notes
·
View notes
Text
so, you wanted to start bookbinding?
so @princetofbone mentioned on my post for "factory settings" about wanting to know more about the binding style that i used for it. so i thought i might make a post about it.
i was as terrible as i always am for taking in progress shots, but i can link you to the resources i used in order to make my book. i would also like to point out that "factory settings" is my 120th bind, and i have been doing bookbinding as a hobby for just over 3 years now. unfortunately this means some of the methods that i used for that bind aren't particularly beginner friendly, just in terms of the tools and methods i have used, but i would love to point you in the right direction when it comes to resources. i dont say this to sound pretentious which i fear i might come across, just so that youre fully informed. getting into this hobby is fun and rewarding, but it can definitely be intimidating.
with that caveat, heres a list of links and resources that i have used for bookbinding in general, with additional links to methods i used specifically in regards to this bind.
ASH's how to make a book document. it gives you a great introduction into typesetting fics (where you format the text of fics to look like a traditionally published books) and then turning them into a case-bound book (the style i used for "factory settings"). it is comprehensive, and explains how to use microsoft word to do your bidding. it was invaluable to me when i was just starting out! currently i use affinity publisher to typeset/format my fics for printing, but i only bought and learned how to use that after i had been binding books for a year and a half. i made some beautiful typesets with word, and some of my close friends use it still and design stuff that i never would be able to in my wildest dreams (basically anything by @no-name-publishing)
DAS Bookbinding's Square Back Bradel Binding. a great style to do your first bind in! this method requires, when making the case, to attach the cover board and the spine board to a connecting piece of paper, which makes it so much easier to match the size of the case to the size of the text block (your printed out and sewn fic). using this method is what allowed me to get much more accurately fitting cases, and made me much more confident with the construction of the books i was making. a well-made book is something that is so wonderful to hold in your hands!
DAS Bookbinding's Rounded and Backed Cased Book. This is the specific method that i used to create my bind for "factory settings"! even before i could back my books, i found that watching DAS's videos in particular helped me see how books were traditionally made, and i was able to see different tips and tricks about how to make nicer books.
Book Edge Trimming Without... i trim the edges of my text block using my finishing press and a chisel i have sharpened using a whetstone and leather strop with buffing compound on it. i follow the method for trimming shown in this video!
Made Endpapers. i follow this method for my endpapers, as i used handmade lokta endpapers, and they can be quite thin, but they look beautiful! i used "tipped on" endpapers (where you have your endpaper and then put a thin strip of glue on the edge and attach it to your text block) i used for a very long time before this, but these feel like they are much more stable, as they are sewn with your text block.
Edge Sprinkling. this is the method that i used for decorating the edges of my text block. but the principle is basically clamping your text block tight and then sprinkling the edges. i do not believe you need to trim the edges in order to do sprinkles on the edges, and that's what makes it accessible! i personally just use really cheap acrylic paint that i water down and then flick it onto the edges with my thumb and a paint brush.
Double-Core Endbands. i sew my own endbands, which i followed this tutorial for. that being said, it's kind of confusing, and this video is a bit easier to follow, but it is a slightly different type of endband.
Case decoration. i used my silhouette cameo 4 to cut out my design for "factory settings" in htv (heat transfer vinyl). i also used my cameo 4 to cut out the oval of marbled paper on the front, as i honestly didn't want to try my hand at cutting an oval lol. i also glued some 300 gsm card with an oval cut out of the centre of it onto the cover before covering it with bookcloth, to get a kind of recess on the cover. i then glued the oval of marbled paper onto the top of the recessed area once it was covered with bookcloth, so that it was protected. the images i used were sourced from a mix of rawpixel, canva and pixabay. a more accessible way to get into cover decoration is by painting on a design for your cover as described in @a-gay-old-time's tutorial just here. or even doing paper labels, which look classy imo.
physical materials. sourcing these will depend on your country. i am located in australia, and have compiled a list with some other aussie bookbinders of places to buy from. here is a great post describing beginning materials for getting started binding.
@renegadepublishing. this tumblr is great! its what got me started bookbinding, and being in the discord has been inspiring, motivating, and honestly just one of the best online experiences i have ever had. it is full of resources, and most people in there are amateur bookbinders, with a couple of professionals thrown in. the discord is 18+, and anyone can join!
i'm sorry this post got so long, but i hope that this has a lot of information for you if you would like to get started bookbinding. its one of the best hobbies ive ever had, and i genuinely believe i will have it for the rest of my life.
3K notes
·
View notes
Text
"Book binders are making fanfiction physical, so it can sit alongside the authorized tales"
#fantastic ficbinders and where to find them#fanbinding#fan art#ficbinding#ficbook#bookbinding#fanbind#fic binding#fic binders#the verge#fandom life#fandom things#fandom#omgreylo
2K notes
·
View notes
Text


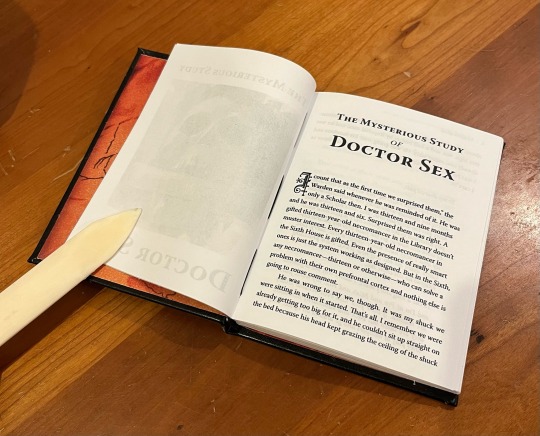
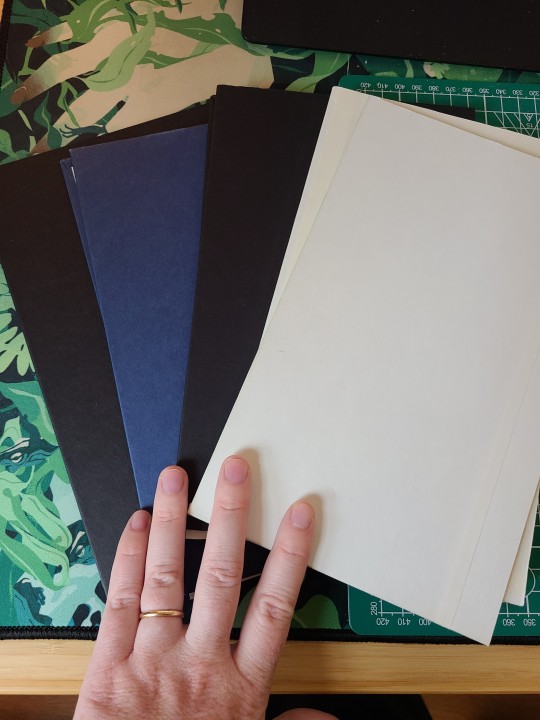
My mom listened to the locked tomb audiobooks and refuses to read anything longer than an article on her phone, so I printed and bound a quarto copy of the official short stories by Tamsyn Muir (The Mysterious Study of Dr. Sex; As Yet Unsent; and The Unwanted Guest, which technically isn’t out yet) as an Xmas gift.
#tlt#the locked tomb#Gideon the ninth#harrow the ninth#Nona the ninth#fanbinding#bookbinding#my binds
844 notes
·
View notes
Text
Salvage by MuffinLance
I completed this baby back in October early November it was painfully fun, lol. Shoutout to @no-name-publishing for sharing their typeset with me!


Below the line, there is more information and photos on this bind!
The foiling took about 8-9 hours or so. There was a lot of trial and error, and I ruined about 3 books worth of bookcloth. I ran through all my heat reactive silver foil (neverforget✊️)before I was able to compelte it. I used foil I got from a bindery that is closing down, I used my new cameo, and the memory keepers heat foil quills.
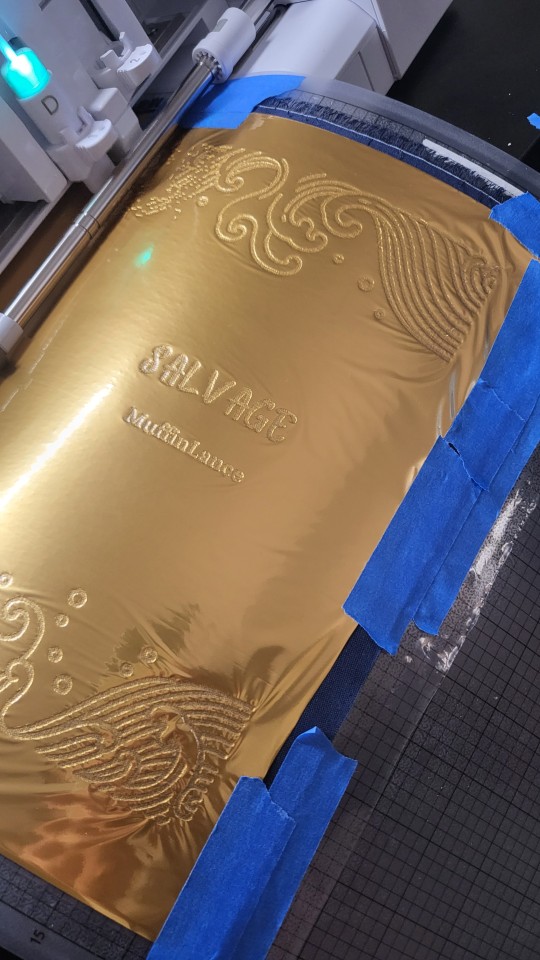
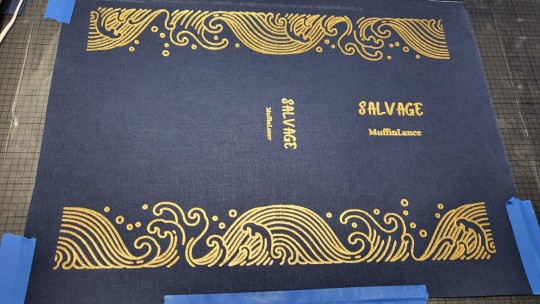
I was originally going to use The Great Wave off Kanagawa as my cover art, but my friends talked me out of it, and I'm glad since, had I not listened, it may have taken longer. The sound of the cameo working will haunt my nightmares. My spouse was dreading their life choices. "Why did I buy her the machine from hell?" Cause you love me, my sweet honeybooboo, that's why.
I used 28lb paper for this puppy, my printer was such a good boy and printed it out without a single issue (bless you babe I will thank you first when I get a trophy one of these days) but after I folded it it was like 3 inches wide and I got so scared for my life.


I used remie band and linen thread (only the best for you, my precious), I made headbands with the bookcloth and l2mm leather core, and I used glue and kozo paper to strengthen the rounded spine.
Rounding and backing almost made me cry, but I had DAS there with me. Also, shoutout to my friend's cousin for the backing and routing boards and Jim with ABE for the wonderful laying press.
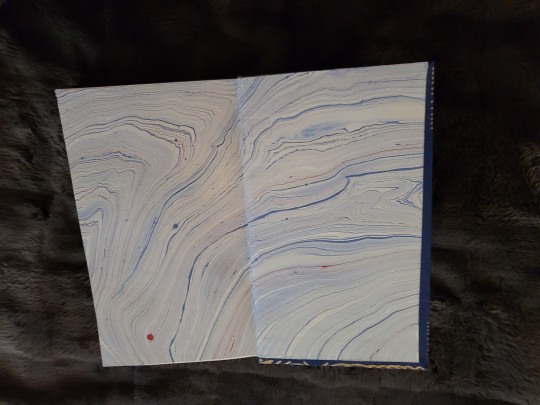
The endpapers are from De Milo Design. They are handmade, and I got them at a local faire. They are beautiful!
The bookcloth is from BookcraftSupplyCo in CA!
If you would like to learn more about bookbinding, consider joining @renegadepublishing

#bookbinding#handmade#renegadepub#atla zuko#atla#avatar the last airbender#fanfic#fanbinding#zuko#prince zuko#salvage#muffinlance#salvage by MuffinLance#ao3 fanfic
863 notes
·
View notes
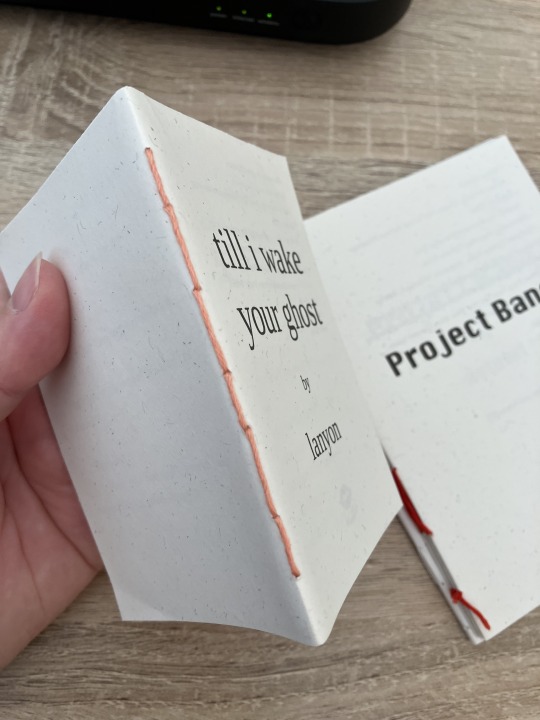
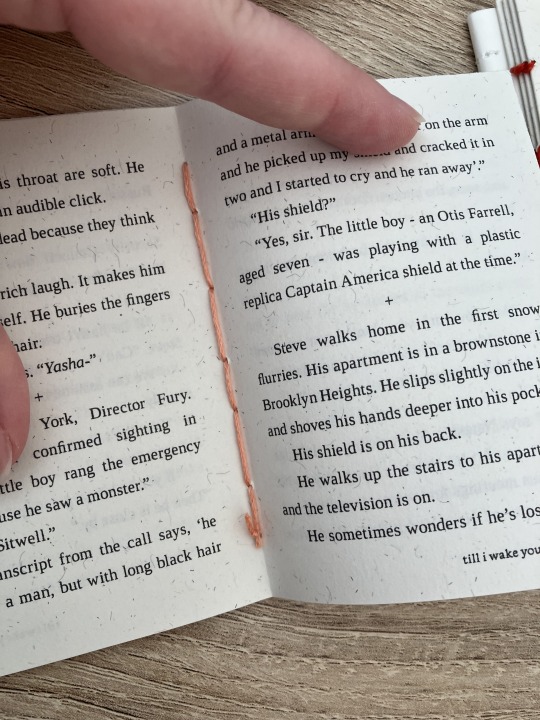
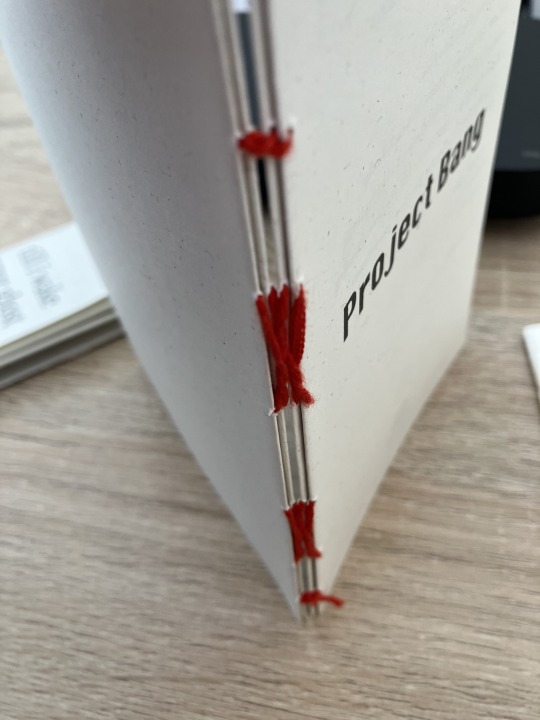
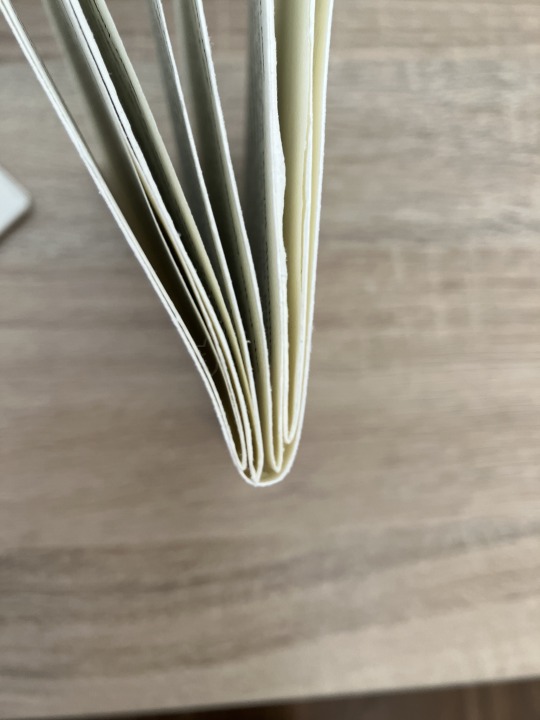
Text
Making a book in five and a half minutes
Well, I forgot to film the folding and the punching so it actually takes a little longer.
This is a quarto, so smaller than my usual (folio-sized) books. It's the author copy of this book (turned out much better this time, I was more cautious with the guillotine.)
I left the audio in because I find it very soothing.
I was a little nervous to make this because what if someone comes in and is like THIS IS WRONG HOW DARE YOU but I am raising my middle finger at imposter syndrome.
651 notes
·
View notes
Note
As you've asked for asks!:
Do you have any quick-and-dirty book/fic binding methods a terrified-of-failure novice could use to bang something out to get over the first collywobbling step of Actually Doing The Thing? (this may be something I've been meaning to ask for ages)
yes! I absolutely do! in my opinion the best quick-and-dirty bookbinding method is a no-glue pamphlet: you don't have to mess with glue or measuring or cutting anything, all you need is your text, some paper, a needle and thread. you can use the same needle to punch holes if you don't have an awl.
this is going to be a little long but that's because I'm going to write out some fairly detailed instructions for an A5 sized pamphlet. If you don't want detailed instructions and think you can glean the necessary info from photos, just skip to the photos! I've also linked tutorials.
for preparing the text to printing, in whatever software you use (word, libreoffice, gdocs, whatever) make sure your document is set to page size A5. make it look readable. then save as/export that document as a straight-paged PDF. now go to the bookbinder JS tool (https://momijizukamori.github.io/bookbinder-js/), and upload the PDF.
source manipulation: none
printer
paper size: A4
display unit (you can ignore, or choose cm if it gives you anxiety that it automatically displays points)
printer type: select single-sided or duplex accordingly*
rotate paper: ignore
flip on long side: check if you are printing duplex and if your duplex printer flips the paper on the long side
page layout:
tick folio
page scaling: original
page positioning: centered
ignore the rest
flyfleaf: ignore
signature format
tick: standard signatures. in the length drop down, this depends on the type of pamphlet you are doing. for folio i generally find 4-5 pages per signature a comfortable thickness. if you have 6 whole A4 pages you can still do that as a single signature or you can split it into two signatures 3 pages each.
wacky small layouts: ignore this
signature info
click the generate preview button to see what your PDF looks like imposed! I love this step especially when I'm doing quarto (A6) or octavo (A7) sized books
generate output - click this to generate an imposed PDF
for A6 and A7 sized books the instructions are much the same, except for these you make sure the page size is A6 or A7 in your software, and then you choose quarto or octavo instead of folio. for signature length drop down I keep signature length to 1 for octavos typically and 2 for quartos, as this still refers to sheets of paper, and for octavo 1 sheet of A4 paper will turn into 4 smaller sheets in one signature once folded and cut.
*if you don't have a duplex printer you will have to manually turn the paper to print on the other side. I cannot be arsed with this so I bought a printer capable of duplex printing (I didn't have a printer anyway). if you already have a printer check what it can do as you might be surprised and go from there.
now to the pamphlets! you don't need a cover - I have one for the long stitch pamphlet but for the saddle stitch one I didn't bother and just made sure the first page had a title on it. you can always take a different piece of paper and print a cover on or or just use coloured cardstock and create a simple cover, but a cover is not necessary unless you're doing a long stitch pamphlet. all you need to do is to punch holes and start sewing. there are a few different stitch types below, I wouldn't say any of them are more difficult or easier than others, but they do look different so...pick one you like the look of and go from there?
pamphlet stitch (uneven number of holes)
I haven't ever done a pamphlet stitch but here's a tutorial for how to do it: https://www.starpointestudio.com/simple-pamphlet-stitch-book-step-by-step/
saddle stitch (uneven number of holes)
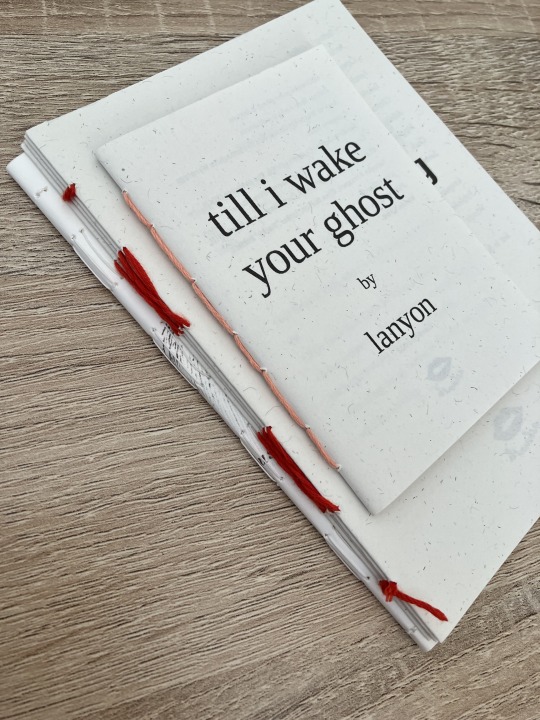
I realised that what I was thinking of as a pamphlet stitch is actually saddle stitch, as in this A7 pamphlet:
here's a tutorial for how to sew saddle stitch: https://www.bookbindingworkshopsg.com/saddle-stitch-bookbinding-tutorial/
here's a video tutorial: https://www.youtube.com/watch?v=aWHkY5jOoqM (sealemon has a lot of bookbinding tutorials and I know many people who like her videos, I used her tutorial for coptic binding way back when I first made a book but I can't otherwise vouch for the quality as I haven't used her videos)
french link stitch (even number of holes)
in this one I used french link stitch which I typically use for thicker textblocks that i'm not planning to use tapes with as the french link gives it some robustness, I used it here because I had never done it before and wanted to try it out. I am planning to take these stitches out and re-sew this pamphlet with a cover now that I've found a suitable piece of transformer fanart to use as a cover:
french link tutorial. it's quite long but it has a colour coded bit towards the end that shows how the thread is supposed to link which i find very helpful to visualise: https://www.handmadebooksandjournals.com/bindings/french-link-stitch-binding/
here's a video tutoral from DAS bookbinding (he is my go to for techniques and he has the most soothing Australian accent as well, though fair warning not all of his videos are for beginners): https://www.youtube.com/watch?v=O4ZPdbaM-Ws
long stitch (even number of holes)
for this one I used long stitch and I had a cover. this one is my favourite variation because I can make these pretty and simple covers and the stitch looks nice on the outside as well, so this one scratches the 'i want to make a book' itch for me.

here's a tutorial that also includes a how to on a cover that is different from my cover: https://lccprintmaking.myblog.arts.ac.uk/files/2020/06/Long-Stitch-Tutorial-A4.pdf
DAS also has a video tutorial for long stitch but it's like three videos long, maybe watch it later :'D
here's one I haven't watched but seems decent: https://www.youtube.com/watch?v=XnignTL_wDQ
you can use saddle stitch for this kind of pamphlet as well, that's what I did for dozens of ships and hundreds of souls (https://ashmouthbooks.tumblr.com/post/681587080267202560).
I hope this helped!!
1K notes
·
View notes
Text
A year and a half ago, I made a post about @renegadepublishing launching their code of conduct. I’m pleased to report the community has been thriving, and is abuzz with even more growth!
Over the past year and a half:
The Discord size has doubled.
The membership has skyrocketed to nearly 200 members.
Our events have also doubled in participation!
We’ve started four brand new events!
We’ve launched 12 satellite servers with 414 members!
All this, and yet, there’s more to come! I’m pleased to announce yet another massive undertaking has finally come to fruition…
THE RENEGADE BOOKBINDING GUILD WEBSITE!
Renegade has grown so much and still remains such an incredible, vibrant community, and this step forward will only enable us to do so much more. There is still more work to be done, but it’s absolutely amazing how far we’ve come. I can’t wait to keep building this community with all the wonderful people in it! 🎉
We’re currently kicking off Binderary 2024 with a bang, with 34 workshops planned for the month of February, all completely free and community-run!
If you’re waiting for a sign, this is it! Come join us, and start your fanbinding journey!*
*Discord is 18+ only!
#fanbinding#bookbinding#fanfic binding#fanficbinding#ficbinding#binderary#binderary2024#renegadepublishing#renegadepub#or should i say#renegade bookbinding guild#🥹❤️
862 notes
·
View notes
Text
Earlier this week I reported on the very depressing for-profit fic pirating happening in certain corners of fandom—but (somewhat coincidentally, timing-wise) I also had the joy of reporting this story on fanbinding, and the work of the @renegadeguild! Featuring the words (and fanbinds) of the brilliant @celestial-sphere-press, @butterfingersbookbinding, and @fanboundbooks (who also talked about Renegade on the most recent Fansplaining episode).
Renegade's binders are strong proponents of the non-monetized gift economy—they truly embody the spirit of fanfiction, in my opinion, both in the communal way they share their work with fic writers and each other, and in the DIY way they approach making books:
There’s a strong parallel between the amateur, instinctive nature of fanfiction and the act of fanbinding. While plenty of fic is penned by formally trained writers, much of it is not. Tiffo, who binds as Fanboundbooks, likens the reverse-engineering involved in teaching oneself both activities. As writers, people try to figure out why stories work. Fanbinders collectively share the process of learning to turn that work into a physical object—tactile, clean, often beautiful. Fic is largely unencumbered by the forms and structures of traditional publishing, and fanbinders approach their work with the same spirit. “People will often say, ‘How do I do this?’ or ‘What’s the rule for this?’” Tiffo says. “The answer that we always try to throw in Renegade is, ‘This is what other people have done, but know that there is no rule to your book—you can make whatever you want.’”
It's a shame seeing people conflate the bad actors of the pirating situation—many of whom don't appear to be in fandom and seem motivated by pure profit—with the work of fanbinders at large, and seeing people scared to try out fanbinding because of the recent news. Not-for-profit fanbinding is just as legal as writing fanfiction, and I don't speak for all fic writers, but if someone ever bound one of my fics, I'd be so touched I would almost definitely weep. 😭
#fanbinding#fanfiction#renegade bindery#fanbound books#celestial sphere press#butterfingers binding#gift economy#fannish crafts#atlas obscura#my writing
1K notes
·
View notes
Text
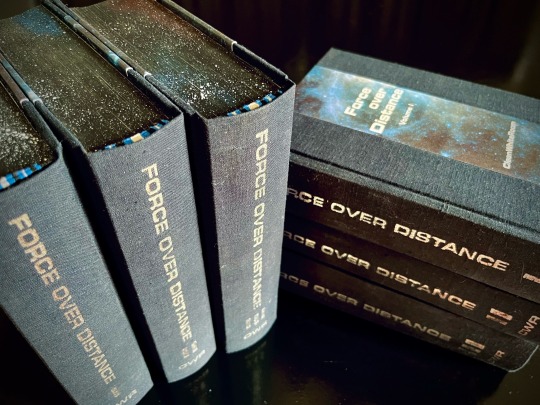
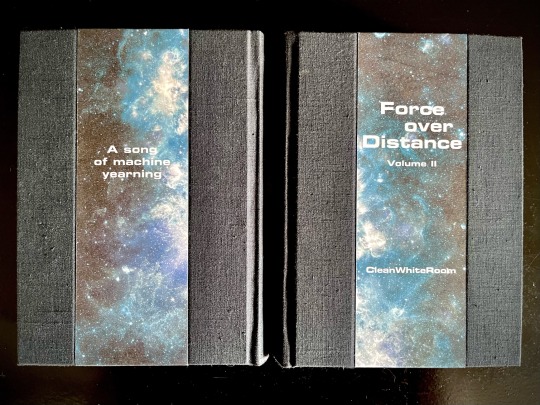
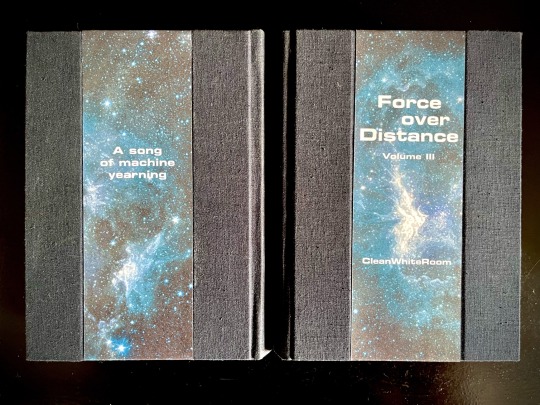

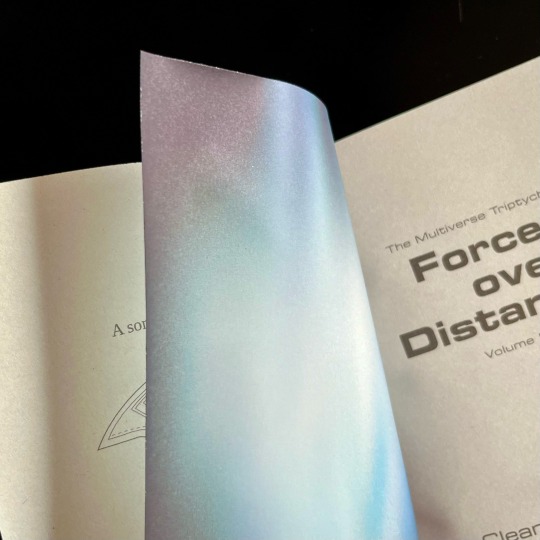

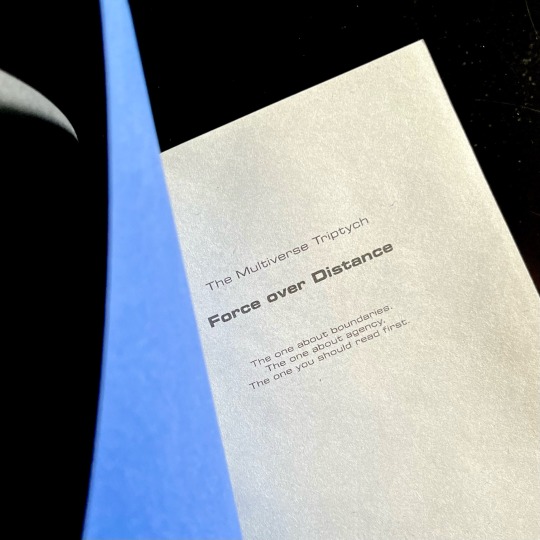
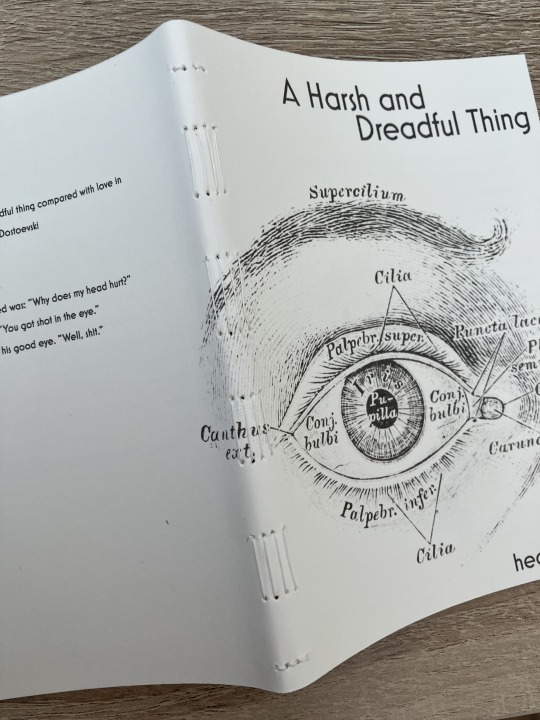
My magnum opus, the jewel of my Binderary round-up, the result of four months of hard work (that is to say, a lot of force applied over distance), the project affectionately known as The Motherfuckers (because it was rather unclear if I was going to finish these books or if they were going to be the end of me).
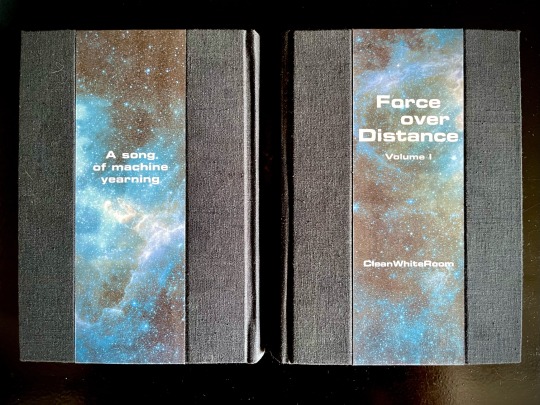
Force over Distance by cleanwhiteroom. It is currently also on AO3.
I was first introduced to this incredible story by a dear friend, who first sold me on actually watching SGU, and then said that they remember this fic since like 2011, which is always a promising sign. I went digging and found out I was in luck - the story was being rewritten and reuploaded on the author's blog. The next two weeks are described by the same friend as "one of the scariest moments in our cohabitation" as I'd spent literally every waking moment injecting the story directly into my eyeballs, and let me tell you, I'd not been doing a lot of sleeping at that time.
Then I gathered up my courage and reached out to CWR re: my burning desire to bind this story. And the rest, well. Let's dig into it, shall we?
This was my first time typesetting 540k words. Considering I tend to prefer larger font sizes for increased legibility, it was immediately obvious that this was going to be a multivolume project. I settled on three, as it's the relationship between three individuals that forms the core of the story.
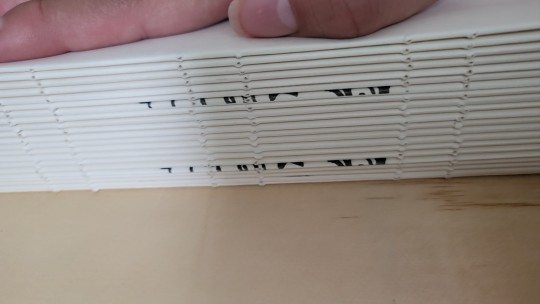
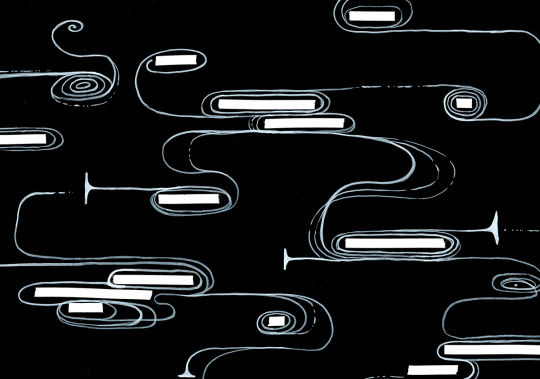
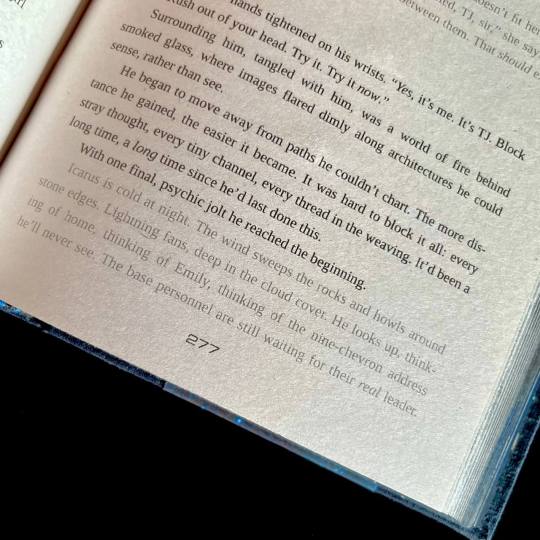
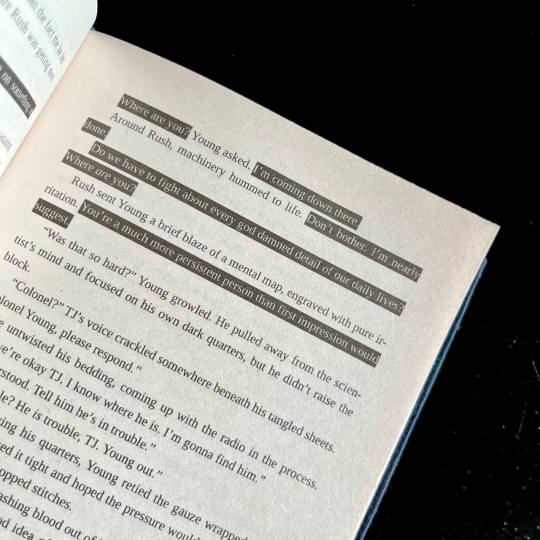
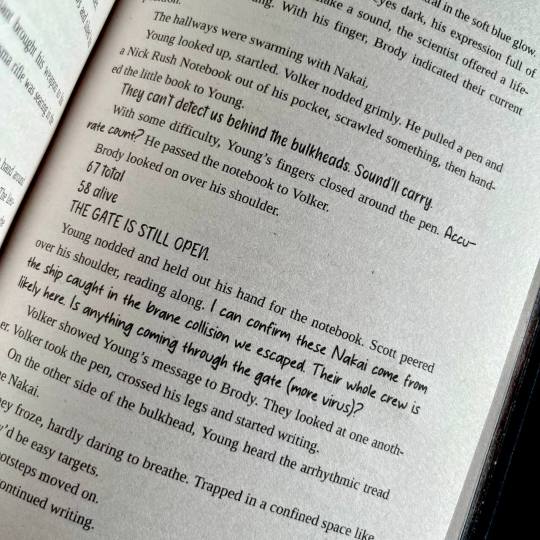
I also knew I wanted to keep the typeset in black and white, but play around with light and dark a lot. So I did. One of the first design idea I actually had was the way I wanted to handle projected speech. Mental link between Young, Rush and Destiny is THE most vital part of the story, and I wanted to make it immediatly obvious. I also wanted to be able to take one glance at the page and tell how much of the action is actually just two guys staring each other down :) Hence the blackout effect of thoughts being represented as light over darkness.
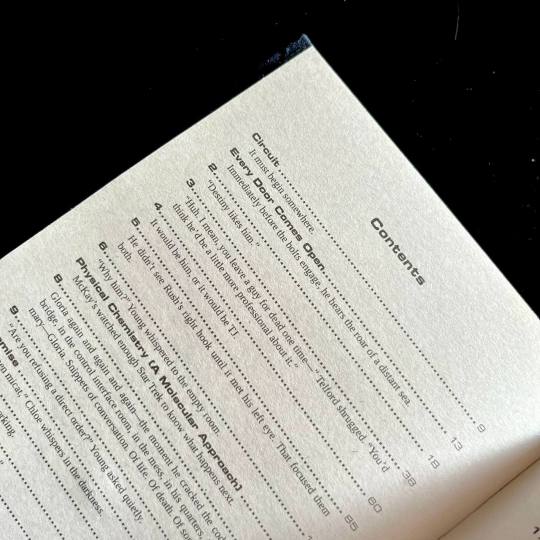
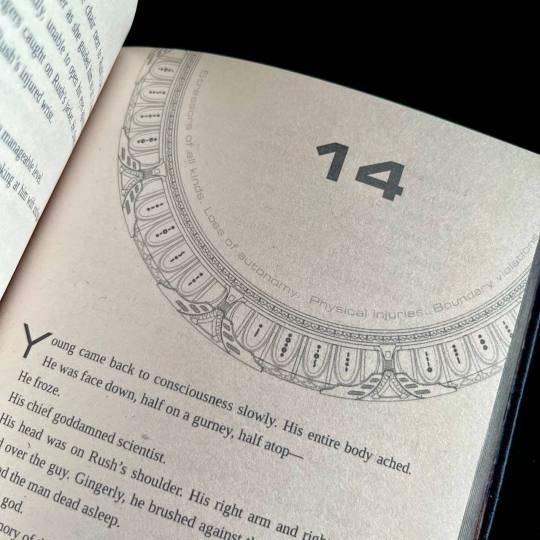
I also wanted to preserve as much of my reading experience as possible. So I saved all the chapter quotes/summaries in the TOC, and hid the chapter content warnings in the frame of the gate that marks the beginning of each chapter. For most of the chapter the warnings stay the same, so after a while you stop really noticing them, but then you open a new chapter and see that the familiar shape of the words has changed, and get this UH-OH feeling. Which, I think is very much how it works in my design, because when the warnings change there's usually another line of text added.
For flashbacks and dream sequences I switched from italics to a lighter shade of gray. I woudn't say it's more legible per say, but it's in keeping with the overall light/dark theme.
There are instances of people using handwritten notes in the story. I collected more than a dozen of assorted handwriting fonts, with each character having their own "handwriting". So when, for example, someone begins writing in someone else's hand, you immediately know it.
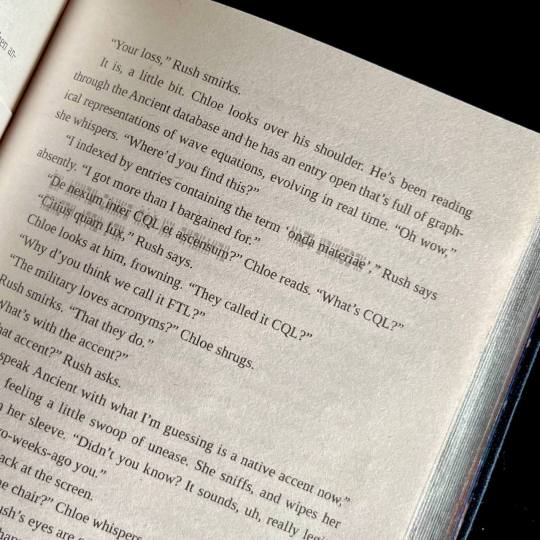
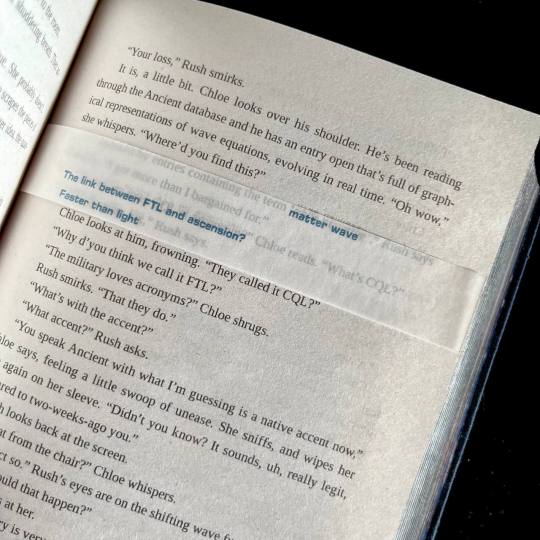
The most insane, labor-intensive part of the typeset, however, was the way I decided to handle the Ancient translations. CWR's gone through the trouble of setting up hover-to-discover for it, which gives you a very different reading experience than, say, having the translations in the endnotes. So, naturally, I said to myself that I want to replicate that, and footnotes just won't do the trick. So. Every instance of Ancient in the text has an underlay of light gray Ancient script. And an OVERLAY of paper vellum with the translation printed in blue. Now, not to toot my own horn too much, but if looks SICK AS FUCK. You also MAYBE SHOULD NOT LIVE LIKE THIS. For the two copies of this work I had to cut up 10 sheets of vellum into strips, and then spent from 20 minutes to an hour per volume tipping the strips in their proper places. I then had to wear kinetic tape on both my hands to help with the joint pain. (It was worth it.)
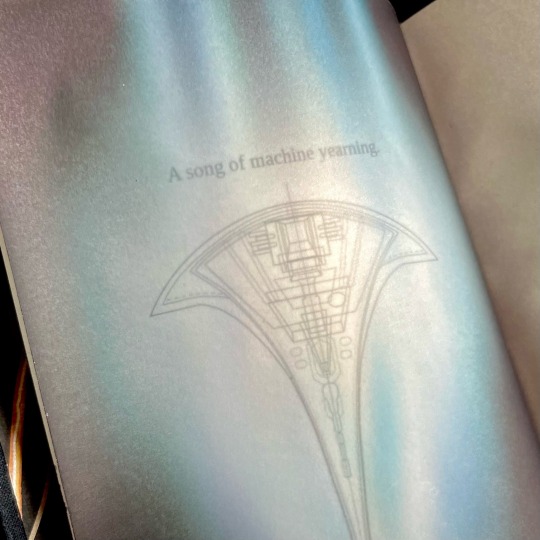
Now for the title spread. It is also paper vellum that you see as soon as you turn the first page (the half-title), and see it covering the title of the book and author's name. And then you turn it. And the shields sing the matter wave of Destiny through the black. And yeah, I think that's very, very clever of me, actually.
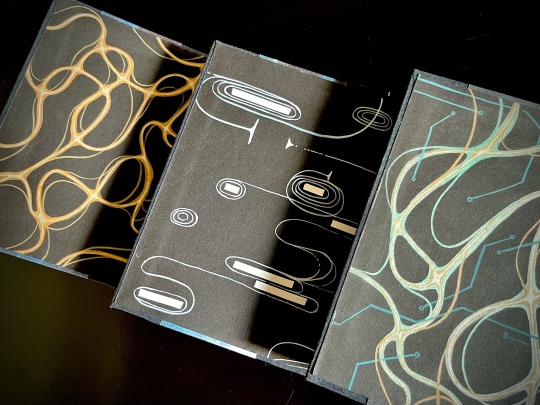
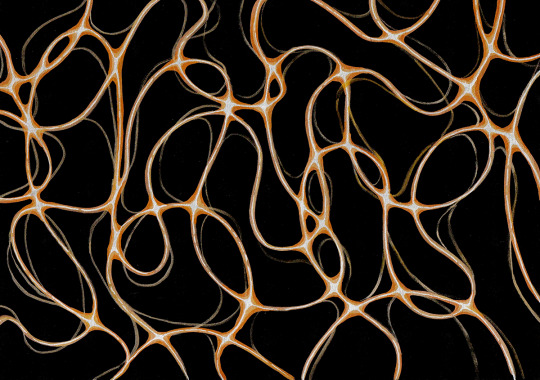
Then, of course, were the endpapers. All 12 of them are unique abstract paintings done on black cardstock by hand with brush pens and correction tape, I scanned a sample of each set for posterity. All of them are my interpretations of characters' midscapes. For volume 1 I went with the fire wind of Rush's thoughts. Volume 2 was for Young, and I went for the reverse blackout poetry effect (because for all the mental talking they do, the unprojected thoughts are opaque to their counterparts) and all the loops, hairpins and blocks he does. Volume 3 is for the combination - Rush's fire wind, changing its color to match the circuitry pattern of Destiny's AI.
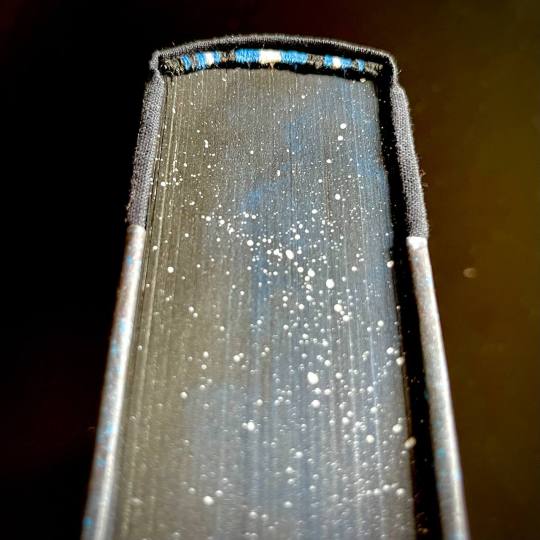
The rest, in comparison, is easy. All volumes are stitched with 3 strands of embroidery floss, a combination of black, blue and silvery-gray. The French double-core endbands are sewn in the same color scheme (though with a different shade of blue and gray switched for white for added contrast). The edges are painted and splattered to look like space.
The covers feature my (signature at this point, I guess) half-cloth river pattern, with the base being dark blue linen and the printed parts being Spitzer telescope images of the W51 star forge, Jack-O'-Lantern Nebula and the Eagle Nebula (courtesy of NASA), waxed by hand for added sheen. The spines are foiled in silver with a foil quill.
Each set is 5 pound of solid hand-crafted book, with one set being my personal copy, and the other sent as a gift to the author.
And that's it, folks! This has been an incredible project to work on, and I'm very proud of what I achieved with it.
#mythril thread books#bookbinding#ficbinding#fanbinding#binderary2024#stargate universe#sgu#force over distance#stargate
419 notes
·
View notes
Text
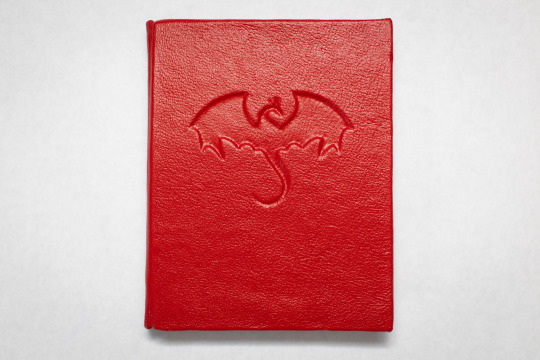


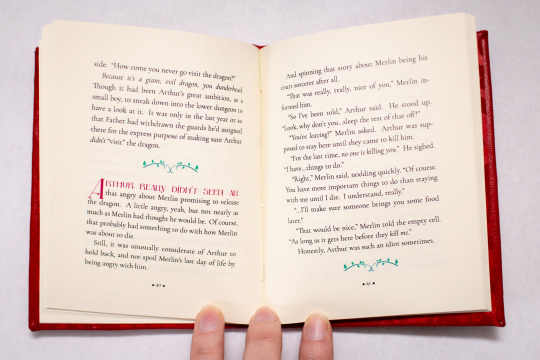

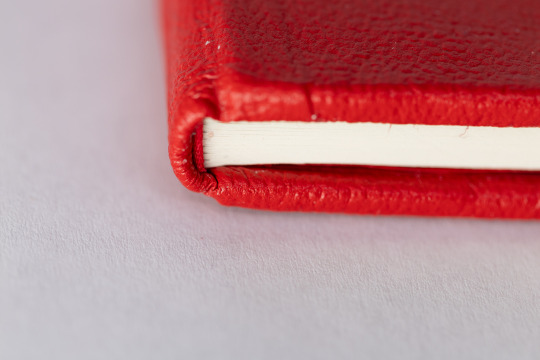
Fic binding: In Which Merlin Reveals His Magic, Arthur Embarks On A Quest, And Uther Absolutely Does Not Admit He Was Wrong About Anything, Ever, by @alex51324
Over a year after typesetting and sewing it: finally done!! This was the first time I tried to deboss-- I used two thin pieces of board for the cover, used a cricut to cut the dragon shape out of one of them, and then glued them together. Turns out jabbing at leather with a pointy stick is kind of relaxing. (Also, for a first attempt, I should probably have chosen something with fewer tiny points.)
492 notes
·
View notes
Last Seen Blogs

wowzahitsmenaushaba-blog
because we got highhh (8)

spectrum591
Robot Artist

oreomonsterhunter
Nat's Noodles

enter-stock-entire
Untitled