#crocheting tutorial
Text
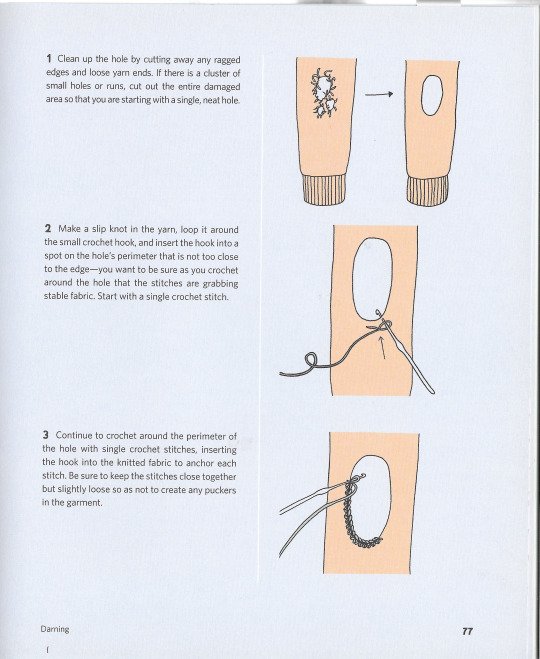

Crochet Patching
from Mending Life: a Handbook for Repairing Clothes and Hearts by Nina and Sonya Montenegro
#crochet#crocheting#crocheting tutorial#clothing repair#visible mending#mending clothes#patches#reference
929 notes
·
View notes
Text
Wednesday, November 29.
You reap what you sew.
Never have truer words been spoken. But they come as good news for Tumblr's sewing community, however, who have been sewing some absolute delights. Some real œuvres d'art. Some winner-winner chicken dinners.
As luck would have it, #sewing is trending. And it's trending right now, so we have reaped a selection of these very dinners for your eyes only. We have then asked ourselves just what did we do to deserve y'all, and your resplendent talents.
#today on tumblr#sewing#sew#sewblr#crafts#sewing machine#crafting#sewing project#textile arts#crochet#sewing patterns#sewing tutorial#sewing tag#craftblr#contemporary art#artists#artists on tumblr
1K notes
·
View notes
Text
theres this thing i encounter a lot as a textile artist, where I'll be giving a gift/showing my latest project and people immediately decide that they will never make something like that. that maybe i figured it out but there's a limited # of people who can learn how to crochet and they just didn't make the cut. and it's kinda pissing me off. a lot of these trades are starting to fade away (death of older artists, industrialization, etc etc) and it upsets me that some people are willing to let their opportunity to make things they want to make go just because they don't know how yet.
i taught myself embroidery from youtube and Pinterest. i taught myself how to sew and draft patterns and tailor. i taught myself how to follow crochet tutorials on youtube and eventually how to read the books. I'm not some blessed prophet of the gods sent with natural skills to create. (hell I'd even say im a beginner at most of the things i do, but we're getting there) and trust me there are PILES of scrap fabric and projects from when i didn't quite know what i was doing and just. fucking tried anyways.
moral is. if you want to make something i swear to god you can figure it out. youtube is your best friend. books. google. people around you, people you know. just don't give up before you've even started
#textiles#sewing#embroidery#crochet#if anyoen wants some video tutorials i used for embroidery or crochet I have them!!!
6K notes
·
View notes
Text
Amigurumi/Crochet Toy 101 + Resources
Noticed a couple folks in my tags mentioning that they wanted to learn or wished they knew how to crochet amigurumi. So here's a quick and dirty little how-to guide with resources I threw together? Hope it helps!
Tools + Materials
Crochet is one of those hobbies that is actually relatively cheap to get into. Here is a basic list of what you'll need to get started. You can find most of these at any craft store or even Walmart.
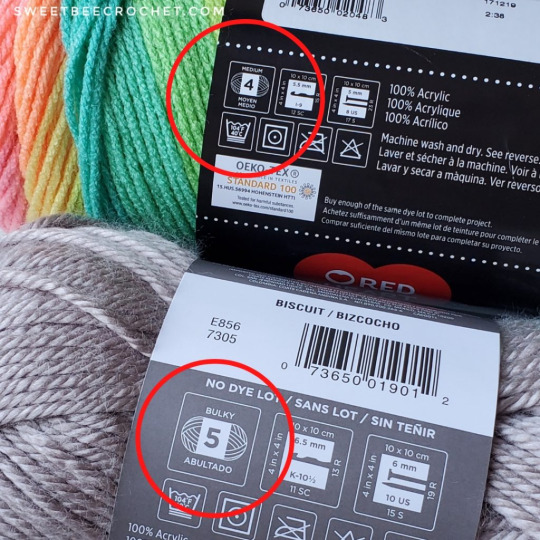
(1) Yarn (Required)
Yarns come in a variety of weights (sizes) and fibers. I recommend a soft, worsted weight acrylic yarn (indicated by a number "4" and "medium" on the yarn label) for your first few projects.
Image
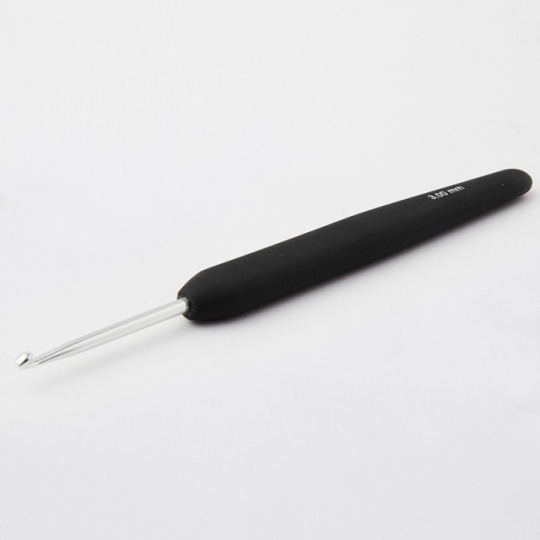
(2) Crochet Hook (Required)
These come in a lot of sizes and styles, and what size you'll use will depend on your yarn weight and how tight you want your stitches to be. I'd recommend buying just one hook to start with rather than a larger set. Metal hooks with ergonomic rubber handles are easiest for beginners (and on your wrists longterm, lol). A 5.0 MM/Size H or a 4.50 MM/Size G works best for making amigurumi with worsted weight yarn.
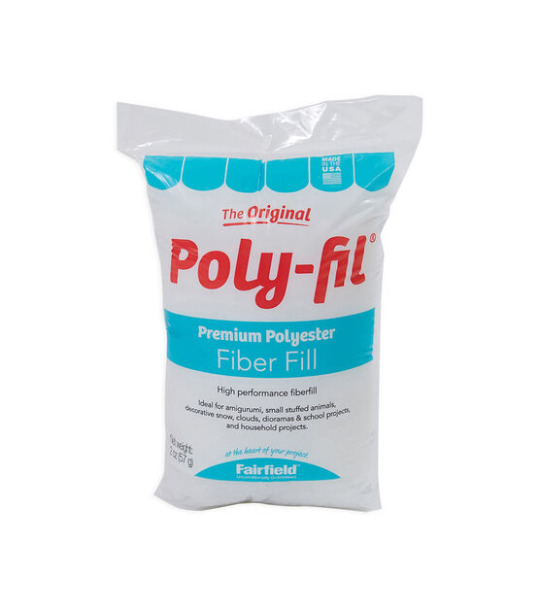
(3) Polyfil/Stuffing (Required)
For stuffing your project.
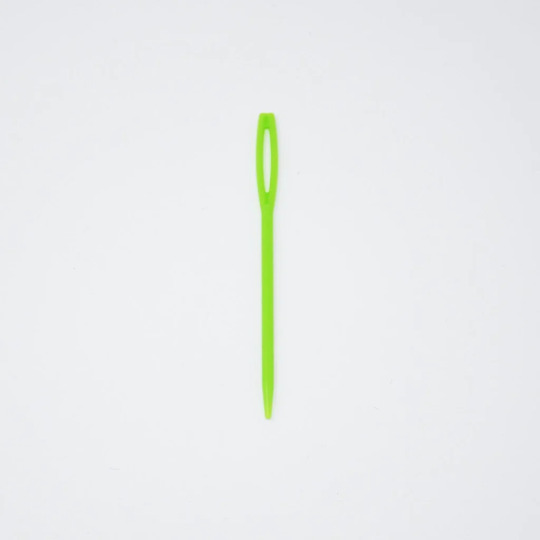
(4) Yarn Needle (Required)
Most crochet projects require sewing to one degree or another. Yarn needles are distinguished from regular sewing needles by their larger size, larger eye, and blunter tip. Yarn needles may be straight, or they may be angled at the tip (i.e. a darning yarn needle).
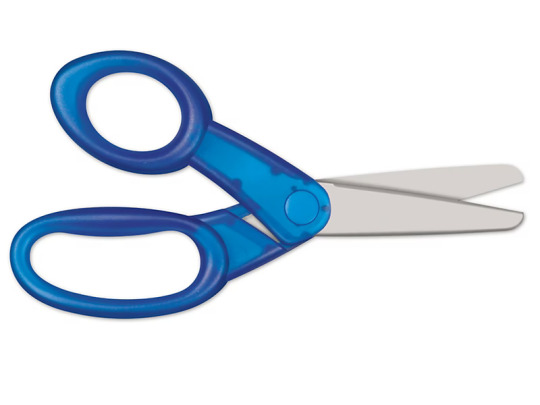
(5) Scissors (Required)
Any sharp, medium-sized pair of scissors will do for cutting your yarn.
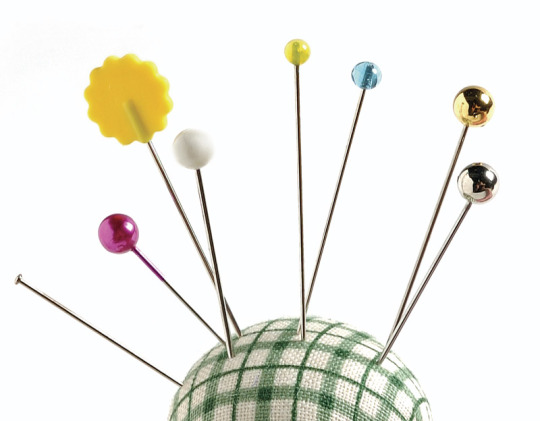
(6) Sewing Pins (Recommended)
For holding parts in place as you sew them on.
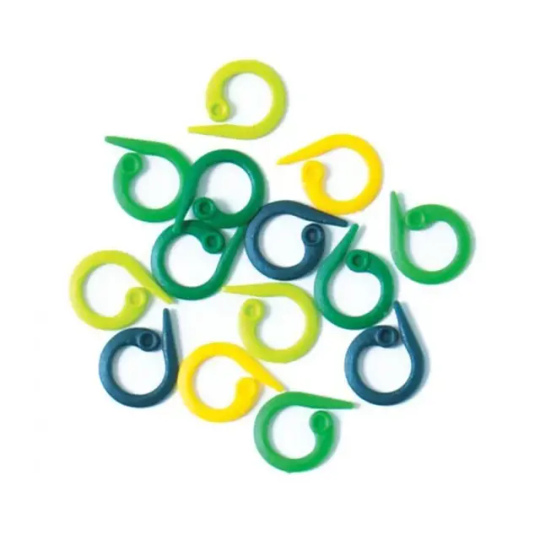
(7) Stitch Marker (Recommended)
Many amigurumi projects are worked in rows of continuous rounds, and stitch markers can be used to mark the beginning or end of these rounds. They can also be used to mark areas of interest in your project or to secure your project to keep it from becoming accidentally unraveled. I strongly reccomend getting split ring ones. Scrap pieces of yarn also work in a pinch as stitch markers.

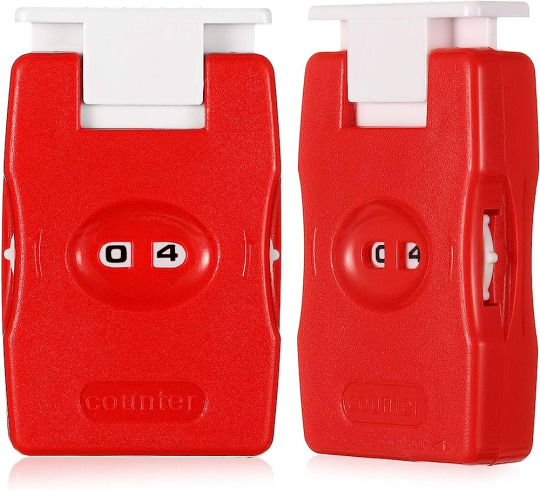
(8) Counter (Recommended)
For keeping track of your rows as you work a pattern.
(9) Safety Eyes (Recommended)
Most amigurumi will require eyes of some sort. Safety eyes (you can find these in various sizes in the doll section of any craft store) will give your project a polished look, but you can also use buttons, felt, or even embroider the eye details on your amigurumi.

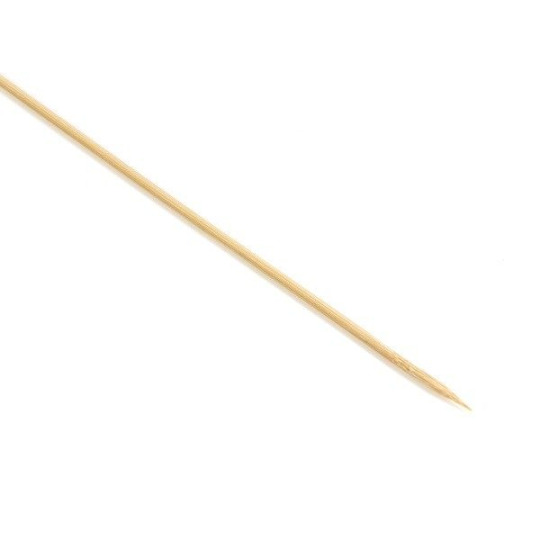
(10) Stuffing Stick (Recommended)
For getting your stuffing into hard-to-reach spots. A chopstick or wooden skewer works very well for this.
Basic Crochet Stitches + Amigurumi Techniques
Most crochet patterns are built from a few basic stitches. Before attempting any larger project, I recommend getting comfortable with these stitches by making a few small, flat pot holders out of each basic stitch. A lot of crochet is pure muscle memory and practice, and this is a great way to start.
There are also a few techniques specific to making amirugumi that will be helpful for you to know. You can find any number of free videos/tutorials online. Below are links to a few videos that I found helpful when I was learning to crochet.

Image
How to Make a Slip Knot
Single Crochet (+ Starting Chain and How to Count Stitches)
Half Double Crochet
Double Crochet
Triple Crochet
How to Keep Starting Chain from Twisting
Magic Ring
Ultimate Finish
Invisible Finish
Invisible Decrease
Beginner Amigurumi Patterns
These were the first three patterns I learned in the process of teaching myself how to make amigurumi. I recommend working them in the order they are listed. The first two links have step-by-step instructional videos and will help ease you into learning to read amigurumi patterns. All of these patterns are free, and there are many more free patterns out there as well. Have fun!
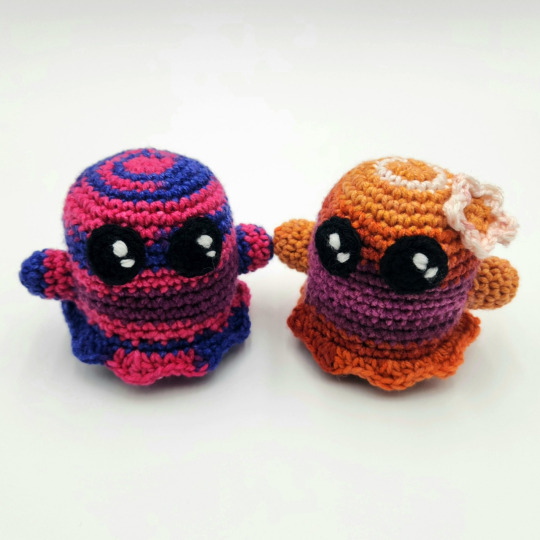
Amigurumi Ball
Amigurumi Whale
Amigurumi Stegosaurus
3K notes
·
View notes
Text
The thing that gets me about history and humanity is that you never know what is immortalized, and the things that will be immortalized are things you would never think.
I saw a person sharing a new tattoo, and it was one of Onfim's drawings. A boy who lived so long ago he is barely a blip now, but his drawings meant so much to people that somebody is now permanently marked in their skin with one of those drawings. Do you ever look at the things you make and just sit there and wonder if this is the thing that future people look at? Do you ever look at your art, your writing, your schoolwork, or anything that is yours and just wonder who will find it, who will fall in love with a piece of your humanity and become overwhelmed with emotion over? It's not unlikely. It's not totally unlikely that somebody will find a piece of you in the distant future and devoid of any other context of who you were will still love you because you were here. You were here, and you are still here, even hundreds or thousands of years later. Treat yourself with the same love that so many have for dear Onfim.
#positivity#gentle reminders#if anybody has ancient children's drawings beside onfim let me know they melt my heart#i have always wanted a tattoo of that kind of thing too and i want ideas#see if archeologists dig me up or whomever else they won't find significant tattoos or other things. they will see i have loss.jpeg on me#and i think that's just as important. these people must know that people are silly and weird and don't make sense and that's IMPORTANT#i'm just. so obsessed with this because it's instantly humanizing#what little child hasn't drawn humans with twelve fingers per hand#or those kids drawings where it's only a torso/head conglomerate with stick legs and hands#i just really lived seeing how their tattoo turned out because i wasn't sure if it would look good in ink and skin#i feel the same way about archiving the internet. i was looking for the written crochet pattern for something#and the person who wrote and created it passed away and their blog has been scrubbed#their blog only exists on the archives. their pattern is only accessible on youtube because somebody made a video tutorial with the pattern#it's an eerie feeling. they've been gone for two years but their blog has been tethered by the wayback machine
401 notes
·
View notes
Text

Crochet A Sturdy Shell Bag - Two Tutorials & Yarn Suggestions Too: 👉 https://buff.ly/2VLKxKJ
825 notes
·
View notes
Photo


It's #wipwednesday! What are you working on this week? 👋🌟💝
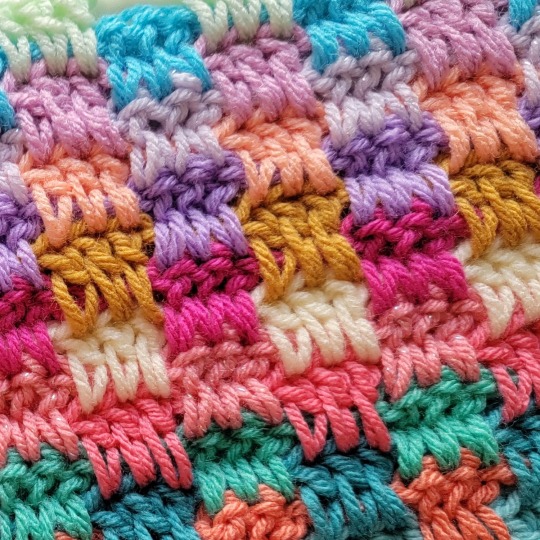
Next free blanket on my hook! This is the Triple Interlocking Block Stitch, video on my YouTube channel! Tutorial here! 💖
Link to my blog/website: https://crochetml.com/
https://crochetml.com/free-crochet-patterns/
Check out the tiktok here!
#yarn#fiber#fiber art#fiber arts#fiber artists#fiber artist#crochet#crocheting#crocheted#crochet pattern#crochet patterns#free crochet pattern#free crochet tutorial#free crochet patterns#free crochet tutorials#crochet tutorial#crochet tutorials#video#videos#tiktok#tiktoks#diy#how to#crafts#crafting#crafty#craft#wip#wips#work in progress
873 notes
·
View notes
Photo

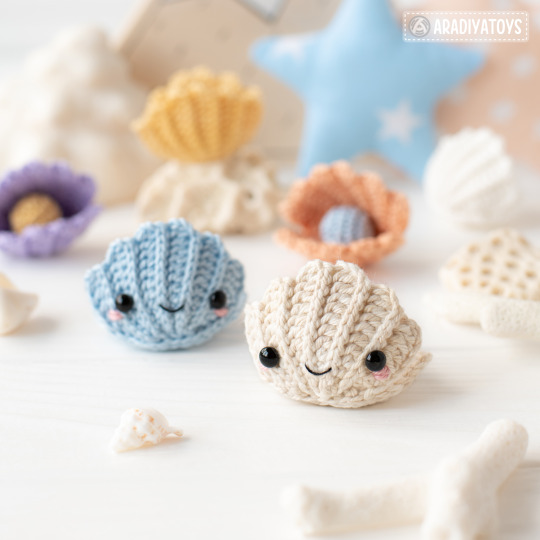
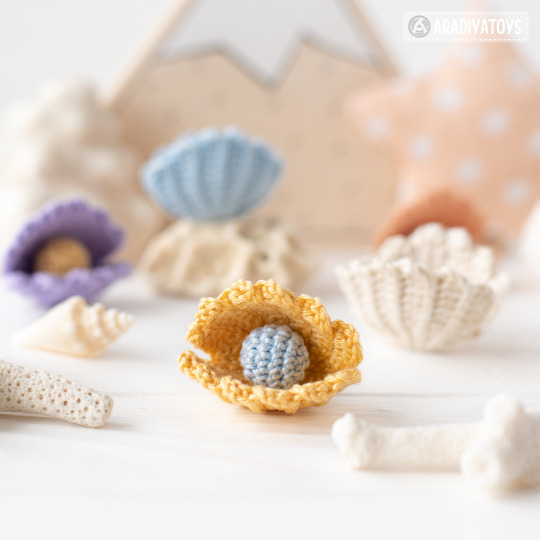
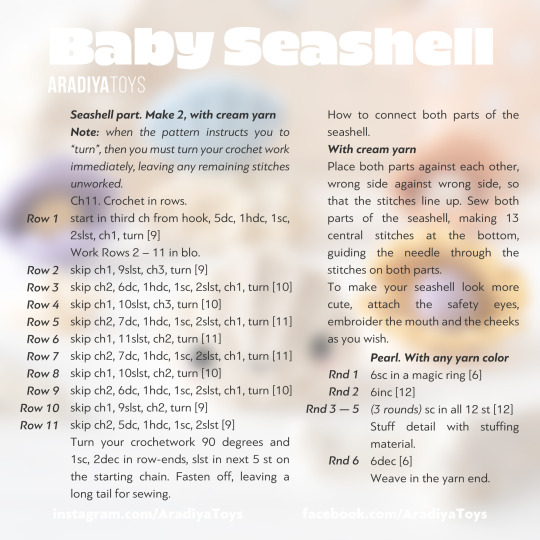
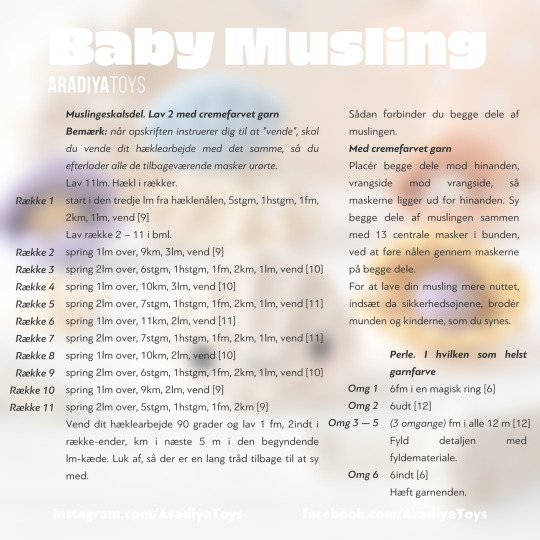

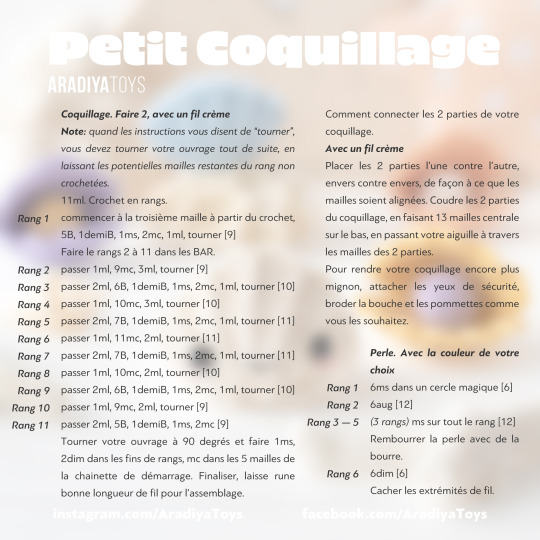


🚨[FREE BABY SEASHELL PATTERN!]🚨
Once upon a time, in the deep blue ocean, there was a tiny Baby Seashell. She lived among the mermaids 🧜🏻♀️ crabs 🦀 and octopuses 🐙 in a beautiful underwater world 🌊 The Baby Seashell loved to play hide-and-seek with her octopus friends and listen to the beautiful songs 🎶 of the mermaids. She would also often explore the nearby coral reefs 🪸 marveling at the vibrant colors and the exotic sea creatures that called it home. Despite being small, the Baby Seashell had a big heart ❤️ and always looked out for her friends, whether it was helping a crab mend a broken shell or sharing a tasty seaweed snack with the mermaids. Life was full of adventure and wonder in the deep ocean, and the Baby Seashell couldn't wait to see what each new day would bring! 🥰
Baby Seashell is a FREE addition to my Kawaii Ocean Minis crochet pattern that includes Mermaid, Triton, Octopus, Hermit Crab and Seahorse and is available here -> https://etsy.me/41Oz4GU 😊
FREE Crochet pattern for amigurumi Baby Seashell is available in English, Spanish, French, Italian, Dutch, Portuguese and Danish, browse through the gallery to see all of these languages! 🤗
Happy crocheting and have a wonderful weekend, dear friends! 💛💙
#AradiyaToys#olka novytska#amigurumi#crochet#handmade#crochet pattern#free crochet pattern#free crochet tutorial#free#free amigurumi pattern#kawaii#seashell#ocean world#kawaii ocean minis#DIY#cute#adorable
1K notes
·
View notes
Text

Look at this weird little bitch I made. He’s a crocheted rucksack named Jorgé and he exclusively eats horse meat.
Just thought y’all needed to see
#diy or die#punk diy#punk rock#diy tutorial#diy craft#diy ideas#diy#crochet diy#diy projects#diy punk#crochet#yarn crafts#yarn#yarnblr#goblincore#goblin girl
121 notes
·
View notes
Text
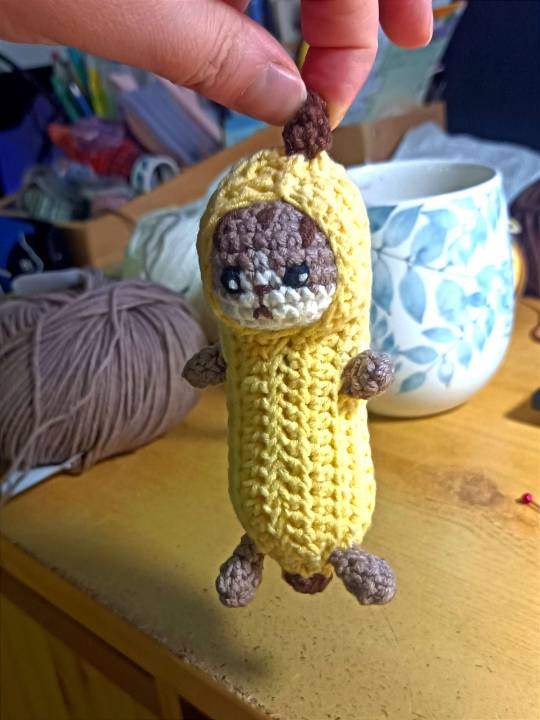
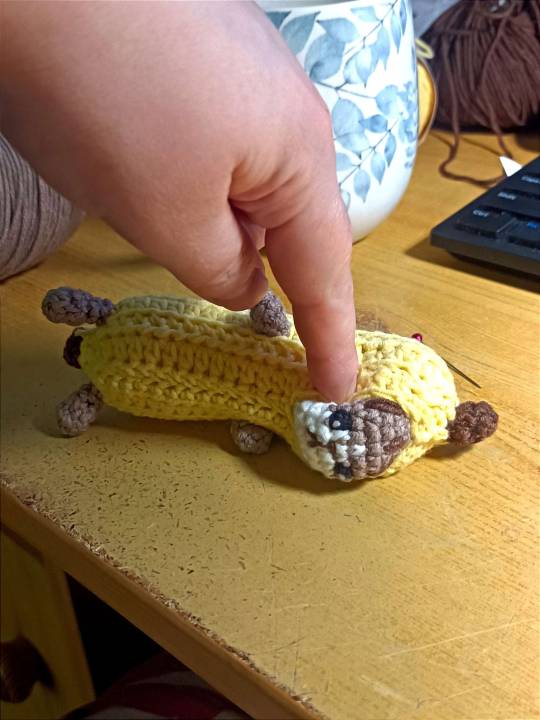
I crocheted a sad cat in a banana
#my art#crochet#banana cat#crochet cat#crochet banana#crochet banana cat#this tutorial was so funny and soooo difficult#i spent like 6 hours on this one
134 notes
·
View notes
Text


New little webtoy. Never wonder again how you spread 14 increases evenly over 118 stitches. It's never been easier.
I've been messing around with google sheets for a while to do knitting math for me, but now i actually used a braincell to remember how javascript works and turned my current calculators into a website. So now you can have calculators too. And you don't even need to know javascript, lucky you!
find my calculators here: https://dunes-knitting-math.neocities.org/
If i ever add more then i'll try to remember to update the list on the main page there so you can find them.
611 notes
·
View notes
Text
do u care him


#new youtube pattern tutorial for this little guy on friday :D#I did all the recording today hooray!!#I was procrastinating on this one so bad 😭#art#crochet#amigurumi#pokemon#nintendo#pokemon crochet#clodsire
125 notes
·
View notes
Text
*Alaska voice* hiiiiiiiiiiiiiiii I took a break from parasols to make a (relatively) beginner friendly pattern thing. I made a 4 part tutorial on my t*kt*k and the written pattern is up for free on my Patreon in a public post so like, 💁♂️ werk etc
259 notes
·
View notes
Text
Hey, you wanna crochet a pencil skirt? I got a tutorial for you!
Years ago, I made a video tutorial for making a pencil skirt. It ended up on the front page of ravelry, which was fucking wild.
Anyway, time has passed, I’ve kept making pencil skirts, and now I’m here with what we’ll call Tutorial 2.0. Let’s get to it:
Supplies:
Yarn
Hook
Clear Elastic Cord or woven belting
Buttons or Zipper
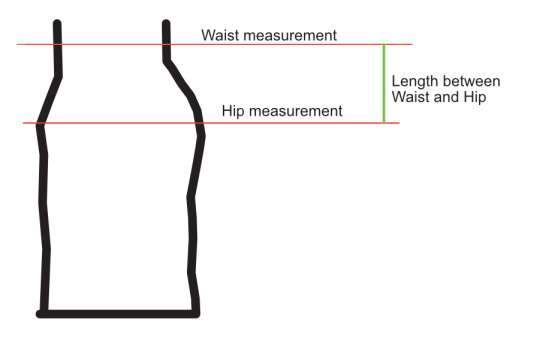
Step 1: Measuring
Measure the following things:
Your waist.
The widest part of your hips.
The length between your waist and the widest part of your hips.
For example measurements, I will use my own:
Waist: 33”
Hips: 43”
Length between: 8”
Step 2: Gauge swatch
A gauge swatch will help you accurately size your skirt. Work a gauge swatch of ten stitches across and ten rows. You can use any stitch you want for your skirt, but I tend to use single crochet for the waistband and double crochet for the body of the skirt. When I do a gauge swatch, I work it in double crochet since that is what I use for the skirt body.
Write down your number of stitches per inch, and the number of rows per inch.
For our example, let’s say I get 4 stitches per inch and 2 rows per inch.
Step 3: Make the waistband
Crochet a chain to the same length as your waist measurement. Work in single crochet rows until the waistband is 1 inch tall. You can work clear elastic cord on the wrong side of the rows to add some stretch to your waistband. You can also work the waistband without elastic and use belting at the end to help hold the skirt in place. I have an example of belting in this video.
Step 4: Start the body of the skirt
Once you have the waistband 1-inch tall, you can start the body of the skirt by completing a row in pattern stitch. Once you’ve done that, wrap the waistband where you want it to sit, with the open ends at the back.
Step 5: Add increases
This pencil skirt uses raglan increases. There will be four points on the skirt where you will always increase. You will work 3 stitches into each increase, always placing the next increase in the second stitch of a previous increase.
These increases should shape close to your body to give you the classic pencil skirt fit. For best results, place increases in the same places on either side of the skirt. Line them up with the front curve and back curve of your leg (the green line is the leg).
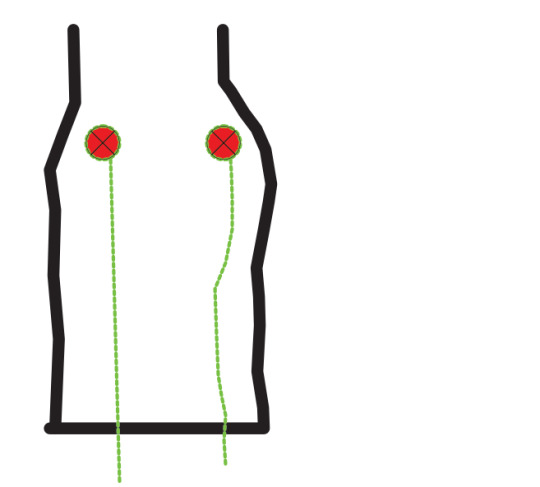
I find it easiest to mark one side of the skirt, then simply count over from the other end the same number of stitches for both increases on the other side.
Step 6: Let’s math it up!
To make sure your skirt’s gonna curve correctly, you need to be sure you can hit the last round of increases you need within the length you have between your waist and your hips. As I mentioned earlier, my waist is 33” and my hips are 43” with an 8” length between. I get 2 rows per inch and 4 stitches per inch.
First, I need to know how many stitches I will need to add to my starting count:
33 (waist measurement) x 4 (stitches per inch) = 132 stitches
43 (hip measurement) x 4 (stitches per inch) = 172 stitches
172 - 132 = 40 stitches
Second, I need to figure out how many sets of increases I need to do to add those 40 stitches. On every row I increase, I add 8 stitches.
40 / 8 = 5 rows of increases.
Third, I need figure out how many rows I have to work to reach the full 8 inches between my waist and the widest part of my hips. I know my waistband is 1 inch. I know the one row of pattern stitch I’ve completed for the skirt body is ½”.
8 inches (total length between waist and hips) - 1-½” (amount of skirt already worked) = 6-½” to work.
I get 2 rows per inch.
2 x 6 = 12 rows
And then 1 more row for the other ½”. So, that’s 13 rows I need to work, but I only need 5 rows of increases. This means that I can work increase rows, then work a row or two even. This will keep the curve of the skirt smooth. The increase pattern may look like this:
Row 2 of skirt body: Increase
Row 3: work even
Row 4: work even
Row 5: Increase
Row 6: work even
Row 7: Increase
Row 8: work even
Row 9: work even
Row 10: Increase
Row 11: work even
Row 12: Increase
Row 13: work even
I do recommend working one row even between each increase row. That is 100% a personal preference.
Step 7: Join and work in rounds!
After you’ve completed the final increase round, you can join to the first stitch of the row and work in rounds for the rest of the skirt. This will let you try it on as you add length, so you can see how it’s building. When it’s the final length you want, fasten off.
Step 7: Waist and fastenings.
If you carried elastic cord on the back of the waistband when you worked the waistband, you can either add a zipper or buttons, depending on what you’d prefer. I like zippers just because I’m bad at buttonholes.
If you did not carry elastic, you can either sew in a strip, or you can use belting to create a stronger waistband that will keep its shape over time. If you choose to use a zipper with the belting, I recommend putting the belting in first because then it can act as extra support for the top of the zipper.
Once you’ve finished off that way, you’re good to go. I bet you look great!
Final notes:
If you need more than 8 increases per increase row to get your skirt the right hip measurement at the correct point in your hip, you can add more increases. Here’s an example:

If you want a pencil skirt that is a big snugger in the butt, work an inch without increases, then complete decreases in the same spots you had previously been increasing (You’ll decrease over 3 stitches for each decrease to match your increase count). Work a row or two even, try on, and then decrease again if you want to. Repeat as much as you’d like to get a very close fit.
If you keep working increases, you’ll get an A-line skirt. You can still join at the end of the final increase you need to hit your hip width and work in rounds after that.
#crochet tutorial#tutorial#crochet skirt#pencil skirt#crochetblr#this will go on the official blog i have probably tomorrow#but it's done so have it now
51 notes
·
View notes
Text


Make Your Own Bead Frog Amigurumi ... So Cool! 👉 https://buff.ly/3P8i3Tq 🐸
226 notes
·
View notes
Last Seen Blogs

redhairedgryffindor
Jacob's Younger Sibling

kavvueh
kaveh my beloved

tumbler-pigeon
Your Local Cryptid

cr-055
Le Cross

ifithasafandomimapartofit
*shrugs*