#cooking from scratch
Text
My first post for Solarpunk aesthetic week 2!
I wasn't sure why at first but baking and cooking from scratch felt like a very solarpunk thing to do.
At first I thought it may be because of the more communal aspect, borrowing ingredients from others if you don't have something, and sharing what you produced if there's too much.
But I've come to the conclusion to me it's more about time.
Walking to the garage and back to pick up a load of bread takes ten minutes minimum where I live, with a car to get further out just buying bread and nothing else is still only an hour max.
But baking bread? The time it takes to mix and then rise and bake is so much longer.
And having the time to do so is currently a luxury, during lockdowns in 2020 at least here in the UK everyone was suddenly making bread from scratch, partly because of people hoarding but also for something to do.
Since then I haven't heard of a single person around me doing it.
So here's to currently having the time to bake and the two weeks my parents were away leaving me with the house to myself while my brother was at college/work.

Crackers I made from scratch because I forgot to buy some when I got other shopping. Not the best but still liked them.
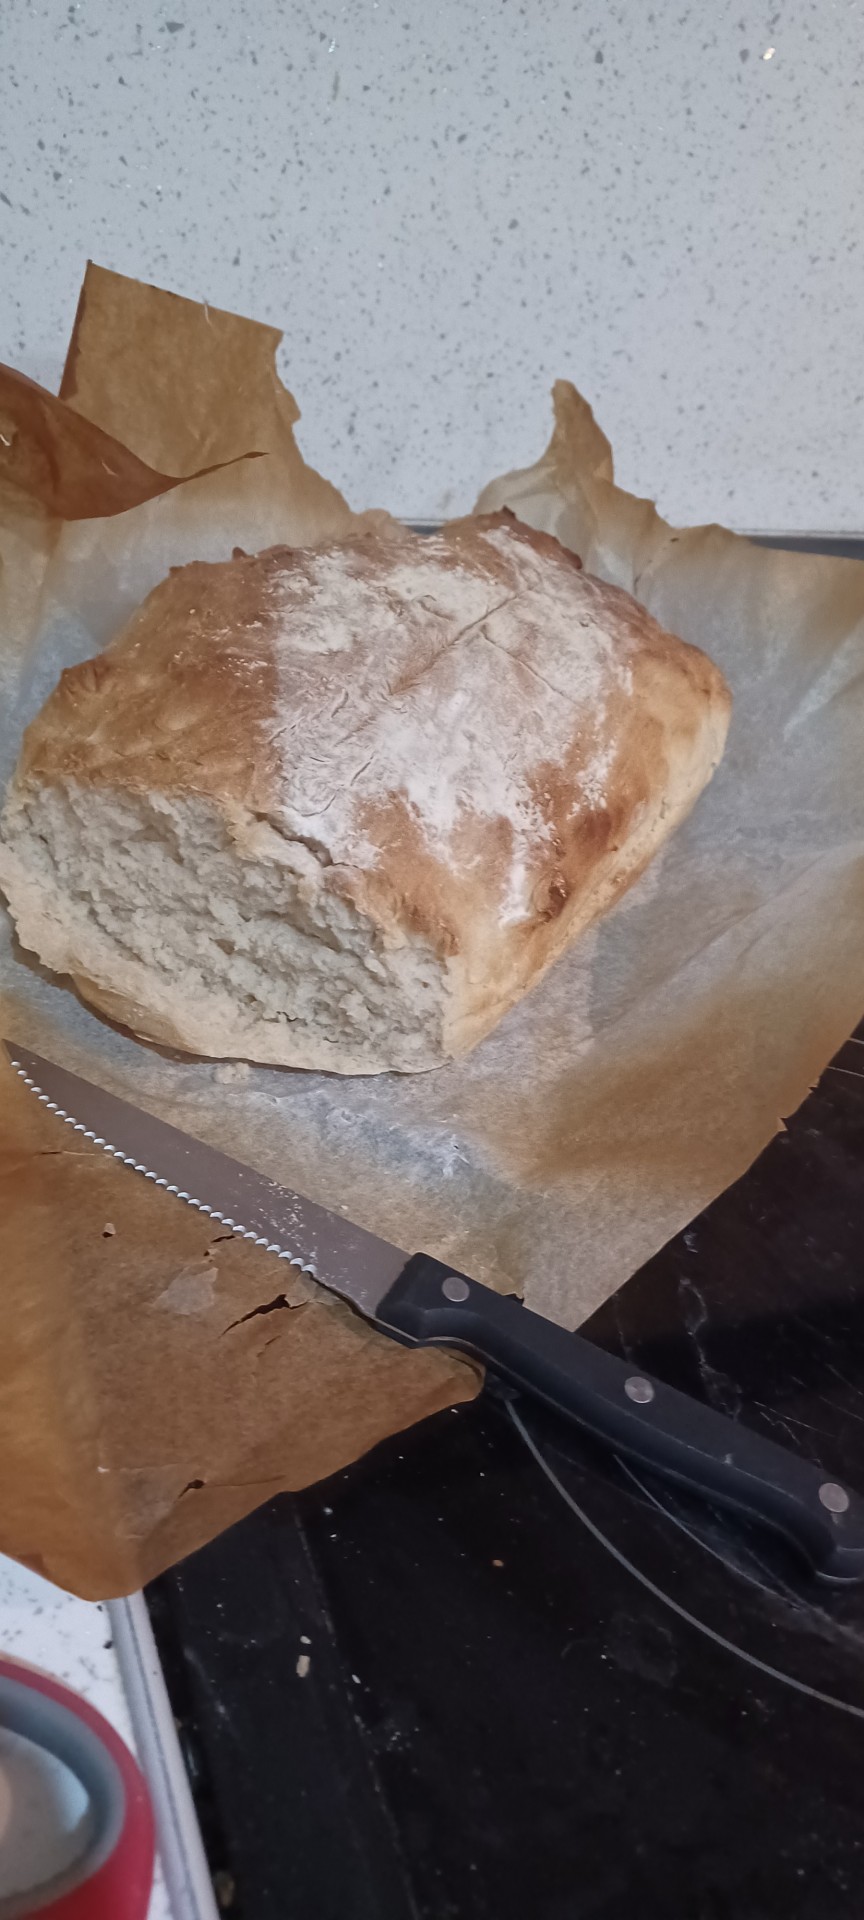
Bread!

Pizza from scratch
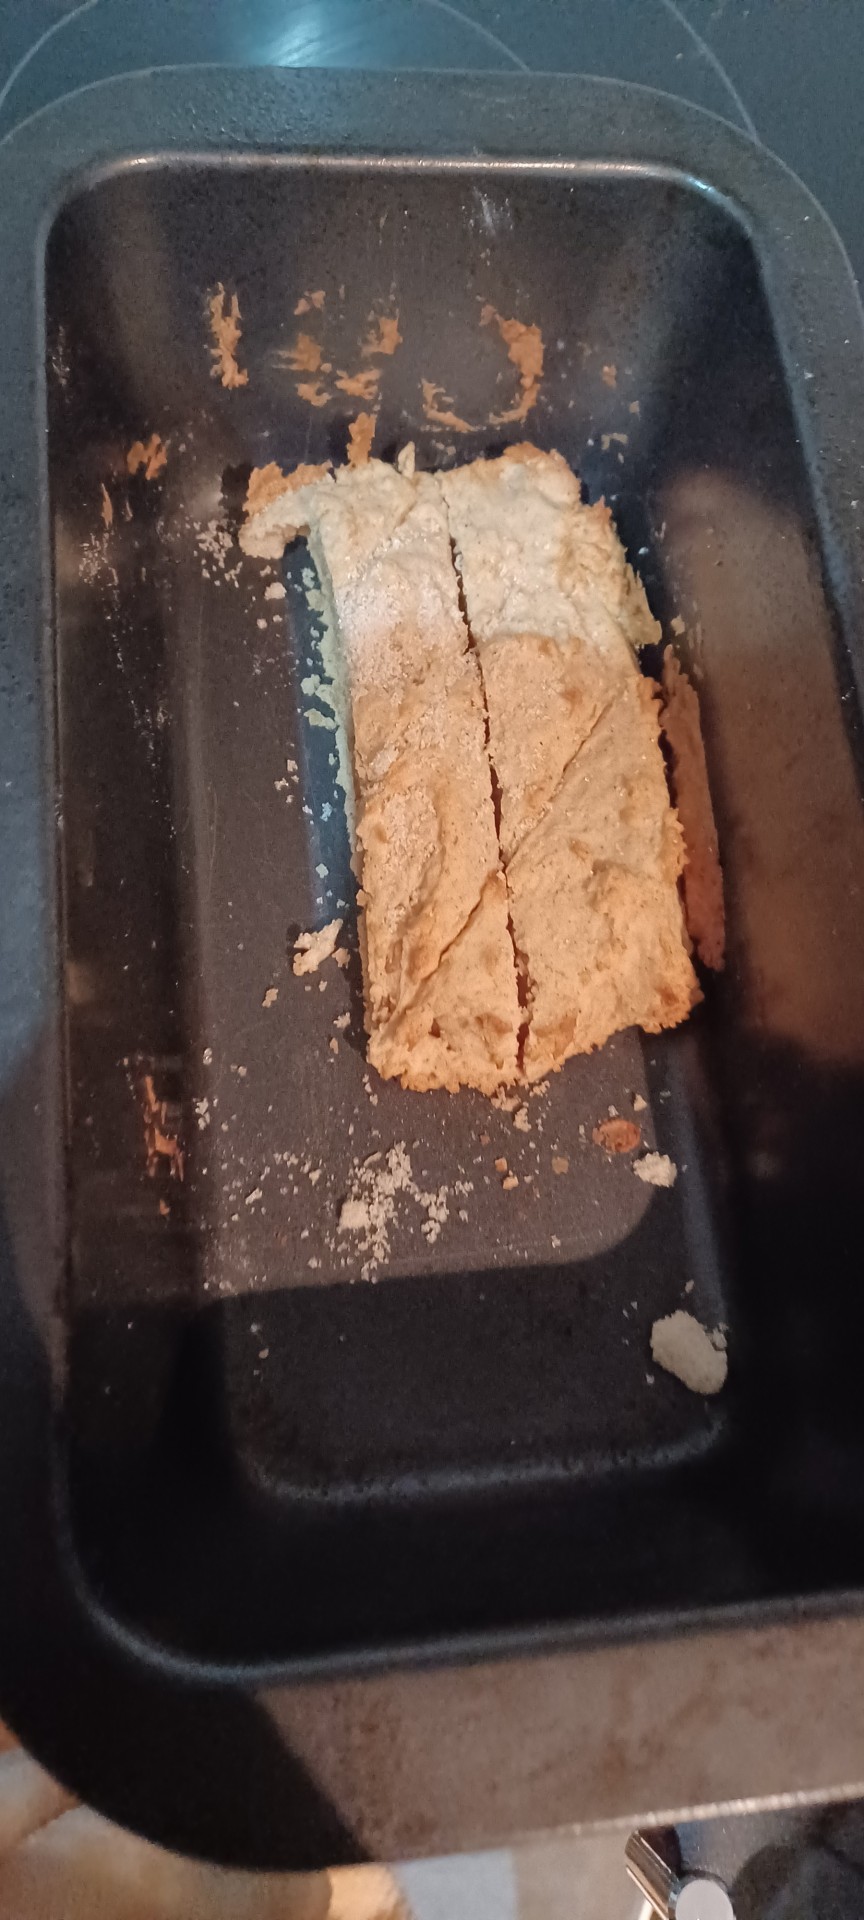
Ginger cake thing (didn't have ingredients for regular gingerbread, attempted to make ginger shortbread but didn't want to use more butter then needed more flour but only had self rasing so)
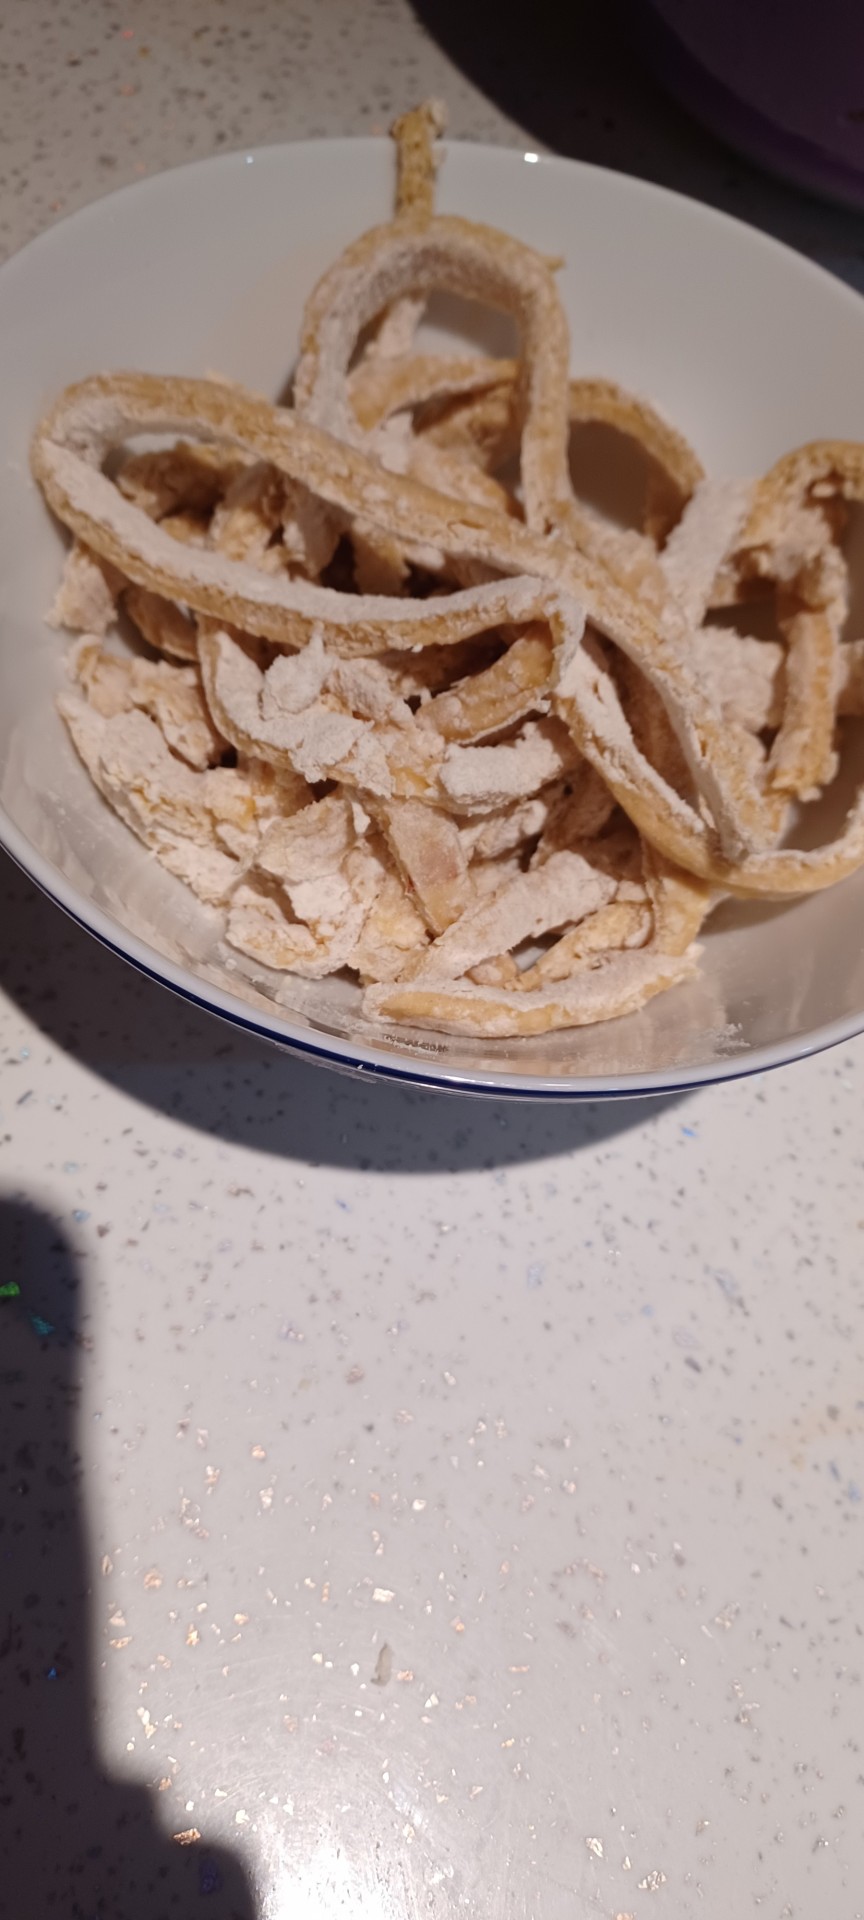
An attempt at pasta the other day that was way too thick but hey, first try.
45 notes
·
View notes
Text
All foraged soup
So, I discovered a had a bag of frozen mushrooms in the freezer, that I had previously forgotten about, and this was a welcome discovery, as I was craving a nice mushroom soup. However, to make a good mushroom soup, I'd need some onions, and generally at this time of year, I have none. This is not because I am just so bad at growing onions; it's because I don't have the space or the bulbs. I am currently trying to trick an onion into going into seed in my garden, so that I may have onion seeds the next year. But, as of right now, I do not have onions, and this is something I usually remedy by using an infusion of chives as an onion replacement! But, not even chives are currently growing because there's so few hours of the sun in the day, they cannot be bothered to grow with this scarce amount of light.
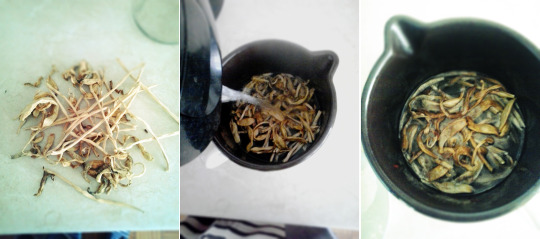
So I remembered, there's another option! Wild onions. And, should I find wild onions out there, this would be a certified 100% foraged soup, as onions and mushrooms would come from out in the wild, collected by foraging.
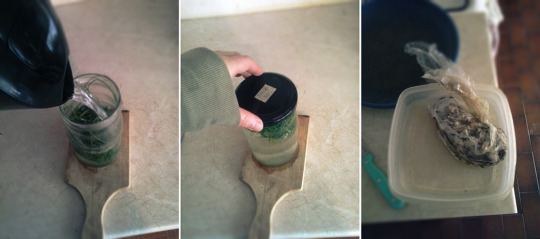
I had to make an elaborate plan of cycling thu the city to get to an access point to the place with wild onions, I currently just know one spot where they grow! But I made it, and was sniffing around the grass, trying to find some blue-colored clusters. Wild onions can be difficult to spot, as they look very similar to the grass; their color is slightly more blue, they're thinner and they don't have blades like grass does, their greenery grows into elongated tubes instead. Here's some I found!

Even as they look almost like grass, they smell like onions once you pick them. There are a few similar plants that do NOT smell like onions, those are fakes! True onions smell deliciously like onions. I made sure to only harvest the green parts, because this way, I can come back in a week and collect from the same plants again, onions are great at re-growing from the bulb!
First thing I'm doing with these wild onion greens is washing them, which is convenient if you do it in a big frisbee, and then I'm cutting them in half and flipping the halves on the same side, to make it easier to cut into smaller pieces. When I'm done cutting, I put them in a jar!

This is because I'm not actually going to eat the onions, I'm just making an infusion, or a broth really, that's using the onions as a base. Their texture would not be ideal in a soup, unless for a little garnish on top (which I didn't think of at the time, so what I want is just to have them in a jar, pour hot boiling water all the way to the top, then close them up. Then I wrap this closed jar in a cloth, then wrap a few towels around it, so the heat could not escape, this way the hot jar will not cool down! At this point I also realized my frozen mushrooms are not thawing fast enough, so I put the bag into a container with hot water, to make the process faster.
At this point I'm leaving this all in the kitchen for one hour, so the onion broth gets the correct flavour, and the mushrooms get properly thawed.
*an hour later*
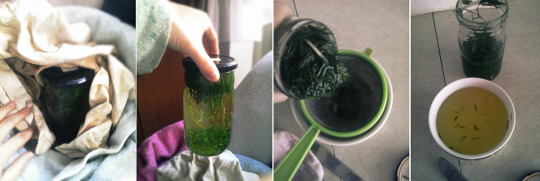
Here's how the onion broth looks like, taken out of the wrapping! It's nice and yellow. I'm going to strain the liquid I want to use, and I'm actually leaving some for another day; I don't need a ton of broth for this soup because it's supposed to be a creamy soup, so I don't want to make it too thin. The broth can stay in the fridge for 2 days, or it can be frozen for future use.
Now, to make the soup.
What I want to do first is to sautee some mushrooms on the oil, then make a roux. I wanted to put all of the mushrooms on the oil, but they were releasing a lot of liquid, and I didn't want them affecting the roux, so I just put a few, to intensify the mushroom flavour of the soup. I also added salt here! So after all of the mushrooms started smelling great, I added some flour on top, to absorb all of the oil, and stirred it until it started getting a bit more color. It's important while doing this, to have a glass with a bit of cold water in it! Putting a glass of water next to the pot was the first thing I did.

It's necessary to stir at all times because the flour burns easily, and before it starts looking bad (which is like, a minute in), I need to pour a glass of cold water on it, and stir. This will quickly make a paste! And this paste is a foundation for all thick and creamy soups.

After the paste has been established, I'm adding all of the rest of the mushrooms, and pouring all of the onion broth in. Then the soup is stirred until it's all the same thickness, and let to boil until it's really bubbly and rising up in the pot! I realized that the creamy soups only turn out okay if I let it bubble all the way up, this insures that the oil, flour and the water are properly mixed, and won't start turning back into separate mixtures.

This is basically all of the work. After it bubbles up, I'm closing the pot with a lid (or a plate, I don't have a lid), wrapping it up in the same cloth, towels and blanket as I did the onion jar, and I'm letting it sit there for 15-20 more minutes, and it can keep cooking in there, without me paying any attention to it. Otherwise you could just cook it on low heat for a bit longer, but it would take stirring and making sure it doesn't burn at the bottom and who's got that kind of patience.

After 15 minutes, I'm taking the pot out, and the last step will just be to blend it, since I have a blender and I can be fancy about it. The mushrooms taste mixes very well with flour and onion, really most of things do.

And here it is! All foraged (except for oil, flour and salt) mushroom soup! It was really good. Tasted like it had a real onion inside, even though I cheated.
#mushroom soup#roux#cooking recipe#cooking from scratch#forage soup#eating from the nature#onion alternative#wild onion foraging#soup#simple soup#soup from scratch#onion infusion#onion broth
60 notes
·
View notes
Text


Cooking From Scratch - The Single Man’s Guide to Making Out in the Kitchen by Willetta Warberg, 1976
62 notes
·
View notes
Text

Fancy restaurants are okay once in a while, but nothing beats a home cooked meal prepared with love from mom or dad. And you certainly don’t need complicated steps that take hours for it to taste delicious, only fresh ingredients and some effort.
.
Sorry I had to repost due to a typo 😑
.
#cooking is my love language#i love cooking#fresh food#cooking from scratch#soulinkpoetry#poetry#she writes#thoughts#feelings#poets on tumblr#food quotes
18 notes
·
View notes
Text
10 Mistakes You're Making With Soup
Master the art of soup-making with expert tips to avoid common soup mistakes. From seasoning secrets to mastering creamy textures, learn how to elevate your soups from ordinary to extraordinary. Uncover the secrets of building flavor, perfecting consistency, and crafting wholesome soups from scratch.
Generally speaking, I like to live my life humbly, knowing there’s always more to learn and many…

View On WordPress
#broth making#chef&039;s tips#comfort food#cooking from scratch#cooking inspiration#cooking mastery#cooking mistakes#cooking tips#creamy soups#culinary artistry#culinary creativity#culinary journey#culinary mastery#culinary skills#culinary wisdom#flavor building#Food#food blog#foodie tips#Fresh ingredients#gourmet soup#homemade broth#homemade soup#kitchen tips#nutritious soups#pantry cooking#seasoning techniques#soul-warming soup#soup#soup adventures
2 notes
·
View notes
Text
From Scratch Series
Making broth
Broth is one of the easiest things to swap out when you're wanting to start from scratch. And it is also something you can make for practically free.
For Vegetable broth:
I make broth with my vegetable waste so it can take a couple weeks to prep. But it can also be made with the whole vegetable if you have it on you. If you're making it with scraps get a large plastic bag and save your vegetables as you cook.
6-8 cups of vegetables or vegetable scraps. I recommend carrots, onion and celery when you're first starting. Garlic(or garlic skins if you're using scraps), mushroom, tomato, bell pepper can also be thrown in. As you get more comfortable try new things.
8 cups water
Salt
Pepper
Optional: A splash of Apple Cider Vinegar(I use the cap, but it's about ½tsp)
If you're using whole vegetables instead of scraps give them a rough chop. You don't want them to be small, but not whole anymore. Include the skin from the onion and the tops and leaves on celery and carrots. If you're using garlic crush it with the flat of your knife. Then cover the vegetables with the water, apple cider vinegar, and a SMALL amount of salt and pepper. Bring it to a boil and once it comes to a boil reduce the heat to low and cover. Let it simmer covered for an hour. Remove from heat and once cool strain. You can at this point pour freezer bags for later use. You can also freeze it in muffin tins and then put into the bag so it's in individual serving sizes.
Bone Broth:
We'll focus mostly on chicken broth here, but any type of combo of bones can work. Chicken bones in my opinion are the easiest to get use what you have. You can also ask the butchers department at your local grocery if they have bones.
1 whole chicken carcass, most of the meat removed
½ - 1 tsp apple cider vinegar
8 cups water
For this I like to use a crockpot but it can also be made in a pot on the stove same as the vegetable broth. It just takes much longer. Add the bones to the pot with he apple cider vinegar and water. I typically don't add salt and pepper to bone broth. If cooking on the stove bring to a boil and then reduce to a simmer. Cover and allow to simmer for 10-12 hours. It should reduce by about half. If cooking in a crock pot turn to low and let cook 12-24 hours. I tend to go closer to 24 hours for mine. Let cool and strain. DON'T throw away the bones. Either freeze them for later or return them to the pot, I always do my bones twice and label as 1st batch and second batch, unless I do them close enough that I can mix the batches. I use 1st batch broth for soups and stews and 2nd batch broths for rice, casseroles, or gravy.
#cooking from scratch#from scratch series#cooking#budget cooking#learn to cook#small changes#healthy swaps#adulting
17 notes
·
View notes
Text
Today's simple, realistic, home cooked packed lunch:

Ingredients for two people:
1.5 cups sushi rice
1.5 c water
Salt & rice vinegar to taste
2 servings of quick cooking protein source of choice, I used tofu
Soy sauce, dried ginger, black pepper, to taste
1 cucumber
1/4 bunch cilantro or other herb
1/2 left over sweet quick pickles from the Asian market
1 T toasted sesame
Directions:
Put the rice in the rice cooker with the water and cook it.
Heat your protein of choice until it's browned on all sides/safe to eat, then add the soy sauce and spices and cook another minute
Slice the cucumbers & cilantro
Rice will probably be done now, add salt and vinegar to taste.
Put everything in a container, sprinkle with sesame seeds
24 notes
·
View notes
Text

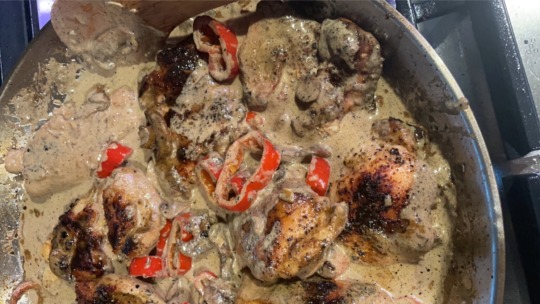

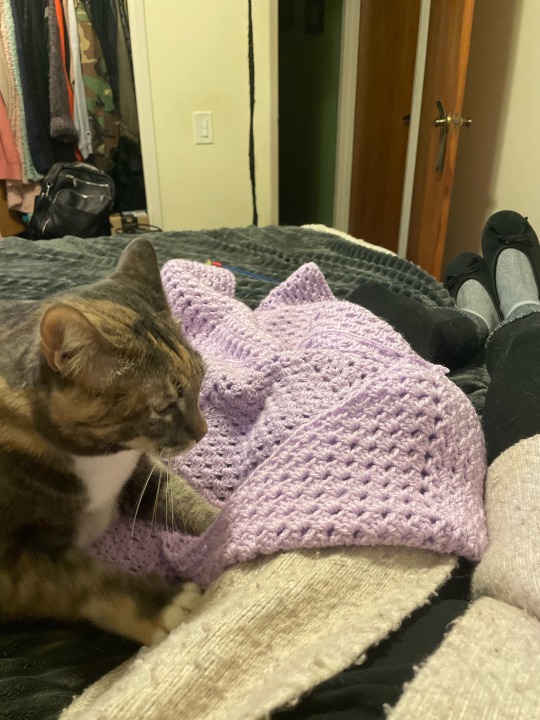
today was pretty good.
#personal#cooking#chicken thighs#mushrooms#cooking from scratch#blue jay#bird watching#pillow-princess666#mine#photography#southern oregon#crochet#kitties#my baby lola
2 notes
·
View notes
Text
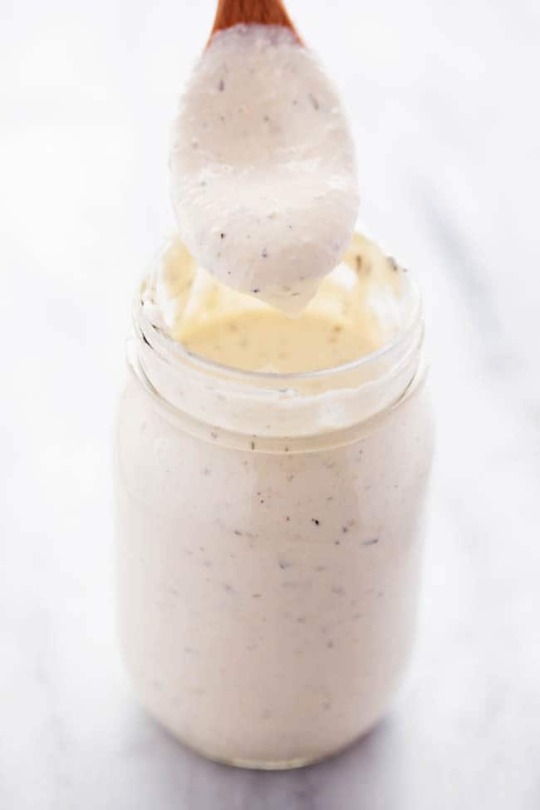
homemade alfredo sauce
9 notes
·
View notes
Text
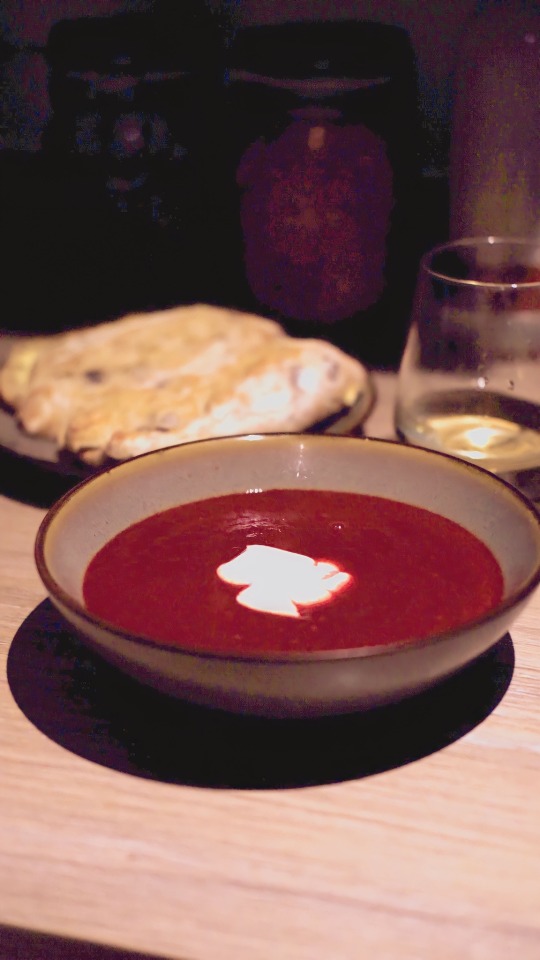
Tomato Borscht…
Grating beetroot is a ball ache but the finished product is wham! (My friend kindly pointed out to me after it was done that my food processor has a grating function 🤦🏼♀️)
6 notes
·
View notes
Text
Good morning! If you saw my live stream this morning you got to see me making homemade marshmallows. It is so fun and easy to make these.
Ingredients:
3 tbsp beef gelatin
1 cup warm water
1 cup honey or maple syrup
3 cup powdered sugar
Watch the original video to get a feel on how to make these yourself. They come together quickly and are great fun to share with your family.
Keep busy sweet friends!
youtube
5 notes
·
View notes
Text
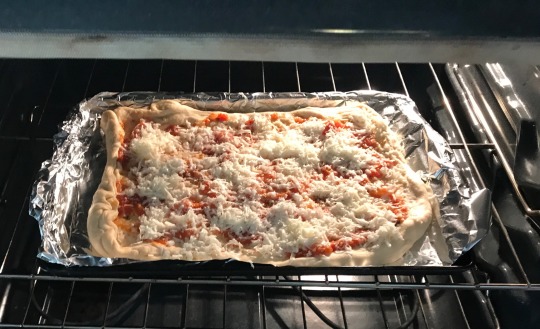
Making pizza from scritchity scratch!
Dough I made, with milk from the goats. Tomatoes from the garden for the sauce. Fresh herbs from my windowsill. And cheese I made from the goats and then shredded!!

#shredding the cheese I MADE was wiiiild#farming#homesteading#baking#cooking from scratch#gardening#cottagecore
16 notes
·
View notes
Text
So, the last summer, I decided to try out the method of drying green-beans, to see if it would be a good alternative to freezing them. I love frozen green beans, but I want a method of preserving that doesn't take any energy to keep them frozen, dry stuff is shelf stable!
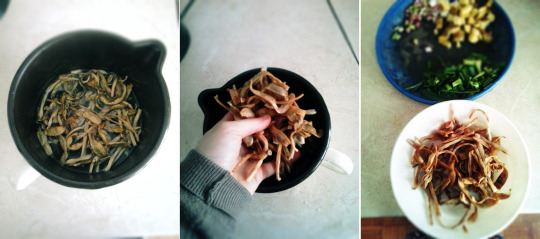
The way to do this is to grab a needle and a thread, stack the green beans on the thread vertically, and then hanging them up to dry. It takes them several weeks to dry, and I do have to say, they all dried properly, none went bad or started getting mold, the drying part went well! Then I put them in my big giant jar and promptly forgot about them for the whole winter.
And now, I'm going to test if they're good to eat!
Some of these are long noodle beans, and some are just normal green beans. In the container next to them are some young garlic plants I found in the field. I've decided to go and make a garlic+green bean soup, to make sure the green beans get a proper time to cook in there.
So, the method of rehydrating these is to put them in a pot, pour boiling hot water over them, and leave them to soak for an hour. This is how they looked when I took them out of the jar:
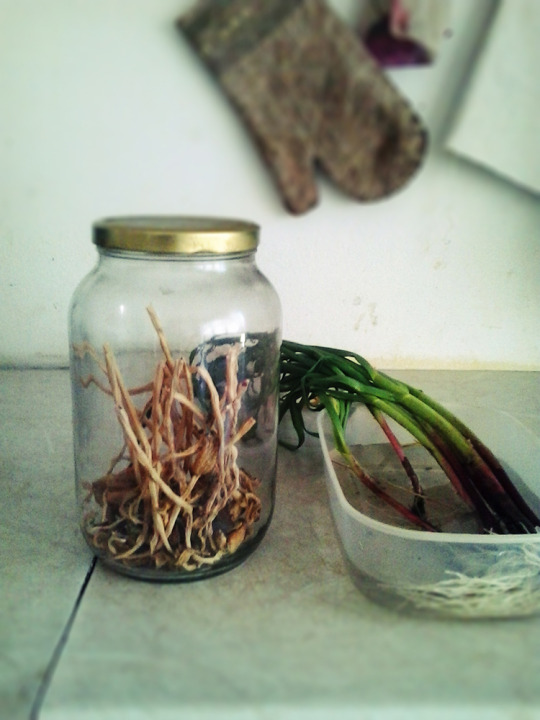
They seemed light and like there's not much substance to them, they're also pretty thin. I covered the pot and left it for an hour. In the meantime, let's look at the garlic plants. Firstly, what are they.
I sometimes forget to harvest a bulb of garlic, and then in the spring, I get 5-6 young garlic plants growing on top of each other. I tried to pry them apart and plant separately, but none of them would really go on to produce a big head of garlic. So I decided it's much more satisfying to just yank them all out and eat them in the spring as fresh garlic. The entire plant is filled with fresh garlic flavour!
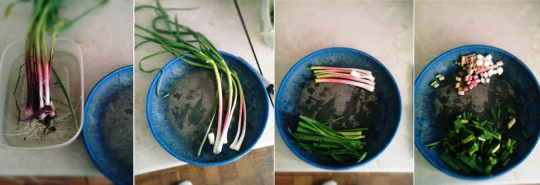
I cleaned them up and separated the white parts from the green, because the white parts can be sauteed on oil, while the green parts will do better to just be cooked. I cut them in little soup-appropriate pieces.
Then I thought, well, this soup would just be so much better if there was a potato in it. Green beans and potatoes just go extremely well together. And I didn't have a young potato, all of mine have already sprouted, so I picked two that looked somewhat decent:
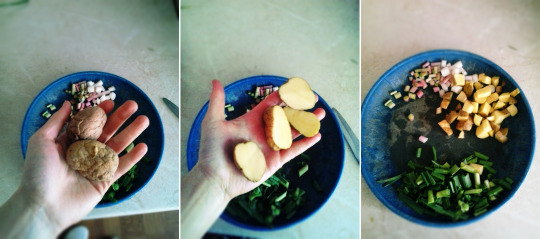
I know these look rough at first, but when you cut them, inside they're just fine! I didn't even peel them, just cut them in little cubes. Now let's look at how are the green beans doing:
They grew bigger! And they now feel very squishy and chewy, and there's much more weight to them, which I like. The smell coming out of them was not like a green-bean scent, it didn't smell much like anything really. I was very curious to how the water would taste where the green beans were soaking, so I tried it. And it tasted like tea. Usually when you cook some vegetable in hot water, it tastes like broth, right? Well this tasted like tea. Tea from leaves and bark. It was extremely interesting.
Anyway, I cut the green beans to little bits as well, and now we have all of the ingredients for cooking! It's going to be a very simple meal, but cool because we're just using garden stuff one can get in early spring.
I put the potatoes and salt on some oil first, because they can handle it for the longest time, and it draws out a more intense flavour in them. When they started smelling real nice, I added the garlic whites, and after a bit, garlic greens and green beans, or at this point they would be called 'leather britches', because people compare the texture of dry green beans to leather. And that's it! Extremely simple soup making. Here it is done:
I was excited to see what the flavour of green beans would be, because I was promised they have this very intense flavour, but I have to admit, this soup tasted overwhelmingly of potatoes and garlic! Which is a heavenly combination, so I loved it a lot. I was a little disappointed that I couldn't taste the green beans, I think the flavour possibly faded because I just left them sitting in a transparent jar for some 9+ months, and they should have been protected from the light better.
I could feel the texture, however, and it was okay, it was slightly leathery but by no means difficult to eat. I ended up eating the entire soup very quickly, and I have to say it was extremely sating. I felt very well fed afterwards and satisfied for hours. Food that is no trouble to store, easy to eat and sating, that sounds like a perfect thing for me.
I'll try it again this summer, but I'll see if I can eat the green beans before they lose the flavour completely, or if I could preserve it for longer by keeping them out of light, in a paper bag or a very dark spot. Possibly I should have tried putting them on oil to draw out the flavour, but I haven't thought of that at the time. I actually have a bit of them left over, because I wanted to see if they cook any different if I don't soak them first, so when I try that out, I'll put that information out as well!
#homemade soup#dehydrated green beans#leather stritches#cooking from home stash#young garlic#cooking from scratch#green beans#green bean experiment#long noodle beans#cooking#experimental recipes
32 notes
·
View notes
Text


These are the roundest pizzas I've managed to make so far!
#food#cooking#pizza#home cooking#homemade food#WHOA WTF YOU CAN EDIT TAGS NOW#homemade pizza#cooking from scratch#don't mind my epiphany outburst there
6 notes
·
View notes
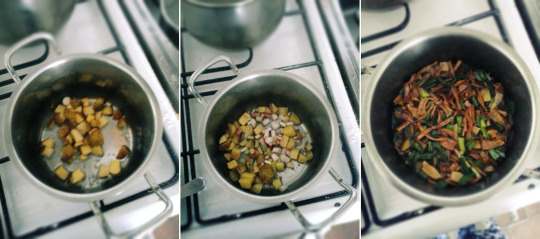
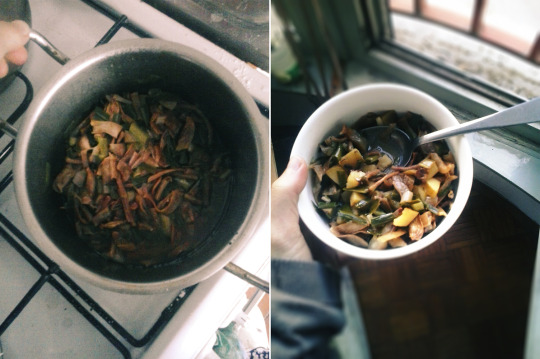
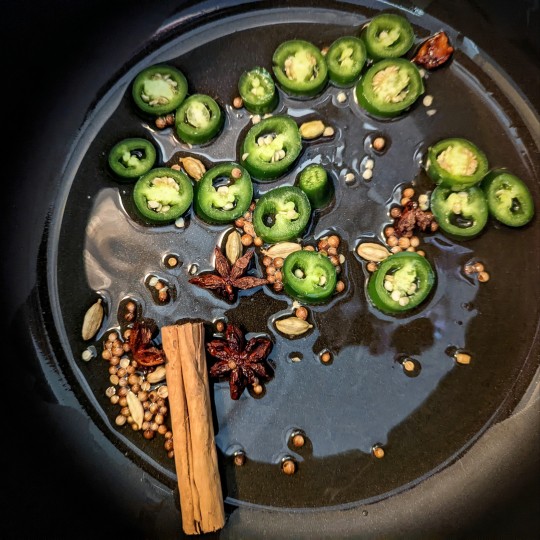
Text
I thought the view inside the pot looked pretty 😊
Cooking from scratch is one of the best things you can do! Removing processed and preserved food as much as you can, can make a huge difference to your health and wellness.
Here I am making a low fodmap Phở for my partners lunches 😊 (and yes, I forgot to buy ginger 😱, however this still ended up DELICIOUS without it)
#arthritis#antiinflammatory#anti-inflammatory#anti-inflammatory diet#antiinflammatorydiet#inflammation#theantiinflammationstation#healthy#vegetarian#vegan#cooking from scratch#homemade#made from scratch#low fodmap
3 notes
·
View notes
Text
Just made tortillas from scratch for the first time ever! Not bad for my first try!
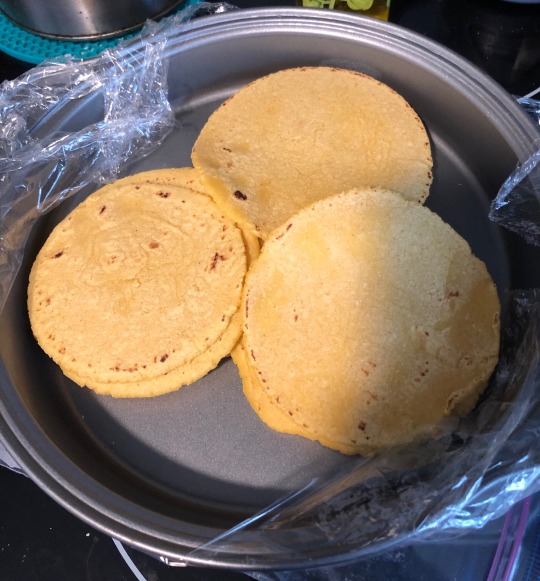
#it’s a super simple and satisfyingly tactile process#so much fun#you get in a rhythm - pinch roll press peel drop pinch roll press flip peel transfer drop#and it only took like three of them to get the pressure right and figure out the best time to flip#flipping tortillas by hand in a skillet is so fun FUCK utensils!!!#they smell SO good#making jackfruit tacos for dinner HELL yeah#corn tortillas#yellow corn tortillas#home cooking#cooking from scratch
1 note
·
View note
Last Seen Blogs

anagatajavanese
Anagata Javanese

everybody-she
Untitled

persesphonestears
Persephone writes things.

vaporgalleriatarranttx-blog
Vapor Galleria Tarrant TX

rainbowreallyy
Shit Show