#romantic fantasy
Text
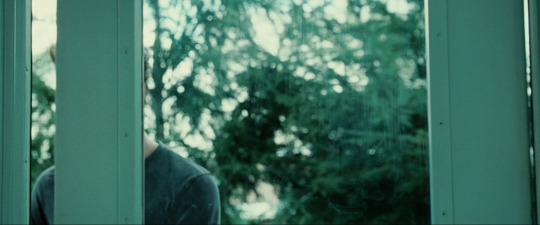


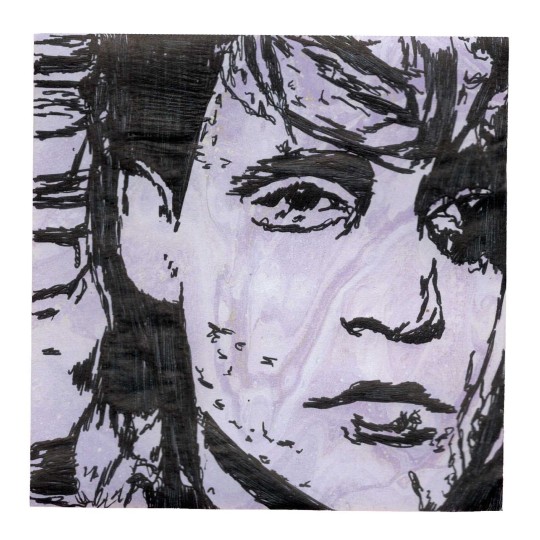
"Beautiful. Very visually dynamic."
Twilight, 2008.
Dir. Catherine Hardwicke | Writ. Melissa Rosenberg | DOP Elliot Davis
#twilight#the twilight saga#catherine hardwicke#us film#romantic fantasy#romance#fantasy#vampire films#10 frames#2000s
155 notes
·
View notes
Text
concept: romantic fantasy otome heroine gets the most insane bad end imaginable where she must kill and scavenge to survive, only to go back in time 7 years to the beginning of her romantic fantasy story and figures surely she can just kill her way out of church/state politics and her reverse harem of useless dipshits
(a few years ago i used to binge-read litrpg fantasy isekai (they were all bad) and think of how i'd spin the genre and recently ive been binge-reading so many noble lady webtoons i felt The Hunger)
314 notes
·
View notes
Text


[The Hobbit - Bofur x Leanna] Warm Hearts Preview #2 - 2 WIP & 1 Finalized🌿
♥ First Preview | Rough Draft ♥ Phew... Halfway done. ♥ Imagine tidbit below.
Shares always appreciated !
🌿Imagine Context: Falling deeply in love on an adventure you thought you'd never have, pining and romantic tension fluttering through the air every time you shared space, only to eventually part ways - unwillingly - several times. During your separation, you are critically injured and taken to an unknown place. You wake up from a realistic fever dream that you were together, and wipe away the tears of frustration that dampened your pillow. Confused, sick, alone. Then, the sound of someone urgently coming towards your closed door echoed through your chilly room.
#the hobbit#oc x canon#2d animation#Bofur#romantic fantasy#bofur x leanna#Warm Hearts#my animations#Leanna Wetherbee#WIP#laketown#Blender
70 notes
·
View notes
Text
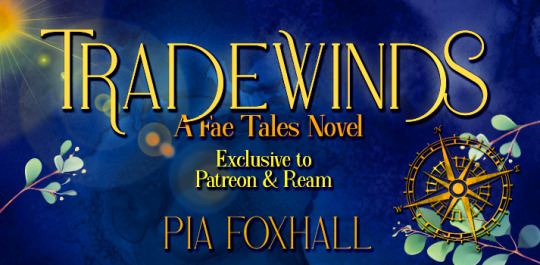
Tradewinds Launch - A Fae Tales Novel - Jan 31st

FULL NOVEL RELEASE on JANUARY 31st - EXCLUSIVE to REAM & PATREON ONLY
In the dangerous, ethereal realm of the fae, alliances between the Seelie and Unseelie fae merchants are few. Some say impossible.
Matan, a Seelie fae and peacock pheasant shifter with a talent for trade, must keep his Seelie alignment a secret as he embarks on a perilous journey to gather wealth and save a loved one from a terrible curse. He joins an Unseelie merchant caravan of fae who would surely eat him if they learned of his alignment.
The enigmatic Udir, a paranoid Unseelie master of poisons and bearded vulture shifter, discovers Matan’s secret and threatens to blackmail him in exchange for vile favours. But Udir’s bravado and bluster hides a painful past and Matan isn’t as innocent or as naïve as he seems.
Amid bustling markets, savvy clients, and travelling to new lands Matan has never seen before, Tradewinds is a story of love, found family, trust, betrayal, and the healing that can grow in the shadows of the vibrant, perilous southern fae lands.

Foxhall @ Ream (available on the Gary+Efnisien tiers or higher)
Foxhall @ Patreon (available on the Gary+Efnisien tiers of higher)
#tradewinds#pia foxhall#fae tales#fae tales verse#merchantverse#original work#original story#romantic fantasy#epic fantasy#secondary world fantasy#hurt/comfort#like mild angst with a happy ending#it's what i would say lighter than my normal stuff#sort of? dsakfjdsa#it's more 'wildness within' vibes but with no OT3#there will be excerpts and more coming over the next two weeks#or there should be i need to organise that lmao#but anyway now the announcement post has been made!
91 notes
·
View notes
Text

We’re advertising a book for readers of adult romance and fantasy: Fall of Ruin and Wrath by the #1 New York Times bestselling author of From Blood and Ash, Jennifer L. Armentrout.
WHAT IT’S ABOUT
Long ago, the world was destroyed by gods. Only nine cities were spared. Separated by vast wilderness teeming with monsters and unimaginable dangers, each city is now ruled by a guardian—royalty who feed on mortal pleasure.
Born with an intuition that never fails, Calista knows her talents are of great value to the power-hungry of the world, so she lives hidden as a courtesan of the Baron of Archwood. In exchange for his protection, she grants him information.
When her intuition leads her to save a traveling prince in dire trouble, the voice inside her blazes with warning—and promise. Today he’ll bring her joy. One day he’ll be her doom.
When the Baron takes an interest in the traveling prince and the prince takes an interest in Calista, she becomes the prince’s temporary companion. But the city simmers with rebellion, and with knights and monsters at her city gates and a hungry prince in her bed, intuition may not be enough to keep her safe.
Calista must choose: follow her intuition to safety or follow her heart to her downfall.
#fall of ruin and wrath#jennifer l armentrout#jla#jennifer armentrout#jennifer l. armentrout#tor books#bramble books#bramble romance#romance#fantasy#romantasy#bookworm#booklr#tbr#library#bookshelf#romantic fantasy
163 notes
·
View notes
Text
✨A Particular Picnic: A Short Swipe Story✨
instagram
I made this story for TikTok and I though it could be nice if I share it here too! I designed every character inspired by the Romantic era (one of my favourites). Their outfits are based on some fashion plates from 1830s.
I hope you enjoy it! Let me know who do choose and how did your picnic day turn out!
#Instagram#swipe story#romantic fantasy#story#choose your story#choose your character#victorian#19th century#romanticism#character design#illustration#albert victoria
80 notes
·
View notes
Text

Back in the mid 1980s I wrote a 12,000-word love story for a friend of mine. That story, "Lior and the Sea," was intended for an anthology called Moonsinger's Friends, a celebratory gathering of stories in honor of Andre Norton. It's a bit unusual for me in both style and topic; half fairy tale, half romance… and a story in which both involved parties are (literally) out of their depth.
I was rereading "Lior" a month or so ago to make sure its copy was clean, because the ebook's previous cover was overdue to be replaced with a newer, better-made one. And something occurred to me as I went through the text. In the rush of the writing—because it was one of those stories that had come quickly—I'd given way too little detailed thought to what the protagonist looked like.
It's amazing how doing cover work concentrates your mind on such details. So as I got to work on this and re-familiarized myself with the character's backstory, I suddenly realized something else. Details of her life story that would be minor to others but not to me (because i run that world) strongly suggest that Lior's almost certainly of Steldene or south Darthene descent, and therefore a person of color.
So, belated as the realization may be, the cover reflects that now... and not before time.
Meanwhile, if you're interested in reading Lior's story, the ebook's over here.
158 notes
·
View notes
Text


FIORENZO is a queer fantasy-of-manners romance featuring secret identities, hurt/comfort, and a happily-ever-after. Out now wherever fine books are found!
Amazon • Apple Books • Barnes & Noble • Kobo • Smashwords
#sebastian nothwell#mm romance#gay romance#historical romance#mlm romance#queer romance#queer fantasy#romantasy#fantasy of manners#mannerpunk#romantic fantasy#fantasy romance#historical fantasy#fiorenzo#hurt/comfort#whump
71 notes
·
View notes
Text


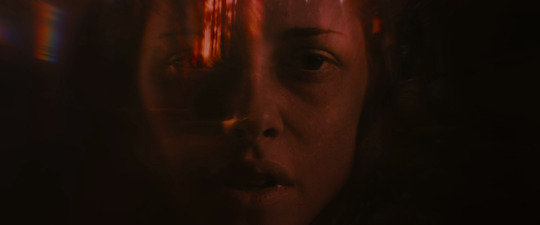

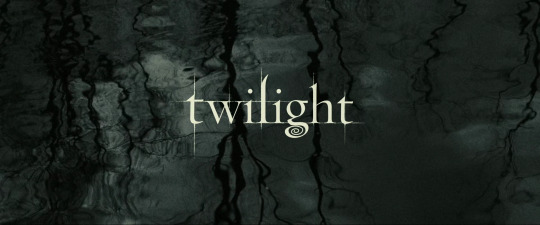
"Who else gets married at 18?"
The Twilight Saga: Breaking Dawn - Part 1, 2011.
Dir. Bill Condon | Writ. Melissa Rosenberg | DOP Guillermo Navarro
80 notes
·
View notes
Text


havent forgotten my romantic fantasy regression deconstruction story
50 notes
·
View notes
Text
On February 14, 1992, Edward Scissorhands debuted in India.

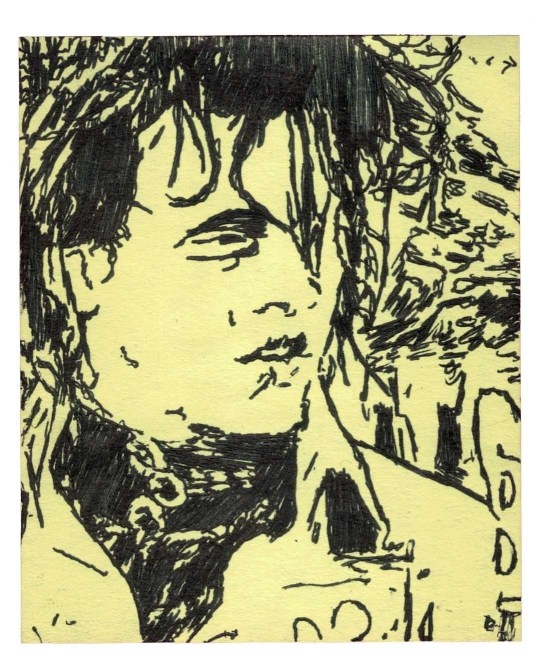
#edward scissorhands#tim burton#johnny depp#romantic fantasy#1990s movies#movie art#art#drawing#movie history
35 notes
·
View notes
Text
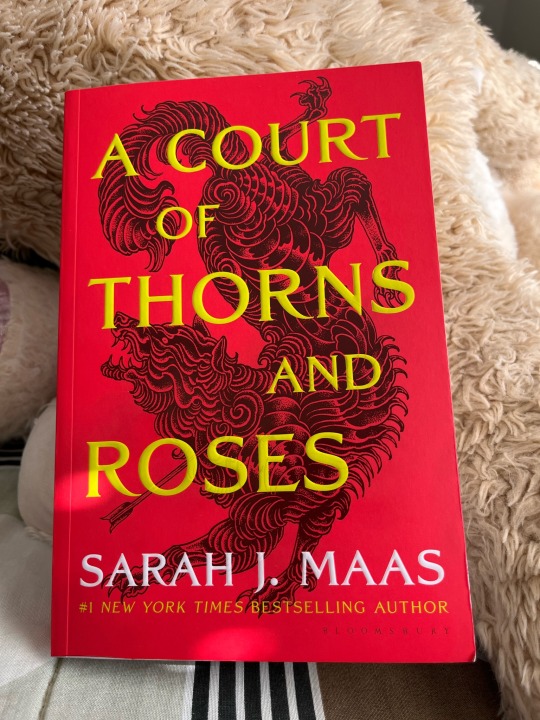

He had put me before his entire court, before all of Prythian.
#reading#books read in 2024#bookblr#books#book photography#book blog#bibliophile#books reading#books and reading#a court of thorns and roses#sarah j maas#sarah j. maas#acotar#feyre#tamlin#rhysand#rhys acotar#tamlin acotar#feyre acotar#fantasy#romantasy#romantic fantasy#fae#faerie#really predictable#cringe#did not like it#review#two stars#march reads
20 notes
·
View notes
Text
Tradewinds excerpt (Fae Tales, Matan/Udir)
Tradewinds excerpt:
Matan looked up when he smelt something charred and saw Udir approaching, a whole bird skewered on a stick.
Please don’t let it be a shifter. Please.
It was practically charcoal. Matan winced as Udir crunched his way through a wing, and Udir smiled, blackened bits of char on his teeth.
‘That’s disgusting,’ Matan said.
‘I’m a vulture,’ Udir laughed. ‘You’re lucky it’s not rotting. But I stay away from the worst of the carrion out of respect to you know…sensitive, delicate goshawks like you. Speaking of…’ Udir sat on one of the other chests and stretched his legs out. His jeans were torn in several places, his boots tailored but made from old leather. The gun by his narrow hip drew Matan’s eye, and he scowled at it. ‘You’re not like any goshawk I’ve seen before. The last grey goshawk I met didn’t have hair like yours.’
‘We don’t all look the same in human-form, do we?’ Matan laughed. He hoped the sound was genuine enough to cover his nervousness, but from the look on Udir’s face, he couldn’t be certain.
‘There’s a purple sheen in that hair of yours. What’s that from?’
‘I dye it,’ Matan said quickly. He felt his cheeks burn hot. In his hybrid and true-form, he had patches of iridescence over sections of his feathers, and it transferred over into his human-form. Gave his hair a glint of violet in certain lights. ‘You have your eyeliner. I think you can understand vanity.’
‘This isn’t vanity,’ Udir said, pointing to the sharp red lines highlighting the murky blue of his eyes. ‘This is heritage.’
‘And the gun? I’m sure your family is very proud of you, using human weapons like that,’ Matan said.
‘What weapons I use are my own business,’ Udir said, staring at him. ‘Maybe I need it.’
‘Yeah? That makes it sound like you have some enemies,’ Matan said.

#tradewinds#mm romance#queer romance#romantic fantasy#fantasy#epic fantasy#high fantasy#original work#fae tales#matan and udir#these two getting along so well x.x#it gets better eventually lol#udir just lives in paranoia-land#but honestly it's understandable
42 notes
·
View notes
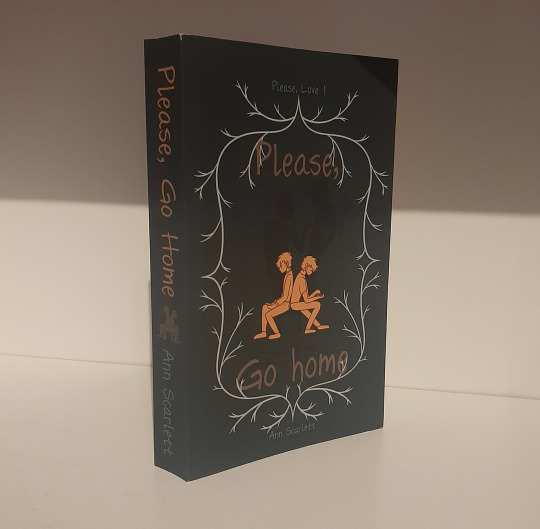
Text
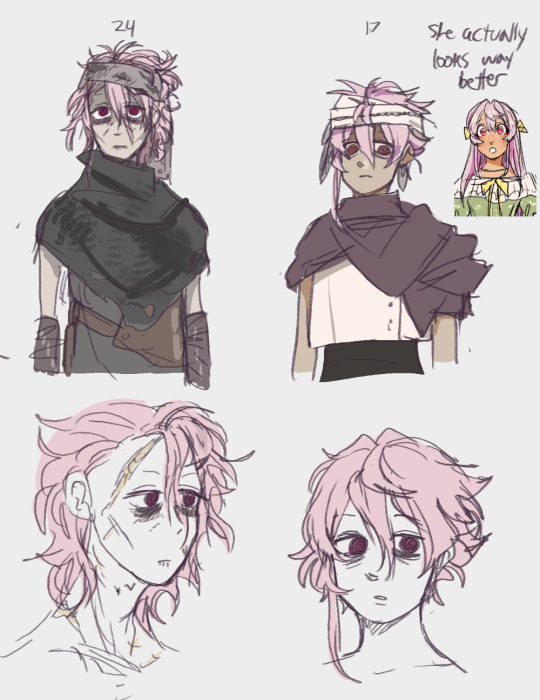
Art school Portfolio project 1
Please, Go Home
Art school didn't end up happening for me (I'm going to do something completely different and more secure, and keep art and writing for myself for fun), so I thought I’d share my portfolio projects here.
Buckle up, this'll be long as fuck.
This is a story I’d been working on for years, since 2018. I’d rewritten it several times, until in 2023, I got the chance to come up with my own project at design school. Immediately, I knew this was what I wanted. I wanted to make this story into a real book. And I wanted to make it all by hand, cause bookbinding seemed cool to try.

I had to come up with 2 ideas to do.
Translation:
Subject 1
Book. Specifically a novel (written by me). I want to make illustrations of the characters, design the inside (text and design thingies and everything), design the cover. Print and bind it myself. Illustrations of the characters are in it, I’ll try to finish as many as possible, but I probably won’t be able to finish all of them. Then I’ll leave blank pages in and stick the remaining illustration in later. (I did finish them all, so I didn’t need to do this.)
Why? I love books. I read them a lot and I’ve been writing for years. Now I want to make a professional looking book myself. And of course I love to draw, I want to incorporate that too. I’d like to have completely handmade versions of the books I’ve written. I’d like to learn bookbinding.
Subject 2
Graphic novel. I want to learn to tell a story visually. And I want to experiment with color more.
Why? I like to read graphic novels. I want to tell and draw stories, and get better with color.
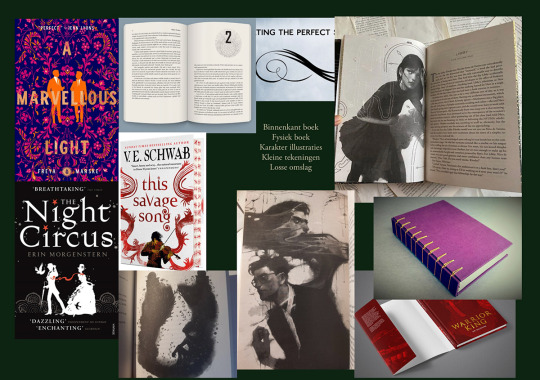
A mood board of what I wanted, I chose the book.
Translation:
Inside book
Physical book
Character illustrations
Little drawings
Dust jacket
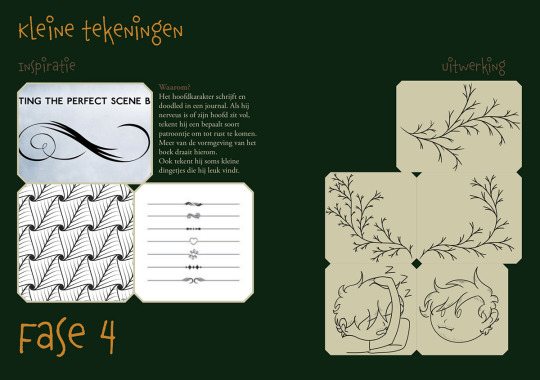
Translation:
Little drawings
Inspiration
Finished product
Why? The main character writes and doodles in a journal. When he’s anxious or his head is full, he doodles a certain type of pattern to calm down. More of the design of the book is based on this. He also sometimes draws little things that he likes.

Translation:
Inside
Fonts
Novels always have a serif font as the standard. Standard book font: Adobe Garamond Pro.
Other than that, I want to use quite a lot of different fonts that resemble handwriting for the chapter titles. The titles are quotes from a character in the chapter, each has their own font as their voice or handwriting. Sometimes, the characters write too, that’s also in their own font.
[A list of fonts.]
Preparations
I made parent-pages for each type of spread that I needed. One with only text, one with an illustration and the start of a chapter, and 2 with only the start of a chapter on either side of the spread. And I made a bunch of paragraph-styles for all the types of text that I needed. I have 2 sections, 1 for the front matter, 1 for the rest.
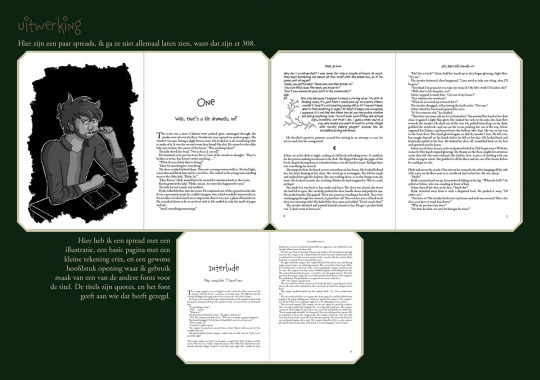
Translation:
Final product
Here are a few spreads, I won’t show all of them, because that’s 308 of them.
Here I have a spread with an illustration, a basic page with a little drawing in it, and a regular chapter opening where I use one of the other fonts for the title. The titles are quotes, and the font shows who said it.
Translation:
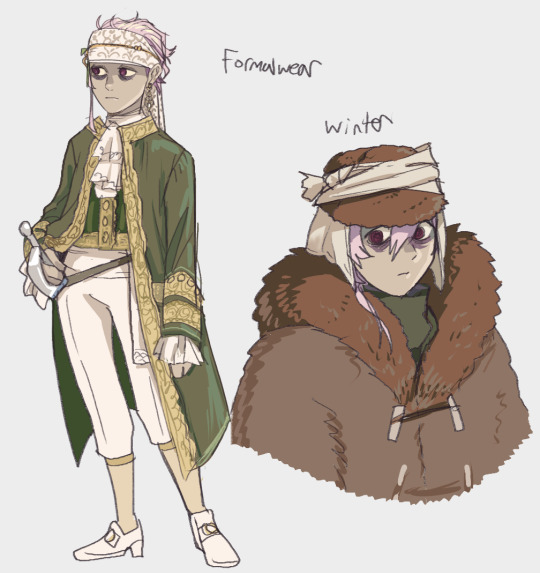
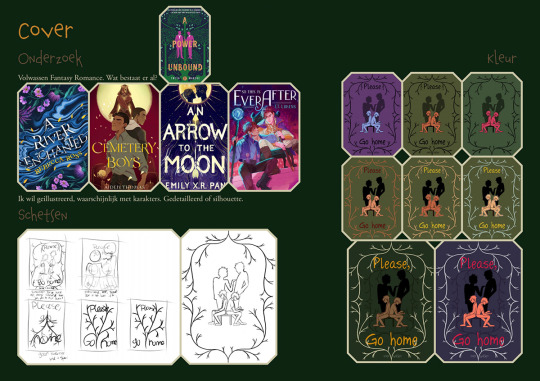
Cover
Research
Adult Fantasy Romance. What’s already out there? (Put a bunch of YA there, but whatever)
I want illustrated, probably with characters. Detailed or silhouette.
Sketches
Colour
Translation:
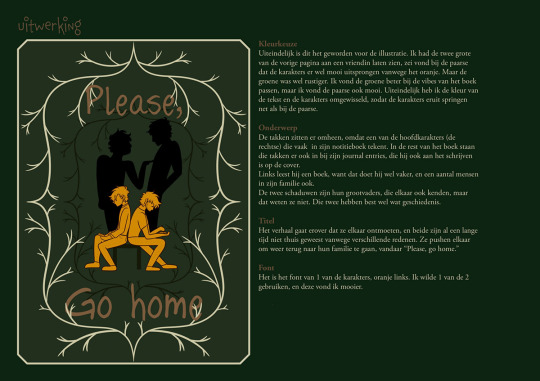
Final product
Color choice. In the end, this is the illustration I went for. I showed the two bigger color choices from the last page to a friend, she said with the purple one, that the characters nicely sprung out of the image because of the orange. But the green one was more relaxed. I thought the green one fit better with the vibes of the book, but I really like the purple one too. I ended up switching the colours of the text and the characters, so the characters sprung out like the purple one.
Subject. The twigs are around it, because one of the main characters (the right one) often draws them in his journal. They’re also there in the rest of the book, in his journal entries. He’s writing in it on the cover. Left, he’s reading a book, because he does that often, and others in his family do so too. The two shadows are their grandfathers, who also knew each other, which the main two don’t know. Those two have quite a bit of history.
Title. The story is about them meeting each other, and they’ve both been away from home for various reasons. They push each other to go back to their families, that’s why it’s called ‘Please, go home’.
Font. It’s one of the characters fonts, orange left. I wanted to use one of the main characters’ fonts, and I liked this one better.
Translation:
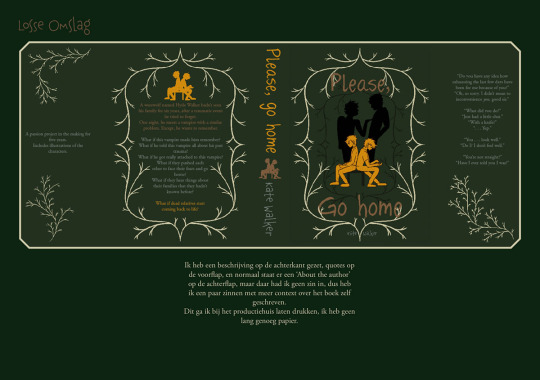
Dust jacket
I put a description on the back, quotes on the front flap, and normally there’s an ‘about the author’ on the back flap, but I didn’t feel like doing that, so I put a short text there to give more context to the book itself.
Sorry about the shitty quality of the next few.
Translation:
Character illustrations
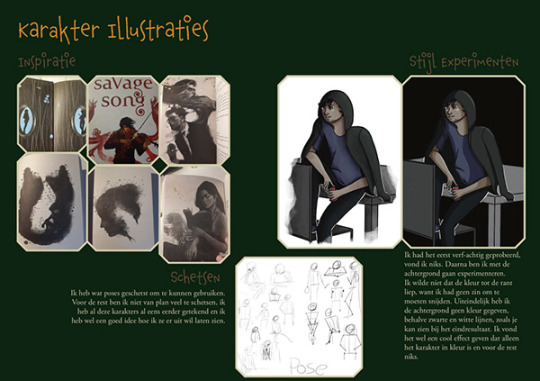
Inspiration
Sketches
I sketched some poses I could use. Other than that, I’m not planning to sketch a lot, I’ve drawn all these characters before and I already have a good idea of what I want them to look like.
Style experiment
I tried something painty first, didn’t like it. After that, I experimented with the background. I didn’t want the colour to go all the way to the edge, because I didn’t want to have to deal with bleed and trimming. In the end, I didn’t give the background any colour, except black and white lines, as you can see in the final result. I liked the effect of only the character having colour.

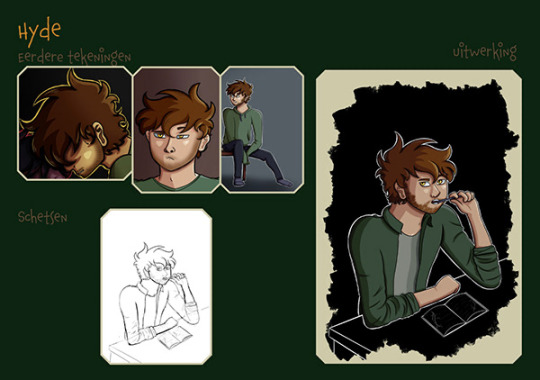
Translation:
Rune
Earlier drawings
Sketches
Final product
In the book, it’ll be greyscale.
(All the next few have the same text except the characters names, so I won’t translate again. Except if I did add some text somewhere.)


Translation:
And with this, all the illustrations are done. I'm not super happy with all of them, but I did my best to make them all unique and recognizable. And within 4 weeks. I'm happy with it.
Translation:
Physical book
Research
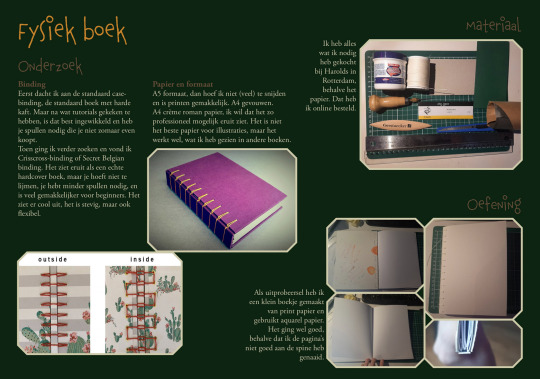
Binding. At first, I thought about doing a standard case-binding, a standard hardcover book. But after watching some tutorials, I realised that's quite complicated and requires supplies that I couldn't easily get. I continued searching and found crisscross-binding or secret Belgian binding. It resembles a standard hardcover book, but you barely have to glue, you need less supplies, and it's easier for beginners. It looks cool, it's sturdy, but also flexible.
Paper and size. A5 size, then I don't have to trim and printing is easy. A4 folded. A4 cream novel paper, I want it to look as professional as I can. It's not the best paper for illustrations, but it does work, I've seen it in other books.
Material. I bought everything I need at an art store in the city, except the paper. I ordered that online.
Practice. As a try-out, I made a small book of printer paper and used watercolour paper. It went well, except that i didn't sew the pages to the spine properly.
Translation:
Final product
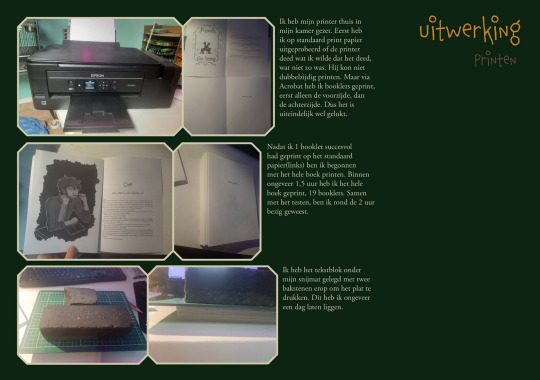
Printing
I put my printer at home in my room. First, I tried on standard printer paper if the printer did what I wanted it to do. Which it didn't. It couldn't print double-sided. But with Acrobat, I printed booklets. First only the front, then the back. So I managed to do it.
After successfully printing one booklet on the standard paper(left), I started printing the whole book on the cream paper. Within 1,5 hours, I printed the whole book, 19 booklets. Together with the testing, it took me about 2 hours.
I pressed the pages underneath my cutting mat with two bricks. I left it there for about a day.
Translation:
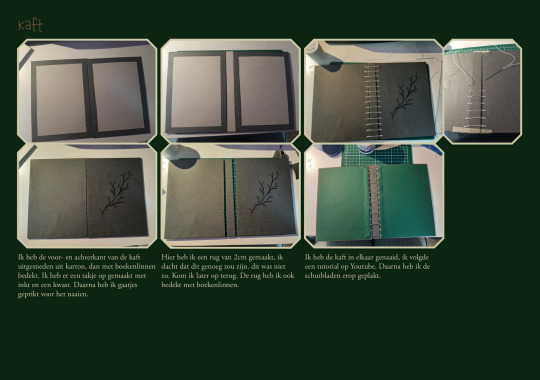
Cover
I cut the front and back cover out of cardboard, then covered it with linen paper. I drew a twig on it with ink and a brush. Then I poked holes in it for the sewing.
Here, I made the spine 2cm wide, which I thought would be enough. It was not. I'll get back to that. I covered the spine in linen paper, too.
I sewed the cover together, I followed a tutorial on YouTube. Then i glued the end papers on.

Translation:
Binding & Dust jacket
I poked holes (in the booklets) for the sewing, then I started sewing the paper to the cover.
When I'd sewn 6 out of the 19 booklets onto the cover, I was already halfway along the spine and I realised this wasn't going to fit. I undid all the sewing and remade the spine. This time 3cm.
The new spine was still a bit too small, even though I thought I'd exaggerated it a bit. The book doesn't close properly. But I refused to redo everything again, so I just accepted it. It was better after pressing it for a day. I didn't trim the edges, that was very difficult with the pages already bound into the book. I quite like the untrimmed edges.
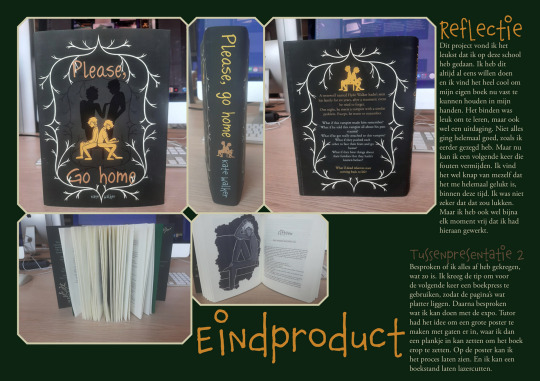
I folded the dust jacket around it and pressed it, so it'd keep it's shape. And now the book is done. The paper of it smudges very easily. A little bit of dust on it and it won't come off. That's a bit disappointing. (Now a year later, it also isn't lightfast whatsoever. It stood in a dark corner of my bookshelf nowhere near the sun and the spine turned yellow. I guess I now know why covers have protective coatings on them. Which I didn't have the option for.)
Translation:
FINAL final product
Reflection
This project was the most fun thing I did at this school. I've always wanted to do this and it's awesome I can now hold my own book in my hands. The binding was fun to learn, but also a challenge. Not everything went perfectly, like i said earlier. But now I've can learn from those mistakes. I'm quite impressed with myself that I managed to do this in this time. I wasn't sure I could do it. But i did dedicate every moment of free time I had to this.
(I did all of this in 5 weeks. All the teachers doubted me, that it was too much work, and just told me good luck. And I said "Watch me." Autistic hyperfocus activated.)
(The second paragraph isn't important, just a short description of the last discussion I'd had with my teacher about this.)

Awful picture, sorry.
This is the final presentation I had at school for this, and this is where it stops for the school projects side of this. But it continues.
After this, I didn't touch it for a few months. Then I let a friend read it (digitally) and processed her feedback into the book afterwards. Then I published it on Amazon.

This won't be the last time I do this. The whole process is really fun and fulfilling. And owning a real, published book that I wrote, illustrated and designed is awesome.
In case you're interested, click here to buy it.
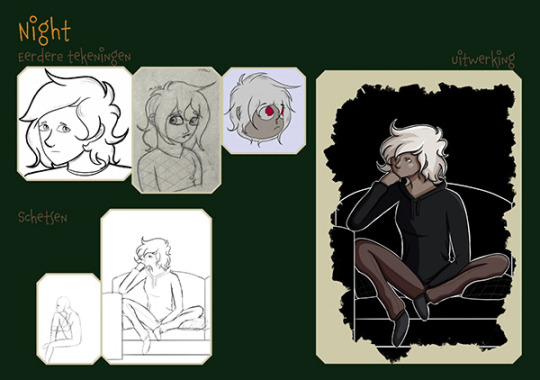
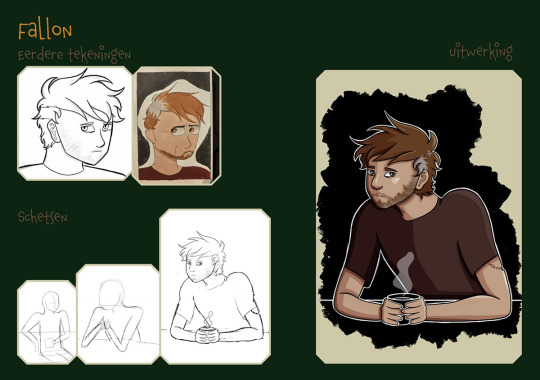
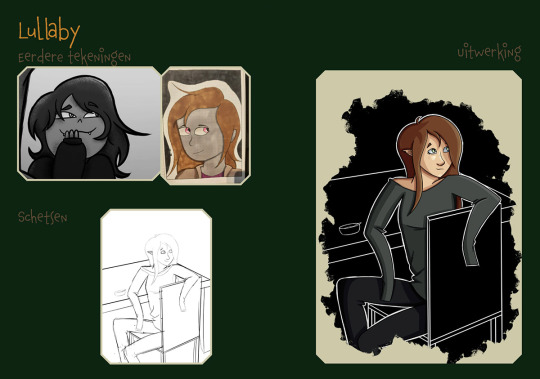
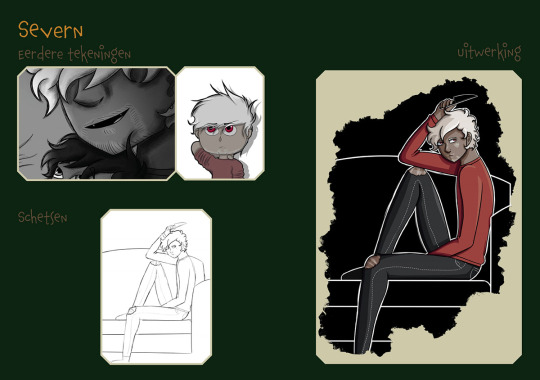
#art#digital art#my art#artists on tumblr#small artist#illustration#art school#book illustration#oc#my ocs#original character#vampire#werewolf#werewolf x vampire#book cover#queer romance#romantic fantasy#book binding#mlm fiction#small writer#whiskers art#aw please love#oc: too many#aw: 2023
13 notes
·
View notes
Text
instagram
Last call to enter my ARC giveaway for SAINTS OF STORM AND SORROW my Filipino Epic Fantasy that's EMPIRE OF SAND X POPPY WAR. Just request Saints at your local library and head to my website to enter the giveaway
Only 60 people have entered so far! You have a really good chance to win! Please share so we can try to get to 100 entries before the giveaway closes 🙏🏽💜🙌🏽
#saints of storm and sorrow#writeblr#filipino author#readblr#bookblr#fantasy#romantic fantasy#queer fantasy#bipoc author#Instagram
14 notes
·
View notes
Text
Nanowrimo 2023 Wrap Up...
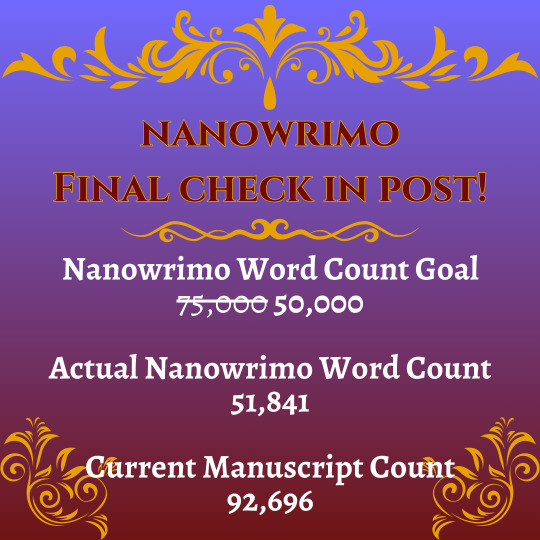
So, I didn't make my 75k or break any personal records, but I'm really not mad about that. I don't know why I thought November was the nano event to try that in, November nano's are almost always a disaster for me. In fact, this is only the second time I've ever hit 50k in November.
But hit it, I did! Final count at 1-minute-to-midnight on November 30th was 51,841 words, which has brought my Darkling Manuscript up to 92,696. That's almost doubled the words I've written throughout the rest of 2023 which is incredible, and I'm so happy.
It also means that it looks like I'm still on track to complete the manuscript by January, which was really my main goal. All in all, I'd call this Nanowrimo a resounding success.
If you're interested in some of my other statistics, I've got some more numbers beneath the cut...

Number of Sprints in November: 132 Sprints
Time Spent Writing in November: 43 hours, 45 minutes
Estimated Remaining: 20-25k words or 7-10 Chapters.
#Writeblr#Writeblr Community#Writing#Writing Community#Darkling#Fey Touched Trilogy#Nanowrimo#Nanowrimo 2023#Self Published Author#Writing Statistics#Nanowrio Wrap Up#vampire#fey#fae#fantasy#Portal Fantasy#Reverse Portal Fantasy#contemporary fantasy#found family#romantic fantasy
23 notes
·
View notes
Last Seen Blogs

thesefatalfantasies
faggy minnesotan.
aubreality
Aubreality
kii-w
kii weatherton

violetgauze
luke

nishinoya-is-baby
🌺Haikyuu (and Some Other) Tings🌺 (Not Active)