#diy buttons
Text
YOOOO! Battle Jacket is A WORK IN PROGRESS!
Today was supposed to be, like... a quick little addition. Maybe a cool patch, or some dental floss embroidery.
What happened:
-I spent 3 hours making whatever made me happy. It's a beautiful disaster.
-Jacket lining looks like a biblically accurate angel, but isn't affecting sensory issues somehow?
-19 buttons were affixed to the collar. Not buttons like pins, buttons like the weird, grandma-y kind. Love them.
-I made a hand-painted patch with one of my personal slogans on it ("DIY until u die" if you wanted to use it for yourself) and sewed it on the back, right in the spot of honor. It's a little small so there's plenty of room for more patches.
-I started working on a roseboy patch and made the O's roses. Might be regretting that. They're sewn on too loose.
-3 different pride flags are secretly painted on
-There's, like... a bloody eye?
-I'm realizing I have some spare caution tape in my room, wondering if I can sew through a layer of plastic for the vibe, and planning to stencil on that neat trans/biohazard symbol I can't remember the name of (I want to say transhazard or genderhazard but I could be wrong.)
-There's, like, gold costume lace on one of the pockets. That was not supposed to happen.
I started sewing on a bunch of bolts and stuff but realized I could save the space for my other patches in progress (some closeted queer stuff since I'm pretending to detransition to fool my parents, and of course, some classic band names and punk slogans.)
-Considered lacing yellow shoestring to the cuffs, as if my combat boots were not enough proof I'm not racist. (Yellow laces indicate you're not racist in the punk subculture for any mutuals who are like "Ellis are you mentally stable that does not make sense what is the connotation/connection/whatever")
-All in all, I'm loving this WIP. I can't wait to add my next patches ("racism is never punk," "biohazard, baby" "No gender? No problem", and several others that are still notebook doodles about positive nihilism and my favorite punk rock songs.)
#battle jacket#bp rambles#jacket#demin jacket#jacket customization#diy#wip#diy clothing#punk#punk rock#punk fashion#punk subculture#battle jacket wip#jacket wip#jean jacket#patches#pins#buttons#diy pins#diy buttons#diy patches#handmade#tagging like a feral beast#transgender#trans pride#trans punk#queer punk#in the closet#biohazard#hazard
31 notes
·
View notes
Text

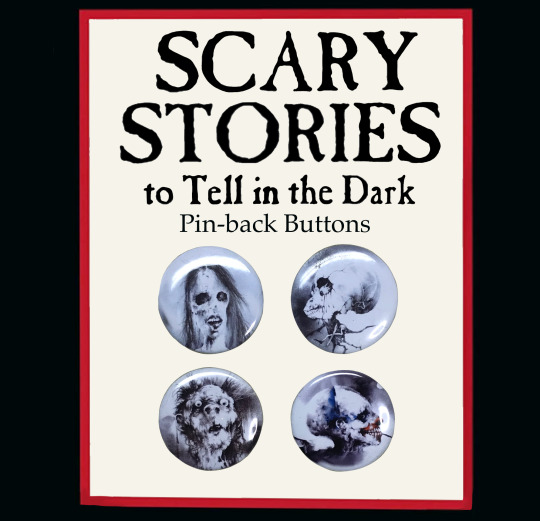
I relisted the Scary Stories pins with more options! Shipping combines correctly and can be sent anywhere in the world. Check it out here.
#scary stories to tell in the dark#scary stories#goth#gothic#goth diy#pins#buttons#diy buttons#goth fashion#punk fashion#animal bones
59 notes
·
View notes
Text
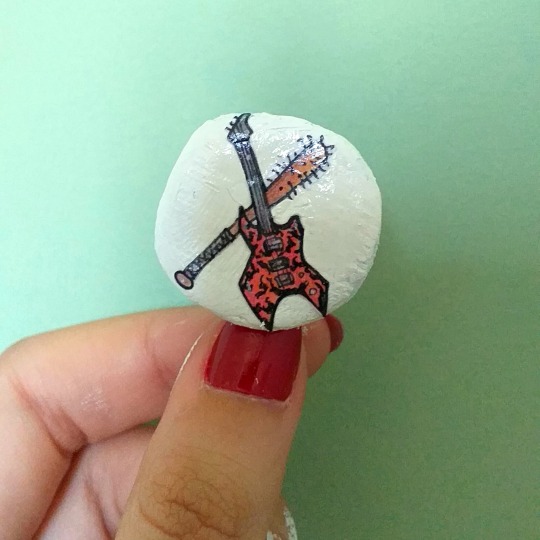
steddie button made out of a beer cap I made back in December :)
#gonna start posting these on here too#I'm not 'traditionally' drawing much but I'm making a lot of these !#steddie#stranger things#eddie munson#my art#buttons#diy buttons#steve harrington
13 notes
·
View notes
Text
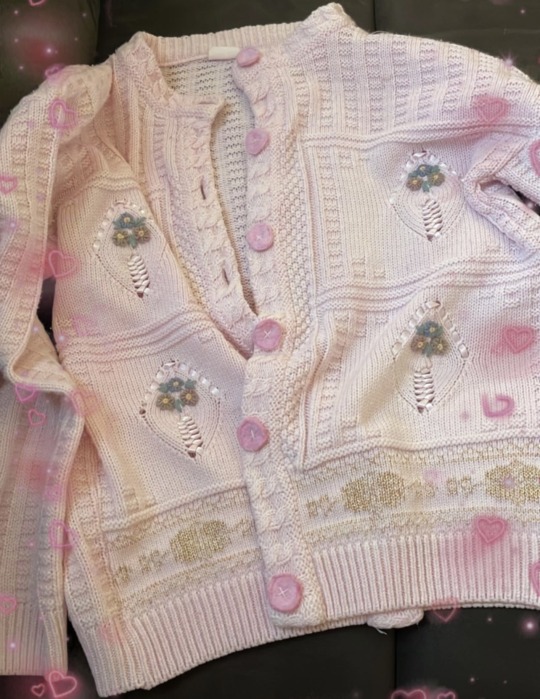
I made some decorative felt buttons to replace some on this cardigan but then I realized there’s like no felt button tutorials anywhere like this….. they’re more decorative than functional although they do work technically. Here’s a short tutorial
Materials:
-felt
-paint (acrylic or fabric) for dyeing felt (optional)
-scissors
-sewing machine (by hand could word too but not as sturdy)
-button of the size needed
Directions:
1. Trace a button size you would like leaving seam allowance, or just approximate the same size and cut out double the number buttons you need
2. Sew the circles together and leave a space enough to turn it inside out, once sewn turn inside out completely (something pointy or a button stuffed in will get it open all the way open)
3. Sew the buttons closed on the small open space, doing your best to maintain the circular shape, if they’re a little messed up it’s ok (if you want to do a satin stitch around the edge of the circle that can also make it look nice but it was a lot of work and I didn’t love the result personally, the bottom button has it)
4. Hot water can make felt more malleable and give it that soft filter wool kinda look so at this point you can dye them (or not) and agitate them in the hot water a bit; I have a dye tutorial although tbh I just soaked them in hot water with a bit of diluted well mixed paint and that does the trick without setting it, they’ll fade over time but I like pastels so it’s fine
5. Dry the felt off and rinse any excess paint off. Now grab a rough/textured material and rub the circles between the two layers, this will make them soft and fluffy and you can rub and shape them to be more puffy and circular; do this till you have your desired texture though too much can damage and thin out your felt
6. If you’d like you can see over the seam again to get that puffy edge look but u don’t have to. Your buttons should now be ready to be sewn on. I think you could stuff the buttons with material to make them thicker or less flimsy but I didn’t stuff mine because I don’t need them to be tooo functional :) more decorative although they do work just not as sturdy as a hard button.
Anyway just thought I’d share this as I don’t see any felt button tutorials anywhere
11 notes
·
View notes
Text


some of my newer bottle cap buttons!!! (please ignore the horrendous mess in the backgrounds)
the piss and vinegar ones are for a friend and i and i’ve really wanted a frank iero pin for a while
0 notes
Text
youtuber/tiktoker/whatever-type-of-video-influencer marinette, where she makes crazy DIY and craft videos and debunks fake content-farm DIYs. she has a modest but loyal mass of followers that grow by the day as her crafts get increasingly intricate and cool. she catalogues all of her mistakes and is very earnest about the process. adrien falls asleep to videos of her sewing and making cool containers and explaining the mechanisms of the strange devices she makes
#lots of fashion and sewing of course but other crafts as well#i think a lot about how marinette made that box that she keeps the miraculous box in#the giant sewing box with a secret drawer that can only be accessed through by inputting a code into hidden buttons#like. that's a whole ass device w mechanisms and everything. girl is an all around DIY queen
5K notes
·
View notes
Text
Buttons!! I found all these in a button bag at the thrift store for like 3 bucks. They're perfect for some solarpunk clothing projects I wanna do
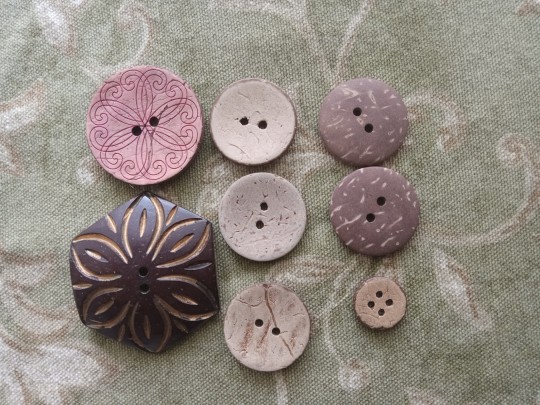
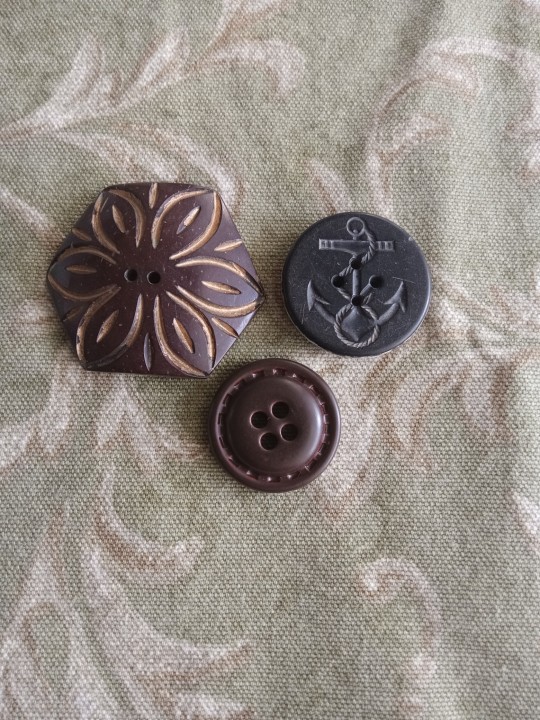
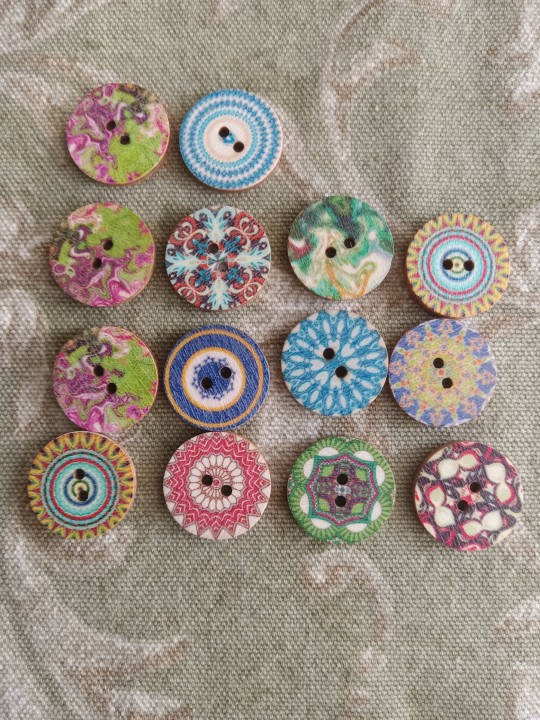


They're mostly wood, coconut shell and metal, and a few plastic ones and they're all so beautiful. I wanted to post them just cause I like sharing my treasures and shinies <3
[Image ID: The first image is of 8 coconut shell buttons, a large hexagon shaped one with a flower design carved into the darker side, and a large circular one with curvy lines carved into the lighter side. The rest are smaller circular buttons with no designs. One side of each button is dark brown and the other side is light brown. All buttons in this image are two-hole buttons.
The 2nd image is of three buttons. The large hexagon one from the first image, and two large plastic buttons, a little bigger than a quarter. One black button with an anchor and some rope carved into it and a simple dark brown one with a stitched design on the outer rim of the button. Both plastic buttons are four-hole buttons
The 3rd image is of 14 wooden two-hole buttons, all the same size (size of a penny). They are a variety of rainbow colors and patterns, some with psychedelic designs. Some of them have the same design
The 4th image contains four large wooden two-hole buttons with the same size and design. There are cherry blossom branch designs burned into the wood.
The 5th image has two rectangular wooden shank buttons (shank buttons have no holes, they have a plastic, metal or wood loop on the back). One is green with peas on the front and the other is red with an eggplant, both are designed like packets of seeds. Almost an inch tall and half an inch wide
The 6th image is a variety of metal shank buttons in various sizes. A set of two large aged brass colored ones with an intricate sun design, a small brass one with a different intricate sun design, a large aged silver one with wildflowers and a butterfly on it, a small brass one with simple leaf designs on it, a small copper colored button with a tree of life, a shiny silver one with intricate geometric designs (hard to describe) and a set of two small hexagon shaped silver buttons with a smaller hexagon in the middle and black swirly lines outside of the smaller hexagon (my favorite ones)
The final image is of a variety of simple smaller buttons. A simple green resin four-hole one with subtle swirls, a few different flat metal buttons woth no designs, two two-hole buttons that have a silver middle and a clear resin rim, a large two-hole copper colored button made of shell, a small brown plastic button with a single 3D leaf design on the front and a blue wooden star shaped button with two holes. End of ID]
I really hope this image ID is sufficient please let me know in the comments or reblogs if there's anything I should edit or fix 💚
#solarpunk#solarpunk fashion#solarpunk aesthetic#solarpunk diy#sewing#buttons#mending#diy#ecopunk#hopepunk
191 notes
·
View notes
Text

My partner and I made some button designs, feel free to print these and use them to show you support for the Palestinian people ❤️🖤🤍💚🍉🇵🇸
I also attended some links where you can donate to help out:
#free palestine#stop the genocide#palestine#ceasfire now#ceasefire#pins#buttons#diy#gaza#free gaza#israël
133 notes
·
View notes
Text
How To Make Medieval Fabric Buttons
You will need:
• fabric (I’m using a medium weight wool)
• a sewing needle
• cotton or silk thread (it MUST be strong)
• a thimble
• dressmakers pins
Using this style of button as a fastening technique was very prevalent in 14th century Europe, on both men’s and women’s clothing. It was used for anything from sleeves and openings on the front of garments, to the iconic liripipe hoods (which is what these are gonna be for!).
They were usually made out of leftover fabric from the same material that was used for the garment they were intended for. As well as using every scrap of material possible, they also save you from having to buy metal buttons, which… aren’t cheap (both now and then).
The trade off is of course having to make them, which can be a painful process (literally - try not to get stabbed by the hedgehog ball at step 4!!). I thoroughly recommend a thimble to push the needle through as you form the ball - this is hard enough without having to pull it through.
Making buttons in my experience is 10% knowledge, 60% spite, and 30% hatred. It is a contest of wills between you (who wants a button) and the fabric (who doesn’t want to be a button). I wish you luck soldier.

To start with, cut a circle out of your fabric. How big will depend on what fabric you use - if it’s linen, you’d cut a larger circle than you would for wool. Mine is about 30mm.
Using a long long thread, bind on and then sew running stitches around the outside, about 5mm from the edge (may vary with fabric).
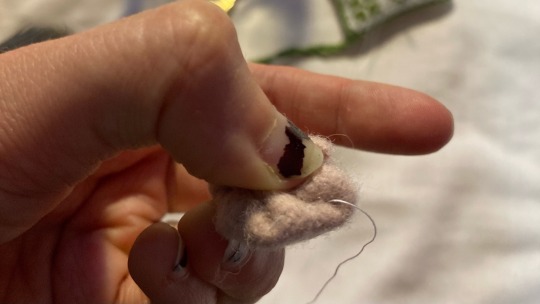
Pull this thread tight like a pouch, and turn the raw edges inwards in one direction. Try and tuck them inside the “bag” section. It will likely be more of a squashed oval at this point than a sphere.

Now, get your dressmakers pins and go absolutely ham. Continue to squish it “inward” (towards where the opening was) as you pin. The button should now resemble a very unfriendly little creature now (good luck with not getting stabbed, it can be a bit of a prick).
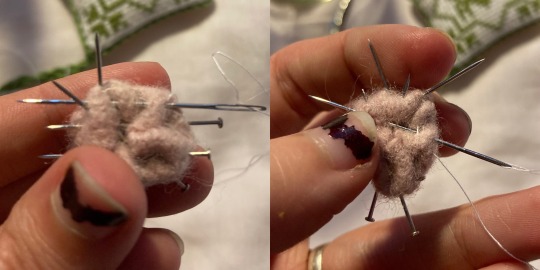
Next, basically use your needle to try and get it to stay in that shape. I usually do a bunch of stitches around the edge of the “back” end, and then spend some time criss-crossing the back. Try and put your needle in close to where it came out, so that you don’t get long pieces of visible thread.
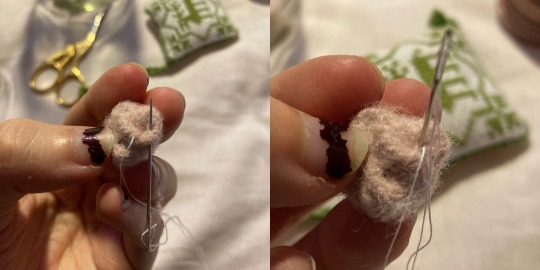
Once you are confident that it will hold A Shape ™ (but also isn’t so stabbed that you can’t refine it further!), remove the pins. Your button will most likely resemble a little tiny messy wool brain at this point, but that’s ok!
The next step is to use your needle and thread to continue tucking the ball inwards to the centre of where the opening was. Above illustrates how I’ll flip the open part of a fold inward, by coming up through the fold and then levering it downwards so it gets tucked away. You can also just use the thread to pull errant folds inwards. Use the hand holding the button to squash it into form, and then sew it into place.
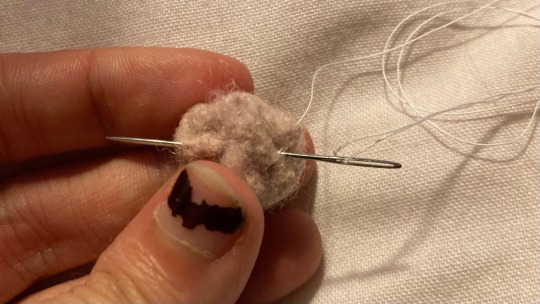
Once the button is actually a ball shape, crisscross the back of it a bit so that everything is firmly held in place. It should now (all things going well!!) actually be a sphere.

Once you’re happy with the shape and firmness, take your thread to stem out of the centre back. Bind off, and then slide the needle off the thread, leaving the long end. This can then be used to sew the button onto the garment.
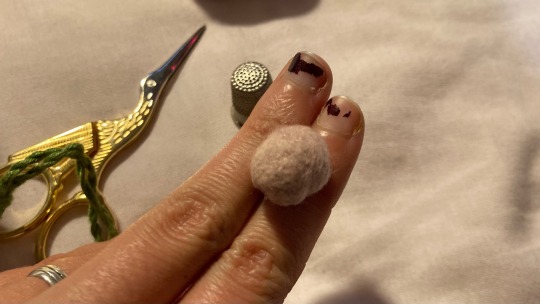
The back will still be somewhat messy, but the front should be smooth, and the whole shape roughly spherical. When the button is sewn on using the remainder of the thread, you won’t be able to see the back!
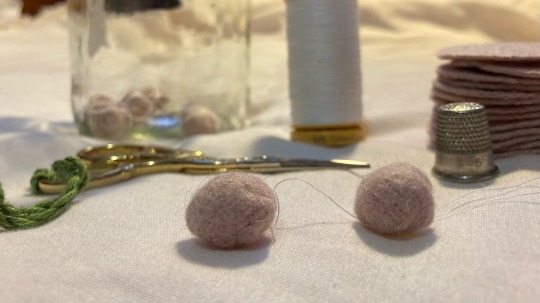
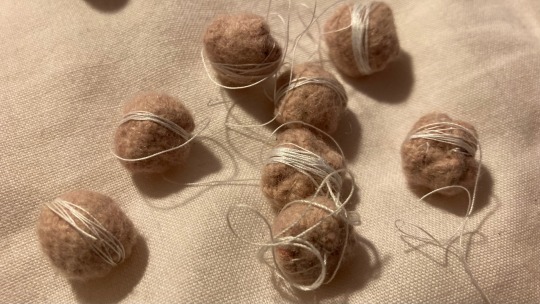
I wrap the remainder of the thread around the finished button so it won’t get tangled, and then pop it in a jar with the rest while it waits to be sewn onto the garment.
Good luck with your crafting! Feel free to ask any questions in the notes, or straight into my inbox :)
#sewing#tutorial#medieval#medieval reenactment#medieval clothing#medieval costume#historical fashion#historical costuming#medievalcore#14th century#buttons#crafting#diy#i’ll be on my merry way now#I have…… sO many of these to do#truly pain torture and misery hours over here
520 notes
·
View notes
Text
Fellow collectors and potential collectors, find a lot of bottle caps and can tabs? Love pins? Want to DIY? Make bottle cap pins!
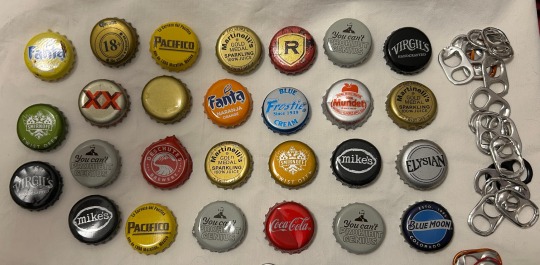

Here’s my collection of caps and tabs that I have and that eventually I’ll hopefully turn into pins like these quick ones I’ve made:

I’m definitely not an artist or super good with paint and handwriting but I think they turned out amazing and it was very rewarding for not much work.
Here’s the video I used to learn how to make them!
195 notes
·
View notes
Text
A classic: the werewolf you’re head over heels for strings you along for half your life, and you’re dumb enough to still follow him. To be his doggy if you will
#I hope I gave enough time with each page.. the pause button is always there I suppose#I’m going to be scanning this and the two issues before it so I can post them and make copies!#and so that it’ll be prettier to look at..rather than a video lol. ^__^#I’m really happy with this one. the last page has a different feel than the two previous but I’m still so fond of it#:) so happy#zines#diy zine#howling.txt#my art#um this is about atlas and scotch’s relationship. atlas is kind of really sucky to him but scotch genuinely lets it all happen#he’s soooo desperate for crumbs unfortunately
138 notes
·
View notes
Text
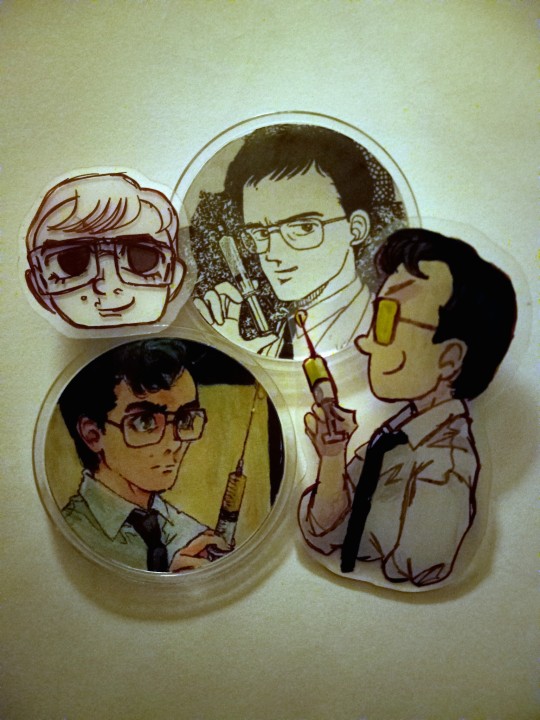
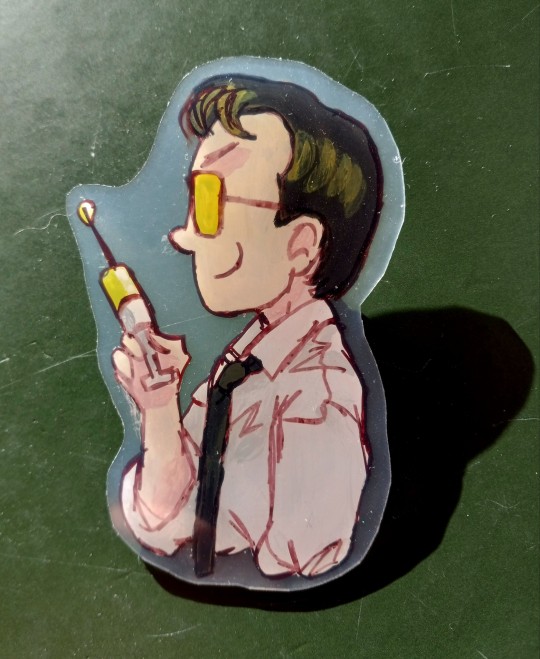


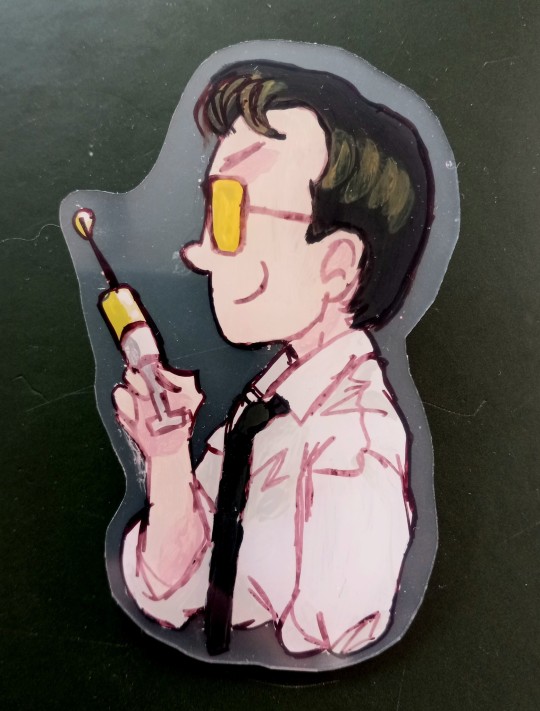
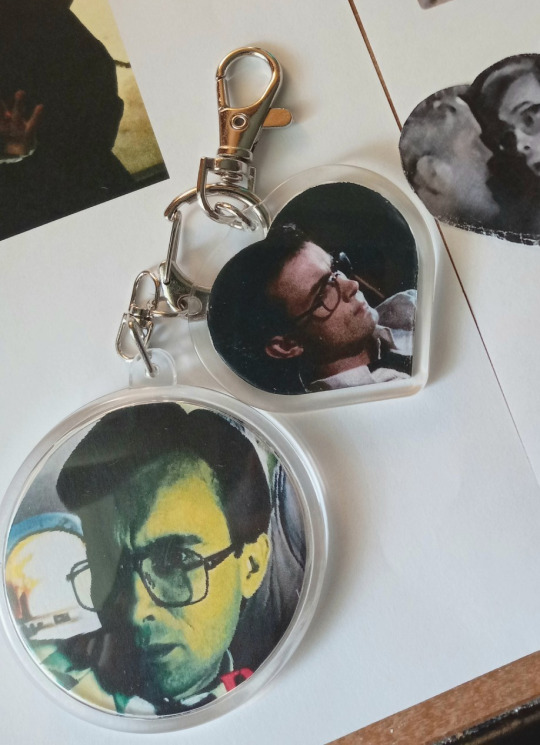
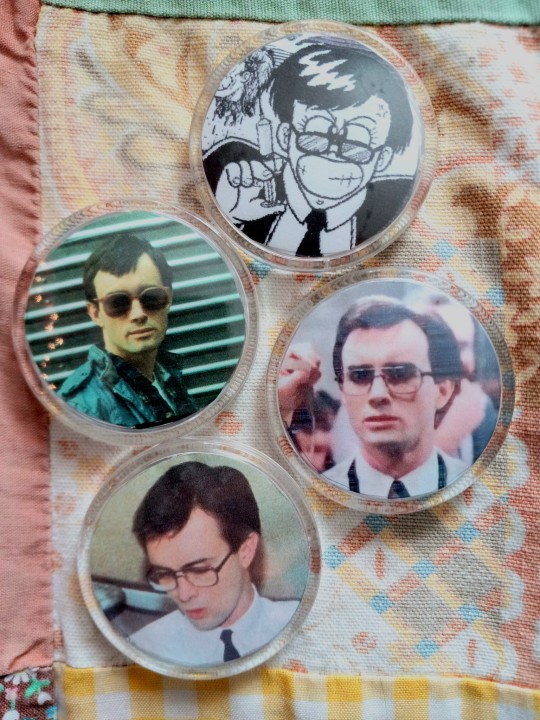
hand made re-ani merch!!
#mine#fanart#herbert west#reanimator#pins#buttons#charms#for my ita bag#diy#shrinky dinks#when there aint a lot of merch u know what to do#itabag#work in progress#jeffrey combs
77 notes
·
View notes
Text
Well golly I've actually listed something on Etsy! More pin-back buttons coming soon.
22 notes
·
View notes
Text
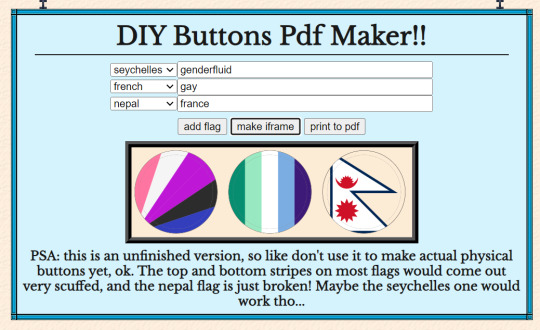
i made an upgrade to my flagmaker so it can be used to make templates for those DIY button making presses. it's hardcoded to use 50mm for now, but i want to add more options in the future. also need to fix the flags getting cut off my those circular margins
145 notes
·
View notes
Text

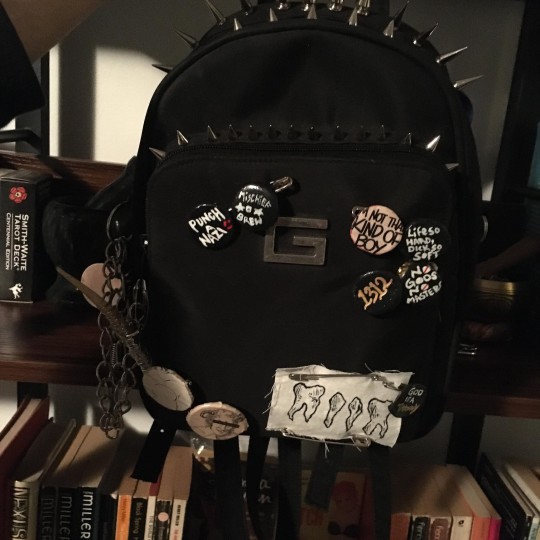
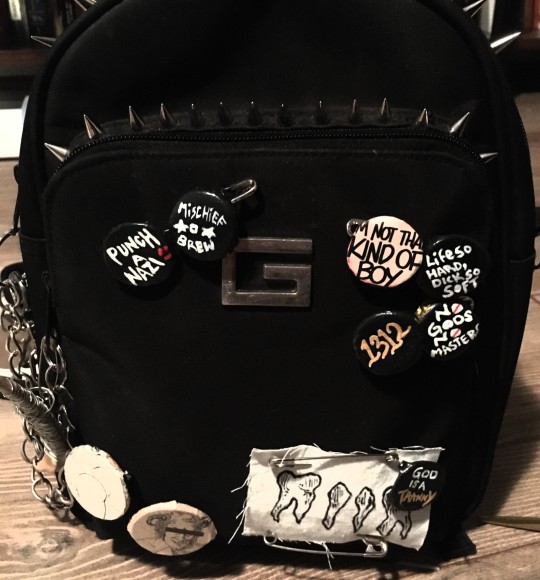

Projects of the day 🥳 ❤🌻
Buttons and pins, lil cheeky teeth patch and new journal I've patched over!
First buttons I've made so super happy how they turned out, currently hunting down more bottle caps for now!
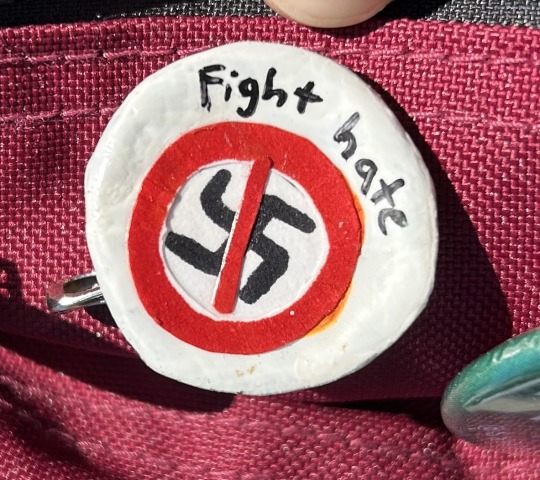
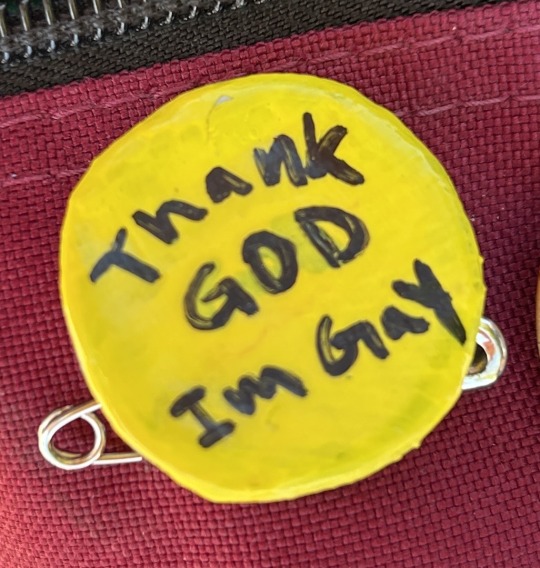
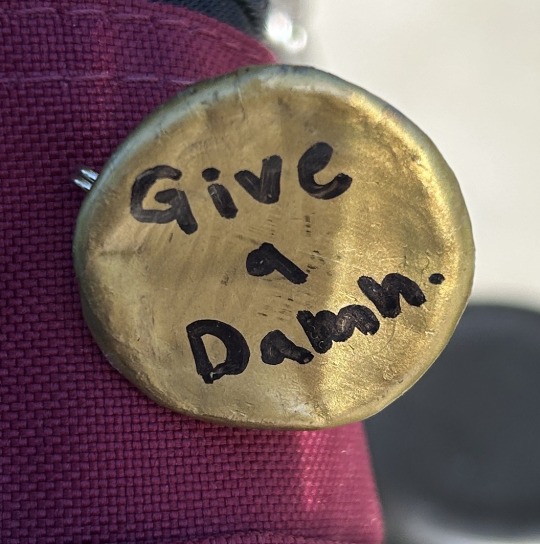
Buttons - 1312, punch a nazi, T4T, occupy empty property, mischiefbrew, no gods no masters, god is a tranny, im not that kind of boy, life so hard dick so soft, cheeky lil booty (cut out from a old gay magazine) , lil devil man (cut out from a old gay magazine)
Will post photos of the new patches ive made as well! ❤❤
#diy punk#punk#punk diy#diy#punk buttons#punk pins#folkpunk#diy fashion#punk bag#craft update#give me bottle caps please
306 notes
·
View notes
Text
Mom and Dad! Do a little dance!!
I made these little silly puppets to give to Chili and Bandit’s voice actors since they were guesting at a local convention. I was able to hand them off and they were the sweetest people ever!
After making these puppets I’m dying to make more silly little guys!
#Bluey#bluey fanart#bluey heeler#needle felted#needle felting#felted wool#my art#fiber crafts#puppet#handmade puppet#puppets#the silly#buttons#puppetry#chili heeler#bandit heeler#bluey art#felted#crafts#diy craft#diy#easy crafts
59 notes
·
View notes
Last Seen Blogs

dajethy
Dajethy DothStyle

imaugediesterne
Entgrenzung

the-red-horse-girls
Girls
imaugediesterne
Entgrenzung
imaugediesterne
Entgrenzung