warstorn
it's not the song
it is the singing | ali, creator
166 posts
Last active 4 hours ago
Don't wanna be here? Send us removal request.
Last Seen Blogs

pardemus
Sans titre

undyingraptor
UndyingRaptor
soulsongofearth
Transformers Transformation
skarabrae-stone
Awen

ygbaes
VIP
Photo

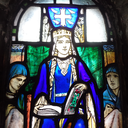
✧ UNSPLASH COLLECTION 075 — BY EVANSYHELP.
In this Unsplash photo collection, you’ll find ( 412 ) photographs of artwork (both historical and modern, in a variety of styles) that are suitable for graphic design and free for both personal and commercial use. Please like or reblog this post if you find this helpful, and remember to like any photos you use!
WARNING: scopophobia, religion, open water, storms, unreality, body horror, food, smoking, various animals (notably birds, snakes, octopi, bears, and horses, but also others).
✧✧✧ ( VIEW COLLECTION. )
406 notes
·
View notes
Text


h. okay 😭
1 note
·
View note
Photo

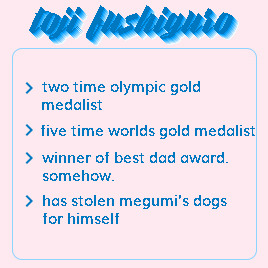

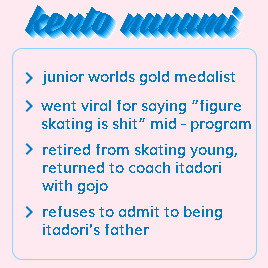


Kaisen on Ice!! | JJK AU
Satoru Gojo, Kento Nanami, and Toji Fushiguro round out the senior line-up!
Bonus character and credits under the cut:

This AU is @the-patchwork-system’s brain-child, I’m just here lmao
#jujutsu kaisen#jjkedit#manga coloring#dailyanime#gojo satoru#nanami kento#toji fushiguro#geto suguru#all i do is make content for my friends and cry#my edit
146 notes
·
View notes
Photo


Bakugo Katsuki, Ultra Academy Hero Student
1/?
#mha#mhaedit#bnha#bnhaedit#bakugou katsuki#my edit#manga coloring#bro this took years off my life please like it#mha students
164 notes
·
View notes
Text


jjkafe | designed as a fix-it universe
— come get your orders!
credits: [panel one photo] [icons] [jjk icons: x, x, x]
5K notes
·
View notes
Note
This is so pretty! how did you make that effect on the left part of the first gif? The stutter effect if you can call it that. It's really cool! /post/650713236450181120/there-was-no-part-of-him-that-was-not-broken-that
Hi! Thank you so much!
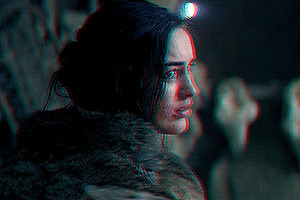
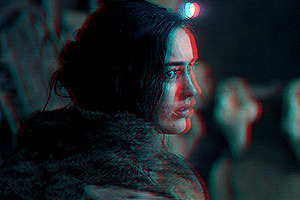
It’s relatively easy, but I haven’t seen any tutorials that don’t overcomplicate it, so I will show how you can go from this
to this

or this

You’ll need an already edited/colored gif and any version of Photoshop that supports the timeline animation (mine is in Hungarian but I’ll make sure to translate everything and show where all the options are that I’m speaking about and put the shortcuts in brackets)
So first you open your gif that you want to put the glitch effect on, and convert it into timeline animation (as shown below), then select all the layers, right click on them and select ‘convert to smart object’

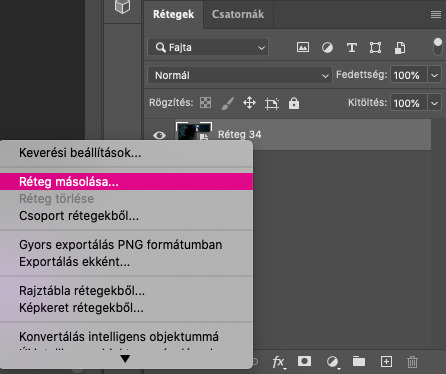
next, you will right click on the smart object that you’re left with and choose duplicate layer
on your duplicate layer you will right click and choose the uppermost option which is blending options. the only thing we will change here is in the advanced blending, you will untick G and B so only the R is ticked off in Channels then press OK

now using the arrows on your keyboard you will move the duplicate layer and you can see that you have a red outline of your image (if you want it to be more subtle only move it one or two pixels per layer)
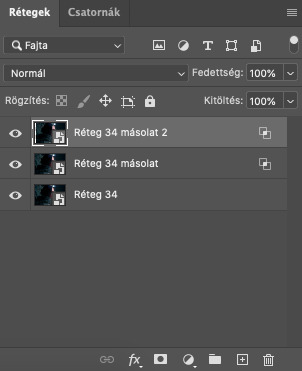
now we will duplicate the duplicate layer (i usually have 2 or three duplicate layers, depends on how much you want your image to ‘shift’) we will be using 2 duplicate layers in this tutorial for simplicity so it should look something like this:
once again using the keyboard arrows we will move the new duplicate layer (in my case i used the right ones because that’s where we have free space besides the face) so now your image should look like this:
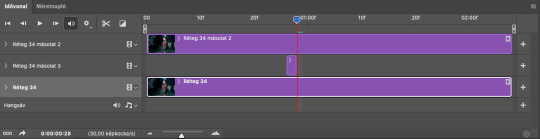
now we are going to create the gif part which is probably the most tedious, but still easy part. on the timeline you will use that red line and pull it to the part where you want the glitch to start at, make sure your first duplicate layer is selected and used that scissor icon to cut the layer:
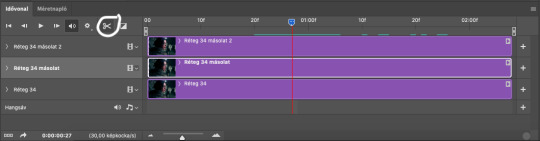
and it will look like this:
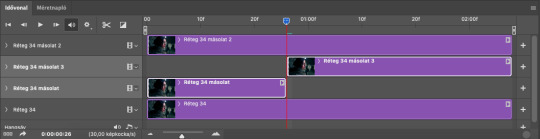
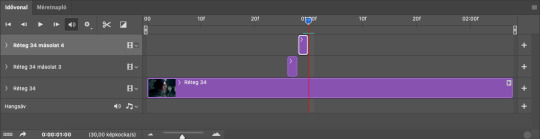
now you will pull that red line forward and use the scissor again (i usually leave like 2 frames, watch your gif while you pull and you can see it move. you want 1-2 frames only for this part because otherwise it will be very slow moving and won’t have that glitch effect)
now we will delete the beginning and ending portion that we cut off so we’re only left with the short one in the middle:
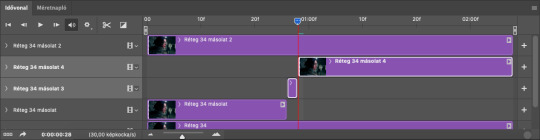
now you will select your top layer which is your second duplicate layer and cut that layer as well (if you didn’t move your red line after the second time we cut the previous layer than it’s in the perfect position so you don’t have to do anything with it)
after you cut the beginning you will pull the red line forward once again, the same amount that you did on your first duplicate layer, cut again and delete the beginning and ending parts, leaving only the short in the middle.
all you have left to do now is save your gif using File > export > save for web ... and your gif is complete:
if you want it to be longer, or want it to have more than 2 glitching layers, you only need more duplicate layers and just repeat the same steps
OPTIONAL PART
now, if you want it to only be on a selected part of the gif all you need to do is select the part you want glitching on your duplicate layer, using the marquee selection tool (M) and add a layer mask
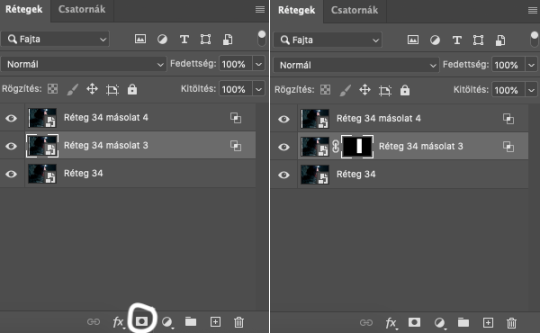
now only that small part is visible from your duplicate layer that you selected. to make sure all of them are visible in the same section right click on your mask and choose add layer mask to selection:

and now you go to your next duplicate layer and add a layer mask to that as well. repeat it as many times as you have duplicate layers, and you’re all done :)

If you have any questions left don’t hesitate to message me so I can help :)
please reblog if you found this useful so it can reach others as well :)
116 notes
·
View notes
Photo


WandaVision (1.08) || Supernatural (15.18)
Ambiguous loss is a loss that occurs without closure or clear understanding. This kind of loss leaves a person searching for answers, and thus complicates and delays the process of grieving, and often results in unresolved grief.
@the-patchwork-system | @still-dean-winchester
#my gifs#marvel#spn#mcuedit#spnedit#wandavision#wandavision spoilers#destiel#destieledit#spn s15#mcu spn parallels
51 notes
·
View notes
Photo


psd#316 - download link in the source
it will not work on every gif/picture!
do not reupload, do not use to create new colorings and do not claim as your own.
reblog if using. that motivates to share them :)
105 notes
·
View notes
Photo

Boku No Hero Academia | The Long and Short Of It
Sometimes,
you get so close to someone
you end up on the other side of them
4 notes
·
View notes


Photo

Boku No Hero Academia | Litany in Which Certain Things Are Crossed Out
Okay, so I'm the dragon.
Big deal.
You still get to be the hero.
10 notes
·
View notes
Photo


war against the world
Black Sails (2014-2017)
3 notes
·
View notes
Text
large file marvel movies dl links
saving these links for later ref because my bookmarks tab has a million pages already:
iron man / [MEGA] / [google drive] / [torrent]
the incredible hulk / [MEGA] / [google drive] / [torrent]
iron man 2 / [MEGA] / [google drive] / [torrent]
thor [MEGA] / [google drive] / [torrent]
captain america: the first avenger / [MEGA] / [google drive] / [torrent]
the avengers / [MEGA] / [google drive] / [torrent]
iron man 3 / [MEGA] / [google drive] / [torrent]
thor: the dark world [MEGA] / [google drive] / [torrent]
captain america: the winter soldier / [MEGA] / [google drive] / [torrent]
guardians of the galaxy / [MEGA] / [google drive] / [torrent]
avengers: age of ultron / [MEGA] / [google drive] / [torrent]
ant-man / [MEGA] / [google drive] / [torrent]
captain america: civil war / [MEGA] / [google drive] / [torrent]
doctor strange / [MEGA] / [google drive] / [torrent]
guardians of the galaxy vol. 2 / [MEGA] / [google drive] / [torrent]
spider-man: homecoming [MEGA] / [google drive] / [torrent]
thor: ragnarok [MEGA] / [google drive] / [torrent]
black panther / [MEGA] / [google drive] / [torrent]
avengers: infinity war / [MEGA] / [google drive] / [torrent]
ant-man and the wasp / [MEGA] / [google drive] / [torrent]
captain marvel / [MEGA] [google drive] / [torrent]
avengers: endgame / [MEGA] [google drive] / [torrent]
spider-man: far from home [MEGA] / [google drive] / [torrent]
into the spider-verse / [MEGA] / [google drive] / [torrent]
944 notes
·
View notes
Text
How to color scenes with POC in them
tutorial by itsphotoshop
please, like/reblog if it was useful
two psds inside
Hello guys! I received a complaint about how some colorings whitewash (especially the pastel trend) a while ago, plus many times I’ve been asked for specific colorings for POC, so here we go. Also, here is a POC-friendly PSDs masterpost.
I’m basically stating which types of coloring to avoid and what settings to use, mostly in Selective Color.
(more examples inside.)
Keep reading
2K notes
·
View notes
Photo

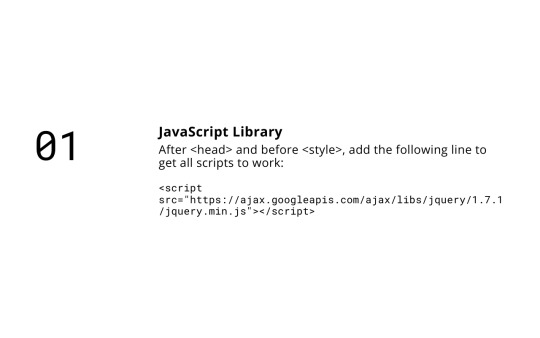


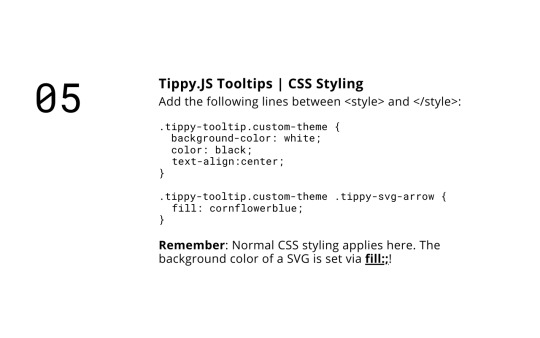

Tutorial: Tippy.JS Tooltips
A tutorial on how to implement Tippy.JS tooltips into your themes and pages.
The written tutorial starts after the cut, since there is a lot of text, and I don’t want to clog your dashboards! I hope you will find this tutorial somewhat helpful.
Keep reading
344 notes
·
View notes