#so I hope they have a lot of watercolor stuff because the local store is also a little deficient in that department
Text
There's a brand new Jerry's Artarama here and I'm going today :^)
#there's a local art store here that's great but it's kind of hard to get to and the watercolor selection isn't the best#and then they have art supplies at michaels and stuff but it's so picked over#so I hope they have a lot of watercolor stuff because the local store is also a little deficient in that department#wait I said that twice
2 notes
·
View notes
Text
Jevijoe in Tbilisi, Day 27
It is my last day in Tbilisi, and I miss the city already.
I was packing up my things for New York, and I could not believe that I accumulated so much stuff that it wouldn't fit in my luggage.
I have to buy an additional luggage bag and also some souvenirs and gifts for New York friends, colleagues, and coworkers. But before I did my itinerary, I prepared a brunch for my last stay in this beautiful and historic apartment, just a noodle soup left over and wine while viewing the window, my last stare at the street of Tbilisi from this perfect balcony spot.
I'm filled with gratitude to the people whom I have met here, especially Mariam, who is a wonderful fellowship coordinator here and also an accomplished artist who represented Georgia in the Venice Biennale in 2022!
I thought of a last-minute farewell dinner later this evening, so I messaged most of the people I met through Whatsapp, hoping they could come over.
I rushed outside to buy the cheapest luggage bag. Then I went to the flea market to buy souvenir gifts and ended up being obsessed with coin and money paper bill collections. I found an old $2 US dollar bill that is so rare in the US, as well as commemorative Olympic coins and silver spoons. I was beginning to wonder why I was buying stuff for myself and not for my friends in New York.
During my flea market buying spree, I was impressed by a woman artist's humility and kindness in selling her small paintings of Tbilisi scenes for 5 lari (that is 1.85 US dollars!). Made of watercolor on linen canvas cloth, I bought several paintings signed by her. I dropped by the local grocery store for souvenir goods and bought variety of Churchkelas, a traditional Georgian candy that looks like candles.
In the evening, I had an incredible dinner night with the Georgian folks, and we talked about a lot of crazy stuff about Georgian history, etc. I recall Nika asking me, "So tell us about your experience in Georgia; we already knew the good ones, but tell us the bad ones." Honestly, I could not think of "bad ones" or a bad experience at all. It's one of the cities I visited where I felt safe even in the "after-party" early morning hours. I was searched by police twice, but it was a random routine and respectful.
My Qvevri that I made during the pottery class was delivered that night by Anna, our pottery teacher. It took a while to process the firing, the glazing, etc. because I told her days ago that I really wanted to bring the earthenware to New York.
5 a.m. is my flight the next day, so I have to return the key to the apartment to the Airbnb owner. I met Vahtang, the Airbnb owner's father, and handed him the key, and I told him, If I'm going back to Tbilisi in the near future, I really want to stay in the same place!
My one-month stay here in Tbilisi has taught me a valuable lesson: Just be present.
1 note
·
View note
Note
You're equally a witch and an artist, I love art too! Like same here! Do you incorporate art and crafty things in your witchcraft? Obviously, I can see sigils being easily used, but what about other forms of art like watercolors, pottery for offering bowls, or maybe even candle making?
I bring candle making in because I like it both for being undercover witchy, but also because it's fun.
Anyways sorry I kinda derailed, I got excited what about you?
I do a LOT of art, and I often mix it in with my craft. You already know I do a lot of enchanting, and I like to make my own jewelry and trinkets to enchant. Woodworking is something I really enjoy, especially carving spoons and pendants. I want to carve more figurines, but it’s just something I haven’t played much with yet.
I’ve also make pendants and charms out of polymer clay, like sculpy and femo. I could totally see offering bowls made like that. That could be really fun.
I’ve done some watercolor art, and I’m learning more about making my own pigments and inks right now, so I can play with calligraphy too. I’m sure that’ll get incorporated into my craft.
I have made my own candles. I got lucky and scored a giant slab of polymer wax from a craft store clearance a while back and have a thrift store set of pots specifically for candle making. I never got super good at it, but I’ve made a few candles from both molds and dipping. It’s pretty relaxing. I really want to try to make the carved candles that have many layers of different color wax.
I’ve also done some blacksmithing to make some witchcraft tools. 2020 was hard to do anything smithing because the place I get metal closed themselves to the public, and we had a super harsh winter, so forging in the snow wasn’t really possible. But I want to make more wands/rods, various ritual knives, and some more small things like warding nails, pendants, little odds and ends. I was going to sell stuff like that at the local ren faire, but it’s been canceled since the whole pandemic, and this year looks like it probably won’t be open either.
I’ve also been dabbling in making spirit traps lately, or more spirit homes. Basically the concept is similar to making a ship in a bottle, but it’s like a home for spirits in a bottle, jar, or box. You can make them either to house friendly spirits and leave it open for them to come and go as they please, or make them confusing dreamscapes to trap unwanted spirits. Making them takes a lot of bits of other art forms, like carving, painting, model making, and whatever else you want to put into it. I still kinda suck at it, but eventually I want to make something worth posting on here.
I’m sure I incorporate art in more parts of my craft, but I just kinda do a lot of it without thinking. I forget art is a distinguishable skill I call on all the time. It’s like someone asks you to help write them a sign and you do so in calligraphy and they go “Wow that's so artistic” and you go, “I guess so. I just wanted it to look cool” never really realizing you did something special. Like I said, it’s all just part of who I am, so it kinda melds together.
Anyhow, I hope you found that interesting, and I’d be happy to hear more ways you, or anyone else incorporates art into their craft. Or even ideas of stuff you’d like to try.
5 notes
·
View notes
Note
Hey Rox, random question. How can one learn to draw? I mean, I got the whole take a pencil and a paper and practice everyday but I mean, after doing that you understand proportions, light, perspective? Naturally? Just by practicing everyday?
Artists telling people just to practice art and not giving them any solid starting place is a bullshit cop-out and something I’ve probably said at some point, but I’m going to rectify it now by giving you a comprehensive guide to starting art.
Some people may disagree with me (and honestly I recommend asking other artists this same question to see what they say and what you yourself agree with), but I think no matter what kind of 2D art you want to make, you should start with traditional, realistic drawing or painting. The reason for this (aside from anecdotal evidence of it working for me) is that learning to draw things that occur in real life gives you a foundation for branching out into different styles or media down the line. Even if you want to draw cartoons or anime, learning realistic drawing will help you, because it will familiarize you with the complicated shapes that more cartoony drawings simplify or exaggerate. For example, if you learn to draw a realistic nose, then you can see different ways to turn that realistic shape into a simplified version of itself. Practicing realistic art can also help train your eye and get you accustomed to different techniques such as line quality, shading, color theory, composition, and various types of art materials, or media, as I will probably begin referring to it as.
So, the next step is to figure out how the hell to start learning to draw realistic stuff. I will help, using written descriptions, tips, and videos I have found online to help you.
First off is Materials/Media.
You can make art with practically anything. Anything from the humble paper and pencil to the most expensive and high-end art supplies. You can burn a piece of wood in a fire for a bit and then use the charred end to make marks with. You can use mud to paint with. You can dip your toe in ink and use that as a paintbrush. My point is that you can really get creative with it and I think creating art should be a joyful experience, not a painful one.
Art supplies can be very expensive, so for beginners I really do recommend a paper and pencil. Not a mechanical pencil either, but one of those wooden ones. They work well for drawing because you can use both the point and the side of the lead to make marks with. I also recommend getting a good eraser. My favorite kind are the grey kneadable ones, because you can squish them into any shape you need for any particular area that needs erasing. I’ll link to some on Amazon later on.
You can practice pencil drawings on lined paper (I have a whole lot of sketches I did in high school that are just on lined paper), printer paper, cardboard, etc, or you could invest in a sketchbook. Cheap sketchbooks are pretty easy to find, like they have them at my local grocery store, but you can also find them online for fairly cheap. Sketchbooks are made of different paper depending on the media (drawing materials) that you’re using. Paper intended for pencil drawings tends to have quite a fine grain for smooth blending, whereas paper in watercolor sketchbooks is rough and absorbent to suit the wet medium. You can get a sketchbook with any paper you want, really. I’ve done pencil drawings on pastel paper before, because it was the only paper around, and it still looked nice, just different than it would on finer grain paper. What materials you choose to use depends on the look you’re going for, and you’ll figure that out more with experience.
To start with, just grab some paper and a pencil and start making marks on it. See how many different looking marks you can make on the paper. I’m not really talking about shapes persay, but literal marks with the pencil. Thin lines, thick lines, scribbles with lots of pressure or just a little bit of pressure. Scrape the side of the pencil along the paper and see what it does. Try blending the lines with your finger. Just take some time to play with the material without getting hung up on creating anything. Do this sort of experimenting with any new art material you’re introduced to. The first thing you should do with a new tool is acquaint yourself with it, and that’s what this is doing. Get used to how the pencil feels in your hand and what motions feel comfortable with it. Keep in mind that you don’t have to hold the pencil the same way as if you were writing. Often if I’m shading with a pencil, I will hold it with all of my fingers around it and use my thumb to put pressure on it.
Now, shading.
Shading and mark making go together, because shading is basically using the marks you’re making with your pencil or pen to indicate lightness vs. darkness. To practice mark making and the techniques that are used for shading, I recommend watching this video and drawing along with the exercise. The artist uses pens in it but you can do it with pencil too!
When you’re ready, you can start trying to shade basic forms (shapes). Shading gives a two dimensional shape a three-dimensional look. It turns a flat circle into a sphere. Once you learn how to shade basic shapes, you can pretty much figure out how to shade just about anything. For example, once you learn how to shade a sphere, you know how to roughly shade a head! And what is an arm if not a cylinder? A nose if not a pyramid?
There are lots of videos online for practicing this. Here’s one that’s pretty good.
This is where I recommend starting. Once you are more comfortable with that, here is a list of things that you can look up and try to get a handle on, in what I think is a pretty alright order.
Perspective (one-point, two-point, three-point)
Value, Tint, Shade
Drawing negative space
Foreshortening
Composition
Drawing from life
Color theory
It would take me a very long time to outline all of this stuff, which is why I’ve given you that list of stuff to look for online. There are a lot of great resources out there and I recommend searching for them and comparing them. I can’t go into depth on everything right now because there’s a LOT of stuff, but I hope the little outline I gave you will help give you a foundation and know where to look and what to look for! If you have any questions about specific stuff, feel free to come and ask me about it and I’ll try to help.
Here are links to some cheap art materials on Amazon:
Grey kneadable eraser
Sketchbook for pencil
Pen set
There are lots of other listings for stuff like this online, so do check around for what you want! The ones I linked are just options.
I hope this helped! Thank you for the ask anon, and good luck!
#ask box#anon#art tips#art instruction#long post#beginning art#sorry i petered out at the end it's just i'm so fuckin hungry rn#i'm about to lose my mind i haven't eaten all day like an idiot#Anonymous
12 notes
·
View notes
Text
My Fashion Connection
I’ve been trying to pin down lately why I love fashion and fashion design. Because I don’t love clothes and designing clothes and the choosing of fabrics because of the glitz and glam of high end runway shows and the glossy pages of Vogue magazine and adulation of famous design houses. Most of that I didn’t even know about until I went to school. I didn’t choose fashion because of any of those things. I really wanted to go into Computer Game Design because of games like Myst.
Growing up in a very small town in the middle of the southern tier of New York, fashion wasn’t anything that anyone in our town was interested in except the town pageant queen who had a ‘reputation.’ It’s dairy country. My town was and is much more interested in dirt bikes, hunting and fishing and kegger beer parties. There were a couple of families that were more well to do and worked at Cornell or IBM and thus wore nicer clothes but out of a town of say 50 to 100 people, there were more cows and farmers and retirees. It’s the type of town when two of the young people marry each other, the entire town becomes related.
My mother is a home sewer. I hate the term sewer in professional capacity because it has the connotations of a house wife sitting at home making amateur garments. My mother made a lot of my sister’s clothes growing up and when she started sending me to Christian schools with dress codes, she also made clothes for me. (Mostly jumpers.) Eventually she either got tired of sewing or felt that we needed to buy things to keep up appearances and she stopped. (This ended up with us shopping in budget discount overrun boutique shops. Yes. A thing. Family Dollar and Dollar General didn’t exist yet! And mother hadn’t discovered the “joys” of the Salvation Army and second hand or they simply weren’t close enough to shop at.)
In a tiny town, you have to drive almost an hour in every direction to get to anything that remotely resembles a fabric shop. Except, between our tiny town and the city of Ithaca we got lucky, because out in a nowhere more nowhere than our nowhere was a tiny fabric shop run by a petite old woman named Leona.
To get to Leona’s shop, you took this very twisty road over and through the hills and turned right when you finally hit another ‘major’ road. And then off to the left less than a mile was a huge stand of pine trees and in the middle of these pines was a dirt drive. You’d drive up the hill between these tall pines the rocks in the dirt crunching under your tires that opened onto a clearing on top of a hill that held a farm. Leona ran her shop out of her home, a one story mixture of a red roofed, white trailer with an add on to make it an L shape. The barn hadn’t been kept up and the red stain was fading and the barn was falling apart. You parked on the edge of the drive, hoped it hadn’t rained lately and it wasn’t pure mud so you could get back out. (If you got stuck, there was always the local farmer with a tractor and chains to pull you out.) You had to park on the edge because despite the fact the farm wasn’t an active farm, she rented out the land and your cars needed to be out of the way for the tractors to get through.
She had the shop in the add on built on the back of the trailer. Firewood piled up next to the screen door and cats lounged everywhere. Leona liked hoarding things so the walkway had gnomes, garden statues and benches and wheelbarrows and yes, there was a tiny garden windmill in the middle of the circular drive. If it was winter, salt crunched under your boots and you had to walk carefully across the ice covered mud slush. If it was spring or summer, there were flowers peeping up among the grass.
And once you crossed the threshold, warmth, Leona smiling with her curly short white hair and the measuring tape around her neck behind the measuring counter. Bolts and bolts of colorful and textured fabrics lined the walls and the blank spaces of walls over tables were old fashioned wall paper in dark red with ducks or cream and pink rose prints and warm golden colored wood panels. Painted sawblades provided decoration. The clock might have been a novelty item, a cow or a cat or even something with shears for the hands. I can’t remember. (There might have been all three.) It smelled mostly of sawdust, dust and in the winter, the sharp smell of a burning fire from the potbelly stoves. Leona’s help were also middle aged or older ladies like her and they weren’t quite as friendly, but they were helpful.
Leona stocked her shop by going down to NYC and buying overruns from the warehouses. (Overruns are fabrics that designers don't end up using and fabrics manufacturers make too much of because they predict more sales than they make. Most fabric retail stores are stocked by overruns.) She mostly had colorful cotton prints and upholstery fabric. There was a little fashion fabric and by the time I hit high school, she had things like stretch velvet. She mostly sold to quilters and people like my mother. Cornell doesn’t have a fashion design program, only a science textiles program, but she’d occasionally get students. Her hours were irregular. I don’t know if she ever turned a profit. She encouraged touching the fabric. (Though she didn’t like children taking bolts out of the shelves for good reason.) She didn’t mind that I wandered about away from my mother. She always remembered me no matter how much time had passed.
But every time I go into a fabric shop, there is still that bit of magic from going to Leona’s. When I returned from college, I wanted to go and show Leona some of my projects. She died before I got the chance and I still regret that.
Professional shops like Mood, Britex, B&J’s and to an extent the discount fabric warehouse that I used during college in San Francisco make me shake my head because the workers don’t always feel helpful. They don’t make you feel like every customer is important. They aren’t like Leona, as frail as she was, with her sunny smiles and slightly raspy voice, glasses, and cheerful attitude and love of textiles.
I also had Barbie. I’ve talked about Barbie and my love of Barbie. I would play with Barbie rather than with baby dolls. (My baby dolls took lots of naps according to my mother.) And I loved the clothing packs. I loved dressing and undressing her and trying new outfits out of the outfits I had. Barbie was a safe present to buy for me when I was growing up, because a) that meant my group of Barbie’s got new clothes and b) if this Barbie had different color hair or skin then I got more variety in my Barbies. (My favorite was the long red headed mermaid with the teal outfit. This was back when the tail was a “Skirt” you could take on and off.) I had maybe one Ken and I inherited a lot of clothes from my older sister who grew out of Barbie about the time I started getting interested. Some of them were homemade but I couldn’t get my mother to make more and she wouldn’t teach me how to sew to make them myself. (In fact, she said it was too hard and downright discouraged it. Guess who doesn’t really like sewing? Me.)
Today, I love Monster High and Ever After High, but if they’d existed when I was a child, I wouldn’t have gotten them because of my parents’ extreme dislike of anything related to monsters, ghosts or Halloween. (I am a November child people. This is ridiculous. Come on, I share a birthday with Bram Stoker. OKAY.)
And somewhere in that time, (1992 apparently, man, I was younger than I thought) when I was getting a pittance of an allowance and had saved money from Christmas, I had enough money to buy a new Barbie or a Crayola Fashion Design stencil/tracing kit. This was before Project Runway. This was before the idea that these Fashion Drawing kits were thought to be remotely popular. No one thought that little girls might like drawing clothes! (Go figure.) The Easy Bake Oven was still the biggest and most innovative thing for a girl’s toy. But Crayola came out with a stencil kit with a bunch of papers that had design outlines, and pattern rubbing plates and a light box. Everything in the kit was meant to fit in the light box. The light box was plastic, pink and ran on D batteries (not included bummer.) And I had just enough money to buy it or a new Barbie. (I think my only other difficult choice that compares to this was the Star Craft Battle Chest and something else and I chose the Battle Chest.)

(I can't believe I found a picture of that, someone is selling one on ebay.) Because, I mean, a new Barbie would only give me one set of new clothes, with this fashion design kit I could draw clothes, lots and lots and lots of clothes. I had always been an artistic child. I liked drawing. This had never really been encouraged except in the “here, have another set of colored pencils, pastels, watercolors, no lessons included.” So, here was Barbie in paper form! I didn’t have to take the clothes on and off. I could just trace what they had on the sheets or try to come up with stuff myself.

Pages of my Fashion Design Kit Now
I’m not going to say I was very good at it. The point was, I had fun, this was something to do that didn’t involve playing a game on the computer or reading a book or practicing my piano and I hadn’t gotten into writing at this age. So, from using this stencil, I started with encouragement of one of my friends, to try and make it more real life proportion and draw the figures myself (once again without any sort of drawing classes. The art classes at my school were a joke.) I bought sketchbooks and took them to school with me. I started writing because of this same friend.
It was frankly an escape. My allowance never grew bigger. So, it went towards buying new books to read, sketchbooks and replenishing my Crayola colored pencils. (Though Imperial ones were better but I only got those out of the colored pencil color by number kits.) I didn’t buy fashion magazines. The idea of fashion as a career wasn’t on my radar. I didn’t have a career on my radar. College was one of those, “I’ll think about it later,” things.
The girls at my school who were cheerleaders and liked fashion weren’t precisely my friends and felt like complete foreigners and strangers to me. I didn’t ‘get’ them. We had our groups and we stuck to them. Having arrived to this school after the groups were formed, I fit nowhere and living so far away from everyone else, there was no way that I could feasibly see to hang out with them after school in order to get to know them well enough to fit into one of the groups at all.
Magazines were a luxury in our house. Vogue never made it into the house ever. It took until after 7th grade and a major fight that we even got the newspaper. So by the time I hit eleventh and twelfth grade and college was ‘mandatory’ and I had a list of requirements for what college I could go to, I had to look through what the colleges offered versus what I was interested in and thought I could be good at. (Let me say that writing wasn’t considered because my mother was very anxious about me being able to have a ‘real job.’) And the practice test for the ACT in 10th grade came with this odd employment aptitude test thing to help you find the job that would be the right fit. (Goodness knows if it was remotely accurate.) Fashion design was in my “right fit” category. And between all the majors, there was a tiny college in Ohio that happened to have a Fashion Design degree under their Health and Human Services Major. And since the only computer graphics and gaming major I could find was at a Calvinist college in Michigan, I thought the Mennonite College in Ohio was probably a better idea.
I didn’t read fashion magazines. I didn’t know really how to sew. (Sewing lessons with my mother were a complete disaster.) I couldn’t make a pattern. I had absolutely no portfolio. There were three things I liked, writing, computer games and drawing clothes. And let’s be clear, I wasn’t that great at drawing clothes and my designs at the time probably weren’t that innovative. I had to make a choice and what very little information I could glean from the Ithaca Public Library (seriously, you’d think having Ithaca College and Cornell, the library would be better,) fashion seemed the way to go. It was a massive industry. It had to have work available after I attained my degree.
Oh to be that young and naïve again. Probably sheltered is the better term.
I was over a year and a half into my fashion degree at this tiny college when someone finally thought to clue me in that “to get a design degree you have to have an art minor.” Realizing that this was utterly ridiculous and that making patterns in ¼ of the size wasn’t really going to get me anywhere after trying to talk with one of the other students about whether or not we could really get work after going to this school, (I’m sorry, sweetie, I hope you realized I was trying to convince myself as well as you,) I transferred out and into the Academy of Art. (And this took another large fight.)
Where, I had a lot of credits but I essentially had to start from the beginning. So, having those credits wasn’t actually to my advantage because the numbers of credit hours earned made it appear that I had more experience than I did. This got me more scrutiny and really a worse college experience.
Let’s understand something, I grew up in New York. The Fashion Institute of Technology is part of the SUNY system of colleges. I was a New York resident. It would have been fairly cheap for me to go to FIT. My parents didn’t want me in NYC or at a secular school. Parsons was always out of the question because it’s as costly as Cornell and I understood that. FIT would have been an extremely LOGICAL CHOICE.
Oh well, I loved San Francisco. I loved the big city/small town feel of it and the ability to walk most places and the public transit. If it wasn’t so expensive to live there, I might still be there.
So, schooling wore away at me, but it didn’t dim my love of creating clothes. My love of creating clothes was never founded or predicated upon the idea that success was a runway show and a big fancy store and my name in lights. I didn’t want to be the next Coco Chanel. I didn’t know who she was and at the time I started drawing clothes, I frankly didn’t care. My going into fashion was me going “here is something I love and enjoy doing, can I make a job out of it? Yes. Yes. I can.”
No one can take that from me. I might get bored or tired, but you can’t take the love of creating away from me.
And by the way, I still don’t read Vogue. It’s out of date before it’s printed and 75% advertisements. I also still don’t care about a runway show or seeing my name in lights as a “name” of a brand. That’s not the fashion price point I do or understand. And that’s okay, despite the push by fashion schools to design for that price point and that should be your goal, there is a lot more to fashion than ready to wear. Maybe that gives me an advantage, maybe it doesn't. That's not my connection to fashion. Magical fabric shops, Barbie, Crayola, the joy of creating, those are my fashion connections. And those are a lot more tangible than a runway or a name in lights by my account.
1 note
·
View note
Text
For poor artists...
Okay so weeks ago I came across a post (That I can’t seem to find now...) that roughly went like this:
“All you tumblrites with depression need some hobbies to help with depression because hobbies help.”
“Not everyone has the privilege of being able to afford hobbies! Hobbies cost money!”
“You don’t need expensive stuff to draw!!! Draw on scrap paper! Napkins! Go to the dollar store!”
Now for weeks since seeing that post it keeps coming back to me... almost hauntingly. It’s not that I can’t comprehend that people can’t afford expensive art supplies, on the contrary I very much remember being like that! But today you poor artists have access to something wonderful that I didn’t growing up:
Under the cut let me tell you a tale about a wonderful place that could have granted my wish for art supplies growing up!
And that place is called Wish.com!
(Disclaimer #1: Almost everything I’m talking about here are supplies that I myself have personally purchased and tried using AND STILL DO!)
(Disclaimer #2: I don’t believe that good supplies make a good artist, but good supplies can help make a good artist better/ make their life easier!)
Now growing up I did not come from a wealthy family. I had 3 siblings, all of us close in age so we were kids/ teens together. My father worked in a warehouse and my mother was a stay at home mom because it was impossible to find an affordable babysitter considering that My older sister had trouble in school with bullies and a reading disorder, I was an un-diagnosed autistic devil-child, my younger sister had severe asthma and was always sick, and my younger brother was deaf. We all kinda needed special attention. As you can imagine we didn’t have a lot of money, and as I got older and more Artish meant I had to make due with what I could get. That didn’t mean I went without, just often had to save and wait for what I could use, which followed me to adulthood. Had Wish.com been around in my teens it would have been a godsend and I’m patient enough to wait a few weeks to get my order!
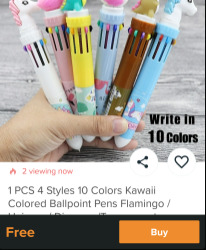
God I love these things! These ball point pens with 10 colors are what I use for story boarding comics and note taking! I used something like these when I was in college because notes were much easier to organize and read when color coded!
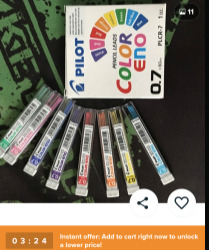
“But KC! I like to sketch with blue/red pencil first!”
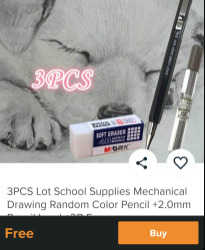
Lookie here! Colored pencil lead refills in all sorts of colors! Cyan works great and so does the red!
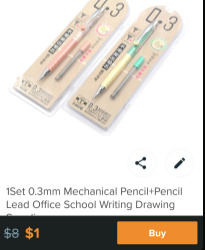
Now I didn’t know they came this small until recently but I LOVE this 0.3mm Mechanical pencil!!! The lines are so thin and small!!! I have literally never seen anything smaller than a 0.5mm in a store!
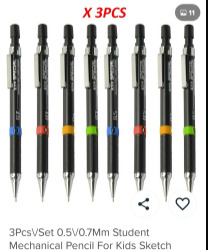
Now I like mechanical pencils for their consistent lead size as you draw! They’re just a click away from being back to sharpness! But you may want a 0.5mm and a 0.7mm and this 3pc set is soo sleek looking! It’s good to have a 0.9mm too! I used to have a spongebob .16mm pencil I stole from my brother but it went missing! I have never found another one that HUGE again! T_T
Speaking of pencils this nice little set comes with a mechanical pencil+lead+a white plastic eraser. They work great though the eraser is not my personal fav...
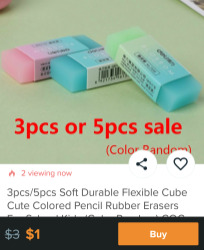
THESE are my favorite erasers to use!!! Not only are they cute colors but they’re a good consistency! They’re softer than a plastic eraser but a bit harder than a gum eraser so they feel really good to erase with and do a good job!!!
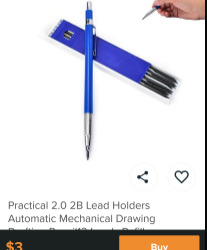
If you really like working with Pencil you can prolly just get a cheap #2 pencil at a dollar store or a box of them at Walmart, but I Really like the feel of a 2B pencil! This lead holder comes with some replacement lead too so you don’t have to worry about sharpening it to nothing!!
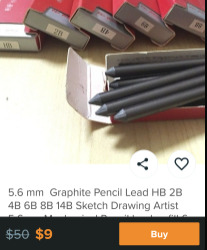
This set of Graphite sticks are a little messy but it comes with all kinds of lead hardness and you can use an x-acto blade to sharpen them to different size points!!!

This is a pretty basic but nice sketch set and has a lot of size options to pick and buy from!! I’ve used the small 32 set and it has everything you need if you love pencil art!
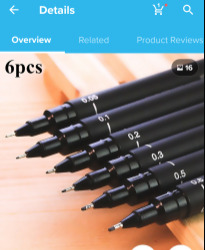
FINE LINERS!!! I have a story about Fine liners! Internet shopping hadn’t quite taken off yet for my family and the only store I knew that sold Microns/Fabercastelle fine liners was a local store. They didn’t sell them in singles so the cheapest set you could buy was a $15 Faber Castelle set with 5 pens (Sm/Med/Lrg/Brush/Chisel). Now $15 doesn’t sound too bad until you remember my family was poor. How poor? Poor enough where my sister and I would each get one of these sets for Christmas and store one away while sharing the other set in hopes of getting them both to last until June where I could get another for my birthday that will hopefully last BOTH of us until next Christmas. I noticed when you buy Microns off of Wish.com you have a 50/50 chance of getting a knock off brand but these ones here worked pretty good for their price!
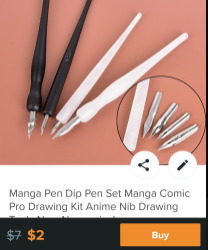
“But KC! Not only am I a poor artist... I’m a poor HIPSTER artist! I wanna kick it OLD SCHOOL!”
WELL This is a nice cheap little set of dip pen nib holders and nibs! The pink one is cute but I have the black one. I personally love my Cork nib holder more but for plastic this one is decently comfortable to hold and a good price! I find Nibs are a bit of “You get what you pay for” but if I was displaced into an apartment somewhere without any of my stuff and I wanted some dip pens this set would do just fine! Dip pens take some skill to get used to so even if you want to just cheaply try some this is a good set to start with! And if you want better nibs later on they fit right in these holders!
I also have a very decorative (but functional) glass dip pen! Unlike the metal nib dip pens above the glass one doesn’t really allow for a lot of variation in line weight, but if you want the line work to stay a consistent size then this one is pretty good for that, though depending on your paper it can bleed a bit... once again takes some practice to get used to it.
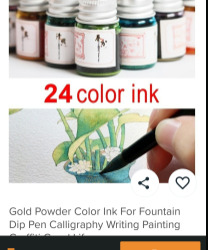
Now you’re gonna need some ink for those dip pens! I haven’t really gotten to try any black ink from Wish.com because I have a few bottles of black ink that I keep getting for birthdays and Christmas and such, so I haven’t run out and gotten to try a new brand. COLOR ink on the other hand... These little 5oz bottles have gold sparkles in it!! And they look nice to boot! They can get a little expensive because on THIS particular order you can only order them one at a time (And pay shipping for each bottle) but you really don’t need all 24 bottles as a lot of the colors look similar to each other.
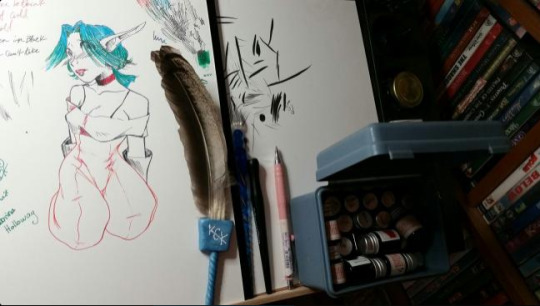
Here’s a sketch of Keira Hagai from Jak and Daxter along with the supplies used to draw it (Notice the ink, glass and black nib pens and the 0.3mm pencil. The only thing used not from Wish.com is the feather sweeper I made from sculpey and chicken feathers.)
The ink doesn’t work great as paint though but you know what does?
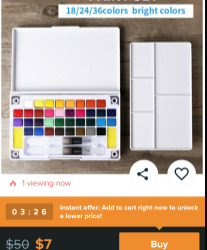
PAINTS! I didn’t buy this one but it’s a nice little affordable starter set with pallet and brushes!

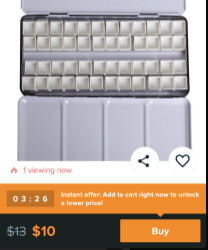
Now I’m a bit snooty, I prefer to buy watercolor paints in tubes and an empty paint pallet. The paint pallet I have isn’t THIS one specifically but this one is a bit nicer than the one I DO have and a bit cheaper as well! (Mine doesn’t have a lid the folds out into a paint mixing area)(Now I wish I had this one!)(Maybe when my current pallet runs out of paint...)
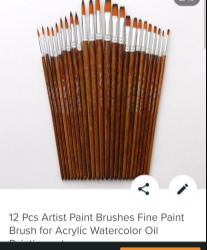
If you use watercolor paints you’re gonna need some brushes! This is a pretty good deal! You get 12 brushes and get to pick either flat or round tip brushes! They’re also not too shabby!
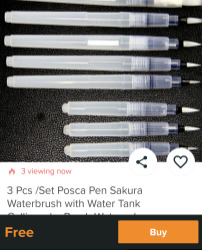
I use a set like this though! They has a water reservoir in the handle so you squeeze the water out and onto the paint! The reason I prefer these is I have a lot of pets and they like to get into mischief, so having a pallet that can be closed if I get up for a bathroom break or water that can’t be knocked over is a must for me!!
“But KC I like more... dry mediums...”
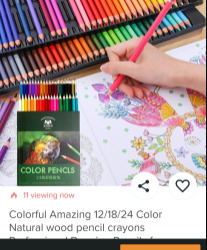
Lucky for you colored pencils are all over the place on Wish.com! You can get all kinds of different sets and sizes and some even have nice carrying cases too! I haven’t bought any because I own a LOT of colored pencil sets already and don’t use them frequently... I’ve also tried some chalk pastels from Wish that worked well enough on their own but the way I use them is grinding them into a fine powder and brushing them onto paper and that didn’t grind well...
And What’s art without PAPER!?!? Wish.com is tripping paper! Whatever is in your price range look around! I can promise you you’ll find a sketch book or two within your budget! Some even name brand sketch pads!
And now some miscellaneous stuff:

I LOVE binder clips! Great way to keep all my paper together and in some places hang stuff up so I can stare at it a bit before continuing working on it!
I like art markers and not many truly can fill in the shoes left by Copic brand markers. I have tried a handful of copic alternatives (And watched even MORE comparison videos by other people who own said markers.) I feel like there is no such thing as a GOOD CHEAP QUALITY art marker. There are lots of sets on Wish.com that (For their prices) are what I consider “Cheap enough to tinker with” When I was in highschool back in 2007-9 I really really really wanted Copics and was resentful that I was poor and couldn’t get any. I would get so angry when I saw 14 year olds on deviantart who drew like ‘14 year olds on devintart’ but had no less that two 72 sets of copics. I know, it was rather petty of me to be resentful of younger more fortunate artists... The trade off with my parents was that I would settle for Prismacolor markers, bought 1 per week with a 40% off coupon provided I did all my chores and kept my grades above failing. That was the closest I ever had to an allowance. Throughout the years I’ve settled with ‘Tinker Markers’ (Cheapish alternative markers) and Ohuhu, Prismacolor, and Touch New seem to be the better alternatives. Just don’t go looking for a brush nib >.<!
MASKING TAPE! Always good for taping things to other things!! Unfortunately I feel like Walmart gives you bigger rolls for better deals so if it’s going cheap I’d say you don’t need tape from Wish...
Aaaah! A light board! And another long trip down memory lane! Last October going into Inktober I noticed there were people throwing little fits about Inktober itself and if it’s okay to do it with a digital medium. One persons comment stuck out (And echo’d in my brain) where they said (And I’m paraphrasing):
“How am I supposed to focus on my ‘self improvement’ with traditional art if I just can’t draw from the anxiety of knowing that every pen stroke is permanent and I could completely ruin my drawing at any second without the CTRL+Z and layers!?!?!?!”
To which my first knee-jerk reaction was: “Wow kid... I think you have waaaay more problems than inktober if your anxiety levels are THAT high that you can’t just accept an oopsie doodle and try again...”
But then I do remember a time when I was like that. In college I scheduled a really bad semester with too many classes, mostly art classes. One was a classic Pen and Ink class which I did fear screwing up, not because of anxiety of failure but because I would have to start over on my homework, and that would take time from all my other homework. Time I didn’t have. I found a large sum of money on the ground ($100.00) one day, waited a month (Nobody claimed it), donated half to my local animal shelter (As is a karma thing in my family with ‘found money’) and used the other half to buy a light board (With a 40% off coupon.) It was the size of a shoe box, thick and clunky, and didn’t get very bright, but it did what I needed it to. If I screwed up on ink homework I’d throw a new paper over it and start again. You can be cheap and use a window on a sunny day, but light boxes (or light boards now) are so affordable and sleek and thin and wish has a lot of them! I have a cheapish but large A-Line tracing board that sits on my drawing table and fits well and honestly saves 40% of what anxiety I would have putting pen to paper (If I hadn’t been drawing freehand so long that I just don’t get that kind of anxiety over it)
If Wish.com was around when I was a teenager art supplies would have never been THAT big of a deal and I wouldn’t have had to ‘Carpool’ 3 fine liner sets per year with my sister!
Really, I know there will still be people out there who still can’t afford some of the things listed above, but if you have an inclination to try art whether it’s with pencils, paints, markers, pastels, ink, dip pens, fine liners, whatever you lean towards, Wish.com has a cheap affordable version that may not be the best quality out there on the market, but thinking back 15 years ago little KC would have loved to save up some money, order some new supplies, and wait a month for them to arrive so she could use them.
Once again most of the supplies listed above have been bought and used by myself. There are some great materials at mostly affordable prices on Wish.com so if you are poor like Little KC was you probably know the patience of putting aside a dollar here and there and having to wait, or if you are well off but don’t want to spend too much on a hobby you haven’t tried yet and don’t know if you’d like Wish.com has you covered!
And if you’d like to, Reblog this for other poor artists so they know they don’t have to share their fine liners!
15 notes
·
View notes
Text
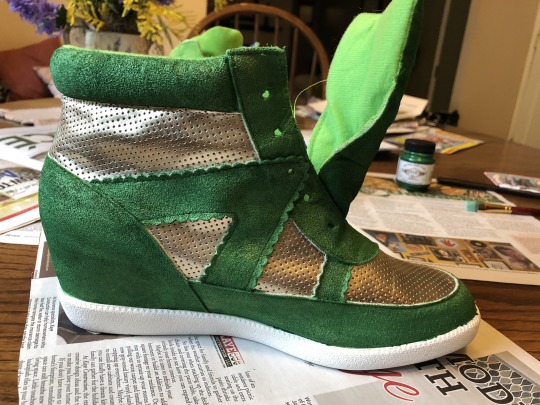
How to Paint Shoes at least Somewhat Effectively
FINAL RESULT:
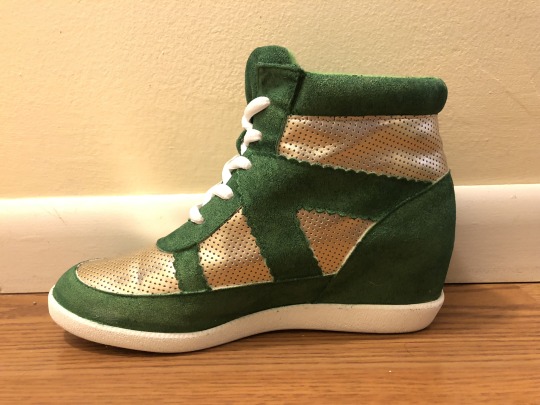
So I’ve previously had some terrors painting shoes. To prevent that from happening to other people, I wanted to share the process I used on these shows and what did and didn’t work.
What you’ll need:
A paint brush or some sort of paint applicator (I used a brush).
Jacquards Textile Paint OR Angelus Paint
Jacquard is great for lots of different materials. Do your research about their products based on what material you plan to paint. Their website has lots of information about their products.
Angelus Paint I have never used but have heard many great things about. If you plan on painting leather or synthetic plastic stuff (like vinyl) I would give this a shot - note you might have to buy extra product for mixing to do plastics.
A pair of shoes
Painters tape

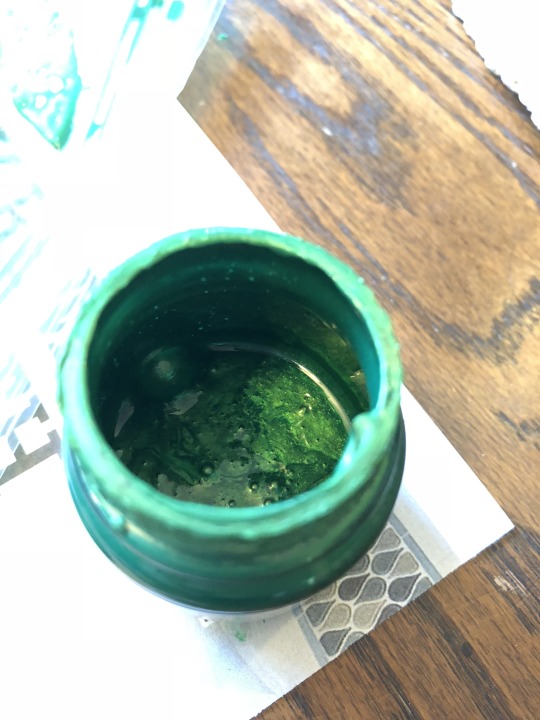
My paint of choice was Jacquard Lumiere. I’ve used it previously and know it works great on fabric. Also, my local craft store actually carries it which is extremely convenient (unlike Angelus which is harder to get). It cost me about $5.

The first thing I did was clean the shoes to remove any dirt as well as chemicals. I’m talking anything that could’ve been applied to the shoe like water repellent, shoe polish (although I doubt that one in my case), etc. Paint needs to adhere to the fabric not sit on top. Washing also brings out leftover dye sitting in the material which you do want. For the shoe laces, I soaked them in hot water.
Dos & Don’t of Washing:
Don’t use detergent/fabric softener - we’re trying to get rid of chemicals not add more
Do use hot water
Do check that after washing, you material absorbs water relatively well - that means it’ll probably take the paint well (unless you’re painting plastic that’s another game)
Do scrub the shoe to remove dirt and lint - but don’t over-scrub
Do make sure to wash the sole as well - so painters tape will stick
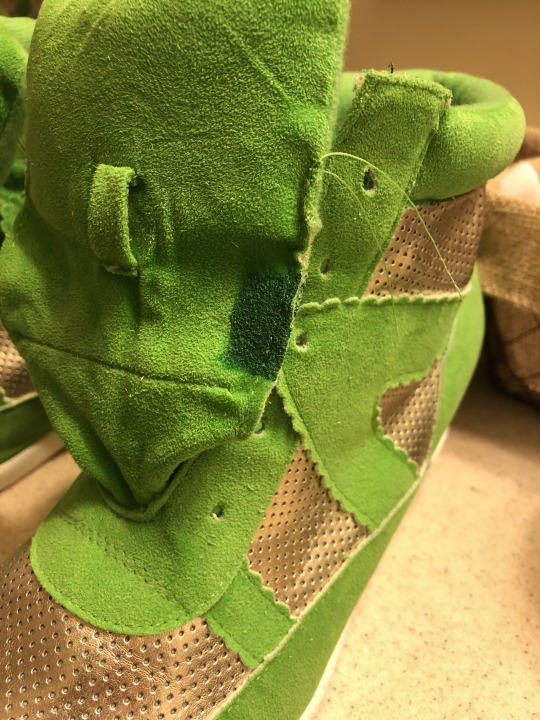
After the shoes have washed and dried, I did a little test splotch. No matter the color paint you pick out, it will always turn out different on the shoe itself based on the current color as well as the material. My green paint matched the green on my costume perfectly when I applied it to some green scrap fabric from my costume; however, when I put it on the shoe it actually came out darker.
Jacquard provides adequate documentation from mixing to get the colors you want, but it wasn’t that much darker that I needed to go out of my way to try and lighten it. Another option is to mix it with water - you can add up to (I believe) 20%. It’s supposed to make it more translucent and more of a watercolor affect - I really didn’t want to experiment with that, but just as an FYI to you.
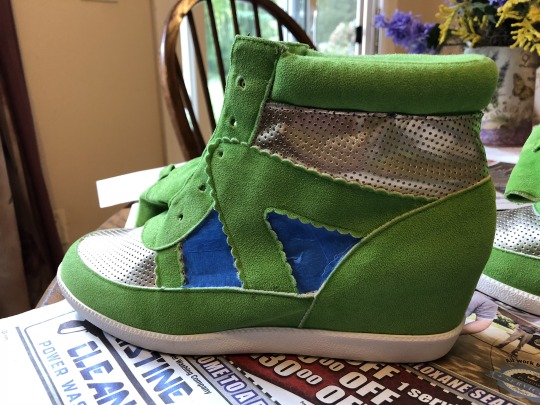
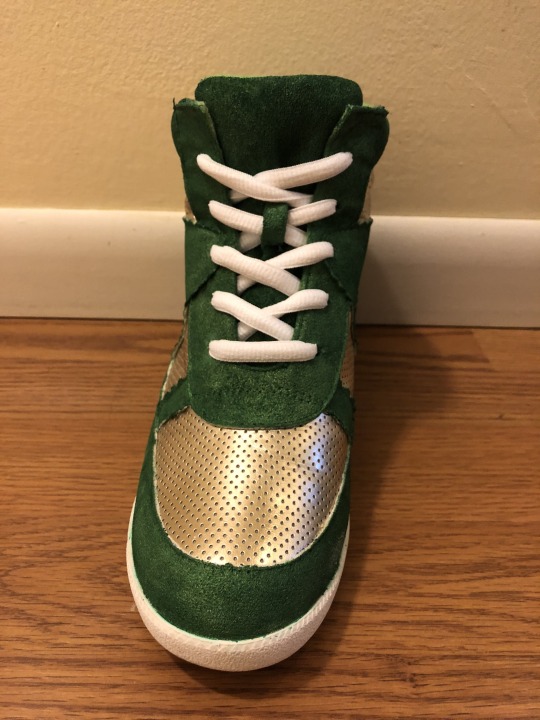
Time to tape up the shoe! Anything you don’t want painted should be tapped off.
Time to get jiggy with it - apply your paint. I used a brush, but you could use a sponge applicator or even an airbrush (you’ll have to add water to use the airbrush option).
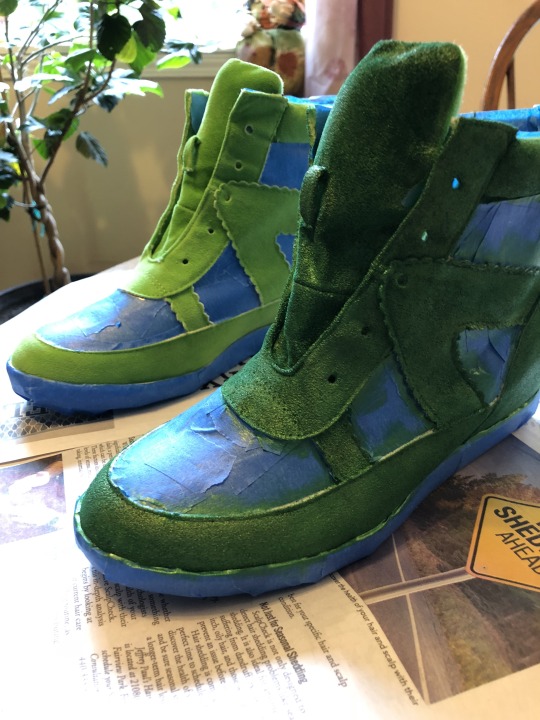
LOOKING GOOD. Take your tape off while the paint is still relatively wet. If any manage to get past the paint and onto the sole (which mine did), simply take a rag with hot water and a bit of soap to remove the paint while it’s still wet.
I had some paint left over so I decided to do a little experiment with the laces. I added 20% water to the rest of the paint and mixed it up.

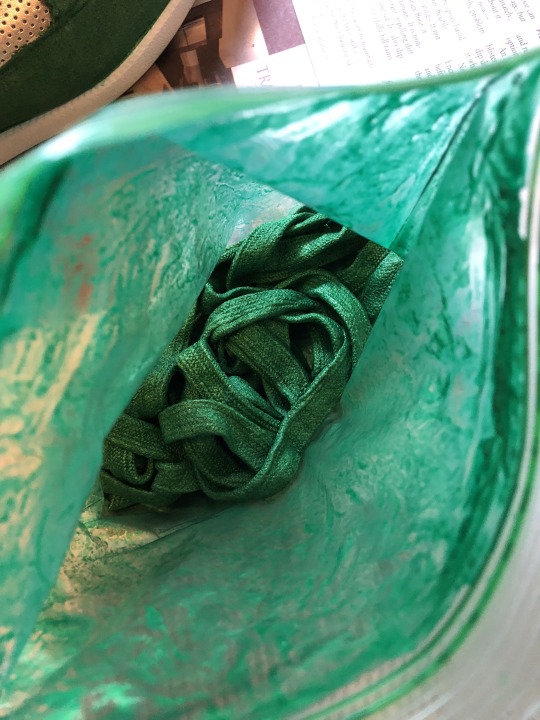
I threw the laces in a plastic bag, poured the paint in, and proceeded to shake and squish to dye the laces!

I let the shoes and the laces sit for 24 hours.
IMPORTANT:
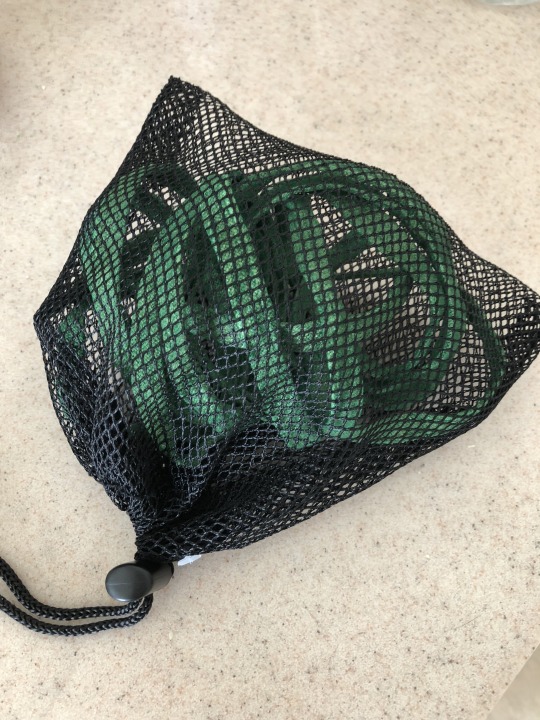
After the 24 hours, I took a hair dryer to the shoes for 30 minutes. You could also throw them in a dryer if you’re feeling adventurous. This is important, because the paint needs to be heat set. Heat setting the shoes prevents the paint from coming off if you plan to wash the shoes. I don’t really plan on washing these shoes, but considering they’re going to be exposed to the elements (rain & snow especially) it is definitely a good idea to set the paint.
So what happened to the shoe laces?
They were a dud... The paint caused them to stiffen way to much to be usable. I tried washing them in a laundry bag, but still too stiff after washing. Darn. I ended up grabbing some extra white laces I had sitting around.
Final Results:
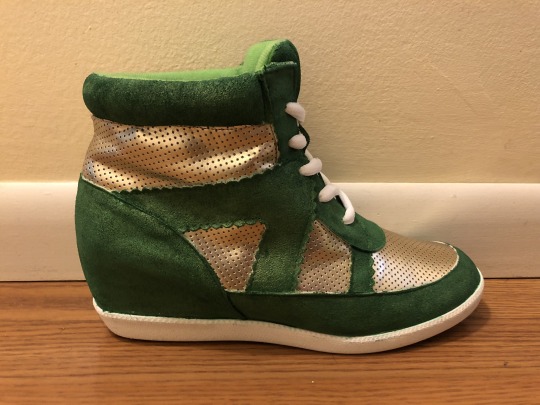
I hope this helps someone with their shoe adventures! Any questions regarding this, or even other things, reply to this post or ask me directly.
❤️Brooke
~sewingisnotforoldpeople~
#Arts and Crafts#diy#how to#painting shoes#cosplay reference#custom shoes#cosplay#how to paint shoes#paint shoes#painted shoes#shoes#painting#Sailor Jupiter#sailor jupiter cosplay#sailor senshi#sailor senshi cosplay#sailor moon#crafts#diy ideas#diy projects
15 notes
·
View notes
Text
Seven Brilliant Ways To Advertise Butterfly Canvas Painting | Butterfly Canvas Painting
Pinkie said she’s accustomed to accord aback to her association with some blush through a attribute locals are carefully accustomed with.
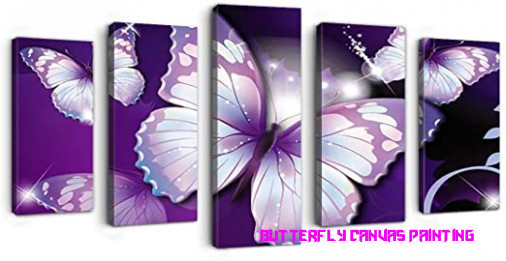
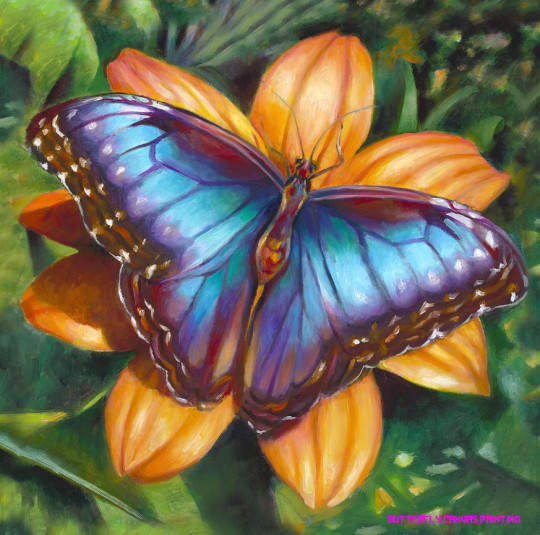
Garth Butterfly Canvas Painting Poster,23 Pieces HD Printed Room Wall Decor,Watercolor Picture for Living Room(PurpleWhite,Size M,Framed) – butterfly canvas painting | butterfly canvas painting
A Sevierville artisan is bringing her abilities to a new canvas that’s bringing blush and ability to downtown.
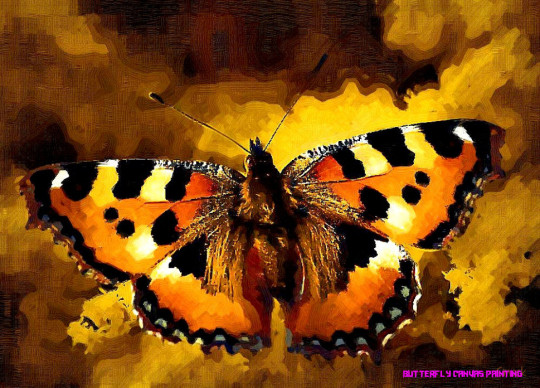
Artist Pinkie Mistry is currently painting a mural of butteries advantaged “Wings of Wander” on the aback of a accumulator assemblage endemic by the Sevier County Bank.
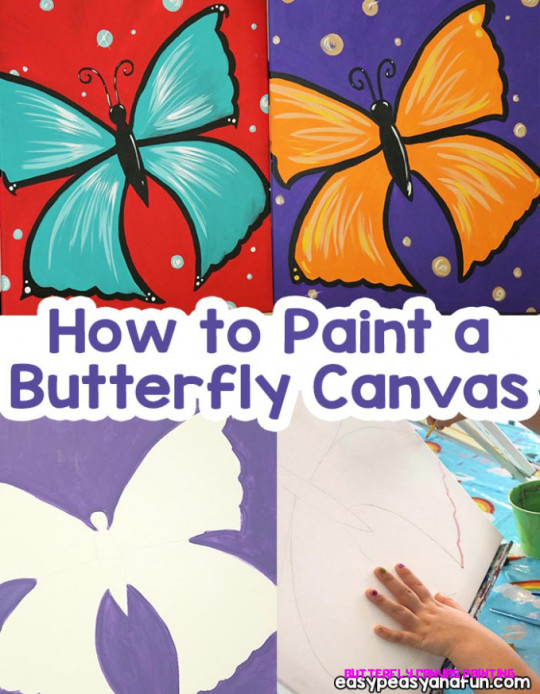
How to Paint a Butterfly – Acrylic Painting For Beginners – Easy .. | butterfly canvas painting
She started painting on Sunday, but the abstraction was in the works several years ago with the Sevierville Commons Association.
A butterfly is actually applicable for Sevierville. Pinkie shares her adulation of collywobbles with addition hometown artisan who is actually absorbed with them: Dolly Parton! After all, “love is like a butterfly, a attenuate and affable thing.”
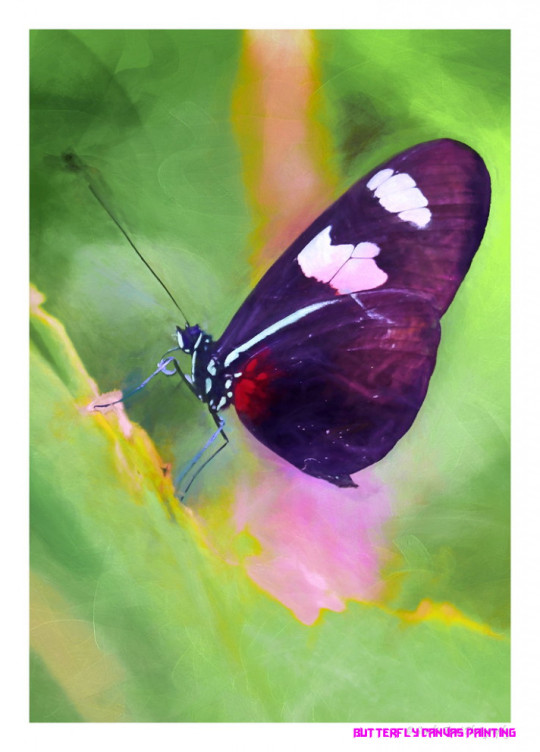
Butterfly – butterfly canvas painting | butterfly canvas painting
While Pinkie is able as a painter and clear artist, this is her aboriginal alfresco mural. She said she’s accustomed to accord aback and advice brighten up her hometown.
“My dad and I would airing to the banks and stuff, because we lived in town. So I’ve apparent this breadth abound a lot and change so much. Its absolutely accurate to see,” she said.

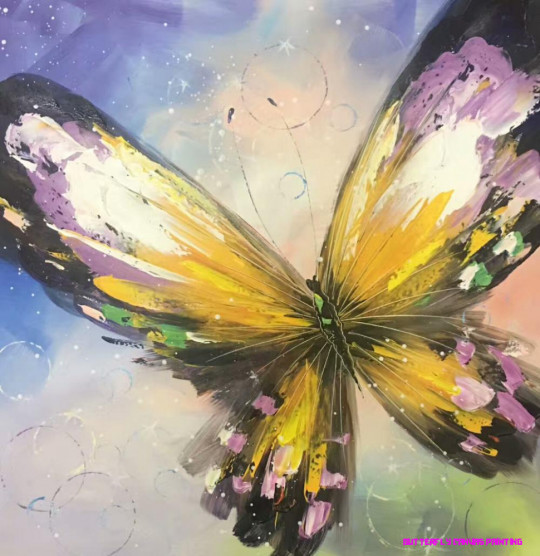
Dutch Masters – butterfly canvas painting | butterfly canvas painting
If you’d like to see the artisan at work… bustle up! Pinkie affairs to blanket up the activity afore the end of the week.
To apprentice added about Pinkie and to analysis out some of her works, analysis out her website here.

“Mariposa y lagartija” 24″ x 12″ – butterfly canvas painting | butterfly canvas painting
Seven Brilliant Ways To Advertise Butterfly Canvas Painting | Butterfly Canvas Painting – butterfly canvas painting
| Allowed to help my website, in this occasion I am going to teach you concerning keyword. And now, this is the primary graphic:

Graffiti Butterflies Canvas Painting Print – butterfly canvas painting | butterfly canvas painting
Why not consider impression above? is actually in which incredible???. if you believe therefore, I’l d teach you several graphic yet again underneath:
So, if you would like secure the outstanding photos about (Seven Brilliant Ways To Advertise Butterfly Canvas Painting | Butterfly Canvas Painting), simply click save icon to store these pics in your laptop. These are available for save, if you’d rather and want to grab it, click save symbol on the page, and it will be immediately saved to your pc.} At last if you like to secure unique and the latest picture related with (Seven Brilliant Ways To Advertise Butterfly Canvas Painting | Butterfly Canvas Painting), please follow us on google plus or book mark this website, we try our best to give you daily update with all new and fresh images. Hope you like staying here. For most upgrades and recent news about (Seven Brilliant Ways To Advertise Butterfly Canvas Painting | Butterfly Canvas Painting) shots, please kindly follow us on tweets, path, Instagram and google plus, or you mark this page on bookmark area, We try to present you up grade periodically with fresh and new shots, enjoy your exploring, and find the best for you.
Here you are at our website, contentabove (Seven Brilliant Ways To Advertise Butterfly Canvas Painting | Butterfly Canvas Painting) published . Today we’re pleased to announce that we have discovered an extremelyinteresting topicto be discussed, that is (Seven Brilliant Ways To Advertise Butterfly Canvas Painting | Butterfly Canvas Painting) Most people attempting to find info about(Seven Brilliant Ways To Advertise Butterfly Canvas Painting | Butterfly Canvas Painting) and of course one of these is you, is not it?
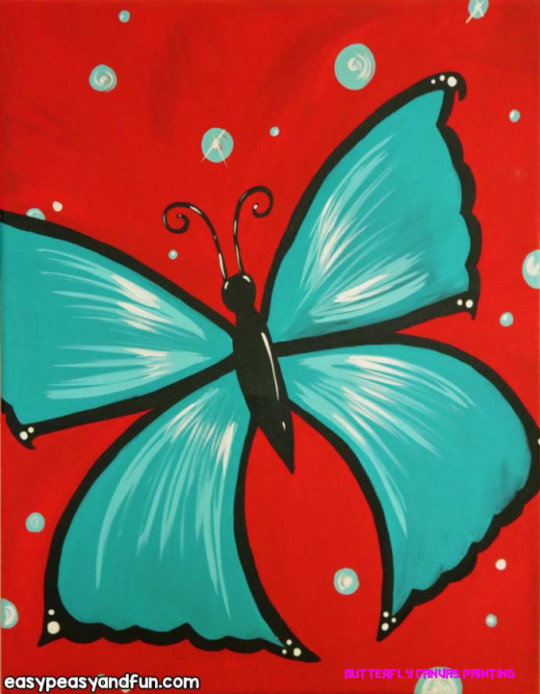
How to Paint a Butterfly – Acrylic Painting For Beginners – Easy .. | butterfly canvas painting
Painter Beauty – butterfly canvas painting | butterfly canvas painting
Colourful Butterfly Canvas Painting –Hand painted Modern Abstract Animal Oil Painting on – US $23 | butterfly canvas painting

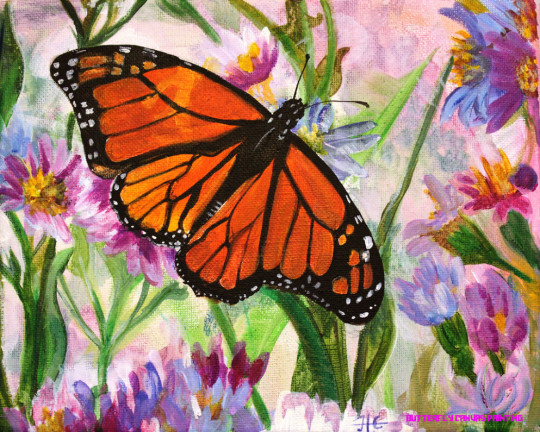
Monarch butterfly Canvas Print – butterfly canvas painting | butterfly canvas painting

Rikivity Original Butterfly canvas painting wall art poster prints Pictures for living room Decor wall sticker free shipping – butterfly canvas painting | butterfly canvas painting
Butterfly – butterfly canvas painting | butterfly canvas painting
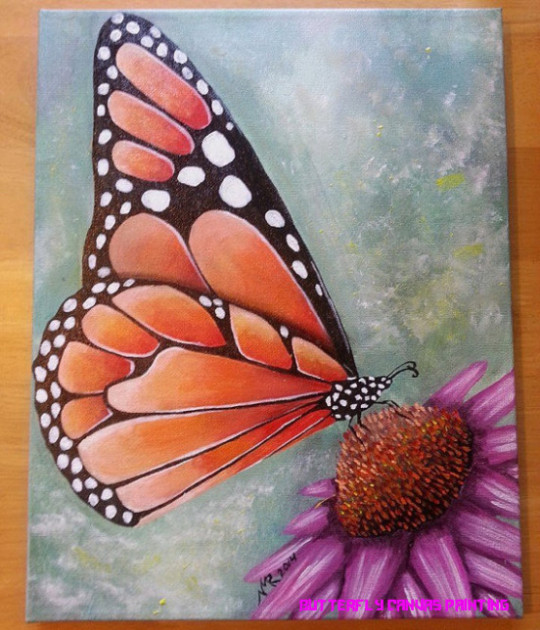
monarch butterfly acrylic on canvas hand by .. | butterfly canvas painting

23 Panel Abstract Butterfly Canvas Print – butterfly canvas painting | butterfly canvas painting
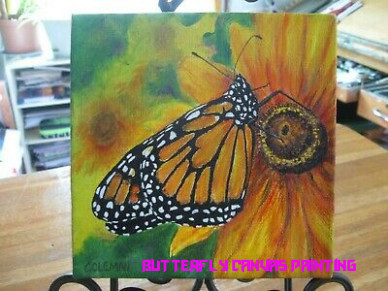
MONARCH” BUTTERFLY CANVAS Original Acrylic Painting 23″x 23 .. | butterfly canvas painting
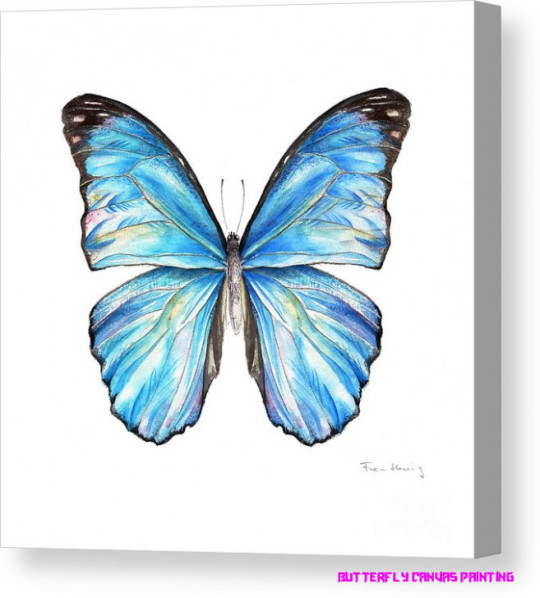
Blue Morpho Butterfly Canvas Print – butterfly canvas painting | butterfly canvas painting

monarch butterfly acrylic on canvas hand painting ooak orange – butterfly canvas painting | butterfly canvas painting
Realistic Butterfly Paintings by Debbie Gioello – butterfly canvas painting | butterfly canvas painting
23pc Beautiful Girl Butterfly Canvas Painting Home Room Unframed .. | butterfly canvas painting
Purple Blue Abstract Floral Butterfly Canvas Wall Art .. | butterfly canvas painting
Spray Paint Butterfly Canvas Print by abbieraw – butterfly canvas painting | butterfly canvas painting

Tortoiseshell Butterfly – butterfly canvas painting | butterfly canvas painting
Blue Morpho Butterfly Painting by Nancy Tilles – butterfly canvas painting | butterfly canvas painting
The post Seven Brilliant Ways To Advertise Butterfly Canvas Painting | Butterfly Canvas Painting appeared first on Painter Legend.
Painter Legend https://www.painterlegend.com/wp-content/uploads/2020/06/garth-butterfly-canvas-painting-poster-23-pieces-hd-printed-room-wall-decor-watercolor-picture-for-living-room-purplewhite-size-m-framed-butterfly-canvas-painting.jpg
0 notes
Note
Um... yuu-senpai, do you have a special sketchbook that you draw on or do you just use random pieces of paper? Sorry for the really random question... but I was thinking about this while looking at your new doodles! I really like your art and look up to you! Thanks in advance!! ^-^
Hello anon! ;v;/// ahh thanks for liking my art, I’m really happy from your compliments and it’s nice to talk with a fellow aspiring artist..!// I highly doubt I am befit to be called senpai..! but nevertheless, I am thankful and I’d love to draw things that would inspire you/you would find pleasing to the eye!! Let’s work hard to improve together. ‘v’)9
That’s pretty cool of you to ask! I haven’t been using any specific type of sketchbook lately, they’re just ones from the local stationery store and they cost me around 1~3 dollars each! I’m not so picky with the types of paper I use in terms of drawing and if the pages aren’t ruled and clean- I just go with them! :)
(here’s a photo of the most recent ones I’ve been using: but they’re just ones I picked up randomly from the store like what I’ve said earlier)
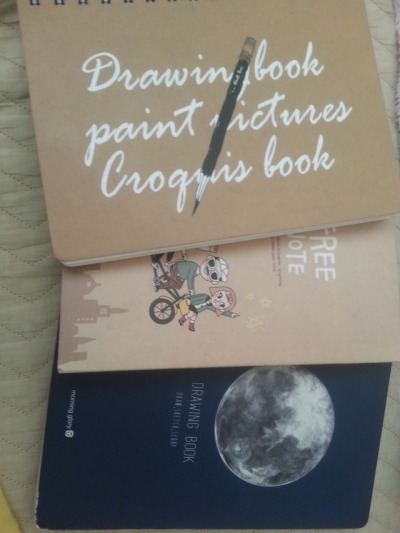
My tip is to choose a notebook w paper that feels smooth, but not slippery; the one I’m currently using is the one on the very top and honestly I would prefer paper that feels less..stiff (however, I feel this type of paper would do very nice with ink) plain A4 is also actually pretty nice to draw on in my opinion because I don’t do watercolor or stuff that requires the paper to be more durable.
another tip of of mine but you may like to choose sketchbook with.. hinges(?) I don’t know what they call these ↓

it doesn’t really matter that much but it makes drawing a bit easier because the paper remains flat as you draw and it also enables taking photos of your traditional works a whole lot easier provided you want to share them and you don’t have a scanner. It will save you a lot of struggles because notebooks without these are much harder to take photos without things looking weird;v;!!//

I don’t use a specific type of sketchbook nowadays but when I first started drawing I REALLY loved using one of these CIAK notebooks!! It’s expensive but I would recommend these to both writers and artists because the papers feel really nice and it holds a lot of pages- I don’t recommend the ruled versions, buy the plain and buy one that’s at least medium size, the small ones..; are really tiny and I really regret having bought those. Do not buy the pocket size, buy medium or large. I think I used large
I first got these as my birthday present and used these to make my own stories! I think I used at least 12 of these when I first started practicing and I loved it! It also got me the habit of trying to use every part of the paper when I draw traditionally because it felt sad seeing the papers run out so fast plus these were hard to get n expensive…orz
But really, your average notebooks that you can get in your local stationery works just fine!! My thoughts are that using good sketchbooks doesn’t make your drawings dramatically improve.. but it does feel good when you use one. It also feels satisfying when you finish using one up entirely OH OH right forgot to mention this but I tend to use one of those smaller sketchbooks when I draw because big ones are heavier and harder to carry around and stuff!! I find small to medium size ones (like A5 size..? I think) more comfy because I’m used to drawing & writing things in small sizes, and smaller sketchbooks are easier to bring wherever you go. I don’t know how it would be for you though?
Hope this helps you anon!// Good luck with drawing, and if you feel comfortable, I would love to see how your drawings are going sometime!! ‘v’///
11 notes
·
View notes
Text
Watercolors for Beginners (on a budget)
All these watercolor artists on YouTube have their favorite “expensive” brushes, meanwhile Jay Lee, who is an incredible artist, uses $4-5 dollar brushes. I’m not a fan of the cheapest ones still, like the $7 packs, because it’s hard for them to retain shape. The best brush for you- like writing software- is a brush you know well over a brush some artist in a fancy studio says Will Get Results. I think this is something that should have been obvious to me after learning photography equipment is more about skill than dollars once you get a DSLR or mirrorless, but enough about that. If you want to get into watercolor, here’s my advice a year in.
Materials
A standard round brush really is the most important brush- unless it isn’t. You can exclusively use flats, and it can add an interesting stylistic aspect to you work. But a round can do pretty much anything you ask from it. Generally, this brush is a size #8, #10, or a #12. If you splurge on anything at all, it should be your base brush, who will be with you for a very long time. Paint and paper are “consumables” so eventually they get used up, but a brush, even a ratty old one, is basically forever. Treat it well.
Some kind of large wash brush, like an oval brush, dagger brush, quill brush, or large flat brush. Or even thick, four inch wide, and slightly terrifying ones for wall sized large surfaces. Whichever one you pick, a large brush really does help give the smoothest washes and gradients for large areas.
Either a rigger brush, small round brush, small/medium flat brush, or even a fan brush. Riggers are good for detail and natural lines, fans for cool effects and lines, and flats for thick or thin lines. That said, these brushes do help certain styles. Riggers are excellent for naturalistic painters who like trees, and they’re also good for painting, well … rigging on ships. The fan is good for abstract, and the flat for geometric shapes specifically, but both of them have many more uses than just those. Rounds are the most multipurpose due to their influence on watercolor in the United States is, and a smaller size can be useful for detail work. All these different brushes fit into one category because they can do each other’s most important job, which is to make super thin lines.
Pans or tubes Don’t worry about cost because they’re about the same. Student grade is okay. I swear. If you’re not displaying your physical paper copies yet, relax. Lightfastness doesn’t exist on the internet. (Tip: learn Photoshop so that your watercolors will look good online, it will make a world of a difference.) If it helps to use the cheapest 7 pan set made by a crayon company so you actually paint, so be it. You’ll have to overcome your fear of using expensive materials eventually though, so student grade is a good medium between the two. Try and pick a brand that has both artist and student quality if you can afford it, so you can reuse pans if you pick that option.
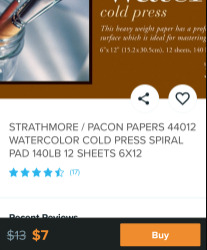
Fluid, Canson, Arches, etc are some good name brands but explore your local art store or online options available cheaply (if you like goulash you can even use regular cardboard). Cold press is good for naturalistic subjects, absorbency, and texture. Hot press is smooth, less absorbent, and allows for re-wetting. Most people use coldpress, it has that classic watercolor look. There are also two main weights for paper, 140 lb which is often cheaper, and 300 lb which comes in higher qualities, often in large sheets. 140lb is best held down or in blocks, 300lb can be painted on its own, which is good for painting outdoors. You can also use the backside of both weights, 140 lb and 300 lb. Remember, this is LB as in pound. Some will say “300 series” or whatever. What’s really important is the weight, not the arbitrary classification by a company.
Fun stuff. Brushes that look weird. Metallic paints. Salt, water brush pens, saran wrap, natural sponges, and masking fluid. Water based ink. Complex mixing pallettes and jar systems to avoid having to get up mid-painting. Paint is supposed to be fun, or intellectually stimulating, or expressive, or whatever reasons you have for doing it in the first place. If making glorious paintings with three primaries in the woods using creek water in a cup sounds like a good time: ignore this next bit, and I respect you. If you’re trying to force yourself to do boring things because of online advice telling you to hammer the basics into your very soul before having fun, here’s the contradicting advice: have fun. It makes for better art, if nothing else.
TL;DR: moderately cheap paper is okay, to a point, which is the 140 lb minimum. Student grade paints are good for work you won’t display. You need three brushes, including a basic brush (#8 round is what I use), a detail brush (#4 rigger for me), and a wash brush (I have lots, even though I paint postcards, so definitely try to plan ahead for your standard paper size).
Extra information: having lots of brushes is really very fun- especially when you have some that you can mistreat. I don’t regret buying the other brushes at all. Go the cheap pack route if you haven’t figured out what “snappy” means, or shedding, or other qualities that makes good brushes good. Going cheap helps you appreciate the nuance of a better brush and gives you a good base, like downloading a basic texture pack for digital art, and something to scrub paint off pans with when they wear out.
I haven’t recommended any brands for a reason, which is there is a lot of brand loyalty among watercolor artists. Plus, I think you should do your own technical (lightfastness, qualities) and experiential (how does it Feel) judging. This is true of brushes, paper, and paint. If you’re totally lost on brushes, watch this video by witty gritty paper co, and this video by Liron, and this other video by Liron. For more research, there’s lots of science behind the quality of brushes, especially water uptake. ProArte is the only brand I know of using prolene synthetic material, which has better water uptake than standard synthetic, and you can find some packs online. I recommend the set with the rigger brush, because large wash brushes naturally hold a lot anyway. Oh, and synthetic is far cheaper than natural hair brushes. With paint and paper, sticking to name brands is a good guideline.
Again, one more time for emphasis. Take care of your brushes. Wet them a little while (Brush Experts™ recommend 30 minutes, I just do it at the same time I wet my pans) before you begin. Clean them thoroughly. Shape them to a point after use. Masking fluid can gunk up your brush, so be careful. Most importantly, don’t press too hard! Watercolor brushes are soft so that they can use the specific properties of water to carry pigment, and bending the bristles can disrupt that. Don’t drag them on the bottom of your water cups, don’t dig them down to the ferrules (the shiny metal or plastic bit) into your paper, and don’t scrape them along the paper unintentionally without enough water. Doing even a couple of these will drastically increase the lifespan of your brush.
Cost breakdown
About $15-20 on brushes, $35ish on paints, and as little as $7 on reasonably sized paper. It’s usually about .50¢ to $1 a sheet, and a pan set or set of tubes will last you a very, very long time. Many artists start using artist grade paints before they run out of student grade. This is about $62, which is a lot of money! So don’t be afraid of the absolute cheapest watercolors, but it’s important to fund your passions, too. You can absolutely start with one quality brush ($5 vs $20), tiny paper ($5), and decent student grade ($35) for $45 and still have everything you really need. Karia on YouTube should be coming out with more reviews, in addition to the ones already posted, on different cheaper materials that could help you save costs, too. Going to a store to avoid shipping helps on top of that, and gives you a chance to compare brush size vs your paper, and to see the different paint options next to each other.
A lot of this post was just me synthesizing information, so definitely check out the people below. These are free excellent watercolor tutorials, material reviews, advanced techniques, and more. I’m just starting in watercolor, but I remember being disappointed there wasn’t any guide on Tumblr on where to spend money and where you can save and still learn something. I hope this guide helps, in some way, to fill that gap, and it wouldn’t exist if I hadn’t had access to videos like these online.
Channel Recommendations
Jay Lee has fantastic tutorials at many levels of skill, mostly works with flowers and brighter colors. This channel is a good option for visual learners, and combines basic exercises with complex brushwork well. Also, this artist freehands, which means no outlining beforehand.
Liron Yanconsky doesn’t traditionally work in watercolor so there are fewer videos than than other content. Still, there are a lot of material and technical discussion, which was incredibly helpful when I was just starting. Liron mostly works with a natural pallette with landscapes. A special aspect of Liron’s paintings are the use of perspective. On top of that, there are multiple speedpaints to help with figuring out how light to dark works. This channel in particular is good for auditory learners, because he talks about everything from technique to mental blocks common to artists. Very interesting stuff, definitely subscribe.
Karia has a similar background to Liron, and the channel is much more low key. I especially like the cat visitors during the videos. The channel doesn’t really discuss much art wise, but still offers good content. Also, you can donate directly to Karia from the links in the description! Definitely consider it, based off all the hard to find comparison videos of paints.
TheWittyGrittyPaperCo is actually a company channel, run by Meredith, who is a self taught (through YouTube) watercolor artist. The channel has a fantastic overview of the basics, including materials, exercises, and other tips. A few specialized aspects are portraits and lettering. It’s also the kind of channel that talks about things that even google has a hard time answering- how much water, how to use new watercolor materials, legal things like reference photos, etc. I have used these videos the most I think, especially small tips buried in the longer videos, to improve my work. Like Jay Lee’s channel, there are tutorials for visual learners. I almost don’t need to subscribe because I revisit the videos so often.
Susan Harrison-Tustain is a watercolor artist from New Zealand who has some incredible instructional videos. Many of them discuss techniques that just aren’t that common on youtube. Susan even has her own brush series. Considering the information is usually found on DVDs, it’s worth at least one watch to learn terms and see specific effects.
Ekaterina Smirnova is another incredible artist. This channel includes tutorials, techniques, materials, and more. Many of these tutorials are freehand, and include both auditory information and visual information. There’s also videos in Russian. The channel updates regularly, but not often, so it would beneficial to subscribe if you like he videos.
That’s it! My inbox is open for anyone that needs help, there’s so much info I just couldn’t include because it was getting long enough already.
EDIT: I waaay over estimated the money for the paints. Cotman watercolors (a half decent beginner 12 color set) is only $13, making the basics cost only $23! I also forgot to mention a hand towel and ceramic plate to sacrifice to the pigments. The hand towel is for drying your brush to control water flow, and the plate is for mixing and diluting. Bought new, it would only be around $5 at most, but I'm assuming you might already have them.
2 notes
·
View notes
Note
i love your stuff; where do you get your materials (images and other stuff). keep at it!
Hi! Oh wow, I’m so glad that you like my stuff. Thank you!!! As for supplies, I get them from a variety of different sources. Let me link you to the exact supplies I have! (yes exact, I was able to find most of them yay) I’m pretty cheap so everything here (apart from some of the magazines) are less than $20.
I have a good number of people asking me where I got my supplies/what they are so I decided to just put them up for a masterpost.
————-
MY ART JOURNAL SUPPLIES;
($12.99) Peter Pauper Press Essentials Grid Line Journal: xCheaper alternative to the traditional moleskines and leuchtturms. Half the price of both, better quality paper than the moleskin + IT IS GRID LINE.
($10.49) Alphabet Stamps from Michaels: x ($2.99) Ink Pad from Michaels in Black: xBought these thinking I was gonna regret it but god was I wrong. Buy them. They give a cool effect to your entries. Don’t forget to buy an ink pad. It was the cheapest one I could find because ya girl is a college student and you know how that goes.
(Dark Floral Print: xWood Grain Print: x Rose Gold Collection: xWatercolor Girls Collection: xThin Rainbow Collection: x
($13.79) Mini Sticky-Notes Marseille Collection: xI like anything from the Marseille collection because the colors are less fluorescent and more pastel/subdued. Great for adding color to otherwise bland pages.
($12) Zebra Mildliners Pink Pack: xI don’t think I need to rehash how adorable these are. Highly suggest picking up the other two sets as well. But this one is just my favorite.
($14.60) Uniball Signo Dx 0.38: xI cannot and will not live without these pens.
($8.99) Washi Origami Paper: xI have a lot of different kinds that I get off of Daiso (which I can’t seem to find an online store for) but origami paper is a great way to decorate your pages~
(99c) Pack of Gluesticks: Don’t think I need to link you to this. Just head over to your local 99c store and head over to the crafts section!
MAGAZINES. MAGAZINES. MAGAZINES. I get all my images from magazines. Good thing my family hoards them. Here are some magazines and what I rip apart to put in my journal. I don’t print because I am a nursing student who needs to print out her 100-page syllabus and ink is expensive.
Time/People Magazine: Cityscapes. Pics of all kinds of people. Social issues. Cars (from the ads). Current events. Personally, my favorite type of magazine to cut from because the images are pretty visionary and reflect on actual issues surrounding this point in time.Glamour/Vogue/InStyle/Allure: Models, Nifty flat-lays. Sometimes insert those perfume samples in my journal too. There’s tons of photography here of funky photoshoots that would be great to add to your journal. I prefer glamour, allure, in-style and vogue over other mags like cosmopolitan and seventeen because the photoshoots are more mature and aesthetically-pleasing in my opinion. Better Homes and Gardens: Flowers. Flowers. And more flowers. (the gardening section of this magazine is great)National Geographic: Sceneries. Animals. Ocean. Landscape. I love taking full pages from this magazine and using them as backgrounds for some of my more artsy pages.Outdoor Photography: SCENERIES. These magazines are for would-be photographers so your bound to get some great stuffFLOW Magazine: So many cute prints and random nifty stuff in every single FLOW magazine. FLOW is dedicated to paper-lovers, so there’s TONS of stuff you can incorporate into your journalWedding Magazines: Flowers again. Wedding magazines have tons of floral arrangement ideas. I just cut them out and paste them in my journal. Rolling Stone: POPULAR CULTURE. Urban culture. What’s “in” at the time. I like to snip headlines, song titles, etc. etc. in my journal to document the current time. While Time may document the world in a more political standpoint, Rolling Stone gives us that pop-culture view that most of us see on a daily basis.
—–
There you go, a quick overview of my supplies for journaling. As you can see, I mainly make my pages out of random magazine clippings and just kind of maneuver them around until they look decent.
I hope I was able to help you some
And if you every have a entry that you’re particularly proud of, please don’t hesitate to send it to me. I would love to see your beautiful work!
Happy journaling~
Kaiye
#ask#art journal#bullet journal#studyspo#journaling-junkie#art journal inspo#journaling#journal#personal#artsy
35 notes
·
View notes
Text
Kaua‘i Restaurant and Shopping Guide (with Kid Friendly Ideas!)
Oh, Kaua‘i. It’s like a dream! The Garden Isle definitely lives up to its name — everywhere you look is lush, dense, tropical vegetation that’s so perfect you swear it can’t be real. If you love laid-back adventures and natural beauty, this is definitely your island. We’re digging extra deep into our Kaua‘i travel guides because there’s so much to do, see, eat, and experience. So up first is our Kaua‘i restaurant and shopping guide! And the good news is that almost all of this is kid friendly. (Come back later this week for our list of things to do and pack).
Where to Eat in Kaua‘i, Hawai‘i
I knew we were going to see beautiful beaches and tons of nature, but I didn’t realize that we were in for some amazing food, too! For such a laid back island, there are some incredible restaurants, ranging from hole-in-the-wall to super fancy (and everything in between). A quick note: we had our kids with us at every meal, so I’m considering all of these places kid-friendly. We were never looked at sideways for having kiddos with us, but we do take a lot of time for training when it comes to eating out so they were (mostly) behaved pretty well. See the links below for our top spots.
Ama. North side, Hanalei. Gorgeous outdoor setting with killer good ramen and fun cocktails. We had three toddlers and a baby with us and nobody batted an eye. That being said, this place is definitely upscale so if you have a rowdy kid you might not want to spend the money to have to wrangle them all night. 😉
Tahiti Nui. North side, Hanalei. A local legend and easy standby. Go for the pizza, stay for the luau if you’re into that sort of thing. They also have live music in the bar (where we were welcomed to sit with the kids) — a couple of sweet older locals playing Hawaiian music.
Kalypso. North side, Hanalei. Fun atmosphere for lunch or dinner. They have crayons for the kids and a menu with a little bit of everything. I loved the poke bowl, and the cocktails were pretty tasty too.
Hanalei Bread Company. North side, Hanalei. One of my favorite meals! This spot is awesome for breakfast. Get a few things to share around — we loved the avocado toast, breakfast sandwich, and frittata. Also, the Ginger Julius smoothie was insanely good. Eat out on the patio or at the picnic tables.
Hanalei Gourmet. North side, Hanalei. I didn’t actually eat at this joint but it was super kid-friendly and a fun atmosphere. Ryan said the fish and chips was legit.
Chicken in a Barrel. Various locations. This is a local semi-fast food joint with the most delicious chicken ever. I just had some shredded chicken on a green salad and it was to die for. Also, the fries are perfection.
Kaua‘i Juice Co. Various locations. I’m adding this here because they bottled my favorite kombucha I’ve ever tasted — Lilikoi Lychee. SO. GOOD. You can find kombucha on tap at their shop, along with lots of other grab-and-go snacks that are super healthy and super delicious.
Wishing Well Shave Ice. North side, Hanalei. A local favorite and a quirky, fun spot for shave ice. I recommend Da Bomb (root beer and cherry shave ice over vanilla soft serve OHMYGOSH).
Lappert’s Ice Cream. Various locations. Delicious, rich, creamy ice cream stop for the kiddos. Or let’s be real, the grownups.
Makana Terrace at Princeville Resort. North side, Princeville. This is the terrace restaurant located in the old St. Regis Hotel. The views from the terrace are spectacular, especially at sunset. They have a kids’ menu, but no kids’ entertainment (i.e. crayons), so we brought our own coloring books and stickers. This is another place where if you have kids that aren’t used to eating out, maybe get a babysitter or save the cash and find an easier spot.
Kauai Poke Co. South said, Lawai. Food truck heaven! I had poke four times during our trip and this was my favorite bowl, hands down. I recommend the Plantation Bowl.
Kickshaws. South side, Lawai. This was Ryan’s favorite meal all week! This is another food truck, with down & dirty hot sandwiches, burgers, and more. Ryan won’t stop talking about the cheesesteak.
Sushigirl. North side, Kilauea. An awesome little sushi spot located by some fun shops. The sushi burrito is a fun twist on a poke bowl or a roll.
Where to Shop in Kaua‘i, Hawai‘i
I love to check out local shops when I’m traveling to a new place, and I totally wasn’t expecting to find so much great stuff in Kaua‘i! The local makers are top notch, and the boutiques there seem to source the most beautiful odds & ends. Here were a few favorites.
Ohana There’s a small location in Hanalei and a much larger one in Kukui’ula Shopping Village in Poipu. They have the loveliest gold jewelry, wall hangings with shells from local beaches, kids stuff, and locally woven hats & bags.
SoHa Living Also in the Kukui’ula Shopping Village, this shop was actually closed when we were there but I did some intense window shopping and was SO SAD to not be able to go in. Lots of fun home goods.
Beauty Bar A small shop in Hanalei with fun beauty products you might not find elsewhere, also a few little jewelry pieces and an awesome selection of Quay sunnies.
The Barn 808 Ryan fell in love with this pair of shops! One side is home goods and the other is clothing — they have lots of funky stuff for kids, too. They were having a huge 50% off sale when we were there so be sure to ask about any deals.
Wishing Well This little outdoor shop is part of Wishing Well Shave Ice but we found some of our favorite kids’ t-shirts here, along with a sweet little gold bracelet for Maggie. The t-shirts are locally dyed and printed.
Kokonut Kids A fun kids’ store with lots of toys and a ton of swimwear (Maggie got a couple of rashguards here because we found out on the first day that she burns really fast!). Awesome spot to pick up something for a baby or kid if you have a birthday coming up.
Warehouse 3540 One of my favorite stops of the trip! This is a warehouse with a handful of various artists shops set up inside (food trucks and coffee trucks too!). Ocean Paper is here, which is kind of a Hawaiian version of Rifle Paper Company and sells lovely hand-painted cards and art. You can also get some organic watercolor paints there in a little travel kit! So cool! Another fave shop in the Warehouse was Hawai‘i Says HI — perfect for pretty souvenirs or little housewares.
Aloha Exchange An awesome surf and skate shop with a little something for everyone! The kids loved the hats, t-shirts, and swimsuits. I loved the women’s clothing, blankets, and surf books. The dudes in our group loved the Patagonia selection and outdoor gear. This is one to add to your list for sure. There’s also a fun mural on the garage door outside the Kalaheo location.
Hunter Gatherer Another fave! This pretty shop has a mystical vibe, with tons of crystals and rocks, and lots of pretty housewares. It actually had a good section of really pretty hand-carved blocks for kids and fun kids books too. But beware here: it’s definitely a place where you need to keep an eye on kiddos who like to reach out and touch things. 😉
Hope these suggestions help you plan your trip to Kaua‘i! Come back later this week for our recommendations on the best beaches and activities, plus a big fat packing list for families! xoxo
Source: https://lovelyindeed.com/kauai-restaurant-and-shopping-guide-with-kid-friendly-ideas/
0 notes
Text
The Sunday Series Vol. 8
Happy Sunday! It’s been a while since we’ve shared our weekly favorites, having taking some time off for the holidays. We’re happy to be back this week, with a series of small inspirations and new finds that have caught our attention recently. Keep reading to see what we all loved discovering these past few weeks…
Julia– We got home late on Thursday night and the first thing I wanted to do on Friday morning was check on the house progress that happened while we were away. We’re inching close to the finish line with our completion date at the end of next month, so all the fun stuff (like tiles, cabinetry, paint, fixtures…) are happening now. While we’re not decorating 100% of the house right away, we’ll have all of the rooms that we use on a daily basis mostly decorated, aside from layering details like art, books, small objects, etc. These are the pieces that I believe you can’t just buy, they are things that are slowly collected over time. And since we’re still young, we have many years ahead to layer them up to create a house that feels lived-in with stories and treasures. We have slowly started to buy art, but only pieces that we fall head over heels for, and we always know right away. A few weeks ago when my sister was in town, she wanted to stop by a local art gallery, Corrigan, so we tagged along with her. I immediately fell in love with a collection of pieces by Meg Page. We left and I couldn’t stop thinking about them, so later that day, Thomas surprised me and took me back to get them. I’m so excited to get them framed and hang them in our house (I’m thinking in our master bedroom). They are four original botanical watercolors (the watercolor is layered over and over, that’s why they don’t look like a typical watercolor). I love botanicals, and over Christmas, Thomas’s parents showed us a collection of antique Japanese botanical prints that his great grandfather had collected while in Japan years ago. They let us pick our favorites from the collection to hang in our house as well. They are so special and beautiful. Needless to say, I’ve been on a bit of a botanical kick. I recently found this Etsy site that has the loveliest (and affordable) botanical prints. My favorites are this set of roses, these camelias and these herbs, which would all make for a beautiful collection on a gallery wall.
Thomas– With a bunch of holiday travel over the last couple of weeks, I had run out of pretty much every airplane movie that I’d wanted to see, so I turned my attention to podcasts. I first started listening to podcasts years ago when I was into home brewing beer, but I hadn’t started listening to them again until a few months ago. We started with Malcolm Gladwell’s Revisionist History, which Julia and I both enjoyed a lot. But after we finished, I failed to find another podcast that I could listen to more than one episode. I stumbled on Freakonomics Radio and I was super excited to listen. I’d read their book, watched the documentary under the same name and I’d read another one of their books which was a compilation of their blogposts called When To Rob a Bank. Needless to say, I’m a fan of their work. They notice and cover topics that are out of the ordinary from everyday life by having conversations with experts, especially academics. They aren’t afraid to go against conventional wisdom or play devil’s advocate to even some of the most brilliant minds in the world. Below are five of my favorite episodes that serve as a great starting point for anyone interested.
The Demonization of Gluten– Details the history of Gluten intolerance and the more current craze over Gluten-Free Diets.
Why Is My Life So Hard– As human beings we have lots of biases. This details our bias about how we feel about the obstacles that make our life harder and the aids we have that make our life easier.
Are We Running Out Of Ideas– Breakthrough innovations are becoming harder and harder to come by, costing more and more for each improvement.
The No-Tipping Point– Some restaurants are moving to a no-tipping policy as the current system of 15-20% tipping, rewards front of house restaurant staff instead of back of house staff, like cooks. This episode discusses the potential of no-tipping policy gaining wider acceptance.
Is America Ready for a “No-Lose Lottery”?– Americans waste billions of dollars every year with the dream of getting rich by winning the lottery. This episode details rewards based savings bank accounts which pay out the collective interest earned of all bank accounts held at a bank to a handful of winners. That way people have the thrill of playing the lottery while saving for the future.
Laura– Happy New Year! I hope you had a great time with family over the holidays. I don’t know about you, but while the thought of a New Year can be so exciting, it’s a little overwhelming at the same time. On the first day of 2018, I experienced a mental and emotional imbalance as my gut was trying to tell me something. However, I couldn’t pinpoint what it was, and as a result, I had a minor anxiety attack late that evening. It was kind of scary and sent my body into a shock. After a full night’s sleep and some reflection, I was able to identify what those feelings were: one of them being fear of the unknown. This is the first year where I haven’t made a resolution. I’m such a planner (hello, type A personality) that I usually have a rough idea of what I want the first six months to look like based on my goals. To be honest, the reason I didn’t make any resolutions is because 2017 was a HUGE year for me – I crossed almost everything off my list. So I guess a part of me just feels content with where my life stands right now and perhaps I just went into a bit of shock that I didn’t have things mapped out per usual. A full year ahead, a clean slate, and for some reason I can’t mentally envision what life looks like past February. An Instagram follower recommended a great podcast for me to listen to, The Lively Show, and this episode in particular really resonated with me. One of the many realizations I had after listening to it is that I don’t have to start new goals just because of a new calendar year, and I should simply focus on making personal strides day-by-day, one month at a time to slow my mind down.
To successfully do this, I came up with a personal exercise to do each weeknight. I’m calling it “word vomit.” At the end of each weeknight, I’ll pull up a new entry in my Evernote, and for one minute or less I will type out every feeling/thought/emotion that remains in my mind from that day. After one minute, I’ll return to the top of that list and assess each feeling as necessary confronting these emotions with the who, what, why, and how. I will ask myself what made me feel this way, how it affected me, and how did I can handle the feeling. I prefer typing this exercise vs. writing it because sometimes my mind is moving so fast that it’s not actually forming full sentences or I have trouble verbalizing what it is I’m feeling. Therefore, a word vomit approach to getting it all out there may work best for me. I’m hoping this exercise will put my mind at ease so I can actually destress, shutdown for the night and start fresh the next day. And if I’m able to pinpoint the root cause of these feelings then perhaps I’ll be able to make a sound decision or take a different approach when I encounter them again.
Margaret– This Christmas and New Year, I visited my family in Atlanta. For those of you who haven’t explored the city beyond the airport, Atlanta boasts incredible shopping and an awesome ever-expanding restaurant scene. I thought I’d share a few of the places where I chose to either shop, eat, or enjoy, for those of you who plan to visit in the near future. My sister, mom, and I spent time shopping in the relatively new Westside Provisions District, making a point to stop in the Ann + Sid Mashburn shops to pick up one of Ann’s coveted shirts. The husband & wife designer team is inspiring and their story is a fun one to follow. We had fun sifting through the signature classic, yet modern styles of the newest collection. I also stopped in the creatively curated Warby Parker Atlanta store around the corner. We completed last minute Christmas shopping at Perimeter Mall & Phipps Plaza. My dad and I practically ran through these malls looking for the perfect gift for my sister. The Tavern at Phipps was a must-stop for dining before shopping. For brunch I always try to make it to West Egg Café in the Westside. It’s one of my favorite brunch spots in the city. After hearing great reviews, I was looking forward to trying St. Cecilia in Buckhead, and I loved the experience. I ordered their cacio e pepe and savored every minute of it.
One of the highlights of my time in Atlanta was visiting the High Museum of Art in Midtown. The fashion works displayed were my favorite part of the showcased exhibit, Making Africa. A couple of fascinating supporting exhibits were Amy Elkins’ Black is the Day, Black is the Night, and the modern art collection. I loved spending quality time at these places with family and dear friends during the holidays. I’m proud to have grown up in Atlanta, and I’m excited to follow how the city evolves.
The post The Sunday Series Vol. 8 appeared first on Gal Meets Glam.
First found here: The Sunday Series Vol. 8
0 notes
Last Seen Blogs
supercosplay
Super Cosplay

vagabondtrousers
Vagabond Trousers

ray-rain
Not as much as a poet as an idiot with a pen.

tulangkecil
Tulang Kecil

promotionalguide
Untitled