#sew cat tutorial
Text
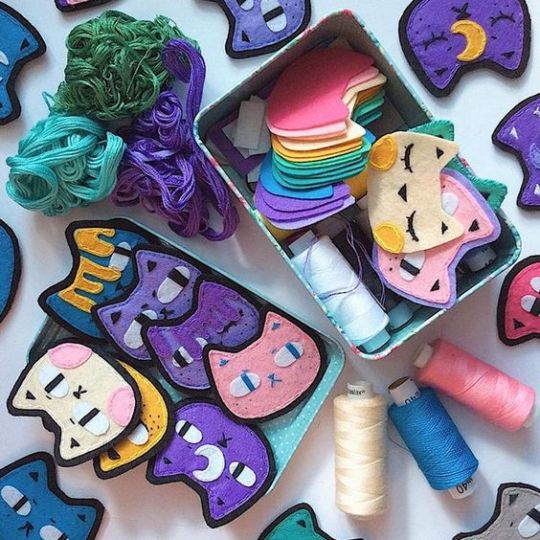
#felt#felt diy#cat#kawaii cat#moon cat#sailor moon cat luna#sew cat tutorial#kawaii sew tutorial#kawaii plushie
4 notes
·
View notes
Text
Man, people on marketplace really suck at taking photos of furniture.
#how do you expect to sell a table if you can't even be bothered to get it from more than one angle?#or clear the garage clutter off it? or include measurements? SO MANY DON'T INCLUDE MEASUREMENTS!#at least 85% of marketplace furniture is Mystery Sized#just looked at one that had FIVE photos from the EXACT same angle all at slightly different levels of tilt and blurriness#there was a cat walking by in the background of 3 of them#I still don't have a table for my sewing machine and I can't start filming the sewing portion of my shirt tutorial until I get one >:(#I just need something smallish and sturdy#complaining#(not the lady I bought my desk from though! she was great and had all the measurements and a good set of clear photos)
109 notes
·
View notes
Text
DIY cat zipper pouch
Love cats and looking for a stash buster? Check out this cat-shapped zipper pouch tutorial by Heather Handmade.
The tutorial comes with a pattern, but you could easily draft your own and customise it however you want.
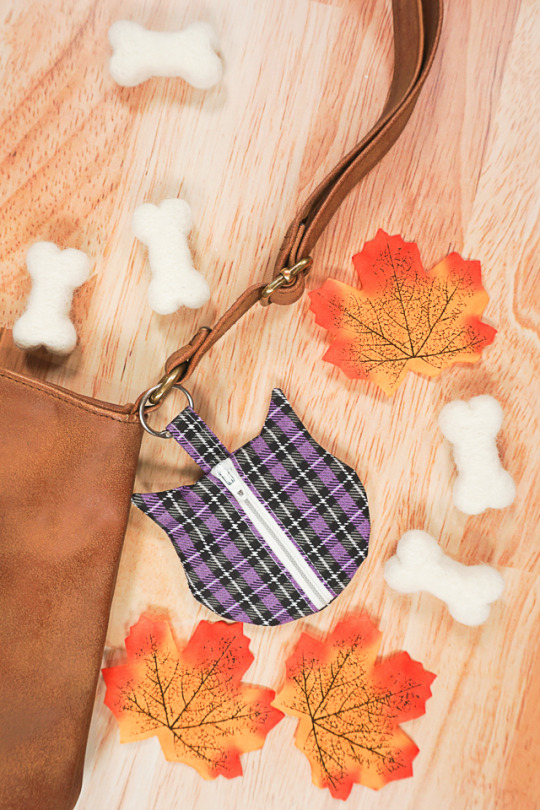
(Image source) [ID: a zipper pouch shaped like a cat's head hanging from a brown purse strap. The pouch is made from black, white, and purple tartan fabric and has a white zipper in the middle.]
#wasteless crafts#diy#tutorial#how to#pouch#cat#zipper#fabric scraps#stash buster#crafts#sewing#sewing project#easy sewing project#diy gift
179 notes
·
View notes
Text
youtube
I made a nyan cat plush tutorial! ♥
#nyan cat#plush#youtube#tutorial#diy#kawaii plush#nyan cat plush#memes#cat#cat plush#kawaii#cosplay#handmade#etsy#crafts#sewing#sew#Youtube
6 notes
·
View notes
Text

link
#sewing#sewing projects#sewing tutorial#cat clutch#diy gifts#sewing clutch#handmade#handmade gifts#sellcrafts#sellhandmade
1 note
·
View note
Text
Art Help

I redid this list because broken links 💀
General Tips
Stretch your fingers and hands
Art is for fun
Never too late to start/improve
Tumblr radar! Submit your work!?
Using a tablet
Editing software: pictures & video
Moodboard resources
Comic pacing
Storyboarding techniques
Watercolor
Coloring
Color Theory (not children's hospital)
Gemstone reference
Resources: coloring things a different color
Gold
Dark Skin undertones
Dark Skin in pastel art
POC Blush tones
Eyes colors
Cohesive Color Palette
Lights and Colors
Human Anatomy
POSE REFERENCES
Eyes: pupil shape, direction
Wizard Battle poses
Romance poses
Shoulders
Tips for practicing anatomy
Proportional Limbs
Skeletons
Hair Directions
Afro, 4C hair
Cane use
Dingle dongles: male reproductive
Clothing
Long skirts
Traditional Chinese Hanfu (clothing reference)
Cultural clothes
CLOTHING REFERENCE
Medieval armor
Sewing information
Animals
Horse -> Dragon
Snouts: dogs, cats, wolves, fox
Foot, paw, hoof
Plants
Blossoms: cherry, plum, apricot, etc
Plants/flowers: North America, Hawaii, Patagonia
More
Drawing references sources
More references: floorplanner, height & weight, expressions, hands, animals, sculpting tool
Art tutorial Masterlist
Another art tutorial Masterlist
Inspiration: father recreates son's art
Inspiration: Lights
ART BOOKS
Art Cheats
#art tips#art tutorial#art references#pose reference#art masterlist#clothing art#art clothing#digital art#watercolor#poc#art
41K notes
·
View notes
Text
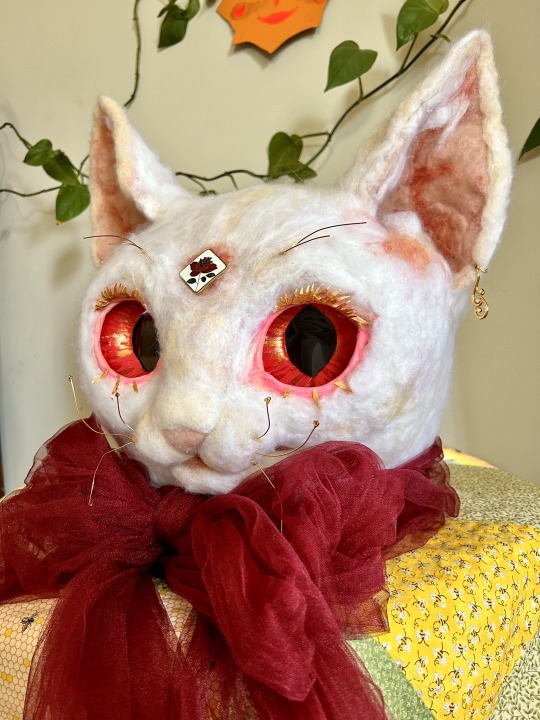
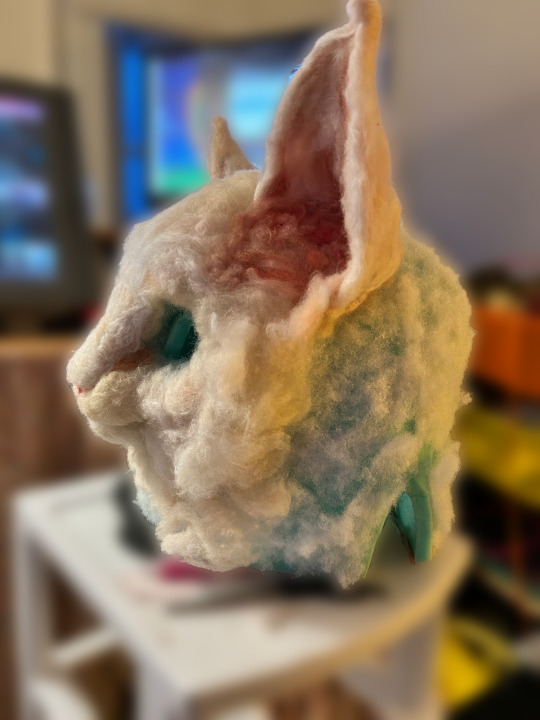
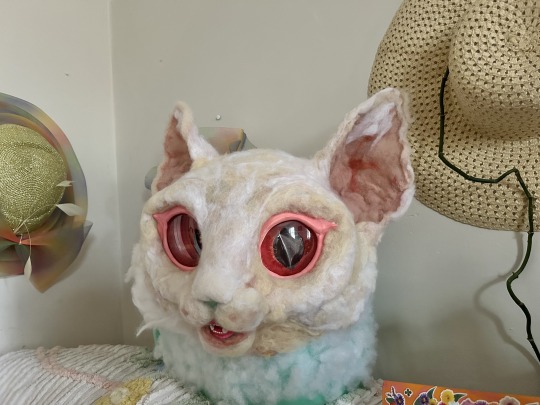
Hello! this will be a quick process post so that you can see how I needlefelted a fursuit head!

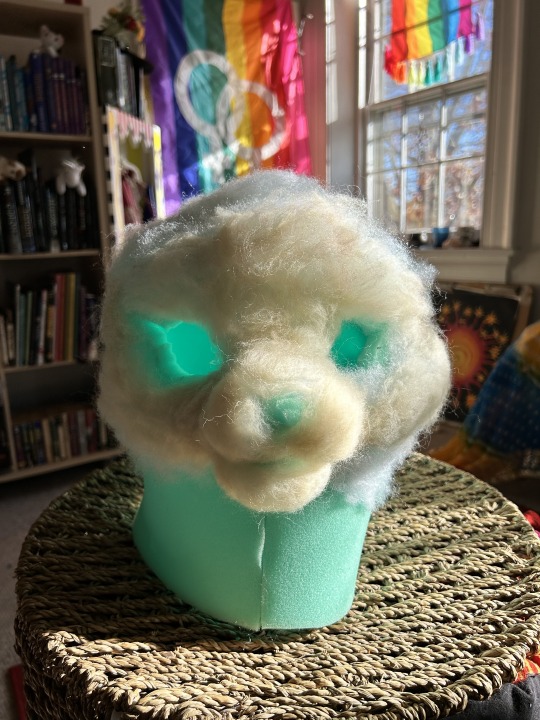
I began by following the "bucket head" tutorial by Matrices, then added a layer of polyfill so that I wouldn't use as much of my merino wool. This is how I typically make a doll head, my "core wool" is often polyfill because it really likes to clump together and fuse.
Overall, this project took about two months of my spare time. This is the first fursuit head I have made, but not my first needlefelt project.
I would really like to encourage other people to try making masks this way! You can do any kind of subtle color with wool and the wool fiber is very cheap. If you wanted to make a fursuit head with the entirety of starry night flowing over it, or a head with tons and tons of complex colors, I think wool might be the best material. I also did not need to know how to pattern or sew in order to make this-- it was sculpture rather than sewing, which I am bad at.
The rest under the cut!

Another angle where you can see that I am building up the structure of the head.
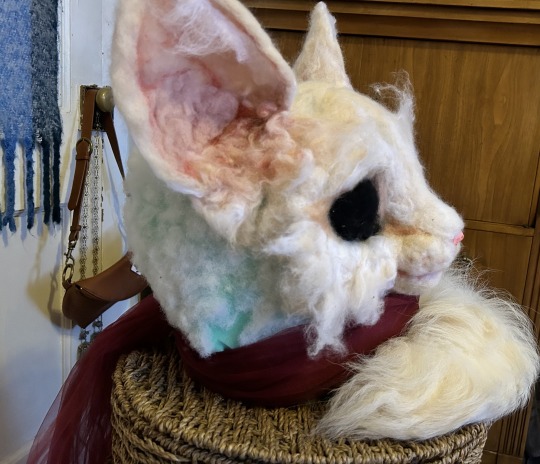
I then made the ears, which are translucent because they're felted, just like real ears!

I wasn't happy yet with the proportions at this point, so I spent a lot of time figuring that out and deciding where and how I'd be placing the eyes.
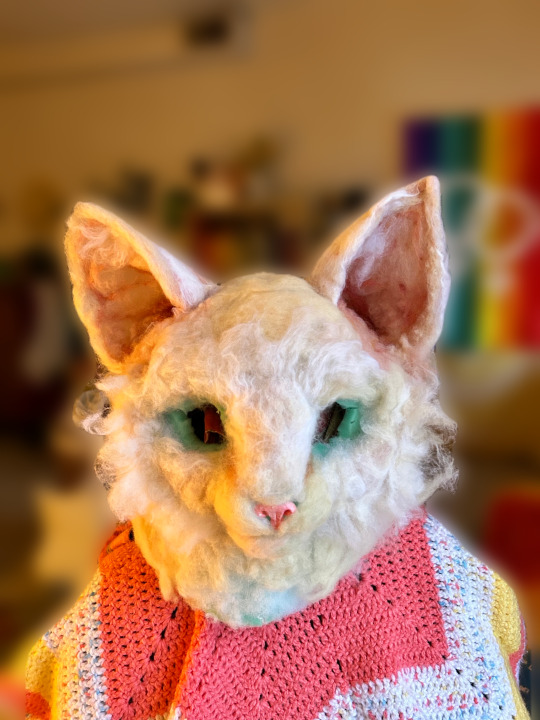
I made a pair of sculpey follow-me eyes by using a little soy sauce dish as a concave circular mold and tried a foam clay nose and teeth. The sculpey eyes could be more successful, they took a lot of shaving and adjusting to get right and they eventually cracked from the strain I'd put them through while making them more shallow. For a while, I intended to make wefts of white wool to use on the sides of the head, but I ended up preferring a domestic shorthair head shape because it reads the most clearly as a cat vs any other animal.
I originally intended to have the eyes behind clear plastic domes and used "shaker domes" that people use to make greeting cards to cover the eye, but in the end they made the eyes too dull. I made foam clay housing for the eyes and painted it pink with acrylic paint. I used stick-on car window tint to create the pupils. My visibility inside the head is really good!
Finally, after fiddling, one of the eyes was deeper than the other and I had to re-set both to account for it. I added spot glitter on top of the acrylic paint on the eye using some gold watercolor paint I had, which was silly because I'll need to wash the head at some point. I will probably seal the eyes before washing and hope for the best. I intend to spot clean the head until it absolutely needs to be washed, at which point I'll remove some pieces or find a way to protect them while soaking the head in a cool dr. bronner's bath.
I glued down a layer of felt fiber on top of the foam clay "tear ducts" and then felted new fiber over the tear duct skin and cheeks to blend them into the face. I also removed the teeth and closed her mouth because I didn't have time to adjust the teeth as much as I wanted before the con that my friends and I attended. I would like to modify this head so that she can open and close her mouth.
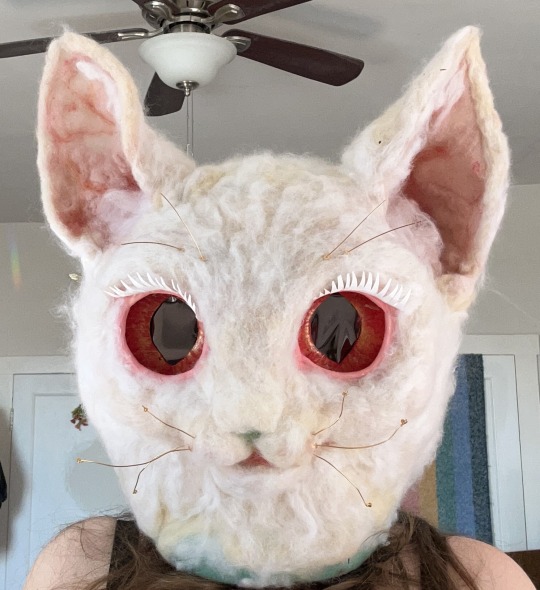
Lastly, I added wire whiskers with little glass beads looped onto the ends and paper eyelashes that I also watercolored and sealed, like the insides of the eyes. Like I said before, it's gonna be a problematic wash, but I'm confident I'll figure it out, and I can always repair her or replace her lashes if something goes wrong.
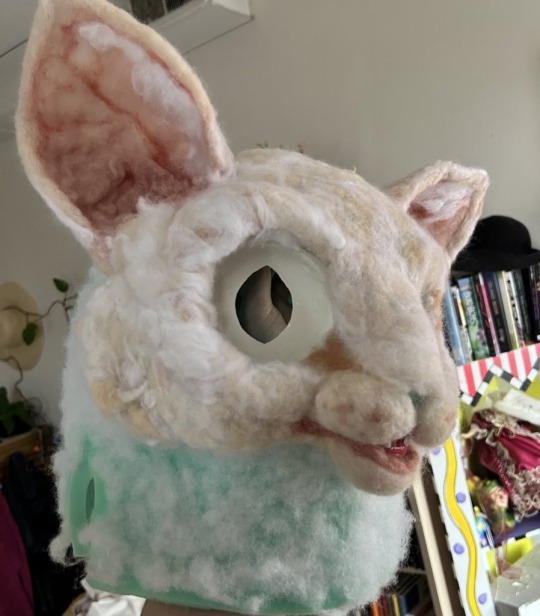
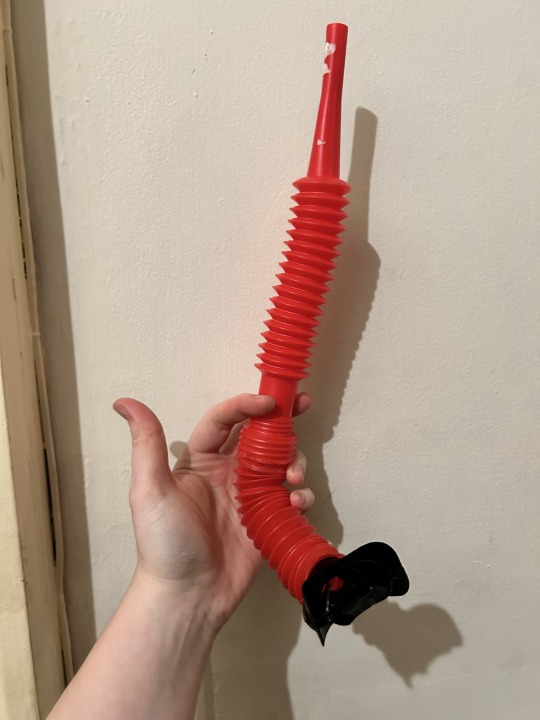
Last thing, to keep the inside of the head nice and cool and prevent fogging since in the end I closed the mouth and had sealed eyes, I made a snorkel out of a snorkel mouthpiece fitted into two collapsible auto funnels.
I would say that realistically this entire project cost me less than $150. I had some materials lying around, like the wire and the beads and the sculpey.
I added two ear vents on either side of the head so that I had options on where to feed the snorkel out. If you look at the other pictures on the blog of me wearing the head, you mostly can't even see the snorkel mouth. However, it was a little problematic to let go of the snorkel to talk. it would be perfect for a silent suiter, but I'm lucky that so many people wanted to talk to me. I'd like to try and replace the snorkel mouth with something I can talk in, but I'm not sure what to use. It should be something that can create a seal to keep my breath out of the head. it's possible that I will be able to make something with a painter's mask.
I hid the "seam" between the head and my body with two yards of tulle tied into a big bow and sewn down onto the neck so that it wouldn't move around.
I hope that if you try making something similar you'll show it to me!
289 notes
·
View notes
Note
Could the cats make little toys? Like making plushies out of plants or figurines out of rocks and sap or something?
70% of the toys they make are weaved or whittled. I actually made a small scene in the outline (which HOPEFULLY, i keep saying this, should be out Soon TM) of Darkstar's Commandment where she creates a wicker ball as a gift for Reedshine
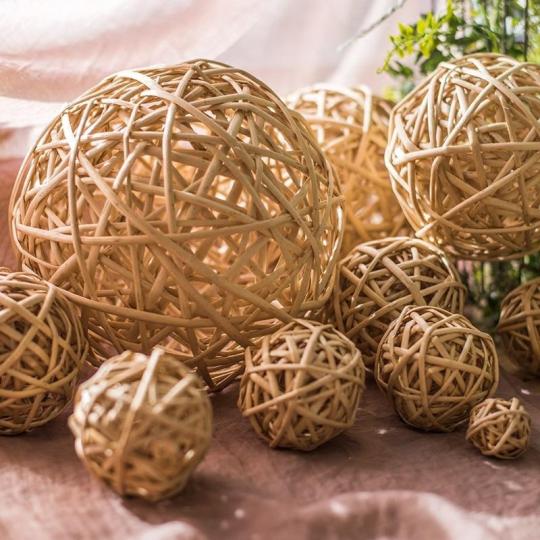
^^^ These are willow balls! If you have access to willow trees, you can make these really easily. For Clan cats, it's a sign that you're a really good weaver, and making these is a big favor because they're naturally quite brittle.
These are the basis of the famous "mossball." Pure moss doesn't keep its shape if you kick it around; a wicker skeleton is stuffed and covered with moss so it doesn't hurt if it bonks you in the face. Usually, these are just kept in a pile somewhere any anyone can go grab and use one for games.
You can customize a ball for a specific person by sourcing some leather or linen, and then sewing it around the skeleton. WindClan has the market cornered on this sort of thing because of how many rabbits they hunt, but for RiverClan, SkyClan, and ShadowClan, pelts and flax are pretty valuable and not typically wasted on crafting good mossballs.
(SkyClan in particular is more likely to just trade kittypets for their excess toys.)
Even the best Clan cat artisans only whittle the sorts of figurines we might associate with small children. They're sharp-edged, simple, and look a lot like these;
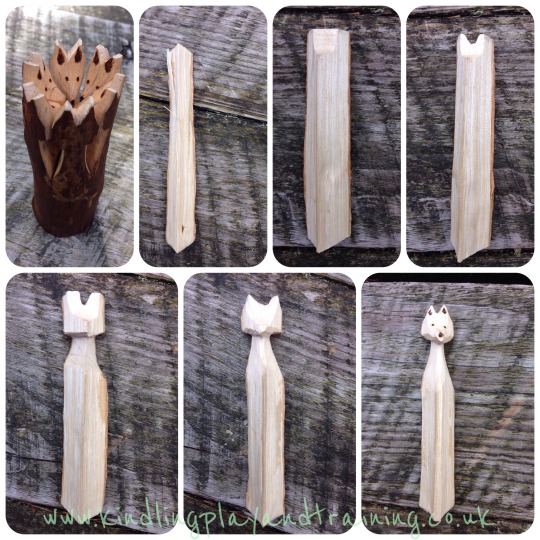
They don't have "polish" figured out yet, so nothing they make looks "smooth." Some cat's going to figure out that they can rub the edges against the nearby exposed sandstone, but I'd leave that for a bit of a "genius" like Dustpelt or his mentor One-Eye to figure out.
They can also be made out of clay, but that's more common in RiverClan and WindClan where wood is scarce.
Figurines are often directly commissioned by deputies and senior warriors for use in strategizing, ESPECIALLY in WindClan where they have a history of needing to "visualize" the various parts of their open moor in battle plans. They can be simple toys, but these can get pretty elaborate as it's seen as a bit of a status symbol if the deputy's "pawn" of you is fancy.
Basically, it means you're important enough to be frequently included in battle plans, so much that YOUR pawn is customized. These will often be buried with the warrior, or passed down to their living descendants.
Figurines show up a lot in "channeling." The illegal, direct method of summoning the dead by bypassing StarClan. They aren't "consumed" by the ritual like more organic tokens, so someone who does a ton of channeling of a specific spirit will often end up crafting one of these.
There's various other toys too, but they're generally not soft or stuffed. Clan cats don't have "plushies," since they require a LOT of textiles and sewing which they can't experiment freely with.
And to close out;
Glue is made from animal hide, and is another one of those "high-quality" materials mostly used by artisans and patrol heads.
Making pitch from pine is dangerous; go here for a tutorial on that
Sap's not a great adhesive, but works fine for kittens just having fun.
Whittling, weaving, and molding are the skills usually used to make toys.
Yes, they make toys, and they love to play with them.
Most "crafts" Clan cats make are communally owned, personal belongings are usually very special.
#Did you know I have 1700 asks#I'm trying to answer some old ones :SPARKLE:#clan culture#Better bones au#Toys#Clan Crafts
192 notes
·
View notes
Text

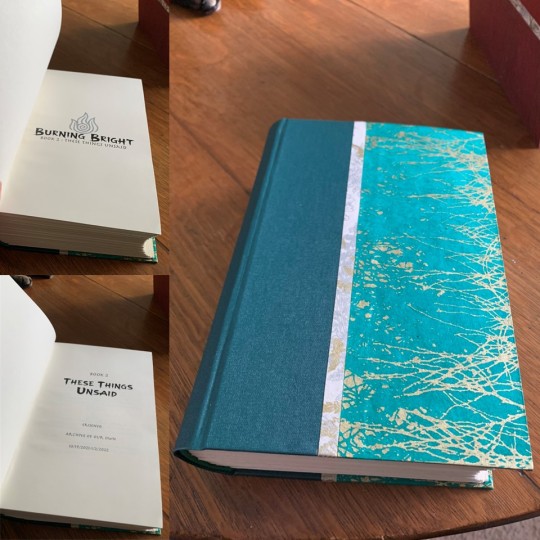
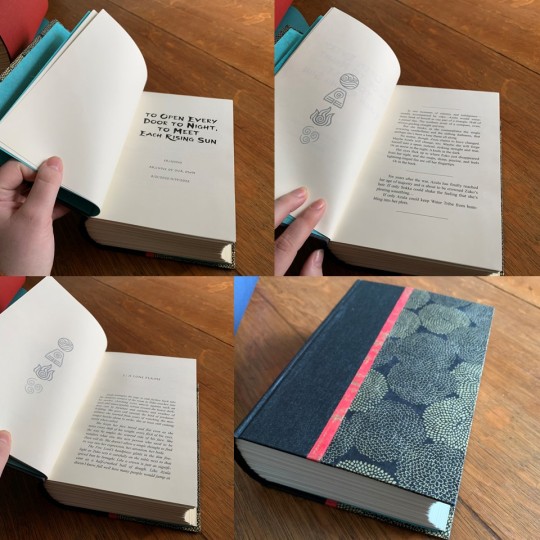
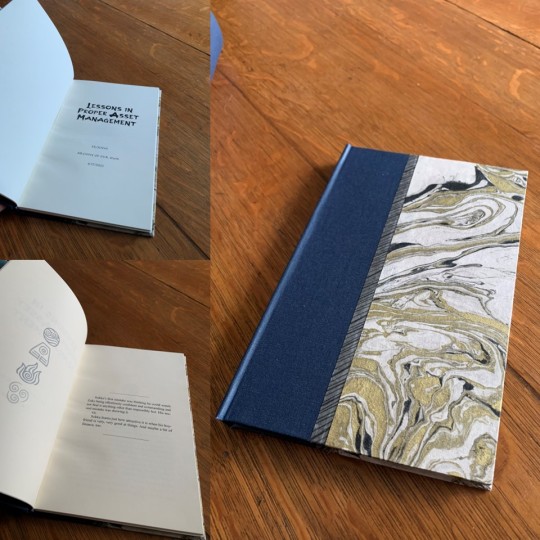
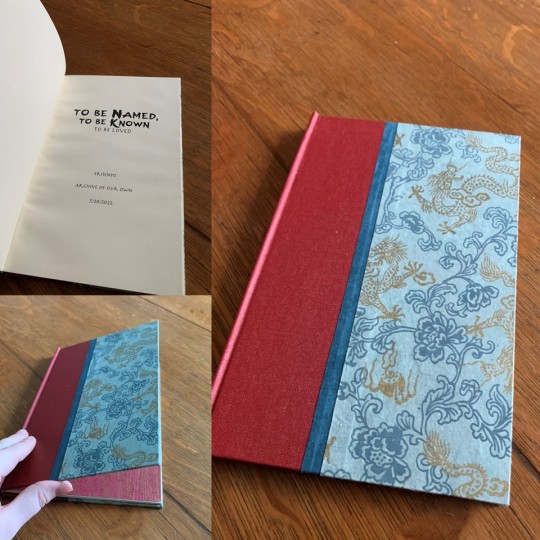
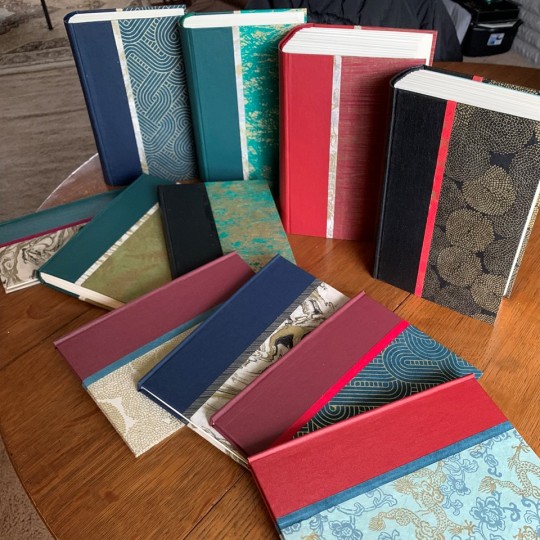
First bookbinding project a success. I think that my cat approves because he would not stay out of my photos. Five months in the making, but I couldn't be more pleased with the results.
I started with @armoredsuperheavy's amazing fanbinding tutorial to create a typeset of each work in @erisenyo's Burning Bright AU published on Ao3. Then had to reread the works in the new format and edit as I went to make sure everything was formatted correctly, (combined word count somewhere around 1.3 million) that took over a month all by itself.
I picked up a copy of Introduction to Bookbinding & Custom Cases by Tom and Cindy Hollander from my local library, to look at some detailed how to images and get multiple perspectives on construction methods. Excellent book, I do recommend.
My hunt for materials included a trip to Detroit with a side stop at Blick to look at decorative papers in person. Blick and the fine people at Hollander’s ended up having everything I needed to make covers. So between my brother kindly 3d printing me a punch cradle, making a DIY sewing frame of my own invention (courtesy of scrap lumber and a trip to the Lowe's hardware department), and three reams of late night printing, I managed to amass all my supplies.
Folding three reams of paper into signatures (the little bundles you sew together) takes about five days if you don't want to lose your mind or your place, and longer if you discover you need to fix things because that definitely happened. Then you get to unfold them to stab holes in them which is as terrifying at first and therapeutic by the end as it sounds.
Next came weeks of sewing books together, a magical process. I learned three new knots, repeatedly stabbed myself (because all forms of creation forcibly demand blood sacrifice) , and felt like I was roleplaying a monastic librarian from the time of Gutenburg. That's 600 years ago, 24ish generations, over 8million ancestors since then (by geometric progression, which excludes the possibility that any of my peasant ancestry is from small towns which is you know likely but I digress) and here I sat sewing pages together in a basement because story is the most sacred of human arts as it binds communities together and shapes perceptions of the self and our brethren, of outsiders allies and enemies, of the world as we know it and as it may come to be. Did I mention sewing books felt magical.
Then came the glue. So much glue. Multiple types of glue. All sticky. all stuck to me. I smeared glue with my fingers like a child.
At last it was time for the covers. Choosing combinations of the decorative papers and bookcloth and making sure I could get enough out of each material for what I needed. Precise cutting so many thanks to the architecture school professors who showed me how to properly cut chipboard. Then measuring and gluing, and more measuring, and more gluing. At last press a little groove by the spine and repeat eleven times.
Then I get to impress all my people with my latest and possibly coolest maker skill unlock, I am a book binder.

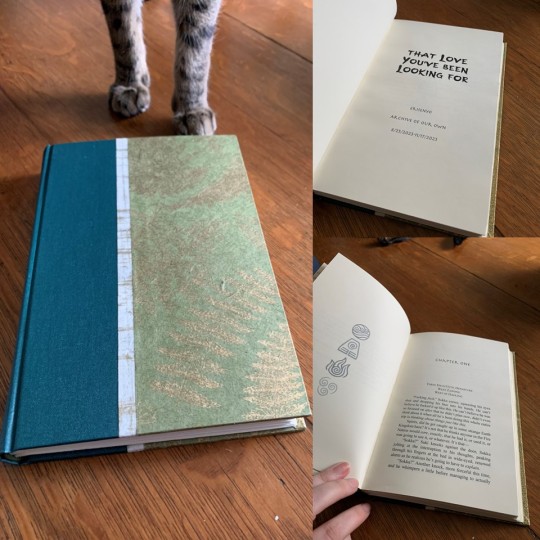
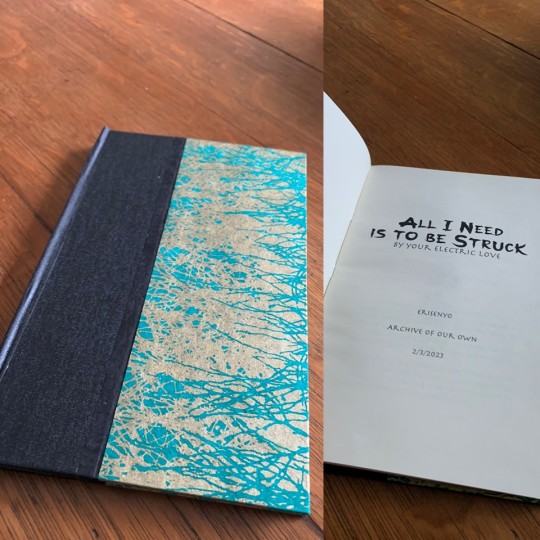
Bottom to top in the stack or left to right at the bottom are:
These Things Written
These Things Unsaid with Without Consent
These Things Known with A Third Chance (or a First)
Oh, The Way Your Makeup Stains My Pillowcase
That Love You've Been Looking For
All I Need Is To Be Struck (By Your Electric Love)
To Open Every Door to Night, To Meet Each Rising Sun (my favorite)
Love Is In the Hair (fanart of this one originally lead me to read the series, thanks @ash-and-starlight)
Lessons in Proper Asset Management
Tangled Up With You
To Be Named, To Be Known (To Be Loved)


#fandom#fanbinding#book binding#book making#zukka#zukka nation#zukka fanfic#avatar#atla#atla azula#atla sokka#atla zuko#ao3#ao3 fanfic#erisenyo
90 notes
·
View notes
Text
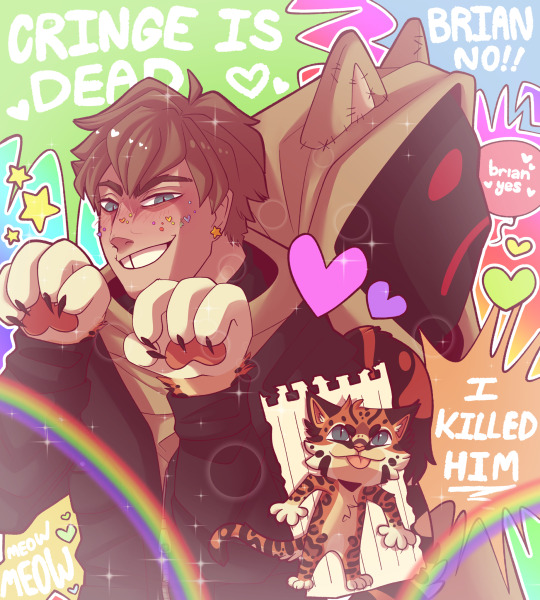
I have unilaterally decided that Brian is a furry and nobody can stop me. I can offer no explanation, it came to me in a vision at 4AM yesterday night and I refuse to listen to reason. This is canon now. The only thing I can say is the phrase “glitter glue gay” popped into my head followed immediately by the thought of Brian in a kigurumi, and I took that as a prophecy.
Btw his fursona is an ocelot named Sal (who I created an entire reference sheet for JUST FOR THIS ONE DRAWING but that’s neither here nor there), and he’s had this guy (and redesigned him many times) since he was in high school. Brian followed a tutorial and made a set of puffy paws and a tail for himself a month before going to a con, and before everything with Alex happened, he planned on making a full suit for his senior project (cause he’s also an art major obviously), but he never got around to it.
Oh and he also definitely sewed cat ears onto his Hoody hood and totheark was like “they’ll know it’s you if you go out like that but okay.”
#my art#my post#digital art#art#fanart#brian marble hornets#marble hornets#mh brian#mh hoody#hoody marble hornets#I don’t know what this aesthetic is but I like it#maximalism?#furry#cringe#brian thomas#furry brian is canon#Sal the ocelot
82 notes
·
View notes
Text
so my project over the summer was making a hard copy of my rottmnt april-centric fic, how to get very good at juggling! shameless plug, it occupies a very special place in my heart.

and a video flip through <3 yes it's a bad video but this has been rotting in my drafts I need it out
step by step-ish process pics under the cut! + a link to the tutorial i used.
I largely used this tutorial by Sea Lemon for the actual construction of the book. For the text block, I just copied it into a word document, formatted it to my liking, and printed it out in 24 page signatures. (This makes it sound easier than it was. I trial and error-ed this step so hard, since all the tutorials I saw were for blank notebooks, and not text. If there's demand for a step-by-step on how to do this process with god's jankiest printer, lmk and i'll write it out)
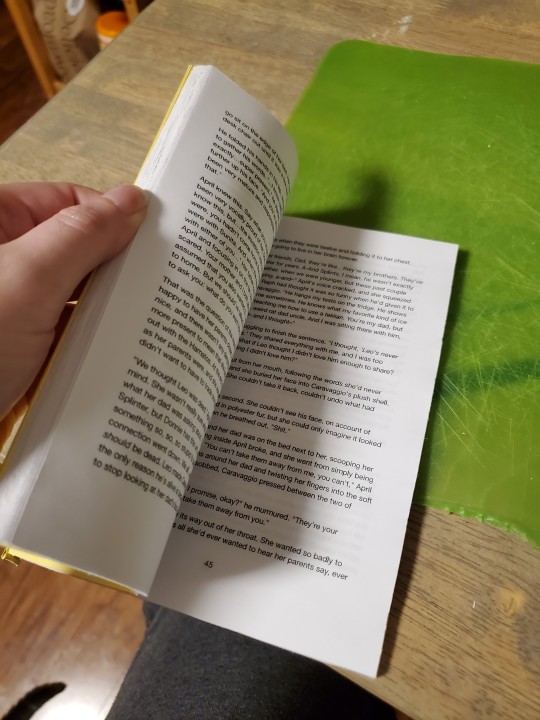
In the end, I had a bunch of signatures that looked similar to this image below. i actually reprinted them (for the third time) after i took this picture bc some pages disappeared and i took the opportunity to center the page numbers. someday i'll learn how to get them on alternating corners.

...that i then sewed and glued into a text block! (ft. my cat)
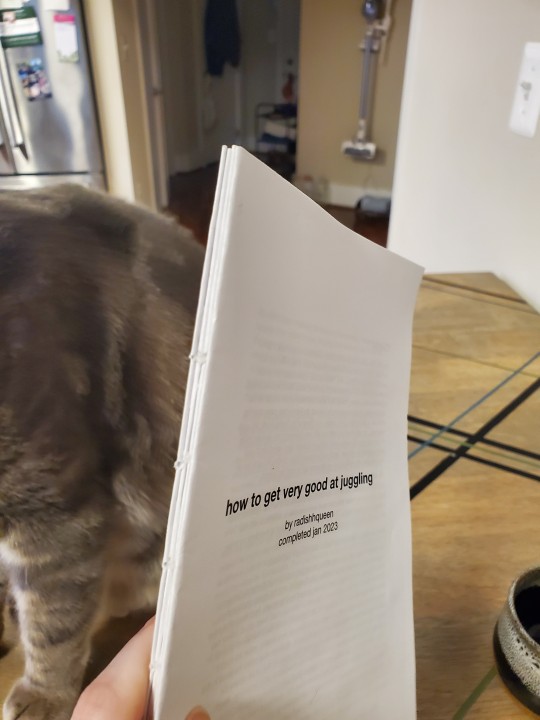
because i was using a public printer, and also because i couldn't figure out how to adjust the margins, i had to do some trimming to make the margins more normal. you can kinda see in the image above that the top margin is like. two inches. (i'm currently in the process on typesetting another fic, i'm gonna figure out the margins this time i swear)

once i trimmed it (very slowly, with an exacto blade) (god i wish i had a paper guillotine), i sewed on some paper headbands and an extra piece of support cardstock (not pictured, whoops), and then it was finally time to start the cover!
okay, admission. when i started this project, my intention was to do a vinyl cover, do the title in stickers, and be done with it. unfortunately the sticky backing of vinyl? very sticky. not easy to adjust things when you have shaky hands and can't get the cover pieces immediately lined up. so i quickly burned through the whole roll of vinyl i had, which meant it was time for plan B, fabric.
also unfortunately, my local chain craft store never fails to let me down, and the only green fabric they had was god's brightest shade of green. regardless, we persevere.
because of who i am as a person, i know how to embroider! more or less! so that meant instead of futzing around with fabric markers and attempting to make a passable cover that way, i just decided to embroider a cover.
first came the mock up
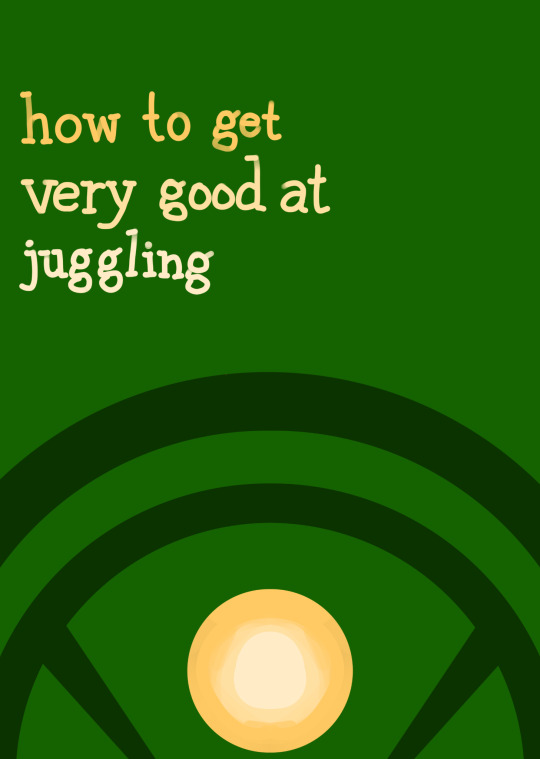
and then i got started with the embroidery! i measured out the dimensions of the cover on the back of the fabric, and made a grid for where i wanted all my pieces to go

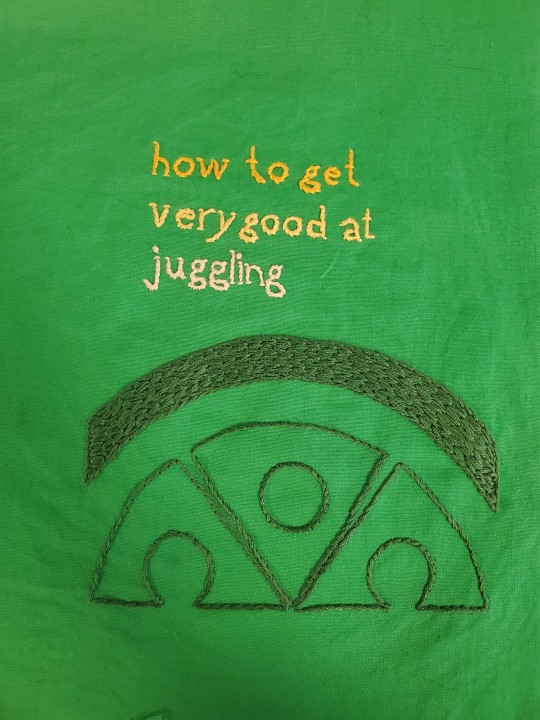
once the cover was finally done, i glued and assembled it a la Sea Lemon's tutorial. and!! now i have a book!!
119 notes
·
View notes
Text
Craft ideas for non-humans
Hey! Im super bored so I made this list full of crafts otherkin can do. Feel free to add on! This list includes some links to tutorials and supplies!!
Yarn tails- Tutorial
No sew animal ears- Tutorial
DIY antlers- Tutorial
DIY fairy wings- Tutorial
DIY Bird/Angel wings- Tutorial
Paper claws- Tutorial
DIY hoof shoes- Tutorial
DIY horns- Tutorial
Paint a cat mask- Buy one here!
Paint a dino mask- Buy one here!
Fangs- Tutorial
Decorate a collar
Make tags for a collar
#therian pride#puppyboy#puppykin#caninekin#therian#dogkin#therianthropy#alterhuman#dog therian#canine therian#alternative#kinnie#kinblr#Otherkin crafts#kin#diy otherkin
2K notes
·
View notes
Text
youtube
Tac Nayn Plush tutorial!
#youtube#tac nayn#nyan cat#plush#tutorial#diy#crafts#sewing#cat#cat plush#kawaii plush#kawaii#thanksgiving#cats#etsy#diycrafts
5 notes
·
View notes
Note
was very interested by your punk DIY posts, and was wondering perhaps if you have any tutorials/general advice on how to make embroidered patches? i'd love to get into that, honestly
(and also i am so sorry about your cat; i know losing a beloved pet is really hard)
Ok so I'm using old jeans for a lot of things but I tend to save the black ones for patches

Cut out a piece of jeans a bit bigger than the area where you want to add the patch. The side you want to embroider is up to you but I like to embroider the inside of the jeans rather than the outside

Fold the edges back and sew them with normal thread you'd use on buttons. This prevents the edges of the patch from fraying too quickly
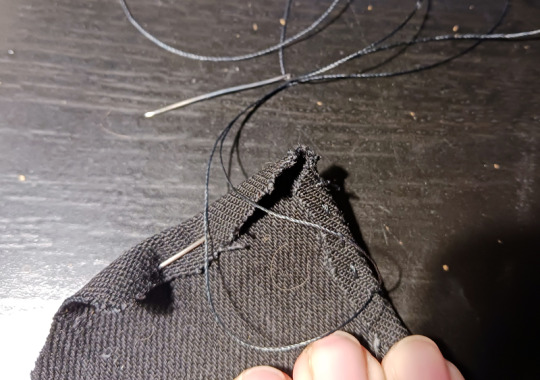
Draw the thing you want to embroider on it
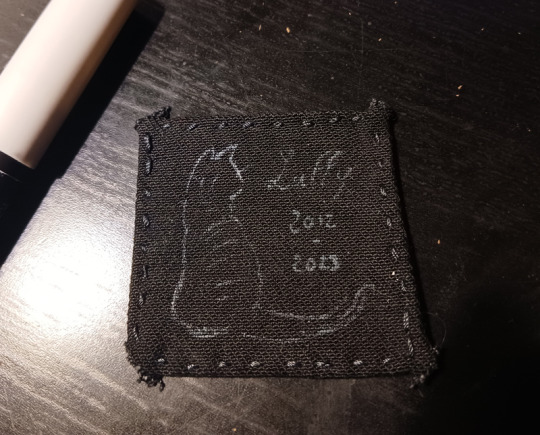
For letters and details I also use buttons thread. I have zero knowledge of actual embroidery techniques and I mostly do straight lines

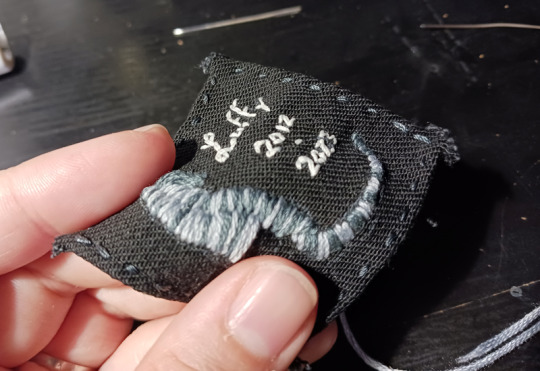
For anything with volume and color I use embroidery thread. It doesn't have to be the expensive stuff. Use a needle with a larger eye for this cause the thread is larger

(I didn't use the light brown thread in the end)
Once again I'm doing straight lines, except now they're next to each other, to create a shape with volume. Stay inside the lines of your drawing and don't go over them

When you're covering the larger areas (like the back of the cat here) it tends to look better if you vary the length of the lines and criss-cross them. It doesn't have to look perfect, perfection's for machines not for human beings
The back is gonna look chaotic as hell but it doesn't matter!
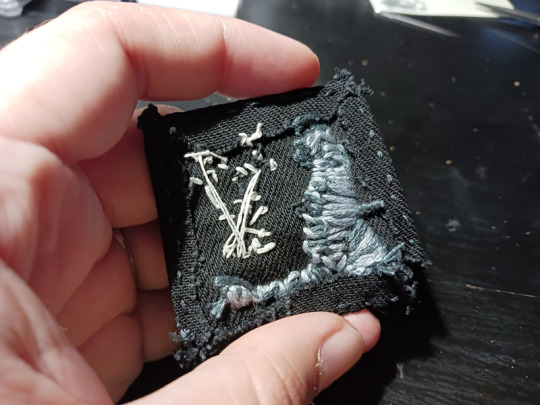
I like to outline things by re-tracing the drawing with button thread to add some details (like the whiskers here)
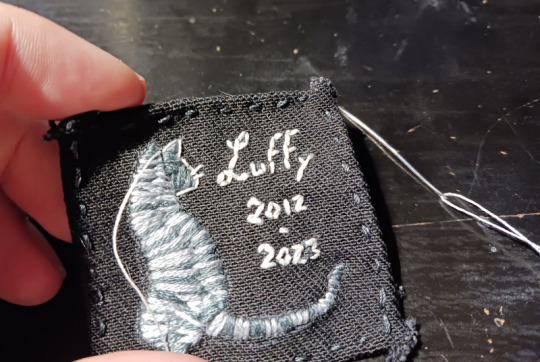
So yeah here's a small patch with my kitty

Only thing left to do is to sew it on the vest with button thread
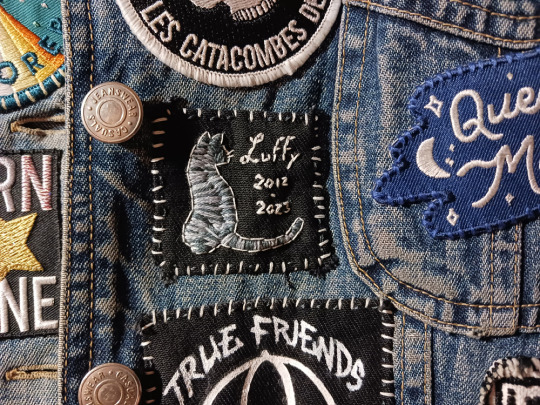
He feels right at home here
I hope this helped!
155 notes
·
View notes
Text

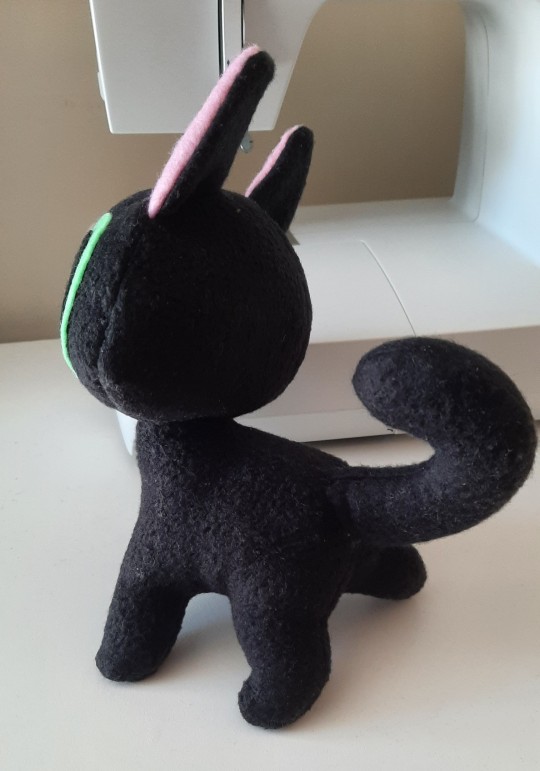
Made a lil plushie of one of the black cats from the OG Trigun using a pattern I found on etsy, and it came out pretty cute! Tho he did end up with a bit of a football head lmao
Here's the pattern if anyone else wants to try it (tho it might be a bit complicated for anyone who doesn't have at least basic sewing/plush making knowledge):
#I'm thinking I might make him a little vash jacket cause that would be very cute.#and cause I have a bunch of red satiny fabric from a kid cat plush I never got around to making#the black fleece I used for this was also from a kiki acnh plush I also never got around to making lol#trigun#kuroneko#sewing#I guess I'll make that a tag#for the once in a blue moon I actually do any
89 notes
·
View notes
Text

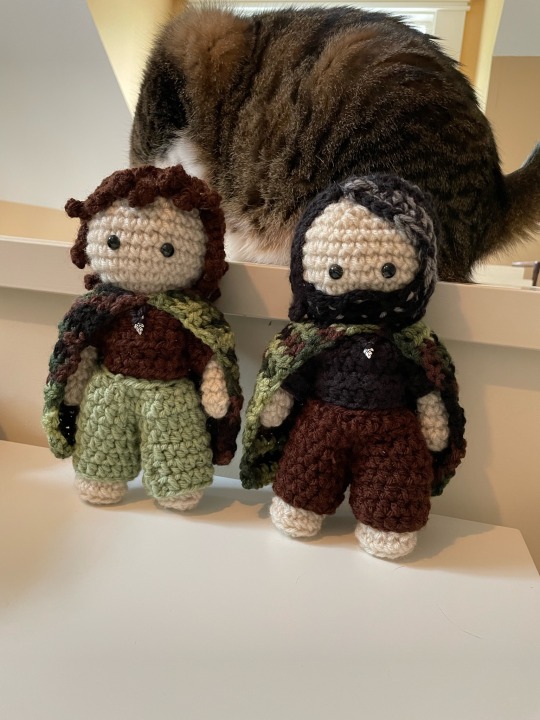
One grouchy father figure, as requested (plus my cat who wanted to be included). The beard was tricky but he looked like an emo preteen without it. Pattern stuff for Halt is below.
This is probably not very helpful, I've never made one of these before and don't really know what to put. Please let me know if something is confusing!
4.25 mm hook, weight 4 yarn, 9 mm safety eyes.
I used this tutorial for the body, minus the wig cap.
Beard:
Ch 13
Row 1: 12sc
Row 2: 4 slst, ch 4, slst in last 4 (to make a little gap)
Take a long strand of grey yarn and weave it randomly in and out to get the speckles.
Pants:
Ch 14, slst into a ring. Hdc around until the desired length (the photo has 5 rows). Make another one. Mimic tutorial to join and make the waist potion.
Shirt:
Ch 10, 5 rows of Hdc. Make another. Sew the two squares together, leaving 2 rows unconnected. I use the tails to tie the tops together. Hdc in the ring to make sleeves, I end up with about 9 stitches. Hdc around until desired length (picture has 3 rows)
Cloak:
Ch 23
Rows 1-13: Hdc across.
Tie two corners together.
Hair is strands of single crochet glued down. I recommend using bobby pins to mess with the placement before gluing and leaving this for last. Most of the strands are 14 stitches long, getting slightly shorter or longer depending on where they are on the head.
84 notes
·
View notes
Last Seen Blogs

calsvoid
charlie
arabrot
THE WORLD MUST BE DESTROYED

carlosjc2
Untitled

jodifiction
Jodi Fiction

galerisantri
IG, FB, TW, TMBLR : GALERISANTRI