#i am covered in pva glue
Text
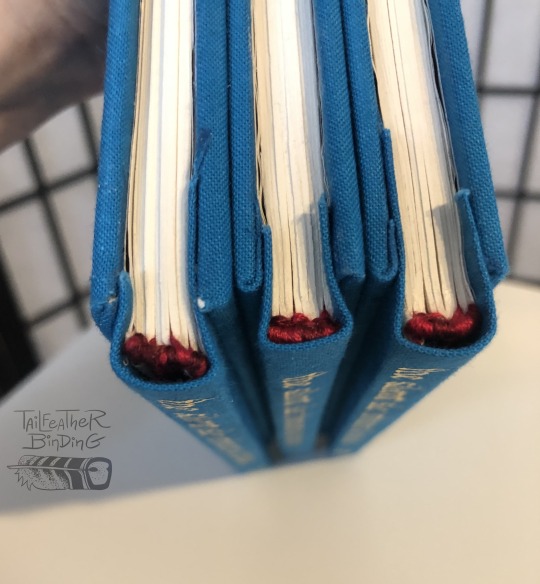
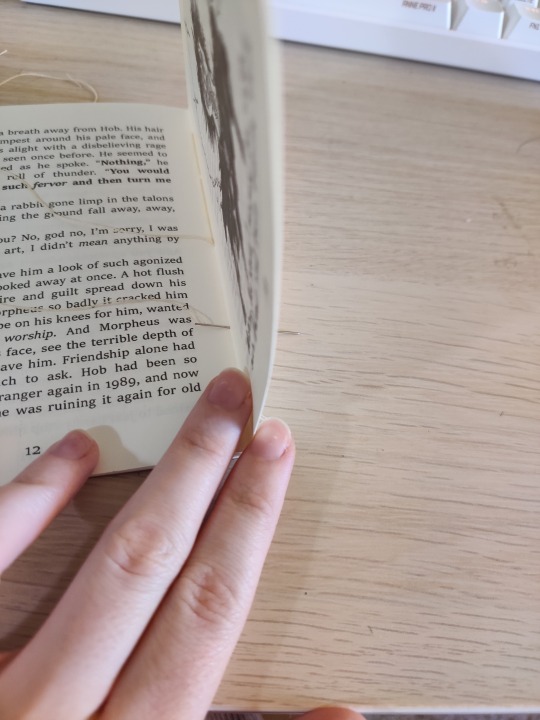
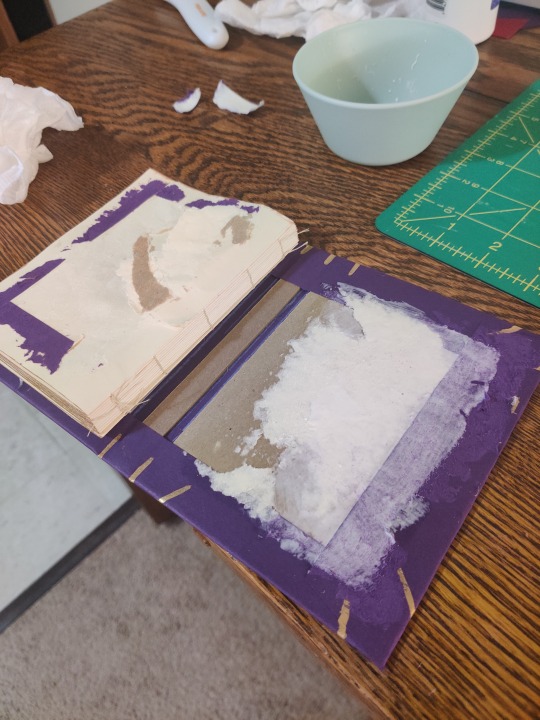
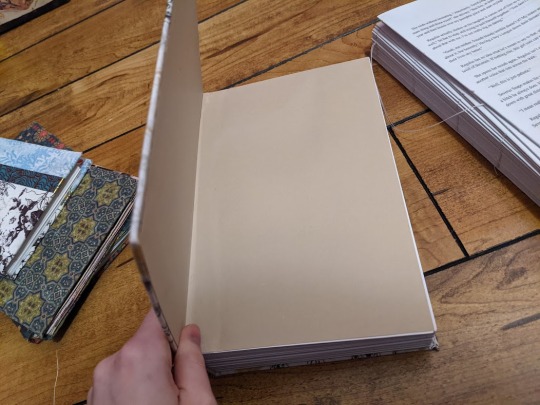
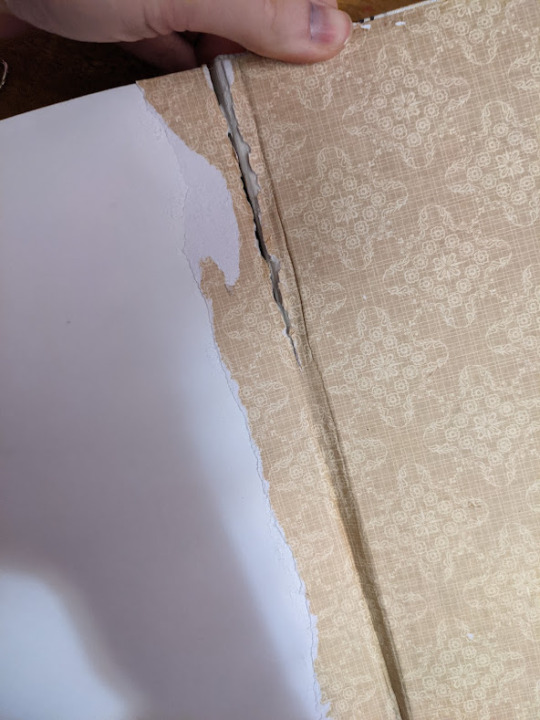
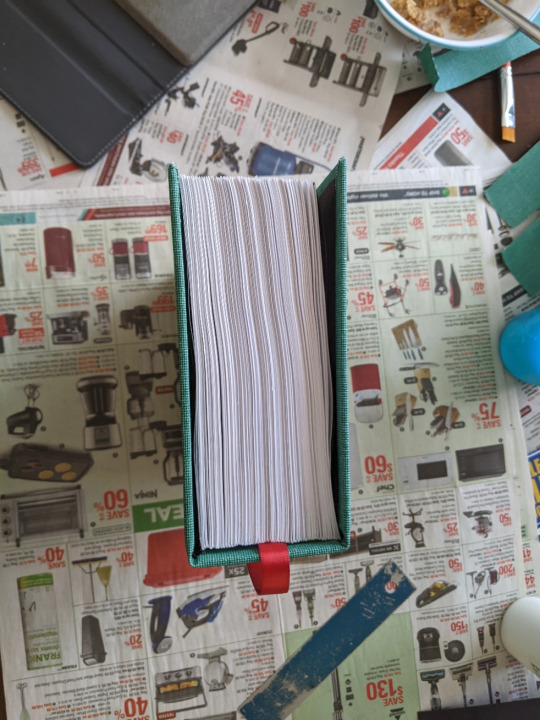
I've been doing some book binding for fun lately and I rebound a thrifted paperback of Fire by Kristin Cashore today so enjoy some photos bc I'm obsessed with this fabric:


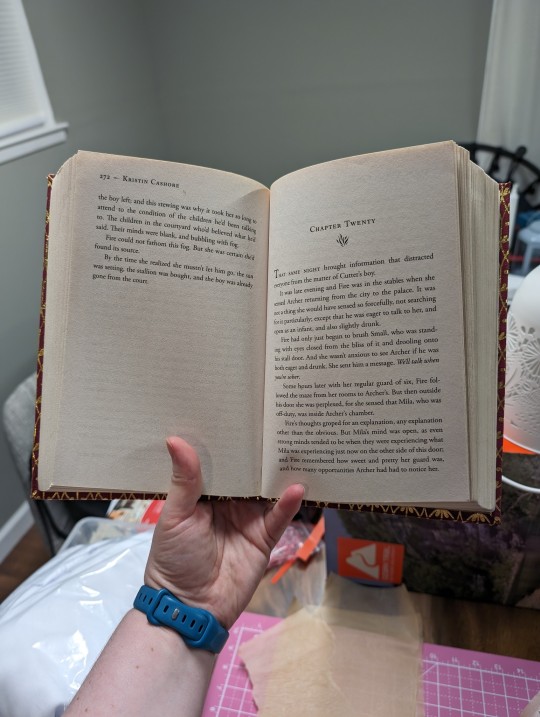

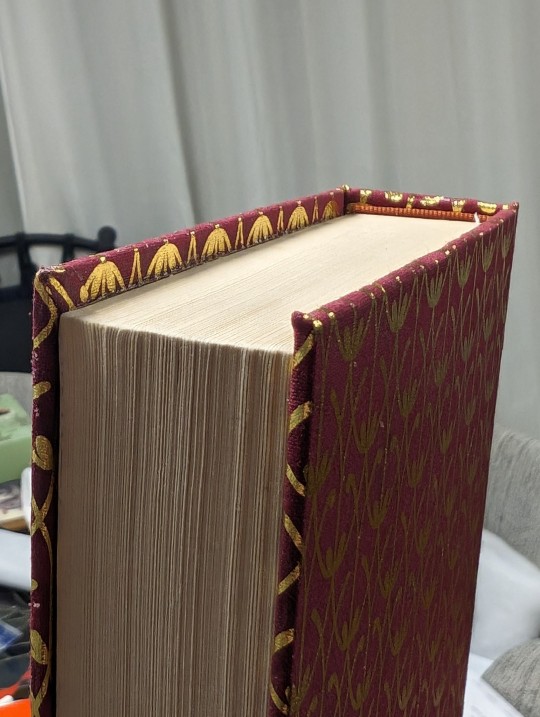

#book binding#i am covered in pva glue#kristin cashore#fire graceling#graceling#graceling series#books#crafts#crafting#mine
53 notes
·
View notes
Text
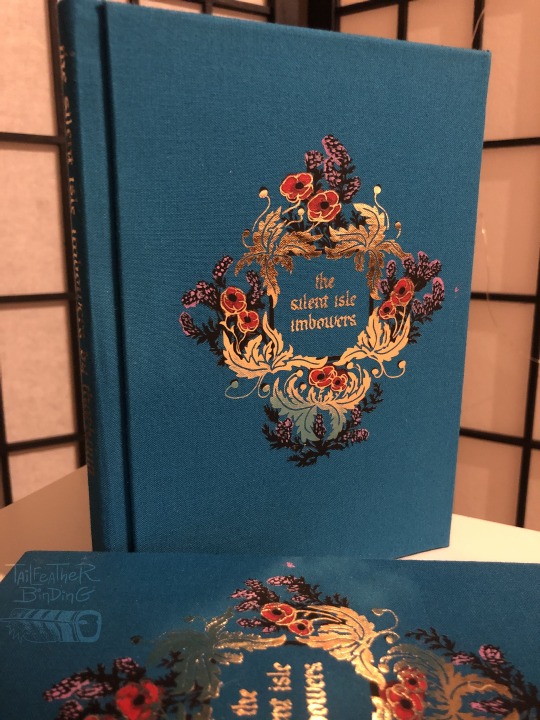
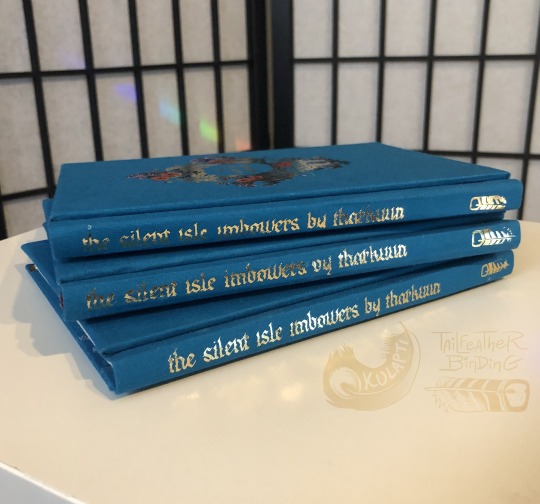

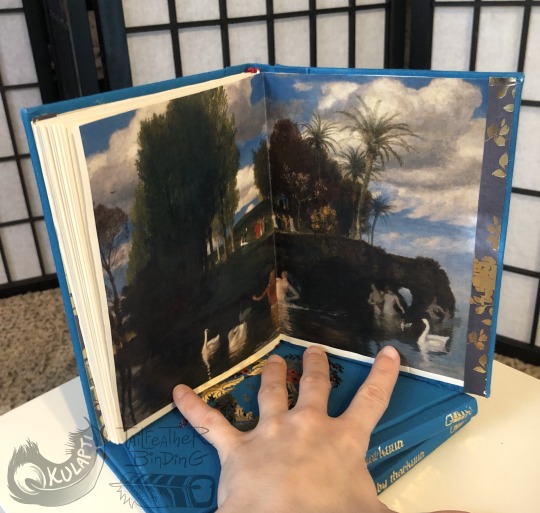
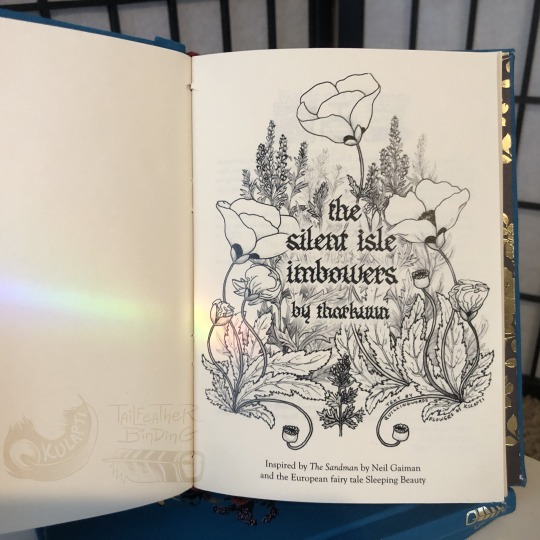
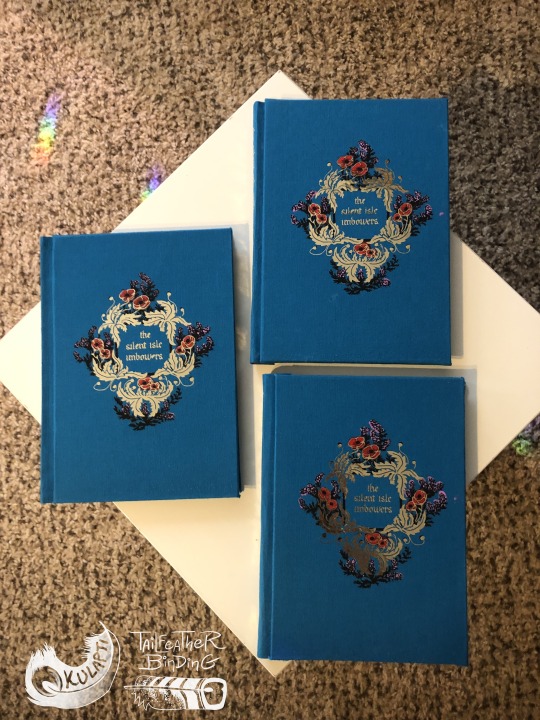
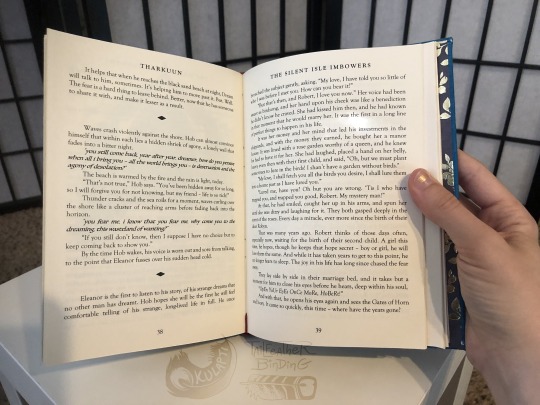
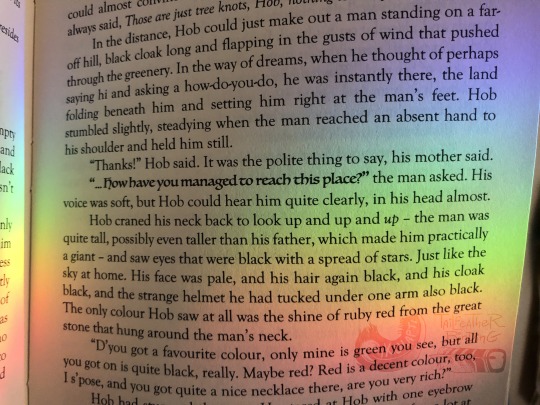
Aug 2023, bookbinding of The Silent Isle Imbowers by Tharkuun.
I’m sooo so so pleased to finally share this! I have been actively working on this for many months and waited until Tharkuun received her copy before posting so the final result would be a surprise.
-----------About this bookbinding under the cut
This binding has been one of the more elaborate pieces I have attempted so far. This has been my first binding where I (1) made three copies of a piece at once, (2) used a modified a historical illustration, (3) collaborated directly with another artist on the decorative elements, (4) finished matching art for the cover and title page, and (5) layered paint and heat-transfer vinyl for the covers. These are also (6) the first non-tiny books I have made with this style of hinge and cover attachment.
Pretty much immediately after I first read this story I felt I had to make myself a copy of this. I had a strong mental image of a vintage-looking cover for a fairy tale, with a deceptively simple design of flowers on the cover, probably with fancy metallic accents, the kind of thing you’d find in an interesting used bookstore with no summary, no text on the back, no dust jacket, just the flowers and maybe a title. I’m going to make a separate post about making this cover design a reality because oh man has it been a journey lol! I designed and drew the digital art for the cover (digital because of the cut and application method), as well as the corresponding title page illustration (pencil and dip pen, scanned, title added digitally).
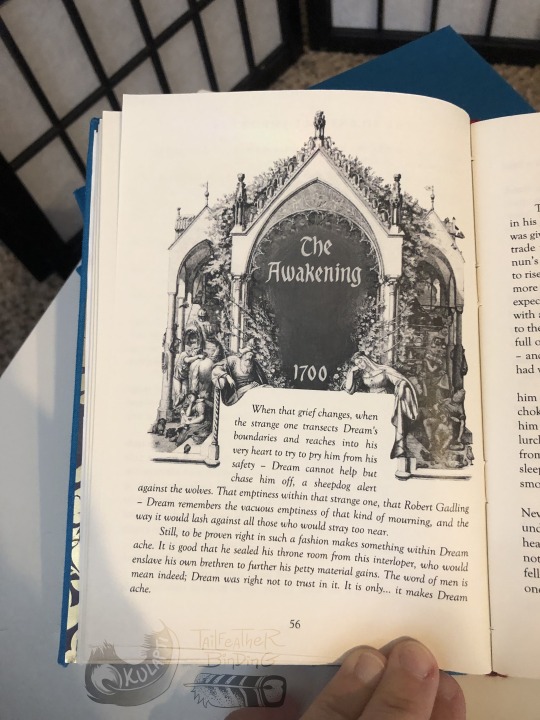
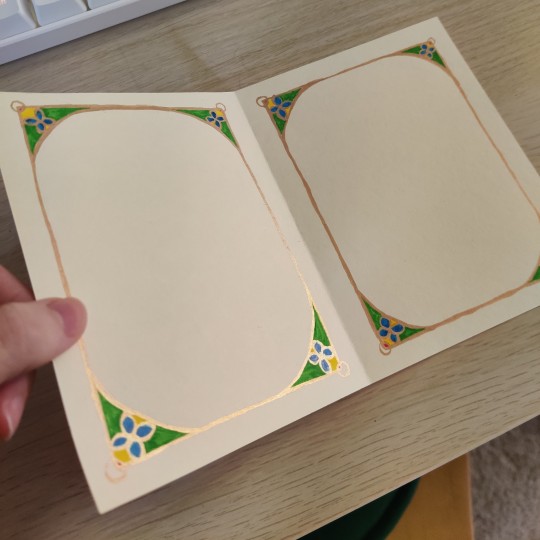
When I asked Tharkuun about it she was excited to suggest I get in touch with quillingwords, who generously agreed to collaborate with me! Among her talents quilling writes calligraphy, and hand wrote both the book title and chapter headers for me to incorporate into my plans. Check OUT those chapter headers! So fancy! A font could never!! Quilling has also been very encouraging and let me yell about this project in dms for months so the final result could be a surprise for Tharkuun. Thank u so much quillingwords, your calligraphy adds invaluable amounts of swag to this project.
I was going to do some kinda neat font for the chapter headers, but quilling’s work is too cool for that and I decided to use a modified piece of a historical illustration instead. The illustration also happens to be cool as heck: I was browsing the Artstor database (an academic quality resource available for free via Jstor, my beloved) and found E. N. Neureuther's 1836 gorgeous etching for etching of the fairy tale Briar Rose, an illustration made for a printing of a Brothers Grimm recorded German fairy tale with Sleeping Beauty elements. Much to my delight this illustration not only matches the general look I wanted but is actually relevant to the story, itself a Sleeping Beauty spinoff.
Slightly less stylistically consistent are the endpapers, which are prints of two different paintings by Arnold Böcklin: Isle of the Dead (1883) in the front and Isle of Life (1888). The first painting had occurred to me as an excellent visual to go with the story, and Tharkuun and I discussed this and agreed that pairing it with the related later, more optimistic piece was too thematically appropriate to resist.
I had fun and learned a lot making these books and I am very pleased with the result!!
Materials: Archival bookboard, cardstock, cotton cheesecloth mull, archival PVA glue, linen thread coated in beeswax, paper cord, red cotton embroidery floss. Blue cotton backed with archival paper, acrylic paint, machine cut black and gold heat-transfer vinyl. Laser printed text and illustrations. Metallic scrapbooking paper.
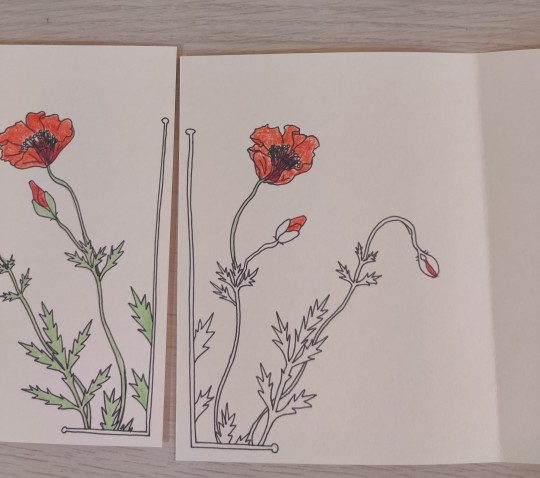
#artists on tumblr#bookbinding#ficbinding#fanbinding#dreamling#my art#here there be fandom#the sandman#the silent isle imbowers#tharkuun#described#id in alt text#pls imagine me screaming continuously about this project for oh idk 4 or 5 months? oh I can make shiny books??#im not allowed to @ people in this post apparently#links and fic rec in reblog#laying on the floor I found a few missing words I must have deleted on accident while fixing formatting#poppies (Papaver somniferum) and mugwort (Artemisia vulgaris)#tailfeather binding
750 notes
·
View notes
Text
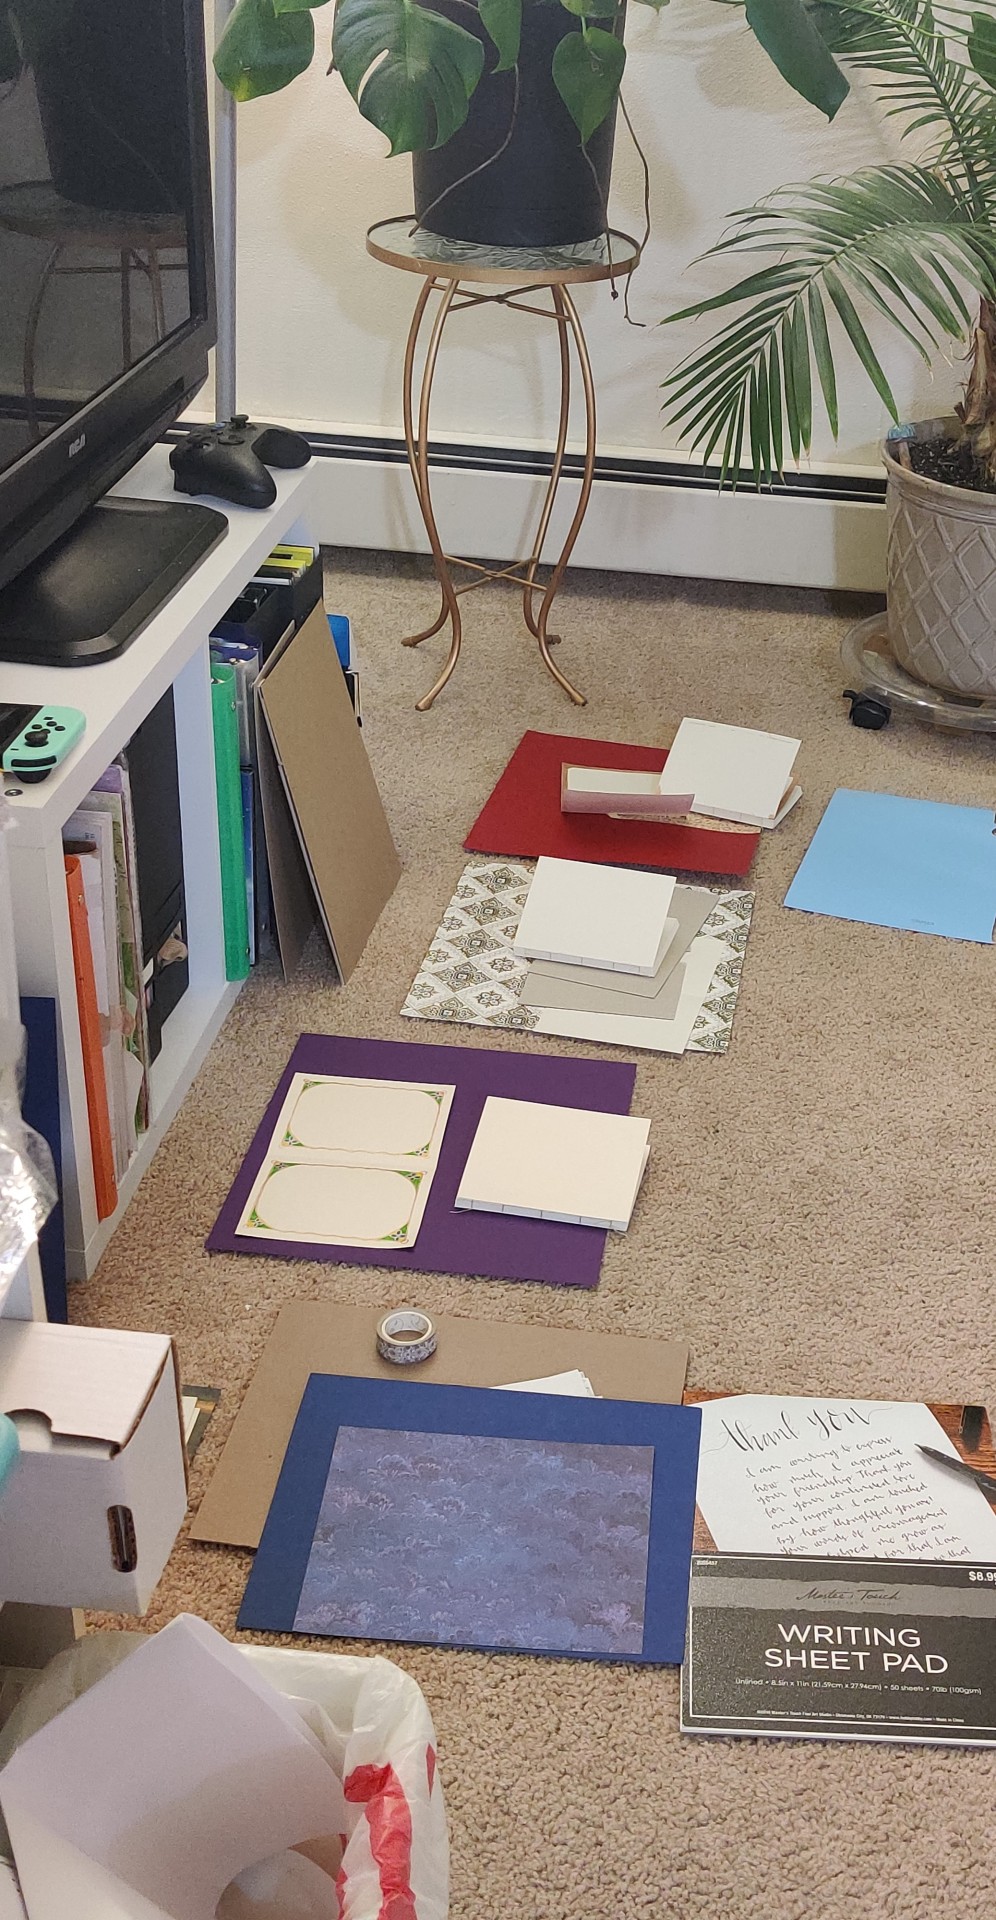
List of Bookbinding Items
MASTERPOST │ ASKS │ COMMENTS │ UPDATES │ GLOSSARY (TBA!)

Disclaimer: I am so, so average at this hobby, maybe even below that denomination, too, but I've been asked a couple times about it privately/via Discord so I figured I could help some people out by providing them a link to get them started.
Before you begin learning how to bind a book, it's a good idea to collect all the resources you will need in order to fulfil the process from beginning to end. Below, I'm going to try and structure a tiered list of equipment you're going to need, from essential to optional. I'll also add explanations of purpose where necessary. Because y'all are international, I'm not going to link to sites - but any store that caters to bookbinding should have these items available to order! Just make sure you're searching specifically.
Essential resources:
Don't skimp out on these - seriously. Not worth it. Where I can, I'll provide self-made alternatives, but these things should definitely go on your 'must get before I begin' list.
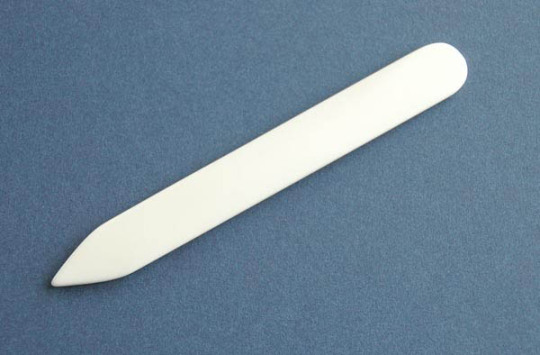
Bone folder (after you fold your signatures, crisp up the fold by pressing the edge over the crease. It'll flatten the fold and make it easier to press).
Book press (you will need this at multiple stages of the process, essentially to flatten everything up. I went for a traditional one, but you CAN use two boards with clamps, anything that you can essentially clamp the book tight between).
Awl (kinda a needle on a stick - used to poke holes for sewing into each signature. I'd recommend getting a proper one, most aren't too expensive! Some binders saw their holes in, but it's a bit risky for first-timers!)
Punching cradle (a device that has equidistant holes to guide your hole-poking, so that every signature is punched in the same place. PLEASE get this).
Waxed linen thread (make SURE it is waxed, which will prevent the paper ripping when you sew it. I recommend 25/3 weight linen thread, usually in a 'natural' or 'cream' colour).
Paper (make sure it is SHORT GRAIN, will explain later. I recommend 80gsm paper in a 'sand', 'natural' or 'cream' colour, as white paper tends to look IMO not quite right, especially for fiction. I honestly just use printer paper!)
Book board (Davey board is preferred, but you can use grey board, chipboard or cardboard. It needs to be thick enough to resist flexibility - I use 3mm Davey board for the covers and either cardstock/1.8mm Davey board for the spine. This can come pre-sized or in larger sheets).
Book cloth (again, recommend actual cloth designed for binding as you'll experience issues with regular old cloth if it's not prepared for the process. It'll be backed with paper or starched to prevent glue seepage).
Glue (acid-free PVA glue. Specialty 'bookbinding glue' is the easiest, but honestly, as long as it's acid-free PVA, it should be fine).
Glue brush/es (something to get the glue spread quickly, as it dries FAST).
Mull (a loose-weave cloth used to reinforce the spine after sewing/gluing).
Cardstock (for reinforcing the spine after mull + assembling the cover/spine case. Get a few sheets, you'll be surprised where this is needed!)
Might be a good idea:
Premade endbands (the little cloth bits that stick up on either end of the spine inside the book? Yeah, they make the book look pretty and hide the gluing).
Ribbon (if you intend to add a ribbon bookmark).
Linen tape (for thicker volumes. You sew it against the textblock to add more stability to the bind).
Cork-backed ruler (to cut book board in a straight line - you can make your own like I did with adhesive cork and a metal ruler).
Bookbinding needle/s (specifically curved needles).
Beeswax blocks (for bookbinding, extra wax to wax the thread goes a long way!)
Box cutter/knife (for cutting book board to size).
Hinge gap sizers (available on Etsy, used to space the spine board from the cover boards).
Book cloth corner cutters (also available on Etsy - comes in sizes to match your book board width so you can ensure you're cutting the right amount of fabric off the corners before folding them over).
Bookbinding sewing frame (entirely optional, but it means you can leave your hands free for sewing the text block up).
For aesthetic purposes only:
Guillotine (for trimming the pages to the same size after gluing, makes the book look professional. One with a large sheet capacity is best. Don't skimp on quality here. You can also just go to a print shop that offers this service!)
Cricut/Silhouette/Vinyl cutting machine (for creating iron-on designs on your book cloth after making the casing).
Cutting machine mat (whoever makes the machine will also make a corresponding mat, this is to hold the vinyl in place so the machine can cut it).
Iron-on vinyl (you want heat transfer vinyl, NOT permanent vinyl; HTV is ironically the more permanent of the two. So many options for colours here, and it is possible to layer different colours!)
Heat press machine (to heat press the vinyl to the book cloth - I personally recommend the Cricut Easy Press Mini because it is much smaller than the standard, giving you more control/ability to target parts of the cover).
Vinyl weeding tools (to pull off the excess vinyl around the design after cutting).
Ribbon clamp and O ring (for adding charms to the end of the ribbon bookmark. Make sure the clamp is the same width as the ribbon).

I collected all these things before I began, and it made the process a lot smoother. Please note these are all things I recommend, but if you are only experimenting or starting out, please feel free to use resources you have on hand! It took me a few months to compile everything, and it's important you have a space to store all this (it definitely piles up). Please feel free to let me know if there's anything you think I should add!
121 notes
·
View notes
Text
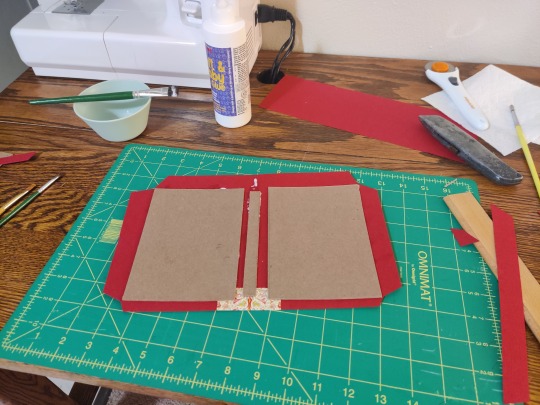
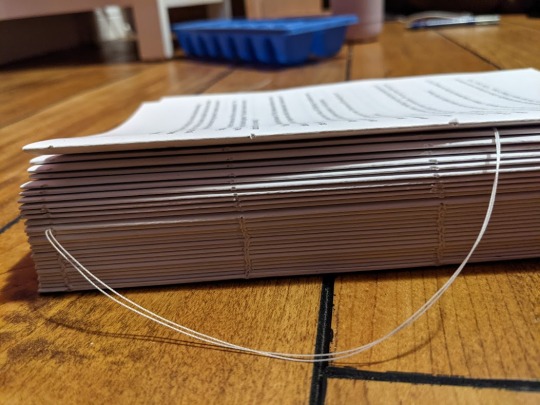
book binding pt 3: aka this really is a whole ass book isn’t it???
Recap for those just joining us: I’m working on my first fanfiction bind! I’m binding The Great IKEA Game by IcedAquarius (@batsandbugs).
I put off casing in this book so long. I was absolutely dreading it and for good reason because cutting these boards was the worst thing I’ve ever done.
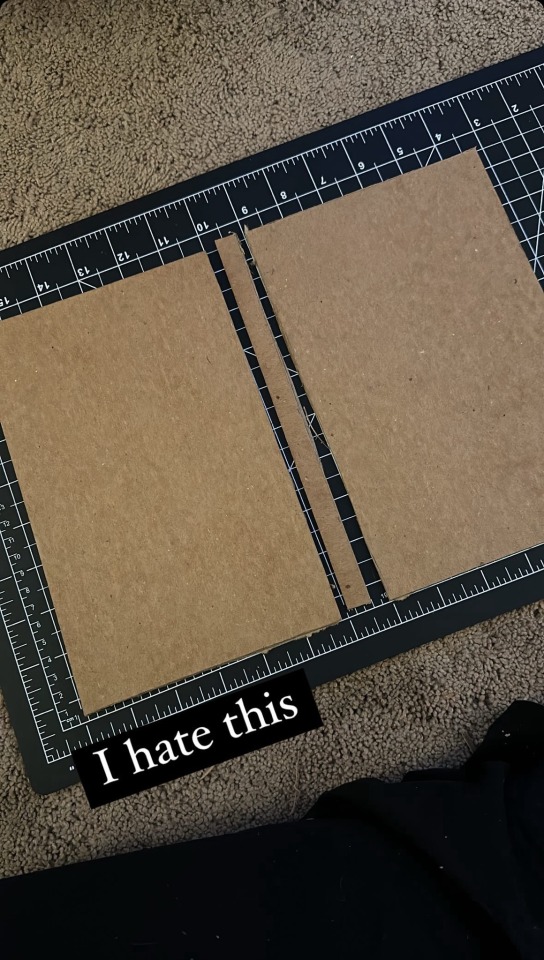
I am still convinced the boards weren’t cut straight and it haunts my dreams. I will power through the FOUR OTHER sheets of davey board I have and then will just order precut boards online bc FUCK trying to cut this board with a box cutter. Any tips or tricks are welcome.
Once I had the boards cut, the actual process of building and covering the case was actually really fun! It was rewarding to see my vision come to life after months of staring at it in Canva. I definitely need to find different cardstock because this mystery pack I found in my office does not like PVA glue - as evidenced by the spots that pulled up on the back cover.

After making the case, casing in was actually pretty anticlimactic! Once I got the gumption to actually do it (a theme with this bind) it didn’t take long and turned out way better than I had any hope for!
Reveal pictures in my next post (probably five minutes from now I have no self control)!
Progress Posts: 1 | 2 | 3 | 4
33 notes
·
View notes
Text
Book Binding Post
The video above is me walking you through the first bookbinding I did. Since a few people mentioned an interest in the initial cost of bookbinding fanfic, I made a list of what I used to start out. You can find most/all of these things on Amazon. If you'd rather not support Amazon, then Hollander's is a great place to find your necessities. You can also find most of this stuff at any local crafting store. As I am in the US, all prices are in USD.
Printer - It doesn't need to be fancy. Unless you're including fanart, a black-and-white one will do. I'm pretty sure you can get a basic printer for less than $100.
Microsoft Word - I wanted to use Macros built for Word, and those don't work with other text editors like Open Office or Google Docs. Macros are little programs that will do repetitive tasks to format the raw text so it can be converted into a book. If you don't have it, you can pay for a subscription for about $7 per month.
Paper - You could use cheap copy paper, but I bought 24 lb cotton linen paper. 500 sheets were about $25. You'll have 4 pages of your book printed on one sheet (two on the front, two on the back), so a 200,000-word fic that is nearly 500 pages will use about 125 sheets.
Bone Folder - This is just a tool used to neatly crease your signatures. Signatures are sets of 5-10 pages that fold into a booklet and then are sewn together. I was very weirded out by the idea of having an actual bone tool (vegetarian, here) so I found a folder that was plastic. You may have something suitable around your house that would serve this purpose if you don't want to buy one. You don't want to use anything that will scratch/tear your pages, though. Cost is about $5.
Awl and Punch Cradle - An awl is a bit like an ice pick. It is used to punch holes into the creases of your signatures so you can sew them together. These holes need to be evenly spaced, and I do 8 total along the spine. To make this easier for myself, I also bought a punch cradle. This is a little plastic tool your unfolded signature sits in while you lay a guide along the crease and punch through the guide with the awl. My punch cradle came with the awl, thread, and needle. All of it was about $25.
Waxed Linen Thread - If you can't find waxed, then you can get a small cube of beeswax and run your thread along it before you begin sewing. Cost is about $5.
Needle - I prefer a large curved metal needle. Sometimes these will come with a punch cradle or thread. If not, they are fairly inexpensive--maybe a dollar or two.
PVA Adhesive with Applicator - This is the glue you'll need to secure the spine and connect the text block (all the signatures sewn together) with the cover. You want to use something suitable for bookbinding that has a neutral pH. You should also get a brush or silicone applicator. Cost is about $15 for the glue and applicator.
Mull (bookbinding cloth) - This is like a rough cheesecloth used to repair and/or bind books. It's going to help reinforce your spine. A large sheet of this runs about $15 and will last you through many binds.
Headband/Endbands - While I have heard you can make your own, I just bought a box of them with assorted colors. It's fairly inexpensive at $10 and will last for a very long time. These are the little pieces of cloth at the top and bottom of the text block, visible only if you look down at the top of the book.
Cardstock/Endpapers - Endpapers are the thicker pages that connect the cover of the book to the text block. When you open a book, it's the first thing you see and is often decorative. Some bookbinders print their own custom ones using blank cardstock, but I bought an assorted pack of decorative pages for about $15. Each page is a 12-inch square and I used two to bind one book--one for the front and matching one for the back.
Chipboard - This is used for your case or cover. I found a pack of 24 sheets that are 12-inch squares and 2.54 mm thick for $25. One square worked to bind one book.
Book Cloth/Leather - This is what you glue to your chipboard to make the cover of the book. I used book cloth I found online. A 40" x 16" piece was $15 and should be enough to handle three to four books.
Exacto/OLFA Knife - This is a retractable and very sharp blade that will help you cut your endpapers, chipboard, and book cloth. Cost is about $5.
Ruler - You'll be doing quite a bit of measuring once you finish your signature block and begin the steps to connect it with the case. You'll also find it handy to use as a guide when cutting with your knife. Cost is pretty cheap--maybe a couple dollars.
I would consider the things listed above as necessities to make things look good and somewhat professional. You could certainly get by without a couple of them (bone folder, punch cradle, headbands), but it will make the process more difficult.
There are some additional things I bought that have helped me greatly. You don't need these things, but they will make your binding experience more pleasant and much easier.
Book Press - It's two pieces of wood that squish your text block (and eventually book) together during the process of binding. After you've folded your signatures, you're going to be using the book press to squish the signatures together after each step, and then leave it that way until you're ready to work on the book again. You could use two large books or boards lying around your home with some cheap clamps. That would work just as well. If you want a book press, they're about $40, but can go up higher.
Craft Mat - You can find self-healing ones online or in craft stores. This is just a large mat to work on. It will protect your table/floor from the blade you'll be using to cut materials. You could use scrap material you already have, but you want it to be sturdy; corrugated cardboard boxes aren't a good substitute because they are too squishy. Craft mats are about $10.
T Spacers and Corner Mitres - These are very helpful when making your case. They allow you to line up the front and back cover with the spine while leaving appropriate space for the hinge and also cut the corners of the book cloth so you can create clean edges when gluing the cloth to the board. I didn't buy these until after I bound my first book, and I regret not getting them immediately because my case would have looked so much better with them. You can get a set of various sizes for $20.
Cricut or Silhouette Machine - I don't have one of these, but I've been considering it. They can be quite expensive, but many bookbinders use them to create artwork for the covers and spine of their books. An alternative would be a laminated dust jacket or you could stencil/paint the title. These machines cost anywhere between $120 and $800. From my minimal research, I think you'd need to spend about $200-300 to get one that would do what you need for cover art purposes.
Subscriptions for Artwork - Many people use a Canva subscription for all design/artwork. If you want to do custom endpapers and a dust jacket, then this will come in handy. There is a free trial, but the monthly subscription will run you $15.
So, how much are we talking? Tools that you only have to buy once will cost you about $50 (bare minimum) to $120 (if you throw in the extras to make life easier). Of course, that doesn't include printer/ink and the Cricut. The materials will set you back about $125, but you'll get several books out of them. I could bind about 4 books without buying anything else. Then I'd need to spend about $60 on more supplies like paper, glue, and book cloth to make another 4. My best guess is that each book uses about $15-20 worth of supplies. So, if we aren't counting your time, it's about what you'd pay for a hardcover. But we're talking about fanfic that isn't commercially available, so we're gonna say $20 for a one-of-a-kind book that holds a story you love is priceless. Right?
If you want a tutorial to get started, then I highly recommend Haunna's tutorial on TikTok. It is easy to follow and what I used.
15 notes
·
View notes
Text
Saint Morpheus Bookbinding, pt 1: Behind the Scenes
(This will be a very long post)
Three weeks ago, I had already had an idea of what project I wanted to torture (positive) myself with: so I giddily hopped off and asked @landwriter if I could bind her achingly good Dreamling fic Saint Morpheus. (If you haven't read it, consider this my blanket glowing recommendation).

Permission granted, I was off!
People have asked me about my work before. This post is not meant to be educational (though all I learned was through Sea Lemon on YT; don't ask me for a more in-depth explanation bc I am not equipped to give it), but I didn't want to have took all these in-progress pictures for nothing. Also I enjoy talking about my work, and maybe some of you will find this interesting.
The formatting-page process undoubtedly takes the longest. I do not use any software, so this is a lot of me using the copy-paste button and praying to any god that will listen that I don't mess it up.
(Formatting: I used 10 pt Sitka Text with no alignment. The pages themselves are a template I made in LibreOffice)

I had also decided to complete illustrations for this, which created additional pages. I had a lot of fun with those, which I'll be posting in pt 2.
Once all the pages were done, it was time for printing!
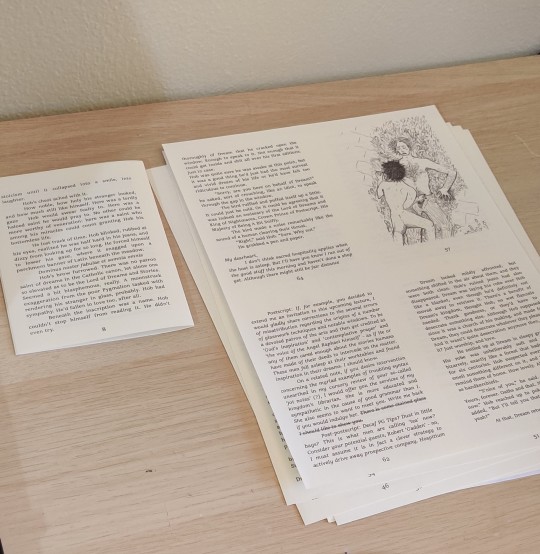
I had a bunch of fat stacks like this, which then had to be cut to size and folded into the page signatures.

(a mostly-complete text block)
I also did fancy stuff for the inside pages, the ones that go on the outside of these text blocks and which would hold the text block to the cover.
(this is one, which was completed)
(here's another one, which was in-progress)
Then came the tedious work of punching all the holes, so I could actually bind the pages together!
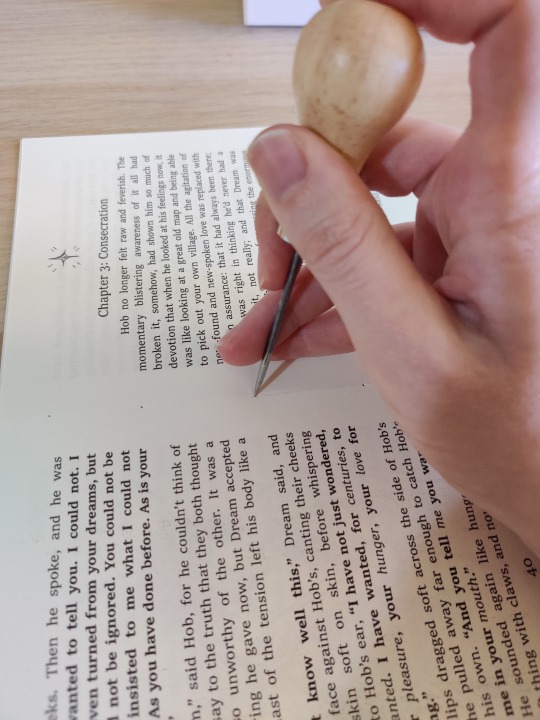
(I had actually bought an awl over the holiday break. Can you imagine i was going all this with a needle before?)
(lots of sewing)
YAY! Text blocks were done!

Then I could finally get to work on the covers, which had been littering my floor for weeks.
My desk was also a proper mess, but that's just what happens.
Cutting the board and arranging the covers is fun, except when I knew I was on the home stretch and ended up messing up things.
(in-progress cover. I use PVA glue)
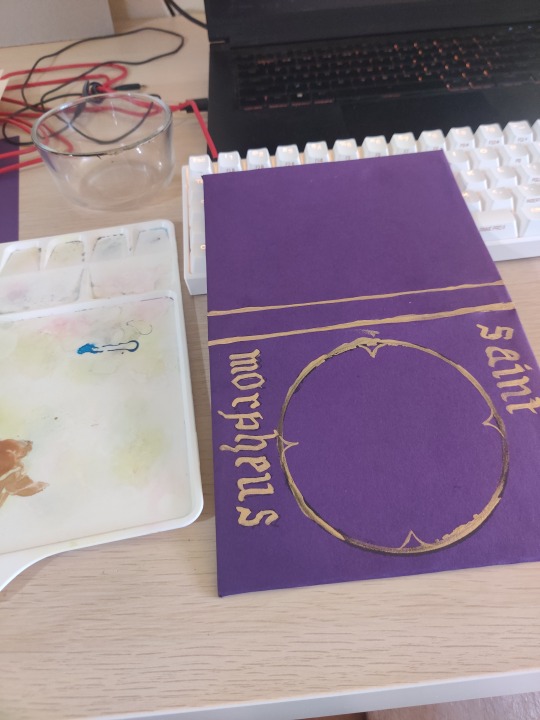
(in-progress front cover I was doing illustrations on)
And I would be nothing without failing a few times, so I might've accidentally glued on a text block upside down on that cover. Which then I had to rip off and rebind. I had to do that twice, actually, cause I fried my brain a few times over while working on these.
There's also some things I did which I did not take pictures of but will be included in the follow-up: I gilt the page edges, which I thought was a nice touch.
And now for the finished product....
47 notes
·
View notes
Text
A statuette from a manga page? Why not)))


Here begins the part where I describe how it was all done:^
To begin with, I want to complain about the Condo, because while I was sawing it out of plexiglass, I managed to shoot the blade into my eye several times. It's good that I was wearing safety glasses!
After cutting the figures out of plastic and polishing them, it was necessary to glue the sketches cut out of paper on them. At this stage, I ran into a problem, because Soji didn't want to stick, and Buddha and Kojiro have small details. I had to change the construction glue to the usual one, which is more often used in school lessons.
Well, now the most interesting thing is the stand. At first I just wanted to draw some pattern, but then I remembered about my sand plate and thought that something similar could be done with figurines. By the way, this is done very easily: you just need to mix sand (in my case, crushed quartz) with PVA glue (I used construction). The thinner the mixture, the longer it will dry and the more solid the sand product will be (the less glue, the more loose the craft will be). So I mixed this mixture and started shoving everything there: a glass imitation of amethyst and citrine, natural amber, marble and soil, and then I covered it all with paint.
The final stage was the varnishing of all the details of the composition separately~☆
After all this, I want to ask: is there anyone else who makes such 2D figurines by hand, or am I the only one who gets so steamed up?
#anime#record of ragnarok#shuumatsu no valkyrie#snv#soji okita#okita soji#kondo isami#buddha#sasaki kojiro
33 notes
·
View notes
Note
how does one go about binding books? it sems so interesting and im just wondering if i ever want to prints fics yk
also picturess
FINALLY SOMEONE ASKING ME ABOUT BOOKBINDING. I have all this knowledge and no one ever asks. I LIVE for bookbinding. I picked up my phone to see this after bookbinding for the past hour.
So: here you go:) A guide.
*This is specifically for fanfiction, if anyone has any questions about making journals etc. I can answer those too :)
Before we start, here’s a start to finish actually binding it tutorial This Man Must Be Protected At All Costs. We don’t deserve him. He talks you through putting the book together really well.
I’m putting the rest below the cut because I’m nice. (there’s pretty + useful pictures there)
Some Bookbinding language:
Signatures. Signatures are the lil groups of paper u bind with. They’re usually grouped into four UNLESS you’re using water colour paper or cardstock. (Just in case someone reading this knows absolutely nothing about paper, don’t use either of those for your fanfic pages you’ll hate yourself and the final product.) (ignore the ice cube tray in the background, its my paint pallet. Don’t judge me.
Book Press: A thing used to press the signatures. Mine is so gross and destroyed I refuse to show it, you can make one out of cutting boards.
Bone Folder: yes, it is made out of bone. Yes you can choose to find a plastic or wooden one. I personally have terrible sensory issues when it comes to paper so I need to use one made out of bone. They’re used to fold the signatures.
*You don’t actually need one if you have a book press, cuz the signatures get flattened in there anyways, but your hands will hurt a bit after all the folding if you don’t use one. Or, at least mine do.They look like this.
Kettle Stitch :This is, in my opinion, the superior binding method for fanfiction. It’s simple, it’s easy to learn, and its great for actually reading cuz the spine is strong but the pages like flip well? That’s hard to describe. The link at the start of this is my favourite tutorial.
Materials & some tips.
Paper: You can use anything. But, beware of the thickness, I use eco recycled paper, which is better for the environment, but you need to be a bit more gentle when actually binding so it doesn’t rip.
A) NYLON thread. Don't come in here with your cotton or polyester thread. Nylon. Is. Superior. It won't break and it's easier to untangle (waxed thread is kind of overrated and expensive)
B) a bone folder and book press: you can really use either or, but if you’re only going to use one, it should be the book press.
C) Board. It’s for the cover. I am begging you, if you are still learning, do not attempt a paperback. You will get severely frustrated. Get yourself some Davey Board or any thick(ish) board of any kind and use that. The tutorial guy will help you with sizing. The trickiest part is the spine, getting it the right size just takes practice.
D) Fabrics: Repeat After Me: Book Cloth Is Stupid. Some book binders hate me rn, but its true and I’ll die there. And then, I show them This:
Do you see this shit? Not one is book cloth. Look How Pretty Your Books Could Be. The purple one is drapery cloth, theres some cork board ones, and the top two are just thickish cotton. The book industry is just boring and they don’t know how to have fun. Also yes, I know the cork board two look kinda awful, they were the first ones I ever made. Leave them alone they’re doing their best.
E) Glue. PVA Acid Free bookbinding glue is the best option, I recommend getting a one of the really soft paintbrushes from Walmart or whatever cheap and big softer one you can, it just makes spreading it easier. I’m really picky about the glue I use because I’m paranoid. This is the one I get, but It’s expensive, you can honestly use tacky glue and you’ll be fine
D) Curved Needle Please splurge on one. They’re like an extra dollar than one of the straight needles, and you will save yourself so many injuries. Every single tutorial will say “oh, you don’t need one” and they’re Idiots for it. Well I don’t like the feeling of stabbing myself repeatedly, and I’m willing to spend 10 dollars on a Set of 36 so that I’m not just in pain all the time.
Ah, Typesetting. Hell on Earth
You want pretty chapter titles? Get Canva. There’s a free version and she’s lovely.
I, personally, will die before I print from a PDF. That being said, I wish with all my heart and soul that I had microsoft word. Because I use Literal Pages (if you don’t have a mac, you’re confused as fuck. If you do and you’ve had the pleasure of attempting to use pages, yeah. I know. It’s not great but it’s what I have)
Get rid of all your margins. Make sure your title images, if you’re gonna be a fancy canva title bitch like me, are moving with your text. I wish I could help you with a table of contents but I do it by hand aka, insert a table & tracking the pages as I copy paste + “fix up” chapters. *by fix up I mean correct colouring, add the indents, change the font size & type etc. Add italics.
Indents should be 0.5 inches or it looks weird. You can do the pages so they’re the professional wall to wall text, but I cannot stress how much work it is to make sure it copies properly.
Now, if you’re stupid and use pages like me...you have to redo all the italics. Good Luck.
If you want to risk seeing if a PDF works---which it really can go badly if your margins aren’t literally Zero (and even then sometimes PDF adds them which is rude of them) you can, and you won’t have to redo all the italics. It’s your choice and if you find a better way Tell Me.
Specifics:
You want Chapter One to be on Page 7 of the typeset. Again, this might change if you’re not using Pages, but that took me so long to figure out that I need to include it here. Before that there’s the, what I call, The Blank gluing page, another blank for the back of that page, the pretty Image + quote page you open up to, a blank one, Table of contents, Blank, Then, Finally, Chapter one.
You can also do some weird settings for changing the page numbers so Chapter one, aka page one, you “Start a new section” and “start at 1″ Then you can delete the page numbers from the previous 6 pages and you’ll get page one on the actual first page of the book.
Font Size: There’s going to be two pages on one paper, so your font size is going to be 16/17. I prefer 17 because I’m blind.
Here’s a Muse In Secret Typeset as an example that I made one day because I was bored. I don’t know if the Author gave permission for us to print it out or not so I haven’t but I made the type set so I could learn with a decent sized project.

So that’s kinda what it looks like.
You print it using the “layout--> Booklet” feature. Print in groups of “16″ which is 4 pages, 2 sided.
Now for: Mistakes I’ve Made That You Won’t Have To Make Now
1.You need to use Thick Cardstock or something stronger to do the interior pages.
It needs to be strong enough that it won’t rip. Don’t be me and think, oh I can use pretty paper, because this happens
*ALSO, and this is a weird one, A03 for some reason....the text is not black. And hey, you have to highlight everything to change the font size, type, and add indents anyways so you might as well change it to black as well. It makes a big difference.
Other than these basics, the fun is the creativity and figuring it out. It’s okay to switch up fonts & design elaborate chapter titles, and add art and fanart you love. Make it personal to you. It’s why I don’t share my typesets. I put so much work into them and I can appreciate every little detail because of that.
Good Luck Amon!! It’s a really fun hobby, and it doesn’t have to be super expensive. Except for printer ink. I have no solutions for that one.
163 notes
·
View notes
Text
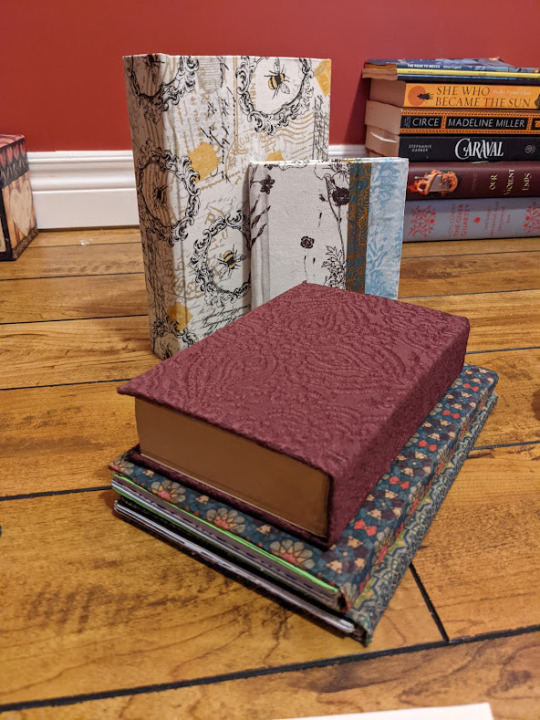
Almost a year to the day after first asking @its-sixxers if I could print out and bind Half Light (after figuring out how one actually does that), I've finally finished it!!!

She's 825 pages long, has some of the early pages warped from glue, and blood (?) staining the text block, and I am so excited to fall in love with Nines and Mary all over again. Thanks for letting me do this, it's been a really rewarding project and I got a new hobby out of it!!!
Please go read Half Light and everything else Six has written, she is immensely talented. Mary is my favourite character in Bloodlines bar none and reading her story endeared me to VTMB when the game itself did not. Six's Fallout works are also masterpieces, and I haven't checked out her newer stuff with Elder Scrolls but I fully intend to because even if I've never touched a Skyrim game in my life, I know I'm going to adore it too!
More info about the process under the cut.
SeaLemon was an invaluable resource starting out here because I barely know how to sew and I had no idea how to approach the actual construction of a book. I'm gonna plug her right off the bat because she's very beginner-friendly if anyone else wants to learn.
But before all of that I had to format everything in Word! Chapter by chapter I copied the text over from the downloadable PDF from AO3 and would scan through the fic to ensure the formatting was correct (italicization, bolding, paragraph breaks, etc). I'd do this for about an hour at a time over the course of a couple months, until I decided to do the rest of it all at once after one March night at 10PM where I decided to learn how to bind it all, because fuck it, why not. (Answer: I was freaked out about my upcoming departmental talk and this seemed like a good distraction).

Printing all of it just on regular printer paper (don't know if I'd do that again in the future, but it's what I had on hand) it ended up being 52 signatures, or collections of 16 pages (4 pieces of paper) folded in half. Pierced holes in all of those using an awl and an old phonebook to hold the pages open, and then used my old embroidery thread to sew them together. This part took me maybe two days because I was just so damn pumped about it lmao. I also don't have any kind of bookpress to weight down the pages, so I had made due with old textbooks and MCAT prep material.

It stayed this way for LITERAL MONTHS as I gathered all the other supplies - chipboard and brushes from my local craft store, PVA glue online, and by far the hardest part was fabric. I've since learned that you can make your own fabric using book cloth and basically anything you want (if I had known this book would have been coated in red silk I swear) but for now I just wanted to be sure it was something designed for this purpose, as the woman at Fabric Land assured me it needed something specialized. So binder's buckram! Took a while to find something local and the color selection was pretty limited, I was hoping for a dark red or a dark blue but the green was the best they had in stock. Took even longer to get here. And by that point I had enough going on that it fell by the wayside until uh.... last week.
I glued the spine, again realizing that maybe I should've just made my own bookpress but powering through with textbooks to hold things in place, and let that sit for a couple days to fully dry. Ideally it would be flat, but beggars cannot be choosers. Gave her a lil ribbon too.

Not pictured because I forgot, the final text block with black construction paper glued to it to form the inside cover (would probably use something thicker/crisper in the future, something more like cardstock perhaps?). But then it came to putting the cover together! And that was just cutting chipboard to fit and gluing it correctly onto the fabric, leaving gaps around the spine.
Let that dry, and then I glued the text block in and let everything sit for just over 24h, again with makeshift weights to prevent the fabric warping (it's the second book from the bottom).

And then tada! Finished book! (This one's from before it was pressed but it looks the same now)
All in all extremely cool to hold in my hands and I look forward to the next fic that makes me this insane. If I get permission to do The Sun Is Now Fading I might take a crack at that and make a little set! Follow your dreams and one day you too will be able to take notes in the margins of your favourite Vampire the Masquerade fic.
#vtmb#vampire the masquerade#its-sixxers#bookbinding#mine#cant wait to read this on my flight and pray that no one asks me what it is lest i have to respond with#..... uh are you familiar with the 1991 TTRPG world of darkness and its subsequent media#em.chats
44 notes
·
View notes
Text

Building Dango: Part 4
We're so far in and still have so fucking much to do. I am fearing I may not have this guy made in time. Which I'll have to stomach through clenched teeth.
We're moving on to priming. And I'll be using Flexbond for this. I previously used a spray version, which fucking stinks. (If any of you guys remember the making of my kenku fursuit then you remember the horrors of gassing my family.)
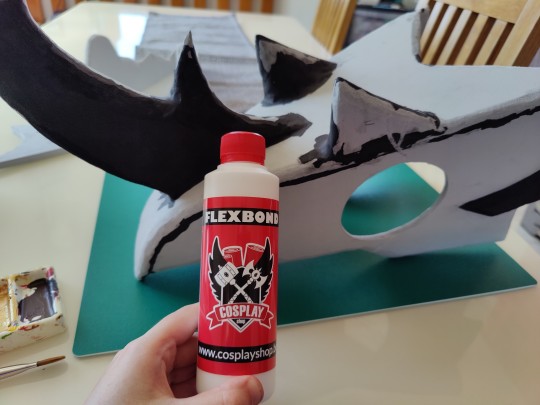
This is odourless and I can slap quite thick bits of it on there.
It's water based and kinda smells like PVA glue (suspicious...) but honestly it worked wonders. I was hoping it would cover up the majority of roughness and imperfections, and with three coats, it did mostly that! Kudos to my friend for pointing me in the direction of this substance.
It took about 3-4 hours to dry on each coat, and I could safely do it inside. Unfortunately there are paintbrush streaks. But I can stomach that.

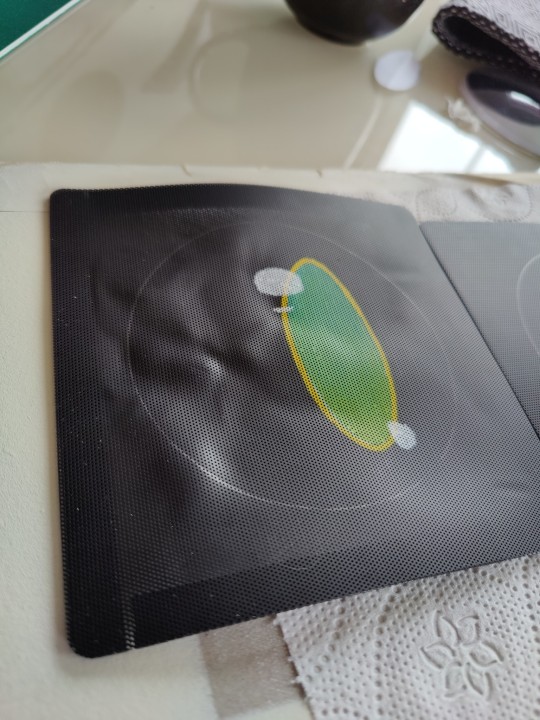
In between waiting for the coats to dry, I got to work on the eyes. I'm using this mesh as the base. It's nice and thick, does have a bend to it, and has fantastic view through the many holes in it. And since it's already black, I only need to paint the pupil. Though I have also painted a set of eyes for a friend that were fully painted and they looked fine too. Poking any clogged up holes IS a chore though, so to make sure there's as little of that as possible, you gotta water down your acrylic paint and slowly work your way up with coats. I haven't tried dried brushing it, mainly because that method is quite messy, and watered down colour worked better for me.

However, this didn't go without a tragedy. While trying to get the paint to dry faster, I often use a hairbrush. But. Well I was holding the mesh up in the air and drying it. And I guess I held the hairbrush too close and it bent the metal just enough to make dents from where my fingers held it. And. Unfortunately. Begudgingly. I could not restore the mesh back. So I had to paint the second eye all over again. So if you're drying with a hairbrush- do so on a flat surface.

For the JAW.
And here's where I start to realise I'm doing this backwards.
For the Jaw I will be using chicago screws. Originally I was going to use this hinge I got off etsy from a polish maker:

But Dango's head is already quite. Tight. And these would add another centimeter on each side of the head and there's just not enough space for that- nor do I think they would fit actually....
SO HERE WE ARE: CHICAGO SCREWS.

Chicago screws are originally used for leather work, and come in various sizes. The main body of the screw is sleek, so the jaw can freely move around on the middle part, while the actual tube is hollow with end being the 'screw' part. This screw part will be inside the jaw so I can freely unscrew it if I ever need to. While two pieces of my high density foam are about 2cm in thickness when smooshed together, I opted for 17mm thick screws instead. Which meant I head to drill holes, then indents into those holes, to make sure the screws fit in.
I did this because A: the flat part of the screw is going to poke through to the outer layer of the skull that will not have fabric covering it. It needs to be flush with the skull so that its not as easily seen. I made it sink into the foam by another 1-2mm so I could then cover it in sculpting foam and then.... prime it again. Like an egit. Anyway.
And B: I didn't want the screws to poke me into my cheeks. Even though they're flat, Id rather drill into the foam and have it flush against it then poke out and be texture hell yanno?
Always test the drill bits on scraps though before you commit to the real deal! It took me a while to get the hang of the actual drill bit of my rotary carver, but in the end I was confident in actually drilling the mask.

ISN'T THIS CLEAN. God I'm so proud of it.

So I was drilling again after priming shit. I should've done this before the priming stage. But tbf they only arrived in the mail after I primed so. Whatever. (spoiler: this isnt the last time I pull out the fucking carver)
THE JAW IS HINGED.

And we continue working....
2 notes
·
View notes
Text
The Human Hair is a Mask
Like I previously mentioned, I can organise a memoir through my various hairstyles over the years and the effort it did or didn’t take to maintain it. Many others can probably do this too, this isn’t always because we are superficial but our hair is a part of our identity.
Unlike our weight, height and intelligence our hairstyles can be changed quickly, effectively an instant transformation. You could go into the bathroom with an electric razor, shave your head in five minutes and come out a new person, while our hair is our identity it’s a temporary part.
Also our continuous wish to be physically attractive or outrageously rebellious means we can dwell on our hair. This trend of reliance on what grows on the top of our head has continued for decades and is constantly marketed to us with any products or services in relation to hair being apart of a richly successful industry that continues to grow.
With this competitive market and erratic trend cycle many can use hair as mask, depending on it emotionally and chasing constant perfection regardless of bleach or heat damage.
I wanted to create a piece that could simply convey this tone within my project. I sourced hair trimmings from a Barbers I use to work in along with a card mask and got to work.
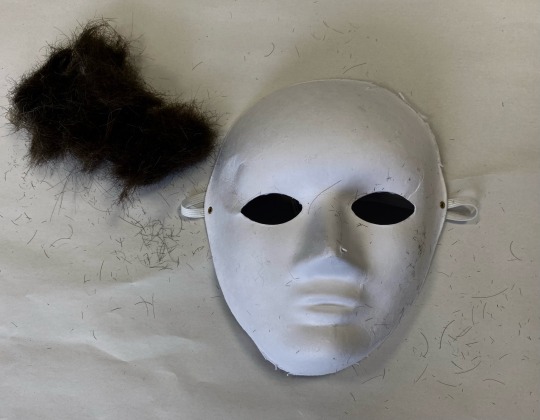
I began first covering the mask with PVA glue and the first layer of hair but was having a few problems with layering the hair

After this I had to get some spray adhesive in order to add another layer I did not want to be able to see white through the hair

I found I could build up more layers effectively this way and of course I was wearing gloves the whole time.

May original plan was to create wire eyelashes with inspiration coming from Anna Donovan but unfortunately I could not create my desired wire eyelashes and secure it to the mask
Although a simple project I am very happy with the eerie feel depicted as I think the fact I’m working with hair that is grown from the scalp of people I have never met is a mysterious concept to begin with.
2 notes
·
View notes
Text
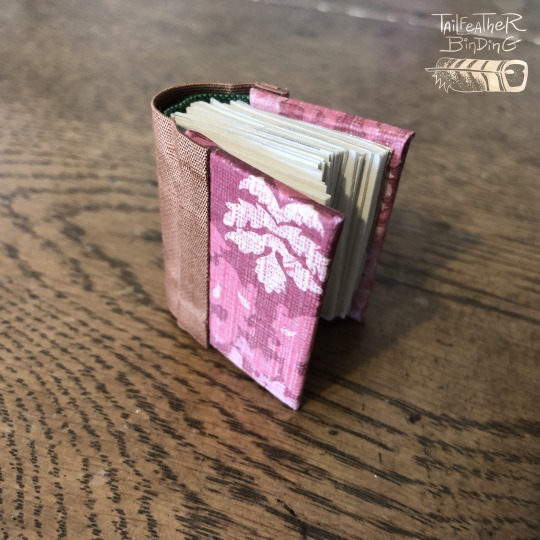
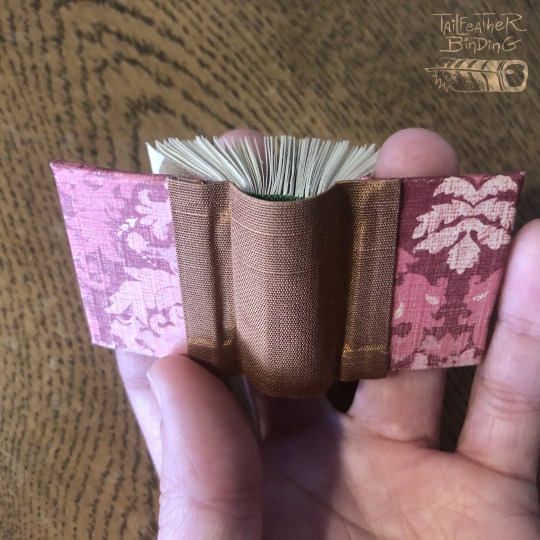
Tiny bookbinding of Very Deliberately Waiting by gloss, Feb 2023.
Gift for daemonluna from the Renegade server, thanks for the request! Every tiny book I learn something new even though this is like number 20 I think? First time rounding a tiny book and I am pleased with the result.
Materials: Covers are scrapbook paper, Italian bookcloth, PVA glue, bookboard; textblock is archival paper pages with laser printed text, cotton thread, beeswax; and faux endbands are cotton scrap fabric.
#bookbinding#ficbinding#my art#tiny book#tiny things#handmade#tailfeather binding#artists on tumblr#id in alt text#finally able to post this! I wanted to wait until Luna received it so the cover design would remain a surprise :D#it's my own fault for not mailing it literal months ago sdfklgjg
73 notes
·
View notes
Text


I started making a base inside of the box for the terrain using some PVA and some cardboard I found. I tore at it and placed it with some PVA til the whole thing was covered in cardboard and glue, Olivia suggested that I make a certain area taller so that the creature would have a place to put it's tail as it was floating a little. I happily obliged and did so decently well I think.
I started on this creature sheet of which I suggested to Olivia. She agreed it would be cool as my previous sheet was rather cool as well. I drew the creature on it's feet and standing up to show both sides of it. I am rather proud of how it turned out considering I don't normally draw birds of odd creatures like this.
0 notes
Text

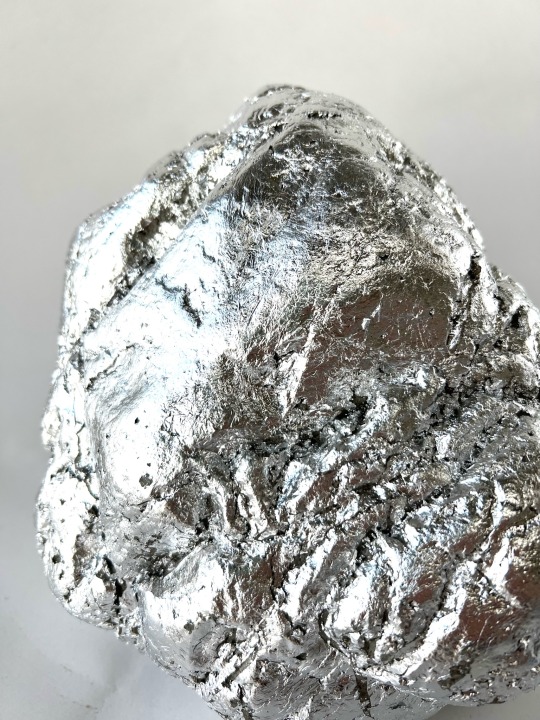

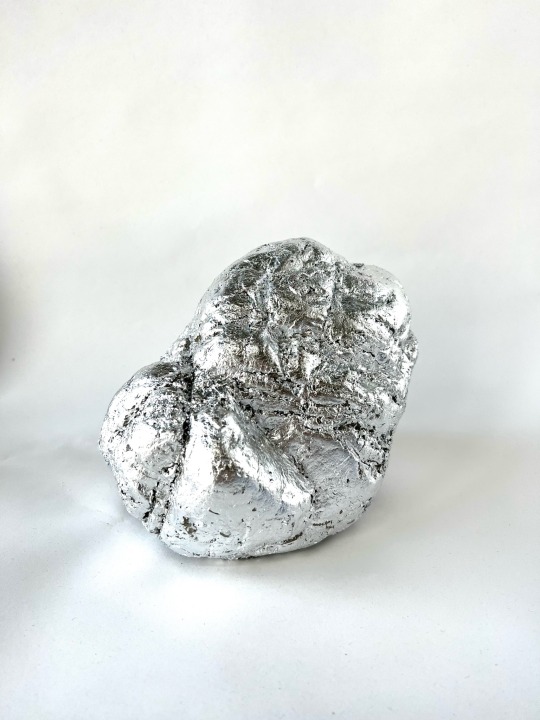
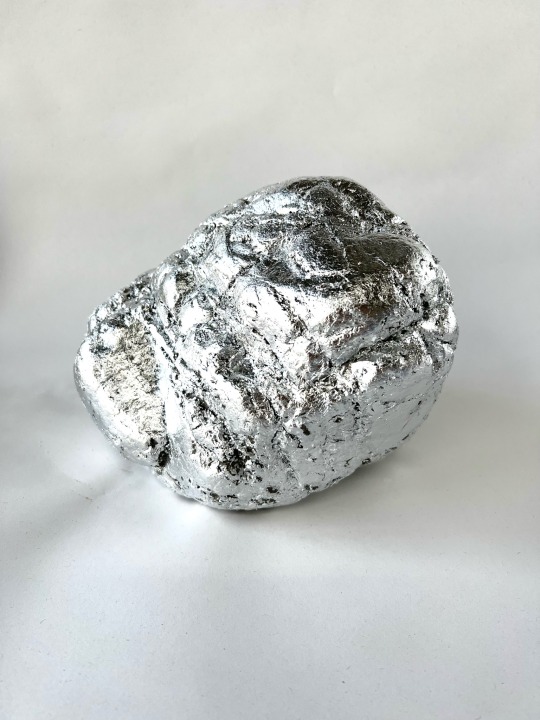
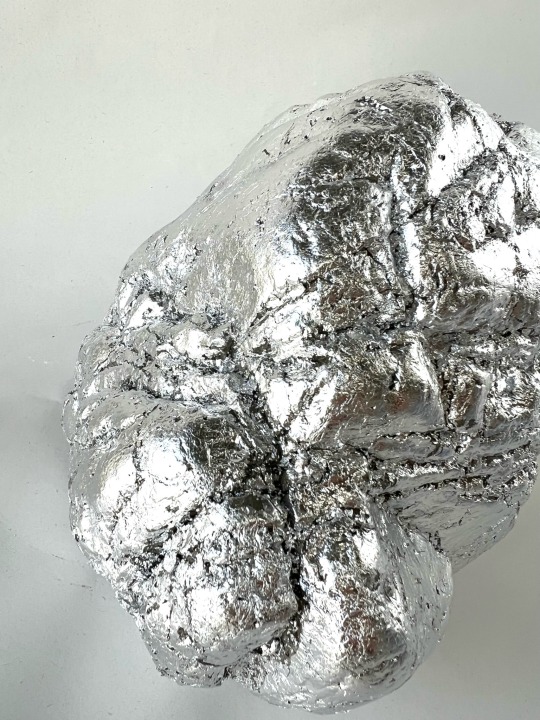
The Final Sculpture
I primed my sculpture with a coat of PVA glue, to coat it in something for the gilding fluid to sit on and before layering on sheets of aluminium leaf. Once I laid a leaf onto the rock, there was surface tension and I struggled to get the silver into all the nooks and crannies. This did irritate me because I wanted it to look like it had been cast in silver, but once I covered the whole surface area I found that it's barely noticeable because of how reflective the surface is. It's dazzling, it's obliterated.
I really like how shiny it is, it exceeded my expectation though I would have liked it better to have been able to see your own reflection in it. That would have been most ideal. But other than that, I achieved what I set to. I manufactured a rock, from start to finish. I synthesised a natural object; and obliterated it so that you can then project yourself on to it. Rich in texture and form. It's even colder to touch than the original stone, as I write this and touch both to compare - it's eery that the natural rock obtains of the ambient temperature but my cyborg rock is much colder to the touch, cold like metal. A manufactured coldness.
And there's something about the pink and the silver, the childish neon brightness of the pink and the magpie draw of the shiny silver results in this aesthetic appeal to the id (like a marketing campaign)- even though there has been a lot of intellectualising in the development, it has a baser attraction rather than a cerebral one. But once you come to understand the concept, that becomes less of the case. I am currently in the process of making four more sculptures for the final degree show, because multiples of this rock would further provide emphasis of this idea of manufacturing through replication. And displayed with the risograph background it will all become a manufactured natural scene.
0 notes
Text
Creating a Miniature Building No.2

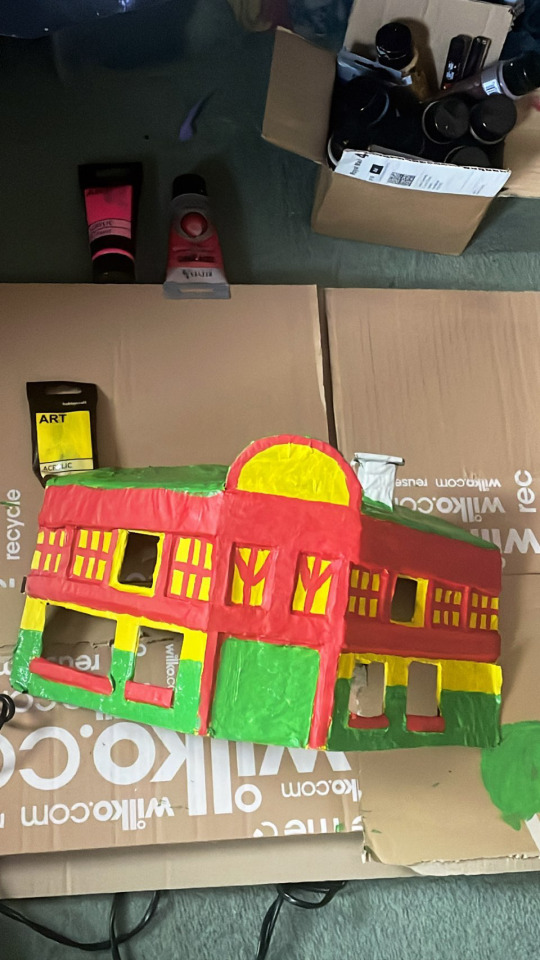

I decided to have another go at designing and creating a miniature building. I wasn't super happy with the last one I made so thought I'd create The Loyal Dog II. I'm much happier with this outcome. Using similar methods I created a corner of the road style pub however this time I had much more fun with the creative process.
This Tim the pub has a roof and a chimney! I papier mached the outside of the building which helped considerably in regards to it's finish, durability and overall look. I then used more acrylic paint to decorate the building and covered the whole thing in a layer pf PVA glue to give it a protective finish.
I am aware there is a certain child like quality to the creation but I guess that's a good thing. doing this process of trying to get in touch with my own creativity and returning to the idea of play I have been continually fighting the urge to create neat and traditional "nice looking" artwork.
It's been great to create work in this intuitive and hands on manner and I think it will really lend it self to the aesthetic of my final outcome.
0 notes
Text
[29-4-22]
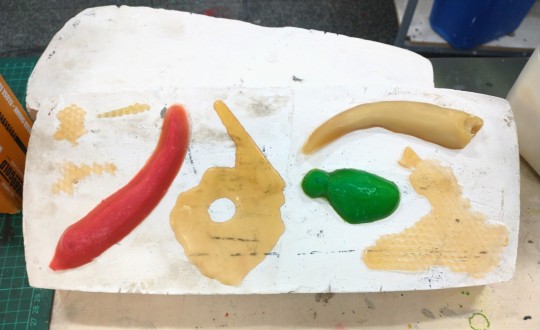
I sampled different methods of creating eyelids for the Transhumanism sculpture. First I painted white emulsion paint onto newspaper, as that is what the base of the eye is made of. Then I used balloon remains, red construction paper, liquid latex and dried latex scraps to make an eye shape. I think the balloon was the most effective as it resembles skin the most. I used PVA glue to stick it down which also allowed me to create skin-like folds and wrinkles around the eye. If I am to use this material for the sculpture I would need a larger piece, which I can't get from a balloon, or I would need to cover the eye in several smaller pieces, which may look unrefined.
I took the latex pours out of their moulds. They were more opaque than expected but had a skin like quality to them because of the colour and texture. The coloured pours came out vibrant and very opaque because they were partially unset (even after two days). While I like the results, they take a long time to set which is an issue because I have limited time and need to make multiple casts. I could make more moulds so that I can do multiple casts at a time, but I want to avoid using excess plastic. I'm therefore going to look into alternative methods of creating the tentacle/pod, or consider making them smaller.
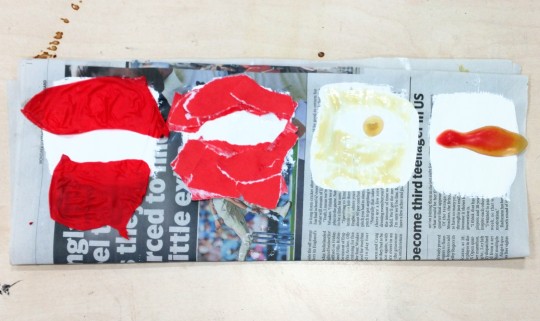
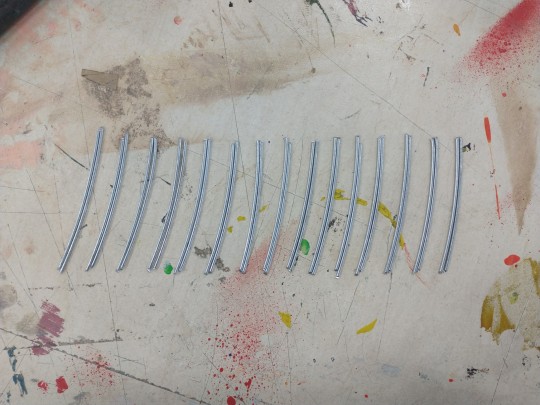
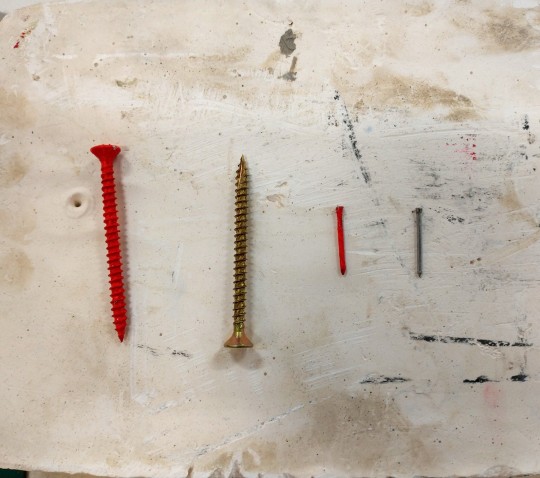
I tested different nails/screws for the Hostility chair. I coloured them red by coating them in white emulsion paint, letting them dry and then painting on a layer of red acrylic. I was happy with the colour but I found that it added a matte finish which made them look softer. I am going to try different methods that preserve the metallic effect of the nails/screws. I also found that the nails were difficult to handle because of their size. The effect of them on the chair would appear more subtle, and I may need more of them to cover the surface of the seat. They are too small to nail through the seat and come out the other side, and hot gluing them to the seat would leave glue visible. I could nail them into the top of the seat, but this would leave the flat part of the nail on top. The screws would be easier to put on the chair, easier to colour and more visually effective. Therefore I am going to use screws for the sculpture. Next I am going to try staining them red, and sample different ways of putting them on the seat (will they be nailed through the board, hot glued on top etc.).
For the Surveillance sculpture, I made frames for the TVs using brown paper. I made antennas by cutting pieces of wire and hot gluing them to the back of the frame.
1 note
·
View note
Last Seen Blogs

stasiscubes
Basically, Run.

claudia-the-griffon
Claudia The Griffon

bobariri
riri's workshop
yamakajis
Things are getting fucky

artworks4all
emotions