#look I made past the sketch and lineart phase
Text
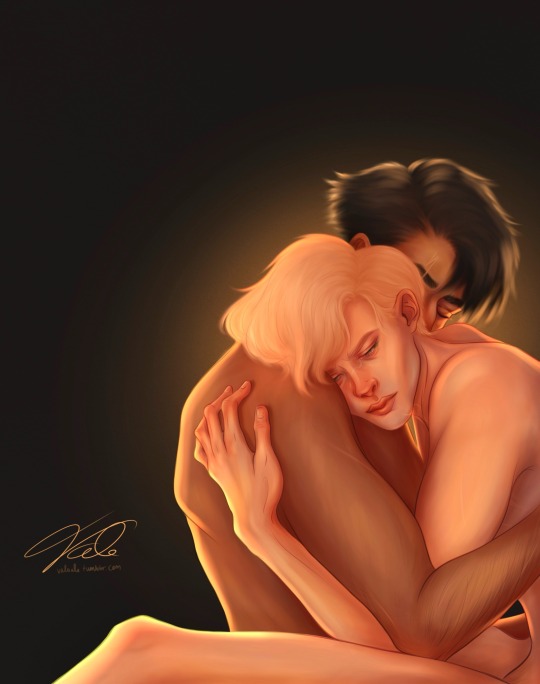
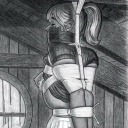
Never let me go
#after 34 hours of pain#I decided it’s ready#I promised more groping but I brought sadness instead#oopsie#anyway#look I made past the sketch and lineart phase#once in a blue moon#hp#draco malfoy#harry potter#drarry#hpdm#vee draws#mine#harry james potter#harry potter fan art
532 notes
·
View notes
Text
Road to 3D- Sam Manson (Part 2):
Character Modeling


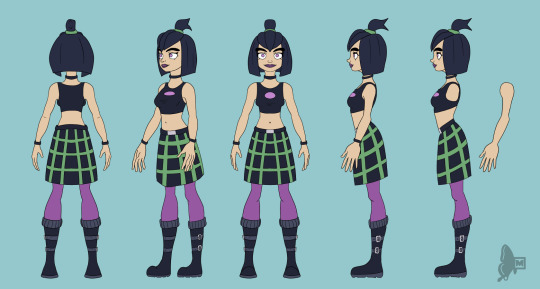
Part 1: Model Sheet
Welcome to the second and final part of this project. Since people have asked how I do my models, I decided to make a write-up on how I approach these things using the example of a model of Sam Manson. The first part focused on how I make a model sheet fo a 3d model the second part focus just on the modeling. There are many more things about how to create a fully realized 3d character that I could make whole other chapters for, like UV unwrapping, texturing, shading and rigging, but I don't have enough knowledge past the fundamentals on these topics that could warrant their own seperate posts.
Additional stuff before I continue:
I use Blender for all my model
This not a beginners guide or something similar, it would be helpful to already know the general workflow of a modeling, how to use Blender and know different terminology like edgeflow, retopology etc.
If you are a beginner and want to learn more about character modeling I recommend the videoseries "Modeling for Animation" by Dikko on Youtube
Maybe I make some reference some tricks from this videoseries
That's it, let's go!


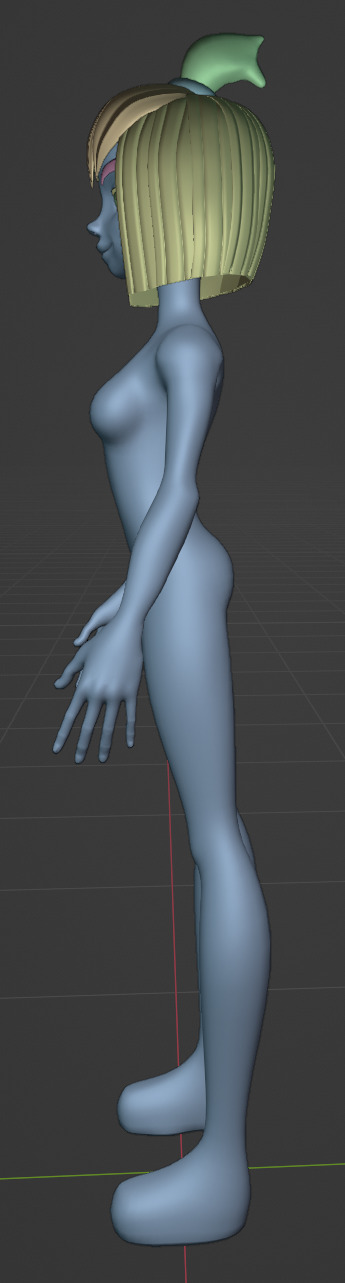
My first step is always the block-out phase. The block-out phase is what the construction lines and the first sketch in a drawing are. I align the frontview and sideview from the model sheet I made in part 1 with the z-axis (the blue line in the images above) and roughly shape out the forms with primitive forms. For this I mostly use a cube with a subdivide modifier.
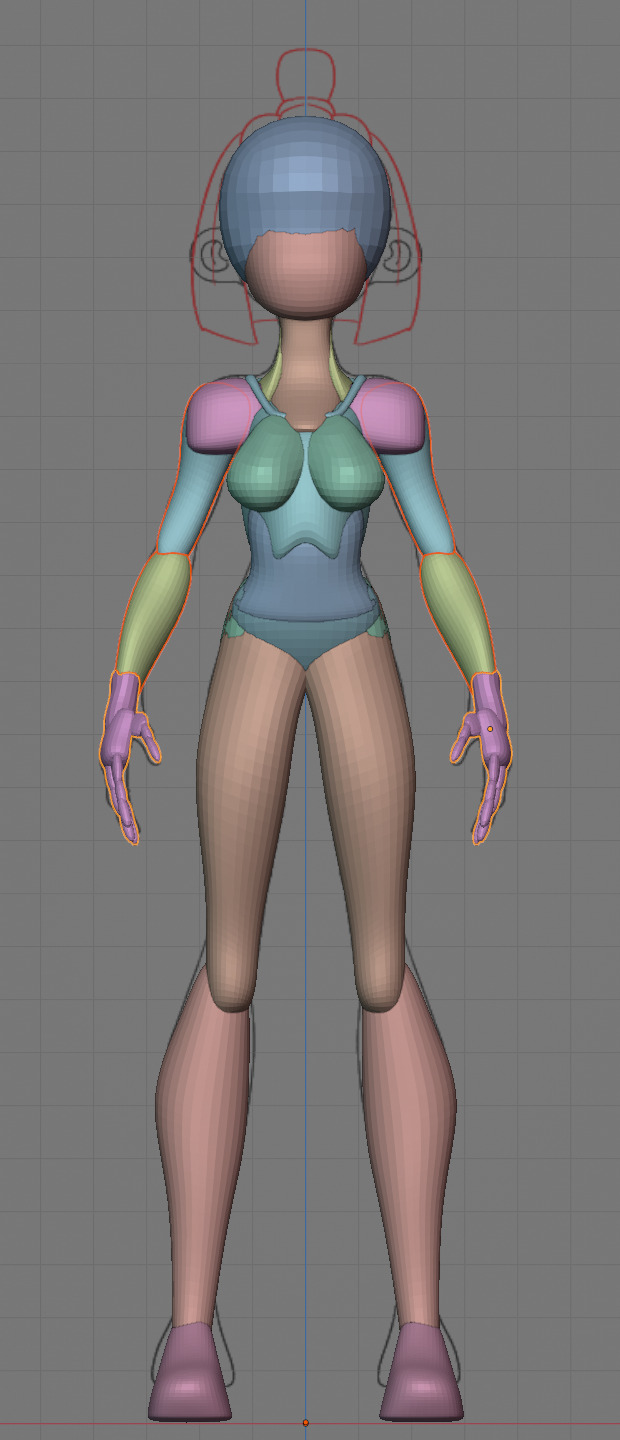


Having a modelsheet without the clothes obscuring the body makes it much easier the get the form right. The block-out phase is one of the most important steps, if it looks good than I have practically half the work done. This is also a good opportunity to practice anatomy.
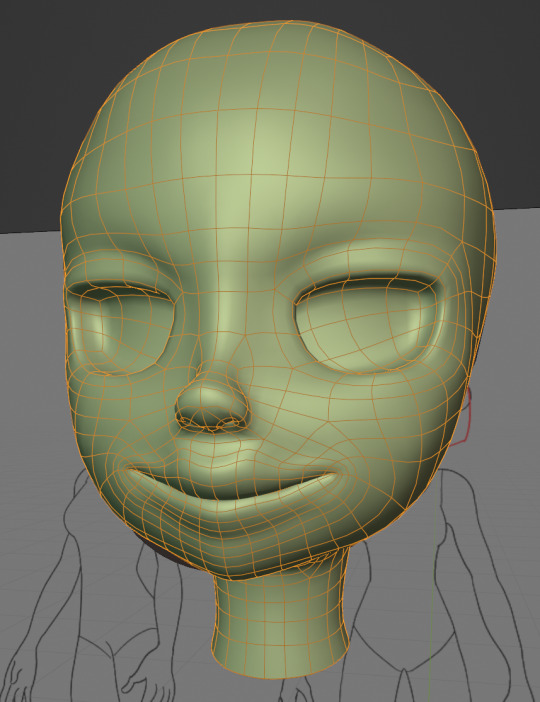

After this stage I continue with the head. First of all, don't forget to add the mirror modifier so I just need to model half of the model. There are different methods to approach modeling the head, like sculpt the head first, retopologize and than bake all the deatails onto the retopologized head. I actually prefer to polymodel the head especially when I have a good model sheet. I practially trace the lineart from the model sheet by extruding vertices, once from the frontview and once from the sideview. The most important points are the form of the eyes, the mouth, the form of the face and the jawline. The head block-out is used as an anchor point for the shrinkwrap modifier so that the traced forms actually look like they belong to a 3d form and not 2d lines floating space. From this point on it's just connecting everything, pull and push vertices so it looks like a 3d head and make sure the edgeflow is good. (It's also helpful to know how the planes of the head look like) After that I add the eyelashes, eyebrow, eyes and the ears, now it looks like something!
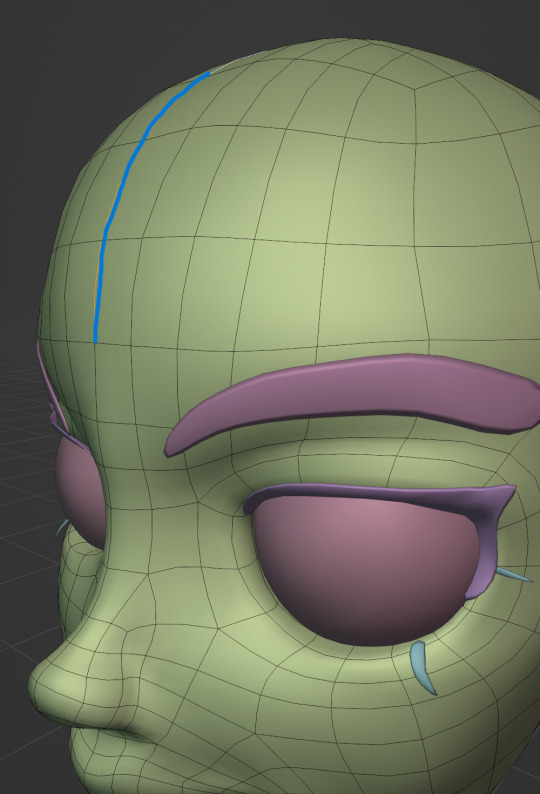
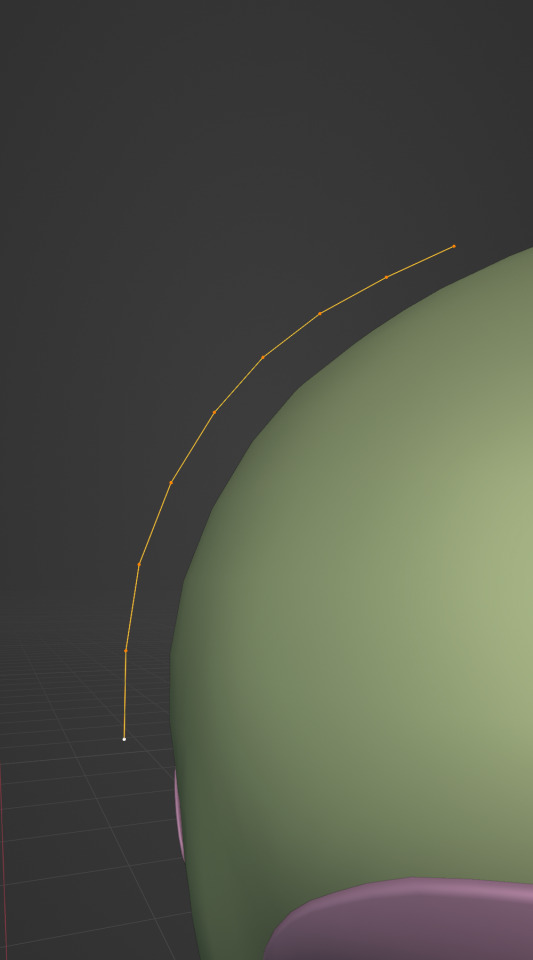
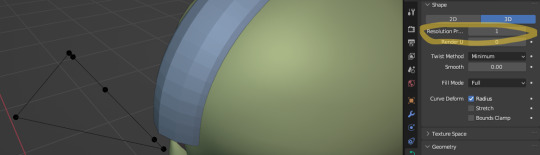
Now comes the hair. For the hair I used the "curve trick" like mentioned in the video series I recommended. Here is a tip to save time: I choose some edges from the head, duplicate and seperate it from the mesh. I convert this seperated line into a curve and choose a beziercircle as a bevel geometry. This is now the perfect foundation to model the hair further. One thing I needed a long time to notice: To get the beziercircle to a perfect square or in this case a triangle lower the Resolution U to 1 in the shape options. Now I just convert the curves into a mesh and add details and the head is done!
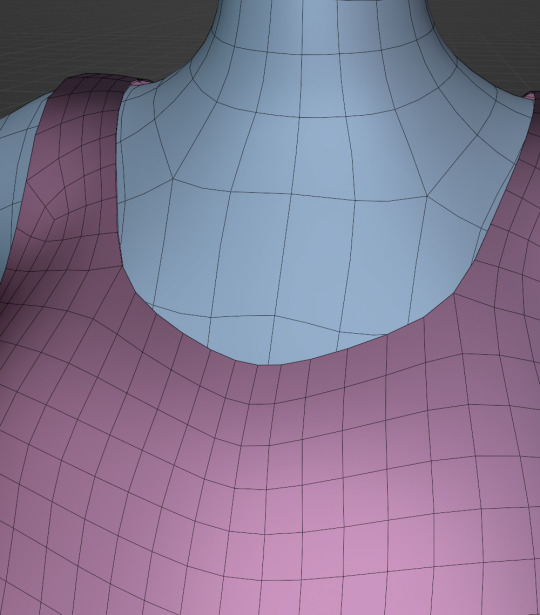
With the head finished I continue with the body. Remember how I wrote with a good block-out half of the work ist finished? Well, for this step I practically just use the smooth brush in sculpt mode and smooth everything out so everything looks connected. Then I retopologize the body and that's it. Well, ok there is a little bit more to it: Before smoothing things out I join the block-out part to a single mesh and remesh it with the remash modifier expept for the hands. I prefer to polymodel the hands seperatly without worrying about the rest of the body because they are difficult to model. I reattach them later. Speaking of reattaching, I make sure that the connection points have the same number of vertices while I retopologize/polymodel. To ensure that, I often use the following trick visualized with a simple example ( which is also described in the video series):
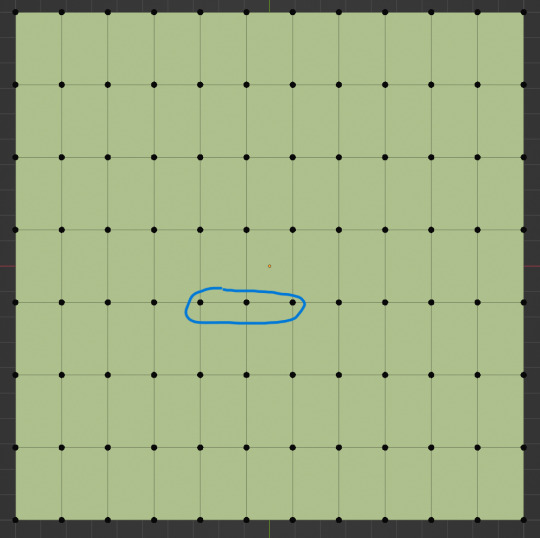
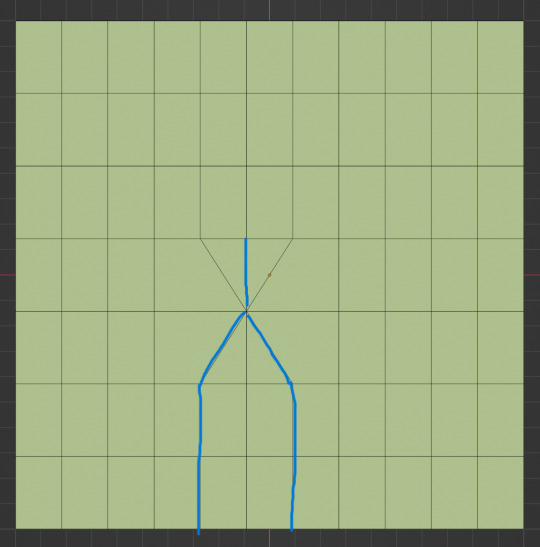

I want to reduce the amount of edges at the bottom of this plane, for this I merge 3 vertices from the middle into 1 vertice seen in the left image. After that I can select the blue marked edges from the center image and dissolve them. The result, which you can see on the right, is a nice clean edgeflow with a reduction in the number of edges.

After modeling every part I attach them together and I have a finished bodymesh the work with.

Now onto the clothes, for this I use the model sheet with clothes as reference. Having a retopologized body makes it easier to model simple stuff like e.g. Sam's shirt. On the left image the marked faces of the the bodymesh already looks like a shirt. I just need to duplicate and seperate this area, clean it up a little and the shirt is basically finished. The more complex stuff like the boots I need to polymodel around the bodymesh.
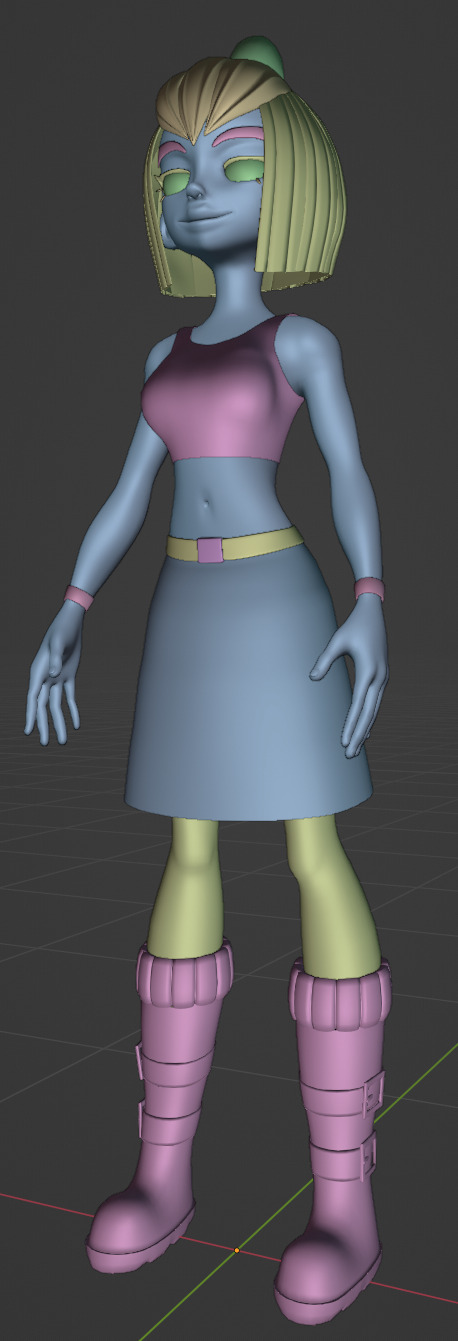

With that the modeling part is done! Now comes the things I said above: uv unwrapping, texture painting, rigging and shading. These are whole other topics I cannot go deeper because I'm still learning how to do these things but I hope my little write-up about how I appoach character modeling was enough to learn one thing or two.
Thank you for your time and thank for reading!
#3d modeling process#3d model#blender#danny phantom#sam manson#long post#my animation#my art#art resources
225 notes
·
View notes
Text
Progress talk thread
I like to take a lot of backups as I draw so we I can show off my widdle Lilly wips!! I'm drawing again that means I get to talk about drawing again yahoo
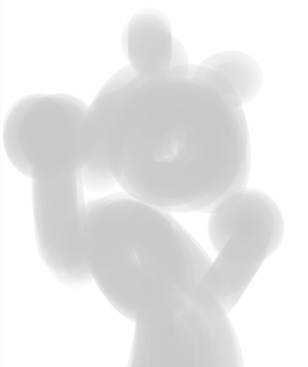
Lately when starting a drawing I've been trying to block out very rough thumbnails as seen above! I usually just start drawing like, the head, and trying to then figure out a body under neath and line by line it all ends up pretty similar to my past stuff because it's just not planned out! I don't know where the road is taking me!
So by starting out and trying to throw together the general pose with just a blown up light brush I'm coming up with much more interesting piece! I can figure out the general shape of the entire piece and then start working on top. No making a shoulder then drawing the hand over it and then erasing the shoulder and getting frustrated because it just doesn't look connected right because I didn't plan it out… where does this drawing end? where's the limits?? where am I going?? So my current workflow involves
Make the dimensions of the piece roughly (just throw a coloured rectangle down) -> very roughly block out the shape of the body within it
This also has the benefit of inspiring me to fill in the blanks with a pose I didn't initially expect! The body is reversed from my initial vague idea because seeing the blobs made me go OH IT'D BE COOL IF I DID IT WITH THE BODY FACING THIS DIRECTION ACTUALLY LET'S MAKE THAT WORK!! If you look at the initial you can kinda see it looks more like she's looking down at you with the raised arm being the one facing you.

Anyways after doing my personal Holiday pic the other day, I was like, it would be cool to do a small run of postcards to send to people yahoo!!
I checked the sizes of postcards and none were even close! They all had like an extra inch on of extra space on the bottom whoops! I free style my rectangle sizes when planning an illustration and I guess they're closer to square than the ideal rectangle! Whoops!
So for this one after getting the initial sketch down I thought, hey how close is this to 5x7? AND LO AND BEHOLD IT WAS THE SAME ISSUE!!! So I took filling out the extra space as a challenge. I'm trying to be more dynamic with my art after all!
I spent time adjusting the piece in sai2 using the transform tool with it's perspective skewing on. I wiggled and rotated and pushed n pulled and you get what you see above. A much more dynamic piece filling out the canvas!
The thing that took the most time in this phase was getting the skirt to a shape I found acceptable.
Up next was moving towards making it a finished piece!
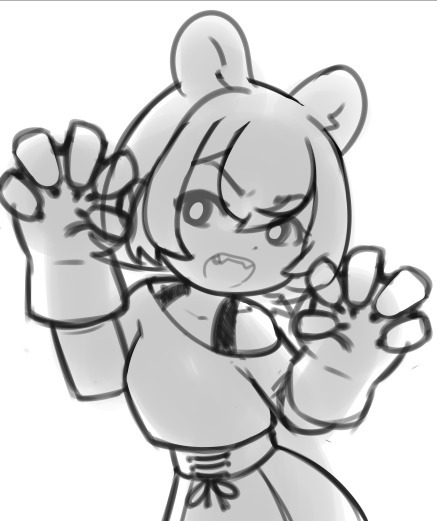
Thick lineart is something I've been deciding if I want to stick with or not but honestly it's my natural state! I love thick lineart!! I grew up on manga I wanna see some black lines!!! In the future I wanna go back to colouring lineart as well but for now I believe I need to lean into my natural tendencies for thick lines!
I threw down my lineart to a mostly acceptable state, and brainstormed ways to fill the empty space surrounding Lilly. I found there was just a lot of empty space in the bottom left and I didn't really solve that in the final, but that's ok. It's something I'm trying to be aware of as I actually attempt illustrations. I want to finish pieces right now, I'm not in a place where I can let perfectionism slow me down.
Currently my layers are (face) and (lineart)
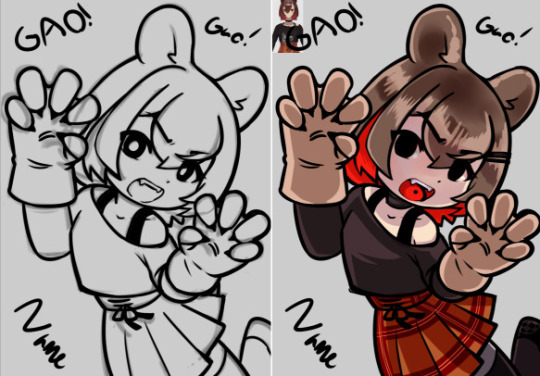
I throw down some flat colours, a light layer above and for once I tried a shade layer too! It might of been a multiply layer. It was probably was. Anyways this is what I was happy with before moving forward with refining it. I'm currently going with more focus on like, backlighting/rimlighting because it's easier to make it work with my no context existing in da void illustrations haha.
To refine it, right now, I'm playing around with mainly using one layer. So I slammed together my layers other than the face (I made that mistake with my previous piece and that's how we ended up with the eyebrow incident. I wasn't going to put myself in a place where I had to erase an eyebrow again) and started sculpting!
I think sculpting is the best way to describe it, really. It's a lot of slamming down chunky lines, and since the lineart is on the same layer, I'm constantly pushing colours out and finding the ideal shape of both it and the lineart. It helps me push my shapes even farther and let the colours take priority when they need to. Instead of them being separate things I worry about they're all just one big piece!
I was a bit worried about merging the plaid pattern down as well, but I did my best to get the skirt in a place I wasn't going to adjust much after the merge. That was the biggest priority of the previous step really.
It's a lot of fun! I recommend people try it! Try sculpting your lineart a bit!
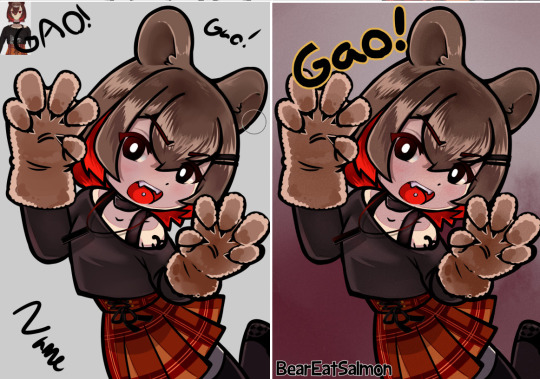
I added the necklace accessory after since I knew trying to fit it in earlier would also be a pain in the ass haha. I'm not a one layer purist! I'm just having fun!
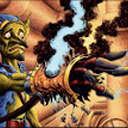
The background, I went in with no idea for a bg. So this is what we get. I think it works fine for this piece, it's a vtuber attacking you with big fluffy bear claws with no context other than that they are a bear and they're going to fucking get you. Red fits, Lilly has a very orange/red hued design and it's an aggressive attack so the mood works. I could of even gone harder and made it look a bit more splattery but I wasn't sure if I was going to fill up the bottom left space or not.
Looking back maybe I could fit in her name on a cool blood splatter there but I am not a graphic design major my brain is growing slowly in this department thank you
Also fluffy claw gloves usually have much less defined fingers but I couldn't make mitts look good with my initial plans so I stuck with my initial idea!!! Thank u.
Anyways follow Lilly [Twitch]
15 notes
·
View notes
Text
It's way past my bedtime ans my cat is sleeping-purring next to me but I thought I'd post the process of the @ailani-reillata Ailaniversary art I made today just to talk a bit more about it
Disclaimer: doing traditional art is cool until you need to scan it or post a picture of it 😂 also kinda long post below so ofc no obligation at all to read it!
Phase one: Sketching the Idea
My inspiration for the posture was a Yara Flor comic strip I found on Pinterest. Yara looks over her shoulder and her hair falls on the side of her face, and I loved the way it framed her face and thought it would look great with Ailani's hair.
I drew a little doodle on the page to help me visualize how the hair would be divided, and focused on 3 main parts (the lines, the bubbles, the empty space) which would - supposedly- help me during the lineart stage. Below are images of the final sketch.
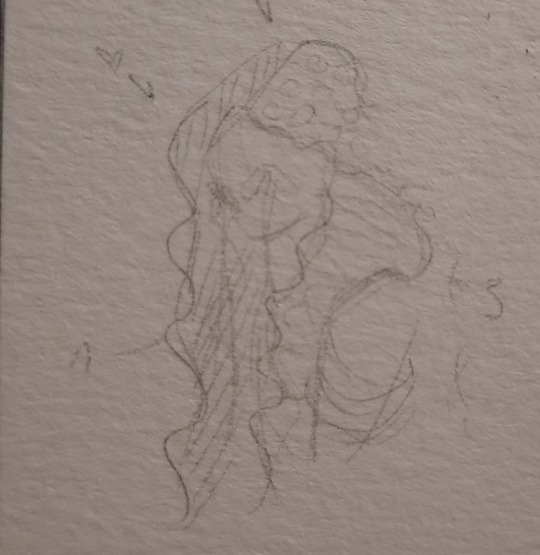
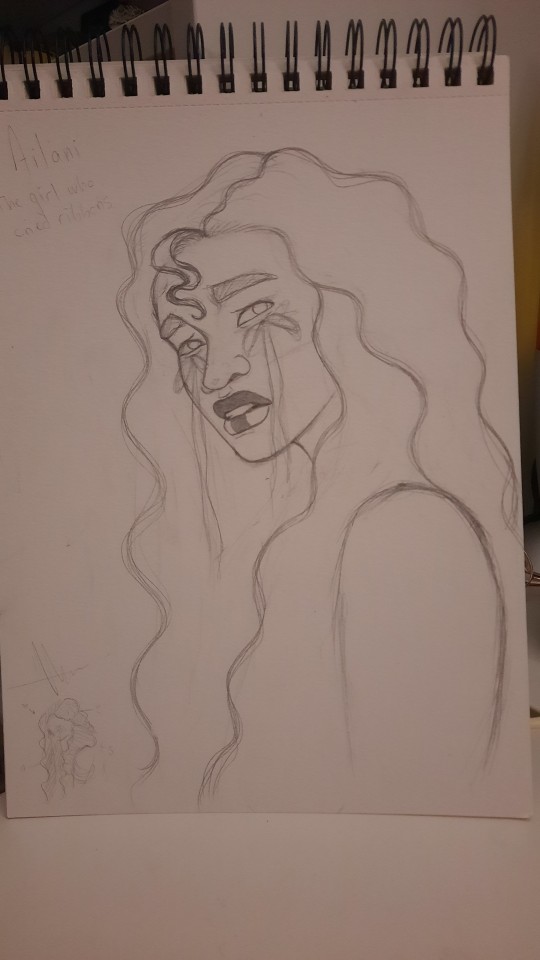
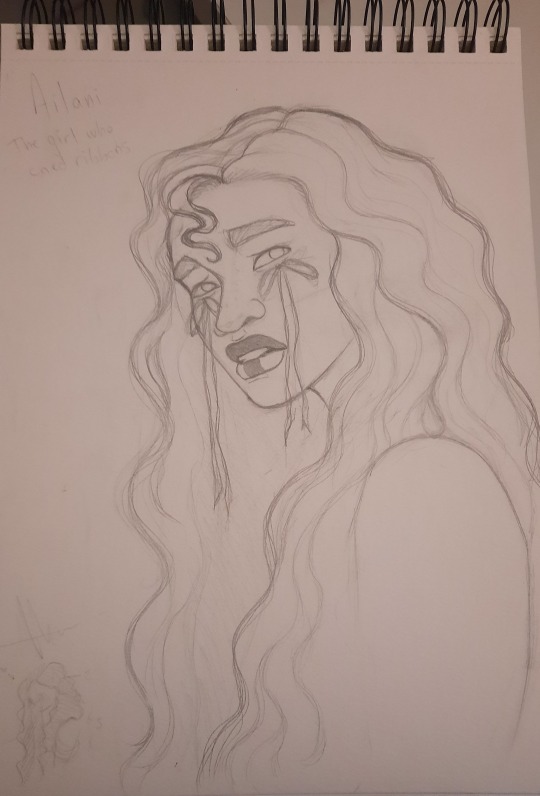
I was hesitant on adding details to her arms, such as the folds of a dress, but I was so anxious about ruining the drawing I abandonzd that idea. I was considering adding her tattoos and was still not decided at this stage of the drawing.
Phase 2: Line-ing the Art
Is that even a real word? Idk, I'm too tired to English properly so we will say it is. Following the sketching phase was naturalle the lineart phase, which is one of my favorite stage when drawing. I bought new inking pens too so I was able to test them out, and it went quite well!
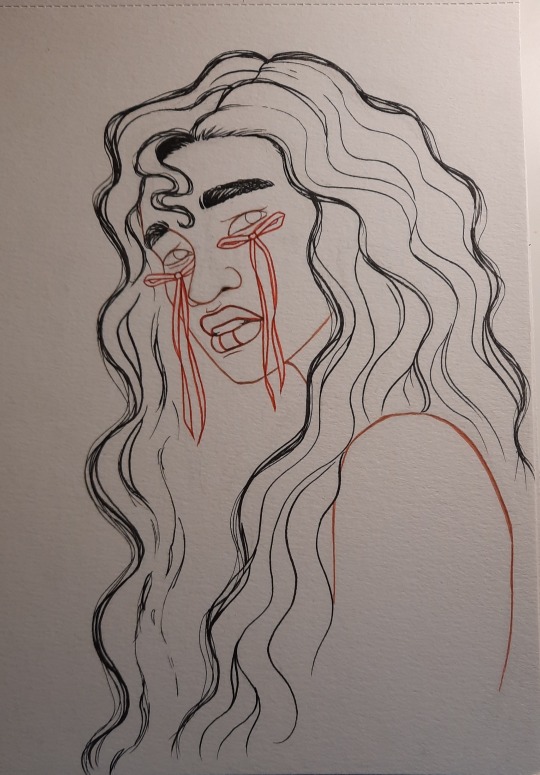
As you can see, the ribbons, outline of the skin and facial features have been done with my new pens, and i was quite happy with the result! It gives a more natural look to the whole drawing in my opinion.
At this stage I decided not to add her arm tattoos and consider this version of Ailani as the one you would find in the early chapters of Begged and Borrowed Time, so before she would get her tattoos.
Phase 2.5: Line-ing the Hair
This stage has it's own part because it was really fun to do! The inspiration for the way I draw hair comes from @/ssavaart (aka Scott Christian Sava on Youtube). I've been following him for a while now and I'm trying to push my art beyond my comfort zone and try new stuff thanks to him, and having fun with drawing hair is one of these things!

Look how beautiful these curls are. I'm not trying to toot my own horn or anything, but I'm really proud of the drawing at this stage 😂 it's the perfect moment where the inking went well and I have not yet ridked myself with the watercolours - so I always take a long sight (and tons of pictures) to celebrate reaching this stage without incidents.
Phase 3: Watercolours
Here comes the difficult part. It always makes me nervous because I always fear ruining my drawing and all the efforts I put into it by doing the watercolours. But I love the medium too much and if I want to get better I need to practice. So, testing the waters, I finally dive head first into this crucial stage.
The watercolouring goes well, I'm overall satisfied enough to take some pictures and even try to scan it, with the hope that the scanned rendering will be better than the usual "photographing and editing" I do with my phone.
Spoiler alert: the scan was NOT better than the pictures, and no amount of editing could change that. (Or maybe I am just very bad at editing.) So, back to my "photographing and editing" habits, I somehow managed to get a good enough result:

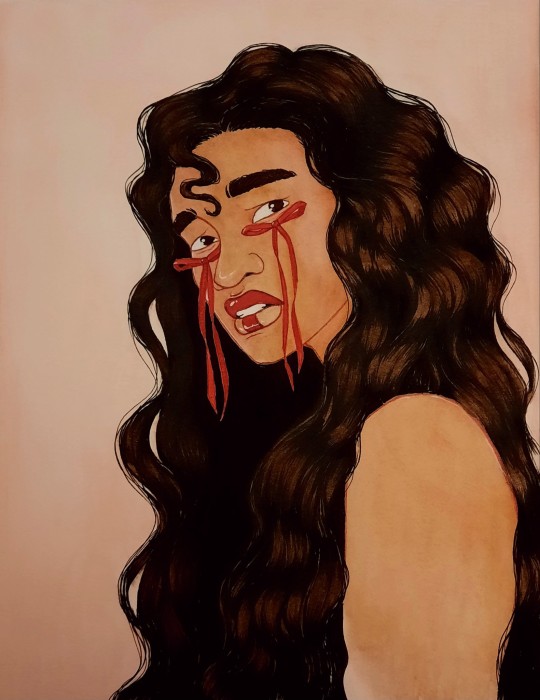
I still feel unsatisfied as I find these digital versions do not properly render the visuals I have on paper, IRL. With the digital versionsw the hair is either so dark we don't see the details, or too bright, the colours are too warm and light... And while Ailani looks light-skinned, the paper version has these visible brown tones that I struggled to find on the digital version, even when editing the pictures. The closest I got is the tone you see on the first picture, but the image is not lighted enough so the overall quality of the picture is a bit lessened by that.
Still, I won't complain too much, because overall it was a very fun drawing to do, I enjoyed every stage of it and I would love to do another piece like this! But for now I will go to sleep because it is Way Past My Bedtime 😂
If you've made it this far, thank you for your attention, feel free to let me know which stage is your favorite and what you liked most (or disliked most) about this drawing!
I for one really had fun doing Ailani's lips, as well as filling her hair, and colouring her eyes! 😊
#ailani#ailani art#I'm tagging just in case you wanna see more but again no obligation to read all of that or anything!#this post is mostly here to show the early stages coz I was so prouf of how smoothly it went!!#until the colours#it's always the colours 😂#but I hope you enjoyed the drawing anyway#I've actually been working on it last weekend but couldn't finish it until this saturday because of my exams week#which is over btw which means i finally has time to read Begged And Borrowed Time!!#and I'm really excited about that!!#so yeah that's all for me now is time to sleep because it's like 4:19am right now and I am huu tired 😂#once again happy Ailaniversary 💕💙#also yes we can't see my signature on the drawings I cut it out by accident when i cropped the pictures and was too lazy to retake pics etc#please pretend like you see my name signed next to her hair x)
7 notes
·
View notes
Text
Interview with Fan Artist loycos!
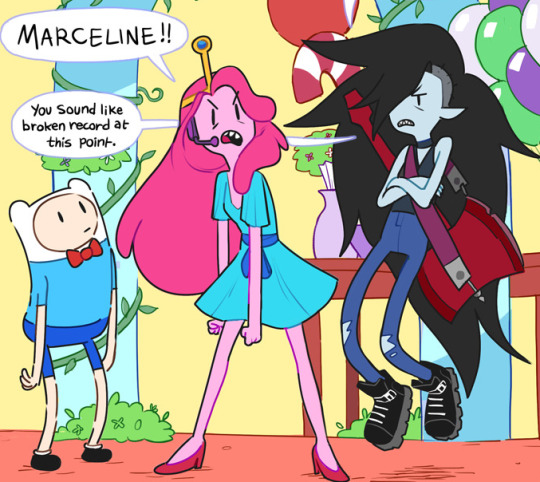
(Art by loycos)
So a few months ago, I was absent-mindedly scrolling on Tumblr (or was it Twitter?) when I came across something: an Adventure Time fan comic by an artist named loycos. As a person embedded in fan spaces, I find fanart like this all the time, but this time, there was something special about the art I was seeing. It was so... show-accurate!
I don’t mean that necessarily in regard to the art style (although it does feel right at home in the Land of Ooo, while still being its own thing with its own flourishes), but rather in relation to the characterization; the way loycos wrote the characters was spot on. She nailed PB and Marceline’s dynamic as former lovers who deep-down miss one another. She nailed Finn’s naive heroism and his one-sided crush on PB. She nailed Jake’s goofball energy. It was perfect.
In the past, I’ve only interviewed people affiliated with the show’s production, but I thought I’d mix things up a bit and reach out to some fan artists that I think are fantastic. As such, I’m delighted to share with you an interview I had with loycos, who answered my questions about her art, her history with Adventure Time, and where her work is headed!
What is your 'artistic origin' story?
[It’s] kind of a corny answer, but I've been drawing since I remember myself. My earliest drawing memories are drawing Clifford (the big red dog) fanart when I was around 5 y/o. I was always more of a "fangirl" artist, [and] I would draw characters from my favorite franchises to illustrate my headcanons and daydream scenarios I'd put them in. That hadn't changed one bit since. I had since gone on to study animation and illustration in official institutions which forced me to design characters and worlds of my own, but when I draw for myself it's always back to fanart (or studies). I don't have any OCs.
Are there particular artists or styles that you were inspired by and/or like to emulate or allude to?
I'd joke that my artstyle is just a mesh of all the franchises I've drawn fanart for over the years, but honestly, is it even a joke? I think you can easily recognize I had a Disney Phase like every other teenager (I didn't have an anime phase though! I know, I'm an anomaly) and [Steven Universe] definitely left it's fat mark on my style too. Out of [Steven Universe]'s storyboarding crew (which I followed very closely over the years) I especially love Raven Molisee and Jeff Liu for their wacky expressions and proportions, and of course Rebecca Sugar for their fluid and carefree lines. When it comes to art in general, I tend to prefer stylized, colorful and brushy styles over realistic or gothic ones, So people like Hue Teo and Patri Balanovsky pop to my mind (and my artstation feed, seriously look them up).
How do you approach your projects; what is your general art process?
It really depends on the type of project I'm doing, though, my [Adventure Time] comics were all pretty similar in their conception: I write down all of my ideas in my notes so I won't forget them. Then I either roughly sketch out the entire comic as fast as I can, or I write a script (if the concept is specifically very dialog heavy) and then sketch it roughly. Then I do the lineart and color, nothing too complicated. The one thing I think is worth noting in my long comic process is that I draw all of my panels on the same document- that way it's easier for me to make sure the characters stay on model and that my panel layout remains fresh. So basically, the way you read the comics on tumblr, as a long scroll, is the format I work on.
How did you come to find Adventure Time? What made you join the fandom?
Adventure Time is one of those shows you just know about, so I don't remember how I first found out about the show. However, I do remember when I started shipping Bubbline—after the episode “Broke His Crown” aired. I somehow ended up in their Tumblr tag and was blown away by the (by 2016's standards) blatant representation. Despite my obsession with them at the time, I never actually watched any episode that didn't feature the girls' relationship. I only started fully watching the show recently. But I did consume a lot of fan content, which I think helped me shape my own headcanons and such. After my initial interest in 2016 I put Bubbline back on the back burner and kept on my [Steven Universe] ramage, until last year's “Obsidian,” which brought me back fully on board the Bubbline decks around 2 weeks before it aired, so I was in maximum hype mode when I watched the special. It did not disappoint [and it] really reminded me of why I loved these characters and their relationship to begin with. I started drawing my own art for the ship shortly after, when I felt like the hype around the special died down and there wasn't much to keep me sustained anymore. I make what I want to see ;)
As for joining the fandom, I don't know if I can be considered a member, seeing how inactive I am most of the time and my very limited list of [Adventure Time] mutuals. I am extremely flattered that my stuff caught ATimers attention in a positive way.
You've done some amazing Bubblegum and Marceline stuff. What draws you to their dynamic?
I'm gay.
OK, seriously now. I have a soft spot for extremely feminine, dainty characters that are very reserved, so PB immediately marked herself as an obvious fav, and the road to shipping her with Marceline (who is such an obvious candidate and a multilayered, fascinating character herself) was a short one. I know calling PB dainty is far from a true statement, but that's what she appeared like on the surface and that's what caught my attention. Another thing is that I love relationships between immortal beings, I think it always adds another layer of complexity to any relationship, especially a romantic one. The whole "getting older without appearing like you've aged" and "watching everyone you love die around you while you stay the same" can surely make 2 beings bond, right? It always felt like PB and Marcy get each other in a way no one else can, they are very different on the surface but share fundamental internal similarities. Oh, and the fact that they're EXES? The romantic tension and the longing? The familiarity and banter they had in every scene they shared?This hit the jackpot on literally every relationship trope that I love. I'd much rather watch a "getting back together" than a "falling in love for the first time" story.
All of this and the fact that they [are] gay. It's really that simple sometimes.
In broad strokes, what is next for you as an artist and/or as a fan?
I have a few [Adventure Time] comics ideas\scripts on the back burner and one that is in the making. I think I'll dabble into some Nintendo fanart cause I've been playing a lot of Smash Bros and [Legend of Zelda: Breath of the Wild] lately.
I’m so excited to see what comes next! Either way, a huge thanks to loycos for chattin’ with me! If you’d like to check out more of her art, visit her Tumblr and her Twitter page!
#adventure time#atimers#adventuretime#bubbline#princess bubblegum#marceline#marceline the vampire queen#pb#marcy#loycos#fanart#fan art#interview#fandom
328 notes
·
View notes
Text
I just watched a mini document from Netflix meanwhile doing the finelining for two comics (2 sheets overall), and when I stopped to take a break I realized I was hungry and for whatever reason also felt tired? I mean, it’s already past 2am but I’ve only been awake for 8 hours or something. I’m really not going to sleep any time soon - plus I wouldn’t even be able to fall asleep anyway :D
I was actually planning on continuing these comics soon, next phase is the coloring which is usually relatively easy and quick to do. Hopefully. I don’t know why but with the first one of these, I just felt like I had no clue how to draw again. I had everything sketched down already but still I had to fix some mistakes all the damn time because somehow I just kept drawing really weird looking lines with the fineliners. Usually I have very steady hand and am able to follow the sketches without any problems, but apparently not today. And well, I was also improvising a lot with some lines that I apparently hadn’t finished in the sketch and that is why I do the sketches first - to make sure the lines made with fineliners ARE good. There’s also still something I might want to add to one of the panels but I just can’t decide if I want to go for that or not, and also what should it be if so...
My point is: drawing something always has its ups and downs. Better and worse days. The previous comic came so well together and I really enjoy looking at that, but this one felt like I suddenly forgot how to draw altogether. I think the second one of these two looks already much nicer so maybe I was just a bit “rusty” because usually it’s nighttime when I draw and I started with these when it was barely even 10pm yet. That or from 11pm on usually is the time when my creativity and brains start to wake up, so maybe I just chose the bad timing for the starting time.
Now I’m going to scan the linearts so I will have better images than poor phone camera quality photos in case I want to do some sort of Behind the scenes posts about these in the future. Maybe I will get tea too before I start with the coloring process.
#mcrmadness' art talk#die ärzte comics on their way y'all - if anyone's interested#tho I already mentioned there's 3 comics I've been working on as I asked if people want to see them
3 notes
·
View notes
Last Seen Blogs
0100mg
AMELIA.
0safe-places0
Things and Stuff
textblogger
xxangelxx29
nazmazh
Assorted Rantings

accioprozac
stressed and depressed