#how to make patches
Note
Question...how do you make your patches? They seem so fuckin cool. I'm working on a vest and a jacket atm, and I'd like for them to be done by the time a pride fest rolls around next month.
Main technique I use for making patches nowadays is linocut. Its best suited for mass production of patches.
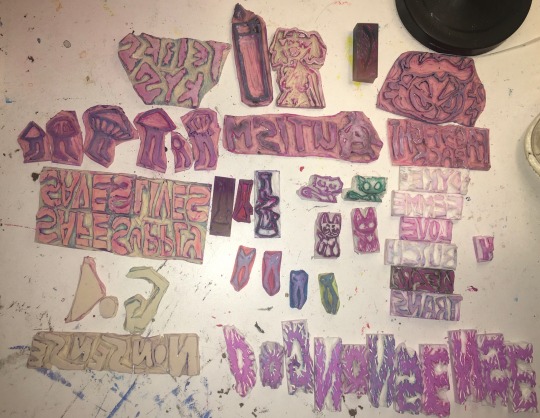
Make sure to remember your carving the mirror image so you have to flip all the text. Using tracing paper to flip the design is a good trick, as well as leaving graphite marks on side, then pressing that to the lino to leave the marks in the same spot. Another trick with pencil is to view what ur carving in negative space quickly, put a paper over your design and shade over it with pencil, darker marks will be where you haven't carved yet.
I use speedball fabric ink, it takes 1 week to set then will be fine to be washed. I have magenta, violet, turqouise, and white. They have a limited range of fabric colors at the store. I have seen gold and silver fabric paint for sale and I will investigate it one day.

I use a speedball roller, i find the smaller one to be better than the big one as I can be more precise and waste less ink.
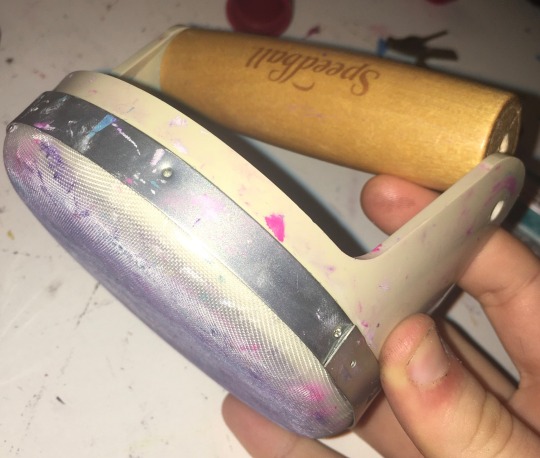
I got a fancy handle for $40 but the screws fallen out so its broken now so just get some heavy books. I used to use a mug. Whats important is pushing your whole body weight into it.
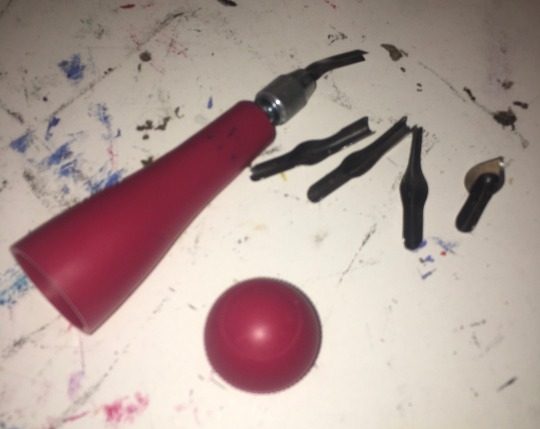
I got a speedball carving tool with different heads I can swap out so I can cut into the lino at different deepness and widths. The heads are stored inside the tool since its hollow and has a screwable removable bottom. I use linocut or dollar store erasers for my carvings. Make sure to wash the ink off your linocuts after your done using them.
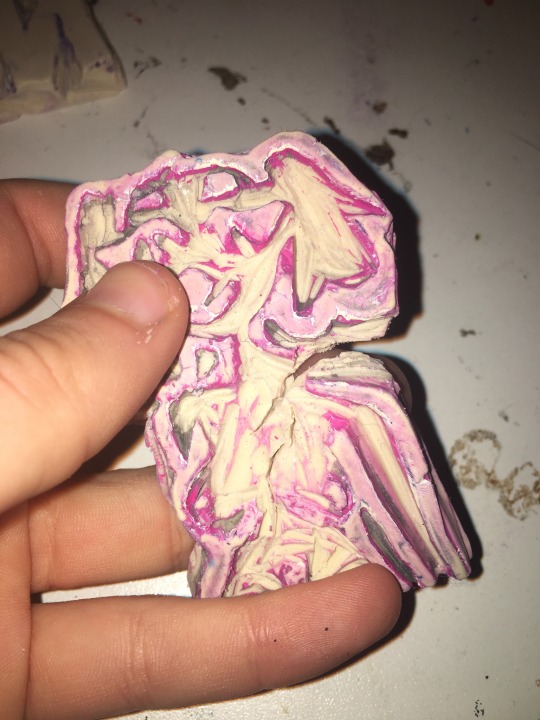
A thing to increase the lifespan of you're linocuts is to use wood glue, some cork or wood pieces, and glued the lino stamps onto them. I dont do that yet so my stamps fall appart from overuse sometime and because I cut way too deep into the lino since I hate chatter.
Chatter is the term for in linocutting when theres little messy lines and stuff. It makes the art more recognisably to be linocut. My work is very clean with no chatter which is why people don't notice its linocut usually. This is a stylistic choice, with diy styles having a lot of chatter can look really cool so experiment with leaving bits of extra uncarvered lino sticking out in ur stamp. I need to experiment and buy some more lino.
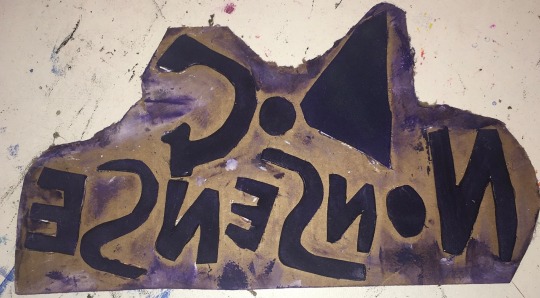
You can also use multiple linocut stamps together to make a patch. Some patches ive made have like 8 different stamps. Ive made a dog nonsense patch where each letter was their own eraser stamp. You can also use different colors between the different lino stamps on the same patch to add more color. An effect I like to do is first stamp it in color, then the next day I stamp it in white over the same spot but shifted to the right and down slightly. It makes the text have a cool border 3D effect I love doing.
If making a more detailed picture with colors, i reccomend hand painting patches. I use white fabric paint mixed with acrylics for color to get all the shades i need. Acrylic paint mixed with fabric softener works too.
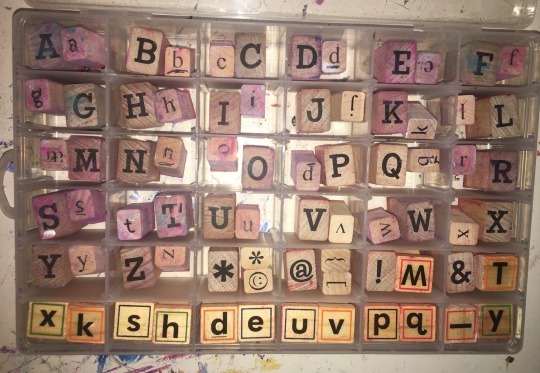
If doing words and you dont want a unique font reccomend using letter stamps. If you want a unique font for that i recommend hand paint for individual or linocut for mass produce.
The positive of letter stamps is the font is neat and can be done quickly. I know from lending them to my roommate that they are very helpful if you have dyslexia and have trouble getting letters right.
A visual effect of the letter stamps is that have a nice boxy edge effect, its an imperfection that adds a personally touch to it. I have both lower and upper case stamps that I got from michaels. You can use a hair band or elastic to hold a bunch of letter stamps together to make a word stamp.
You can use other stamps than letters that you find at craft stores for example my racoon print is a craftstore stamp.
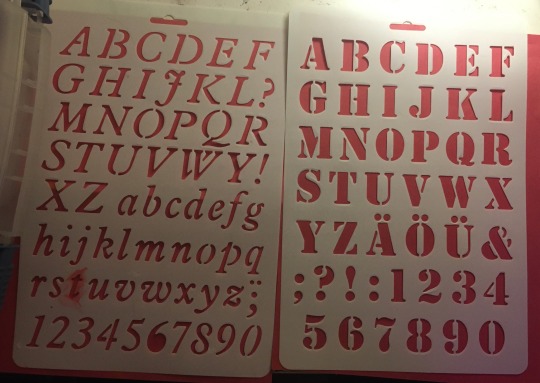
You can also find big plastic letter stencils at the dollar store that you can use to do lettering by filling in gaps with a sponge or or paintbrush. They make special paintbrushes just for using stencils.
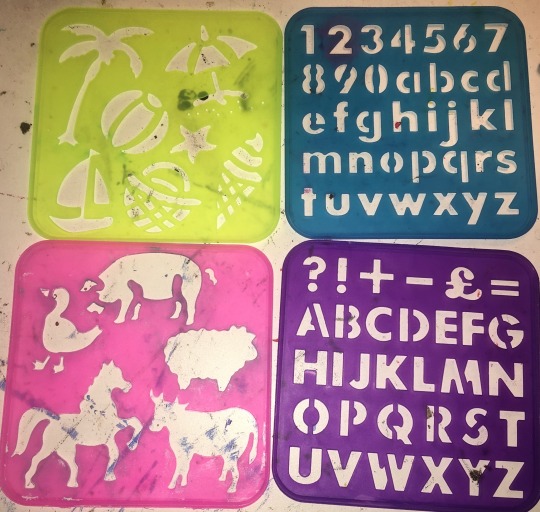
You can also get plastic stencils in the shapes of things, i got some for children and use a horse stencil for my horse smoking weed patch. Easier than drawing a horse myself.
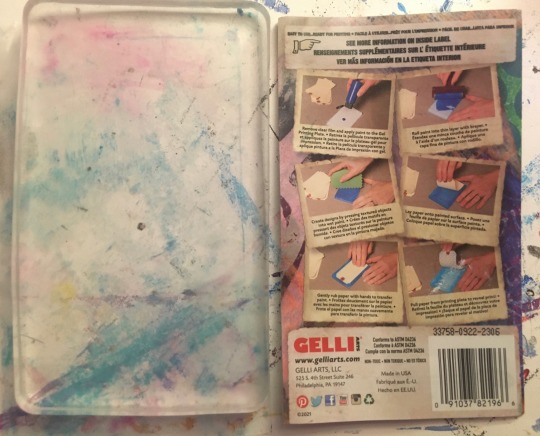
Another technique I use for more unique clean patches is gel plating. I haven't tried printing laserprint images with it as ive seen online a lot but I will try one day. What i personally do is use it to make imprints with chains and physical objects.
Another thing i use with gelplates are any stamps or linocuts that dont have words, or words ones that i fucked up with and forgot to mirror when carving. It flips mirror image twice with the gel plate so it goes back to being right again on the patch.
Another patch making technique is using foamboard cut into shapes glued onto cardboard. This is good for a quick test of a design and is very cheap to make. It will not hold under water so is more difficult to clean.
#punk#diy#patches#diy patches#patch pants#diy punk#crust punk#crust pants#battle vest#punk fashion#punk diy#punk patch#queer art#linocut patch#gel plate#linocut#stencil#my patches#patch tips#how to make patches#patch 101
342 notes
·
View notes
Text
Had a few folks interested in how I made the patches I posted for Solarpunk Aesthetic Week, so I thought I'd give y'all my step-by-step process for making hand-embroidered patches!

First, choose your fabric and draw on your design. You can use basically any fabric for this - for this project I'm using some felt I've had lying around in my stash for ages.

Next, choose your embroidery floss. For my patches I split my embroidery floss into two threads with 3 strands each, as pictured. You can use as many strands in your thread as you prefer, but for the main body of my patches I prefer 3 strands.
Next you're going to start filling your design using a back stitch.

First, put in a single stitch where you want your row to start.

Poke your needle up through the fabric 1 stitch-length away from your first stitch.

Poke your needle back down the same hole your last stitch went into so they line up end-to-end.
Repeat until you have a row of your desired length (usually the length of that colour section from one end to the other). Once you have your first row, you're going to do your next row slightly offset from your first row so that your stitches lay together in a brick pattern like this:

Make sure your rows of stitches are tight together, or you'll get gaps where the fabric shows through.
Rinse and repeat with rows of back stitch to fill in your patch design.

When you're almost to the end of your thread, poke your needle through to the back of the fabric and pull the thread under the back part of the stitching to tuck in the end. Don't worry if it looks messy - no one's gonna see the back anyway.
This next step is fully optional, but I think it makes the patch design really pop. Once your patch is filled in, you can use black embroidery floss to outline your design (or whatever colour you want to outline with - it's your patch, do what you want). I use the full thread (6 strands, not split) of embroidery floss to make a thicker outline.

I use the same back stitch I used to fill the piece to make an outline that adds some separation and detail. You could use most any 'outlining' stitch for this, but I just use back stitch because it's just easier for me to do.
Once you're finished embroidering your patch, it's time to cut it out!

Make sure to leave a little border around the edge to use for sewing your patch on your jacket/bag/blanket/whatever, and be careful not to accidentally cut through the stitches on the back of the patch.
If you have a sturdy enough fabric that isn't going to fray, you can just leave it like this. If not, I recommend using a whip stitch/satin stitch to seal in the exposed edges (I find that splitting your embroidery floss into 3-strand threads works best for this).

And then you're done! At this point you can put on iron-on backing if you want, or just sew it on whatever you wanna put it on. Making patches this way does take a long time, but I feel that the results are worth it.
Thanks for reading this tutorial! I hope it was helpful. If anyone makes patches using this method, I'd love to see them! 😁
#solarpunk aesthetic week#sewing#tutorial#sew on patch#punk diy#diy punk#punk aesthetic#handmade#solarpunk#handcrafted#embroidery#embroidered patch#how to#how to make a patch
17K notes
·
View notes
Text


#gale dekarios#gale of waterdeep#caoimhee thirfaen#tara the tressym#bg3#baldurs gate 3#bg3 patch 5#bg3 epilogue#bg3 spoilers#bg3 epilogue spoilers#bg3 patch 5 spoilers#'not in front of tara' oh but making out in front of her is okay???#gale pls#i can just imagine how insufferable they're being to everyone around them post-wedding#mygifs
3K notes
·
View notes
Text
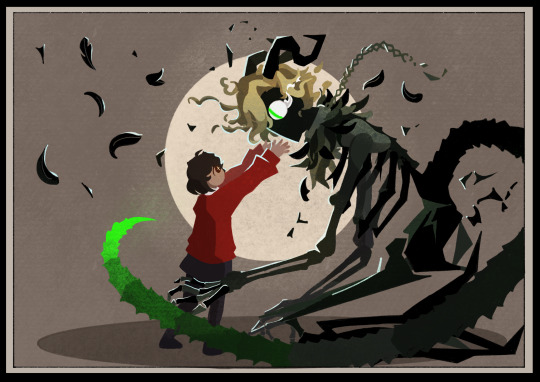
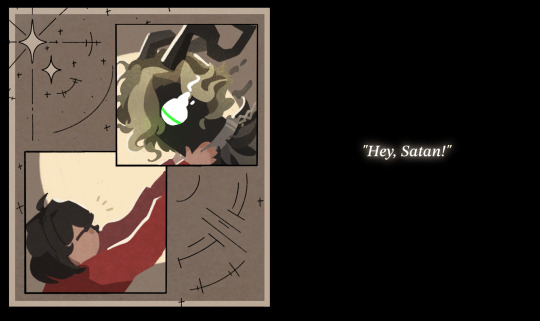

one thing about ik is that she will always reach out
#obey me#art#i had the idea for this and managed to bulldoze through drawing it all without losing motivation halfway through#but Do Not expect me to post art this frequently in future#idk how to do panels so if the middle bit with the text might be laid out weird#i added the stars and feathers and stuff because there was a bunch of empty space around the boxes#obey me satan#jtta ik#(btw the crumbling symbol next to the exploding feather is the wrath symbol from in-game)#(with the pride symbol attached upside down at the bottom)#(not so much symbolism as it is just me whacking you over the head with the point but it looks cool)#i had a lot of fun doing satan's more monstrous design so i might try my hand at some of the other demons later?#i do have some ideas for levi (deep sea creatures are just really fun)#also happy nightbringer release day!! it showed up on my homescreen like half an hour ago and i was like “wait what”#for some reason i thought it wasn't releasing til next week??#the new genshin patch is today as well so looks like i'll have plenty to do with the rest of my free time for the easter hols#(i promise i'm also working on the next chapter of jtta but i am so stuck on how to get lucifer actually Talking)#anyway. here's a gold star for making it through all my rambling in the tags for anyone who did so: ⭐
5K notes
·
View notes
Text
Punk 101: A History of Battle Jackets
Battle Jackets have a long and interesting history in general, not limited only to punk. Today we see them as a reflection of the wearer, they are a form of self expression and affiliation.
Battle jackets can trace their origins back to WWII American pilots who would decorate their flight suits and bomber jackets with their squadron's insignia patches. They were jackets that allowed pilots to easily recognize each other and instilled a sense of pride and community in their owners. This is also where the term 'battle jacket' comes from.
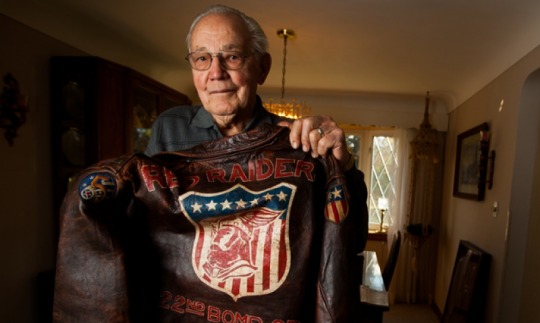
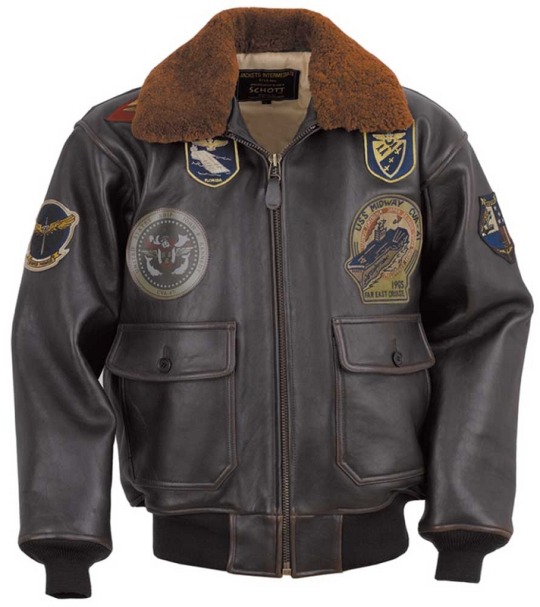
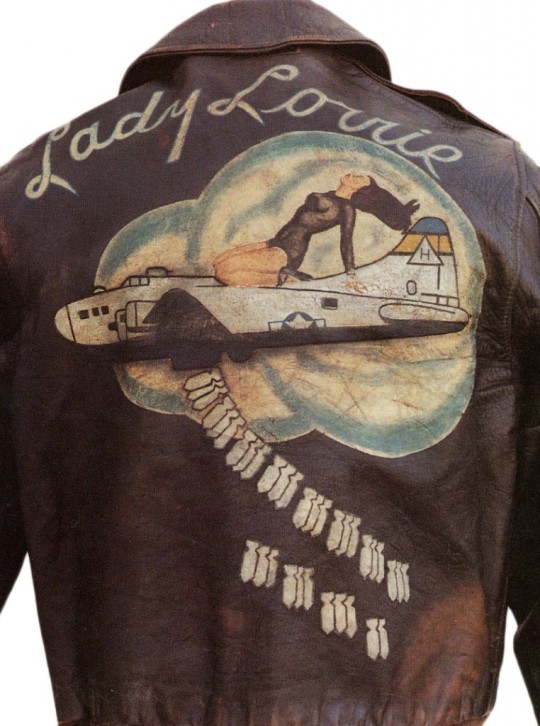
After the war was over, pilots returned home and many found joy in the speed and excitement of motorcycles. Biker clubs were formed, and thus, biker culture as well. Pilots often used their bomber jackets while riding because of the protection they offered, though the sleeves were usually removed due to how they restricted movement. Jackets got decorated with club/gang logos to represent their wearer's affiliation, much like the insignia patches. As biker clubs grew, members without a pilot history often used leather or denim jackets to showcase their affiliations. There is a LOT more to biker jacket history, but this is what's really relevant to punk jackets.
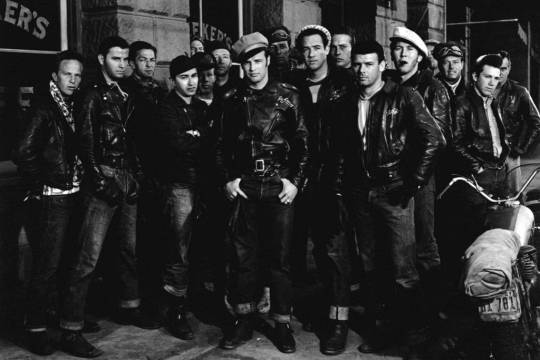
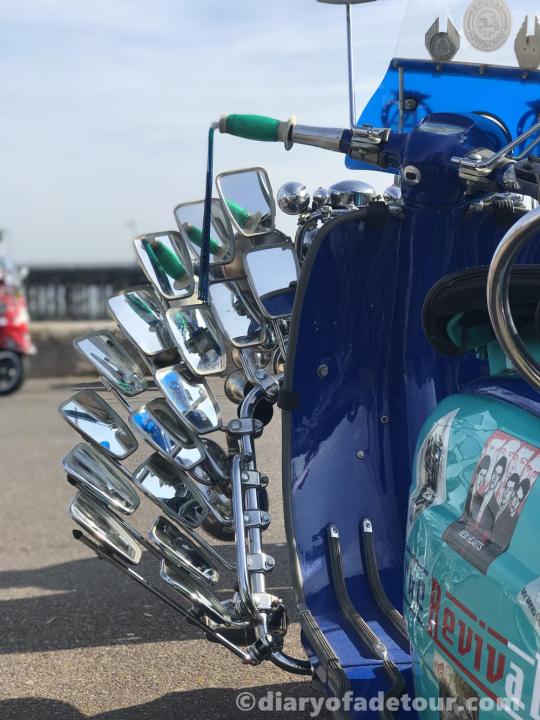
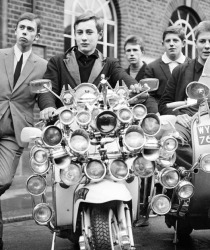
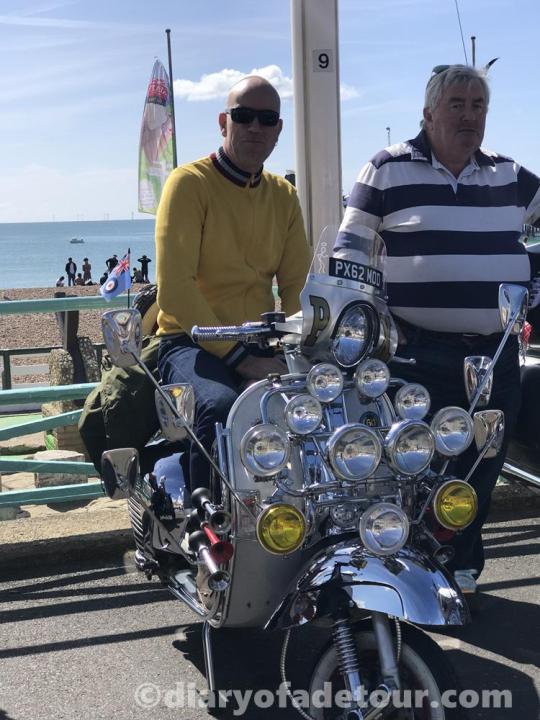
In the 60s, two different cultures evolved in the UK. The first is The Mods, known for listening to modern jazz and riding scooters (supposedly their name comes from the modern jazz thing. I would not have been surprised if it was from 'modification' considering the seeming obsession to keep adding mirrors and lights to their scooters). The other group was The Rockers who were known for listening to 50s rock and riding motorcycles. While the groups strongly disliked each other, they both decorated their jackets in ways that influenced punk's jacket scene. The Mods often added pictures, paintings, and patches to theirs, while The Rockers were more likely to be seen sporting spikes and studs. (Not to say that those things were strictly limited to each side - just what was more common)

The following decade (the 70s), the two branches came together as various music subgenres collided and formed. Punk was among the genres formed, and the culture surrounding it was one of the first non-gang or club related groups to decorate their jackets. Taking influence from both The Mods and The Rockers, the characteristic punk look was formed, and intended to be a Fuck You to societal norms. In the earliest days, punk jackets were mostly covered in band patches, much like modern heavy metal jackets. As punk evolved into what we know it as today, with notes of anti-establishment and anarchy, it became more common to see political patches right along side the band ones.
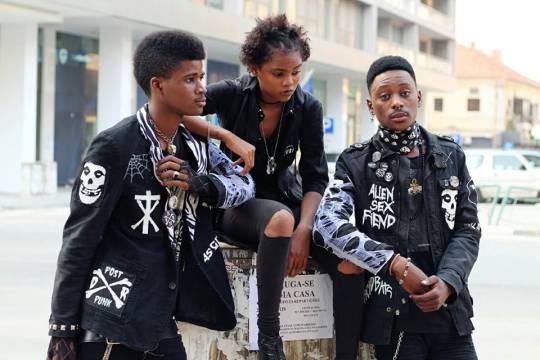
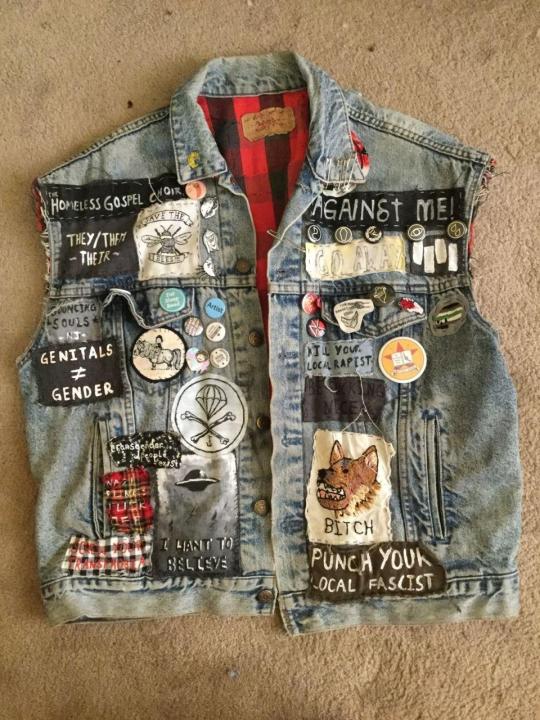
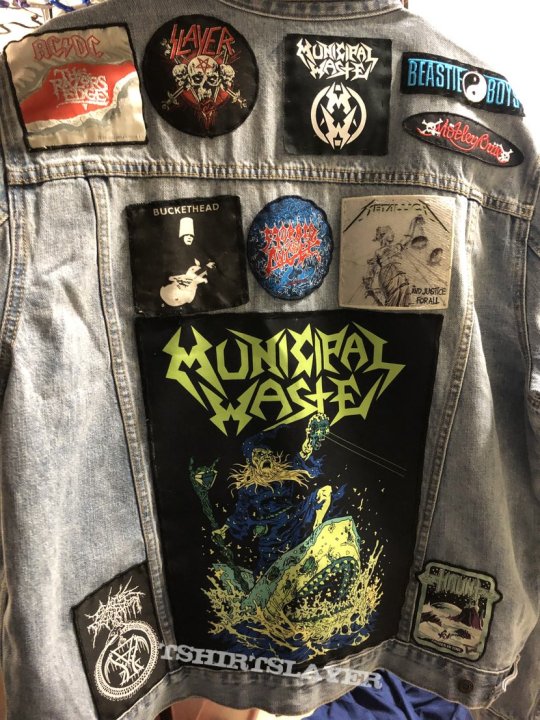
Today's jackets are a personal statement. the bands you like, your interests, political statements. They are a symbol of individuality and rebellion against society. They are a physical representation of YOU and your history with punk culture. This is why it is so important within punk culture to make your own jacket or have someone help who can customize it to you. You are not a generic human off the rack, you have lived a life, had your own battles, have your own personality, and have your own history. A premade, mass produced jacket won't showcase any of that or really truly represent the individuality of 'you'.
#punk 101#I honestly intended this to be more 'how to make' and 'things to know' but I got a little to into the history research#i'm sorry i'll do another one on that stuff#just not tonight I'm tired#battle jacket#patch jacket#punk jacket
2K notes
·
View notes
Text

we get a little silly
#project sekai#pjsk#proseka#emu otori#prsk#i was SO sleepy yesterday after class i couldnt draw or sketch so i blocked this out of color very silly style#i love drawing like that and other artists make it look so good i'm not great at it but its fun from time to time. she silly!#nenes cardigan patch is a seashell bc i didnt know how to draw robot head. soz.#i will never miss emu heart hair strand. believe it.#my first class was late in the evening + ive been jumping around on all of my comms so i havent drawn mych personal. i sleepy#my semester staarted yesterday so my biweekly posts will become um maybe monthly who knows. more like whenever i wnat which is what i do rn#if youre reading this i wuv you.#the early birthday emu.. but she will get more. just u waits.
1K notes
·
View notes
Text
dug through my files and found a leon doodle i never posted. anyways he should have his bra strap back i think <3
#listen. he looks so good in the remake and i have no problems abt his design.#but id love to see him with the bra strap again please. they buffed him up so much could you imagine how hed look with one now.#capcom its not too late to make a patch for this come on.#coughs anyways#resident evil#leon s kennedy#allyart
3K notes
·
View notes
Text
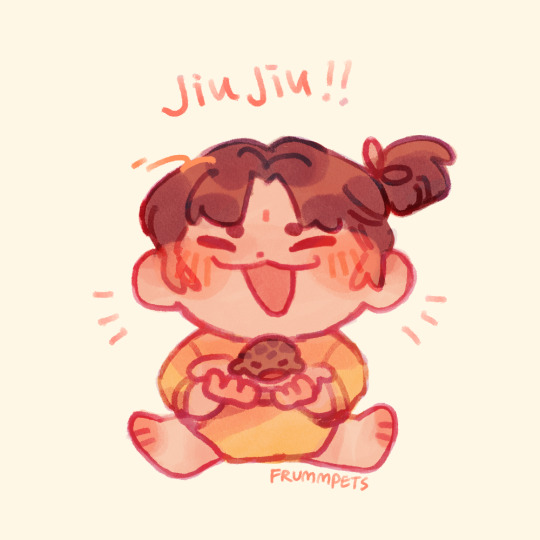
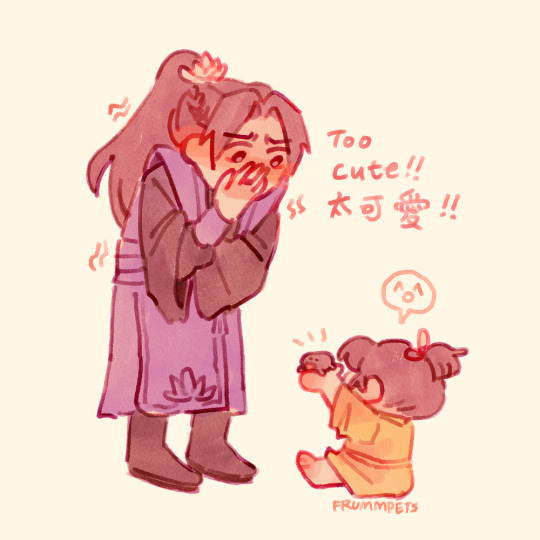
🍋: look jiujiu, froggy!!!
🍇: 🥹🥹🥹📸
idea from a post from @purplenies!!!
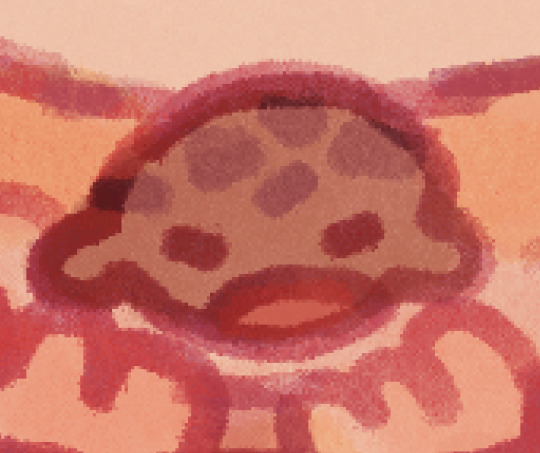
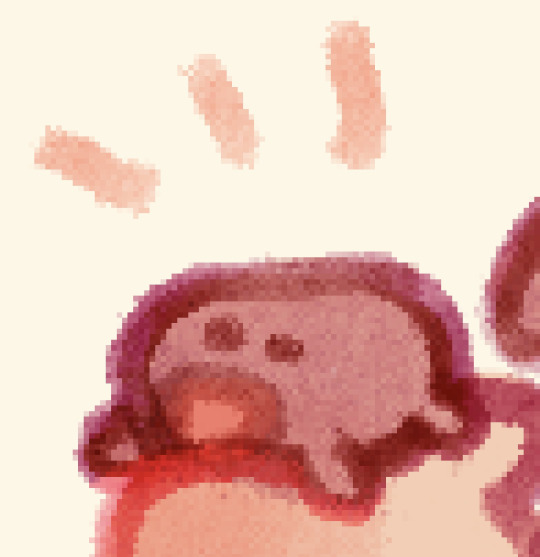
very important close-ups of the blob
#jin ling found a frog by the lotus pond and now he's attached#you know how some pets act like their owners#yeAH#and you know those clips of rain frogs being angry and tiny and all squeaky?#just teeny jin ling and his teeny frog angrily squeaking at u!!!!!#lotus pier cannot take him seriously and this only makes jin ling and his frog angrier and squeakier#if jin ling named his dog fairy i cant see why he wont name the frog an equally adorable name#mdzs#mo dao zu shi#grandmaster of demonic cultivation#mdzs fanart#jin ling#jiang cheng#my art#frummpets art#tomato patch#frog#rain frog
549 notes
·
View notes
Text
"Oh no, someone's attracted to the aesthetics of my -punk movement but doesn't know the praxis and history behind it like I do--"
OK. Tell them. Make it a teaching moment. Everyone who's in your movement learned the background from somewhere at some point, maybe this is that point for that person. Give them a jumping off point that they can dive into later.
"Oh but I shouldn't be responsible for teaching baby -punks about the history and the how-tos and--"
OK. Then don't tell them. You don't have to be responsible for teaching people with a budding interest in your group the ins and outs and how-tos. That's fair and valid! It can be a lot of work. Someone else will handle it
"But I'm annoyed that they would try to claim to be part of/be interested in my community without knowing all the details that I know after being in it for months/years/decades, they're dumb, they're posers, they're--"
OK. Then don't engage with them, if it's that bad. Maybe someone else will come around and tell them the history, maybe they'll pick it up on their own, maybe they'll just enjoy the fashion elements for awhile.
"But they shouldn't claim to be part of the -punk community if they don't know the--"
I feel like we have a few options here. People can either talk to them, share the history, share the values, share the praxis. Or they can just chase off anyone who even thinks about dipping a toe in their community, and then wonder why it's dying off later down the line.
I dunno, maybe I'm too naive and patient or whatever. But if people are entering your -punk spaces without knowing The Rundown of what you feel they need to know, maybe being nice about it and informing people instead of immediately assuming stupidity and malicious intent could help you make a new friend. Even the loudest voices in a space had to learn from somewhere, and not everyone has the luxury of being in the space as the History was Happening--whether it's an age thing or a not being aware of the space thing. Or maybe I just don't see what the big deal is behind people hating people who like the aesthetic of something and don't know the behind the scenes history about it yet.
Because I believe in the word 'yet.' No one comes into this world knowing everything about everything, and we're all constantly learning new things. I'm not gonna degrade someone and call them a poser for not knowing what I know. Because if it were me, interested in a scene but getting chased out and called a poser? I wouldn't hit the books and study up, I'd go 'that fuckin sucks, those people sucked' and then avoid anyone and anything having to do with it.
So chase people off and call them posers if you want. But if your community starts dwindling, don't be fucking shocked.
#out of queue#ani rambles#punks and posers#i cant even call this a 4am hot take because its 7pm but like#idk i keep seeing posts about like 'how DARE people think I bought my punk clothes how DARE they not know the how-tos and DIYs'#or 'ugh people only care about the ~aesthetics~ of my movement if you don't know shit get out of here' and like#maybe I'm just a shy ass introverted nerd whos scared of social rejection! but I avoid that shit like the plague#so if someone were to reject me based on not knowing about something I'd never even heard about? something i was JUST getting into?#there's a high chance I'd just scram and never look back. i don't wanna be the one who causes that emotion in someone else#granted this is coming from someone who STILL doesn't know how to make her own patches or worked up the courage to do direct action praxis#outside of offering neighbors to my tomatoes and trying to talk to people about what I'm passionate about#but still imo unless someone's a malicious intentional bad actor i dont see the point in scaring newbies off#thats how movements die imo#i know this is my solarpunk blog but its not a solarpunk specific thing#i think the main post that inspired this was about store-bought versus self-made spiked leather jackets#which honestly just feels petty to me but who knows.#might delete later
2K notes
·
View notes
Text
quick thing of these two i did while watching Etho's first episode :]
#obligatory canda patch to make sure the viewer knows its etho you know how it is#Etho#geminitay#hermitcraft#etho fanart#geminitay fanart#creature gem my beloved i love her vibes this season#her eyes are too bright in retrospect but whatever#my art
248 notes
·
View notes
Text
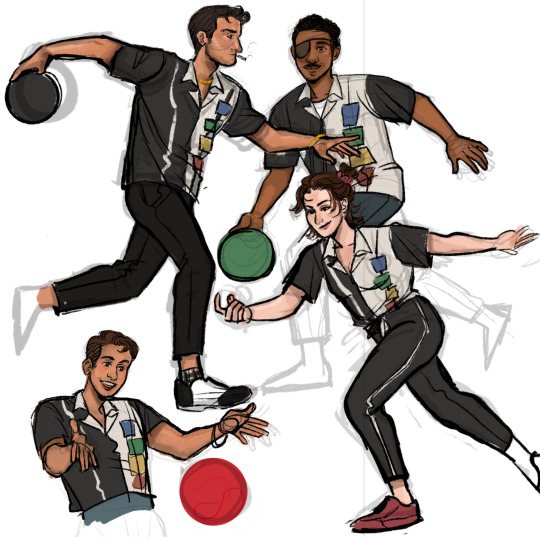
I guess I only draw bowling now
Anyway
Some of The Chairmen bowling team
#it looks like swank is going to be slammed with that bowling ball#but it’s just the compilation location#fnv bowling au#fnv the chairmen#Benny gecko#fnv swank#fnv tommy torini#idk how Tommy’s eye patch would alter his depth perception and make bowling harder but I love Tommy so I let him bowl#fnv oc#Queenie is one of my two chairmen ocs#so she bowls!
228 notes
·
View notes
Text
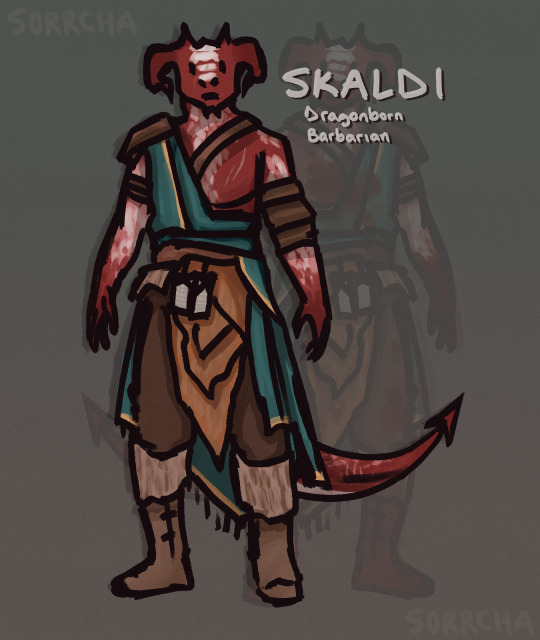
warmup drawing i like enough to put here- a complete redesign of one of my ocs, skaldi. she's got an entirely different look and story now.. gonna play her as a resist durge in bg3 ^w^
#art#digital art#creature#dragonborn#red dragonborn#(<- sort of. there's some other stuff going on in there)#dungeons and dragons#dnd#d&d#baldur's gate#baldur's gate 3#the dark urge#durge#skaldi#before this she was just a romantic interest to pair up with ruarc.. but since i changed ruarc's entire story she no longer fits into it :>#so now she gets her own story and becomes her own character. i also decided to make her a girl bc i have so many guy ocs already pfft#haven't played bg3 since december so hopefully i remember how to play. hm. steam is installing a 100gb patch for it rn dear god#hall of fame
180 notes
·
View notes
Text

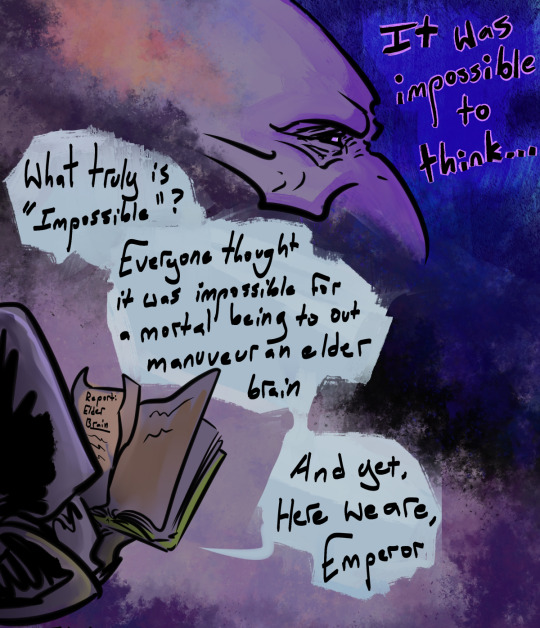


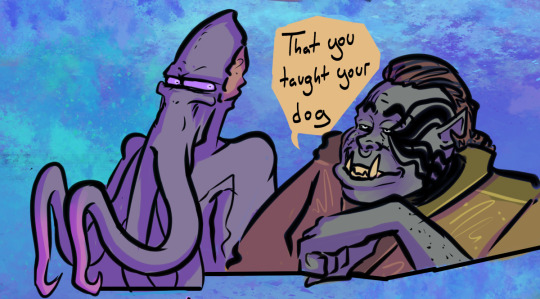
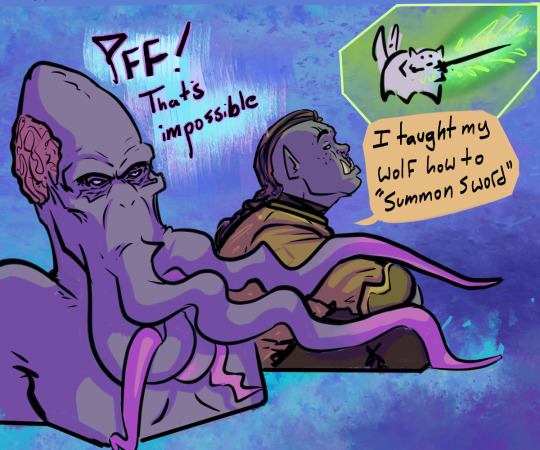


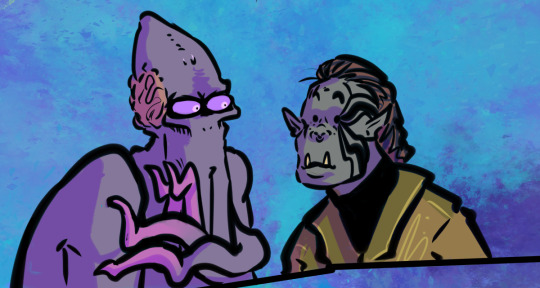
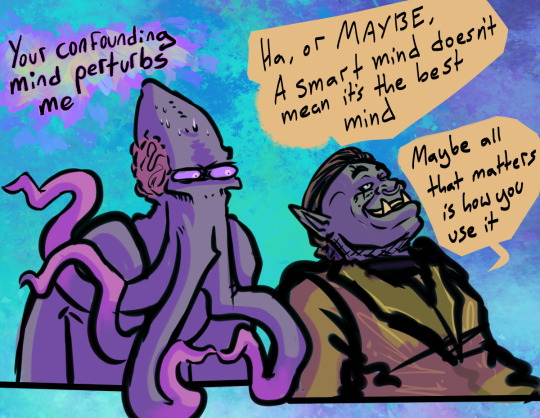


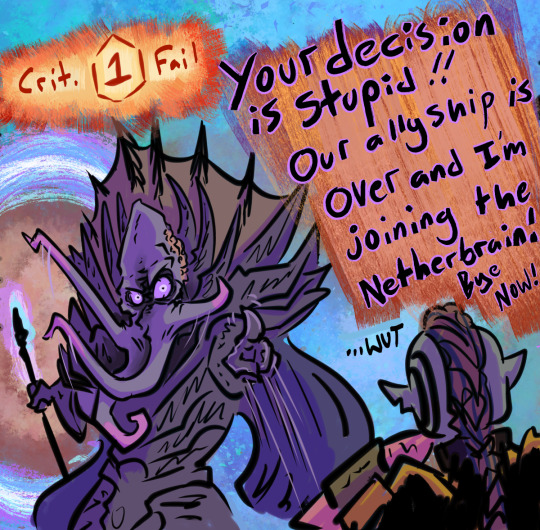

Crack Theory #1
Crack theory #2 about dat dumb Choice: If character development actually happened in the most silly squid way possible that only Greygold's Emps could achieve. Two peas in a pod indeed.
Personally. My favorite reason why Emps left.
I call this the 'confused but the got the spirit' strategy. Emps tried. Had to have been bad luck. The downside to trying something they're not proficient in. Like chaos and teamwork.
I understand how every other class progresses in power, but Ranger's 'exceptional training' with their animal companions? Confounds me. wth rangers.
Greygold: Terrible at Raising Kids, But Can Unlock Killer Animal Companions' Magical Potential they don't even know themselves. And dancing. If a bear can summon another bear while in hell, that's more than talent, that bear knows magic.
#bg3 spoilers#bg3#baldur's gate 3#the emperor bg3#Greygold#bg3 fanart#bg3 comic#crack theory 2#inspired by Gortash's lil note#Greygold was that Tav that taught Scratch how to wield a sword before the patch fix absolutely#Either Greygold's 'power of friendship' has manifested into -actual- magic#Or apparently magically bonding with your animal companions turns them into animal warlocks at a certain level#....friendship warlocks#If it makes emps feel any better Greygold thought it was rather unexpected
144 notes
·
View notes
Text

Bait
#digital drawing#splatoon#SalmonSquid#tried to make a bigger picture again#took a while#the shading didn't really worked out how I wanted it this time#anyway#Blorbo patch notes:#his weapon has now caution tape on it
165 notes
·
View notes
Text
"kill the part of you that cringes" is all well and good but you also have to kill the part of you that feels the need to explain every flaw of a thing before you can say you enjoy it lest it be assumed that you are unaware of or supporting of it and get judged for liking it
#you have to be able to like a thing if others dont like it#and you have to be able to accept that some people will dislike you because you like those things#have a spine about the things you care about and dont make a huge deal about how it should be Actually Okay when someone disagrees#patch me through to palaven command
247 notes
·
View notes

Last Seen Blogs

offerzonly
Untitled

fuckyeahilkkavilli
FUCK YEAH ILKKA VILLI

melinamoroz
Melina Moroz

heylookits
mystuff

pequene-ninho
smol nest