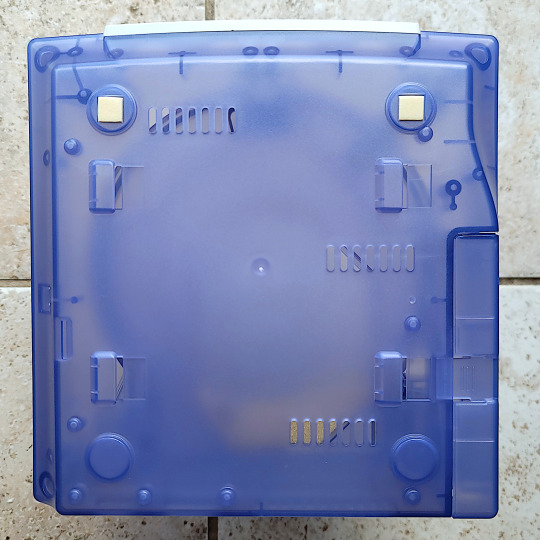
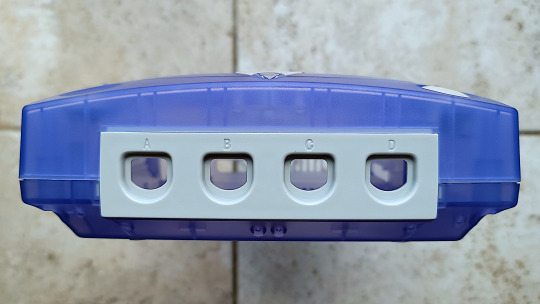
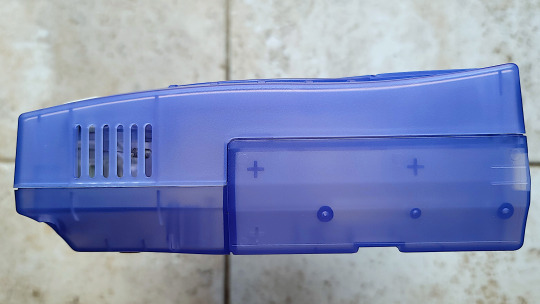
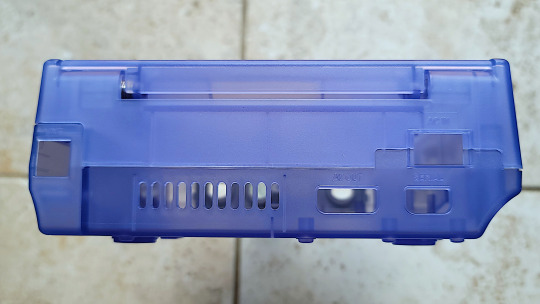
#custom game consoles
Text
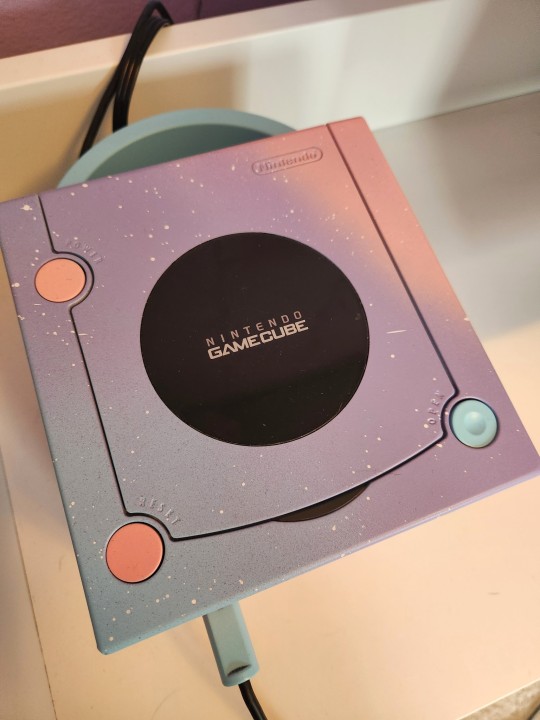
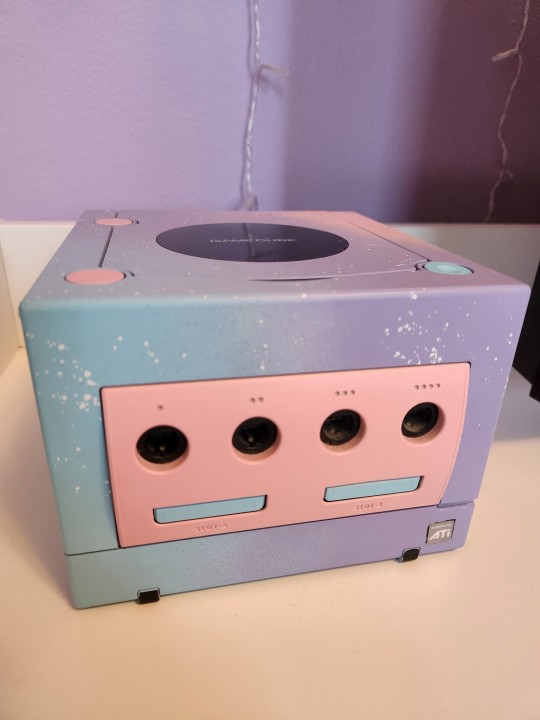
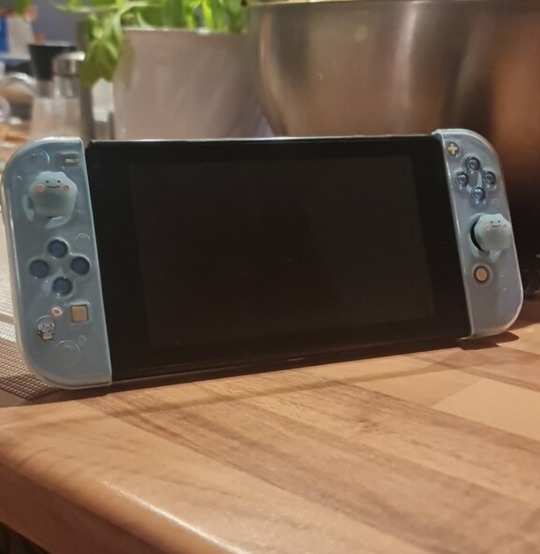
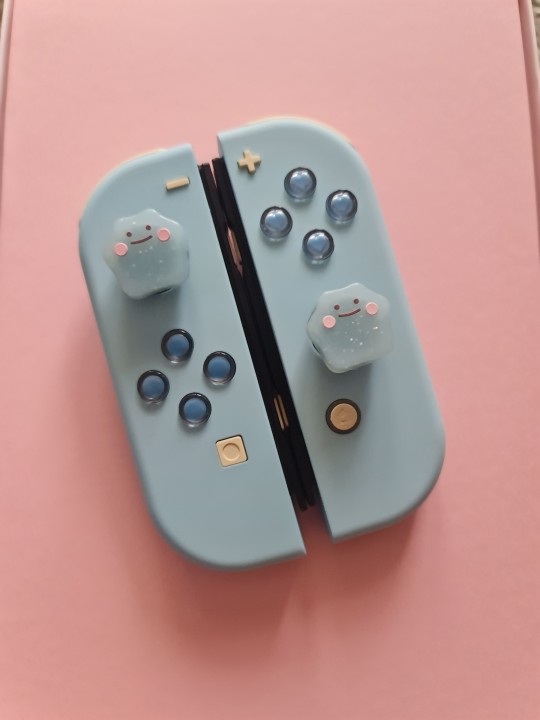
Hi hello I'm back with another thing I did!


#artists on tumblr#pastel#kawaii#yumekawaii#custom painted gamecube#custom gamecube#nintendo#aesthetic#star cluster art#custom game consoles#pastel bi colors#pastel n64 posting
1K notes
·
View notes
Text
Does anybody here like pretty, customized old-school game consoles??
I did this last year & I'm still kinda proud of it.
15K notes
·
View notes
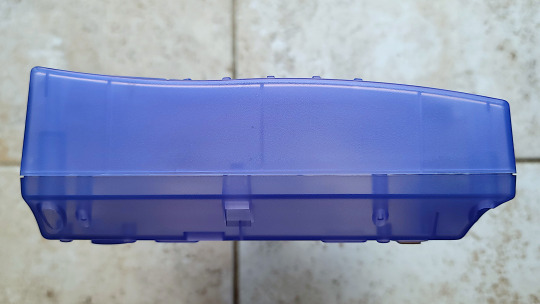
Text


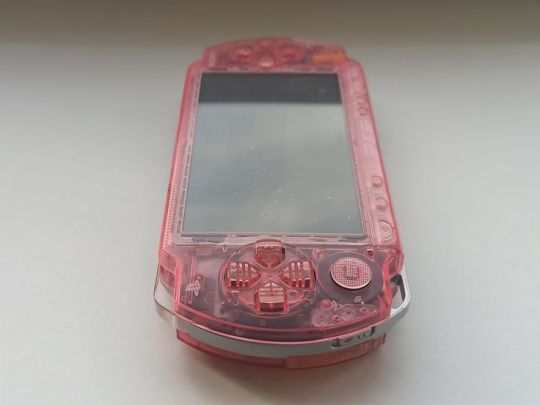


Transparent pink Sony PSP 1000 console mint condition custom modded with new housing case and IPS screen
#art#clear shell#console#custom#cybercore#cyber y2k#design#futuristic#kaybug#playstation#pink#photography#psp#sony playstation#sony#techcore#tech#technology#video games#y2kcore#y2kore#y2k aesthetic#y2k core#y2k cyber#y2k design#y2k futurism#y2k
501 notes
·
View notes
Text
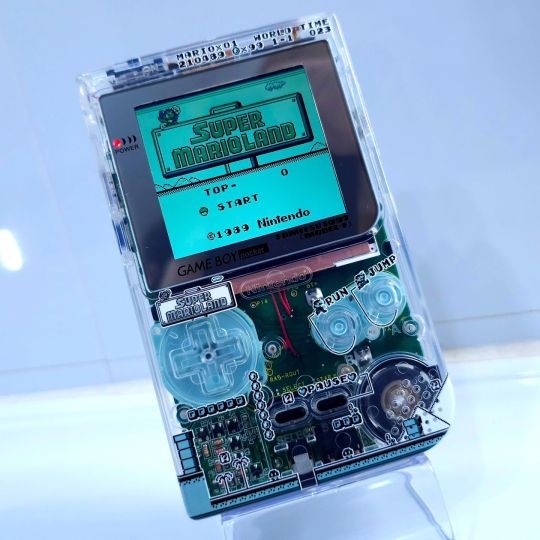
link
#@supergusiland#supergusiland#game boy#gameboy#handheld gaming#handheld#game boy dmg#classic#mario#mario bros#super mario#gamer#gaming#Nintendo#Art#Custom#vintage#videogame#retro console#retro gaming#modded#mod#video games#design#style#transparent shell#hardware#tech
261 notes
·
View notes
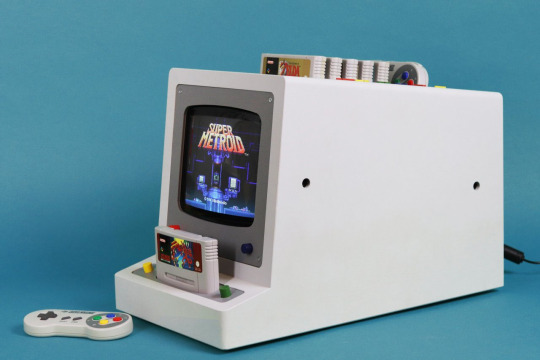
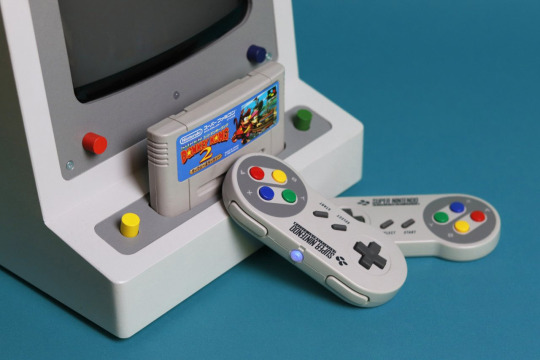
Text
Custom SNES TV


#video games#videogames#gaming#games#electronic#entertainment#custom#console#system#SNES#Super Famicom#nostalgia#nostalgic#mood#atmosphere#aesthetic#cool#awesome#interesting
138 notes
·
View notes
Text
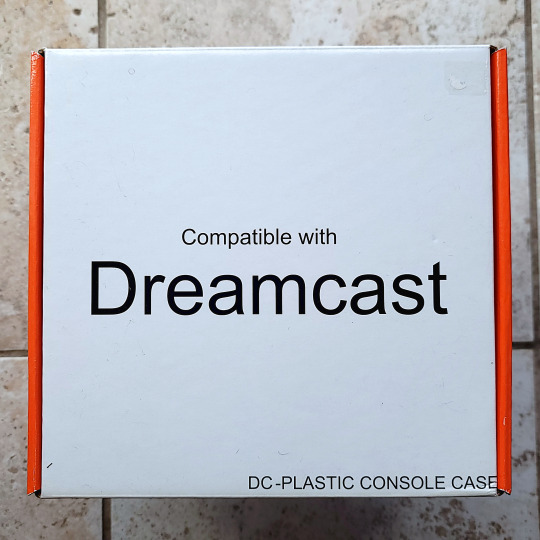
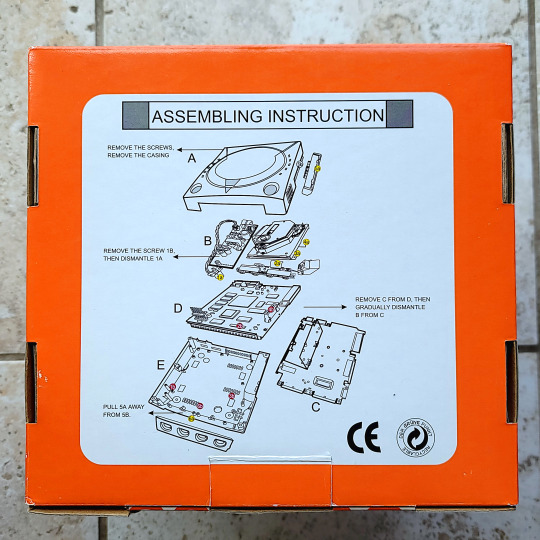
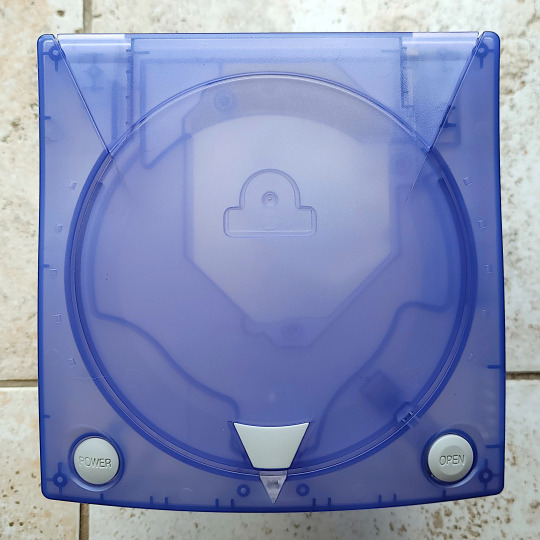
Sega Dreamcast Plastic Console Replacement Case - Unlicensed
27 notes
·
View notes
Text
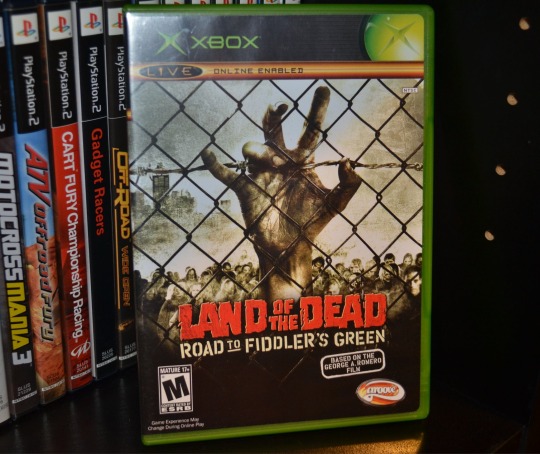
It does not have to be high end to make me fall in love with it.....its not even a great game but the subject matter just does it for me.
#game#gaming#retro#retro gaming#video games#games#tag game#dash games#retrogaming#all for the game#retro gaming times#retro collection#retro aesthetic#retro tech#retrowave#retro style#retro photography#xbox#is the last of us on xbox? all the consoles you can play the game on#xbox and amazon customers are just realising they can claim two free star wars games – here’s how#popular xbox exclusive is scrapped from game pass – and the weird reason why#microsoft xbox#xbox 360#land of the dead
55 notes
·
View notes
Text
- - People you'd like to get to know better!
Thanks for the tag @torissims and @slightly-ludic !! 🫶🫶

Last Song - - lastjune by ericdoa (obsessed with his music)
Favorite color - - uhhh purple?? hello?? LMAO
Currently watching - - I don't watch shows im gonna be honest 😭😭 im a youtube goober
Sweet/Savory/Spicy - - Spicy, even though i always get my ass kicked by the spice
Relationship - - Single 🙃
Current Obsession - - Red dead redemption 2... i've been playing it non-stop...
Last thing you Googled - - "voices of the void"... I watched someone play it and now I wanna play it LMAO

Tagging...
@groovetrys @minimooberry @circusjuney @holocene-sims @kuroashims @miralure @elderwisp and if you saw this, feel free to do this and tag me! (i'm super out of loop rn so if you've done this, then ignore this! and feel free to just ignore this if you dont wanna do it :))
#loveeee doing tag games#this is the first time i've been on my laptop in like a week#been putting my hours into my console LMAOO#2+ days worth of playtime on rdr2 and whatever else i've casually played on my xbox#currently downloading skyrim on my laptop so hopefully i can give ya'll some skyrim content 🤔🤔#“will you try to make ro-” yes are you silly?? who do you think i am LMFAO#i might see if theres customization mods- cuz i've already played thru MOST of the game and dont think it'll hinder my experience at all#tag game#tagging game#people you'd like to get to know better tag game#yapping
15 notes
·
View notes
Text
I hope everyone is excited for Pikmin 4 as I am!

I remade some of the Pikmin merch from the Nintendo Store (Tokyo)! And there are some from the Pikmin × Gelato Pique collab.
Also, remade the Pikmin wallpaper from the Animal Crossing e-reader card.

Please enjoy!
MA-4787-7315-7560
#acnh#acnh design#animal crosing new horizons#animal crossing design#acnhdesign#pikmin#pikmin1#pikmin2#pikmin 3#pikmin4#animal crossing custom design#nintendo#nintendo switch#games#nintendo console
38 notes
·
View notes
Text
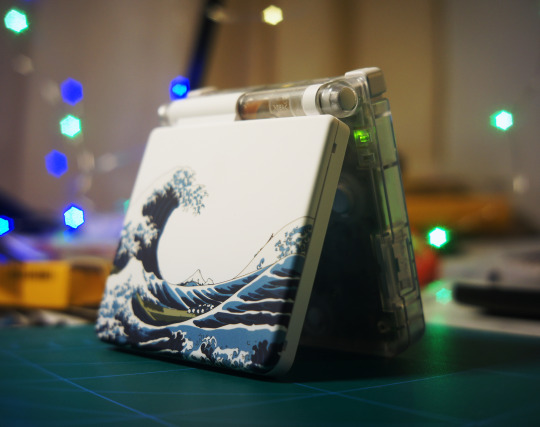
AGS-101
Kanagawa Wave/Clear 50/50 mod shell.
30 notes
·
View notes
Text
Squirtle / Pokemon themed Joycons that I gifted my Boyfriend for Christmas! ✨️

#custom joycon#diy#joycon#nintendo#custom#christmas#gaming#console#video games#selfmade#pokemon#squirtle#nintendo switch
86 notes
·
View notes
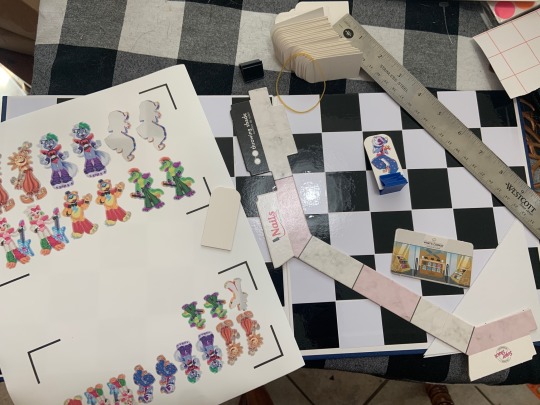
Text
Resources for customizing your very own game consoles & controllers
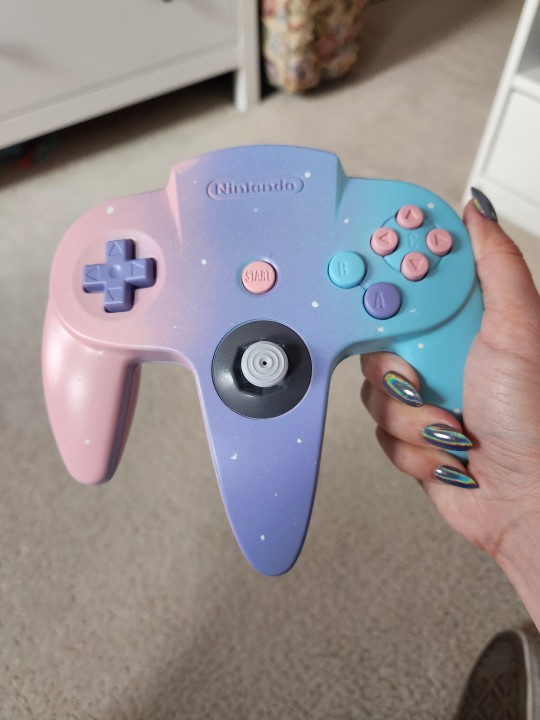
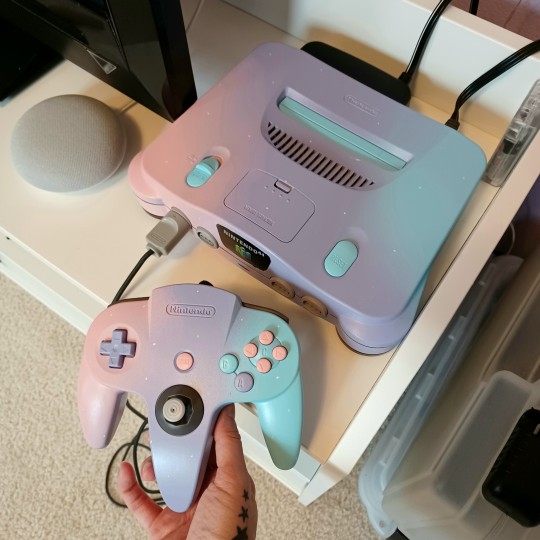
So since my custom Nintendo 64 post has blown up, I've been asked a few times for a guide on how I did it - so I've decided to put together a masterpost of sorts!
Your first step in customizing any consoles or controllers will be to completely disassemble it & get all the electronics out, separate out any buttons & port covers, etc. You can find tutorials for disassembling probably most if not all consoles with a quick Google or YouTube search; here are a couple I have used:
Nintendo 64 (VERY good tutorial & includes spray painting guidance too! Highly recommend giving this a watch even if you're not doing an N64)
Gamecube (this is technically for modding a Gamecube, & does involve more disassembly than you'll need to do necessarily, but has the basics)
Reassembling the top portion of a Gamecube shell (it's a bit tricky)
Gamecube controller
Once your console is completely disassembled, the next step is to wash the shell & all parts you want to paint. Easiest way is to just fill a sink with dish soap & water & wash just like you're doing the dishes!
Once everything is nice & clean, dry it thoroughly or allow it to air dry. When it's dry, use painter's tape to cover the jewel or any stickers you don't want to paint over, & a craft knife (Xacto is my knife of choice) to carefully cut off the excess tape around the jewel and/or stickers.
Next, you'll want to rough up the surface of everything you're going to paint with some 600 grit sandpaper. You're aiming to take the shiny finish off the plastic - if your surface started out black, you'll be looking for it to appear a little whitish. It doesn't take much. This helps give the paint a better surface to hold onto. Once you're done sanding, give it a thorough wipedown with some damp paper towels to clean up any stray particles.
And then it's painting time!
I use spray paint, starting with a flat white primer, then a few coats of color, then a clear top coat. You'll want to be sure you get a paint that specifically says it works on plastic - Rustoleum is my go-to.
Another thing to bear in mind is you definitely want to read all of the instructions on the can! It's important to do any painting in a well ventilated area & wear breathing & eye protection.
The process for me took a lot of patience as my particular spray paint requires me to recoat within one hour, or after a full 48 hours (and I think this is common with most/all spray paint - the reason is to prevent bubbles & uneven finish). Also, for the type I used, it has maximum plastic adhesion after 5 to 7 days, so even once I'm done painting I generally wait a full week to put things back together to be absolutely on the safe side.
As an aside, related specifically to what I did on the ones I have painted & if you're looking to do something similar, the white flecks are also spray paint applied a little differently. I just sprayed white paint onto on a paper plate, holding the can very close to the plate so I could get a good little puddle of it; and for my best results yet, I dipped a toothbrush in the paint, held the toothbrush above the surface, & hit the brush to splatter the paint. (If you want to do this, I highly recommend testing it out on some cardboard or anything but your equipment first to be sure you like the result/know how you want to do it.)
Another option is to just use a small paintbrush & manually paint dots, but I personally like the splatter effect better.
As to the gradient, that's something I just trail and error'd & experimented until I got it right. If you want a smooth blend between multiple colors, you want to avoid using painter's tape to make any hard lines. It can be challenging to get all the paint where you want it to go (and stay away from the parts where you don't want it), but patience is key. I've found just sometimes using a piece of paper (held in my free hand) helps to keep the paint off one area of the shell, but again even that can be tricky & requires some practice & trial & error.
If you make any mistakes, one blessing is that spray paint is very forgiving. You can always either paint right over or sand off mistakes & start over!
Happy crafting!
#i hope i covered basically everything#custom game consoles#how to#guide#helpful tips#diy#star cluster art guides#custom n64#custom gamecube#asks#tips
20 notes
·
View notes
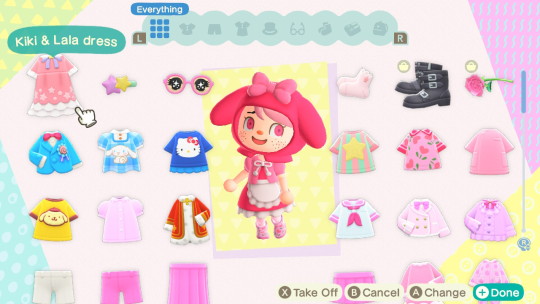
Text
This is what he will wear today! Is it an OOTD? A coord? X3 I don't own lots of clothes irl, I wear the same 2 old nightgowns all the days lol so when I dress up Sugar, that is me expressing myself fully- through his supercute ☆ wardrobe ~ !!
15 notes
·
View notes
Text
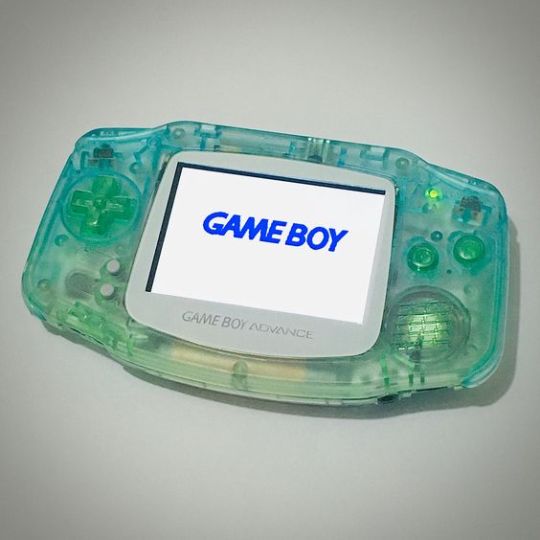
Custom Blue to Green Fade Game Boy Advance with Backlight Mod
#art#blue#console#custom#cybercore#cyber y2k#design#gameboy#game boy#game boy advance#gaming#green#kaybug#nintendo#video games#y2kcore#y2k aesthetic#y2k core#y2k cyber#y2k design#y2k futurism#y2k
290 notes
·
View notes
Text
If Hasbro won’t give me what I want, I’ll just have to make it myself 😤
#fnaf#fnaf security breach#mall madness#custom board game#I’ve been needing this since security breach was ANNOUNCED#my dream for this would be to get Andy field to record new lines#but I don’t know how to program the center console#so cards and dice it will be
7 notes
·
View notes
Text
me everytime I am preparing a meal with multiple elements I have to balance so they all finish cooking at the same time: Wow this is just like the 2009 hit Nintendo Wii game 'Food Network: Cook Or Be Cooked'
#or like if I'm making two things and one finishes cooking before the other and has to sit there and get cold#in my brain it's always like 'tsk tsk.. they would deduct points from my score for that' hjhjb#one of those instances of game mechanics imprinting onto your brain. kind of like imagining sims interaction moodlets in irl conversations#i LOVE the game though it's so fun. I've never even heard of it before I just found it by the dumpster in a box of other old wii#games someone was apparently discarding and picked it up due to my interest in cooking shows and stuff#I like having to time things and all the little actions you can do. though sad that there's so little recipes#you can unlock the whole game in like a day or something. I think if I had more time and social energy to actually talk in forums or be par#of a 'community' - I think looking into the type of stuff where people mod wii games and etc. would be very very cool#Wii is my favorite console and so much of the time I am always like 'grrr.. they dont make new games.. and this one game is very cool#but imagine if these 5 improvments were made to it! it would be SO much cooler!' etc.#Like being able to download new custom recipes/levels for Cook or Be Cooked lol#Modding wii sports resort the same way that some people mod skyrim and build entirely new games out of it#with new quests and etc. Like just.. create your own sports.. RPG mode.. use the already existing archery assets and etc. to have a mode#where you can just free roam around the map shooting at enemies and stuff ghhjbjh#WHICH I WOULD LOVE DEARLY..#I dont realyl like combat in games but idk I'd make an exception.. whatever.. I just want to play more in the Wii World#I have the soul of one of those people who builds all their own computers and 3D prints custom frames to transplant their 3DS into and#has like all special 'hacked' phones and wii mods and customizes everything and etc. etc. like.. 100% my exact personality and preferences#HOWEVER I just simply do not have the money or physical energy/time to get onto projects like that#The best I can hope for is one day having a close friend who does that so I can maybe use their 3D printer every once in a while or we both#collaborate on some wii modding project or etc. but I just couldn't on my own.. I already have too much stuff going on.. Have to make#compromises due to lack of money + low energy + busy. Like I could never build my own phone. I could save up for a teracube phone#or something so it's better and more repairable than all these dumbass modern phones you cant even take the backs off of. but that's probab#y the best I could do lol. ANYWAY.. Especially wii customization. I could get really into that.. I saw a picture one time of someone who#made like a semi transparent case for theirs kind of like the famous purplish see through gameboy color case but for a wii.. which is.. aAA#yearning crying sobbing etc. etc. so on and so forth
7 notes
·
View notes
Last Seen Blogs
kateliz1993
♋️Tragic💕Heart

shinygaminganimezonk
Untitled

taqtag
僕のこと。
meu-mundo-imperfeito-mz
Meu Mundo Imperfeito

nahfamily
I Moved To Iridescentjin