#best logo design software for beginners
Text
Bat Bros' Brewery: 🦇³

Apologies that this is late to the game. I'd meant to have this modern AU fic properly finished as a one shot for Day 4 (Bat Boys), then Day 7 (Free Day), of @azrielweek2022, but last week coincided with a lot of our moving preparations. That insanity took over my life, understandably, so here it is now, but in the form of a headcanon, instead. I'm sorry, I know it's not my best effort, but I'm currently so exhausted that I fell asleep at 6pm last night and slept for 12 straight hours, so... 🥱🥱🥱
Please enjoy the unedited fluff and nonsense.
While at university, all three of the bat bros lived together while in appropriately different fields (Rhys studied an arts-law double major, Azriel studied software engineering with a minor in robotics, and Cassian studied secondary education with the goal of teaching PE and bio).
To celebrate the end of their year as JAFFYs, Cassian and Rhys bought a home brew kit and set it up in the dining room of their share house.
Azriel, who was a year ahead, just rolled his eyes and sighed. Rhys and Cassian could get chaotic.
After their final exams, the three of them made their first attempt at a basic ale. Reader, it was barely tolerable (and entirely messy), though their friends didn't much care; it was still free beer, and it "did the job."
Their second attempt was marginally better.
It wasn't until their third go round that they had something they would call both functional and enjoyable.
By the end of Azriel's third - and Rhys and Cassian's second - year, they had a solid ale and lager, and were almost there with a stout.
By the time Azriel was graduating, at the end of Rhys and Cassian's third year, it was so good that they were proud to serve it to their friends.
Rhys' girlfriend, one Feyre Archeron, a first year fine arts student who was the youngest sister of his law classmate, Nesta, had even designed a logo for the three of them. Thanks to their years on the high school football team, they called themselves the bats, and Feyre had grown up obsessed with the TV show Charmed, so... 🦇³ it was.
A decade passed them by, and they had all settled down, both into relationships and careers. Azriel worked in the tech industry, as did most who completed his degree, for a moderately sized company.
Feyre and Rhys had married young, followed by Azriel and the middle Archeron sister, Elain (a botanist) two years later. Azriel and Elain had met when Feyre brought Rhys (and Cass and Az) home for dinner with her sisters, who were attempting to mend bridges after their rough childhood. Nesta and Cassian then proceeded to drag out an almost decade-long battle of wits that had finally ended with a hook up at age 29. After that, they were as inseparable as their siblings, though not married. They joked that it would be another ten years before "any of that," or, to call it even, they'd probably marry by 40.
At approximately the seven year mark after graduation, Azriel, Cassian and Rhys were all getting a little frustrated with their careers, as they could feel themselves stagnating. By the ten year mark, they had decided to actually do something about it: turn the Bat Bros Brewery into a legitimate business.
Over the preceding years, they'd taken quite a few short courses in home brewing, not to mention they'd discovered that Elain, an avid cook, had an amazing palate for beers and cider in addition to food. Their brews were, in short, pretty damn good, so they began to run a stall at the local farmers' market on the weekends.
The first weekend all of their friends and families came out to support them - they highly suspected that Rhys' cousin, Mor, had a thing or two to do with that - and everyone had a blast. The second weekend was a bit of a let down, and they were worried about beginner's luck, but business picked up a bit in week three, and slowly but steadily continued to improve.
Not quite two years into this endeavour, the boys taking it in turns to run the stall each weekend, or sometimes running stalls at bigger festivals after they'd made a name for 🦇³, the co-owner of a local gastro pub got in contact with them and said that she and her sister would love to stock Bat Bros Beer on tap.
It took some time to ramp up production in their small, rented brewery space - and they tentatively began to look at larger facilities, just in case - but eventually, 🦇³ ale and lager were on tap at The Wolf and Shadow, with their stout and cider to both follow in autumn, if sales were as good as they hoped.
Nuala and her twin sister, Cerridwen, were so pleased with the popularity of the Bat Bros Beer that they could hardly wait for the new stock to arrive, and they began to negotiate for a Wolf and Shadow special brew.
By the end of that school year, Az, Cass and Rhys - along with Elain, Nesta and Feyre - realised that they could no longer treat BBB as a part time venture. With their families on top of two essentially full time jobs, it was too much, and something had to give; Cassian quit his job at the local high school, and Rhys and Az left their positions, too.
Their collective experiences weren't for nothing, though. Bat Bros Brewery boasted one hell of a website, to say the least.
As the school year ended, they found themselves moving into a much larger building that they fitted out with just enough equipment to get them started, and plenty of space left over to expand as they (hopefully) needed.
Everything progressed so well that, by the next December, other local pubs and restaurants were also clamouring to stock 🦇³ products.
The boys were very pleased that they didn't have to slink back to their old jobs with their proverbial tails between their legs.
Feyre, Elain and Nesta were glad that their partners were being professionally fulfilled once more.
By the ages of 38, 37 and 37, Azriel, Cassian and Rhys were happier than ever. In addition to their brewery, Azriel and Rhys had Elain and Feyre respectively, and a hoard of kids (or "batlets") between them. Nesta had proposed to Cassian on his 37th birthday, and they were "happily engaged."
You know those couples who get engaged and stay that way forever? Cassian and Nesta were beginning to appear that way until, one Autumn day, they invited their siblings, nieces and nephews to the park for a picnic.
Well, surprise, it was their wedding!
Nesta's good friend Gwyn was officiating, and Emerie, the other member of their inseperable trio, had returned early from her trip home to Illyria when Nesta had asked (because Nesta had never asked for anything like that before).
It was the most spectacular, Pinterest worthy autumnal wedding that anyone could have imagined. Elain was overjoyed that her spiced apple cider cake (made with 🦇³ apple cider, of course) was THE wedding cake; Feyre took the photos (and thank god she'd gone back for her tripod, after all).
At the end of the day, Nesta and Cassian handed out thank you cards that said the "three" of them were so glad everyone made it.
Feyre, the first to open hers, actually screamed. Mor followed suit no more than a second later, as Elain laughed her joy.
Azriel just raised his eyebrow at the commotion, at which point Elain gave him her card to read.
A giant smile bloomed on Az's face as he and Rhys tackled Cassian in a hug.
#modern au#acotar headcanon#modern au acotar#bat boys#bat bros#bat bros brewery#elriel#feysand#nessian#nuala and cerridwen#azriel week 2022#i'm sorry this is late life has been crazy busy#wouldn't mind a beer myself#azriel appreciation week#azrielweek2022
131 notes
·
View notes
Text
Bookbinding for Beginners by a Beginner Part 3
*braces self on a door frame*
Right there's a lot of information I still need to cover so lets get into it.
I don't recall if I told everyone to set up the document to be booklet type or not but here's how to do that (I'm not re-reading what I wrote my brain stopped working at some point)
But Layout Tab, Page Layout, hit the little arrow pointing towards the document:
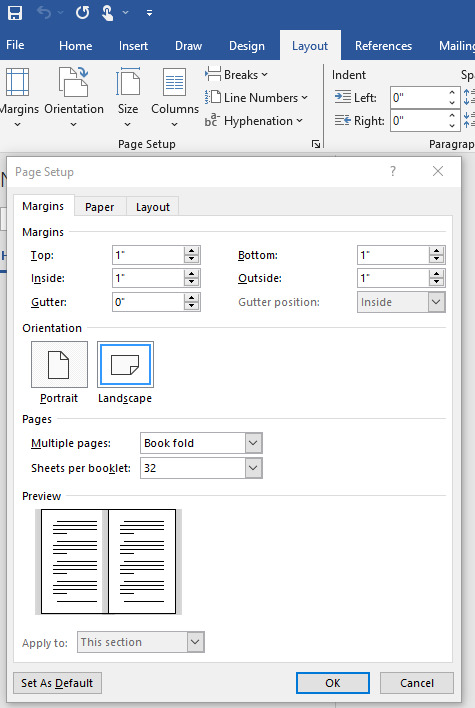
I have the sheets per booklet set to 32, but this site is helpful for helping you get the exact number of signatures (a portion of the fic you are printing it is one section of the book, whereas a text block is the whole thing together)
That's if you want to print through the program you're type facing (the text within the pages all of the formatting and indents and everything we started covering in part 2 is type facing). I have totally done printing through the word processor but there is a different option that I will cover later down this post.
For now I'm going to try and remember all of the extra stuff I need to cover. A lot of this is trial an error and fiddling, farting, and sometimes sobbing your way through this.
OH! Right if the fic you're type facing has a fake email. Like.... I don't know "[email protected]" Word will sensor it automatically when you paste it onto the document. The only work around I have is to have the OG link to the fic you're working on, and try your best to locate the email copy it, and find it within the text of the document using the headers to skip to the chapter in question and scan for the brackets with [Email redacted] or some such, it's usually blue text with "[ ]" going on.
I can't truly think of anything else at this time pertaining to my tips and tricks for Word. There is more I may know but my mind is fizzling out I may circle back to this but I think I'll move on towards downloading and uploading fonts to use in your bookbinding adventures and some Canva stuff.
DaFont and 1001 Free Fonts work
Dafont:

1001:
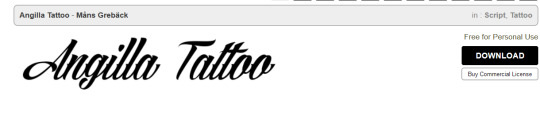
I'll be using these two Fonts as my examples cause... well I actually quite like them.
Hit "Download"
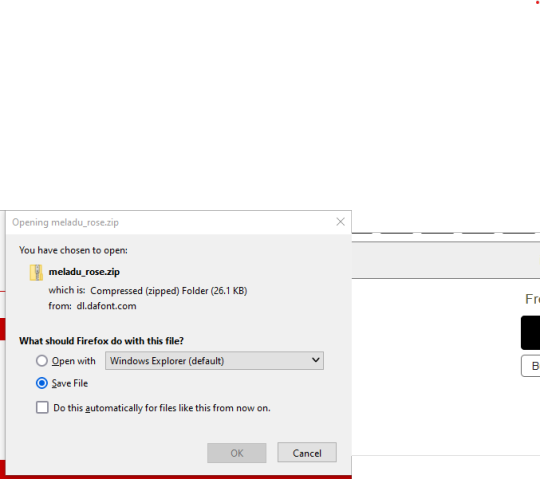
This will pop up on your screen hit "OK"
Go to your Downloads or where you put your downloads,
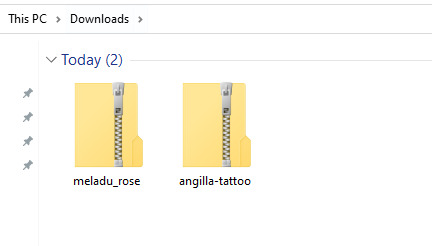
Right click on the file in question and hit "Extract All"
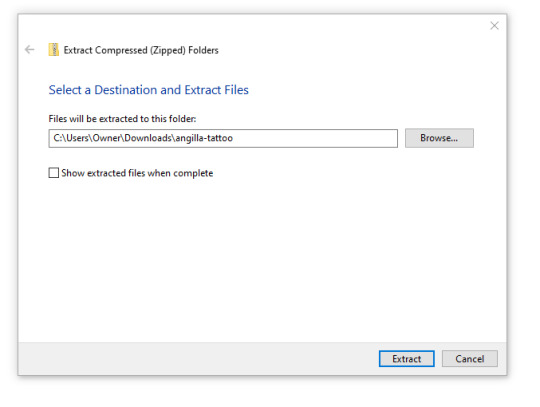
Hit Extract.
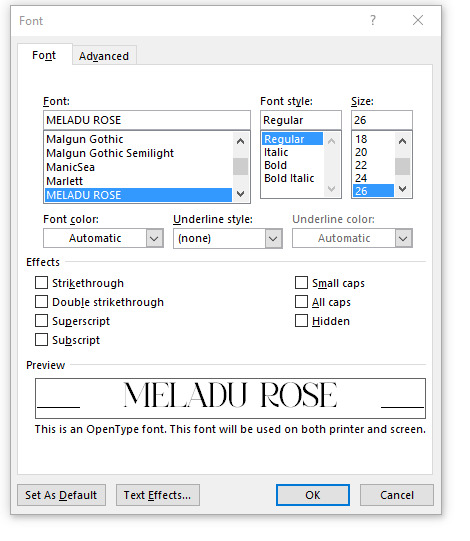
Click on the folder post extraction. The file type you're looking for is "Open Type Font File" Right Click, "Install" or "Install for all Users" works as well and the font will be available to anyone that has a User key for the computer you're on.
Sometimes the file will look like this:

The Greyed out one? That's the type file.
There will be a pop up that says "Installing Font" give it a few seconds and it will disappear.
You will now be able to open up your word processor and go to the font section and be able to find your newly downloaded font
Enjoy your new found power in getting fancy pants fonts on your word documents!
Now... Canva...
You can download it for free like I said. I have it on my phone and on my computer as a software application:
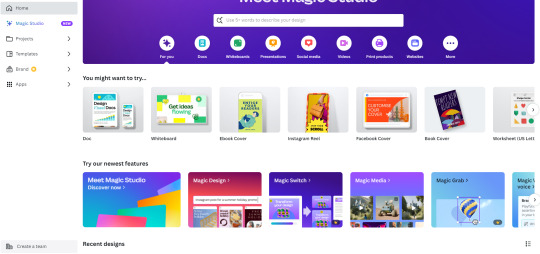
So I don't accidentally doxx myself this is all you really need to see- you can do much much more than bookcovers, I've done bookmarks, and logos and a few other things.
but for our purposes we'll open up a document and make a few pages:
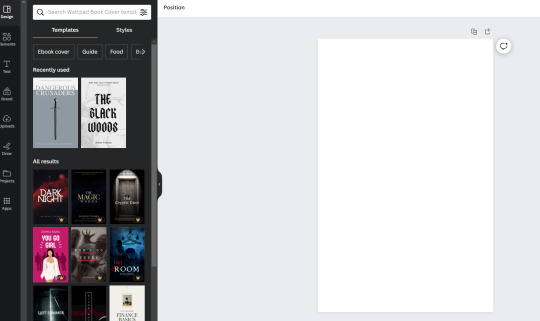
At the very tippy top that I did not show there's "create Design" I usually hit either "Bookcover" or "ebook cover".
There will be a document with some template examples and you can scroll and see if you like any of those. OR You can just go down to "Elements" and start playing and toying around with that.
You can also grab screen captures of decorative lines to replace the "***" on your document.
How to do this- in elements there should be a search bar type in "decorative lines" and you can refine it "Decorative Rainbow" "brush stroke" "ornate" then open up the application on your computer that allows for screen shots Snip and Sketch for Windows, I don't know for Mac. Sorry.
Select something you like and when it appears on the document click outside of it.
open up your screen grab and grab the line in question
Here's my example.
Now in your word document feel free to go into the Pages tab of the Navigation bar and find whatever the author has used to break up the text. Highlight, right click, hit "search" There will be a pop up on the right hand of word hit the tab that says "Search this document/file" you can see how many times "***" or the equivalent has been used. I would suggest opening this link and reading all of the other tips and tricks since they break it down better than I ever could.
Edit as of November 18th 2023: But the root gist of it all is to highlight the "***" or equivalent divider on the document. Right click, "Search" there will be a prompt that opens on the right hand side of Word hit the "In this Document" and it will bring up every instance of what you have highlighted.
Have the image you intend to replace "***" with right click "Copy". Back in Word, hit "Replace" there will be a box that pops up with "Replace with" Type: ^C . What this does is take the image you've just copied and will override the highlighted "***" Hit "Replace all". You may have to scrub through the document to center it properly but thankfully it's easier to find especially with the Navigation Bar on the "Pages" tab open.
End Edit
Though you can just scroll and find the breaks highlight and drag and drop the image to break up the text if you so choose. Do what works for you.
Now you can also do the same thing with decorative chapter headers, just choose or fiddle and make something that works for the fic in question. Remember when I made you do all of those "Next Page" breaks for the fic? Well on the top of that page with the chapter, double click the header insert an image and "warp image" to "Behind text" and you are free to resize and move the image around.
Just so you know whatever is next to the image will repeat with this example it's the author's name, it will appear no matter the page number odd or even. I don't know the work around and it doesn't bother me much at the end of the day. At this point I'm just trying to pull all of the tips and tricks I've learned over time out of my ass to help people out.
Back to Canva. You can make your Covers if you'd like in this and you can do decorative cover pages. Just go to the page that you want the title page on, insert an image, and warp image to "In front of text" You will be free to stretch and fill the page as much as you please. I do the same thing with my logo placement for the logo page.
Now... if you're still with me... Congratulations I'm not sure I'm still with me or not.
So I'll move on to the "OK I like how this all looks and I've saved everything I've done"
GREAT you can calculate the right number of signatures and print from here OR you can take a few extra steps.
Hit File, Export, hit Create PDF/XPS. I hope you have at least a free Acrobat or PDF reader. Wait. Don't panic if it looks like the processor is freezing up on you. there should be a pop up of a PDF after that minor heart attack.
Now. With your new PDF you're going to go to Bookbinder JS
Upload the pdf file you've created and I'll walk you through the steps.
Letter 612 x 792 is your standard 8.5 x 11 paper.
Printer type- Duplex I hope you have a duplex printer. You'll need it or else you will be manually flipping the pages to make this book bind.
Folio- That is just 8.5 x 11 paper folded in half to make 8.5 x 5.5 booklets. Keep these numbers in mind.
Signature format- there you can select "Perfect bound" AKA Paperback. Or Standard signature. Here I select 20 page signatures. Keep in mind that there will be four pages per one sheet of paper.
Preview output ALWAYS preview output because it will tell you how many signatures will be with the upload. For example:

What this means: Total pages of the file uploaded, since the fic I'm type facing is 300+k words I divided the chapters up.
so you know what a 100+k word fic looks like printed folded and the air compressed (I will cover this as well) Keep this in mind this was Celestial Navigation now add similarly stacked pages atop of what's here. 100+k fics it's wisest and best to split this in half. Keep in mind your wrists. 500-600 pages is comfortable holding. You can get to around 800 pages but if it's 900+ pages I would think about dividing the document up.

After you are happy with the number of everything. Hit "Generate Output" wait for the popup for the save file to appear and hit "Save" this will be in a zip file as well. Head over to your Downloads and hit extract, open up the file and some terminology that will help with this:

Aggregate book means "the whole damn thing" Signature 0 is the first signature.
To spare the wrath and protest of my printer- I print one signature at a time and fold it since I don't have to worry about getting the page numbers to line up.
Take however much time you please. Next post. Folding signatures, pressing signatures, stitching, gluing end bands and ribbons.
aka- welcome to the world little fic. We hope you enjoy your stay. You're going to be a real book soon.
If I wasn't running out of steam I would cover Quartos. But if you wanted to print a smaller fic know this- increase the text size through out the whole document, these things are SMALL. 4.5x5.5 all said and done. I would go to TikTok and Youtube and look up "Quarto Book bind" if you want to see the smallest, cutest most pain in your ass book you've ever wanted to try and make.
I've done those as experiments as well... they can be fun but my god I'm bad at mathing at times.
#bookbinding for beginners by a beginner#book binding#DIY#so you really want to get into bookbinding?#have I scared you yet?
5 notes
·
View notes
Text
Best Freelancing Skills For Beginners
Now a days freelancing has become an attractive option for educated unemployment. It’s become a popular way to earn dollar currency that helps a development country like us directly. Its need a computer, Internet connections and proper skill that helps freelancer to do the work.
For beginners entering the freelancing world, certain skills not only offer ample opportunities but also have a lower barrier to entry. Here are some of the best freelancing skills for beginners:
Content writing: Content writing is a versatile and highly sought-after skill in the freelancing world. Content writing involves creating engaging and informative articles, blog posts, and web content. Build a portfolio showcasing your writing style and explore platforms like Upwork and Fiverr to find writing gigs.

Graphic Design: If you have a creative eye and enjoy working with design software, freelancing as a graphic designer can open doors to a variety of projects, including logo design, social media graphics, and website elements. Familiarize yourself with design tools like Canva or Adobe, and build a portfolio to showcase your work on platforms like 99designs.
Social Media Management: In the age of digital marketing, businesses recognize the importance of a strong social media presence. If you're adept at navigating platforms like Instagram, Facebook, and Twitter, offering social media management services can be a lucrative freelancing option .Showcase your own social media profiles and explore platforms like Upwork to find social media management opportunities.

Virtual Assistance: Many entrepreneurs and small businesses require assistance with various tasks, providing an excellent opportunity for freelancers to offer virtual assistance services. If you are organized, detail-oriented, and proficient in administrative tasks, virtual assistance can be a rewarding freelancing career. Highlight organizational skills and offer services on platforms like Upwork or Time Etc.
Video Editing: With the rise of video content on platforms like YouTube and TikTok, there is a growing demand for skilled video editors. If you have a creative eye and enjoy working with video editing software, freelancing as a video editor can be both fulfilling and lucrative .Learn popular video editing software and offer services on freelancing platforms such as Upwork or fiverr.
Translation Services: If you're fluent in multiple languages, offering translation services can be a valuable freelancing skill. Many businesses, websites, and individuals require content to be translated to reach broader audience. Highlight language proficiency and offer services on platforms like Upwork or ProZ.
E-Commerce Management: With the rise of online businesses, freelancers can assist with e-commerce tasks, including product listings and customer support. Familiarize yourself with e-commerce platforms like Shopify and offer services on freelancing platforms or directly to businesses.
Search Engine Optimization (SEO): Businesses are increasingly aware of the importance of a strong online presence, making SEO expertise highly valuable. If you understand how search engines work and can optimize content for better rankings, freelancing in SEO can be a rewarding and in-demand career.

Embarking on a freelancing journey as a beginner requires careful consideration of your skills, interests, and the current market demands. While the skills mentioned above are in high demand, it's essential to choose a path that aligns with your strengths and interests. Building a successful freelancing career takes time, dedication, and continuous learning. As you gain experience and positive feedback, you'll find more opportunities and field to grow up with freelancing sector.
2 notes
·
View notes
Text
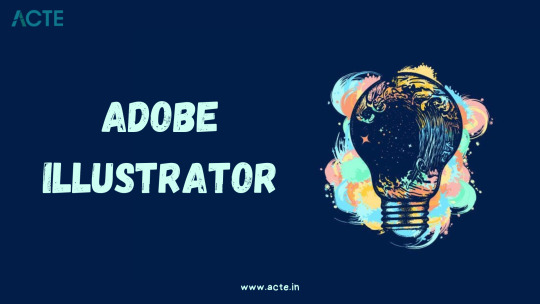
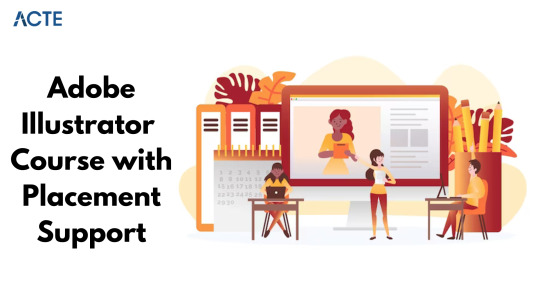
From Novice to Pro: How Adobe Illustrator Took My Artistry to New Heights
As an artist, I have always sought ways to enhance my creativity and push the boundaries of my art. When I first came across Adobe Illustrator, I was drawn to its reputation as a powerful tool for digital artistry. Little did I know at the time just how much this software would transform my artistic journey. In this blog post, I will share my personal growth and skill development using Adobe Illustrator, highlighting the pivotal moments that elevated my artistry to new heights.
The Novice Beginnings
When I first started using Adobe Illustrator, I was a complete novice in the digital art world. The interface appeared daunting, and I felt overwhelmed by the countless features and tools at my disposal. As a beginner, doubts crept into my mind. Would I be able to master this complex software? Could I truly unlock my creative potential through Adobe Illustrator?
Discovering the Power of Adobe Illustrator
Despite my initial uncertainties, it didn't take long for me to realize the immense power and potential of Adobe Illustrator. The software's vector-based design capabilities captured my attention from the start. The precision and scalability offered by vectors were unparalleled, allowing me to create stunningly detailed and dynamic illustrations. Additionally, the ability to manipulate anchor points and paths opened up a whole new realm of creative possibilities.
The Learning Phase
Eager to harness the full potential of Adobe Illustrator, I embarked on a dedicated learning phase. I enrolled in an Adobe Illustrator course offered by ACTE Institute and sought out comprehensive tutorials to deepen my understanding of the software. One of my breakthrough moments during this phase was discovering the Pen Tool and mastering its intricate controls. Learning to effortlessly bring my creative visions to life by manipulating Bézier curves was a defining milestone in my artistic journey.
The First Projects
As I gained confidence in my skills, I began taking on my first projects using Adobe Illustrator. These early endeavors allowed me to put my newfound knowledge into practice and overcome the inevitable hurdles that came my way. From designing logos and icons to crafting intricate digital illustrations, each project presented unique challenges and valuable lessons. Along the way, I learned the importance of patience, attention to detail, and the power of iteration.
The Evolution
As time went on, I witnessed a remarkable evolution in both my skills and confidence. Adobe Illustrator became an integral part of my artistic process, fueling my creativity and enabling me to bring my ideas to life with precision and finesse. Notable projects and milestones marked my progress, including collaborations with respected artists and recognition for my work in renowned galleries. With each triumph, my passion for Adobe Illustrator grew exponentially.
Overcoming Challenges
Of course, no artistic journey is without its fair share of challenges. I faced moments of frustration and self-doubt, but through perseverance and a growth mindset, I overcame these obstacles. One strategy that proved invaluable was seeking inspiration from fellow artists, both within and outside the realm of digital art. Embracing new techniques and approaches helped me break through creative blocks and push the boundaries of my artistry.
Becoming a Pro
There came a defining moment in my artistic journey when I realized I had transitioned from a novice to a proficient user of Adobe Illustrator. I found myself effortlessly navigating the software, utilizing advanced features and techniques with ease. Adobe Illustrator had become an extension of my artistic vision, enhancing my ability to translate ideas into mesmerizing visuals. The software had truly propelled me to the professional level.
Showcasing Your Artistry
Now, it is my pleasure to showcase some of my best work created with Adobe Illustrator. These pieces exemplify my growth and expertise, highlighting the incredible possibilities that emerge when artistic vision merges with the powerful capabilities of this software. From intricate illustrations to mesmerizing typography, each artwork stands as a testament to the transformative impact Adobe Illustrator has had on my artistry.
Advice for Aspiring Artists
To those embarking on their journey with Adobe Illustrator, I offer this advice: embrace challenges and keep pushing your creative boundaries. Don't be discouraged by initial difficulties or doubts; instead, let them fuel your determination to learn and grow. Seek out resources, connect with like-minded artists, and never shy away from experimenting with new techniques. The path to becoming a proficient user of Adobe Illustrator may be challenging, but the rewards are truly extraordinary.
From my humble beginnings as a novice artist to my transformation into a seasoned professional, Adobe Illustrator has been my guiding light. This software has not only elevated my artistry to new heights but has also enabled me to express my creativity with unparalleled precision and finesse. I am forever grateful for the impact Adobe Illustrator has had on my artistic journey, and I encourage each reader to embark on their creative exploration. The potential is endless, and using Adobe Illustrator, going from a beginner to a pro is extremely motivating.
6 notes
·
View notes
Text
Graphic Designing Course
Graphic Designing Course
Website:- https://picklesanimation.in/graphic-designing-course-in-delhi/
Contact us - +91 9999065344
Welcome to Pickles Animation, the premier destination for graphic designing courses in Delhi. If you have a passion for creativity and a keen eye for design, then our graphic designing course is perfect for you.
At Pickles Animation, we offer comprehensive and industry-relevant training in graphic design. Our course is designed to equip students with the necessary skills and knowledge to excel in this dynamic field. Whether you are a beginner or an experienced designer looking to enhance your skills, our course caters to all levels of expertise.
Our experienced faculty comprises industry professionals who bring their real-world experience into the classroom, ensuring that students receive practical insights and hands-on training. Through a combination of theoretical lessons, practical assignments, and industry projects, we provide a holistic learning experience that prepares students for the challenges of the graphic design industry.
As part of our graphic designing course in Delhi, students will learn essential concepts such as typography, color theory, layout design, image editing, logo creation, and much more. They will also gain proficiency in popular software tools like Adobe Photoshop, Illustrator, and InDesign.
Upon completion of our course at Pickles Animation, students will have developed a strong portfolio showcasing their creative abilities and technical skills. This portfolio will serve as an excellent resource when seeking employment opportunities or freelance projects within the field of graphic design.
Join us at Pickles Animation and embark on an exciting journey towards becoming a skilled graphic designer. Enroll today in our Graphic Designing Course in Delhi and unlock your creative potential!
2 notes
·
View notes
Text
Graphic Designing Course

Graphic Designing Course
Website:- https://picklesanimation.in/graphic-designing-course-in-delhi/
Contact us - +91 9999065344
Welcome to Pickles Animation, the premier destination for graphic designing courses in Delhi. If you have a passion for creativity and a keen eye for design, then our graphic designing course is perfect for you.
At Pickles Animation, we offer comprehensive and industry-relevant training in graphic design. Our course is designed to equip students with the necessary skills and knowledge to excel in this dynamic field. Whether you are a beginner or an experienced designer looking to enhance your skills, our course caters to all levels of expertise.
Our experienced faculty comprises industry professionals who bring their real-world experience into the classroom, ensuring that students receive practical insights and hands-on training. Through a combination of theoretical lessons, practical assignments, and industry projects, we provide a holistic learning experience that prepares students for the challenges of the graphic design industry.
As part of our graphic designing course in Delhi, students will learn essential concepts such as typography, color theory, layout design, image editing, logo creation, and much more. They will also gain proficiency in popular software tools like Adobe Photoshop, Illustrator, and InDesign.
Upon completion of our course at Pickles Animation, students will have developed a strong portfolio showcasing their creative abilities and technical skills. This portfolio will serve as an excellent resource when seeking employment opportunities or freelance projects within the field of graphic design.
Join us at Pickles Animation and embark on an exciting journey towards becoming a skilled graphic designer. Enroll today in our Graphic Designing Course in Delhi and unlock your creative potential!
2 notes
·
View notes
Text
Which is the best logo/poster designing software in 2023?
There are many different software options available for designing logos and posters, and the best choice will depend on your specific needs and preferences. Some popular options for logo and poster design include:
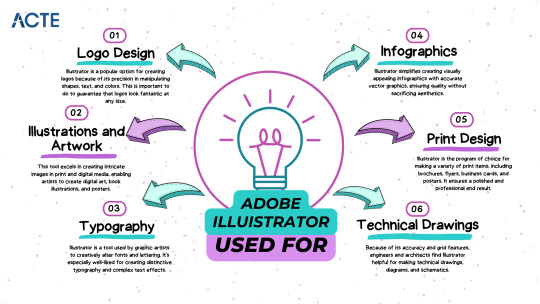
Adobe Illustrator: This is a professional-grade vector graphics editor that is widely used by graphic designers. It has a wide range of features and tools for creating logos, posters, and other designs.
Adobe Photoshop: This is a raster graphics editor that is often used for photo editing and manipulation, but it can also be used for logo and poster design. It has a wide range of features and tools, including support for layers, masks, and text effects.
Canva: This is a web-based graphic design tool that is popular for its ease of use and wide range of templates and design elements. It is a good option for beginners or for those who need to create designs quickly.
Inkscape: This is an open-source vector graphics editor that is similar to Illustrator but is available for free. It has a wide range of features and is a good option for those on a budget.
Ultimately, the best software for logo and poster design will depend on your specific needs and design goals. It may be helpful to try out a few different options and see which one works best for you.
#andweart#graphic design#vector#illustrator#logo#logo design#creative logo#united states#designer#graphic art#tumblr things#artists on tumblr#tumblrpost#illustrators on tumblr#writers on tumblr#poets on tumblr#your tumblr year in review#tumblrr tmblr tumblrgram tumblrs tumblraesthetic tamblr tumblrfeed tumblrposts tumblr👽 tum#tumblr milestone#tumblr meta
2 notes
·
View notes
Text
Mastering Graphic Design: 5 Essential Tips for Professional Excellence
We present you our blog where we discuss the art and science of graphic design. In the contemporary computerized era, communication, marketing, and branding strategies depend on graphic design. Whether you are a highly experienced designer or an inexperienced beginner, achieving perfection in this field involves being imaginative and technically competent while having a sharp vision for minor details.
This blog post will discuss five essential tips that will help you develop your graphic design skills to a pro level.”
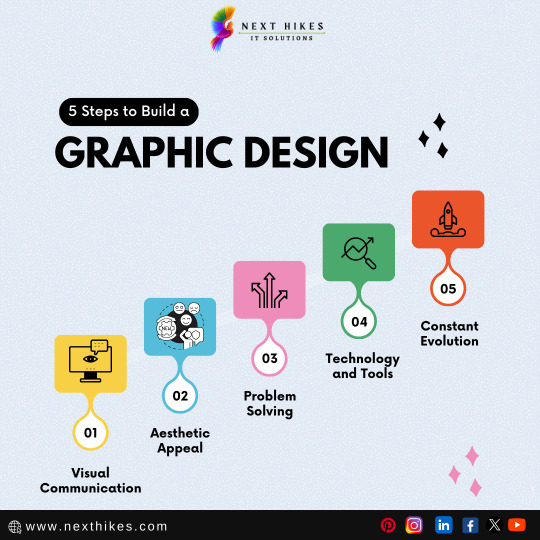
1. Visual Communication:
Graphic design is beyond making pretty images, it’s more about passing a message. In your designs, emphasize clear and straightforward visual communication. Identify your target market and customize your visuals to speak to it; also, consider the colors, typography, images as well as designs carefully to evoke intended feelings and tell your brand’s story effectively.
2. Aesthetic Appeal:
To make the design of your art good consider the following details: balance, harmony, contrast, and whitespace. Into your art use different styles and trends but always remember about brand identity during the choice of style.
3. Problem Solving:
The whole point of graphic design is to solve problems. Be it in designing logos, websites, or marketing campaigns there is no specific way through which these projects can be achieved successfully. Creating a logo today and tomorrow the same may change into a product identity however there are always issues that remain constant throughout all designs such as lack of originality among others; hence the need for creativity among others. Have a problem-solving attitude towards any project that comes your way so that you can comprehend well what the customer wants together with other issues at hand (e.g., audience). Communicate extensively with customers to understand what they want out of you; consequently, come up with innovative ideas that would help them solve their problems.
4. Technology and Tools:
To remain competitive within the ever-changing field of graphic design, one should always be informed about new design technologies and tools. It’s crucial to know how to use industry-standard software (like Adobe Creative Suite which includes Photoshop, Illustrator, or/InDesign) as well as what is new in this area when it comes to getting work done faster and more creatively using some tools or plugins that have come up recently. In addition, spending hours on understanding different styles through attending seminars among other things would help.
5. Constant Evolution:
In the ever-changing world of graphic design, technology, consumer interests, and new design fashions have contributed to this. It is very critical as a designer that you always think that you have not achieved all that there is but rather keep on learning bit by bit till when time is no more remaining for you. The more you know about something; indeed so does your ignorance increase about it at an equal ratio but never to infinity which means there are always some things you will still find hard even after some time doing something in such a field. Stay prevState=current&compare-to=cur&lang=Enonquisitive; explore fresh styles; try various methods & ask colleagues/tutors for advice aiming at improvement. You should realize that growth takes place when we step away from our comfort zone and move beyond the limits of our creativity.
At Nexthikes, We understand how important graphic design is to a brand's identity formation and achieving business goals. We have designers who have been doing this type of work long enough that they know almost everything about it. This way, they can come up with great designs that suit your specific requirements best because their minds work strategically combining creativity with preciseness (Catterall et al., 2013). In case you require rebranding services such as changing shop names or making them look different from each other but keeping their original logos intact; feel free to contact us right away! Also, if you need posters or flyers for promotion purposes yet you do not know what they should be like just allow us to help. Alternatively, what you had in mind about an appealing website involved animated features as well.
To Know More:
1 note
·
View note
Text
From Beginner to Pro: A Roadmap for a Comprehensive Graphic Design Course
The world of graphic design is a captivating blend of creativity, technical skill, and strategic thinking. It's a field that allows you to translate ideas into visually compelling experiences, shaping the way people interact with brands and information. If you've ever dreamt of transforming your artistic vision into professional designs, enrolling in a graphic design course Hyderabad can be the catalyst for your creative journey.
But with a multitude of graphic design courses in Hyderabad available, navigating your options can feel overwhelming. This comprehensive guide serves as your roadmap, outlining the key elements of a well-structured program and equipping you with the knowledge to choose the course that best propels you from design novice to design pro.
Laying the Foundation: Core Concepts and Software Skills
The initial stages of a graphic design course Hyderabad establish the fundamental principles that underpin all successful design endeavors. Here's where you'll encounter the building blocks that will empower you to create visually harmonious and impactful designs:
Design Principles 101:
Color Theory: Delve into the science of color, understanding how colors interact, evoke emotions, and influence perception. You'll learn how to utilize color palettes effectively to create visually appealing and brand-consistent designs.
Typography: Explore the world of fonts, learning to differentiate between serif and sans-serif fonts, understand hierarchy and spacing, and utilize typography strategically to enhance readability and message delivery.
Composition and Layout: Master the art of arranging visual elements on a page. You'll learn about balance, proportion, negative space, and how to create layouts that are both aesthetically pleasing and user-friendly.
Mastering Design Software:
A graphic design course Hyderabad equips you with proficiency in industry-standard software. These tools become your creative instruments, allowing you to bring your design concepts to life:
Adobe Photoshop: This versatile software is a cornerstone of graphic design. You'll learn photo editing techniques, image manipulation, and how to create stunning visuals for print and digital media.
Adobe Illustrator: Mastering vector graphics through Illustrator empowers you to create logos, illustrations, icons, and scalable designs for various applications.
Adobe InDesign: This software is essential for crafting professional layouts for brochures, magazines, reports, and other print publications.
By understanding these core design principles and mastering essential software tools, you'll establish a solid foundation for your creative growth in a graphic design course Hyderabad.
Expanding Your Skillset: From Design Principles to Practical Application
As you progress through a comprehensive graphic design course Hyderabad, you'll move beyond foundational concepts and delve deeper into specialized design areas:
Building a Diverse Design Toolbox:
Conceptualization and Design Thinking: This involves the ability to translate client briefs and design challenges into creative solutions. You'll learn brainstorming techniques, user research methods, and how to develop innovative design concepts.
Branding and Identity Design: Explore the world of brand creation, learning how to craft logos, brand guidelines, and visual identities that effectively communicate a brand's message and personality.
User Interface (UI) and User Experience (UX) Design: In the age of digital experiences, understanding UI/UX design principles becomes crucial. You'll learn how to design user interfaces for websites and mobile apps, ensuring a seamless and user-friendly interaction.
Project-Based Learning: Putting Theory into Practice:
The best graphic design courses in Hyderabad incorporate project-based learning. This allows you to apply the design principles and software skills you've acquired to real-world scenarios. You'll work on individual and collaborative projects, tackling various design challenges and building a diverse portfolio that showcases your problem-solving abilities and design capabilities.
By expanding your design skillset through specialized areas of study and applying theory through practical projects, a graphic design course Hyderabad empowers you to confidently approach diverse creative challenges in the design industry.
From Classroom to Career: Preparing for the Design World (After a Graphic Design Course Hyderabad)
The final stages of a well-rounded graphic design course Hyderabad focus on preparing you for a successful career in the design field. Here's what you can expect:
Career Guidance and Portfolio Development:
A good graphic design course Hyderabad goes beyond just teaching design skills. Many institutes offer career guidance workshops, resume writing assistance, and portfolio development support. These resources help you tailor your resume to highlight your design strengths and effectively present your skills to potential employers through a compelling portfolio.
Exploring Career Paths:
The world of graphic design offers a multitude of exciting career opportunities. A graphic design course Hyderabad can equip you with the skills to pursue various paths, including:
Graphic Designer: This is the most common role, allowing you to work in various industries like advertising, branding, marketing, or web design. You'
ll be responsible for creating visual content, such as logos, brochures, social media graphics, and website layouts.
User Interface (UI) or User Experience (UX) Designer: In the age of digital experiences, UI/UX designers are in high demand. These roles involve designing user interfaces for websites, mobile apps, and software, ensuring a seamless and user-friendly experience.
Motion Graphics Designer: If you have a passion for animation, you can explore a career in motion graphics. This field involves creating animated graphics for explainer videos, motion typography, or interactive elements on websites.
Freelance Graphic Designer: With the skills acquired from a graphic design course Hyderabad, you can choose the freelance route and work on projects for various clients. This path offers flexibility and allows you to build your own client base.
Remember, a graphic design course Hyderabad is an investment in your creative future. Choose a course that provides comprehensive career guidance and equips you with the skills and resources to confidently navigate the design job market.
Conclusion: Charting Your Creative Course
The journey from design novice to design pro is an exciting one. A well-structured graphic design course Hyderabad equips you with the foundational knowledge, practical skills, and professional guidance to excel in this dynamic field. By understanding the core elements of a comprehensive program, you'll be able to select a course that aligns with your learning style and career goals.
Are you ready to embark on your creative journey in the City of Pearls? With its thriving design scene and numerous graphic design course Hyderabad options, Hyderabad offers the perfect environment to nurture your artistic vision and transform it into a successful design career.
Enroll in our graphic design course Hyderabad today and take the first step towards a fulfilling career in the world of design! We believe in nurturing creative talent and empowering individuals to turn their design dreams into reality.
0 notes
Text
Exploring Vector Graphics: Versatile Tools for Graphic Designers

Introduction
Welcome to the world of vector graphics, where creativity knows no bounds and design possibilities are endless! As a graphic designer, understanding and harnessing the power of vector graphic design tools can elevate your work to new heights. In this blog, we'll dive deep into the realm of vector graphics, exploring the tools that empower designers like you to create stunning visuals.
Why Vector Graphics?
Vector graphics offer unparalleled flexibility and scalability, making them ideal for a wide range of design projects. Unlike raster images, which are pixel-based and can lose quality when resized, vector graphics retain their crispness and clarity at any scale. This inherent advantage makes vector graphics essential for everything from logos and illustrations to complex artworks and print designs.
Essential Vector Graphic Design Tools
Adobe Illustrator: A powerhouse in the world of vector design, Illustrator offers a comprehensive suite of tools for creating, editing, and manipulating vector graphics. From precise drawing tools to advanced color controls and seamless integration with other Adobe products, Illustrator is a must-have for serious designers.
CorelDRAW: Another industry favorite, CorelDRAW provides a user-friendly interface coupled with powerful vector editing capabilities. Its intuitive features make it a go-to choice for both beginners and experienced designers looking to unleash their creativity.
Inkscape: As an open-source alternative, Inkscape packs a punch with its robust set of vector drawing tools. Ideal for budget-conscious designers, Inkscape offers a range of features comparable to premium software, including bezier curves, text manipulation, and SVG support.
Affinity Designer: Known for its lightning-fast performance and modern interface, Affinity Designer is gaining popularity among designers seeking a fresh perspective. With features like non-destructive editing and seamless compatibility with other Affinity products, it's a worthy contender in the vector graphics arena.
Vector Graphic Design Tips
Start with Sketches: Before diving into digital tools, sketch out your ideas on paper. This initial brainstorming phase helps clarify concepts and leads to more refined designs.
Master Bezier Curves: Understanding how to manipulate bezier curves is key to creating smooth, precise shapes in vector graphics. Practice using anchor points and handles to achieve the desired curves and angles.
Use Layers Wisely: Organize your design elements into layers for better control and organization. This allows you to easily adjust individual components without affecting the entire design.
Experiment with Color: Don't be afraid to explore different color palettes and combinations. Use gradients, patterns, and opacity effects to add depth and visual interest to your designs.
Optimize for Scalability: When saving your vector graphics, choose formats like SVG (Scalable Vector Graphics) that maintain quality across various devices and screen sizes.
Conclusion
In the dynamic world of graphic design, mastering vector graphic design tips and techniques is essential for creating impactful visuals. By harnessing the versatility of vector graphics and following best practices, you can unleash your creativity and bring your design visions to life. Start exploring these powerful tools today and elevate your graphic design game to new heights!
Suggested Link: -
Cinematic video editing
Graphic Design Innovation
Font pairing techniques
0 notes
Text
Vector Graphics: Unveiling the Power of Visual Design
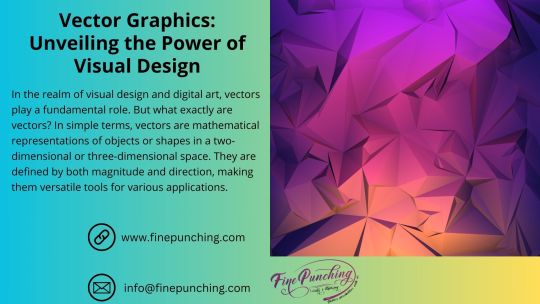
In the realm of visual design and digital art, vectors play a fundamental role. But what exactly are vectors? In simple terms, vectors are mathematical representations of objects or shapes in a two-dimensional or three-dimensional space. They are defined by both magnitude and direction, making them versatile tools for various applications.
Understanding Vector Drawing
Vector drawing refers to the creation of digital illustrations using vector-based software. Unlike raster graphics, which are composed of individual pixels, vector drawings are composed of paths defined by mathematical equations. This allows for infinite scalability without losing image quality, making vector drawing ideal for logos, icons, and illustrations.
Exploring Vector Graphics
Vector graphics, on the other hand, are digital images created using vector-based software. These graphics are composed of shapes, lines, and curves defined by mathematical formulas. One of the key advantages of vector graphics is their scalability, as they can be resized without losing clarity or detail.
Comparison Between Vector Drawing and Vector Graphics
While both vector drawing and vector graphics involve the use of vectors, there are some key differences between the two. Vector drawing focuses on the creation of individual illustrations or designs, while vector graphics encompass a broader range of digital images, including logos, icons, and typography.
Tools for Vector Drawing
There are several software options available for vector drawing, each with its own set of features and capabilities. Popular choices include Adobe Illustrator, CorelDRAW, and Inkscape. These tools offer a wide range of tools and functionalities, allowing designers to create intricate illustrations with ease.
Tips for Creating Vector Drawings
Creating vector drawings requires both technical skill and creative vision. To achieve the best results, designers should follow some key tips and best practices. This includes using layers to organize elements, mastering the pen tool for precise shapes, and experimenting with different brush styles and effects.
Examples of Vector Drawing in Design
Vector drawing finds applications across various design disciplines, from illustrations and icons to logos and typography. Illustrators use vector drawing to create intricate artworks, while graphic designers rely on it for branding and identity design. Logos, in particular, benefit from the scalability and versatility of vector graphics.
Understanding Vector Graphic Formats
Vector graphics are typically saved in specific file formats that preserve their scalability and editability. Common formats include SVG (Scalable Vector Graphics), AI (Adobe Illustrator), and EPS (Encapsulated PostScript). These formats are widely supported by design software and are ideal for printing and web use.
Advantages of Vector Graphics in Web Design
In the realm of web design, vector graphics offer several advantages over raster graphics. Their scalability ensures that images remain crisp and clear across different screen sizes and resolutions. Additionally, vector graphics have smaller file sizes compared to raster graphics, resulting in faster loading times and improved website performance.
Challenges and Limitations of Vector Graphics
While vector graphics offer many benefits, they also come with their own set of challenges and limitations. Detailed illustrations with complex shading and textures can be difficult to achieve with vectors, as they are best suited for simple shapes and clean lines. Additionally, mastering vector-based software can be challenging for beginners, requiring time and practice to fully understand.
Future Trends in Vector Drawing and Graphics
Looking ahead, the future of vector drawing and graphics looks promising. Advances in technology, such as machine learning and augmented reality, are opening up new possibilities for creative expression. Integration with other design processes, such as 3D modelling and animation, is also becoming increasingly seamless, allowing designers to create more immersive and interactive experiences.
Conclusion
Vectors, vector drawing, and vector graphics are indispensable tools in the world of visual design. From illustrations and logos to web graphics and typography, vectors offer unparalleled versatility and scalability. By understanding the principles of vector-based design and mastering the necessary tools and techniques, designers can unleash their creativity and bring their ideas to life.
0 notes
Text
Canva pro lifetime Access
In today's digital age, having access to powerful design tools is essential for individuals and businesses alike. Canva Pro Lifetime offers an incredible opportunity to unlock a world of creativity at an unbeatable price. Let's explore what Canva Pro Lifetime has to offer and how you can make the most of this exceptional tool.

BUY NOW - Canva pro lifetime access $2.5 only
Understanding Canva Pro Lifetime
Canva Pro Lifetime is not just your average design software; it's a comprehensive platform that empowers users to create stunning visuals with ease. With a wide range of features and benefits, Canva Pro Lifetime is revolutionizing the way people approach design.
Features and Benefits
Canva Pro Lifetime boasts an extensive array of features designed to streamline the design process and elevate your creations to new heights. From customizable templates to advanced editing tools, here are some key features and benefits:
Template Library: Access thousands of professionally designed templates for various purposes, including social media graphics, presentations, and marketing materials.
Advanced Editing Tools: Fine-tune your designs with advanced editing options such as layers, transparency, and image effects.
Collaboration: Seamlessly collaborate with team members in real-time, allowing for efficient workflow and idea sharing.
Brand Kit: Maintain brand consistency with the Brand Kit feature, which allows you to store logos, colors, and fonts for easy access.
Priority Support: Enjoy priority customer support, ensuring that any issues or concerns are addressed promptly and effectively.
How to Get Canva Pro Lifetime
Getting started with Canva Pro Lifetime is quick and easy. Simply follow these steps to unlock a lifetime of creative possibilities:
Subscription Plans
Choose from a variety of subscription plans, including monthly or annual options, to suit your budget and needs.
Pricing Options
For a limited time, Canva Pro Lifetime is available for a one-time payment of just $2.5. That's right – for less than the price of a cup of coffee, you can enjoy lifetime access to premium design features.
Subscription Offers
Take advantage of special subscription offers and discounts to maximize your savings and get the most out of your Canva Pro Lifetime experience.
Canva Pro Lifetime vs Competitors
While there are many design tools on the market, Canva Pro Lifetime stands out for its affordability, ease of use, and extensive feature set. Compared to competitors, Canva Pro Lifetime offers unparalleled value for money and a user-friendly interface that caters to both beginners and experienced designers.
Tips for Using Canva Pro Lifetime
To make the most of your Canva Pro Lifetime subscription, here are some tips to help you unleash your creativity:
Experiment with different templates and design styles to find what works best for you.
Take advantage of Canva's extensive library of fonts, images, and graphics to personalize your designs.
Collaborate with colleagues or clients to brainstorm ideas and iterate on designs in real-time.
Stay up-to-date with the latest features and updates by following Canva on social media and joining their community forums.
Creative Possibilities
With Canva Pro Lifetime, the only limit is your imagination. Whether you're creating social media graphics, presentations, or marketing materials, Canva Pro Lifetime provides you with the tools and resources you need to bring your ideas to life.
Conclusion
In conclusion, Canva Pro Lifetime is a game-changer for anyone looking to unleash their creativity and elevate their design skills. With its affordable pricing, extensive feature set, and user-friendly interface, Canva Pro Lifetime is the ultimate design tool for individuals and businesses alike.
FAQs
Is Canva Pro Lifetime suitable for beginners? Absolutely! Canva Pro Lifetime is designed to be user-friendly and accessible to users of all skill levels.
Can I cancel my subscription at any time? Yes, you can cancel your Canva Pro Lifetime subscription at any time.
Are there any hidden fees or charges? No, Canva Pro Lifetime is available for a one-time payment of $2.5 with no additional fees.
Can I collaborate with others on Canva Pro Lifetime? Yes, Canva Pro Lifetime allows for seamless collaboration with team members and clients.
What types of designs can I create with Canva Pro Lifetime? With Canva Pro Lifetime, you can create a wide range of designs, including social media graphics, presentations, posters, and more.
0 notes
Text
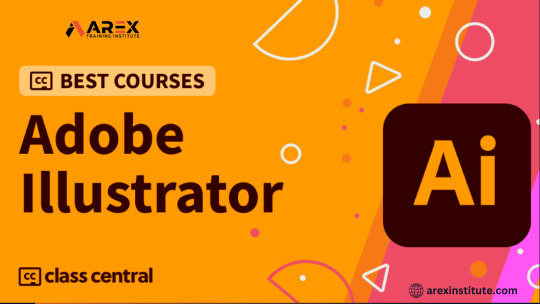
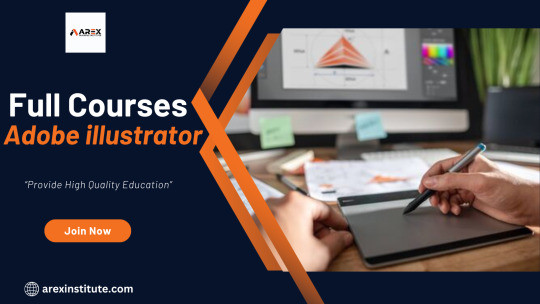
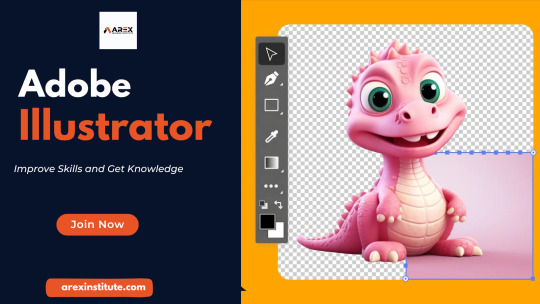
Adobe Illustrator Classes in Rajkot - Illustrator Course in Rajkot with Affordable Fees
Adobe Illustrator Classes in Rajkot - Illustrator Course in Rajkot with Affordable Fees
Hey! Are you finding an Illustrator course in Rajkot? Then you are at the right place, Arex Institute is best for learning illustrator software at reasonable prices. Our Institute provides high quality education and all types of facilities. We offer complete training in various software to achieve your goal and get the best job opportunity in the graphic design field.
Nowadays Adobe Illustrator Classes in Rajkot is a very popular software for design with influential features to help you create logos, icons, business cards, and many more. It’s very easy to create, we teach basic theory also practical bases, so you will learn easily and smoothly the concept of the software tools used. After learning you can create professional logos, brochures, and many more you will create by your own ideas.
Illustrator Classes in Rajkot are useful for learning full course, in another institute fees are very costly compared to our institute. We give the best facilities at affordable prices. After learning Illustrator, we give a certificate as well as top job placement. You can get knowledge, skills, and an advanced level of editing with the help of our institute.
Our institute supplies a full Illustrator Course in Rajkot and also provides modern facilities, illustrator is very easy to learn and we start the course with beginner to advanced level editing. In illustration, there are more than 80 tools to customize those tools. The five most influential tools in Adobe Illustrator help to create artwork are:
1. Pen Tool
2. Shape Tool
3. Shape Builder Tool
4. Type Tool
5. Direct Selection Tool
If you want to be a Professional graphic designer you must know about Adobe Illustrator. Adobe Illustrator has six different types of tools which are Type, Type Area, Type on a Path, Vertical Type Vertical Area Type, and Vertical Type on a Path.
Our institute is best for learning graphic design courses in Rajkot, the teacher is explaining deeply about Illustrator software, also they are friendly. We teach theory and practicals so students can understand easily and get an idea about the tools, which are important. If you want to learn professional graphic design then join us now at Arex Institute, we give the best high level education. The newest version of the illustration is version 28.3 which was released in Feb 2024 the Illustrator CC and Illustrator CS6 both are best for Illustration Version. The Illustrator CC version uses new cloud technology, and the designers use multiple programs for design projects. Nowadays Adobe CC is the most used version.
In our institute many students are joined like 120+ and learn full graphic design trained, also get the best job placement around 110+ from our institute. After completing course, you will get a certificate and a 100% guarantee, we provide job placement. So, stop searching and joint Adobe Illustrator Classes in Rajkot, because our institute is the No. 1 for learning advanced technology full courses at affordable prices.
0 notes
Text
Best Graphic Designing Training Course in Chandigarh
What is Graphic Designing. Role of Graphic Designing in Modern World.
Graphic Designing Training Course in Chandigarh
Graphic Designing is a creative and visual communication discipline that involves the art and skill of combining text and images to convey messages or ideas. Graphic designers use various elements, such as typography, color, layout, and imagery, to create visually appealing and effective designs. These designs can be used in a wide range of mediums, including advertisements, posters, websites, logos, packaging, and more.
Role of Graphic Designing in modern World.
In the modern world, graphic design plays a significant and multifaceted role across various industries and aspects of our daily lives:
Branding and Marketing: Graphic design is integral to branding. Logos, marketing materials, and advertisements are all created by graphic designers. Effective design helps companies establish a unique identity and attract customers.
Web Design: Websites are a primary point of interaction for businesses and individuals. Graphic Designers are responsible for creating visually appealing, use friendly web interfaces.
Print Media: From magazines and newspapers to brochures and posters, graphic design enhances the visual appeal and readability of printed materials.
Entertainment and Gaming: Graphic design plays a crucial role in the entertainment industry, including movie posters, video game graphics, and special effects.
Education: Educational materials, textbooks, and e-learning platforms all rely on graphic design to make content engaging and informative.
Graphic designers use a variety of tools and software to create visual content. Here are some of the essential tools and software used in graphic design:
Tools and Software in Graphic Designing
Adobe Creative Cloud: Adobe's suite of design software is a staple in the industry. It includes Photoshop (for image editing and manipulation), Illustrator (for vector graphics), InDesign (for page layout), and more.
Corel DRAW: This vector graphics editor is an alternative to Adobe illustrator, often used for logo design and vector-based illustrations.
Canva: A web-based design tool with templates for various design projects, making it accessible to beginners and non-designers.
Sketch: Popular among UI/UX designers, Sketch is used for creating user interfaces and web design.
QuarkXPress: Used for page layout and design, particularly in the publishing industry.
Same Best Institute for Graphic Designing Training Course in Chandigarh
Excellence Technology:
About.
Excellence Technology Chandigarh offers Best Graphic Designing Course Training in Chandigarh. Those who have Graphic Designing . As Graphic Designing is growing in now days. We provide Best Graphic Designing Training in Chandigarh, Panchkula and Mohali.
Contact No. +91 9317788822
Extech Digital:
About.
Extech Digital is best for PHP training in Chandigarh which gives you the facility of doing PHP training in Chandigarh , programming languages, web designing courses , coding languages, digital marketing courses ETC .
Contact No. - +91 87280 81563
Excellence Academy:
About.
Excellence academy is a best institute for PHP training in Chandigarh which also gives all the facility that a PHP trainer wants. It also provides these courses in Hamirpur and Kangra also. excellence-academy
Contact No.- +91 9317788822
FOR A BRIGHT FUTURE YOU SHOULD MUST JOIN EXCELLENCE TECHNOLOGY IN CHANDIGARH
I am GauravSaru form Mandi (H.P)
0 notes
Text
Mastering CorelDRAW: A Beginner's Guide to Navigating the Basics
Are you a newcomer to the world of graphic design, tentatively dipping your toes into the vast expanse of CorelDRAW? If so, fear not, for you've stumbled upon just the right guide to set you on the path to proficiency. In this article, we'll embark on a journey through the fundamental features of CorelDRAW, ensuring that you not only understand the layout of the software but also gain insight into its essential functions.
Before we delve into the nitty-gritty, make sure to hit that subscribe button to stay updated with all the latest tutorials and tips. Now, let's dive straight into business.
Welcome to CorelDRAW! As you launch the software, the first thing that greets you is the user interface. Familiarizing yourself with this interface is key to navigating CorelDRAW efficiently. Let's break it down:
Menu Bar: This is your control center, housing various dropdown menus such as File, Edit, View, Layout, Object, Effect, Bitmap, Text, Table, Tools, Window, and Help.
Standard Bar: Next in line, the Standard Bar provides quick access to commonly used tools and functions.
Property Bar: Situated conveniently below the Standard Bar, the Property Bar displays contextual options and settings based on the selected tool or object.
Tools Bar: Located to the left of the workspace, the Tools Bar is where you'll find an array of tools for creating and editing your designs.
Status Bar: Lastly, at the bottom of the interface, the Status Bar offers valuable information and updates on your current workspace and tasks.
Now, let's shift our focus to the right side of the interface:
Color Palettes: Here lies a spectrum of colors, ready to breathe life into your creations.
Workspace: The blank canvas before you is your workspace, where imagination meets reality.
Now that we've acquainted ourselves with the layout, let's explore some essential functions:
File Menu: Starting with the basics, the File menu offers options such as New (Ctrl + N) for creating a new document. Customize your document settings, including page size, orientation, and color mode, to suit your project requirements.
Page Sizing and Resolution: Select from a range of standard page sizes or customize your dimensions. Ensure optimal resolution for high-quality output, typically set at 300 DPI (dots per inch).
Color Modes: Choose between CMYK and RGB color modes depending on your intended output, whether for print or digital media.
Orientation: Decide between landscape and portrait orientations to best showcase your designs.
Resolution: Maintain a high resolution (300 DPI) for crisp and clear images, especially for print projects.
By mastering these fundamental functions, you're well on your way to unleashing your creativity within the realm of CorelDRAW. Remember, practice makes perfect, so don't hesitate to experiment and explore the myriad possibilities that this powerful software offers.
Stay tuned for more tutorials and advanced tips to elevate your CorelDRAW skills to new heights. Until next time, happy designing!
🌸 Attention all creatives and designers! 🌸
Are you ready to take your designs to the next level? I've got something special just for you: a collection of over 1000+ beautifully crafted floral elements in CorelDRAW format, absolutely FREE! 🎨💐
Imagine the endless possibilities: use them to enhance your logos, create stunning graphics, or add a touch of elegance to your projects. These florals are versatile, customizable, and ready to elevate your designs to new heights.
But here's the catch: to get your hands on this exclusive collection, all you need to do is subscribe to my channel, give this post a like, and share it with your fellow designers. It's that simple!
Don't miss out on this incredible opportunity to supercharge your creativity. Subscribe, like, and share now to unlock your access to over 100 florals in CorelDRAW format. Let's blossom together! 🌼✨ #DesignInspiration #FreebieAlert #CreativeCommunity
Get over 1000+ beautifully crafted floral elements in CorelDRAW format, absolutely FREE!
1 note
·
View note
Text
Visionize Ai Review – Canva And Photoshop Killer
Hey I’m Inzamul, Welcome to my Visionize Ai Review – Canva And Photoshop Killer.
Say Goodbye To Hiring Designers, Artists, Video Editors, Or Using Expensive Apps… This New AI Model Is A Canva Killer…. No-Experience AI App Allows Us To Generate Stunning AI Animated videos, Ai Cartoon Images & Videos, 4K HD Images, Instagram Posts & Reels, Facebook & YT Videos, AI Drawing & Images, Ai Sketch Images, Ai Cinematic Pictures, Story Telling Images & Videos, AI Logos & Graphics
Table of Contents
Visionize AI Review- The Overview
Creator: Pranshu Gupta
Product: Visionize Ai
Date Of Launch: 2024-Feb-09
Time Of Launch: 10:00 EDT
Front-End Price: $17
Refund: YES, 30 Days Money-Back Guarantee
Product Type: Software (online)
Support: Effective Response
Discount : >> GET THE BEST DISCOUNT HERE <<
Recommended: Highly Recommended
Skill Level Needed: All Levels
Coupon Code: “Visionize” $3 discount
The Features Of This Software
Click Here to Get Instant Access of Visionize AI Right Now >>
Generative AI: Utilizes 2nd generation generative AI for creating visuals like images, logos, banners, videos, animations, 3D models, infographics, and more.
Unrestricted Access: Provides unrestricted access to AI capabilities without monthly payments.
Wide Compatibility: Works across various devices including desktops, laptops, smartphones, and tablets.
Keyword or Voice Input: Allows input via keywords or voice commands, similar to virtual assistants like Siri.
Fast Generation: Quickly generates visuals within seconds using AI algorithms.
Commercial License: Includes a free commercial license, enabling users to sell generated visuals.
Marketplace Integration: Facilitates selling visuals on an integrated marketplace with millions of active buyers.
Mobile Edition: Offers a mobile edition for operating VisionizeAi on smartphones or tablets.
Comprehensive Training: Provides detailed training videos covering all aspects of the software.
World-Class Support: Offers reliable support to assist users with any issues or queries.
Graphics Generator AI: Generates graphics with a single click without the need for additional software.
Content Generator AI: Creates realistic images surpassing previous AI models.
Videos Generator AI: Produces videos without recording or editing, enhancing video marketing efforts.
Mobile Optimizer: Optimizes visuals for mobile devices, ensuring compatibility and performance.
Traffic Generation: Includes built-in features to drive traffic to generated visuals.
Advanced Editing: Offers features for reconstructing, inpainting, and colorizing images.
Logo Design: Enables users to design logos, banners, business cards, and other branding materials.
User-Friendly Interface: Designed to be beginner-friendly, requiring no prior experience.
Money-Back Guarantee: Backed by a 30-day money-back guarantee for customer satisfaction.
Bonus Package: Provides additional bonuses including special training, mascot characters, infographic guides, video marketing graphics, and 3D icon maker packs.
Visionize Ai Review – Canva And Photoshop Killer more info
Generate AI Images
Generate ANY Logo & Graphic
Generate Sketches & Drawings
Generate AI Videos
Generate AI Animation
Generate 3D Designs
Generate Instagram & Facebook Reels
Generate YouTube Shorts
Generate 4k HD Images
Reconstruct Images
Image Colorization
AI Images Inpainting
AI Image Denoising
AI Images Recogninzation
AI Images Synthesis
AI Cartoon Generator
AI Background Eraser
AI Image Filters
Free Commercial License
30 Days Money-Back Guarantee
How Does It Work?

Visionize Ai Review: Who Should Use It?
Click Here to Get Instant Access of Visionize AI Right Now >>
Affiliate Marketers: Those in the affiliate marketing space can use VisionizeAi to create compelling visuals for their promotional efforts, such as banners, social media graphics, and product images.
CPA Marketers: Cost Per Action (CPA) marketers can leverage VisionizeAi to design eye-catching creatives for their campaigns, increasing engagement and conversion rates.
Blog Owners: Bloggers can use VisionizeAi to enhance their content with visually appealing images, infographics, and videos, making their posts more engaging and shareable.
Product Creators: Individuals or businesses creating digital or physical products can utilize VisionizeAi to design product packaging, logos, branding materials, and promotional videos.
E-commerce Store Owners: Owners of online stores can benefit from VisionizeAi by creating high-quality product images, videos, and advertisements to showcase their merchandise and attract customers.
Local Business Owners: Small businesses can use VisionizeAi to create professional graphics for their websites, social media profiles, advertisements, and promotional materials without the need for expensive design software or hiring a graphic designer.
Agency Owners: Marketing agencies can incorporate VisionizeAi into their service offerings, providing clients with visually appealing content for their digital marketing campaigns, social media channels, and websites.
Visionize Ai Review: Who Should Use It?
There are several reasons why you might consider using the VisionizeAi app:
Ease of Use: VisionizeAi boasts an intuitive interface that allows users to generate various types of visuals with just a few clicks. Even those with little to no design experience can create professional-looking graphics, videos, logos, banners, and more.
Time-Saving: With VisionizeAi’s AI-powered capabilities, you can significantly reduce the time spent on creating visuals for your projects. Instead of manually designing each element, you can quickly generate high-quality images, videos, animations, and 3D models in seconds.
Versatility: Whether you’re an affiliate marketer, blogger, e-commerce store owner, or agency owner, VisionizeAi offers a wide range of features and functionalities to meet your visual content needs. From social media graphics to product images to video ads, VisionizeAi can handle it all.
Cost-Effective: Unlike many other design tools that require a monthly subscription fee, VisionizeAi offers a one-time payment option, giving you unlimited and unrestricted access to its features without any recurring costs. This can save you money in the long run, especially if you’re on a tight budget.
Commercial License: VisionizeAi comes with a free commercial license, allowing you to sell the visuals you create to clients or on the built-in marketplace. This opens up opportunities for freelancers, agencies, and entrepreneurs to monetize their design skills and generate additional income.
Cutting-Edge Technology: VisionizeAi leverages 2nd generation generative AI technology, making it one of the most advanced visual content creation tools on the market. With features like AI graphics generation, content creation, video editing, and more, VisionizeAi stays ahead of the curve in terms of innovation.
Overall, if you’re looking for a user-friendly, time-saving, versatile, cost-effective, and technologically advanced solution for your visual content needs, VisionizeAi could be an excellent choice for you.
What’s The Cost?

Frequently Asked Questions
Here are some frequently asked questions about VisionizeAi:
Do I need any experience to get started?
No, you don’t need any prior experience to use VisionizeAi. It’s designed to be user-friendly, and all you need is an internet connection to access its features.
Is there any monthly cost?
If you purchase VisionizeAi now, there is no monthly cost. However, the pricing model may change in the future, and there could be a monthly subscription fee if you wait to purchase it later.
How long does it take to make money?
While results may vary, some users have reported making their first sale on the same day they started using VisionizeAi. However, individual results may depend on various factors such as marketing efforts and niche selection.
Do I need to purchase anything else for it to work?
No, VisionizeAi is a complete solution that provides everything you need to create visual content. There are no additional purchases required to make it work.
What if I fail?
VisionizeAi offers a money-back guarantee to mitigate any risk for users. If you try the app and don’t achieve the desired results, you can request a refund, and the company may even offer additional compensation as a gesture of goodwill.
How can I get started?
To get started with VisionizeAi, simply click on any of the buy buttons on the website or promotional materials. Once you’ve made your purchase, you’ll receive access to the app and can begin using its features to create visual content.
Where can I get support if I have questions or issues?
If you have any questions or encounter any issues while using VisionizeAi, you can reach out to the support team via email at [email protected]. They should be able to assist you with any inquiries or technical difficulties you may have.
Click Here to Get Instant Access of Visionize AI Right Now >>
These FAQs should provide you with a better understanding of VisionizeAi and its features, pricing, and support options. If you have any other questions, feel free to reach out to the VisionizeAi team for assistance.
Thank for read my full review article, Visionize Ai Review – Canva And Photoshop Killer
Visionize Ai Review – Canva And Photoshop Killer
Affiliate Disclaimer :
Some of the links in this article may be affiliate links, which means I receive a small commission at NO ADDITIONAL cost to you if you decide to purchase something. While we receive affiliate compensation for reviews / promotions on this article, we always offer honest opinions, users experiences and real views related to the product or service itself. Our goal is to help readers make the best purchasing decisions, however, the testimonies and opinions expressed are ours only. As always you should do your own thoughts to verify any claims, results and stats before making any kind of purchase. Clicking links or purchasing products recommended in this article may generate income for this product from affiliate commissions and you should assume we are compensated for any purchases you make. We review products and services you might find interesting. If you purchase them, we might get a share of the commission from the sale from our partners. This does not drive our decision as to whether or not a product is featured or recommended.
#VisionizeAi#AItechnology#GenerativeAI#ArtificialIntelligence#VisualGeneration#GraphicDesign#VideoCreation#DigitalMarketing#ContentCreation#OnlineBusiness#AffiliateMarketing#CPAMarketing#BlogOwners#ProductCreators#eCommerce#LocalBusinesses#AgencyOwners#Entrepreneurship#TechInnovation#DigitalArt#MobileOptimization#MarketplaceSelling#OnlineMarketplace#SmallBusinessOwners#SocialMediaMarketing#BrandIdentity#GraphicDesignTools#VisualContent#ContentMarketing#VideoMarketing
0 notes
Last Seen Blogs

q2602
I should not be wasting time on tumblr

scienceandfandoms
Despite everything, I still post
astraldrake
A product of my own twisted ambition


vedantanetralyagzb
Vedanta Netralya