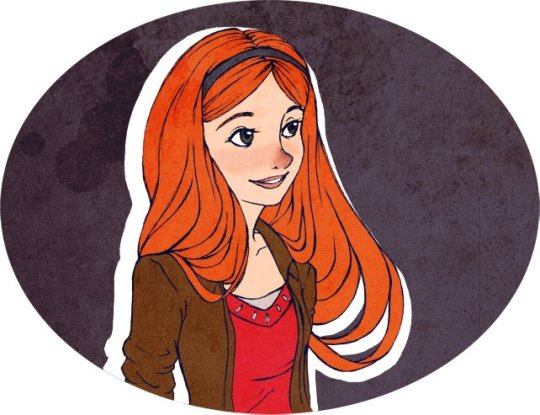
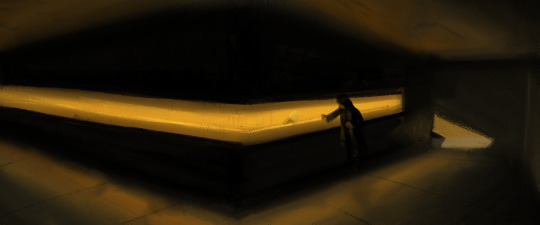
#an experiment with coloring in a more traditional looking way with digital tools!!!
Text

⋆*❁*⋆ฺ。*
#wip#lauriam#mi arte#an experiment with coloring in a more traditional looking way with digital tools!!!
98 notes
·
View notes
Note
What program do you use to make your fanart? Is it on just an average ipad or is there special ones just for art? Your work looks so good! I’m wanting to try digital art but unsure where to start :)

I use the Procreate app for all of my digital art! ✨
It should be available on any iPad 💗 I personally invested for my birthday this past year and I have the 12.9" M2 iPad Pro, but I'll even occasionally use my fiancé's iPad Mini and the Procreate app on there in a pinch since it's so small and portable~
The only real difference is that performance might suffer a bit, the larger an art piece is or how many layers your work has, depending on the iPad. But if you're just starting out, I probably wouldn't find that to be much of an issue!
(More rambling about digital art origins under cut ✨)
There's definitely a learning curve, especially if you're more used to drawing traditionally! It can help to still sketch traditionally (if that's what you're used to) and then upload a photo of your drawing to your tablet to work over digitally (this is personally how I started out and I used to just make little digital doodles by tracing and coloring over my traditional sketches.)
A small doodle from my sketchbook that I traced and colored digitally, from around 2011-2012, I think? Uh, happy Doctor Who day today!
My very first digital art set up was actually a tiny Wacom Bamboo tablet where the drawing space probably wasn't even bigger than my hand, and a super old bootleg version of Photoshop CS2 which was already a version that was 7 years too old for the time (CS5/CS6 was the most updated version by the time I had started on digital art).
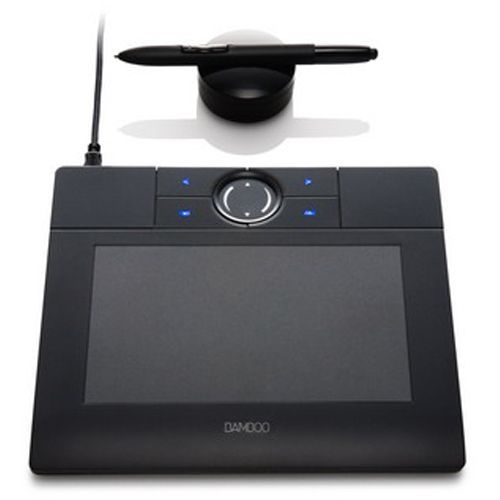
Everyone else in my class had the bigger/fancier/professional-grade Wacom Intuos and I remember my professor taking one look at my baby tablet and just going like "how tf are you drawing on that" lmao.
But still! Experimenting and doing little exercises can get you a long way – I would say to approach it with similar exercises you would do as if you were learning to draw traditionally for the first time.
Shade in circles/nail down basic lighting. Gesture drawings. Random scribbles. Just things that help you get used to the feel of digital art!
Test out different textures you can achieve with one brush, then expand it to see how other different types of brushes can behave and add to the experience.
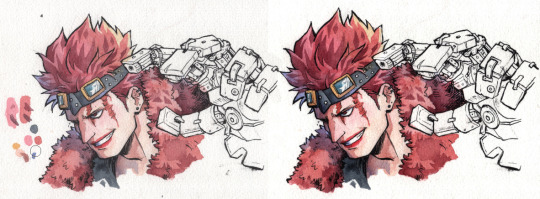
For proof that even just one brush and not the best/most updated tools can work: these are two of my first more "serious" digital art projects I did in college (with my tiny tablet and mega outdated version of Photoshop) and 99% of the rendering was just done with the "soft airbrush" brush.

But even then, we were taught to create our base sketches traditionally and upload them to the program to work over.
Then one day I decided I wanted to just be able to also do all my sketches digitally and just worked on getting used to sketching straight on my digital program. It was then that besides the all-powerful undo-redo buttons, I started to really make use of the transform/canvas flip/liquify features which I don't think I can live without now lol.
(Caveat: I'm now a little too dependent on those features so I keep a traditional sketchbook to do silly doodles in occasionally to exercise my hand because sketching traditionally without the buffer of those digital tools is pretty difficult for me now lol.)
That was a little long-winded, I'm so sorry hahaha. I hope something in this rambling could be taken as somewhat helpful for starting out on digital art!! 💗
34 notes
·
View notes
Note
heyyy I'm new to digital art, would you mind sharing some tips regarding programs and tutorials and etc? also on how to turn a real life piece into a beautiful and clean digital piece... really love your art
oh good luck with your art journey!
my experience with digital art is pretty dated (as in a decade + levels dated) and i might be too out of touch to give beginner tips but regardless, allow me to attempt
Programs: it would help to know which hardware you have for digital but ill put down some i have experience in
1. Clip Studio Paint Pro - PC/Android/ipad/everywhere i think? unfortunately they betrayed humankind and its now a subscription everywhere but on PC. i bought a one-time license years years years ago on sale and its probably the best available on my end. I also got it on subscription on android so i can sync works between my PC and tablet. its very flexible in a way that you can draw with it in the most basic way single layer sketches or whatever but they have so many features and keep adding more.
2. procreate - ipad only
never been an apple user but my friend is, and he's been a procreate user forever. he recently tried CSP on ipad though and he still claims he likes procreate better for ease of use and compatibility with tablet ergonomics and apple pen
3. medibang paint - pc/android/ipad
free forever. and out of all the free programs i recommended my other digital art newbie friend this is what he liked best.
4. adobe photoshop - dont even look at this the only reason i have one is im leeching off company license. its still unfortunately the industry standard tho but CSP is much cheaper and has the same controls and most of the basic functions
5. Paint Tool SAI - my first art program but i haven't tried it again. honestly still think this has the best brush flexibility and pen pressure control
-----
As for tutorials, i find digital art has such a steep and high skill ceiling and its a challenge im still tackling and probably will forever tackle haha. I'm trying to osmosis painting techniques from splash art painters from League of Legends who most of them post complete timelapses (my favorite being Bo Chen) where you can study not just their techniques but like, art directions that make their pieces striking.
Anyway, I also promised a friend I would make a simple coloring tutorial so maybe after inktober hustle, I would look for a piece there I'd use for the guide.
----
Traditional to digital is never a satisfactory process to me but if you can, invest on a scanner. I use an epson v39, had it for years.
scanned vs edited. the goal is to at least get the white of the paper as white as possible and the blacks the blackest, without whitewashing/burning the rest of the colors. Level correction function is your best friend here and most art programs have that.
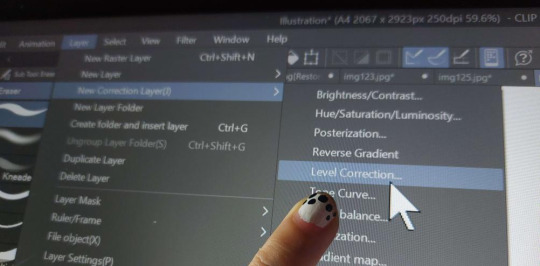
Then i just clean dust and errors and slide the contrasts around until it looks as close to the original piece
If you have a decent phone camera, you can get away just posting instagram aesthetic pics with materials framing it or smth and just edit as usual. natural light tends to be a lot more forgiving than the harsh light of scanners anyway.

Anyway I hope this helps and have fun learning!
#granpa voice: back in my day we didnt have phones or tablets capable of drawing#we had to use dodge and burn on pirated photoshop apps using a mouse on the family computer#i think i also started digitals a bit late in life so unlike younger millenials and gen Zs its not easy as second nature to me#compared to traditional mediums at least
29 notes
·
View notes
Note
hello! I'm someone who has become incredibly obsessed with Greenteacup's Lionheart, and necessarily, your beautiful artwork as well. i'm so impressed by your artistic abilities -- how do you make the art that you do? what do you use to make your art? any tips for a beginner artist? I don't know how to make digital art but i have an old watercolor set you've inspired me to take advantage of... thank you so much!
Hi!
First of all, that is so incredibly sweet. I’m glad I can be a part of the fandom circle of life where art inspires art inspires art and so on.
In response to your question, if you’ll pardon the trite answer but it’s all just practice. I’ve been drawing and doodling since I was about 6 or 7, and I’m in my 30s now. Over that amount of time you just naturally start to amass some skills, plus I’ve got a fine arts degree so I’ve had some actual specific training. (On traditional art, not digital. Procreate scares me.) I’ve only been doing digital art for about the past year or so, before that I was strictly a pen and paper sort of girl. I try to do at least one new thing each time I break out the ol’ iPad so I’m continuously learning.
That said, here are some thoughts I have about starting out on your Art Journey ™
If you’re just starting it’s always easier to work from a base instead of just your imagination. Translating what’s in your head to paper is HARD, and unless you’re somehow a magical wizard it’ll get more frustrating than it’s worth. Find a picture, go outside and look around, go to a museum and just do your best to notice shapes/ shadows / details. Trace the broad strokes if you have to (provided it’s not someone else’s work of course) I’ll stitch references together in a creepy collage sometimes before I get a pose I like (a hand from here, a fabric lay from there) - transfer paper is your friend. I’d also recommend starting to learn about shadow and shapes from inanimate objects rather than human figures, they’re less complex.
Find a medium that you like that doesn’t frustrate you. You could not pay me to work in pastels. Watercolors are HARD to work with, just based on personal experience so if you’re just starting and you want your art to look specific and detailed, watercolors are hard to control. Start with a pencil or a pen and go from there, then start adding in colors second. Me personally, I love a good fine tip pen, calligraphy pen, and the digital airbrush tools. If you want to do watercolors, masking fluid is a super valuable tool!
After you doodle a little bit, you’ll start to notice things that come easier to you and things that are harder. I personally loooove organic lines which is why I draw hair so often and I hate straight lines which is why I rarely draw backgrounds. Lean into what you’re good at!
Rather than trying to get a solid perfect line and/or erasing over and over again, do a lot of smaller lines and keep it sketchy, I find it’s a lot easier to control shapes that way. If I’m drawing a circle, I do it in 15-20 tiny strokes rather than all in one fell swoop.
This is just me personally, but I like to work dark to light - so for example, if I’m drawing Hermiones hair, I’ll start with a dark brown then add in the highlights after. However - that’s only useful in certain mediums (digital) so if you’re working with pencil or paint, reverse it.
I literally used to try and recreate old Disney concept art from the hand drawn movies as practice. That’s a great study in line thickness and movement. Jin Kim and Glen Kane are my faves.
You’ll have more drafts than finished copies. I have so so so many old sketchbooks and abandoned drawings that just didn’t hit the way I wanted them to. That’s okay!!
So, tools. I use my iPad and Apple Pencil and I honestly only work in the sketchbook app. I will move to procreate eventually buuuut no rush. For traditional art, any pencil and paper will do but if you want to get fancy, get a basic drawing kit with different hardness of pencils, a kneadable eraser, cold pressed paper, and a blending tool. If you’re working with watercolor, there’s special paper that’s made for watercolor and printer paper will absorb a lot of the water and warp a bit. (Again, that’s okay! Just something to be aware of) if you’re working with water based paint, painters tape and masking fluid have saved my butt many a time in the past.
Okay wow that was a very long winded answer thank you if you made it to the end of this absolute novel.
Have fun, enjoy the process and don’t get discouraged along the way. Art doesn’t have to be “good” to be important.
#aprilshowersasks#sketch#drawing class is in session#the flashbacks this gave me to undergrad were sudden and vivid
3 notes
·
View notes
Text
Exploring the Intersection of Art and Design
Art and design are two powerful forms of human expression that intersect in fascinating ways, shaping our world and influencing how we perceive it. While art is often seen as a means of personal or cultural expression, design is more about problem-solving and functionality. However, the boundaries between the two are not always clear-cut, and they often blend together to create captivating experiences and innovative solutions.
At its core, art is about creativity and imagination. It encompasses a wide range of mediums, from traditional painting and sculpture to digital art and multimedia installations. Artists use their unique perspectives to evoke emotions, provoke thought, and challenge conventions. Art has the ability to transcend language and cultural barriers, speaking to universal themes and emotions that resonate with people from different backgrounds.
On the other hand, design is about intentionality and purpose. Designers apply artistic principles to create products, environments, and experiences that are not only visually appealing but also functional and user-friendly. Whether it's designing a logo, crafting a user interface, or planning a space, designers carefully consider the needs and preferences of their audience while infusing their work with creativity and aesthetics.
One of the most exciting aspects of the intersection between art and design is how they inspire each other. Artists often draw inspiration from design concepts, incorporating elements of typography, layout, and color theory into their work. Likewise, designers look to art for new ideas and perspectives, infusing their designs with artistic flair and creativity.
In today's digital age, the boundaries between art and design are becoming increasingly blurred. Digital artists harness the power of technology to create immersive experiences, interactive installations, and groundbreaking visual effects. Meanwhile, designers leverage digital tools to prototype ideas, collaborate with teams, and iterate on designs quickly and efficiently.
Ultimately, both art and design play crucial roles in shaping our world and enriching our lives. Whether we're admiring a stunning piece of artwork in a museum or interacting with a beautifully designed app on our devices, we're constantly surrounded by the creative output of artists and designers. By embracing the intersection of art and design, we can unlock new possibilities, spark meaningful conversations, and inspire positive change in our society.
#Art#Design#Creativity#Imagination#Inspiration#Innovation#Digital Art#Multimedia#User Experience#Aesthetics#graphic designer#logo design#creative logo#graphic design#logo maker#designer#post design#post designer
4 notes
·
View notes
Text
Entry 3: Playing around with Procreate
I have always been a Photoshop person to create digital paintings, I still prefer it over the other softwares. My favorite aspect of it is the blending process. The way that the tools worked is similar to mixing colors irl, where you get the hues that are in-between the colors you’re mixing, creating new ones. The other thing is some of the brushes are designed in order to detect the angle of the pen tip and so the brush would rotate or tilt accordingly, making it able to mimic a traditional drawing tool like a pencil or a charcoal stick. In my relatively short experience with Procreate, I struggled to get the colors to blend to my liking. I absolutely hated that my only two options were either smudge the colors together or to alternate the opacity of the colors to give the ‘illusion’ of mixed hues, which they’re technically not. Adjusting the settings of the brushes felt like a solving a puzzle, it was hard to keep track of what I did or didn’t modify, and the differences in the settings were undetectable. So for the most part, I used Procreate for rough sketches only and finished the rest on Fresco.
Adobe Fresco is the equivalent of Photoshop but made specifically to be used on a tablet. It functions very similarly to how Photoshop brushes usually do. I would dare say that the smart brushes on Fresco are even better than the og software, they’re phenomenal and very fun to play around with. But sadly, recently it’s been glitching on me and those features are no longer working (it could be due to a number of factors, it could need a system update or something else. I still haven’t gotten to the bottom of it) However, something about Procreate that seemed appealing to me. For a starter, it’s a one-time purchase app, no monthly/yearly subscription shenanigans, which is always a bonus. But also, perhaps it’s the plethora of great art pieces that I see people make by using it. Some of the brush sets, blending techniques, line-works look absolutely impeccable, which piques a curious itch in my brain that makes me want to explore this app more. It can’t be this much of a lost-cause to work with, right?
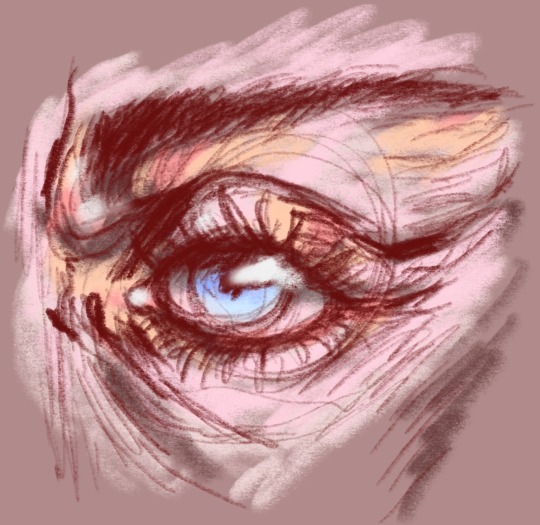
Today, I changed the pressure and smoothing settings for the pencil. I saw a blog focusing on the different variations of the pressure curves to suit your own preference, and I tweaked around until I feel like I got it to work in a manner that feels more comfortable for me. It was relatively simple, I just adjusted the physical pressure I need to use to get the maximum opacity of the strokes to about 25%. This is kinda rich coming from a heavy-handed bastard like myself lol. But with this adjustment, I am consciously using less pressure which makes sketching feel like a breeze honestly.
So I made this sketch fully aware that nothing about it makes sense, not the anatomy, nor the colors, or pretty much anything. But what I like about it is that it didn’t strain my hand, the ‘loosness’ of the sketch actually felt quick and loose, something I really appreciate. I think I’ll have more fun using Procreate after those small adjustments. My next target to tackle is definitely gonna be the brushes. but in the meantime, the current ones that I got are definitely gonna feel different now that the pressure settings are set to something completely new :)
Cece M.
090324 : 0230
💙
2 notes
·
View notes
Text
Struggling with Art: Proadhog's POV
I'm not good with titles
I've been struggling with changing from traditional art to digital for a long time. First I tried with a screenless tablet, which was a terrible experience. Look, I'm a gamer, I have a good eye-hand coordination but dear god it was so bad.
Then I got one with a screen but it still wasn't really working for me. I just couldn't do what I imagined and I got demotivated. Sometimes I tried but failed again so I put it away, pouting. Watched countless videos, tips and tricks, tried some of them but still the results were far from expected.
Then I came across 2 yt channels, which I really recommend:
Jeremy from Light Ponderings and Sam from SamDoesArt
Jeremy awakened my interest in lighting and offered useful and fun excercises where I could start without pressure. (I've figured that my problem is expecting perfection every time I try something, but that is another story). Sam is hilarious with good advices, fun to watch.
So I started with a simple excercise: draw and egg. BUT. it wasn't really about to get the shape right, but to find the colors and the lights without cheating with the eyedropper tool. It is harder than you think! Well, it was for me at least. But it was fun! I was motivated again! And I did some more studies!

Yeah, the colors are muted, the edges aren't so crisp, but I did something and I enjoyed. And it looked far better than my previous tries.
Life got busy and I stopped. I still collected images for later use, but every time I scrolled through them I felt they are all too complex and challanging. I had to figure out something. "Draw what you love" is an advice I heard a lot, but e.g. drawing characters is a big big no for me (at least for now).
Then I came across Blade Runner 2049, for about the 100th time, but this time I looked at it differently. I loved it already (one of my fav, that's why the 100th time), but this time I saw the mastery behind lighting and cinematography, and I thought... that's what I want to draw.
It really gave the push I needed:
- I can rewatch again for screencaps
- I can/try to draw the screencaps
- I can listen to the soundtrack while doing it
I already have a lot of images to draw but I only rewatched 20 minutes maybe? Anyway, I wanted to start with really easy things, so I don't get overwhelmed, but...

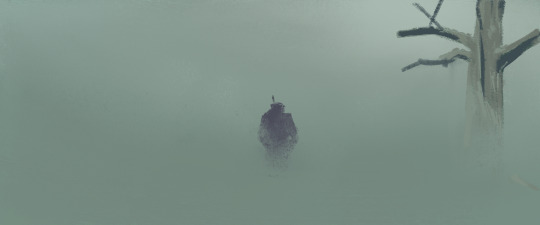
...way harder than expected. I suffered for an hour or so, I even cheated with the color of the tree (eyedropper) and I was still soooo far that I left it. BUT, this time, I had so much more to work with, the failure didn't hurt my soul that much.
Then these came:
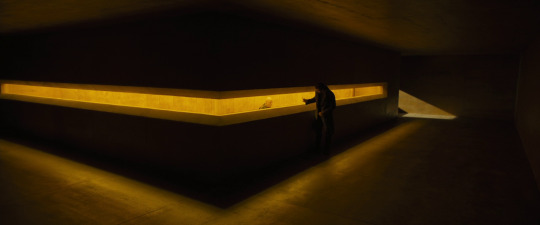

Now I see many problems with them, but I was quite happy when I finished each one. I started using hard edged brushes got a bit braver, but forgot to use sketches and it shows 😀 but the aesthetics are quite similar so it's a win for me!
Anyway, my post is about encouraging other begginers to keep working, even though it is hard sometimes and you feel you've failed with a piece. It is all about learning and having fun. Draw/paint what you really like, challange yourself but take baby steps, set achievable goals.
I don't have any technical advice other than check the yt channels above. And do sketches before you get lost in a piece :D
I wish your next piece of art to be fun and an improvement to your prevoius works! ❤️
4 notes
·
View notes
Text
Digital Witchcraft 101
When you’re researching witchcraft and Paganism, it’s easy to fall into the trap of believing that there’s One Right Way to do it. When I was a baby witch, I thought adhering to Wiccan traditions and principles was the “correct” way. My first few months of research were filled with fantasies of elaborate altars carefully arranged with God and Goddess symbols and elemental objects, high-energy rituals for the sabbats, and an emphasis on incorporating various herbs, oils, and incenses into my practice. I looked online trying to find a wand that was both beautiful and inexpensive. I wondered where in my tiny cluttered room I could set up an altar. I tried my hand at keeping a Book of Shadows and planned to fill it with all the spells and correspondences I could find.
Of course, there’s nothing wrong with these practices, and if they work for you, that’s fantastic! But it’s also important to acknowledge that magick isn’t one-size-fits-all and some methods aren’t accessible or feasible for everyone, for a variety of reasons.
Magickal tools like wands, athames, crystals, and tarot decks can be expensive, making them out of reach for witches who are unemployed or living in poverty. Ritual work tends to require a lot of focused physical and mental energy that witches with chronic illnesses and fatigue simply don’t have, as well as being time-consuming to perform. And, like myself, many witches are living in homes where it might be unsafe to reveal their craft to family members, which means that magickal tools and fancy altars aren’t an option.
Fortunately, non-traditional witchcraft is just as powerful and effective as the “traditional” stuff. (Sometimes even more so, because it allows you so much freedom to customize and figure out what works for you!) One of the most accessible and versatile tools available is digital technology. If you’ve got a computer and/or phone, there are tons of ways you can use them for your practice. Here are just a few ideas that could be useful to witches at any level of experience.
~
1. Digital Book of Shadows
I think most of us enjoy the images we see online of super-detailed grimoires and journals. The fancy leather covers, scrawling handwriting, stunning artwork, and beautiful border designs. The tables of correspondences and hand-drawn moon phase calendars. Beauty and detail like that makes people excited about witchcraft! It’s basically the bullet journal inspiration of the witchy world.
But if you’re like me, looking at those gorgeous flip-throughs on Tumblr and Instagram can also feel overwhelming. Not all of us feel great about our art skills. Not all of us have the time it takes to handwrite pages and pages of spells and lists. (My arm starts hurting after a few paragraphs of handwriting anything, to be honest.) If you have nosy or controlling housemates, a physical book might not be safe to keep. And physical grimoires can also be tougher to organize. I always worry that I’ll have something to add after a designated section is entirely full. I may be a witch, but I can’t just magickally make another blank page appear where I need it.
A digital grimoire or Book of Shadows, though? Easy to maintain.
Using a word processing program like Microsoft Word or Google Docs can make organization a breeze. As an example, I use Google Docs for storing a lot of my witchy information, split into their own sections: Correspondences, Deities, Holidays, Ideas/reminders, Journal prompts, Spells/rituals, and Tarot/divination. If you do a lot of research online, you can copy and paste relevant information into a document within seconds instead of copying it down by hand. You don’t have to worry about running out of space, either.
You can still personalize a digital version by using colorful fonts, copying and pasting pictures, and taking advantage of the templates offered by your word processor.
~
2. Digital Spellwork
One advantage of using your device in your magick is that the electricity powering it adds an extra boost of energy to your spells. I like to visualize the cord keeping my laptop charged also charging up my magick. This can be helpful for us witches who have issues with energy regulation and fatigue.
There are also countless ways you can cast spells with a computer as your tool. Some witches use social media likes and sharing to charge and cast their spells. Others use emojis to symbolize their intent. I’ve personally used my desktop background as a symbol with the intention that the spell will charge whenever I look at it. If you’re into writing magick, you can type up a quick incantation and activate it either by saving or deleting the document. If you’ve got witchy friends, you can cast and charge by messaging each other.
There are even more ideas out there that I haven’t listed. Get creative. Take a look at the built-in abilities of your device and figure out how you can harness them to focus your magick.
~
3. Digital Divination
I am, above all else, a tarot witch. I was unintentionally doing digital witchcraft long before calling myself a witch when my teenage self started using a website that gave free computer-generated tarot and rune readings. It was how I first started learning the meanings of the cards and where I first connected to tarot as a divination system.
Years later, I still take advantage of free online readings from time to time. This is especially true for moon phase readings — I can never guarantee that I’ll have the focus and motivation needed to clear off my desk, get out a deck and tarot journal, and do a full spread. Using computer-generated readings and typing my interpretations is a lot easier sometimes, particularly on days where my depression is strong.
There are plenty of other ways to use technology as a divination tool. You can use random word or writing generators for insight. Your digital music library is all you need for shufflemancy (the practice of using shuffled songs for divination). Word processors are ideal for quick-paced automatic writing sessions. Get creative and see what you can come up with.
~
4. Digital Worship
For those witchcraft practitioners who work with deities, there are plenty of ways to honor and interact with them using technology. The number one method I’ve found is the use of e-shrines. If you don’t have the space or you’re unable to be open with your practice, e-shrines are a great alternative to physical altars. All you need is a digital space where you can leave prayers and offerings.
Any social media site can house an e-shrine, but my personal favorite is Pinterest. I have an entire board dedicated to the deities I work with where each deity is given their own section. You can put anything you want on your shrine — I personally save any quotes, photos, and artwork that remind me of them. Your deities will appreciate the time you put into collecting such posts. An e-shrine also serves as a space where you can go to connect with your deities by reading or viewing things that remind you of their energy.
I know that looking at others’ elaborate methods of practice can lead to frustration and self-comparison. Even though I’ve gotten better at embracing my own unique way of making magick, I still often feel a pang of envy or inadequacy when I see those gorgeous Instagram altars packed with massive crystals, expensive tarot decks, and bundles of herbs and flowers. I sometimes worry that my magick won’t be as effective without all the traditional tools.
~
But the most important lesson I’ve seen and learned since beginning my practice is this: there is only one absolute essential you will ever need in witchcraft and that is you. Your magick comes from within. Any tools that you use in the process are simply there to help you focus your intention. That means that there’s no shame in using whatever options are available to you. If you want that added focus and your computer or your phone is all that you can or want to use, go for it. I promise your magick will be just as powerful and beautiful.
11 notes
·
View notes
Text
From Doodles to Designs: How Adobe Illustrator Became My Companion
I can still vividly recall the first time I picked up a pencil and let my imagination flow onto a blank sheet of paper. It was an act of pure creativity, guided by the simple joy of making marks and giving life to my thoughts. Those early artistic endeavors, though humble, ignited a passion that would shape my creative journey.
The Genesis of Your Design Journey
As a child, I reveled in the world of art. Crayons, markers, and coloring books were my closest allies. I cherished the moments when I could lose myself in the world of colors and shapes, creating my little masterpieces.
The turning point in my creative journey arrived when I stumbled upon Adobe Illustrator. It was like opening a door to an entirely new realm of artistic possibilities. The allure of this digital canvas was irresistible, beckoning me to explore further.
Adobe Illustrator Unveiled
To truly appreciate the role of Adobe Illustrator in my creative evolution, let’s start with a brief introduction to this powerful software. Adobe Illustrator is a vector graphics editor known for its precision, versatility, and the ability to bring imaginations to life.
However, entering this new world was not without its challenges. Navigating Adobe Illustrator as a beginner was akin to finding my way in a foreign land. The tools and interface were unfamiliar, but the excitement of what lay ahead kept me going.
From Doodles to Digital Art
Adobe Illustrator allowed me to bridge the gap between my traditional artistic roots and the digital landscape. It was a seamless transition from doodles on paper to crafting digital art that felt just as tangible.
Learning Adobe Illustrator was an adventure of its own. I scoured tutorials, devoured books, and sought guidance from fellow designers. It was a journey of trial and error, but with each endeavor, I could sense my skills growing.
The Evolution of Your Creative Projects
Looking back at my early Adobe Illustrator projects, I can’t help but smile. They were simple, perhaps even a bit amateurish, but they were mine. These initial creations laid the foundation for what was to come.
Adobe Illustrator became my teacher, and I became a student of design. Milestone by milestone, I witnessed significant improvements in my work. The lines grew crisper, the colors more vibrant, and the compositions more balanced.
Adobe Illustrator as Your Creative Companion
Adobe Illustrator is more than just software; it’s a dependable ally in my creative process. It offers the freedom to experiment, make mistakes, and innovate fearlessly. With each project, it became increasingly evident that Adobe Illustrator had earned its place as my creative companion.
Amidst the array of tools within Adobe Illustrator, there are certain features that hold a special place in my heart. Whether it’s the Pen Tool’s precision or the versatility of the Layers panel, these features have become my trusted allies.
Inspiration and Influence
Every artist has their muses. Throughout my journey, I’ve been inspired by remarkable designers and artists. Their works have shaped my style and influenced the direction of my creative path.
Adobe Illustrator isn’t just a tool; it’s an extension of my artistic vision. It has taught me to think critically about design, composition, and aesthetics. The software has, in many ways, influenced my creative philosophy.
Challenges and Learning Curves
The path of growth is rarely without obstacles. Adobe Illustrator presented its fair share of challenges, from intricate vector paths to mastering the intricacies of the Bezier curve. However, every challenge conquered was a step forward in my creative journey.
The world of design is dynamic, ever-evolving. Adobe Illustrator has taught me that learning is an ongoing process. Stagnation is the enemy of creativity, and I strive to keep learning, experimenting, and refining my skills. The ACTE Institute provides an array of Adobe Illustrator Course, guides, and forums to help beginners get started and enhance their skills. Whether you prefer written tutorials or step-by-step video guides, you can find valuable resources online to assist you in learning and mastering Illustrator.

Sharing Your Creative Process
In the age of digital connectivity, platforms like social media and online portfolios have become windows to my creative world. They allow me to share my Adobe Illustrator projects with a global audience.
Being part of design communities and forums has been instrumental in my growth as a designer. Sharing insights, receiving feedback, and learning from fellow creatives has been a rewarding experience.
Adobe Illustrator Beyond Personal Projects
Adobe Illustrator isn’t confined to personal projects alone. It has also played a crucial role in my professional journey, enabling me to contribute to a variety of design projects.
My proficiency in Adobe Illustrator has opened doors to collaborations and opportunities I never imagined. From freelance gigs to collaborative projects, the software has been the key to unlocking numerous creative ventures.
The Future of Your Creative Journey
Looking ahead, I have ambitious aspirations for my creative journey. Adobe Illustrator will remain my trusted companion as I strive to explore new horizons and push the boundaries of my creative potential.
To those embarking on their creative journeys, whether with Adobe Illustrator or any other tool, I offer this advice: Embrace the unknown, persist through challenges, and let your passion guide you. Your artistic evolution will be a testament to your dedication.
In retrospect, my journey from doodles to designs has been a transformative one, guided by the ever-present Adobe Illustrator. The software has grown from being a curiosity to becoming an integral part of my creative identity.
Adobe Illustrator has not only been a software but a mentor, a companion, and a canvas for my imagination. It has breathed life into my artistic dreams, and I eagerly anticipate the creative wonders that lie ahead, hand in hand with my trusted companion.
As I conclude this journey through my creative evolution, I invite you to embark on your own. Whether you’re a seasoned designer or just starting, the world of creativity is boundless, and Adobe Illustrator stands ready to accompany you on your path of artistic discovery.
3 notes
·
View notes
Text
✦

Hello! Welcome! I'm Ambiguous Hybrid!
Welcome to my portifolio + personal blog, i do not assure you i will be very active here. But i do will try to maintain this place going for as long as i can :]
Feel welcomed to ask and interact!
Please know, english is not my first language
DO NOT INTERACT:
If you're an active AI user, and claim yourself to be a "AI artist", you will be blocked instantly.
You're in favor of NFT's
I will block spammers. (does not envolve spam liking)
Repost artwork or even worse trace it. (NO, my work is not avaliable for repost not tracing, if any of theses happen you will be reported and blocked.)

My name is Lee, AKA Ambiguous Hybrid. I’m a asian digital artist from Brazil. My main focus currently is digital art, but i do traditional art in my spare time!
I have a huge love for fantasy related stories, and a deep interest in creating lore and original characters. I’m open for art commission and freelance work as a main hobby.
In this page you can see my artwork, that can involve the multiple fandoms i’m in, and my OC’s!
my carrd (with all my socials)
commissions

T R A D I T I O N A L
Faber Castell Eco-Pencils: i mostly use the faber castell green eco-pencils, they are very comfortable to draw, i mostly use them for black and white drawings. One package has a limited types of graphites going from HB to 8B, the 8B being the most softer and easier to blend.
Staedtler 4 pigment liner: I don't usually do lineart when doing traditional art, but i use them mostly for writting on the drawing pages, as well as doing small scribbles and abstract paintings. But when i do use for lineart, i use 0.8, 0.3 and for details 0.1 or 0.05.
Faber Castell Eco Super Soft: I had theses colored pencils for a few years now, they are great for gradients and mixing colors (As long as you don't do it too hard then the colors won't blend). No they're not watercolor pencils unfortunately. I use them for silly sketches or just to add more color on a simple sketch.
SketchBook Canson, A5, with the black covers: They are very water and ink resistent, but in my opinion they are not great for alcohol markers like copics, since they bleed right through the pages. They are overall one of the best sketchbooks i've ever used.
Faber Castell Dust Free eraser: Theses are like the best of the best erasers i've ever bought. I use them for everything, but again do not use too much pressure on the pencils, if the color is too bright or too dark, the eraser will not be able to clean if you put way too much pressure.
D I G I T A L
Gaomon Display Pd1161: I've bought this display 3 years ago, gaomon is not as expensive as other displays brands, yet is very good, i never had any problem with this brand, and honestly so far it's one of the best i've had.
Paint Tool Sai 2: I've bought SAI in 2018, at the time in Brazil it was around R$160, few years ago a friend of mine told me it was now at R$260. I enjoy SAI, it's a program i've used since i started digital art. But the app is still going through a lot of updates, which causes the settings archive of the software to get constant errors, making users delete their settings to avoid this error. Though i'm looking for new art softwares to use in the future and not be totally stuck on SAI.
KRITA: My experience with krita so far is very good, i believe it only lags a lot because of how bad my laptop is lol XD But so far i've enjoyed it! It has a huge variety of filters, brushes, etc. At the moment i enjoy it a lot, though you do have to set your settings if you're not used to the keyboards shortcuts the program has!
I'm currently looking on investing on a IPad so i can draw remotely during travels or when i'm at university, when this happen i'll update it here!
N A V E G A T I O N
My artwork is under #my art
Any ask or rambling will be at #gnomeo rambling
Friend's reblogs #friend's art reblog
Thank you for reading and enjoy your stay <3
4 notes
·
View notes
Note
hey! i am consistently in awe of your work, i genuinely adore it (I’d love to get prints of some of your pieces if that’s available anywhere 👀) but im writing to ask abt your technique and brushes! Im new to digital art, and i wanna create the sort of effect you make and i cannot for the life of me figure out how to do it! you have these strokes that look sort of like charcoal but also paint? also refracted light???? idk what program u use or anything and im just a noob still learning how to get the most out of the brushes that come w procreate, but even if you’re using a different program and stuff, I’d love to see if there’s anyway i can translate that effect somehow to the tools I’m using. It’s really cool stuff!! im sorry if you’ve already answered this somewhere 😅
hey! ok first off take anything i say with a grain of salt because 1. i'm self taught 2. there are many many ways to do art, there's no One Right Way. experiment and settle on what works best for you!
atm I basically only use procreate on ipad with an apple pencil.
I've compiled the brushes I use most into this post click here, I'd say download some sets and try them out! this seems to be a bit of an unpopular opinion because I regularly see advice to stick to the basic brushes however if you were making traditional art you wouldn't unnecessarily limit yourself to the cheapest brushes/paints either (assuming you could afford everything), so. go ham.
the main technique I use is a pretty common one where I use a big textured brush and then use a base color layer + clipping masks (you can google how to use these) or selection tool to get sharp edges. so I'll make a selection of the shape I want to paint and then paint within that selection. i often do this with light strokes and/or the brush on lower opacity so i'll keep texture. if you look at concept artists on instagram you'll see this technique used a lot too :) 'edge control' is a term to google to find more about hard/soft edges and how they'll improve your art!
for the light, even for digital art I would very very much recommend james gurney's book 'color and light' because it teaches you almost all you need to know about, well, color and light, and you can apply these principles to digital art too. it's well worth the price but if you can't afford it then there are perhaps some copies to be found online ;) for the actual method in procreate, I like to use layers on the add and screen blending modes, sparingly, and NOT with white highlights but with the actual color of the light e.g. yellow, blue-ish, etc. for stuff like wings, it's usually multiple layers stacked on top of each other!
(i am not organized)
as a final note i will add that i painted traditionally for years before starting digital art, so i do think that'll have influenced my approach in a couple ways because i basically took all that knowledge and methods into digital rather than starting from scratch.
#hope this is comprehensible and sorry for lack of more pics I just know it’d have taken even longer otherwise#feel free to dm me if you have more questions#if anyone is wondering about a specific painting let me know and i'll happily explain howeverrrr#am terrible with answering asks tho so pls be patient & just in case too many ppl ask i may not get around to all of it#not art#mjulmjul answertime#LONG post
26 notes
·
View notes
Note
I have a question, what is ur drawing style? Like realism or caricature or something like that? I like to draw cartoony characters more than realism, but that’s because when I was in my art class we had to do realism. Also what’s your fav media to use? Ik that u do a lot of ur works on a program on a sketch pad, but off of the sketch pad which is ur fav?
Hey there!
I never really like to define my drawing style, cause I have a hard time doing it. It depends on the drawing itself, or what I feel like drawing (what I feel fits best in regards to what I'm trying to portray/depict). I suppose it would be somewhere inbetween cartoony and realistic, cause I love both. Since I love both, I love mixing them, be creative with it and experiment.
My art/artstyle is kinda all over the place. I like experimenting and having fun with it. So sometimes my art will look more realistic and other times it will be more cartoonish. I don't think an artstyle is something that is set in stone, you can always change it up if you want to. You don't have to pick one artstyle and only do that one. Understanding one artstyle and mastering it often makes it easier to do others, too. It goes kinda hand in hand, you know?
(I also don't like it when art schools force students to focus on ONE THING. Cause art is so much more than just realism. Though I've never been to art school so I don't know alot about that)
As for art media, I mainly do digital art (when I say mainly, I mean only). I don't enjoy drawing traditionally, it just... doesn't do it for me. Some years ago I did some traditional stuff for inktober 2017 where I would line with pens and color with uh... promarkers I think it was? And while that was fun, I prefer digital art way more. I guess I just don't have the patience or attention span to do traditional art or both.
(also in case you're curious, I draw on an Ipad using procreate, I usually do all my sketching there before transferring it over to my PC where I use a Wacom Cintiq and Paint Tool SAI for lineart and coloring and everything else. Sometimes I'll do everything on my ipad, it depends on the drawing )
7 notes
·
View notes
Note
Hello!!! I have said this before and I'll say it again: I have always adored your art style
I had always had a talent for drawing, but I only ever drew by looking at a drawing and making an exact copy of the drawing. I never dared making my own art because I didn't want to fail. But you inspired me. I tried getting out of my comfort zone. I wanted to be like you. I wanted to be that artist on Tumblr that had the cute art style. I wanted to be the artist that loved drawing Tom's hair
I have been improving, and honestly, I'm not doing too bad. I'm ok in traditional art, but I've been trying digital
And I don't know how to do line art. HOW DO YOU TRACE???? It's a pain. :,) If you don't mind, could you give some tips?
But, what I wanted to say was: Thank you. You may not have been aware of it, but you had been great inspiration. You made me get up do it. And hey, who knows who else you've helped
Thank you <3
Hey there! (You asked a single question and I wrote practically an essay, I'm so sorry aaa)
First- Thank you so much gOSH :’0 That means SO SO SO much to me. Anyone considering me an inspiration is one of thee biggest compliments I could ever get. <33
There are a few art programs, but it seems most have a “Stabilizer” now. It helps smooth out lines when you draw, making more fluid looking lines. I sometimes have shaky hands due to medication and anxiety. So it really helps!! I'd look into it, but I personally use Clip Studio and it does have a stabilizer options under tool properties when a brush is selected.
This might help as well but- I wouldn’t think of doing line art as “tracing” you’re re-drawing the sketch on top of it. If you only consider the sketch’s lines and think of tracing the lines it will end up like those “the sketch” vs “the line art” memes. It’s hard to explain- sketches can be messier so your eye sees the thicker part of sketches and “fills in” what it considers to be right. So you're still drawing when you line art, still analyzing and correcting as you go.
Also have the sketch layer at much lower opacity. Don’t have it in a light color and at 100%, the chances of drawing on the wrong layer is higher that way. Some programs have a "lock" option for layers so you could even lock it so you don't do it on accident.
My OTHER advice is. You don’t HAVE to line art. You can clean up your sketch, leave it a little messy and consider it good enough. There’s nothing wrong with that! :)
Duplicate the layer and hide the original so you can always go back to that if you don't like how it's coming out. and SAVE SAVE SAVE.
And don’t even get me started on how much I love Tom’s hair and drawing it ; u; I love drawing fluffy hair so so much.
Another piece of advice I have is- similar to how you mentioned re-drawing other's art you can use that to study. Don't 'just' draw what you see, try to really look at it and think but why was it drawn that way? Then draw it yourself a few times using structure and guide lines. just REALLY study it and it could really help you learn. Just don't upload or claim it as yours obvi.
I allow anyone to study my art as long as it isn't uploaded. Technically you don't have to ask to do so if you stick to the "Study it and don't upload it" rule. And look into multiple artists! Experiment with different ideas and ways of doing stuff. When it comes to art styles don't worry about that too much. Don't feel bad if it seems inconsistent or keeps changing. That will always be apart of life. You learn, you gain more experience, you change and you grow.
Wishing you the best with everything!! <3
8 notes
·
View notes
Text
Top 10 Ways PiePie.ai Can Transform Your Video Content Strategy
In today’s fast-paced digital landscape, video content reigns supreme. From social media marketing to brand storytelling, videos have become an indispensable tool for businesses and creators to engage their audience and drive results. However, creating high-quality videos can be a daunting task, requiring time, resources, and technical expertise. That’s where PiePie.ai comes in.
PiePie.ai is a groundbreaking AI-powered video generator that is revolutionizing the way we create and share video content. With its intuitive interface and powerful algorithms, PiePie.ai empowers users to effortlessly produce professional-grade videos in minutes, unlocking a world of creative possibilities. But how exactly can PiePie.ai transform your video content strategy? Let’s explore the top 10 ways:
1. Rapid Content Creation:
Say goodbye to long hours spent scripting, shooting, and editing videos. With PiePie.ai, you can generate high-quality videos in a fraction of the time, freeing up resources to focus on other aspects of your business.
2. Cost Efficiency:
Traditional video production can be expensive, with costs associated with equipment, software, and manpower. PiePie.ai offers a cost-effective alternative, allowing you to create compelling videos without breaking the bank.
3. Versatility:
From product demos to social media ads, PiePie.ai offers a wide range of templates and customization options to suit any video content need. Whether you’re promoting a new product or sharing a customer testimonial, PiePie.ai has you covered.
4. Consistency:
Maintaining a consistent posting schedule is crucial for building brand awareness and engagement. With PiePie.ai, you can create a library of on-brand videos that can be scheduled and published on a regular basis, keeping your audience engaged and informed.
5. Scalability:
As your business grows, so do your content needs. PiePie.ai scales with you, allowing you to easily produce more videos as demand increases without sacrificing quality or efficiency.
6. Personalization:
Tailoring your content to the preferences and interests of your audience is key to driving engagement. With PiePie.ai, you can easily customize videos with text overlays, logos, and brand colors to create a personalized experience for your viewers.
7. Data-Driven Insights:
Understanding how your videos are performing is essential for optimizing your content strategy. PiePie.ai provides valuable insights into metrics such as views, engagement, and click-through rates, allowing you to make data-driven decisions and refine your approach.
8. Accessibility:
Not everyone has access to professional video production tools or expertise. PiePie.ai levels the playing field, allowing businesses of all sizes and backgrounds to create high-quality videos with ease.
9. Experimentation:
Innovation thrives on experimentation. With PiePie.ai, you can quickly test out new ideas, formats, and messaging without the time and resource investment required for traditional video production.
10. Creativity Unleashed:
Above all, PiePie.ai empowers you to unleash your creativity and bring your vision to life. Whether you’re a seasoned marketer or a novice content creator, PiePie.ai gives you the tools and confidence to create captivating videos that resonate with your audience.
In conclusion, PiePie.ai offers a game-changing solution for businesses and creators looking to elevate their video content strategy. With its speed, affordability, and versatility, PiePie.ai empowers you to create compelling videos that drive results and leave a lasting impression on your audience. Ready to transform your video content strategy? Give PiePie.ai a try and unlock the power of AI-generated video today!
0 notes
Text
Unlocking Creativity: Fiverr Logo Design Maker — Where AI Meets Expert Craftsmanship

In today’s digital age, where businesses strive to establish a strong online presence, the significance of a well-designed logo cannot be overstated. Your logo serves as the visual representation of your brand, making it essential to create a design that resonates with your audience and effectively communicates your brand identity. With the advent of technology, logo design has undergone a significant transformation, shifting from traditional methods to innovative solutions powered by artificial intelligence (AI). One such solution is the Fiverr Logo Maker, which combines the power of AI with the expertise of top logo designers to deliver professional-quality designs tailored to your unique needs.
<Grab Your Logo Now>
Introduction to Logo Design Maker
Gone are the days when businesses had to rely solely on graphic designers to create their logos. With the emergence of logo design maker platforms, businesses now have access to a wide range of tools and resources to design their own logos quickly and affordably. These platforms leverage AI technology to automate the design process, allowing users to create custom logos with minimal effort and expertise.
The Evolution of Logo Design
Traditional Methods vs. Modern Solutions
Traditionally, designing a logo involved hiring a graphic designer or agency, which could be both time-consuming and costly. While this approach yielded high-quality designs, it often came with a hefty price tag and lengthy turnaround times. However, with the advent of technology, the landscape of logo design has shifted dramatically, with businesses now turning to online platforms and software to create their logos more efficiently and cost-effectively.
<Grab Your Logo Now>
Rise of AI Technology
AI technology has revolutionized the way logos are designed, enabling businesses to harness the power of machine learning algorithms to generate unique and personalized designs in a matter of minutes. By analyzing vast datasets of existing logos and design trends, AI-powered logo makers can generate designs that are both aesthetically pleasing and on-trend, saving businesses time and money in the process.
Introducing Fiverr Logo Maker
Fiverr Logo Maker stands out as one of the leading platforms in the industry, offering businesses a seamless and intuitive way to create professional-quality logos in minutes. As part of the renowned Fiverr marketplace, Logo Maker leverages the expertise of top logo designers from around the world, ensuring that every design is crafted with precision and attention to detail.
<Grab Your Logo Now>
Overview of Fiverr Platform
Fiverr is a global online marketplace that connects freelancers with clients seeking digital services, including graphic design, copywriting, web development, and more. With millions of users and a diverse pool of talent, Fiverr has established itself as a go-to destination for businesses looking to outsource their creative projects.
Collaboration with Top Logo Designers
What sets Fiverr Logo Maker apart is its collaboration with top logo designers who bring years of industry experience and creative expertise to the table. By combining the power of AI technology with the human touch of skilled designers, Fiverr Logo Maker offers users the best of both worlds — the speed and efficiency of AI-driven design, coupled with the creativity and craftsmanship of seasoned professionals.
<Grab Your Logo Now>
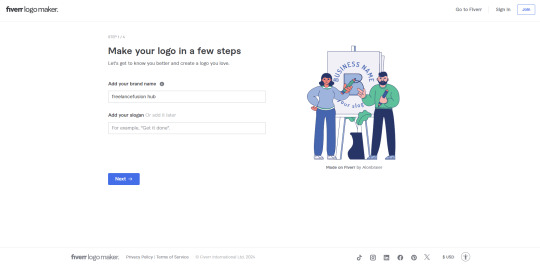
How Fiverr Logo Maker Works
Fiverr Logo Maker simplifies the logo design process, making it accessible to businesses of all sizes and budgets. Here’s how it works:
AI-Powered Logo Creation Process
The first step is to input your business name and industry, along with any specific preferences or requirements you may have for your logo. Fiverr Logo Maker’s AI engine then generates a variety of logo concepts based on your input, taking into account factors such as color, typography, and style
<Grab Your Logo Now>
Customization Options and Features
Once the initial designs are generated, users have the flexibility to customize their logos further, adjusting elements such as fonts, colors, and layout to suit their brand identity. With a wide range of customization options and features at their disposal, users can create a logo that truly reflects their unique vision and personality.
Benefits of Using Fiverr Logo Maker
Cost-Effectiveness
One of the primary advantages of using Fiverr Logo Maker is its affordability. Compared to hiring a traditional graphic designer, which can cost hundreds or even thousands of dollars, Fiverr Logo Maker offers professional-quality designs at a fraction of the price, making it accessible to businesses of all sizes and budgets.
<Grab Your Logo Now>
Quick Turnaround Time
With Fiverr Logo Maker, businesses can create their logos in a matter of minutes, rather than waiting days or weeks for a designer to deliver a concept. This quick turnaround time is particularly beneficial for startups and small businesses that need to establish their brand quickly and efficiently.
Professional Quality Designs
Despite its speed and affordability, Fiverr Logo Maker does not compromise on quality. Each design is crafted with care and attention to detail, ensuring that businesses receive a logo that is not only visually appealing but also reflective of their brand identity and values.
<Grab Your Logo Now>
Testimonials and Success Stories
Countless businesses have experienced success with Fiverr Logo Maker, achieving their branding goals with ease and confidence. From startups and entrepreneurs to established brands and corporations, Fiverr Logo Maker has helped businesses of all sizes and industries create memorable logos that leave a lasting impression on their audience.
Conclusion: Embracing Innovation in Logo Design
In conclusion, Fiverr Logo Maker represents a new era in logo design, where technology and creativity converge to deliver exceptional results. By harnessing the power of AI and collaborating with top logo designers, Fiverr Logo Maker empowers businesses to create professional-quality logos quickly, affordably, and effortlessly. Whether you’re a startup looking to establish your brand identity or an established business seeking to refresh your logo, Fiverr Logo Maker is the ultimate solution for all your logo design needs.
<Grab Your Logo Now>
Unique FAQs
1. Can I trademark a logo created with Fiverr Logo Maker?
Yes, logos created with Fiverr Logo Maker are eligible for trademark registration, provided they meet the legal requirements for trademark protection.
2. Are there any limitations to the customization options available on Fiverr Logo Maker?
Fiverr Logo Maker offers a wide range of customization options, but some advanced design features may be limited compared to hiring a custom graphic designer. However, the platform is continually updating and improving its features to better serve its users.
0 notes
Text
Unlocking the Next Level of Entertainment: Metaverse Casino Game Development

In the ever-evolving realm of gaming and entertainment, the concept of the metaverse has emerged as a groundbreaking innovation. This digital universe, where users can interact, create, and explore, has paved the way for unprecedented experiences. Among these experiences, one shining example stands out: Metaverse Casino Games.
What is the Metaverse Casino Game?
Imagine stepping into a virtual world where the allure of a casino beckons at every corner. From the comfort of your own home, you can dive into a realm where traditional casino games are reimagined in a digital landscape. This is the essence of Metaverse Casino Games – a fusion of the excitement of gambling with the immersive environment of the metaverse.
The Rise of Metaverse Casino Game Development
Metaverse Casino Game Development has become a focal point for many developers, driven by the immense potential of this innovative concept. With advancements in technology, particularly in virtual reality (VR) and augmented reality (AR), developers have been able to create immersive casino experiences like never before.
Enter Metaproalne: The Gateway to the Metaverse
At the heart of Metaverse Casino Games lies the concept of Metaproalne – a gateway that transcends the boundaries of reality and ushers players into a digital paradise. In this virtual realm, players can indulge in a myriad of casino games, from classic favorites like poker and blackjack to innovative creations designed exclusively for the metaverse.
The Immersive Experience: Stepping into the Metaverse Casino
One of the most captivating aspects of Metaverse Casino Games is the immersive experience they offer. Through the use of VR technology, players can step into a virtual casino environment that rivals the atmosphere of its real-world counterparts. From the dazzling lights and vibrant colors to the sounds of slot machines and the chatter of fellow players, every detail is meticulously crafted to transport players to a world of excitement and possibility.
Exploring Metaverse Products: Beyond the Casino Floor
Metaverse Casino Games are just one facet of the broader metaverse ecosystem. Beyond the casino floor, players can explore a vast digital landscape filled with endless opportunities for adventure and discovery. Whether it's socializing with other players, participating in virtual events, or engaging in immersive experiences, the metaverse offers something for everyone.
The Future of Entertainment: Metaverse Casino Games
As technology continues to evolve and the metaverse expands, the future of Metaverse Casino Games looks brighter than ever. With advancements in AI, blockchain, and immersive technology, developers have the tools they need to create even more captivating and immersive experiences for players.
Embracing the Metaverse Revolution
In conclusion, Metaverse Casino Games represent the next evolution in gaming and entertainment. With their immersive experiences, innovative gameplay, and boundless potential, they are poised to revolutionize the way we think about casinos and gaming as a whole. As we continue to embrace the possibilities of the metaverse, one thing is clear: the future of entertainment has arrived, and it's more exciting than ever before.
0 notes
Last Seen Blogs

underthestarsandbars-blog
Someone's Heart Is Always Blessed

slot998
สล็อตเว็บตรง
anadenanthera
anadenanthera
chemicalbreather
Crystal Dimension #8

duvsoap
☺︎