#Silhouette Cameo
Text


#victorian#cottagecore#pearls#books#pink aesthetic#rose#blush#light academia aesthetic#classic academia#flowers#flowercore#coffee#jewelry#brooches#silhouette cameo
1K notes
·
View notes
Photo
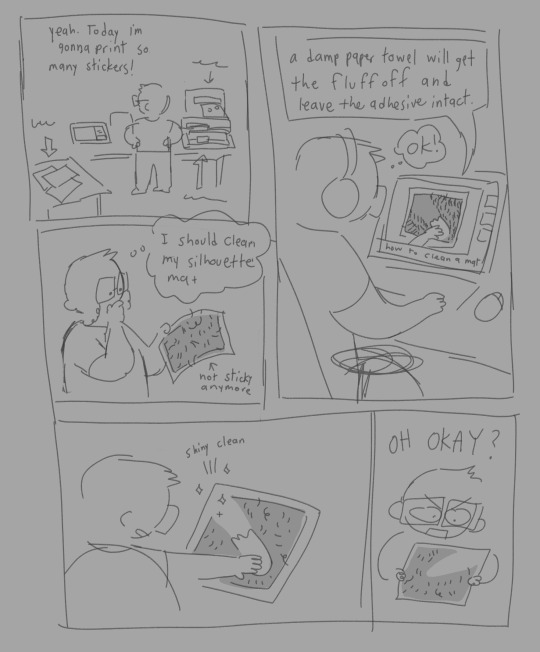
this follows the beats of a classic rage comic. nearly started it with *le me*
i had 2 work on other stuff today since i didnt have the right kinda glue to replace the adhesive (ordered more mats in the meantime) grr
#comic#silhouette cameo#this was the undersketch i coulda actuially labeled the printer and stuff but i GAVE UP OKAY
161 notes
·
View notes
Text

Embroidery WIP inspired by the sage advice of Our Lady Commander to help pass the time till season 2!
The letters are outlined in stem stitch and filled with satin stitch. Worked with DMC Cotton thread on a scrap of white medium-weight linen, both from my stash. The colors are supposed to look like the torso wrap Galadriel wears in Numenor.
I made the design in the Silhouette Design Studio program and used a pen to draw it on the fabric with a Cameo machine bc I can't freehand for crap. The font is Blackriver and it's goooorgeous.
#galadriel#trop#crafting#trop fanart#tolkien fanart#lotr#embroidery#textile arts#silhouette cameo#sewing#the rings of power
28 notes
·
View notes
Photo

#Truth 🙌🏻🙌🏻🙌🏻🙌🏻
#crafting#funny#cricut#silhouette cameo#crafting quote#knitting#crafts#craft ideas#vinyl cutting#sticker making#cricutmaker#SVGed
4 notes
·
View notes
Text
How To Use Silhouette Cameo 3? [A Comprehensive Guide]
Do you want to learn how to use Silhouette Cameo 3? We are here to help you. This is the comprehensive Silhouette Cameo 3 guide to answer all your queries about how to get started using your brand-new cutting machine.
Silhouette Cameo 3 is the ultimate die-cutting machine. It uses a tiny blade to cut more than 100+ different materials, including paper, vinyl, cardstock, and fabric. This Cameo 3 includes all the same capabilities as the previous versions with a few extra features. This Cameo 3 has a dual carriage so that you can use two tools at once, and it has Bluetooth features; the Silhouette Cameo 3 is compatible with Silhouette’s new AutoBlade. Silhouette Cameo 3 can use registration marks for Print and Cut applications and is compatible with PixScan.
Let’s start with the best part: unboxing. Are you excited?
Let’s get you ready now.
Steps To Unbox Your Silhouette Cameo 3 Machine
First, before setting up your Cameo 3, let’s get it out of the box. We love this part; there’s nothing better than opening a new machine.
Here’s everything included in the box:
Silhouette Cameo 3 machine
Power cable and A/C adapter
USB cable
Crosscut blade
AutoBlade – Silhouette’s new auto-adjusting blade
12×12 inch cutting mat
Bluetooth removal tool
Once you have unloaded, you will need to remove all tape and foam from the machine itself.
Now it is time to connect…
Steps To Install Silhouette Studio Software
Next, go to the Silhouette site, where you will see a turquoise rectangle on the top right side of your screen stating ‘Update Software.’
After pressing the button, a link will pop up to download Silhouette Studio.
Choose the Windows or Mac computer option – depending on your PC.
If you use a Mac system, you will be directed to drag and drop the Silhouette Studio icon into your Applications folder. In contrast, Windows system users must follow your on-screen instructions to install the Silhouette Studio software.
Steps To Connect Your Cameo Machine on Windows and Mac Computers?
Now, plug the AC adapter into the right side of your machine and turn it on by clicking on the start button. You will get on the touchscreen with the initial setup screen, which is visible on the right. Choose the language of your choice. Now you are ready to install Silhouette Studio software.
Steps To Activate Bluetooth Connection
Once everything is set up, you can activate your Cameo 3’s Bluetooth, connecting your computer and the cutter wirelessly.
The Bluetooth symbol on your machine should be on the top left side of the LCD screen. If not, you need to turn on Bluetooth by clicking the Settings menu on your screen and activating it. From the Silhouette Studio, click on Silhouette, and scroll down to ‘Add Bluetooth Machine.
Your machine should appear, along with an option to connect. Then, tap on Connect.
Choose your Silhouette Cameo 3 from the available Bluetooth list, and your machine and PC will begin syncing together. It ends once the screen is shown ‘ready.’
Here are the Bluetooth signs you should be looking for on your Silhouette Cameo 3:
If you are facing a problem installing Bluetooth, you may need to do so on behalf of your PC.
If you have a Mac system, find the Bluetooth icon in your System Preferences menu and click on it, making sure the Bluetooth is enabled.
After that, find your Cameo 3 machine in the list of Bluetooth that appears and tap on ‘Pair.’ It will take a few seconds to show that your devices are connected.
How To Use Silhouette Cameo 3 Machine
Now, let’s start by loading up AutoBlade on your machine. The AutoBlade is your main cutting tool, automatically set to the required depth for every project. All you’ve to do – is place it into your cutting machine once:
First, unlock the blade carriage by removing the lock lever out.
After that, insert Autoblade.
Now, push the blade carriage forward.
Finally, your machine will cut out any project.
Using Silhouette Studio Software
You must know that your new Cameo machine has a free version of Silhouette Studio software. They also have three paid versions: Designer Edition, Designer Edition Plus, and Professional Edition. You don’t have to own a machine to use it, only if you want to cut out your designs.
Now let’s get back to the Silhouette Studio software; if you don’t open it, do it now. The main screen is covered with a 12×12 cutting area (as shown in the picture), similar to the provided cutting mat.
Let’s create something simple for the Cameo 3 machine tutorial – like a basic cut shape.
First, tap on the Shape Tool on your left corner side.
Next, press on and drag on the cutting area with your mouse to draw a circle. You will be shown where your image will be cut on the mat. If you find it is making an oval instead of a circle, hold shift as you pull, and it will become a perfect circle.
After that, connect your Cameo 3 machine with your PC using its USB cable. Remember to do so now if you haven’t removed the protective liner from the mat.
Tip: Saving your cutting mat for later projects is worth saving.
Now, put your materials on the top left corner of the cutting mat, as indicated in Silhouette Studio software. In this example, we will be using cardstock.
Note: The cutting mat will be sticky; the material may stick to it at first. It’s normal; it will become prepared over time.
Then, align the left side of your cutting mat with the blue guide sign on your machine. Ensure the mat rests against the white rollers.
Next, press the Load button on the touch screen. The mat should be loaded into your Cameo 3 machine.
Lastly, go back to Silhouette Studio software. Tap on the “Send” tab at the top right side of your screen and select the material type. In this example, you must choose “Cardstock, Plain.” Then, select “Cut” as your activity and “Autoblade” as your tool. These should be your default settings, but sometimes, they can be changed by mistake.
Now you have verified that everything is in order, tap on the blue “Send” button on your bottom right side to start your project to cut.
Your cutting machine will automatically change the depth of the blade for the material you choose. Once your design is cut out, click “Unload” on the touch screen to unload your cutting mat. You can peel your new cut material off the cutting mat.
That’s it! This guide on how to use Silhouette cameo 3 is complete now. Hope it helped you learn something new today.
Source :- Silhouette Cameo 4 Pro , Silhouette Cameo 4 Pro
3 notes
·
View notes
Text

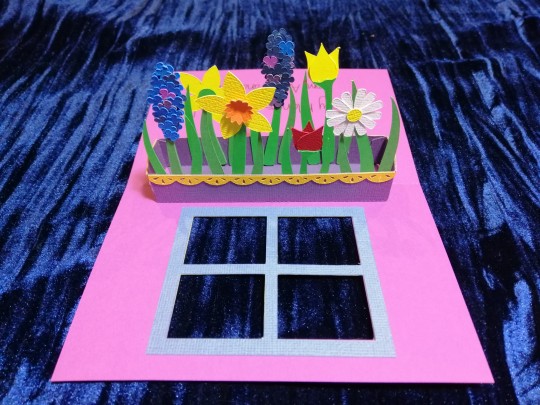
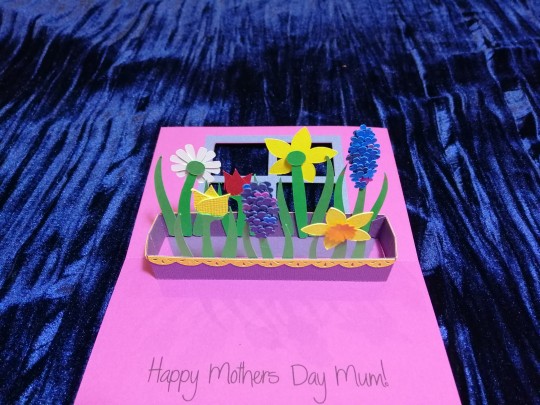
A mother's day card, the flowers turned out really cute, tempted to make myself a field of daffodils
The original idea from http://qbeesquest.blogspot.com/2011/03/flower-box-pop-up-card.html
Mad props to people who do all the measuring and cutting by hand, I will stick to drawing it on the computer and getting the silhouette cameo to cut it out
3 notes
·
View notes
Text
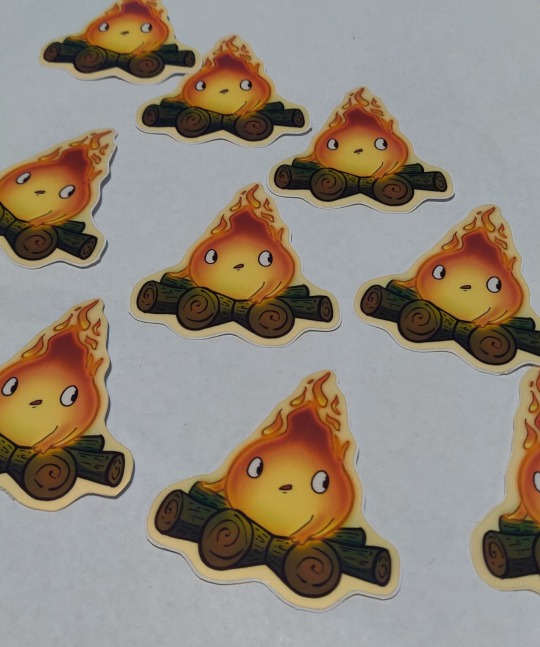

Ghibli stickers for a game convention this week! I've never done this one before, but I'm excited to be a vendor! This'll be my second show of the year.
2 notes
·
View notes
Text
and the hyper-fixation of the day is....


Well, I haven't eaten or peed in the past 8hrs because I've been hyper-focused on creating SVG cut files for clothing designs. Check it out on my Etsy shop!
#Etsy#dopamine#svg#cut files#silhouette cameo#silhouette creations#cricut#cricut creations#clothing#apparel#audhd#autistic artist#hyperfocused#hyperfocus#mental health#neurodivergent#hyperfixation
1 note
·
View note
Text
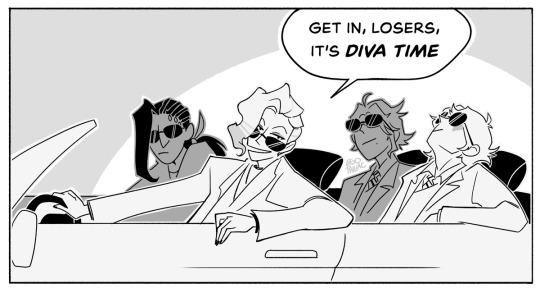
roll out the red carpet guys we're going to the SHAFTLANDS
#art#twisted wonderland#twisted wonderland spoilers#tapis rouge#i have nothing else right now i'm sorry i just got excited by that vil hairstyle#(and i got REALLY excited for a second because i thought red carpet = movie premiere and i always love it when vil gets to be an ~acteur~)#(but 'luxe couture' makes me think fashion show instead. ah well.)#anyway it's time for the vil hometown event!!!! or...travel event at least?#are we gonna get to meet eric or is it gonna be someone else 👀 👀 👀#like i would love to see eric but i kind of think it won't be him since he had that little main story cameo#(as portrayed by Generic Man Silhouette with some hair drawn on)#but feel free to prove me wrong twst! show us how much more glorious his hair has gotten in the last ten-ish years
6K notes
·
View notes
Text
Let them eat cake🍰
instagram
#aesthetic#aestheitcs#lifestyle#girly#luxury#girly aesthetic#vintage#pinkshadow#pastel pink#fashion#marie antoinette#let them eat cake#silhouette cameo#vintage retro#parisian vibe#parisianlook#parisian#Instagram
0 notes
Text
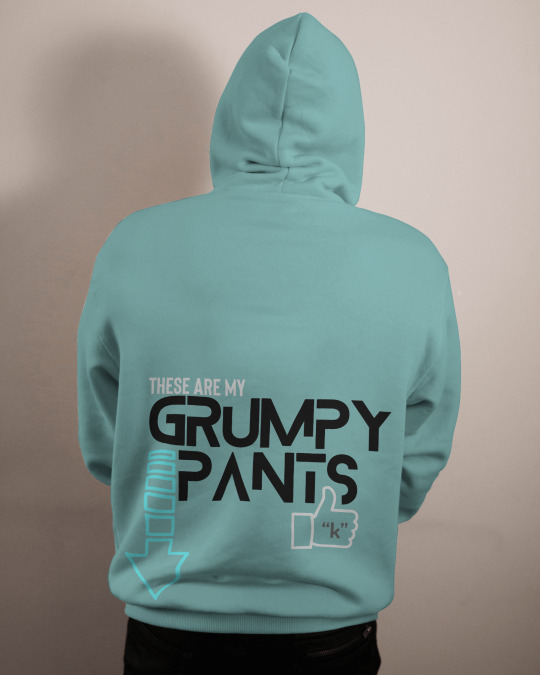
I need to come up with more things to do with my Silhouette Cameo vinyl cutter. It's a tremendously versatile machine — basically a plotter that's especially suited to dragging a knife around to cut or score sheets of material: adhesive or iron-on vinyl, paper, cardstock, thin plastic for stencils, even wood veneers. With pens swapped in for the blades they can draw, as well. I've only used mine for my laptop logo, a demo stencil for that ruler forearm temporary tattoo, and laying out some Eurorack panel templates, but I've used the Makerspace's unit to make labels and embellishments for my Eurorack case, my Cracklebox, and my "It's Spring!" reverb. But having a new hammer means you suddenly start looking around for nails, so I'm pondering what other things need vinyl cutouts applied to them, or cardstock shapes layered onto them.
One additional — not problem, exactly, but complication — is that the Silhouette Studio software that drives the cutter is somewhat limited without paying extra for the "Designer" or "Business" upgrades. It's completely functional, it just won't do (very desirable) things like import or export vector graphics from or to other software. So your designs are limited to what you can draw yourself, what you can trace from a raster image (a JPG or PNG), or — and this is the most important part to the manufacturer — what you buy from their online store, where you can find hundreds of variations on "Live, Laugh, Love" signs.
I'm being a little mean about the selection, here, and Silhouette's model is miles better than, say, Cricut's old model, where any pattern you wanted to cut out you had to buy on a goddamned cartridge. But it's very limiting when you can't reuse designs you've made in SVG or EPS format without paying $50/$100 extra, and the patterns that they want to sell you are on this level:
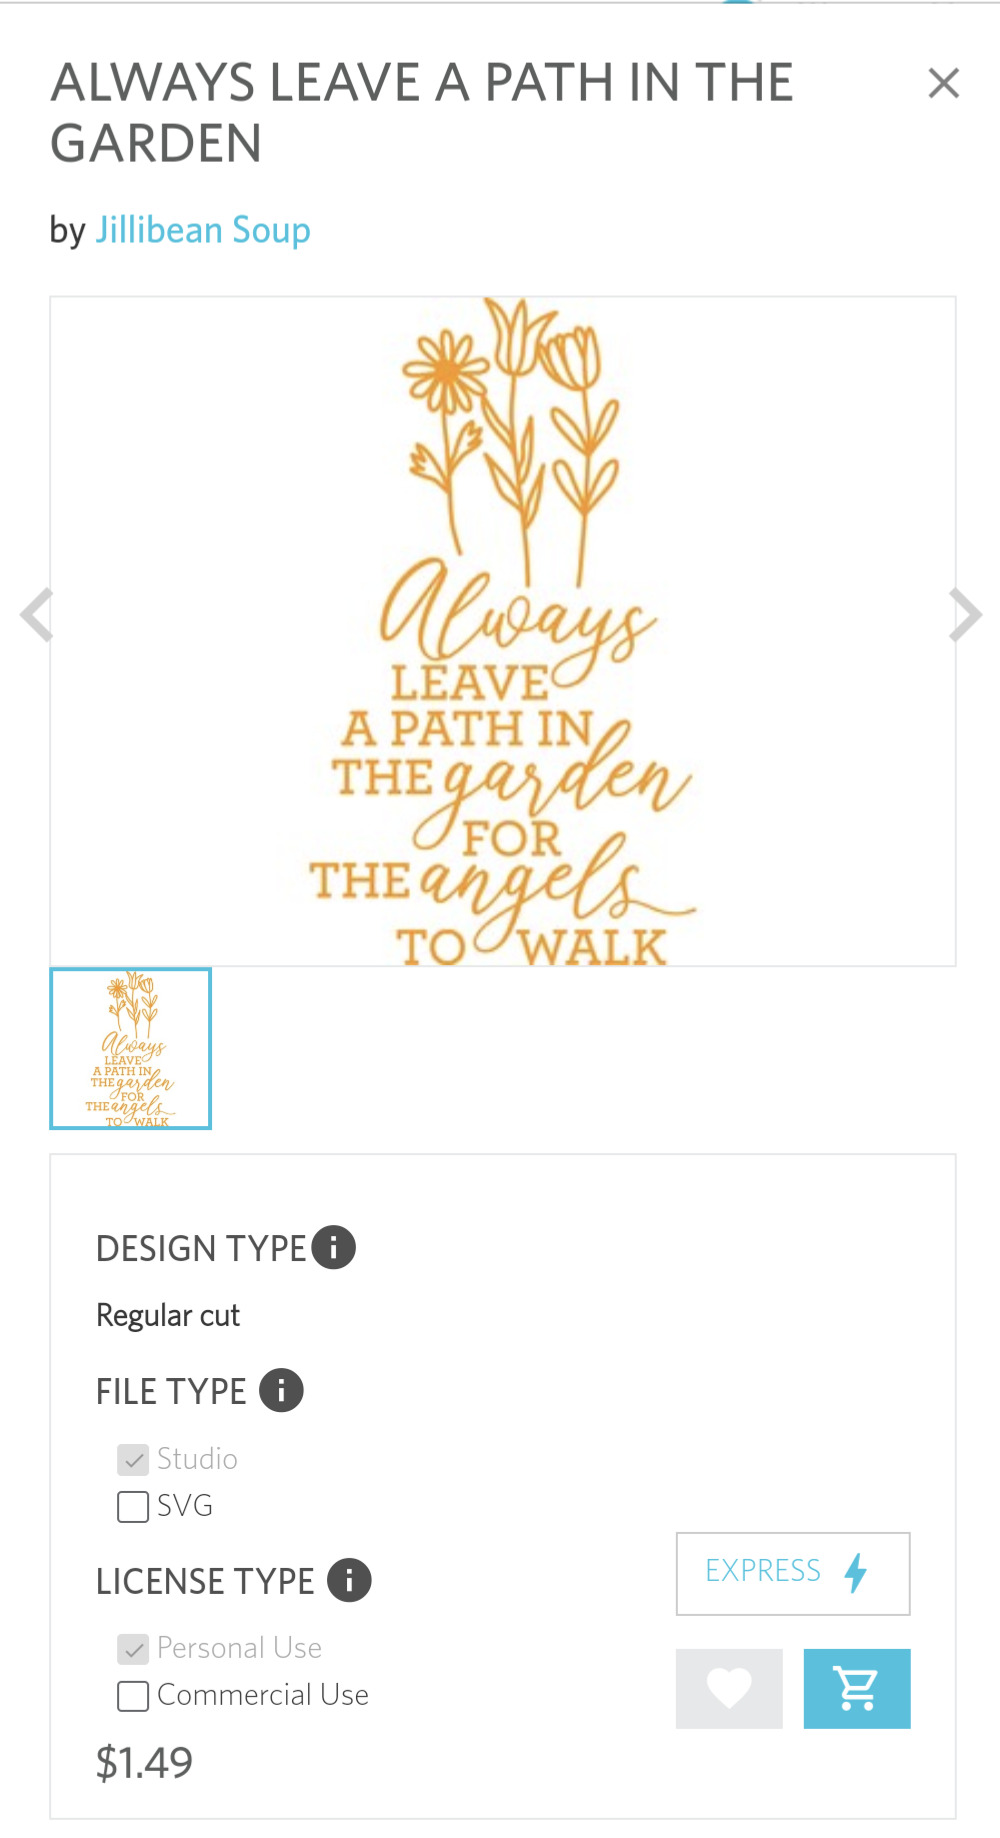
(The price jumps to $9.99 if you want to sell something with that design on it.)
0 notes
Text
#etsy#rarebeauty#rare beauty#vintage jewelry#vintage#etsyvintage#etsysmallbusiness#etsy finds#etsyseller#cameo necklace#cameojewelry#silhouette cameo#carved
0 notes
Text
you guys are really putting my sticker machine to work! 🤧💕🪩
#disco elysium#sticker cutter#silhouette cameo#my art#only put sound on if you want to hear the horrors of a sticker cutter
74 notes
·
View notes
Text
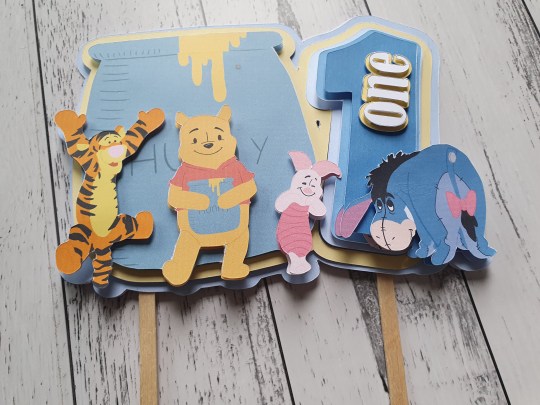
Winnie the Pooh and Friends Cake Topper
Winnie the Pooh and Friends Cake Topper
Moving on with the theme of Winnie the Pooh characters I have now created a set of cake toppers that you can personalise with any age you would like.
Winnie the Pooh and Friends
And just like the cupcake toppers, you can choose the whole gang or purchase the characters individually.
Winnie the Pooh, Tigger, Piglet, Eeyore cake toppers
Characters have been printed on 220 gsm/250 gsm cardstock…
View On WordPress
#1st birthday#cake smash#cake topper#cricuit maker#cupcake topper#first birthday#first year around the sun#one year around the sun#papercraft#silhouette cameo
0 notes
Photo

Funny Breaking Bed Stickman Sex Vector SVG Design for Cricut, Silhouette Cameo and Crafts. 🛏️ 😂
More Funny Stickman SVG Designs:
https://www.SVGed.com
#funny stickman#crafts#cricut#silhouette cameo#cricut ideas#funny decal#funny sticker#sticker making#car decal#breaking bad#vector decal#svgfile
2 notes
·
View notes
Text
9 Mind Blowing Christmas Ideas With Silhouette Cameo
When holidays are just around the corner, all we can actually think about is how to make it festive and dreamy for our families. The few things that complete a perfect holiday are definitely food, family, laughter, and good decoration.
Over the years, I have understood that it is far better to be prepared well in advance and use the right gadgets to help us attain speedy preps. I have actually been using my Silhouette Cameo cutting machine to make my Christmas decorations intricate and festive. I am sure you have arrived at my blog because you want some Christmas ideas with Silhouette Cameo. With all the preparations in full swing are brain often tends to fog when we think about Christmas decorations. Have you been struggling lately with what to create for Christmas using your flawless Silhouette Cameo machine? Then don’t you worry, I have got you sorted.
The idea behind creating a perfect craft piece for Christmas using Silhouette Cameo cutting machine is to keep it simple yet creative. Go looking for little details that you want to wrap up in festivity with your craft. For example, using a festive acrylic disc for serving cupcakes, cookies, or gingerbread can really be a tiny yet thoughtful Christmas decor. One more easy yet simple thing that you can create using your Silhouette Cameo is a Christmas tree ornament. This blog is filled with many mind-blowing Christmas ideas with Silhouette Cameo that will take your holiday decoration up a notch. So, keep reading to get inspired and create a dream holiday.
Christmas Ideas With Silhouette Cameo
Before starting a rundown of the best Christmas ideas with Silhouette Cameo, I am going to boost you up a little. Using your Silhouette Cameo to make crafts and decorations for Christmas is fast and easy, and the possibilities are just endless. With just a little effort, you can also save a lot of your money and use it for some other Christmas tradition instead of buying super expensive personalized Christmas decors. So, buckle up, get inspired, and create:
Snow Village Etched Cake Covering Dome
Cakes and Christmas go hand-in-hand; from plum cakes to modern iced cakes, we have so many options. But to cover them with beautiful cake lids would actually accentuate the aesthetics of your dining table or kitchen top. With your Silhouette Cameo, you can cut intricate snow village stickers or any other holiday design you like. Once you cut it out, simply apply it to the sides of your transparent cake dome by peeling off the sticky clear plastic. This simple trick saves your money in a blink of an eye and gives the best Christmas vibes.
Jingle All the Way Holiday Sign
Wooden holiday signs are a creative addition to the whole Christmas vibe. You can print famous Christmas jingles or make a signboard exclaiming the classic “Merry Christmas.” I used the famous one-liner from my favorite Christmas carol- “jingles all the way.” You can hang these signboards near the fireplace, staircase, or in the mailbox. You can cut strong balsa wood using your Silhouette Cameo machine. And then, with just a few brush strokes, you will be good to go.
Rustic Christmas Sign
Nothing beats a traditional rustic decor piece. With time, we have become more technical and adore modern crafts. But trust me, a rustic Christmas sign is sometimes all that you need. To get the rustic vibe, use custom stencils that you can very easily cut out from your Cameo machine. Use that customized stencil to write classic font style Christmas phrases, and to add more class, use a fun woodsy decor on the sides. I bet this will give you the nostalgia for the old Christmas movie looks.
Faux Metal Christmas-tree Ornaments
The Christmas tree is the centerpiece of any Christmas decoration. A well-done tree could actually complete your whole Christmas look. But often times this process is anxious enough, you know, from finding the perfect pine tree, having good length is in itself a huge task. The last thing that often comes to our minds is stressing over ornamental pieces and glass balls to cover the entire tree. You can use a few layers of Silhouette chipboard and some embossing powder and create intricate faux metal ornaments to beautify your Christmas tree. Some design options I can suggest here are reindeer, Santa caps, bells, stars, etc. Once you cut the ornaments out, use a little strand of ribbon to hang them well on the tree.
Christmas Subway Art
Instead of running to the shopping mall to get good wall pictures, why not create some superfast and fun designs yourself? All you need is your desktop to get the design customized, your Silhouette Cameo cutting machine, a picture frame, and paper. Use little holiday-inspired texts, icons, pictures, graphics, texts, or images from the vast library of your designing app and print them out to frame it.
Reversible Holiday Blocks
Create your very own texts on some wooden blocks with your Silhouette Cameo machine. Cut some from a wooden piece and choose the size of each block. Use an electric sander for sanding the sides of the blocks, giving them a cleaner look. You can stain the blocks or leave them natural and then mod-podge the paper on the block. So instead of writing the texts just one side. I used the back side of the blocks to write something else.
Decorative/Etched Glass Blocks
Just as the previously explained wooden blocks are capable of upgrading your homes into a wonderland for Christmas, you can also use glass blocks as well. Simply take glass blocks of the size you prefer; no cutting or shaping is needed. Cut out beautiful calligraphed letters with the help of your Silhouette Cameo machine. And emboss them on your glass blocks; you can also add some fairy lights near the glass blocks to add more glamour to regular blocks.
Do-It-Yourself Lighted Sign
There are so many ways to make beautiful signs for Christmas; I also tried using lights on the sign to write letters. Believe me; it was a game changer. You can cut out Balsa wood in the shape you want to and then use mini light bulbs to write on the wooden block.
Etched Lightbulbs
Lightbulbs add so much beauty to the night times during Christmas. I guess the bling they add to the glory of Christmas nights is absolutely breathtaking. Lightbulbs are whole in themselves, but I believe in getting a little creative with them by etching Christmas-related designs on them. The light emitted from these beautifully etched light bulbs emits Christmas patterns on the walls near them, adding festivity to your homes at night.
Source:- Silhouette Cameo 4 Pro , Silhouette Cameo 4 Pro
2 notes
·
View notes
Last Seen Blogs

ukrposhta
Etno.ua

serenasoutherlyns
bring back tracey kibre

from-student-2-teacher
¡amfigaro!

cartoonscientist
each doctor has a special power

vinhempichstationery-blog
VINHEMPICH