#Le Sse
Text
How LONG it took each K-POP GROUP to get their first win!
Brave Girls - 3628 days after debut
SUPER JUNIOR-D&E -2685 days after debut
NU'EST - 2610 days after debut
U-KISS - 2378 days after debut
N.Flying - 1981 days after debut
Dreamcatcher - 1923 days after debut
NCT U - 1656 days after debut
Jewerly - 1490 days after debut
PENTAGON - 1471 days after debut
CLC - 1426 days after debut
DAY6 - 1416 days after debut
VERIVERY - 1414 days after debut
Shinhwa - 1361 days after debut
fromis_9 - 1322 days after debut
BTOB - 1309 days after debut
ONF - 1308 days after debut
DKZ - 1273 days after debut
BF - 1265 days after debut
SF9 - 1198 days after debut
VICTION - 1098 days after debut
Girl's Day - 1096 days after debut
ASTRO - 1071 days after debut
DIA - 1065 days after debut
EXID - 1057 days after debut
ONEUS - 1043 days after debut
OH MY GIRL - 1008 days after debut
LABOUM - 974 days after debut
WJSN - 950 days after debut
Lovelyz - 916 days after debut
MONSTA X - 915 days after debut
Block B - 912 days after debut
Golden Child - 850 days after debut
CSJH The Grace - 769 days after debut
BABY V.O.X - 761 days after debut
B1A4 - 756 days after debut
B.A.P - 748 days after debut
Epik High - 739 days after debut
KARA - 707 days after debut
BTS - 691 days after debut
Brown Eyed Girls - 631 days after debut
GOT7 -628 days after debut
MAMAMOO - 626 days after debut
TEEN TOP - 603 days after debut
f(x) - 601 days after debut
LOONA - 570 days after debut
2AM - 566 days after debut
Treasure - 565 days after debut
VIXX - 561 days after debut
AOA - 459 days after debut
Bolbbalgan4 - 545 days after debut
THE BOYZ - 517 days after debut
Billie - 510 days after debut
INFINITE - 487 days after debut
Secret - 457 days after debut
EXO - 432 days after debut
MOMOLAND - 427 days after debut
Crayon Pop - 408 days after debut
NMIXX - 400 days after debut
BIGBANG - 384 days after debut
GFRIEND - 382 days after debut
Stray Kids - 375 days after debut
NCT 127 - 350 days after debut
Seventeen - 344 days after debut
B2ST (BEAST) - 343 days after debut
After School - 339 days after debut
Stayc - 306 days after debut
TEMPEST - 273 days after debut
Apink - 261 days after debut
Wonder Girls - 257 days after debut
2PM - 245 days after debut
ATEEZ - 239 days after debut
Red Velvet - 238 days after debut
Super Junior & MBLAQ - 231 days after debut
Twice - 198 days after debut
Sistar - 196 days after debut
Everglow - 187 days after debut
NCT Dream - 173 days after debut
CNBLUE - 163 days after debut
T-ara - 156 days after debut
Enhypen - 155 days after debut
CRAVITY - 140 days after debut
CSR - 128 days after debut
SHINee - 116 days after debut
4Minute & I.O.I - 104 days after debut
JBJ - 100 days after debut
SS501 - 99 days after debut
TVXQ! - 93 days after debut
Davichi - 90 days after debut
NU'EST W - 86 days after debut
Girls' Generation - 67 days after debut
AESPA - 61 days after debut
FT ISLAND - 42 days after debut
2NE1 - 39 days after debut
GOT the beat - 27 days after debut
(G)I-DLE - 20 days after debut
New Jeans - 17 days after debut
EXO-CBX - 16 days after debut
Gaya-G (WSG Wannabe) - 14 days after debut
Blackpink & AB6IX - 13 days after debut
IKON & Hi Suhyun - 12 days after debut
EXO-SC & Irene and Seulgi (Red Velvet) & NCT DOJAEJUNG - 11 days after debut
IZ*ONE & Kep1er - 10 days after debut
Itzy & Girls Generation-TTS & Wanna One- 9 days after debut
TXT & Le Sserafim & Highlight & BTOB 4U- 8 days after debut
Ive & Viviz & CIX & WSG WANNABE - 7 days after debut
X1 & SSAK3 - 5 days after debut
Winner - 4 days after debut
Kinda long list, you know? It's really sad that most of groups need to wait that long for their first win... What's your opinion about this? Comment below!
#kpop#twice#first wins#debut#winner#X1#SSAK3#IVE#VIVIZ#CIX#WSG WANNABE#TXT#ITZY#Le Sse#girls generation#IZONE#KEP1ER#BTS#NEW JEANS#(G)I-DLE#exo#IKON#Blackpink#facts#shinee#enhypen#nct 127#nct dojaejung#BRAVE GIRLS#NMIXX
9 notes
·
View notes
Text
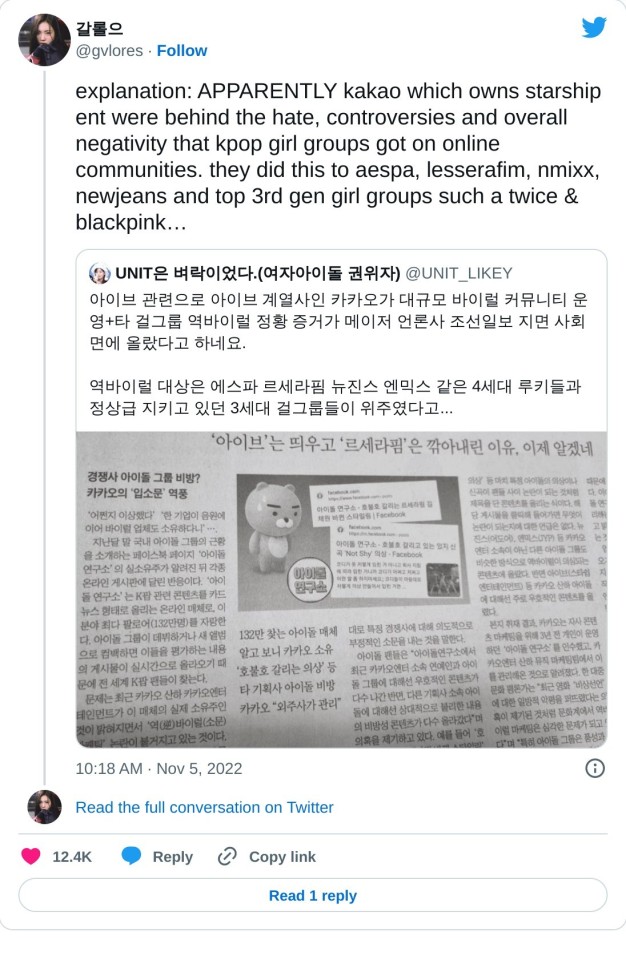
this is fucking crazy.... i always knew there was something off with the way aespa got a hate train each time they breathed especially around cb dates but to find out it's the label doing it to hype up ive...
12 notes
·
View notes
Text
about to learn how to mod skyrim just to add some goddamn child diversity without having to install 23 different kid mods i don’t even like
#there was one i kinda liked and was gonna get so i could have an orc kid#but evidently this mod is not even for sse. so.#nexus is so annoying i constantly accidentally end up on le mods and go to download it and then realize it’s not sse
2 notes
·
View notes
Text
How to replace Skyrim NPCs with faces made in RaceMenu
(aka the method I used to make all my NPC overhauls)
This is an updated version of the tutorial from this post. I forgot a step originally.
Why use this method?
RaceMenu (RM) gives you a lot more creative freedom than simply editing NPC faces in the Creation Kit (CK).
Just installing RM gives you access to new sliders not found in unmodded Skyrim and you can install further slider mods (such as Expressive FaceGen Morphs, or Khajiit Character Creation Extended, etc.)
It also allows you to use Overlay mods (like DomainWolf's mod series or Freckle Mania 2) which give you many more options to layer warpaints or skin features and create a more detailed face.
Links are to the SE version of the mods, as that's what I'm most familiar with. They likely have LE counterparts.
Things you will need:
RaceMenu (and SKSE; be sure to get the correct versions of both for your game)
NifSkope - you will use this to open and edit the mesh. Here's GamerPoet's setup video
More Informative Console (especially if you're editing mod-added NPCs)
BSA Extractor (or similar mod that lets you open and extract BSAs)
Things I highly recommend:
Creation Kit Platform Extended for Skyrim - makes using the Creation Kit way less like pulling teeth
Unofficial Creation Kit Patch - if you're using AE
An alternate start mod - I like Dimes Quickstart for its simplicity, but any would work
Another Race Menu Rotation Mod - handy for seeing how the back of hairs look
Stand still in RaceMenu (OAR) - stops the character from wiggling out of frame
If you're looking to edit an NPC from an unplayable race (Elder, Child, etc.) you will likely need a mod that makes that race playable
Fun Stuff for diverse options:
Extra slider mods (I like Expressive FaceGen Morphs)
Skin Overlay Mods (for extra detailed faces)
If you want to get REAL funky with it, you can also use OutfitStudio to have a lot better time sculpting/getting super wild with assets, but that's too advanced for this tutorial (and my method is very 'goof around until it just works.'
I don't really want to cover using mod-added headparts (like eyes, hairs, etc.) There are basically two options there: add them as new headparts for your mod or make your mod dependent on the mod the headparts are from. The second way is probably simpler for beginners, but I definitely suggest installing Creation Kit Platform Extended, as it will allow you to load the other mods as masters without the Suffering™.
The Workflow
1. Design your character like you would a player character. For this example, I am redesigning Arcadia.

A recommendation: unless you really feel like you need to change it, it is typically better to make the Weight slider match the NPC's actual weight. You can see this value using either SSE Edit or the Creation Kit.
It is no big deal if you don't, but if you change the weight and load the mod into an already existing save you will get a gap between the NPC's neck and body (unless you use Save Unbaker.)
Be careful, though, there is a RaceMenu bug where if you load up RM again after exiting, it changes the weight by .01. So annoying.
For Skin Tone choice, if you do a custom skin tone (by pressing 'E' while hovering over the slider) I would recommend leaving the transparency slider (the 'A' value) at 100% (though I usually make the exception for Khajiit and Argonians.) This info will go into the Interpolation Value box in the CK, and the RM values can't be directly input, so you have to calculate the value with a (RM Number/255 = X/100, solve for X which is your Interpolation Value)
1a. If you are planning on adding faceparts from mods to your own plugin, I recommend saving and doing that now. Then come back to your save and change your headparts to the versions from your plugin. If you want to just have the other mods as masters, you can skip this.
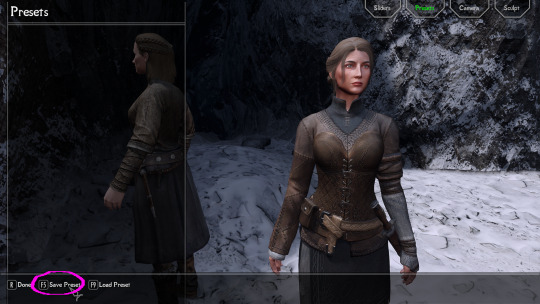
2. Once you're satisfied with your design, I recommend saving your game and saving your head as a preset (click to enlarge):

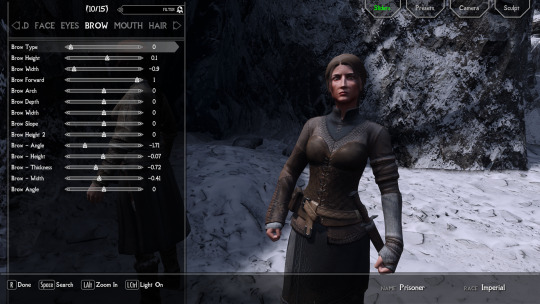
3. Now, you will need to write down some stuff.
Skin Tone (RGB value):
Hover over Skin Tone slider. Press 'E'.
write down the R G B values (and A if you change it, see above note)
Even if you use a default skin tone, this is the best way to make sure you get the correct value for the CK.
Weight (number)
Scars (name) (if applicable)
Hair (name)
Facial Hair (name) (if applicable)
Eye Color (name)
Brow Type (name)
Writing down Hair Color is optional: with this method, the hair will inherit color from the head you export, not the CK value. Plus, RM's values are not really useful, because the default hair colors are named.
It's the same with the Face Complexion (wrinkles, etc), with this method it is exported with the head mesh.
4. Export the Sculpt:


It should end up in your SKSE folder (SKSE\Plugins\CharGen), wherever that is for you
5a. Method 1 (works for both Vanilla and Mod-added NPCs): get your NPC in front of you, either by console command (example with J'zargo):
~
help 'J'zargo'
then, using their RefID (the number that appears next to their name) type:
player.placeatme 0001C1A3
Or find them in-world.
With the mod More Informative Console installed, reopen the console (~) and click on them. Write down their BaseID.
5b. For Vanilla NPCs: close your game and search for your character's name on UESP and find their BaseID. Copy this number.
6. Open your BSA extractor of choice and Skyrim's data folder. Find the Skyrim - Textures0.bsa. Open with your BSA extractor, and paste the BaseID in the search box
Check the checkbox next to the main facegen file only and extract somewhere easy to find.
7. Repeat this process with the Skyrim - Meshes0 file.
8. Create a new mod folder. You can either make a mod directly in the mod organizer (MO2 lets you right click in the left pane -> All Mods -> Create Empty Mod Above) or on your desktop.
Cut and paste the 'textures' and 'meshes' files you just extracted into your mod folder. If you are installing it via archive, go ahead and zip and install the folder.
9. Now open the Creation Kit. Use the folder icon to load your masters.
Pick Skyrim, Update, DLC (if applicable), and any other mods you want to be masters for your mod (for eyes, hairs, etc.) If you've made your plugin already for headparts, just load it up.
10. In the Object Window, expand the Actors -> Actor -> Actor tabs and now you have a lot of tabs with Race names. Find the race your NPC belongs to then open the appropriate gender tab. Alternatively, you can just search the character's name in the searchbox.
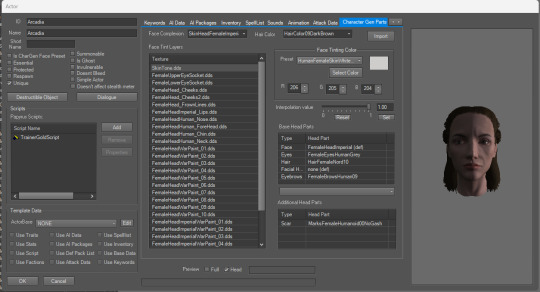
11. Find your NPC's name and double click. This opens their Actor window, which is where you will use all the data you wrote down.
If you want a preview of their face, tick the box at the bottom of the window.

For weight adjustments: go to the Traits Tab. For all other values you need to worry about for this tutorial, go to the Character Gen Parts.
So, to parse this: you can ignore the Face Tint Layers box and pretty much everything on the left side of the screen.
Face Tinting Color
Type in your values for R G and B (you can ignore the Preset dropdown completely.) The Interpolation value corresponsed to the 'A' value, so unless you are working on Khajiit or Argonians, it will probably always be 1.
Base Head Parts
To change stuff in this section, click the line you want to change then go down to the dropbox below it and change it to what you want
Face - unless you're using something like High Poly Heads, you can ignore this
Everything else in this box: change to what you wrote down for each
Additional Head Parts
This is mainly used for scars and functions a little differently. To add a scar, you need to go to the Object window again.
You can expand the Character tab and click 'HeadPart' then search the name of the scar you want. Click and drag the line with your scar into the Additional Head Parts box and it should show up there.
12. Once you've got the above like you want it, hit 'Ok', save your plugin. Now, to make the next step a little easier, you can click the NPC name in the Object Window again and hit f4.
This will export the meshes/textures file folders to the mod you just made in step 8.
Go ahead and exit the CK now
13. Go your your files exported from the last step. Open a second window from the files you exported from SKSE.

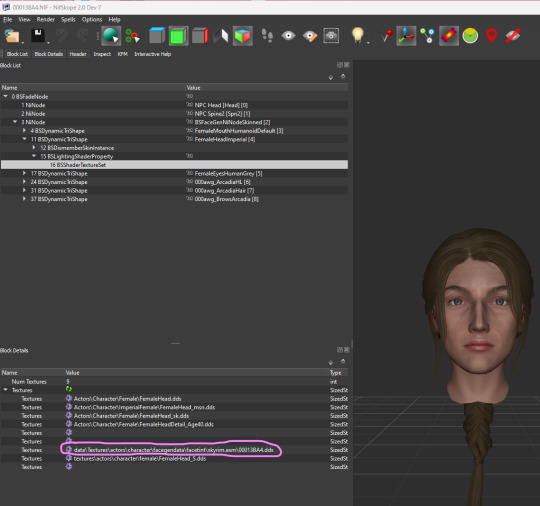
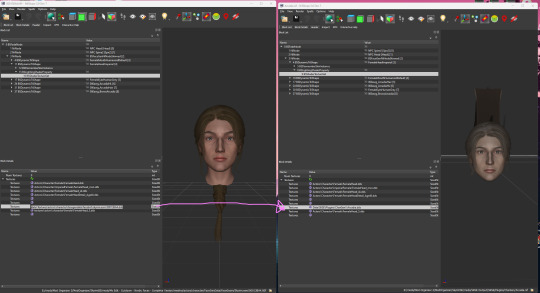
Open both meshes in two separate NifSkope windows.

If your SKSE head has a weird broken neck mesh like above, that's not a problem and can be ignored.
You absolutely must make sure your headparts match the head you exported from RaceMenu exactly, or you will get the dreaded dark face bug.
Now, you will need to find the Head textures in the head you exported from the CK. If your NifSkope is set up like mine, it should look like this:
Copy this line and paste it into the SKSE head in the same slot.
Save the SKSE NifSkope and close.
14. Rename the SKSE files (both .dds and .nif) to the number your exported heads are. You can then copy and paste your your SKSE files to their respective folders in your step 8 mod folder:
the .nif file goes in meshes/actors/character/FaceGenData/FaceGeom/[name of plugin]
the .dds file goes into textures/actors/character/FaceGenData/FaceTint/[name of plugin]
And now you're ready for testing! At this point I also recommend taking a second and converting your plugin to an ESPFE via SSE Edit. It's pretty simple and there are tutorials out there.

Scully, you're not gonna believe this.
111 notes
·
View notes
Text
Stormhold Warrior Armor SSE is now available!
This is a port plus fixes and edits of the original Stormhold Warrior Armor for LE.
149 notes
·
View notes
Text
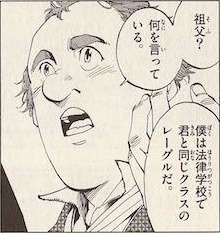
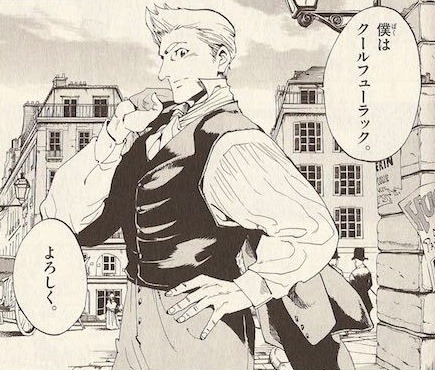
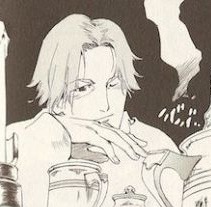
I am ridiculously far behind on my Les Mis Letters/Arai Manga posts, but I couldn't let today's chapter of 3.4.1, "A Group That Almost Became Historic," go by without showing Arai's Les Mis designs from when they first show up (there's no direct equivalent to this chapter in Arai, but the characterization notes from it get woven in throughout the manga from here on out).
Les Amis are quite popular in Japan, possibly because the trope of a group of people from dissimilar backgrounds coming together for a common cause is much more common there than in US-based media, which tends to favor a lone hero (see: Super Sentai, and also, like, every shounen manga ever).
Anyway, here they are (in reverse chapter order):
Grantaire, looking even worse than he does for most of the manga, since he's clearly already VERY drunk:

Joly:
Bossuet, with this being one of the very few adaptations where he's actually bald/balding:
Bahorel:

Courfeyrac:
Feuilly:

Jean Prouvaire:

Combeferre:
And Enjolras:

Arai does explain the pun, with ABC and Abaisse being spelled out phonetically in katakana next to the Roman alphabet characters in Enjolras' dialogue (a-be-se and a-be-sse, respectively). Les Amis are generally known as "ABCの友," (ABC-no-tomo) or "friends of ABC" in Japanese.
85 notes
·
View notes
Text


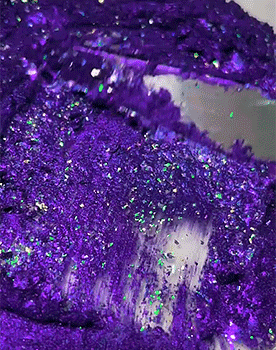


Purple OB-SSE-SSED, the stimbord💜
Le violet est mon intérêt spécifique autistique💜💜💜 Et vous?
#purple#purpleaesthetic#purple aesthetic#purplecore#purple moodboard#purple glitter#dark purple#purple fairy#stimboard#stimming#purple stim#aesthetic#aesthetic moodboard#moodboard
16 notes
·
View notes
Text
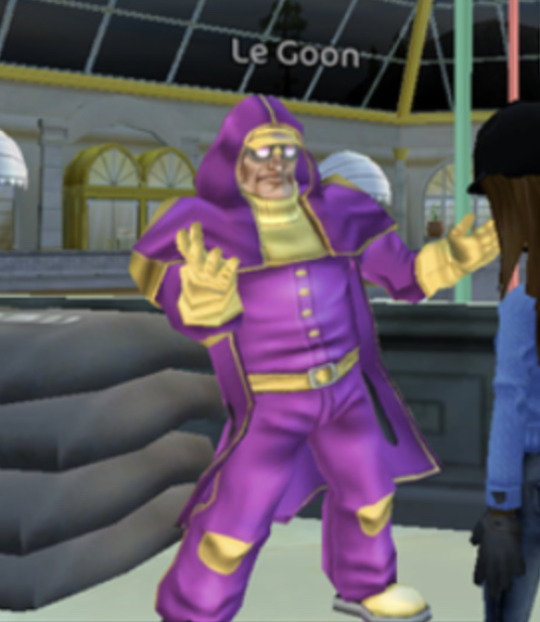
Since SSE have discontinued Le Goon I am in fact making it canon that she identifies as a he/she gay man. And she’s a star. And icon. He is the moment.
60 notes
·
View notes
Text

harpae ( pocket mirror ) id pack


names : coral( le ) , peach , harp( ette / esse ) , rose( tte / tta ) , tea , musique , tune( tte / sse ) , soprano , baritone , bluebell , bow( ie / ette / esse ) , petticoat , cataract , capelet , savio( u )r , petal , livre , libro , artiste , palette , fleur , flor , gramophone , facet , song( ette / esse ) , lament , crystal / cristal , kristal / krystal , guardian , miroir , reflejo , pristine , maiden
pronouns : ruffle / ruffles , protect / protects , book / books , literature / literatures , flower / flowers , petal / petals , neat / neats , piano / pianos , pa / paint , paint / paints , bow / bows , ruffle / ruffles , mu / music , music / musics , so / song , song / songs , tu / tunes , blue / blues , glass / glasses , guard / guardian , guardian / guardians , guard / guards , protect / protector , protect / protects , mirror / mirrors , shatter / shatters
requested by anon along with a fleta id pack and a few upcoming ones :3

#♥︎ we are now on the record .#mogai community#mogai blog#mogai safe#mogai friendly#mogai#pronoun ideas#pronoun list#pronoun suggestions#pronoun suggestion#pronouns#name ideas#name suggestion#names#name list#xenopronoun suggestion#xenopronoun suggestions#xenopronoun list#xenoprns#xenopronouns#neoprns#neopronoun suggestion#neopronoun suggestions#neopronoun ideas#neopronoun list#neopronouns#id pack#harpae#harpae pocket mirror#pocket mirror
21 notes
·
View notes
Text
This fix was published 2 years ago, and I thought it might be good to mention it here.
When you use HPH and EFA - male edition together, the animation file for the eyebrows have a tiny flaw. They move, too, when the character is blinking.
I fixed that eyebrow TRI.
#modding#skyrim se#skyrim mods#skyrim#skyrim modding#mod author#the elder scrolls#high poly head#EFA
18 notes
·
View notes
Text
hey important question between skyrim le and SSE, which one do you currently have installed/ prefer playing?
there's no "just here for the results" option because i'm trying to figure out what mod release to prioritize/ if there's even an interest in a LE version at this point to begin with
maybe reblog this for a bigger sample size if you can, thanks
24 notes
·
View notes
Note
No estas asustada que Splatoon 3 termine pronto? lo digo por que Deep Cut ha tenido tan poco desarrollo y casí no sabemos nada del pasado de Shiver, Frye y Bigman Individualmente por lo que al menos que sse venga Splatoon 4, no se como sera la cosa. En mi caso si ando asustado que no tendremos un arco con ellos :c Que opinas?
uhhhhhhhh bueno yoooo como que siempre trato de no tener mucha opinion de nada, trato de no tener muchas expectativas para evitar sentirme decepcionada luego. todavia faltan muchos meses antes de que splatoon 3 termine, asi que no le estoy dando mucha mente a eso y quiero disfrutar el momento presente. sobre deep cut, entiendo lo que quieres decir, aun que creo que han hablado un poco de sus pasados en las entrevistas en la revista de nintendo, por si los has visto, pero ademas de eso, el mismo story mode de splatoon 3 como que,, bueno si estuvieron ahi, pero siento que fueron como,, medio,,,, a lo lado, si eso hace sentido? no se skfhskdjak no es gran cosa imo pero me hubiera gustado si los vieramos un poco mas. pero amo a las squid sisters so supongo que hay que hacer sacrificios. de cualquier manera, si tengo una queja, genuinamente, que me molesta, y es lo de el aniversario, eso si me molesto un poco, un splatfest tan, como digo, importante? con mucho peso? no es un tema que se trata facilmente, por ejemplo callie vs marie fue el ultimo splatfest de splatoon 1, asi que tuvo mucho hype yknow mucha importancia, pero no se, el asunto que me preocupa a mi es lo de daybreaker anthem, que diria yo que es como el "credits theme" de deep cut, y donde lo ponen? despues de cada splatfest. eso no me agrada, un tema tan importante comparable a into the light o las otras Tres canciones que tienen las squid sisters, osea si fuera yo, yo hubiera sacado daybreaker anthem al Final Final, porque para mi se siente que lo hicieron ahora como para salir de deep cut ya, me entiendes? soy la unica que se siente de esa manera? no se. y por ponerla que suene siempre despues de cada splatfest ya para el final cuando la cancion sirva su proposito ya va a estar gastada porque la escuchabamos tan frecuentemente. eso es lo que yo pienso pero, otra vez, trato de no darle mucha mente porque en fin solo es un juego y todos estamos aqui para pasarla bien y disfrutar so, eso es lo que voy a hacer sin importar lo que suceda lol
6 notes
·
View notes
Text
I'm Glad My Mom Died, by Jennette McCurdy (January 2023)

Jennette McCurdy's memoir about her relationship with her mother, the impact she had on her both during her life and after her death, and the consequences of being a child actor.
Would I recommend it to anyone? Yes, but not to everyone because it's really "child abuse, addiction and eating disorders", The Book. So you have to make sure those aren't triggers for you before reading this book.
Level of (dis)satisfaction based on the summary and my expectations? I almost never read non-fiction, I'm trying to read more of it so I'm glad I liked this one.
My thoughts on it? I had heard several people say that the narration feels child-like at the beginning and that it was because Jennette McCurdy wrote from child-her's point of view, and I didn't really get what they meant. And then I read it and I understood. As an adult reader, I could understand things that 8-y.o-Jennette or 13-y.o-Jennette couldn't, I could see how toxic and abusive her mother's behavior was. And it was gut-wrenching.
It was a very interesting read on several levels, we see a bit of the reality of child actors, and I think that the people who watched Nikelodeon during the iCarly years etc will sse the show and Jennette in a new light. That said, I also know someone who couldn't finish the book because they were a fan of Jennette and reading it was breaking their heart.
Anyway, Jennette McCurdy is right to focus on writing now, she's talented (and it makes her happier).
btw, i think it's sad that the first thing the official summary says is “A heartbreaking and hilarious memoir by iCarly and Sam & Cat star Jennette McCurdy” while she clearly said she doesn't want to be remembered as Sam. i understand that it's for marketing reasons, but it's still sad
French version under the cut
Les mémoires de Jennette McCurdy sur sa relation avec sa mère, l'impacte qu'elle a eu sur elle de son vivant comme après sa mort, et les conséquences d'une carrière d'enfant star.
Est-ce que tu le conseillerais à quelqu’un ? Oui, mais pas à tout le monde parce que c’est vraiment “maltraitance d’enfant, addiction et troubles alimentaires”, Le Livre. Donc il faut s’assurer que ce sont pas des déclencheur avant de commencer le livre.
Niveau de déception/satisfaction par rapport au résumé et tes attentes ? Je lis quasiment pas de non-fiction, j’essaie dans lire plus donc je suis contente d’avoir aimé celui-là.
Avis sans spoiler ? J’avais entendu plusieurs personnes dire que la narration est un peu enfantine au début et que c’était parce que Jennette McCurdy écrivait de son point de vue en tant qu’enfant, et je comprenais pas trop ce que ces personnes voulaient dire. Puis j’ai lu le livre et j’ai compris. En tant que lectrice adulte, je comprenais des choses que Jennette-à-8-ans ou Jennette-à-13-ans ne comprenait pas, je voyais à quel point le comportement de sa mère était toxique et abusif. Et c’était vraiment déchirant.
C’est vraiment une lecture très intéressante à beaucoup de niveaux, on voit un peu la réalité des enfants star, et je pense que pour les personnes qui regardaient Nikelodeon à l’époque de iCarly etc vont voir la série et Jennette sous un nouveau jour. Après je connais aussi quelqu’un qui n’a pas réussi à finir le livre parce qu’iel était fan de Jennette et que ça lui brisait le cœur de le lire.
En tous cas, Jennette McCurdy a raison de se concentrer sur l’écriture maintenant parce qu’elle a vraiment du talent (et ça la rend plus heureuse).
d’ailleurs, je pense que c’est triste que le premier truc que le résumé officiel dise c’est “Un mémoire déchirant et hilarant par la star de iCarly et Sam & Cat, Jennette McCurdy” alors qu’elle dit clairement qu’elle veut pas qu’on se souvienne d’elle comme Sam. je comprends que c’est pour des raisons marketing mais c’est quand même triste
#i'm glad my mom died#jennette mccurdy#memoirs#celebrity books#celebrity memoirs#books#book recs#book reviews#booklr
21 notes
·
View notes
Note
How did you get started modding npcs? I’d love to work on making the elderly people in Skyrim feel less identical but the creation kit is intimidating. Is there an easy way to dip into the modding scene or do you just have to crack things open and make mistakes? It’s hard to find guides that don’t focus on cbbe 😔
Sorry for the lateness of this, Tumblr won't let me edit drafts for asks on mobile, so I couldn't jot down my thoughts as I had them which is my usual method of answering stuff like this.
Oh man, my start was probably learning to edit the NPC from Tame the Beast 2 lol. She stood out like a sore thumb in my game. I found a tutorial that ended up becoming my method through the RS Children page.
It primarily focuses around using RaceMenu, which has a function that allows you to export the head you make directly from Character Creation. This allows you to use the extra facial sliders (like the ones from and overlays (like Freckle Mania 2, my beloved). So basically, it allows for potentially far more unique NPCs than editing via CK.
I am going to warn you, it definitely is not simpler than editing NPCs in the Creation Kit alone. Sorry.
Links are to the SE version of the mods, as that's what I'm most familiar with. They likely have LE counterparts. Sorry, I am not the greatest at writing tutorials.
Things you will need:
RaceMenu (and SKSE; be sure to get the correct versions of both for your game)
NifSkope - you will use this to open and edit the mesh. Here's GamerPoet's setup video
Things I recommend:
Creation Kit Platform Extended for Skyrim - makes using the Creation Kit way less like pulling teeth
Unofficial Creation Kit Patch - if you're using AE
an alternate start mod - I like Dimes Quickstart for its simplicity, but any would work
Another Race Menu Rotation Mod - handy for seeing how the back of hairs look
Stand still in RaceMenu (OAR) - stops the character from wiggling out of frame
For your quest to edit elders specifically, you will probably need a playable Elder Race mod (I have not tested any, but just searching for them yields plenty of options.) You will have to know exactly what races the NPCs you're editing are, though
Fun Stuff for diverse options:
Extra slider mods (I like Expressive FaceGen Morphs)
Skin Overlay Mods (for extra detailed faces)
If you want to get REAL funky with it, you can also use OutfitStudio to have a lot better time sculpting/getting super wild with assets, but that's too advanced for this tutorial (and my method is very 'goof around until it just works.'
I don't really want to cover using mod-added headparts (like eyes, hairs, etc.) There are basically two options there: add them as new headparts for your mod or make your mod dependent on the mod the headparts are from. The second way is probably simpler for beginners, but I definitely suggest installing Creation Kit Platform Extended, as it will allow you to load the other mods as masters without the Suffering™.
The Workflow
1. Design your character like you would a player character. For this example, I am redesigning Arcadia.
A recommendation: unless you really feel like you need to change it, it is typically better to make the Weight slider match the NPC's actual weight. You can see this value using either SSE Edit or the Creation Kit. It is no big deal if you don't, but if you change the weight and load the mod into an already existing save you will get a gap between the NPC's neck and body (unless you use Save Unbaker.) Be careful, though, there is a RaceMenu bug where if you load up RM again after exiting, it changes the weight by .01. So annoying.
For Skin Tone choice, if you do a custom skin tone (by pressing 'E' while hovering over the slider) I would recommend leaving the transparency slider (the 'A' value) at 100% (though I usually make the exception for Khajiit and Argonians.) This info will go into the Interpolation Value box in the CK, and the RM values can't be directly input, so you have to calculate the value with a (RM Number/255 = X/100, solve for X which is your Interpolation Value)
1a. If you are planning on adding faceparts from mods to your own plugin, I recommend saving and doing that now. Then come back to your save and change your headparts to the versions from your plugin. If you want to just have the other mods as masters, you can skip this.
2. Once you're satisfied with your design, I recommend saving your game and saving your head as a preset (click to enlarge):

3. Now, you will need to write down some stuff.
Skin Tone (RGB value):
Hover over Skin Tone slider. Press 'E'.
write down the R G B values (and A if you change it, see above note)
Even if you use a default skin tone, this is the best way to make sure you get the correct value for the CK.
Weight (number)
Scars (name) (if applicable)
Hair (name)
Facial Hair (name) (if applicable)
Eye Color (name)
Brow Type (name)
Writing down Hair Color is optional: with this method, the hair will inherit color from the head you export, not the CK value. Plus, RM's values are not really useful, because the default hair colors are named.
It's the same with the Face Complexion (wrinkles, etc), with this method it is exported with the head mesh.
4. Export the Sculpt:


It should end up in your SKSE folder (SKSE\Plugins\CharGen), wherever that is for you
5. Now you can close down the game and open the Creation Kit.
Use the folder icon to load your masters.
Pick Skyrim, Update, any official DLC (if applicable), and any other mods you want to be masters for your mod (for eyes, hairs, etc.) If you've made your plugin already for headparts, just load it up.
6. In the Object Window, expand the Actors -> Actor -> Actor tabs and now you have a lot of tabs with Race names. Find the race your NPC belongs to then open the appropriate gender tab. Alternatively, you can just search the character's name in the searchbox.
7. Find your NPC's name and double click. This opens their Actor window, which is where you will use all the data you wrote down.
If you want a preview of their face, tick the box at the bottom of the window.
For weight adjustments: go to the Traits Tab. For all other values you need to worry about for this tutorial, go to the Character Gen Parts.
So, to parse this: you can ignore the Face Tint Layers box and pretty much everything on the left side of the screen.
Face Tinting Color
Type in your values for R G and B (you can ignore the Preset dropdown completely.) The Interpolation value corresponsed to the 'A' value, so unless you are working on Khajiit or Argonians, it will probably always be 1.
Base Head Parts
To change stuff in this section, click the line you want to change then go down to the dropbox below it and change it to what you want
Face - unless you're using something like High Poly Heads, you can ignore this
Everything else in this box: change to what you wrote down for each
Additional Head Parts
This is mainly used for scars and functions a little differently
To add a scar, you need to go to the Object window again
You can expand the Character tab and click 'HeadPart' then search the name of the scar you want. Click and drag the line with your scar into the Additional Head Parts box and it should show up there.
8. Once you've got the above like you want it, hit 'Ok', save your plugin. Now, to make the next step a little easier, you can click the NPC name in the Object Window again and hit f4.
This will export the meshes/textures file folders to wherever you have CK set up to export files (if you use MO2, it goes directly to the Overwrite folder by default.) Your plugin will be in the same place, (probably. Mine is bugged.)
Go ahead and exit the CK now
9. Go your your files exported from the last step. Open a second window from the files you exported from SKSE.
Open both meshes in two separate NifSkope windows.
You absolutely must make sure your headparts match the head you exported from RaceMenu exactly, or you will get the dreaded dark face bug.
If your SKSE head has a weird broken neck mesh, that's not a problem and can be ignored.
Now, you will need to find the Head textures in the head you exported from the CK. If your NifSkope is set up like mine, it should look like this:
Copy this line and paste it into the SKSE head in the same slot.
Save the SKSE NifSkope and close.
10. Rename the SKSE files (both .dds and .nif) to the number your exported heads are. You can then copy and paste your your SKSE files to their respective folders:
the .nif file goes in meshes/actors/character/FaceGenData/FaceGeom/[name of plugin]
the .dds file goes into textures/actors/character/FaceGenData/FaceTint/[name of plugin]
And now you're ready to pack up your mod for testing! At this point I also recommend taking a second and converting your plugin to an ESPFE via SSE Edit. It's pretty simple and there are probably tutorials out there.
Scully, you're not gonna believe this.
27 notes
·
View notes
Text
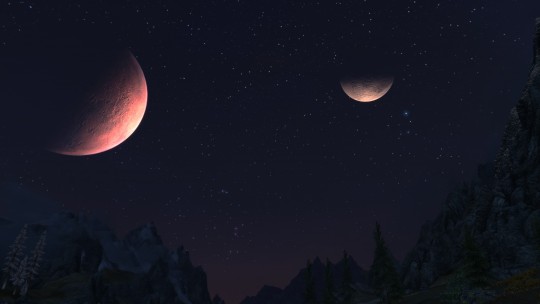


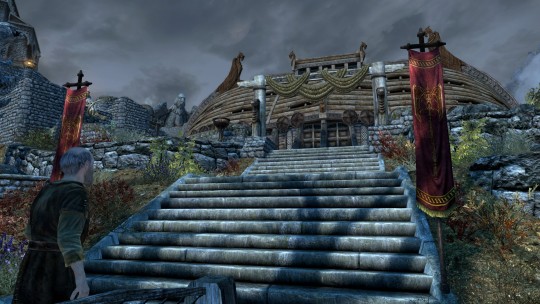
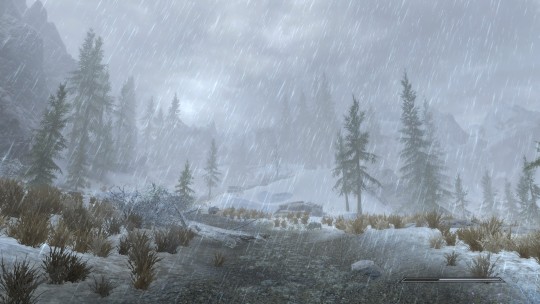
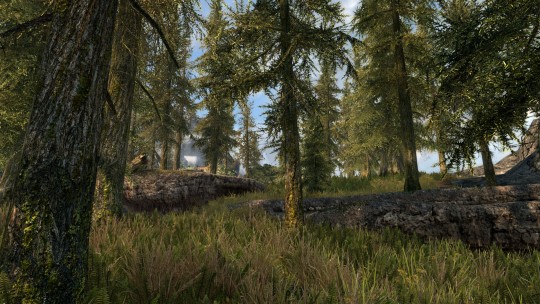
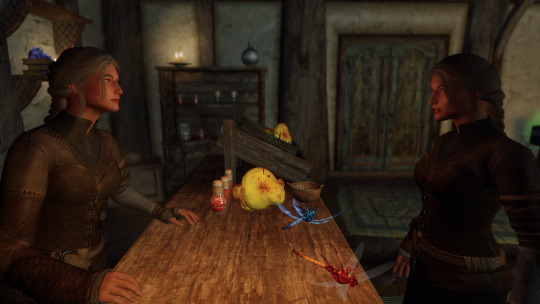
#skyrim#elderscrolls#tesv#oblivion#tes#skyrim special addition#special anniversary edition#screenshots#skyrim screenshots
2 notes
·
View notes
Text

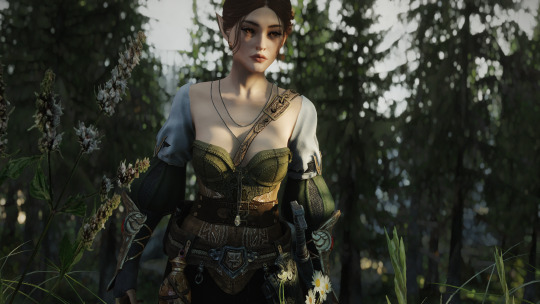
i said i'd stick to nolvus but it was too heavy a modlist that left me with choice paralysis, so i went back to the roots to rebuild one similar to my LE playthrough to suffer from... even more choice paralysis. so far i have SFO and tamrielic grass installed for landscape and it already makes such a huge difference ;; i'll take my time and carefully install mods a few at a time.
some favorite finds (nts so i can download later):
Sleek Nose On Winter Bears - Enhanced And Reshaped Snout
Khajiit Has Wares - A Caravan Camp Overhaul
(ESL) Creatures of Nirn - Khajiit Alfiq (SSE port)
i've been using Cabbage ENB which is probably my favorite by far! it's plug and play and everything looks perfect. but i miss the colors from LE's K ENB :(
2 notes
·
View notes
Last Seen Blogs

star-thousand
Untitled

madelinedear
Writer :)
winsstar-art
Art Blog Time

barrychannel131
Barry channel

dailyscottleadreadyii
Daily Scott Leadready II