#sims 4 horses cc
Text
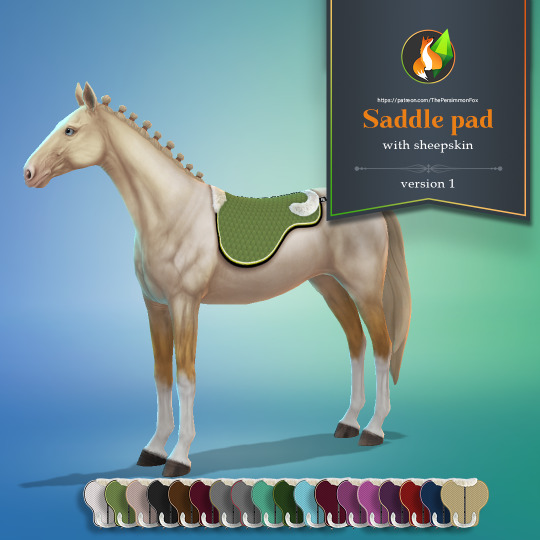
Sims 4 Saddle Pad with sheepskin


Yay, I've finally finished it! 😄
17 swatches
Comes in two versions: with and without sheepskin
Download it on my Patreon (Free)
I would appreciate it, if you support me on my Patreon, besides, I'm planning to start my own Equestrian Line of high quality equipment for horses 😉
#sims 4 cc#sims 4 custom content#the sims 4 custom content#ts4 horses#sims 4 equestrian#sims 4 horse ranch#sims 4 horses#the sims 4 equestrian#the sims 4 horses#ts4 equestrian#ts4 horse cc#the sims 4 horse cc#sims 4 horse cc#sims 4 horses cc#the sims 4 horses cc#ts4 custom content#ts4 horses cc#ts4#the sims 4#sims 4
782 notes
·
View notes
Text
North Swedish Horse

Because I felt that there was a dire need of more draft horses for the latest EP
The download is a household of four horses all hand painted by yours truly


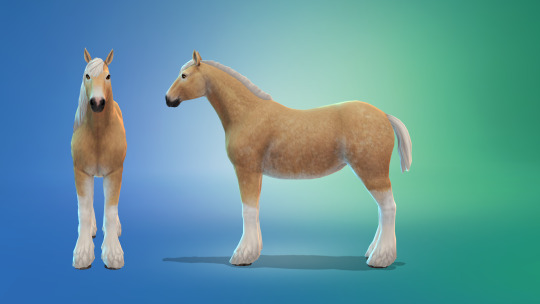
CC Used is linked below, but none of it is required in order for the horses to work (aside from the Horse Ranch EP lol :P) however I think it definitely makes the horses look a lot better
DOWNLOAD (Google Drive, no ads)
CC Used
History Sims 4 Irish Cob Mane & Forelock
Colourfui_Sims Wavy Mane & Forelock
Someone_Elsa Soulmate Default Replacement Horse Eyes
The Kalino Short Tail
Nesurii Horse Re-Texture
MinervaMagicka More Sideways Eyes Fix
(Also after I made this I found this cc chin fluff which would definitely work well on these horsies)
Now we just need some nice draft horse-y poses òwó
#sims 4 cc#ts4 cc#ts4 horses cc#ts4 household cc#sims 4 horses cc#sims 4 household cc#sims 4 custom content
252 notes
·
View notes
Text
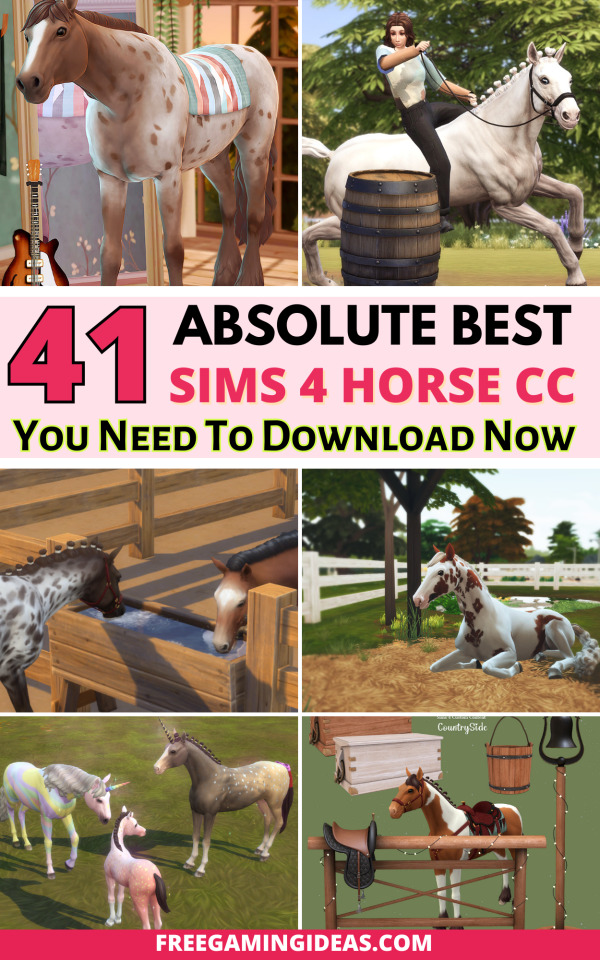
41+ Sims 4 Horse CC You Have to Check Out Now
Looking for the best Sims 4 horse CC to add to your CC folder? Here, I’ve rounded up a list of the best Sims 4 horse CC finds that are sure to make your Sim’s ranch the best on the block!
You can find the post here.
#sims 4 horse cc#sims 4 horse ranch cc#sims 4 equestrian cc#sims 4 horse ranch mods#sims 4 horse mods#sims 4 pet cc#horse cc sims 4#sims 4 cc horse#sims 4 horses cc#horse ranch cc#free gaming ideas#freegamingideas#sims 4 cc#sims 4 mm#sims 4#ts4cc#sims 4 cc finds#ts4 mm#the sims 4#ts4#the sims 4 horse cc#the sims 4 horse ranch#the sims 4 horses#ts4 horse cc#ts4 horse ranch#sims 4 horse ranch#ts4 horses
213 notes
·
View notes
Text
objuct's short tail - skunk retexture
@kebbe-sims's amazing skunk tail textures definitely needed to be added to my hoard of short/bobbed tail cc for my chunky draft horses, and I'm sharing that cc with y'all. Literally the quickest edit I've ever done anywhere.
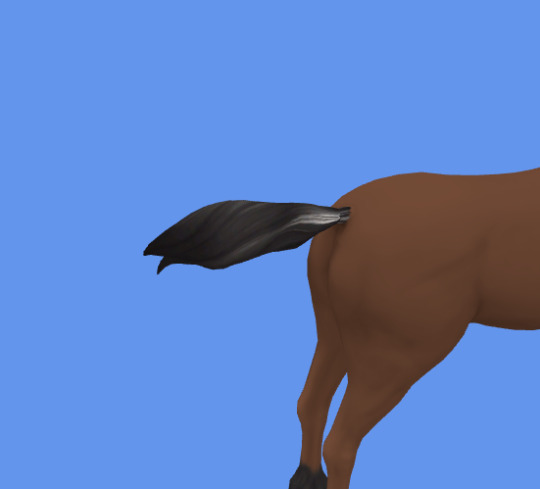
all colors (even unnaturals), etc etc, have fun. Don't paywall this shit extra EXTRA so because none of this shit is mine.
Get it HERE
72 notes
·
View notes
Text
A guide for making a horse stencil (but it also works for cats and dogs, technically).
Edited 16/10/2023: Updated to add more info on hash ID generation and better practice.
If you've read my previous guide on making custom brushes, you'll find that it's relatively similar.
If you're brand spanking new to making any mods, this will probably take you through every single step, because I have an issue with being over-detailed.
Things you'll need:
Sims 4 Studio
GIMP
Notepad
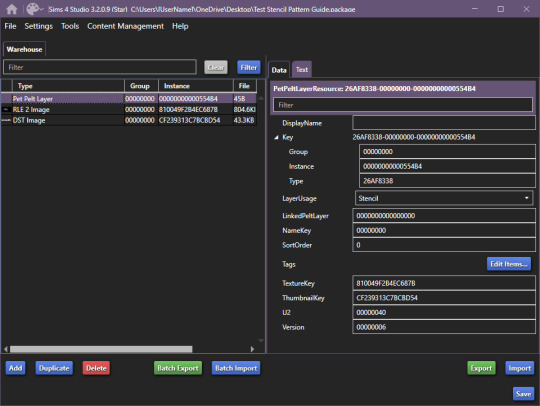
Tools in S4S we'll be using:
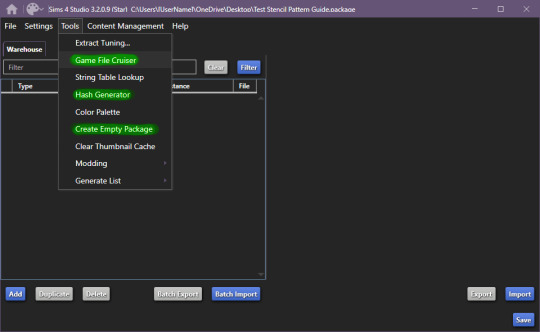
Begin by making a new, empty package file, after that, open up the game file cruiser.
Find the "Pet Pelt Layer" and tick the box, after that, in the search box below the file types, write in "EP14", as this will hide cat and dog stencils that will show up.
From here, it's important that we find the right one to work with, it has to be tagged as "Stencil", in this case, it'll be the 3rd from the top of the list or - 00000000000554B4
You can definitely work with just the first one which is a pattern if you want to, but if you're completely new to modding, it will be much easier with the one I've linked. If you do choose the pattern route, remember to change it from pattern to stencil and ThumbnailKey is responsible for the thumbnail you'll see in game.
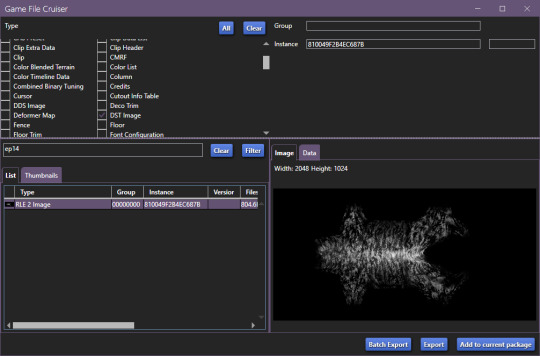
Now, grab your trusty notepad and make note of these ID's:

In our case it's:
810049F2B4EC687B
CF239313C7BCBD54
Once you've made note of these ID's, make sure you add the file to your current package. You can also skip writing down the ID's and just view them from your package editor screen, but I find it helps keep the workflow more compact, however it is up to you.
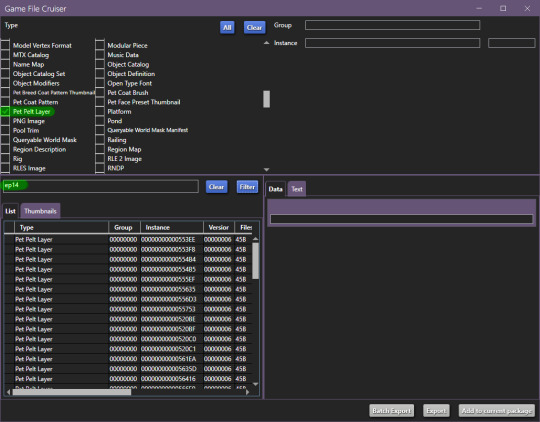
Now, go back to your filetype list and select "DST Image" and "RLE 2 Image":
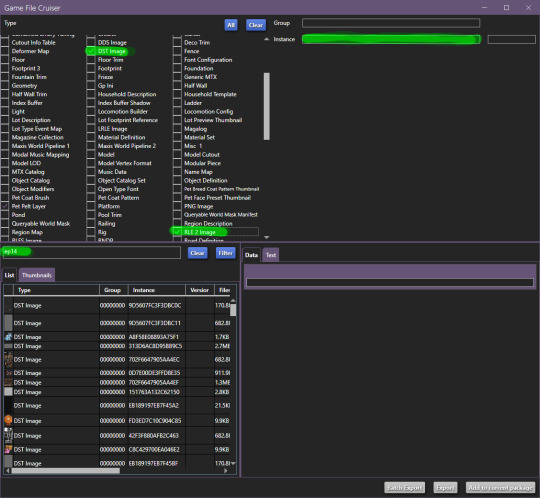
Additionally, make sure you still have "EP14" in the search bar, for the next part we'll be using the instance search bar, as marked on top right.
Enter your first ID -
Add to package and do the same with the second ID.
Now, your new package file should look like this:
Once you're at this point, it's relatively easy sailing.
Start by going to Tools > Hash Generator and generate 3 ID's:
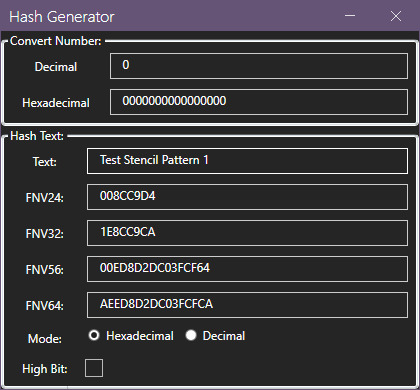
Edited 16/10/2023: When generating your hash ID's, please use your creator name ie.: "[YourCreatorName/Blogname]TutorialCustomFurCoat1", this will give you a more unique hash code than hoping to be as descriptive as possible when generating the hashes (in this case instance ID's). PS. You should still be descriptive.
Thanks to Mizore Yukii for this advice, from Creator's Musings.
I do it this way, descriptor + numbers, but you can do it whatever way you want to.
After that, we'll assign your newly generated ID's.
These are the ID's I generated:
AEED8D2DC03FCFCA
AEED8D2DC03FCFC9
AEED8D2DC03FCFC8
Respectively, my first ID will be used on the Pet Pelt Layer, Second ID will be used on the RLE 2 Image and 3rd ID will be used for the DDS image:
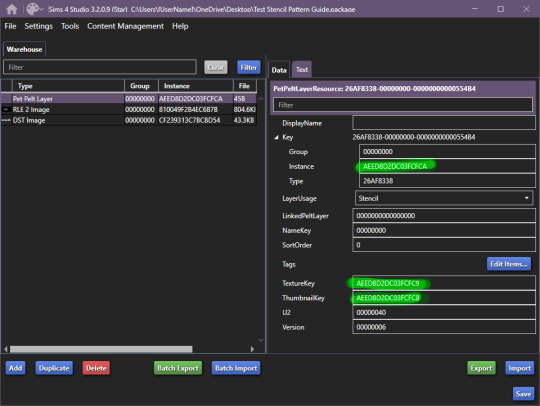


The package you're working on should now look something like this:

After this, you should save your package (so you don't lose your progress, I had a bluescreen happen and I'm still mad, so don't make my mistakes, it's easy to fix, just takes too much time).
Once you've saved your package, we can begin exporting/importing images.
For editing, I recommend actually grabbing the horse skin file. I've uploaded it to SimFileShare, it comes in two flavours .dds and .png, .png will be easier to work with, since it won't have the same layers are .dds.
Anyway, back on track we go:
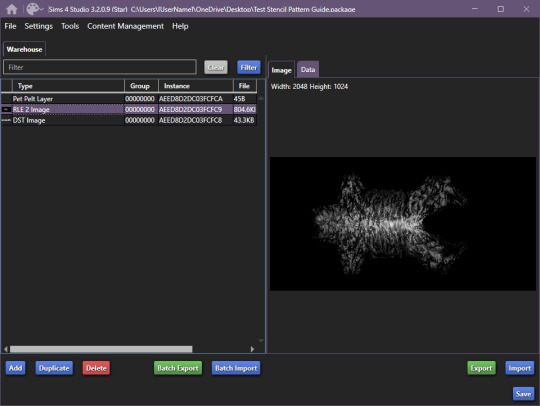
Export the RLE2 image, it'll be saved as a .png, keep that in mind for later.
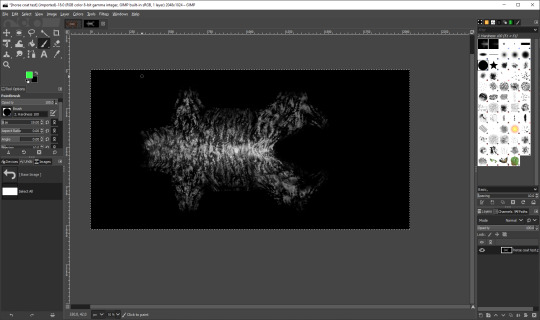
Once you're happy with your results, get to exporting your image.
IMPORTANT: remember to export the file in L8 format.
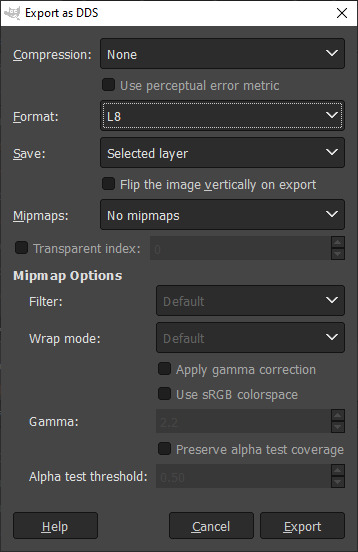
Once you're done with that, go ahead and import your picture into the package:

Repeat the same steps for the DST image, and you're done.
Now, save your file and load it into the game:
And you're all set and done.
If you have any questions, let me know.
#Sims 4 Horses#Sims 4 Horses CC#Sims 4 Horse Ranch#sims 4 equestrian#Sims 4 CC#Sims 4 CC Guide#Sims 4 CC Resources#ts4 tutorial#ts4 guide#ts4 cc#The SIms 4 Horse CC#The Sims 4 Horses#The Sims 4 Horse Ranch#The Sims 4 Equestrian#The Sims 4 cc
78 notes
·
View notes
Text

I was investigating how the EAxis water troughs and feeders worked and found I could change the position that the horse accesses them from by rotating the like slot point thingies. Anyway someone saw my test and requested an upload to use in between pasture fences. I made sure to test that it would indeed work if horses were blocked off from the other side and they do indeed work exactly as you'd hope. It also blocks their pathing like a fence would. So I moved the water spigot to the side of it, and walla.
To use it you'll need to chop a 2 block hole out of your fence and place it in the gap.
Hay Now! Water Trough - In-Fence Edit
Horse Ranch Required
Non-default (doesn't replace the other water trough)
Includes default texture swatches
Download | Mirror 📂
3K notes
·
View notes
Text

Horse Water Trough
You can find all my items by searching “ PV ” in game
Enjoy ☺
PATREON
#pixelvibes#sims4#sims4cc#ts4cc#s4cc#s4mm#ts4#ts4mm#sims 4#sims4mm#sims 4 cc#ts4 horse ranch#horse#ts4 custom content#ts4 cc#ts4 download#sims 4 custom content#art#ranch#ts4 maxis match
1K notes
·
View notes
Text


Addons for The Sims 4 Horse Ranch
I had some spare time and decided to make some extra addons for The Sims 4 Horse Ranch EP. I have to thanks Windenbro for these really good ideas.
Here is the list of items and requirements:
From Window to Arch (Requieres Horse Ranch EP)
From Decorative to Functional Bathtub (BGC)
From Stool to Dining Chair (BGC)
From Stool to Dining Table (BGC)
Dining Table without tablecloth (BGC)
From Window to Pet Door in 2 sizes (Requieres Cats and Dogs EP)
From Decorative to Functional Planters (BGC)
Wider Windows (Requieres Horse Ranch EP)
FREE DOWNLOAD HERE
#sims 4#the sims 4#sims#maxis match cc#maxis match#sims 4 maxis cc#the sims#sims 4 cc#sims cc#ts4#ts4 horse ranch#sims 4 horses#sims 4 horse ranch#the sims 4 horse ranch#sims4#horse ranch#cc finds#ts4 cc#the sims cc#custom content#my cc#cc by sixam cc#sixamcc#furniture by sixam cc#sixam cc#cc sims 4 furniture#furniture sims 4#cc furniture#addons#horse ranch gp
2K notes
·
View notes
Text

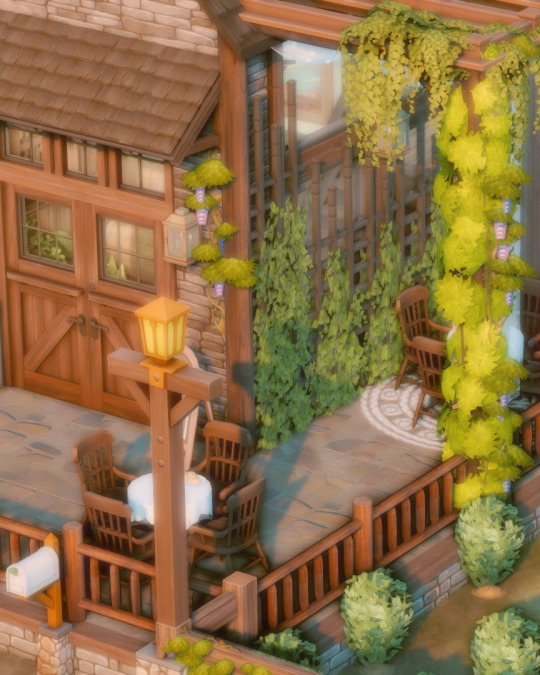
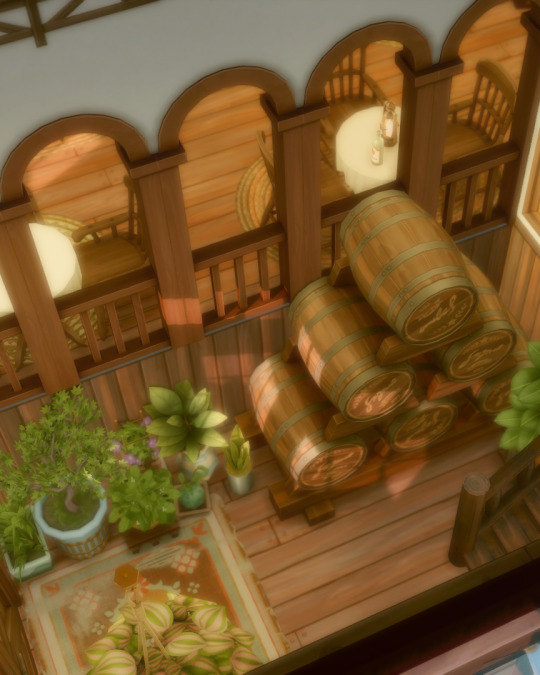
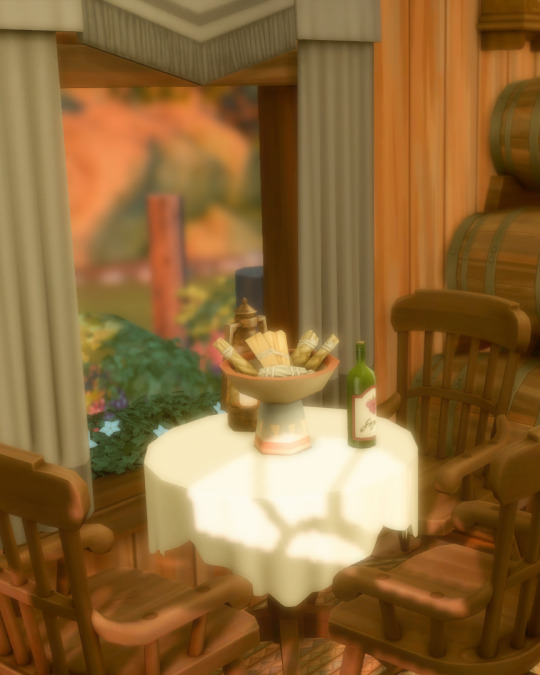
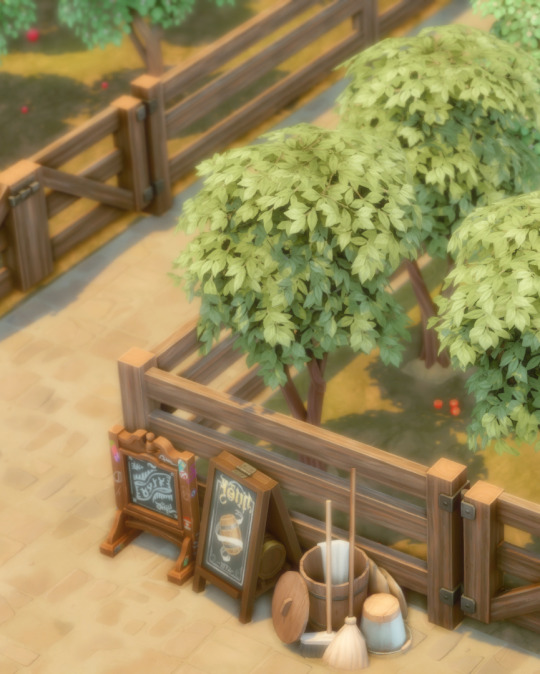
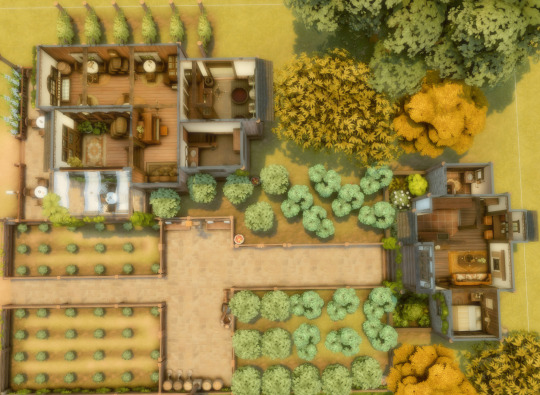
winery & restaurant ❤ TS4: House Ranch
no cc 40x30 ❤
download google drive (free)


#maxis match#ts4cc#the sims 4#ts4#sims#sims 4 download#ts4 builds#ts4build#maxismatch#no cc build#house ranch#sims 4 horse ranch#ts4 horse ranch#winery#ts4 download#ts4 simblr#ts4 gameplay#sims 4#simblr
2K notes
·
View notes
Text

RIDE 'EM! a recolour by luridsims (sailorsenshims)
when i saw plumbella talking about the lack of obnoxious horse girl shirts in the new pack, i knew i had to do something about it. so here's 17 swatches of ranch-themed shirts, with some gay shit thrown in.
featuring simlish slogans such as: y'all means all, just a girl who loves horses, save a horse ride a cow(boy/girl), cowboys for trans rights, this barbie is a cowgirl, sheriff of gaytown, and i put the ride in pride (and more!)
THIS SHIRT REQUIRES THE ORIGINAL MESH! you can download it from @aharris00britney [HERE] - it is the Zoë Top V1 which you can find in the item index listed on the download post.

🐎 DOWNLOAD HERE 🐎
2K notes
·
View notes
Text
Sims 4 Tartan Set for Horses (3d Ear Bonnet, Saddle Pad, and Exercise Blanket

Hey!💝 It took me forever to finish the set, because of RL work, holidays and all that, but I sincerely hope, you will enjoy it!


The bonnet fits almost every custom bridle, but some can clip into it a little.
As always: please, do not use my mesh in your creations, do not recolor, do not claim as you own, do not reupload it.
DOWNLOAD IT HERE
#sims 4 cc#sims 4 custom content#the sims 4 custom content#ts4 horses#sims 4 equestrian#sims 4 horse ranch#sims 4 horses#the sims 4 equestrian#the sims 4 horses#ts4 equestrian#ts4 horse cc#the sims 4 horse cc#sims 4 horse cc#sims 4 horses cc#the sims 4 horses cc#ts4 custom content#ts4 horses cc#ts4#the sims 4#sims 4
209 notes
·
View notes
Text


Longer mane and forelock - version 2 & 3
Made a second and third version of the longer waved mane and forelock.
non-default
FREE DOWNLOAD - Version 2
FREE DOWNLOAD - Version 3
2K notes
·
View notes
Text
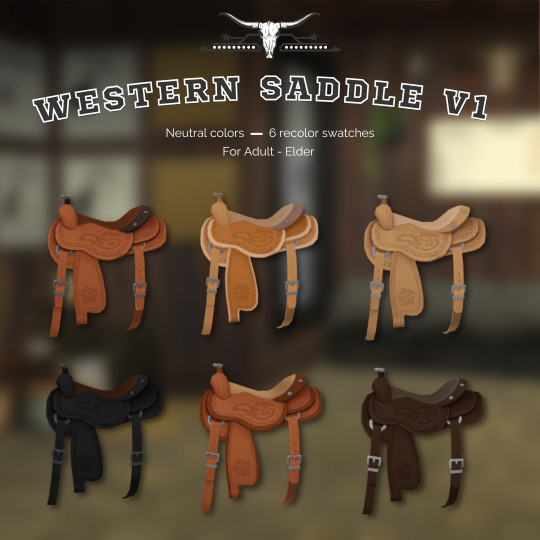
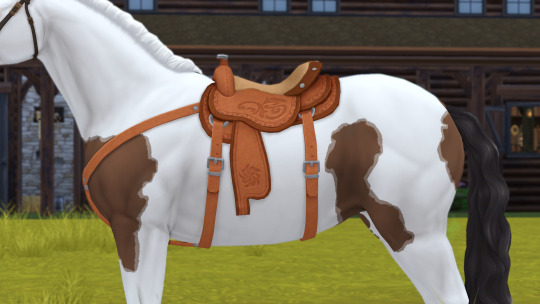
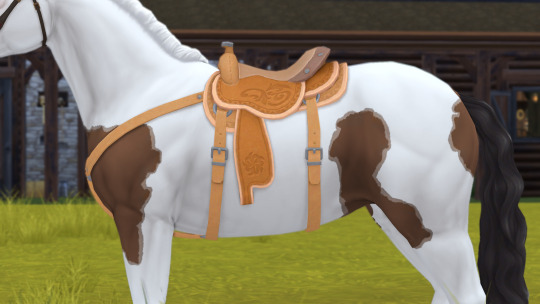
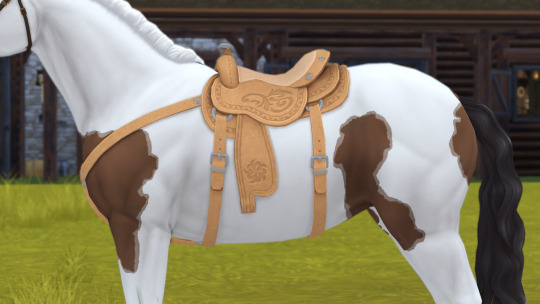

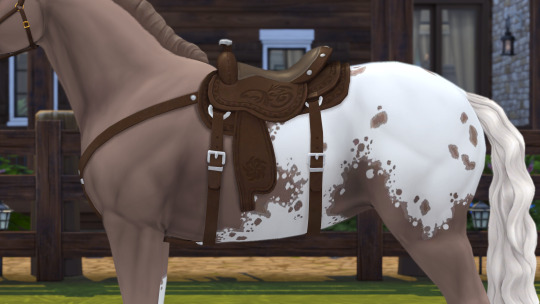


There it is, our first custom content!
We've created a western saddle with neutral and realistic colors for your horse. All saddles are a recolor of the original saddle from the sims or a mix of other saddles.
We hope you can make your horse even more beautiful with the new western saddles we have created.
Details:
6 swatches (Neutral recolors with silver metal wear)
For adult/elder horses
Unisex
Requires Horse Ranch DLC
(The in-game pictures have no effect added over them. Only a Depth of Field to blur the background)
🌻 ~ Howdy

Patreon (Free!) | Website
#sims 4 cc#sims 4 horses#sims 4 horse ranch#sims 4 mmcc#sims 4 horse pack#sims 4 horse saddle#sims 4 recolor#ts4cc#Buckarooranch#Sims 4 horses#ts4 horse ranch#sims 4 horse cc#ts4 horse cc#ts4 saddle cc
2K notes
·
View notes
Text
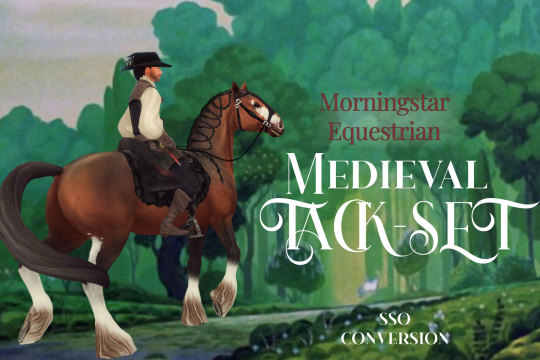
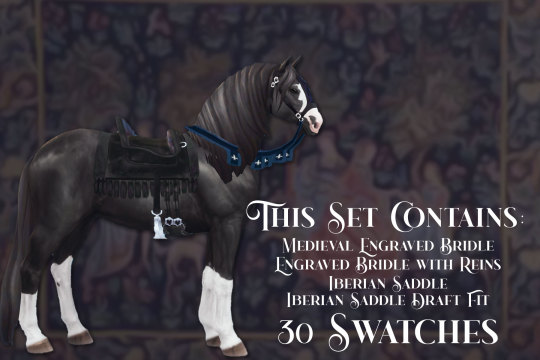

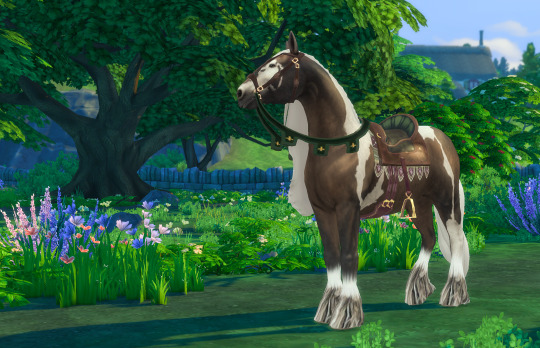
Hail, good Simizen! On this day, I present unto thee a medieval-inspired tack set, crafted for thy noble knights and ladies.
This Set Contains:
• Medieval Engraved Bridle ( 30 swatches)
• Medieval Engraved Bridle With Reins (30 swatches)
• Iberian Saddle (with stirrups, 30 swatches)
• Iberian Saddle V2 (no stirrups, 30 swatches)
• Iberian Saddle - Draft Fit (fitted to work with Walnuthill’s Draft Body Overlay, with stirrups, 30 swatches)
• Iberian Saddle V2- Draft Fit (fitted to work with Walnuthill’s Draft Body Overlay, no stirrups, 30 swatches)
*Notes: the reins are a edit of @objuct wonderful knight set! And only made possible thank’s to their very open T.O.U. You can get the set here
The horse Blankets shown in the pictures are by the lovely @flowermilksims (I think this one and the saddle are meant for each other💜) find them here
and Zorela's Iberian Fur Pad found here
The body overlay by @walnuthillfarm can be found here
Let me know If You experience any issues.
Enjoy! <3
DOWNLOAD: Patreon | Google Drive
#sims 4#ts4#sims 4 cc#ts4 cc#ts4 equestrian#ts4 fantasy#ts4 medieval#ts4 horse cc#sims 4 horse ranch#sims 4 horses#ts4 horses#sims 4 horse cc#download#morningstarequestrian cc
1K notes
·
View notes
Text
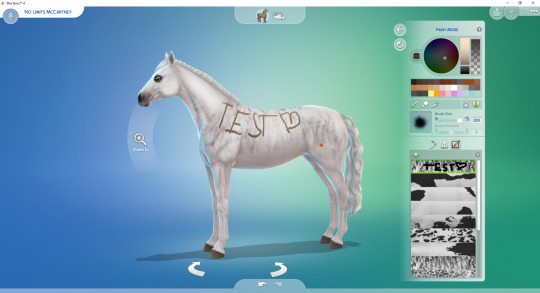
after a necessary daytime nap (i actually am mad that i fell asleep lol), i have a very unmotivated brain and i still can't figure out how to force a thumbnail to appear for the custom coat, i think it's just impossible at this point, i've looked through every possible ID and i'm still empty handed, but i'm still excited i pulled it off
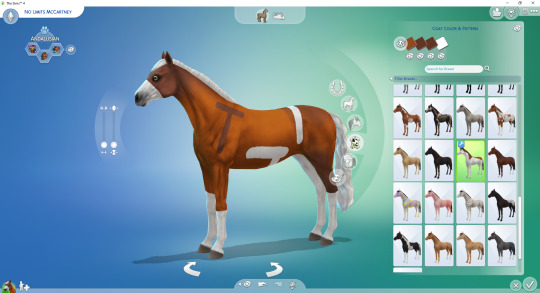
feast ur eyes upon no limits mccartney (thank u EA) wearing his sunday best lol

this is what the package structure looks like, a lot more work than just brush or stencil, since this can involve up to 5 or more ?(not sure) different texture pieces, meaning you can get pretty detailed
each rle2 img is assigned a colour and that's about it
rly hae no idea how to get the thumbnail to show up in-game, am at a total loss, even following EA's file structure for the OG, no idea how to link it or if it's something hard coded
thank u for coming to my ted talk
21 notes
·
View notes
Text
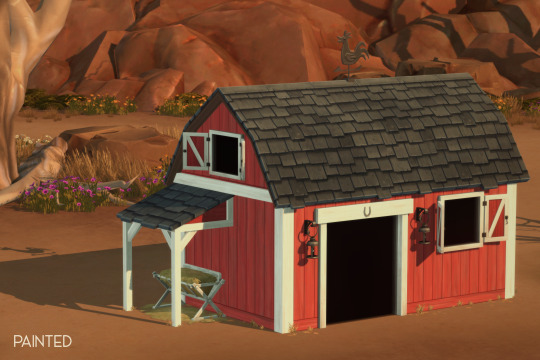

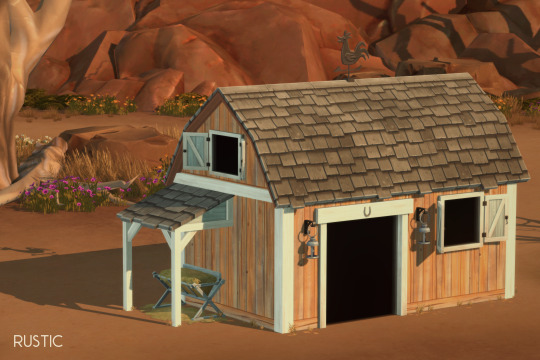
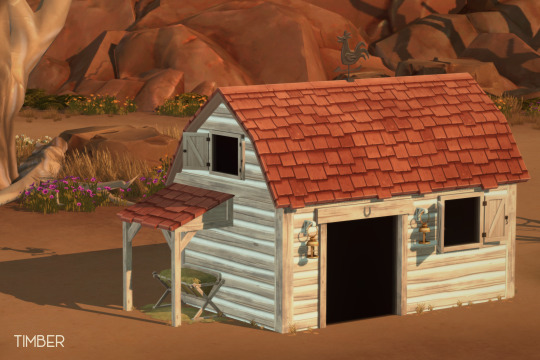
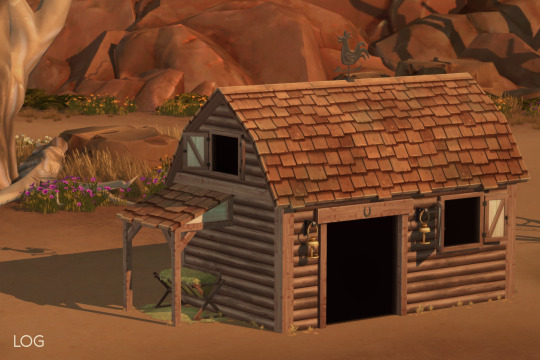
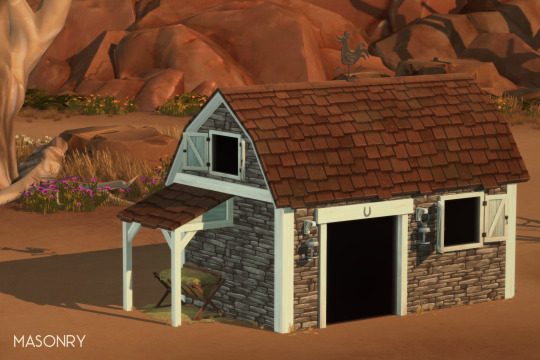
Chestnut Ridge Animal Barn
Requires Cottage Living
All LODs + Maps
All Geostates
Custom thumbnails
6 different versions
51 swatches total
Painted: 11 swatches
Painted (Chipped): 11 swatches
Rustic: 8 swatches
Timber: 8 swatches
Log: 8 swatches
Masonry: 5 swatches
7,176 polys
Find in the catalog easily by searching "CloverCollector" or "raindropsoncowplants"
TOU
Download (Patreon, Early Access until August 11th)
Download (Simfileshare, free, no ads)
2K notes
·
View notes
Last Seen Blogs

webtasarmc-blog
Web Tasarımcı

fromband
hey dingus *

goldenguillotines
SIN CITY

sansbutch
Just A Boring Skelly

mileniyum
Mileniyum!★