#i used to draw with my finger all the time on ibis paint back in 2020
Text
eating pumpkin pie
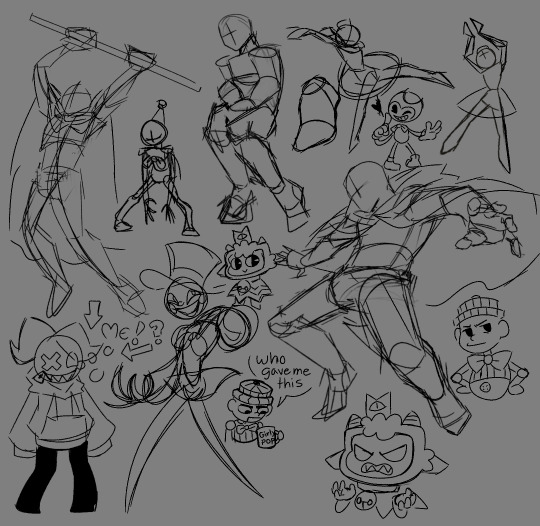
#doodles#sketch#imakestuff1987arttag#imakestuffarttag#art#i honestly dont know which art tag is the correct one oops#theres a bunch of miscellaneous things in here and i dont feel like tagging them#i drew all of these with my finger :-)#i used to draw with my finger all the time on ibis paint back in 2020#but I have since upgraded to apple pen and procreate#in an art block so im doing all the things that make me happy
10 notes
·
View notes
Text
Updates~
Hey there!~ Yes, this is the second time I post in… 40 seconds. If you haven’t seen the other post I just made yet, go through my blog to see it. It’s a redraw of an old drawing of Marjorie. And it’s cute. Because she’s cute. Like always.
Yes, this is an order, you peasants. Go.
But by the way, I’m making another post for two main reasons—
First, the poll I made a day ago!
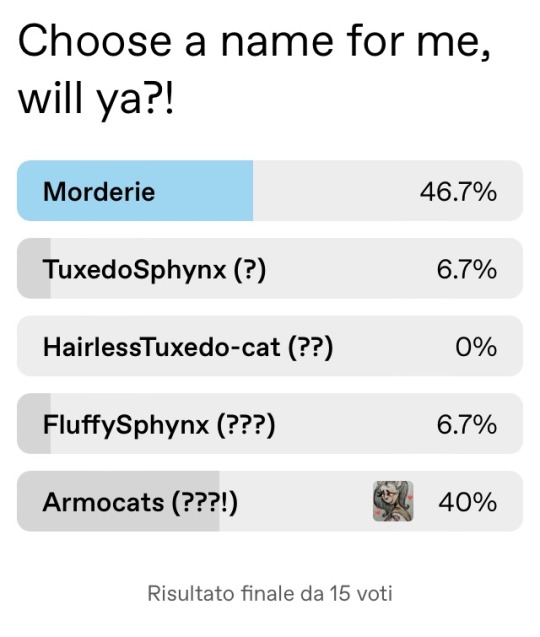
(Translation: final result from 15 votes)
With a 46.7% of majority of votes, in the name of democracy, convention won over dubious originality probably stemming by multiple head traumas suffered as an infant by the undersigned creator GentleLass aka Isabel, and #morderie is the official name we will use to address this equally dubious and unlikely pair living rent-free in my head for the last three months at least!
But I said the reasons I was making this post were two, right?
Well, I recently have been repeatedly mentioning a ‘bigger project’ I’ve been working on, and since I am far too sensitive for my own good and feel cruel for ‘teasing’ you all like that for an extended period of time, I want to give you a couple sneak-peaks on the mess I’ve been (horrifically slowly) working on for the last few weeks:
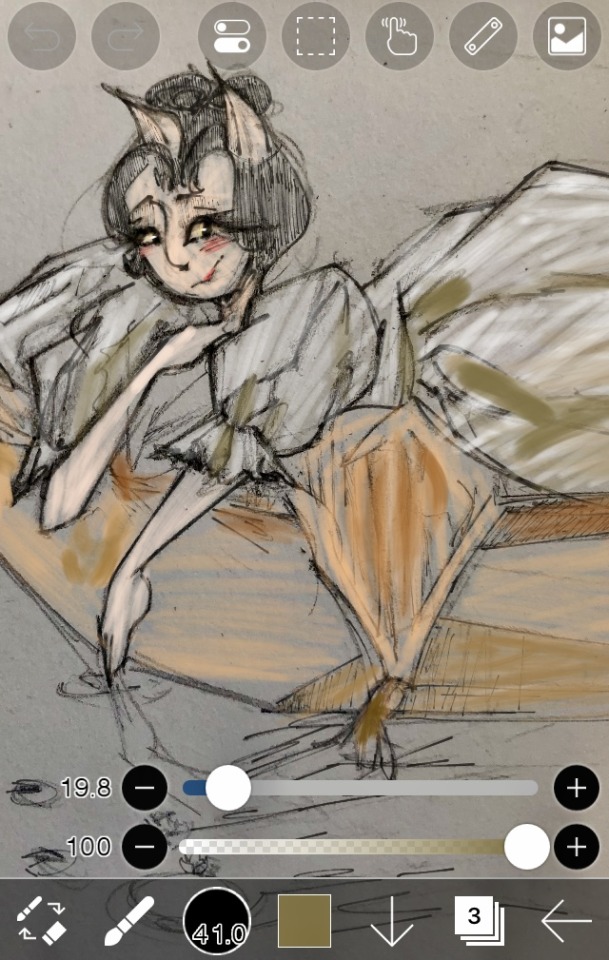
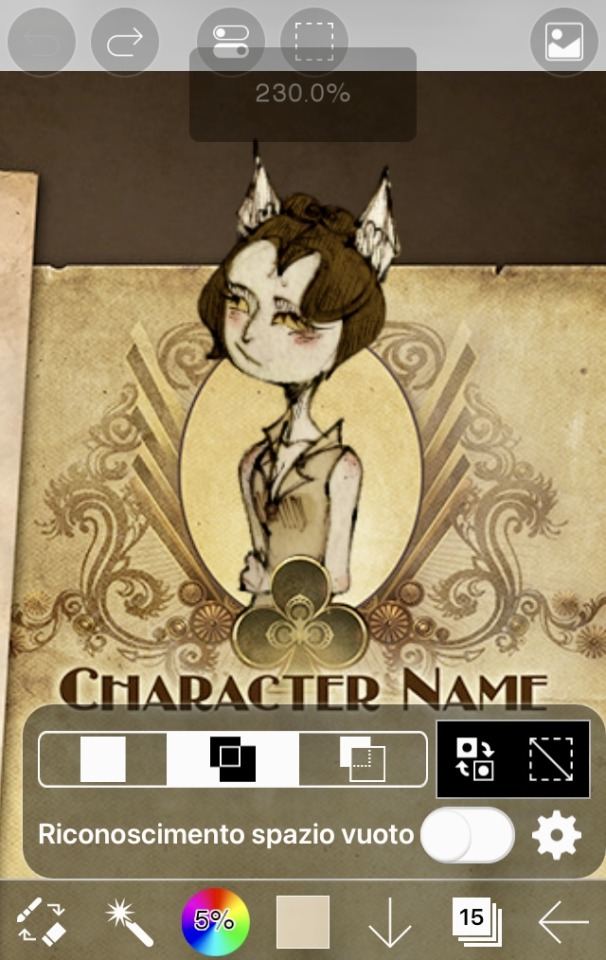
Yes, as I have not even bothered concealing, it is Marjorie’s character sheet and the artwork to pair with it.
I actually have her description ready already (hey, it rhymed!), but the aforementioned artwork and the editing of her name with that strange but beautiful font of Tracy’s which is NOT downloadable are… slowing me down. Terribly so.
Yes, the program is Ibis Paint X, and yes, I literally draw with my bare finger, which is one of the many reasons I’m slow as heck.
Margo may or may not be on a boat.
It may or may not have been inspired by the Savoys’ character sheets… for undefined reasons I ain’t disclosing just yet.
I take back what I said, maybe I do am a tiny bit cruel, after all.
-GentleLass.
#artists on tumblr#lackadaisy#oc#original character#lackasona#oc art#self insert#sketch#doodle#lackadaisy oc#character sheet#marjorie ford#morderie#mordecai heller#tracy j butler
9 notes
·
View notes
Text
Someone commented on an old video recently asking me (genuinely) if one of my speed paints was AI because 1) it was broken up into highlights for TikTok, and 2) I have a very unorthodox sketching process. So, I have decided to show the entire ass backwards way I sketch out the nearly incomprehensible nonsense that my mush brain spits out at me.
To preface, I use Ibis paint x on a cell phone.
I do not have a fancy program like procreate or clip studio, or even a tablet and a lot of how I work has evolved from what I have found works the best for drawing on my tiny, little, shitty phone screen.
That being said....
A speed paint video
To begin, I rarely map faces more than just very basic shapes. (Though, I will admit the structures can get more complex the less comfortable I am with drawing the face.) I usually start with a very basic framework that I implement half from just years of practice in drawing faces and becoming more comfortable with those base shapes, as well as the fact that I'm already aware I will inevitably be over using the liquify pen. Now, I would like to say this is a crutch and I just do it because it's easy, but unfortunately it's actually just because I have fat fingers and a tiny screen (sometimes I can place lines better with my pen but it's still a really small surface to work with) and it's just less of a headache to address the lines with liquify than redoing them a million times or zooming in so close that I lose the rest of the picture.
I will often start with faces because they tend to have the most small details. From there, I will then usually shrink the drawing down and place it about where I think it'll need to be to draw the next part, all while less than strategically erasing the piss poor guidelines I had originally given myself.
SOMETIMES I will save my guides of a second layer in case I might need them later, but that's about as far as I ever plan ahead to be honest...
And we can see that in the next part where after scribbling in a few vague marks for their hair I then IMMEDIATELY regret erasing my head guides and hastily sketch them back in so I can proceed to poorly map out their bodies (most of which I will inevitably be covering up anyway, which I KNEW was going to happen with this one and I cursed myself the entire time). I then fill in where I want all the glorious hair, which fills up the rest of the blank space in the art with fun and interesting shapes and conveys the lore of the AU.
After this, and to take this from a sketch to actual lineart, I will clean up some of the lines on a second layer and keep some of the original sketch features where I like them. This helps me keep the life of the original sketch while also allowing me to clean up the more scratchy lines, which usually produces a pretty nice, clean looking line work.
Should I do a lore drop for my AU next??
Kinda want to...
7 notes
·
View notes
Note
Who you use Ibis paint?! How! Please tell me your secrets 🥺
Ah well, it's simple. It's free on the appstore so yknow- I also use my finger to draw. Some of my advice with getting into digital art is that you're not going to be perfect instantly or know all of the tools immediately. Most of my art is drawn traditionally before I take a picture and import it into ibis by using the import photo option when going to make a new canvas by clicking the plus

Another thing with using ibis is that it- it WILL lag. I don't have premium at all, so it ends up lagging whenever I add too many layers. Speaking of layers, digital art is- very time consuming, just like doing big traditional art projects. I tend to use the brushes unlocked already, such as fine tip or the digital brush, also airbrush tool. Any other tools I use I need to watch an ad to unlock.

For the Christmas art or any art in general- especially with two people, I use multiple folders. You can make folders by clicking the plus with the squares, which will give you the options for it. Slide a layer up and then back down under the folder for it to be part of it. Folders are EXTREMELY helpful for coloring and lining, keeping everything organized, especially with multiple characters. ALSO NAMING LAYERS IS IMPORTANT!! I forget sometimes but it's good to name them in order to keep track lmao. For shading I use the clipping tool, which involves creating a layer over the colored portion I want and clicking the clip button so that I can shade without it getting into any other colors. My way of shading is usually just making the shade of color I use darker and darker and blending it all in. Most people on tiktok probably hate that lmao. Besides clipping there's also alpha locking, which is basically clipping but without creating a new layer. You just press it on the layer you're on and boom! Only that colored section or line can be erased or colored.
Anyways, that's most of my advice!! I hope this helps and doesn't really confuse ^^ ty for asking!
10 notes
·
View notes
Note
!! I do use ibis paint !! I love it it's very easy to use :3 I can draw with my finger but I prefer the pen so aside silly doodles, I'm waiting til my delivery with my new pen comes in :3
When I finish art of him I'll share it with you if you want !! Can't say when It'll be because my package hasn't even shipped yet😖
I'm working on LOTR ocs now, they're all pretty old and in need of updates since I've changed so much since I created them !!
The one I'm updating rn is my very first LOTR oc !! Originally they were a fem elf , in love with Legolas... Tbh a very basic oc for LOTR I made when I was like 13
But !!! I'm making him ftm and instead of Legolas, they eventually date Haldir :3
He was an elvish archer alongside Haldir but one time on patrol he ends up encountering something strange and gets possessed😧 he didn't wanna go back in fear of Haldir finding him disgusting or assuming he's a monster and trying to kill him, so he lingers in the forest, close enough to still keep an eye on the people of Lothlorien (and his beloved Haldir)
I don't have much more worked out but I did make him in a picrew
https://cdn.picrew.me/shareImg/org/202401/1885456_g2CjIgXO.png
also most old people are very rude, I think they have the "respect your elders" mindset that they think they an be assholes to everyone younger than them and we just gotta respect them??? Like shouldn't you be in a grave by now why are you still being hateful??
-🌱
My goodness I sent a whole reply and then the app crashed 😭 but if you feel comfortable please share if you want to and when you can I’d love to see it!
Y’all have such creative backstories to all these ocs I know a lot of them are inspired by the specific show or video game they exist in but I’m still so very impressed with how y’all take an existing idea and transform it into something better!
Also his background story sounds so sad but so lovely! Imagine having a whole future planned with the one you loved now you’re only allowed to watch them live that life without you😭
Also you’d think spending sm time on earth would make you a more understanding individual but every old person just turns bitter and cruel
3 notes
·
View notes
Text
Really liking my new tablet so far so lemme give a review. In summary, up front: If you draw on your phone with your fingers, this is a step up! If you draw on a pen tablet with a PC and want something more portable, this is good enough but not gonna be as good as your, say, Wacom or Huion.
I got the Ugee Q6 a week ago for use with my phone. (Important note: it works only on Android phones/tablets)
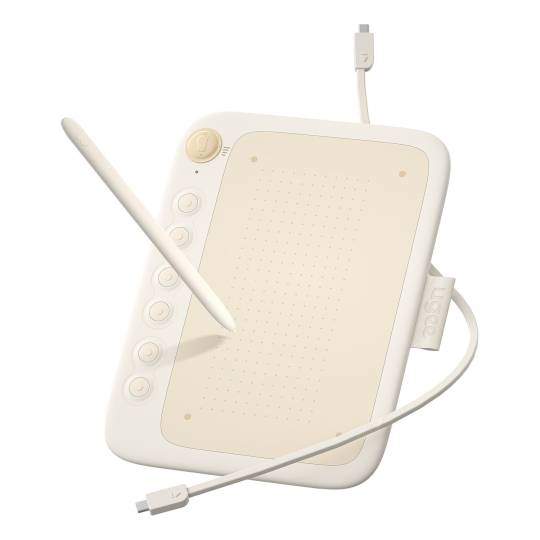
Been using it every day since to color (cell shading), sketch, and ink.
PROS:
- it's affordable (Depending on where you are. I got it for equivalent $24 on sale)
- it's very portable. Slightly wider than an A5 notebook and about as heavy as a hard bound book of the same size. The cord stores in the back of the tablet and the pen can be placed in the faux-leather loop
- pen pressure. Of course.
- this is what made me get this over other brands/models: the switch that toggles modes. If you use it with a phone, which has a tall screen, you'll want it in full phone screen mode so the proportions of the tablet area matches the screen. Same if you use an Android tablet or a laptop. (If your tablet area and screen match proportions, you can draw a circle on the tablet and expect a circle to appear on the screen, not an oval.) You can get used to tablet area proportions being off, but it takes a while and it's a pain in the ass.
- it doesn't use up much of my phone battery. Lost maybe 30% in two hours?
CONS:
- default pen pressure sensitivity isn't great. You can adjust sensitivity on a PC, but not on a phone-- unless you use Ibis Paint X. Ibis has its own sensitivity adjustment (pressure curve). The pen pressure is okay on other apps for sketching and coloring, but maybe not painting and inking. (I ink on Ibis because of this). You'd have to find apps that allow you to adjust the pressure curve to how you want it.
- there's a slight lag. It's not noticeable most of the time, especially not when sketching. But I've noticed it when inking. Sometimes when coloring. (I've checked other reviews, and a couple of people have also noticed it: an Osu! player and someone who takes notes with it.) I don't mind it but other people might.
YMMV:
- the pen is thinner and less grippy than I'm used to. Probably just gonna slap a pen grip on it. It's about the width of a mechanical pencil.
- the textural feedback of the pen against the tablet surface is a little plastic-y, but with a little more grip to it. Kind of between plastic and smooth rubber. I'm more used to a really textured, metallic(?) feeling surface.
- the cord is really short. It's more designed for mobiles. If you want to use it for a PC you'll need an extension cord.
...
And that's it, that's the very long review. Dunno if this thing will last, but if it lasts a year I'd be happy with that. It was (relatively) cheap after all. (It doesn't feel cheap)
#ugee q6#tablet review#for any digital artists who follow me#i know that's not many lol#but maybe the 2 out of 10 people who follow me might find this useful#digital art
2 notes
·
View notes
Text
I tried digitizing my drawing of Mighty Marshall

I used ibis Paint X for this, since it has a scan feature for traditional art, which makes it easier for me to digitize it. Unfortunately when it comes to coloring, I have never known how to shade (in both traditional and digital art)...so that's why it looks so flat. I'm also brand new to digital art, so it's even harder for me than traditional art, and I don't have a stylus for my tablet so I have to do all of this with my finger...which makes it even harder to do it right. I did try making it look like his paws are glowing by tracing over them with white, similar to the way my Mighty Pups t-shirts do it. I think it came out okay...not as good as I would've liked, but decent enough. And yes, I know my handwriting is terrible, please don't mention that, it's bad even when I'm writing with a pencil on paper, it's always been that way. 😅
It's been a while since I've posted anything art related, but I hope to start that up again soon, I've just had art block for a while and couldn't bring myself to draw anything without feeling like it looked terrible. Hopefully though, this doesn't last much longer so I can get back to posting art soon.
Okay, that's all for now, so till next time, Marshall out! ✌️
#paw patrol#paw patrol fanart#paw patrol marshall#original mighty pups#my first attempt at digital art...i know it's not the best 😅#mighty marshall#his original mighty pups outfit is still one of my favorites#marshall's art#marshall talks
5 notes
·
View notes
Text
Pigment
Callum discovers the wonders of elven pigments.
(The first of two pieces written for @falling-for-you-a-rayllum-zine, which is now having leftover sales!)
('Future' chapter; takes place post-s3, naturally not canon to TTM. Oneshot. 4k. Ao3 link)
---
The first time Callum was introduced to the concept of elvish pigment was, ostensibly, by Rayla’s skin. He’d noted the marks under her eyes in the same hurried, panicked glance that picked out the horns, the ears, the alarming points of the weapons in her hands…
He wondered about them, of course, but in the first frantic two weeks of their acquaintance, there really wasn’t a lot of time to ask about it. Not until the Storm Spire, when he sat mulling over the flight-runes on Ibis’ wings, and how they might have come to be there.
“…So, I’ve been wondering,” he said to Rayla, apropos of nothing, while she was tending to her equipment. She looked up as he began to speak, the armour momentarily forgotten. “Those…markings you have, the ones on your face—and the ones a lot of other elves seem to have—what are they?”
She blinked, and for a moment, her fingers rose to her face, as though only just remembering the marks were there. “They’re pigment?” She offered, squinting at him a little. “…Is that a trick question, or…?”
“No, really, I have no idea what they are.” He assured her. “I was never sure if they were tattoos, or…weird elf birthmarks, or something. But—pigment? Does that mean it’s like…ink? How do you get them on?” Tattoos, as he understood them, involved needles. He hoped elven pigment didn’t involve needles.
For a moment, Rayla stared at him, looking decidedly nonplussed. “You…paint them on?” She offered, still thrown. “With a brush? And then they stay there for a while. Half a year, maybe. Depends on how good your pigment is.”
“Huh.” Callum mused. For a moment, he was tempted to press further, to ask about the intricacies of various pigments and the application thereof…but he’d been asking for a reason, after all, and his attention remained there.
If they were painted on...then that boded well. That meant that it was something that he could do, if only for the presence of the pigment and a brush.
It wasn’t much later that, after a guilty rummage through Ibis’ things, Callum stood at the pinnacle of the Storm Spire and painted flight-runes onto his skin. That was his first true introduction to the pigments of elves. As an artist, he couldn’t help but marvel at it. The pigment was white, yet it entirely obscured the darker colour of his skin with only a single, easy stroke. Only one layer, and it was solidly opaque. It glowed a little—then settled utterly dry, clean, and steadfast upon his arms.
For a moment, he spared a thought to wish that his paints could be like that. He’d dabbled in every form of art medium he could get his hands on over the years, and he’d never worked with any pigment like this one. It would be gorgeous to paint with.
But then he was too distracted trying to fly to think about art any longer, and that was the last mind he paid to pigment for a while.
*
After the battle of the Storm Spire, he prevailed upon the use of a finer, neater brush, and filled in the edges of his flight-runes until the shape of each was perfect and immaculate. Ibis watched him with a critical eye, and nodded.
“The spell will come easier if the runes are tidy.” He said, approvingly. “You’ll need to re-apply the pigment every three months. Any longer than that and it will begin to fade—which isn’t so great an issue when the marks are merely aesthetic, but with runes…”
“I can see how you wouldn’t want these fading, no.” Callum said ruefully, and accepted the little bottle of white pigment with a murmur of gratitude. He tucked it into his things for the next time he and Rayla went travelling, and she smiled at him.
“Packing your pigment for the journey, Callum?” She remarked, a little teasing. “Think we’ll be gone that long, do you?”
He laughed, and shrugged, glancing down at one of his arms. “I guess it’s just in case, really. I shouldn’t need to touch them up again for months, but…you never know. Wouldn’t want to end up flightless for some reason.”
“I suppose you are a tad obsessed with flying, now.” She agreed, as if she wasn’t always finding excuses for him to sweep her up into the sky for another flight. She reached out, absentminded, and trailed a fingertip around the curve of one rune with the trace of a smile on her lips. “Still, if it came down to it, you could always borrow mine.”
He glanced up at her, startled. “Your pigment?” He checked, eyes settling on the marks beneath her eyes. “I didn’t know you had any with you.”
“I don’t. Need to pick some up from Ethari, when we visit.” She said, succinctly, and he supposed that was another reason for their stopping at Silvergrove on the way to Katolis. How long had it been, since she last refreshed her pigment? Did she need to do it again soon, or was she just planning for the future?
He stared at her for a moment, contemplating her, feeling his heart flutter with a familiar warmth. If her markings had faded at all since he met her, it wasn’t immediately obvious to him. They looked as clear and lovely as ever; a natural part of her face. It was strange to think of what she might look like without them.
Rayla eyed him, when he’d stared a little too long and smiled a little too softly, and huffed at him. Her cheeks pinked a little, the colour darkening her markings. “What are you looking at?” She muttered to him, a touch self-conscious. Rather than look away, he smiled at her all the wider, and captured the hand she had on his arm to plant a kiss on its fingers.
“You.” He said, very contentedly, and watched with pleasure as her face coloured and her fingers twitched beneath his touch.
“Dumb prince.” She sighed, a smile spreading unbidden and affectionate across her lips. It was beautiful, so of course he kissed that too. He felt the widening of that smile against his mouth, and lingered there for as long as she’d let him before she prodded him away to finish packing.
She gave his arms a strange look, though, when he next bared them. Appraising, almost, with a narrow-eyed sort of consideration. “…What?” He asked, when she’d been staring long enough to warrant the question.
“Your runes are…neat.” She said, tone as considering as her eyes. “Tidy.” She shook her head then. “I guess I shouldn’t be surprised, with all the art you do. Of course you’d be good at painting skin-pigment.” He eyed her, because there was clearly more to this observation than just surprise that he’d managed some tidy brushwork, but all she said when he asked was “It’s nothing. Don’t worry about it.”
He didn’t believe her, obviously. Not with the way she kept shooting half-considering looks at him when she thought he wasn’t looking. But he didn’t press her, and she didn’t mention whatever was on her mind. In time, he forgot about it.
Until they were back in the Silvergrove.
*
Rayla asked Ethari, and within the minute he was pressing a small dark bottle and a fine brush into her hands. “I did wonder if you needed any.” He said, as she turned the glass over and the indigo liquid swirled around within. “It’s been a while, hasn’t it?”
“Yeah,” She agreed, pocketing the vial and the brush both. “It’ll start fading soon. So…thanks.”
He nodded at her, all warmth and familial affection. “Not a problem. Did you want me to help with that while you’re here?”
She hesitated, then, and for a moment…for a moment, her eyes slid to Callum, who’d been watching them idly over the top of his sketchbook. “…I’m good.” She settled on, eventually, and if there was anything particularly knowing about Ethari’s smile then, Callum didn’t notice it.
He kept drawing, content in that she was content, and happy to be in her home under happier circumstances than the first.
But then, later: “I wanted to ask you something.” Rayla said, abruptly, when it was just the two of them in what was ostensibly her childhood room. It had been adapted over the years for a growing teenager, but still maintained hints of the past lingering within its walls. He spotted a child’s doodle of a shadowpaw etched into the grain of the dresser, and suppressed a smile.
He turned to her, eyes crinkling a little at the thought of a tiny rambunctious Rayla who scrawled over the walls and furniture. “Yeah?” He responded, a little distracted, as he wondered if there were perhaps any baby or childhood portraits in residence somewhere. He should ask Ethari. If there were any to be found, surely he’d know.
That distraction fled the instant she spoke. “Will you paint my pigment for me?” She asked, directly, and his eyes shot to her at once. At his expression, she added, “You don’t have to. But it needs doing soon, or it’ll start fading faster.” She paused, looking a little more tentative as she said, “If you don’t want to, Ethari can—”
“No,” he blurted, clumsy, then scrambled to say “I mean, yes, I mean—I mean I’d like that. To help. To, er. Paint your pigment on.” He felt his face heat, in part from how he’d stumbled over the words, and in part because…well. He might not know a lot about elven pigment and elven markings, but he was fairly sure that they were…personal. That painting someone’s markings for them was personal.
His reply settled her, and she huffed, lips twitching with familiar fondness. “…Good.” She said, in the end, and surprised him by leaving the room without further word. He blinked after her, uncertain whether he was supposed to follow, but then she returned a bare few moments later with a towel and a wet cloth that she was already wiping her face with.
“Er,” he offered, perplexed, as she dried her face off and set the towel and cloth both down. He didn’t understand until she plucked the bottle of pigment from her dresser and pressed it into his fingers. “Now?” His voice was something of a squeak, and she rolled her eyes.
“When else?” She asked, procuring a brush and giving him that too. “We’re setting off tomorrow. Now’s best.” She paused. “…That okay?”
Her voice had gone tentative again, and his chin jerked up, fingers tightening around brush and bottle as if worried she’d take them away. “No, yeah, it’s okay,” he assured her, and then laughed, a little nervously. “I just…wasn’t expecting it.” He cleared his throat, and took a closer look at the brush. It was like the one he’d filled his own runes in with, fine and delicate and short enough that it didn’t seem liable to flick off in weird directions. “…So I just…paint this onto your face?” He asked, after a moment, feeling his cheeks heat for reasons he couldn’t quite put to words. It felt special, in a way that was hard to describe.
“That is how it works.” Rayla answered, dryly, and then tugged him by the rune-adorned arm until they were both sitting on the floor, towel and cloth at close remove. He supposed those were there in case of spillages, though considering how quickly elvish pigment took hold, he wasn’t sure how much good a towel would do. He wondered if there was some sort of solvent, magical or otherwise, that was up to the task of dissolving pigment like this.
“What happens if I make a mistake when I’m putting your pigment on?” He wondered aloud, only half directing it at her. “Do you just have to walk around with it on your face for months?”
She snorted, and shook her head. “Nah. There’s pigment-remover for that.”
A little tension eased from his shoulders. “Oh, good,” he sighed, relieved. “That’s much less pressure, then.”
She rolled her eyes again. “Just paint my face, Callum.”
He chuckled at her, a little nervously, and uncapped the bottle. The liquid inside was so much darker than the pigment he used, and bizarrely true in its colour. Usually, inks tended to look much darker than their actual colour when they were in the bottle. It was only when you painted them onto a page that you could see how light and bright they were. This, though…it was just solid, liquid indigo, as if someone had distilled the concept of the colour of Rayla’s markings and spilled it into a bottle. “This would be amazing to paint with.” He murmured, somewhat distractedly, watching the pigment shimmer in the low light.
Rayla didn’t answer that, which was unusual enough that his eyes darted to hers, and found her looking strangely thoughtful. She shook her head, though, as if to dispel some thought, and started giving the pigment bottle and the brush some very meaningful looks. He laughed, softly, and obeyed the unspoken command; he dipped the brush in, drained off the excess, and then lifted it. It was dyed the same solid, true indigo—a colour that he was about to put onto her skin.
It hit him then, or at least started to; he looked between the brush and her face and felt his breath catch at—at something. It felt a little like panic, a little like wonder, a little like the breathless infatuation she always managed to inspire in him. For a moment, he didn’t know what to do with it, and just…stared at her, heart beating wildly at—at the trust, and the honour, that he couldn’t help but feel she’d given him.
She was looking impatient by the time he finally moved, and likely would have spoken if not for how he shuffled closer, until their knees were touching. Her mouth closed, watching him, eyes settling on his own as he reached towards her. His fingers brushed the edge of her jaw, feather-light, as tentative as he always was when he remembered that someone as amazing as her had deigned to be with someone like him. His breath caught in his throat as he lifted his hand, thumb tracing tenderly along a cheek that warmed beneath his touch.
He cupped her face in his hand, then, unable to resist the impulse, and she leaned into it without even thinking. Her eyes fell half-lidded for a moment, the smallest smile twitching at the edges of her lips, and he wanted to kiss her. That wasn’t what he was supposed to be doing, but—but he wanted to, and she was smiling at him, and her eyes were soft and warm in the quiet and low light of the room—
So, he kissed her, and she huffed an amused breath against his lips, lifting a hand to trail affectionate fingers along the side of his neck. “This doesn’t feel like face-painting to me.” She murmured to him, fond and teasing at once, and he wouldn’t have been surprised for a moment if his heart stopped beating for the strength of how much he loved her. “Weren’t you supposed to be doing something?”
He laughed, a little breathless, and the warmth of it spilled between them. “Yeah.” He agreed, helplessly, drawing back with her fingers still warm on his neck and his hand still cupped to her cheek, and paused for a moment to treasure the sight of her looking at him like that. He couldn’t believe how lucky he was that she loved him. He didn’t think he’d ever believe it. “I’ll just…get on that.”
She withdrew her hand, and watched him. Waiting.
His fingers shifted on Rayla’s face, moving to press his thumb gently to the side of the marking under her left eye. Pulling at the skin, ever-so-slightly, to allow for painting it more evenly. Another urge struck him, but this time he suppressed it. He could kiss her cheek-markings later. For now, he was supposed to be painting them. And so…
With an almost reverent care, he lifted the tip of the brush to her face, hovering just above her skin with a heady mixture of breathless wonder and breathless trepidation. He exhaled, softly, and felt her eyes upon him. Watching, warm and fond and expectant.
Finally, with the utmost care, he touched the brush to her skin.
She flinched a little at the touch so close beneath her eye, but he’d expected that. He held the brush steady and traced a slow, perfect line down her cheek, along the edge of the extant marking, like a dark border to the fading colour. And it was fading; he could see that now. It wasn’t noticeable on its own, but with the contrast of the fresh pigment beside it, it was fully obvious that the old colour had begun waning.
With the brush to her skin, Callum’s hushed awe fell in step with the breadth of his skill and practice. He’d never put brush to someone else’s skin before, but that did nothing to diminish his skill. He knew brushwork, and he knew the delicacy needed for fine detail, and…and, in the end, this was easy. Just tracing around an existing marking, and filling it in. There could be nothing easier.
He drew the pigment across her skin in smooth, effortless lines. He traced the borders of her marking and then filled it in, up until when the brush began to run empty, and he had to go for the bottle again. The colour settled fast, immediate, and perfect upon her face, with that gorgeous fidelity he’d never seen in any other pigment or paint or ink in all his life. It was a pleasure to use it, and all the more that he was using it for this.
Callum fell half into an artist’s trance for the remaining minutes it took to finish. He filled the left marking in, stark and perfect, then shifted his fingers tenderly to her other cheek, and repeated the process. When he was done, there was nothing but perfect lines and perfect colour upon a face that he loved.
He smiled, small and satisfied, and set the brush aside. “Done.” He murmured, and leaned forward to press his forehead to hers, cradling her face in both hands. It felt strange, to risk touching her skin when he’d only just painted it. But that was the wonder of elvish pigment; it dried the moment it was applied, and permitted no possibility of smearing whatsoever. He stroked his thumbs beneath her eyes and felt more happy, more tender, more loving than he’d ever known. “Perfect.” He murmured, reverential, the words meant for more than the pigment.
Her eyes blinked across from his own, and he loved them. Loved her. She brought her arms up and drew him closer, one hand splayed on the back of his neck. “Maybe I’ll have you do me some new markings, someday.” She murmured to him, in the end, a small and secret smile at the edges of her lips. He stared at her, spellbound, for the three beats of his heart that lingered between her smile and her movement. She leaned in and closed the meagre distance between them, the kiss soft and sweet and all the more perfect for how dearly he adored her.
He imagined, for a second, drawing that ink-brush again along her skin. Imagined it between her fingers, along her arms, casting indigo whorls about her shoulders. He thought of new pigment, new markings, and the sheer delight of being the one who got to put them there. His heart fluttered. “I’d like that.” He said, against her lips, and she kissed him again.
“Good.” When she drew back, the markings were still stark and beautiful beneath her eyes, where he’d painted them. The sight of them left him a little breathless, even now, unable to shake the sense that he’d been afforded an enormous privilege, a gift of worth beyond measure.
Someday, he hoped, she’d afford him that gift again.
*
Callum saw the fruits of Rayla’s thoughtful consideration and furtive glances a while later, when July came around and he was startled from thinking about her birthday by the arrival of his own. She cornered him with palpable satisfaction, and gave him a parcel that she very clearly expected him to be delighted with.
She wasn’t wrong.
He unveiled an array of small bottles; thirty-six hues of true and perfect elvish pigment, distilled for the purpose of painting. He beheld them all with a nearly breathless joy, finding the little parcel of pigment-brushes, the bottle of solvent, the masking-fluid….
“You like it?” Rayla asked, with a broad and decidedly smug smile on her face. She clearly already knew the answer.
“I love it.” He pronounced, and set at once to trying them out.
The very first thing he painted was her. She watched him, and huffed as she saw the familiar lines of her own face taking form on the page, pleased and exasperated all at once. She never did seem to understand why he drew her so often, but that was okay. And, with these pigments…
The colours were spectacular, brighter and more intensely pigmented than anything he’d ever seen. He found himself utterly swept away in the delight of using them, and hours later, emerged from his artist’s trance to the completed work: Rayla in the early evening of the Silvergrove, her hair and eyes gleaming softly with the gentle illumination of the lights and moon-moths around her. It was one of the finest works he’d ever produced, and at the sight of it, he concluded the process of falling helplessly in love with Elvish pigment.
Rayla, for all her embarrassment at being painted, seemed to approve of it too. “You picked that up quickly.” She noted, handling the edges of the thick paper with the delicate care it deserved.
“These pigments are my new favourite thing.” He declared, arranging the bottles a little more tidily beside him. His eyes rested, a little consideringly, over another wide sheet of paper. He stared at it for a long while, growing quiet and solemn, and eventually reached out to take it.
He had his birthday traditions to observe, after all.
The second thing he painted with the elven pigments was his family portrait, atrophied and truncated by tragedy. There was no Sarai there, and hadn’t been for years. No Harrow, and that was a new pain. He felt the ghosts of their absence in the lines he didn’t draw, in the colours that never fell upon the page, in the voids of grief that they left in his life.
But there were new faces now, too.
With quiet, exquisite care, he drew himself. He drew Ezran, older now, wearing a mantle that had come for him too soon. He drew Bait in his brother’s arms. He drew Aunt Amaya. And, tenderly: he drew Azymondias and Rayla. The outlines took form, and as the hours passed, elvish pigment filled them in.
In the end, he had his family portrait again. Changed, and echoing with its empty spaces, but…
Quiet, from her place beside him, Rayla slipped her hand into his own.
“Come on,” She said, with the small but tender smile that he loved. “Zym has a present for you too. He’ll be disappointed if he can’t give it to you today.”
Callum exhaled, and let her fingers tighten around his, pulling him up to his feet beside her. His own smile slipped onto his lips. “Then we’d better go find him.” He said, casting a last glance at the portrait on the table. He didn’t resist it when she tugged on his fingers, pulling him away.
With a strange, quiet serenity, he followed her out into the light.
---
end.
This is word-for-word what was published in the Rayllum zine 'Falling For You'; I have made no changes. It’s the shorter and less impressive of my two pieces, but I hope you liked it anyway.
I’ll potentially be making some minor edits to the second piece before posting, given I intend to continue it - in fact, I’ve already got like three extra chapters of it written, though small ones. I’m considerably more excited about that one, so stay tuned!
#rayllum#rayllumzine#tdp fic#tdp callum#tdp rayla#seriously though the soulmate au piece is good times#looking forward to everyone being able to read it#had to do word count negotiations to get a piece that long into the zine lol#the mods kindly granted me a couple extra ks#and then I decided to reduce my word limit for this first piece by 1k so I could shift that to the more exciting piece too#it deserved every word I could give it#this one is nice don't get me wrong#i'm just not made for short decisive pieces#and the soulmate AU's ending is VERY MUCH open-ended#and inviting follow-up#which I then wrote and shared with my closest cohorts#awaiting the day it could be published#looking forward to seeing the comments on my baby
61 notes
·
View notes
Text
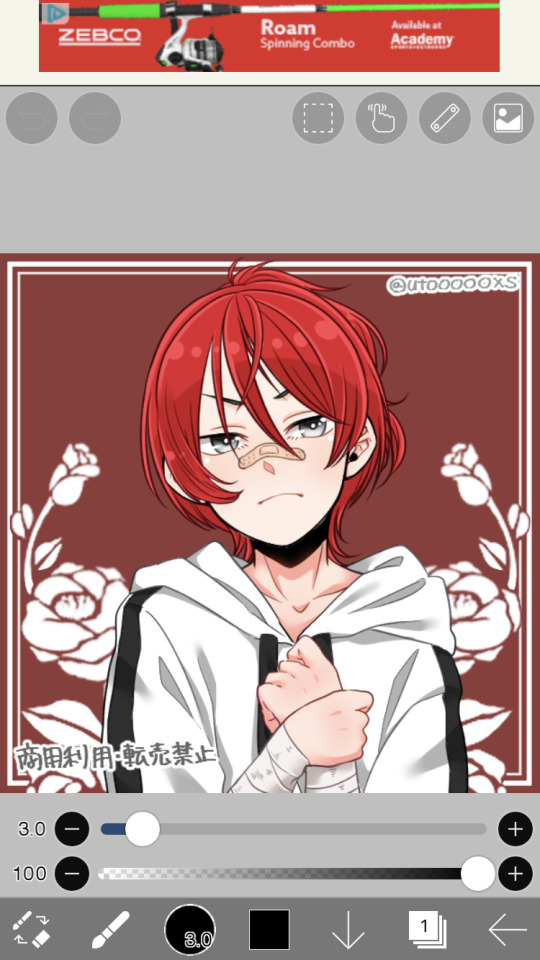
basic manga cap tutorial || ibis paint x

I got a request on how I color my manga caps (you can check them out in #morgan-colors-bnha and #morgan-colors-hq), so I thought I’d do this step by step tutorial that walks you through my process!
I color and draw on my phone (Samsung Galaxy Note10+) using the stylus provided with the phone, however you can use your finger. For manga cap coloring, I use Ibis Paint X, which you can find HERE for the Google Play Store, and HERE for the Apple App Store! It is a FREE app, and actually really helpful for a number of reasons, which I’ll show you down below! It does go without saying - there are a limited number of brushes that you get with the free section, but I haven’t found them to be too limiting, however I’ve only done basic manga cap coloring. You can watch short ads (I haven’t watched any, so I can’t vouch for the obscenity of them) to use the non-free brushes for a short period of time, though.
The first part of this tutorial is going to be showing you how I took THIS SUGAWARA manga cap and turned it into the one you see HERE (both as pictured on the header image). The second part of this tutorial, attached at the bottom, is a timelapse video where I show you how to turn THIS BOKUTO manga cap into the one you can find HERE.
Alright - without further ado, let’s get into the tutorial! As always, if you have any questions, please feel free to drop by my ASK BOX! Hopefully this is in depth enough without being too confusing. ❤
I’m doing this in steps so it can be in depth and informative enough, but I know that can become a little confusing, so I’m going to do my best to explain each step. I’ve also highlighted using little yellow boxes where I’m referencing, as pictured below.
To start, here are the ways I usually find manga caps:
1. Google searches, Pinterest searches, etc. Sometimes they’re already transparent, other times they’re not. I’ve found that I’m able to use the non-transparent ones because of the tools that are within Ibis Paint X.
2. Tumblr blogs - there are some blogs that are meant purely for transparent manga caps.
3. Manga scans. I, personally, haven’t used manga scans, but I know others that use them! They usually require some extra clean up, which can take extra expertise. Removing speech bubbles, backgrounds, etc.
Please remember to provide credit if it’s requested from the original poster!

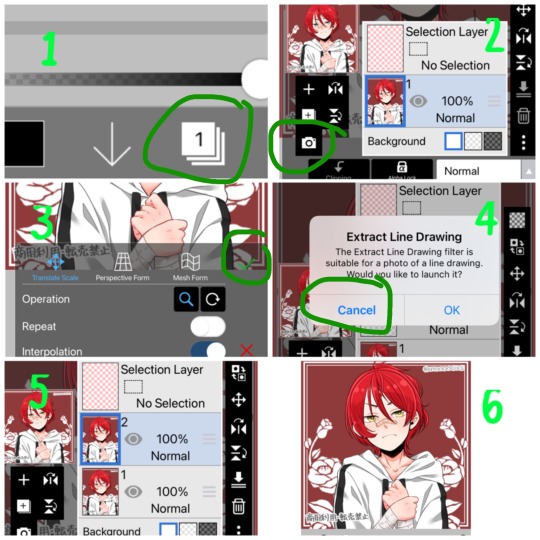
Step #1: Open IP (Ibis Paint - I’m not going to say it every time because WOW that would get repetitive) and click on “My Gallery”.
Step #2: This is your gallery - as you can see, all of my prior caps are here, and this is where you will either open an old cap and keep coloring, or start a new one. In the bottom lefthand side, you see I’ve highlighted the “+” sign. This will bring you to the next screenshot.
Step #3: This is where you can choose if you want to create your own canvas, or create a canvas based off of the imported photo. Since I don’t do many “official” manga cap posts where I create a full image set from them, I usually just click on “Import Picture”, and go from there! However, if you want to create an image canvas, and import the picture once you’ve gotten the canvas open, please see Step #6 for how to import the image once you’ve already created a canvas!

Step #4: This is the screen that should pop up every time you import an image. When you’re doing manga caps especially, you’ll want to hit “Ok”.
Step #5: I believe these are the automatic settings, however if they’re not on your app, these are the settings I use when selecting how to extract the line drawing. Black at 0%, White at 100%, and Middle at 50%. This will remove the background from the manga cap, and only leave the dark line art remaining.
Step #6: This is what the layer should look like once you’ve extracted the line drawing. See highlighted the “+” button - this is how you will add new layers. I chose to add a new layer, which you can see in Step #7. However, if this is where you want to add an image, see the highlighted camera button. This will let you choose an image from your camera roll and import. The “Extract Line Drawing” option will appear each time that you import an image, so don’t worry about triggering it! It will trigger itself!
Step #7: Here is the new layer! I cut out the screenshot from before, but each new layer shows up on top, so I had to use the three little lines on the righthand side to drag it beneath the layer of the Sugawara manga cap layer.
Step #8: I used this new layer to import a photo of Sugawara in his uniform from a quick google search. I actually end up grabbing another one just to make sure I know what the bottom half of his uniform looks like, but I don’t show it just yet. Because the layer is behind, it shows up underneath Suga’s face. I end up erasing the parts that interfere with the cap here in a bit.
Step #9: When you click the brush button down at the bottom, this selection screen comes up. There are a ton of brushes to choose from, but for the base colors, I use “Dip Pen (Hard)” at 100% opacity. I’ve shown it highlighted here!

Step #10: Now we’re going to create our color palette. Sometimes I will find color palettes online And import them, but for the sake of simplicity, I’m going to use this photo of Suga along with another one that I nab later to create the palette. The way you use the “dropper” tool (if you’re familiar with Photoshop) to select the colors from another portion of the image is to press down rather hard, and then this circular selection tool will pop up. You can keep the pressure and drag it to the specific spot you want to pick up a certain color for. I’ve found that it’s best to do this with my finger instead of my stylus. I’m not sure if it’s because the heat of my finger and the change in pressure is easier to pick up, but that’s what works for me!
NOTE: It is important to note that if you have the eraser tool selected instead of the brush tool, you won’t be able to use the color selector. This might come as second nature to some of you, but it STILL makes me screw up from time to time, haha.
Step #11: Using the dropper/color selection tool from Step #10, I create a small color palette, as you can see in the upper lefthand corner of the image in this step. I grab both the lightest and darkest shades from the different things I’ll need to color in for the cap. I picked up the highlights and shadows of Sugawara’s skintone, eyes, hair, and jersey. I just draw in little overlapping circles so I can switch back and forth between the colors
Step #12: I added an additional layer in the very back of this image, and colored it in completely using a blue shade. This will allow me to make sure that I’ve filled in all of the space behind the manga cap. It’s important to note that in order to color the line art in later, you’ll actually need to “overdraw”. We’ll touch on that more later.
Step #13: As I show here, I have a layer where I use the singular skin tone shade and color in behind the manga cap, filling in all the spaces where Sugawara’s skin is showing. I usually use a different layer for each different shade/color just in the event I need to do a bunch of erasing, or if I need to change the layer style later.
Step #14: Here is where I show how I “overdraw”. I’m not sure if you can see it very well here in these screenshots, but the way that these manga caps are drawn, sometimes the line art isn’t “clean”, it looks more shaded/scratchy. So, in order to combat white space, I usually overdraw and then go back in with an eraser. You can see in Step #15 the size brush I usually use - somewhere between 2.0-4.0, but most of the time I use a 3.0 size brush. I’ll go back in with the eraser with a similar size on the easy parts, and then all the way down to the smallest size - 0.3 for really close quarter erasing.
NOTE: It’s important to realize that the smaller the eraser, sometimes the circumference of the eraser can be really light in opacity as well. You can help this with the intensity of the pressure that you use with your stylus/finger, but I’ve found that sometimes using a really small eraser can be counterproductive. There are times where I’d rather “over” erase in which I actually erase into the cap and then redraw using a small brush size. You’ll have to play around with eraser/brush size and such to see what works best for you!
Step #15: Here is the skin all colored in! You’ll notice I colored in his eyes and mouth, which are going to end up being white in the end. I do this because usually it’s easy to forget that you need to color things in white if you’re doing it against a white background. I oscillate between the colored background and the white/transparent one because sometimes it can be tough to look at that bright color all the time. I’ve found that this is more of a tip/trick for me to be able to remember to color in his teeth and eyes and even sometimes the brow or other features! In the end, this just works for me. You don’t have to do this step!
NOTE: As I stated in Step #14, using pressure can change things. The same goes for this specific pen type - the dip pen. I use about size 3.0 most of the time, but I can actually do really detailed work with this size pen (see Suga’s ears, the spaces between his hair, etc.) by using lighter pressure. I do have a stylus, so this is a lot easier for me. The pressure was a little tricky for me to get down in the beginning, but once you realize how soft/hard you need to press down, you can use bigger brushes for even smaller areas. I find that makes it a lot easier for me, since I don’t have to keep changing the brush tool - which you can do using the sliding bar at the bottom of the screen labeled “Thickness”. The thickness of a brush is the circumference it has when you are using the hardest version of pressure you can muster, so keep that in mind!

Step #16: Here is where I do the basic coloring for the skin, hair, and eyes. These colors will be relatively the same as the colors from the palette, because there is not a “gray cast” caused by the line art sketch from the manga cap. This means that the skin color that is showing in the manga cap that I’ve colored is pretty close to the original color from the screencap from the anime/the palette that I’ve got in the upper lefthand corner. I do FLAT coloring for this - aka NO SHADING YET. So I only use the LIGHTEST shade for the hair and skin - the ones farthest to the left on the palettes for each section. I do use the DARKEST shade for the eyes, but that’s because usually the lighter shade is the one you use most sparingly, where as with skin, the darker shades are used for shadows only and aren’t used in excess.
NOTE: As previously stated, I do a separate layer for each different color. At this point there should be six layers, as follows (from the bottom up):
Layer 1: Background Layer (Mine is blue, but for the sake of easy viewing, I made it white.)
Layer 2: “Notes” Layer - this is where I keep my notes, as in the reference photos, color palette, and any other things here and there.
Layers 3-5: These are the colored layers - skin, hair, and eyes.
Layer 6: Manga Cap Line Art

Step #17: Here’s where I’m showing the two different orange tones. This is what I meant in Step #16 - The original orange shade is the lower part of Suga’s collar - as you can see, the line art shading makes the color a lot more muted. I used the color wheel to find something brighter, just for a comparison shot. I still choose to use the traditional palette that I pulled from the anime screencap.
Step #18: Now that I’m ready to color the manga cap pieces that are skewed by shading (i.e. his jersey here), I usually turn the manga cap down in opacity, so I’m able to recognize where I need to fill in! This is where I fill in the blue of the jersey, the orange of the collar and other accents, as well as the off-white shade for the number and the line accents.
Step #19: Using the eraser and smaller brush sizes, I fill in all of the flat colors. No shading yet!
Here comes the time consuming, nuances...
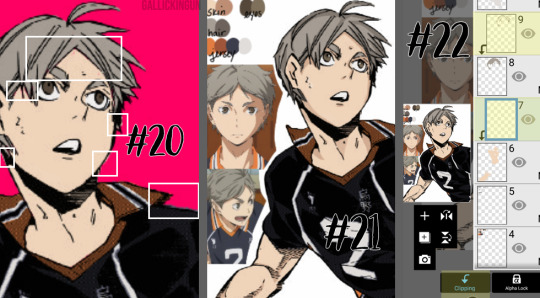
Step #20: I’ve turned back on the colored background layer - sometime between when I started and now, I changed it from blue to pink. If you can zoom in on the image, you’ll see the boxes in white contain “errors”. This is areas where there are “holes” in the coloring, or where I’ve gone outside the lines. I’m going to go back in and clean this all up with the eraser and some more brush work.
NOTE: This is very important, especially if you’re trying to make this a transparent image, or if you’re going to do the extra steps and color in the line work. Any holes, overdrawn, or underdrawn areas will make the final drawing look a little funky.
Step #21: Here is the shading! Honestly, this cap kind of shaded itself, haha. Some manga caps have “built in” shading, as you can see on Sugawara’s arms and neck. I added some shading to his hair and face, trying to use the anime caps as a reference. I’m not very good at shading yet, but I wanted to show it here so you guys could see!
I used the darker shades from the palettes on the eyes, hair, and skin. I didn’t do any shading to the jersey because the manga cap lines already skew it so much, that it didn’t really seem necessary. This can be a really hit-or-miss time, both with areas that you choose to shade, as well as the colors that you use. I would really suggest searching for skin tone palettes if you’re not using the anime screencaps for reference!
Step #22: For my shading, I actually use “clipping” effects. As you can see, the two layers that are highlighted are clipped to the layers beneath. This means that the coloring on the clipped layer will “attach” aka clip itself to the layer beneath and that layer only. So, for the shading of the skin, hair, and eyes, I chose to clip the shaded parts to the base coloring, that way even if I over drew, the colors wouldn’t bleed together.
I did more of what’s called “cell shading” for this manga cap, as well as the Bokuto one that I do in the timelapse video below. What is cell shading? This wiki page explains it pretty well, but basically it’s more “harsh” shading where there’s not necessarily an airbrushed quality to it, it’s more blocky. You can see I only chose to use one color of shading, which makes the contrast much more stark. IP does have several airbrush tools, I’ve used them in my Bakugou manga caps for his gauntlets, and they work really well!
I brought up earlier that it’s important to color your base colors all the way to the edges of the manga cap line art. This clipping effect is why. On Suga’s neck and ears, the darker shade that I used for his skintone goes to the edge and actually underneath the line art of the cap, because it is clipped to the base skintone layer beneath. Had I not made sure to go all the way to the edge of the line art, this would be much more choppy, and there would be white space between Suga’s ear and his hair!
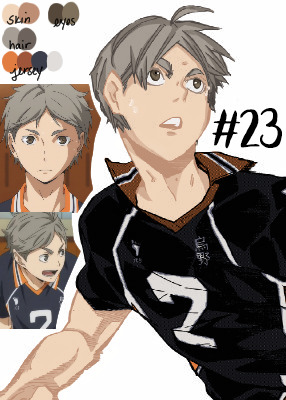
Step #23: Here is the extra step - line art shading! This can be tricky, depending on the complexity of the line art, the shading, etc. Usually, in choosing a shade to color in the line art, I grab the darkest shade for that section, and then grab something even darker. As seen in Step #18, there is that drop down box that is currently listed to “Normal” - this will need to be set to “Screen” for the current line art coloring layer. You’ll also need to “clip” the layer you’re using for the line art color to the manga cap, meaning it will need to be on top of the manga cap layer - and therefore, should be the highest layer in the image.
For this image, I only did line art coloring on Suga’s face, hair, arms, and neck. I was really satisfied with leaving the jersey alone so far as coloring. I did this mostly because of the sketchy quality of the cap, the line art would be really involved and complicated, and it just wasn’t worth it to me (so sorry lol), and I liked how it looked with the darker color outlining it anyway.
Also, I added little details like making the sweat on Suga’s face outlined in white! And yes, I do know that missed Suga’s beauty mark, but we’re going to pretend I didn’t just do that. I love you, Koushi, please forgive me.
And that’s it! I’m sure there are easier ways to do things, or better ways, haha. But this is my beginner tutorial (as in I’m the beginner, lol). I hope that this helped anyone whose doing it for the first time! I stated this before, but if you have any questions, please feel free to hop into my ASK BOX and ask me! I’d love to help anyone out! And I’ll do my best!
See below an additional manga cap coloring - Bokuto Koutarou this time! I thought doing a timelapse video of me actually coloring in the cap would help you guys out!
PLEASE BE AWARE: This video is in 2x speed so it could not be forever long and really boring lol. With that being said, I do spin the screen around several times while coloring in the cap - this could make you nauseous, so please beware of that before you watch!
Here is a link to the time lapse video on YouTube!
A special thanks to @cutesuki--bakugou who helped me a lot while I was coloring my original caps, and also to @writeiolite who nudged me in the direction of finally starting to color manga caps! And a little thanks to @rouge-heichou since I bugged her about a couple of things as well. And then as always, a huge thanks to @candychronicles because she keeps me sane. Also a special mention to @pixxiesdust because she does really cool gifs and has done a wonderful job in the bookclub of trying to share her knowledge with everyone else.
Disclaimer: I’m no artist, this is just for fun! I’m sure my shading and line art can use some work.. but I’m not focusing on that! Instead I’m just going to keep playing around and having a good time ❤
#haikyuu!!#haikyuu manga#haikyuu manga cap#sugawara koushi#bokuto koutarou#manga cap color#manga cap coloring#manga cap tutorial#coloring tutorial#manga cap coloring tutorial#morgan colors hq#morgan colors bnha#morgan does tutorials
159 notes
·
View notes
Text
How to have mismatched eye color in any picrew: a tutorial
*****
At the bottom I give a quick overview (but not a specific tutorial) of how you can also make various other things that are almost never available in picrews, some of these are harder than others: Other forms of Heterocromia, Inner eye ring colors, Custom scars, Custom skin tone variations (can make vitiligo, granted the picrew creator added enough skin variations), Custom hair color streaks
*****
Hate when you choose the perfect picrew, but your oc has some form of heterocromia and the picrew won’t let you show that?
Here’s a quick trick to fix it, with zero artistic talent required.
Everything we need is already in the picrew! We’re just going to use a simple layer trick to merge 2 of the same picrew
This will be user friendly for people who have no experience with digital art and will be done using a free mobile app. (Since most people don’t have computer drawing apps if they aren’t into digital art)
Needed: a picrew you like, a free digital art app (I’m going to use ibis paint X for this tutorial)
The link to the picrew I’ll be using for this. No orange eye color though, the one thing I needed lmao
Step 1:
Save two versions of the same picrew with differing eye colors in each as the only difference.
In my experience, the picrew stays built when you re-enter the link. So, just build it and save it as normal, then it will still be there and you can change the eye color before saving the second copy.
Your copies should look about like this: it’s important to keep the rest of picrew as a copy except for the eye color. The fewer differences, the easier it will be.
Step 2:
Ok, now the hardest part is over! Drawing apps can look scary if you’re not used to them, but it will be ok.
When we open IbisPaint X it will look like this:
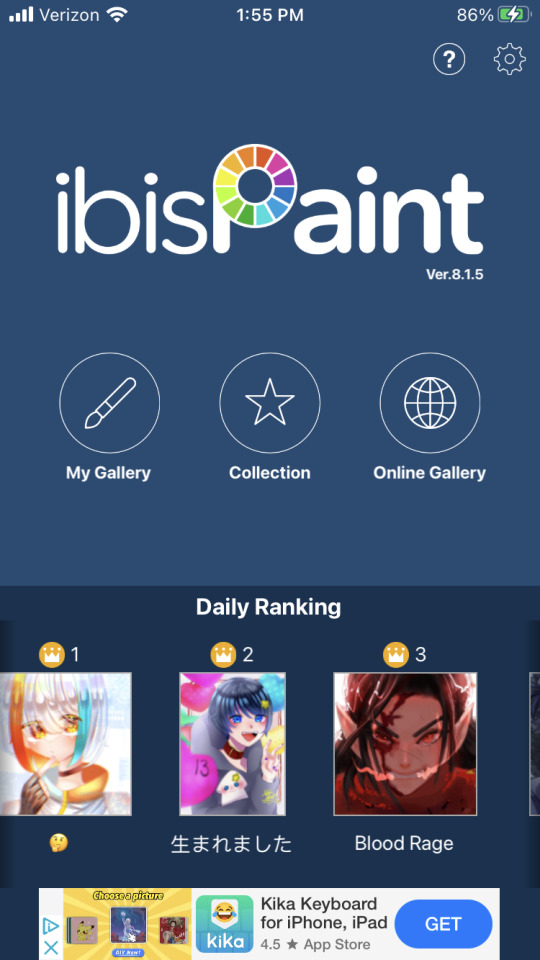
You want to select ‘My gallery” and then hit the plus sign at the bottom left hand corner. You’ll then be given this menu:
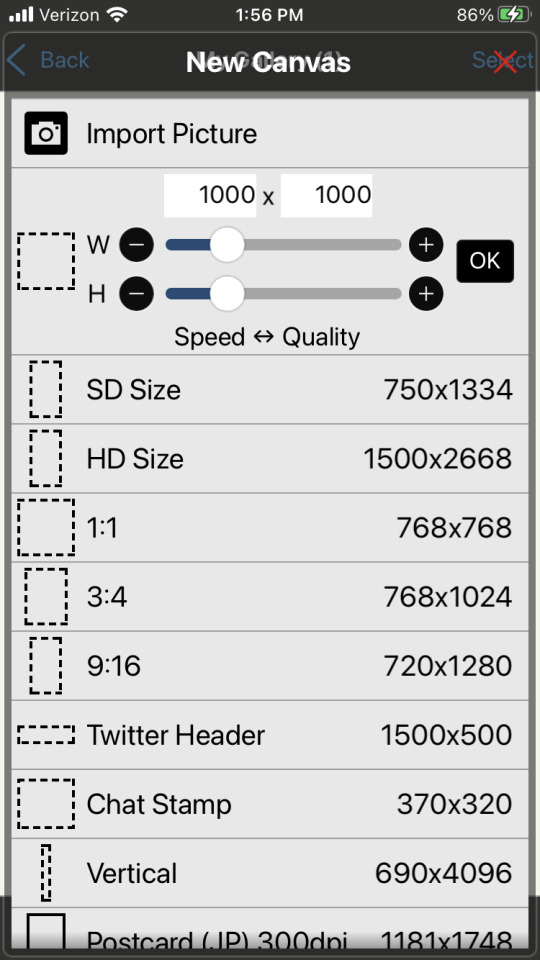
Now this looks like a mess, butttt you’re just going to ignore it all and click import picture. You can then choose 1 of the picrew’s from your gallery. Don’t worry it doesn’t matter which you choose.
You will be prompted with this notification:
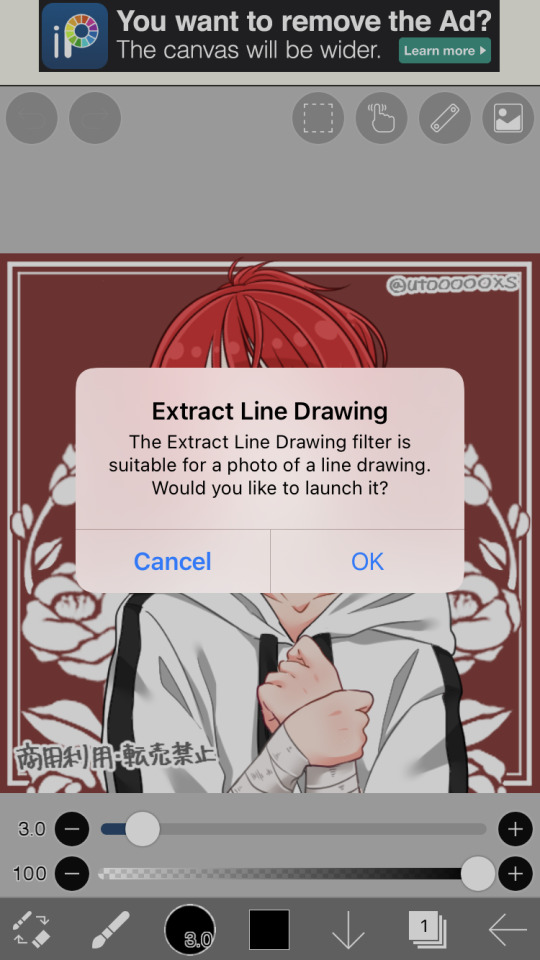
Cancel this. This will turn the work into lineart or something I’m not sure tbh. Not familiar with this app. But it will mess up our picrew. Accidentally did it? No problem! Just close the app and go back through the menu
Step 3:
So, now you have this:
We’re ready to overlap it with the other picrew we made!
I’m running out of the 10 photos per post, I’ll try to still give a visual for each step though. Hope it’s not confusing
1- First we’re going to hit the ‘layers’ symbol at the bottom right
2- here we can see the layers, this app seems to automatically make a new layer for a new picture, so don’t worry about any of this! Select the add photo button and choose your picrew with the opposite eye color of the 1st
3- Dont mess with these settings, just push the green check! We don’t want to move the picture since we’re relying on them being directly on top of each other
4- cancel the lineart thing again
5- Now we have 2 layers, each with 1 version of your picrew
6- you can just tap above this menu to close it. It should appear as though our picrew has changed eye color.
Step 4:
Now for the fun part! We’re going to erase one of the eyes on this top layer to reveal the other color underneath!
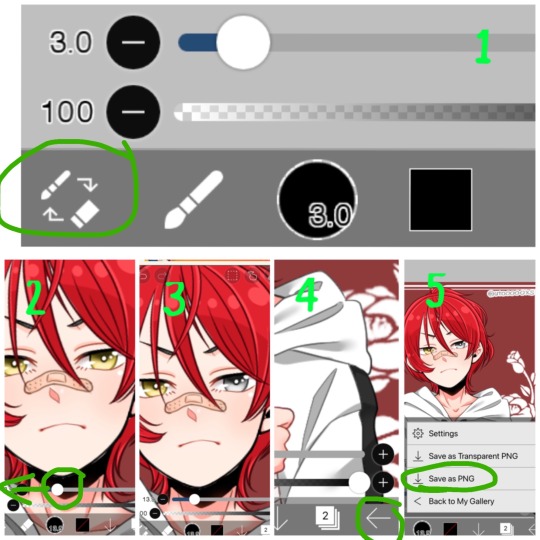
1- We’re going to switch from pen to eraser using this button in the bottom left hand corner.
2- For the best precision, we’re going to want to zoom in towards the eye that isn’t supposed to be the current color (we can zoom in by placing two fingers on the canvas and pulling them apart. Idk what this is called. Reverse piniching?) The other thing we’re going to do is make the eraser smaller by sliding the top slider to the left.
3- Now we’re ready to erase! Carefully erase over the eye and it will change color. Be careful not the erase the other eye, or it will change color as well. If you make a mistake, the undo button is towards the top of the canvas
4- all done! Just gotta save it now. Push the button in the bottom right corner
5- When the menu comes up, you want to save as a normal PNG. Now it’s in your gallery!
Step 5:
Done!
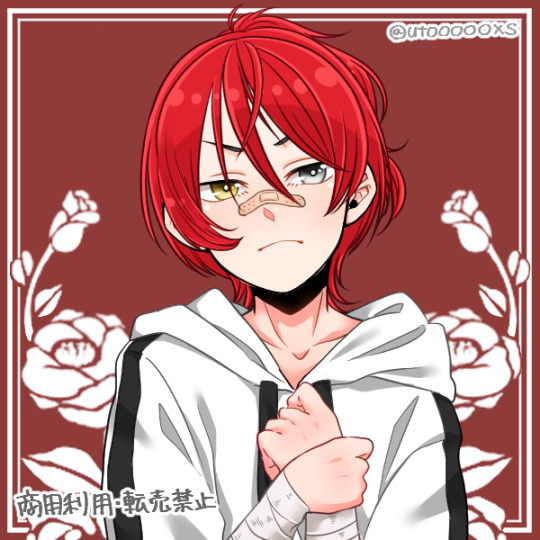
It doesn’t look edited at all! Because it’s really not, we just combined two of the same art in different colors. No one would ever guess. It still has the same dimensions and everything!
*****
Other stuff you can do with this trick:
Although some of these take a lot more careful erasing, these shouldn’t require any actual drawing. You can use these basics to experiment with this stuff as well:
- A different colored ring around the middle of the eyes: put the middle color on the bottom layer and erase around the pupil carefully in a circle with a very small eraser brush size.
- eyes that are half colored, in a line down the middle (a form of heterocromia): layer order doesn’t matter, erase half of each eye carefully, depending on which color should be where.
- a color streak through the hair: this one will require careful erasing to look good. You’ll need a picrew where the hair is entirely the color of the streak, and a picrew with the surrounding hair color. Put the color streak layer on the bottom layer. Erase the top layer in the shape of the streak you want colored. You can place it anywhere. You can do this with faded hair tips as well, but how well that turns out will depend on the color difference the creator had between similar hair colors... in other words, if dark and light brown are closer together in color value, it will look more natural when you merge them. I would recommend putting the lighter hair color layer on the bottom. When you erase, you’ll be drawing where the highlights are, functionally the same as the color streak.
- you can make uneven skin tones or vitiligo if the creator has added enough skin tone variations to the picrew: to make vitiligo you’ll make a picrew with your lightest skin tone and a picrew with your darkest skin tone. You’ll put the lightest skin tone on the bottom layer. Then you’ll erase the top layer in the pattern where skin pigment has been lost. You’ll be able to control the pattern of color loss like this, and make any pattern you want! This layer order works best for putting light patches on darker skin. If you want to darken an area you’ll put the darker layer down first and erase the top layer with lighter skin into the pattern you want. Essentially: put light down first if you want to put a light pattern on dark skin. Put dark down first if you want to put a dark pattern on light skin
-custom scars if the creator has added enough skin tone variations to the picrew: this is the same idea as skin tone variations. This time though, we need a picrew with a pink tone skin color choice, a lighter one than the character’s skin tone can also work if you want silver scars. Make a picrew with normal skin tone for the character, and a picrew with the scar color. Put the scar color picrew down first, then add the normal tone one. Now when you erase it should make scars in any pattern you want!
If you’re having trouble erasing neatly, the answer is always to zoom in on the canvas and decrease the eraser brush size! Also you can undo and redo until it looks how you want!
That’s all I can think of right now! Hope everyone has fun making those OC’s that the picrews always seem to forget. And especially anyone who’s been left out themselves!
I have on anon asks if anyone has questions/problems using this tutorial! Or any questions about how to do something similar
Feel free to add other tips to this post as well!
*****
6 notes
·
View notes
Text
F.A.Q Read this before you ask
Q. What is this?
This is a Steven Universe AU about my oc, Taaffeite, who was made to replace White to rule Homeworld
Q.Where can I start the comic and read in order?
You can start right HERE
Q.How often do you update the comic?
Every 10 days or so, I’ll alert you guys when i’m postponing it
Q. How did you come up with this AU?
I was thinking about a gem who was made by Pink tampering with the injector that was going to Earth and that accidentally made this rare gem. And then after watching the SU movie, more ideas popped up and more ideas got added to the story!
Q. Why a Taaffeite?
When the comic was in the making, I researched gems rarer than a diamond and I found a Taaffeite (I also found a Painaite but further research concluded that Taaffeite is rarer and Painaite didn’t have a “ring” to it.
Q. What do you use to draw?
On my phone with Ibis Paint X with my finger. I recently got Medibang but I’ll stick with Ibis.
Q.Will Spinel be in your story?
Yes.
Q. Will most of the original cast be in your comic?
Yes!
Q. Will most of the stuff that happened in the show happen in your comic?
Absolutely! Most of what we saw in the show will happen but Taaffeite will now be in it so they’ll be a tad different. It’s only a matter of time.
Q. When does this AU take place?
7,000 years ago, 1,000 year before Pink got her colony and rebelled.
Q. Can I roleplay a gem in another au and send you an ask to roleplay?
I don’t want to answer asks about RP. I’m very busy and I don’t feel like changing the story line.
Q. Will Steven be in this AU?
Yes, but it’s going to take a while.
Q. Why can’t she shapeshift back? And if she poofs, can’t she turn back?
Well Taaffeite has some powers that she doesn’t even know she has, but her original powers, Shapeshifting, fusion,etc, are limited, so her powers can function without her getting tired. So when she shapeshifted, she used up all her shapeshifting abilities for that form (she’s pretty big) so going back might do some real damage
Q. Why does she have “all “ powers, isn't that a little dramatic?
It’s because White wanted a powerful diamond, so she made sure the diamond had every power to rule.
Q.If there are other Diamonds, how come they're not on Homeworld?
I’m actually making a comic that explains all that right here. Updates on Saturdays.
Q. Will your oc’s be in your story?
Yes yes yes (duh)
Q. Can I make fanart of your au?
Yes! Yes! Yes! Just tag it as #Rare Au and send me an ask or a message or Tumblr if you want me to see it!
Q. Are requests open?
Yes
Q. Do you do commissions?
Not now
Q. Why didn’t you answer me?
Maybe the question was answered in this F.A.Q or it was stupid.
Q. Why didn’t you update?
It’s pretty difficult making 2 of your own comics by yourself while juggling your social life and school. I try but it’s hard to keep up.
Q. How can I support you?
You can consider supporting me on Tapas!
#read the faq#F.A.Q#frequently asked questions#Rare au#Rare au related#su au#au#the rare au#readthefaq#i'll update this saturday#i'll probably make a patreon or a ko-fi soon
16 notes
·
View notes
Text
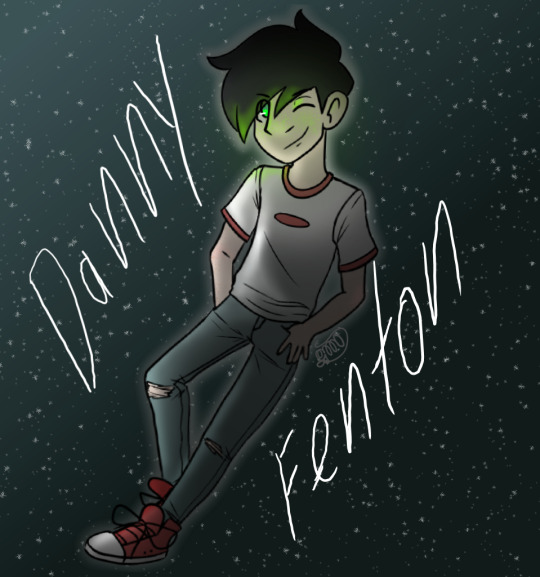
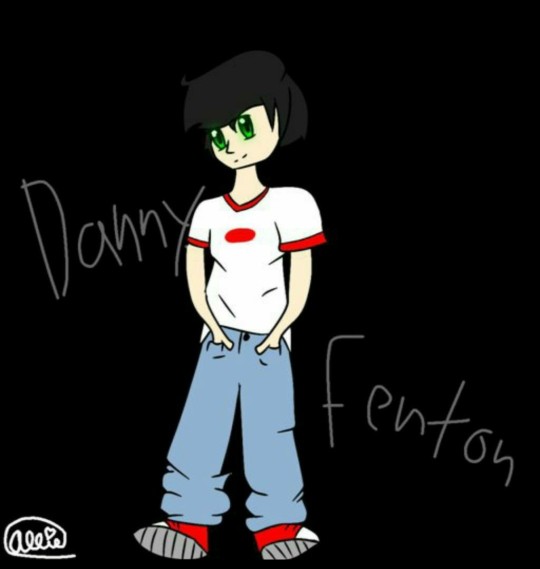
So I did my very first digital Danny Phantom drawing all the way back when I was in elementary school. It was before I'd gotten a drawing tablet and I was still doing all my digital stuff on Ibis Paint X. Actually my friend introduced me to the app as I had been using Flipaclip before that.
I was recently going through some old art and I stumbled upon this "gem!" I actually used to have it uploaded on Amino but I deleted it when I got back into DP the second time in September 2018.
Anyway, that was my very first finished digital drawing of Danny! It's... it could be worse? I've made a lot of progress since elementary school, especially in shading and things of that sort.
The original solid black background wasn't very good so I changed it to space! I tried to keep as close to the original pose as possible but it just does not look nice especially the way you can see the bottoms of his feet? I probably only did that because I couldn't draw shoes yet. Or at least that's my theory. I tried to put Danny's hand in the pocket like in the original but I couldn't get it to look right and changed it so his thumb was the only finger in the pocket and not vice versa.
Ok so I have no idea why but I just love giving Danny ripped jeans. But not like the fake ripped jeans just for style, I think it's likely he could have a pair and actually wear out the knees. That happened to be a few times when I was little. I don't even think ripped jeans look cool irl but they just look neat on Danny.
Thanks for reading and have an absolutely outstanding day!
14 notes
·
View notes
Text
Ive been going through old pictures so I can back everything up onto my laptop and found a bunch of old art. For context, I was already drawing traditionally for a but over a year at this point. All if these were also drawn using ibis paint, and my finger on a tiny phone screen.
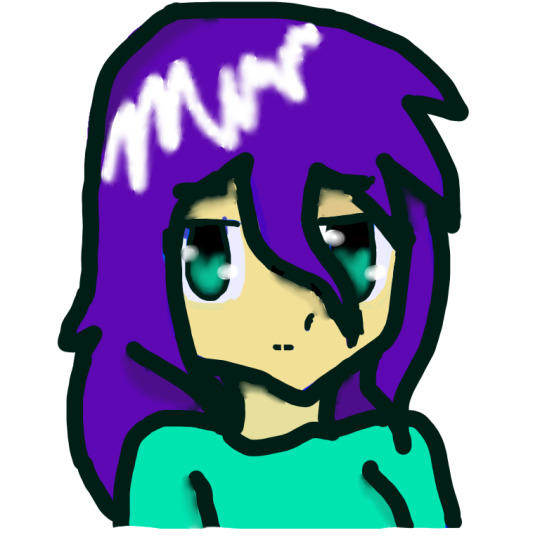
This was drawn in late 2018, right before Christmas, and is also the first thing I ever drew digitally.
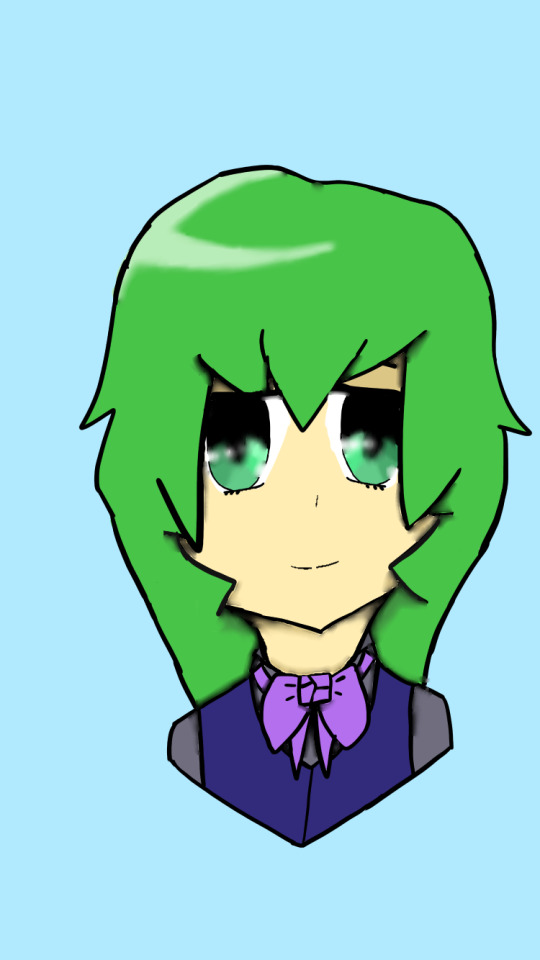
Heres some stuff from about 2 weeks later, the green haired one was drawn earlier and was the first thing I drew digitally that I actually liked. The blonde hair one was my first attempt at drawing a body digitally.

This was done in late January of 2019, and only looks better than the others because I traced over some stuff I drew on paper and then colored it. This would become the main way I drew stuff because my phone screen is tiny, like my hands are bigger than my phone screen tiny.
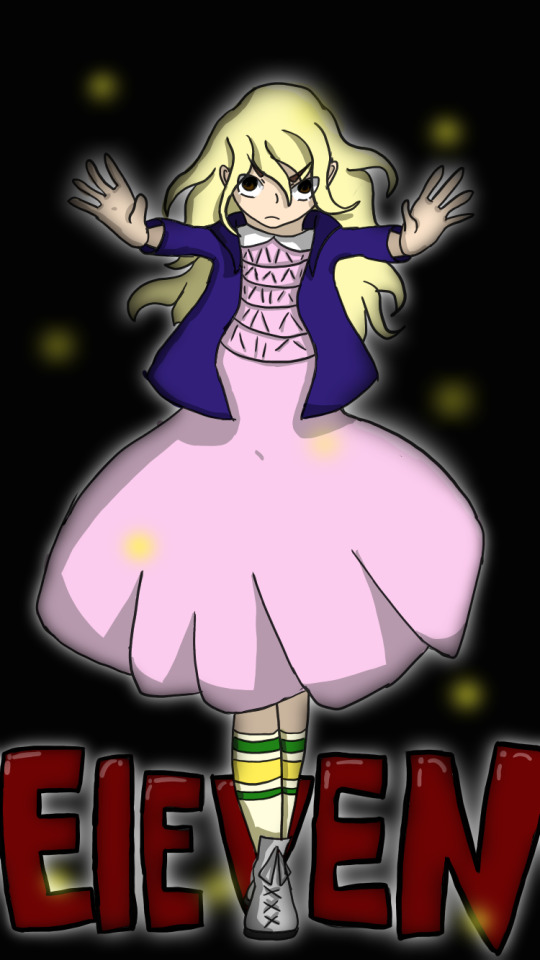
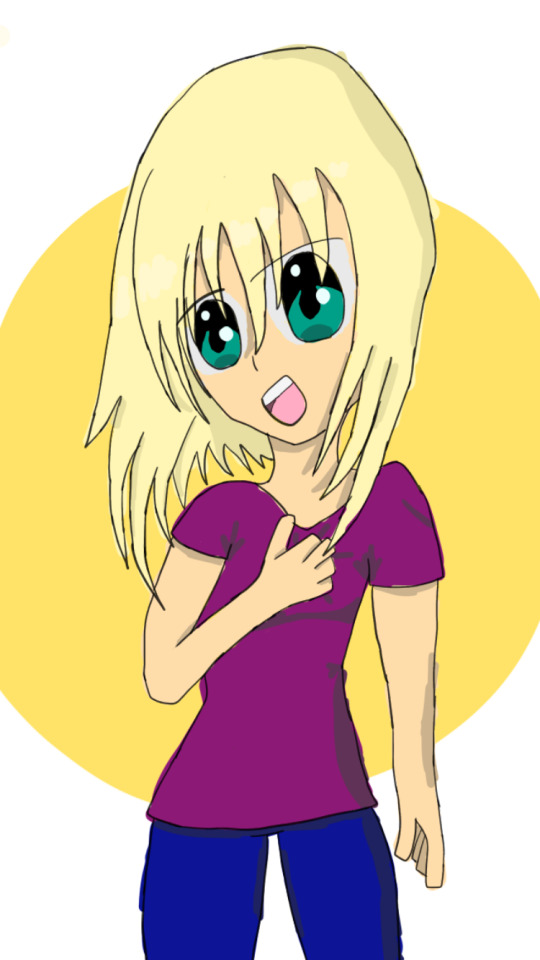
From Summer 2019, Ive actually learned what I was doing finally. The brown haired girl is actually a self portrait of me, and the other is just Stranger Things fan art
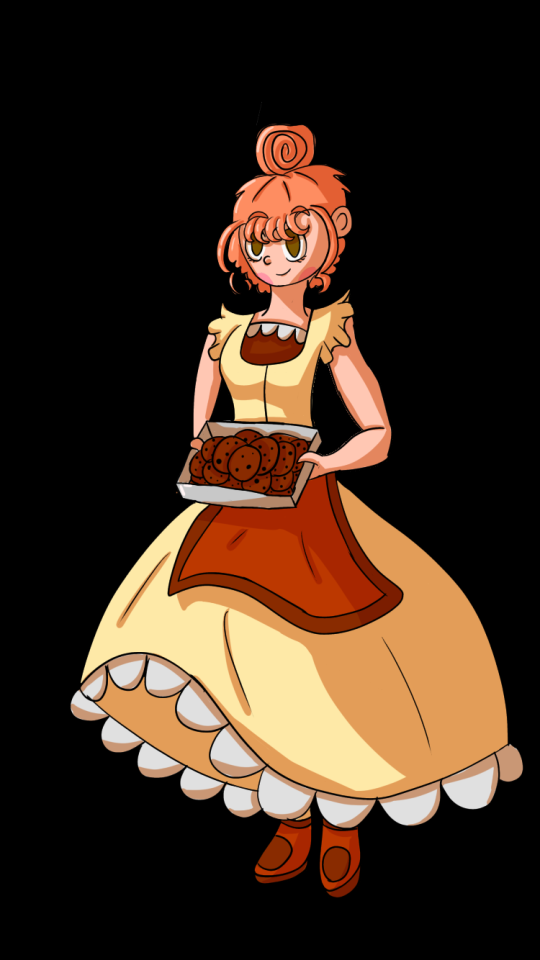

Heres stuff from late 2019, the girl with cookies was drawn for christmas gifts to everyone, the girl on the beach was just a thing I drew because I hate snow and also because I had no clue how to draw backgrounds well and wanted to learn.
Heres some stuff I drew in 2020. One is pokemon fanart, and the other is my halloween costume. Ive already posted a bunch of stuff around this time (also theres a 10 image limit) so thats about it.
Morale of the story is, it takes a long time to learn how to do art well, and also looking back on old art and seeing the progress you have made makes you like your current art a lot better.
0 notes
Text
R5, R6
(SX 540672) 12/12/ 2020
Serendipity, rhizomes and lines.
On my studio desk I have a number of rocks, stones and pebbles. None are particularly rare or precious, most have been collected locally yet every one is an object of beauty. One such stone is a sharp piece of flint. Small enough to hold in my palm, it has become my go to de-stress stone. I like to let its razor sharp edges bite, just a bit, into soft skin. My teasing wake up call. It has volume and weight, four planes—a tetra. One side runs smooth, curving to meet a granular knobbly surface, bone-like and skeletal, like the indenture of a clavicle or ankle bone. The underside of the stone is cut sheer, sliced through its core, creating a flat expanse onto which it is able to stand upright, before rising into a terraced plane, each step the size of a thumb print, a patternation that reveals the cryptocrystalline formation of flint (‘crypto’ meaning ‘secret’ or ‘hidden’). I found it on a beach in Cornwall. A dark grey stone with a white thread running through its centre. Its shape and size tickles my imagination, and as I turn the flint over in my hand I play with the idea that it was used as a Neolithic arrowhead, chipped away, stone on stone some 5000 years ago. The structure of flint requires a level of skill and expertise to shape; one wrong strike will send fracture lines through the stone rendering it useless as a tool. Our early ancestors were artisans and makers. Over and over, I have drawn this stone, feeling it’s texture, the sharp edges and definite weight in my palm. It does not take up much space and yet every time I draw it, a different angle or plane opens up. It is never the same. A small rock, inert and fixed, offering infinite possibilities.
You think you know something, someone, some place. A line on the horizon, a spit away from the sea and moor. Clambering over rocks, swimming in icy rivers and streams, climbing trees and making dens. 'Whence cam'st thou, mighty thane', pronounces Duncan in Act 1 of Macbeth. The utterance of such a question now comes with a cautionary red flag, one that implies exclusion and ‘you are not from here’. Too bad, coming from a white working class background, where histories and lives are lost, undocumented and unrecorded, I have no idea where my roots are tangled. I cometh from nowhere, no fixed abode, shallow rooted, spun together by frail relatives that can’t, or don’t want to, remember. To remedy this unknown, I was gifted by my eldest daughter a DNA test for my 50th birthday. The results from my spit reveal a blueprint that aligns with peoples who cluster around the North East of England, with a smattering of Swedish, Norwegian, Icelandic, Scottish and Irish. Farmers and seafarers I suspect, a web of people who somehow managed to survive hunger and disease, violence and brutality, the lustful fumble in the hay and the traumatic birth. The odds were not good—about one in 400 trillion chance of being born according to the boffins. In staking a claim on the improbability of existence we got lucky, very lucky.
Where we come from and who we are. Layers of paint, fresh applications, still wet bleeding into others, making new colours and new pictures. Blending and binding. Some work and some don’t. It seems so arbitrary how we come to be. I should make time to salute the stream of past people, winding all the way back to the bones of dear Lucy, 3.2 million years ago, and her mother and grand-mother, all coming and going, doing their time. But, I won’t, it's enough to breathe in the noise of now. One heart beat, a blink of the eye and we are gone. Serendipity, luck, random, the throw of the dice. The cells didn’t bind in the correct sequence and the possibility of life just slipped down the toilet. Is it any wonder we seek out patterns to create order and structure, finding comfort in numbers and story; assigning value in the unexpected, and agreeableness in what wasn’t sought. Ones and zero’s, lines and dots, giving shape to all things. Artists do this all the time. Seeking opportunity in the accidental and unintended. Any stick, stone, door, book, conversation opening up new creative possibilities. The rhizomes seeking out a good place to settle, a place to nourish. The patterns, whether real or not, helping to make sense of the intensity of the here and now.
Jennie’s story is fascinating. Her blue eyes, flaxen hair and Bridget Bardot pout might have you thinking she is of Swedish heritage, whilst my dark skin, hair and black eyes has in the past suggested Mediterranean roots. Not so, the paint palette is muddied. I will let Jennie tell her story. One thing to note here though, Jennie is an adventurer, she has travelled all over the world: on her own, through work, with friends and lovers. Occasionally I have joined her but mostly I skirt the edges of Western art history, moseying around European capital cities, museums and galleries. Both of us are wanderers in different ways. Parallel lines. The same but different. I am amused to read that women of ‘a certain age’ partake in what Jennie and I are doing—walking and exploring local history. I also note the term ‘a certain age’ is often used to describe middle-aged women, usually accompanied by a roll of the eyes and a double-fingered quotation sign. It is basically code for women no longer of a fertile age—post 40 and therefore deemed unattractive, and given age tends to gift experience (though not always) they carry a certain confidence i.e., speak their mind and know what they want.
A simple stone. We are breathing, blinking and unstill.
We ask ourselves how did we not know about this walk? It is literally a stones throw from Jennie’s parents village, just over the hill yonder, where Jennie spent her teenage years and part of her adulthood, and where I lived for awhile whilst homeless and lovelorn. Of all the places on Dartmoor this is an area that I would confidently say we know well, and yet here we are discovering new trails, hidden valleys, different perspectives and layers and layers of history, a thread of which connects with Jennie’s recent travel’s with her son to the other side of the world. The walk begins in the small Devon village of Meavy on the southwest of Dartmoor, a place I have cycled and walked through many times, enjoying a sup or two at the Royal Oak on the way. The route follows the river Meavy upstream to Burrator dam not far from Down Tor, where Jennie first set this adventure in motion as we glugged champagne and watched the setting of a glorious October sun. From Burrator, the road winds through Sheepstor village and into the woods where earlier in the year, at the height of bluebell season, I waited with my children for the badger's to come out. Hunkered down amongst bramble and fern at dusk, quiet as mice, hearing the birds hush and darkness settle. The children were not scared but reverent and awed by being in the woods at night, a time and place synonymous with the darker side of fairytales: of wolves, witches and being lost, and where the unknown and the unformed lurk. We whispered and signed to each other in the darkening gloom, until we no longer needed words and laid back in a bed of fern, faces turned upwards, watching the patchwork of sky between the canopy high above turn from indigo to midnight blue and then merge dark into the tall trees, the cool air lulling us to sleep.
The ax strikes and life reclaims as swift as the blade can cut. My hand brushes the damp surface of a lopped off tree stump in the woods down from the reservoir, and I stop to observe a platter of squirming, burrowing, scuttling, squirrelling, decaying life; three empty acorn shells evidence a previous luncheon. I have set the objective to notice more when I am on these walks, to seek out habitat changes and to learn and know the names of things. But always I surrender to just being, breathing in the light and air, the atmosphere. I feel happy on these walks, a sense of euphoria and lightness washing over. It feels good to leave aside the cerebral and to let the physical, the motion of walking awaken a realm of sensing and scanning. She doesn’t say but I know Jennie has arranged this walk pre-Christmas because she is aware I am struggling with sadness—a sadness caused by my natural melancholia and tendency to ruminate, and a much bigger life crisis. Battle hardened to general romantic crisis’ I am not so experienced with career rifts, and so I have withdrawn and pulled down the blinds. But it won’t do and I know, as Jennie does, that the moor will help to alleviate the mental muddle I am in, and even if the effects are only temporary, it will store up the memory bank, to plunder and remember during the times when I get locked in.
Ten minutes into the walk Jennie spots a Heron standing stock still in the woods by the river Meavy. Camouflaged against the bare trees, charcoal grey and ochre, we watch it rise and drift across the valley. Great grey wings, near 6ft in span, pulse slowly, its head and neck arrow-like thrust forward piercing space. It has a primordial presence. In mythology it is linked to the sacred Ibis, a bird revered by the Egyptians as representing Thoth—their god of wisdom, writing and magic. I take it as a good omen. The wood is dazzling, ice cold water tumbling down from Burrator reservoir. Wood, rock and foliage glisten from the early morning downfall, the ground water-logged from weeks of incessant rain. The element of water is strong here, 4210 mega litres—enough to quench the thirst of a city and the surrounding hinterland—held in check by towering granite slabs that form a 23.5 metre high gorge. Completed in 1898 and extended in 1923, the reservoir pools run-off from the surrounding moor and water from the river Meavy. Standing downstream from the dam in the wooded valley I hope the granite wall holds strong. The sun breaks through and turns up the volume on colour. Saturated greens: acid, moss, lichen, pine and fern. We watch a man on the other side of the steep valley, oblivious to our presence, pissing freely, a spray of urine forming a perfect arc; glinting golden droplets catching the sunlight.
Having learned nothing from our previous walks we decided not to take the obvious path and instead followed the course of the river upstream. This meant having to clamber over rocks and fallen trees, until we reach the imposing dam wall and are forced to scrabble up the steep bank, thick with mud, to get back on the road. Jennie leads the way, an experienced hash runner not deterred by the muddy terrain, she turns into a sure-footed mountain goat, while I, slip-sliding, defy gravity and somehow fall up the slope. Walking over Burrator bridge we pass the man we saw pissing earlier and beam broadly, making sure we hold eye contact for a bit longer than comfortable for him. We then follow the road up to Sheepstor village, and—given we are women of ‘a certain age’—we are keen to nosey round St Leonards, the C15th village church. But sadly, the door is locked so instead we admire the Lych gate, a covered over a double gate with a lychstone to rest the coffin before entering (‘Lych’ or ‘lich’ meaning corpse in Old English). At the time I did not notice the foliate skull carving above the main door, only a little while later when we sat for lunch under a massive oak tree, which we reckoned to be near on 500 years old given the size of its girth, do I undertake a little online searching and read to Jen a short history of the church and its whereabouts.
So intrigued by what I find that I go back a couple days later, this time with my dog and younger children in tow. In particular I wanted to see the foliate skull above the porch. In recent years there has been a growing interest in Pagan symbology such as the ‘Green Man’ and the ‘Three Hares’, several examples of which can be found in churches across Dartmoor. The ‘Green Man’ is usually represented as a carved face with foliage growing from the head, mouth, nose, ears and eyes. It is presumed to be a pre-christian Pagan symbol representing renewal and life—from death comes life—that has been absorbed into Christian ideas of resurrection and life after death. Often found in churches and cathedrals across Europe, its more macabre cousin, the foliate skull, is said to have appeared after the Black Death in the 14th century. The skull at St Leonards church is carved with ears of wheat sprouting from the eye sockets above an hourglass. The suggested date of its making is given as 1640 and it is suspected to have originally been part of a sundial. Now it sits behind glass in a small recess above the porch, and on this particular day was partially obscured by condensation so I could not see the inscription incorporated into the sculpture: ‘UT HORA SIC VITA’ (As the hour so life passes), ’MORS JANUA VITA’ - (Death is the door of life) and ‘ANIMA REVERTET’ (the soul will return).
As a motif representing vegetation, rebirth and resurrection, the ‘Green Man’ archetype is found in many cultures across the world, including the ancient Egyptian God Osiris, the god of fertility, agriculture, death and resurrection, who is often depicted as green skinned, alongside several green figures found in Nepal, India, Iraq and Lebanon, the latter dated to the 2nd century. I wonder how far the Green Man story goes back? As a cross cultural archetype it suggests a commonality of belief about the life cycle that is interconnected with the land. Whilst its incorporation into ecclesiastical architecture alongside other apparent Pagan motifs, points to the fluidity and evolution of belief systems, which subsume and build on pre-existing ideas, even when the incoming authority seems most rigid and contained. Most of the what we know about the ‘Green Man’ is based on speculation and supposition, as we have no historical evidence as to why and for what reason they were made. Instead the ‘Green Man’ motif has been reclaimed and remoulded at various points in history from Romanticism to Neo-Paganism and most recently as a symbol for the environmental movement.
A little village church under the shadow of the looming granite tor on the southern edge of Dartmoor, connected through culture and shared beliefs with a much wider world and history. If the Green Man does not provide enough evidence of these interconnections, then the large sarcophagus, protected by iron railings in the churchyard, and housing the remains of James Brooke, First Rajah of Sarawak (29 April 1803 – 11 June 1868) alongside two other White Rajahs should affirm the connections without doubt. It was whilst peeling the shell off hard-boiled eggs, freshly laid by my chickens that morning, at the foot of the big oak tree that Jennie realised that she had previously encountered the story of James Brooke whilst travelling through Borneo with her son. A sultry jungle, 7,000 miles away on the other side of the world tied by empire and colonialism, violence, power and trade to this peaceable village. I find out a little more about James, the questions concerning his sexuality and love for men stick with me more than the dates, titles, skirmishes and conquests. I go back again to the church on new years day and with fresh snow on the ground, sipping steaming hot chocolate on the bench overlooking Brooke’s slab of a tombstone, I retell the story of what I know to my children. They hang off the iron railings and argue over the remains of the Christmas chocolate, I don’t think they were listening.
SC
Reading: Lyon, N., (2016) Uprooted: On the trail of the green man (London, Faber & Faber).
https://www.legendarydartmoor.co.uk/sheepstor_church
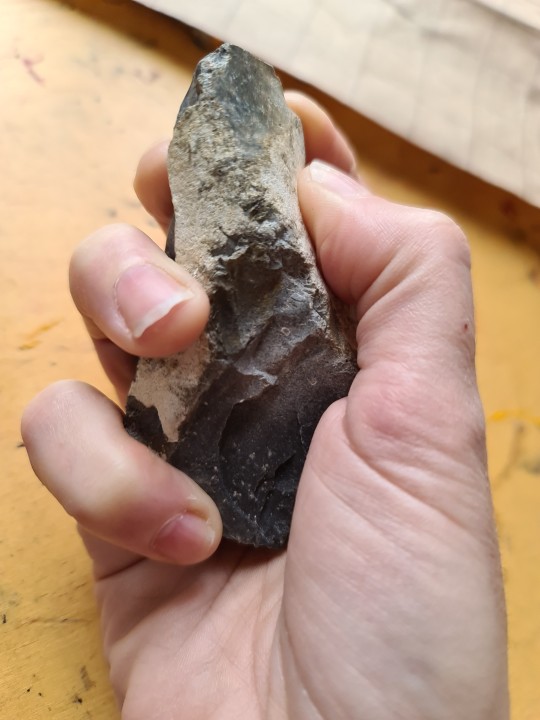
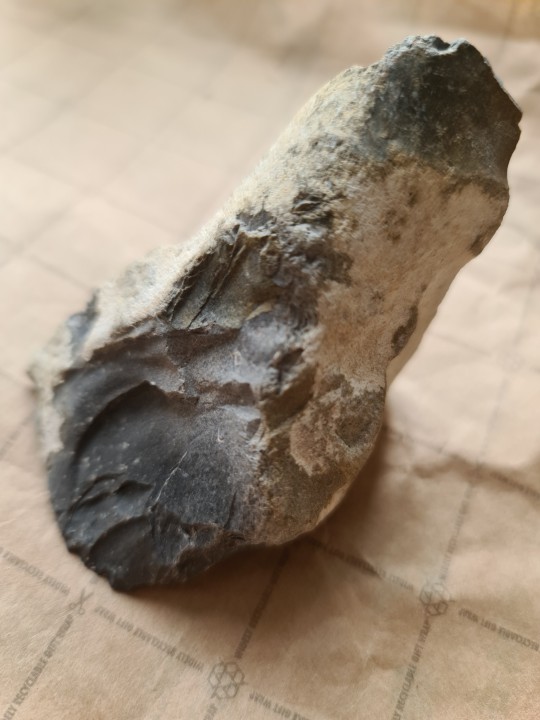
0 notes
Note
Hey, Galuby! I've been meaning to ask these things for some time, but how long did it take for you to figure out how to draw via digital art? And what kind of drawing tablet do you use for it? I'd like to eventually take a step out of the world of traditional art and learn how to do it all digitally myself (though I may have to wait a while before I can afford it due to college), but I'd also like to hear your thoughts and advice on the matter if that's okay with you.
That`s completely ok with me ovob and i`m so flattered that you came to me for advice and kinda scare to screw up
Ok so
I`m still figuring out how to do digital drawing, and i learn something every day, it was, of course, a really intimidating step to give, out of the comfort zone of traditional art, but bro, that was the most exiting thing about it.
Another thing is, buddy chum fella, where there`s a will, there`s a way.
I don`t draw with a drawing tablet, I use a Samsung Galaxy 5 my aunt gave to me because she fucking rocks and didn`t wanted it anymore:

I cried that day, i`m not even from a country that sells these everywhere, they cost a kidney and a half. My granma brought it when she came to visit us from the USA, i have it since 4 years ago and is still kickin`.
The apps i use to draw are MedibangPaint and ibisPaintX (ibis was the first one i used then moved to medibang)
and bro, lemme get a side-to-side before and after:
http://galuby.tumblr.com/post/161371646319/galuby-2014-2017-who-are-you-im-you
And as you can see, i`m still figuring out hehe ^^;
as to what i use as a pen:
I use my fingers, mostly my index one but the others help sometimes.
Things is, it doesn`t matter which tool you use, what matter is the artist.
Trust me, getting a drawing tablet has always been my dream, i had to wait a looooooooooooooooooooooong time to get one, and worked my ass to get it too.
I went to my uncle`s house in Missouri a few weeks ago and stayed there for six months, taking care of my cousin, saving money to get one and now finally FINALLY GOT ONE! It`s an Intuos i haven`t used yet because now that i`m back home there`s not space for it here, but i will save some money and buy a desk ;). It wasn`t easy to get it to work tho, we had many MANY technical problems, i even had to wait more to buy a new laptop and get it to work, and yeah, is ready for use now.
Sorry for that ramble abt my life but I wanted to get a point. You will need patience, if you can`t afford it right now save and wait. If you have a way to learn the basic now THEN LEARN. And practice a lot. Pay attention in art streams, see what the artist does with the program, watch speed-paints that show the tools being used, watch tutorials but most important of all: MAKE MISTAKES! ALL THE MISTAKES YOU CAN POSSIBLE CAN, you will not learn from them right away (maybe) but know that if you were drawing a beautiful piece and suddenly lost it, you at least got a bit of experience! (this happened to me more than twice).
Another thing, apps and programs are different. The Medibang program is like hell for me, i will need to practice with it more.
Get a pen if you can and want If you`re willing to start with a phone bc i heard it can damage your fingers in the long run. No matter how you start, phone/mouse/tablet you WILL improve and get better tools and more skills everytime you practice.
Good luck! I BELIEVE IN YOU OVOb
6 notes
·
View notes
Photo
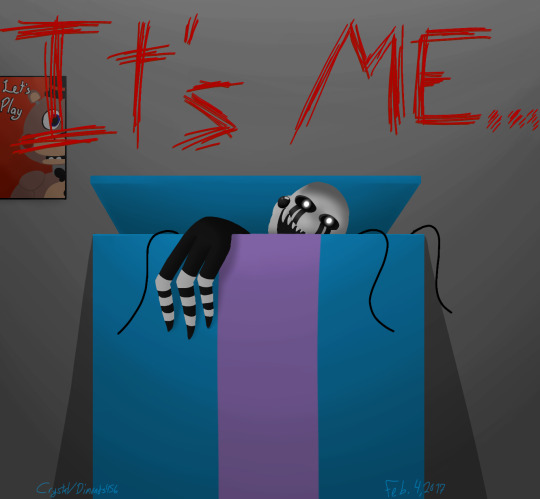
Nightmarionne - FNaF Speedpaint (with no speedpaint ;-;)
So uh, I should probably upload this here, right? XD So sorry that I haven't been too active lately. I've been too busy for art ;_;
Namely, trying to get used to my new school, spending time with family, school, exploring Tumblr XD, eating, school, hanging with friends, school, playing Undertale, Geometry Dash, FNaF SL, Piano Tiles 2, school, etc. I just haven't had much time ;-;
I'll try to make it up to you guys by flooding you with a torrent of puns- I-I mean art XD
So first up, we have Nightmarionne, aka Nightmare Puppet! From FNaF, obviously (#notsponsored). He was MEGA fun to draw, and I am SUPER proud of it! He might have become my best speedpaint yet!
But, he almost was never made.
Another reason that there has been no art is because I was made at my software, Ibis Paint for Android. Looking back on it now, my reaction and art rage quit was actually kinda funny. So, I figured I'd tell you what happened.
* * * * *
I was hyped. I had just finished re-watching Markiplier play FNaF 4, all the way through to the Halloween Update, and I wanted to make some FNaF fan art. Night 6 was still in my mind, so I began sketching Nightmarionne. (Fun fact: the exact same pose that he is in the final product. Let me explain.) I was satisfied with it, so I grabbed my recording software, hit record, and began making it into a speedpaint that I would upload onto Youtube.
I was nearly finished. I was working on the backround, happy and giddy that this would be my BEST yet, and I got a little too excited. On my Blur tool, I made it as large as it could go to blend my backround (which is a size of 250 pixels- a LOT), swiped my finger across the ENTIRE screen, and... I crashed it. I crashed Ibis. I figured, "oh, well, I can just jump back into Ibis and go back to editing from where it had last auto saved."
BUT I WAS SO FREAKIN WRONG.
That crash managed to crash my WHOLE TABLET to the point that it had to REBOOT ITSELF. IT PHYSICALLY TURNED ITSELF ALL THE WAY OFF AND TURNED ITSELF BACK ON.
That had happened to me before (a few times), so I figured that it was no big deal, although I would be missing part of my recording.
Oh, no. Not at all.
I got on Ibis. It all seemed ok. It tried to restore the AMAZING picture I had. And do you know what it told me?
101: Error file not found. There has been an error finding file (insert really big number here).
So, I got out and tried again. NOPE! Told me the same thing. So, after a few more attempts, I deleted it. Afterwards, I went on my recording software and selected all the captured footage (because I record in parts of 20 minutes or so), and deleted it, too.
Then I walked away from Ibis for a good long while. 3 weeks, in fact.
I only just returned to it today, making this picture the exact way that I did before, recording the whole thing, and I didn't encounter any problems. I SIGHED WITH PURE RELIEF. But, my electronics weren't done with me yet.
Remember how I said that I recorded drawing the new one? Well, I uploaded it to Google Drive, downloaded it onto my computer from there, and attempted to put them into Windows Movie Maker to string them into a speedpaint. But, when I tried, it yelled at me. So, I tried re-downloading each video, 7 VIDEOS, and the same result. I did this twice more. So I thought, "ok, I will just go back to Mobizen (my recording software) and try re-uploading it into the Cloud." ok, I did that, but THE SAME THING HAPPENED!!!!
So, after about an hour and a freaking half, I just threw it in the towel. No video for this one guys, and I would be sorry, but it ISN'T MY FAULT. BLAME MY STUPID ELECTRONICS, PEOPLE.
* * * * *
And that is this picture's history in a really big nutshell. If you like it, a follow would be AMAZING, and I wanna know: Is this your favorite of mine so far? Which one is? Did I do okay, or could I improve? I WANNA KNOW, PLEASE!!!!! :DHave a WONDERFUL rest of your day!Bye!! :D
#Nightmarionne#FNaF 4#FNaF 4 Halloween Update#FNaF Halloween#Nightmare Puppet#Dimonds456#I AM SO MAD RIGHT NOW
4 notes
·
View notes
Last Seen Blogs

lifeisablackhole9
God is testing me, and I’m about to fail

praefectux
KOMAND'R
kthyukoh
sarah
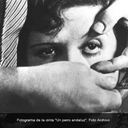
alexberumen
Untitled

creatinghealthandwellnessnow
Creating Health and Wellness Now!