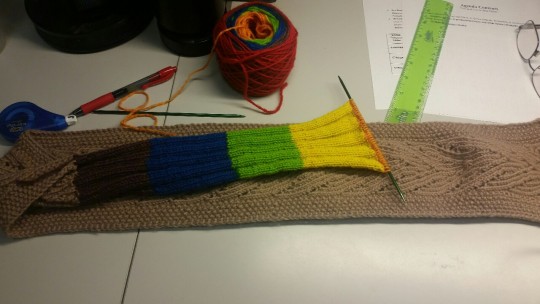
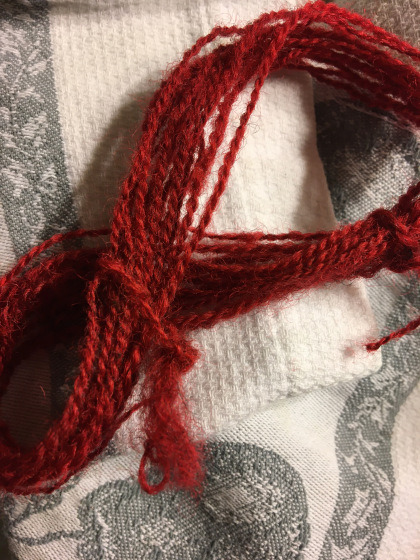
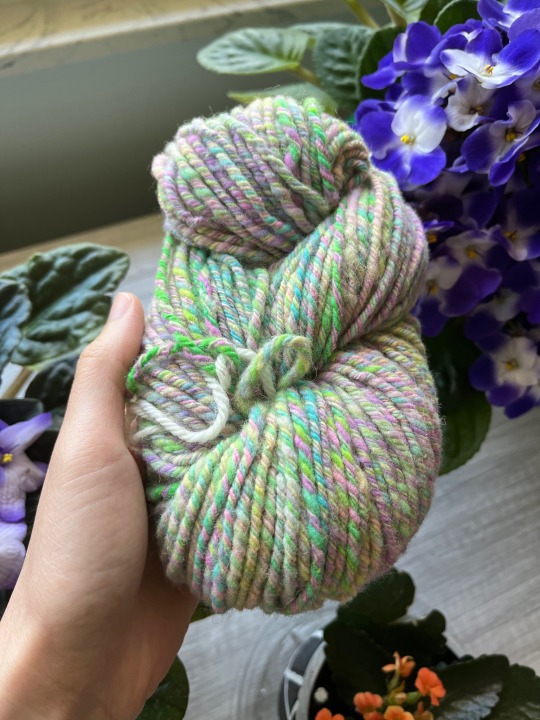
#i didn’t dye myself but it hand dyed yarn
Text
think post non disability sweater content is okay

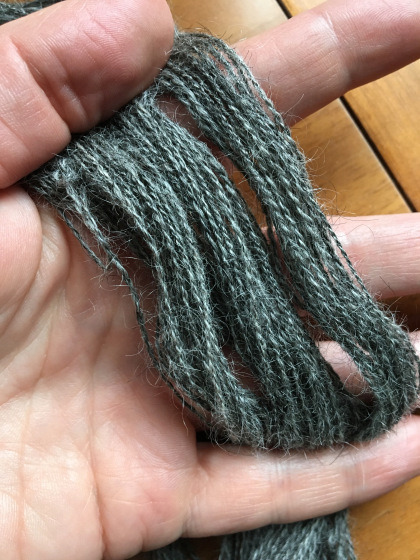
slubby yarn first ever fingering sweater first ever fingering weight anything but enjoy so far. fingering weight sweater take less weight of fiber because thinner but also mean take long time.
90 superwash merino / 10 nylon don’t usually knit super wash because stretch when wash if not careful. knit wool sweater in 40°C weather 👍
color super super nice was at first worried about too much too busy but color pretty and it good kind of busy on purpose and depend on how finish look like maybe even can be part of decora kei outfit
#wool special interest#eyestrain#<tagging just in case because color + lighting make picture slight too much contrast#knitting#sweater#hand knitting#fiber arts#fiber crafts#wool#wool sweater#knit#hand dyed yarn#i didn’t dye myself but it hand dyed yarn#🍞.txt
218 notes
·
View notes
Photo


Guys, Gals, and Queer Pals.
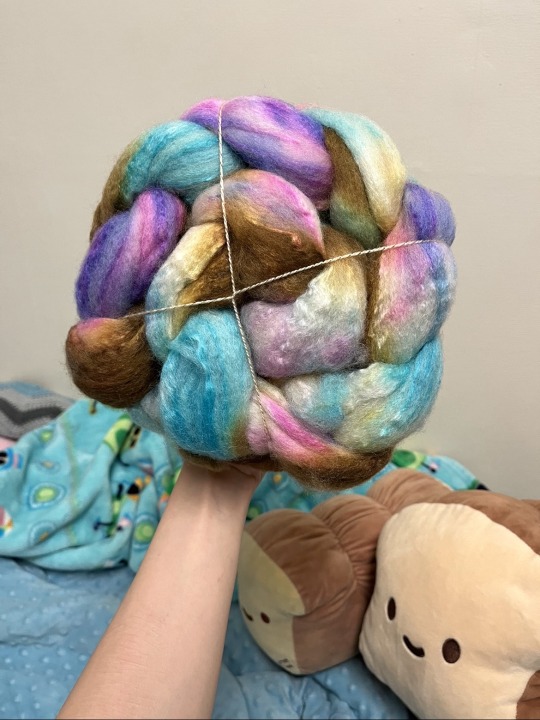
I proudly present to you, Project Noah. A THREE YEAR PROJECT examining how to dye a ball of yarn in multiple different colors. I wanna talk about two seperate ways to dye a yarn ball with several different colors and the pros and cons of each. I also want to talk to you about growth.
Three years ago, in 2016, I had this giant ambition to dye the rainbow for my “Matthew Shepard” scarf. I was so inspired by the message of that pattern, and how closely I feel tied to the LGBT+ community that I simply had to pull out all the stops. I had never dyed before, I had never approached a fisherman construction, nor have I ever tried editing a pattern to fit my tastes. When I finished it, I felt like I could DO ANYTHING. It had all worked out great- all of it except my approach to dyeing yarn.
It has taken me several years, not only to get to a place where dyeing yarn was financially feasible, but also to learn techniques and learn from my mistakes. I was so DETERMINED to get a rainbow that flowed from one color into the next almost seamlessly. I want to share with you what I’ve learned- and how it feels to see growth in such a real way,
Three years ago, I thought, that if you put the colors of the rainbow ROY G. BIV in some mason yarns, and divide your yarn equally amount those colors you’d get BAM a rainbow. I used food coloring at the time and nearly obliterated my family’s stock of red food coloring for red velvet cake. I had that vision in my head and I KNEW I could do it– my first result was, severely disappointing. I thought that the colors would magically meld, because I left yarn to dangle in between the yarns- thinking capillary action would bring each color into the next and create that gradient I was looking for. I was wrong. Hopefully. Excited! But wrong.
Let me tell you my great surprise when I learned that I had accidentally created self striping yarn WHILE I was trying to knit my Matthew Shepard scarf. It was terrifying, hoping maybe it would work as I got farther and farther away from the point I could safely frog it without losing some really hard lace motifs. I was feeling like a failure when I found that last little bit of yarn. It was hanging across ALL of the pots and picked up that gradient EXACTLY I had envisioned it. THERE WAS HOPE.
So, I tried again. This time I did some research! I found out about sock blanks! SO. Usually it was knit up using a knitting machine (the same kind of toy one that always dropped stitches and started my knitting journey, needless to say at the time it was out of the question) I didn’t have a good one at the time. SO I decided to take out some size 17 circular needles and knit the things MYSELF. YA’LL IT TOOK ME THREE WEEKS. So after finishing, I promptly got some squirt bottles I used for tie dyeing shirts and proceeded to DYE MY SEAMLESS COLORED DREAM. I thought- if it’s in a skein, and I shove a bunch of different colors in each other. MAGIC would happen. AND ID FINALLY BE ABLE TO GET MY RAINBOW. It didn’t quite work out. IT WORKED. Most definitely, but it wasn’t seamless- beautiful, and well enough for my scarf but when I look of that picture of it drying in my shower, I cringe just a little bit. I remember being so EXCITED for that yarn, and getting shot down when I wanted to show it off. So discouraged that it took me another three years to even think of attempting it again.
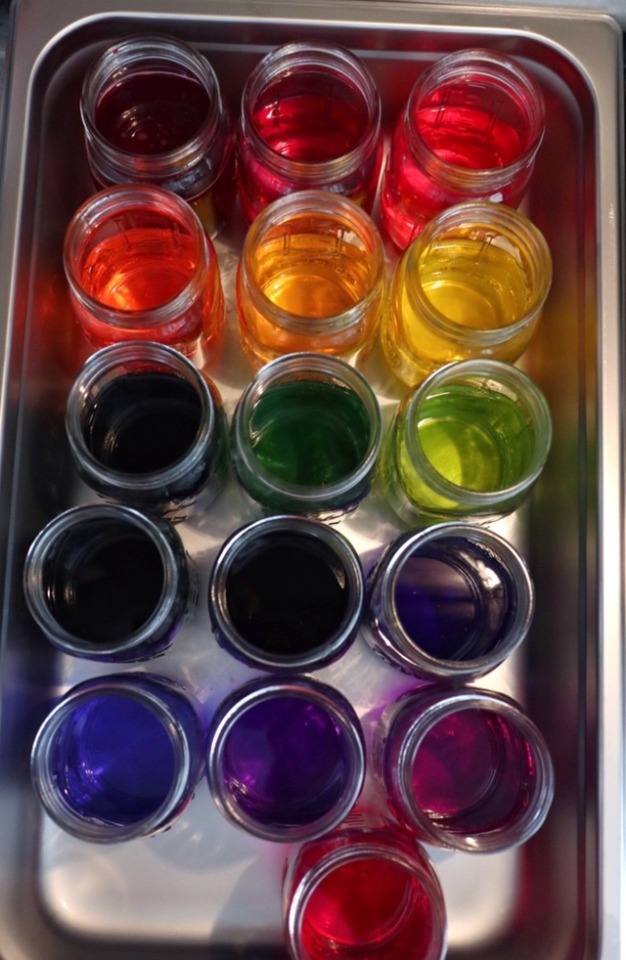
Fast forward to today. I have math on my side now. I had finally been able to work out dye concentrations, and the depth of shade I was looking for- and after ensuing mistakes, trials, and experiments. I ended up with 16 mason jars and a whole ton of colors. Once everything was out of the dye pot. I was SO PROUD of the shades that came out. I got teals, I got coral, I got chartreuse! AND IT STILL FEEL LIKE I could go further!
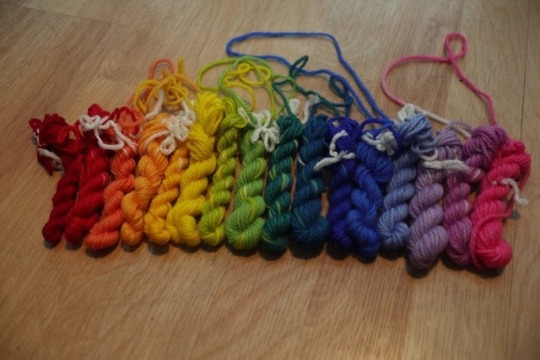
Let me share with you some of my notes on this. I knew, I would start with my primary colors. Red, Yellow, Blue. I needed a stand in for “Ultra Violet” And I know that the pride flat ops for pink, so pink it was. From there, I had to figure out how I could fully saturate a skein of yarn, but ALSO have the dye solutions light enough so that one color doesn’t fully over take the other.
Yellow was a .0375% stock solution as they are quite strong
Pink was the same concentration.
Blue was a .05% stock solution.
Red was the same as blue.
From there I figured out how deep I wanted to get the lighter colors first. Yellow, and Pink. Once I got myself a fade set I was happy with, I went ahead and started adding reds or blues, depending on their position with an inverse relationship. As one color gets strong, the other color gets weaker.
What I love most about this technique is that you can be extremely accurate and replicate your color way quite easily. If you find a color you absolutely love, you have notes on it to do it again for either a full skein or more mini skeins. It can be expanded- as long as the ratios are the same.
My frustration with this technique is this. IT DOESN’T FLOW. You’ll gave to get REALLY granular- and maybe do a dozen stages of a gradient to replicate that seamless gradient. I would be really happy to do this for maybe two colors and their transitions- but for a whole rainbow. This will take me more time.
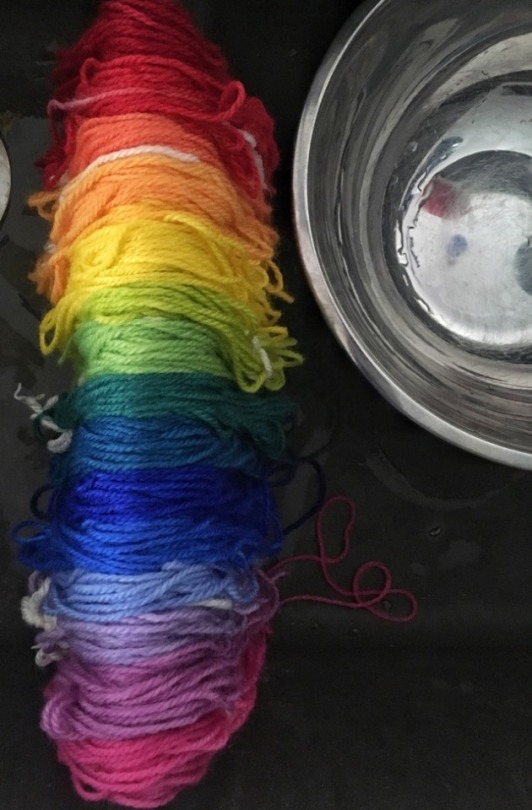
NEXT. WAS THE SOCK BLANK.
I used my same stock solutions- one because I made a ton, but two I wanted to try and keep the same relationships between colors if I could.
If done right, dyeing a sock blank is endlessly satisfying. For me, it’s very much a messy organic process where your hands get blue, and your whole surroundings become a canvas for colorful chaos. It was a blast. Having my hands on the skeins, squeeze one color into another and pouring the colors on a blank skein made me feel like an alchemist. I didn’t put a lot of thoughts into how big my swatches of color were going to be- and I probably should have been more precise. Nevertheless, I find myself preferring to dye this way if I were just dyeing for me. You may not get exactly what you want- but the joy is i the process. And you can more easily get that kind of “FLOW” into the next color because you’re literally pouring one over another.
There are a lot of difficulties with this method. One, you have to watch your work surface. Getting bits of stray colors on the skein is really easy. sometimes it’s even inevitable. Your sock blank may not be completely perfect. It usually isn’t easily replicated so knitting double can be really helpful– sock blanks are notorious for their little pockets of resist created by the interlocking knit stitches so if your dye strikes too fast, you’ll get variegated yarn instead of solid or tonal. Because of that, I like to dye without heat and then steam set. That brings more complications though. Watch how saturated you get your yarn with liquid. I say this because, I thought once I had dyed the perfect blue gradient. Before it was time for me to heat set the yarn. It flowed so wonderfully into the next. I couldn’t stop looking at it. I covered it in plastic wrap giant mistake because plastic doesn’t breathe. SO. If you have too much liquid in your skein of yarn. Guess what. its going to pool on the bottom side of the yarn while it steams. Your hard work could get erased in the last stage- and it can be disheartening. Take my advice get a big roll of butcher paper. You can find it cheap at wholesale culinary stores or the internet and it works like a dream.
DID I GET EXACTLY WHAT I WANT?
er. Yes, and no.
I am so proud of this work, and I’m so excited to see how I’m going get these skeins knitted up. I can’t help but wonder. How much better can I do this three years from now?
PLEASE KEEP CRAFTING. KEEP CREATING. EVERY HICCUP IS A LESSON YOU CAN USE TO GET STRONGER. YOU ARE ALWAYS GROWING.
280 notes
·
View notes
Text
Wow. It’s been a while.
Things got really busy with doctor’s appointments and general exhaustion. I am better now! I had a lumpectomy on November 14th and radiation therapy for the entire month of January – my last day of radiation was also W. A. Mozart’s birthday, so there was a lot to celebrate. It wasn’t until about two weeks or so ago that I realized exactly how tired I had been because all of a sudden I wasn’t that tired. I still am tired, and my joints are creaky, but that’s the tamoxifen. But hey, as far as I know I do not have cancer, and that’s a win.
I’ve tried to keep up with practicing and making things, but tendonitis struck again. I’ve had it since about this past September in my left elbow, and I did not do what I was supposed to do (rest, heat, NSAIDs), but kept practicing both cello and gamba. The result was that I stopped cello the end of October until mid January, and I stopped gamba in the first half of December until the very end of January. I couldn’t button my sweater or braid my hair anymore, and I still can’t believe I let it get that bad. It’s sooo much better now, but it’s still there, so I’m being careful and doing what I need to do to make it better.
This also meant that all that hand work I was doing wasn’t possible anymore. Spinning for any huge length of time made it worse. Knitting has been right out for months and months. Combing wool was only possible in about 3 minute chunks. And then my friend Lee started a make-a-thing-daily project and invited everyone to join in. Her process of choice this time was embroidery.
Well!
I have been itching to embroider for some time, and Lee’s rules seemed simple enough: gather all your materials ahead of time, set the bar so low you can roll over it (quick and dirty, Kate, quick. and. dirty.), and do not fret about what you are making. Quantity over quality. Okay, okay, so I naturally fret over quality. Always. But I also recognize this is a thing that I need to maybe let go of now and then. So. A daily thing for February. The Short Month! Yes, I thought, I can do this.
I found all my embroidery floss and hoops and needles. And I began.

Week 1. These are Very Small, which keeps to the quick-and-dirty principle.
I had no patterns – so I just doodled. And doodled. Some I like, some not so much. But I did start to look at embroidery online and got to thinking about flowers.
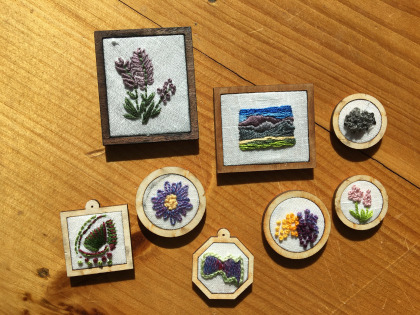
Week 2, plus one. Moar doodles!
I re-learned how to do French knots, I learned the bullion stitch, and I learned that some of the yarns I spin are perfectly suitable for embroidering with. The purple flower (there’s a bit of charcoal on that one from the frame – the frames were laser cut, and so had carbon on the edges) is a silk/merino blend I spun up, as well as the purple in the octagonal frame. The grey sheep/mouse (it was supposed to be a sheep, but didn’t quite work) is a bit of Gotland I’d spun.
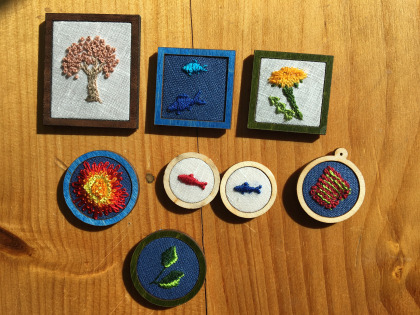
Week 3, plus a bit? Feeesh, flowers, and…more flowers?
I am really enamored of French knots. And embroidered flowers. And in rayon floss! I really wanted silk yarn (because who wouldn’t?), but all I could get quickly and on the cheap was rayon, so I settled (for now). The tree I’m especially happy with – that one is all in cotton floss, but from three colors I kept pulling out and staring hard at. I’d been looking at pictures online of tiny, gorgeous embroidered flowering trees made from satin stitches and French knots. Eventually, I knew I’d get to it. And I did. And I’m happy with it. And I think this particular tree with this particular color scheme will inspire Something Else (stay tuned?). The dandelion was a doodle to see if I could do it. I have a skein of variegated yellow cotton and I thought, “O, that reminds me of dandelions.”
I’m telling you, I have so much appreciation for those professional embroiderers who can create depth with needle and thread just through the use of color and stitch direction.
Late in the game, I ran out of white linen, so reached for a scrap of blue. But you know, it just wasn’t working. I love this shade, but I just wasn’t happy with how the colors of the floss were working with it.
Well. In any case, you’ll notice that there are fewer than 29 embroideries. I framed the last batch (Week 3 and a bit) yesterday, and while trying to start another wee embroidery to catch up on the last day of the month, I realized that the tendonitis really did not like it. I practiced a ridiculous amount of cello yesterday (yay, Vivaldi [except I can’t play it yet]), but the thing that made the tendonitis really painful was holding the embroidery hoop. Argh. The embroidery can wait. There will be other months, and an almost endless supply of floss and handspun yarn.
This is not to say that I did not make nothing prior to February. Spinning did aggravate the tendonitis, but as long as I did it in small chunks and took care, I spun. The spinning also helped with the mental stuff going on – a repetitive task that I don’t have to think overly much about and at the end, I get soft, squishy yarn. That I can squish.
I’ll try to go in order.
This was a bit of dyed Leicester Longwool and I got from a destash pile at one of the spinning guild meetings that I spun up in late December. I’m pretty happy with it. It was very easy and very mindless to spin, and there was a lot of it. I believe this is 8 ounces – each skein is 4 ounces. The only thing about this project was that the dye still hasn’t finished washing out, and I washed that skein about four times. I had used some cotton weaving yarn as ties on the skeins, and those picked up some of the dye, which leads me to believe the dyer used fiber reactive dyes rather than an acid dye. Which is aggravating. It would explain the lack of luster one would expect in this breed of wool. So, I’ll have to be careful when washing whatever project I use this for. (I’ll likely get a dye magnet or another fresher bottle of Synthropol to remove the rest of the excess dye.)
At some point, I realized I needed to start making progress on the Shetland fleeces. Because I have way too many fleeces and need to get through them! Especially if I want to buy more fleeces to make into more fabulous yarn to weave fabulous cloth. I’d been spinning samples for a bit (pretty sure this was January), and this one was one I was reasonably happy with. It’s got a bit more twist than I think the Shetland really wants, but I would absolutely weave with it. And let me tell you, Shetland is a joy to spin. It almost spins itself, it’s so very soft, and it’s so very lustrous. Can you see the shine?!

FLUFFFFFFY SHETLAND!
I tried another sample of the Shetland, this time with slightly less twist, and look at the difference! It’s much puffier than the stuff in the previous photo, and it’s so, so squishy. I loves it, I do. I want so much to weave with this, but I’ve had two people (experts in weaving and spinning, actually) tell me that this yarn is Really Suitable for Knitting. Sigh. I mean, it’s a sample. I can’t quite knit yet (tendonitis), but I might be able to weave it into a sample. Maybe. A tiny one.
Honestly, I love that yarn. I have never loved yarn I’ve spun so much as I love this one.
At some point in January, I decided to try out R.H. Lindsay Wool Merchants. I follow them on social media, and some of their pictures of wool are just so delicious. They sell wholesale, but they’ll also sell by the pound to whoever wants it. And I did. They’d posted a picture of super bouncy Dorset/Polypay roving from New England sheep. For $8.50/lb. I ordered two pounds. (The shipping was nearly that much, so I did briefly consider getting three pounds – I have no where to put it!) It came lickity-split and I pulled some of that off to spin:
Super springy! Super bouncy!
Yep. That’s pretty springy and bouncy! I gotta say, I really like this. You can’t beat the price, even with the shipping, and the roving is not carbonized. There were bits of VM in there, which I very happily picked out.
And then!
Look at that luster! Look at the color! Ooooh! Aaaaah!
I’m putting in a full size photo of the Gotland. I mean, how could I not?
This was my first attempt at spinning it. It’s not easy to spin. This is from commercially prepared roving that had sat in storage for some time, so was compressed some. There’s no crimp, there’s no wave. It’s a bit like spinning mohair, except it’s a bit less slippery. Getting the right amount of twist was a challenge, but I am pretty happy with this. It’s a two ply and if I can, I’ll weave a tiny sample out of this and full it to see what happens. But, on the other hand, I have more roving, and really what I should do is spin up the rest of it, and weave that into a sample, but cut the sample into three pieces, and go to town with experimental fulling. “Why all the trouble?” I hear you ask. The answer is that I want so much to sew myself a grey wool coat, and, believe it or not, I cannot find the right grey wool. It’s either not the right color, not the right weight, or some combination of wool and synthetic fibers. Or some combination of those three. And it pisses me off. So, I’ll just weave my own cloth, and spin the yarn if I have to. Dammit.
I know this is a huge project. I’d like to get it done in the next three years (before I’m 50).
Here’s another snap of that yarn:

I guess all that practicing spinning really paid off. I seem to be improving!
And then!
My friend Rachel (over at Spotted Sheep Studio) found some Gammelnorsk fleeces. I bet you had no idea there was a breed called Gammelnorsk, did you? Well. There is. And it’s rare. And she found a person in Norway who raises this breed, and got to buy a bag of fleeces from her. And Rachel and I stool around in the Webs parking lot after a spinning meeting opening the bag and smelling the delightful fumes of Norwegian barnyard and lanolin. And, of course, fondling the Gammelnorsk fleeces. The colors are amazing.
This breed is a dual coated breed, which means it has hair and a downy undercoat (tog and thel, respectively). I do not know much more than this, but Rachel is a fount of knowledge and will impart all her wisdom if I ask – also I’m going to be helping to prepare these fleeces for spinning, and then spinning. So I’ll have to know.
And the very last picture I have to show you is a bit of yarn I spun up yesterday. I have been learning about spinning and preparing the fibers via some Interweave videos. And so I tried coming the alpaca batts I have, because who doesn’t want alpaca top? Well. The batts are made from garbage alpaca. Or they were carded into oblivion, I’m not sure. In any case, the batts are only suitable for felting. The fibers are way too short for even spinning yarn. I even tried to card it and spin it. So aggravating. So, then I decided to turn my attention to a red Spelsau batt that Rachel’s husband brought back from a recent trip to Norway for me (and Rachel too, you should have seen her haul!). I tried combing a bit, and I got some top off it, but I think this batt is really suitable for carding. However, the color is AMAZING. Behold:
And lo! The Perfect Red!
And you know what? No dye came out of this when I washed it. None. Not even a little.
I love this red so much I want to roll around in it.
Really, what makes it so gorgeous is that it’s a tan or brown fleece that has been dyed red. The brown deepens the color and brings it over to the orangey side rather than the blue side. I’m thinking about experimenting with dyeing some of that brown Shetland – I have a white fleece too, but man, this red…
I’m still here. Wow. It's been a while. Things got really busy with doctor's appointments and general exhaustion. I am better now!
7 notes
·
View notes
Text
Dyeing Techniques Overview
Continuing with the previous article’s format of “defining” certain terms, I wanted to give a bit of info on various dyeing techniques and the finished products can be created with them. I know that there are techniques out there that I’m not going to cover, but my goal here is to cover the most commonly used ones. That way as you venture into this colorful world, you can better interpret the ideas you have into colorways you and others will love.
Note: I don’t have photos for every single technique, but I will include photos of what I can. They will all be photos I’ve taken myself, either of my own hand-dyes or others, and I will credit other brands as necessary.
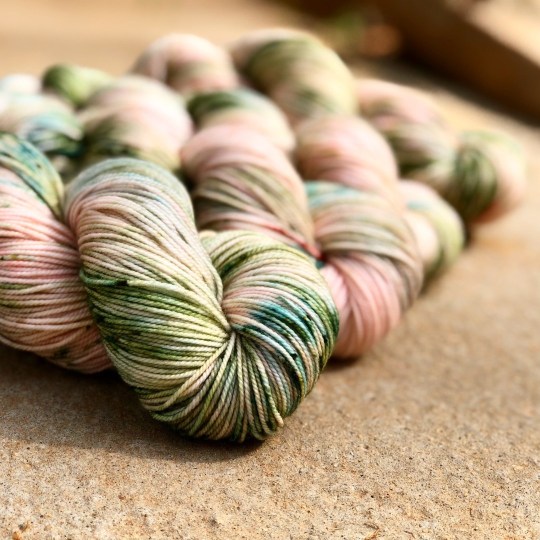
Gradient: a gradual shift between two or more colors. This can be accomplished within a single skein with long color sections or an injection process. You can also create a gradient across multiple skeins, as pictured below. However you decide to divvy up the yarn itself, whether within a single skein or a set of skeins, you create the gradient itself by mixing the dyes in changing ratios that shift the hues from one to the next. If you want a quick color change, use a lower fraction, like 1/3: first cup would be 100% color A, the second cup would be 50% color A and 50% color B, and the third cup would be 100% color B. Then for a more gradual color change, use a higher fraction, like 1/6: first cup is 100% color A, second cup is 80%/20% color A/B, third cup is 60%/40% color A/B, fourth cup is 40%/60% color A/B, fifth cup is 20%/80% color A/B, and the final cup is 100% color B. Lots of math, but if you measure carefully and keep good notes, you'll be able to create seamlessly flowy gradients--and reproduce them if desired!

Hand-painted: the term used for the process of applying dyes to the yarn by hand in various patterns, color sequences, etc., to create a variegated colorway. You can use a foam brush, you can pour the dye out of a measuring cup, or apply it in other ways as you prefer. You generally use a flat pan of some type and just enough water to heat set the dye, but you intentionally avoid completely submerging the yarn, which gives you a higher degree of control over where the dyes go. This also creates starker color changes for a higher contrast look.
(photo by me of Cameo Yarns colorway Prim)
Injection dyeing: this is a fun process you can use to create a gradient effect within a single skein. First up, wind the hank using a ball-winder instead of leaving it in a loop. Then put it in the pot to make sure it's completely saturated. Then you use a giant syringe or baster full of dye to inject the color into the center of the skein. It will slowly bleed outward within the ball, creating a dark-to-light transition. You can include a second color by putting dye into the pot around the ball and letting it slowly bleed into the ball.
Kettle-dyed: this process involves fully submerging the yarn in the dye bath and having extra water in the pot to leave room for the yarn to freely move in the pot and absorb the dye. It can be single-colored (semi-solid/tonal) or multi-colored (variegated) as desired, and it gives a more watercolor effect to the colors than hand-painting generally does.
Ombré: this type of colorway typically involves one very long, gradual transition between a light and mid or dark colorway. It can also be called a gradient technically.
Over-dyed: if you have some yarn you're not in love with anymore, or maybe your mad science experiment in the dye pots didn't turn out quite right, you don't have to toss the yarn! You can over-dye it and revitalize it! It's the same process as dyeing it up the first time, you'll just be a touch more limited on what you can do depending on the colors in the yarn that you're wanting to dye over. Light colors are easy and should be fine with mid-tones. If it's a mid-tone yarn, you'll be looking at dyeing it with darker colors unless you want to change the color by "mixing" the new dye with the existing tone. It's truly an experiment, so you'll have to see for yourself how the colors play with each other!
Self-striping: when dye is applied in super long color sequences that when knitted, it creates a striped fabric without having to mess with changing colors and carrying yarn or weaving in a bunch of ends. Very popular for socks!
Semi-solid: when the yarn is all the same color, but there are light and dark variations within the hue rather than being completely solid. This occurs when different parts of the hank absorb the dye at different rates, creating places that are more saturated, yielding darker tones, or less saturated, yielding lighter tones.

Solid: an even color application without light and dark variation.
Speckled: a technique that creates spots of color on the yarn that add a splash of color and fun texture.
Tonal: same product as semi-solid, just a different way to say it.
Variegated: this term is used for colorways with more than one dye color. This can be accomplished via multiple processes as outlined above--hand-painted or kettle dyed.
I think I've covered the most common terms and the most widely-used processes in dyeing yarn, but if there's something I've forgotten, definitely leave a comment so I can add to this list! I hope this gives you a strong foundation from which you can truly build a love of this craft and enjoy the work of your hands and imagination!
About Me
My name is Annie, and I’m a knitwear designer and yarn-dyer living south of Atlanta, GA. When I’m not doing yarn-related things, my other hobbies consist of reading, playing ultimate frisbee, photography, and video games.
2 notes
·
View notes
Text
So, the other day I mentioned that one of my stash-bust projects was bigger and deserved a post of its own.
And here it is!
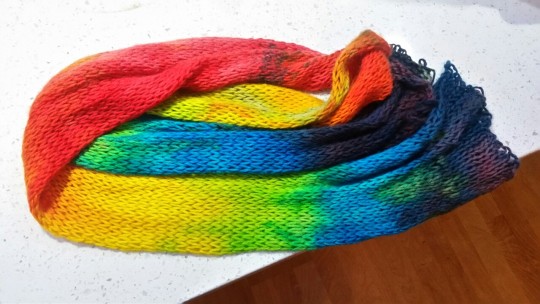
A shawligan. It’s a shawl – but with sleeves!
How flipping awesome is that? I mean, I love shawls, but they’re not always the most practical of thing. But a shawl with sleeves? Fantastic. Absolutely fantastic.
The pattern is the Avery Shawligan, by Deni Sharpe. It’s a paid pattern, well-written and with helpful pictures. Essentially it’s a triangular granny-stitch shawl, but with sleeves added to create more of a cardigan shape. Tassels are optional, but who doesn’t love a tassel?
I’m in two minds about whether this is a project that really counts as a stash-bust, though. The yarn was in my stash, yes. It had been sat there for months, yes (since Christmas, in fact – it was a present from my brother). But I had earmarked this yarn for this project since Boxing Day, so does it really count as stash, if it was just waiting for the right time to be used?
The yarn itself is hand-dyed wool, from the Ruataniwha dye studio, in these lovely autumnal shades (full details on my Ravelry project page). Apparently my brother scoured etsy to find yarn for me. Bless him. It’s so nice having supportive/generous relatives 😀 it’s a gorgeously soft yarn, lovely to work up and very comfortable to wear.
It didn’t take me long to make – less than a week – and I have practically lived in it since then. It’s so snuggly and swishy and yes, it has become my favourite piece of clothing ever.
I added a little tie to it – a long chain, worked with two strands of each colour (so six strands in total) with a jumbo-sized hook. I think it was 12mm or something, but I can’t remember precisely. I left the tie loose, so I can adjust where it goes on the shawligan – higher or lower, depending on where I want it.
And, because I had a bit of yarn leftover, I made a pair of fingerless mitts to go with it. The pattern for those is Petals to Picot’s V-stitch wrist warmers. I followed the helpful notes on some other Ravellers’ projects to add thumbholes to it.
I can absolutely see myself making this pattern again. And again, and again, quite possibly. Because one isn’t enough, right? I need one in different colours! A blue-ish one, or a purple-ish one, or green-ish. I am keeping my eyes open for the perfect yarn 😀 and hey, Christmas is coming up, maybe my brother will buy me more. Because obviously, even though I’ve been trying to stash-bust, there is simply no such thing as too much yarn. Am I right?
Yes. Yes, I am right.
Now, if you’ll excuse me, I’m going to snuggle up in my snuggly super-duper shawligan, and enjoy this sunshiny autumn afternoon 🙂
Ta da! Shawligan So, the other day I mentioned that one of my stash-bust projects was bigger and deserved a post of its own.
7 notes
·
View notes
Photo

Gosh these two are so beautiful they're distracting me from myself tasks at hand..! 🤩I took an impromptu day off work today to get a shit tonne of dyeing done, stitch markers packed, and some Bert Surprise Club packing (I actually also stupidly underdyed the Club by 8 skeins at the weekend, my own mistake with updating (or rather not updating) a pivot table 🤦♀️ So I've also dyed them up this morning, and will be packing them by Friday at the latest 💪). You might have noticed my website is closed for a couple of days, that's just so I can slow the flow of yarn orders a tiny bit; I'll reopen tomorrow or Thursday as I'll have dyed up all current orders by then 🙌 I took a few too many evenings off last week and didn't keep on top of the dyeing 🙊 My bad...! But I did enjoy resting. In an ideal world I'd have stock of all my yarns available ready to ship, but I don't physically have space to store them 😂 Love you all!! Hope you're good. And happy. And healthy and safe. Just remember - if you feel a need to 'test your eyesight' before taking a big drive, I'd recommend NOT going as far as a thirty mile round trip, it seems excessive. And especially not with your family in the car, if you're not sure about your eyesight. In fact, I'd recommend just not driving at all... 😘🤷♀️🙌👍 (at Ryton, Tyne and Wear) https://www.instagram.com/p/CApmVckB8Bh/?igshid=1aagn80gnmmd6
0 notes
Text
Trigger Warning: This post may evoke recall of previous traumatic events. If you feel you need to talk to someone please go to Beyond Blue, The Black Dog Institute or Lifeline
Since my last post I’ve received many questions about my accident.
The most common one is asking how can I even look at the photos of the car.
This slideshow requires JavaScript.
I don’t recall having any problems looking at it but after I was released from hospital I felt I needed to go to the accident site AND track down the car and see it. Inspect it, look at it all over. Whilst at the accident site, I collected broken, shattered, scorched pieces of the car, including some of the windscreen that I had intended to use to make some art pieces, sculptures to present to the people who saved me. I still have those pieces but I have not as yet been able to create. Time restrictions, not traumatic affects.
Why did I do these things? I’m not sure. I just felt it was part of my healing process.
This slideshow requires JavaScript.
The above slideshow are some of the photographs I took at the smash repairs. It took me a few days to track down the car and where it was but once I did, my daughter accompanied me to have a look.
The fellow there was fantastic. He was so helpful and took us straight out the back to have a look. He stood with us the whole time, shaking his head and repeating over and over again how he just could not believe I got out of that car and was standing right there in front of him. He gave me paper, pen and clipboard so I could write a list of belongings we could identify from the boot of the car. There were three iPad’s lost in the fire. Two of which were almost brand new. One of those iPad’s belonged to my boss, one to the college I was attending and one was mine that had taken me over two and a half years to save for. There was well over $2,000 of fibre, yarn, needles and dyes in preparation for my class the next day. Nothing within the car was insured. I lost my new spectacles, a brand new pair of Birkenstocks, my $1,600 phone and more. It took me a while to process that these were just things. I am still alive and that is all that matters.
Maybe it wasn’t as hard as it should have been because it wasn’t my car. That right there is the one thing that did trouble me. The car belonged to my former boss and before that it belonged to her beloved Dad who had since passed. That’s what I found the hardest. I thought that maybe, if she was anything like me, that car was one of her last connections to her Dad and that hit me hard.
I was so upset for her and I struggled to not blame myself. Even though it was proven that it was just an accident and I was not driving recklessly, irresponsibly or dangerously (which of course I already knew)
That day, I had driven with a colleague to a Red Cross training in Kent St Sydney, some 150kms and over 2 hours drive away in peak hour traffic. My colleague remained in Sydney that night and I returned alone. Thank goodness! It started to rain heavily on the freeway on the way home. It hit hard and bucketed down from about Mt White. Visibility was almost non existent and traffic on the freeway had slowed to about 60kms. The rain didn’t ease until I exited the freeway at Ryhope when it stopped completely. There was no rain but the roads were covered in water. I was driving well below the suggested speed limit, simply because it was so wet and because it wasn’t my car.
I reached a crest in the road where it cambered hard to the left and the back of the car just kept going. I made the mistake of braking hard to try stopping the car from ploughing off the edge of a rather high drop which would have sent me hurtling through a paddock. Once I realised that braking was not the right thing to do, I started pumping the brake in the hope I would gain some control. This must have all happened in seconds. There was nothing more I could do (well that’s what I thought at the time. I just held onto the steering wheel and tried my darnedest to steer the vehicle. ( I know a little more now about how I should have handled a front wheel drive). Before I knew it, I was headed uncontrollably toward that tree. It was so fast and so surreal. I could see the tree focused within a circle of blurriness and literally saw snippets of my life flash before me. I honestly thought I was about to die.
This is my interpretation of what I saw as I hurtled toward that tree
The following is what I posted to my Mothers Facebook two days later.
Spelling and other mistakes have been corrected.
It’s me Rochelle, currently I’m unable to access my fb account since I don’t have access to my phone and security code.
I just want to let my family and friends know that I’m great, I’m still here and I will be discharged from hospital today or tomorrow.
For those who don’t know, I had an horrific car accident at approximately 6pm Wednesday night (25/02/14) on Millar Rd, Wakefield where the car I was driving left the road and wrapped around a gum tree head on.
After recognising that I was still alive, I realised I had to get out immediately as the car was on fire.
I stopped, took a deep breath and commenced Systema Breathing Techniques as taught to me by my friend Deano Reynolds (thanks Deano :-))
I gained my composure and saw to my right a young girl who had turned the corner in her car and pulled up at the sight of my twisted wreckage. I called out to her to assist me but the poor thing was frozen.
I was aware there was broken glass and pieces of shattered gum tree falling onto me through the broken windscreen. There was smoke gently wafting in through the window and it was then that I realised I was trapped. Pinned by my left leg under the dash and steering wheel. I looked to my left and recognised the driveway of Craig and his family, he and his twins are members of the fire brigade that I’m a member of. I started calling out to Craig to help me. After calling out the second time, it dawned on me that he wouldn’t hear me but then, by some miracle he and his boys were standing beside me.
“Craig, it’s me”. He didn’t recognise my car as I was driving my bosses car. Craig looked like he went into shock at the realisation it was his colleague trapped in this car.
Despite this, he and his boys worked at getting me out of that car and the impending fire.
I could see the fire increasing rapidly and I guess, as a firefighter I knew the urgency of needing to be extracted asap. I was in a lot of pain, my neck, chest andback hurt real bad and my hands were not working but it was a case of risking paralysation or burning alive.
Craig coached me to get my leg out somehow. I still don’t know how I did.
As soon as my leg was released Craig, Josh and Tom extracted me out through the window and carried me across the road. By the time I looked up, the car was involved and the seat I had just been removed from was now alight.
EDIT: I have since found out it was Craig and Jamie who lifted me out whilst the boys did traffic control and helped manage the scene.
It was then I remembered the car was on gas. I told Craig there was gas on board and he immediately cleared his boys and other people from the vicinity.
From the moment of impact to the time they had me on the side of the road, I reckon would have been no more than 3 minutes.
After I was moved in another vehicle, away from the accident, I heard the car explode. (Well that’s what it sounded like, it may have just been the battery).
I need to express my most sincere thanks and highest regard to Craig, Josh and Tom along with Sally.
I have absolutely no doubt that if it weren’t for them, I would not be here today to tell my tale. I know they are all incredibly humble and would not like all of the fuss, saying that it’s all part of the job. No it’s not. They looked after me, their colleague and friend, despite the risks and dangers to their own lives and despite themselves going into shock.
I owe them my life.
Thank you to all of the onlookers and bystanders for your assistance.
Every single person who helped me in some way that day, the paramedics, the police and of course my beautiful Wakefield Rural Fire Service. Thank you for giving me another chance and saving my life.
EDIT: The newspaper article states that Joe from our Brigade arrived in the Cat 1 to help with fire control and vehicle protection. This is what I was told too. I have only recently discovered that it was in fact Killingworth FB. Enormous thanks and gratitude to Killy for your assistance too.
Somehow I remained reasonably calm throughout the entire ordeal. I was just concentrating on my breathing after telling myself I needed to remain calm or I would not get out.
The paramedics arrived and did their thing including taking my blood pressure. They took it again. And again. And again, before reaching for a second sphygmomanometer to take it several more times. The paramedic then asked his colleague to take my blood pressure a couple of times. I remember asking if there was a problem. They told me they didn’t think so and that was the problem. I was asked if I was implementing some sort of relaxation technique and I told them I was. The paramedic told me whatever I was doing, to keep doing it because my blood pressure was perfect and they had never seen anything like it before.
Once I arrived at the hospital, the nurses commenced working on me straight away. They cut my jeans off (and I had wet myself) they refused to cut off my tie dyed jacket because they liked it, they cut off my T-shirt but refused to cut my underware, stating that they understood how hard it was to get good fitting bras. I appreciated that. They too took my blood pressure several times before paging the doctor. He asked if I was implementing any relaxation technique also and could not believe my blood pressure either. It was still giving a perfect reading.
It was short lived though. I broke down when my children and my Mum walked in. They were only informed that I was in hospital but they were not allowed to be informed why or how. That upset me quite a bit.
Not long after I really started to struggle with the pain. The collar I had around my neck was digging in, pulling and hurting terribly. May back was hurting so bad, my neck, my arms, my legs, it just all hurt. I felt like I was going to climb the walls. I could not keep still and I kept getting in trouble for moving around when they still didn’t know if I had any fractures.
X-rays were done, ultra sound and various other tests before I was transported to the ward to commence my recovery. I had much bruising and a huge haematoma that extended from behind my earline, along my jaw, down across my chest, across my rib-cage and wrapped around my back. The x-rays did not show any fractures due to the haematoma covering them it is believed and I did not learn about most of them until almost two weeks later when the pain in my neck, ribs, chest and back were worsening.
I managed to fracture my neck, C5 and C6, my right collarbone, five ribs on my right and a tiny bone in my left ankle, the Talus.
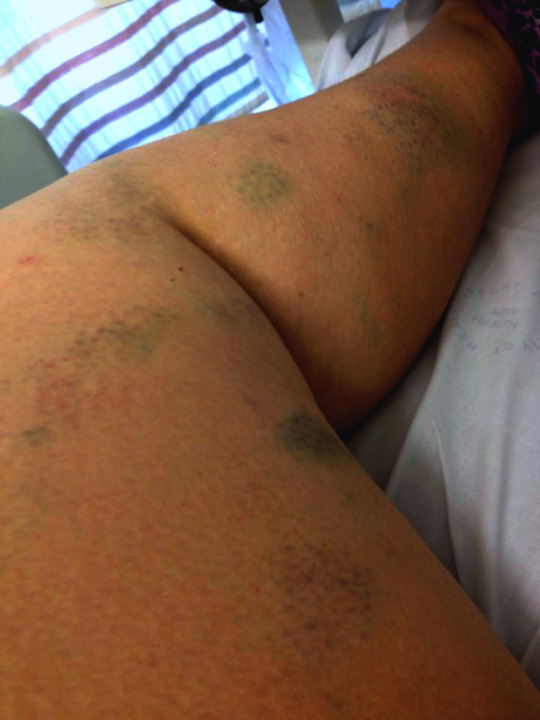
Some of the bruising on my left leg. The haematoma down toward my ankle was showing signs of compartment syndrome.
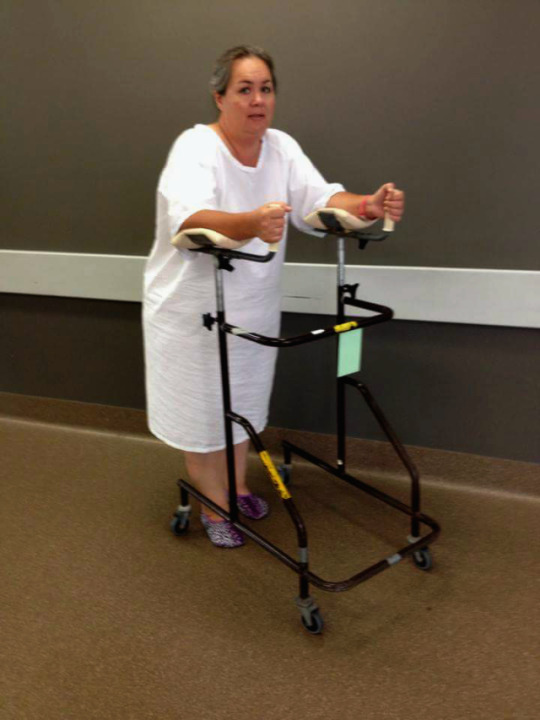
Pretty bad photo but here I am on the ward, day two, trying to walk again.
If you click on the image below, it will take you to the news article in The Newcastle Herald.

Click HERE to follow the link to the newspaper article
The hardest thing I find now is driving past that spot. I felt I had to drive there the day I was released from hospital. I felt that if I didn’t, I would never drive that road again. That is when I got out, walked the road, walked back through the evidence that was still there and tried to nut out what happened exactly.
It is 15 months since that accident and I still struggle to drive that road, especially in the wet. I have to drive it though, it is the road to our station and the most direct route from home. It is even the most direct route to my sisters home.
If you drive that road now, you can still see the scorched tree and the burnt, melted tarmac on the road. Still to this day, a constant reminder of how very close I came to my last day here on earth.
A friend of mine told me she is beginning to think I am secretly a cat because I seem to have nine lives. It certainly feels like that sometimes.
Was my recovery hard? Damn right it was. Many people commented that I seemed to handle it all so well and heal so fast. In many ways I did not handle it well at all. I cried myself to sleep each night for months. I had nightmares and what they call flash backs and was diagnosed with PTSD. I had this awful, awful sensation every time a car I was travelling in turned a corner. It honestly felt like the car was losing control, the back end was sliding and we were going to lose control again. It didn’t matter who was driving whether it was me, my son, my Parents, my daughter, whoever. I was convinced the car was out of control. Even though it was psychological, it felt so incredibly physical. I would get all sweaty, shaky, my breathing would become rapid and my insides would churn. Sometimes I would even be physically ill and have panic attacks. It was hard. I’m sure I must have stretched the patience of my family. I was so jumpy and edgy around cars. I can’t tell you how I overcame this. I worked with my psychologist regularly and still do. I still struggle to be in a car with someone else driving and I still get anxious when driving in the rain. I’m improving every day and more often than not, I usually forget the whole thing.
The pain was unbearable, even on morphine. More pain on top of my chronic joint pain was just yucky. It hurt to breathe for months, I couldn’t turn over in bed, in fact lying down was incredibly painful. The pain in my neck just did not give up. I begged my doctor to do something. His advice was that it was time to get back on-board the firetruck.
WHAT? Are you serious? How do you think I will be able to climb up into that vehicle?
The very next day, I found myself on-board assisting with storm relief. It would have been about Monday 27th or Tuesday 28th April. Some nine weeks after the accident. It worked. Whether it was the action of pulling myself in and out of that truck all day or whether it was just the fact that I was back out, doing what I love, helping and contributing and gaining my confidence once again. I just don’t know but I have barely had any problems with it since.
I think that is all I have to say.
In all of this, I just want to offer you hope and encouragement to find joy in the small things. I actually had to become more mindful of finding my joy after this event and although it took me months, I find my joy every day.
If you ever find yourself in a sticky situation, remember to remain calm. Utilise whatever technique you can, whether it be relaxation techniques, prayer or Systema Breathing Technique. You can do it!
Please scroll down to the bottom of our page to leave a comment. We would LOVE to hear from you.
The Accident Trigger Warning: This post may evoke recall of previous traumatic events. If you feel you need to talk to someone please go to…
0 notes
Text
The basket was full of dyed skeins of wool and linen thread.
Some I had been given by Jocasta, some I had spun myself. The difference was obvious, but even the lumpy, awkward-looking strands I produced could be used for something. Not stockings or jerseys; perhaps I could knit a tea cozy— that seemed sufficiently shapeless to disguise all my deficiencies.
Jamie had been simultaneously shocked and amused to find that I didn’t know how to knit. The question had never arisen at Lallybroch, where Jenny and the female servants kept everyone in knitted goods. I had taken on the chores of stillroom and garden, and never dealt with needlework beyond the simplest mending.
“Ye canna clickit at all?” he said incredulously. “And what did ye do for your winter stockings in Boston, then?”
“Bought them,” I said.
He had looked elaborately around the clearing where we had been sitting, admiring the half-finished cabin.
“Since I dinna see any shops about, I suppose ye’d best learn, aye?”
“I suppose so.” I dubiously eyed the knitting basket Jocasta had given me. It was well equipped, with three long circular wire needles in different sizes, and a sinister-looking set of four double-ended ivory ones, slender as stilettos, which I knew were used in some mysterious fashion to turn the heels of stockings.
“I’ll ask Jocasta to show me, next time we go down to River Run. Next year perhaps.”
Jamie snorted briefly and picked up a needle and a ball of yarn. “It’s no verra difficult, Sassenach. Look— this is how ye cast up your row.” Drawing the thread out through his closed fist, he made a loop round his thumb, slipped it onto the needle, and with a quick economy of motion, cast on a long row of stitches in a matter of seconds. Then he handed me the other needle and another ball of yarn. “There— you try.”
I looked at him in complete amazement.
“You can knit?”
“Well, of course I can,” he said, staring at me in puzzlement. “I’ve known how to clickit wi’ needles since I was seven years old. Do they not teach bairns anything in your time?”
“Well,” I said, feeling mildly foolish, “they sometimes teach little girls to do needlework, but not boys.”
“They didna teach you, did they? Besides, it’s no fine needlework, Sassenach, it’s only plain knitting. Here, take your thumb and dip it, so …”
And so he and Ian— who, it turned out, could also knit and was prostrated by mirth at my lack of knowledge— had taught me the simple basics of knit and purl, explaining, between snorts of derision over my efforts, that in the Highlands all boys were routinely taught to knit, that being a useful occupation well suited to the long idle hours of herding sheep or cattle on the shielings.
“Once a man’s grown and has a wife to do for him, and a lad of his own to mind the sheep, he maybe doesna make his own stockings anymore,” Ian had said, deftly executing the turn of a heel before handing me back the stocking, “but even wee laddies ken how, Auntie.”
I cast an eye at my current project, some ten inches of a wooly shawl, which lay in a small crumpled heap at the bottom of the basket. I had learned the basics, but knitting for me was still a pitched battle with knotted thread and slippery needles, not the soothing, dreamy exercise that Jamie and Ian made of it, needles clicketing away in their big hands by the fire, comforting as the sound of crickets on the hearth.
Not tonight, I thought. I wasn’t up to it. Something mindless, like winding up the balls of yarn. That I could do. I laid aside a half-finished pair of stockings Jamie was making for himself— striped, the show-off— and pulled out a heavy skein of fresh-dyed blue wool, still redolent with the heavy scents of its dyeing.
- Drums of Autumn
66 notes
·
View notes
Text
It has been awhile since I posted….let’s see if I remember how to do this!
Since my last post in…..let me check…..HOLY CRAP….2016???!!!! Really???
……Wow.
Okay…so since that time sooooo long ago, we have moved from Toronto back to Hamilton, got a new puppy….a Patterdale Terrier named Oberon (who has his own Instagram account that you should check out because he is so bloody cute!) and I have continued with my fibrearts dabbling. It has taken somewhat of a backseat to my work over the past while as I get used to commuting between cities again and unpack our new house…but I still knit and crochet and spin and weave and needle felt (You can see why I call myself a dabbler!) …. and dye wool!
I have dyed skeins and fleece in the past but only a few times and with food coloring to get a sense of how the whole process worked. This time, I have been working with dyes from Greener Shades and experimenting with different approaches.
One dyeing technique I tried last week was dyeing a wool ball. I saw it on a youtube channel and thought it would be interesting to try. It was supposed to result in a cool mottled affect that would be dark at one end and lighten as the dye soaked through the layers towards the middle.
On hand, I only had a few natural colored skeins so I chose a light brown wool skein to work with and I balled it up manually….which takes so long after using a swift and yarn winder on a regular basis!
The technique is to simply dye the ball….allowing quite a bit more time than you normally would when dyeing skeins because of the tightness of the wind…the dye needs more time to soak through layers.
After soaking the ball, I started with a simple deep blue dye.
I left the ball in the dye bath for 20 minutes….then checked it…..20 more minutes….then checked it…..20 more minutes…..You get the picture.
I was dyeing other items at the same time so I ended up leaving it in the pot for over an hour.
But even after all that time….there was still dye in the water. I could have left it longer….should have actually but I got impatient and removed it, using the remaining blue to dye some leftover raw fleece that I had on hand.
So, I rinsed the ball and left it to sit for a bit and when I finally handled it and looked through the layers, I discovered that the dye hadn’t made its way very deeply. (Which you can see if the photo below)
I had balled the yarn quite tightly and that obviously affected how deep the dye was able to penetrate. If I were to do this again, I would a) try to wind a bit looser and b) probably leave the ball in the pot for the whole afternoon and go about my business doing other things.
I unfortunately didn’t take photos of the next step….but since I wasn’t satisfied with how much it had dyed….I dyed the ball again.
I let the ball cool down, and then unwound it halfway so it was wound into two smaller balls that were connected. I dropped one of them into a pot of red dye and the other into a pot of purple dye. Then I left them….for 20 minutes…again and again….same as the first time.
I must wind pretty tightly because the dye didn’t penetrate through either ball fully, but it still resulted in an interesting mix of colours. They unfortunately aren’t very sharp and defined but I would still call this experiment a success.
I would try this technique again but I would pay more attention to how tightly wound the ball is, leave it in the dye bath likely for hours and plan out my colors a little better. Not sure how I feel about a brown base with these shades 😉
Experimental Fibre Dyeing – From a Ball It has been awhile since I posted....let's see if I remember how to do this! Since my last post in.....let me check.....HOLY CRAP....2016???!!!!
0 notes
Text
Cloverworks Farm
Based in Albany, Vermont and only 15 minutes from Sterling College, I couldn’t pass up an opportunity to visit with Katie Sullivan and talk sheep. Katie was kind enough to let me interrogate her the day after she broke her foot while working on constructing their new barn. Major props to Katie for suffering me as she literally could not get away!
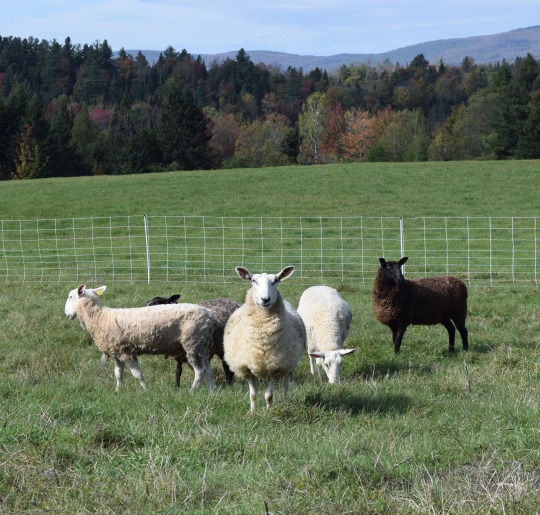
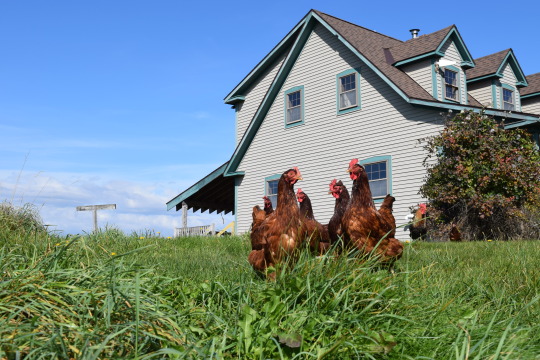
The registered Border Leicesters of Cloverworks farm enjoy fresh pasture
Cloverworks consists of Katie, her husband Matt, and their flocks of Bluefaced Leicester and Border Leicester sheep, who decided to join us up north this past July. They moved their operation from Williston with the intent of growing their flock from 10 ewes to about 65 or 70 in a sustainable and economically sound manner. It’s also kind of hard to farm in the middle of a city. When one of their sheep died, she asked around: “what do you do with dead stock?” and an old-timer responded that he just puts the sheep in a barrel, covers it with sawdust, and waits for spring. Katie laughed and said, “so that’s something we couldn’t exactly do in Williston.” Can you imagine the smell?

One benefit of small ruminants is that they can thrive with minimal physical infrastructure. It’s a lot more easy to get started with sheep than with dairy cows.
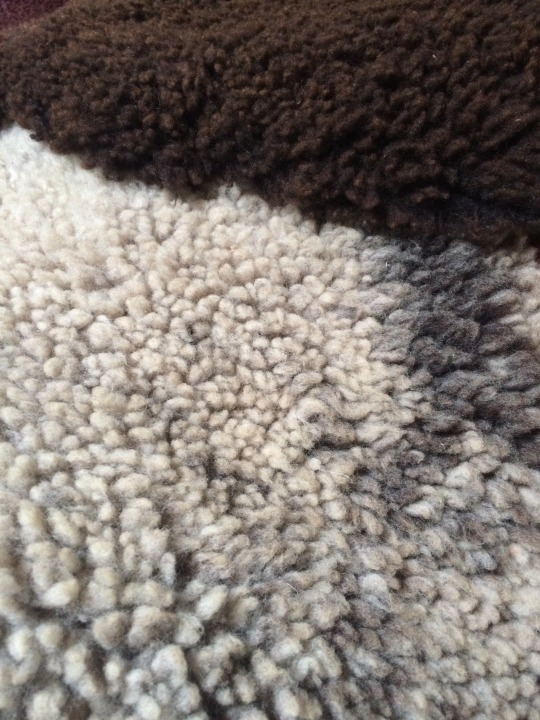
In terms of growth, though, they are about halfway there, currently stewarding 35 ewes. While Matt works to maintain their tractor and the technological side of things, Katie does most of the hands-on work in the field with the sheep. From their sheep come delicious meat, beautiful fiber, and pelts that are so stunning I bought not one, but two.

But really, how could I resist? The luxuriousness of the wool is out of this world.
In terms of processing fiber, they shear the sheep together. Katie skirts the fleece by hand, and takes it to Mad River Woolery to be spun. She then dyes the yarn by hand, although she has found that natural colors command a following as well. When I asked if she participated in Farmer’s Markets, she said they had in the past, but, “if you show up the first day of July, people are like, oh, fantastic, I’ve never seen you here before! And then they buy buy buy. And the next week you show up and they’re like, “getting started knitting that hat!” and the next week, they’re like, ‘still knitting it!’” That’s what’s different about the mind of the consumer vs. the mind of the producer. Vegetables, of course, have a highly consumable nature. High quality fibers, perhaps not so much.
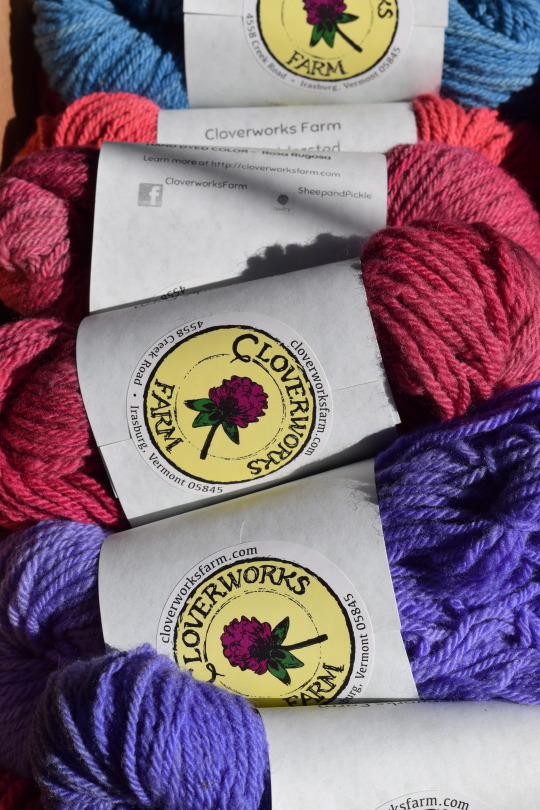
Hand-dyed yarn.
As for meat, their lambs will either be sold to Walden Meats, who will process them before sending the meat to Boston. Boston folk will pay Boston prices, and they could make as much as they would for selling retail. If that doesn’t work out, the lamb would be sold for retail or wholesale value. In terms of marketing lamb, Katie and a lot of the farmers I talked to noted that lamb can be perceived as a luxury meat, one more exotic than the broiler chickens that regularly grace the tables of Americans. So while the marketing of lamb “doesn’t necessarily lend itself to the creative ways that people have found to sell other stuff”, those that do buy it are often willing to pay a premium (myself included). Lamb is about 80% of the sheep revenue, but people naturally respond to the beauty of the wool, so her marketing efforts are really focused on directing the response to lamb and making it a little more positive.
And then the pelts. Even though it’s a terminal product, people really like the pelts. Like I said, I ended up taking home two of Katie’s stunning pelts. My boyfriend and I sleep on them every night. They feel like home - they’re so soft, warm, and beautiful. There have even been studies showing that sleeping on wool can lead to a more beneficial night’s sleep!
This crappy iPhone photo doesn’t capture the natural beauty of these pelts.
When I asked Katie “why sheep?” She responded that they provide so many products and so many different revenue streams. She wants to use everything that sheep can generate and be really engaged in the practice. That includes genetics - she’s working with really strong genetics and cares a lot about maintaining those two breeds, especially improving the Bluefaced Leicesters. They’re also more affordable than large ruminants, which require feed that the rocky soil of a lot of Vermont hill farms aren’t yet equipped to provide. With Matt’s technical skills and her knowledge of grazing, they are able to lengthen the dollar they make on sheep products by producing their own hay. The focus here is not on ever-increasing growth, but on reaching a sustainable lifestyle point.

I think we’d all be content to graze under these cerulean skies and transitioning hills.
When I asked about her experience farming as a woman, she agreed that Vermont is really progressive in a lot of ways, but in the rest of our vast country, sheep raising “is a very traditional and conservative practice, [and] women are taken a lot less seriously. First of all, out West, they talk about thousands of ewes. They point at the East and laugh.” This phenomenon can henceforth be known as the Hierarchy of Seriousness, as coined by Katie Sullivan. Being out West is way more serious. Specifically, the men out there consider themselves the real sheep breeders, and we have less serious specialty breeds grazing the hills of the East. Katie joked that the lowest on the totem pole would be a woman that hugs her five rare fiber sheep every day and has named them all. There’s clearly a grain of truth there. She shared a little about her experiences going to pick up sheep in Ohio and not wanting to present herself as a liberal Vermonter. She said they took Matt’s truck, and left the Bernie stickers behind. Having travelled through the Midwest myself and being blown away by the images presented to me via billboard and some crazy bumper stickers, I knew what she meant.

Check out the sheep in the background. She looks like she’s plotting world domination.
Katie emphasized, “the only way to win at their game is to make a profit loving what you do, to drill home that you have control over your market and market prices, and to essentially beat them at their own game.” She then talked about the declining industry out west and the centralization of the meat-packing market in Montana - you really can’t control the prices of your livestock. It’s a system that can run parallel to the conventional fluid milk market, in more ways then one. It’s easy to see the generational cycle and gaps therein, and especially in Vermont, to see farmers aging out of the business. There is hope, though: according to Katie, “we will see the ascension of women in this business. We’ll see women raising sheep and treating it seriously.”

I daydream about running my fingers through this wool regularly.
Katie made sure I didn’t leave without understanding the role that community has played in their lives since they moved to the area. The neighbors have struck the sweetest kind of down-home Vermont deal with them, keeping Cloverworks sheep fed while also keeping their fields clear. It’s a win-win. They’re also been a big help with understanding the history of the property itself, which is lacking nutrients from being continually hayed with no fertilizer added back. Their land is currently way more depleted than they’d like. One way to do bring back rich, active soil is to raise turkeys and chickens, to follow after the sheep and spread out the nutrients they drop. And there’s one more revenue stream for you: grass fed poultry garners a much better price at the market than conventional birds. And if you’re raised birds this way, or bought from those who do, you’ll know it’s hard to go back.
Plus, having sheep and chickens on Vermont’s working landscape just kind of feels right.
So there you have it. Rotational grazing, diversification, cultivating and improving the genetics of livestock, and women as the vanguard of the agricultural revolution: these are a few of the ideas that make modern farming such a holistic and rewarding practice. It might not sound radical to those of us living this kind of life, but compared to more “serious” (read: industrial, focused on growth at all costs, and yield-based) farming that currently rules America and dictates what kind of food we’re eating, it’s a breath of fresh air. Based on our interview and resulting correspondences, the businesswoman running Cloverworks farm would tend to agree.
0 notes
Text
all my wool yarn i make from trusty drop spindle !!!
all is buy wool in braid / rolag / batt / roving. and then do spin with drop spindle myself. want eventually take wool from sheep and process it (wash / skirt / comb / etc) and dye it and spin and knit it all by self (with lots of help bc high support needs but want involve in all process) but no space / time / ability yet!!

1 this one is very first one make ever december 2022 - january 2023!! is 4 oz 70% black shetland + 30% silk roving 2ply no dye
is squishy but is not very soft is spiky and chose this as first project because want practice before make more colorful ones so don’t ruin them and it turn out very good for first project

1.5 left one is from one single rolag of angora rabbit/merino wool/faux cashmere blend. only one rolag because accident spin too thin and hate knit thin yarn. but rolag so so soft love angora
2 right one is rainbow corriedale sheep wool with little sparkles (angelina) from rolag. do chain 3-ply so color change stay same!!! still very thin and don’t know what do with but it pretty

3 is set of targhee sheep wool from 4 oz braid!!!! is easter egg color but end up a little too much green, but still pretty. feel like when spin up, pastel color get more muted… left is main hank, think was 4 ply??? because this still era where spin thin.
but then didn’t time yarn right so had some left over.. so the little hank on right is born!! is 2 ply and actual like this color better because more even and green not overpower.

4 is merino 2 ply from braid!! is gift from partner and it spin very squishy and soft and then i add back the braid label so don’t lose. this time manage spin thicker but nature of hand spin with drop spindle, not very even, so parts thicker parts thinner. twist tend to escape from thick part to thin parts so the thick parts end up loose not spin enough.. but is beauty of hand spin!!!!!
feat. picture of drop spindle

5 is very bad pictures because forget bring… but is 4oz 75 bluefaced leicester (BFL) + 15 silk in chain 3-ply braid so so pretty favorite favorite but maybe is picture bad lighting bad but finish yarn look muted and weird and sad..
6 is also 75 BFL + 15 silk 4oz. 2 ply. is a very very very pretty pink love love!!! is actually first time spin wool that is dyed single color - always thought dyed single color is boring but fell in love with this pink and it very nice. this honestly one of favorite.
#wool special interest#🍞.txt#handspun#hand spin yarn#wool#fiber arts#spinning#hand dyed yarn#drop spindle#yarn crafts
108 notes
·
View notes
Text
My story is not typical of many of the artists who have been featured here. I came to art late in the game. I didn’t draw and doodle much as a child. I didn’t study art in school or college. My path was very different.
I grew up in rural northern Indiana. I love the rural Midwest landscape, especially trees and fields. I went to college in Utah, where I learned to appreciate the desert landscape and mountains. I graduated and came back to Indiana and earned a Ph.D. in linguistics from Indiana University, where I taught for 26 years. During that time, we moved to forty very rural acres in Solsberry, Indiana. We had two children, made a beautiful garden, and I learned to weave and dye.
In due time, I started a side business selling hand-dyed yarn and handwovens. In 2011, I started blogging about our rural life and all the crazy things that happen out here. Those disparate activities taught me a lot of important things. As an academic, I learned to study and ask questions. To be a better dyer, I learned everything I could about color theory and color mixing. To be a better blogger, I learned photography and composition.
One day in 2014 on Facebook, I was tagged in one of those memes where you have to answer 20 questions about yourself and one of the questions was: If I had the time I would _____________. I found myself answering: If I had the time I would study painting. I had recently turned 50 years old and it had always been a secret dream of mine to be a painter.
I thought about that for a long time and then decided that just studying painting was a great way to start. I still study all the time: many different artists, styles and mediums. I study color. I study composition. That Christmas I got myself a little ‘how to watercolor’ book and did a few of the exercises. I let myself paint a lot and didn’t worry if it was bad. I painted the same scenes again and again. I took a few online Craftsy classes in watercolor and got a lot of encouragement. I took a watercolor class offered through the local community college and again got a lot of encouragement. The instructor invited me to join the local watercolor society, which I did.
I kept painting and painting and sharing my work with others. Someone suggested that I submit one of my pieces to the juried member show of the Watercolor Society of Indiana and it was accepted. At that point I got serious about watercolor. I took multi-day workshops with nationally known artists. I painted and painted.
What I like best about watercolor is also what is most challenging about watercolor. It’s unruly. The truth is, a lot of my life is that way. Our forty acres are big and messy and vulnerable to the caprices of nature. I spent years photographing and blogging about our life out here but I could never quite express the feeling of all that sky meeting all those trees meeting all the rest of rural Indiana until I started painting it. I love it when folks look at one of my landscapes and say, ‘Oh, that reminds me of home!’ I try to put as much home as possible in every painting. Things may not be tidy out here, but they sure are interesting. That’s what I paint.
The one thing that has made the biggest difference in my art has been my choice to be confident in my approach. Sometimes this means I paint confident garbage, but mostly it means that I am painting more and more good things. Using professional quality materials is a big confidence booster. I paint on Arches 140lb cold press paper. I use tube paint from Winsor & Newton, Daniel Smith, Mission, M. Graham and Sennelier. A single color can differ from maker to maker. It’s OK to experiment and try several different makers. Right now I really love how M. Graham and Sennelier have such intense colors and easily wetting paint – they are both made with honey and won’t dry on your palette. (As a beekeeper myself, I love that!)
Those are my beehives and I really do paint them bright colors like that!
My process is to gather several reference photos and then start putting together thumbnail sketches of the basic large shapes in my composition. I don’t try to make my painting match any photo. I might do a notan. Then I decide what colors to use. I might do a color harmony swatch or two. Or five. Then I dive right in on a 10 x 14 inch piece of paper and do the first draft.
This first draft is just that: a DRAFT. It’s not going to be perfect. I adjust colors. I take things out. I put things in. I pencil in possible corrections to the composition. I get a lot of feedback. In the end, this draft is usually a mess.
Getting feedback from multiple sources is really important to the process. It’s necessary if you want to find out whether or not you’re communicating what you think you are in your painting. It’s easy to get really focused on something and forget what else might be there. Feedback helps remind you about the whole painting. If they all say, ‘What’s that blob?’, then perhaps you need to work on it. But if one says, ‘Oh, I love that red shed’ and another says, ‘I don’t like that red shed’, then you know it’s fine, it’s just a matter of taste.
Feedback also tells you about the person giving the feedback. I once had someone spend 15 minutes telling me why a ½ square inch of my painting ruined the whole thing for her. It was a reflection of where she was in her life, her own issues and insecurities. I listened politely and she left feeling happy that she had set me on a better path with that piece. I did not make the change she suggested.
A great way to get feedback is to start a critique group. You can meet in person or start an online group. Find people who are interested in improving their art, not just getting positive feedback on any attempt. It doesn’t have to be watercolor – all art deals with color, shapes, value and composition. Find people who can give and take suggestions with grace and tact. Learn how to give suggestions with grace and tact. A good way to suggest a possible change is, ‘What if…’ or ‘Have you considered….’ Often, when I post a piece to my crit group, I do have an idea of what I’m unsure of in the piece and I come right out and say it. That helps focus the feedback on exactly the areas I want to work on.
Once I get some feedback, I make whatever changes I need to and start the next draft. As I work, I take the time to sit and look at the piece. See how it looks from 10 feet away. If your studio space is too small for that, then snap a pic, pull it up on your computer and take a look. If the painting works SMALL, it will work BIG.
Once a piece is finished, I set it aside and move on to something else. Then I come back to it after a few days/weeks to see if something jumps out at me. I make any changes and sign it, photograph it and frame it. Framing is an important step for me. It’s a way to give the piece some polish, to send it out into world, best foot forward. I use conservation quality mats and frame myself using ‘Best Practice’ techniques that I glean from professional framers and museums. Once the piece is framed, it is ready for immediate sale, shipping or exhibition. That saves a lot of last-minute fussing later.
My personal challenges these days are around color (always) and brushes. I try to take regular, everyday type rural scenes and paint them in an innovative way using unusual colors. I’m trying to work larger and that is forcing me to try new brushes and larger ones. My favorite brushes are the Princeton Long rounds, but I just got a size 30 round Mimik and I have to say I’m loving it for the big work. Every once in a while I try a piece using only a 2 inch flat brush. That’s a real challenge for me.
I will continue to study and paint and see where the art takes me. I hope my story has given you confidence to pick up a brush or pencil and just start. Wonderful things will happen, even late in the game. There are many paths to becoming an artist. I hope you find yours. And when you do, I’d love to hear about it!
Robin Edmundson
Website
Blog
Facebook
Instagram
Pinterest
Google +
Twitter
Etsy shop (hand-dyed yarn)
#WorldWatercolorGroup - GUEST ARTIST: "Many Paths Lead To Art" by Robin Edmundson -#doodlewash My story is not typical of many of the artists who have been featured here. I came to art late in the game.
#WorldWatercolorGroup#aquarelle#art#artist#farm#featured#inspiration#painting#rural#watercolor#watercolour
0 notes
Text
This past weekend was full of unexpected things. I did not know there were going to be house guests, but breakfast out was really nice! We went to a local café on a farm down the road from us. The building is a strawbale construction, a simple design, with rustic decor. The food is tasty and plentiful. And the owners know my friends (of course). During the course of chatting with the owners, I happened to look out one of the side windows and noticed a walnut tree laden with nuts, so at an appropriate moment in the conversation, I changed topics and asked about their tree. Would it be possible to collect some of the walnuts I had seen on the ground? I wanted to make a dye. Of course! was the answer. The one tree I had seen turned out to be part of four trees. I was given a small paper bag and after we’d finished, I went outside and around the corner to the walnuts. And lo! there I saw so many walnuts. In fact, I’d never seen so many walnuts, and I wanted all of them. However, not knowing how many I’d actually need to making dye, I happily filled my paper bag and asked if I could come back if I needed more. The owners were more than happy to oblige. I can come get as many as I like. Woohoo!
(Sadly, I did not get a picture of the trees.)
I counted them – about 60. But I had to toss a few that ended up being full of worms.
I must say, black walnuts smell delightful. The hulls have a sort of earthy citrusy fragrance that makes me so happy. I can’t quite adequately explain it.
The hulls will also stain your hands brown like crazy. We got home, and I put the rest of my day’s plans aside for a few hours so I could peel the hulls from the nuts – the hulls are used for making dye. The shells are too, but if I’m going to use the shells, I want to save the nutmeats, so I spent time separating everything into two buckets.
Nuts in the left bucket. Hulls in the right.
Most of the instructions I found online made it seem like getting the nut out of the hull was really hard and that I needed to drive over them, whack them with the claw of a hammer, or find a mallet and whack them until they yielded the nut. None of that was necessary. I got a steak knife and just ran the blade around each walnut, neatly dividing the hull into two hemispheres. Then a twist released one hemisphere, and if it didn’t, then one more cut to divide a hemisphere in two did the trick. It was a bit reminiscent of pitting all those peaches I canned a while ago.
So, the staining. Because black walnut hulls have so much tannin in them, they stain things pretty permanently – the tannin is the mordant. Cloth, skin, any natural fiber…brown. All the sources I found online told me to wear heavy rubber gloves. I didn’t have any, but I did have some disposable food service gloves at hand.
Yeah. So, all this brown? Still got through, and my forefinger and thumb are a bit brown.
I got them all hulled! But what to do with them then? Most instructions say to simmer them for an hour or so, but I do not want to have an accident in the house and stain the kitchen. It is not my kitchen after all. So, I’m trying what I think is a far more likely historical recipe (even though I have no proof at all): I’m soaking the hulls in that bucket in water for a couple of weeks. Then I’ll strain everything and maybe might see if I can find an outdoor cooking arrangement so I can simmer it and kill any mold that might have formed. Or not. Maybe I’ll put some in quart sized mason jars for later.
This dye is also apparently an excellent wood stain! I loves me a multitasking thing I can make! So, after a little experimentation with some wood scraps and some research, I may do any final prep and put some in jars for my woodworking friends. (And I am filing this knowledge away for later when I want to build bookcases for whatever house I end up with!)
I’ve got a couple of white skeins of two ply yarn I’ve spun – one skein I really have to run through the wheel again to give it some extra twist. And I have so much more white (Down breeds blend) that could be dyed with local black walnut dye handmade by me. The dyeing process itself is apparently super easy. You simply put the yarn or cloth in the dye and leave it there until it’s brown. If simmering it, I think you simmer for something like 30 mins to 1 hour. I will likely try just soaking it for a day and see what happens. (I do have to look into some sort of outdoor cooking equipment, though…)
I was also thinking of dyeing some bamboo rayon yarn and/or cotton yarn for weaving cloth or towels or something. Because why not?
But, don’t you need more walnuts for dyeing all that stuff? I hear you ask. It turns out, everyone seems to agree that you only need 12-15 walnuts per gallon of water. For just the hulls. So I have 4 gallons of the stuff. That’s a LOT of dye. Even 2 gallons is a lot if some of the water is supposed to be lost in cooking it. I am planning on also getting the shells, which apparently yield a darker brown. (Of course, that may not work, but I will try.)
I filled up the bucket with the hulls with water. I’ve set it in the garage with a piece of wood on top to soak for a while. The bucket with the nuts got filled with water, and I started scrubbing the remaining hull gunk off. I had read that the gunk could rot and mold and make a mess, but most importantly, it would dye your hands dark brown. I don’t feel like walking around with dark brown hands and having to explain that I have been playing with dye everywhere I go, so I elected to scrub. The two floaters were thrown away – I suspect if they float, there’s probably a problem with them.
I got about half scrubbed before I ran out of time and energy. So I drained out the water, put a tiny bit in so the ones that were left were only barely covered, and set those in the garage too to wait until I have some time to resume scrubbing. I’m hoping the soak will help to soften up the remaining gunk.
The real work to this project is going to be actually cracking the nuts. A quick read about black walnuts online seems to show that I’ll need to use a vice as a regular nut cracker will not do it at all. Woo.
Excuse the messy counter – my first attempt at waffle production!
I also found an as-yet-unused, brand-new-in-the-box, three-year-old electric waffle iron in the house! Of course I tried making waffles. This is the first time I’ve tried making waffles. It was an adventure.
I thought I’d double the recipe, because ultimately, I wanted waffles in the freezer that could be toasted in the toaster for near-instant waffle goodness. But then I accidentally put in twice the amount of butter for a doubled recipe, which meant I either had to throw everything away and start over, or end up with a quadrupled recipe. I went for the quadrupaling.
We have a LOT of waffles in the freezer. The house guests tried the waffles the next morning in the toaster, and declared them delicious. Successful experiment! I think the recipe needs tweaking – it needs a little sugar, and the optional cornmeal actually sounds good, so I might try that. And they were a little dense, probably because I didn’t whisk the egg whites nearly has much as the recipe said I ought, so maybe I’ll try that next, but with some cream of tartar to help things along a bit. So many tweaks. Or I could try another recipe.
In weaving news, I have a crazy idea involving 60/2 silk and some very fine baby alpaca and an overshot pattern. First, I want to make myself something beautiful, but it occurred to me that I could sell one, and the pricetag would be fairly high – this would be a very time-consuming project with excellent and expensive materials. The bulk of the cost would reflect the labor involved. I wonder if I could sell one or two (or three?), because then I could buy a cello. It looks like that experiment has been successful enough that I’m close to outgrowing the cello I rent. Do you guys have any thoughts on this? Advice? Suggestions? Is this an idea worth pursuing?
(I can rent a viola da gamba, it turns out, and it is affordable. I kind of hope that I don’t love it as much as I think I will, because there are almost not enough hours in the day for adequate practice…)
This past weekend was full of unexpected things. I did not know there were going to be house guests, but breakfast out was really nice!
0 notes
Last Seen Blogs

idalvapmella
Idalva Pâmella

thefitnessfactory-mogappair
The Fitness Factory

lo-flo-jen
Bad Bitches Only.

crimesyndicateofgotham-blog
The Crime Syndicate of Gotham

meowthmoments
squeamshots