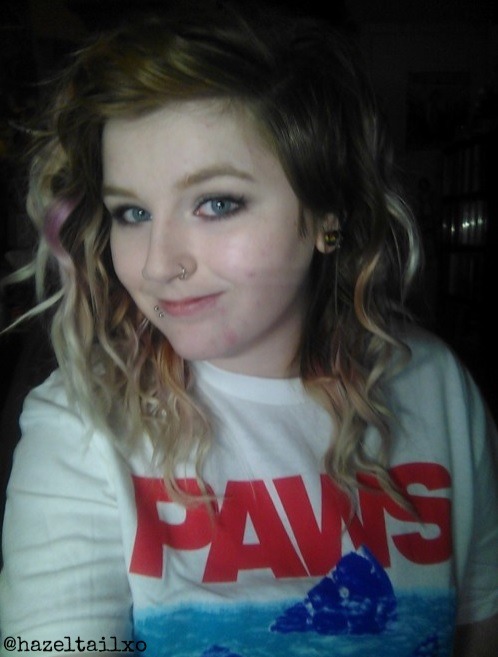
#curling hair
Text
Why did I think this was a good idea?
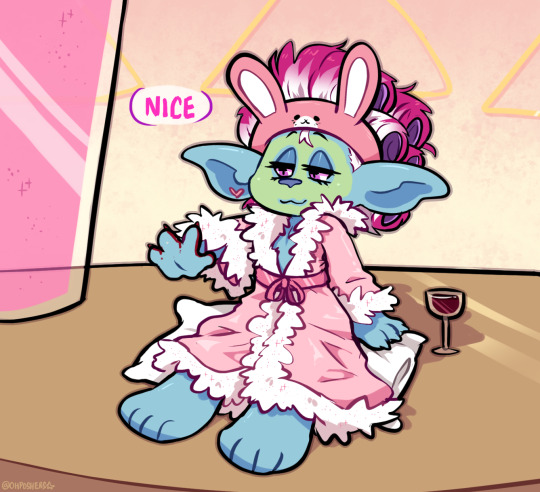
So my hair can't decide if it's wavy or what, and when it's short it tries to curl, so I figured I'm off tomorrow, why not try curling my hair? I'm using heatless rollers to avoid damaging it.
I HAVE SEVERLY UNDER ESTIMATED HOW LONG THIS IS TAKING.
So uh, one of my nicknames is Rapunzel, for good reason. I frequently sit on my hair. Friends sitting around me frequently sit on my hair if it's down. My hair is also rather thick, even with some thinned out bits.
It's been 2+ hours with dividing and rolling.
I am only halfway done.
SEND HELP.
#no i am NOT just going to take the done half out#i need to finish this now#i am so tired#hair misadventures#curling hair#long hair problems
2 notes
·
View notes
Text

HOLIDAY FLASHBACK
How I Curl My Hair w/Undercut
hazeltailxo on ig
#hair#curled hair#curling hair#curling iron#hair tutorial#hair tutorials#curl hair#curls#hair video#hair videos#undercut#sidecut#curly hair#beauty#beauty blog#beauty blogger#beauty blog post#hazeltail#hazeltailxo#hazeltail official#hazeltailofficial
2 notes
·
View notes
Text

Wonderful Things That May or May Not Be Wonderful!!!
Sometimes you can’t just pick up your food. Sometimes you need to stab it. That’s where forks come in. Such a simple tool in concept and execution yet so helpful for edible consumption especially of things that are too hot and/or too messy. Yep, that’s why forks are wonderful
P.S. Please remember to never stick your forks in toasters and electrical outlets and always clean them after using them to curl your hair.
0 notes
Text
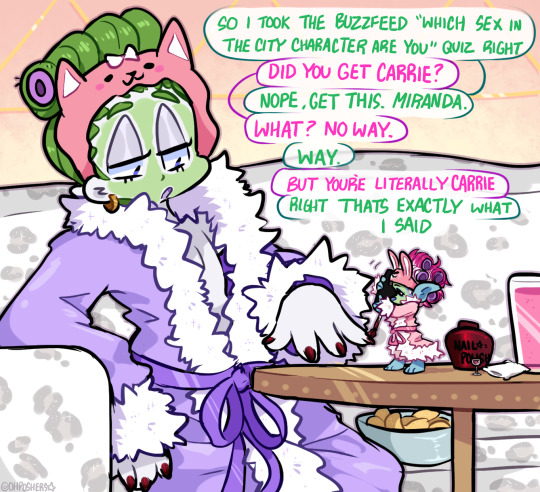

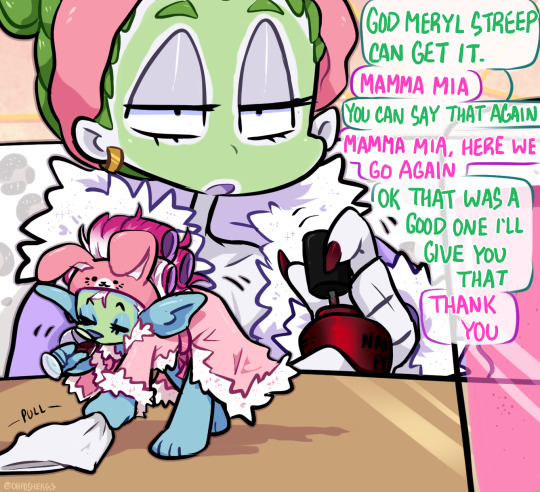
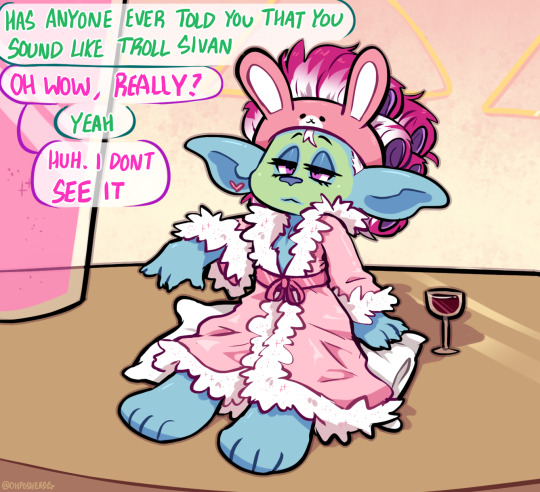
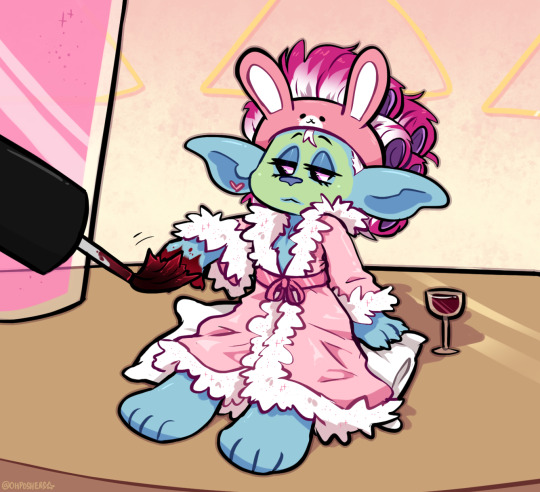
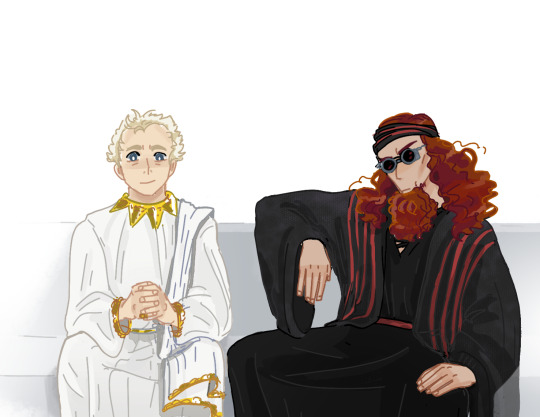
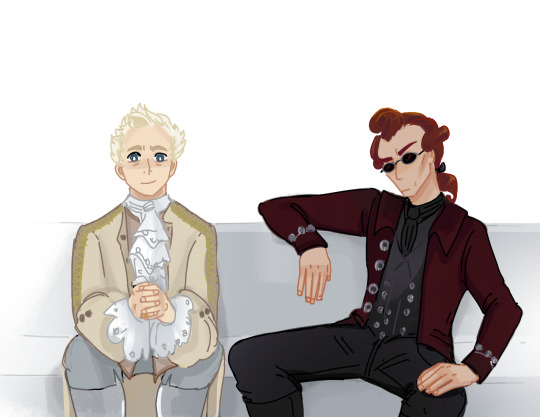
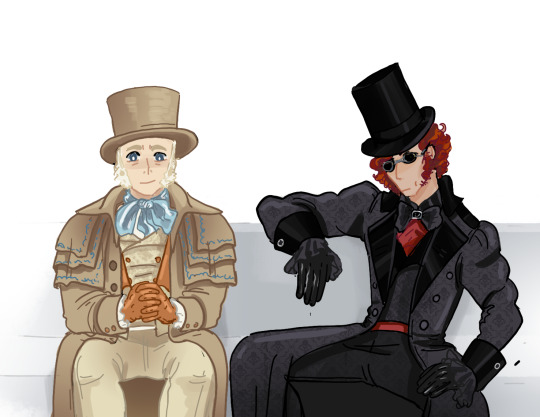
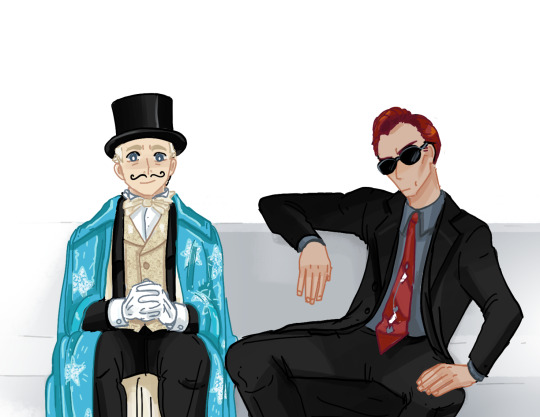
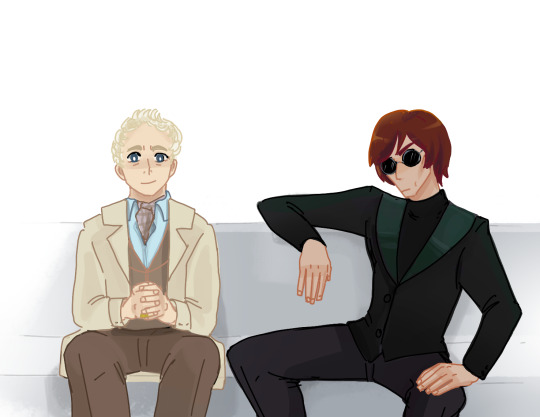
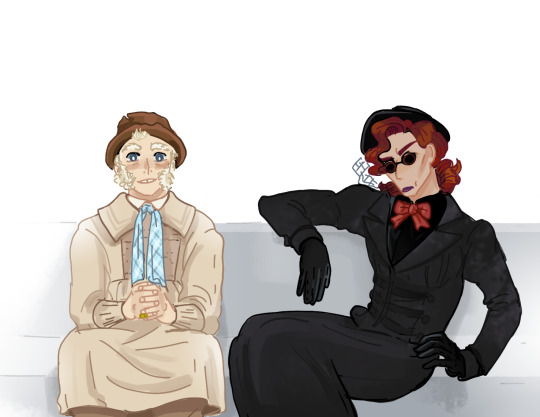
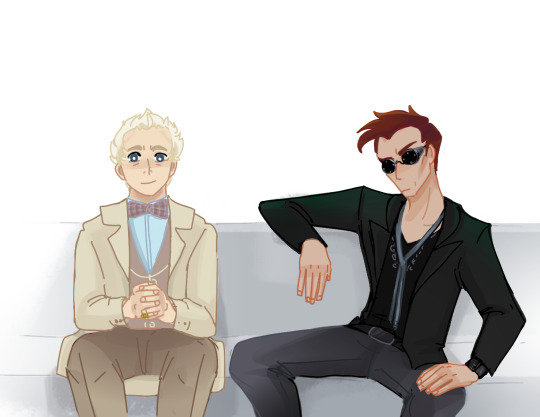
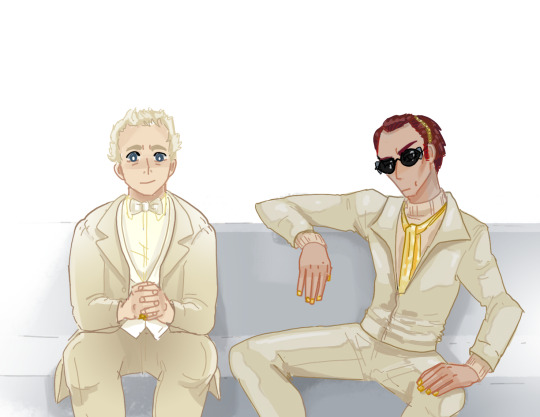
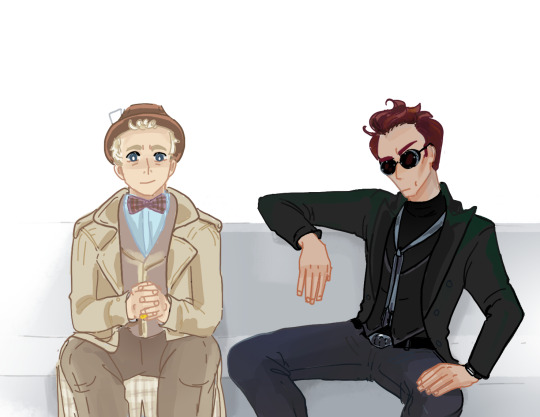
This started as a shitpost and then I just kept going anyway AU where Floyd eventually forgives Veneer and they end up becoming besties a few years down the line and have girls nights ugh
[NOT SHIP ART!!!]
aaand Bonus doodle of when they take the curlers out or some shit dont look at me man
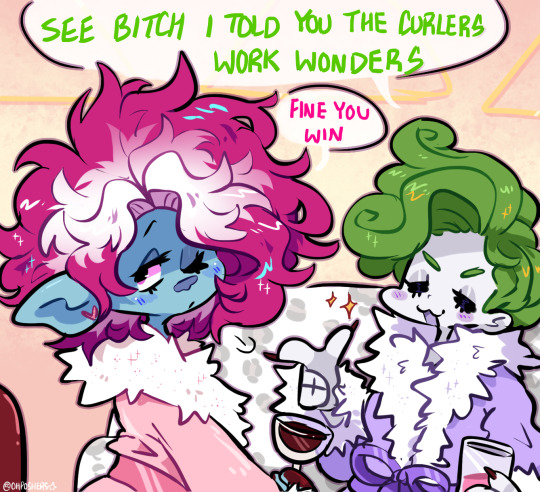
#floyd was convinced his hair was gonna look stupid with curls but hes a believer now#this is so stupid im sorry guys#can you tell i had fun writing the dialogue#trolls#trolls band together#floyd trolls#veneer trolls#im so tired i stayed up all night making this#veneer and his senior citizen best friend#my art
4K notes
·
View notes
Text

i can't be the only person who sees the resemblance
#just curl his hair and you have will solace#tell me i'm wrong#nico di angelo#percy jackson#will solace#solangelo#pjo#heroes of olympus#hoo#pjo hoo toa#riordanverse#art#fanart#my art
9K notes
·
View notes
Text

it's you!
I don't know bingbong, let's ask the destroyed roomba
#bonnet binghe im OBSESSED WITH YOUUUUUU#his hair is messy in the first but i tried to convey it more straight than usual....#so that when he transmigrates sy tries to revive his curls </3333333 he buys a diffuser and everythinf#god im unwell. sick and twisted.#binggeyuan#luo binghe#luo bingge#shen yuan#scum villian self saving system#svsss#the trend already died but im late to everything so its fine
2K notes
·
View notes
Text
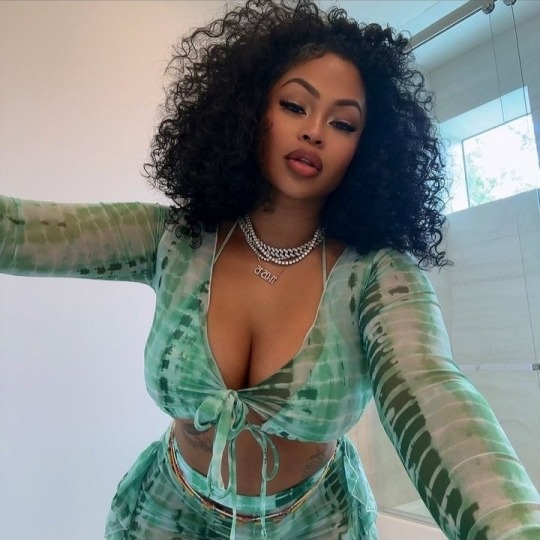
The baddest!!!!! @Lashontae , she was built to last!!!
#black girl moodboard#black girl aesthetic#black girls are beautiful#black women#pretty black girls#black girls of tumblr#beautiful#blasian#black girl beauty#black girl magic#melanin#black woman#black beauty#beautiful women#girls with curls#curly hair
2K notes
·
View notes
Text
IG@Kiarapeachlegit
#afrodesiacworldwide#submission#natural beauty#natural hair#cute#black beauty#beautiful#pretty#beauty#black girls rock#curls#girls with curls#curly hair#curlygirl#afro curls
1K notes
·
View notes
Text
How to Curl Your Hair with a Flat Iron
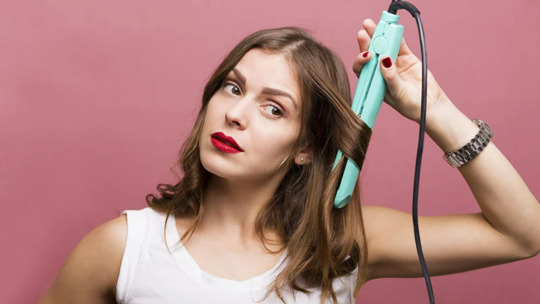
Gone are the days when a family function sent you to the nearest salon to get your hair neatly straightened and set loose down your shoulders. Today, curls are the way to go, framing your face in a way that stands out and sets you apart from the crowd.
But you have already invested in a straightener quite recently, have you?
Then before you jump to buy a curler, here we are to provide you with the tricks you need so you can use your hair straightener to curl your hair, so you now have an instrument to straighten and curl your hair too.
Or perhaps you want to invest in just one tool that you can use to style your hair. In that case, a hair straightener is a better option for you to straighten and curl your hair.
That said, read on. Know all there is to use your hair straightener like a pro in curling your hair:
Why can’t I curl my hair with a flat iron?
Okay, so you checked out tips on the internet and then tried experimenting on your hair to end up frustrated with an unsuccessful mess on your head.
Don’t worry, just follow these steps from us as we teach you how to do it right and the mistakes to avoid.
You could be using the wrong kind of hair straightener, not following the steps to prepare your hair, and so on.
So, read on to know what you need to do, and before you know it, your flat iron will be your favorite instrument when it comes to curling your hair.
How to Curl Your Hair with a Flat Iron?
Now, the secret that most women out there don’t know is that you can curl your hair with straightening iron. If you keep practicing with the years, using the tips and tricks available, you can use your straightening iron like a pro, creating different hairstyles with straight or curly hair.
However, in this article, we shall look at how to curl our hair with a straightening iron.
1. Decide on the Type of Curl You Want
Now, curls are of different types. And this is one of the first things that you need to know before you curl your hair. It will go a long way in helping you determine the look you want and the kinds of curls you want to create with your hair.
From bouncy curls to loose beachy waves, each kind requires a different technique to master.
And this is not all.
There are polished waves, S waves, tight ringlets, and so much more that you can make a study of to choose just the kind of curls you would go for according to what suits your face.
There are C waves that are large and tend to face outwards. There are generally thinner pin curls, bouncy waves that you can go for if you want to add volume to your hair, and finally, polished waves that are long and elongated to create a sophisticated look when you go for dinner or a date.
You can choose a different type of curl for a new look each time, based on the occasion and the outfit that you plan to wear.
You could pair that black dress with tight curls or simple C waves on a formal dinner. And on days when you want to hang out with friends, you could wear your hair in pin stripes curls that create a casual look.
2. Choose the hair straightener
Okay, there is one thing that you need to know. It is that you are using the right kind of hair straightener. A flat iron needs to be thin and generally should not exceed a width of more than two inches.
So, if you intend to buy a flat iron that you can also use to curl your hair at times, then this is one thing that you should keep in mind!
On the other hand, if you have already invested in a very broad straightener, then perhaps you could get it sold or exchanged for one that is narrower.
Or you could just put it off, (if it has become too old) to invest in a hair straightener that is narrower and can also be used to experiment with curling your hair.
3. Get The Rest of the Tools Ready
Now, some of us may not know it but straightening or curling your hair is not just about attacking that curler or iron and putting it to your hair to style or create curls right away, no matter how excited you get.
You must prepare a lot of things. And so if all you have is your iron before you get ready to do some running around.
With that, we need shampoo, a blow dryer, some serum, cream, or any form of hair protection which we will talk about later, and finally, a hairspray, which we will use in the end.
All this will go a long way in helping you style your hair the right way and stay away from damage that can happen if you excitedly jump to work on your hair.
4. Start with Clean and Dry Hair
One of the first steps is to prepare your hair. Your hair is the best to work with when it is newly washed and dried, just out of the shower, soft, and easy to work with.
Be sure that you use the right shampoo that goes well with your hair to bring the best out of your curling iron.
Also, remember that you need to dry your hair thoroughly as some of the damages happen when you put an iron onto damp hair.
5. Use the Right Hair Protection
One of the biggest mistakes we tend to make when working on hair is missing out on hair protection.
It will not only make your hair increasingly hard to work with but also go a long way in damaging your hair, which can be avoided.
All you have to do is find the serum, cream, or spray needed to nourish and protect your hair. And with the range of it from different brands out there, this should not be difficult.
6. Section Your Hair
If you were about to attack your hair without dividing it, wait a minute, or you are going to spend more than an hour and end up with nothing but a mess on your head.
That said, one of the first steps to working on your hair, be it straightening or curling, is dividing it. It is after you are done with washing, drying, and nourishing your hair.
Make small portions that make it easy, as you go section by section till you finish with all of them, and finally stand before your mirror with those adorable curls framing your face.
How small should the sections be? It depends on the kind of curls you want to create on your hair. For instance, if you want to pin beach waves, ensure that you divide smaller sections of your hair.
Voluminous beachy curls, on the other hand, would require a bit larger sections than that.
7. Start Curling
There are two ways in which you can do this. You can start from the bottom by clamping the iron on a small section and curling it upwards to create small flicks that stand out on your hair.
Or you could begin from the top, close to the scalp, running the iron down to the end and turning the iron as you go, creating more noticeable curls.
Work slowly, and if you want to create tight curls. But if beachy waves are what you look for, you need to glide the iron faster on your hair.
You could even wrap the entire hair from your scalp to the end around the barrel, twisting as you go for those long loose curls. Wrap them closer and tighter if you want tighter curls.
8. Finish with a Hairspray
Finally, you can end with a light mist of spray that helps your hair stand in place. An anti-humidity spray is a good option if you live in a region that has a humid climate.
A lot of people recommend using hairspray before styling the hair. While this is fine and makes it easy to style your hair, it is essential to use hairspray in the end. It is because your curls can tend to go off at the end of a long day.
Happy Curls!
And these are the steps you take to curl your hair. So, the next time you bring out our flat iron, don’t go for the same look as you glide it along with the tresses of your hair.
Start experimenting.
Style your hair with curls, getting better as you go, and before you know it, you will be using your flat iron to try out a lot more hairstyles than merely straightening your hair.
#hair#care#straightening#flat iron#haircare#beauty tips#hair straightner#fashion#curlynaturalhair#curling hair#natural hair#hair straightener
1 note
·
View note
Text
more of the dapper lad! i Cannot get him out of my brain
#i sit down to draw dragons and/or ocs and OOPS my hand slipped its wally#hes so. bites him bites him bites him#but affectionately <3#but also with affectionate intent to maim <3#every time i feel like my feelings about him are starting to level out to a normal baseline....#....i feel a heart squeeze and im back to insanity#welcome home#scribble garnish#wally darling#welcome home wally#welcome home puppet show#also i am once again imaging that he is modeling for sally#this is alternatively titled 'consistency? dont know her'#his hair confuses me so much#no matter how many times i look at references or draw him it still baffles me#which way does it curl? how does it floof? fuck if i know!#yknow before i drew this i set out with the intent to put Other neighbors in schmancy outfits#and then i saw that colorblock shirt. and it all went downhill#its 2 am now.#i spent a solid hour making a fancy background but i scrapped it bc it was Too Much
4K notes
·
View notes
Text
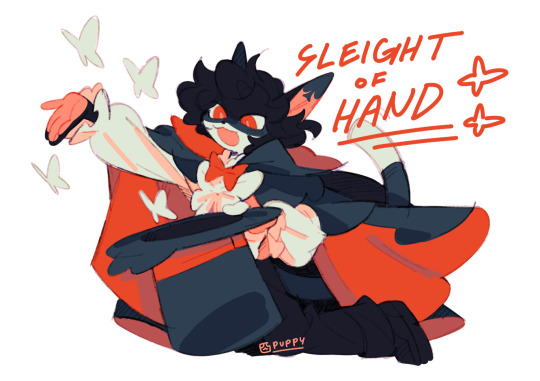

wanna see a magic trick? 🪄🎩
#YEAYYYY i like drawing this guy#now that i think abt it i cant remember the last time i saw a furry with tattoos.... ive decided not to think too hard about how it would#work but i think i like the idea of him getting playing card tats on his ears would be cool ^_^#apparently anthro species on furth include birds and mammals and i think fish amphibians and reptiles are non anthro#so instead of whipping out doves he would make white butterflies appear out of his hat :o)#its sort of meant to tie in with the ruffles on his shirt resembling a butterfly!!! i thought id make it close to a swallowtail so#that way its easy to see at a glance. i think that would look really cool irl#he looks a lot like joker p5 now that i look at it... it wasnt intentional but the red eyes and black messy hair is obvious huh#oh but the way his hair curls in the front isnt strictly in one direction just so that its easy to draw lol. its meant to curl around his#hat brim a little bc i thought it would look cool#my art#myart#my oc#oc#sleight#laika's comet#laika's comet oc#fan character#furry#furry art#fur
2K notes
·
View notes
Text

HOLIDAY FLASHBACK
How I Curl My Hair w/Undercut
hazeltailxo on ig
#curls#curled hair#hair#hair tutorial#hair tutorials#curl hair#hair styling#hair styling tips#curling iron#curling hair#undercut#side cut#hair video#hair videos#beauty#beauty blog#beauty blogger#beauty blog post#hazeltail#hazeltailxo#hazeltail official#hazeltailofficial
2 notes
·
View notes
Note
sometimes i think about natural hair machete
.
#OOHH#natural hair Machete!#I've drawn him with the trimmed fur for so long I had almost forgotten he's capable of being floofy as f- heck#shedding becomes instantly ten times worse#really captivated by the way you rendered the fur#it looks so soft and voluminous and the way the tufts curl just seems so three dimensional#the shading auh#the little bit of pink on the elbow#and the expression as well#he comes across a lot more casual and relaxed somehow#that's nice#such a lovely surprise! thank you!#gift art#alwaysoutofpaper#own characters#Machete#from pencil neck to mane
2K notes
·
View notes
Text

6000+ years, together

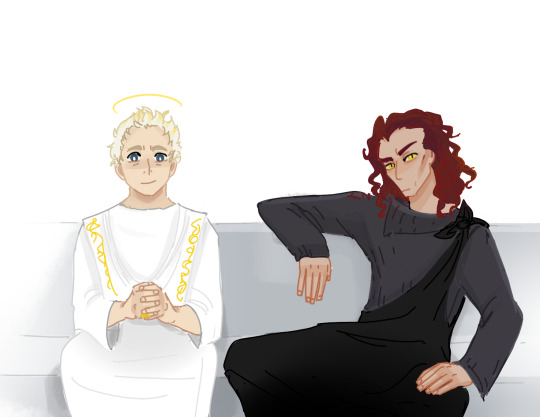


#good omens#good omens s2#ineffable husbands#aziraphale#crowley#good omens fanart#fanart#yall never guess my favorites#this could be the most annoyingly LONG post in history but i decided to be mildly normal about it#i was eating the new seasons hair so much#crowley has a more red-red tone and curls it back#aziraphale is the same but he is perfect so i love him and his WHITE hair ...it was whiter tho but it could be more the lightning on set#i'm still missing some.... if we get s3 i might add them#a group of two is a - couple -Crowley called them a couple in the most non-commitment way possible im crying
2K notes
·
View notes
Text
Simple $ Life Hack
I've not spent a penny on curling products in over 15 years, however I almost have soft voluminous curls that last nearly until bed time.
The easiest and cheapest way of doing this is taking some pants or old (cleaned) clothing that is too torn to wear anymore. Cut a few thin strips of fabric, making them a few inches long and no more than an inch wide. Before bed, wrap your strands of hair around the fabric and roll them up tight, and tie them. They will keep your hair out of the way and from getting tangled in the night too. In the morning, simply untie and remove the fabric and let your soft pretty curls fall.
This technique has given me the easiest and best looking curls of my life and it takes no time or money from your life. Curling irons and creams are not worth the money at all.
1 note
·
View note
Last Seen Blogs
jordisstigander
What Color's the Sky in Your World?


delitslovetraps-blog
Traps sind lieb