#craft project
Text
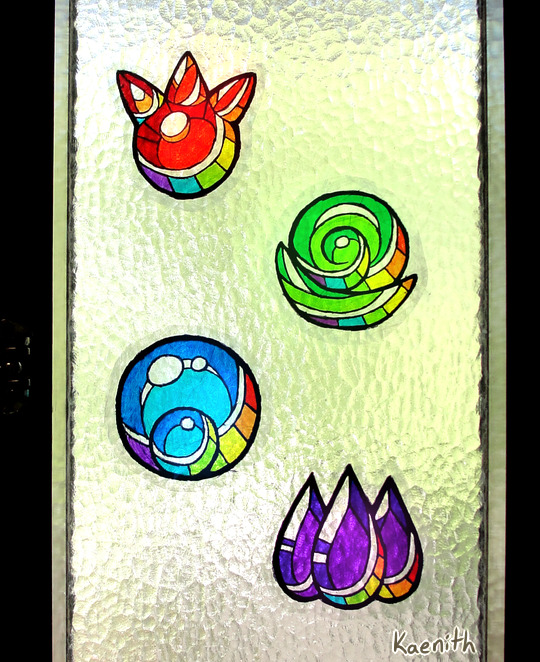
I've been making window clingies of the elemental gems from Minish Cap and Four Swords (plus rainbows because pride month) and I thought I'd put together a tutorial :)
Materials needed:
Permanent markers
Clear cellophane wrap
Scisors
Paper to sketch or print your design on
Not strictly necessary but useful:
Tape (for holding your pattern in place)
Something with a straight edge, like a ruler or bone folder (for smoothing out the plastic)
Step one:
Decide on a design. I drew mine digitally and printed it out. The printer had an issue, but eh, I can still see the lines, it's good enough ¯\_(ツ)_/¯

Step two:
Fold a sheet of cellophane wrap in half to make a double-layered sheet that is a little bigger than your intended design. Try your best not to get it too crumply and wrinkled, but in my experience a little bit of crinkling is unavoidable. Best not to get too perfectionist about it, and just embrace it as part of the stained-glass look!
Unfortunately, cellophane being clear, this step is hard to photograph ^^;;
Step three:
Lay the double-sided cellophane sheet over the top of your design. The best way I found to keep everything in place was to tape the pattern to a smooth surface and stick the plastic down around it.
Starting with the lightest colors first to avoid color bleed, start coloring your design, leaving the lineart for last.
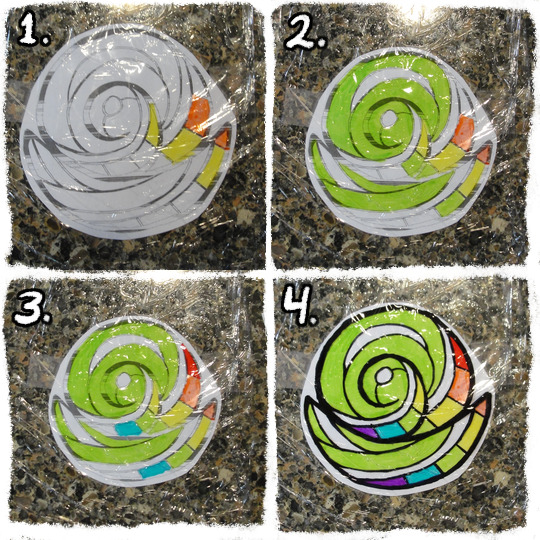
Step four:
At this point, the colors might look nice and vibrant against the white paper, but when you pick the plastic up and hold it up to the light, it will likely look washed-out and/or streaky.
To build up the colors more, fold another layer of cellophane and place it on top of the inked side of your current sheet. Then go over the colors and lines again, once again in order from lightest to darkest.
Keep adding layers until you're satisfied with the darkness of the colors. You can even get some interesting effects and shading by combining layers of different colors!

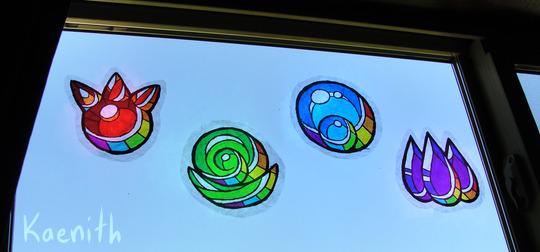
Step five:
When you're done, add one final layer of cellophane to the top to protect the inks. If you have a ruler or bone folder, I recommend using it now to smooth out the plastic and press the layers together as much as possible.
Then just trim around the edges and slap it on your window! :D
#legend of zelda#four swords#minish cap#tutorial#tutorials#craft project#craft projects#to pluralize or not? it seems I have done both in the past#pretty colors#my art#fanart
645 notes
·
View notes
Text
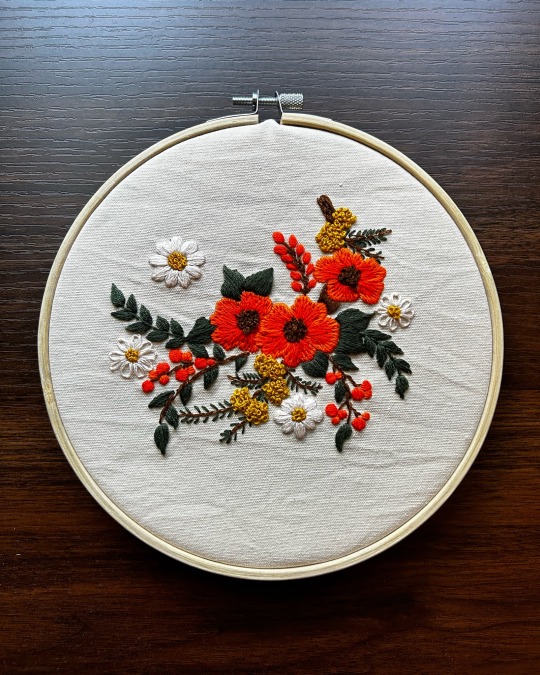
Finished my first ever embroidery project!
#embroidery#embroideryart#needlepoint#needlecraft#craft project#crafting#embroidery pattern#fabric crafts#fabric#art#cottagecore
104 notes
·
View notes
Text
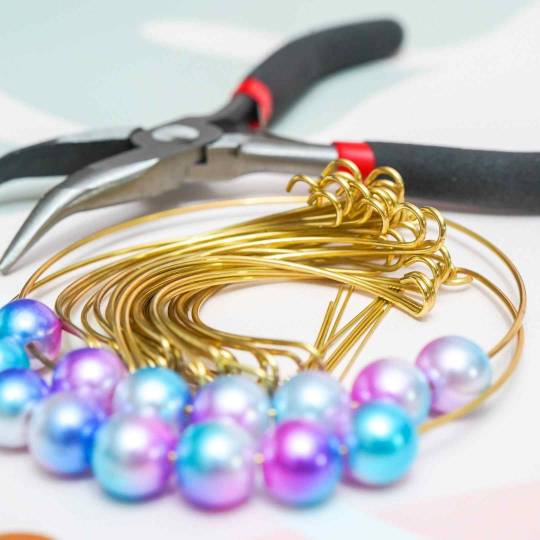
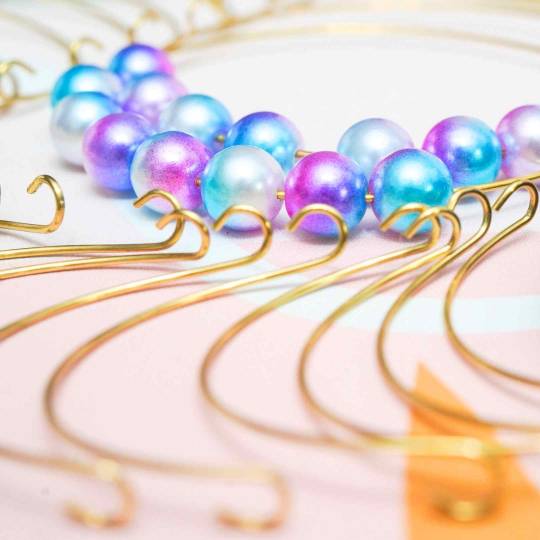


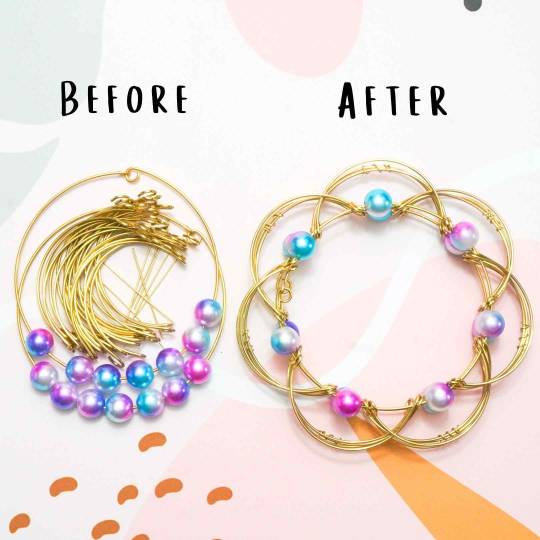

Introducing our new DIY Fidget Flower Kit! | Ships April 17th, 2023
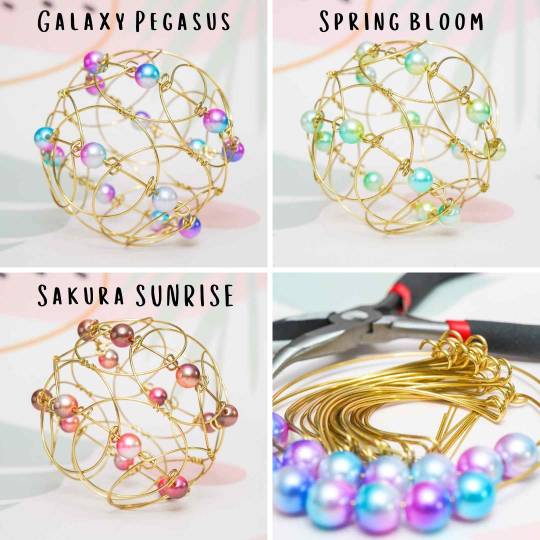
With this starter set kit, you can assemble and put together 1 3D Fidget Flower of your colour of choice.
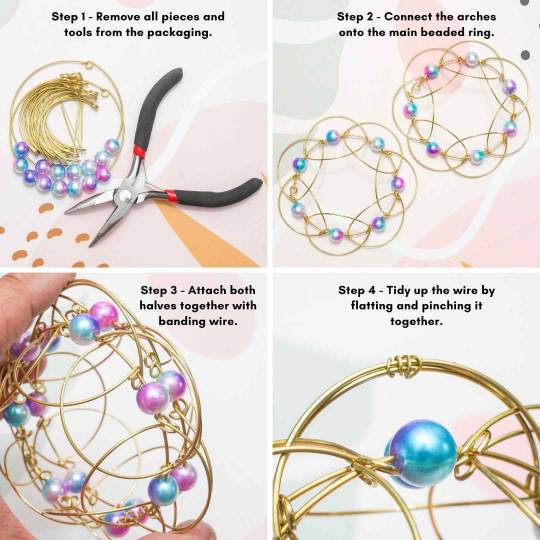
This DIY kit provides you all the materials (and tools), you need to make your very own convertible 3D wire flower from start to finish. Just scan the QR code on the card included, and follow along my complete tutorial video of how to complete this project. (available soon)
Included in the kit:
Prepared arches with looped ends (30pcs)
Your choice of 3 beaded ring styles (2 pcs)
22 gauge banding wire (10pcs)
Optional Add-On: 5'' craft pliers for assembly (1pcs)
Meraki Sphere sticker
Pre Order Here | Pre-order exclusive price $24.99 (valid until April 16th)
#First Fidget Flower DIY Kit#Stimblr#DIY project#Craft Project#How It's Made#Mother's Day Gift#Home Craft Projects#Fidget Bloom#Make Your Own Jewelry#pre order
153 notes
·
View notes
Text
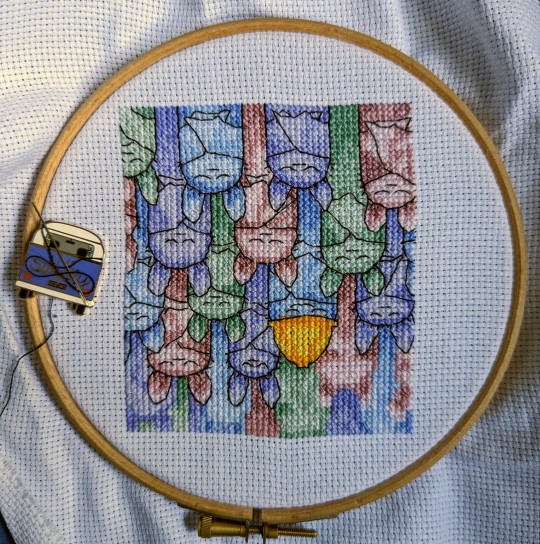
The hubris of not looking at the pattern and the humbling ordeal of fucking it up
215 notes
·
View notes
Text
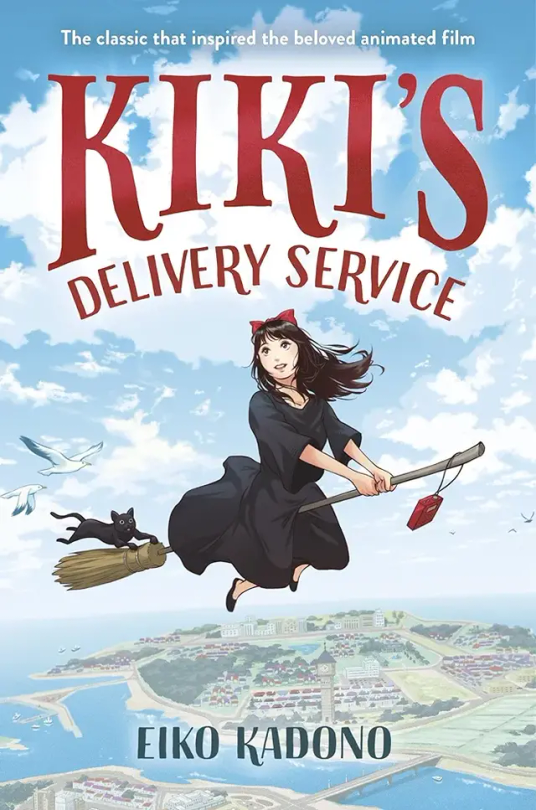
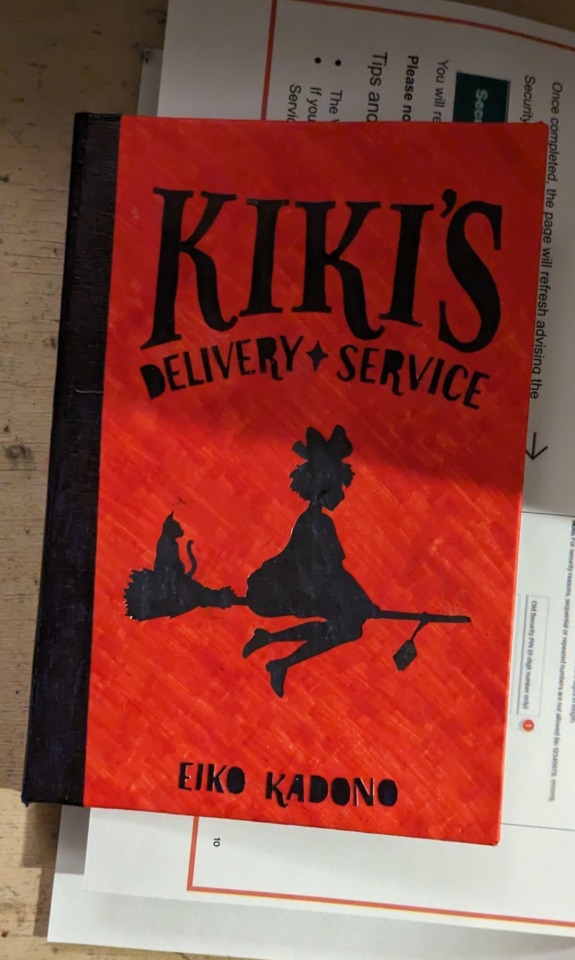
I completely forgot I could post craft stuff so here's this book rebinding I did like a month ago:
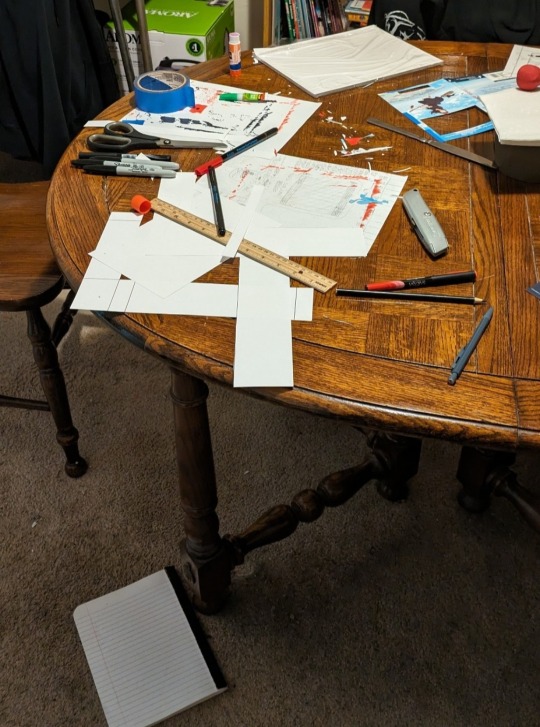
also the aftermath:
and the tutorial I used is here
I only used parts of it tho. I didn't feel like making an actual spine so I used painters tape and sharpie. I also ran out of white glue a quarter of the way through so for most of it I ended up using a gluestick and superglue. worked out nicely tho because then I could keep working without having to take breaks waiting for glue to dry. the cover isn't printed like in the tutorial either. it's layers of marker colored cardstock over a cover I cut off of an old school notebook (the one on the floor). I drew and cut out the silhouette of kiki myself. I also liked the lettering in the original cover so I cut those out too and glued them on. I also cut out eiko kadonos author picture, glued it to the back, and rewrote the "about the author" bit under it. the inside of the covers is black to match the spine and lettering.
all in all I don't think I did too bad for my first try at bookbinding. with materials I had at home no less.
it took about 10 hours in total not including weighing it down overnight
#I may or may not anger someone with this post#sorry in advance#bookbinding#kiki's delivery service#eiko kadono#craft project#studio ghibli#hayao miyazaki
12 notes
·
View notes
Text
Day 13
"Look at it, it's freakin' bats. I love Halloween'
The Pessimist by Peter Underhill : Heritage Crafts.
40 notes
·
View notes
Text
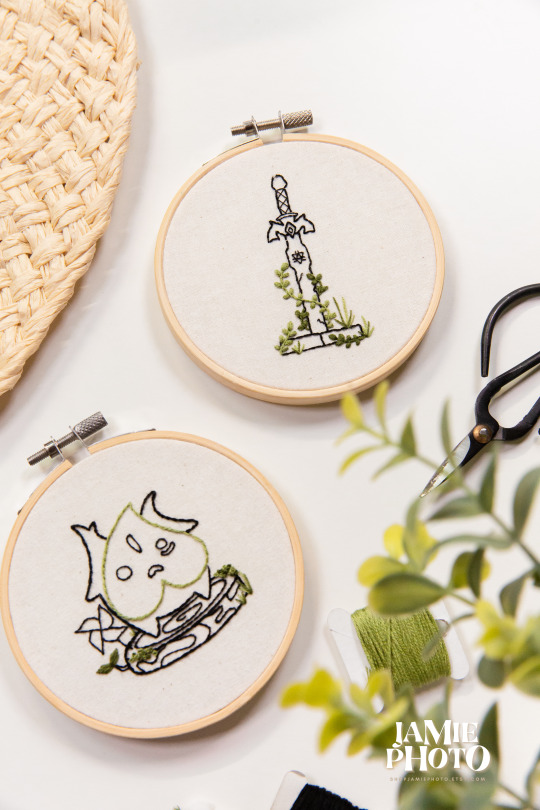

#Hand embroidery pattern#Legend of Zelda#Koroks#Master Sword#Video game inspired#Hyrule#Triforce#Hero's journey#Adventure#Fantasy#Gaming decor#Whimsical#Artistic#Home decor#Craft project#Gaming enthusiasts#Stitching#Thread#Needlework#DIY crafts#Embroidery design#Gaming nostalgia#Nintendo#Fan art#Charming#Heroic symbols#Hero of Time#Triforce of Power#Wisdom#and Courage
30 notes
·
View notes
Text
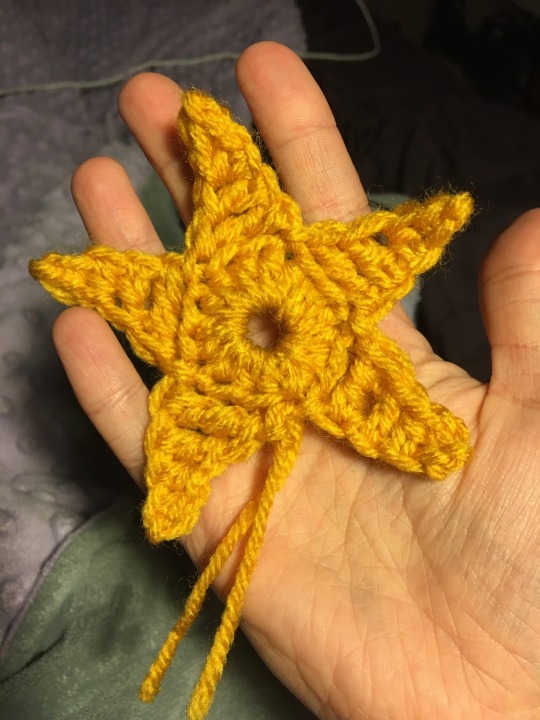
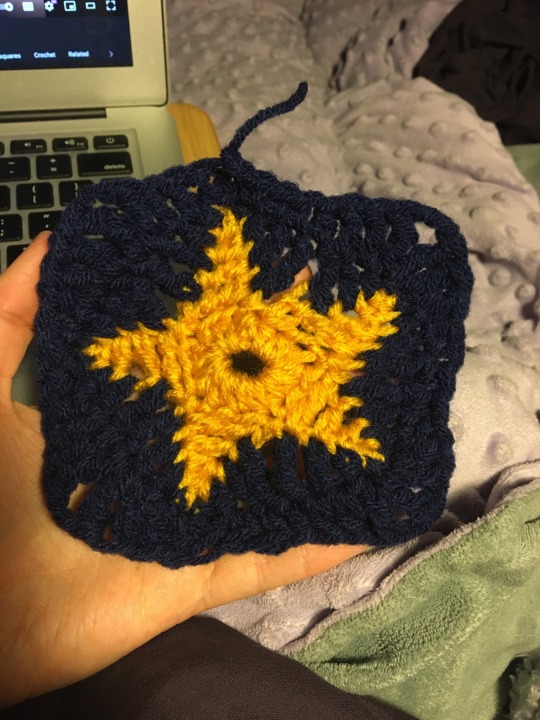

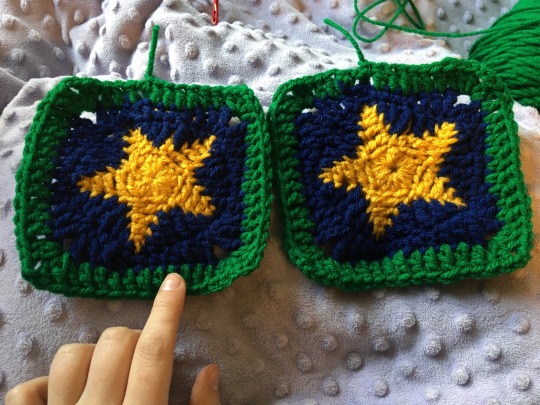


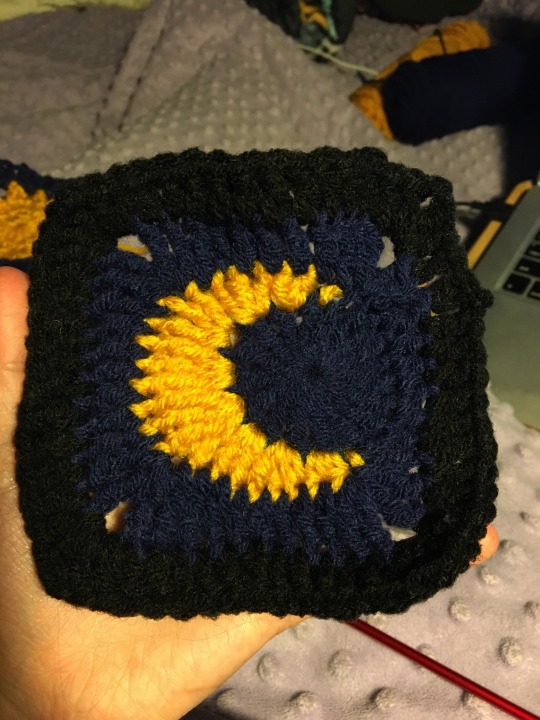
come with me on my journey to make mock-ups for my eventual celestial blanket project! my first official crochet project. star pattern video tutorial here ⭐️
i’m not gonna say it taught me how to crochet but it taught me the names and kinds of stitches (so it basically taught me to crochet). i’ve basically never done anything other than a single crochet stitch in a circle before
thank you @yellow-rags for being my crochet guiding light ☀️ listening to all my kvetching and talking stuff out just to realize i answered my own question
#crochet#crochet project#celestial granny squares#crochet progress#craft project#new project#blue rambles#my crochet#i guess?#my crafts#more like#first crochet#first crochet project
57 notes
·
View notes
Text
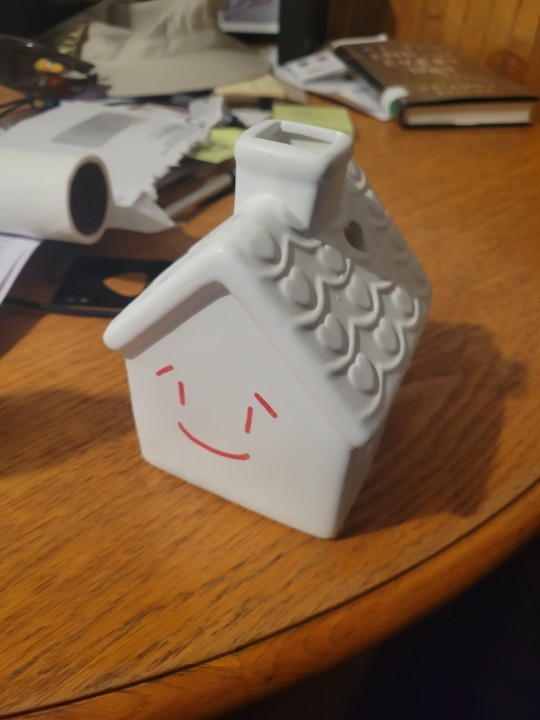
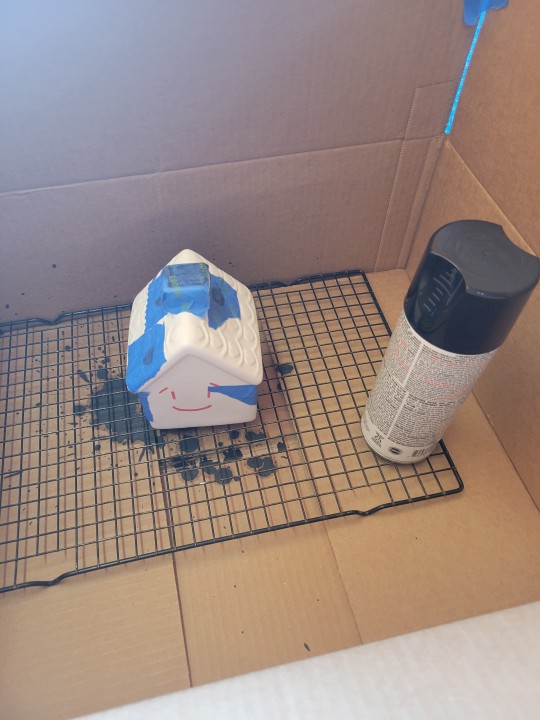
Here's the before and after of my Welcome Home project...Home!
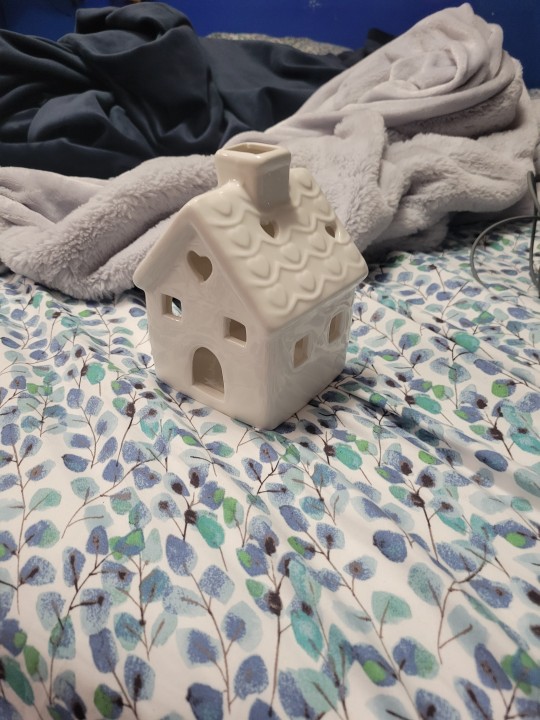
I found this at the thrift store. It's like it was...calling out to me. "Make me into something!" So I did

The primer.
The paint pens.
The interior.

First coat of mod podge.

Final coats of mod podge.
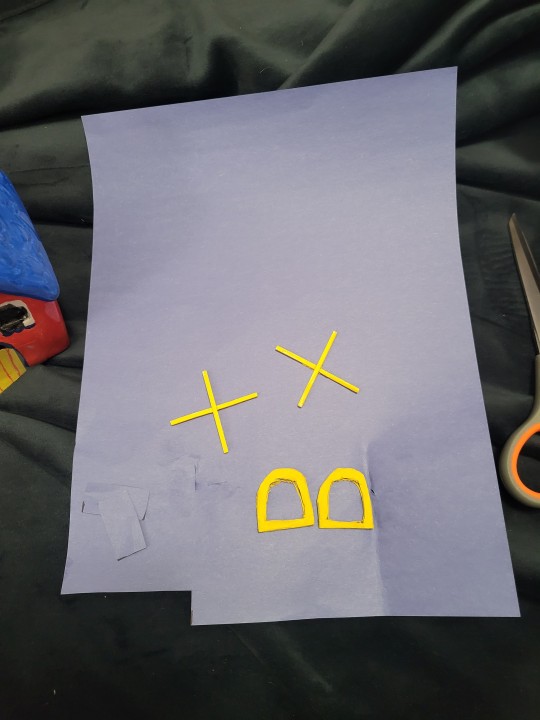
The window frames.

The finished project! Im so happy with how it turned out!
#welcome home#home#ceramics#paint#matchsticks#cardboard#construction paper#glue#tealight holder#whenmywallyplusharrives#hewillhaveafriend#:)#craft project#tape#tea light candles
15 notes
·
View notes
Text
A lot of cons I go to have a trinket trading economy to them, and it’s really fun. I’m not artsy in the sticker design way but @saphoblin made a tutorial that they shared with me to make little fairy bottles. I bought a bunch of little bottles at the dollar store and sat down with a box of beads I’ve had since 2009 and a strip of fancy ribbon that I don’t remember where it came from.i had stick on rhinestone hearts too, for some reason, so a lot of this was just stuff I had. I opted not to put loops on the corks.
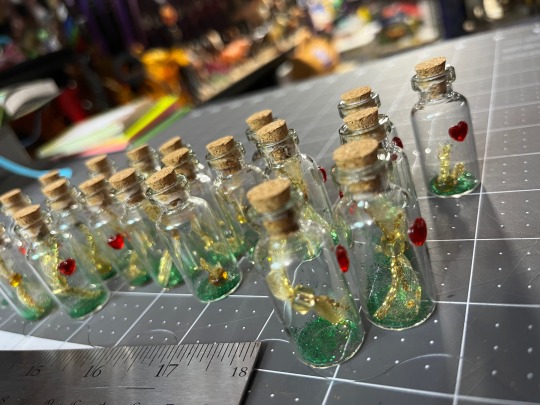
I have 21 of them and I don’t think I’ll have time to make more. They didn’t take much time doing them in a batch. I might get some different color beads, but I like how glittery these came out
9 notes
·
View notes
Text


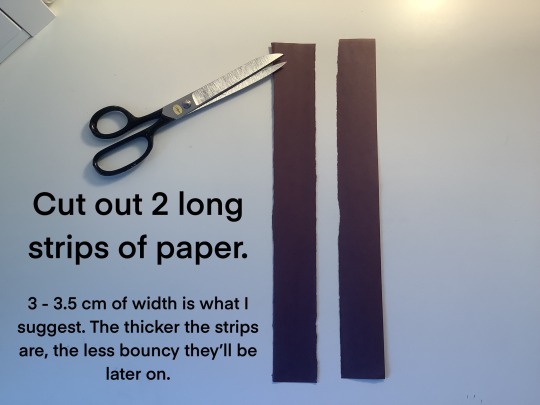


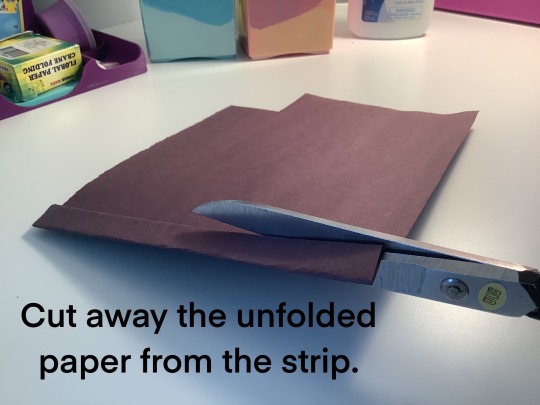
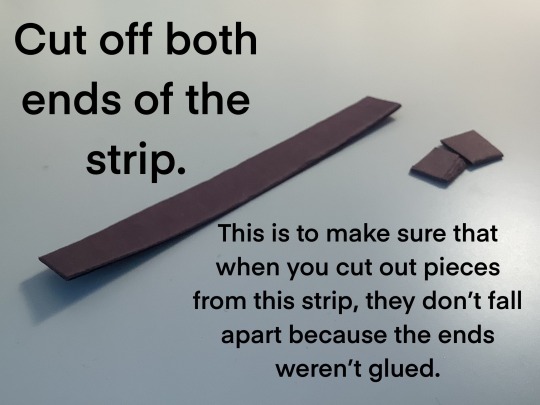


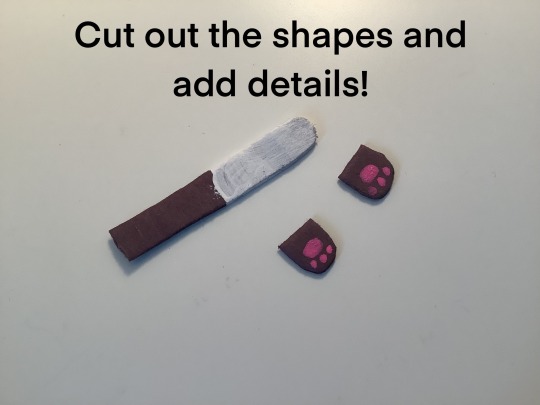

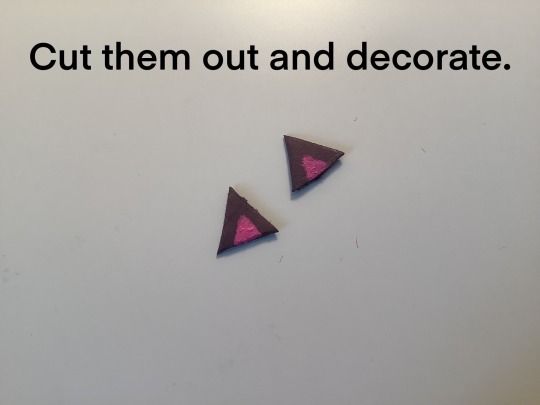

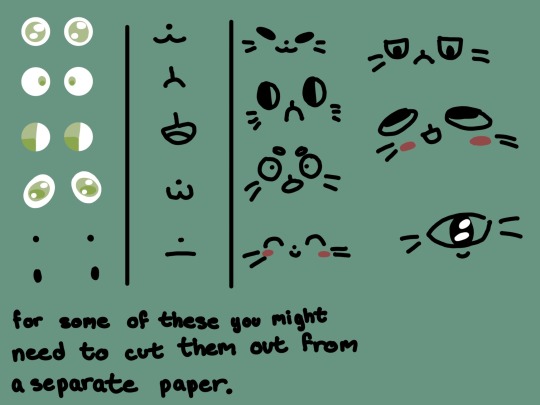
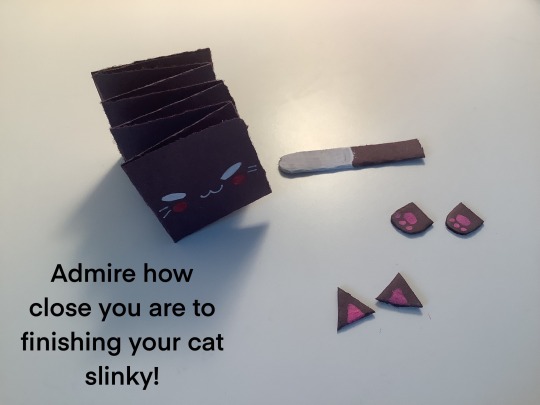


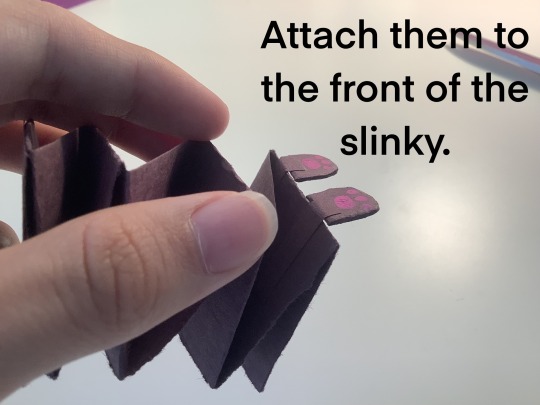
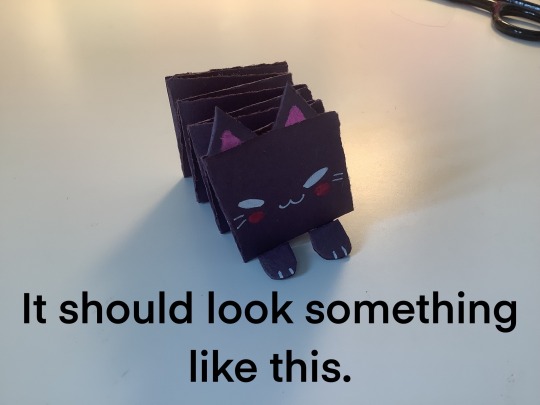


How to make slinky cats ‼️
I’ve also posted this on scratch.
50 notes
·
View notes
Text

The efforts I'm going to just to have all the World Grand Prix racers
9 notes
·
View notes
Text
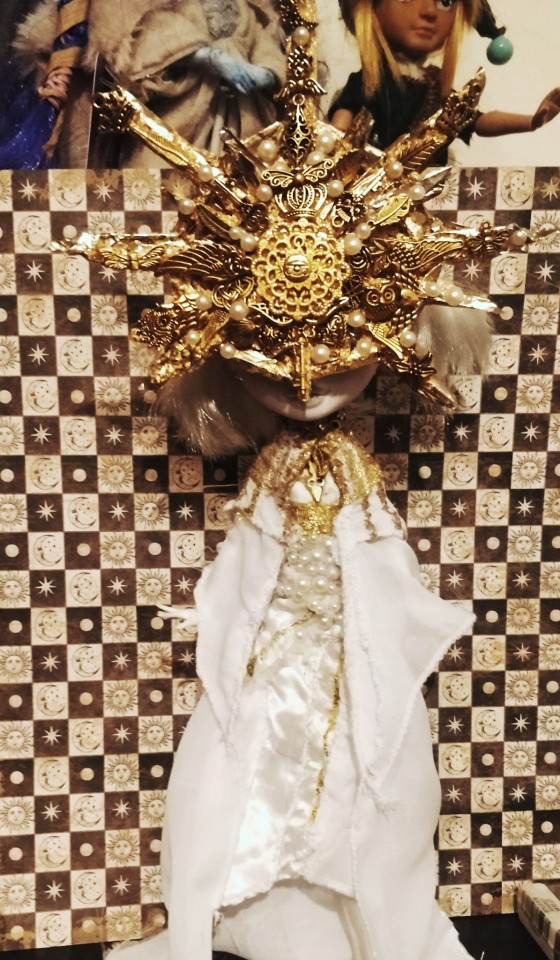
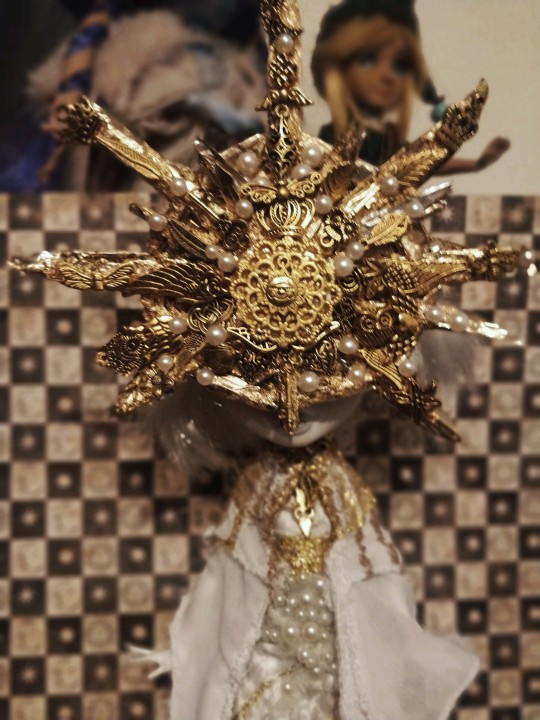
Progress on the OOAK gwyndolin doll
Just waiting for the snakes to arrive so I can attach them!
10 notes
·
View notes
Text
Stupid but possibly maybe probably not genius idea I just had: stuffed animal version of a balloon animal.
I've seen a crotched/knitted version of it around where they make, like, the sausage link looking string of little tubes stuffed with batting connected with narrow sections, make the tubes correspond with how long you need each "body part" to be, and then twist it together like a real balloon animal
BUT
Sewed instead.
Again, this is probably a terrible idea and I'd have no idea how to feasibly pull it off in reality (would I be able to make the thin connecting bits fabric sewed into a tight tube connected to the main bigger tube structure or would it have to be a different material like string or yarn attached to the end of the main tube? How to structure the pattern to begin with and would I be able to pull off maybe making it one long ass piece sewed into a tube of varying thicknesses? What fuckin fabric do I even use for this??? etc etc, you get the picture)
If anyone has any input it would be appreciated otherwise it's the very time consuming and expensive option of trial and error, I'm gonna do some searching myself and see if someone else has come up with a version of this that doesn't suck
#the cat in the purple pants chat#crafting#sewing#project idea#craft ideas#sewing ideas#input welcome#sewing project#craft project
13 notes
·
View notes
Text
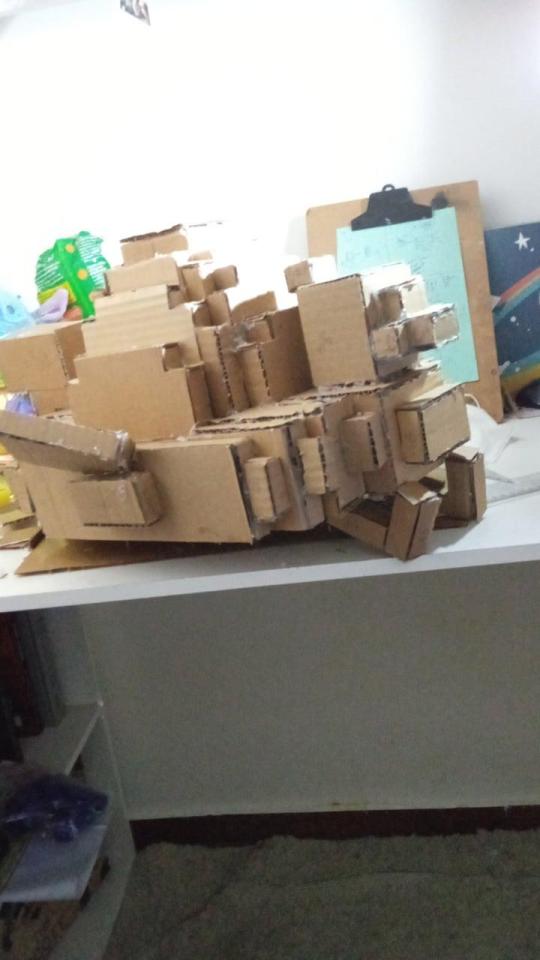

I'm making a life-size Chayanne out of cardboard! Dog for scale
#cardboard#qsmp eggs#qsmp#qsmp chayanne#chayanne the egg#chayanne fanart#cardboard art#craft project
11 notes
·
View notes
Text

Day 17
Happy Saturday, and it is done. I've framed it already because it is part of a project I have been doing on and off. I've already done 3 others of this style and will be starting another one soon. I will eventually show off what I have been doing with them.
The Pessimist by Peter Underhill : Heritage Crafts.
12 notes
·
View notes
Last Seen Blogs

knuckle
管他熙熙攘攘阳关道, 我偏要一条独木桥走到黑

candy-skullz
British people

mykarmas
MyKarmas

vcrp
VAGABOND CODE

perfectbabes24
Perfect Babes