#3 Piece plier set online
Text
Buy Wire Cutting Pliers - Groz USA
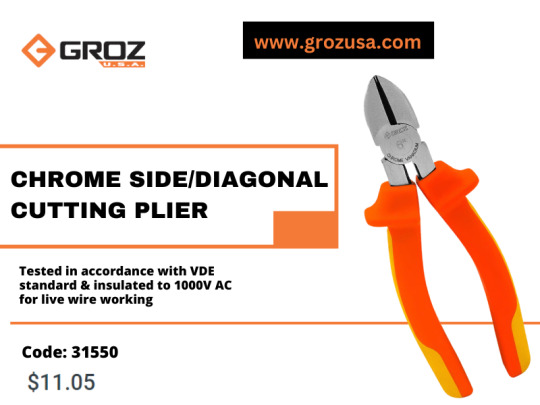
Our chrome side/diagonal cutting plier in 6 or 7 inch is tested in accordance with VDE standard & insulated to 1000v ac for live wire working and has Induction hardened cutting edges (52-60 HRC) for cutting soft, medium and hard wires. Wire Cutting Pliers individually forged, fully hardened & tempered. Buy now at very resonable price of $11.05!
0 notes
Text
Tips to Create Unique Custom Jewelry
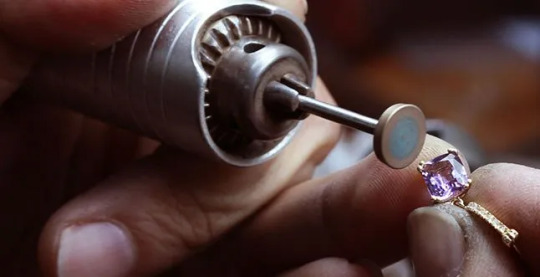
If you’re looking to create something truly unique and special, consider crafting your custom jewelry. Whether you’re making a necklace, bracelet, or pair of earrings, custom jewelry is a great way to express yourself and make something that nobody else has. Read on for some tips on how to craft custom jewelry pieces that are truly one-of-a-kind.
1) Gather Your Supplies
Before starting any project, it’s important to have all the necessary supplies on hand. Make sure you have all the materials and tools you need to create your piece of jewelry before you begin. This includes wire cutters and pliers if you plan on using metal wires; beads, charms, and other embellishments; and string or cord for threading elements onto your piece. It also helps to have some graph paper or sketchbook handy so that you can draw out your design before transferring it into reality.
2) Start With A Design Concept
Once you have all of your supplies gathered, it’s time to start designing! Begin by brainstorming ideas in a sketchbook or on graph paper. Think about what colors, shapes, textures and materials best represent the look and feel that you want for your piece of jewelry. Consider the scale of your design—are the elements large or small? Do they fit together well? Once you’ve settled upon a concept that works for you, start transferring it into reality by gathering the appropriate materials from your supply stash.
3) Create Your Piece Of Jewelry
Assemble each element by your design concept until all the pieces are complete. Start with larger components first such as charms or beads before adding more delicate details like chains or ribbons last. Take breaks between each step to review how everything looks together and make adjustments if needed until satisfaction is achieved! When done properly this process should be enjoyable rather than frantic; take as much time as needed until finished with perfect results!
4) Finish & Wear Your Custom Jewelry
Once your custom jewelry is complete, it’s time to show it off! This could be as simple as wearing it out for a night on the town or taking photos and posting them online. Whichever route you choose, take pride in knowing that you have created something truly unique—a piece of jewelry that nobody else has! Enjoy your one-of-a-kind creation and don’t be afraid to come up with new ideas for future designs.
5) Repurpose Old Jewelry
If you’re looking for a creative way to repurpose old jewelry, consider customizing it! This is a great way to give life to pieces of jewelry that no longer fit your style. You can take apart existing pieces and use the components to create something new and unique, or create an entirely new piece from scratch. This is also a great way to save money on jewelry supplies, as you can often use existing materials without having to buy new ones.
Conclusion:
Creating custom jewelry can be an incredibly rewarding experience – not only are you able to express yourself through art but also make something truly unique that nobody else will ever possess! Craftsmanship itself takes practice however there's no better way than trial and error when learning new skill sets – so don't be afraid to experiment with different techniques & materials until achieving desired results! Use these tips from Gold Refinery when crafting your next masterpiece and show off your one-of-a-kind creation with pride!
0 notes
Text
youtube
Watch the American Climate Leadership Awards 2024 now: https://youtu.be/bWiW4Rp8vF0?feature=shared
The American Climate Leadership Awards 2024 broadcast recording is now available on ecoAmerica's YouTube channel for viewers to be inspired by active climate leaders. Watch to find out which finalist received the $50,000 grand prize! Hosted by Vanessa Hauc and featuring Bill McKibben and Katharine Hayhoe!
#ACLA24#ACLA24Leaders#youtube#youtube video#climate leaders#climate solutions#climate action#climate and environment#climate#climate change#climate and health#climate blog#climate justice#climate news#weather and climate#environmental news#environment#environmental awareness#environment and health#environmental#environmental issues#environmental justice#environment protection#environmental health#Youtube
16K notes
·
View notes
Text
Realistic!Hannibal Lector the murder artist:
- making a 3am run to Walmart to see if they have a specific gauge of wire because hobby lobby and Home Depot are closed and he ran out in the middle of a murder tableau
- having to rewind an obscure DIY YouTube video for the umpteenth time to try and learn an obscure practical art skill on the fly because the janitor is due to discover this crime scene in forty minutes and he forgot to brush up on rope pulley installing before hand and this drywall is not going to be able to support a full grown man if he does it wrong
- postponing a murder until spring because no you literally cannot buy that specific kind of perfectly symbolic plant for your murder shrine for love nor money in the middle of November so stop harassing all the poor florists online for it
- yes he has favorite weapons but he also has a favorite set of needle nose pliers he lovingly keeps strapped to his ankle at all times
- leaving the finished scene then coming back to fiddle with one last detail before leaving again. Then coming back to fiddle with one more detail. Okay just one more detail. Okay just one more more detail-
- sulking that the impulsive rush job tableau he spent forty minutes on has gotten tons more press and chatter and fame than the one he spent weeks planning.
- often invents reasons to murder just so he can try out a new niche interest he found on Pinterest because where else is he going to get to try this new origami/Shibari/hat making/basket weaving trick, clearly an entire new project is the only way.
- has so many Pinterest boards. Like SO many. Only actually uses like 3% of his pins.
- has had to call off a killing last minute because the fedex estimated shipping date for that specific crafting material was inaccurate. (He kills the fedex man not the person he purchased it from because he supports small businesses and understands they have no control over those kinds of things.)
- has drawers and drawers of twine and wire and types of glues and tools ect that he keeps acquiring that he swears he’ll need someday and can’t quite bring himself to throw away.
- the majority of the injuries he sustains are not from psychopath knife fights but from having to haul massive equipment and pieces into place all by himself in tiny windows of time. He’s jacked because of hauling corpses and trees and massive sheets of glass and power tools in the dead of night without making a sound, not from actual murders or anything.
- is constantly trying to figure out a way to hire art students to assist in set ups that wouldn’t necessitate additional murder cleanup after. There was one time he came across and recruited a group of eight stage crew theatre majors getting high on a campus once and they were delightfully helpful in rigging a five corpse sculpture they had no memory of in the morning but recreating that kind of safe help is ultimately more work and risk than its worth.
#Hannibal#Hannibal lector#I would love a comedy style behind the scenes Hannibal where he’s at the self checkout in his plastic suit buying duct tape at 2am#and the twenty something night shift worker doesn’t even bat an eye#show me what’s in Hannibal’s etsy cart you cowards
92 notes
·
View notes
Text
7 Best Porcelain Tile Drill Bits Reviews 2022
These three forms of tile typically share one common characteristic — glazing. Ok, admittedly, you can get unglazed ceramics and raw clay quarry tiles, but these are only found in vintage homes or in houses for people going for a retro aesthetic. It’s the ultimate challenge that’s perplexed and confounded DIYers for eons — how to drill a hole in tile without wrecking it.
I even sold one of the 3.0Ah with the more powerful cells because I didn’t like the size. I believe in all the technology involved, but, where are they taking it, and why? Is this going to be the way of all their batteries from now on?
Drill Bits
If you are hanging something substantial, like a bathroom cabinet, it might be better to wait 48 hours to be sure the tiles are set.
I know you didn’t come here for a physics lesson — but it’s important.
Don’t make the mistake of believing that going full-speed is more effective.
Thirdly, you will be working at a high level — so ideally utilize a cordless drill to prevent mains-cable hazards.
The heat produced from the friction can be quite intense, and caution is required.
Own an Ace Store Your ultimate power tool for business success. Free delivery from store with qualifying online purchases of $50 or more. Ace welcomes your feedback, comments, and suggestions regarding the Beta Test Program and potential improvements to the Beta Test Program (collectively, "Feedback"). Ace may use such Feedback, without restriction, to improve or modify the Beta Test Program and Ace’s other products and services. You agree that Ace is under no duty to use your Feedback or keep your Feedback confidential. In no event will Free Delivery benefits be available to you if reside outside the delivery service area of a Participating Beta Test Program Retailer.
One of the first things you need to pay attention to if you want to learn how to drill through tile is the type of tile you are working with. If you know the characteristics of the material you are trying to bore through, then you will have a better understanding of the size of the task at hand. All HART 20V Power Tool and Lawn & Garden products are covered by a 3-year limited warranty. All HART 40V Outdoor Tools are covered by a 5-year limited warranty. All HART 40V batteries are covered by 3-year limited warranty. Hand Tools (tape measures, hammers, pliers, etc.) are covered by a limited lifetime warranty.
Put a 2”x2” piece of masking tape in an ‘X’ pattern over the area where you want to drill. The masking tape will prevent the drill bit from drifting or walking off the desired hole location. Drilling through the tile with a carbide- or diamond-tipped bit is beneficial.
If you’re working on something and expect to fully drain a 5Ah battery in a short time, this isn’t the best battery for the task. Oiling wood floors helps to enhance the overall appearance of its surface, as well as adding protection and nourishment. Clear maintenance oils are available in both matt and gloss finishes to restore the original look and feel of the flooring. For something a little different, a colored oil tint can completely transform the planks to create a whole new look. By sanding down the top layer, you’re left with a new surface that can be re-finished to create a new-looking floor. The strain on the hinges has worn and enlarged the existing screw holes.
Large Bit Holder, Can Store Up To 400 Bits
Some saw needs pressure, some needs low pressure, whereas some saw is sensitive to pressure. Diamond tip bit are costly than the carbide one, almost the double. Over exceeding the pressure is the very reason behind such an incident. Exceeding the pressure while the spinning isn’t that immediate causes greater friction that stops the bit. You are going to aim at larger holes of extensive work within minutes.
Top 5 Picks: Best Ceramic Drill Bit For Ceramic Tile
A total of 10 different sizes available that expands the usability area of the product. Once the hole is started to form, change your 45-degree angle into a vertical position. The stuff is a quick one when you start drilling with a small incision resistance.
As you suggested, some bits actually like it when you move the drill in an orbital fashion. You are running the drill too fast, that ruins the bit edge so it doesn't cut. Non Coring Bit for granite and other types of stone and material Model Diameter Height DBX5 5mm(1/5") 10mm DBX6 6mm(1/4") 10mm DBX8 8mm... Thin Wall Core Drill Bit for smooth chip free coring of porcelain, natural stone, engineered stone, granite, and more Model Diameter Width ... Lubricating the area to be drilled with water to avoid friction and heat buildup and possible scorching and tile breakage.
Allowing the bit to cool will increase the working life of your tools and decrease the risk of the tile cracking. Be careful that you don’t get water in your drill motor as this will spell disaster for your power tool. Before you start drilling, put on your goggles, gloves, and face mask. Also, now would be a good time to load your drill bit into the drill.
2 notes
·
View notes
Text
A Bum Steer
Parts arrived! Time to put the steering in order on Sacrebleu! First, let’s get all the equipment out. Hydraulic jack, jack stands, tool cart. Pull Sacrebleu in front of the garage, line the jack up on the underside of the engine cradle and begin lifting the front end into the air. Oops, I don’t have the jack centered well enough, Sacrebleu is rocking a little three wheel motion. That’s not going to work. I lower the jack slowly, and try again. Ok, even with the mechanical advantage of the long lever, AND the hydraulic advantage, Sacrebleu is HEAVY! This time goes better, and both wheels slowly leave the ground. The jack shifts, rolling forward further under the car, as the pad of the jack pulls the frame along with each pump raising the car. Finally there’s enough clearance to get jack stands under the A arms, carefully positioning, then lowering the weight onto the stands. I leave the jack in place with some tension on it, as a safety measure. Now’s the time to capture video of the slop between the center link and the pitman arm, after a few false starts, I get enough video to create a gif with.

A quick examination of the fasteners leads me to go back in the garage and come out with the tools I didn’t grab before. A pair of needle nose pliers for the cotter pins through the castle nuts, a set of 3/8″ drive semi-deep impact sockets, and an electric 3/8″ drive ratchet. I start with the pitman arm, using the pliers to pry the cotter pin off the nut before straightening the pin and pulling it back through the nut. I try to get the ratchet on the nut, but there’s not enough room. I go to the tool cart, and grab a flex head 3/8″ drive ratchet, and with a bit of oomph, the nut comes loose. I repeat the process three more times, at the idler arm, and both inner tie rod ends. All the fasteners are off, the only thing holding the center link in now is the friction of the press fit of the tapered shafts for the link itself and the inner tie rod ends. I experimentally give the ends of the tie rod end a few taps with a maul, with little success. I hit it a little harder, and think I’m getting somewhere. I go after the end of it with a will, and end up having made no progress, and my muscles are exhausted. I experiment on the other tie rod end, with a similar lack of success. I pause, think for a moment, and with a bit of dread, try to thread a castle nut onto the inner tie rod…nope. Ain’t happenin’, bro. I’ve mushroomed them, and am going to have to replace the tie rod ends on both sides. Greaaaaat. This still doesn’t solve how I’m going to get the center link loose from the pitman arm, idler arm, and inner tie rod ends. The only thing that comes to mind is buying a pickle fork. It’s a heavy, drop-forged tool that splits the press fit pieces together with judicious application of a maul. Ok, fine. Off to the auto parts store I go, it’s a mile up the road. First, I wash up and dust off, brushing as much of the dirt and dust from my clothes before hopping in the car. That chore finished, I find myself standing in the parts store, facing the counter, being helped by an associate. Oh! The gas cap on Sacrebleu needs to be replaced, I can order one while I’m here. While doing that, I notice that the parts store has a tool rental program, where you “buy” the tool, and if you return it within 48 hours, they refund the money. The pickle fork is part of their tool loan program, so I buy/borrow it and head home. Once I’m home, I waste no time crawling back under Sacrebleu, and in less than 5 minutes, I have the center link freed from both the pitman and idler arms. That just leaves the inner tie rod ends. I position the pickle fork, but there’s no room to get any real force on the end of the fork. I suppose it would be fair to say I’m in a bit of a pickle. A few moments of consideration, and I’m carefully lowering the jack, bringing all the weight of the front end of the car onto the jack stands. The stands take the load, I take the jack and position the lifting pad under the pickle fork end. Then, I start pumping the jack, slowly pressing it against the end of the fork, letting the weight of the front end bear on the fork and the joint. Suddenly, the parts come loose, with a bit of a jump and a jerk. Success! Triumph! Only one more inner tie rod end remains to be separated, and the center link will be free! I manhandle the jack over to the other side, line up the fork, and repeat the process. Oho, this one isn’t going as smoothly as the first, and I end up lifting the front end of the car BY the fork AT the joint, OFF the jack stand. Yeah, that’s not safe. I reposition, and try again, with the same result, but with the added bonus of Sacrebleu trying to shift off the jack stand laterally! Ok, what about hitting the joint while it’s under tension? Sure, why not? What could go wrong with hitting the end of the tie rod end with a thousand or more pounds bearing on it. Um….yeah, no. I lower the jack, free the fork, and give the tie rod end stud a few good whacks. When I get everything repositioned, the stud pops free of the center link, and the link is now loose at all four points. I pull the tie rod end studs free, leaving the center link held in place by the idler and pitman arms. A bit more wrangling, a bit of persuasion with the maul, and the center link is free!
Installation is the reverse of removal. (Again, iykyk)
Hanging the new center link from the pitman and idler arm is easy, I run the castle nuts down just to hold it in place. I’m done for the evening, because I need inner tie rod ends. This is a good time to take the pickle fork back to the parts store, and see about ordering parts. Checking their online portal, it shows the value line (Read: Cheap) steering components available next day, and the quality ones not available next day. Driving back to the parts store with the tool and receipt, I work with the person at the counter, order a new locking gas cap, and the value line inner tie rod ends. That’s it for the day, there’s nothing more to be done.
*12 hours later*
I call the shop doing the work and speak with H, he recommends replacing the rest of the steering components, adjusting sleeves and outer tie rod ends. I decide to get the adjusting sleeves and leave the outer tie rod ends alone, that way I don’t have to borrow the pickle fork again. Midday, I pick up the parts from a store near work, top quality stuff from my preferred parts company. The company discount saves me $45, about 35% off retail. Nice. The remainder of the work day passes, soon I find myself home, new parts ready to be installed. I still need to remove the old inner tie rod ends and adjusting sleeves, and the passenger side seems a bit resistant to coming free, but with a bit of leverage, working smarter, not harder, I free the inner tie rod end and adjusting sleeve all as one assembly. The new hardware is laid out, ready to be installed, I take a minute to get some anti-seize lubricant on the threads of the sleeves, to help prevent galling. By some miracle, anti-seize ends up only on the threads. I run the new tie rod end to the sleeve, match it up for approximate length to the one I just removed, tighten the clamp nut, and begin installing it in the car, threading the adjusting sleeve onto the outer tie rod end, down to where the previous sleeve had been threaded. A little bit of fiddling gets the tie rod end stud lined up with the center link, and the castle nut is threaded on loosely. Repeat for the driver’s side, and it’s time to torque to spec. Climbing from under the car, I go in the house, wash up, and grab the factory chassis service manual for the car. A few minutes later, I have the torque specs for the fasteners. 30-50lb-ft for all but the pitman arm, 30-40lb-ft for the pitman arm. I decide to go 35lb-ft for the pitman arm and 40lb-ft for the rest. Applying the torque wrench, I go around and tighten everything to spec, then check it. Once everything is torqued, I only have to tighten one castle nut to line up the groove for the cotter pin, sweet! I decide to check the steering, but this time, there’s NO movement. I can’t shift anything, everything is right and tight! For the last time, I climb out from under the car, clear all the tools, and position the jack on the engine cradle/crossmember, this time to lift it off the jack stands. The front end rises, I snag the jack stands, pulling them clear. Carefully, watching the car closely, I open the pressure relief valve on the jack, slowly. Sacrebleu returns to all 4 wheels on the ground, and with relief, I pull the jack away. All that’s left is putting away the tools and equipment, and washing up. A non-event, a necessity nonetheless.
The following morning, driving Sacrebleu to the shop, I’m thrilled with the change in steering. Sacrebleu no longer darts as though she’s trying to kill me. Once I arrive at the repair shop, H puts it up on the alignment rack, lubricates all the fittings I forgot to do, sets the steering wheel straight, and pronounces my work good.
#16#sacrebleu#boattail#boat tail#riviera#buickriviera#buick#buick riviera#72 Buick#72Buick#rivierags#72riviera#fastwithclass#70scars#70s cars#gscars#stage1#buick455#bigblockbuick#buickbigblock#3rdgenriviera#3rdgen#steering#centerlink#center link
3 notes
·
View notes
Note
Do you have any advice for getting into keeping rabbits? I was looking into getting a couple for meat production and possibly starting to learn to tan pelts but I don’t want to get confused over all the conflicting info on the internet about wire flooring and such things.
ugh, it’s so frustrating, isn’t it? with pretty much every other animal you can just google “how to raise x” and get tons of good advice, but the rabbit results are dominated by HRS forums that will crucify you for even mentioning breeding, much less meat production.
so here’s some points i’ve learned from experience to help you out:
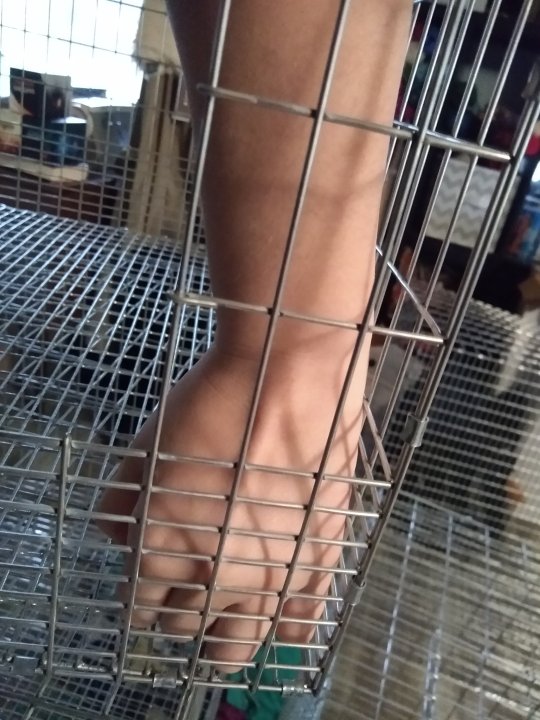
1. wire flooring is not evil. in fact it’s great. it’s clean, it’s sanitary, there’s airflow if you use it in a hutch, and if you do it right you won’t have foot problems (unless you’re raising rex or giant breeds, but even then there’s easy fixes like my lattice mats.)
here’s what you’re looking for: 1″x0.5″ grid 16g - 14g wire. if you order your cages from a manufacturer like Bass Equipment (my preferred cagemaker,) or Klubertanz, this will come standard. if you make your own cages or buy from a feed store, it’s a bit more hit and miss.
make sure the half-inch wires are on top when you build your cages, so the weight is distributed properly:
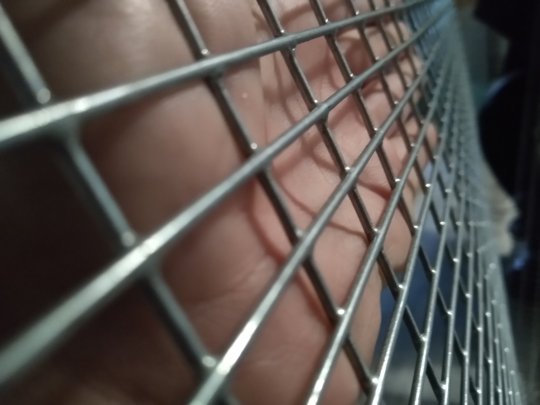
see how the smaller gaps are “on top”?

vs this side. (shoutout to me having like twenty cages all in pieces in my living room to get these nice reference pics ;p)
i also recommend you get your floors galvanized after weld; they’ll last a long longer that way!
–
2. babysaver wire is called that for a reason. babysaver is when there’s a 1x0.5 grid near the bottom of a cage. it’s there to keep kits from falling out of the cage, and helps prevent predators from easily pulling kits out.
this is a cage with babysaver. it does what it’s meant to. i use these for my doe cages, and even if a kit gets dragged out of the nest, as long as i find it in time, it’ll survive because it didn’t roll out and get snatched by something off the ground.
vs one without:
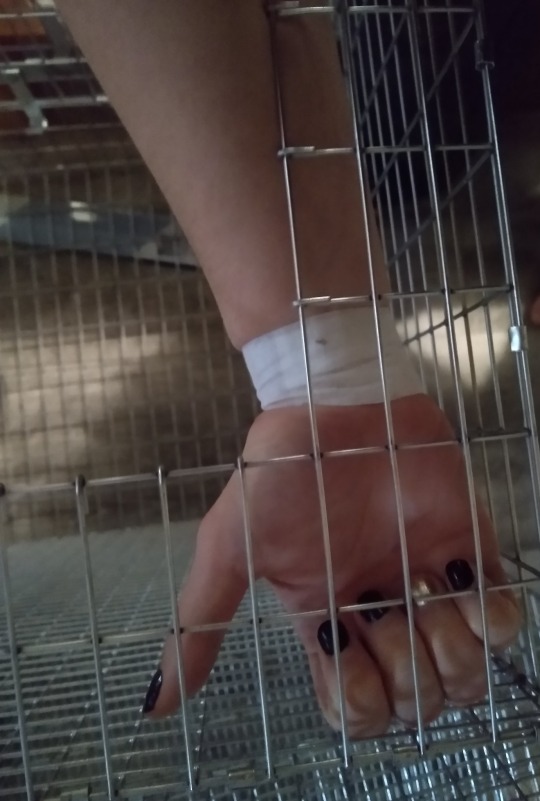
i use these for bucks and my growout pens for older kits. they are cheaper than babysaver cages, but it’s worth the money to keep your babies safe.
–
3. invest in a good pair of j-clip pliers. even if you buy prefab cages, often times they’re cheaply made and you’ll need to fill in gaps so they don’t fall apart so easily. it’s also good to keep them around just because, because after a while the clips can get rusty and fall off, and you’ll need to replace them occasionally.

good on left, not so good on right. the ones on the left cost my about fifteen bucks from my favourite hilariously-named rabbit supply site: Rabbitnipples.com. the ones on the right were like $8 at my local feed store. so a significant markup, but VERY worth it. the good pliers are more comfortable to hold in your hand, and make much nicer/more secure crimps than the cheap ones. i often have to crimp clips twice or more with cheap pliers, because of the way they’re shaped:
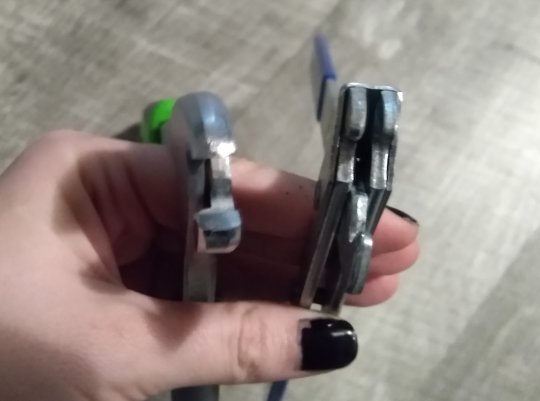
the good pliers have a solid mouth that make a clean loop with no pointy outy bits. and they can double as removers if you mess one up!
this is topical because i lost my good pliers and had to order new ones, and in the meantime i built four cages and my palms are so sore/bruised from the cheap pliers. don’t be like me.
–
4. vets kinda aren’t worth it. one of the things you’ll see on HRS sites is that vets are ABSOLUTELY necessary. i don’t hate vets, but they chronically have no idea how to treat rabbits, often making them worse or causing them to die because they administered a med that’s safe for cats but not rabbits. they also often subscribe to HRS rhetoric that pellets are evil and rabbits should only eat hay and greens, which is…wrong (i’ll get to that in a minute.) if you can find a good vet it may be worth it for one or two rabbits, but once you get into the double-digits, it’s just not worth it. exotics vets are expensive, and i can’t afford $50 just for a consult for thirty rabbits. learn how to treat everyday ailments like sore feet, wounds, abscesses, eye infections, stasis/bloating, and birthing issues on your own. i suggest joining up with a meat rabbit forum (i like rabbittalk.net,) and going through their articles on rabbit medicine and herbology. if i can’t fix it myself, that rabbit is soup. and if a rabbit chronically has health issues, don’t use it as a breeder. bad immune systems/teeth/feet/etc are hereditary.
–
5. things will die. get used to it. with livestock comes deadstock. if you can’t handle animals dying, including newborn babies, or having to euthanize animals (including newborn babies,) don’t get livestock. if you can’t look your food in the eye and thank it for its sacrifices, then don’t get livestock. this is not a place for bleeding hearts.
–
6. don’t breed a new doe by herself. rabbits are running on hormones only for their first litters, and sometimes they mess it up. having an experienced doe kindle alongside her that you can foster to gives the new doe’s kits the best chance of survival in case she doesn’t get it quite right. this ties in with the last point, though - you’re gonna have dead babies. sometimes you have to make the babies dead yourself, because mama screwed up and the foster already has eight of her own. not everyone has a n’rithaa who can nurse nineteen and not break a sweat, and the kindest thing to do is pick the strongest and cull the weaker ones so mama doesn’t have so many to feed.
–
7. feed them pellets until you know what you’re doing. pellets are formulated to be perfect nutrition for rabbits. they are the healthiest option imo, and definitely the easiest. it can take a few tries to find a feed that works for you, but they’re generally not too expensive and if your animals keep weight and make babies, then they’re fine. trying to feed fodder only is expensive, time-consuming, and often ends up with animals not getting enough vitamins that cause bone issues, bloating, and tooth problems. i am 100% convinced this is at least half of the reason why you see a lot of house rabbits that go into stasis a lot and have bad teeth. (The other half is they’re always poorly bred byb rabbits, but that’s another conversation.) fodder can be done well, but unless you really have the time/resources to grow appropriate plants or have a lot of pasture to graze on (and no worms/cocci or other bad things in your soil,) pellets and hay are perfect. especially if you show.
–
8. if you wanna get into tanning, just get a synth tan, and don’t expect fur rabbits to be an ideal meat producer. fur doesn’t prime until the animal is about six months old, and typically you’ll be slaughtering them for meat around 12 or 16 weeks. so if you want to produce fur, either stop caring about the quality of your hides, or get ready to spend more in feed while you grow them to prime. i know it’s popular to use rabbits as a dual-purpose animal, but you need to set expectations lol. so far i’ve found rabbits that are half rex produce really nice furs before “prime” age, but they still take longer to grow out than my meat-specific rabbits. dual purpose really just means “not that great at one or both purposes.”
also just don’t even bother with brain/egg tanning and get you a synth tan like Rittel’s or Trubond. “natural” tans have too much of a learning curve, require smoking to make them waterproof, and the results are subpar. synth tans are cheap, easy, usually safe to put down a train if you’re on city water/toss outside if you’re on septic, and will produce a waterproof skin that’ll last forever.
also alum isn’t a tan. if you get it wet it’ll start rotting again. if you wanna make clothes or rugs, use a real tan. please. i beg of you.
–
9. auto-water systems are godly but don’t waste your money on expensive ones. if you don’t know this, i’m disabled, and i like to make things easy on myself so i’m not having to fill 39458639458 bottles a day. it sucks. auto-water systems are SUPER convenient because you only have to refill the reservoir every few days and keep an eye on the nipples to make sure they aren’t clogged.
the problem is: they leak. all the time. forever. when i first got started i used cheap water nipples from amazon and was annoyed at how often they’d start leaking, or were leaking right out of the package. so i switched to the more expensive Edstrom system that you can order online from places like rabbitnipples.com, bunnyrabbit.com, the bean farm, and bass equipment. problem is, those leaked just as bad, and the edstrom water nipples cost FIVE DOLLARS EACH. when half the nipples leak directly out of the box, i’ve just wasted $20+. at least the ones from amazon are like $20 for a bag of 100. if they’re all gonna leak anyway, at least i won’t go broke having to replace them all.
–
i can’t think of anything else off top my head so i’mma cap it here. i’ve been doing this for five years and learned many many things the hard way so hopefully you won’t have to!
#questions#cecile posts#faq#housing#equipment#this post is so long my neck hurts now from concentrating#foxstew
113 notes
·
View notes
Text
youtube
Watch the 2024 American Climate Leadership Awards for High School Students now: https://youtu.be/5C-bb9PoRLc
The recording is now available on ecoAmerica's YouTube channel for viewers to be inspired by student climate leaders! Join Aishah-Nyeta Brown & Jerome Foster II and be inspired by student climate leaders as we recognize the High School Student finalists. Watch now to find out which student received the $25,000 grand prize and top recognition!
#ACLA24#ACLA24HighSchoolStudents#youtube#youtube video#climate leaders#climate solutions#climate action#climate and environment#climate#climate change#climate and health#climate blog#climate justice#climate news#weather and climate#environmental news#environment#environmental awareness#environment and health#environmental#environmental issues#environmental education#environmental justice#environmental protection#environmental health#high school students#high school#youth#youth of america#school
16K notes
·
View notes
Text
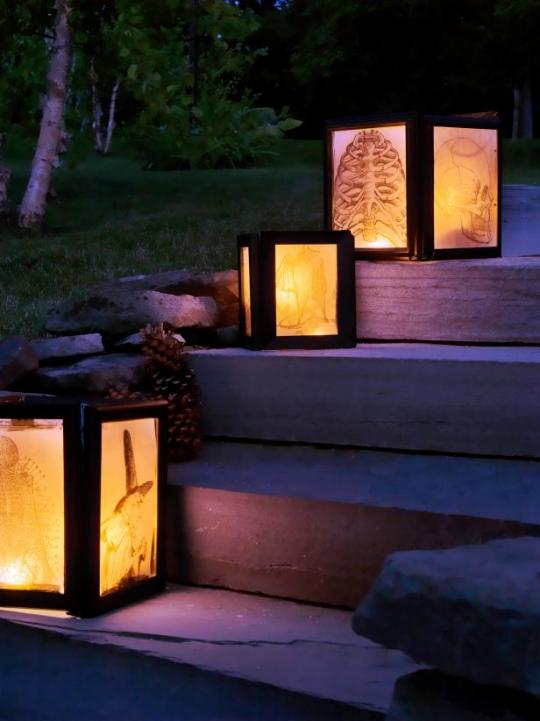
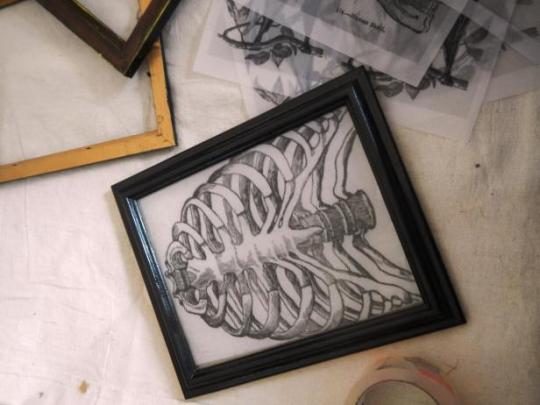
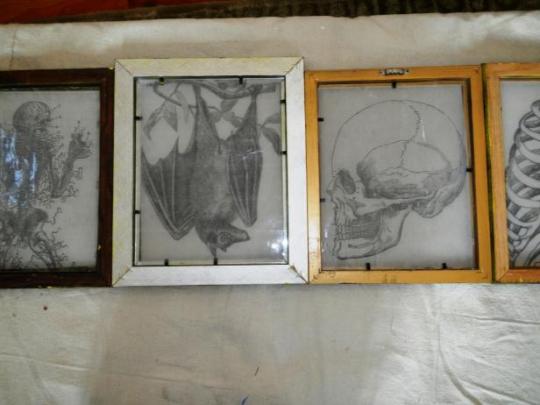
How to Make Halloween Lanterns
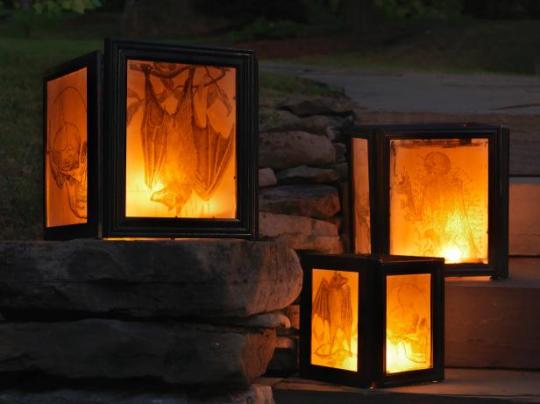
These spooky lanterns cost very little to make. The black-and-white drawings were found online and printed on vellum paper then inserted in secondhand 8" x 10" picture frames. The frames were then fastened together to make a square, and then a votive candle was placed inside.
TOOLS
scissors
flathead screwdriver
pliers
painter's tarp
paintbrush
MATERIALS
picture frames (we used 12 frames to make 3 lanterns)
white vellum paper
clear packing tape
black duct tape
black craft paint
black spray paint (matte)
(3) votive candles
STEP 1
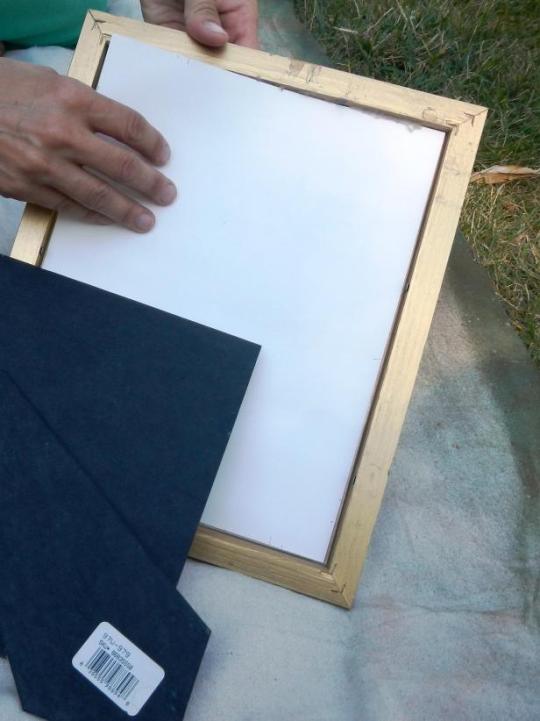
Prep the Frames
For each lantern, use four picture frames that are all the same size. We were lucky to find a bunch of standard-size frames at a resale shop. Discount stores often carry basic frames that will cost just a dollar or two.
Remove the matting and glass from the frame and set aside. Keep the brackets or nails that hold the glass in place.
STEP 2
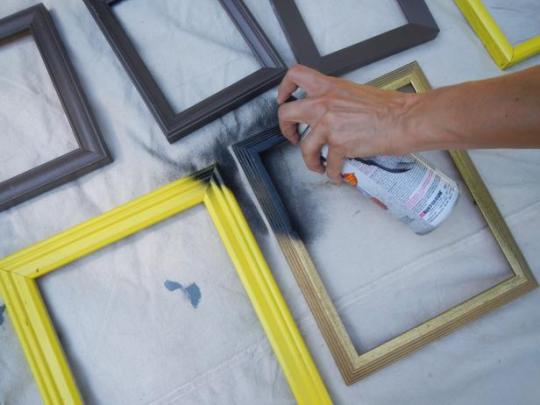
Paint the Frames
Lay the frames out on a tarp and spray them with black spray paint. Let dry and then turn them over to spray the back and sides.
STEP 3
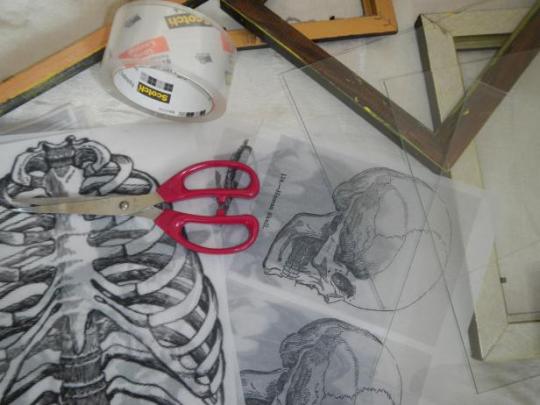
Find Spooky Drawings
Search the internet for vintage-style black-and-white Halloween drawings. We used bats, skeletons, witches and old medical drawings. Size the images accordingly, then print them out on the white vellum paper.
STEP 4
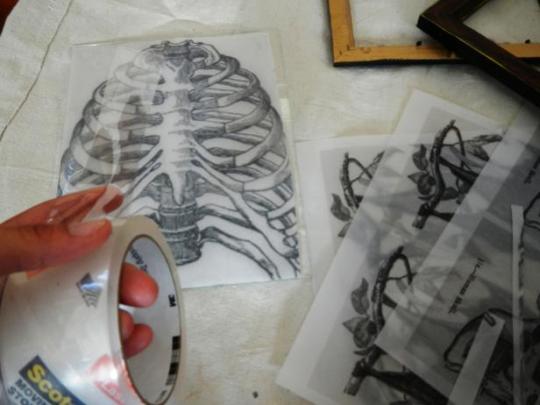
Attach Picture to Glass
Cut the printouts to fit the frame. Place the front of the picture down upon the glass. Cover the back of the paper with the clear packing tape (this way water will not get on the paper and potentially damage it). Lay the packing tape so it overhangs the glass, then fold it over the glass by about 1/4".
STEP 5
Place Picture in Frame
Place the glass and print back into the frame and fold the brackets (or nails) back over to hold it all in place.
STEP 6
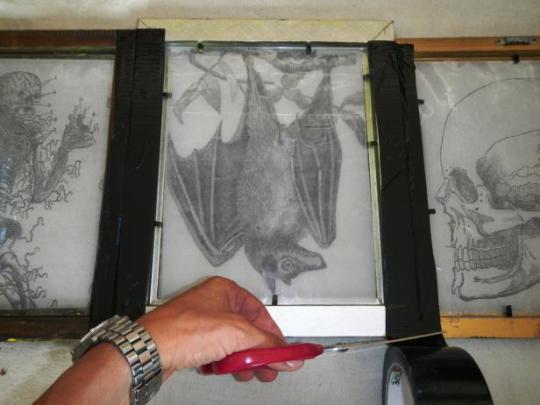
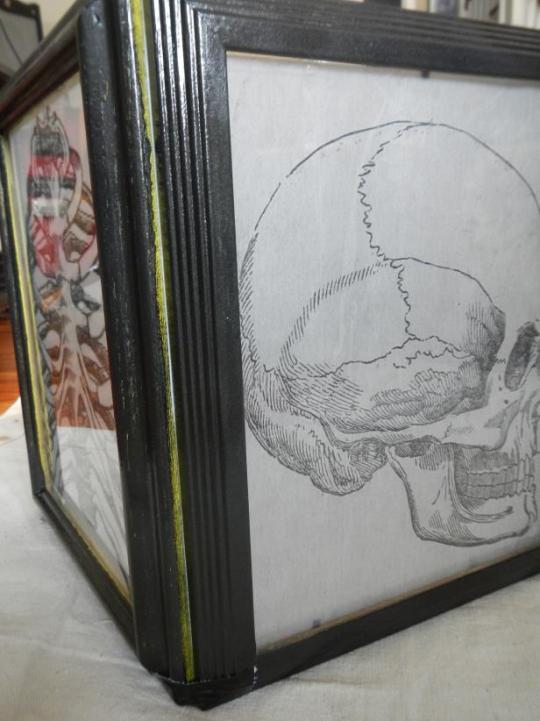
Lay Out the Frames
Lay the four frames down beside each other with the backs facing up (Image 1). Use black tape to secure the edges of the frames together (Image 2). Leave one at the end unattached for the moment. Stand up the frames and put them into a square, then attach the last piece of tape from the inside (Image 3).
STEP 7
Add Candle
Place lantern frame over a candle (battery-operated or standard).
63 notes
·
View notes
Text
TOP 12 PERFECT GIFTS IDEAS FOR 2022 ARMED FORCES DAY

Giving gifts this armed forces day is upon us, and we’ve got the best military present guide for you. Regardless of whether you’re gifting to someone who just lately joined the government, has already recently been serving long, is a veteran, or someone who has not yet linked up with the military but is planning on repeating this soon, here are some acquired presents that are suitable for them.
(1) Watch
Wearing them is more important than length of time in the military, especially being on time. Wrist watches can get pummelled pretty quickly during a call modern day of the durable watch is simply the actual need. Bear in mind, if your service member has a MOS where they are going to into a categorized area, they will not have the potential to wear a watch which has a GPS in it.
(2) Multitool
Some sort of multi-tool is an outstanding practical present for virtually every service associate who at any given time may need to use a screwdriver, scissors, huge pliers, etc. Since multi-tools are utilized for practically anything and quite often they can break or be misplaced. Therefore, if your service new member already has one, developing a backup multi-tool will certainly not be a dreadful idea.
There are many multi-tools online or you can visit a local outdoor shop. The most commonly used multi-tool in the military will be a Leatherman, nevertheless, any multi-tool can get the job done.
(3) Sunglasses
Away in the field, down at the range, or on the drive to work sunglasses build a great practical present. Eye protection is considered very significant in the army, so it’s no problem to spend on a set of sunglasses that are the most effective.
While looking for sunglasses, we recommend sunglasses which have compatible contact lenses, this way they can be used when on the product range as well as off. Your own service members will appreciate being able to look good on and off the range with their new hues.
(4) Good Quality Water Bottle
Hydration is very important, particularly for our service members keeping themselves in ideal condition will mean that they can serve more effectively. Help it become easier for them to want to remain hydrated with a normal water bottle, one present they will definitely use and not return. Beneath are some durable alternatives to drinking normal water bottles.
(5) Military Wood Signage
With your service member moving around a great deal, making anywhere seem to be like home can be tough. Support them and decorate with a piece of alternatives they will love. Whether it’s a selection of hints of where they have offered, already recently been, or a devoted painting set is considered certain to make a statement on their wall surfaces and remind them you will be always considered what they have done with regard to their country. Presently there is a wide range of great wooden signal options on Etsy that you should look over.
(6) Coffee Glass
Every one of us knows you have noticed the tall tale that the government operates on coffees, but it really is no joke. Beginning with long night times makes espresso a real part of any service participant's diet.
Provide the present of energy to your service member that they can make sure to use every day. You will want to be sure you have that durable mug for coffee which can withstand being crashed or with some other elements. Right here are a few of our suggestions for an espresso tumbler that is really as tough as your service member.
(7) Coffee Package
Ensure you get your service member the greatest coffee package present by adding a bag or two of espresso with their seamless wine glass.
There are a lot of Knowledgeable companies roasting together espresso beans that not only provide your service new member with a great mug of dude, but also support some good brings about as well.
(8) Combat Shoes/Boots
One advantage with regards to the government will certainly not be worrying about what you’re starting to wear, or what shoes go best with your outfit. For the most part, your service members wear the same couple of fight boots every solitary day, until they have worn through the feet. Minimize them the next pair of beat boots, they can alternate, at the very least have a ready one that they’ve worn by with those they have now.
You will want to make certain anyone asks what type of start your service new member has on as each department has different rules for what boots their service users should wear.
(9) Durable Socks
There’s nothing even more difficult than a collection of blistered legs in the government. Although there is a wide range of things that can cause blisters, developing a pair of clothes in any quick and easy way to help ensure their feet stay tender spot free.
(10) Phone Case
Although recruits might not have the ability to use their cell phones during basic training, they will get full use of them afterward. Obtain them a situation that will protect their phone from all the outdoor activities they might take in the future.
(11) Coin Display
All through the long term their time in the military, service participants will get difficult task coins for their accomplishments. Some sort of a service member’s difficult task coin selection may easily develop, making a screen a great present for them to display their achievements. Etsy contains its own different problem coin displays to choose from.
(12) Apparel
Quite often clothes are a first product for gift items, but with companies like Grunt Model and Nine Brand Clothing, you cannot go awry. Both clothing lines carry probably the most devoted apparel away there, which your service member will certainly enjoy and would not be coming back again.
Conclusion
Whether you’re looking specifically for armed forces day military gifts or maybe for military surprise ideas in general, we certainly have a good sense that our gift giving guide has satisfied your research. Comment down below what gift you have chosen.
0 notes
Link
Best Carpet removal Service and Cost in McAllen TX |RGV HAULING JUNK & MOVING
More information is at: https://junkremovalmcallentx.org/carpet-removal-near-me/
Carpet removal Service near McAllen TX: Are you looking for the Best Carpet removal Service near McAllen TX? RGV HAULING JUNK & MOVING, our professional crew will schedule a time that works for you to haul away your carpet. We also have years of experience with recycling carpet and will make sure your disposal is eco-friendly. Cost? Free estimates! Send us a message or call us today. Best Carpet removal Service around McAllen TX. We serve McAllen TX and other areas. Get a Free Quote Now!
BEST CARPET REMOVAL SERVICE IN McAllen TX
MCALLEN CARPET REMOVAL
Carpet Removal
We’re Ready to Remove, Recycle or Dispose of Your Old Carpeting
Carpet removal Service near McAllen TX: Carpet removal is rarely one of those things you think about all the time. But when you do need to think about it, it swiftly becomes an urgent need. Situations like home renovations, floods, mold and other welcome or not-so-welcome events can suddenly create the need for a carpet removal service.
Our RGV HAULING JUNK & MOVING team of junk removal professionals can safely haul away your old, unwanted or damaged carpet, allowing you to focus your energy on the next project at hand. With our eco-friendly policies, you can rest easy that we will recycle as much of the material as possible, so your project will have the smallest impact on the Earth as possible.
Types of Carpeting and Rugs We Remove
● Home carpeting
● Office carpeting
● Wall-to-wall carpeting
● Flood- or water-damaged carpet
● Fire-damaged carpet
● Indoor / outdoor carpeting or rugs
● Area rugs of all sizes
● Carpet Padding
You don’t have to wait to have your carpet removed. Just call to RGV HAULING JUNK & MOVING or Book Online and our professional crew will schedule a time that works for you to haul away your carpet. We also have years of experience with recycling carpet and will make sure your disposal is eco-friendly.
Our Junk Removal Services
Carpet removal Service near McAllen TX: It doesn't matter where in Manhattan you are we'll find a way to get to you. Over the decades we've been in the junk removal business, we've taken virtually any kind of junk you can think of. This includes:
● carpet scraps
● beat up mattresses
● discarded auto parts
● excess construction waste
● old sofas and other furniture
● dying appliances
● yard waste
● and more!
If our two man crew can find a way to move it, then we'll haul it away for you. It's that friendly, can-do attitude that has made us the largest junk removal company in the world. We're in your neighborhood.
Affordable Pricing
When we give you a quote, it's customized to your particular junk removal job. You don't have to worry about people standing around and killing time we charge by the volume of junk we haul, not by the time it takes us to remove the junk. It's these affordable rates that have kept us as leaders in the junk removal industry. No matter what your junk problem is, we can deal with it while working inside your budget. Show us what we're up against.
Carpet Removal Services:
● Residential Carpet Removal
● Townhome Carpet Removal
● Apartment Building Carpet Removal
● Hotel Carpet Removal
● Office Carpet Removal
How to Remove Carpet in 6 Easy Steps
Carpet removal Service near McAllen TX: You’ve finally decided to get rid of that worn-out wall-to-wall carpet, but before you can install new flooring or fresh carpet, you’ve got to get it off the floor and out of the house. While a carpet installer can take it out, you can save time and money by learning how to remove carpet yourself. All it takes is a dust mask and a little bit of muscle and that old shag carpet will be gone before you know it. Read on to find out how to remove carpet and the tools and materials you’ll need to get the job done right.
Materials and Tools
● Utility knife
● Crowbar
● Pliers
● Dusk mast
● Shop vacuum
● Heavy work gloves
● Floor scraper
1. Remove obstacles.
You’ll want to make sure all furnishings are out of the way before you start pulling up the carpet. If your carpet was installed under a shoe molding, use a crowbar to remove it. Doors that swing into the room should also be removed.
2. Take precautions.
Old carpet can be full of dust, so be sure to wear a dust mask. Protective gloves should be worn to protect hands from staples and while cutting the carpet and handling tack strips.
3. Remove the carpet.
Loosen a corner with pliers and pull the carpet back. To make the removal process easier, you’ll want to cut the carpet into easier-to-carry strips. Once you’ve pulled back about two feet of the carpet, fold it over and use your utility knife to cut through the back. Carpet is easier to cut from the back and this also protects the floor beneath. Continue pulling and cutting until all of the carpet has been removed. Carry the pieces out of the room.
4. Remove the tack strips.
If you’re going to be installing new carpet, you can leave the tack strips, the thin piece of wood studded with nails around the border of the room, as long as they aren’t damaged or rusted. To remove them, use your crowbar to pry them off the floor. Be sure to wear heavy-duty gloves.
5. Remove the carpet pad.
Start at the corner and pull back the padding. Fold the pad over and cut into strips, just as you did with the carpet. The pad may have been stapled or glued to the subfloor. Use a floor scraper to remove stuck-on pieces and pull out staples. You can also use pliers to remove the staples, but a floor scraper will save you a lot of time.
6. Clean up.
Once everything has been removed, use a shop vacuum to clean the subfloor. Check with your local sanitation department to find out their policy on carpet disposal. You may be able to set it out on a bulk-pickup day or bring it to a drop-off facility. Some cities have also carpet recycling programs.
The RGV HAULING JUNK & MOVING specializes in carpet removal projects. No matter how big or how small of an area you need to remove carpet from, we'll be able to complete most carpet removal projects in just one day.
If you’d like to have your old, dirty carpet removed and disposed of properly then give The RGV HAULING JUNK & MOVING a call today.
TIPS
Tips on How to Remove Carpet
Remove old carpet yourself and save!
Carpet removal Service near McAllen TX: Having new carpet installed? Removing the old stuff yourself is a smart move. Here’s how to remove carpet quickly and efficiently.
Before the tear-out
Talk with your installer to find out exactly how much you’ll save by doing the how to remove carpet project yourself. Your installer can also give you advice on handling any unusual situations in your home and what to do with the old carpet. Many trash haulers will accept short rolls of carpet along with the regular trash and some cities have carpet recycling programs.
Before you begin tearing up carpet, remove any doors that swing into the room, including behold closet doors. Doors that swing into adjoining rooms can stay in place. Then clear the floor completely, removing all the furniture from the room. Slip on a pair of gloves to protect your knuckles from the abrasive carpet backing and the needle-sharp tack strip. There’s a lot of dust trapped inside old carpet. So if you’re sensitive to dust, strap on a dust mask, too.
Required Tools for this How to Remove Carpet
Have the necessary tools for this DIY how to remove carpet project lined up before you start; you'll save time and frustration.
● Dust mask
● Knee pads
● Locking pliers
● Pry bar
● Safety glasses
● Utility knife
COST
Carpet Removal Cost
Carpet removal Service near McAllen TX: The cost to remove and dispose of old carpeting runs from $1–$2 per square yard, or $0.11 to $0.22 per square foot on average. The cost of removing the carpet in a 330-square foot living room is between $37 and $183, but with a minimum removal charge of $150 to $200, the average homeowner will pay $175 to remove carpet from one large room. In some cases, carpet removal can cost up to $5 per square yard or $0.56 per square foot for glued-down carpet.
Carpet Removal Cost Per Square Foot
● National Average Cost $0.16
● Minimum Cost $0.10
● Maximum Cost $0.56
● Average Range $0.11 to $0.22
Average Cost To Remove Carpet
Removing existing carpet costs between $1 and $2 per square yard, and your minimum charge will be around $150 to $200. This price does not include any repair of the nail or staple holes, or reinstallation of baseboards. Also, removing glued carpet can cost up to $5 per square yard or $0.56 per square foot.
Before you can put down your new floors, you have to take out the existing carpet, because you can’t install new carpet or any other kind of new flooring over old carpet. Removal of the old carpet may be included in the estimate for installing the new carpet.
Average Cost To Remove Carpet
Cost Factor Average Cost
Basic Removal Cost $1–$2/sq. yd.
Stairs $7–$10/stair
Glued Carpet Up to $5/sq. yd.
Furniture Moving $0.23/sq. ft.
Carpet Disposal $.50–$1/sq. ft.
Recycle Carpet $.05–$.25/pound
Carpet Removal Cost Factors
The cost factors below don’t note the fact that any floor repair must be done before new flooring is installed repair of nail and staple holes are included in the cost at $0.96 to $4.34 per square foot. Carpet removal costs also don’t include reinstalling baseboards or trim which costs about $375 for a typical living room measuring 20’ x 20’). In addition to the basic cost of $1 to $2/sq. yd., factor in these extra costs below:
Removing Carpet from Stairs
Removing carpet from stairs takes extra time, as each step must be done one at a time. Each step will have carpet pad staples, tack strips, and padding that need removing. Expect to pay between $7 and $10 per step.
Remove Glued-Down Carpet
A glued-down carpet will mean a lot more work for the removal person because the glue used on the carpet is meant to last forever. And once you do get the carpet up, the glue must be scraped off the subfloor. Expect to spend up to $5 per square yard to remove the glued-down carpet.
Furniture Moving
Because of the time and labor involved in moving all the furniture out of one or several rooms, there is a fee for this service. It’s one place where you can save on the cost of removing the carpet. If your rooms are clean and empty of every single thing, the installers can go right to work. Else, expect to pay around $0.23/sq. ft. or $60/hour.
Cost to Dispose of Old Carpet
You can hire a junk hauling company to come and pick up your old carpet and haul it off. Prices vary according to location, but you can expect to pay $0.50 to $3 per sq. ft. or about $80 total. [1] [2] Sometimes they will haul to the landfill, but if they have access to a carpet recycler, they may haul it there. Some landfills accept carpeting, and some won’t.
Sometimes, if your carpet is still in good shape, it can be reused. An option for reuse includes listing it on a community board online if someone wants it, they can come and pick it up, saving you the trouble.
Cost to Recycle Carpet
Ask your carpet professional if they’ll bring your carpet to a recycling center if that’s your preference. Access to a recycling center depends on where you live. Check with your city or county to see what’s available to you. You can recycle used carpet at CARE (Carpet America Recovery Effort), or other recycling centers if they accept carpet. CARE charges $0.05 to $0.25 per pound of carpet, and carpet is heavy, weighing in at 4–5 pounds per square yard, so a 1,000 sq. ft of carpet could cost between $225 and $1,125 to recycle.
Carpet Removal Cost Calculator
Carpet removal Service near McAllen TX: The cost to remove carpet is figured in square yards or by the hour. The cost to remove and dispose of carpet will run about $1–$2 a square yard, or up to $5/sq. yd. if the carpet is glued down.
Here's how to calculate your room size:
● Measure the width and length of the floor.
● Multiply the width by the length. For example, if the room is 8’ x 10’, the square footage will be 80 square feet.
● Divide the square feet by 9 to get the square yardage. In our sample, that would work out at 8.88 sq. yds.
Carpet Removal Tools
To remove your own carpet you will require the following tools:
● Pliers or vise grips: $5 to $10 per item.
● Knife: $5 to $10 per item.
● Gloves, eye protection, and dust mask: $1 to $2 per item.
● Vacuum: $50 to $1000.
● Heavy duty trash bags: $5 per roll.
● Hammer and pry bar: $5 to $10 per item.
FREQUENTLY ASKED QUESTIONS
How much does rug removal cost?
Removing a rug costs $0.35 to $0.45 per square foot based on a contractor coming in, rolling up the rug and hauling it away by vehicle for disposal or recycling. If furniture needs to be moved then they could charge an additional $0.20 to $0.25 per square foot of furniture.
How do I know if I should repair, clean, or remove and replace my carpeting?
Ten years is the lifespan of a carpet according to most manufacturers. You should consider cleaning or repairing if it has the following:
● Stubborn stains.
● Flattened fibers or padding.
● Small rips or tears.
● Strong odors
● Increase in allergies.
How can I find cheap carpet removal companies or services?
You can search our directory of carpet removal companies and services to find an affordable, background-checked contractor. All HomeAdvisor listings are vetted, reviewed and rated by homeowners, so you can be sure to find a local pro qualified for your project.
How much do carpet removers charge to move furniture?
Expect to pay $0.20 to $0.25 per square foot of furniture that needs to be shifted between rooms. A few small and light items might be done for free. We do not recommend moving furniture yourself due to the risk of injury and damage to your furniture.
How much is carpet removal in McAllen TX?
It costs $1.10 to $2.10 per square foot to remove carpet in McAllen TX, including the labor costs, waste disposal and cleaning up the site.
How much to pull up commercial carpet?
Including labor time and haul away costs, it is a minimum of $1 per square foot to remove commercial carpet. But the price can drop to $0.85 per square foot if you’re removing more than 1000 square feet of carpeting.
Can I use household carpet cleaners for spot removal?
We recommend using only ServiceMaster Clean products. For more information, contact your local ServiceMaster Clean professional.
CALL FOR US:
● Carpet Removal Near McAllen TX
● Carpet Removal Tools
● Carpet Removal Service
● Carpet Removal Cost
● Carpet Removal DIY
● Carpet Removal And Installation
● Carpet Removal Tools Home Depot
● How To Remove Carpet From Concrete
● How To Remove Carpet McAllen TX
● Lowes Carpet Removal Cost
● Home Depot Carpet Removal Cost
● Carpet Removal Services
● Carpet Removal And Installation Cost
● What Is The Price Of Removing Carpet With The Glue
● Carpet Replacement Cost
● Carpet Removal And Disposal
● Carpet Removal Cost McAllen TX
BEST CARPET REMOVAL SERVICES IN MCALLEN TX
RGV HAULING JUNK & MOVING
REQUEST MORE INFORMATION. CONTACT US NOW!
CONTACT US:
RGV Hauling Junk & Moving
CALL (956) 587-3410 JUNK REMOVAL
CALL (956) 587 3484 HANDYMAN
CALL (956) 587 3486 CLEANING
CALL (956) 587 3487 MOVING
Best Junk Removal Hauling Company in McAllen, TX
Open Monday to Sunday
Located in McAllen, TX 78541
Website:
www.junkremovalmcallentx.org
http://www.valleyjunkremoval.org/
http://www.rgvhouseholdservices.com/
SERVICE AREA:
Alamo, TX | Combes, TX | Delmita, TX | Donna, TX | Edcouch, TX | Edinburg, TX | Elsa, TX | Garciasville, TX | Grulla, TX | Hargill, TX | Harlingen, TX | Hidalgo, TX | La Blanca, TX | La Feria, TX | La Joya, TX | La Villa, TX | Lasara, TX | Linn, TX | Los Ebanos, TX | Los Indios, TX | Lyford, TX | Mercedes, TX | Mission, TX | Penitas, TX | Pharr, TX | Progreso, TX | Raymondville, TX | Rio Grande City, TX | San Juan, TX | Santa Maria, TX | Santa Rosa, TX | Sullivan City, TX | Weslaco, TX
Starr County | Hidalgo County | Willacy County | Cameron County | 78504 | 78539 | 78540 | 78541 | 78542 | 78501 | 78503| 78505 | 78557 | 88540 |78502 | 78504 | 78539 | 78572
#junk
#moving
#handyman
#mcAllen
#texas
#cleaninghttps://junkremovalmcallentx.org/carpet-removal-near-me/
0 notes
Link
Best Carpet removal Service and Cost in Wichita KS |WICHITA HAULING JUNK & MOVING
More information is at: https://junkremovalhaulerwichita.org/carpet-removal-near-me/
Carpet removal Service near Wichita KS: Are you looking for the Best Carpet removal Service near Wichita KS? WICHITA HAULING JUNK & MOVING, our professional crew will schedule a time that works for you to haul away your carpet. We also have years of experience with recycling carpet and will make sure your disposal is eco-friendly. Cost? Free estimates! Send us a message or call us today. Best Carpet removal Service around Wichita KS. We serve Wichita KS and other areas. Get a Free Quote Now!
BEST CARPET REMOVAL SERVICE IN Wichita KS
WICHITA CARPET REMOVAL
Carpet Removal
We’re Ready to Remove, Recycle or Dispose of Your Old Carpeting
Carpet removal Service near Wichita KS: Carpet removal is rarely one of those things you think about all the time. But when you do need to think about it, it swiftly becomes an urgent need. Situations like home renovations, floods, mold and other welcome or not-so-welcome events can suddenly create the need for a carpet removal service.
Our WICHITA HAULING JUNK & MOVING team of junk removal professionals can safely haul away your old, unwanted or damaged carpet, allowing you to focus your energy on the next project at hand. With our eco-friendly policies, you can rest easy that we will recycle as much of the material as possible, so your project will have the smallest impact on the Earth as possible.
Types of Carpeting and Rugs We Remove
● Home carpeting
● Office carpeting
● Wall-to-wall carpeting
● Flood- or water-damaged carpet
● Fire-damaged carpet
● Indoor / outdoor carpeting or rugs
● Area rugs of all sizes
● Carpet Padding
You don’t have to wait to have your carpet removed. Just call to WICHITA HAULING JUNK & MOVING or Book Online and our professional crew will schedule a time that works for you to haul away your carpet. We also have years of experience with recycling carpet and will make sure your disposal is eco-friendly.
Our Junk Removal Services
Carpet removal Service near Wichita KS: It doesn't matter where in Manhattan you are we'll find a way to get to you. Over the decades we've been in the junk removal business, we've taken virtually any kind of junk you can think of. This includes:
● carpet scraps
● beat up mattresses
● discarded auto parts
● excess construction waste
● old sofas and other furniture
● dying appliances
● yard waste
● and more!
If our two man crew can find a way to move it, then we'll haul it away for you. It's that friendly, can-do attitude that has made us the largest junk removal company in the world. We're in your neighborhood.
Affordable Pricing
When we give you a quote, it's customized to your particular junk removal job. You don't have to worry about people standing around and killing time we charge by the volume of junk we haul, not by the time it takes us to remove the junk. It's these affordable rates that have kept us as leaders in the junk removal industry. No matter what your junk problem is, we can deal with it while working inside your budget. Show us what we're up against.
Carpet Removal Services:
● Residential Carpet Removal
● Townhome Carpet Removal
● Apartment Building Carpet Removal
● Hotel Carpet Removal
● Office Carpet Removal
How to Remove Carpet in 6 Easy Steps
Carpet removal Service near Wichita KS: You’ve finally decided to get rid of that worn-out wall-to-wall carpet, but before you can install new flooring or fresh carpet, you’ve got to get it off the floor and out of the house. While a carpet installer can take it out, you can save time and money by learning how to remove carpet yourself. All it takes is a dust mask and a little bit of muscle and that old shag carpet will be gone before you know it. Read on to find out how to remove carpet and the tools and materials you’ll need to get the job done right.
Materials and Tools
● Utility knife
● Crowbar
● Pliers
● Dusk mast
● Shop vacuum
● Heavy work gloves
● Floor scraper
1. Remove obstacles.
You’ll want to make sure all furnishings are out of the way before you start pulling up the carpet. If your carpet was installed under a shoe molding, use a crowbar to remove it. Doors that swing into the room should also be removed.
2. Take precautions.
Old carpet can be full of dust, so be sure to wear a dust mask. Protective gloves should be worn to protect hands from staples and while cutting the carpet and handling tack strips.
3. Remove the carpet.
Loosen a corner with pliers and pull the carpet back. To make the removal process easier, you’ll want to cut the carpet into easier-to-carry strips. Once you’ve pulled back about two feet of the carpet, fold it over and use your utility knife to cut through the back. Carpet is easier to cut from the back and this also protects the floor beneath. Continue pulling and cutting until all of the carpet has been removed. Carry the pieces out of the room.
4. Remove the tack strips.
If you’re going to be installing new carpet, you can leave the tack strips, the thin piece of wood studded with nails around the border of the room, as long as they aren’t damaged or rusted. To remove them, use your crowbar to pry them off the floor. Be sure to wear heavy-duty gloves.
5. Remove the carpet pad.
Start at the corner and pull back the padding. Fold the pad over and cut into strips, just as you did with the carpet. The pad may have been stapled or glued to the subfloor. Use a floor scraper to remove stuck-on pieces and pull out staples. You can also use pliers to remove the staples, but a floor scraper will save you a lot of time.
6. Clean up.
Once everything has been removed, use a shop vacuum to clean the subfloor. Check with your local sanitation department to find out their policy on carpet disposal. You may be able to set it out on a bulk-pickup day or bring it to a drop-off facility. Some cities have also carpet recycling programs.
The WICHITA HAULING JUNK & MOVING specializes in carpet removal projects. No matter how big or how small of an area you need to remove carpet from, we'll be able to complete most carpet removal projects in just one day.
If you’d like to have your old, dirty carpet removed and disposed of properly then give The WICHITA HAULING JUNK & MOVING a call today.
TIPS
Tips on How to Remove Carpet
Remove old carpet yourself and save!
Carpet removal Service near Wichita KS: Having new carpet installed? Removing the old stuff yourself is a smart move. Here’s how to remove carpet quickly and efficiently.
Before the tear-out
Talk with your installer to find out exactly how much you’ll save by doing the how to remove carpet project yourself. Your installer can also give you advice on handling any unusual situations in your home and what to do with the old carpet. Many trash haulers will accept short rolls of carpet along with the regular trash and some cities have carpet recycling programs.
Before you begin tearing up carpet, remove any doors that swing into the room, including behold closet doors. Doors that swing into adjoining rooms can stay in place. Then clear the floor completely, removing all the furniture from the room. Slip on a pair of gloves to protect your knuckles from the abrasive carpet backing and the needle-sharp tack strip. There’s a lot of dust trapped inside old carpet. So if you’re sensitive to dust, strap on a dust mask, too.
Required Tools for this How to Remove Carpet
Have the necessary tools for this DIY how to remove carpet project lined up before you start; you'll save time and frustration.
● Dust mask
● Knee pads
● Locking pliers
● Pry bar
● Safety glasses
● Utility knife
COST
Carpet Removal Cost
Carpet removal Service near Wichita KS: The cost to remove and dispose of old carpeting runs from $1–$2 per square yard, or $0.11 to $0.22 per square foot on average. The cost of removing the carpet in a 330-square foot living room is between $37 and $183, but with a minimum removal charge of $150 to $200, the average homeowner will pay $175 to remove carpet from one large room. In some cases, carpet removal can cost up to $5 per square yard or $0.56 per square foot for glued-down carpet.
Carpet Removal Cost Per Square Foot
● National Average Cost $0.16
● Minimum Cost $0.10
● Maximum Cost $0.56
● Average Range $0.11 to $0.22
Average Cost To Remove Carpet
Removing existing carpet costs between $1 and $2 per square yard, and your minimum charge will be around $150 to $200. This price does not include any repair of the nail or staple holes, or reinstallation of baseboards. Also, removing glued carpet can cost up to $5 per square yard or $0.56 per square foot.
Before you can put down your new floors, you have to take out the existing carpet, because you can’t install new carpet or any other kind of new flooring over old carpet. Removal of the old carpet may be included in the estimate for installing the new carpet.
Average Cost To Remove Carpet
Cost Factor Average Cost
Basic Removal Cost $1–$2/sq. yd.
Stairs $7–$10/stair
Glued Carpet Up to $5/sq. yd.
Furniture Moving $0.23/sq. ft.
Carpet Disposal $.50–$1/sq. ft.
Recycle Carpet $.05–$.25/pound
Carpet Removal Cost Factors
The cost factors below don’t note the fact that any floor repair must be done before new flooring is installed repair of nail and staple holes are included in the cost at $0.96 to $4.34 per square foot. Carpet removal costs also don’t include reinstalling baseboards or trim which costs about $375 for a typical living room measuring 20’ x 20’). In addition to the basic cost of $1 to $2/sq. yd., factor in these extra costs below:
Removing Carpet from Stairs
Removing carpet from stairs takes extra time, as each step must be done one at a time. Each step will have carpet pad staples, tack strips, and padding that need removing. Expect to pay between $7 and $10 per step.
Remove Glued-Down Carpet
A glued-down carpet will mean a lot more work for the removal person because the glue used on the carpet is meant to last forever. And once you do get the carpet up, the glue must be scraped off the subfloor. Expect to spend up to $5 per square yard to remove the glued-down carpet.
Furniture Moving
Because of the time and labor involved in moving all the furniture out of one or several rooms, there is a fee for this service. It’s one place where you can save on the cost of removing the carpet. If your rooms are clean and empty of every single thing, the installers can go right to work. Else, expect to pay around $0.23/sq. ft. or $60/hour.
Cost to Dispose of Old Carpet
You can hire a junk hauling company to come and pick up your old carpet and haul it off. Prices vary according to location, but you can expect to pay $0.50 to $3 per sq. ft. or about $80 total. [1] [2] Sometimes they will haul to the landfill, but if they have access to a carpet recycler, they may haul it there. Some landfills accept carpeting, and some won’t.
Sometimes, if your carpet is still in good shape, it can be reused. An option for reuse includes listing it on a community board online if someone wants it, they can come and pick it up, saving you the trouble.
Cost to Recycle Carpet
Ask your carpet professional if they’ll bring your carpet to a recycling center if that’s your preference. Access to a recycling center depends on where you live. Check with your city or county to see what’s available to you. You can recycle used carpet at CARE (Carpet America Recovery Effort), or other recycling centers if they accept carpet. CARE charges $0.05 to $0.25 per pound of carpet, and carpet is heavy, weighing in at 4–5 pounds per square yard, so a 1,000 sq. ft of carpet could cost between $225 and $1,125 to recycle.
Carpet Removal Cost Calculator
Carpet removal Service near Wichita KS: The cost to remove carpet is figured in square yards or by the hour. The cost to remove and dispose of carpet will run about $1–$2 a square yard, or up to $5/sq. yd. if the carpet is glued down.
Here's how to calculate your room size:
● Measure the width and length of the floor.
● Multiply the width by the length. For example, if the room is 8’ x 10’, the square footage will be 80 square feet.
● Divide the square feet by 9 to get the square yardage. In our sample, that would work out at 8.88 sq. yds.
Carpet Removal Tools
To remove your own carpet you will require the following tools:
● Pliers or vise grips: $5 to $10 per item.
● Knife: $5 to $10 per item.
● Gloves, eye protection, and dust mask: $1 to $2 per item.
● Vacuum: $50 to $1000.
● Heavy duty trash bags: $5 per roll.
● Hammer and pry bar: $5 to $10 per item.
FREQUENTLY ASKED QUESTIONS
How much does rug removal cost?
Removing a rug costs $0.35 to $0.45 per square foot based on a contractor coming in, rolling up the rug and hauling it away by vehicle for disposal or recycling. If furniture needs to be moved then they could charge an additional $0.20 to $0.25 per square foot of furniture.
How do I know if I should repair, clean, or remove and replace my carpeting?
Ten years is the lifespan of a carpet according to most manufacturers. You should consider cleaning or repairing if it has the following:
● Stubborn stains.
● Flattened fibers or padding.
● Small rips or tears.
● Strong odors
● Increase in allergies.
How can I find cheap carpet removal companies or services?
You can search our directory of carpet removal companies and services to find an affordable, background-checked contractor. All HomeAdvisor listings are vetted, reviewed and rated by homeowners, so you can be sure to find a local pro qualified for your project.
How much do carpet removers charge to move furniture?
Expect to pay $0.20 to $0.25 per square foot of furniture that needs to be shifted between rooms. A few small and light items might be done for free. We do not recommend moving furniture yourself due to the risk of injury and damage to your furniture.
How much is carpet removal in Wichita KS?
It costs $1.10 to $2.10 per square foot to remove carpet in Wichita KS, including the labor costs, waste disposal and cleaning up the site.
How much to pull up commercial carpet?
Including labor time and haul away costs, it is a minimum of $1 per square foot to remove commercial carpet. But the price can drop to $0.85 per square foot if you’re removing more than 1000 square feet of carpeting.
Can I use household carpet cleaners for spot removal?
We recommend using only ServiceMaster Clean products. For more information, contact your local ServiceMaster Clean professional.
CALL FOR US:
● Carpet Removal Near Wichita KS
● Carpet Removal Tools
● Carpet Removal Service
● Carpet Removal Cost
● Carpet Removal DIY
● Carpet Removal And Installation
● Carpet Removal Tools Home Depot
● How To Remove Carpet From Concrete
● How To Remove Carpet Wichita KS
● Lowes Carpet Removal Cost
● Home Depot Carpet Removal Cost
● Carpet Removal Services
● Carpet Removal And Installation Cost
● What Is The Price Of Removing Carpet With The Glue
● Carpet Replacement Cost
● Carpet Removal And Disposal
● Carpet Removal Cost Wichita KS
BEST CARPET REMOVAL SERVICES IN WICHITA KS
WICHITA HAULING JUNK & MOVING
REQUEST MORE INFORMATION. CONTACT US NOW!
CONTACT US:
Wichita Hauling Junk & Moving
CALL (316) 500-7551 CLEANING
CALL (316) 448-5733 JUNK REMOVAL & MOVING
CALL (316) 448-3974 HANDYMAN
Best Junk Removal Hauling Company in Wichita, KS
Open Monday to Sunday
7 Am – 11 PM
Located in Wichita, KS 67211
WEB: junkremovalhaulerwichita.org
SERVICE AREA:
55 Cities within 30 miles of Wichita, KS: Andale, KS | Andover, KS | Argonia, KS | Augusta, KS | Belle Plaine, KS | Bentley, KS | Benton, KS | Buhler, KS | Burns, KS | Burrton, KS | Cheney, KS | Clearwater, KSColwich, KS | Conway Springs, KS | Danville, KS | Derby, KS | Douglass, KS | Elbing, KS | Garden Plain, KS | Goddard, KS | Greenwich, KS | Halstead, KS | Harper, KS | Haven, KS | Haysville, KS | Hesston, KS | Hutchinson, KS | Kechi, KS | Maize, KS | Mayfield, KS | Mcconnell AFB, KS | Milan, KS | Milton, KS | Mount Hope, KS | Mulvane, KS | Murdock, KS | Newton, KS | North Newton, KS | Norwich, KS | Peck, KS | Potwin, KS | Pretty Prairie, KS | Rock, KS | Rose Hill, KS | Sedgwick, KS | South Hutchinson, KS | Towanda, KS | Udall, KS | Valley Center, KS | Viola, KS | Walton, KS | Wellington, KS | Whitewater, KS | Winfield, KS | Yoder, KS
ZIP CODES: 67001 – Andale | 67016 – Bentley | 67017 – Benton | 67020 – Burrton | 67025 – Cheney | 67026 – Clearwater | 67030 – Colwich | 67031 – Conway Springs | 67037 – Derby | 67039 – Douglass | 67050 – Garden Plain | 67052 – Goddard | 67055 – Greenwich | 67060 – Haysville | 67067 – Kechi | 67101 – Maize | 67106 – Milton | 67108 – Mt Hope | 67110 – Mulvane | 67118 – Norwich | 67120 – Peck | 67133 – Rose Hill | 67135 – Sedgwick | 67147 – Valley Center | 67149 – Viola | 672xx – Wichita | 67204 – Park City or Wichita | 67219 – Park City or Wichita | 67220 – Bel Aire or Wichita | 67221 – McConnell AFB | 67226 – Bel Aire or Wichita | 67543 – Haven
68116, 68117, 68118, 68122, 68124, 68127, 68130, 68131, 68132, 68134, 68135, 68137, 68142, 68144, 68147, 68152, 68154, 68157, 68164, 68178
#junkremoval
#haulingservice
#handyman
#moving
#Wichita
#Kasnas
#residencialjunkservic
#commercialjunk
#officejunkremoval
0 notes
Link
Best Carpet removal Service and Cost in Lincoln NE |LNK HAULING JUNK & MOVING
More information is at: http://junkremovallincoln.org/carpet-removal-near-me/
Carpet removal Service near Lincoln NE: Are you looking for the Best Carpet removal Service near Lincoln NE? LNK HAULING JUNK & MOVING, our professional crew will schedule a time that works for you to haul away your carpet. We also have years of experience with recycling carpet and will make sure your disposal is eco-friendly. Cost? Free estimates! Send us a message or call us today. Best Carpet removal Service around Lincoln NE. We serve Lincoln NE and other areas. Get a Free Quote Now!
BEST CARPET REMOVAL SERVICE IN Lincoln NE
LINCOLN CARPET REMOVAL
Carpet Removal
We’re Ready to Remove, Recycle or Dispose of Your Old Carpeting
Carpet removal Service near Lincoln NE: Carpet removal is rarely one of those things you think about all the time. But when you do need to think about it, it swiftly becomes an urgent need. Situations like home renovations, floods, mold and other welcome or not-so-welcome events can suddenly create the need for a carpet removal service.
Our LNK HAULING JUNK & MOVING team of junk removal professionals can safely haul away your old, unwanted or damaged carpet, allowing you to focus your energy on the next project at hand. With our eco-friendly policies, you can rest easy that we will recycle as much of the material as possible, so your project will have the smallest impact on the Earth as possible.
Types of Carpeting and Rugs We Remove
● Home carpeting
● Office carpeting
● Wall-to-wall carpeting
● Flood- or water-damaged carpet
● Fire-damaged carpet
● Indoor / outdoor carpeting or rugs
● Area rugs of all sizes
● Carpet Padding
You don’t have to wait to have your carpet removed. Just call to LNK HAULING JUNK & MOVING or Book Online and our professional crew will schedule a time that works for you to haul away your carpet. We also have years of experience with recycling carpet and will make sure your disposal is eco-friendly.
Our Junk Removal Services
Carpet removal Service near Lincoln NE: It doesn't matter where in Manhattan you are we'll find a way to get to you. Over the decades we've been in the junk removal business, we've taken virtually any kind of junk you can think of. This includes:
● carpet scraps
● beat up mattresses
● discarded auto parts
● excess construction waste
● old sofas and other furniture
● dying appliances
● yard waste
● and more!
If our two man crew can find a way to move it, then we'll haul it away for you. It's that friendly, can-do attitude that has made us the largest junk removal company in the world. We're in your neighborhood.
Affordable Pricing
When we give you a quote, it's customized to your particular junk removal job. You don't have to worry about people standing around and killing time we charge by the volume of junk we haul, not by the time it takes us to remove the junk. It's these affordable rates that have kept us as leaders in the junk removal industry. No matter what your junk problem is, we can deal with it while working inside your budget. Show us what we're up against.
Carpet Removal Services:
● Residential Carpet Removal
● Townhome Carpet Removal
● Apartment Building Carpet Removal
● Hotel Carpet Removal
● Office Carpet Removal
How to Remove Carpet in 6 Easy Steps
Carpet removal Service near Lincoln NE: You’ve finally decided to get rid of that worn-out wall-to-wall carpet, but before you can install new flooring or fresh carpet, you’ve got to get it off the floor and out of the house. While a carpet installer can take it out, you can save time and money by learning how to remove carpet yourself. All it takes is a dust mask and a little bit of muscle and that old shag carpet will be gone before you know it. Read on to find out how to remove carpet and the tools and materials you’ll need to get the job done right.
Materials and Tools
● Utility knife
● Crowbar
● Pliers
● Dusk mast
● Shop vacuum
● Heavy work gloves
● Floor scraper
1. Remove obstacles.
You’ll want to make sure all furnishings are out of the way before you start pulling up the carpet. If your carpet was installed under a shoe molding, use a crowbar to remove it. Doors that swing into the room should also be removed.
2. Take precautions.
Old carpet can be full of dust, so be sure to wear a dust mask. Protective gloves should be worn to protect hands from staples and while cutting the carpet and handling tack strips.
3. Remove the carpet.
Loosen a corner with pliers and pull the carpet back. To make the removal process easier, you’ll want to cut the carpet into easier-to-carry strips. Once you’ve pulled back about two feet of the carpet, fold it over and use your utility knife to cut through the back. Carpet is easier to cut from the back and this also protects the floor beneath. Continue pulling and cutting until all of the carpet has been removed. Carry the pieces out of the room.
4. Remove the tack strips.
If you’re going to be installing new carpet, you can leave the tack strips, the thin piece of wood studded with nails around the border of the room, as long as they aren’t damaged or rusted. To remove them, use your crowbar to pry them off the floor. Be sure to wear heavy-duty gloves.
5. Remove the carpet pad.
Start at the corner and pull back the padding. Fold the pad over and cut into strips, just as you did with the carpet. The pad may have been stapled or glued to the subfloor. Use a floor scraper to remove stuck-on pieces and pull out staples. You can also use pliers to remove the staples, but a floor scraper will save you a lot of time.
6. Clean up.
Once everything has been removed, use a shop vacuum to clean the subfloor. Check with your local sanitation department to find out their policy on carpet disposal. You may be able to set it out on a bulk-pickup day or bring it to a drop-off facility. Some cities have also carpet recycling programs.
The LNK HAULING JUNK & MOVING specializes in carpet removal projects. No matter how big or how small of an area you need to remove carpet from, we'll be able to complete most carpet removal projects in just one day.
If you’d like to have your old, dirty carpet removed and disposed of properly then give The LNK HAULING JUNK & MOVING a call today.
TIPS
Tips on How to Remove Carpet
Remove old carpet yourself and save!
Carpet removal Service near Lincoln NE: Having new carpet installed? Removing the old stuff yourself is a smart move. Here’s how to remove carpet quickly and efficiently.
Before the tear-out
Talk with your installer to find out exactly how much you’ll save by doing the how to remove carpet project yourself. Your installer can also give you advice on handling any unusual situations in your home and what to do with the old carpet. Many trash haulers will accept short rolls of carpet along with the regular trash and some cities have carpet recycling programs.
Before you begin tearing up carpet, remove any doors that swing into the room, including behold closet doors. Doors that swing into adjoining rooms can stay in place. Then clear the floor completely, removing all the furniture from the room. Slip on a pair of gloves to protect your knuckles from the abrasive carpet backing and the needle-sharp tack strip. There’s a lot of dust trapped inside old carpet. So if you’re sensitive to dust, strap on a dust mask, too.
Required Tools for this How to Remove Carpet
Have the necessary tools for this DIY how to remove carpet project lined up before you start; you'll save time and frustration.
● Dust mask
● Knee pads
● Locking pliers
● Pry bar
● Safety glasses
● Utility knife
COST
Carpet Removal Cost
Carpet removal Service near Lincoln NE: The cost to remove and dispose of old carpeting runs from $1–$2 per square yard, or $0.11 to $0.22 per square foot on average. The cost of removing the carpet in a 330-square foot living room is between $37 and $183, but with a minimum removal charge of $150 to $200, the average homeowner will pay $175 to remove carpet from one large room. In some cases, carpet removal can cost up to $5 per square yard or $0.56 per square foot for glued-down carpet.
Carpet Removal Cost Per Square Foot
● National Average Cost $0.16
● Minimum Cost $0.10
● Maximum Cost $0.56
● Average Range $0.11 to $0.22
Average Cost To Remove Carpet
Removing existing carpet costs between $1 and $2 per square yard, and your minimum charge will be around $150 to $200. This price does not include any repair of the nail or staple holes, or reinstallation of baseboards. Also, removing glued carpet can cost up to $5 per square yard or $0.56 per square foot.
Before you can put down your new floors, you have to take out the existing carpet, because you can’t install new carpet or any other kind of new flooring over old carpet. Removal of the old carpet may be included in the estimate for installing the new carpet.
Average Cost To Remove Carpet
Cost Factor Average Cost
Basic Removal Cost $1–$2/sq. yd.
Stairs $7–$10/stair
Glued Carpet Up to $5/sq. yd.
Furniture Moving $0.23/sq. ft.
Carpet Disposal $.50–$1/sq. ft.
Recycle Carpet $.05–$.25/pound
Carpet Removal Cost Factors
The cost factors below don’t note the fact that any floor repair must be done before new flooring is installed repair of nail and staple holes are included in the cost at $0.96 to $4.34 per square foot. Carpet removal costs also don’t include reinstalling baseboards or trim which costs about $375 for a typical living room measuring 20’ x 20’). In addition to the basic cost of $1 to $2/sq. yd., factor in these extra costs below:
Removing Carpet from Stairs
Removing carpet from stairs takes extra time, as each step must be done one at a time. Each step will have carpet pad staples, tack strips, and padding that need removing. Expect to pay between $7 and $10 per step.
Remove Glued-Down Carpet
A glued-down carpet will mean a lot more work for the removal person because the glue used on the carpet is meant to last forever. And once you do get the carpet up, the glue must be scraped off the subfloor. Expect to spend up to $5 per square yard to remove the glued-down carpet.
Furniture Moving
Because of the time and labor involved in moving all the furniture out of one or several rooms, there is a fee for this service. It’s one place where you can save on the cost of removing the carpet. If your rooms are clean and empty of every single thing, the installers can go right to work. Else, expect to pay around $0.23/sq. ft. or $60/hour.
Cost to Dispose of Old Carpet
You can hire a junk hauling company to come and pick up your old carpet and haul it off. Prices vary according to location, but you can expect to pay $0.50 to $3 per sq. ft. or about $80 total. [1] [2] Sometimes they will haul to the landfill, but if they have access to a carpet recycler, they may haul it there. Some landfills accept carpeting, and some won’t.
Sometimes, if your carpet is still in good shape, it can be reused. An option for reuse includes listing it on a community board online if someone wants it, they can come and pick it up, saving you the trouble.
Cost to Recycle Carpet
Ask your carpet professional if they’ll bring your carpet to a recycling center if that’s your preference. Access to a recycling center depends on where you live. Check with your city or county to see what’s available to you. You can recycle used carpet at CARE (Carpet America Recovery Effort), or other recycling centers if they accept carpet. CARE charges $0.05 to $0.25 per pound of carpet, and carpet is heavy, weighing in at 4–5 pounds per square yard, so a 1,000 sq. ft of carpet could cost between $225 and $1,125 to recycle.
Carpet Removal Cost Calculator
Carpet removal Service near Lincoln NE: The cost to remove carpet is figured in square yards or by the hour. The cost to remove and dispose of carpet will run about $1–$2 a square yard, or up to $5/sq. yd. if the carpet is glued down.
Here's how to calculate your room size:
● Measure the width and length of the floor.
● Multiply the width by the length. For example, if the room is 8’ x 10’, the square footage will be 80 square feet.
● Divide the square feet by 9 to get the square yardage. In our sample, that would work out at 8.88 sq. yds.
Carpet Removal Tools
To remove your own carpet you will require the following tools:
● Pliers or vise grips: $5 to $10 per item.
● Knife: $5 to $10 per item.
● Gloves, eye protection, and dust mask: $1 to $2 per item.
● Vacuum: $50 to $1000.
● Heavy duty trash bags: $5 per roll.
● Hammer and pry bar: $5 to $10 per item.
FREQUENTLY ASKED QUESTIONS
How much does rug removal cost?
Removing a rug costs $0.35 to $0.45 per square foot based on a contractor coming in, rolling up the rug and hauling it away by vehicle for disposal or recycling. If furniture needs to be moved then they could charge an additional $0.20 to $0.25 per square foot of furniture.
How do I know if I should repair, clean, or remove and replace my carpeting?
Ten years is the lifespan of a carpet according to most manufacturers. You should consider cleaning or repairing if it has the following:
● Stubborn stains.
● Flattened fibers or padding.
● Small rips or tears.
● Strong odors
● Increase in allergies.
How can I find cheap carpet removal companies or services?
You can search our directory of carpet removal companies and services to find an affordable, background-checked contractor. All HomeAdvisor listings are vetted, reviewed and rated by homeowners, so you can be sure to find a local pro qualified for your project.
How much do carpet removers charge to move furniture?
Expect to pay $0.20 to $0.25 per square foot of furniture that needs to be shifted between rooms. A few small and light items might be done for free. We do not recommend moving furniture yourself due to the risk of injury and damage to your furniture.
How much is carpet removal in Lincoln NE?
It costs $1.10 to $2.10 per square foot to remove carpet in Lincoln NE, including the labor costs, waste disposal and cleaning up the site.
How much to pull up commercial carpet?
Including labor time and haul away costs, it is a minimum of $1 per square foot to remove commercial carpet. But the price can drop to $0.85 per square foot if you’re removing more than 1000 square feet of carpeting.
Can I use household carpet cleaners for spot removal?
We recommend using only ServiceMaster Clean products. For more information, contact your local ServiceMaster Clean professional.
CALL FOR US:
● Carpet Removal Near Lincoln NE
● Carpet Removal Tools
● Carpet Removal Service
● Carpet Removal Cost
● Carpet Removal DIY
● Carpet Removal And Installation
● Carpet Removal Tools Home Depot
● How To Remove Carpet From Concrete
● How To Remove Carpet Lincoln NE
● Lowes Carpet Removal Cost
● Home Depot Carpet Removal Cost
● Carpet Removal Services
● Carpet Removal And Installation Cost
● What Is The Price Of Removing Carpet With The Glue
● Carpet Replacement Cost
● Carpet Removal And Disposal
● Carpet Removal Cost Lincoln NE
BEST CARPET REMOVAL SERVICES IN LINCOLN NE
LNK HAULING JUNK & MOVING
REQUEST MORE INFORMATION. CONTACT US NOW!
CONTACT US:
LNK Hauling Junk & Moving
Lincoln`s famous junk removal hauling services!
CALL (402) 875 7271 JUNK REMOVAL
CALL (402) 881 3135 CLEANING
CALL (402) 875 7305 HANDYMAN
CALL (402) 590 8095 MOVING
Open Monday to Sunday
Lincoln Nebraska
WEBSITE:
https://junkremovallincoln.org
http://www.lnkjunkremoval.com/
https://lnk-hauling-junk-and-moving-lincoln.business.site
SERVICE AREA:
Lincoln Nebraska Metro Area: Bennet Ne, Firth Ne, Hallam Ne, Hickman Ne, Lancaster County, Lincoln Nebraska, Malcolm Ne, Milford Ne, Panama Ne, Seward County, Seward Ne, Staplehurst Ne, Utica Ne, Walton Ne, WAVERLY NE, Lincoln NE | Lincoln NE | Lancaster County NE | Seward County NE | Milford NE | 68501, 68510, 68512, 68514, 68516, 68517, 68520, 68524, 68526, 68529, 68531, 68532, 68542, 68544, 68583, 68588.
Omaha-Council Bluffs Metropolitan Area: Downtown Omaha, Central Omaha, Southwest Lincoln and Sarpy County, including the communities of Lincoln, Omaha, Bellevue, Blair, Carter Lake, Elkhorn, Fort Calhoun, Fremont, Gretna, La Vista, Millard, Papillion, Ralston, Springfield, Plattsmouth, Arlington, Ashland, Louisville, Wahoo, Yutan and Waterloo, NE, and Missouri Valley, Avoca, Glenwood, Council Bluffs, IA. Zip codes: 68007, 68010, 68022, 68102, 68104, 68105, 68106, 68107, 68108, 68110, 68111, 68112, 68114, 68116, 68117, 68118, 68122, 68124, 68127, 68130, 68131, 68132, 68134, 68135, 68137, 68142, 68144, 68147, 68152, 68154, 68157, 68164, 68178.
#junkremoval
#movingservice
#cleaning
#commercialjunk
#residencialjunkremoval
#lincoln
#nebaraska
#handymanservice
0 notes
Text
Top Six Hand Tools used in Daily Life
Stanley Dealer in Dubai - Power tools are definitely a big part of our lives today. We use saws, drills, sanding tools and other power tools on a very regular basis. With these power tools available it might seem like hand tools are out dated and a thing of the past.
Fischer Dealer in Dubai - However, there are many hand tools that are very useful that will not be going away any time soon. I have made a list of the top 6 hand tools for you to have around your house. These tools are something everyone should have on hand.
1. The first tool on this list is the hammer. The hammer is mostly used for pounding nails into a piece of wood to hold things together. This by itself is useful but you can use a hammer for anything else that you need to bend, shape or break apart.
2. Second is a needle-nosed pliers. This is a very nice tool to have around. You never know when you are going to need a pair of pliers and there is really just no replacement for this tool.
3. Another thing you will want to have available is a good set of wrenches. Sure, you can use an impact driver but there will be times when you can't fit an impact driver into the space you need to get into. This is where wrenches come in handy. When all you other bolt fastening tools fail you can always count on a good wrench.
4. The fourth-hand tool we will take a look at is the Phillips screwdriver. This is an obvious one because of how many common items use the Phillips screw to hold it together. An important part of this is you need to have multiple sizes of Phillips screwdrivers.
The reason you need multiple sizes is that since it is such a common screw, there are many different sizes. You cannot always use a drill to tighten and loosen screws as you cannot get into many small places and you can't work with smaller screws if you are using a drill.
5. A less common hand tool that could prove to be very useful is a tri wing screwdriver. This is a tool you will need if you take apart electronics. You will usually need a smaller screwdriver so you can get into smaller places.
6. The last hand tool you absolutely need to have is a good old crescent wrench. The reason you need this in addition to your other wrenches is it can be any wrench you need. There will be times that you need two of the same sized wrenches to do a job and if you have a crescent wrench it is simple. If you have this around you will find that it is a very useful hand tool.
Presto Dealer in Dubai- The only way to get a good quality hand and power tools is to buy one online. You will be able to find the best deals at Grand Hardware Trading LLC
Source & Reference: https://sites.google.com/view/grand-hardware-trading-llc/top-six-hand-tools-used-in-daily-life
0 notes
Text
Arplis - News: These 20 EDC items are definitely worth the daily carry
Batman never roars into the Gotham night without his utility belt. James Bond never embarks on a world-saving mission without stopping to see Q and picking up a few helpful gadgets.
The world can be a challenging, even occasionally dangerous place — and that's never been more apparent than in the past few months. So while we're not saying you're going to confront homicidal clowns or diamond-powered super lasers in your daily travels, there are enough obvious dangers out there that you should really have the right equipment on hand at all times.
Check out this list of 20 borderline essential multi-tool and EDC items and accessories that could be game-changers in the pinch.
Germbusters
CleanKey Mini Antimicrobial Brass Stylus (2-Pack) – $16.99; originally $19
In case you don't have a lot of carrying room, the Clean Key Mini might be right up your alley. Just hook it to your keychain and at 2 inches long and weighing about half an ounce, this antibacterial, antimicrobial helper that comes with its own retracting carabiner can help you push all the buttons and pull all the door handles you need, without ever touching a thing.
CLEANFob Touchless Brass Antimicrobial Tool (2-Pack) – $22.99; originally $34
If a brass tool can help with pushing buttons or signing touchscreens, why can't it do more? The CLEANFob can, designed with added features to expand its daily usefulness, like a screwdriver, a box cutter, a hook and even a bottle opener. Of course, the solid brass workmanship and ability to avoid contact with 99 percent of germ-infested surfaces doesn't hurt either.
vimeo
11th Digit Germ-Free Touch Tool – $32.99; originally $35
Brass keys are fine and all…but if you really want to interact with the world, stay safe and engage in some safety, you've got to go bronze. Crafted from a slab of billet bronze, this functional and cool looking key has all the natural antibacterial and antiviral properties of brass keys — and looks even cooler.
McGuyver Favorites
8-in-1 Multifunctional Screwdriver – $15.99; originally $29
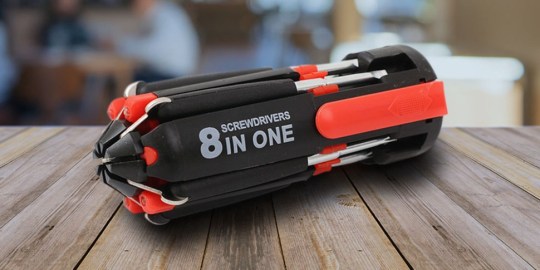
Whether you need a Phillips head or a slotted screwdriver, this handy helper has four of each type in varying sizes ready for immediate use. Everything folds back into the handle so it slips back into your pocket easily and it even has a built-in LED light so you can actually see what you're doing.
Cyclist Card Everyday Carry Multi-Tool – $72.99; originally $90

The Cyclist Card was created to get any pedaler out of a jam, but this card-shaped multi-tool that can slide right into your wallet is a serious problem-solver for everyone. Lightweight and made of ultra-durable steel, the card has more than 43 functions from hex wrench duties to
serrated edge blade to a basic ruler.
Multifunctional Pocket Tool – $16.99; originally $29

Knife, pliers, wirecutters, even a fish scaler, it's all right in this foldable pocket tool. Capable of 11 different tasks, this super versatile instrument also comes with its own storage case for safekeeping. And the nail file can even keep you looking good while you wait for chances to fix stuff.
Higher Objects Sawyer Utility Bracelet – $24.99; originally $39
In case you find yourself short of pockets, here's a utility tool that just hangs out on your wrist until needed. The Sawyer sports a blade with a screwdriver head for all kinds of odd jobs, all safely secured on a genuine leather strap that fits all wrist sizes. Sure, it's functional…but the great look kind of seals the deal here.
Anywhere Tools Everyday Carry Bundle – $39; originally $65

Keyport has a whole customizable modular system of swappable, compact multi-tool packages — and this 12-in-1 assortment lets you configure your tools any way you want. With a stainless steel bottle opener, flathead and Phillips head screwdrivers, a cord cutter and a premium 27-lumen flashlight with dual modes, there's definitely a collection of pieces for you. You've just got to put it together.
BitzBlade 2.0 Multi-Tool – $79.99; originally $99

The BitzBlade is loaded, including 26 different features for on-the-spot fixes. Successfully funded on Kickstarter to the tune of $121,180, this tool includes 9 interchangeable steel bits in both standard and metric sizes, a tungsten carbide tip window punch, a light and more in this super-strong collection that still weighs under 3 ounces.
youtube
EverRatchet Ratcheting Keychain Multi-Tool – $24.99; originally $27

The key to the EverRatchet is…well, the invaluable ratchet. With that dynamic action, you can use it to tighten screws and bolts faster, all without the constant readjustment. Of course, the EverRatchet more than just the ratchet featuring, also including 7 wrenches, a bottle opener, a wire stripper, metric and imperial rulers and more. There's even a custom-sized Flint2Go fire flint to get a blaze started just like that.
youtube
Keys Are the Key
KeySmart Flex: 2 Pack – $12.99; originally $20

The Keysmart turns keys from a jangled, scattered mess into a tight, ordered easy-to-carry collection. This ultra-durable body houses up to eight keys up its sleeve — and with this two-pack, you can separate home and work keys and quit having keys jab you from inside your pocket ever again.
Keyport Pivot Bundle Minimalist with Keyport ID & MOCA Tool – $23.99; originally $33
Keyport Pivot Outdoor Plus Bundle – $46.99; originally $61
BuzzFeed called the Pivot "an amazing multi-tool that has the ability to really transform your daily life and activities." So we figured we'd give you a pair of ways to get this part key organizer, part Swiss Army knife, part smart locator service package.
With the Pivot Minimalist collection, you get a nine-key Pivot organizer and a 10-in-1 MOCA multipurpose tool to serve as a bottle opener, screwdriver, hex bit driver and more. You also get a 2-year subscription to Keyport ID, an online service that helps reunite lost keys with their owners.
youtube
In the Pivot Outdoor Plus bundle, you get everything in the minimalist package, plus a pair of Pivot-compatible modules, including a 2.2-inch pocket knife and a mini-flashlight. You'll also get an S-biner to secure fobs or other loose items to your Pivot or attach the Pivot to a bag, a backpack or even a belt loop.
youtube
Skill Master 24-in-1 Handyman's Smart Key Tool – $24.99; originally $39

Made from stainless steel, the Skill Master has a roster of 24 specific talents, from serving as a stripping tool, makeshift saw teeth or a quarter-inch drill drive and more. For the enterprising handyman or quick-thinking guy out in the world, this is a super convenient tool to have at the ready.
KeyBar Compact Key Holder Multi-Tool & Organizer – $29.99; originally $39
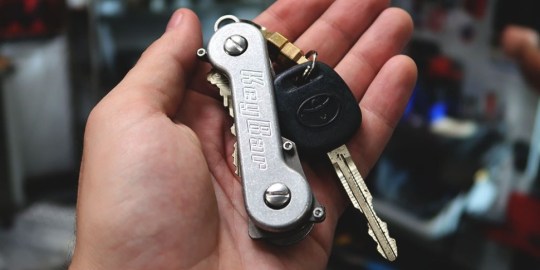
With the KeyBar, you can organize up to 12 different keys or mix and match a batch of helpful tools like a screwdriver, bottle opener or a flash drive. Made from aircraft-grade aluminum and high quality rust-free stainless steel hardware, the KeyBar adds almost no weight to your keys, yet puts the entire collection in order.
youtube
The Kelvin 007 Pocket Spinning Tool: Set of 2 – $29.99; originally $39

The Kelvin is like a Japanese throwing star for the DIYer. The six-pointed multi-tool features six handy heads (two straight screwdriver bits, two Phillips, and two Torx tips), all snapped inside the Kelvin handle magnetically, which turns on ceramic bearings for a smooth spin.
Emergency Lights
Collective Carry Glowing Vials – $21.95; originally $34

With just 15 minutes drinking in the sun's rays each day, the X Vial will cast its unearthly glow for hours at night. A crazy practical camping or outdoor accessory, you can hook this handy light right on to a bag or zipper and have a light source from sundown until bedtime.
Aurora A5x GITD Keychain Flashlight with UV Sidelight – $32.95; originally $36
Aurora A7 GITD Keychain Flashlight – $45.95; originally $56
The Aurora keychain flashlights are like strapping on a searchlight that's barely over two inches long. With a maximum output of a whopping 650 lumens, the Aurora A5x is a flamethrower, issuing an ultra-bright light for use in camping, night activities or for emergencies. It's also got an incredible amount of battery life for its size, capable of running up to 66 hours at low power.
youtube

Meanwhile, the Aurora A7 has an extra trick in its arsenal. Made of polycarbonate combined with fluorescence powder, the A7 literally glows in the dark. In addition to the blue glow, it also features white sidelights strong enough to read by or use as an emergency flash beacon.
And Finally…
Pry.Me Bottle Openers – $10.99

If you're going to have a bottle opener, you might as well have a super strong one…like one that's strong enough to pull a car across a parking lot. That's the Pry.ME, the world's smallest keychain opener, clocking in at no bigger than a penny. But crafted from Grade 5 titanium, it can hold up to 164,000 times its weight, which means it can more than handle any bottle you got.
Prices are subject to change.
Do you have your stay-at-home essentials? Here are some you may have missed.
Arplis - News
source https://arplis.com/blogs/news/these-20-edc-items-are-definitely-worth-the-daily-carry
0 notes
Text
Agilenano - News: These 20 EDC items are definitely worth the daily carry
Batman never roars into the Gotham night without his utility belt. James Bond never embarks on a world-saving mission without stopping to see Q and picking up a few helpful gadgets.
The world can be a challenging, even occasionally dangerous place — and that's never been more apparent than in the past few months. So while we're not saying you're going to confront homicidal clowns or diamond-powered super lasers in your daily travels, there are enough obvious dangers out there that you should really have the right equipment on hand at all times.
Check out this list of 20 borderline essential multi-tool and EDC items and accessories that could be game-changers in the pinch.
Germbusters
CleanKey Mini Antimicrobial Brass Stylus (2-Pack) – $16.99; originally $19

In case you don't have a lot of carrying room, the Clean Key Mini might be right up your alley. Just hook it to your keychain and at 2 inches long and weighing about half an ounce, this antibacterial, antimicrobial helper that comes with its own retracting carabiner can help you push all the buttons and pull all the door handles you need, without ever touching a thing.
CLEANFob Touchless Brass Antimicrobial Tool (2-Pack) – $22.99; originally $34

If a brass tool can help with pushing buttons or signing touchscreens, why can't it do more? The CLEANFob can, designed with added features to expand its daily usefulness, like a screwdriver, a box cutter, a hook and even a bottle opener. Of course, the solid brass workmanship and ability to avoid contact with 99 percent of germ-infested surfaces doesn't hurt either.
vimeo
11th Digit Germ-Free Touch Tool – $32.99; originally $35

Brass keys are fine and all…but if you really want to interact with the world, stay safe and engage in some safety, you've got to go bronze. Crafted from a slab of billet bronze, this functional and cool looking key has all the natural antibacterial and antiviral properties of brass keys — and looks even cooler.
McGuyver Favorites
8-in-1 Multifunctional Screwdriver – $15.99; originally $29

Whether you need a Phillips head or a slotted screwdriver, this handy helper has four of each type in varying sizes ready for immediate use. Everything folds back into the handle so it slips back into your pocket easily and it even has a built-in LED light so you can actually see what you're doing.
Cyclist Card Everyday Carry Multi-Tool – $72.99; originally $90
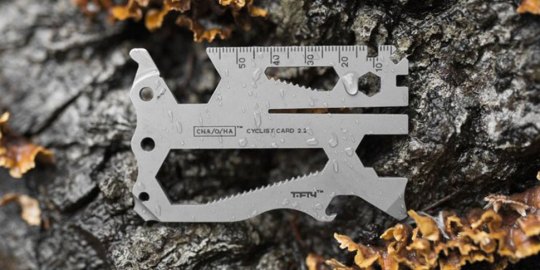
The Cyclist Card was created to get any pedaler out of a jam, but this card-shaped multi-tool that can slide right into your wallet is a serious problem-solver for everyone. Lightweight and made of ultra-durable steel, the card has more than 43 functions from hex wrench duties to
serrated edge blade to a basic ruler.
Multifunctional Pocket Tool – $16.99; originally $29
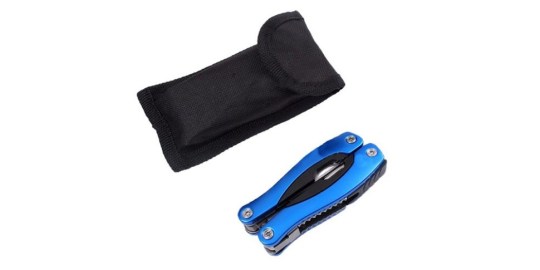
Knife, pliers, wirecutters, even a fish scaler, it's all right in this foldable pocket tool. Capable of 11 different tasks, this super versatile instrument also comes with its own storage case for safekeeping. And the nail file can even keep you looking good while you wait for chances to fix stuff.
Higher Objects Sawyer Utility Bracelet – $24.99; originally $39

In case you find yourself short of pockets, here's a utility tool that just hangs out on your wrist until needed. The Sawyer sports a blade with a screwdriver head for all kinds of odd jobs, all safely secured on a genuine leather strap that fits all wrist sizes. Sure, it's functional…but the great look kind of seals the deal here.
Anywhere Tools Everyday Carry Bundle – $39; originally $65
Keyport has a whole customizable modular system of swappable, compact multi-tool packages — and this 12-in-1 assortment lets you configure your tools any way you want. With a stainless steel bottle opener, flathead and Phillips head screwdrivers, a cord cutter and a premium 27-lumen flashlight with dual modes, there's definitely a collection of pieces for you. You've just got to put it together.
BitzBlade 2.0 Multi-Tool – $79.99; originally $99
The BitzBlade is loaded, including 26 different features for on-the-spot fixes. Successfully funded on Kickstarter to the tune of $121,180, this tool includes 9 interchangeable steel bits in both standard and metric sizes, a tungsten carbide tip window punch, a light and more in this super-strong collection that still weighs under 3 ounces.
youtube
EverRatchet Ratcheting Keychain Multi-Tool – $24.99; originally $27
The key to the EverRatchet is…well, the invaluable ratchet. With that dynamic action, you can use it to tighten screws and bolts faster, all without the constant readjustment. Of course, the EverRatchet more than just the ratchet featuring, also including 7 wrenches, a bottle opener, a wire stripper, metric and imperial rulers and more. There's even a custom-sized Flint2Go fire flint to get a blaze started just like that.
youtube
Keys Are the Key
KeySmart Flex: 2 Pack – $12.99; originally $20
The Keysmart turns keys from a jangled, scattered mess into a tight, ordered easy-to-carry collection. This ultra-durable body houses up to eight keys up its sleeve — and with this two-pack, you can separate home and work keys and quit having keys jab you from inside your pocket ever again.
Keyport Pivot Bundle Minimalist with Keyport ID & MOCA Tool – $23.99; originally $33
Keyport Pivot Outdoor Plus Bundle – $46.99; originally $61
BuzzFeed called the Pivot "an amazing multi-tool that has the ability to really transform your daily life and activities." So we figured we'd give you a pair of ways to get this part key organizer, part Swiss Army knife, part smart locator service package.

With the Pivot Minimalist collection, you get a nine-key Pivot organizer and a 10-in-1 MOCA multipurpose tool to serve as a bottle opener, screwdriver, hex bit driver and more. You also get a 2-year subscription to Keyport ID, an online service that helps reunite lost keys with their owners.
youtube

In the Pivot Outdoor Plus bundle, you get everything in the minimalist package, plus a pair of Pivot-compatible modules, including a 2.2-inch pocket knife and a mini-flashlight. You'll also get an S-biner to secure fobs or other loose items to your Pivot or attach the Pivot to a bag, a backpack or even a belt loop.
youtube
Skill Master 24-in-1 Handyman's Smart Key Tool – $24.99; originally $39

Made from stainless steel, the Skill Master has a roster of 24 specific talents, from serving as a stripping tool, makeshift saw teeth or a quarter-inch drill drive and more. For the enterprising handyman or quick-thinking guy out in the world, this is a super convenient tool to have at the ready.
KeyBar Compact Key Holder Multi-Tool & Organizer – $29.99; originally $39

With the KeyBar, you can organize up to 12 different keys or mix and match a batch of helpful tools like a screwdriver, bottle opener or a flash drive. Made from aircraft-grade aluminum and high quality rust-free stainless steel hardware, the KeyBar adds almost no weight to your keys, yet puts the entire collection in order.
youtube
The Kelvin 007 Pocket Spinning Tool: Set of 2 – $29.99; originally $39
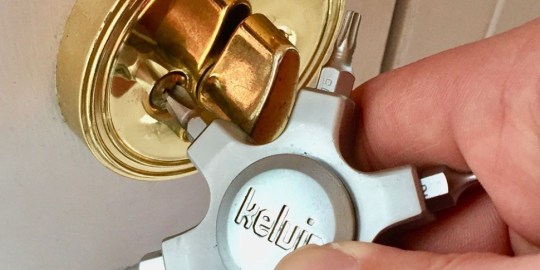
The Kelvin is like a Japanese throwing star for the DIYer. The six-pointed multi-tool features six handy heads (two straight screwdriver bits, two Phillips, and two Torx tips), all snapped inside the Kelvin handle magnetically, which turns on ceramic bearings for a smooth spin.
Emergency Lights
Collective Carry Glowing Vials – $21.95; originally $34

With just 15 minutes drinking in the sun's rays each day, the X Vial will cast its unearthly glow for hours at night. A crazy practical camping or outdoor accessory, you can hook this handy light right on to a bag or zipper and have a light source from sundown until bedtime.
Aurora A5x GITD Keychain Flashlight with UV Sidelight – $32.95; originally $36
Aurora A7 GITD Keychain Flashlight – $45.95; originally $56

The Aurora keychain flashlights are like strapping on a searchlight that's barely over two inches long. With a maximum output of a whopping 650 lumens, the Aurora A5x is a flamethrower, issuing an ultra-bright light for use in camping, night activities or for emergencies. It's also got an incredible amount of battery life for its size, capable of running up to 66 hours at low power.
youtube
Meanwhile, the Aurora A7 has an extra trick in its arsenal. Made of polycarbonate combined with fluorescence powder, the A7 literally glows in the dark. In addition to the blue glow, it also features white sidelights strong enough to read by or use as an emergency flash beacon.
And Finally…
Pry.Me Bottle Openers – $10.99
If you're going to have a bottle opener, you might as well have a super strong one…like one that's strong enough to pull a car across a parking lot. That's the Pry.ME, the world's smallest keychain opener, clocking in at no bigger than a penny. But crafted from Grade 5 titanium, it can hold up to 164,000 times its weight, which means it can more than handle any bottle you got.
Prices are subject to change.
Do you have your stay-at-home essentials? Here are some you may have missed.
Agilenano - News
from Agilenano from shopsnetwork (4 sites) https://agilenano.com/blogs/news/these-20-edc-items-are-definitely-worth-the-daily-carry
1 note
·
View note
Text
Few Dental Equipment every dentist must have
Whether building a new place from scratch, upgrading an existing practice or expanding a practice with additional operatories or new specialty services, numerous pieces of dental equipment are going to be needed to finish the project. Quite more than just the technologies used to treat patients, dental equipment also includes the utility systems that power a practice , the systems used for infection control protocols, and even all of the equipment used to set up a transportable dental operatory. There are many dental equipment like cordless endo motor, hand pieces and lots of others.
The following dental instruments shouldn't be missing from any dentist's examination tray:
NiTi files
Rotary instrumentation should be performed with slow-speed, low-torque electric motors with constant and precise torque suited to the canal being treated. Endo motors offer programmable settings; automatic reverse functions designed to scale back file breakage, and even integrated apex locators. niti h file have 3 times more elastic flexibility in bending and torsion also as superior resistance to torsional fracture in comparison with size stainless-steel files that's why nickel-titanium files gradually force out hand stainless files.
Niti files have many benefits
— Time saving: with practice a typical molar are often totally cleaned and shaped in far less time than hand instrumentation.
— Less post-op pain due to debris being extruded from the canal during the crown-down technique rather than being pushed through the apex during step-back.
— Less Fatigue for the operator compared handy instrumentation.
— Less Transportation of canals.
— Predictable results whenever even when handling curved canals.
Micro motors
Micro motors are used for the treatment of semi hard dental tissues. Different working speeds and torques also are variable; meanwhile differing types of instruments are often placed onto the micro motor: straight and contra-angle handpieces
Straight Handpieces: There are many sorts of handpieces like german led handpiece. These are rock bottom speed rotary instruments (between 20,000 and 40,000 rpm) and aren't usually used inside the mouth. They are used to refine the prosthesis and are always attached to a micromotor; additionally, these instruments may or might not carry light. during this post we'll offer you some very useful tips regarding straight handpieces.
Contra-Angle Handpieces: It is used to work within the mouth so as to get rid of decaying material, prepare cavities or crowns, remove fillings, also on finish and polish dental and restorative surfaces. They’re low speed, high torque instruments.
Dental Examination Mirror
The mirror is an important dental instrument that permits dentists to explore the patient's oral activity, both for direct viewing and indirect vision techniques, also on act as a mouth separator. Its little size and adaptablity make it a basic but highly practical instrument for an ideal working vision.
Forceps
A dental forceps is another basic instrument utilized in dentistry for a mess of tasks. they're used to separate tissues, hold them together, suture them, and to move small objects to the mouth or out of it. Counting on the task to be performed, there are differing types of forceps: surgical, ligatures, hemostatic etc... pinza diseccion
Pliers
Pliers are instruments utilized in dentistry for a mess of treatments, especially in orthodontics and within the laboratory, as an example , to chop through wires and dowels, or to bend hooks, etc. There are multiple sorts of pliers counting on the actual function to be performed. They even be used to traverse materials like plaster and are available with various sorts of tips.
Turbines
A dental turbine may be a rotary instrument that's driven by air compression directly through the dental unit's hose via a coupling. Of all the rotary equipment, it's the very best speed but rock bottom torque. it's recommended for jobs that need greater resistance to the treatment, as an example , to get rid of hard tissues from the tooth like enamel or prosthesis material. during this post, we'll tell you all about dental turbines in additional details.
Light Curing Dental Lamps
These lamps are used for light curing procedures on dental materials, especially adhesives and composites. They need an ultraviolet that acts on light-curing materials, causing them to polymerize and harden during a short period of your time . an honest example of such instruments is that the Coltene SPEC3 Spec 3 curing light.
X-Rays
For dental diagnosis and coverings it's quite common in dentistry to perform radiographic tests. find all types of materials used for x-rays including developer boxes, intensifier screens, negatoscopes, films, x-ray holders, x-ray positioners, protective materials, cleaning materials, x-ray protectors, sensor protectors, stain removers, developers, fixers etc.Digital X-Ray or rvg sleeves are the favored for cover of patient and sensor from cross contamination.
Apex Locators
Apex Locators are endodontic devices that measure the impedance, frequency and resistance of surrounding material so as to locate the working length of the basis canal to be treated. For this, we might recommend you the WOODPEX III PRO LCD Apex Locator which offers excellent value for your money.
You can buy dental equipment like differing types of handpieces, dental lamps, turbines and rotary files online from trusted sites like My Dental Stock.
0 notes
Text
How to Make Costume Dragonfly Wings

My four-year-old insisted on being a dragonfly this year for Halloween. When I couldn’t find any costume “fairy wings” that could pass for dragonfly wings, I decided to make them myself. I was pleased with how they turned out, so I thought the process was worth documenting. The same technique could be adapted to make anatomically correct wings for any insect costume.


Supplies:
Printer/scanner/copier and paper
Dark pen or marker
Craft paper or butcher paper (or removable fabric stabilizer)
Sewing thread
Invisible monofilament thread
Decorative (rayon) thread for machine embroidery
Sheer woven fabric for wings (knit fabric or netting might work but I haven’t tried it)
1.5 mm polyester millinery wire
Iron and pressing cloth
Fray check
Fabric marker or fabric paint
Exoskeleton fabric (I used a 4-way stretch polyester-spandex cosplay fabric)
Backing fabric (I used black quilting cotton)
Batting
Black 3/8” elastic braid
4 large sew-on snaps
8 medium sew-on snaps
Process:
1. Find a detailed photograph of a dragonfly online. Zoom in on one pair of wings and print them on white paper. With a pen or marker, trace any details of the wings, such as the venation, that you want to add to the costume. Copy and enlarge this image to a suitable size (mine were about 18” from thorax attachment to wingtip). Make a copy of the wings that is a mirror image of the first set.
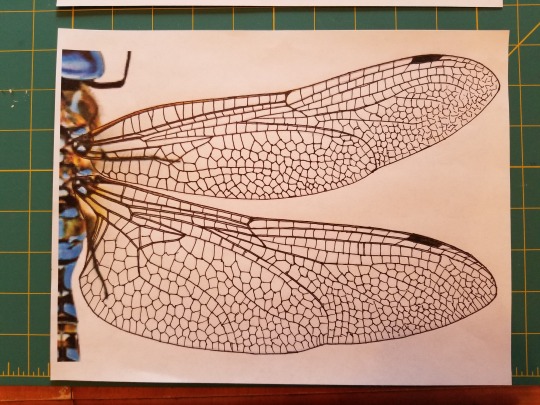
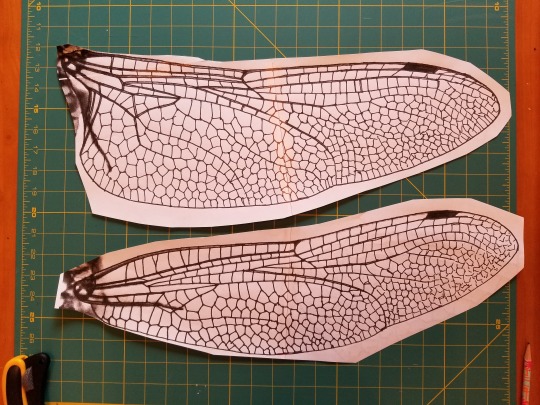
2. Cut the paper wings out along the outside edges. Add lines to indicate grain; you want the straight or crosswise grain to run along the length of the wings as much as possible so that the main body of the wings will not be on the bias. Trace each wing onto a piece of craft paper or butcher paper, making sure the grain lines are all parallel and leaving about two inches between the pieces.
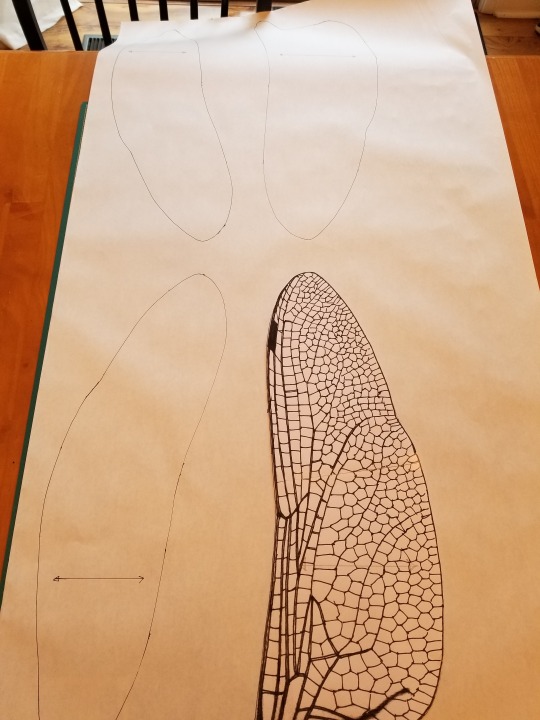
3. Pin a single layer of wing fabric to the craft paper and machine baste the paper to the fabric, directly on the pattern outline, using a medium-long stitch. The basting holds the fabric in place and stabilizes it in preparation for adding the wing armature. I used white thread because these stitches will be covered later, but in retrospect, invisible monofilament would probably have been a better choice. (The pieces can be carefully cut apart before or after stitching; just make sure the fabric stays stable and on grain until you have it basted to the paper.) (Note that I used craft paper because I didn’t have any Sulky Solvy or other “real” stabilizer on hand. If you have more time than I had and are using a washable fabric, you might want to use a dissolving stabilizer here to save time and effort later.)
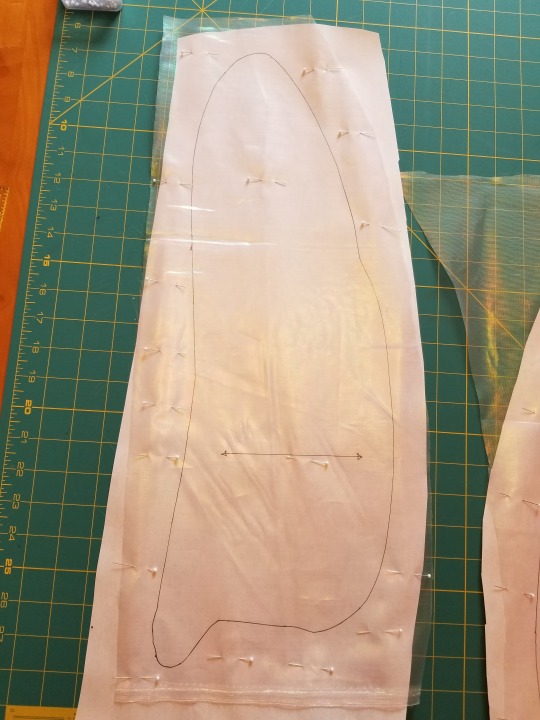
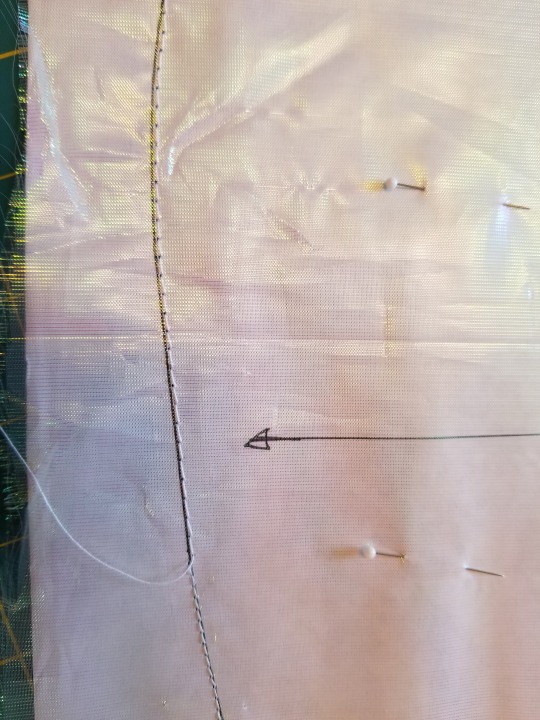
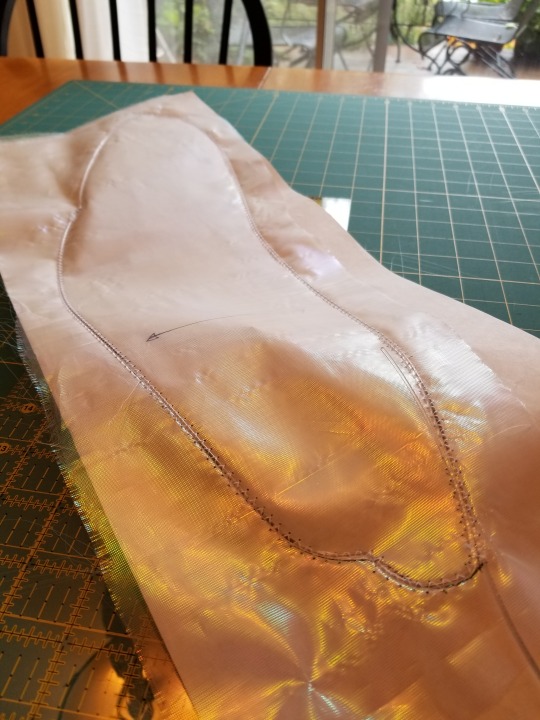
4. For each wing, cut a length of 1.5 mm polyester millinery wire equal to the circumference of the wing outline plus the distance around the wing joint area and 10-12” down the top edge of the wing. Using your original pattern piece for reference, bend the wire along the outline of the wing, so that it matches as closely as possible the outline you’ve drawn and cut around. Double the wire along the wing joint and the top edge of the wing to provide extra stability and support. The wire will not lie flat at this point, but that’s okay. Just focus on accurately placing specific bends and curves along the length of the wire. You’ll sew them in place in the next step. (Tips for working with the wire: Don’t unfasten the coil of wire all at once or you’ll have a mess to untangle. Instead, slip out one loop at a time until you have the length you need. You can gently pull and bend it in your hands to relax some of the coil before you start shaping it. I was able to bend and crimp it using just my fingers, but you might want to also use needle-nose pliers for more accurate corners and sharper angles.)
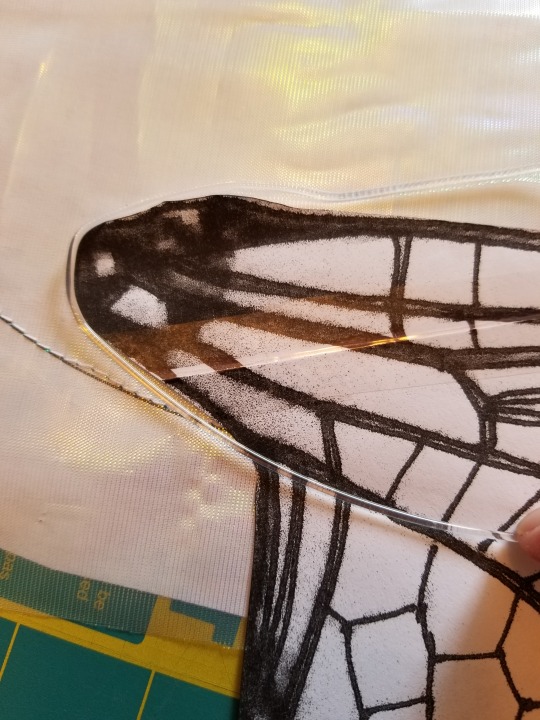
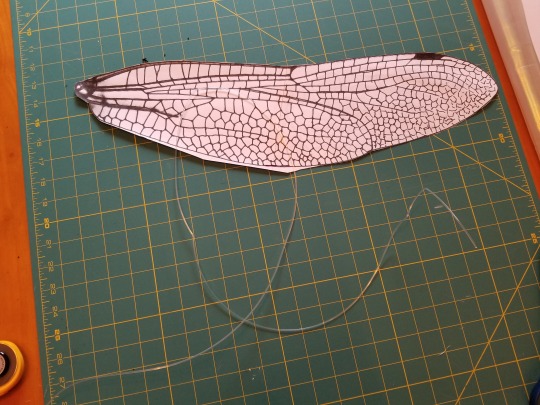
5. Set your machine to zig-zag at a stitch width that accommodates the wire without striking it with the needle. Carefully stitch the wire directly over the top of the wing outline. Keep in mind that you’ll need to switch to a wider stitch for the areas where the wire is doubled.
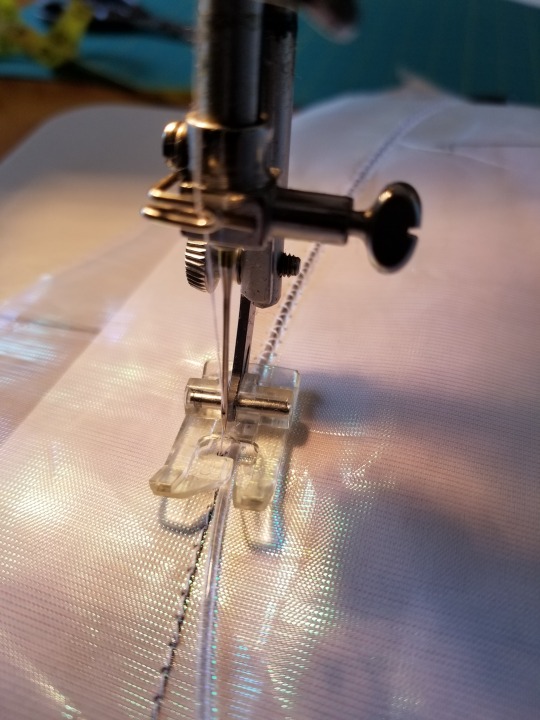
6. To “set” the shape of the wing armature, put a dry iron on low heat. The milliner’s supply shop where I bought my wire says that 60 seconds of 175-degree heat is sufficient to set polyester wire. I found the synthetic setting on my iron was too low, so I used a wool setting. Using a pressing cloth and being careful not to scorch or distort your fabric, press each area of the wing outline for at least 60 seconds. Don’t slide the iron back and forth; just hold it firmly in place at intervals along the wire. Let the wing cool. I weighted mine with my acrylic cutting guide as they cooled, to keep them flat.
7. Carefully tear the paper away from the wing. This is where using a “real” tear-away or dissolving stabilizer might come in handy; getting the bits of craft paper out of the stitches was a royal pain and involved tweezers and lots of patience. :)
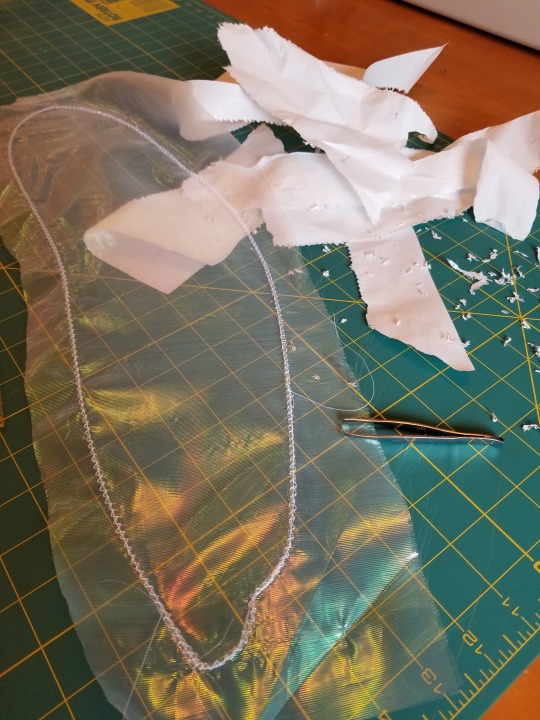
8. Put your machine back on straight stitch and install the zipper foot. With the right side of the wing facing down, fold the extra wing fabric over the wire and pull it as taut as possible without distorting or tearing it. You want to get a little tension on the wing, but not too much; your previous zig-zagging will prevent you from pulling the fabric too far. With the needle on the right side of the foot and the foot snug against the inside edge of the wire, straight stitch through both layers of fabric around the inner circumference of the wing. (Again, I used white thread, but monofilament would be appropriate here.)
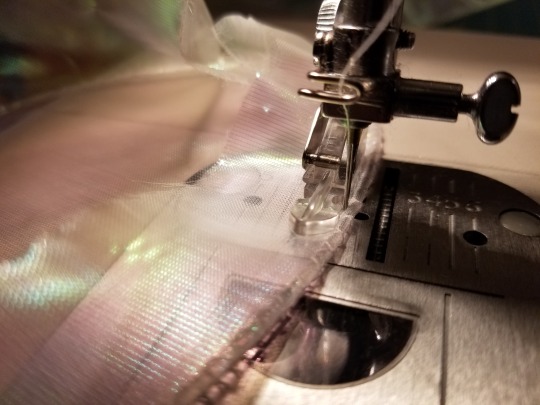
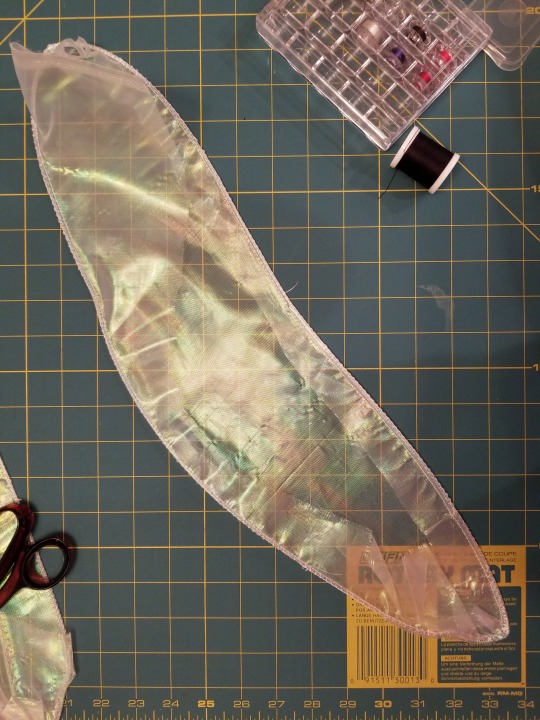
9. Reinstall the standard sewing machine foot. Using a short stitch length and a wide zig-zag setting, with the right side of the wing facing up, satin-stitch around the edge of the wing. I used cinnamon-colored rayon thread for my dragonfly wings.
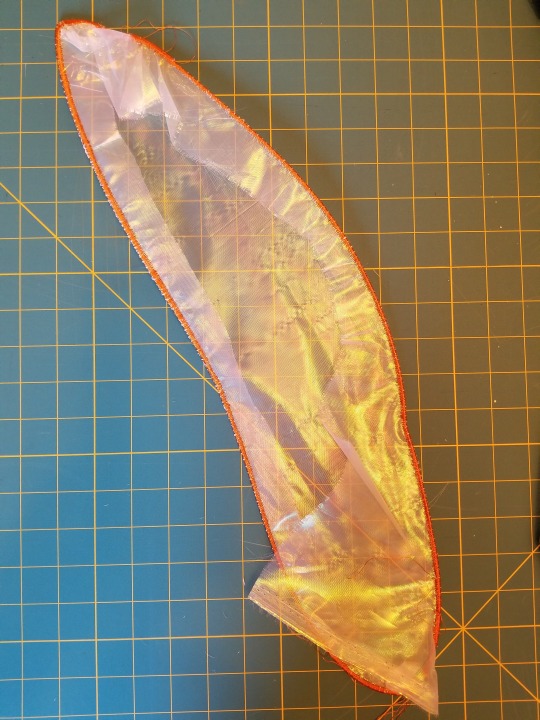
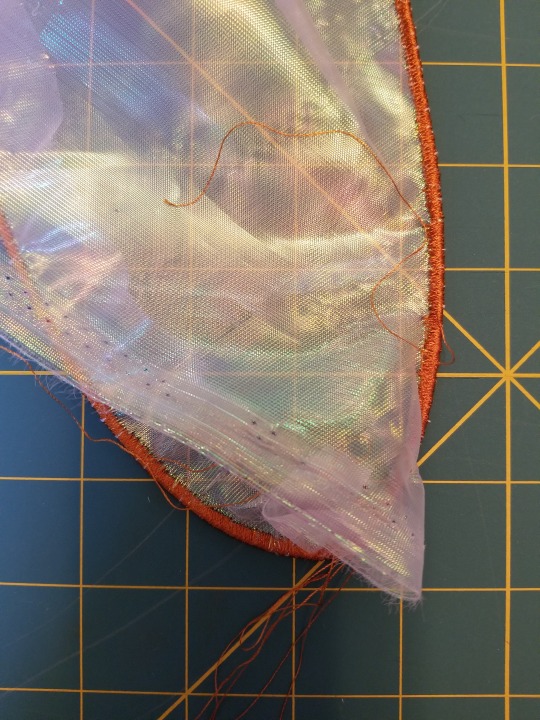
10. Apply Fray-Check to the inside edge of the satin-stitching. Trim away the extra fabric as closely as possible to the stitching, being careful not to poke a hole in your brand-new wing (applique scissors might help).
11. Lay the wing right side up over its original pattern piece and trace details onto the wing using a fabric marker, fabric paint, or other medium. You may want to experiment on a scrap first. Fabric marker was almost invisible on the organza I used, so I went with copper-colored fabric paint. (I tried to protect my pattern from bleed-through using plastic wrap, but this turned out to be a bad idea that caused the paint to smear a little on the first wing.)
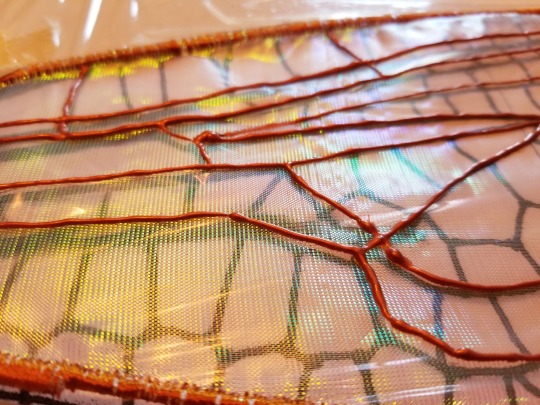
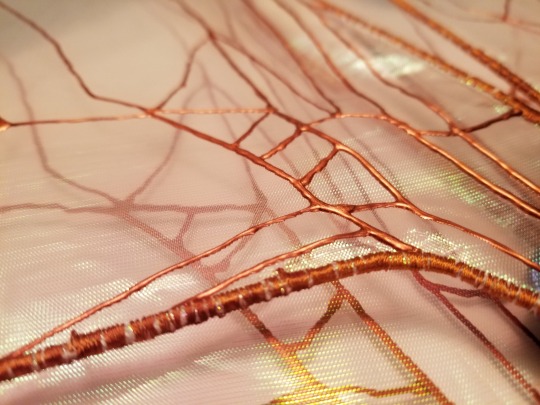
My son wanted wings that would flap (I know, I know; dragonflies don’t flap like that), but I wanted wings that would stay rigidly in place. As a compromise, I decided to make convertible wings; with a 40” wingspan, I figured he’d need to be able to narrow the costume for indoor use anyway. (NB: For wings that have to go through doorways, consider making something less than 36” across; better yet, make something not much wider than the wearer’s shoulders.) Therefore, the remaining steps will produce a set of convertible wings that can be worn upright in one place or loose with loops over the arms for flapping, either attached to an insect costume thorax or separately over regular clothes for dress-up. This process could easily be adapted to make simpler wings.

12. The wings will function as pairs, with each pair sewn to a smaller base that will later be attached to a larger base using snaps and elastic. (For fixed wings, you could just sew all four wings to one large base.) To figure out the size and shape of the two smaller wing-muscle bases, I traced the outlines of a pair of wings, positioned as I wanted them relative to the center back line and the back neckline, over the outline of the side back piece of the costume thorax. I shaped the smaller base so that its edge would intersect with the armature at the top and bottom of both wings and so that it would support the narrow “joint” portions of both wing ends. I used the original photo of the dragonfly loosely for reference. Then I sketched in the larger center-back base, shaping it to support one small base on each side of a center decorative element.
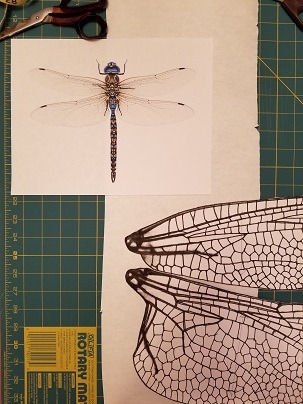
13. For each of the two small wing-muscle bases, shape a piece of 1.5 mm polyester wire to match the outline of the base and secure it into an unbroken loop (I used thread and tape but I think you can also melt it). Cut a piece of exoskeleton fabric about 3/4” larger than the loop. Cut a piece of batting and a piece of backing fabric the same shape as the loop. Lay the wire loop on the wrong side of the exoskeleton fabric, gather the edges of the fabric around the loop, and secure your stitching. Tuck the batting inside, making sure it lies flat. Clip and press under 1/4” of the backing fabric, and stitch it in place over the gathered exoskeleton fabric to hold everything in place and provide a firm foundation for stitching on the wings, snaps, and elastic.
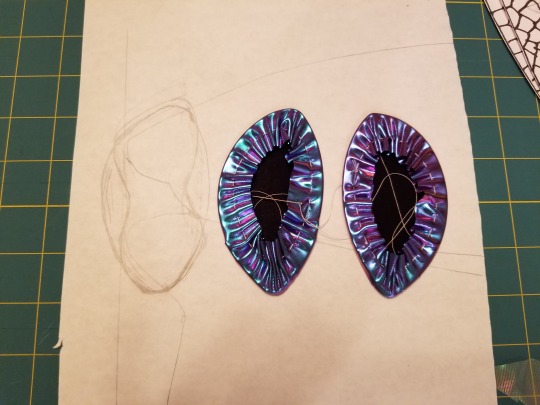
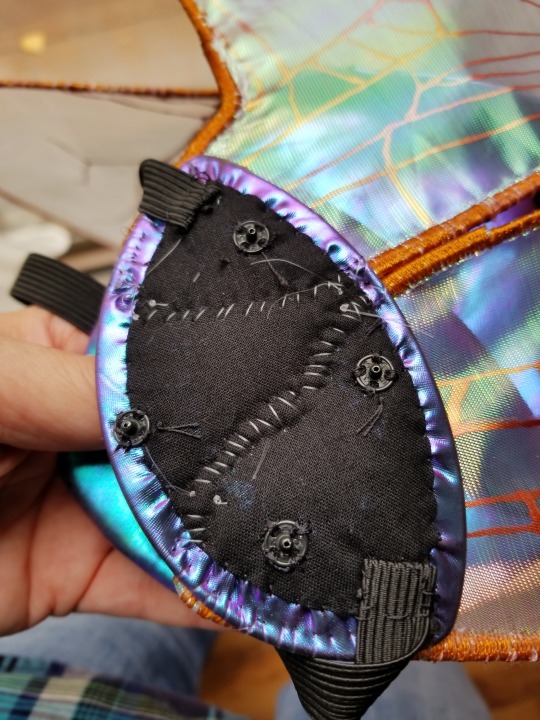
14. Make the larger center-back base in the same way as the smaller wing-muscle bases, but cut the batting 1/2” larger than the loop, and lay it on the wrong side of the exoskeleton fabric before you gather it around the wire loop. Attach any decorative elements you want on the right (exoskeleton fabric) side of the base. (I added a narrow stuffed teardrop shape with a double wire frame hidden on the inside to give additional structural support to the base.)
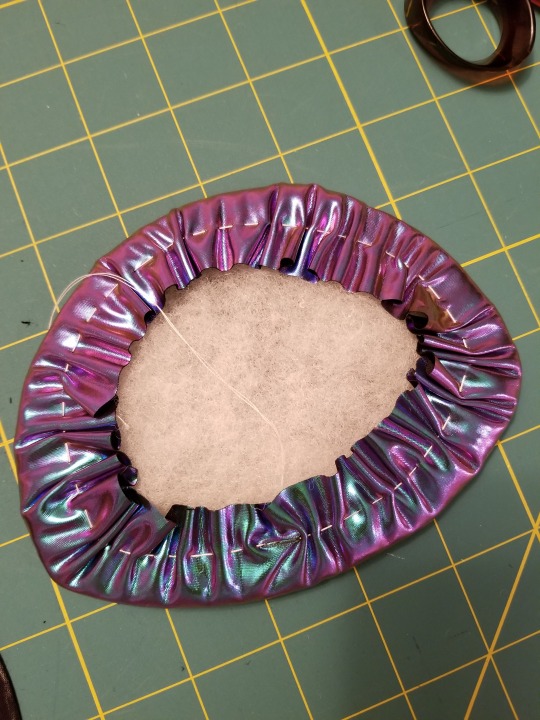
15. To attach the center-back base to the costume thorax, sew halves of four large snaps onto the back of the base; sew the other halves of the snaps onto the costume thorax in their corresponding positions.
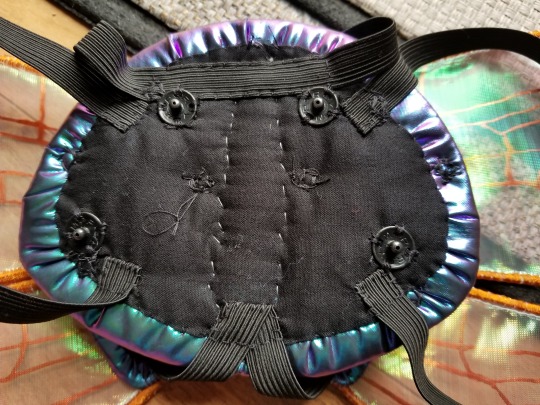
16. To wear the wings without attaching them to a costume, attach two loops of 3/8” elastic to the back of the center-back base, one on each side, to extend around the wearer’s shoulders and upper arms. My loops were 15” around.

17. To attach the wings to the smaller wing-muscle bases, position one pair of wings over the right (exoskeleton fabric) side of a wing-muscle base and pin them in place. Using invisible monofilament thread, whipstitch the wings firmly in place by taking stitches over the wire armature of the wings. Add extra stitches at the points where the wire wing armature intersects with the underlying wire armature of the base. Repeat with the other pair of wings and the other wing-muscle base.
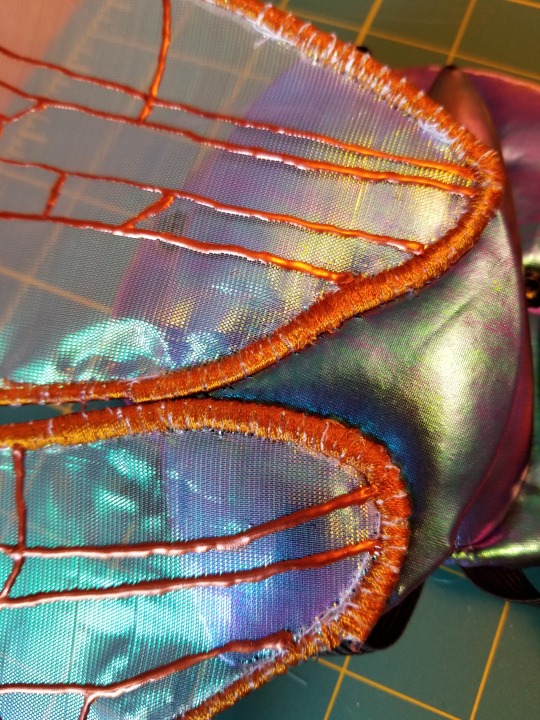
18. To hold the wings to the center-back base in “flapping” mode, cut two pieces of 3/8” elastic. The elastic will be anchored to the back of the center-back base with the four ends attached to the edges of the wing-muscle bases. One piece is for the top edge of the wing-muscle bases, the other is for the bottom edge. The top piece needs to be long enough to allow the top edges of the wings to dangle low enough to hang flat against the wearer’s back, but the bottom piece needs to be just long enough to allow the bottom edge of the wing-muscle bases to be snapped onto the center-back base, and no longer. My top piece extended about 2-1/2” or 3” beyond each side of the top of the center-back base, and my bottom piece extended about 1-1/2” beyond each side of the bottom of the center-back base. Sew the two pieces of elastic firmly to the center base first. Then sew the ends to the edges of the wing-muscle bases that are opposite the wings and closest to the center back, taking care not to twist the elastic.
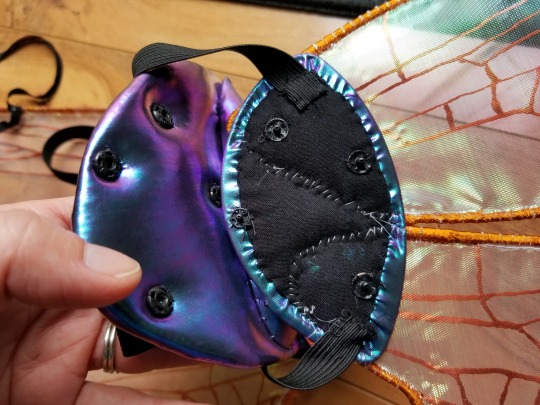
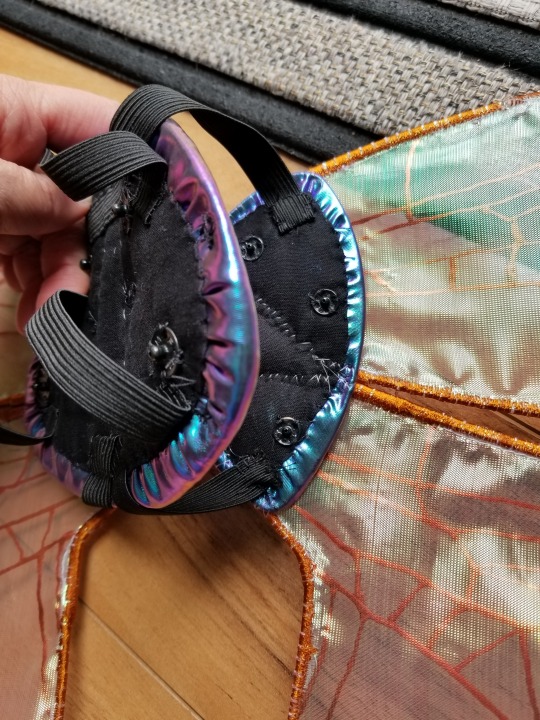
19. To hold the wings to the center-back base in “fixed” mode, position the two smaller wing-muscle bases over the center-back base so that the wings extent at the desired angle. Mark the positions for four medium snaps on each wing-muscle base, placing them strategically for maximum support (e.g., one very near the center of the center-back base, one near the “outer” edge of the wing-muscle base, one near the top edge of the wing-muscle base, and one near the bottom edge). Sew the snap halves into place on the wing-muscle bases and the center-back base.

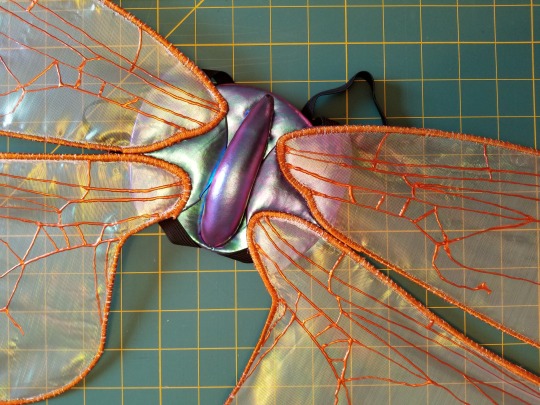
20. To allow the wearer to operate the wings in “flapping” mode, attach a narrow loop of filament or fabric to the center top edge of each top wing, large enough to go around the wearer’s arms. I used a thin strip of my exoskeleton fabric and attached it with invisible monofilament thread.
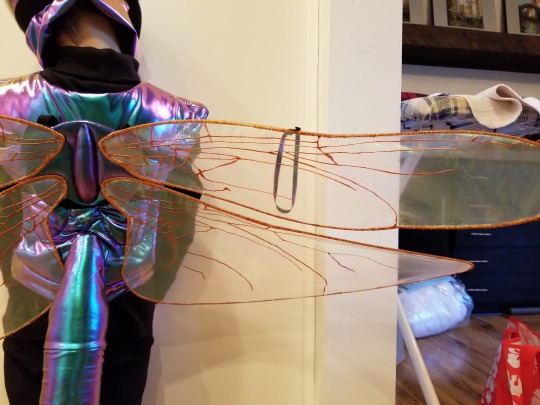
21. Optional: to further stabilize the pairs of wings and provide extra support when they’re being used in “flapping” mode, shape a small square out of a scrap of 1.5 mm polyester wire and attach it at the midpoint between each pair of wings, sewing it to the wing armatures with invisible monofilament thread.
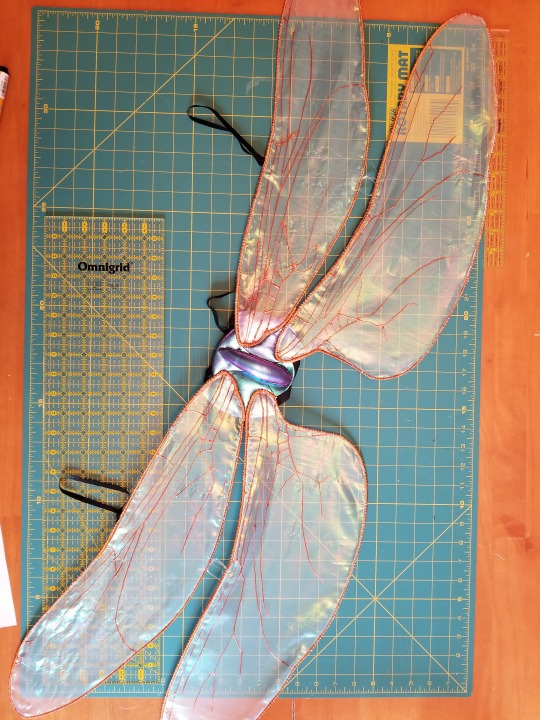
To wear the wings in “flapping” mode, snap the center-back base onto the costume (or slip the elastic loops onto your shoulders/upper arms). Let the wings dangle from the center-back base and slip your arms through the wing loops to control the wings. To wear the wings in “fixed” mode, take your arms out of the wing loops and snap the wing-muscle bases to the center-back base. :)
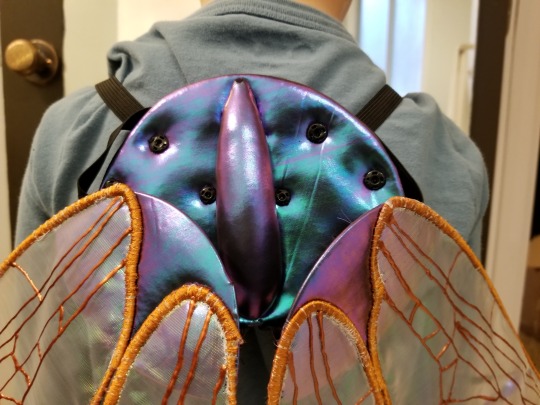

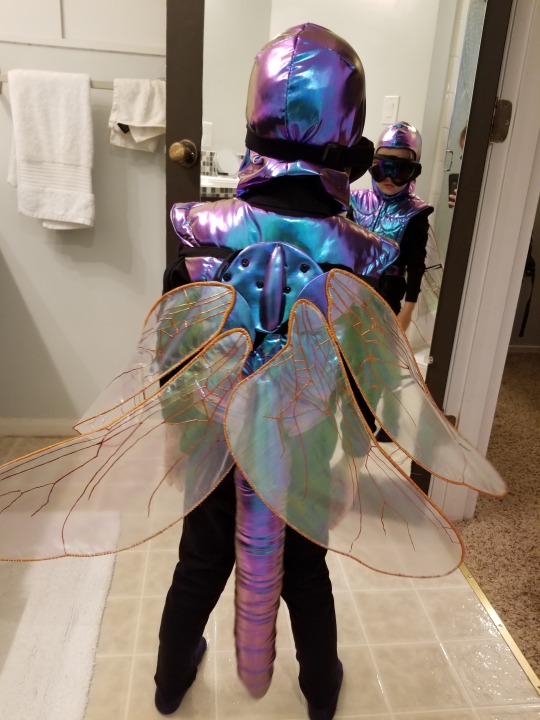
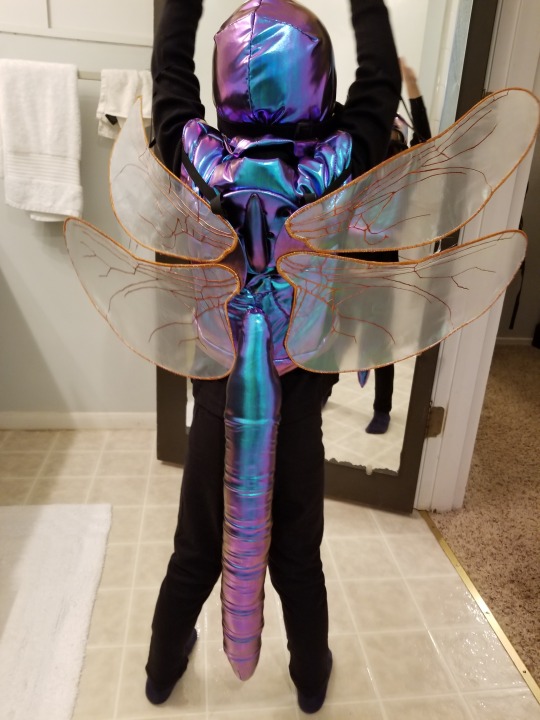
To wear the wings in “fixed” mode, snap each of the smaller wing muscle bases to the larger main base and do not use the narrow arm loops that are attached to the tops of the wings.
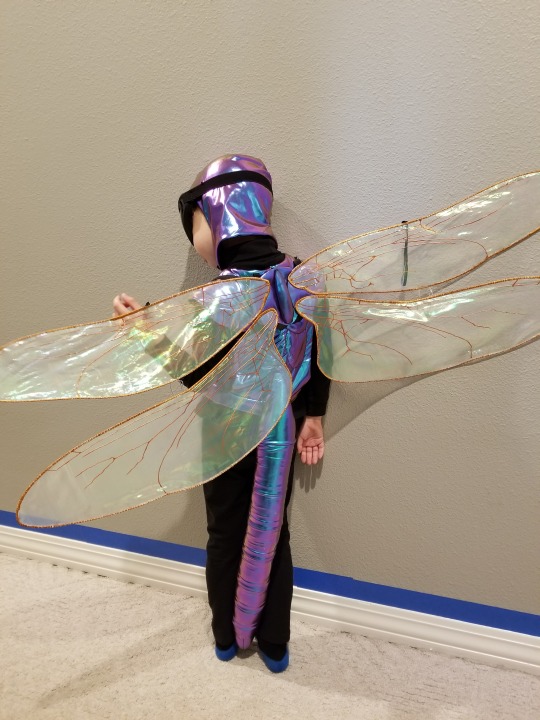
4 notes
·
View notes
Last Seen Blogs

armitageway
This is Richard Armitage's Way

fusehund
Was denn? Jetzt?

rat-detector
Rat Detector

creativecontractor
Creative Contractors

treatiseongrace
“Joy is the serious business of heaven.”