
lauraiscooking
Laura is cooking.
I'm a young woman in Texas.
A novice cook learning as I go.
This is a blog of my cooking adventures,
escapades, and disasters.
164 posts
Don't wanna be here? Send us removal request.
Last Seen Blogs

our-walk-together
Our Walk Together

sarggacupanggenetical
Sargga Betta

lykegenia
Tell Me We're Going To Fight That Dragon

emelifs
what the fuck am i doing

moonlights-thoughts
Midnight And Beyond
Text
Thai Peanut Noodles

Okay, okay, the title is deceiving. But I promise you won’t wish that it was noodles instead of zoodles!
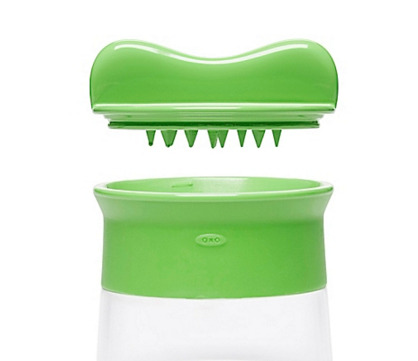
I have heard so much about spiralizers. They’re everywhere these days, and I am late to the party. However, on a recent trip to Bed Bath & Beyond, my mom and I both decided to try out the OXO Hand-held Spiralizer. I wasn’t sure whether I would like spiralized zucchini and didn’t want to commit to something expensive or that occupied counter space. I’ve had great experiences with OXO products before, and at $14, the hand-held spiralizer fit all my criteria!
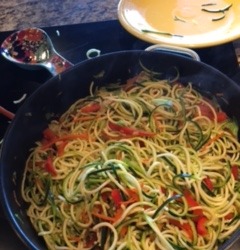
For my first attempt at zucchini noodles, I decided to try something Asian-inspired. I love Pad Thai, but it is not the most healthy dish and I could eat about 10 servings of it in one sitting. As a result, I figured Thai Peanut Zoodles would be a good way to get all the flavors I love without the guilt! I found a Thai Chicken Peanut Noodles recipe on pinterest, and thought that would be a good place to start! My intuition did not steer me wrong.

Behold, Trader Joe’s Asian Style Spicy Peanut Vinaigrette! I used this in my recipe. I recently discovered this delicious peanut sauce, and it’s the best that I have ever encountered outside of a Vietnamese Restaurant. Life changing stuff, right there, and you don’t have to go through all the work of making your own peanut sauce. It’s the best.
When I spiralized my zucchini, I was astounded by how many noodles there were, but they shrunk down a great deal in cooking. The spiralizer was easy to use and very effective. This recipe was colorful, tasted fresh, and was easy to make.
Thai Zoodles in Peanut Sauce
Ingredients
2 tbsps sesame oil (or olive oil)
2 cloves minced garlic
1 cup shredded carrots
1 cup thinly sliced cabbage, red or green
1 large red bell pepper, very thinly sliced
3 zucchini, spiralized and dried with paper towels
2-3 cups chicken breast, cooked and diced
1/2 cup TJ’s Asian Style Spicy Peanut Vinaigrette (or homeade peanut sauce)
Directions
Heat the oil in a large skillet over medium high heat and add the garlic. After two minutes or so, add the carrots, cabbage and red pepper. Stir frequently until the vegetables are tender, approximately 5-7 minutes.
Once these vegetables are softened, add your zucchini noodles and stir often. In 5-7 minutes, they will have begun to shrink down. At this point, add the TJ’s vinaigrette and the diced chicken. Stir well to combine.
Once the zoodles are softened to your liking and the chicken and vinaigrette are hot, it’s time to enjoy!
Recipe inspiration: http://sallysbakingaddiction.com/2016/02/22/peanut-chicken-zucchini-noodles/
#noodles#thai food#pad thai#asian food#zoodles#spiralizer#spiralized#zucchini#red pepper#trader joes#trader joe's vinaigrette#vinaigrette#peanut sauce#peanut#cabbage#food#recipe#low calorie#low carb#diet#thai
2 notes
·
View notes
Text
Blue Apron Review
Blue Apron seems to be everywhere these days - Facebook, my mailbox, etc. I had been curious for a while, but never motivated enough to actually try it. I enjoy grocery shopping and I like finding my own recipes. When a friend offered us a week free though, I couldn’t turn it down. I needed to see what all the fuss was about.
I signed up, entered my code, and there it was, my free week of Blue Apron. You get to indicate any dietary preferences. We went with the meat entree (but I’ve heard the vegetarian are just as good).
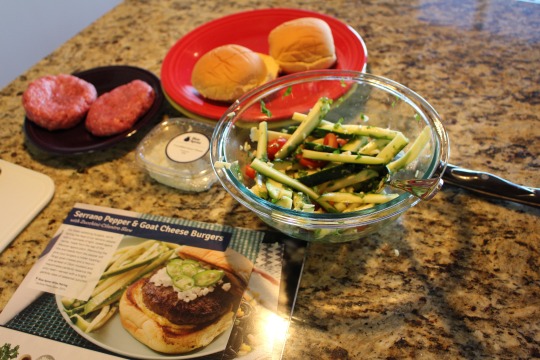
The food arrives straight to your door with ice packs to keep the food cold. Everything is labeled and it was easy to figure out what items went with each other. The package also came with recipe cards which gave detailed instructions, with pictures, on how to prepare each dish.

Our box came with three recipes: Serrano Pepper & Goat Cheese Burgers, Lemon Chicken & Green Beans, and Shrimp & Squid Ink Spaghetti. Overall, each recipe was easy to follow, was ready in about 30 minutes, and was well portioned for two people. Our favorite was a tie between the lemon chicken and the burgers. I felt like the recipes had fresh ingredients, were for dishes I wouldn’t think up on my own, and incorporated easy cooking methods that anyone could master.
There were a few negatives. I thought I could tell when Blue Apron had an expensive entree and thus skimped on the side. While the burgers were filling, they came with a zucchini “slaw” which involved cutting the zucchini, pouring some vinegar on it, and adding some minced garlic. It was a pretty strange side. I added tomatoes because it was fairly bland. Also, the squid ink spaghetti looked like worms and was very salty. I am all for trying new ingredients and have enjoyed squid ink with sushi, but in pasta form, it just wasn’t appetizing at all.

Overall, I would definitely try Blue Apron again. It got me thinking outside the box, trying new ingredients, and it got my boyfriend into the kitchen. It was really enjoyable to try new things and cook together. The food was fresh, healthy, and convenient!
#Blue Apron#food delivery#food delivery service#at home cooking#food#recipe#squid#squid ink#spaghetti#shrimp#corn#burgers#goat cheese#serrano peppers#serrano#zucchini#tomato#slaw
1 note
·
View note
Text
Cape Town Pt. II
Cape Town is one of the most amazing places I’ve ever been. Every time we talk about it, I have trouble conveying the magic of that city. I cannot wait to go back.
For some of the places we dined, we found them in a Lonely Planet guide book. Others, we came upon when we were hungry and driving to our next destination and just had to stop for food. It was nice to have a plan of places we wanted to try and opportunities for fun surprises.
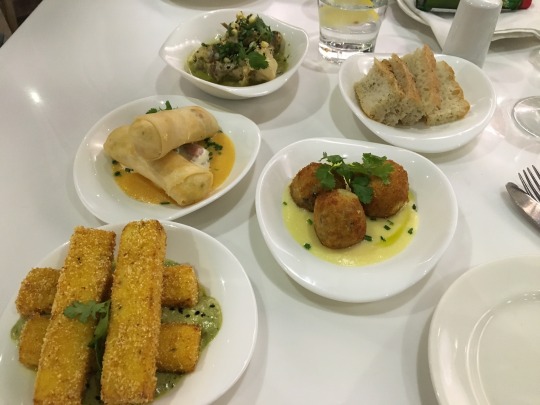
We had an amazing dinner at Bistro Sixteen82 at the Steenberg Wine Farm, which we found thanks to Lonely Planet. We ordered off the tapas menu. We started our dinner with wine and oysters on the half shell. What a treat, considering that oysters were out of season in the northern hemisphere.
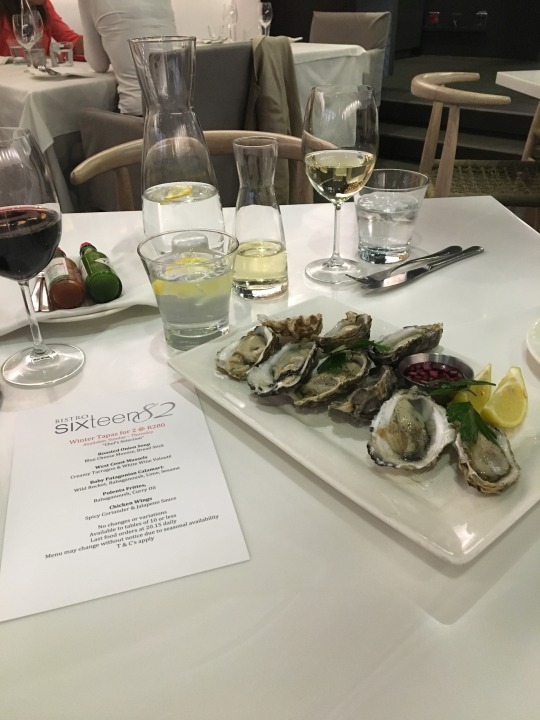
[Please note the tabasco on the left above - apparently, it’s not just in Louisiana. That stuff was everywhere!]
Next came the tapas! We ordered 4 to try - Polentas Frites (a favorite!!), Arancini (which I acquired a taste for in Italy and this did not disappoint), sticky chicken wings, and bacon and jalapeño egg rolls.
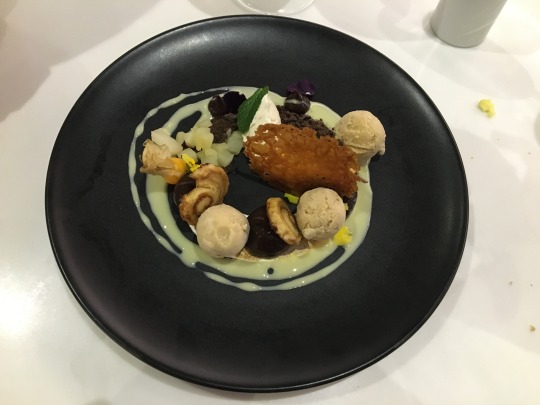
Next came dessert! We ordered the salted chocolate caramel - what a presentation! I’ll give you the description per their menu: Salted Caramel Chocolate Ganache, peanut pinwheels, vanilla creme, peanut butter ice cream, lace biscuit. And it tasted divine! It was a beautiful evening.
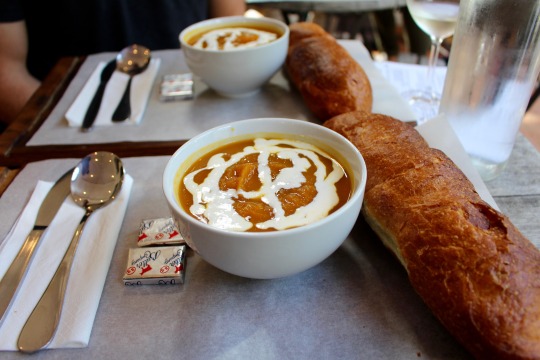
We tried butternut squash soup at several locations, but the soup at Eagle’s Nest was the best. We just wanted a light snack and saw that it came with bread, but I figured it was just a slice. It was a whole loaf! This place was a treat.
The meal below was at Delaire Graff Wine Estate - another place I highly recommend. We stopped here on our way to the Cape Winelands, on the route from Cape Town to Stellenbosch and Franschoeck. We ordered the Pea & Herb Risotto and Oysters Three Ways.
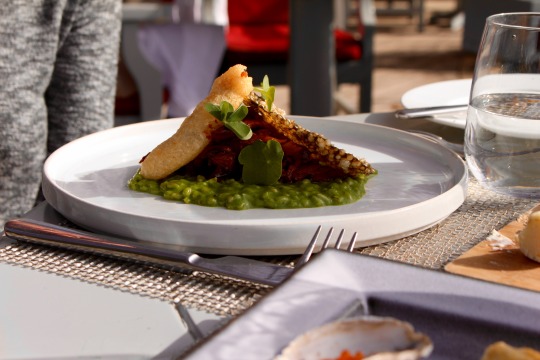

This was the view. It made the food taste even better, if that was possible!

Cape Town was the trip of my dreams. I can’t wait to return, visit some of these favorites, and find some new gems!
#delaire#Delaire Graff#Delaire Graff Wine Estate#Steenberg#Sternberg Wine Farm#wine#farm#vineyard#cape town#oyster#view#mountain#africa#stellenbosch#franschoeck#grapes#white wine#red wine#champagne#oysters#raw oysters#risotto#cheese#tapas#food#cape town food#butternut squash#dessert#peanut butter#egg rolls
3 notes
·
View notes
Note
Hello, hope you are doing well! I'm an online photo editor for FoodandWine/FWx. We're working on a slideshow of Fireball recipes featuring your Fireball Whiskey Pumpkin Pie. We are in urgent need of images for the slideshow. Would you be able to send high resolution images today, along with the photo credit, we can use in this slideshow? We are hoping to post this as soon as possible. Please let me know if you have any questions. Thank you!
Yes! I can provide by EOD today. Is there an email address I could send to?Laura
0 notes
Text
Cape Town Pt. 1 - Breakfast!

South Africa may be the most beautiful place I’ve ever been. And we ate some amazing breakfasts! It is the most important meal after all!


Yummy lattes and breakfast stacks at Truth coffee roasters. Not pictured - AMAZING peanut butter banana oatmeal. You must go here if you ever visit Cape Town.
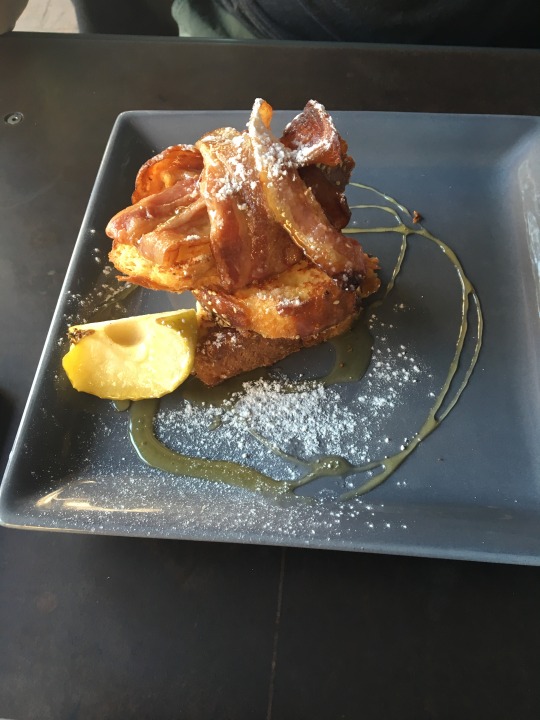
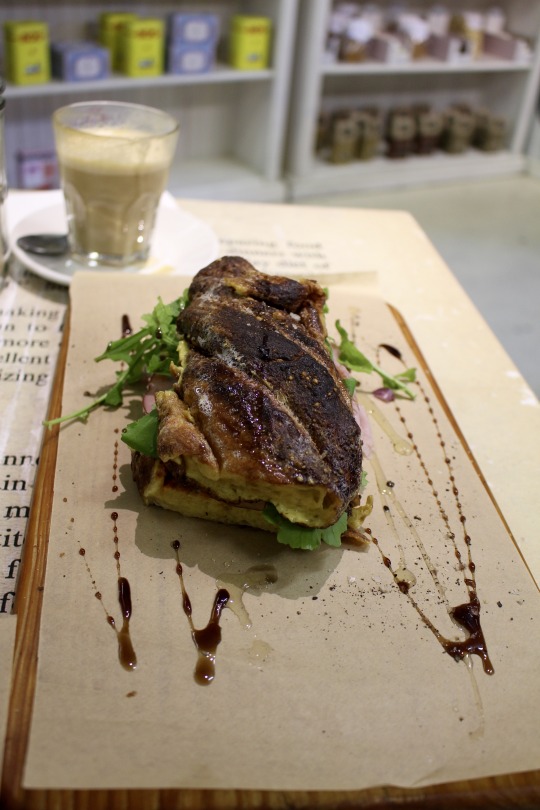
French Toast and Eggs at Jason Bakery.
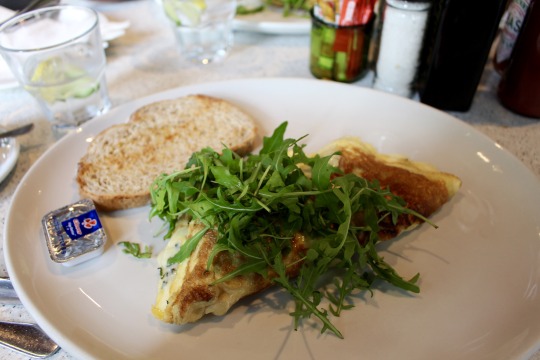

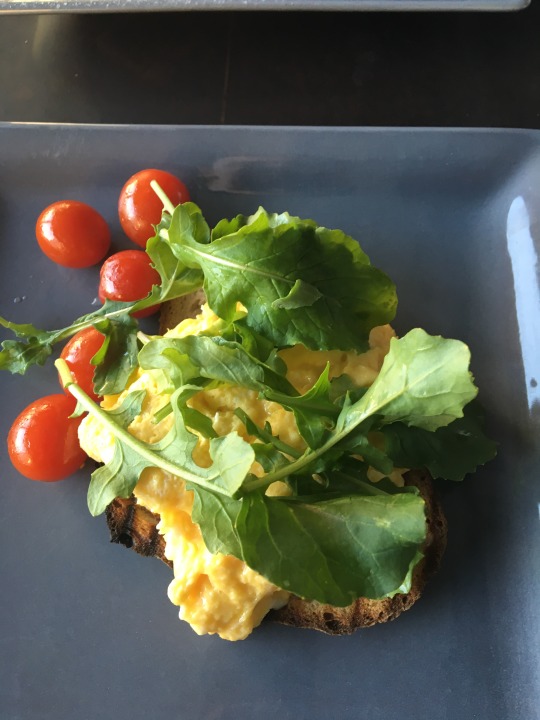
Breakfast bowl and omelette at Company’s Garden restaurant. This was a unique restaurant in the middle of the Company’s Gardens in central Cape Town. And the breakfast was great.
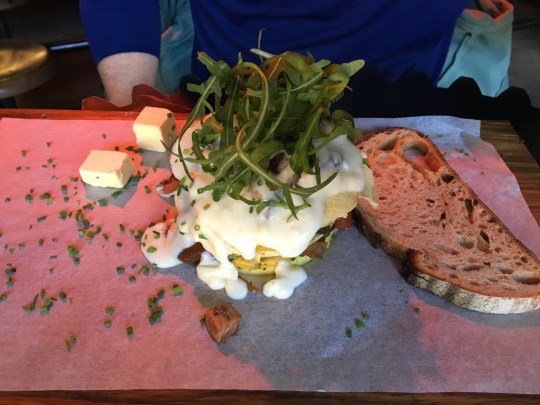
Breakfast sandwich at the Neighborhoods Market in Woodstock in Cape Town. Definitely visit this bustling, beautiful market on a Saturday morning for gifts, snacks, and handmade goods!
#Neighborhoods market#cape town#south africa#africa#cape town south africa#city bowl#truth coffee#truth coffee roasters#lattes#sandwich#breakfast#travel#jason bakery#Company's gardens#company's gardens restaurant#food#french toast#eggs#omelette#breakfast food#latte#yum#recipes
1 note
·
View note
Text
Happy (Late) Birthday to Me!
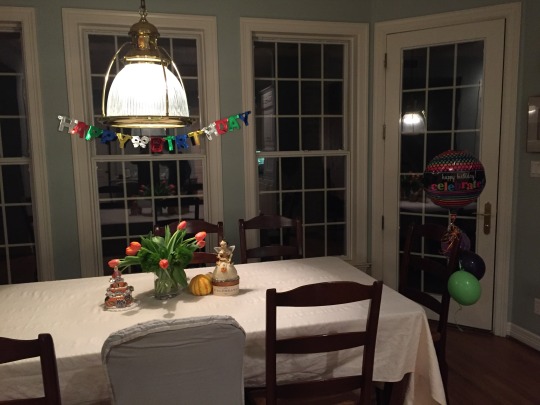
It’s been a while! But I’m back with a yummy dessert to make up for my absence!
My birthday recently came and went, funny how those things sneak up on you. I’m not necessarily a “cake person.” My one true love is frozen yogurt (though ice cream will do, I like pie, and love candy – but cake, it’s not necessarily something I get excited about.
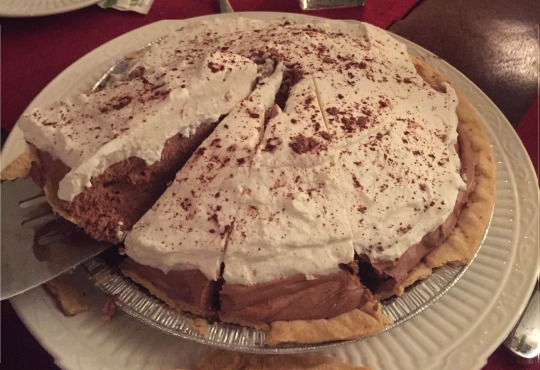
My mom has always been accommodating and is great at helping me find cake worth celebrating. Last year, she made this amazing coconut cake that was out of this world. This year, we made a Chocolate Sin Cake, full of many of my favorite things – cookies, candy, whipped cream! It may have been “sinful,” but I didn’t feel any guilt. It was so good!

There are many versions of this cake out there, but I liked ours for a few reasons. First, we used Hershey’s chocolate pudding – do not use Jello pudding (Sorry, Jello!). The Hershey’s pudding tastes so chocolatey, doesn’t have that artificial taste, and was crucial to the success of this cake. We also crushed heath bar and put it on top – I think this made the cake better texturally – who doesn’t love a little crunch? One last thing, use cool whip, not homemade whipped cream – it’s more firm and will hold up better.
I hope you enjoy this cake as much as I did! I would eat it every day if I could!
Chocolate Sin Cake
Ingredients:
For the Crust:
½ cup (1 stick) unsalted butter, softened to room temperature
1 cup all purpose flour
¼ cup finely minced pecans
For the First Layer
1 package of cream cheese, softened at room temperature (8 oz)
1 cup powdered sugar
1 cup Cool Whip
For the Second Layer:
2 packages of Hershey’s chocolate pudding
3 cups milk
Topping:
1-2 cups of Cool Whip
½ cup crushed heath bars
Preheat oven to 350F. In a large bowl, mix flour, pecans, and butter until the mixture becomes doughy. Spread into the bottom of a 9x13 inch baking dish. Bake for approximately 20m minutes, or until the crust is lightly browned. Allow the crust to cool completely, about 1-2 hours.
While it is cooling, work on the other two layers. Mix together the cream cheese and powdered sugar until well-blended. Add 1 cup of Cool Whip and mix until well combined. Refrigerate for 10-15 until the mixture is a little more firm, and then spread this layer over the cooled crust.
Mix together the pudding and milk until it thickens. Spread over the cream cheese layer, being careful not to mix the two layers. Next, carefully spread the remaining Cool Whip on top of the pudding layer. Cover and refrigerate for several hours until all the layers are more firm, if you can.
When you’re ready to serve, sprinkle with crushed heath bar, cut, and serve!
#cake#birthday cake#chocolate sin#chocolate cake#ice cream#birthday#happy#food#recipe#dessert recipe#dessert#cool whip#whipped cream#heath bar#shortbread#pecan#pecan dessert#shortbread cookies#chocolate#chocoalte pudding#hershey's chocolate#hershey's pudding
3 notes
·
View notes
Text
Amen to this 🙌🏻
Reminiscing about the time I tried to give up carbs

467 notes
·
View notes
Text
Recipe Review: French Silk Pie
Recipe Review: French Silk Pie by The Pioneer Woman, Ree Drummond
I was recently invited to a “barbeque” and wanted to bring a dessert. I don’t like showing up empty-handed, especially since events are a great opportunity to try a recipe that is outside of my usual repertoire of weeknight dinners.
I decided to bring dessert, because it was unclear what kind of “barbeque” we were headed to. I chose a recipe that makes great use of my KitchenAid mixer, a French Silk Pie by Ree Drummond, the Pioneer Woman. At the time, I was worried it was an overly fussy dessert for such a relaxed dinner, but I was in luck! Turns out the “barbeque” was actually a nice steak dinner at a friend’s parents’ home, complete with candlelight, grandparents, and steak!
The pie was a hit! The Pioneer Woman rarely steers you wrong, and her step-by-step instructions were easy to follow. I would recommend having a helper in the kitchen – I couldn’t have gotten such a great result without my boyfriend’s assistance. The original recipe also didn’t call for whipped cream on top, but I added some and sprinkled cocoa on top of the pie for visual effect. I can’t wait to try this again, maybe with a homemade crust!
French Silk Pie Recipe – The Pioneer Woman
Vanilla Whipped Cream
8 oz heavy whipping cream
1 tsp vanilla
2 tablespoons sugar
Place a metal mixing bowl in the freezer for 10-15 minutes. Remove the bowl, add the sugar, the vanilla, and the whipped cream. Using a large whisk or a stand mixer and the whisk attachment, whisk the cream rapidly until the mixture forms medium-stiff peaks. This should take 10-15 minutes by hand, or less if you’re using a stand mixer.
#pie#french food#french dessert#french silk pie#the pioneer woman#ree drummond#recipe review#dessert recipe#recipe#food#food blog#chocolate#whipped cream#sugar#vanilla#dessert#birthday#barbeque#kitchenaid mixer#kitchenaid#mixer
5 notes
·
View notes
Text
Venison & Pork Stuffed Peppers
As the weather turns cooler, I am much more inclined to turn on the oven. In Texas, deer season has begun, and what better time to serve venison and pork stuffed peppers!
When you shoot a deer, it’s amazing how much meat there is! You could eat it for weeks on end. There’s a lot of pork/venison in my freezer right now.
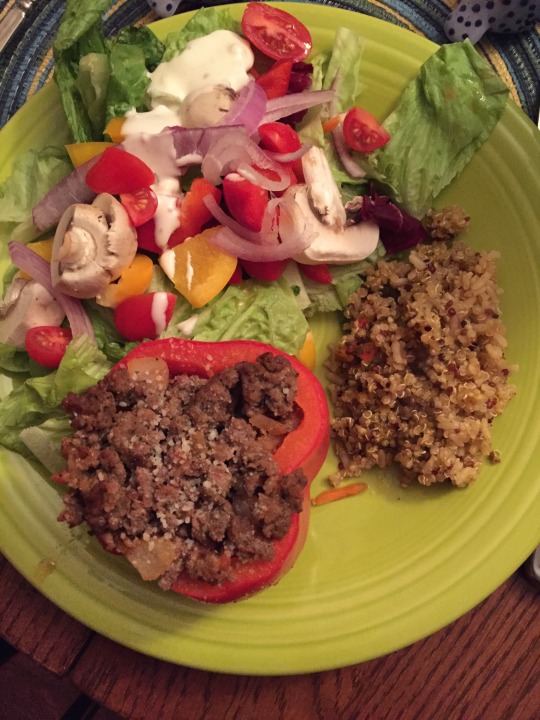
Because venison is naturally very lean, it’s often mixed with pork when it’s processed. To make use of the pork and venison pan sausage, I like to substitute the venison for ground beef. To me, it’s more flavorful, and is a nice change of pace from standard ground beef. A few weeks ago, I made these Italian-inspired pork and venison stuffed peppers.
I have not historically been fond of stuffed peppers that are baked. The peppers are often still too crisp while the meat can get dried out in the oven over a long period. I found a technique online in which you boil the peppers for a few minutes before stuffing them, which solved both of these problems. We ended with tender roasted peppers and meat that was juicy. It was a hit, and I hope you’ll enjoy it too!
Venison & Pork Stuffed Peppers
1 lb venison and pork pan sausage
4 Bell Peppers, tops cut off and seeds removed
1/2 cup (or more to taste) spaghetti sauce
1/2 yellow onion
2-3 tablespoons parmesan cheese
1 tbsp italian seasoning
3 cloves garlic, minced
Cooking Spray
Preheat the oven to 350F. Boil a pot of water, and insert the peppers until covered. Boil for 2-3 minutes until they begin to soften slightly.
In a medium nonstick pan, heat the pan to medium heat. Spray the cooking spray, and then add the onions, and garlic. Stir occasionally until the onions are translucent.
Add the sausage. Stir the meat occasionally over medium heat until the meat is almost cooked fully, but not quite. Transfer the meat to a bowl, and add the spaghetti sauce, and italian seasoning. Stir well to combine. Stuff the peppers with the meat mixture, and place into a baking pan lined with foil. Cover with foil and place in the oven for about 30 minutes. Remove, sprinkle with parmesan cheese, and enjoy!
#venison#pork#game meat#game#food#recipe#italian#italian seasoning#spaghetti#spaghetti sauce#garlic#onion#bell pepper#peppers#stuffed peppers#baking#deer season#cooking spray#parmesan cheese#parmesan#dinner recipe#quick recipe#food blog
1 note
·
View note
Text
Adventures in San Diego
As an early birthday present, I recently visited San Diego with friends. Below are a few snaps from our trip, and some yummy treats we ate!
Beautiful Hotel Del Coronado. This was the best beach we visited, and the interior of the hotel was stunning!


On to some food we ate! Saturday, we had breakfast at Hash House! The portions were so huge, and while we’d heard this, I don’t think we understood until we saw food coming out of the kitchen. I have never seen so much food as one entree! We couldn’t finish one order between the two of us!
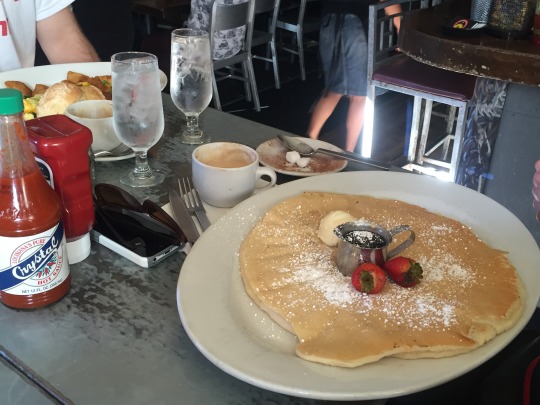
The pancakes were the size of a pizza! Those are not regular plates.
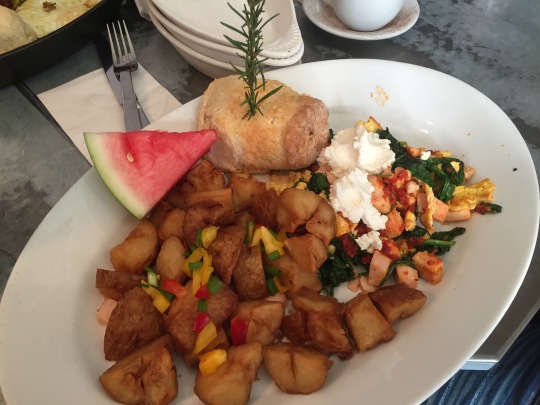
Our meal was an egg scramble, with roasted chicken, spinach, tomato pesto, and goat cheese. There was a homed biscuit we ate with strawberry maple jelly and crispy potatoes. I don’t think we ate for nearly 8 hours after this!
We worked off some of this breakfast by kayaking in La Jolla!

On the trip, our last stop was Balboa park. What a treat and surprise this was! We weren’t sure what to do for a few hours, and decided to just walk around. There were beautiful gardens, stunning trees, museums, and even an orchid show!

We ate so much great food, but I forgot to take photos of most. San Diego, what a treat you were! I already miss your weather!
#San Diego#san diego tourism#balboa#balboa park#hash house#food#breakfast#pancake#egg#scramble#tomato pesto#goat cheese#travel#birthday#vacation#hotel del coronado#coronado island#food blog#recipes#kayak#la jolla#california
1 note
·
View note
Text
Italian Roasted Squash
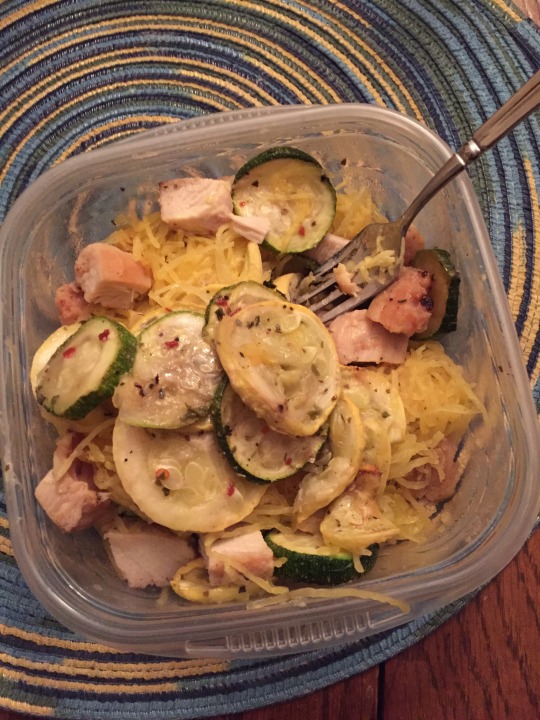
The other night, I made italian roasted squash. We are getting closer to fall, and here in Texas, there are touches of cooler weather. I don’t do well with the cold, so to relish the last bit of summer, I decided to make a quintessential summer vegetable - squash and zucchini!
The freshness of the zucchini and squash along with the italian seasoning was such a great combination. I enjoyed mine atop spaghetti squash and some diced roasted chicken. You could pair it with pasta, eat it with some yummy bread and goat cheese, or just as a side. I’m looking forward to making this again!

Italian Roasted Squash
1 zucchini, sliced thinly
1 yellow squash, sliced thinly
1 tablespoon olive oil
1/2 tbsp italian seasoning
1 tbsp parmesan cheese (or other italian cheese of your choosing)
Preheat the oven to 400F and slice the vegetables. Combine the vegetables, olive oil, and italian seasoning in a large bowl. Toss well to combine. Line a baking sheet with foil and lay the slices out onto the baking sheet. The slices should lay flat against the foil and not be layered upon each other. Roast for 20-25 minutes. Remove from the oven, sprinkle with parmesan cheese, and enjoy!
#zucchini#squash#yellow squash#summer squash#italian seasoning#olive oil#cheese#parmesan cheese#roasting#roasted vegetable#roasted squash#roasted recipe#roasted#chicken#spaghetti#spaghetti squash#vegetable#food#recipe#yum#tasty#marinara sauce#parmesan
1 note
·
View note
Text
Chicken with Tomatoes & Artichokes
Chicken is great - chicken cooks quickly, is endlessly versatile, and most people really enjoy it. Chicken can also get dull fast, at least for me. It can be tough for a chicken recipe to really catch my eye.
I’d seen several recipes which paired chicken and artichokes that piqued my interest. They typically are a riff on spinach-artichoke dip, which I love, but the recipes were a little indulgent for my at-home dinners - heavy on the mayo, creamy sauces, and the like. Then I saw a Kraft recipe for Foil-Pack Chicken Artichoke Dinner (credit below). I was inspired! I finally found a yummy, healthy way to put my artichokes to good use!
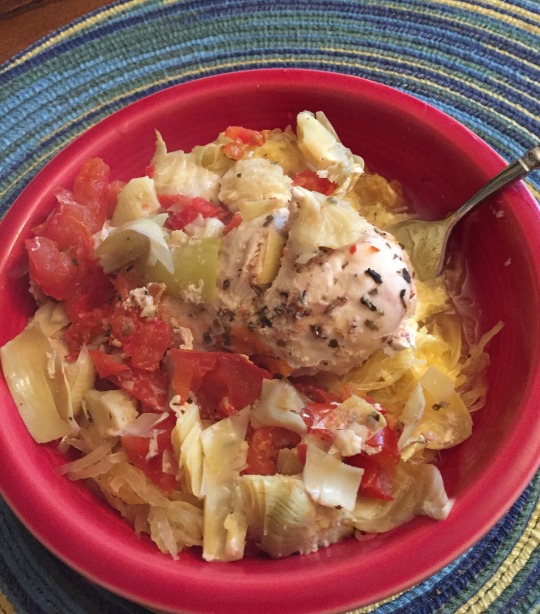
The foil pack method keeps the chicken nice and moist. I recommend marinating the chicken for several hours ahead of time to infuse the chicken with as much flavor as possible. The artichokes and tomatoes add a freshness that can be hard to come by in the fall. The artichokes are canned and drained and you could use canned tomatoes in a pinch.
I loved this recipe and can’t wait to use this foil pack method again!
Foil-Pack Chicken with Tomatoes and Artichokes
2 Chicken Breasts
1/2 can artichokes, drained and roughly chopped
2 Roma tomatoes, roughly chopped
2 cloves garlic, minced
1 tablespoon olive oil
1 tablespoon pesto
1 tbsp parmesan cheese
Marinate the chicken in the olive oil and pesto for 4-8 hours. Once marinated, preheat the oven to 400F. Place the chicken breasts in foil and pour the artichokes, tomatoes, and garlic over the chicken. Close the foil packet and bake in the oven for 40 minutes, or until chicken is cooked fully through. Top with parmesan cheese.
I served mine over spaghetti squash, but this would go great with pasta, couscous, or rice. Enjoy!
Recipe inspiration: http://www.kraftrecipes.com/recipes/foil-pack-chicken-artichoke-dinner-75459.aspx
#chicken#artichoke#tomatoes#tomato#spaghetti squash#pesto#garlic#recipe#parmesan cheese.#baked chicken#foil packets#foil pack chicken#olive oil#italian recipe#Italian food#food#food blog#artichokes#canned artichokes#quick and easy meals
1 note
·
View note
Text
Broccoli Cheese Stuffed Baked Potatoes
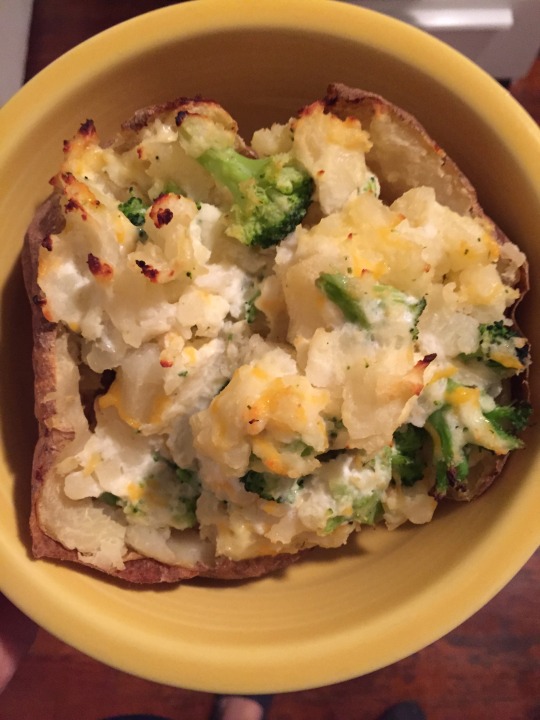
I love baked potatoes. In college, I practically lived off of them. They are filling, have lots of vitamins, and can be easily made into a meal! They can get dinner on the table in minutes also, if you microwave them. Usually, I’m too impatient for cooking them in the oven and twice-baking, but with this Broccoli Cheese Stuffed Baked Potatoes, they were worth the wait!
I enjoyed this recipe because it was easy peasy, and used ingredients you’re likely to have around the house when the cupboard and refrigerator are getting bare. The broccoli and cheese were reminiscent of broccoli cheese soup flavors without the heavy cream! This was a healthful, tasty weeknight meal. I also enjoyed that this recipe could be used as a template for other things. You could add meat to this, change up the veggie, top the potatoes with BBQ instead; there are many possibilities! Baked potato night could again become a regular thing in my house.
Broccoli Cheese Stuffed Baked Potatoes
2 baking potatoes
1/2 cup sharp cheddar cheese or more if you’d like!
1 1/2 cups frozen broccoli
Salt and Pepper, to taste (or garlic powder, Mrs. Dash, etc)
Bake potatoes at 400F for 1 hour and 15 minutes, or until easily pierced with a fork. Remove potatoes from oven and slice from the top. Scoop out insides of potatoes into a small bowl, leaving 1/4 inch of potato flesh in the skin. Mix the potatoes with the cheese and broccoli and spices, and stir well to combine. Stuff broccoli, cheese, potato mixture back into the potato skins. Return to oven and bake for 30 minutes at 350, or until the broccoli is warmed through and the cheese is melted.
Enjoy!
#potato#baked potato#cheese#cheddar cheese#meat#meatless monday#meatless monday recipe#no meat#vegetarian#vegetarian recipe#potatoes#broccoli#vegetable#food#delicious#recipe
2 notes
·
View notes
Text
Urban Eats
Last night I discovered a delicious restaurant! I had big plans for two baked potatoes, but a last-minute dinner invite made those plans go out the window. I’d driven by Urban Eats in central Houston many times, curious about the place every time. And I definitely was not disappointed.
The restaurant is comprised of a bistro+bar upstairs and a market downstairs. The bistro+bar upstairs functions as a seated restaurant with table service and a great menu of salads, sandwiches, and several hearty entrees like meatloaf or steak. The market downstairs is separate and has an olive bar, cheeses, pastas, and sauces for purchase. The market also has a coffee bar and a seating area. You can order from the bistro+bar menu or grab a salad or sandwich from their cases. They also have some pre-made items like pasta salads, grain salads, roasted vegetables, etc. It was a convenient place designed for both casual dining and a quick bite to eat or meal on the go.
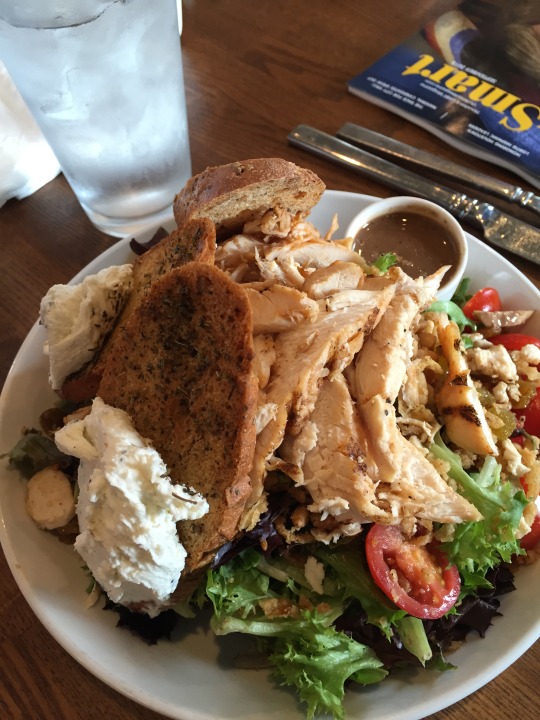
I ordered the Goat Cheese Crostini & Shaved Roasted Chicken Salad. The salad also had garden greens, cherry tomatoes, golden currants, pine nuts and fried onions and came with a rosemary balsamic vinaigrette. It was definitely a full meal, if not two! The goat cheese was creamy, the chicken was well-seasoned and the greens were fresh. I loved it!
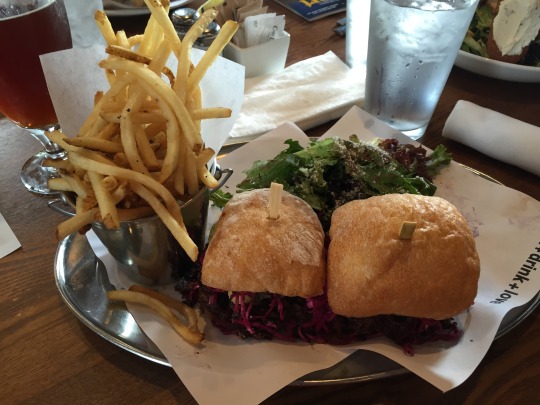
We also ordered a sandwich - “the Picnic” which was bbq chopped brisket on a toasted ciabatta roll with white cheddar, red cabbage slaw and dill pickles. The beef was so tender, and the slaw gave it a lighter flavor. I would definitely get this again. As you can see, this restaurant is definitely generous with their portions, and the prices are well worth it.
I loved this place. Honestly, the whole menu looked so good and I can’t wait to go back and try more yummy things. Urban Eats, I approve!
#Urban Eats#urban eats restaurant#houston#houston food#houston restaurant#restaurant#restaurant review#bbq#brisket#bread#ciabatta roll#cheese#cheddar#cabbage#slaw#salad#goat cheese#tomato#pine nuts#balsamic vinaigrette#yum#delicious#chicken
0 notes
Text
Houston Restaurant Weeks 2015
Houston Restaurant Weeks happens every August. It’s 5 weeks in which local restaurants offer special menus at reduced prices and $7 from each meal goes to the Houston Food Bank.
Most restaurants typically serve 3 courses - appetizer, entree, and dessert. It’s a great way to try a new restaurant, eat delicious food, and give back a little to the community.
This year, I went to Prohibition Supper Club in downtown Houston. The atmosphere was cozy, and we were seated right next to a window downtown, which was nice. The restaurant has a beautiful bar area, and on the weekends, they host burlesque shows + dinner!
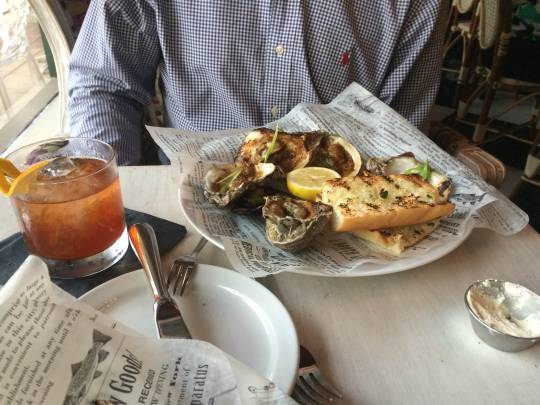
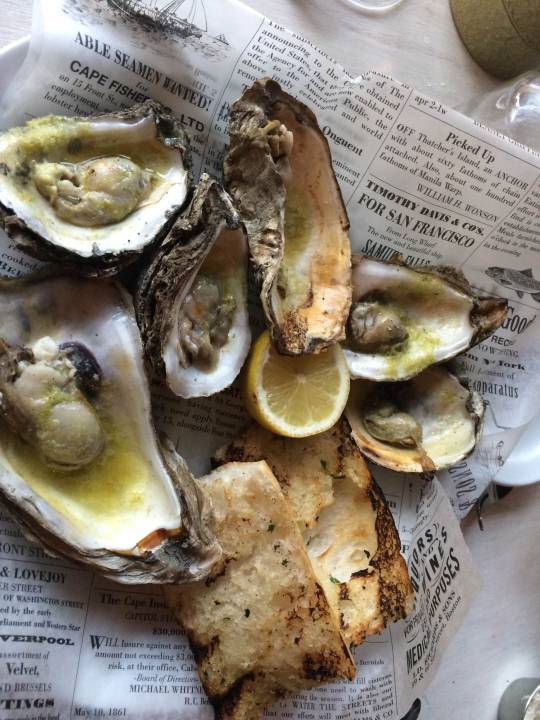
I was drawn to the menu mostly by the prospect of chargrilled oysters! I’m a big fan of raw oysters, but hadn’t tried them chargrilled yet. There are SO many restaurants that are part of Houston Restaurant Weeks that it’s nearly impossible to choose!
I ordered the Oysters Rockefeller which were grilled with tarragon, watercress, fennel, celery, butter, herbsaint, parmingiano reggiano. It was buttery and delicious, though it seemed like some of the oysters were pretty small. I think that’s due to the season, though. All in all, I enjoyed chargrilled oysters, but I find the raw oysters to be better.
For our entrees, I ordered the Sauteed Scottish Salmon on top of a “ratatouille” of roasted cherry tomatoes, eggplant, summer squash, basil, golden raisins, hazelnuts. It was light and delicious, and I totally forgot to take a picture.
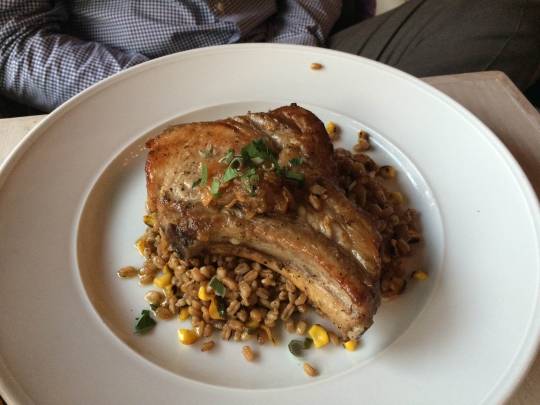
My boyfriend ordered the pork chop which came with toasted farro, sweet corn, zucchini, heirloom tomato, mustard-apple sauce. It was amazing and had a yummy bacon flavor.
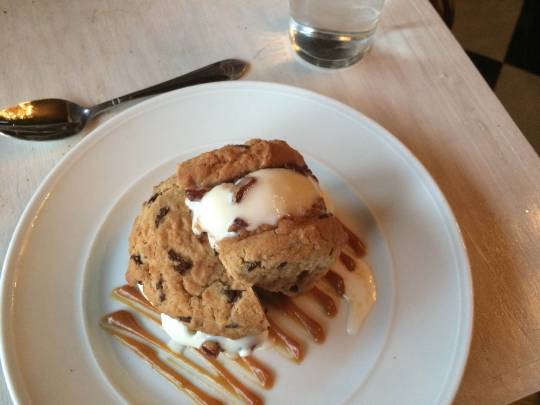
For dessert, I had the ice cream sandwich, which consisted of two chocolate chip cookies and butter pecan ice cream in the middle! Needless to say, I was pretty full at this point and couldn’t finish it, but it was good! The ice cream was the best part of the dessert.
All in all, we really enjoyed this restaurant, and I am looking forward to trying new places next year!
#Houston Restaurant weeks#houston#houston restaurants#restaurants#restaurant week#Prohibition Supper Club#food#charity#food bank#houston food bank#oysters#cookie#ice cream#pork chop#chocolate chip cookie#dessert#appetizer#entree#salmon#chargrilled oysters#seafood#raw oysters#zucchini#tomato#ratatouille#farro#scottish salmon#fish#bacon
0 notes
Text
Black Bean, Corn, Tomato & Avocado Salad
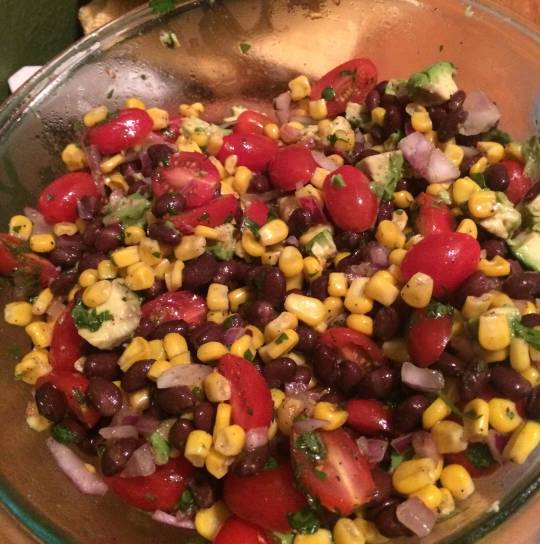
As I’m sure I’ve said before, my love for mexican food, specifically Tex-Mex, knows no bounds. I could eat it every day if my waistline would allow it. What I don’t love, though I know they have a bajillion adoring fans, is Chipotle. One of those adoring fans is my boyfriend who I cook for and with on a very regular basis. He is one of those adoring fans. As a compromise, I used a black bean, corn, tomato and avocado salad that was leftover, and we made these Chipotle-inspired mexican rice/salad bowls to please both of our palates!
As mentioned, this recipe began with a black bean, corn, and tomato salad I made to take to a friend’s house for dinner. The leftovers + rice + romaine + grilled steak and chicken made for a tasty meal, and I’m making it again tonight!

The bowls were an easy creation. You can serve the black bean, corn, and tomato salad solo, with chips, or make it into a bowl as pictured above. We added romaine lettuce, grilled steak, and an obligatory dollop of queso!
Bean, Corn, Avocado, and Tomato Salad
1 can black beans, drained and rinsed
2 cups corn, off the cob, or thawed if frozen
1 lb cherry tomatoes
1 avocado, cut into cubes
1/2 red onion, diced
1/4 cup cilantro, chopped
For the Dressing:
1 tbsp Olive Oil
1/2 tsp cumin
1/2 tsp taco seasoning (or 1/2 tsp cumin, your choice!)
1/2 tsp salt
1/2 tsp pepper
Dice and prep all the vegetables, except the avocado. Stir the beans, corn, tomatoes, and red onion together. Whisk the dressing ingredients together and pour over the vegetables. Stir well to combine.
If you’re serving the dish in the next several hours, feel free to dice the avocado and stir to combine, then refrigerate until serving, at least 10 minutes so the flavors have time to blend together.
If you’re making the salad in advance, refrigerate the veggies + dressing without the avocado. Dice the avocado 15 minutes prior to serving, add to the vegetables, stir, and then refrigerate.
Enjoy!
#chiptole#black bean#corn#beans#tomato#cherry tomatoes#cherry tomato#tomatoes#avocado#guacomole#food#recipe#mexican food#baja mexican food#food blog#yummy#dinner#salad#rice#mexican bowl#mexican dinner#mexican recipe#cilantro#cumin#taco#taco seasoning
3 notes
·
View notes
Text
Pinterest vs. Real Life: A Casserole Story
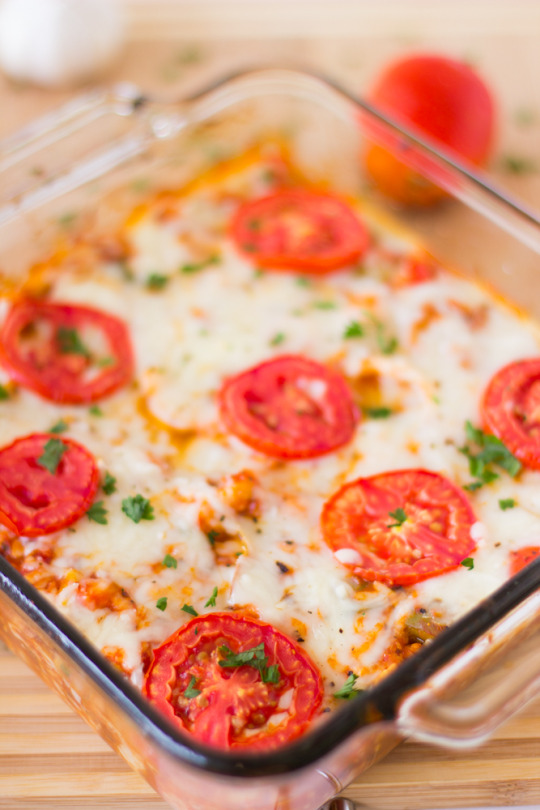
Well isn’t the above pretty? Photo credit to Jessica in the Kitchen, who took this beautiful photo and created an awesome Cauliflower Pizza Casserole recipe. And by following her recipe directions for the most part, my photo below looks nothing like hers. Photographically speaking, you could call this a pinterest fail.
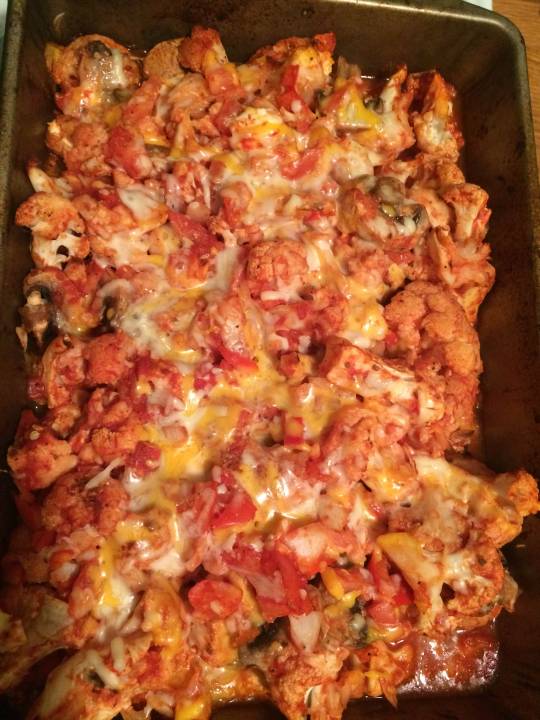
While that photo above isn’t exactly appetizing, the food tastes so good! I even got a second opinion, and they agreed!
I found the above recipe on pinterest, a website that is both great and deceptive. The point of pinterest is to feast your eyes on everything from craft projects to weddings to recipes. But with this recipe, I am reminded pinterest is not real life, and we can all make delicious, healthy meals at home - no fancy cameras or lighting required!
I served this casserole in several ways. First, we had it simply with some meatballs. Today at work, I had it atop some pasta. It would also be good as an entree with a side of crusty bread. And it tastes better when it’s leftover! There are lots of possibilities!
Cheesy Cauliflower Pizza Casserole
1 head caulifower, cut into small florets
1 tablespoon olive oil
1 teaspoon salt
1 teaspoon pepper
14-16 oz marinara sauce of your choice
2 roma tomatoes or 1 beefsteak tomato, diced
1/2 yellow onion, diced
1/2 bell pepper, diced
1 package mushrooms, sliced
4 cloves garlic, minced
1 teaspoon Italian seasoning
2 oz goat cheese
1/2 to 1 cup mozzarella
Preheat oven to 425 and toss the cauliflower florets with olive oil and salt and pepper. Roast for 30 minutes.
In the meantime, prepare all the other vegetables - there’s a fair bit of slicing and dicing. Once the cauliflower is roasted, remove from the oven and transfer to a large bowl.
Add the marinara sauce and stir well to combine. Add the diced and minced vegetables along with the Italian seasoning, and stir again to combine. Crumble the goat cheese, add the cheese to the mixture, and stir one last time.
Transfer the cauliflower mixture to a large baking pan. Sprinkle with mozzarella until the mozzarella covers the top of the cauliflower. Reduce oven heat to 375 and bake covered with foil for 25 minutes. Remove foil and bake for another 5-10 minutes.
Enjoy!
Original Recipe and Photo Credit: http://jessicainthekitchen.com/cheesy-cauliflower-pizza-casserole/
#cauliflower#pizza#roasted cauliflower#italian#italian food#italian recipe#pasta#meatball#marinara sauce#tomato#onion#bell pepper#cheese#goat cheese#mozzarella#mushrooms#food#recipes#recipe#food blog#yum#pinterest#pinterest fail
0 notes