#wip pics
Text

I've had like four different people inquire about it over the years, and each time it fell through, but at long last I HAVE BEEN COMMISSIONED TO MAKE ALTAIR'S BRACER.
There are many like it, but this one is mine. 😁
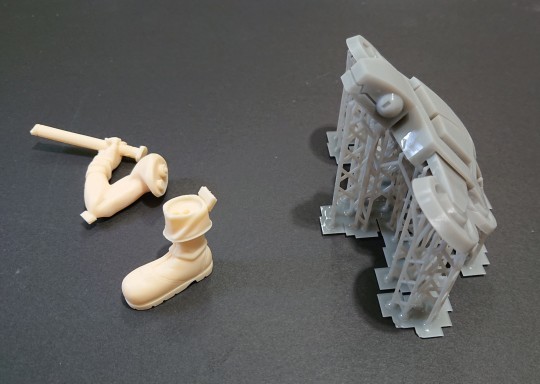
Bracer details were taken from the 1:6 scale figure and HOLY SMOKES, I don't know how they got it that fine -- I'm making it real-person sized, and some of the detail is still nearly too small to render in leather. It must be microscopic on the figurine:

61 notes
·
View notes
Text
Okay, I could talk about each of these topics in greater depth, but I'll keep it boiled down or else I'll be typing for a loooong time. If anyone wants elaboration on the following steps or on any particular pieces I've done, let me know and I'll give more tips and tricks later :)
Apologies for the formatting, I'm still getting used to posting on Tumblr
-------------------------
Step 1: Clean up and prep
I start by sanding down leftover pieces and flaws in the model caused by the production process.
In traditional model kits, these are pour tabs, flash and seam lines.
For 3D printed, these would be pits or bumps left behind from supports and layers lines.
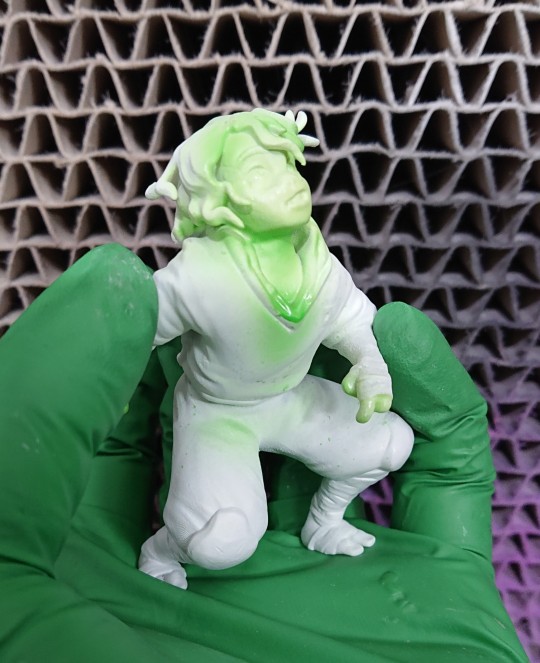
The arm and boots on the left are from a traditional model kit, and have visible tab chunks that will need snipping then sanding. S.H.E.L.L.D.O.N on the right needs his supports removed, then sanding.
Every piece (minus those with fine texture) gets buffed with 240, 320, 600 and 1000 grit sandpaper/sanding sponges (clear parts and any pieces intended to be painted with clear paints, such as character skin, are additionally polished with a melamine sponge, also known as a magic eraser).
This is to make sure the surface is level and uniform. Any bumps or scratches that aren't removed will show up in the final paint job.
(Note for beginners: It's fine to just remove production remnants and do a little clean up before going to the next step. All that prep is tedious! Just have fun with it for now!)
Step 2: Make sure the model parts fit well together.
It's very common for a model to not fit together perfectly right away. Dipping the model in hot water to soften it, then pressing the pieces together usually fixes this. Be careful not to burn yourself! Sometimes drilling and sanding is required.
At this point, larger model kits will require drilling and pinning, though most are fine being assembled later just with glue.
Step 3: Primer
I secure the pieces on clips to keep them elevated, and spray them in thin, even layers of primer. Primer is essential, as it is what makes the paint stick to the model.
- White primer: Best for anime and cartoon figures, makes colors pop
- Grey: For realistic characters, dulls colors down a little.
- Black: For metal or specialty products, like Armored Komodo pigments
Primer will make any unresolved blemishes become more visible, so I usually go back to step 1 until I get them all.
Step 4: Clear coat
For an even, level paint job, I spray a layer of Gloss clear coat on every piece, to smooth the surface even more. I skip this for finely textured pieces, so the details don't get filled in. Spray in a well ventilated area with protection!

There are many brands of clear coats. These are my favorites!
Step 5: Paint
I use three kinds of paint:
Lacquer: Expensive, take a little while to cure, must be thinned with a solvent. Sometimes hard to find. Offers lovely effects, is durable and sticks very well. Can be difficult to correct if something goes wrong. *HAZARDOUS, use in a well ventilated or outside area and use breathing protection!*
Enamel: A little easier to find, takes a long time to cure, which sometimes is a benefit, as it can level itself and provide a smoother surface. Must be thinned with a solvent, sticks very well. Most importantly, enamel can be used on top of lacquers and erased without damaging the lacquer layer. *HAZARDOUS, use in a well ventilated or outside area and use breathing protection!*
Acrylic: Great, vibrant colors, easy to find, very affordable! Dries very fast, even faster if you lightly use a hair dryer. Very delicate, prone to scratches and chips. Can be easily stained by other acrylic color. You only need water to thin it!
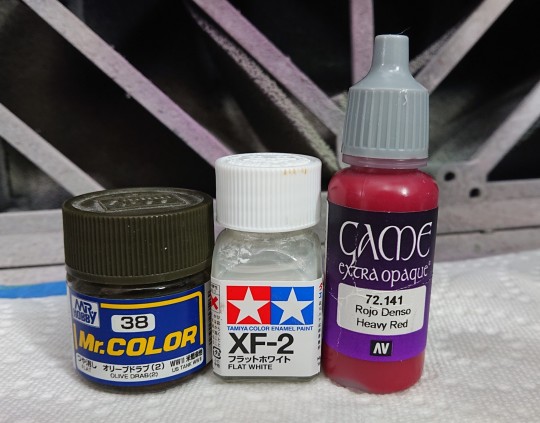
Left to right: Creos Mr Hobby Lacquers, Tamiya Enamel, Vallejo Acrylics
I usually start with the character's skin first. This is because I paint skin using built up layers of clear colors, to get a sort of 'glow' that shines through to the primer and differentiates the skin from clothing and hair pieces.
Afterwards and throughout the project, I 'save' my work by spraying a layer of clear Gloss or Matte spray. I use an airbrush, so to further protect other parts of my work, I cover the finished pieces in masking liquid and/or masking tape, before spraying the next color. Because Enamel can be easily wiped off of lacquers without affecting the lower color layers, I use this type of paint second. If you use Enamel first, you may run into issues with the underlying lacquer causing paint cracking in the future.
(Note for beginners: Using just acrylics is fine. :) I have painted entire models with acrylic paints obtained from craft stores and Walmart, and had very good results.)
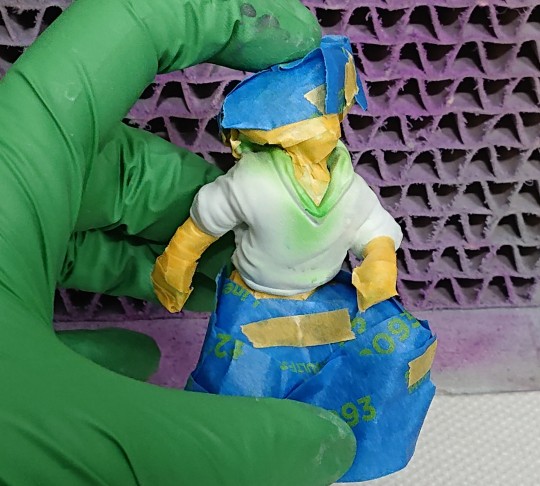
Despite my masking, some enamel paint leaked through on Casey's neck. Masking is rarely perfect, so expect to do touch ups after removal.
Step 6: Face eyes and details
...this is an entire essay on it's own, which will require another post. But I use layers of enamel for eyes, water color pencils for eyebrows, chalk pastels for makeup/shading and acrylics for eye lashes.
I have shaky hands sometimes, so the ability to erase my work and start again is very helpful here, hence why I don't use lacquers for this part.
There are... So many products and colors in this one piece...
Step 7: Touch ups then gluing
I typically do touch ups as I go, but now is the last chance to correct anything. Once it's ready, 2-part epoxy or crazy glue (sometimes both) will be enough to get most models together entirely.
----------------------------
That's a basic breakdown for my process, though for things like effects, clear pieces and fancier/realistic models, it can get quite elaborate. I don't want to scare anyone away from the hobby, so I'll just say this...
You don't have to do allllll this stuff!! Find a model you love (repainting dollar store figures is a great place to start!), prime it, and slap some paint on it! Just have fun, and then go from there!! My first model was lumpy, and looked like she was painted with nail polish, but I kept going and just enjoyed myself, trying new tips and tricks along the way. The point is to have fun! Make sure to take proper precautions and read product instructions as well, if you choose to use the more toxic products.
If anyone decides to give figure painting a shot, send pics of your projects my way, I'd love to see them!! :D It's always great to have more people in the hobby! And I'm always up for more questions, they might just take me a little while to get to replying.
16 notes
·
View notes
Text

Thinking of making a Picrew
#if I do make this it’s gonna be called make your funky cookie dragon#idk guys I really like Picrew#anyway I just finished some heads and also Lychee’s eyes#the eyes are can be colored different btw#this is gonna take A LOT of layers#help#lotus dragon cookie#ananas dragon cookie#pitaya dragon cookie#lychee dragon cookie#cookie run#Picrew#WIP Picrew#wip pics#I just thought of this during a therapy session lmao
40 notes
·
View notes
Photo

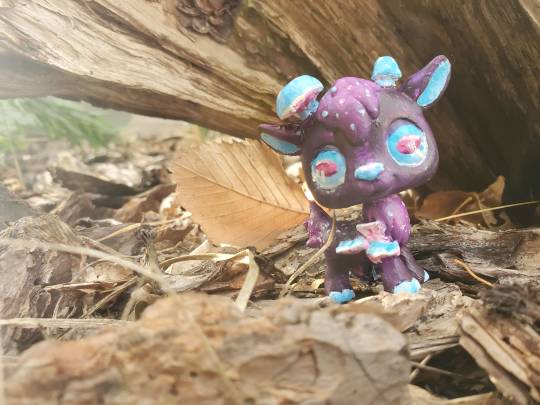


Another OOAK custom lps! I really enjoyed making this little fella, tho the sculpting was really hard with how tiny the scale was.
And I like to think I improved a bit from my last one---
#art#traditional art#ooak#ooak toy#lps#lps custom#littlest pet shop#wip#wip pics#finished#ooak custom#goat#mushroom#fantasy#fantasy creature#ratth3cat
10 notes
·
View notes
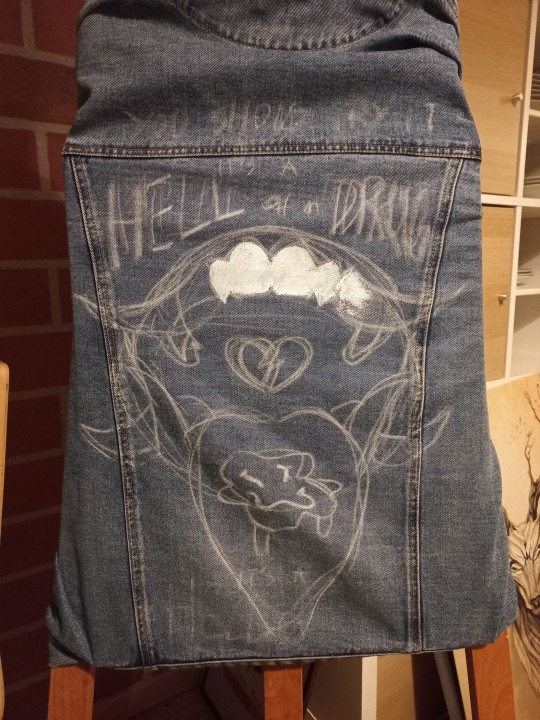
Text
I found this absolutely perfect denim jacket with drop seam shoulders and a baggy fit at a thrift store in Norway and decided to paint the back. I ended up changing like every color from my original design lol. Wanting to get some patches for it too but their hard to get a hold off :0<


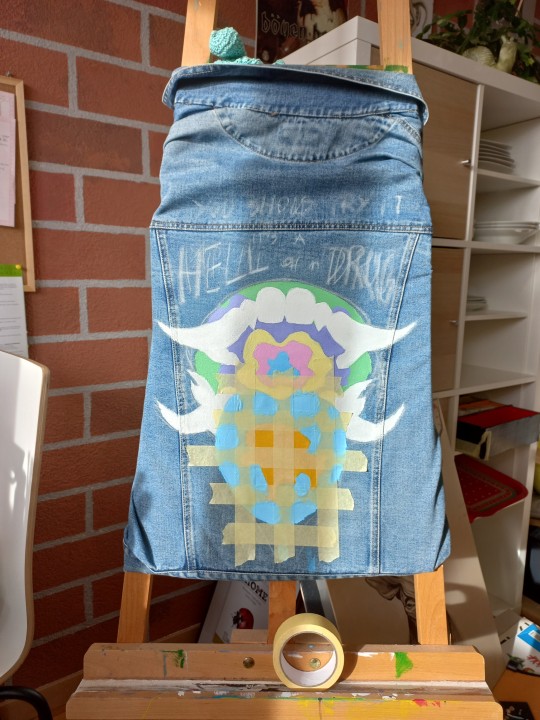

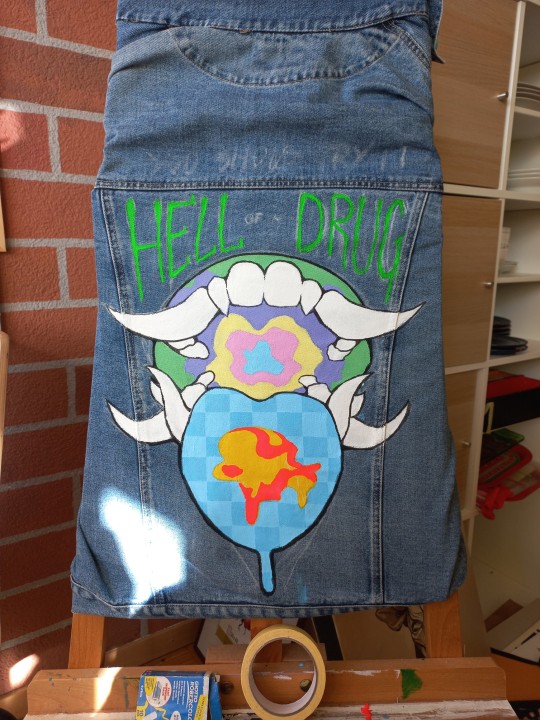


#wip#wip pics#pictures#acrylic painting#acrylic#denim jacket#denim#painting#traditional art#analog art#teeth#mouth#diy#jacket#colorful#bright colors#fangs#tounge#smiley#smiley face#drip#drippy#psychadelic#fun#song lyrics#punk#metal#fingerless gloves#blue hair#urban
2 notes
·
View notes
Text

👀
Yea new shading is 100% better
2 notes
·
View notes
Text
She's done babes ✨️


2 notes
·
View notes
Text

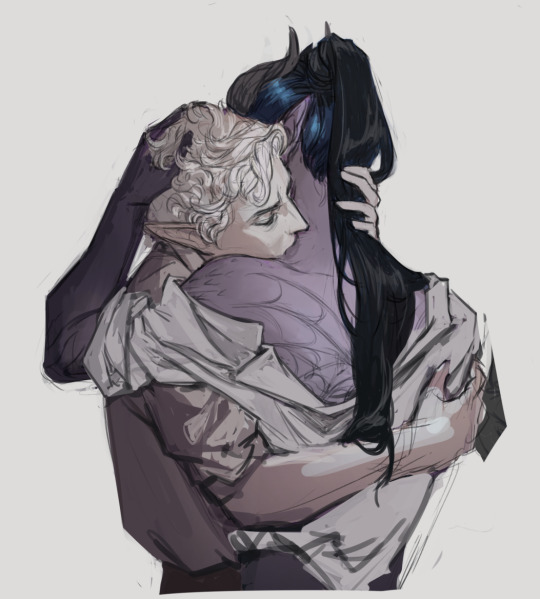
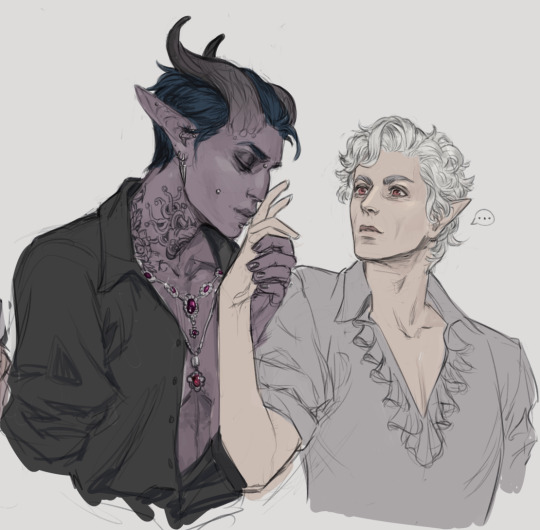

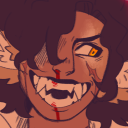
images of this nature keep manifesting on my hard drive
#idk man i just work here#astarion#nox#bg3#baldur's gate 3#my art#my ocs#exorcising these from my wips. begone satans#i find astarion really difficult to get right likeness-wise actually but nox looks cute and that's all that really matters#hoping the little bit of tasteful ass pic will evade expurgation due to them being ourple
2K notes
·
View notes
Text

a divine performance
◼️⛩◼️
one thing I love about Sukuna fights is that you will always be in for a show
#Sukuna#Ryoumen Sukuna#Ryomen Sukuna#Jujutsu Kaisen#JJK#JJK fanart#luxites art#based on the scene where he bows from the ep cuz I LOOVVEEEDDD it#he's so theatrical alskdfj#if you search WIP on my blog you can see the thumbnail for this from forever ago lol#when I went to get ref for this pic I ended up getting distracted and rewatched the whole ep#it's soooo good it's one of my fave eps from the series ever
1K notes
·
View notes
Text
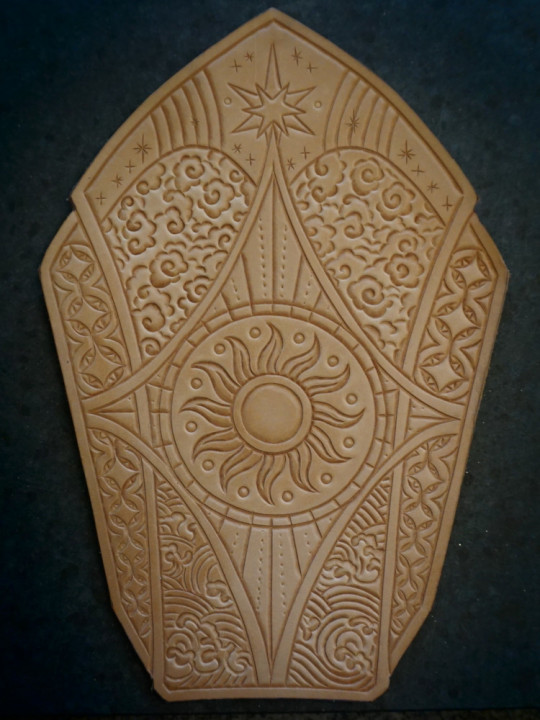


Current WIP, the first greave of a custom LARP set.
132 notes
·
View notes
Text
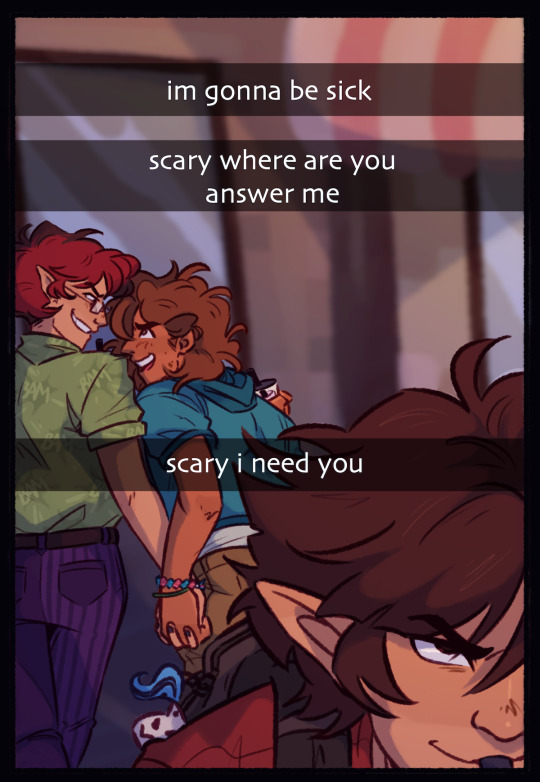
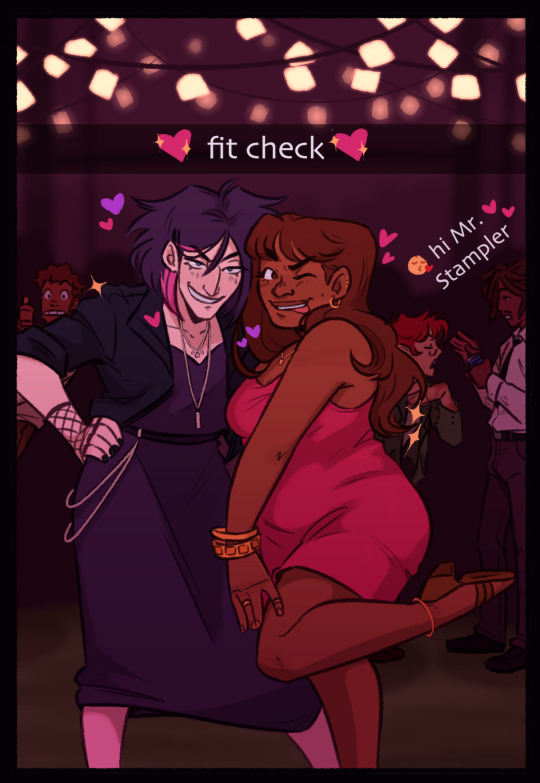
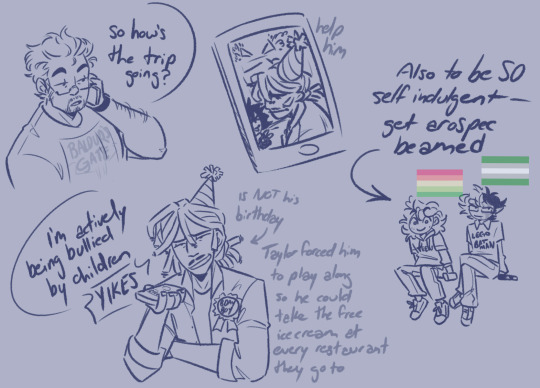
hey gang <3
#dndads#dungeons and daddies#oakworthy#scerica#scary marlowe#normal oak swallows garcia#hermie the unworthy#erica drippins#taylor swift dndads#lincoln li wilson#terry jr stampler#grant wilson#i had another wip take featuring link more prominently but i didn't have time to finish that for today sadly#i've mentally put them on a field trip they're all having a great time even terry who i've slotted into the chaperone position lmao#hes also holding a pepsi in that second pic hes just enjoying a nice soda#anyways happy valentines for anyone who cares about that and if not have an even better day#my artwork
819 notes
·
View notes
Text

sketchy ofmd wip
#ed's hair is glorious in this pic i just had to#ofmd#our flag means death#blackbeard#ofmd fanart#taika waititi#fanart#my art#art wip#wip
626 notes
·
View notes
Text


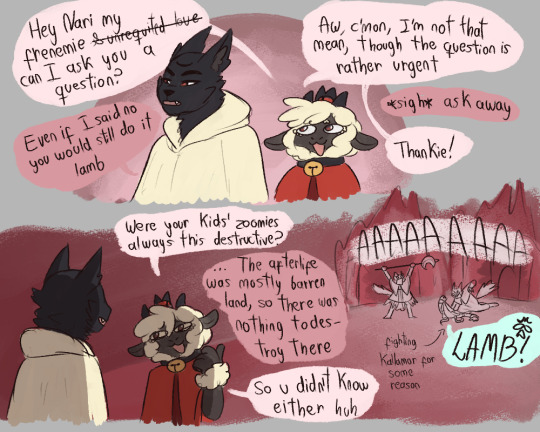


damn these new followers be causing a ruckus
Some cotl doodles :> was experimenting with a couple of brushes and just decided to goof around, the second one is inspired by this song
#bubba doods#cult of the lamb#cotl#lamb cotl#shamura cotl#leshy cotl#narinder cotl#heket cotl#kallamar cotl#cotl oc#the lil guys from my other comic are here :>#aym cotl#baal cotl#i meant theyre like little doodles there#but theyre there#tormenting their uncle kallamar KJHSJAHS#anyways i wanna do a small cotl animation to nonbreathe obligue but HNNGGGG#I GOT SO MANY WIPS ALREADYYYYYY#narilamb#i should draw them kissing at least once#bishops of the old faith#the one who waits#edit: slides one more pic whoops#furry
790 notes
·
View notes

Text
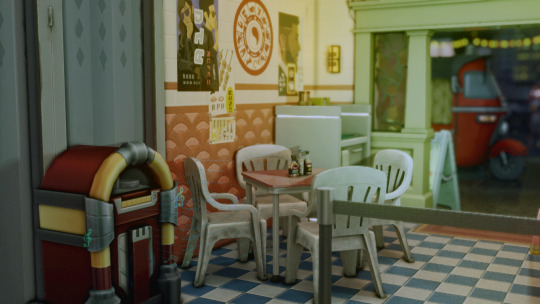
a noodle shop down the corner of the street
#more wip shots!#finished the laundromat today but was too lazy to take pics#wip#ts4#the sims 4#mgbuilds#ts4 builds
525 notes
·
View notes
Note
Toji definitely uses his daughter as a stand in for his late wife! Definitely loves breeding her and calling her his pretty girl
˚₊· ͟͟͞͞➳❥ TW INCEST
Oh you are foul for this one (っ˘з(˘⌣˘ ) I am kissing you so deep
Daddy keeps you naked and dizzy and cock-dumb in his bed. Tells you that you’re his little puppy and Daddy’s girlfriend. He licks you top to bottom and tells you that you were meant to be his little breeding doll.
“My pretty little girl, you were made for me.”
#HELP I STARTED A NEW WIP#I was going to Drabble and then I saw this pic from the new Priscilla movie#and then the YEARNING caught up to me#secret.dollie#ask.dollie#thirsty.dollie#tw.incest#daddy toji
753 notes
·
View notes
Last Seen Blogs
shrikeicee
FACELESS HORROR
asap-site-services
Untitled

ask-junjouegoist
Ask Nowaki and Hiroki
littledoveheart
"Careful, Ren."
daffy-rimi
Pensando A Gritos