#using my 3D tool knowledge only for the most important things but tbh frame by frame animation of rotation sounds painful
Photo
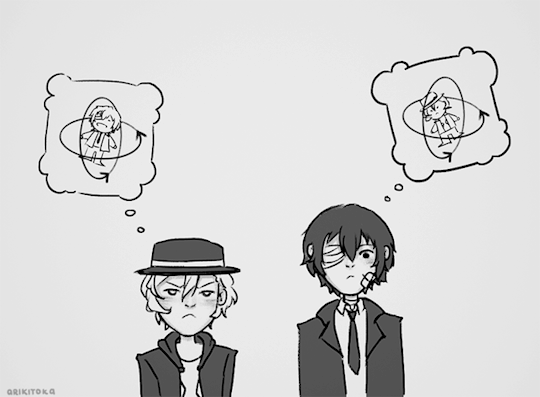
when the meeting is so boring you start rotating your guy inside your brain
courtesy of this post
#special thanks to viktor wintertaurus whose tags haven’t left my mind since I’ve read them#using my 3D tool knowledge only for the most important things but tbh frame by frame animation of rotation sounds painful#ignore the rotation axis those are still fragments from the time this wasn't supposed to be a gif#I kinda like them tho they look like 3d gizmos#bungou stray dogs#bsd fanart#bungo stray dogs#soukoku#skk#chuuya nakahara#bsd chuuya nakahara#bsd chuuya#osamu dazai#bsd osamu dazai#bsd dazai#my art#gif
2K notes
·
View notes
Text
Deco Sims - A Tutorial
FINALLY IT HAPPENED!!
I promised this tutorial forever ago and I finally got around to writing it.
DISCLAIMER: This tutorial assumes you have a basic knowledge of blender/studio. The steps described below aren’t advanced by any mean, but they do require you to know your way around the programs.
THINGS YOU WILL NEED:
a. Blender
b. Studio
c. Photoshop
d. THESE psd’s for the sims’ base (they include three skintones and three eyecolors already, feel free to add your own)
STEPS TO FOLLOW:
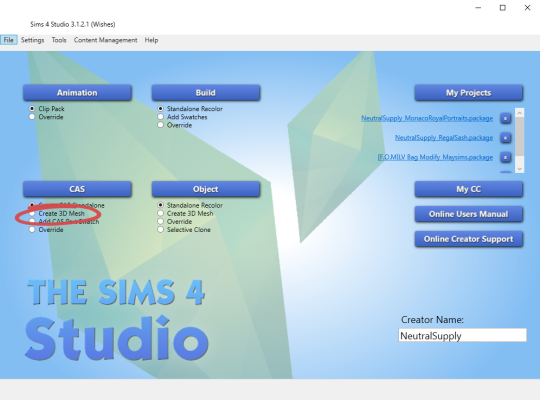
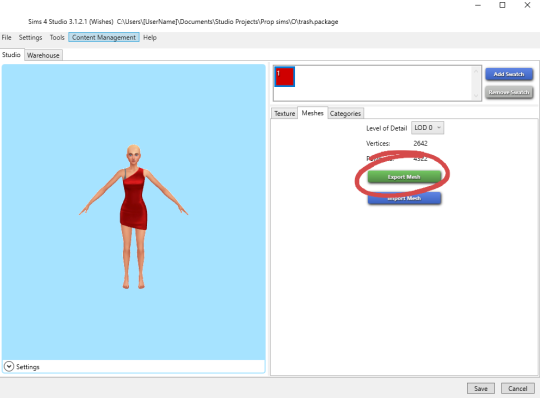
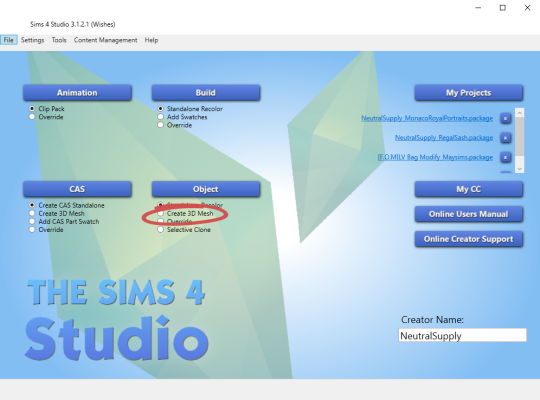
1. In studio, go to CAS -> create 3D mesh
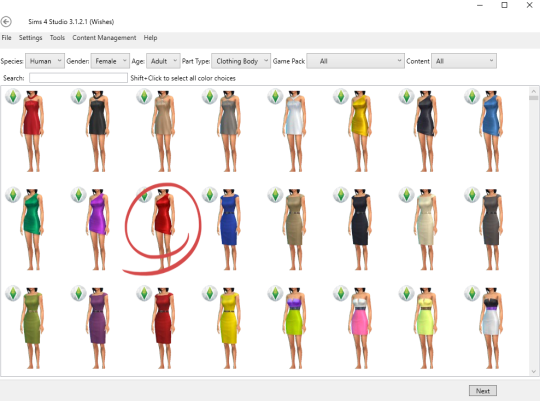
2. Choose whatever dress you want your deco sim to wear and create a package. You will be throwing this away when done so don’t worry about keeping it safe.
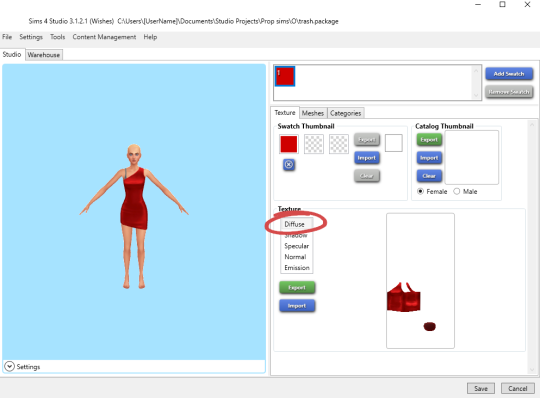
3. Export both the diffuse map and the mesh of the dress.
4. Repeat steps 1-3 for shoes, hair, and any other accessories you would like to apply to your sim.
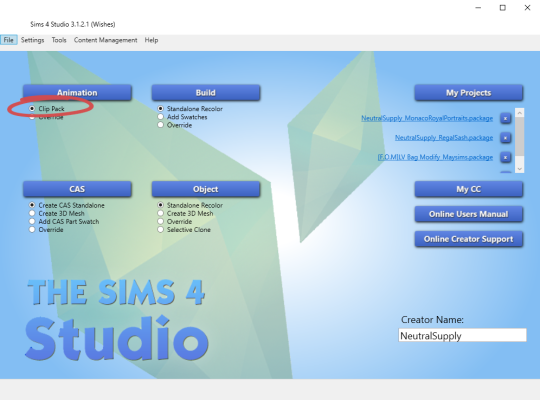
5. Back in the Studio main menu, select Animation -> clip pack
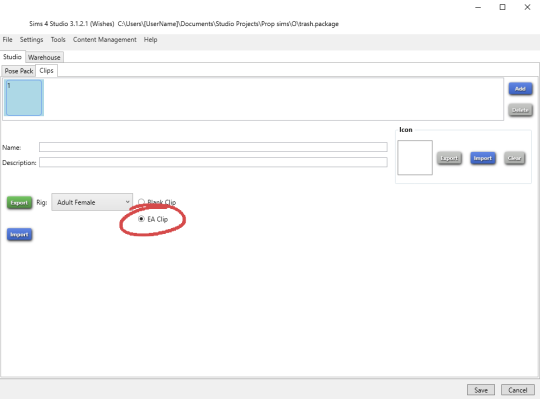
5. Select EA Clip and click export. Choose whatever animation you want to use. Most are self explanatory, others you can just play around with.
6. Open the animation in blender. Drag the timeline along until you find the frame you want to use.
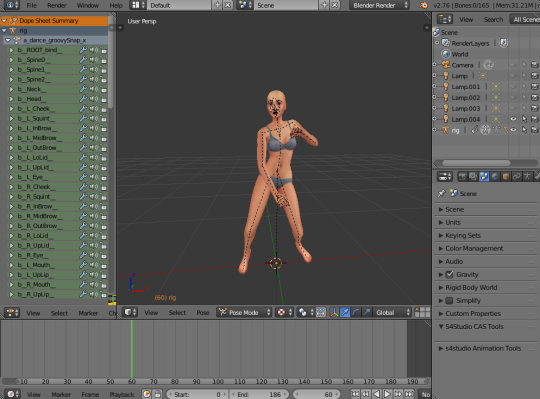
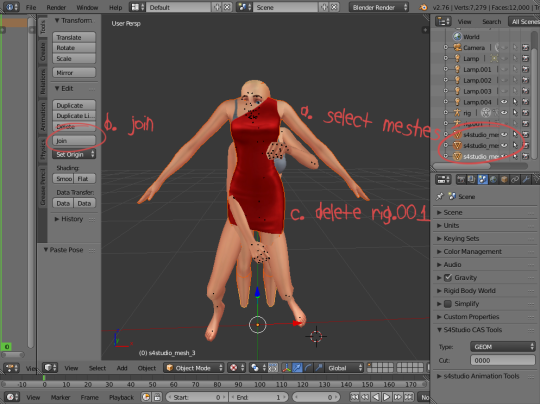
7. Append the dress mesh you exported earlier to the animation (it may have more than one mesh).

8. Select all the meshes in the dress and join them. Delete the rig that came with the dress (it should be rig.001) and any other “bones” or “empty” that came with the mesh.
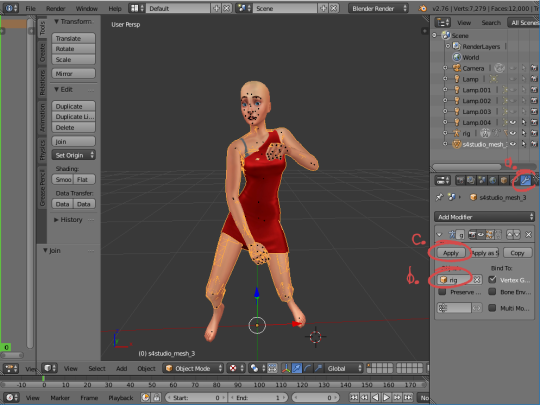
9. With your dress mesh selected, go into your modifiers tab. The armature modifier should already be there (if not, add it). Select “rig” as the object and the dress will mold to the rig. Click “apply”.
10. Repeat steps 7-9 for hair, shoes, etc.
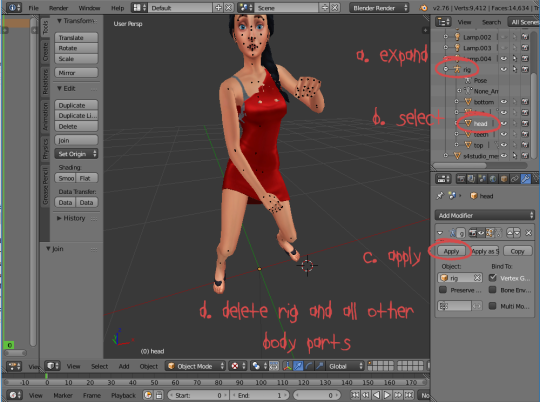
11. Expand the rig so it shows all the sims body parts. The only one you will need is the head, as the dress and shoes already have all other body parts covered. Select the head, go into modifiers, and click “apply”. Now delete the rig, as well as all the other body parts. Join the head, dress, hair, shoes, etc, together.
12. Go back into studio and select Object -> Create 3D mesh
13. Choose a statue mesh. I like to use the suit of armor. Select it, and export it. This will be the file that will become your deco sim, so you want to name it and store it properly. Once in the file, export the statue’s mesh.
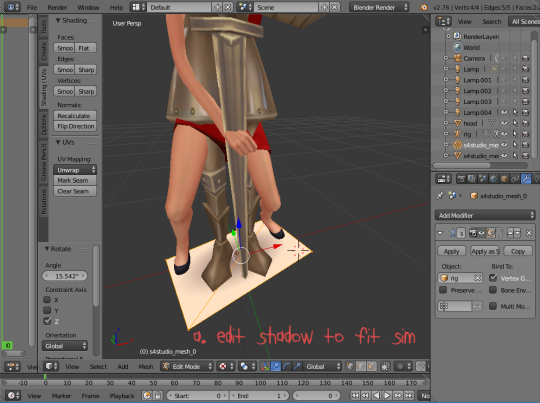
14. Append the statue’s mesh (both mesh and shadow mesh) to the sim. Edit the shadow mesh to fit under the sim’s feet.
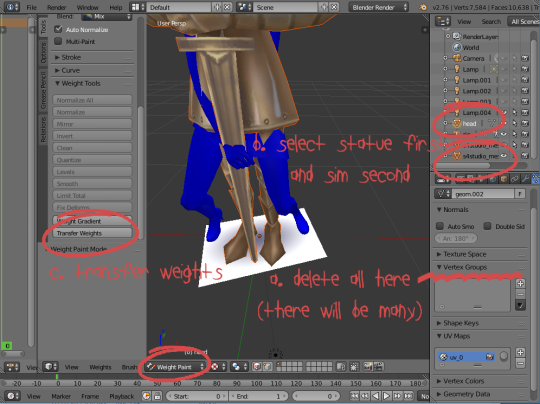
15. With the sim mesh selected, go into the object data tab. Delete all the vertex groups you find there (there should be many). Now select the statue first, then shift+click on the sim mesh, and go into weight paint mode. Transfer weights.
NOTE: You can obviously also just add a “TransformBone” group and weigh the mesh 100% on it, I’m just too lazy to type and would rather click 100 times.
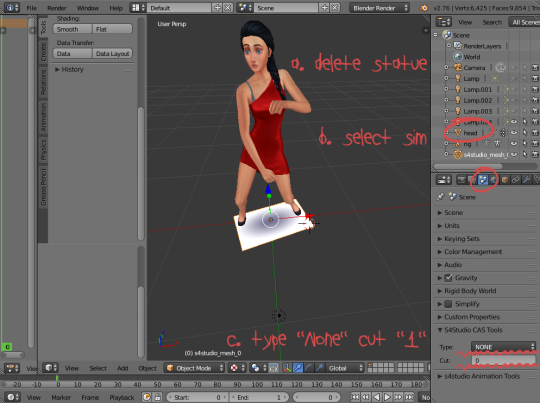
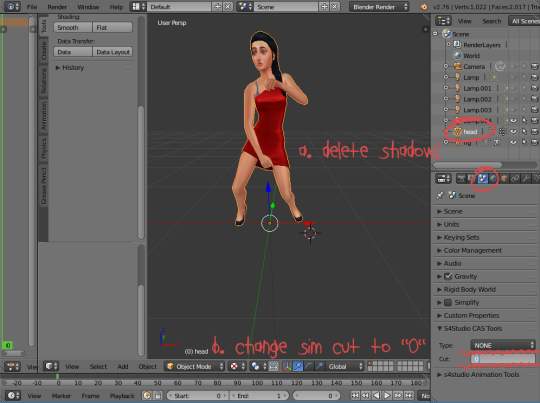
16. You can now delete the statue. Select your sim mesh, go into scene tab, and in the studio CAS tool change type to “none” and cut to “1″ (do as I say, not as I show - I accidentally took the pic with the shadow mesh selected).
17. With the sim still selected, go into edit mode. In the tools panel, click “remove doubles”. This will help reduce vertex count and keep the mesh intact when you decimate it to make lower LODs.
18. Save the mesh as DecoSimYOURNAME
19. Now select the shadow mesh and delete it. Select the sim mesh, go into scene tab, and change cut from “1″ to “0″.
20. Save this file as DecoSimYOURNAMEShadow
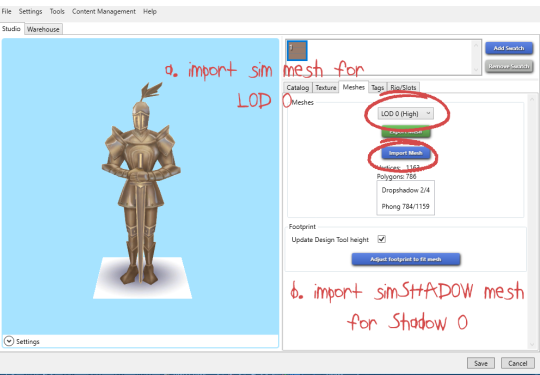
21. Back to studio. Go to your deco sim file (that is currently still the statue) and import your DecoSimYOURNAME mesh for LOD 0. Import your DecoSimYOURNAMEShadow for your Shadow 0. For LOD 1 / LOD 2 and Shadow 1 / Shadow 2, simply decimate your sim mesh in blender and save the result as DecoSimYOURNAMELow and DecoSimYOURNAMEShadowLow.
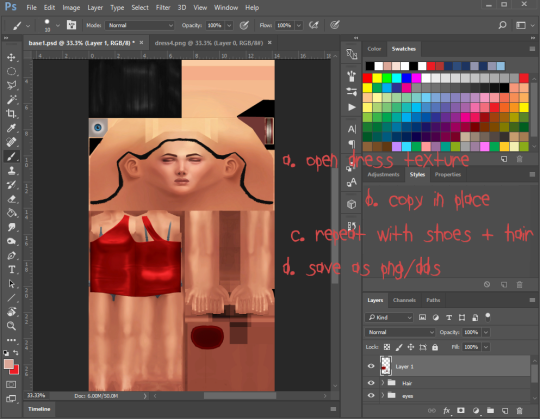
22. Now onto editing the texture. Open the PSD that is linked at the beginning of the tutorial. Also open the dress texture. Copy the dress texture, go back to the psd, and “paste into place”.
23. Repeat the same steps with shoes and hair.
24. Save as either png/dds (I just use png tbh).
NOTE: because this dress doesn’t cover the bra straps, I had to edit them out in PS. You might have to that depending on what clothes you choose to use.
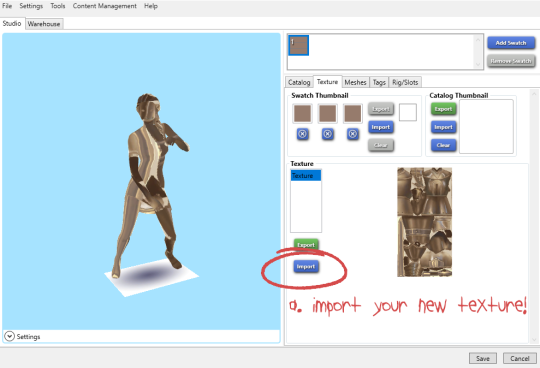
25. Go back to studio, and import your new texture. And TAAA DAAA!! You are done. I don’t have a photo of the finished product because my computer crashed, but you get the idea.
Hopefully these steps are easy and clear enough to follow! As I have mentioned before, making deco sims is not hard, just time consuming.
Also! Don’t forget to change the catalog name/description and give your deco sims the correct tags :)
HAPPY SIMMING EVERYONE!!
#ts4#ts4 cc#ts4 custom content#sims 4#sims 4 cc#sims 4 custom content#ts4 tutorial#sims 4 tutorial#sims tutorial
1K notes
·
View notes
Last Seen Blogs