#thesemiprofessionalkonditor
Text
Hey Guys...
I havent posted in a while, I had a lot of stress and a small mental health break but i hope to get back to it.
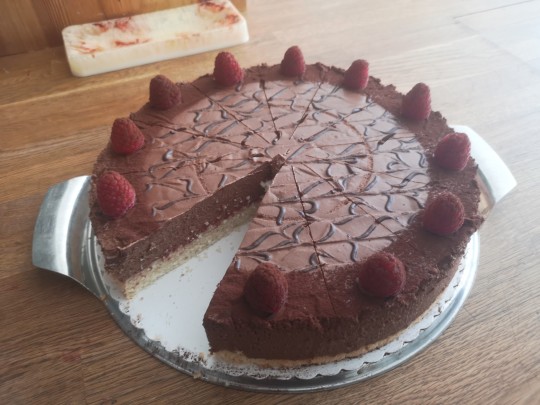
Today I have a nice chocolate-mousse-cake that is nice and light an airy.
It is real simple and you don't even have to start the oven and stay in a hot kitchen for hours on end. You DO need to prepare it at least one day in advance though so keep that in mind. Make sure to read the whole recipe as the is an optional ingredient that will take you longer to prepare.
Here is what you need:
A sponge cake, 26-28cm in diameter and 2cm tall(do yourself a favor and buy it from the store so YOU don't have to start the oven on a hot day)
900 ml of heavy whipping cream
300g semi sweet chocolate chunks
300-400g frozen raspberries
50ml lemon juice
Optional coffee beans/instant espresso powder
Start by measuring out 300ml of your cream and heat it until it starts boiling. Add the cocolate to a heatproof bowl and pour the hot cream ontop. Wait about 20 seconds and slowly stirr the cream with a whisk until all the chocolate has melted and combined with the cream. Congrats you made a ganache. Let your ganache cool down, until it is no longer warm but still liquid.
That takes a bit, so in the meantime take your frozen raspberries and you lemon juice and boil it until you can pass the berries through a fine mesh sieve. You will get something akin to a runny jam. Taste test if it is to your liking, it will be rather sour. If that's to sour for you, add sugar to your preference but don't make it to sweet. The sourness will cut through the sweetnes of the mousse later on.
Add your 'jam' back to your pot, crank the heat up and let it boil down while stirring constantly, until you can drag your spatula through and the jam takes a while to flow back together. That took me about 5 minutes I think... But don't quote me on that, I didn't time it!
Let that cool down a bit until you can touch it without burning yourself! Take your layer of sponge cake and spread your raspberry concentrate ontop. Make sure it reaches the edge of the cake. Pop that in the fridge to cool down completely.
Your ganach should be cool by now so start whisking the rest of the cream. Once it starts to get thicker slowly stream in the ganache and keep whisking until the mousse starts keeping its shape/soft peaks. This is the important bit! DON'T OVERWHISK IT!!! otherwise you get chocolate butter and chocolate buttermilk. Don't try to whisk it to stiff peaks, you don't need it and the mousse will easily try to curdle and turn to butter.
Take your sponge cake, put it on your serving plate and put a springform rim around it of tue same diameter. If you don't have one or don't want to use it take a bowl and line it in clingfilm. No matter your method pour your mousse into your vessel and smooth out the top.
If you chose the springform and still have a bit of ganache left (you usually do, unless you licked the bowl clean, for which I wouldn't blame you🤤) you can now drizzle it ontop of your mousse and drag a toothpick through, to create a pattern.
Now pop that whole thing back in the fridge for a few hours or better yet over night so it can set and firm up.
If you chose the bowl method you need to check every now and the to see if it has firmed up just a bit but is still a bit wobbily.
Start checking after about 30 minutes.
After that take it out of the fridge and put the cake ontop. Make sure to flip the sponge cake so the raspberry side is in contact with the mousse. Then pop it back in the fridge.
Once it's time to serve it, take it out of the fridge and decorate to your liking.
This is a good cake for the summer, as it is not as heavy as a buttercream cake, as those tend to sit rather heavy in your stomache and make you uncomfortable. Also you can eat more then one slice😅🤤
Now. If you opted for the coffee variant you can either add your instant espresso into the ganache while you stirr in the cream OR you take about double the cream, so about 600ml (so you need 1.2 liters of cream all in all) and about 200g of whole coffee beans and let the beans sit inside the cream the night before. You would need an additional day to prepare so keep that in mind. It adds a nice bit of bitterness to the mousse and thus enhances the flavour profile just a bit. But be carefull if children eat it as there probably will be coffein in the cake as well.
All you need to do now is to enjoy your creation.
Tüdelü and till next week!
2 notes
·
View notes
Text
Hello to the handfull of people following me.
If you are interested, I started a second Blog @thesemiprofessionalkonditor. There isn't much at the moment, just a little introduction, but I plan to post something cake related every Saturday from now on.
Please consider checking it out if you want to. Have a cookie🍪 as a thank you!
0 notes
Text
Hey.
So, today I decided to start with something easy an reasonably quick. It is a recipe I got from my mother. She used to make this cake for us, me and my brothers, on our birthdays. But my brother did request one for his 30th birthday to share with his collegues, so who cares 🤷♀️😅.
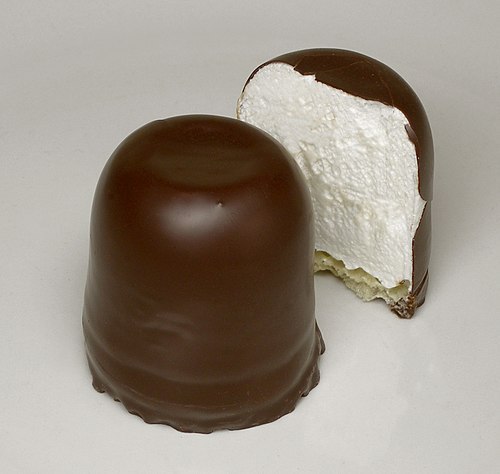
It is a 'Schokokusstorte'. The nearest english translation would probably be something like a 'Marshmallow-Fluff-Cake'.
This is a Schokokuss giving the cake its name. Its official translation is a 'Chocolate-coated Marshmallow treat'
For this you will need the following:
12-16 Schaumküsse
250g Quark
500ml whipping cream
1 tbsp lemon juice
One layer of biscuit cake about 3cm thick
If you don't find 'Schaumküsse' you should be able to substitute them with 250-300 gramms of marshmallow fluff and 100 gramms of grated chokolate. But I never tried that because I hate marshmallows and Schokoküsse as they are so I never bought marshmallow fluff. I only like Schokoküsse in that cake.
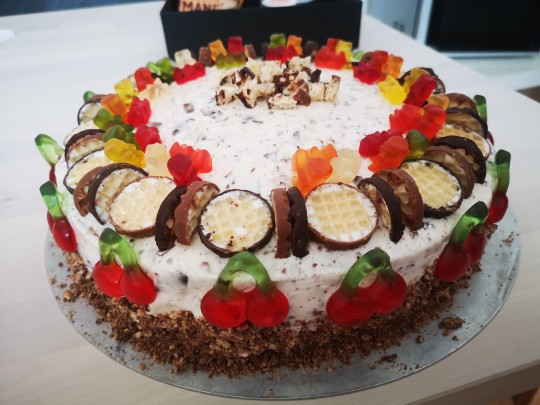
If you do find them take of the waffles on the bottom. You can either eat them or set them aside for decorating.
Take your Schaumküsse or fluff and grated chokolate and mix them with the quark and lemon juice. Beat your whipped cream till stiff and fold it under your marshmallow mixture.
Put everything on your biscuit layer. It is easiest to shape it into a dome. You are basically finished now but if you want you can decorate it as you like. I usually do that by using the waffle layers and Haribo.
If you can put it in the fridge for an hour but you don't need to do that if you serve it directly.
It is perfect for an early summer kiddie birthday and is easily modiefiable with fruits inside or adding molten chokolate with the whipped cream.
Please tell me if you try it. I would love hearing about it.
This is it for this week.
Tüdelü and see you next week.
3 notes
·
View notes
Text
Hello.
My Name is theSemiProfessionalKonditor. My preferred pronouns are She/They.
After I told my therapist about my positive experience here on Tumblr they thought it might be good for my self-esteem to post some of my baking here.
I am from Germany and if you don't know, after our typical school education we can either go to Uni, start working certain jobs directly or start an apprenticeship. As I was bullied extensively from first all the way to seventh grade, I was in no hurry to keep going to stay in a similar setting like Uni.
I chose to go the apprenticeship route as a confectioner/sweets baker. In german that is called a Konditor. Hence my name.
Sadly my emotional state was not as stable as I thought (I was severely depressed) and I was unlucky enough to get a toxic Master. A Master in an apprenticeship is your first teacher for all the practical stuff. Without a Master there is no apprenticeship possible. The Master always has the last say.
Sadly his behaviour basically destroyed the rest of my already tiny self-esteem and I had to drop out eventually. Add to that undiagnosed and therefor untreated ADHD and PTSD and treating only my depression just wasn't working.
That was in 2019. I voluntarily admitted myself to a psych clinic for eight weeks and another twelve weeks after my stay there in their on site ambulatory day-care. When I felt I could return to work Covid happened and shot all my progress to pieces.
So... Yeah. You probably didn't need to know all that... And in my experience Tumblr is rather progressiv when it comes to this stuff. But my opinion is that it is easier for me to gauge my surroundings (including people) if I am open about what happend and it makes it so I can better distance myself if necessary.
Which brings me to my 'Rules of Interaction' on this Blog:
- Don't be mean or hatefull to anyone!
- If you don't like it... Ignore it? This isn't for you. It's for me.
- I reserve the right to block people if I deem it necessary or deactivate comments if necessary.
I think that is it for now. My plan for now is to post something every Saturday if I manage (and remember... 😅).
Tüdelü for now and hopefully see you around. But if not that is also OK!
#TheSemiProfessionalKonditor#probably content warning?#bullying#hospital stay mentioned#baking#self-esteem
2 notes
·
View notes
Text
Hey Guys. Sorry about last week but easter became quite stressfull for me and I didn't manage to post something.
For today I thought why not do something easy.
Quatre-quarts, the recipe is again from Aurelie Bastian but what can I say, she has a lot of easy and basic recipes you can adapt to your liking.
For this cake you won't need much, just eggs, flour(all purpose or 405/550), sugar and butter for the base and then whatever flavouring you want.
Prepare your baking dish, rectangular works best, 26cm in length. Butter the inside or spray it with oil, then lightly coat it in flour. Preheat your oven to 180°C convection.
Take your eggs, 3 or 4 will be enough, and weigh them still in their shell. Then weigh out the same amount of flour, butter and sugar.
Seperate your eggs and add the sugar to the yolks. Whisk the youlks and sugar until light and fluffy. I like adding a splash of lemon juice to the yolks, it makes whisking it easier and faster. I also sometimes substitute about half of the sugar with brown sugar. It doesn't change the recipe but adds a nice subtle caramel taste.
Now melt your butter and whisk the egg whites to stiff peaks. If you want you can add a big pinch of sugar when the whites start getting frothy, that prevents from overbeating the whites for a bit and makes it easier to fold into the batter later on.
Whisk together the molten butter and sugary yolks, then add everything including the flour together and fold the batter until there are no more clumps of flour or streaks of egg white.
Now you add your flavourings. I like to add lemon juice. No specific measurement, just taste the batter.
Or you could take a third to half the batter and add a bit of cocoa powder, unsweetend of course and make a marbeled cake.
Pour into your baking dish and bake for 40 minutes. Let it cool for about an hour and decorate to your liking.
This is an easy recipe to experiment with and quick to prepare if you need an emergency cake. It should also be easy to make with kids... I wouldn't know, I don't have kids😅.
The butter can easily be substituted for margarine for a lactose free variant.
This is it for toda, see you next week.
Tüdelü
#Baking#french#Aurelie Bastian#thesemiprofessionalkonditor#easter#Holiday stress#easy recipe#basic recipe#adaptable recipe
1 note
·
View note
Text
Today I thought to post about something a bit more complex. And that is Brioche. The recipe is from Aurelie Bastian.
The website is in german, so if you don't speak it you will need to translate a fair bit, but they are authentic french recipes.
I did change it a little bit but not by much.
Now let's start. You will need:
620g wheat flour (all purpose/405 or 550)
One egg + one egg yolk
One package ore 42g of fresh yeast
125ml heavy cream
150ml milk
100g sugar
Salt
70g of cold cubed butter
Some vanilla is optional but tastes really good
All in all this is a fairly sweet bread. You can reduce the sugar if you want to but if so I would leave out the vanilla. That way you have a more savoury loaf.
Warm up your milk and cream together up to room temperature. Add in your yeast in small pieces an set it aside for now.
Add all of your other ingredients EXCEPT the butter into a bowl. If you have a standmixer, lucky you. A handheld mixer is also good, but if you have neither, be prepared to knead quite a bit😅.
Roughly combine everything in the bowl and add your liquids whith the yeast. Knead it all together until a shaggy and sticky dough forms. Now you can tip it out on your contertop or keep kneading in the bowl, that is up to you. I prefer it on the countertop but if you don't have any space, the bowl is perfectly fine as well.
Once you have your dough add in you cold and cubed butter bit by bit, kneading it into the dough as well as you can. That can take quite some time, depending in how you do it. So i wont give you a time estimate but a 'look' estimate. Your dough is finished once it looks smooth and is less sticky. If you are unsure you can do the window test. You take a small piece of dough and stretch it out carefully into a square shape. It should be able to strech out thin enough to let light through without ripping. If it rips you should keep kneading. Repeat the test whenever you need.
Once your dough is ready let it rest at room temperature. Leave it in the bowl and cover it loosely with a damp towel/cloth. Leave it for up to two hours or until it has about doubled in size.
In the meantime take a rest yourself if you kneaded by hands. You deserve it☺️.
Once your dough has proofed enough you knead it one more time to get out all the air. You will notice that it is no longer sticky.
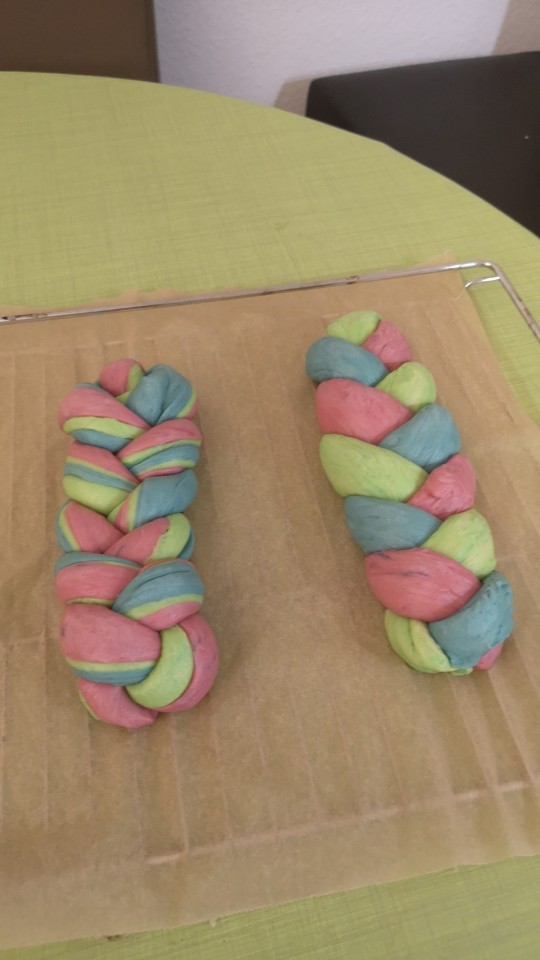
Devide the dough in half and then each half again by three. Then you shape each sixth into long strips about the length from your fingertips to your elbow. Take three strands, lay them out infront of you and pinch the tops together. Then you braid it and put it on aprepared oven tray lined with baking paper.
Repeat that for the second loaf and cover them again loosely, this time with clingfilm. The towel would just stick to the loafs. Preheat your oven to 180°C... Umluft...circulating air... Convection oven... Google is unclear about that... The thing with the fan... While your oven is preheating pit in an ovensafe dish with about 1 liter of water. That will give you a bit more volume and a fluffier loaf.
Let your loafs rest again for 30 minutes. In the meantime prepare an eggwash from your leftover cream and eggwhite. Brush it on your loafs prior to putting them in the oven(without the clingfilm😉) and let them bake for 20 minutes. You do not necessarily need the eggwash but it keeps the bread from forming a crust to quickly and gives it a nice shine after baking.
Be cautious when taking them out after baking as there will be quite a lot of steam escaping. And to my fellow glasses wearer.. Take them of beforehand or you will be blind for a bit😶🌫️.
And now you are done. Let the brioche cool down before you cut into it as the heat trapped inside is crucial to keep it fluffy and moist once it has cooled down.
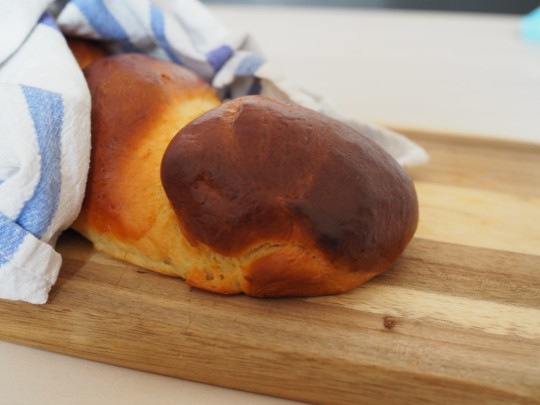
I enjoy it with a nice butter and just salt ontop or with chocolate sprinkles in the morning. But the best I ever had it was with my grandmas homemade raspberry jam. Not to sweet with a nice sourness to it, that compliments the richness and sweetness of the brioche.
You can also color the dough while kneading and get some funky colors after baking.

That is it for this week. Tüdelü and till next time.
0 notes
Text
Another shit weekend another late post. But whatever.
Today we make a favourite of mine...
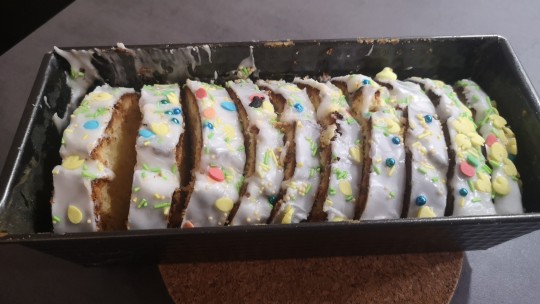
Cake in a jar!
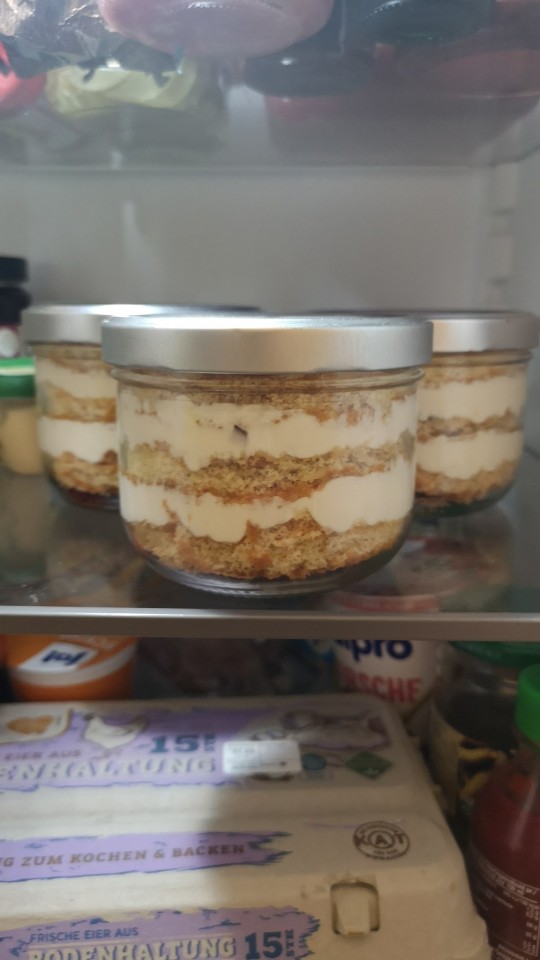
Good to take in the go/transport and easily portioned. As well as easily modified.
My go to is lemon-mousse but you can easily use any kind of mousse or flavored whipped cream.
For lemon-mousse you will need:
Any kind of cake layers(sponge cake is easiest)
Whipped cream
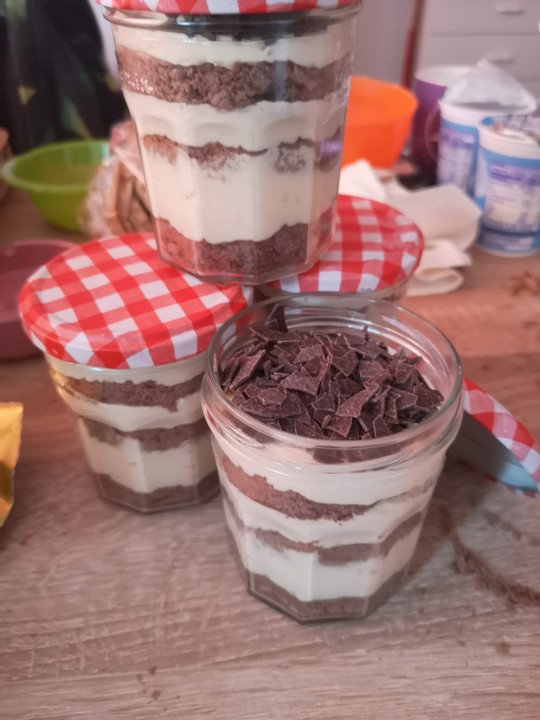
Grated Chocolate(optional but gives a great contrasting taste)
Lemon curd
For the lemon curd you will need:
250ml lemon juice
250g sugar
4 eggs
5 egg yolks
120g cold butter
Seperate your 5 yolks and add everyting except the butter into a medium sized sauce pan. Crank the heat to medium to high heat and stir constantly, preferably with a whisk until the mixture starts to thicken. Lower the heat and continue stirring. Stop occasionaly and check for big bubbles. The go: blubb blubb... Plop! Caution: they might splatter. Once you see the bubbles, kill the heat and add your cold butter. Keep stirring until it is all combined and put aside to cool for a bit. Half an hour or so should be enough to be able to use it for the mousse. Stir occasionally to stop any skin from forming and to make sure it cools evenly.
In the meantime prep your cake layers. Make sure they are not too thick, maybe half a centimeter or... 0.19 inches... But centimeters are easier to measure😅. If you don't have a ruler... About half your thumb thickness. Take your jar and just use it as a kind of cookie cutter amd cut out as many layers as you need. Alternatively use a cookie cutter the same diameter of your jar. You will have cleaner edges but that is the only difference.
Whip up your cream with a bit of sugar and if you have it a bit of vanilla. Once your lemon curd is cool enough take a whisk and add one tablespoon of the curd at a time. Five tablespoons will probably be enough for about 200ml of whipped cream.
(You will have a ton of curd left. But don't worry. It will keep in the fridge for at least a week but I usually use/eat it all befor it can go bad.)
Now. Your whipped cream WILL have turned a bit runny. That is OK! After all, everything will be contained in a jar. If you want to use it normally (not in a jar cake) you can use gelatin or agar agar to make it keep its shape or you can fold some melted white chocolade into it. The chocolate will solidify once you put it in the fridge to set an keep everything in its place.
It is time to assemble!
Now this is up to your preference. You can start woth a layer of mousse and then the cake or the cake first and then the mousse. But I like to put a layer of cake in, then a layer of mousse and, for a little extra a dollop the curd. Then another layer of cake and repeat until the jar is full. If you opted for the grated chocolate, you can add that at any point after whipping up the cream. I like to layer it in wherever but always add some on top. Done.
Put your jars in the fridge until you are ready to eat/go. They will keep for about 2-3 days in the fridge but after that you should be careful. Because of the lemon you will probably not notice if the cream went bad so make sure to test befor hand. If you are unsure toss it. But keep the jar😅 they are quite useful.
Here another picture with a chocolate sponge instead of vanilla and in smaller jars.
Hope you try it for yourself. I made the ones from the first picture today and all in all that took me about one and a half hours. I did use storebought sponge cake. There is absolutely no shame in that.
And with that Tüdelü and till next Saturday(hopefully😅😇).
#thesemiprofessionalkonditor#baking#lemon#cake in a jar#why can't everyone use the metric system?#it is so much easier
1 note
·
View note
Text
Sooo. I am two days late but my week was just... Yeah... I needed the weekend to just do nothing. Which is also why this post is rather short.
Now. Today we are making Buttermilk Scones. The recipe is direktly from the BBC:
They are really easy to make and don't take too long. You can easily experiment with toppings or add-ons like chocolate chips or something fruity.
Enjoy them plain with a nice and tangy lemon curd or with added chocolate chips and a simple whipped cream, or traditionally plain with raspberry jam and clotted cream. Perfect for every season.
Tüdelü and till saturday.
1 note
·
View note
Last Seen Blogs


kiotsuckhoeviet
Sans titre

proudfromafar
Proud From Afar

cultofpoppy-tm
Cult of Poppy™

geekyboymom
Ramblings of a Geeky Boymom