#the very basics and draw some squares circles cylinders at different angles
Note
sorry to bother you, but seeing some of your art recently has inspired me to start doing (digital) painting again. it's going... surprisingly well, all things considered, but there is one thing i'm having problems with.
im really struggling with head shapes/angles (esp profiles), and i was wondering if you remembered how you improved on those? did you just do studies of existing art/photographs, did you use any of the construction techniques - some other third thing? i feel like i skipped a basic step somewhere and now idk how to go back lmao. tysm! (also it was implied above but i think your art is awesome and really enjoy looking at it!!)
Hey, it's no bother at all. I'm always extremely honoured when I hear I'd inspired someone to get back into art!
Imo heads are one of the more difficult parts of the human body to draw considering how many little details they have so don't feel discouraged if you can't get 'em quite right yet, especially since you're just getting back into the swing of things. Don't be afraid to pull up a reference even when you're doing personal work.
For me, 99% of it is studies. Make yourself a pinterest folder or a regular folder on your computer and hoard any face you think looks interesting. I try to stay away from having them all be typical instagram models with chiseled jaws and so on. Having variety in your references is an important part of building your visual library. I also like people watching when I'm outside.
Strengthen your observational skills - when I look at a face I don't just take in the whole, I try to take note of how individual features relate to each other: the distance between the bottom of the nose and the bottom of the chin (and between the top of the forehead & the eyebrows), how large the space between the eyes is, how large or small specific features are (both on their own and in relation to each other), etc. Eventually you'll be able to start mixing and matching these into unique faces, as well as exaggerating them to fit your style.
For guidelines, to be honest I've always been a bit resistant to using them, but that's more of a me problem lol. I got started off with the loomis method: here's the book if you want the instructions directly from the horse's mouth (all of his books entered free domain a while back I think). If you're more of a visual learner like I am, proko's got a series of videos breaking it down: basics, how to adapt it to more varied faces, freestyling it.
The important thing about this method (or really, any draftsmanship method) is that you'll have to adapt it to suit your own needs. Especially considering that these guidelines follow a more ''idealized'' face (according to loomis) that you'll probably wanna break out of eventually. Think of it as a springboard – the method is good for giving you the fundamentals to begin visualising how proportions work, but don't get bogged down in following it to the exact mathematical line every time you draw a head. Of course, this comes with time and practice (where those studies will really pay off); once you start to feel that you understand the proportions, you can start branching out.
Practice drawing the skull! This helped me a lot - if you know where all the bony landmarks underneath the skin & muscles are, like the cheekbones, browbones, eyesockets (the eyesockets are especially helpful for profiles – you can build the rest of the features around them), etc. it becomes easier to keep track of your proportions in perspective. Sketchfab has a lot of 3D skull models you can rotate around, here's one where you can visualise how the skin sits on top of it.
Learning how to break the head down into basic flat planes is also helpful. Here's an Asaro Head you can turn in 3D space.
It's a bit more advanced but I also really like doing this exercise to practice drawing the head at different angles. Especially how he starts off with simple blocky shapes in the beginning.
I know I mention this a lot, but try working in 3D. Whether with a digital program or real clay. Sometimes sculpting things out in three dimensions is what it takes for things to really click.
Doing studies from tv shows/movies is also fun 'cause you can get video footage of the head turning in real time.
Hopefully some of that was helpful (and coherent, I'm still a bit loopy from my fever/the cold meds)! Again, it all really boils down to time and practice - you'll be noticing new things and building up your knowledge for as long as you're alive, so the most important thing is to stay curious and observant!
(& thank you!!)
#ik how it feels feeling like you skipped some step somewhere too hahah. when in doubt it could be helpful to just go back to#the very basics and draw some squares circles cylinders at different angles#text#long post
76 notes
·
View notes
Note
how do u do anatomy becuz i have tried and ended up failing miserably several times :3
hello there!! I'm not too good at giving tips so bear with me for this one aha
BODY
So like most people, I draw the parts segmented into shapes, usually a weird rectangular or trapezoid shape for the torso and hips depending on the body type (drawing body types is an entirely different topic which I'll admit I'm not as well versed in compared to other artists considering I draw a lotta robots lol, still it's very important to know how!!)
see this attempt at a full body sketch i did in like 5 seconds lmao
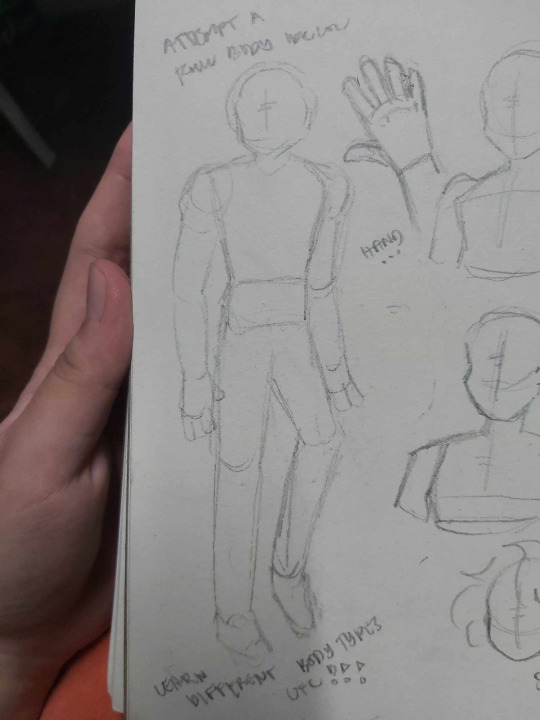
general shapes I use for each part as you can see from the pic above:
- head: circle, loomis method that shit
- torso and hips: trapezoid/rectangular thing
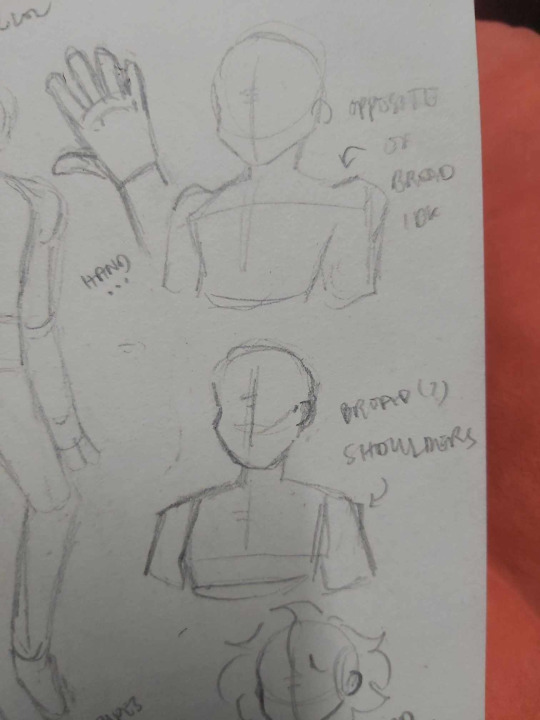
- shoulders are defined by circles, think of like how ball joints work on limbs for toys, I realize I should've worded the writings for the shoulders on that image better, both of them are kind of broad already, one is just square shoulders (top) and sloped shoulders (bottom) so yeah
- arms and legs: mostly cyllindrical, rectangles are good too but I feel like some people lean too hard into it and forget that without the funny curving, it just looks too stiff so I think cylinders are a better shape to attach to that!
i usually draw from head to foot, rarely full body though because feet are tough as hell for me. Although, I hope you can kind of understand the weird little shape I used in the pic
HANDS
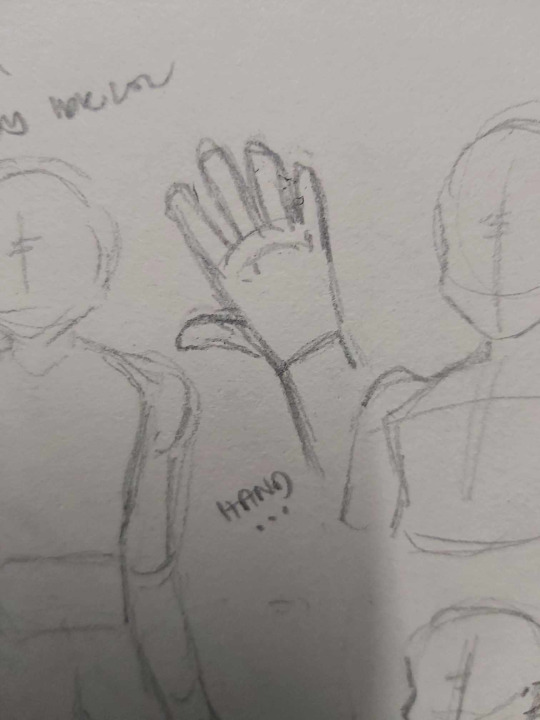
Alright, I'm gonna assume you meant anatomy for hands as well so that one's pretty simple for me
It's essentially one big trapezoid thing and you just attach the fingers on it, easy peasy
Don't worry about making sure each finger is the right size, I used to do that and it just made it harder for me, it's okay to just make them all the same size!! (unless you're going for realism, in which case then yeah the finger size thing is smthn to remember)
HEAD
Usually just following the loomis method for me aha
Some people and even me ocassionally, I start with the face first then form the head around that but I really do recommend doing the head shape first especially if you're drawing your character in certain angles
It's a basic circle, doesn't need to be perfect, with a funky cross in the middle as guidelines. I usually use those to mark out what direction I want the character to be facing, see the pic below:

Unlike that pic though, I don't bother marking out the mouth but it's still something you can do!
Side of the head is marked by another circle, that's where the ear usually goes
Neck goes down from the back of the ear, it doesn't start straight from the middle or under the chin!!
Alright that's all I got, hope this helped in some way lol
This isn't meant to be a definitive tutorial or anything, it's how I draw, I recommend looking at other artists' works or even just browsing tutorial online, do some sketches for practice, yadda yadda
1 note
·
View note
Text
Anime Character Drawing

Learning how to draw an anime character is very easy, you just need to read and repeat the steps from this drawing lesson created by the team of Drawingforall.net. In one of the previous guides, the team of Drawingforall.net has already shown how to draw anime, and in this instruction we want to show how to draw an anime character from a slightly different angle. This lesson will also be a kind of basic guide with the help of which our readers will be able to learn to draw a wide variety of anime persons. Using this simple instruction you can also draw an anime version of yourself or your friends. So, to start creating you will need such classic things as paper, pencil, preferably automatic since it is easier to work with it, and an eraser.
Step 1
In order to properly draw an anime person we must draw his skeleton and begin, of course, from the head. Next, using the most simple, light and almost transparency line depict the spine. On the spine sketch the chest and pelvis. The arms we also sketch with light lines. We did all these operations in order not to get confused in the proportions in the future and that our anime character would be beautiful and proportional.
Free interactive 3D characters for reference poses. Breathe life into your art. Give depth to your characters with the best pose reference tool on the web. Anime is one of those drawing styles that makes it fairly easy to change the expressions of the characters. Get 300+ freebies in your inbox! Subscribe to our newsletter and receive 300+ design resources in your first 5 minutes as a subscriber. A character for a manga or an animation should have a reasonably simple design (it can become too time consuming to draw a complex character multiple times). You need to consider how a manga or anime character will look from all views/angles (you will likely have to draw them from multiple views multiple times). A simple PyTorch Implementation of Generative Adversarial Networks, focusing on anime face drawing. Randomly Generated Images. The images are generated from a DCGAN model trained on 143,000 anime character faces for 100 epochs. Image Interpolation. Manipulating latent codes, enables the transition from images in the first row to the last row.
Drawing basic shapes. Drawing anime characters is great. But if you are a total beginner to drawing in general you should start by learning the basics. Practice drawing simple things like straight lines and basic shapes like circles and squares. This can be boring at times but will help you improve. Continue drawing anime or anything else you might like. Practice drawing basic lines and shapes a few minutes a day and then draw anything you find fun or interesting after that.
Step 2
Now we need to make our anime person drawing more voluminous, for this we will have to work with simple geometric shapes. For us it is very important that the face of the anime person was symmetrical and there were no mistakes in it. For these purposes, we will draw two lines intersecting in the center of the face in the place where the nose bridge will be located. To draw the neck we use a simple cylinder and to draw a torso we use a smooth geometric shape resembling a large cylinder.
Step 3
Now we need to add volume to the limbs of our anime character. For drawing arms and legs, we use elongated cylindrical shapes. And for drawing the shoulders, elbow and knee joints, we use circles and ovals. A small life hack to check the proportionality of the sketch. You can look at it through the mirror and it will show you all the errors in the ratio of details.
Step 4
The head of anime characters is one of the most difficult. And in order to properly draw the anime head, first of all we need to add the most basic details and for this we will be guided by the intersecting lines that we drew in the second step. Gently sketch the location of your character’s eyes, mark nose with a short line and the mouth with another one. In the same step, you need to outline the contours of the jaw and hair.
Step 5
Now we start indicating lines of clothing, it is actually very easy. If you draw clothes from a photo or from imagination, then try to transfer all the lines on paper as the artists of Drawingforall.net did in the example below. To start adding details some artists use a new sheet to put it on top of an old sheet with the sketch in order not to use an eraser and immediately get rid of them. Anime characters often wear slim fit pants, so most of the folds will be located in the area of groin, knees and at the very bottom of the pants.
Step 6
Circle the face details with dark and clear lines, add the necessary details if you missed them earlier. The jaw of an anime person can be narrowed like ours, round or more angular. Now circle the hair with the same dark lines. The more lines the hair will look more realistic. Of course, there are an infinite amount of types of people in this world, and their faces will also be very different, but the general principles of drawing remain unchanged.
Anime Character Creator
Step 7

Let’s get down to the torso. But first, draw the neck muscles with two slightly curved lines and the clavicle with two more lines. Circle clothing using very smooth and sharp lines. Anime persons have a great variety of clothes and styles. You can wear your drawn character in a T-shirt or something more complicated. To make your anime person drawing look prettier and cleaner, remove all unnecessary auxiliary lines from the torso.
Step 8
Anime Character Drawing Outline
Now, dear artists, let’s repeat the same actions, but with the arms of the anime man. We also need to circle them using clear and dark lines. By the way, you can make lines thinner and thicker in order to focus on certain areas and make the lines more juicy and more interesting. Circle the hands and fingers, remove all unnecessary guidelines. By the way, in the guide about anime hands you can learn about it in detail.
Step 9
The basic guidelines for the shape of the jeans are already drawn, and here we just need to deep into the details. So, here we need to indicate the folds that look like simple and short strokes and bumps located in the area of the pelvis, knees and in the place where the pants are tucked into shoes. And to clean your anime person drawing, take the eraser and remove all remaining unnecessary auxiliary lines which we no longer need.
Step 10
Anime Character Drawing Easy
To correctly draw the shadows, first map out their location. Then start smoothly filling the necessary areas with hatching, adjusting the intensity of shadows by changing the pressing on the pencil and changing the density of the hatching. Try to keep the drawing clean from unnecessary lines, for this you can use a piece of paper that you can put under the working hand.
As we said, you are free to use the guide about how to draw an anime character, to portray yourself or or anyone else. For this purpose, you first need a photo that will serve as the basis for the future work of art. You will need to painstakingly transfer the photo to a sheet of paper, simultaneously turning realistic features and details into a more anime version. One more thing you should remember, is that the team of Drawingforall.net is waiting for your suggestions and criticism. This is a very important aspect, which helps us not to lose touch with the audience, which is also interested in the subject of art. So write your comments under our articles, subscribe to us on social networks and share our articles with everyone who, just like you, wants to become a real artist.
Anime Character Drawing Base
Recommended
1 note
·
View note
Text
NCERT Solutions for Class 10 Maths
NCERT Solutions for Class 10 maths covers all exercise questions given in the CBSE textbook. You can download this as free pdf from this page. Our best Mathematics master teachers have reviewed all the class 10 maths ncert solutions of exercise questions that will help you solve all the NCERT class 10 maths questions without any problem. We at Learncbse provide free PDF solutions for NCERT maths class 10 for your ease. You can also share the link of our Learncbse website with your classmates so that they can also download CBSE class 10th math NCERT solution. At any point of time, if you have any doubt while going through the class 10 maths NCERT solutions, The online classes will be conducted by one of our best mathematics teachers. You can even talk to the tutor as you would in a normal tuition class.
https://www.quora.com/What-are-the-chapters-contained-in-the-NCERT-solutions-for-class-10-maths
https://www.quora.com/profile/Arika-Ahuja
https://www.quora.com/unanswered/What-are-the-chapters-contained-in-the-NCERT-solutions-for-class-10-maths
NCERT Solutions for Class 10 Maths - Free PDF Download
Class 10 being a whole new experience for you as it will be the very first time when you will be appearing for the board exams. Speaking of which, a thorough knowledge of all the chapters along with NCERT Solutions for Class 10 Maths can really help you to understand the subject better in less time. Below given are the chapters and the topics and exercises entailed in each of them. Scroll down to get well-versed with each and every chapter of CBSE Class 10 Maths.
Chapter 1 – Real Numbers
NCERT Class 10 Math Chapter 1, Real Numbers, is the extension of the topics learnt in 9th class. Sections 1.2 and 1.3 of this chapter contains some very important properties of positive integers, namely Euclid’s division algorithm and the Fundamental Theorem of Arithmetic. Furthermore, you will be revisiting Irrational Numbers in section 1.4 whereas Revisiting Rational Numbers and Their Decimal Expansions will be included in Section 1.5. Euclid’s division algorithm has a lot to do with divisibility of integers. It has plethora of applications associated with the divisibility properties of integers. NCERT Class 10 Maths Chapter 1, Real Numbers will be highly beneficial to compute the HCF of two positive integers.
Chapter 2 - Polynomials
Polynomials has total of four exercises however the last exercise is optional. In the first exercise, you need to find zeroes of polynomials p(x). In the second exercise, there are two questions. You have to verify the relationship between the zeroes and the coefficients in the first, while in the second, you have to find a quadratic polynomial. The third exercise has a total of five questions in which you have to do division of polynomials and obtain zeroes of polynomials. Then comes the optional exercise which has five questions in which you need to find zeroes of polynomials.
Chapter 3 - Pair of Linear Equations in Two Variables
There is an introduction part in the beginning of this chapter explaining the concepts of Linear equations in two Variables. You will learn some further complex topics while revising concepts that you have learned in class 9. This chapter has a total of seven exercises in which the last exercise is optional again. You will see three world problems given in the first exercise. In the second exercise, there are a total of seven questions. The third exercise has three questions. The fourth exercise has two questions. The fifth exercise has a total of` five questions in which you have to solve the pair of linear equations through various methods given. The sixth exercise has two questions. The last exercise is optional. Some important topics covered in this chapter are graphical representations, Pair of Linear Equations in Two Variables, Algebraic Methods of Solving a Pair of Linear Equations, Graphical Method of Solution of a Pair of Linear Equations, Elimination Method, Substitution Method, Cross-Multiplication Method and Equations Reducible to a Pair of Linear Equations in Two Variables.
Chapter 4 - Quadratic Equations
You will study quadratic equations and number of ways to find their roots. You will also get to learn some applications of quadratic equations in our daily life situations. There is a total of four exercises in this chapter. The first exercise has two questions, in the first you will need to find check whether equations are quadratic equations or not while in the second you have to convert world problem into quadratic equations. You need to find the roots of quadratic equations by factorisation in the second exercise. You will be finding the roots of quadratic equations in the third exercise also. The fourth exercise has five questions based on finding the roots. Solution of a Quadratic Equation by Completing the Square, Solution of a Quadratic Equation by Factorisation, and Nature of Roots are the main topics studied in this chapter.
Chapter 5 - Arithmetic Progressions
Arithmetic Progressions, chapter 5 of Class 10 Maths, deals with an introduction to Arithmetic Progression with the help of simple daily life examples and gradually deals with the topics entailed and their complexities. Four exercises are given in this chapter divided into various questions in which we have to find the term. Overall, you will learn how to find the nth terms and the sum of n consecutive terms, and in turn use the acquired knowledge in solving some daily life problems.
Chapter 6 - Triangles
There are six exercises in chapter 6, Triangles, including one optional having different set of questions based on the properties of triangles. This chapter has a total of 9 theorems and is very important for all the students of class 10 Maths for their class 10 Board exam.
https://sites.google.com/site/mathsncertsolutionshttps://sites.google.com/site/ncertsolutionsblog/ncert-solutions-for-class-10
https://sites.google.com/site/ncertsolutionsblog/ncert-solutions-for-class-10-maths
http://www.learncbse.in/ncert-class-10-math-solutions/
https://sites.google.com/site/slstudycentre/home/kendriya-vidyalaya
Chapter 7 - Coordinate Geometry
A total of four exercises are given in the chapter. The questions are based on finding the distance between the two points whose coordinates are provided and area of a triangle formed by three given points.
Chapter 8 - Introduction to Trigonometry
This chapter has a total of four exercises comprising of various questions mainly on finding trigonometric ratios of the sides of a right triangle with respect to the acute angles of that triangle, called trigonometric ratios. Trigonometric Ratios, Trigonometric Ratios of Specific Angles, Trigonometric Identities and Trigonometric Ratios of Complementary Angles are the main topics you will learn in this chapter.
Chapter 9 - Some Applications of Trigonometry
In this chapter, you will be studying about some very interesting ways in which trigonometry is uded in the daily life around you. This chapter has only one exercise and the questions of which are based on the practical applications of trigonometry.
Chapter 10 - Circles
Circles has just two exercises. The first exercise contains basic questions, while the second has various questions in which you have to prove the given equations.
Chapter 11 - Constructions
In this chapter, there are two exercise where you have to draw various constructions such as division of line segments, construction of Tangents to a Circle and the questions are based on them.
Chapter 12 - Areas related to Circles
There are three exercises that cover all the questions of the area of a circle and finding the areas of two special ‘parts’ of a circular region.
Chapter 13 - Surface Areas and Volumes
In this chapter, there are five exercises and all of them will deal with the problems of finding areas and volumes of different solids such as cube, cuboid and cylinder.
Chapter 14 - Statistics
You will see a total of four exercises in this chapter. The questions will be based on finding mean, median and mode from ungrouped data to that of grouped data. You will also be solving questions related to cumulative frequency, how to draw cumulative frequency curves and the cumulative frequency distribution topics.
Chapter 15 - Probability
Out of the two exercise in this chapter, one is optional. The questions are based on finding the probability of getting a situation mostly on coins and dice.
Why Learncbse.in
Learncbse.in NCERT Solutions for Class 10 Maths enables you to understand all the basic & advance level concepts after solving each & every exercise question. Our Maths teachers especially focus on clearing out your concepts and providing you with a thorough understanding of all the topics. You are taught on a one-to-one basis by our most dedicated teachers. We at Learncbse.in don't believe in just recorded lectures as they don't prove helpful in solving doubts related to any of the book solutions.
To assess your progress on a regular basis, you are tested by our maths tutors at a definite interval of time. The results are shared with your parents to keep them on the same page as well. Another benefit of Learncbse.in is that you get to choose the pace of the learning of the lesson and the timing of the live tutoring session. The lesson plan is customized according to your requirements. The live sessions are also recorded and are available free of cost to all the students and their parents later for review and revision purposes. Another biggest advantage of studying with Learncbse.in is that you can choose to study class 10 maths ncert solutions either on your PC or through your Android mobile devices after downloading our Instant doubt solving app! You can either join us as a regular student or contact us whenever you have doubts and want to prepare for your tests or examinations! We want our NCERT solutions for class 10 maths to prove highly beneficial for you!
There are several ways with which you can avail the benefits of our NCERT Class 10 Maths Solutions. Let’s see what they are after a brief description. Stepping into Class 10 is the best experience of your life as you will be experimenting and facing new things which might appear very exciting to you. As mentioned already that it will be the first time in your life when you will be appearing for the class 10 board exams. Maths is counted among the most dreadful subjects which is feared by a lot of the students. This is the reason why along with NCERT Solutions for class 10 Maths, we have provided the detailed chapter-wise content so that you face no problem while solving the tricky questions of class 10 Maths. Students are advised to keep the Maths NCERT Solutions class 10 handy so that they can prepare short notes that are highly beneficial for class 10 Maths exam. You can include important formulas and theorems and make short notes of it. Chapters like Coordinate Geometry and Constructions need undivided attention which can be gained by solving NCERT Solutions for class 10 Maths and going through the root cause of each and every problem you are facing problem with. We wish you all the best for your journey along with the preparation of Class 10 Maths and good fortune to all your endeavours.
2 notes
·
View notes
Text

LESSON THREE: GETTING IN SHAPE(S)
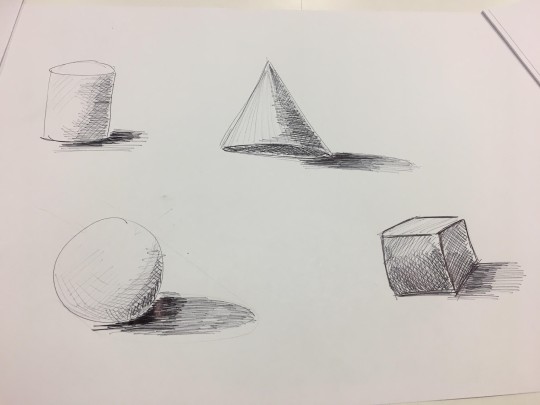
Today’s lesson will focus on geometric shapes and forms, and how to render them with light and shadow.
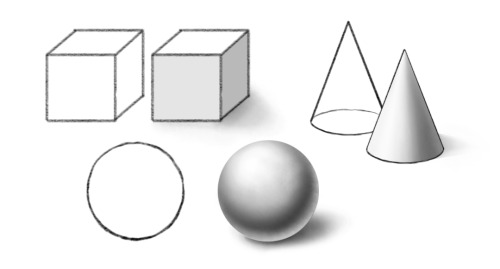
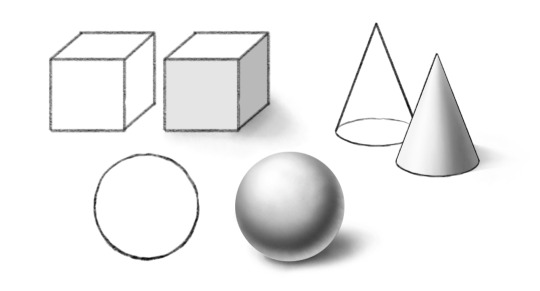
Now granted, very little of what you may want to draw will consist of perfect spheres, cubes, or cones. But almost every complex, organic shape? Can be reduced to basic geometric components. A nose might not be a standard geometric form, but you can build one by combining spheres for the tip of the nose and nostrils with a rectangular prism for the bridge – and if you know how to render and shade those forms, then shading a nose gets a lot easier.
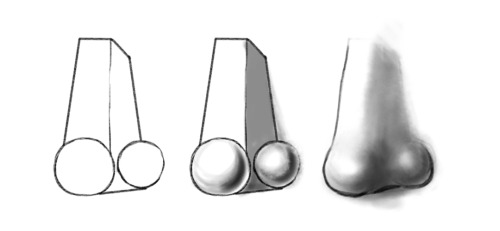
Now, a sphere with no shading at all, just looks like a circle. It’s a little easier with boxier shapes to convey 3-dimensionality just with contours, but it’s still tricky sometimes to convey depth. You can convey a lot with just contours and linework, but we’ll be talking about the technique involved in that in a later lesson. For today, dealing with light and shadow to communicate shape and depth will be our focus. We’ll be concentrating mainly on simple geometric forms, because these are our building blocks for constructing more detailed, complex images as we feel more comfortable with our skills.
To start, let’s make sure we have some terms defined:
SHAPE: A two-dimensional figure. ie, a circle, square, rectangle, triangle, etc.
FORM: A three-dimensional figure. ie., a sphere, cube, prism, cone, etc.
Technically nothing we draw is three-dimensional, since the page itself is two dimensional, but with shading and depth indicators, we are able to create the illusion of three-dimensional space in a two-dimensional drawing.
So, there’s our terms as far as shape. Now, for light and shadow, let’s look at some more terms:
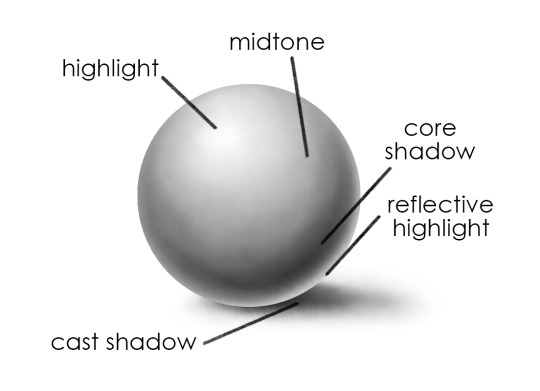
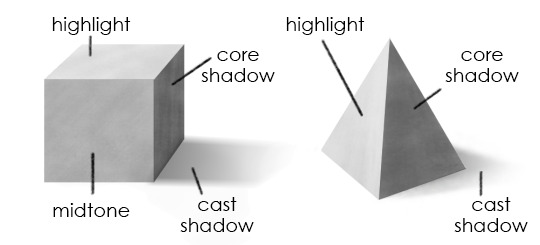
HIGHLIGHT: The area of a form that faces the light source and reflects the most light.
MIDTONE: What it says on the tin.
CORE SHADOW: The area of a form furthest from the light source which has the deepest area of visible shadow.
REFLECTIVE HIGHLIGHT: An area of dimmer light where the form catches light reflected by other surfaces.
CAST SHADOW: The shadow the form casts on the surface it rests on, or on objects around it.

On a curved surface, such as we see in the sphere above, and also in cones and cylinders, we see shading in a gradient. There is a gradual shift along the same continuous surface from an area of highlight to an area of shadow.
On flat surfaces, such as on cubes, prisms, or the flat top of a closed cylinder, the light hits all points of a surface at a more similar angle, making each visible side a comparatively flat area of highlight or shadow. (You may see some gradation, depending on proximity of the light source, reflections, or small variations and imperfections in the form – but not to the degree you would on a sphere).

Now, the most important step in drawing shaded objects? Is IDENTIFYING YOUR LIGHT SOURCE.
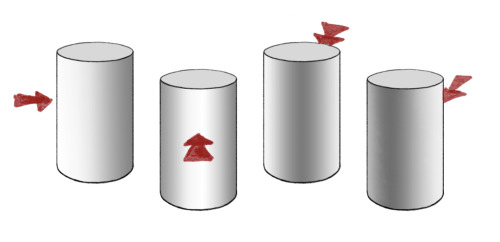
On each of these cylinders, the light is coming from a different direction. On the second cylinder to the left, the light is coming from the front; the area of brightest highlight is visible; the area of deepest shadow is on the far side of the cylinder. On the cylinder immediately to the right of it, the opposite is true – we can see the deepest shadow, and the highlight is on the far side.
Now, in reality, there are often multiple light sources – two lamps in a room, natural light through a window plus indoor light, lights reflected off multiple surfaces, etc. But for the sake of our drawing exercises, we’re really just going to focus on a single primary light source in a given drawing, plus some slight amount of reflected light.
When you have multiple objects in a drawing, or a complex object made of multiple geometric forms, keeping track of your light source is important! It’s logically consistent, and makes everything in your drawing appear to occupy the same space. I often make a little arrow to remind myself of the angle of the light, which I can erase later.

Recommended Media: If you have gray-toned paper and drawing chalks/gray pastels, this is a great time to break them out. Otherwise, charcoal is great, or pencil and paper is fine.
EXERCISE ONE: VALUE SCALE
When we talk about values in drawing, we are’t talking about our moral principles (though there is a fantastic quote by G. K. Chesterton that “art, like morality, consists of drawing the line somewhere.”) Instead we are talking about light and dark in very literal terms.
Before drawing any shapes, let’s take a minute to explore the full range of your value scale. Draw at least 9 to say, 12 boxes of equal size, all in a row with touching sides.
Now, starting on one side, fill in the first box as dark and black as you possibly can.
Using your materials, in whatever medium you’re in, try to fill in the boxes from one side to the other in a gradual scale, with the opposite box being white (if you are drawing on gray-toned paper, you will want to fill in that box with white chalk, conte or pastel). Make the transition as even and gradual as possible. In the end, it should look something like this:

The value of this exercise (ayyyyy see what I did there?) lies in making you explore the FULL range of value available to you, so you’re aware of just how deep you can make your shadows in comparison to your highlights. A lot of folks go light on their shading instead of really getting in there with a full value scale. Pin this up as a reminder of what you have at your disposal!
EXERCISE TWO: DRAWING FORMS
On different pieces of paper, draw, and then shade:
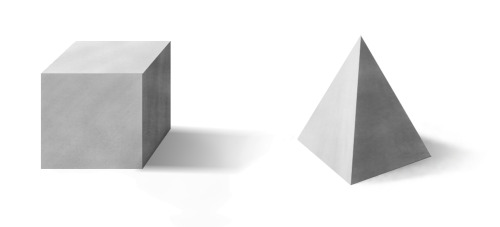
a cube
a sphere
a cylinder
a cone
and a pyramid
(links provided for example – you can use them as reference, or you can find your own, online or in real life!)
For each form, identify a direction for your light source. Figure out your area of highlight, your area of core shadow, and your cast shadow. Refer to your value scale! If you’re feeling ambitious, try drawing the forms more than once, with your light source at different angles.
EXERCISE THREE: GET IN FORMATION
Now, on a new sheet, try combining and overlapping the forms, maintaining a consistent light source.
If you want to do this with references, you can look online, OR – look in your pantry. Canned goods and boxes make great simple geometric references. Eggs, while ovoid, shade similarly to spheres. Shine a desk lamp on your composition for a clear light source, and then draw away!
As always, my askbox is open, you’re welcome to @ me, and I’m happy to provide feedback via message if asked.
#drawing 101#lena's drawing 101#shading#forms#shapes#beginner drawing#light and shadow#drawing with lena#reposting#art lessons
55 notes
·
View notes
Text
Week 13 Blog Post
Lesson Overview:
This week is the final week for this communications course. During the lesson we participated in drawing, particularly line-work to improve on our sketching skills. Various aspects of sketching was practiced during the lesson such as shading, perspective drawing, lifework, and hand - eye coordination.
What i learnt from this lesson:
- Importance of shading
- Practicing of our hand eye coordination
- what I found difficult / easy / further improvements
The lesson:
1.Importance of shading:
During the lesson there was activities which required us to practice on our shading skills. This included things such as drawing multiple squares on a page then filling them with a gradient (light to dark) from different angles. The importance of this was realized when we were required to draw various shapes such as cones, spheres, cylinders with their shadows they cast.
I found that the shadows plays a huge role in making an object look 3D, and in some instances perfecting the shadow can be more important than the object itself. However understanding how light hits an object and the different angles of shadows it casts is something which I found difficult to grasp. This is something that I will need to work on through consistent practice.
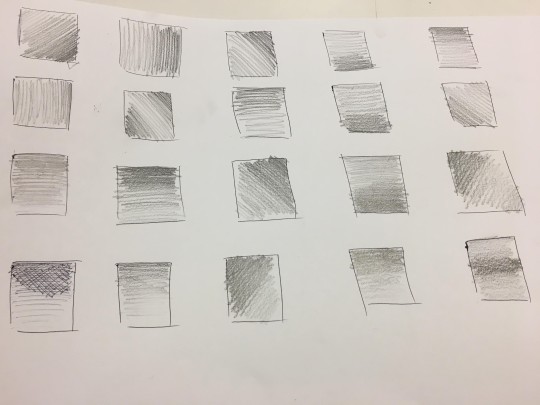
Above image: practicing shading in gradients on squares.
Above image: drawing various shapes and sketching the different shadows they cast.
2. Practicing hand - eye coordination:
We were also required to undertake different activities that worked on our hand eye coordination. Such activities included;
- Drawing 20 dots across the page which we were later required to join them up in straight lines, in one go, freehand.
- Drawing multiple circles which touched perfectly, then drawing ellipses inside of those circles.
- Drawing an even transition from an ellipse to a circle from a horizon point on a page.
- Drawing a freehand grid on a page that tests our ability to draw straight lines with our shoulder instead of just using the wrist.
We also practiced contour drawing which adds depth in drawings. This was done by drawing shapes of fruits and adding contours in them.
These activities I found to be quite simple and easy. Though hand eye coordination is an important element when it comes to a good sketch. And is crucial for designers to clearly communicate their ideas with the world.
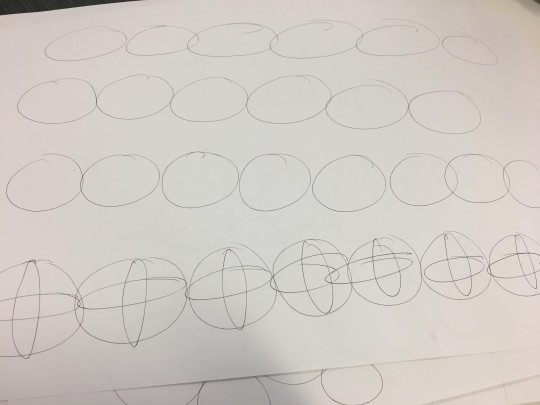
Above image: drawing circles and then ellipses within those circles.
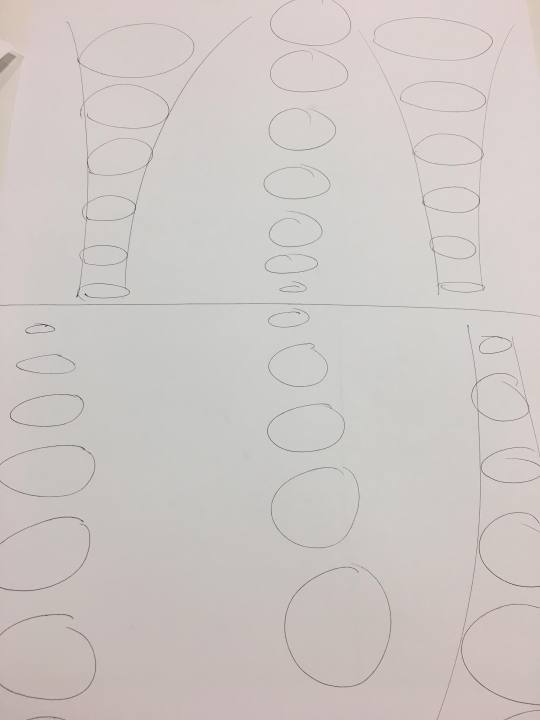
Above image: drawing an ellipse transitioning to a circle from a horizon line.
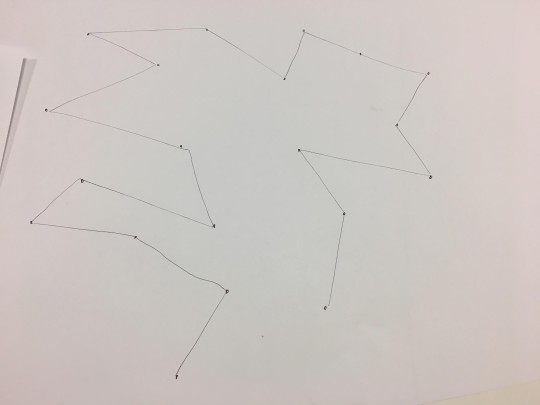
Above image: Joining dots on a page freehand.
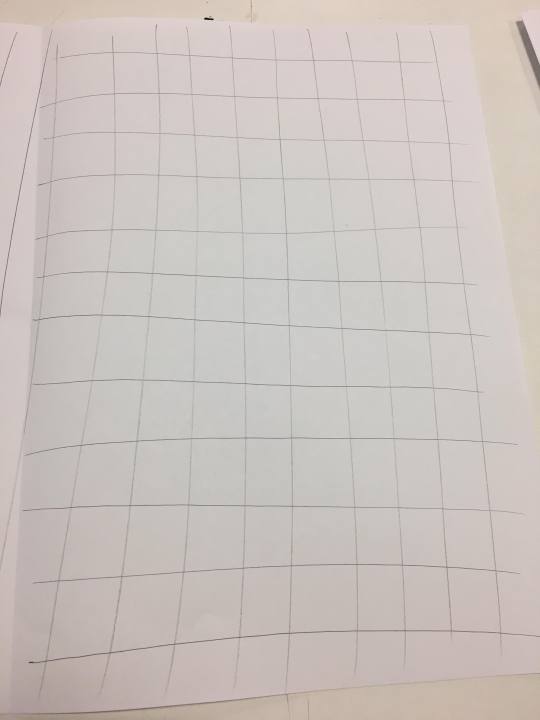
Above image: practicing drawing grids that tests our ability to our whole arm to draw straight lines.
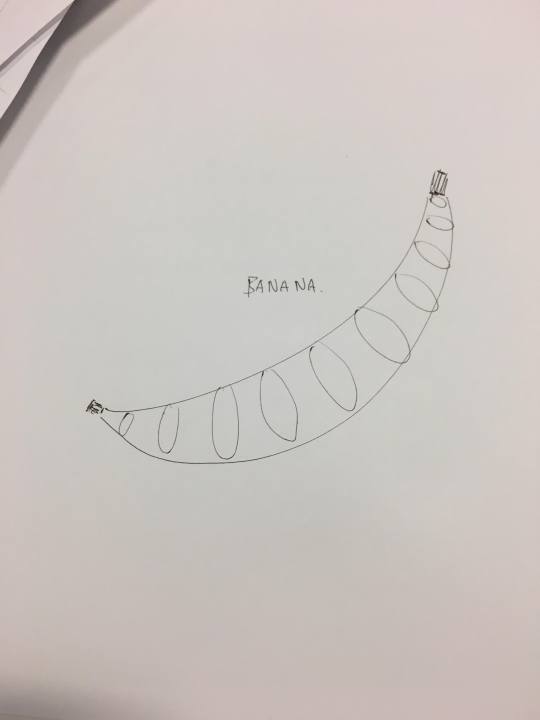
Above image: practicing our contour drawing by applying it into various fruit shapes.
3. What I found difficult / easy / further improvements:
What I found difficult:
The thing that I found difficult was mainly just the shading part of the lesson. understanding how to implement shading correctly according to how light hits an object was something that needs further refinement.
What I found easy:
The other activities such as drawing circles, ellipses, joining dots and straight lines i found to be quite simple and easy. As week 11 which was a drawing lesson, I enjoyed this lesson as it was a change from using computers and doing our work digitally.
Further improvements:
As mentioned before, my shade work needs improvement. Other improvements include taking time in my work as I did not put much effort into this activity because of the simplicity of it. However reflecting upon my work I could have put more effort into it seeing the quality of work.
Lesson conclusion:
This week’s lesson was quite simple and easy. However it was an important lesson as it tests and works on our fundamental drawing skills, which is needed for more complex works. Each element such as contouring, line-work, hand-eye coordination etc is crucial aspects in a good sketch.
Communications course semester conclusion:
Overall, I found this course to be very important and informative. It has taught me basic the uses of software such as Photoshop, AutoCAD, Adobe Bridge CC etc which is essential for industrial designers. Also this course tested our ability to create models and undertake technical drawing.
What I learnt / difficulties / enjoyed in this course:
Difficulties:
- The main aspects of this course which I found difficult was getting used to the different software that is required such especially Photoshop.
- However I found AutoCAD to be difficult in the beginning but managed to understand it easily
- Task 2 I found to be the most difficult of all tasks due to the lack of lessons which allowed me to grasp how the Photoshop works.
Enjoyed:
- I enjoyed model making and the drawing aspects of this course as I am better at using my hands than digitally producing works
- Enjoyed learning technical drawing although it being very tedious
- I liked the photography class as it was a change from the usual classes that required an object being drawn / made
Learnt:
- Learnt of different ways to measure complex forms and using this data to create a model.
- The different rules and how to correctly undertake technical drawing
- The use of software such as: Photoshop, Adobe CC, AutoCAD
Course conclusion:
Although this course was hard at first it has allowed me to grasp the basic necessary of design. The skills learnt from this course will help me through this course and into pursing my passion for design.
4 notes
·
View notes
Text

LESSON THREE: GETTING IN SHAPE(S)
Today’s lesson will focus on geometric shapes and forms, and how to render them with light and shadow.
Now granted, very little of what you may want to draw will consist of perfect spheres, cubes, or cones. But almost every complex, organic shape? Can be reduced to basic geometric components. A nose might not be a standard geometric form, but you can build one by combining spheres for the tip of the nose and nostrils with a rectangular prism for the bridge -- and if you know how to render and shade those forms, then shading a nose gets a lot easier.

Now, a sphere with no shading at all, just looks like a circle. It’s a little easier with boxier shapes to convey 3-dimensionality just with contours, but it’s still tricky sometimes to convey depth. You can convey a lot with just contours and linework, but we’ll be talking about the technique involved in that in a later lesson. For today, dealing with light and shadow to communicate shape and depth will be our focus. We’ll be concentrating mainly on simple geometric forms, because these are our building blocks for constructing more detailed, complex images as we feel more comfortable with our skills.
To start, let’s make sure we have some terms defined:
SHAPE: A two-dimensional figure. ie, a circle, square, rectangle, triangle, etc.
FORM: A three-dimensional figure. ie., a sphere, cube, prism, cone, etc.
Technically nothing we draw is three-dimensional, since the page itself is two dimensional, but with shading and depth indicators, we are able to create the illusion of three-dimensional space in a two-dimensional drawing.
So, there’s our terms as far as shape. Now, for light and shadow, let’s look at some more terms:
HIGHLIGHT: The area of a form that faces the light source and reflects the most light.
MIDTONE: What it says on the tin.
CORE SHADOW: The area of a form furthest from the light source which has the deepest area of visible shadow.
REFLECTIVE HIGHLIGHT: An area of dimmer light where the form catches light reflected by other surfaces.
CAST SHADOW: The shadow the form casts on the surface it rests on, or on objects around it.
On a curved surface, such as we see in the sphere above, and also in cones and cylinders, we see shading in a gradient. There is a gradual shift along the same continuous surface from an area of highlight to an area of shadow.
On flat surfaces, such as on cubes, prisms, or the flat top of a closed cylinder, the light hits all points of a surface at a more similar angle, making each visible side a comparatively flat area of highlight or shadow. (You may see some gradation, depending on proximity of the light source, reflections, or small variations and imperfections in the form -- but not to the degree you would on a sphere).

Now, the most important step in drawing shaded objects? Is IDENTIFYING YOUR LIGHT SOURCE.

On each of these cylinders, the light is coming from a different direction. On the second cylinder to the left, the light is coming from the front; the area of brightest highlight is visible; the area of deepest shadow is on the far side of the cylinder. On the cylinder immediately to the right of it, the opposite is true -- we can see the deepest shadow, and the highlight is on the far side.
Now, in reality, there are often multiple light sources -- two lamps in a room, natural light through a window plus indoor light, lights reflected off multiple surfaces, etc. But for the sake of our drawing exercises, we’re really just going to focus on a single primary light source in a given drawing, plus some slight amount of reflected light.
When you have multiple objects in a drawing, or a complex object made of multiple geometric forms, keeping track of your light source is important! It’s logically consistent, and makes everything in your drawing appear to occupy the same space. I often make a little arrow to remind myself of the angle of the light, which I can erase later.

Recommended Media: If you have gray-toned paper and drawing chalks/gray pastels, this is a great time to break them out. Otherwise, charcoal is great, or pencil and paper is fine.
EXERCISE ONE: VALUE SCALE
When we talk about values in drawing, we are’t talking about our moral principles (though there is a fantastic quote by G. K. Chesterton that “art, like morality, consists of drawing the line somewhere.”) Instead we are talking about light and dark in very literal terms.
Before drawing any shapes, let’s take a minute to explore the full range of your value scale. Draw at least 9 to say, 12 boxes of equal size, all in a row with touching sides.
Now, starting on one side, fill in the first box as dark and black as you possibly can.
Using your materials, in whatever medium you’re in, try to fill in the boxes from one side to the other in a gradual scale, with the opposite box being white (if you are drawing on gray-toned paper, you will want to fill in that box with white chalk, conte or pastel). Make the transition as even and gradual as possible. In the end, it should look something like this:

The value of this exercise (ayyyyy see what I did there?) lies in making you explore the FULL range of value available to you, so you’re aware of just how deep you can make your shadows in comparison to your highlights. A lot of folks go light on their shading instead of really getting in there with a full value scale. Pin this up as a reminder of what you have at your disposal!
EXERCISE TWO: DRAWING FORMS
On different pieces of paper, draw, and then shade:
a cube
a sphere
a cylinder
a cone
and a pyramid
(links provided for example -- you can use them as reference, or you can find your own, online or in real life!)
For each form, identify a direction for your light source. Figure out your area of highlight, your area of core shadow, and your cast shadow. Refer to your value scale! If you’re feeling ambitious, try drawing the forms more than once, with your light source at different angles.
EXERCISE THREE: GET IN FORMATION
Now, on a new sheet, try combining and overlapping the forms, maintaining a consistent light source.
If you want to do this with references, you can look online, OR -- look in your pantry. Canned goods and boxes make great simple geometric references. Eggs, while ovoid, shade similarly to spheres. Shine a desk lamp on your composition for a clear light source, and then draw away!
As always, my askbox is open, you’re welcome to @ me, and I’m happy to provide feedback via message if asked.
51 notes
·
View notes
Text
Exploring the World of Geometry
What is geometry?
Geometry is exactly the math of shapes made of points, lines and surfaces..
How is geometry used in art?
Geometry is used in art through combining multiple points and lines together to create a theme throughout their artwork.
What art movements explored in geometry?
Geometric abstraction - is a style of using the fundamental shapes and lines of geometry to get the effect.
Op art - or ‘optical art’ is one of the visual art styles that uses optical illusion. It uses geometric shapes to lines to create the impression to the viewer that there is movements.
Josef Albers background:
Where/when was the artist born?
Josef Albers is born on 19 March, 1888 in Germany, Bottrop. He died on the 25 March, 1976 - making him aged at 88 years old. Josef became the most influential of the twentieth century.
Where is/was their educational background?
From 1905 to 1908, he studied to become a teacher in Buren. He was a teacher for 5 years teaching in Westphalian primary schools from 1908 to 1913. He later certified to teach art and later studied the lithography in Essen and attended the academy in Munich. In 1920, Josef Albers at the age of 32, entered the Bauhaus - a school that is committed to exploring the relationship the art and technology society.
What inspires/inspired them to make artwork?
What really inspired Josef Albers into making his artwork includes the inspirations from artists, friends and art movements. Artist such as Piet Mondrain which is similarly explore the world of geometry through his artwork and is considered to inspired and influences Josef Albers into making his artwork. Furthermore, art movements such as Italian Futurism, Bauhaus and Constructivism all have inspired Josef Albers in creating his own piece.
Art movement:
What art movement are/were their apart of?
Josef Albers is apart of the Bauhaus and Geometric Abstraction. Bauhaus was the most influential modernist art school of the 20th century. Geometric abstraction refers to non-objective art that is based on geometric principles. In short, it is the art style to its most fundamental shapes and lines.
What does the art movement concentrate on?
The art movement - Geometric Abstraction is a form of abstract art that is based on using basic geometric shapes to create the effect.
Who else was central to the art movement?
Ilya Bolotowsky was a Russian-born America painter. Bolotowsky works mostly incorporated the uses of geometric shapes and forms similarly to Josef Albers. Bolotowsky is born on the 1st of July 1907 and his education background is that he graduated from National Academy Museum and School. He was a successful leading artist in the 20th century in abstract painting.
What inspired the art movement?
Out of all the art forms that are available, abstract art is considered to be the most intellectual. Geometric abstraction was formed in the early 20th century by many artists who was frustrated by following the same style of old painters.
3 of Josef Albers’ artworks:
Study for Homage to the Square: Departing in Yellow

The art work was released in 1963 and the medium used to create this artwork is oil paint.
The artwork is incredibly simple and minimalistic. It explores the uses of different tones of colours throughout the whole artwork. 4 symmetrical shapes is being used for this art work, which is a square. Furthermore, what I’ve noticed is how the outside colour of the shape is less saturated than the one in the middle - this not only make the work stands out but also it draws the viewer’s attentions to the mid-section. It is also made using oil paint on fibreboard to get the results.
It may appeared to be a very narrow conceptual framework. However Josef Albers intentions were that the different colour palettes can be depict as different climates. Furthermore, the choices in the colour palettes - as well as their placements is aimed at an interaction with each of the colours.
I do like the artwork a lot as it explores the different shades of the colour yellow. Although it’s simple and minimalistic - this does not mean that this isn’t an abstract art. The uses of the different shades of yellow is not only creative but it stands out.
Graphic Tectonic

The art work is released in 1941 and the medium used is pen, ink and paper.
The artwork looks complex and a lot of thoughts have gone into it to create this illusion results. It’s still explores the uses of geometry by creating this illusion of movement using points and lines throughout the artwork. Moreover, this results created multiple shapes inside that is pleasant to look at and it is the focus of the artwork since you have the illusion of movements going on.
The medium which Josef Albers uses to create this artwork is only pen, ink and paper. It’s incredible how the results are well measured out and doesn’t look distorted - be it as to how he only uses those tools.
Although Josef Albers is best known for his colour studies. however, here his interest is to studies the lines and it is where he worked to create "maximum effect from minimum means."
My opinion for this artwork is that I like it. It looks simple considering it is just lines. However, these lines make up to a complex shapes that creates an optical illusion - and that’s what he’s trying to do. Furthermore, even though he’s best known for his colour studies, but I also like how he is exploring other media as a studies as to not limit himself.
Impossibles

This artwork is released in 1931.
The artwork looks geometrically abstract and simple. It appeared to be 3-dimensional as it looks to be a cylinder shape. It’s mainly consist of flat circles and ovals to get the final results.
This artwork dates back to 1931 which was when Josef Albers was still at the Bauhaus. He represents his experiments with nontraditional materials and techniques.
I like this artwork as this was when he moved from a figurative style of picture making to geometrically based abstraction. It’s simple and minimalist - however, not only do I like the simplistic of the colour black and white, which makes the object stand out, but I also like how he combined 3-dimensional and 2-dimensional shapes together.
Step-by-step to how I create artwork inspired by Josef Albers:
Step 1: Create a new A4 Illustrator document.
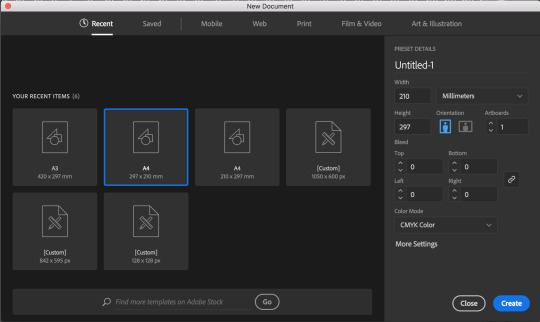
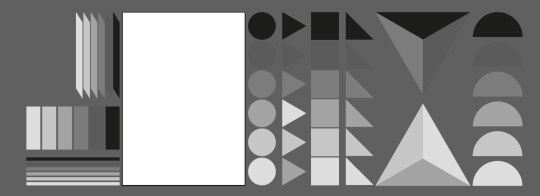
Note: We were given an Illustrator file containing Monochrome shapes to begin the project. However, I don’t want to be restricted with what was already created. Therefore, I decided to create my own artwork using my own inspiration and creativity.
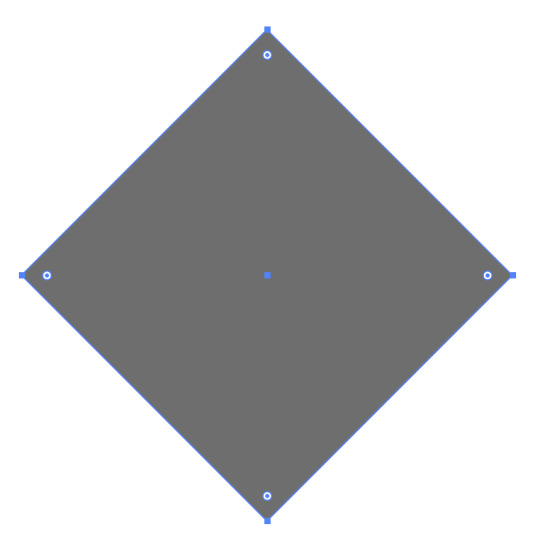
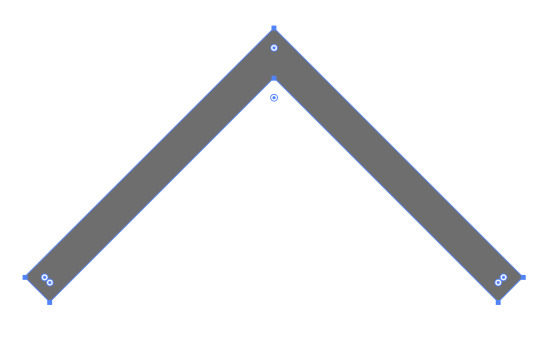
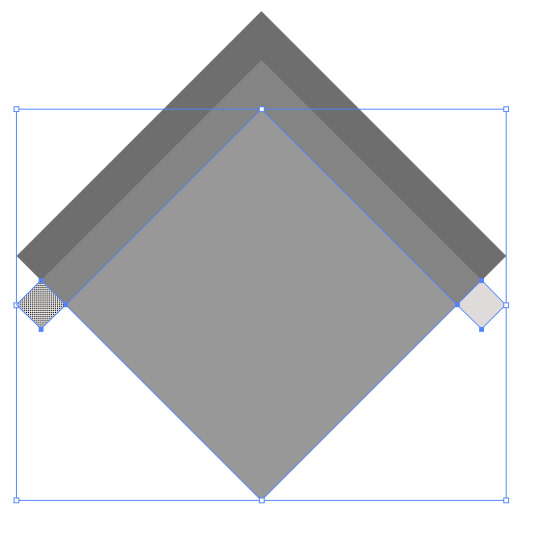
Step 2: Select the rectangle tool and create a symmetrical square by holding the shift key.
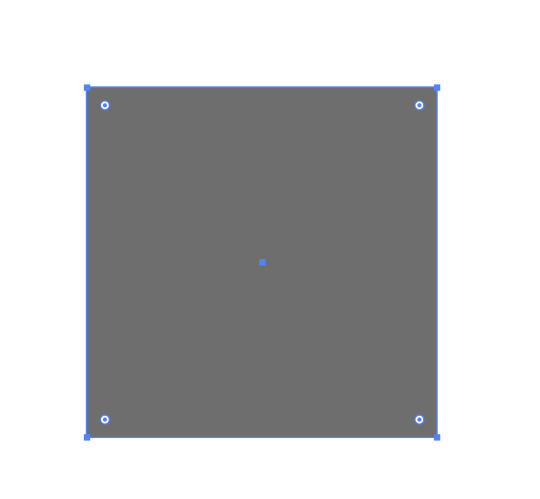
Step 3: Select one of the corner of the shape and rotate it while holding the shift key to get a 45° angle.
Step 4: Duplicate the shape 3 times and leave one set aside for later steps.
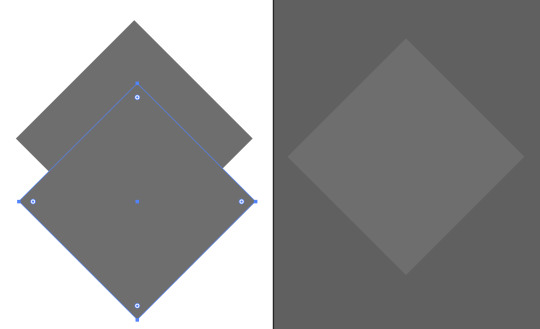
Step 5: Place another duplicated shape on top of the original shape so that it is overlapping each other. However, leave some distance between each other as well.
Step 6: Select both of the shapes by holding the shift key and select the shape builder tool. Press and hold the alt key for the minus icon to appear. Click on certain areas within the shapes to remove it while still holding the alt key.
You should get something like this:
Step 7: Place the cut out shape on top of the duplicated shape that we’ve set it aside earlier. Make sure it is align perfectly to it as well. Also make sure to set the cut out shape a different colours so that it makes everything easier.

Step 8: Select cut out shape and duplicated it one time and set it aside for later stage.

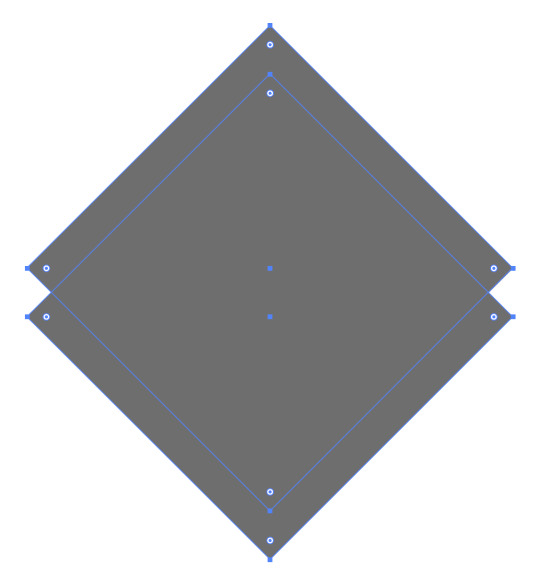
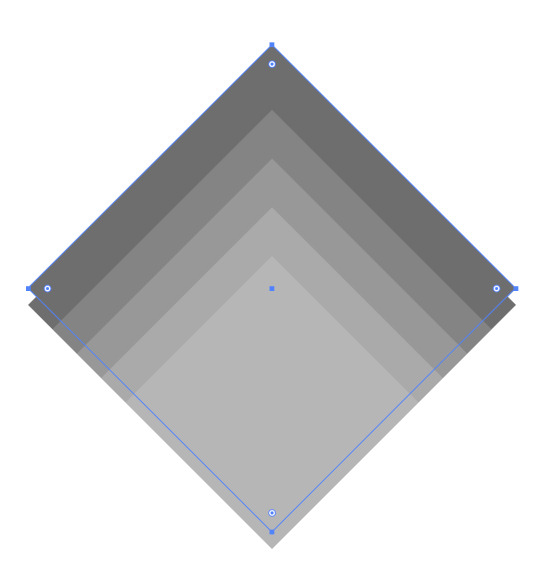
Step 9: Duplicate the square shape again and align it together with another square shape.
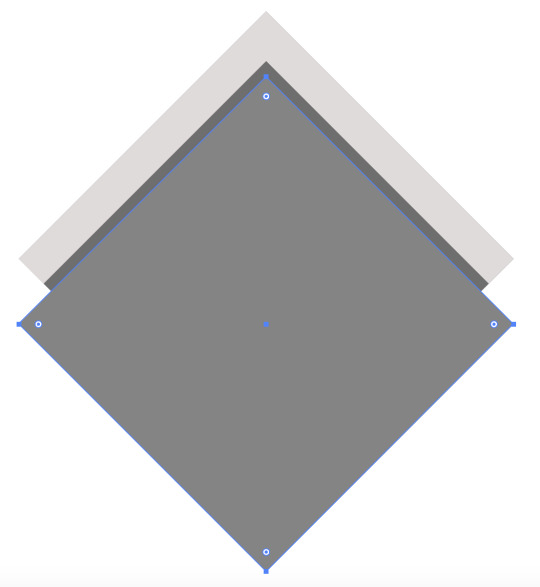
Step 10: Select the cutout shape as well as the original shape and select the shape builder tool to remove the area where the cut out shape is on top of the duplicated shape to get this look:
Step 11: Repeat the process and duplicate the shape again and aligning it with the original. Also make sure to set a different tones of the colour as to not confuse ourselves in the process.
Step 12: Select the cut out shape that we previously set aside before and place it on top of the smaller shape.
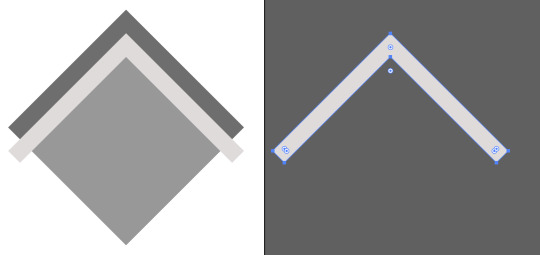
Step 13: Repeat the process again by duplicating the cut out shape and setting it aside. Now select both of the shapes and select the shape builder tool to remove the top area where the cut out shape is placed on top of the original shape.
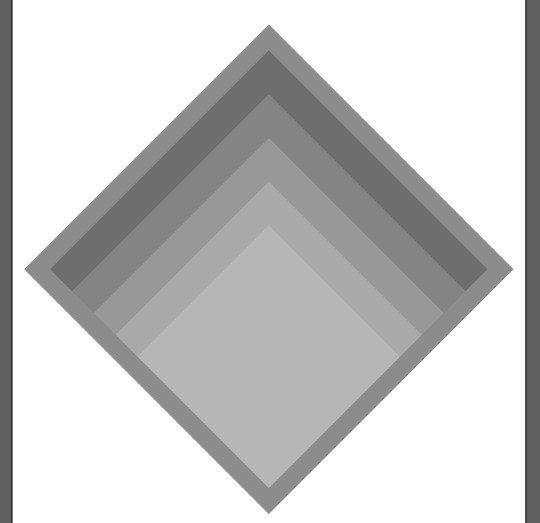
Step 14: Repeat the process until you’re satisfied with the results.
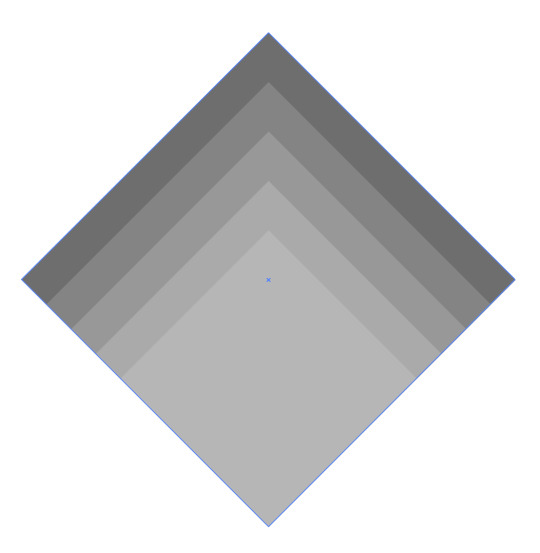
Step 15: Select the shape at the back and duplicated it one time. Make sure that it is aligned with each other.
Step 16: Press and hold the shift and the alt key and enlarge it so that it goes over the base shape.
Step 17: Select a different shades of a certain colours to your preference - in this case, I chose pink.
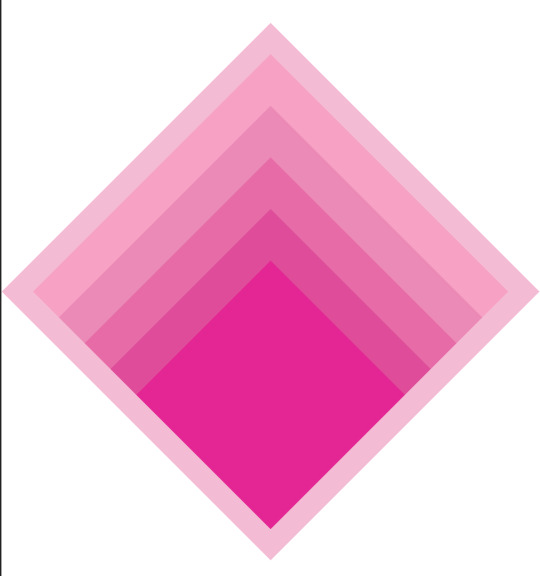
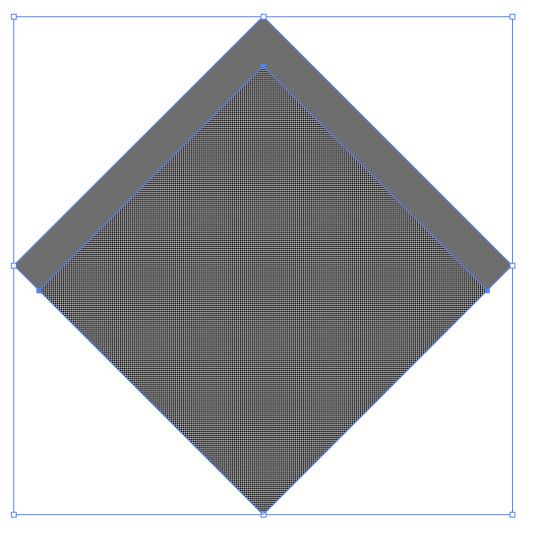
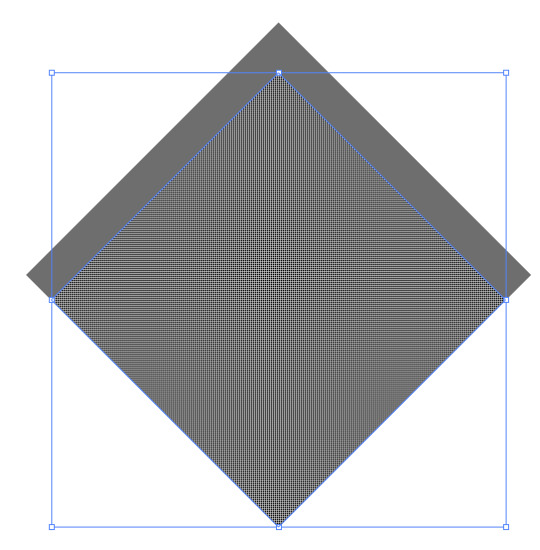
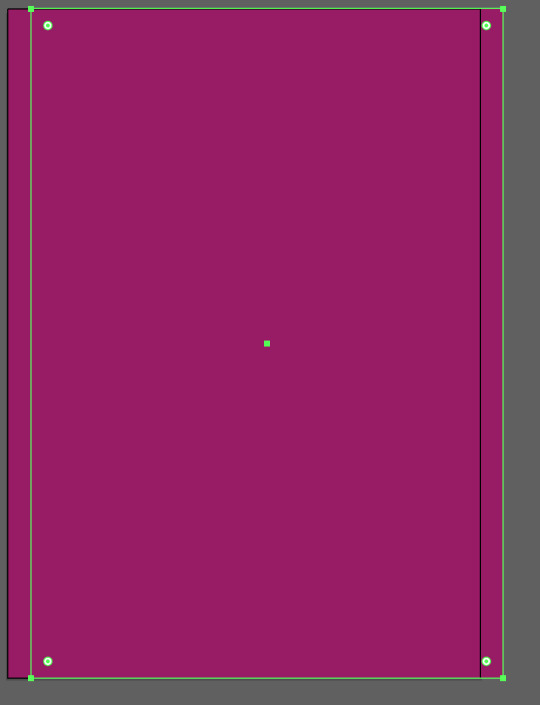
Step 18: Create a new layer and select the rectangle tool. Create a shape that fits the art board and select the colour for your background.
Step 19: Once everything is finished and ready, this step is creating the grain texture. Duplicate the background shape by holding the alt key.
Step 21: Go the the colour palette on the left side and select the gradient colour.
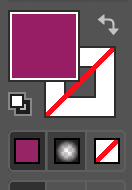
Step 22: In the gradient panel, make sure to select radial instead of linear as we wanted to make it glow in the middle.

Step 23: The colour should be default, which is white and black. However, on the white arrow, click on it and select the opacity to 0%. Leave the colour black as 100%.
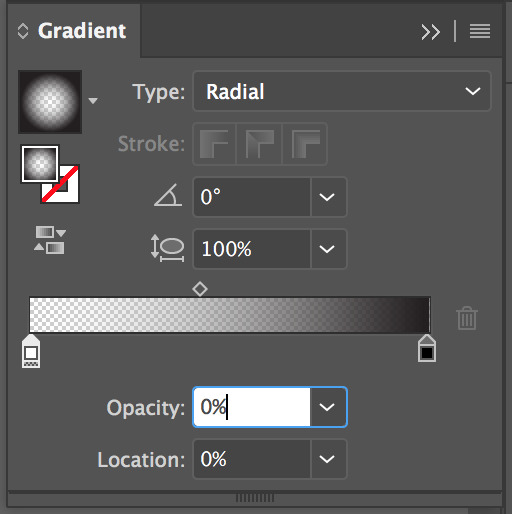
Note: the reason why I have to make the opacity for the white colour 0% is because it allows us to see the colour underneath the transparent surface, but also - the colour black will be used as a grain texture.
Step 24: Go to Effect > Texture > Grain.
Step 25: Adjust the intensity and contrast to your preference and click OK.
Step 26: Make sure to adjust the opacity for the grain texture as you don’t want it to be too intense.

Step 27: Repeat the process again by doing it for all the shapes.

Quick tip: To avoid having to do all the adjustments for the grain texture again, go to Effect > Apply Grain.
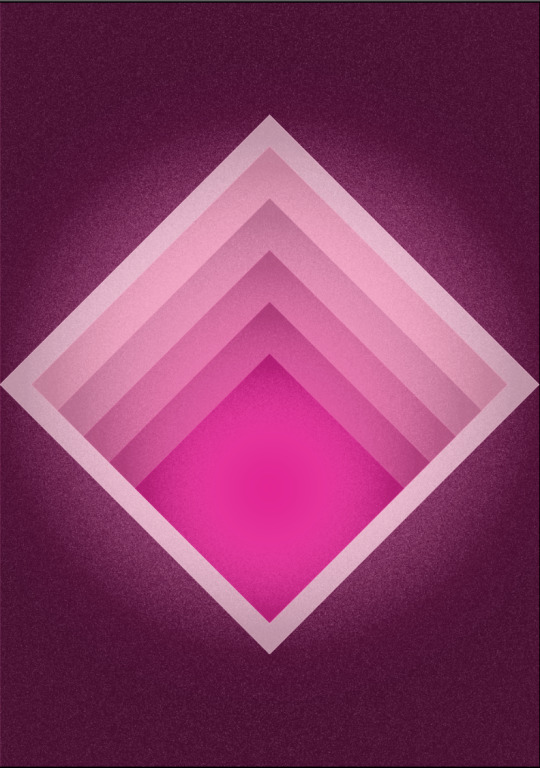
Final results:
Here is another project I worked on:
What did you do?
Once the research was completed, I moved on to do practical artwork inspired by my chosen artist - Josef Albers. The style will be similar to my chosen artist, but also adding some of my creativities in the process as well.
Why did you do it?
The reason I decided to do an inspired artwork based on Josef Albers is because it’s a good way to understand how he created his work; the process he’s going through to create it - which is very different to how I created the artwork. As time passes, the convenience to easily create the inspired artwork is very time friendly. What an artwork that used to be created with a few days of working can now be created under a few minutes.
Did you change any of the shapes provided?
For both of my inspired artwork, I decided not to use any of the shapes provided as I wanted to create something I feel comfortable, instead of being restricted to monochrome shapes.
Did you introduce any new shapes?
I introduced a new shape instead of using the provided monochrome shapes is because I wanted variation to my inspired artwork for Josef Albers. The shape I introduced is a symmetrical square that has been rotated 45° angle. The reason why I decided to introduced this new shape is because I was inspired by simple and minimalist characteristics in Josef Albers’ works.
Did you introduce any type?
Unfortunately, I did not introduce any types in the 2 of my artworks. The reason is because I believe there is no need to use the types, but I also believe it won’t make the artwork any better. I wanted to stay true to Josef Albers’ styles as much as possible to show its uniqueness.
Do you think you successfully explored the use of geometric shapes in the style of your chosen artist?
I believe I have successfully created the artwork that is in the style of my chosen artist. This was because Josef Albers does many work of geometry with different colours or in the same colour scheme, but are of different tones. I decided to do this as well as to create the same style as my artist. However, I also added a little bit of grain texture which is just my personal preference to make it look even better.
What went well?
The things that went well for this project is that I’ve managed to stay true to Josef Albers’ styles. However, with a bit of my own styles in there as well to make it look better. Moreover, with Josef Albers’ background research - I’ve managed to learn the style he uses and what really inspired him to create this kind of art.
What didn’t go so well?
I believed I have successfully created the artwork. However, If I had to refer to something which I didn’t like then that would be introducing too many of the same shapes. I wanted the focus to be mainly on the different shades of the same colour. However, introducing new shapes into the design may make the artwork even better.
What would you do differently next time?
As mentioned above, now that I’ve realised the mistake, I wanted to introduce new shapes into the design to see how it will improve the art work since geometric abstraction is all about simple geometric shapes anyway. Therefore, I wanted to add more of different shapes into the design next time.
0 notes
Text
How to Create Your First 3D Model in SketchUp: A Beginner-Friendly Introduction
SketchUp is a 3D modeling software for creating geometric 3D objects such as architectural models, scale models, interior design items, and functional parts. It’s a program that gives you the perfect mix of simplicity and quality: SketchUp is known for its user-friendly interface and easy learning curve. Upon completion of the exercises in this beginner’s guide to SketchUp, you will know the essential tips and tricks to create your own models in SketchUp. So let’s get started and learn the basics of this great 3D modeling software!
This tutorial by All3DP’s SketchUp expert Mich Judelag will help you understand the basics of this powerful 3D modeling software. He will show you how to build a simple 3D object and how to use basic commands and tools in order to turn your ideas into the third dimension.
In this tutorial you will learn the very basics of SketchUp, including:
How to prepare your workspace and get started
How to draw basic 2D shapes (lines, rectangles, circles, arcs)
How to turn a 2D shape into a 3D object
How to move, push, pull, cut, rotate, scale, copy and delete objects
Ready, steady, go!
Step 1: Download the Software
To download SketchUp, go to https://www.sketchup.com/download, follow the steps, and fill in the necessary information.
SketchUp is available both as a freeware version, SketchUp Make, and a paid version with additional functionality, SketchUp Pro. Basically, both versions are the same when it comes to basic commands and tools for modeling.
SketchUp Make is ideal for beginners, while SketchUp Pro is for advanced users. The former provides all the commands you can use for 3D modeling, and the latter provides additional functions like printing in scale or exporting/importing to/from CAD software.
Step 2: Prepare the Workspace
SketchUp allows you to select the workspace you want to use from a window that appears when you open the application. The window shows three tabs: Learn, License, and Template. The Template tab displays a list of different presets to select from. They depend on the type of model you will be doing.
The presets/templates vary in backgrounds and edge styles – which only affects the visual aspect of your model (i.e. background color and line thickness), type of model to be done (i.e. landscaping, interiors etc.) and measurement systems (Imperial or Metric). I recommend that you explore these templates, but for now, let us use the Simple Template – Meters.
Click on the template and then on the button Start using SketchUp on the lower right side of the window. I recommend you to check the box on the lower left side that says Always show on startup, as this will enable you to select any template every time you open the application.
Step 3: View the Most Important Tools
SketchUp has a lot of commands and tools that you can select from. On your first SketchUp workspace, you will see default toolbars on the upper part of your screen. Now click on View > Toolbars.
A window will appear with a list of toolbars. For this tutorial, we will use the Large Tool Set. This toolbar contains most of the tools you need to build a 3D model. Check the Large Tool Set. I recommend you uncheck the other toolbars to avoid confusion.
Step 4: The Axes
SketchUp utilizes the Red, Green, and Blue axes in the workspace like any other 3D software. This allows you to view your work from different angles.
Also, SketchUp has a snapping feature that helps you align your lines or models along the different axes.
Now that we have our toolbar ready and see the three-dimensional space with its three axes in front of us, let’s start creating our first 2D shapes.
Step 5: Basic 2D Drawing – Lines, Rectangles, Circles
To get started, let’s draw Lines, Rectangles, and Circles. These are the fundaments of our (future) 3D models.
Drawing a line:
1. To draw a line, first click the Pencil symbol on the toolbar or simply press L on your keyboard
2. Click anywhere on your screen to assign the first point
3. Drag the mouse to the desired location of the second point and click
4. To specify the length (in this case I entered 5), simply type the value right after Step 2 and press Enter
As you have probably already noticed, you can align any line to the Red, Green, or Blue axis of the workspace.
Drawing rectangles/squares:
1. To draw a rectangle/square, first, click the Rectangle icon on the left beside the pencil symbol or simply press R on your keyboard
2. Click the desired location to assign the first corner of your rectangle/square
3. Drag the mouse to the desired location for the opposite corner and click
You can also enter the length and width of your rectangle/square: enter the values after Step 2 and hit Enter on your keyboard. This part is a bit tricky. The first value you enter corresponds to the length/width along the Red axis and the second value corresponds to the length/width along the Green axis. Enter the values like this: 4, 4, Enter.
Drawing circles:
1. To draw a Circle, first click the icon below the rectangle icon or simply press C on your keyboard
2. Click the desired point to assign the midpoint of your circle
3. Drag the cursor anywhere on the screen to make the circle and then click
4. To specify the radius (i.e. radius = 2), simply enter the value right after Step 2 and press Enter
Step 6: Movement Controls
Let’s learn how to change our view with the basic movement tools of Pan and Orbit.
Pan:
1. To use Pan, click the icon or simply press H on your keyboard
2. Click to set the origin, hold the mouse button and just drag. This will allow you to move your view
Orbit:
1. To use Orbit, click the icon on the toolbar or simply press O on your keyboard
2. Click anywhere, hold and drag to rotate the whole view
3. You can also use the mouse wheel to Orbit
Step 7: Being on the Safe Side – Undo and Saving
If you made a mistake simply click on Edit > Undo and you will be taken back to your previous step. You can also press Alt + Backspace to achieve this.
In order not to lose your progress, make sure to save your file from time to time. To do this, click File > Save or simply press Ctrl + S on your keyboard. Enter the filename and select the directory you want your file to be stored in.
Step 8: Making Your First 3D Object
We’ve already created 2D shapes. Let’s turn them into 3D objects!
1. First, zoom in on one of your 2D shapes by using your mouse wheel button
2. Click the Push/Pull icon on the toolbar or simply press P on your keyboard
3. Hover your mouse cursor over the plane of the circle
4. When you see the plane is highlighted (i.e., when the plane shows a dotted texture on it), click on it and simply drag it upwards. Click the left mouse button again to set the height of your cylinder, cube or cuboid. Or type the height after the first click
You will then see that the 2D shape has converted into a 3D object. Congratulations! You have created your first 3D object!
Step 9: Dimension Tools
This tool allows you to check the dimensions of your model.
1. To use this tool, simply click the Dimension icon on the toolbar
2. Next: either click the starting point and then the end point of the line you want to measure. Or simply click the line. You will then see the length of your line or object
You can also use this Tape Measure Tool to measure distances more freely and the Protractor Tool to check different angles. The best way to learn how to use these tools is by playing around with them. You can see the results of the Tape Measure Tool and the Protractor Tool in the lower right corner (see screenshot below).
Step 10: Moving and Maneuvering Objects
This tool is very easy to use:
1. First select the object you want to move. Do this by clicking on the Select tool and ‘drawing’ a selection net around your object
2. Click the Move tool or simply press M on your keyboard
3. Click the selected object and drag it. Simply click again when you reach the desired location
Step 11: Creating Copies of Your Object
1. To create a copy of your object, select it again (as seen just above)
2. Press Ctrl on your keyboard to create a copy of the model
3. Left-click again to place the copied model in the desired location
Step 12: Erase Tool
This tool works like a basic eraser: it erases lines or planes you have created.
1. First click on the Eraser tool on the toolbar
2. Once the eraser icon appears, click on the lines you want to erase
(you can also select a line with the Select tool and then hit the delete button)
Step 13: Text
The 2D text tool allows you to calculate base areas of planes and to place labels. In the picture below it was used to label the object as a ‘cube’. The arrow indicates which object was labeled.
The 3D text tool actually creates the text as a 3D object that is part of your design. As always, it makes sense to simply play around with these two tools.
Step 14: Basic Cutting
This tool allows you to cut or eliminate a section of your model. To show you how to use this tool, we used the cylinder.
1. Click on the Pencil tool in the toolbar to draw a line (we used this tool at the beginning of the tutorial)
2. For this tutorial, make a line on three points of the surface of the cylinder. Mark the first at any point on the edge of the top surface of the cylinder. Second, make a point in the center and third, make a point that aligns to the red axis
3. Click on the Push/Pull tool on the toolbar
4. Click on one half of the top surface of the cylinder and push it downwards to create the cut and click to finalize
What a nice, clean cut! Play around with this tool some more to discover all its functionalities.
Step 15: Drawing an Arc
Besides lines, let’s try to draw with the Arc tool. It allows you to draw a curve. After selecting the tool, click on one of the corner points of a cube. Then click somewhere on one of its top axes and draw an arc. Sounds complicated? It’s easy once you try it!
After having drawn your arc, use the Pull/Push tool to cut this part off.
Step 16: Scaling and Stretching
This tool allows you to adjust your model accordingly or to the desired scale.
To use this tool, simply select your model first and click on the Scale tool on the right or press S on your keyboard. This will show you the different scaling points you can use. You can scale and stretch the object by clicking on the green dots that appear.
If you want to scale our model up or down while maintaining the ratio and proportion of our rectangular box (this is called uniform scaling) you need to click on one of the 8 corner points of the rectangular box.
You will see the value of your scaling in the lower right corner of the window. A value of 0.50 means you will be scaling your model down to 50%.
Step 17: Rotating
This feature is very useful when you experience orientation issues. This is when you have your model facing the opposite/wrong direction.
1. First select the model you want to rotate and select the Rotate tool or press Q on your keyboard
2. Click on the center of the top surface of the rectangular box to set your axis. Extend your cursor towards the green or red axis to select the baseline of your rotation
3. Rotate the model to the desired direction or simply input an angle value. In this case, we entered 30°
You now know 17 important tools to get started! It’s time to create your first 3D model in SketchUp yourself, and we hope you enjoyed this tutorial by All3DP’s SketchUp expert Mich Judelag. If you want to stay up to date with all things related to 3D printing, make sure to check out All3DP’s website here.
Did you already create a 3D model in SketchUp and want to make it 3D printable? This requires some extra steps which you will learn in this tutorial. Once you know how to model in SketchUp and how to make your 3D model printable, you could create an amazing object such as Kurt Plagge’s ‘Articulated Cube’.
Are you more interested in simple 3D modeling software for sculpting organic objects? Then our SculptGL and Meshmixer tutorials might come in handy.
from 3D Printing Blog | i.materialise https://i.materialise.com/blog/first-3d-model-in-sketchup-tutorial/
0 notes
Text
SSC CPO Syllabus 2017 New exam pattern
Latest update on https://sscdada.in/ssc-cpo-syllabus/
SSC CPO Syllabus 2017 New exam pattern
SSC CPO Syllabus 2017 download is available here with exam pattern. Candidates you can download the SSC CPO Syllabus 2017 for paper 1& 2 from our web page. Staff selection commission has decided to organize the Preliminary Computer based test from 30th June 2017 to 7th July 2017. SSC CPO Syllabus 2017 is given for ease of preparation. To attend the examination candidates need to cover all important topics which are essential to qualify the exam easily.
SSC CPO Syllabus 2017
The SSC CPO Syllabus 2017 along with exam pattern for both paper 1 & paper 2 is given here for the aspirants who are searching for SSC CPO Syllabus 2017. Before attending the examination candidates need to know which topics is very important for getting maximum marks in the exam. By helping SSC CPO syllabus 2017 you can check it easily. Here we provide details regarding this exam syllabus.
The SSC CPO Exam syllabus 2017 includes General English, General Awareness, General Aptitude & Reasoning ability & Quantitative aptitude. There is two paper conducted for SSC CPO Recruitment 2017 Prelims & mains. Visit the official website of SSC and download SSC CPO syllabus 2017 new exam pattern in pdf file format.
SSC CPO New exam pattern 2017
The Staff selection commission has published the SI recruitment advertisement to fill up vacant post in their department across India through the main web portal. All applicants who have successfully registered for SSC CPO vacancy 2017 may check the SSC CPO Syllabus 2017 for both papers.
Tier-I Exam pattern
Section Subject name No. of Ques Sec. Marks Time Limit A General Intelligence &
Reasoning 50 50 120 minutes B General Knowledge &
General Awareness 50 50 C Quantitative Aptitude 50 50 D English Comprehension 50 50
Tier-II Exam pattern
Subject Name No. of Ques Total Marks Time Limit
English language &
Comprehension
200 200 2 hours
Every year a large number of candidates attend the examination to get the government job in this department. Only graduate candidates have filled the application form. Now after registration, every candidate had started their preparation for the exam. So for that, they are finding online exam SSC CPO syllabus 2017 pdf, in order to some idea about their exam. At the bottom of this article Along with exam pattern, candidates can check our SSC CPO Syllabus 2017 from the authorized web page.
Detailed SSC CPO 2017 Exam syllabus
As per the official notification, every candidate’s selection will be done on the basis of overall performance in paper 1 & paper 2. An applicant who got merit list in the exam will automatically qualified for next round. For getting details about SSC CPO Exam pattern 2017 you can read the official notification from here.
SSC CPO General Intelligence & Reasoning Syllabus
General Intelligence & Reasoning: – This section includes questions of both verbal & non-verbal type. In this section topics are
Similarities and differences Analogies space visualization Problem solving Analysis Observation judgement Arithmetical reasoning and figural classification Arithmetic number series Decision making Visual memory Spatial orientation discrimination Relationship concepts Non-verbal series Coding and decoding Statement conclusion Syllogistic reasoning etc. The topics are Figural analogy Semantic analogy Symbolic/number analogy Semantic classification And symbolic/number 9 classification Semantic series Figural classification Number series Figural series Problem solving Word building Coding & de-coding Trends Numerical operations Symbolic operations Space orientation Space visualization Venn diagrams Drawing inferences Indexing address matching Date & city matching classification of centre codes/roll numbers Punched hole/pattern-folding & un-folding Figural pattern- folding and completion Critical thinking Small & capital letters/numbers coding Decoding and classification Embedded figures Emotional intelligence Social intelligence
SSC CPO General Awareness Syllabus
This section includes questions relating to India and its neighboring countries especially pertaining to History culture, Geography, Economic, General Polity, Indian constitutions, scientific research etc.
India and its neighboring countries General Polity Indian Constitution Indian History Scientific Research Economic Scene Current Events Indian Geography Indian Culture
SSC CPO Quantitative aptitude Syllabus
The questions will be designed to test the ability of appropriate use of numbers and number sense of the candidates. The questions will be asked from these topics
Computation of whole numbers Fractions Decimals Interest and relationships between numbers Ratio and proportion Right prism Right circular cone Right circular cylinder Sphere Hemispheres Regular right pyramid with triangular or square base Histogram Frequency polygon Trigonometric ratio Degree and radian measures Standard identities Complementary angles Heights and distances Histogram Bar diagram & pie chart Square roots Percentage Averages Profit & loss Discount Partnership business Mixture and allegation Triangle Quadrilaterals Rectangular parallelepiped Regular polygons Circle Triangle and its various kinds of centers time and distance Time & work Basic algebraic identities of school algebra and elementary surds Graphs of linear equations Congruence and similarity of triangles Circle and its chords Tangents Angles subtended by chords of a circle Common tangents to two or more circles.
SSC CPO English Comprehension Syllabus
Candidates ability to understand correct English, his basic comprehension and writing ability would be tested.
Paper-I:
Error detection
Basic Comprehension, etc.
Paper-II:
In this paper question will be designed to test the candidates understanding and knowledge of English language. questions asked from topics
Fill in the blanks (using verbs, preposition, articles etc) Vocabulary Phrases and Idiomatic use of Words Comprehension Sentence Structure Synonyms & Antonyms Sentence completion Spellings Grammar
Complete SSC CPO Exam pattern 2017 with the Exam pattern in the pdf file is available here. Those candidates who are going to give the test they must prepare through the SSC CPO syllabus 2017.As we all know that competition level of exam is so high, so prepare well for the sub inspector post examination.
SSC CPO syllabus 2017 for Paper 1 and Paper 2
We think that six months of serious study is enough in cracking this exam. But the most important thing is to understand the SSC CPO syllabus 2017 and choosing the right books for the exam. If you have appeared in the SSC CPO Exam then you must be aware, that SSC had made some important changes in the exam pattern and scheme of SI exam.
Knowing the exam syllabus and exam pattern of SSC CPO Exam pattern 2017 in advance will help you in the exam preparation. Both paper 1 & paper 2 exam syllabuses & exam pattern is available here in pdf file format to download. Click on the below provided direct link to download SSC CPO syllabus 2017.
After checking syllabus you can collect all study material through online or offline mode. We hope that given information will be useful for you. If you want to get a regular notification about this post, then you can subscribe with us on Facebook, twitter, Google plus and another networking site.
SSC Exams 2017
SSC CPO Exam 2017
0 notes
Text
The Best Free 3D Modeling Software
3D models are important elements of digital production.
This is the reason why selecting an ideal software for 3D modeling is very essential.
It assists to actualize your creative ideas with little or no trouble.
However, it is a daunting task to find the ideal software for 3D modeling. To assist you in making the best decision, we have compiled a list of the best free 3D modeling software.
Although, to make our list precise and straight-to-the-point, some programs have been excluded, therefore there shouldn’t be a cause for alarm if several premium ones are not listed here.
TinkerCad
TinkerCad is a nice starting place for total beginners at 3D modeling. The 3D modeling software allows you to make geometrical 3D shapes, and they can be saved, shared online and exported to .STL files when set for 3D printing.
Although, TinkerCad is apparently a little limited when it comes to features, but it is brilliant for tinkering, and because shapes are the starting points, beginners can slowly build up from the simple ones to the more complicated or intricate ones.
TnkerCad provides a few 3D shapes for a start, and also an arcade of complete printable 3D models to give you inspiration.
3DSlash
Another free and great choice for beginners is 3DSlash. It was launched just a year ago, and t was made particularly for non designers of every age, even children, to initiate concepts of 3D modeling in interesting and fun platforms( actually, 3DSlash is really Minecraft based.)
Users make use of regular tools such as chisels and hammers to form blocks of three dimensions in 3DSlash. The process of 3 steps is colorful, intuitive and exciting, and ultimately, you can share 3D model online or export it to .STL to 3D print.
The recently released V2.0, and they have comprehensive video tutorials featured on their website. You should probably check them out.
Blender
This is an open source and free software for 3D modeling and it is one of the most versatile and reliable programs available. You will instantly realize it is more capable than your expectation, and it can easily handily things such as 3D animation and 3D printing.
The great community at the back of Blender’s success guarantees steady improvement and development of the software. This community we are talking about can as well help in troubleshooting and in giving essential information on how to maximize Blender.
Add-ons can be installed to unlock several extensions and functionalities based on your task.
Daz Studio
This is feature-filled and free software for 3D modeling which may not be simple for beginners, but provides sophisticated functionalities for experts. It allows brilliant 3D art to be created by users, with GPU speedy real time rendering.
Apart from posing, 3D Morphing, rendering, and animation features, Daz Studio turns you to a skilled 3D artist, with the assistance of in-built interactive tutorials. It supports Mac OS X and Windows.
FreeCAD
This is parametric software for 3D design which can be adopted to design real objects of different sizes. Because it is parametric software for modeling, your model parameters can be simply and easily changed by returning to the history of your model.
It is available for Mac, Linux, and Windows, this is an apparatus which can be used to create 3D architectural models, gaming models, animation models, and industrial models.
A few of the primitive objects that it gives Cone, Sphere, Torus, and Cylinder, while the tools for editing images include Cut, Thickness, Fillet, Fuse, Extrude, etc. For the fact that it is a multi-platform product, multiple file formats such as STEP, IGES, IFC,DAE, DXF, OBJ, STL, SVG and many others can be read and written.
Leopoly
Leopoly provides a free web based software for 3D design. It is extremely easy to use. Pre-made designed objects can be used on their site, and you can use their apparatus to customize them. Shapes, letters, and colors can be added easily.
Your design can be started from scratch, and by using another software, files can be uploaded easily. Afterward, your created files can be exported, and you can directly 3D print it on their platform.
K-3D
This is one of the best free Cad software with its creative approach, tailored to animation and 3D modeling. Provided you have a need for more sophisticated design features, the software can be upgraded with plugins like architecture and visualization pipeline.
Several interactive tutorials will provide you with guide for your design modeling.
Leocad
This is a program to create virtual models of LEGO. Although, it is helpful for this function, it has limits; therefore it is not the kind of software to be used for a difficult project. It has a friendly UI, and includes more than 6000 pieces that can assist 3D model to be created quickly.
Google SketchUp
It started as a science experiment in the basement of two university students, and fast forward a decade, it has flourished into the most used modeling software in the world.
Although several experts ridicule the idea of making use of SketchUp to do anything other than concept Sketch, however, its growth as a full fledged design program is beginning to topple that old stigma.
It is simple and fast. It has several tools for modeling that enable you pull, warp, push, and shape your way approach into the world of 3D modeling.
You can swiftly go from idea to photorealism with tons of available plugins. SketchUp offers a lot to computer savvy people, and it is fast turning into a practical apparatus for even the most displeased 3D visualization experts.
Open SCAD
Open SCAD is not for people who are not really savvy about the basics of computer scripting and coding. It concentrates on the practical parts of computer assisted designs instead of the artistic designs.
Users create their model via a sequence of text based commands, algorithms and coordinates, and run the script to produce the 3D model, that you can use to manipulate or render in other software.
If you are lost at ‘scripting and coding,’ you shouldn’t be blamed. It is recommended for you to use Open SCAD if you are more ‘figures and numbers’ than a ‘squares and circles.’
However, provided you’re the former, this software is perfect for you, and is indeed one of the best free cad programs.
VUE Pioneer
This is a tool for 3D modeling for the landscape builders in our midst. Although, it has a toolset and interface that could be too sophisticated for the regular user.
It has several tools that enable you to mold, shape and make practical terrain models which integrate effortlessly with an on-board engine to render.
The majority of programs for 3D modeling have difficulty with modeling of land, thus having VUE pioneer available for occasions like this, it would be of great assistance, and it is absolutely free.
Wings 3D
This is a highly developed modeler which provides a wide scope of tools for modeling and an interface that can be customized, together with an integrated tool for AutoUV mapping, and also export capacity for 3D formats.
Although, despite the fact that Wings 3D offers stunning features such as support for virtual mirroring for symmetric modeling, it doesn’t support animation.
Meshmixer
Meshmixer enables you to design and create 3D designs by joining two models or more in just a couple of steps. It has an easy cut and paste process, and even bolsters sculpting such as shaping and improving the surfaces just like virtual clay.
It offers support for 3D printing, taking models of design as inputs then transferring the models over to a 3D printer.
3DReshaper
3DReshaper is simple to use and affordable software for 3D-modeling devoted to the 3D mode process. You can use it in numerous fields like mining, arts, ship-building, and civil engineering. It supports many textures and scripts, and filled in a lot of features for simple modeling.
3D Crafter
This is another real time tool for 3D modeling and animation which includes using a sensitive drag and drop method. Complex and intricate models can be built making use of 3D shapes,and there is support for sculpting and printing also.
This is a highly developed tool to create animations.
PTC Creo
This is a broad program for mechanical engineers and designers that design models that make products making use of straight approach for modeling of 3D CAD. Direct modeling enables designs to be created by pre-made designs or new ideas.
Therefore, you can make easily and quickly add changes to the geometry of an object. PTC Creo is a premium system but it has a free trial of 30-days and also for teachers and students.
NaroCAD
NaroCAD is an extensible and full-fledged CAD modeling program. Based on the Open Cascade technology and it supports both Linux and Windows.
It provides support to both advance and basic modeling operation, plus you can extend it via programming interface and plugins.
LEGO Digital Designer
Lego Digital Designer or LDD, by the LEGO group, is available for Windows and Mac OS. The program allows the +building of models using virtual LEGO bricks in CAD.
The software has an export feature, allowing the created models to be opened and edited in other 3D modeling software.
ZCAD
2D or 3D drawings can be created using ZCAD. It provides support to several platforms but gives nice angles for viewing and several apparatus to ease the entire modeling project.
It has a very easy to understand interface and the process of drawing is simple. You can save the complete design in AutoCAD’s format and also several other popular extensions.
Houdini Apprentice
Artists, hobbyists, and students can make a non commercial 3D modeling project with the use of Houdini Apprentice, which is Houdini FX’s free version. Apart from a limited size of render, A free version of Houdini FX, Houdini Apprentice can be used by students, artists, and hobbyists to create non-commercial 3D-modeling projects.
Other than a limited render size and some other restrictions, Houdini is a feature filled tool with a nice UI.
DesignSpark
DesignSpark enables users to produce detailed 3D designs by offering a design worksheet. It promises simple features to get rid of blocks by making additions and amendments to your design and also concepts of changing the product in 3D swiftly.
It supports also direct modeling system and also 3D printing.
Sculptris
Sculptris offers a brilliant entry into the fascinating 3D world. It has easy to learn, navigate, and use features, even with people who aren’t experienced in modeling or digital art.
It assists to eliminate geometry worry from the process of design, and will animatedly separate the model, handling better the resources of your computer.
MeshMagic
This software assists to create 3D rendering files, and draw 2D objects or extend them to 3D. It is a simple and sensitive software for 3D design for users of several fields.
While it presently supports Windows only, it enables you to save the output file in the well known STL format, which you can open and edit in numerous offline and online 3D models.
Open Cascade
This is a software development kit designed for software developers who deal with 3D CAD DATA.
The unique, community developed class libraries which gives 3D modeling and surface services, rapid and exchange app development, and data visualization is incorporated into this software.
OnShape
Onshape is a fairly fresh 3D modeling software still, and its free account comes with a number of limitations. Though, Onshape provides a few professional-grade and exclusive features of 3D modeling, such as team-based 3D design and real-time, which make it a distinctive choice for professional engineers.
Onshape is a mechanical CAD program for 3D modeling for making intricate components. The entire platform which is based on the cloud can be used with many devices, as well as Android and iOS smartphones, and enables many team members to all together work together on the 3D design.
It includes other features such as version control, complete CAD functionality, and limitless export and import for 3D printing. In addition, both Pinshape and Materialise have partnered Onshape through their individual applications.
The only restrictions that the free account has are that it limits users to just ten private docs and a mere storage space of 5GB If that is not sufficient, professionals can upgrade for only $100 per month.
DX Studio
DX Studio provides a complete development setting for the development of interactive 3D graphics. DX Studio includes a real time 3D engine and a set of tools for editing. By making use of DX Studio, you can create sensitive 3D animations, 3Dgames, 3D models and a lot more.
Despite providing a wide scope of 3D models, it provides apparatus to make these models as well. Also, it enables two models or more to be created at once.
Among the several available tools for 3D modeling, you will see apparatus to create special effects, terrain system to add rocks and vegetation to your terrain, and a real time editor for 3D and 2D scenes.
Ending thoughts
In selecting the ideal software for 3D modeling, it is essential to determine the reason why you want the software at first. Another vital factor to be considered is file conversion.
If you plan to print the fraction you design in 3D, remember that 3D printing makes use of the kind of STL files. However, like they rightly say, the more expensive it is, the better it will be, and there are a lot of tools for 3D design that can do the job efficiently.
The majority of these features are best suitable for beginners because they come with integrated applications and learning tutorials. The list highlights a few of the best free 3D software you can get on the internet.
Evidently, free isn’t the same thing as bad. The programs on this list can turn you to a proficient visualization artist or 3D modeler, and you wouldn’t need to break a bank to get it.
from Web Development & Designing http://www.designyourway.net/blog/resources/the-best-free-3d-modeling-software/
0 notes
Text
It is very important for the ambitious candidates to possess complete understanding of SSC CGL 2017 syllabus & examination routine, so that they could prepare a better and clean time table by covering each of the themes as per official syllabus and new pattern. Candidates are advised to prepare strictly according to new test pattern & selection scheme to crack approaching SSC CGL 2017 Examination.
Changes in SSC CGL Assessment Pattern 2017
SSC CHSL Syllabus
SSC will conduct both Tier -I and Tier II exam in on-line mode.
Introduce a descriptive paper of 100 marks within 60 minutes in paper and pen mode.
Decrease the time limit for assessment of Tier -I from 120 minutes to 75 minutes.
Tier II will remain same.
No Sectional Cut off.
The Evaluation will probably be run in four tiers as indicated below:
Written Assessment (Objective Multiple Choice Sort)
Written Examination (Objective Multiple Choice Type)
Tier -III --Illustrative Paper in English/Hindi (writing of Essay/Precis/Letter /Application Writing
Computer Competence Test/ Ability Evaluation (wherever relevant)/ Record Verification
SSC CGL 2017 Detailed New Syllabus Combined Graduate Level (Tier-I) Exam 2017: Enormous Changes
SSC CHSL Syllabus
GRADE 1
General Intelligence & Reasoning
This component may contain questions on: -
(i) analogies, similarities and differences, space visualization, spatial orientation, problem solving, analysis, ruling, decision making, visual memory, discrimination, observation, relationship theories, arithmetical reasoning and figural classification, arithmetic amount series, non-verbal chain, coding and decoding, statement conclusion, syllogistic reasoning etc.
(ii) The topics are, Semantic Analogy, Symbolic/Amount Analogy, Figural Analogy, Semantic Categorization, Emblematic/Number Classification, Figural Categorization, Semantic String, Number Series, Figural Series, Problem Solving, Word Building, Coding & de coding, Numerical Operations, symbolic Operations, Tendencies, Space Inclination, Space Visualization, Venn Diagrams, Drawing inferences, Perforated hole/layout –folding & unfolding, Figural Design – folding and finish, Indexing, Address matching, Date & city matching, Categorization of centre codes/roll numbers, Little & Capital letters/numbers coding, decoding and classification, Embedded Figures, Critical thinking, Emotional Intelligence, Social Intelligence, Other sub-topics, if any.
Important Tips
Reasoning is normally a scoring subject in comparison to the quantitative section, as it requires just thinking potential of a candidate. If the nominee has the capacity to use it, he is able to easily score nicely in this section. Unlike mathematical ability in reasoning section you do n’t need to learn some formula by applying that formula, and solve question. You just have to be really cautious while answering these questions. This section can’t be mastered within the given time without appropriate practice, so you must practice enough to score well in this section.
General Comprehension
Questions in this component will probably be aimed at testing the candidates general awareness of the environment around him and its use to society. Questions will likewise be designed to test knowledge of current events and of such issues of every day observations and experience in their scientific facet as may be anticipated of any well-informed person.
(i) The evaluation will also contain questions relating to India and its neighboring states especially pertaining History, Culture, Geography, Economic Landscape, General Policy & Scientific Research.
Significant Hints
General awareness isn't at all something that you can expect to master in a day. But from an assessment viewpoint, if you spend time you can perform well in it in relatively less time as compared to Quantitative Aptitude and Reasoning section. This section gets more importance because this really is the sole section which can be tried fast i.e. in 12-15 minutes and at the same time, decent symbols can be scored in this section if prepared well. GK additionally comprises 25 questions of each 2 marks.
Quantitative Aptitude
UPSC Syllabus 2017
The questions will be made to test the potential of the candidate of proper use of numbers and number awareness. The extent of the evaluation will be computation of:-
(i) whole numbers, decimals ,fractions and connections between numbers, Percent. Ratio & Proportion, Partnership Business, Averages, Interest, Profit and Loss, Reduction, Square roots, Mixture and Alligation, Time and distance, Time & Work.
(iii) Triangle, Quadrilaterals, Regular Polygons , Circle, Right Prism, Right Circular Cone, Right Circular Cylinder, Sphere, Hemispheres, Rectangular Parallelepiped, Regular Right Pyramid with triangular or square base, Trigonometric ratio, Degree and Radian Measures, Standard Identities, Complementary angles, Heights and Distances, Histogram, Frequency polygon, Bar diagram & Pie chart
Significant Hints:
The questions in this segment are made to check the ability of proper use of number sense and numbers of the candidates. The extent of quantitative means is clearly identified and is restricted to type 10th level mathematics. Should you have good command over this section, you can score a great marks. All you have to do is attempt the questions with good precision. The degree of the section is expected to be of moderate.
English Comprehension:
Candidates’ means to comprehend correct English, his fundamental comprehension and writing capability, etc. would be examined.
Important Tips: English Section is one section that gets mixed responses from candidates depending upon their educational background and preparation amount. For some, this really is an easy task but for others, this section becomes a nightmare and largest hurdle in getting an excellent score in the exam.
Men even I'm from the same, but your Firm Determination can alter things, although I'd like to say that English section is rough for those who've passed their Intermediate in Hindi Medium.
NOTE-1: Part C (Quantitative Aptitude) of Test pamphlet for Tier-I and Paper-I (Quantitative Skills) of Tier II will contain separate group of Questions for VH candidates just, (who have elected for help of scribe) which will not have elements of Maps, Graphs, Statistical data, Diagram, Figures, Geometrical problems. However, parts of other papers will be the same for other candidates.
NOTE-2: The Commission shall possess the discretion to fix different minimal qualifying standards in each element of the Tier-I Evaluation taking into consideration among others, group-wise vacancies and category-wise number of candidates. Only those candidates, who have scored above the cut off marks would be needed to show up in the Tier –II Assessment.
NOTE-3: Tier-I examination is utilized to screen the candidates for appearing in Tier-II assessment for various documents that will be particularly required for different groups of posts. Marks of such screened nominees in Tier-I will be taken into account for final position of candidates for picking them for the Computer Ability Tests/ Data Entry Ability Test as well as for final selection.
Combined Graduate Level (CGL Tier-II) Pattern & Syllabus
Tier II of the Combined Graduate Level Test -2017 will be of Objective Kind Multiple Choice and will be ran over a period of two days.
Paper-I : Quantitative Ability:
The questions will be made to test the capacity of the candidate of proper utilization of number sense and numbers. The scope of the test will soon be the computation of decimals, whole numbers,fractions and connections between numbers, Percentage. Ratio & Proportion,Square roots, Averages, Interest, Profit and Loss, Discount, Partnership Company, Mixture and Alligation, Time and space, Time & Work, Basic algebraic identities of School Algebra & Simple surds, Graphs of Linear Equations, Triangle and its various types of centers, Congruence and similarity of triangles, Circle and its own chords, tangents, angles subtended by chords of a circle, common tangents to two or more circles, Triangle, Quadrilaterals, Regular Polygons , Circle, Right Prism, Right Circular Cone, Right Circular Cylinder, Sphere, Hemispheres, Rectangular Parallelepiped, Regular Right 20 Pyramid with triangular or square foundation, Trigonometric ratio, Degree and Radian Measures, Standard Identities, Complementary angles, Heights and Distances, Histogram, Frequency polygon, Bar diagram & Pie chart.
Paper-II : English Language & Comprehension
Paper-III : Figures for Investigator Grade II
Ministry of Statistics & Programme Implementation & Compiler in RGI.
Collection Classification and Presentation of Statistical Data – Secondary and primary data, Techniques of data collection; Tabulation of data; Graphs and graphs; Frequency distributions; Diagrammatic presentation of frequency distributions.
Measures of Dispersion- Common measures dispersion quartile deviations – range, mean deviation and standard deviation; Measures of relative dispersion.
Several types of their relationship and minutes; meaning of kurtosis and skewness; distinct measures of skewness and kurtosis.
Scatter diagram; simple correlation coefficient; simple regression lines; Spearman’s rank correlation; Measures of association of aspects; Multiple regression; Multiple and partial correlation (For three variants only).
Probability Theory – Significance of chance; Different definitions of likelihood; Conditional probability; Compound odds; Separate events; Bayes’ theorem.
Random Variable and Probability Distributions – Random variable; Probability functions; Expectation and Variance of a random variable; Higher moments of a random variable; Binomial , Poisson, Normal and Exponential distributions; Joint distribution of two random variable (discrete).
Sampling Theory –
Statistical Inference - Point estimation and interval estimation, Properties of a good estimator, Techniques of approximation (Minutes method, Maximum likelihood 21 approach, Least squares approach), Testing of theory, Fundamental theory of testing, Little sample and substantial sample tests, Evaluations based on Z, t, Chi square and F statistic, Confidence intervals.
Analysis of one way classified data and two-way classified data. Time Series Analysis - Elements of time series, Determinations of trend element by different techniques, Measurement of seasonal variation by distinct approaches.
Index Numbers - Uses of Index Numbers, significance of Index Numbers, Issues in the construction of index numbers, Kinds of index number, Distinct formulae, Base shifting and splicing of index numbers, Cost of living Index Numbers.
Paper IV:
Component A: Finance and Accounts-(80 marks)
Fundamental principles and basic idea of Accounting. Financial Accounting: Nature and scope, Limitations of Financial Accounting, Fundamental Customs and theories, Generally Accepted Accounting Principles.
Component B: Economics and Government-(120 marks)
Comptroller & Auditor General of India- Constitutional Role, provisions and responsibility
Finance Commission- Function and functions
Fundamental Concept of Economics and introduction to Micro Economics
Theory of Demand and Supply Meaning and determinants of demand, Law of demand and Elasticity of demand, Price, income and cross elasticity; Theory of consumer’s conduct-Marshallian approach and Indifference curve strategy, Significance and determinants of supply, Law of supply and Elasticity of Supply.
0 notes
Text
The Best Free 3D Modeling Software
3D models are important elements of digital production. This is the reason why selecting the most ideal software for 3D modeling is very essential. It assists to actualize your creative ideas with little or no trouble.
However, it is a daunting task to find the ideal software for 3D modeling. To assist you in making the best decision, we have compiled a list of the best free 3D modeling software.
Although, to make our list precise and straight-to-the-point, some programs have been excluded, therefore there shouldn’t be a cause for alarm if several premium ones are not listed here.
TinkerCad
TinkerCad is a nice starting place for total beginners at 3D modeling. The 3D modeling software allows you to make geometrical 3D shapes, and they can be saved, shared online and exported to .STL files when set for 3D printing. Although, TinkerCad is apparently a little limited when it comes to features, but it is brilliant for tinkering, and because shapes are the starting points, beginners can slowly build up from the simple ones to the more complicated or intricate ones. TnkerCad provides a few 3D shapes for a start, and also an arcade of complete printable 3D models to give you inspiration.
3DSlash
Another free and great choice for beginners is 3DSlash. It was launched just a year ago, and t was made particularly for non designers of every age, even children, to initiate concepts of 3D modeling in interesting and fun platforms( actually, 3DSlash is really Minecraft based.)
Users make use of regular tools such as chisels and hammers to form blocks of three dimensions in 3DSlash. The process of 3 steps is colorful, intuitive and exciting, and ultimately, you can share 3D model online or export it to .STL to 3D print. The recently released V2.0, and they have comprehensive video tutorials featured on their website. You should probably check them out.
Blender
This is an open source and free software for 3D modeling and it is one of the most versatile and reliable programs available. You will instantly realize it is more capable than your expectation, and it can easily handily things such as 3D animation and 3D printing.
The great community at the back of Blender’s success guarantees steady improvement and development of the software. This community we are talking about can as well help in troubleshooting and in giving essential information on how to maximize Blender. Add-ons can be installed to unlock several extensions and functionalities based on your task.
Daz Studio
This is feature-filled and free software for 3D modeling which may not be simple for beginners, but provides sophisticated functionalities for experts. It allows brilliant 3D art to be created by users, with GPU speedy real time rendering. Apart from posing, 3D Morphing, rendering, and animation features, Daz Studio turns you to a skilled 3D artist, with the assistance of in-built interactive tutorials. It supports Mac OS X and Windows.
FreeCAD
This is parametric software for 3D design which can be adopted to design real objects of different sizes. Because it is parametric software for modeling, your model parameters can be simply and easily changed by returning into the history of your model. It is available for Mac, Linux, and Windows, this is an apparatus which can be used to create 3D architectural models, gaming models, animation models, and industrial models. A few of the primitive objects that it gives Cone, Sphere, Torus, and Cylinder, while the tools for editing images include Cut, Thickness, Fillet, Fuse, Extrude, etc. For the fact that it is a multi-platform product, multiple file formats such as STEP, IGES, IFC,DAE, DXF, OBJ, STL, SVG and many others can be read and written.
Leopoly
Leopoly provides a free web based software for 3D design. It is extremely easy to use. Pre-made designed objects can be used on their site, and you can use their apparatus to customize them. Shapes, letters, and colors can be added easily. Your design can be started from scratch, and by using another software, files can be uploaded easily. Afterwards, your created files can be exported, and you can directly 3D print it on their platform.
K-3D
This is one of the best free Cad software with its creative approach, tailored to animation and 3D modeling. Provided you have a need for more sophisticated design features, thee software can be upgraded with plugins like architecture and visualization pipeline. Several interactive tutorials will provide you with guide for your design modeling.
Leocad
This is a program to create virtual models of LEGO. Although, it is helpful for this function, it has limits; therefore it is not the kind of software to be used for difficult project. It has a friendly UI, and includes more than 6000 pieces that can assist 3D model to be created quickly.
Google SketchUp
It started as science experiment in the basement of two university students, and fast forward a decade, it has flourished into the most used modeling software in the world. Although several experts ridicule the idea of making use of SketchUp to do anything other than concept Sketch, however, its growth as a full fledged design program is beginning to topple that old stigma.
It is simple and fast. It has several tools for modeling that enable you pull, warp, push, and shape your way approach into the world of 3D modeling. You can swiftly go from idea to photorealism with tons of available plugins. SketchUp offers a lot to computer savvy people, and it is fast turning into a practical apparatus for even the most displeased 3D visualization experts.
Open SCAD
Open SCAD is not for people who are not really savvy about the basics of computer scripting and coding. It concentrates on the practical parts of computer assisted designs instead of the artistic designs. Users create their model via a sequence of text based commands, algorithms and coordinates, and run the script to produce the 3D model, that you can use to manipulate or render in other software.
If you are lost at ‘scripting and coding,’ you shouldn’t be blamed. It is recommended for you to use Open SCAD if you are more ‘figures and numbers’ than a ‘squares and circles.’ However, provided you’re the former, this software is perfect for you, and is indeed one of the best free cad programs.
VUE Pioneer
This is a tool for 3D modeling for the landscape builders in our midst. Although, it has a toolset and interface that could be too sophisticated for the regular user. It has several tools that enable you to mold, shape and make practical terrain models which integrate effortlessly with an on-board engine to render. Majority of programs for 3D modeling have difficulty with modeling of land, thus having VUE pioneer available for occasions like this, it would be of great assistance, and it is absolutely free.
Wings 3D
This is a highly developed modeler which provides a wide scope of tools for modeling and an interface that can be customized, together with integrated tool for AutoUV mapping, and also export capacity for 3D formats. Although, despite the fact that Wings 3D offers sunning features such as support for virtual mirroring for symmetric modeling, it doesn’t support animation.
Meshmixer
Meshmixer enables you to design and create 3D designs by joining two models or more in just a couple of steps. It has an easy cut and paste process, and even bolsters sculpting such as shaping and improving the surfaces just like virtual clay. It offers support to 3D printing, taking models of design as inputs then transferring the models over to a 3D printer.
3DReshaper
3DReshaper is simple to use and affordable software for 3D-modeling devoted to the 3D mode process. You can use it in numerous fields like mining, arts, ship-building, and civil engineering. It supports many textures and scripts, and filled in a lot of features for simple modeling.
3D Crafter
This is another real time tool for 3D modeling and animation which includes using a sensitive drag and drop method. Complex and intricate models can be built making use of 3D shapes,and there is support for sculpting and printing also. This is a highly developed tool to create animations.
PTC Creo
This is a broad program for mechanical engineers and designers that design models that make products making use of straight approach for modeling of 3D CAD. Direct modeling enables designs to be created by pre-made designs or new ideas. Therefore, you can make easily and quickly add changes to the geometry of an object. PTC Creo is a premium system but it has a free dial of 30-days and also for teachers and students.
NaroCAD
NaroCAD is an extensible and full-fledged CAD modeling program. Based on the Open Cascade technology and it supports both Linux and Windows. It provides support to both advance and basic modeling operation, plus you can extend it via programming interface and plugins.
LEGO Digital Designer
Lego Digital Designer or LDD, by the LEGO group, is available for Windows and Mac OS. The program allows the +building of models using virtual LEGO bricks in CAD. The software has an export feature, allowing the created models to be opened and edited in other 3D modeling software.
ZCAD
2D or 3D drawings can be created using ZCAD. It provides support to several platforms but gives nice angles for viewing and several apparatus to ease the entire modeling project. It has a very easy to understand interface and the process of drawing is simply simple. You can save the complete design in AutoCAD’s format and also several other popular extensions.
Houdini Apprentice
Artists, hobbyists, and students can make a non commercial 3D modeling project with the use of Houdini Apprentice, which is Houdini FX’s free version. Apart from a limited size of render, A free version of Houdini FX, Houdini Apprentice can be used by students, artists, and hobbyists to create non-commercial 3D-modeling projects. Other than a limited render size and some other restrictions, Houdini is a feature filled tool with a nice UI.
DesignSpark
DesignSpark enables users to produce detailed 3D designs by offering a design worksheet. It promises simple features to get rid of blocks by making additions and amendments to your design and also concepts of changing product in 3D swiftly. It supports also direct modeling system and also 3D printing.
Sculptris
Sculptris offers a brilliant entry into the fascinating 3D world. It has easy to learn, navigate, and use features, even with people who aren’t experienced in modeling or digital art. It assists to eliminate geometry worry from the process of design, and will animatedly separate the model, handling better the resources of your computer.
MeshMagic
This software assists to create 3D rending files, and draw 2D objects or extend them to 3D. It is a simple and sensitive software for 3D design for users of several fields. While it presently supports Windows only, it enables you to save the output file in the well known STL format, which you can open and edit in numerous offline and online 3D models.
Open Cascade
This is a software development kit designed for software developers who deal with 3D CAD DATA. The unique, community developed class libraries which gives 3D modeling and surface services, rapid and exchange app development, and data visualization is incorporated into this software.
OnShape
Onshape is a fairly fresh 3D modeling software still, and its free account comes with a number of limitations. Though, Onshape provides a few professional-grade and exclusive features of 3D modeling, such as team-based 3D design and real-time, which make it a distinctive choice for professional engineers.
Onshape is a mechanical CAD program for 3D modeling for making intricate components. The entirely platform which is based on cloud can be used with many devices, as well as Android and iOS smartphones, and enables many team members to all together work together on the 3D design. It includes other features such as version control, complete CAD functionality, and limitless export and import for 3D printing. In addition, both Pinshape and Materialise have partnered Onshape through their individual applications.
The only restrictions that the free account has are that it limits users to just ten private docs and a mere storage space of 5GB If that is not sufficient, professionals can upgrade for only $100 per month.
DX Studio
DX Studio provides a complete development setting for the development of interactive 3D graphics. DX Studio includes a real time 3D engine and a set of tools for editing. By making use of DX Studio, you can create sensitive 3D animations, 3Dgames, 3D models and a lot more. Despite providing a wide scope of 3D models, it provides apparatus to make these models as well. Also, it enables two models or more to be created at once. Among the several available tools for 3D modeling, you will see apparatus to create special effects, terrain system to add rocks and vegetation to your terrain, and a real time editor for 3D and 2D scenes
Ending thoughts
In selecting the ideal software for 3D modeling, it is very essential to determine the reason why you want the software at first. Another vital factor to be considered is file conversion. If you plan to print the fraction you design in 3D, remember that 3D printing makes use of the kind of STL files. However, like they rightly say, the more expensive it is, the better it will be, and there are a lot of tools for 3D design that can do the job efficiently. Majority of these features are best suitable for beginners because they come with integrated applications and learning tutorials. The list highlights a few of the best free 3D software you can get on the internet.
Evidently, free isn’t the same thing as bad. The programs on this list can turn you to a proficient visualization artist or 3D modeler, and you wouldn’t need to break a bank to get it.
from Web Development & Designing http://www.designyourway.net/blog/uncategorized/the-best-free-3d-modeling-software/
0 notes
Last Seen Blogs

purero0india
Fit RO Service Center In Hyderabad

next-d99
NexT-D

devilbeez
Fuck Me For Accidentally Deleted My Og Account

marshalllange52
The Journaling of Perkins 601

spendedge
Untitled