#photoshophelp
Note
How do you make such vibrant and colorful gifs
Hey! So I’ve already done a small tutorial on how I do my really bright/colour porn/colour palette gifs, so I’ll do this more of an example on how I make my regularly coloured gifs, which are pretty vibrant on their own because i love colour!
then and now example:

Now, I’m not going to go through the entire gif making process. I’m going to go on the assumption that you know how to grab your screencaps, load them into photoshop, create your timeline and do your cropping/sharpening. If you don’t, @jakegyllenhaals has a VERY detailed tutorial here, including proper gif sizing.
So after loading your frames, and do all your basic cropping, you’ll have something like this:
Now, the first thing I do with gifs like these, is I want to take away the yellow tinge because I personally prefer to work with blue tinge. I do this using a colour balance layer. this will be different with each scenery, and sometimes even with gif within the same scene.
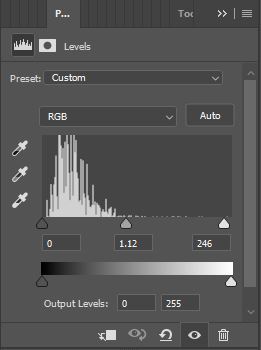
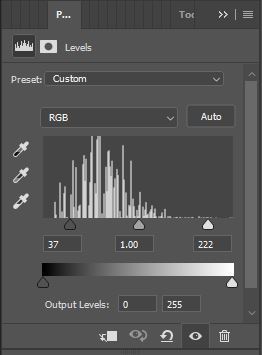
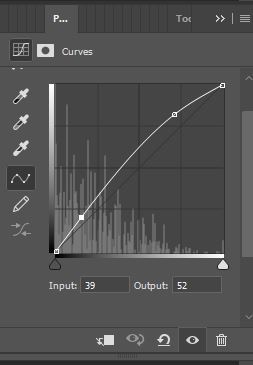
Now that I’ve altered my balance, I want to brighten my gif. This can vary between gifs, but I usually keep them relatively the same so long as the gifs arent extremely dark (i.e sewer scenes) or extremely light (some outdoor scenes that are white based.) I usually use levels or curves exclusively to brighten, because I find that brightness/contrast layers wash out the gif.
Now the lighting does still wash the gif out slightly, so I add a vibrance layer to bring the natural colour back out. This will also change per gif, but I only ever adjust the vibrance and not the saturation because the saturation alters the hue will bring out an unhappy red in the gifs.

I don’t particularly like the green tinge that’s happening in this gift at the moment, so I’ll usually add another colour balance layer and lean the blue more towards the yellow.
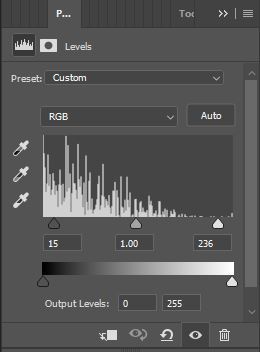
Even though the colours are bright, I’m still going to play around with the colouring to continue to get them to pop a little nicer. The first thing I add is create a selective colour layer and set the black to +8. Don’t touch any of the other colours, especially not “neutrals” and then I’ll add some more levels layers where the gifs will appear darker, while you’re still able to see everything and colours are vibrant.

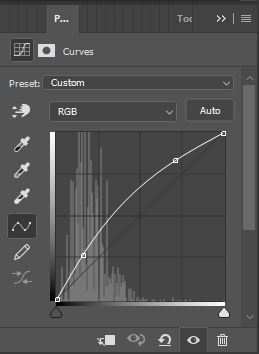
You can probably stop here, but I myself add some more curves just as a finishing touch
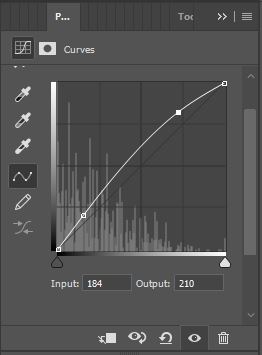
and then you have a final product of your gif! This is also the same process I use as my base psd for most of colour porn/colour palette gifs as well.
#itsphotoshop#completeresources#yeahps#photoshophelp#gif tutorial#gif tut#colouring tutorial#**#*tut#tuserdi#uservega#tuserdanielle#full disclosure this is the psd i use for almost everything at this point
313 notes
·
View notes
Text
Suggestions or Tips?
— Anyone that has photoshop, is there a tutorial that goes step by step with making a gif? I’ve tried several ways, but I can’t seem to get them right. Any suggestions or tips are helpful! I appreciate it a lot, thank you!
13 notes
·
View notes
Photo
Anyone else loosing their mind with the new photoshop glitches? I'm not even drawing stuff with that crazy of details. IM FINE.🥴 ___ #ink #sketchbook #art #totodile #pokemon #gator #direwolf #photoshop #selfportrait #photoshophelp #adobehelp (at Brooks, Alberta) https://www.instagram.com/p/CKHWullF6zN/?igshid=prxu5438bvr9
0 notes
Photo
I need help!
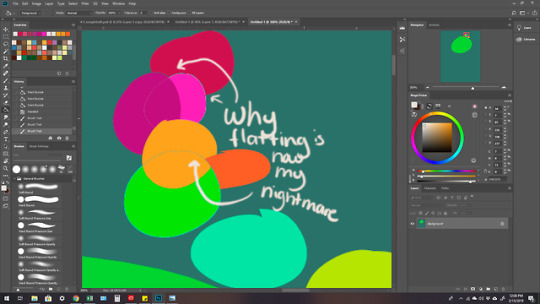
I’m working on coloring a comic in Photoshop and I don’t understand why this is happening and what I can do to change it. Or maybe this is normal and I’m just losing my mind for no reason.
So for comic coloring, I’ve learned that you must first flat all of the colors. It’s used as a selection tool down the road so you can easily switch between sections of color using the magic wand. To flat, you make selections with the lasso tool, and fill with the paintbucket. But the point is to never leave any white so you must ‘bump up’ and select other colors.
I’ve played with settings for all of those tools and can’t figure out the differences. But after all of that I’m still getting these weird halo effects! It looks absolutely terrible and it makes it hard to do colors later on down the line.
Oh! And I’ve tried using online flatting software, which doesn’t have these effects, but for other reasons, I can’t use those programs because I spend more time editing it, and then the edits end up with these halos anyways.
0 notes
Video
SAAAAAAAAVE MEEEE!!!#photoshophelp #sketchodyssey #layering https://www.instagram.com/p/Bu3tP85Be_C/?utm_source=ig_tumblr_share&igshid=skm95y557465
0 notes
Photo
#🦖 #🚀 h3y Guys, TODAY @ 1 pm I will show you how to create a FIRE 🔥 SHARK 🦈 using Adobe Photoshop. #h3yMik3y #photoshop #tutorial #photoshophelp #photoshopkids #kidart #artforkids #kidsmoma #howto #kidshowto #youtubekids #familyfun #adobe #adobehelp #premierpro #premierprohelp #editvideos #photograhyedits #edits #youtuber #adobe2018 #photoshop2018 #premierpro2018 #kidprogrammer #creativecloud #🔥🦈 #learnwithme #childlearning
#premierprohelp#premierpro#familyfun#photograhyedits#kidart#youtuber#photoshophelp#kidsmoma#premierpro2018#kidshowto#adobehelp#🚀#learnwithme#edits#🦖#youtubekids#🔥🦈#editvideos#childlearning#creativecloud#photoshop#h3ymik3y#photoshop2018#artforkids#photoshopkids#kidprogrammer#adobe2018#howto#tutorial#adobe
0 notes
Photo
New blog post is up and it's a goodie! It's my very first HOW-TO. I love photoshop and I love sharing all the new things I learn! ❤️ head over and check it out and don't forget to let me know what you think! 😁 . Link is in the Bio 👆🏼 . . #photoshophowto#photoshopelements13#photoshophelp#howtoblog#newblogpost#newblogpostisup#bloggerlife#momblog#muditamom#muditamomblog#checkitout#instablog
#photoshophelp#momblog#instablog#checkitout#newblogpostisup#photoshopelements13#muditamomblog#photoshophowto#newblogpost#howtoblog#muditamom#bloggerlife
0 notes
Text
Photoshop Training Kolkata, Photoshop Home Tuition Kolkata | CALL +91 9830889567
FroggyLeap provides advance Graphic Design Training in Kolkata with Adobe Photoshop, CorelDraw. Get the best training from our experienced mentor having more than 12 years of experience.
We also have Graphic Designing home tutor where our teachers will go to your home/place to teach you Graphic designing with software like Adobe Photoshop, CorelDraw personally.
The Area where we provide Graphic Designing Home Tuitions are:
Ichapur, Shyamnagar, Palta, Barrackpore, Naihati, Sodepur, Khardha, Dunlop, Belgharia, Lake Town, Bullygunj, New Alipur
Photoshop Course Module at FroggyLeap:
Basic Photoshop Course – 2 Months (16 Classes / 32 Hrs)
Advanced Photoshop Course – 3 Months (24 Classes / 48 Hrs)
Special Photoshop Course – 7 Days (7 Class / 14 Hrs)
Photoshop & Corel Draw Crash Course – 1 Month (8 Class / 16 Hrs)
Advanced Corel Draw Training – 3 Months (24 Classes / 48 Hrs)
You can contact for more detail at:
FroggyLeap
Ichapur, Surya Nagar
PO Nawabganj, DST 24PGS (N)
Behind Netaji Sangha Club
Ichapur, West Bengal 743144
Call : +91 9830889567
E-mail : [email protected]
Website : www.froggyleap.com
WebURL : http://www.froggyleap.com/photoshop-training-course-kolkata-india.html
0 notes
Text
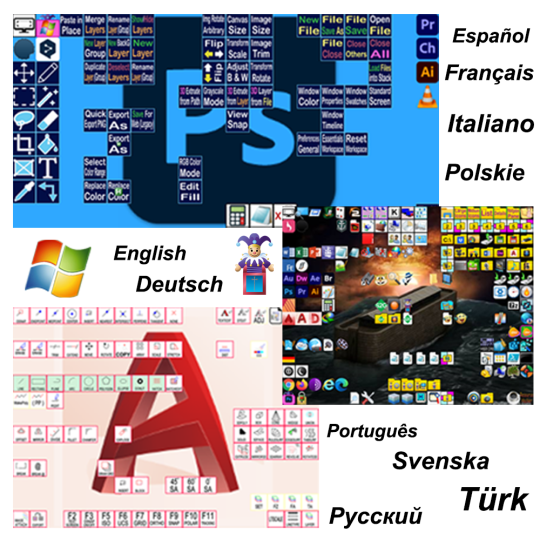
#adobe#graphic#graphicsdesign#graphicdesigner#helpphotoshop#learnphotoshop#macros#newsoftware#pc#pctips#photoshop#photoshophelp#photoshoptricks#photoshoptutorial#photoshoptutorials#pshelp#software#windows#windowsshortcut#windowsshortcuts#windowshelp#windowstips#tech#techtip#techtips
0 notes
Text
Tweeted
Dear @AdobeCare I need some help. This keeps happening when I try to save my animation as .gif . Please help!
.#helpme #photoshophelp #notatechexpert pic.twitter.com/n1ero7iDxM
— Veronica Cowie (@viriniki) March 9, 2019
0 notes
Text
Photoshop help?
— okay, so I'm broke. And I can't afford photoshop, anyone wanna gift it to me, or let me borrow their adobe account that they aren't using?? Because I wanna learn how to gif stuff and it looks so exciting.
8 notes
·
View notes
Link
0 notes
Photo
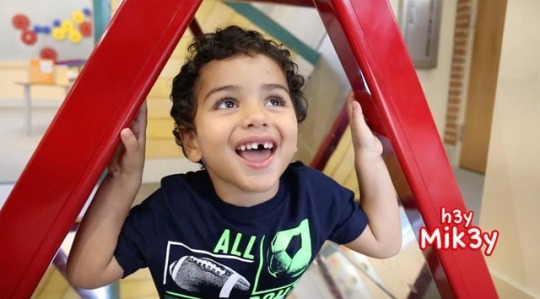
TODAY! 🚀 Join me as I explore the Knock Knock Children’s Museum! #h3ymik3y #🦖 #🚀 #familyfirst #familyfriendly #kidsyoutube #youtubekids #blendedfamily #toys #toyreview #marvel #spiderman #h3ymik3y #comics #toyreview #kids #adobe #photoshop #learnwithme #howto #photoshoptutorial #turorial #tutorials #photoshophelp 🦖
#toys#h3ymik3y#photoshop#photoshoptutorial#🚀#familyfirst#familyfriendly#youtubekids#learnwithme#turorial#photoshophelp#🦖#blendedfamily#tutorials#kids#toyreview#marvel#spiderman#adobe#howto#kidsyoutube#comics
0 notes
Text
JOB ORIENTED PHOTOSHOP TRAINING IN KOLKATA
This is the best course for those who want to learn Graphic Designing and want to secure a job as a Graphic Designer in Kolkata.
To be a Graphic Designer you must learn Photoshop and Graphic Designing techniques. FroggyLeap has come up with the solution as we don't only teach software's like Photoshop, we make you learn - "How To Learn Graphics Design" or "How to Get Started with Graphic Design"
Join us and see the differences. Here at FroggyLeap you are definitely goint to have the very best Job Oriented Photoshop Training in Kolkata.
Please visit our website.
Call us and discuss with us. We are always ready to help you and pull you up from the dilemma.
Visit us :
FroggyLeap
Ichapur, Surya Nagar
PO Nawabganj, DST 24PGS (N)
Ichapur, West Bengal 743144
Call : +91 9830889567
E-mail : [email protected]
WebURL : http://www.froggyleap.com/photoshop-training-course-kolkata-india.html
0 notes
Video
Guys my computer is doing something weird with photoshop. Or maybe its my pen? Or maybe its Windows? I dont know but i can’t work like this #windowshelp #photoshophelp #computerhelp #photoshopproblems #windowsproblems #computerproblems
0 notes
Photo

So, I’ve seen a ton of photoshop tutorials, but since I’m broke and my laptop doesn’t support photoshop (chromebook) I’m gonna teach you how I do it.
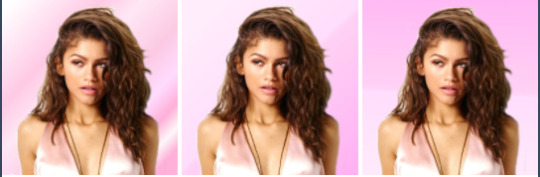
We’re gonna go from this
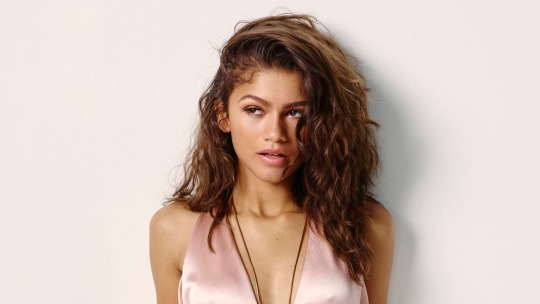
to this

and even to this

rest of the icons
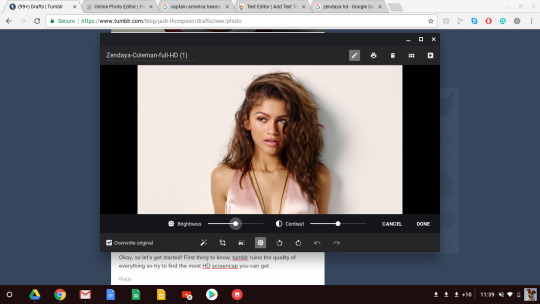
Okay, so let’s get started! First thing to know, tumblr ruins the quality of everything so try to find the most HD screencap you can get.
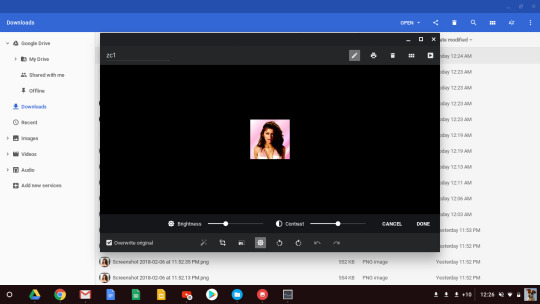
Start by brightening the image!
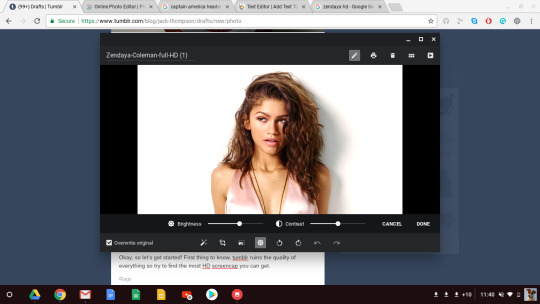
You can also use polarr but I find that for my computer using the software already in my computer works better and keeps the naturallness of the picture. Now, crop the image to a square ratio. You can resize now, but it’ll make the next few steps difficult.

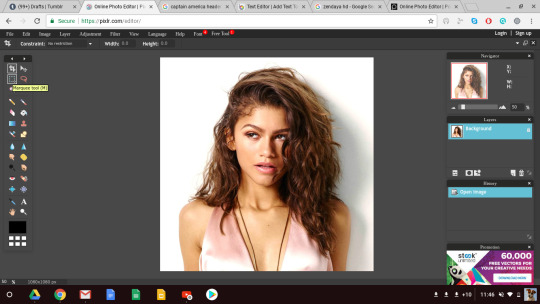
Now you should have this (for purposes of the tutorial, I am leaving it at the original size):

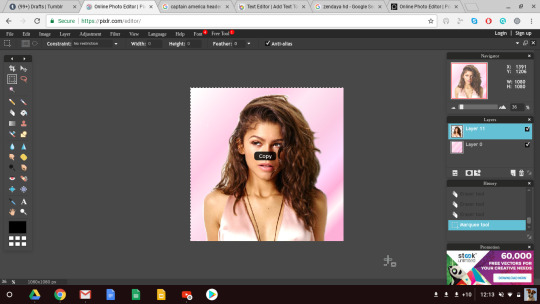
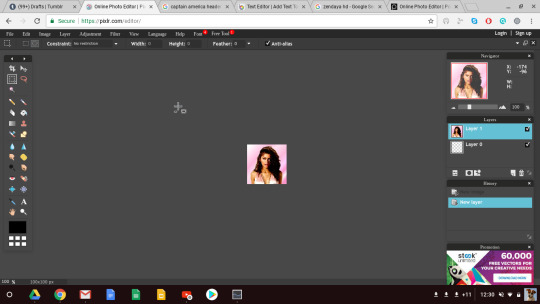
Now, I use pixlr, a really easy free tool. First you want to upload your image

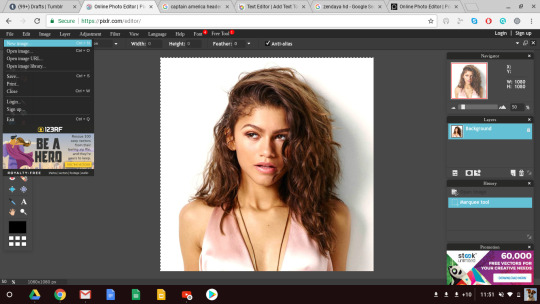
And then click on the marquee tool and select the entire picture.
The hit ctrl c or cmnd c. Whatever the keyboard shortcut is for copying on your computer.
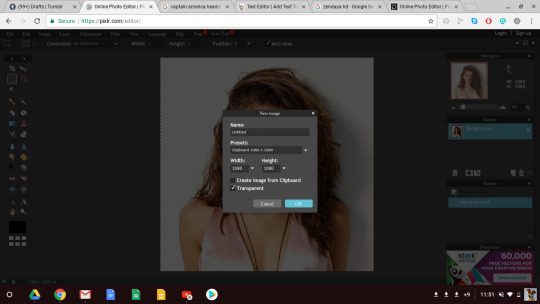
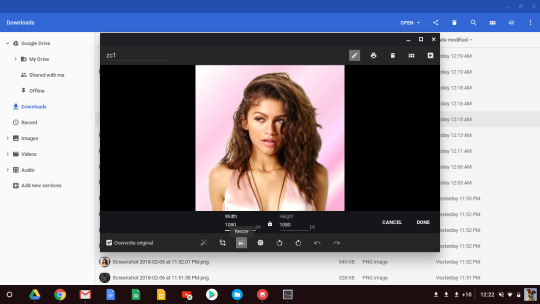
Then, this is important!! Click on file and then new image (upper left hand corner)
Keep the dimensions the same, but make the bottom layer transparent!! IMPORTANT!!
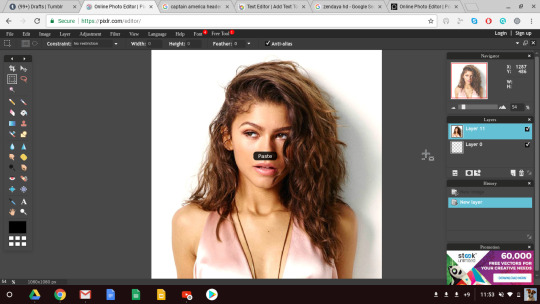
Then, with your transparent base layer, paste the photo on. (Use the paste shortcut!)
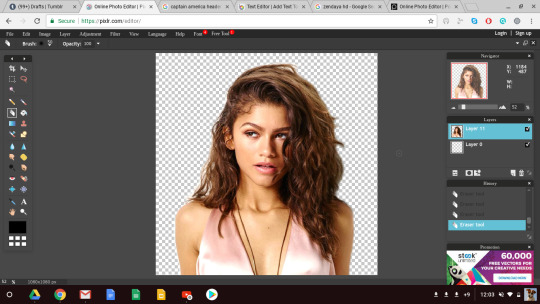
Okay, now’s where things start to get kinda tricky. Using the eraser tool, start erasing the portions that you don’t want to show up in the icon. It takes awhile to get used to it, but over time it gets easier, so don’t give up!
You can use any of the eraser tools you want, but I prefer the default, it’s easier and has smoother eraser marks (at least in my opinion).
So then we end up here (I erased part of her hair cause it’s midnight and I don’t have the patience to go in for all that meticulous effort.)
So now, onto the color. I use the gradient tool for the background. REMEMBER TO SWITCH LAYERS!!
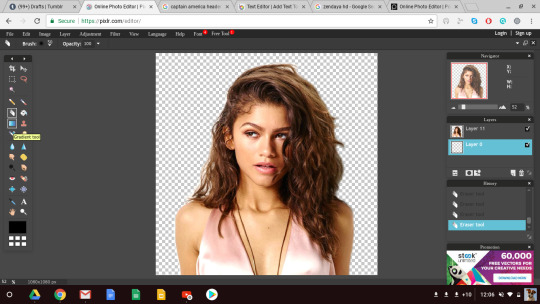
Now, the default selection of gradients is pretty shitty, except for the pinks and the cyans. Also, at this point in the tutorial, I will be diverging off in how to easily make multiple icons, just to let you know.
You can use any of the gradients, and in any direction you want! Play around with it! It’s fun! (At this point, you can clean up any mistakes that you can see as you use the gradient)
Now we’re here:

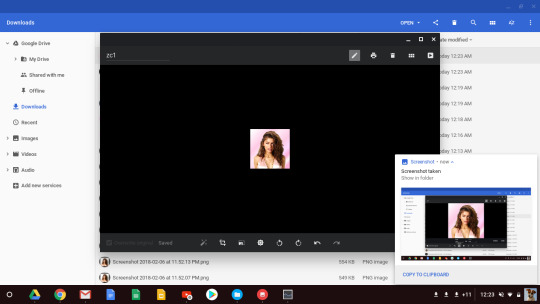
If you just want this one icon, save it then resize it to 100x100! That’s it!
If you want more, I’ll continue!
Using the marquee tool (again) select the entire image, and making sure it’s on the layer with the subject of the icon, copy.
So basically,
Exit out of the image (be sure to save!!) and then paste and play around with more gradients. Make as many as you like!!
For the purposes of this tutorial, I’ve made 3!!
Remember, now to resize the icons to 100x100!
The hair in this one got lighter, a way to avoid that is to darken the image afterwards, it’ll make it more vibrant!
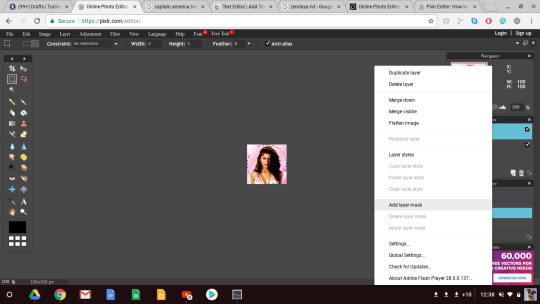
To make circular icons:
Now that we’re already here, it’s very easy to make circular icons!
Create a new transparent image (100 x 100) and add the desired image as a layer.

As I’ve already done, click on the marquee tool and choose the elliptical tool. Now, before we continue, use the marquee tool to create a circle around the image.

Add the layer mask, and boom, you got a circular icon!
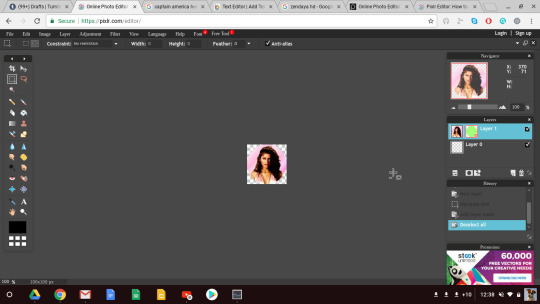
Now, you just save and you have a wonderful circular icon!
42 notes
·
View notes
Last Seen Blogs

salty-ays
arzyharzy

var-en
Snap

feedeepupgurl
Raven (18+)

intellitecedu
Intellitec College

theleotuneblr-blog
Dream, Travel, Capture, Live & Repeat.