#miniature projects
Text
How does one make miniature furniture and decor for shadow boxes?
Shadow boxes are a great way to showcase and preserve memories, but they can also be used as miniature worlds. Creating miniature furniture and decor for a shadow box is a fun and rewarding project that allows you to exercise your creativity and showcase your craftsmanship. In this article, we’ll walk you through the steps of making miniature furniture and decor for a shadow box.
Continue reading…

View On WordPress
#Crafting#DIY#dollhouse#Miniature accessories#miniature decor#miniature furniture#miniature projects#miniature room#miniature scale#miniatures#shadow boxes
1 note
·
View note
Text
The end of one project, can it be? My plans to completely finish my niece's dollhouse were scrapped when I got pregnant and tired. Thanks to baby sleeping through the night and free babysitting I just finished the outside in time for her birthday.
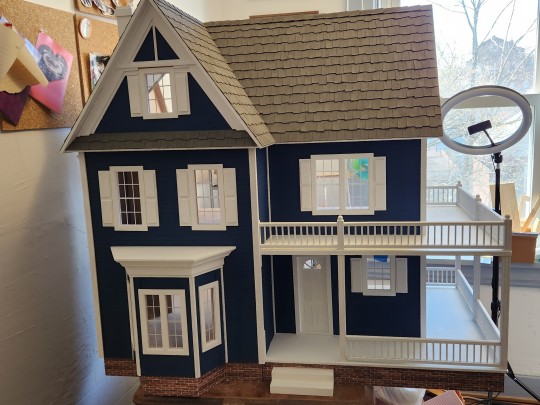
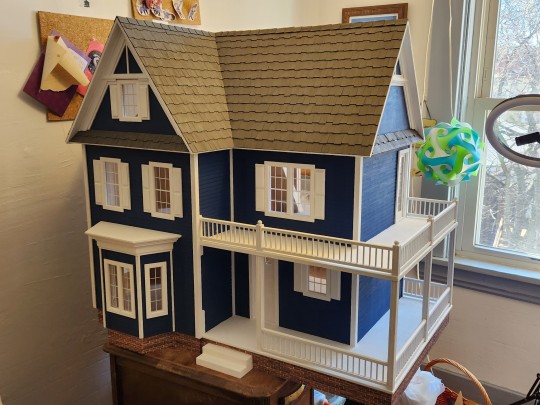
She pretty.
That brings my craft room capacity back to two dollhouses, and now that I have a little potato, I have a plan for the third dollhouse. Let the games begin.
🙃
1 note
·
View note
Text
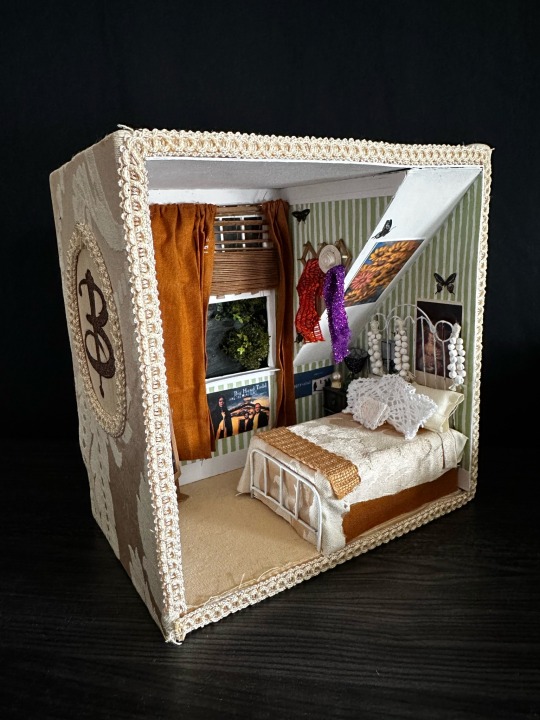
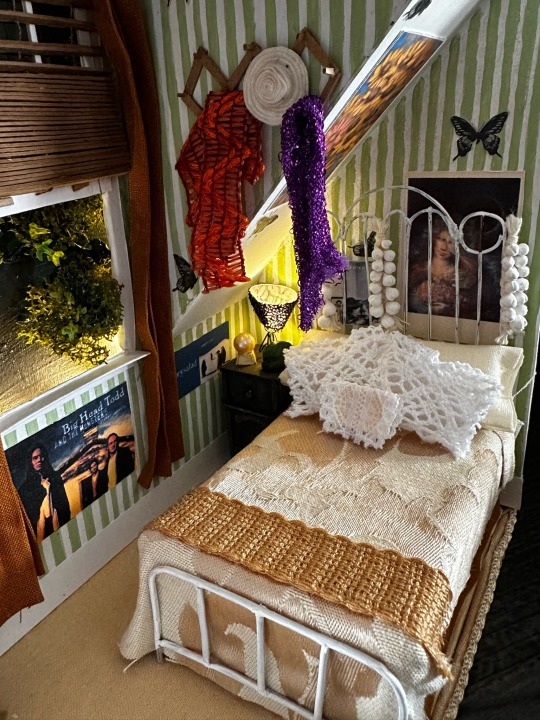


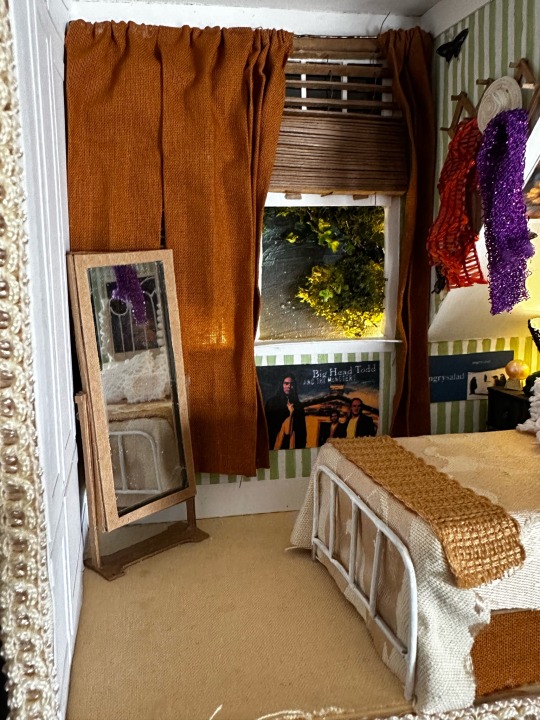
Sometimes the fun of miniature making is capturing something— in this case, the feeling I had watching Buffy the Vampire Slayer on a bulky tv in my bedroom as a teenager and finding her room to be a comforting place ❤️🪦 Wood box with an interior of cardstock, chipboard, fabric, wire, paint and scrap material, 7”x7”
#my art#miniatures#diorama#btvs#buffy the vampire slayer#Buffy summers#dollhouse#diy projects#Buffy#fanart
2K notes
·
View notes
Text
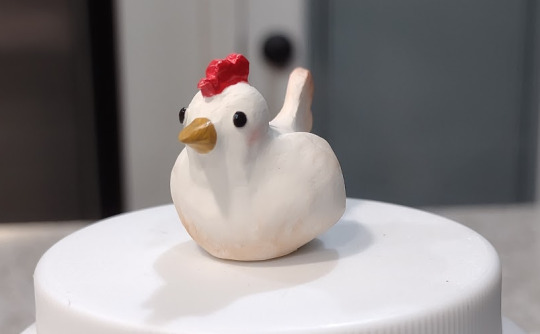
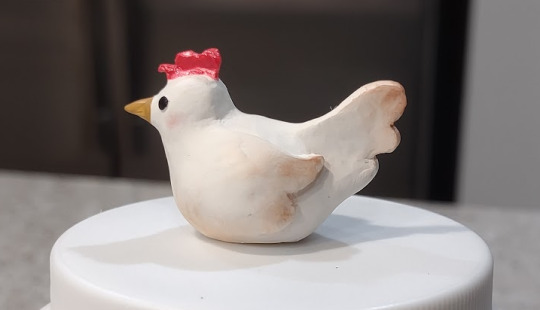
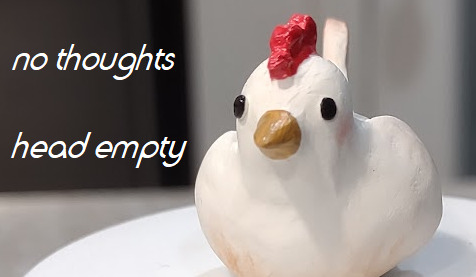
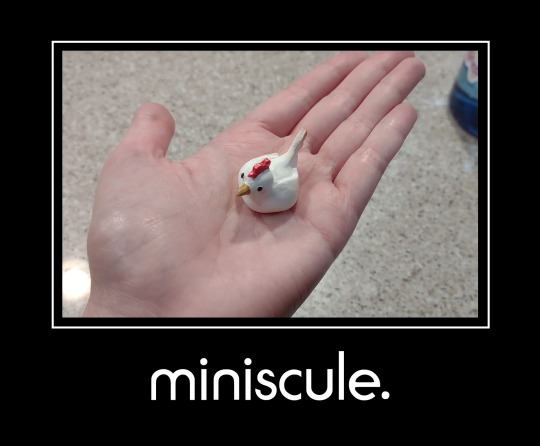
baby's first polymer clay creation
her name is Annette
#birds#chickens#art#sculpture#sculpey#miniature art#polymer clay#clay#crafts#homemade#i have no idea the tags i'm just stealing them from other peoplw dfbghjdhfsbg#she makes me want to CRy#artists on tumblr#a bird blog i follow rbed a bunch of tiny birds someone made. i wanted to try making a tiny bird#i bought clay over a year ago because i wanted to make harpy women with some old doll faces from the 80s#that my mom still had from her crafting days. but that was a really intimidating first project so i Didn't#a chickem i s easy :) (it took like 3 hours Just to sculpt.)#its 4am i want to cry its so fucking small oh my godd#the thir dimage sends me into hysterics#please look at this chicken im begging you
819 notes
·
View notes
Text

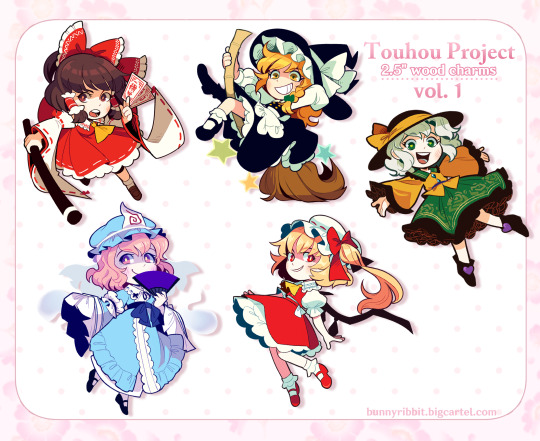
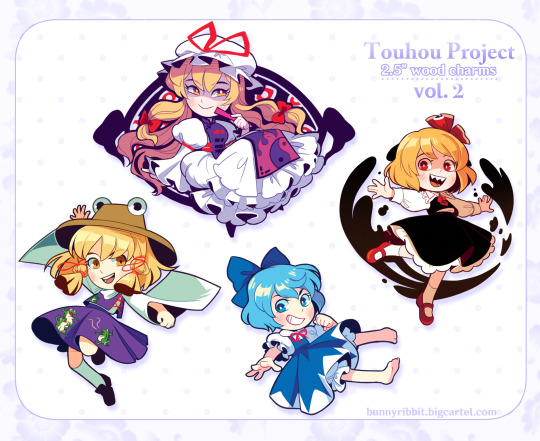

HEY ALL!! Update to the store: I'm selling my left over touhou charms as well as some miniature shadowbox pins! I'll be selling ones I've already pre-made as well as offering customizable options too, so please take a look if you're interested, supplies are limited!
Also, take a look at our other wares too, especially my gf's recent pre-order item!
🐰 Store is here~ 🐸
(Reblogs are appreciated 💕)
161 notes
·
View notes
Text
My Mii figurine!!
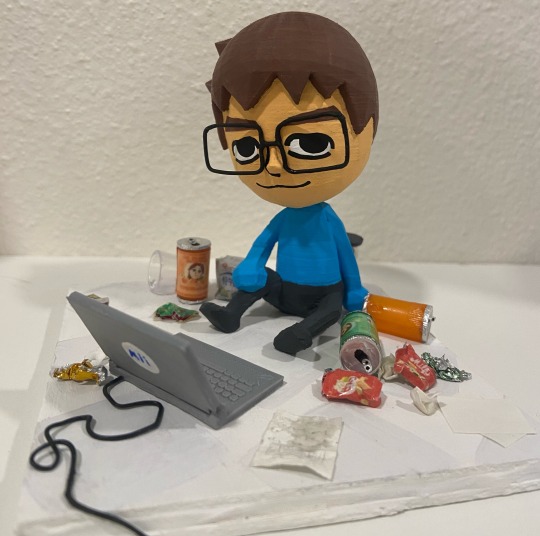
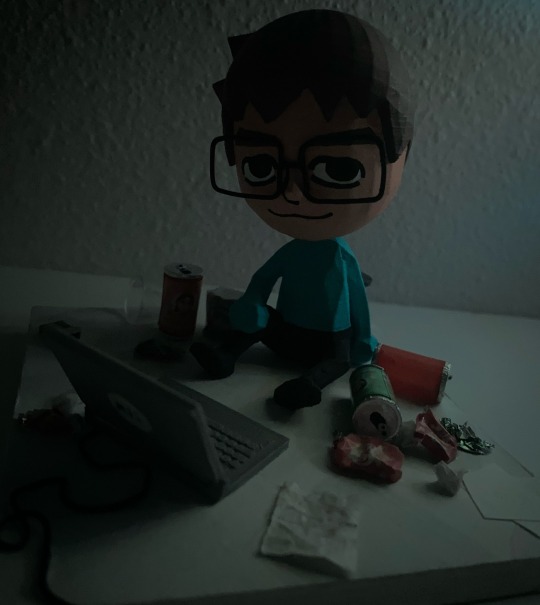
(WIP photos under the cut)
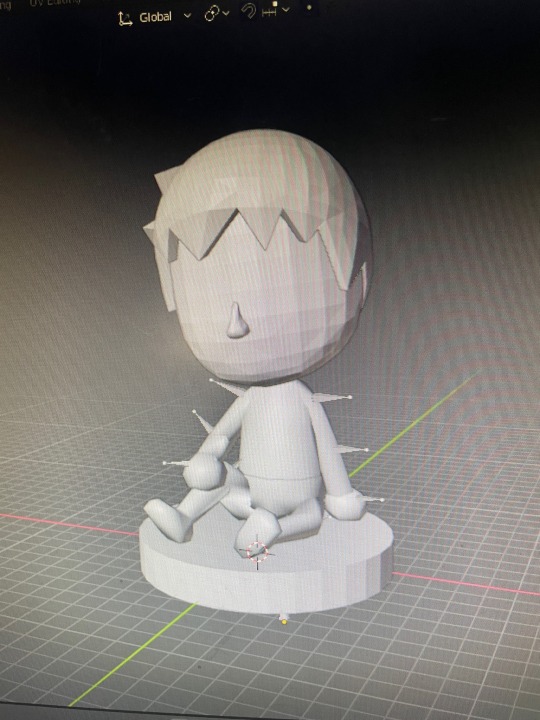
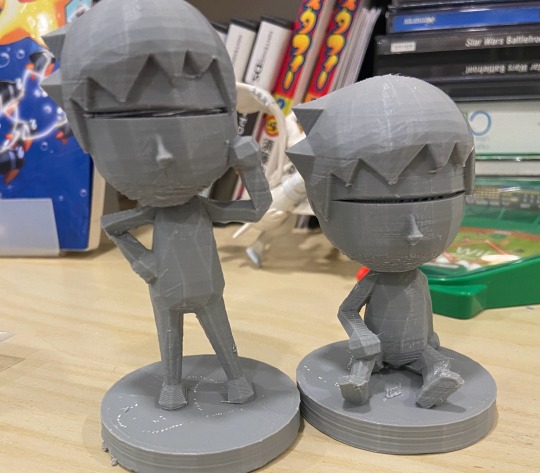
(My concept art)

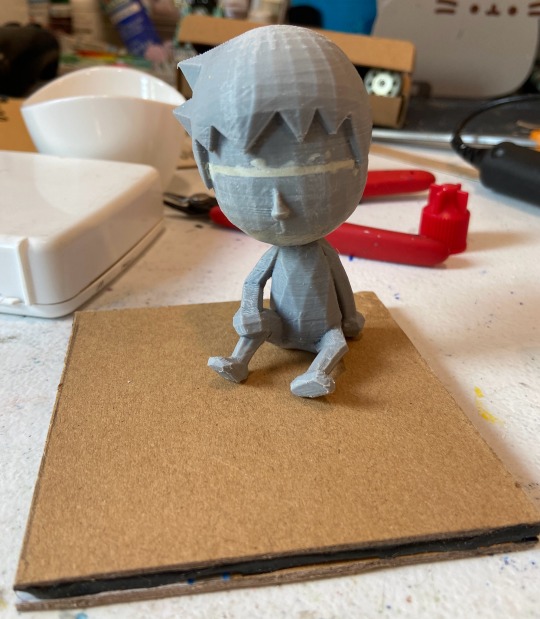

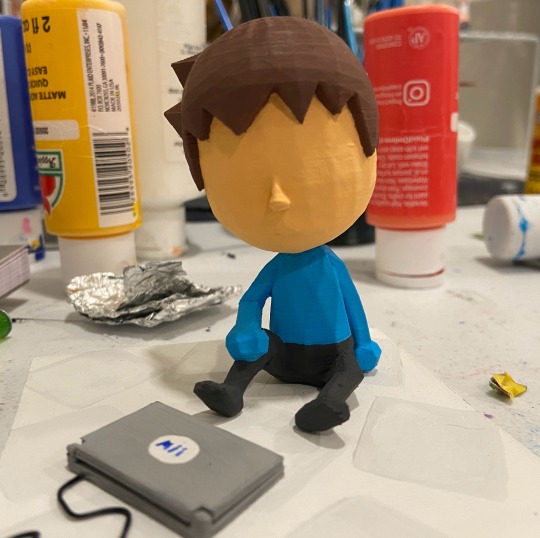
The cans + designs I made for them (free to use)
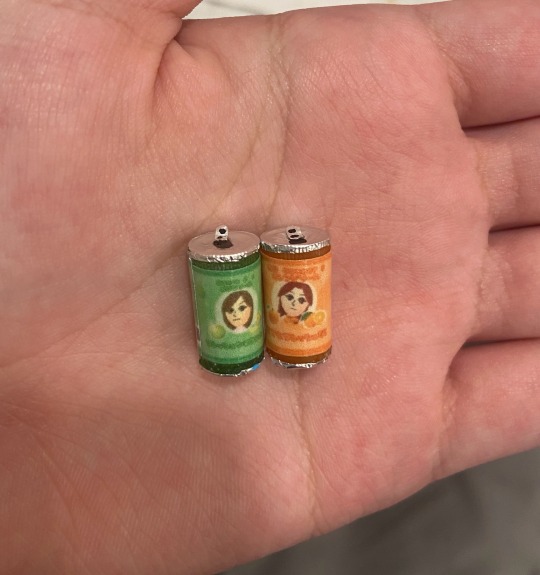

#miiblr#i love miis#mii#nintendo#miis#mii enjoyer#my posts#tomodachi life#3d printing#3d printer#miniatures#figurine#custom figure#hikikomori#my art#my projects
147 notes
·
View notes
Text
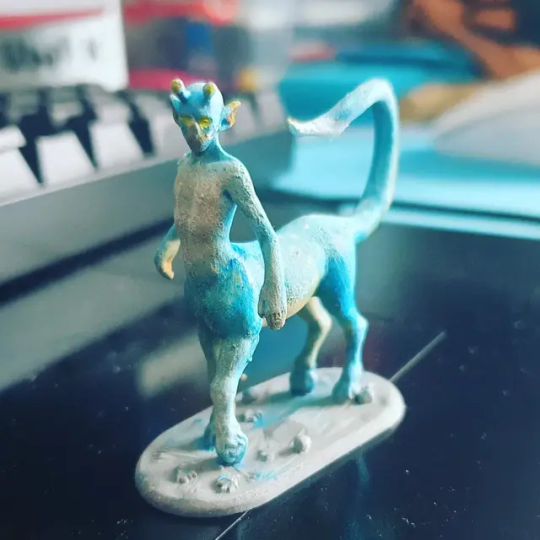
might as well share this one too?
miniature andalite originally made in heroforge, then edited a little in blender, 3d-printed and painted.
#mostly done for miniature painting practice hehe#andalite#animorphs#heroforge#irl shenanigans#my brother was the one who did the blender edit. this was a little collaborative project#this is no character in particular#maybe animorphs tumblr likes this idk
165 notes
·
View notes
Text
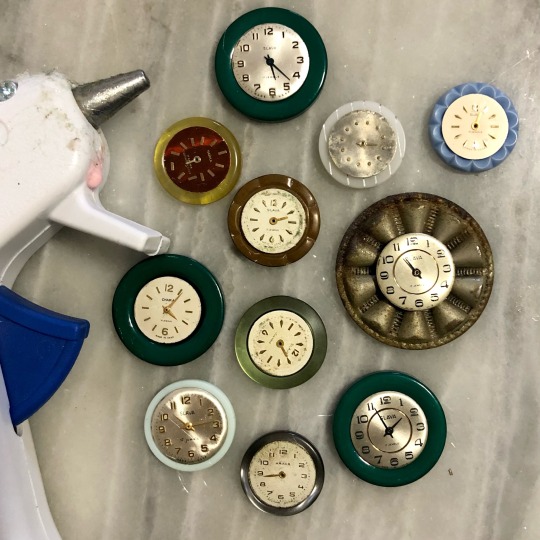
Buttons + old watch faces + hot glue = tiny clocks. Yes I did need to make this many, for reasons.
476 notes
·
View notes
Text


the pond water is clear glue dyed with watercolour drips
#miniatures#model#architecture#photography#postcards from nowhere#art#artist on tumblr#1st jan#happy new year#watercolour#plants#garden#paper#pond#kitchen#furniture#toy#doll house#i have another 2 projects in the work#but will be very busy till march so just going to put all the photos from this set up in the next few days
73 notes
·
View notes
Text
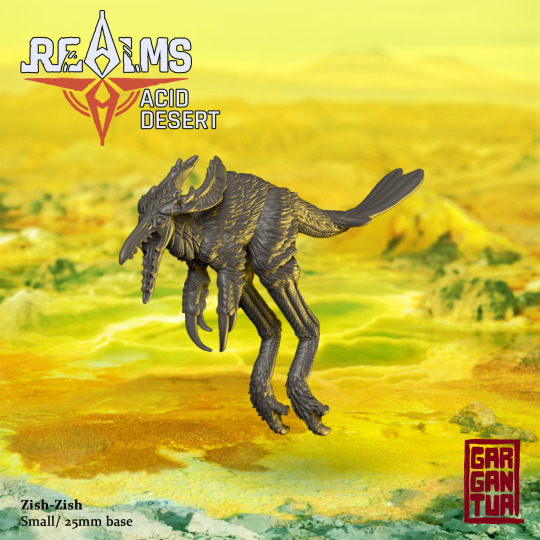
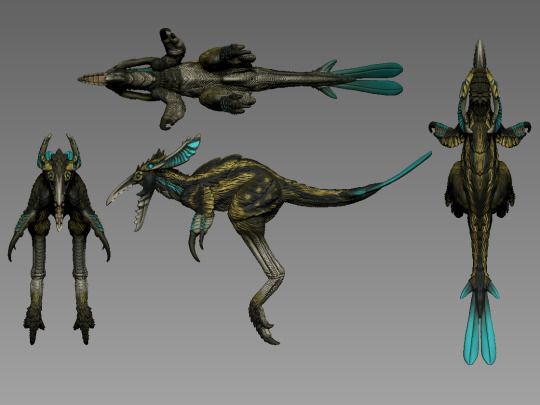
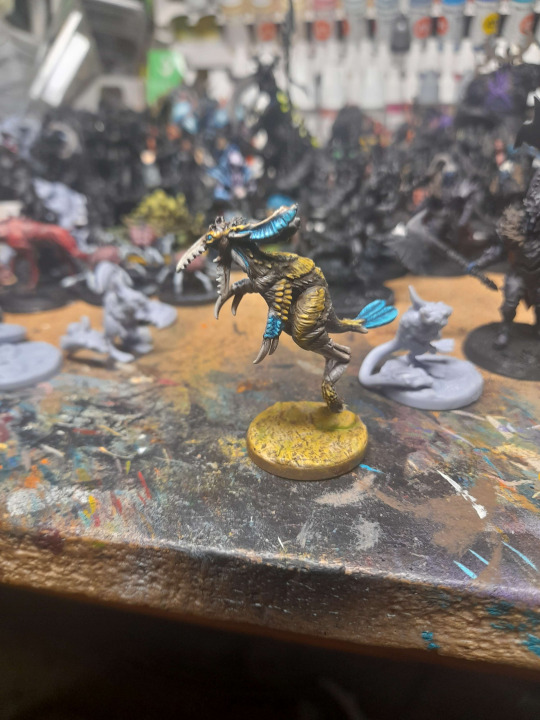
Meet the Zish-Zish!
Our creature roster expands with another small species that inhabits the Ssizur desert. This time, an agile hopper reptavian that lives in packs (or mobs, if you will). Because it's a social animal, it uses its ears and colorful plumage to communicate with other members of its group and intimidate possible predators.
All those characteristics were incorporated in the design of the Zish-Zish for its miniature, although if we wanted them to be noticeable, those had to be bold and exaggerated.
Also, we had to show at least a portion of how swift and expressive this creature is, so we ended up choosing the "hopping", "attacking", and "distressing" variants.
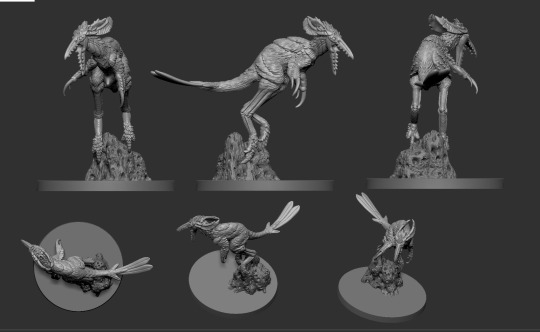
Of course, the attacking pose was the most challenging, but we managed to make it well-balanced thanks to the custom base with the porous desert rock.
This animal rarely touches the hot sands, so it was the perfect opportunity for us to make some dynamic poses!
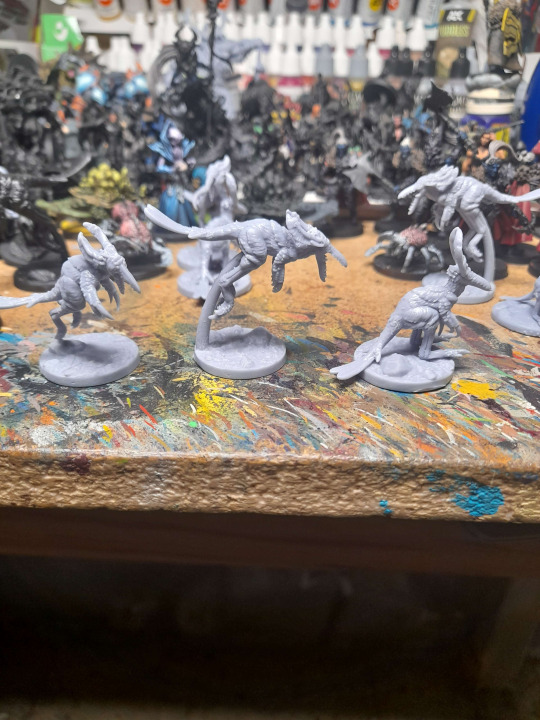
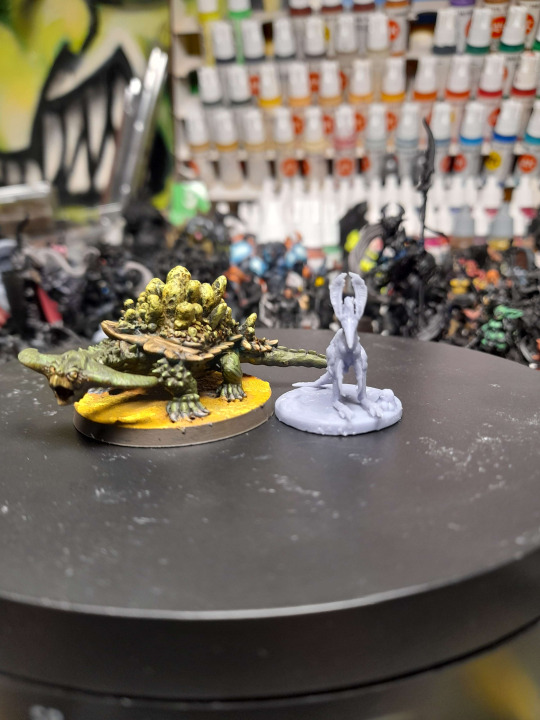
The final touch had to be the colors, and because this species was a mix between an avian and a reptile (you could say it's a little bit "dinosaur-ish"), we decided to give it some striking pigments. The aquamarine blue was perfect as a contrast to the acid yellow of the desert.
And that's it for the Zish-Zish!
If you liked this species for our project REALMS and want to print one (or lots of them!), please consider supporting us. It includes some goodies so you can implement these in your campaigns, so give it a shot!
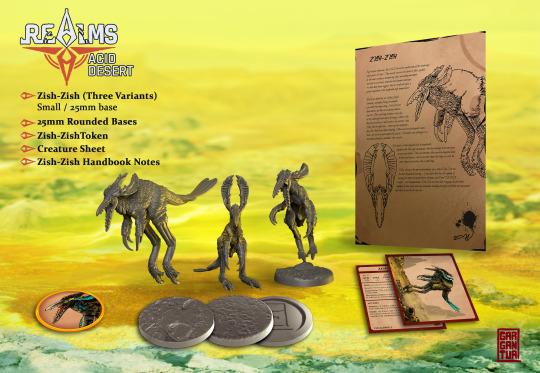
Every purchase helps us a lot to continue developing these critters!
You can get the Zish-Zish and other beasties here:
Ko-fi / Cults 3D
#project realms#3d printing#miniature painting#creature design#ttrpg#bestiary#fantasy#wargaming#toy#desert#reptile#avian
24 notes
·
View notes
Text
I found these plastic dinosaur minies and decided to paint them to look like Lucky and Wuerhosaurus from paleo pines & and i will show you all the steps in case you want to do something like this yourself

This was my firs time painting minie figures and i tried using the same techniques people use for DnD figures so you can just look up those tutorials on youtube.
I found these ugly plastic dinosaurs on at a flee market for like 5 hryvnias and this is how they looked before their makeover:

First thing i did was wash them with soap and strip off all the spray paint from them using polish remover/acetone, untill they were this weird yellowish plastic color. (Idk if this step was necessary but i wanted to romoves all the dirt & dust so the paint sticks better)

Then i painted them fully with a dark color. I dont advise using pure black. I used a more dark-ish grey with a bit of blue so the undertone works better.

By the way here are these mfs near a match (for size comparison ofc).
Next i dry-brushed them with a cream color to bring out the texture and leave the dark color in the creases and shadows. I had to go over with a few coats so that they were not too dark.

Fore some reason they made these guys all wrinkly instead of scaly but it did help with the texture lol.
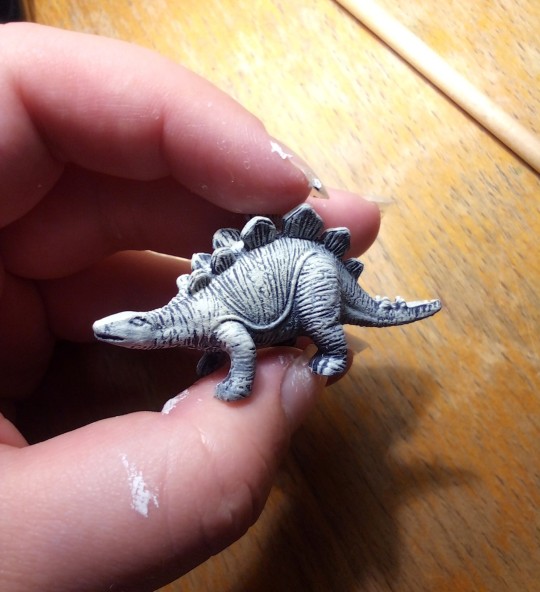
(The more i looked at them the more i saw how weird and inaccurate they are. Still cute though)

And the last steps were to cover them in colorfull washes:
The key is to go slowly, building up the colors layer by layer. I also added a bit of different hues in some places to make the colors less more alive (like a bit of pink on the plates, or some green in certain places idk it just gives more variety to the colors. with out it it the colors look a bit monotonous).

Also, seriously go play the game!!!! it`s just so cute. Dinosaur designs are cutified but still faithfull to how the animal looked according to science (minus the pastel colors lol) and you just know that it was made by true dinosaur lovers.
They do have a tumblr blog at @paleopinesofficial but i see their content more on tiktok
#paleo pines#dnd art#dnd miniatures#painting miniatures#goblincore#corvidcore#trinkets#dinosaur#dinosaur art#dinosaurs#paleoart#trinket collection#miniature#minis#miniature painting#crafts#diy projects#diy ideas#arts and crafts#video game fanart#dinocore#corvid collection#lucky#parasaurolophus#wuerhosaurus
69 notes
·
View notes
Text


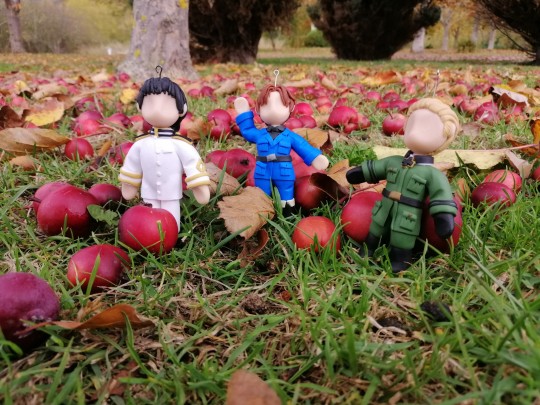
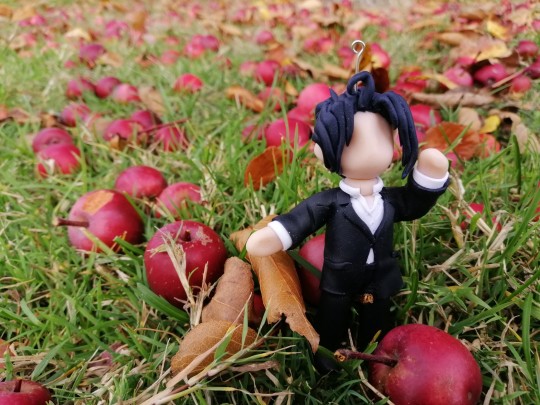
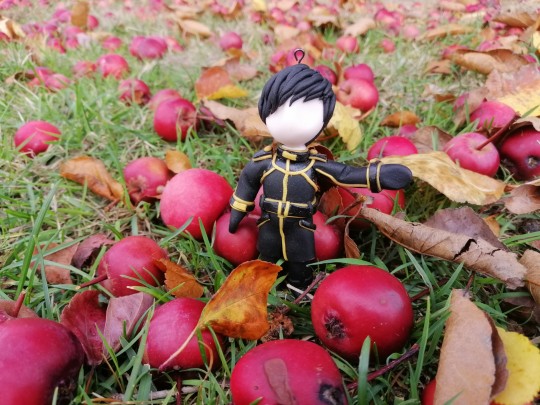
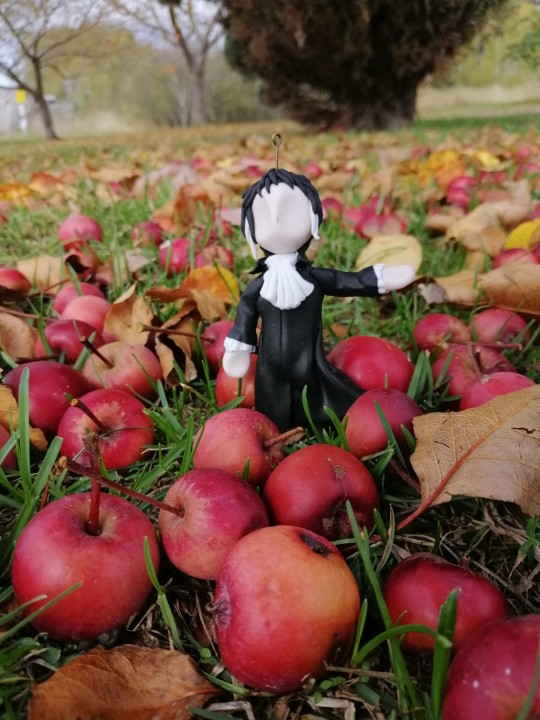
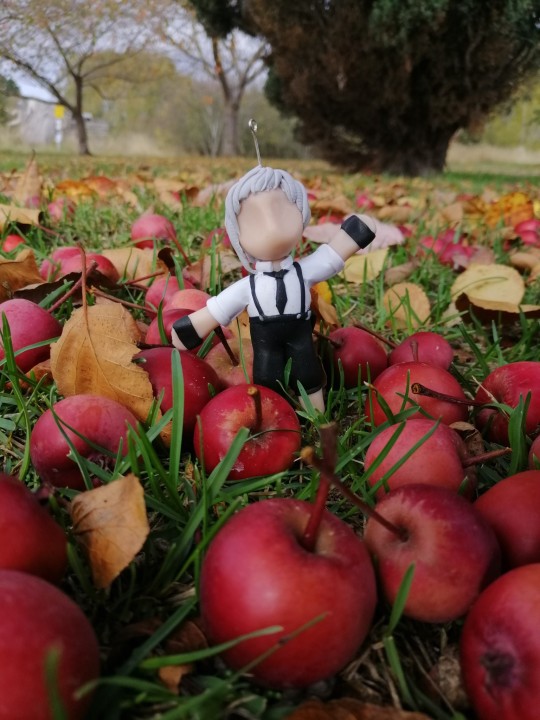
It is getting extremely autumnal around here
#mini people#polymer clay#fanart#miniatures#polymer clay art#hetalia#hetalia fanart#photography#bungou stray dogs#aph prussia#moriarty the patriot#messiah project#aph italy#aph germany#aph japan#aph france#bsd atsushi#bsd akutagawa#Mikke mayo#mtp sherlock
24 notes
·
View notes
Text
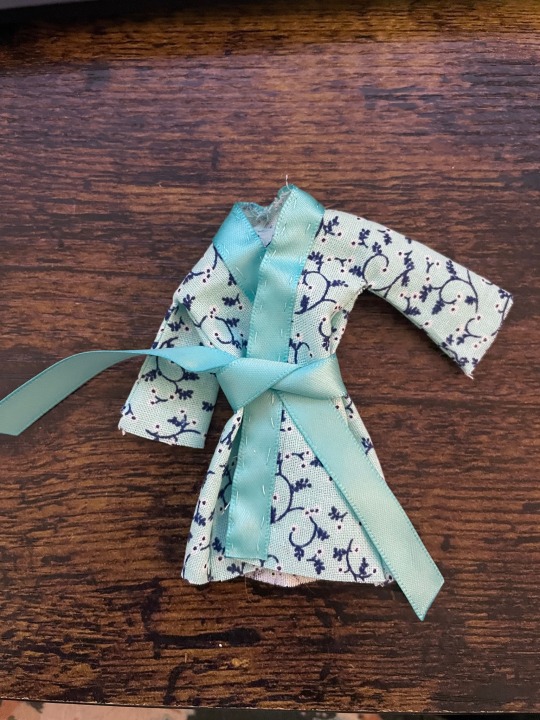

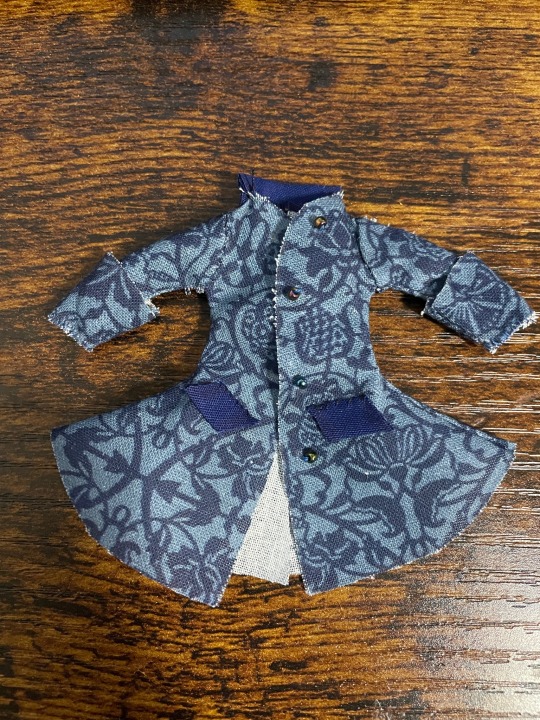
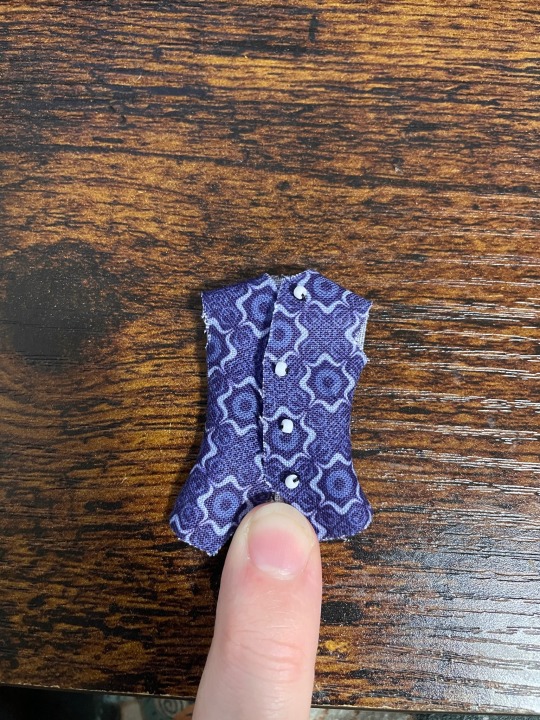
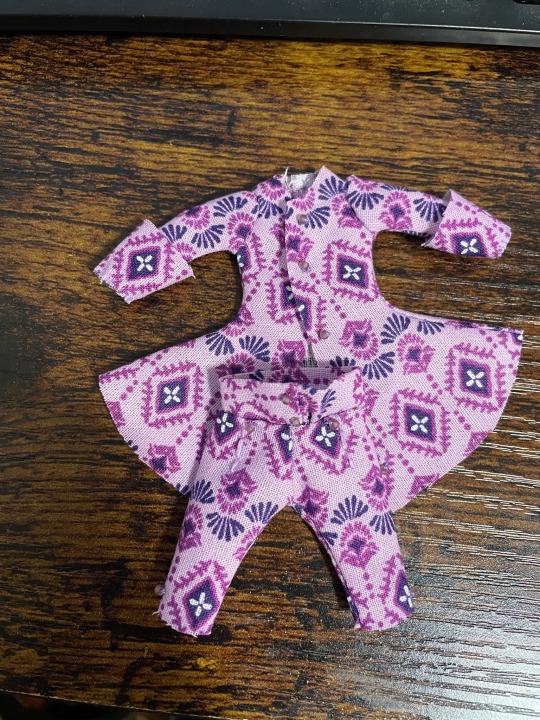
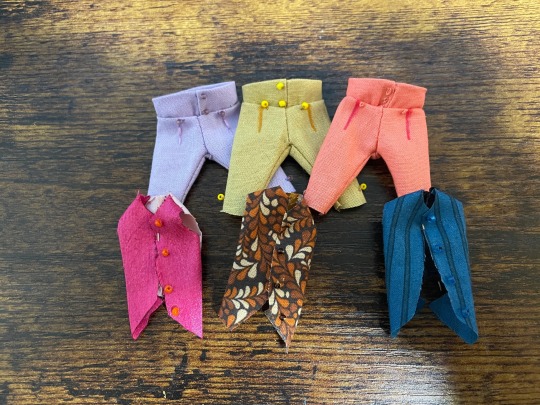

a bunch of garments to fill out the wardrobe, not necessarily based on ones seen on the show
31 notes
·
View notes
Text
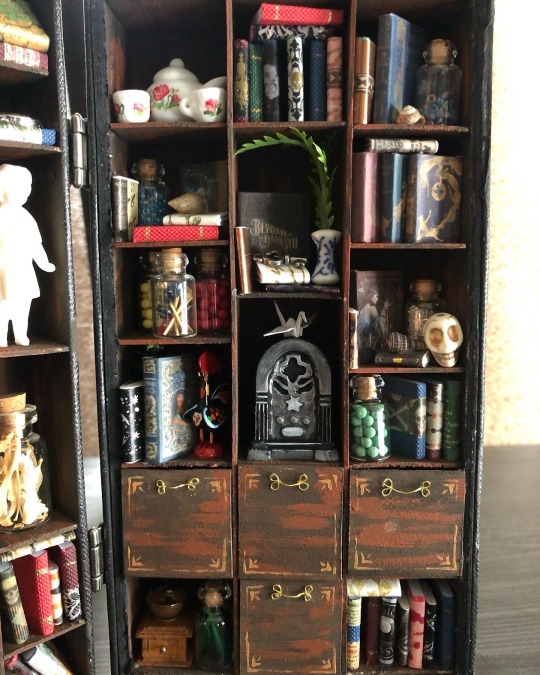
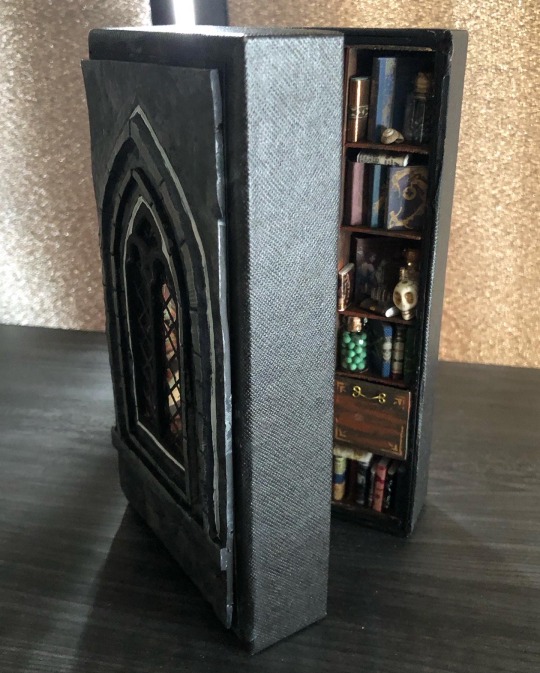
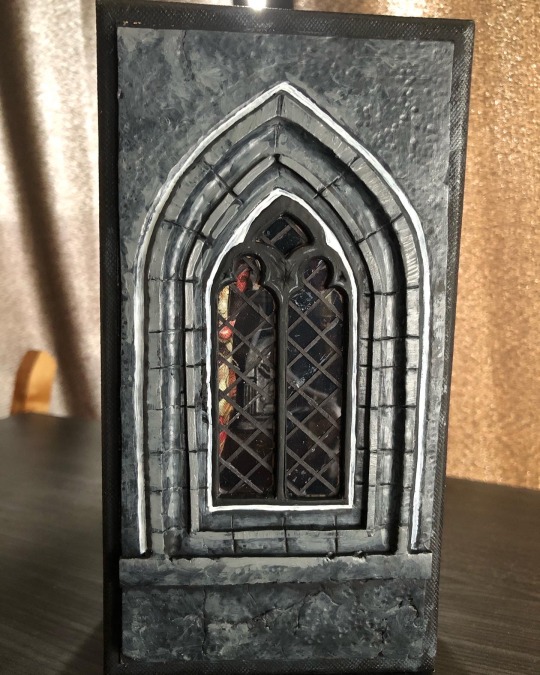
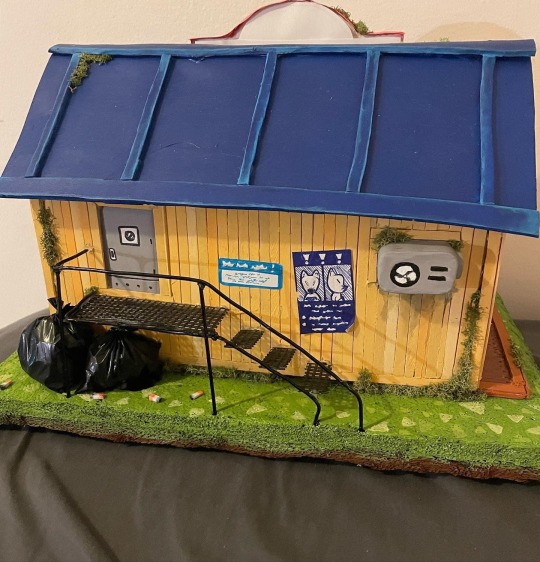
Made another tiny thing, a little fairytale-inspired library🪟A mix of DIY and found minis from Michael’s and a local antique mall, with polymer clay exterior (box was originally for sunglasses and was too fancy to throw away). (Sold)


2K notes
·
View notes
Photo
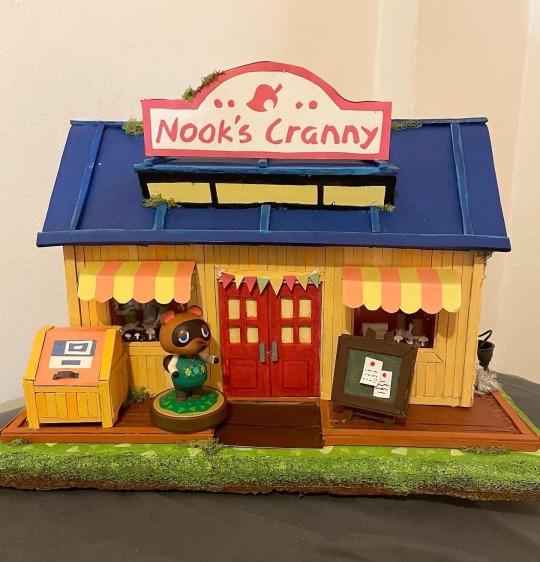
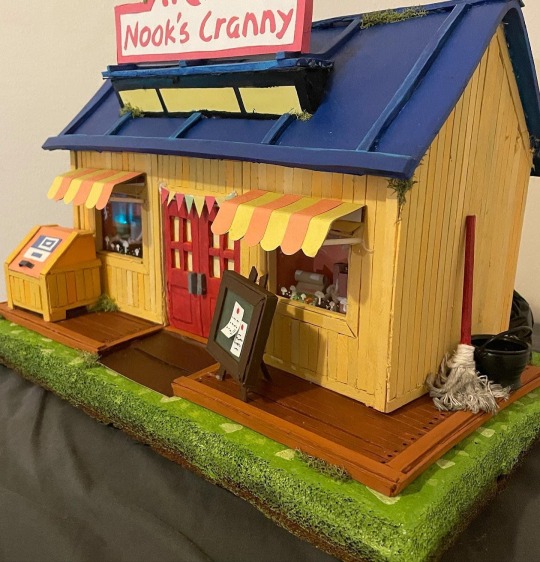
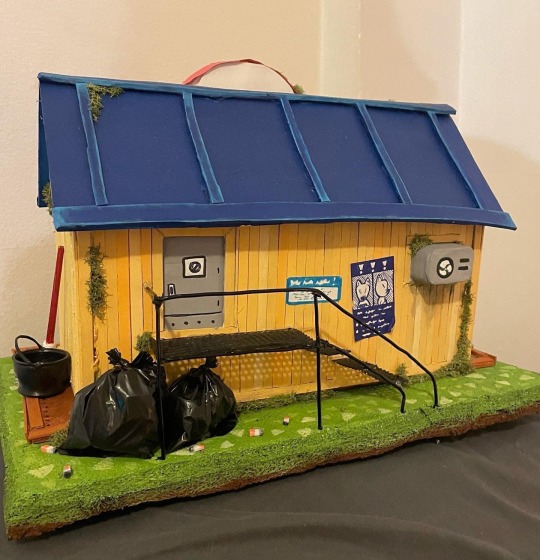
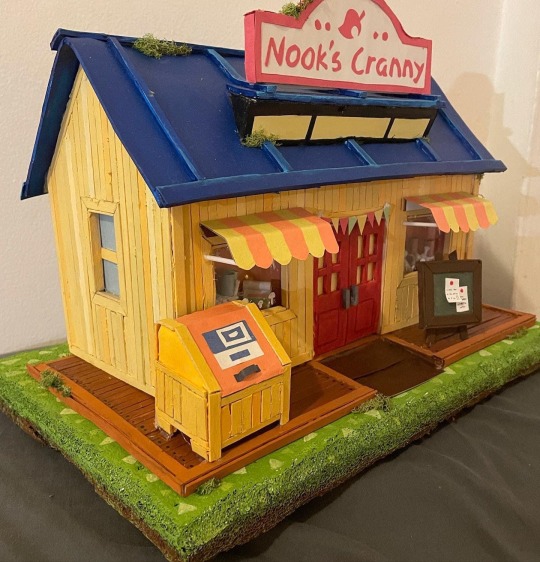
the back isn’t visible in game so i took some creative liberties LOL
#animal crossing#animal crossing new horizons#acnh#crafts#miniature#second crafting project COMPLETE hope you like it
926 notes
·
View notes
Text
ULTRAMODERN/POST-APOC PARKING LOT BASE TUTORIAL
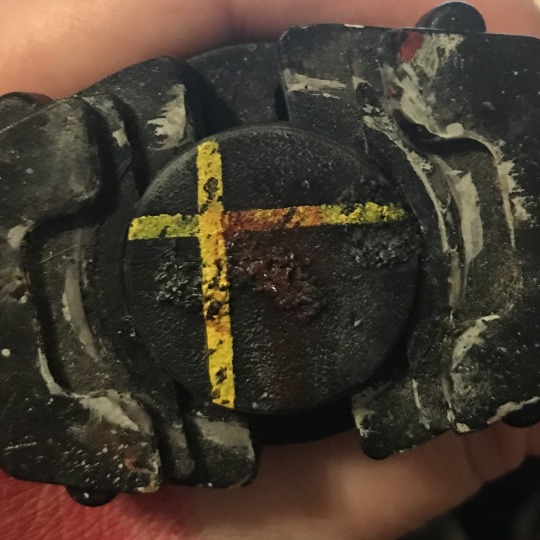
Working on some minis for Project Z from Warlord and I thought I'd share how I'm doing the bases! I'm painting them separate from the models for reasons that'll quickly become apparent.
PREP: Before basecoating, I applied watered-down PVA glue in small patches on the base, then dunked them in fine modelling sand, shaking off the excess.
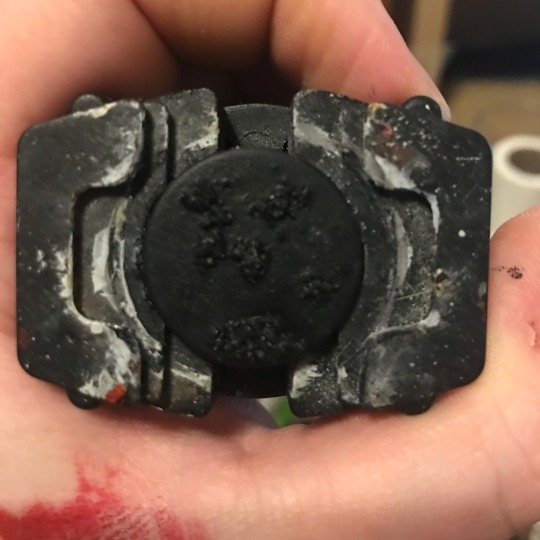
STEP 1: Prime the base black. I'm using a Vallejo brush-on primer here.
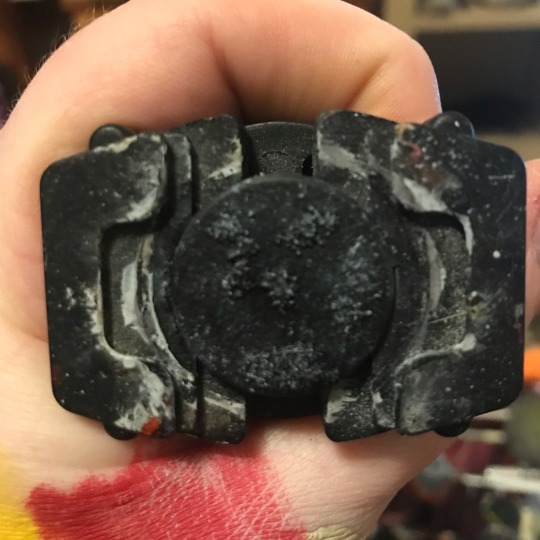
STEP 2: Drybrush and lightly stipple a pale, bluish grey. I'm using Vallejo Ghost Grey. Don't worry if some parts are a little too bright, we can go over that with black later.


STEP 3: Using two pieces of masking tape, cover the base, leaving a thin gap between the pieces of tape. Try and press it in a bit to reduce bleed. Then, with a domed drybrush, heavily stipple your line colour, typically white or yellow. I'm using Citadel Flash Gitz Yellow. If you want a second line, repeat the process at a right angle to the first!
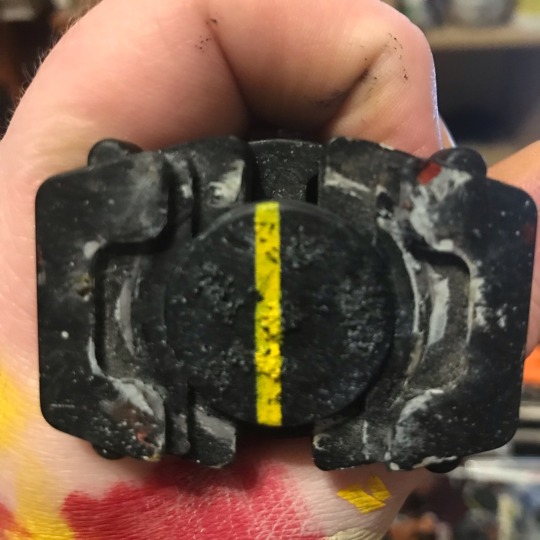
STEP 4: Using some black and a fine brush, clean up the line, chip it as desired, and bring back any areas where the drybrush was too heavy.
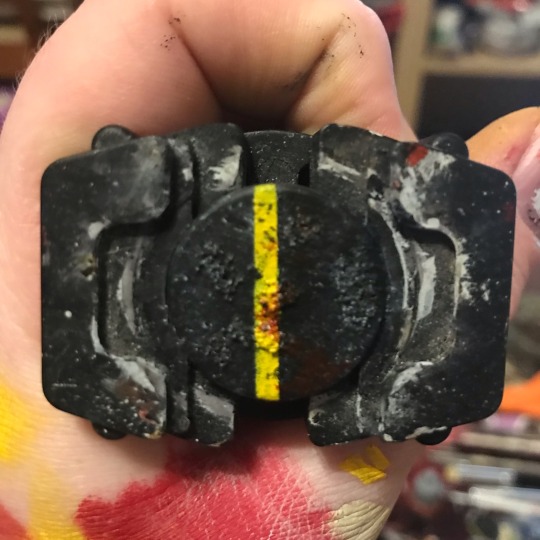
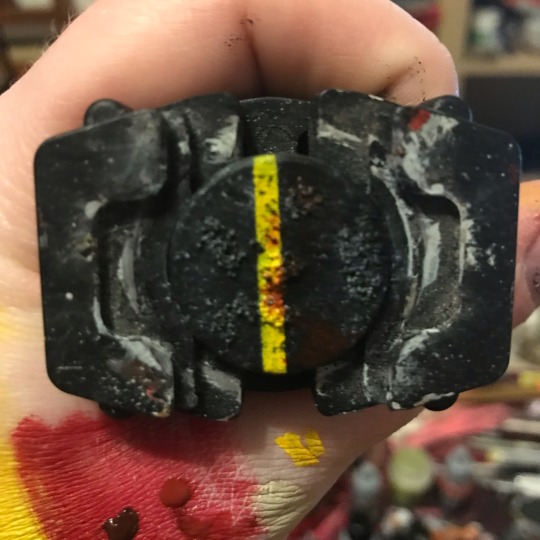
STEP 5: Using a heavily frayed brush, stipple on some Vallejo Dried Blood, followed by some Fresh Blood in the centre of the larger patches. And you're done!!
#miniatures#warlord games#miniature painting#project z#post apocalyptic#ultra modern#basing#parking lot#zombie
22 notes
·
View notes
Last Seen Blogs