#diy mending
Text
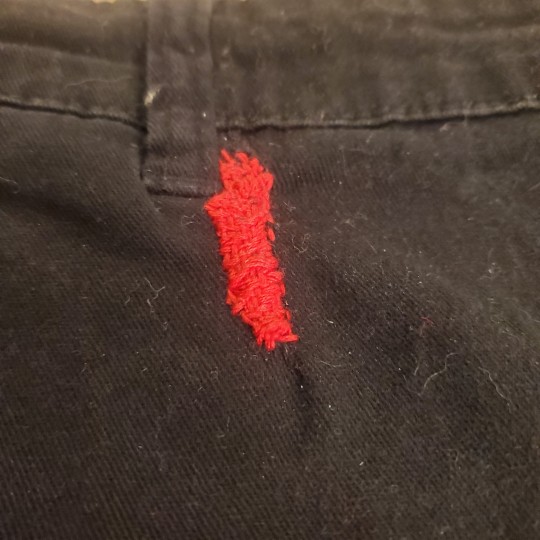

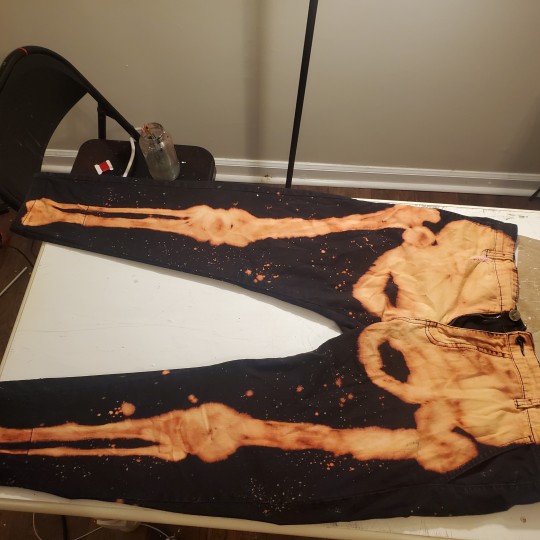

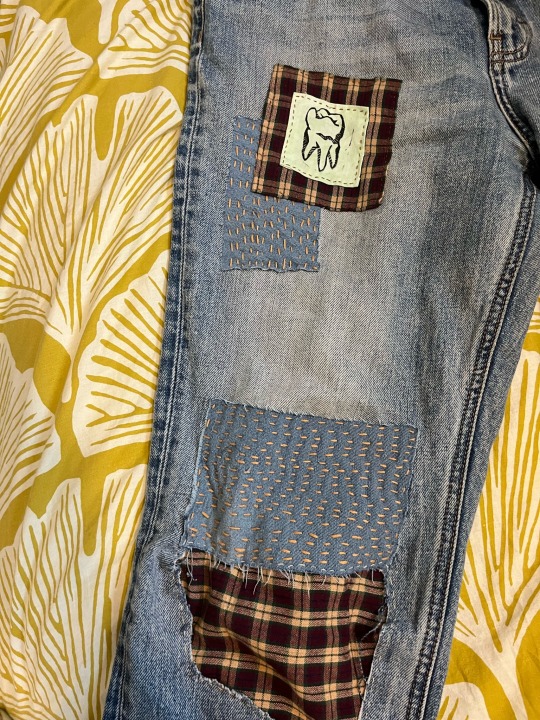
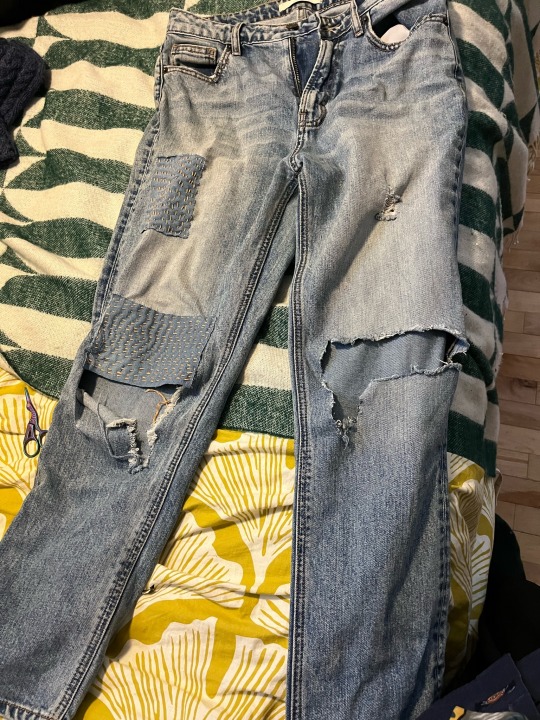
some visible mending on a pair of pants I also bleached to look like skeleton legs :) the first time I've ever done a patch like this.
285 notes
·
View notes
Text
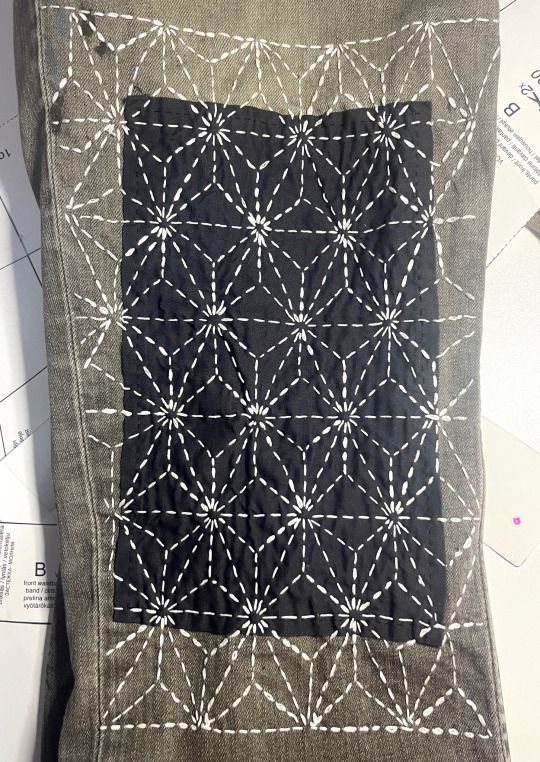
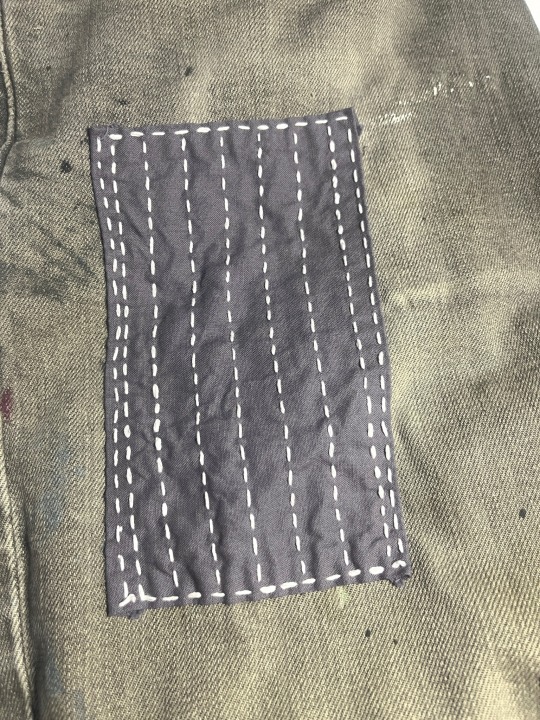
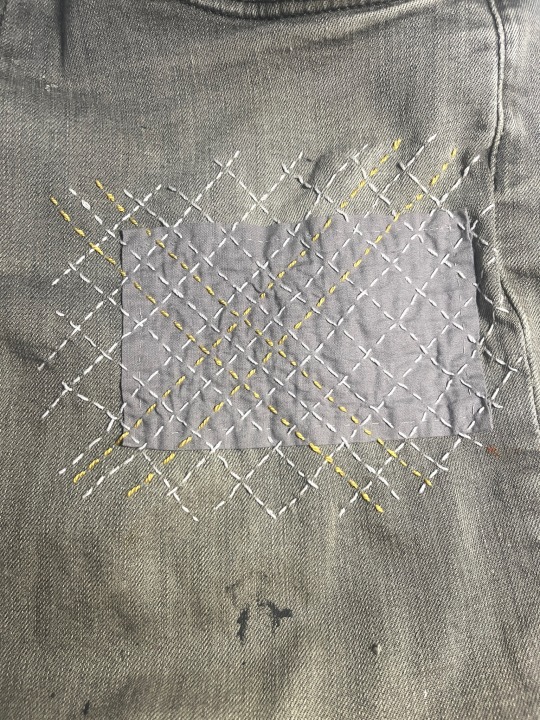
More sashiko inspired patches and mending!
I didn’t know that the traditional way to do a sashiko mend is to stitch the patch with the pattern and and then attach the patch to the clothing… but i still think it looks really cool! And it should still be plenty strong lol.
#sashiko stitching#sashiko#sashiko mend#visible mending#mending project#mending#hand sewing project#sewing project#diy mending#sustainable fashion
182 notes
·
View notes
Text

I repaired this sick ass digital clock I got from a thrift store very cheaply a few years ago. It's just a floating LCD panel and I think it looks so frigging amazing. (Really makes me think of that cool Dutch YouTuber, Posy, and his love of LCD panels. (And I'm like "hell yeah!! There's so much beauty in the mundane!!! Just look how frigging cool this clock is!!"))
Anyhoo, it wasn't working when I got it. Probably why it was so cheap.
It has a little on/off switch on the back, but nothing would happen when you flipped it, but sometimes if you held its solar panel under a very bright light the clock would turn on
...for one second
before turning off again
and then back on again.
Very rhythmically.
So there was still some life left in the old girl... somewhere... 🤔
Unscrew the back of it and have a look see.
Discover a pair of circuit boards, one of which has a cr2032 coin cell clamped onto it. Hooray, a Vital Clue!
Fortunately, I have one of those batteries lying around. A second spare from when I replaced the batteries in some Digimon v-pets.
So I replace it.
Aaaaand nothing happens...
:(
Next step: fully disassemble the clock to look for More Clues.
Discover that its LCD panel isn't wired in to anything. There's just a row of teeny tiny contacts along its base which press up against a matching row of teeny tiny contacts along its control board, held together by the frame of the clock and a kind of thin pink foam buffer ring around the contacts. Very cool!
(Like two mouths kissing but only one of them has any lips. 😆)
Examine the two circuit boards under a loup. Maybe there's a visibly-broken component!
(I hope there's a visibly-broken component, else I have to dig out my multimeter and start systematically testing them one by one)
(I hope there aren't any visibly-broken components. If it's the quartz crystal or one of the two capacitors, then I might be able to replace it, because those are regular-sized, through-hole, components; but if it's one of the surface-mount resistors then I'd have to scrap the whole clock, because I just don't have the tools, experience, or know-how to deal with those microscopic little guys... :/ )
There aren't any visibly-broken components. Phew, but also consternation, because now what?
But hmm, there are some teeeeny tiny white flecks of crusty residue here and there over the circuit boards... I guess the old battery must have leaked at some point?
I gently scrape them off with the tip of a very fine pair of tweezers and then reassemble the clock enough to test it.
(LCD panel & solar panel back into front-frame, control board back over them to hold them into place and make contact with the LCD; everything else [coin-cell daughterboard, piezo buzzer, and the user-input buttons] dangling free in the breeze Winnie-The-Pooh-style)
It turns on! It chirps out a happy little song of high-pitched beeps!! It blinks "12:00" at me!!!

I fully reassemble the clock with a song in my heart and set its time and date.
Goddamn this clock looks so cool. 🥰
6 notes
·
View notes
Text

#crafts#crafting#mending#diy#sewing#embroidery#sashiko#visible mending#coworkers misunderstand and try to chastise me for being too humble when i argue with them for saying the top thing#so i made a meme about it#inspiration#?
19K notes
·
View notes
Text
Idea: sew some cute little moths with scrap fabrics and sew them on holes you have on your clothes so you can keep wearing them :)

#diy#sewing#visible mending#textile art#DIY culture#diy punk#sewing ideas#craft ideas#eco fashion#reduce reuse recycle
22K notes
·
View notes
Text

Shrimps is bugs.
#embroidery#hand embroidery#diy#shrimp#shrimps is bugs#sewing#shitpost#shitpost embroidery#shitpost sewing#visible mending#solarpunk#bucky crafts#bucky sews
3K notes
·
View notes
Text
Part 1 of my mending series! I embroidered the edge of the right pocket!
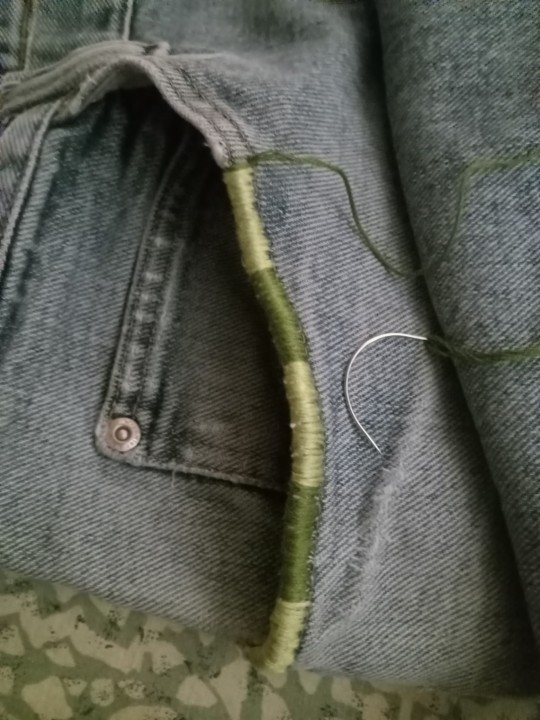

This alone took a while so I'm definitely taking my time with this project lol. But I'm making progress :)
I think I'll use browns or maybe blues for the left pocket for asymmetry and then next I'll tackle the waist band. Idk yet we'll see
[Image ID: two pictures of the right pocket on a worn out pair of light blue jeans. The top edge of the pocket is reinforced with light green and dark green embroidery thread and it alternates in-between the colors. Each block of color is about an inch long before it changes to the other color. The first image shows when it was almost done with the needle in the frame and the second image is the finished product. End ID]
#trash pants: reborn#solarpunk#solarpunk fashion#solarpunk aesthetic#punk#punk fashion#hopepunk#ecopunk#sewing#embroidery#mending#visible mending#sustainable fashion#sustainability#diy#solarpunk diy#punk diy#hatchet mends things
722 notes
·
View notes
Text


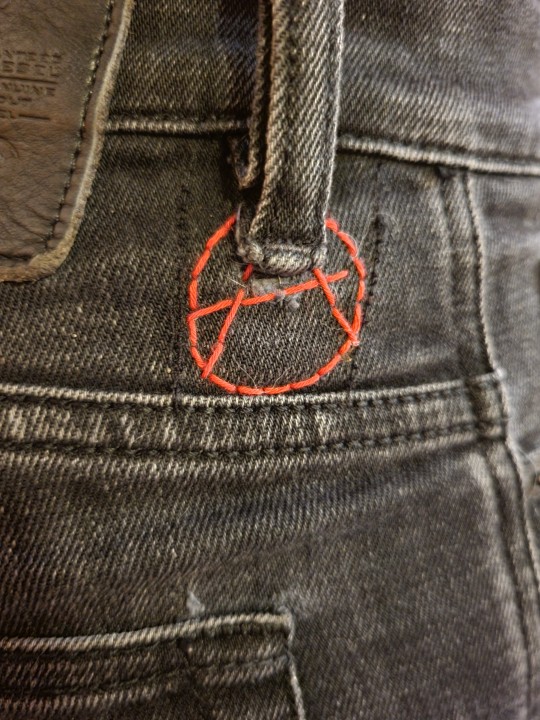
Finally got around to finishing this visible mending project from this fall.
#solarpunk#printmaking#punk patch#punk#diy fashion#blockprinting#punk patches#diy punk#patches#solarpunk fashion#eco fashion#visible mending#mending#clothing repair#sewing
581 notes
·
View notes
Text


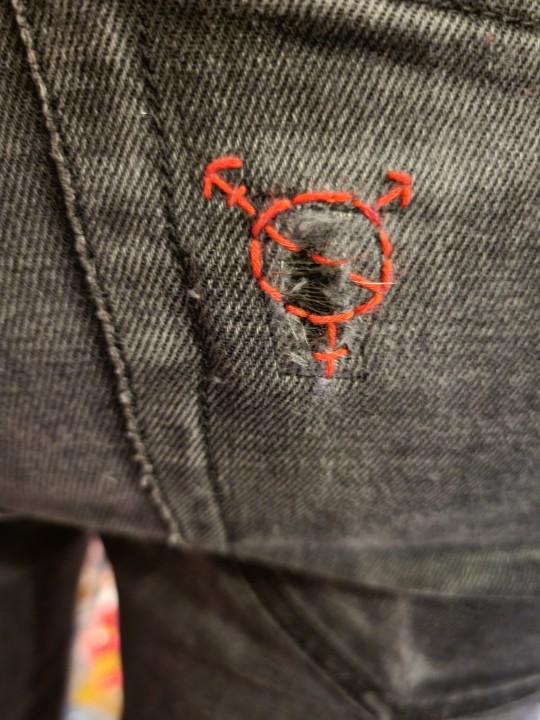
I repaired my jeans with a bunch of embroidery! The knee is done with sashiko and is a lot stronger now, I think I'll go over the back of all the embroidery with fabric glue to hold it in place since I wear these on a regular basis. (ID in alt)
452 notes
·
View notes
Text
My DIY ripstop worked!
Inspired by ripstop fabric, and by the idea of reinforcing stuff before it breaks, I machine-sewed a little grid along the inside part of the jeans where they always wear out first.
Tonight I was venting about an awful group project to a friend and I draped myself dramatically over the couch and felt something rip a little.

Look! The rips stayed inside their little squares. Look how small it is! Look how easy it'll be to mend!
Ok actually since the fabric's been fading and the thread now looks really dark, I'll probably unpick the grid and sew it again. I'll do thread a shade lighter than the fabric currently is so it'll still match as fading continues.
#diy ripstop#cj sews#solarpunk#sewing#diy#it's not waste until you waste it#beginner sewing#visible mending#mending#ripstop
638 notes
·
View notes
Text
Patching up some holes in my sweatshirt
The holes are patched with beetle patches
#punk#diy#patches#diy patches#patch pants#patch hoodie#mending#mending clothing#upcycling#crust punk#diy punk#beetles#beetle patch#bugs#mending tiktok
2K notes
·
View notes
Text
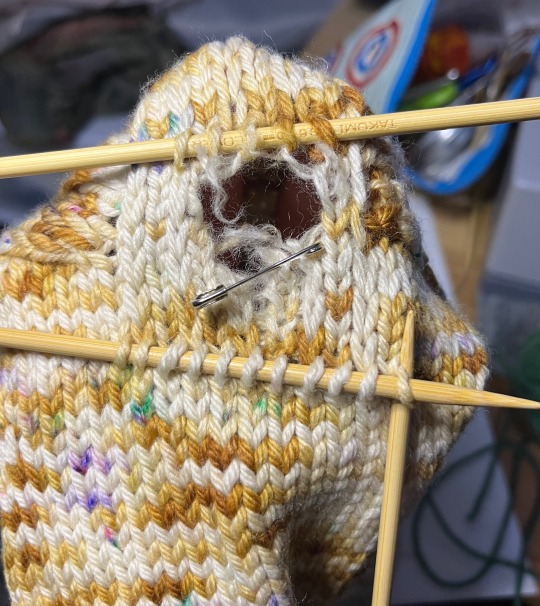
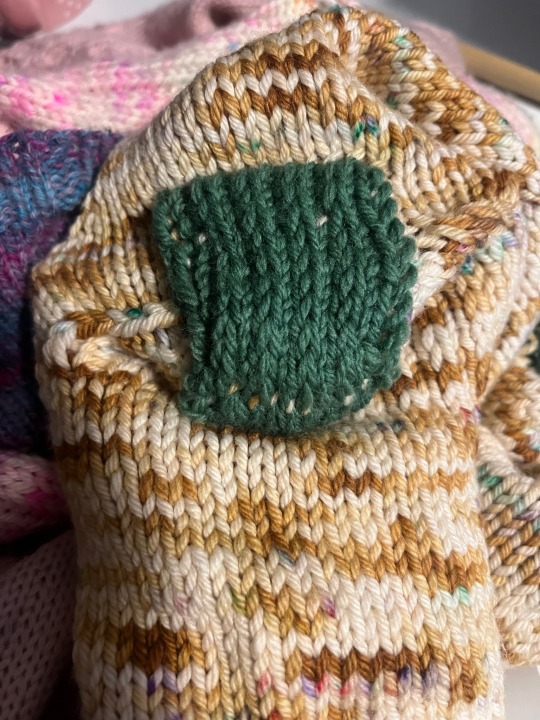
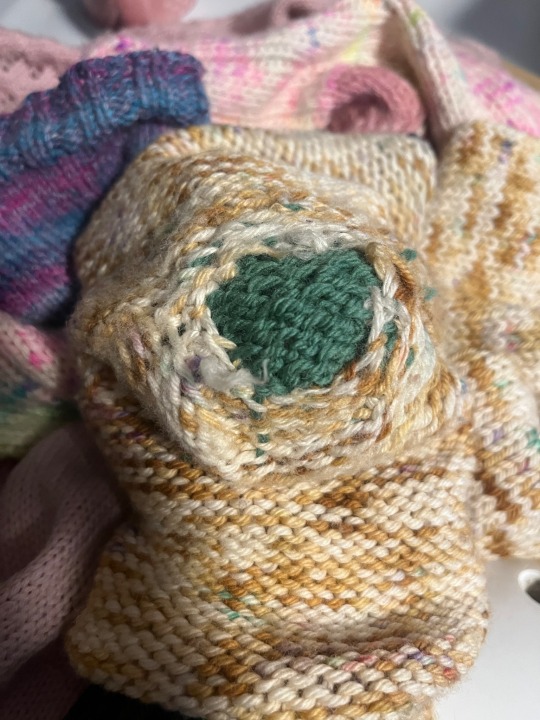
Tried out a new kind of mending patch for knits! You just… knit a patch right over the hole. I think it turned out quite well, and I hope it holds up well. Very quick to do!
#mending project#diy mending#visible mending#mending#mending socks#mended clothing#hand knit socks#darning socks#darning
15 notes
·
View notes
Text
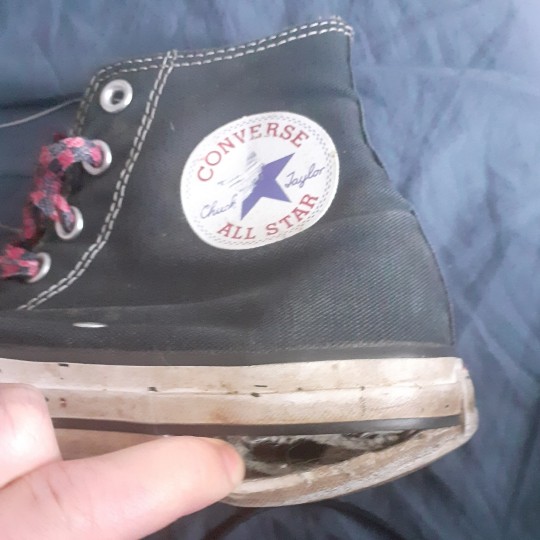

Since glue stopped working a while ago I pivoted 2 floss.... Is there anything she cant do?
#diy or die#visible mending#ik that might not be the usual thing in the tag but whatvr lol#also im slightly interested how horribly wrong this is from a shoe professionals perspective. not enough 2 look up proper technique tho#youd think after 9 years id be willing to part with this pair but absolutely not#also this destroyed my hands and i nearly broke a needle but it is what it issss#oh also. forgot more tags#diy punk#diy punx
150 notes
·
View notes
Text
Now that Pixie's out of her bitey puppy phase, I'm fixing some of the shirts she bit holes in.
This the sleeve of one of my flannels:

Gonna do a bit more of this pattern and color on a big hole in the shoulder and another small one on the back.
The backing material is 14 count cross-stitch Aida (to keep the geometrics geometric), and the thread is 2 strands of embroidery floss. Still gotta wash the starch out because it's stuff as hell right now.
The pattern came from an image search for geometric embroidery designs. It's a lot bigger than this, but I only needed the center piece for this one.
168 notes
·
View notes
Text

Got around to darning the holes in my sock heels! Now they're ready to wear in my favourite boots next winter too.
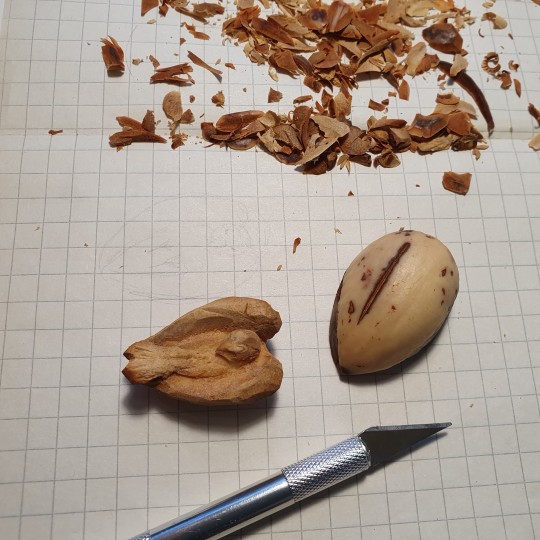
Also tried carving avocado pits! I let it dry for a few days, cut it in half and used a crafting knife to carve a lil bird. Nice and soft to sculpt!
#craftsofsiri#mending#fiber arts#knitting#solarpunk#avocado#carving#miniature#crafts#solarpunk crafts#diy crafts#diy
150 notes
·
View notes
Text


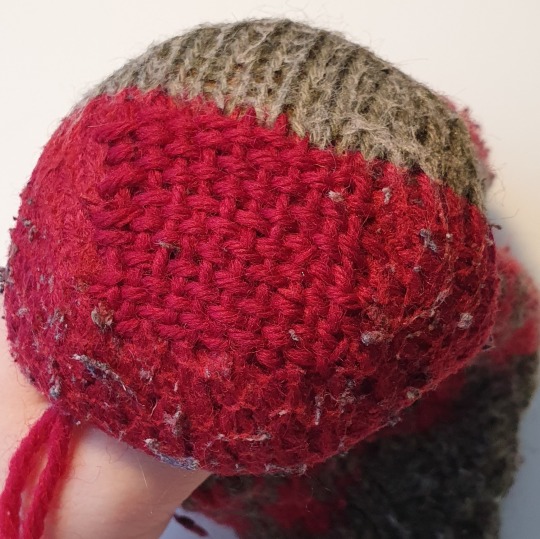
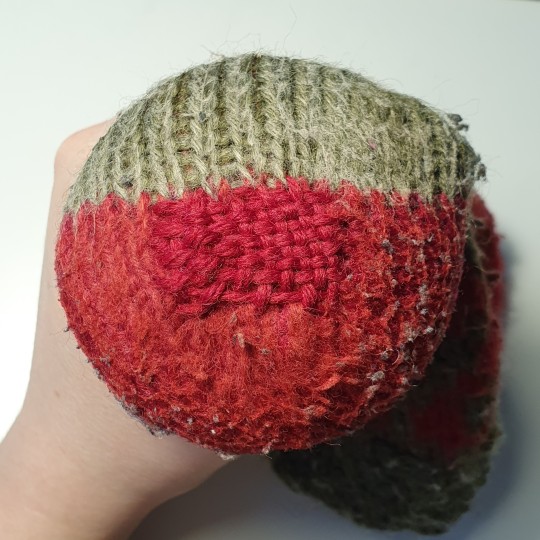
This flannel coat was found on a neglected campsite that hadn't been touched since 2019. It was on a log beside an old firepit- the original owner must have left it there by accident. It was rotting away, and so gross. As I was canoeing back towards home, my canoe capsized, soaking the coat in water. It weighed like 20 pounds, full of water and dirt. After 2 washes, I could finally start to assess the damage. The right front bottom corner had essentially disintegrated, the snaps had fallen off, the cuffs did not exist, and it was covered in damaged fabric and scorch marks. Lots of darning, embroidery, and patches have helped rebilitate this guy. The back is looking a bare and I've got a plan for that, but for now it's wearable!
The vibes are reuse and the importance of pollinators in our ecosystems.
196 notes
·
View notes
Last Seen Blogs

yourdearoldfriend
Just a girl who's in love with~

lindseyoulater-blog
(pronounced lins see you later)

hotashellstrom
dance with me

dedahblog
Personal blog

thirdxporsche
This is a mess but so are you