#averland
Text
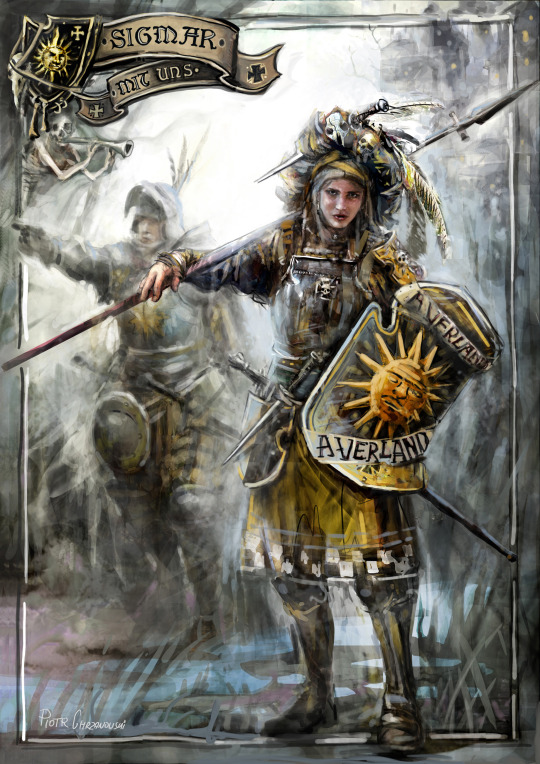

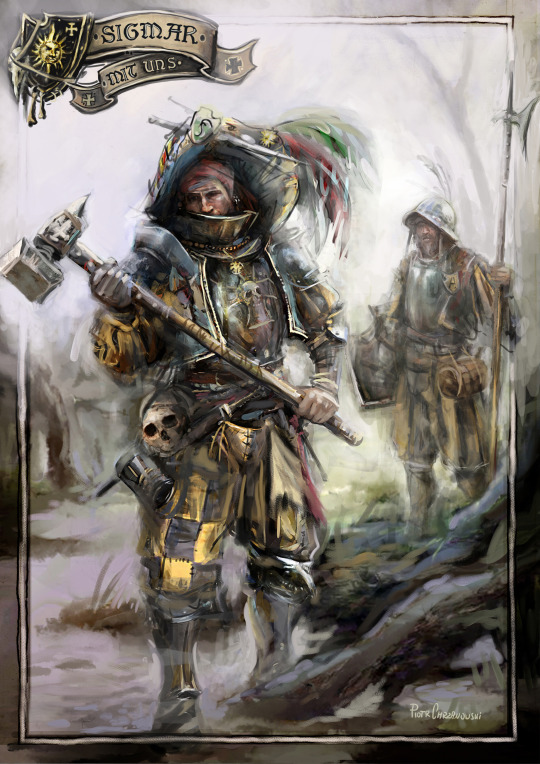


Warhammer Empire fan art. Averlanders. Illustrations made for LARP group Sigmar mit Uns: https://www.facebook.com/groups/100445717072332
#Warhammer#empire#wfrp#averland#landsknecht#characterart#conceptart#fantasy#game#gameart#characterdesign#medieval#mercenary#rpgcharacter#warhammer empire#sword#knight#swordsman#warrior#spearmen#illustration#painting#rpg game#game design#game art#digital 2d#2d illustration
201 notes
·
View notes
Photo

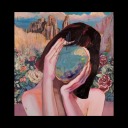
New Icon for my lovely significant other @imperium-of-vibes ,they’re previous icon was quite old and this one better reflects their interests, they’re very into Warhammer and miniature painting right now
[Photo ID: a Woman in Imperial Greatsword uniform in averland clours blck and gold leans against her sword in the foreground. The background consists of grassy fields leading to a mountain range. The sky is sunset turning from gold, to orange, to pink, to purple. The sky is starry. End ID]
#Warhammer#Warhammer Fantasy#Averland#Empire of Man#Fantasy#Greatswordsman#Digital Art#This was great practice for so many things i dont usually do like a more painty style backgrounds and metals#The armor turned out really well for someone whose never done armor before lol#And i personally really like how the sunset turned out
18 notes
·
View notes
Text
Averland is the most autistic Imperial province
#Averland#Warhammer Fantasy#Warhammer The Old World#Come on read their description and tell me it doesn't fit#I'm starting the propaganda early before I get a bunch of TOW stuff for the Empire
1 note
·
View note
Text
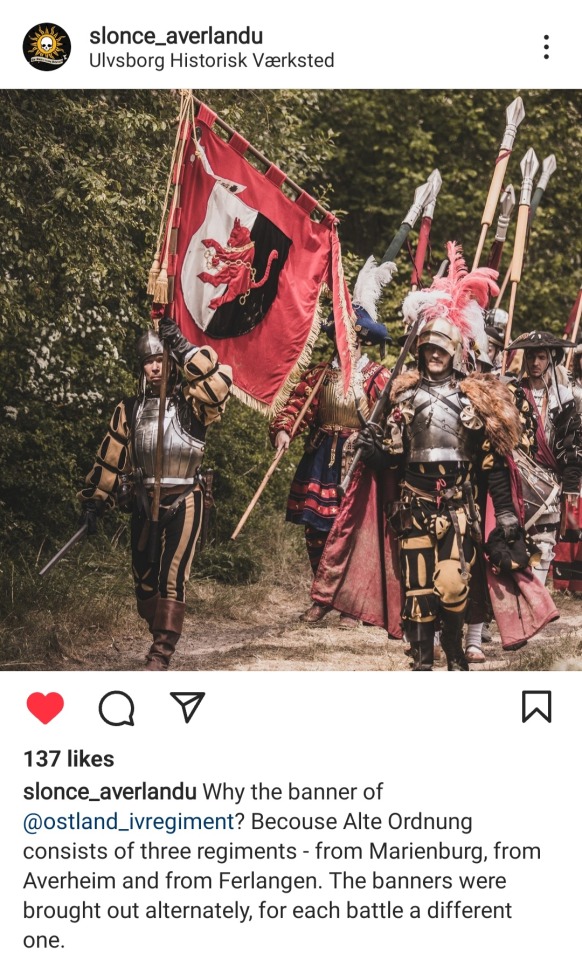

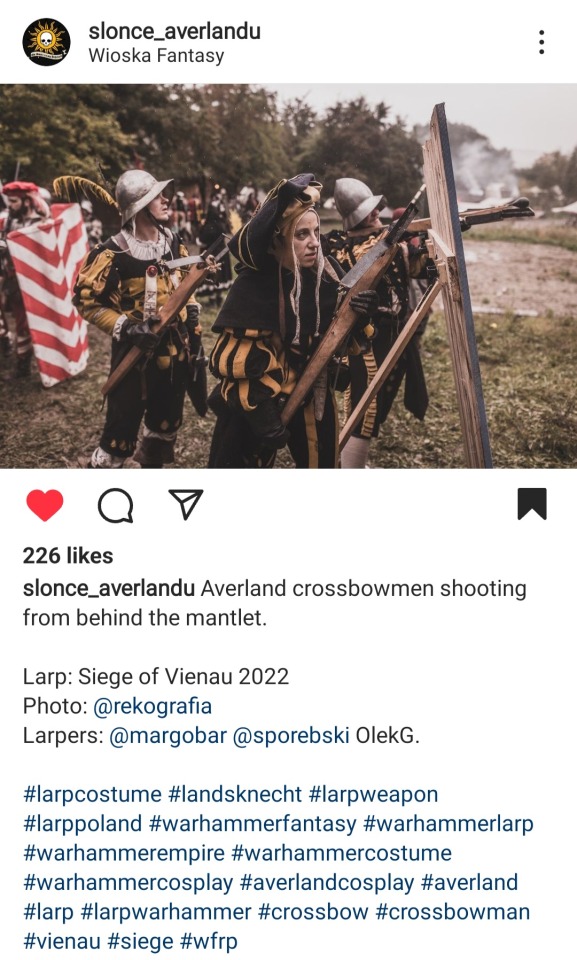

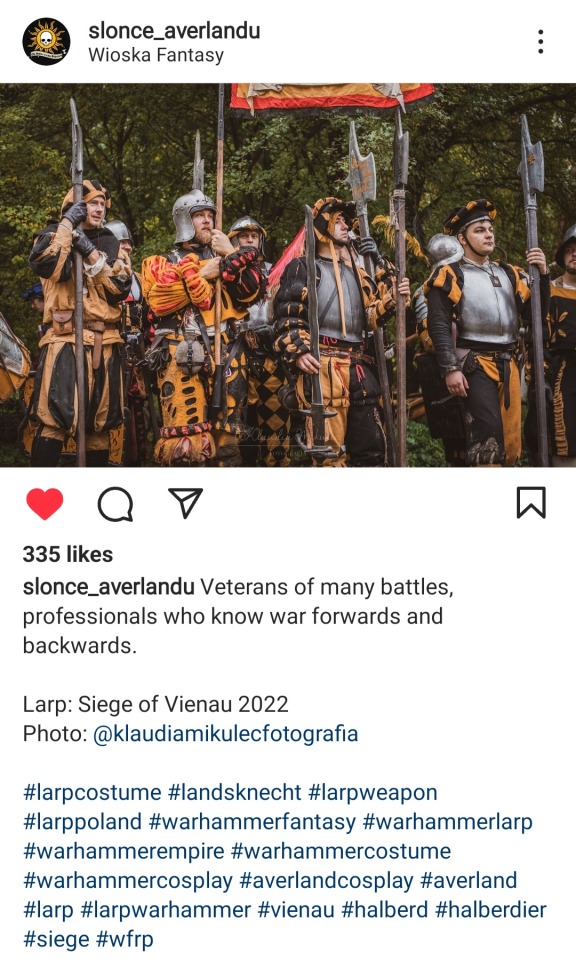
Deeply jealous of the supremely dedicated polish warhammer fantasy larp community
11 notes
·
View notes
Text
Okay I lied I ate some dinner and took a breather and I don’t hate this little dude anymore

#not ghost#warhammer 40k#plague marines#I was just being unfair he’s trying his best okay#the Averland sunset or whatever tf I used to hilight the pustules is rad#I love that I get to say the phrase highlight the pustules
5 notes
·
View notes
Photo
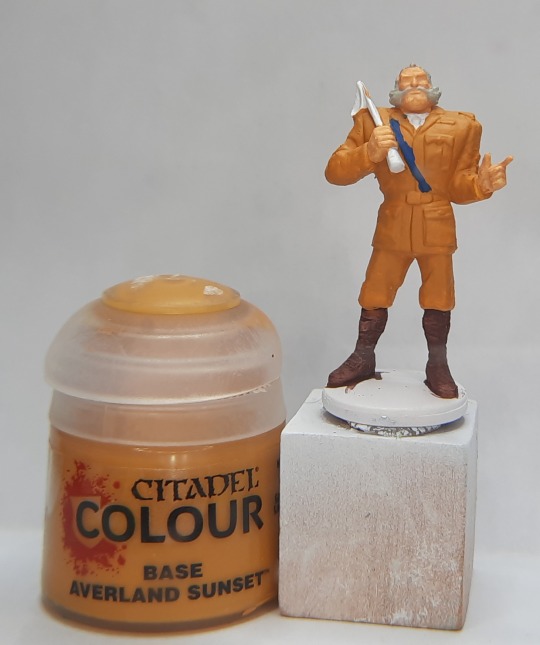
Base painted Colonel Mustard. Trying to get into the habit of taking phots after the base paint with the color I used in case I can’t remember later because that happens a lot to me. I already forgot what color his boots are.
For the most part, I use Vallejo Model Color but this shade of yellow has such better coverage with Citadel Colour there is no comparison. He’s gonna look awesome.
https://www.ebay.com/usr/willowwind78
#Clue#Clue Master Detective#how not to paint miniatures#miniature painting#citadel colour#averland sunset
3 notes
·
View notes
Text
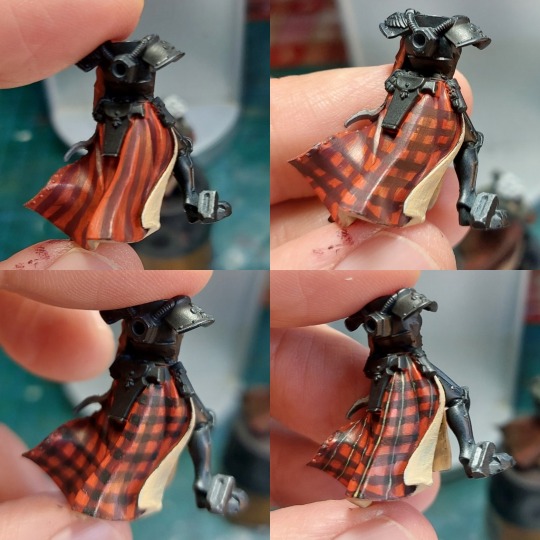

Painted another corpse fanatic today, so captured the process if some of you were interested. Yes, I still need to finish the base.
1. Base coat in scarlet/ rhinox hide mix
2. Black / khorne red stripes
3. As before, but make a lattice.
4. In the cross sections paint a black square.
5. A thin line vertical of Averland Sunset and white. I do this a bit bold, don't worry we'll knock em back in a bit.
6. As before, but horizontal
7. Using black, create a thin lattice in the scarlet boxes, vertical and horizontal.
8. Get brave. Apply a coat of matt varnish. Let it dry and cover in AK Streaking Grime. Let this dry and with a brush and white spirit brush to the bottom of the model.
9. Apply an oil wash of black and brown. As before let dry and dab off.
You're done. Add pigments if you like for extra dirt.
Full credit, I adapted my process on this tutorial by @kujopainting
youtube
85 notes
·
View notes
Text

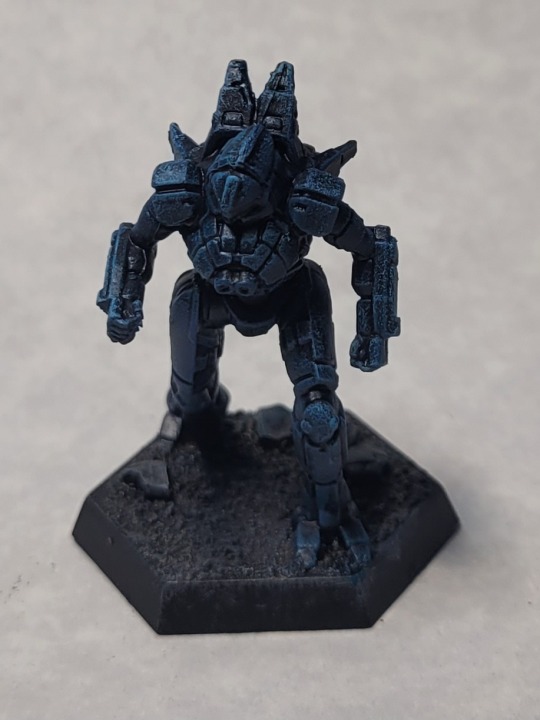
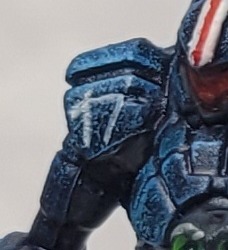
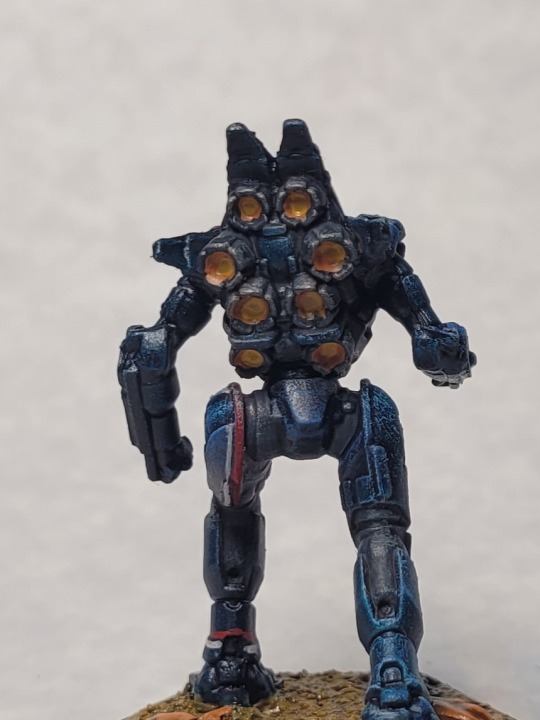
Getting back into the swing of doing paint tutorials- I pulled a Spider out of a salvage box and I figured I'd do a quick and dirty davion scheme! This is the parade paint job for the First Davion Guards, AKA quintessential battletech 'good' guy mechs.
Paints you will need:
Black primer
Dark grey (citadel mechanicus standard grey)
Light grey (citadel dawnstone)
Off white (army painter spaceship armor)
Red (citadel mephiston red)
Light blue (citadel baharroth blue)
Green (citadel warpstone glow)
Gun metal (citadel leadbelcher)
Silver (citadel rune fang steel)
Dark wash (citadel drakenhof nightshade)
Citadel akhelian green cintrast
Citadel blood angels red contrast
Things you might want
Khaki (citadel zandri dust)
Fleshy orange (citadel ratskin flesh)
White (army painter matt white)
Dark green (citadel Caribana green)
Light red (citadel evil sunz scarlet)
Yellow (citadel averland sunset)
Black (army painter matt black)
Citadel aggaros dunes contrast

I started by basing my mini with my normal desert badlands basing scheme (paint base in glue, sprinkle on basing sand and let cure. Paint on more glue and stick down some aquarium gravel) and then priming the whole thing black with brush-on primer.
Once the primer is finished drying, load some of your dark grey up on a fat drybrush, wipe off slightly less than most of the paint, and then apply the remainder to the model in long up and down strokes. All of the panels should be grey, with some black showing in crevices and hard to reach recesses of the model. Next, repeat this process with your light grey paint, but wipe off more and apply less liberally- you want the darker grey color to remain in most places with the edges and raised details highlighted in grey. Finally, drybrush the model one last time with your off-white color only in the areas that will catch the light most like the head, torso, shoulders, the vectoring fins on the mech's back, and the outstretched left knee.
Now that the mech has been presented in greyscale, we can make it blue. Akhelian green is going to be doing the majority of the heavy lifting in this paint scheme- I find it to be a pretty easy contrast paint to work with. Apply it undiluted to the model, looking to spread it in a single coat like a thick wash, and then leave it to dry for 20 minutes. Afterwards, you might want to brighten the blue up in places as I did- drybrush on some light blue in the same areas you used off-white earlier.

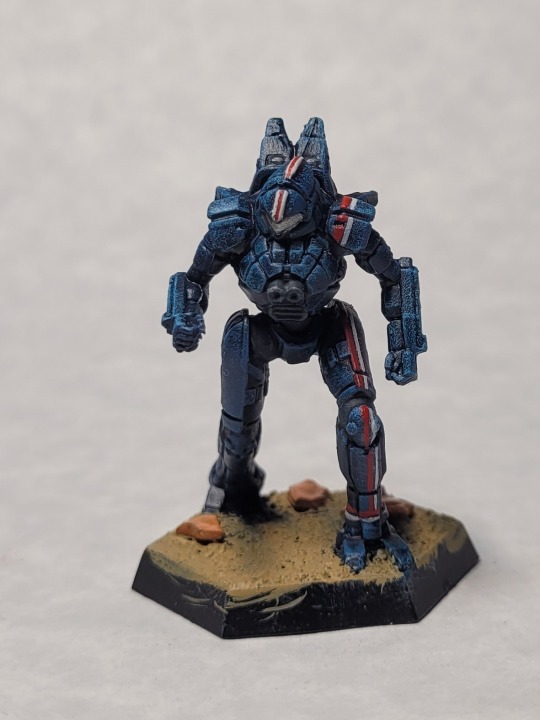
At this point, I got a little excited and decided to do the Davion stripes. Start with your red, pretty well thinned on your palet, and a thin detail brush. To make this easy on ourselves, we're going to look for vertical panels on the left side of the mech's torso and leg and basically connect all of those with a straight line. In the case of the Spider, the easy ones are the shoulder and that panel that runs down the upper thigh. Apply a thin edge highlight of red along those panels and then carefully continue the line down the rest of the leg, terminating at the ankle. If your hand is steady enough, run a thin line of red around the mech's ankle where the vertical line ends. Then, go back with your off-white and using the red line you made already as a guide, run a parallel stripe down the outside edge of the red (if you swap these battletech nerds will dunk on you online).
At this point, I also striped the ridge running down the Spider's helmet, but it's not super necessary.
Now that we've got our blue sorted out, we've got a bit of a 'draw the rest of the owl' step. First, you're going to want to go back over any of the parts of the model that you want to be exposed mechanical elements with your dark grey. I painted the joints in the legs, the shoulders, the lasers and the big vent on the chest, the 'chin strap' under the spider's canopy glass, and the jump jets in this color. Then, wash the grey with your favorite dark wash- I really like the deep blue of drakenhof nightshade but something like nuln oil will also work well for this. Finally, apply a light drybrush of your light grey to the shaded grey. If a part is too recessed to easily drybrush, you can leave it as is or do use a small brush to carefully highlight it. You should also add a small dot of green to the inside of each of the laser barrels at this point.
Next, paint the mech's canopy glass silver. Once that's dry, paint over the silver with blood angels red or any other colorful contrast paint for a vibrant metallic color.
If you're following along with my desert basing, paint the sand on the base khaki and the larger pebbles with your fleshy orange. Then paint over everything with agarros dunes contrast or a dark brown wash like agrax earthshade.
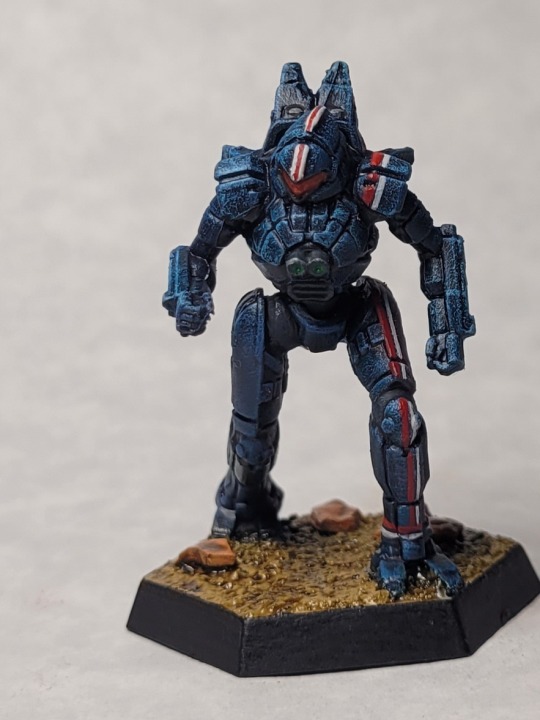
And with that you have a Spider that's fully ready for tabletop with 3 colors, shading, and a textured base. There's still a couple more things we can do if you have more time and patience that I'll detail below.
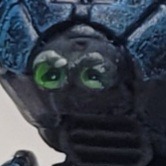
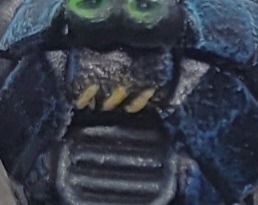
To apply some quick and dirty jeweling to the lasers, start by painting a half circle of light green on each barrel, focused on one of the bottom corners. Paint the recess of the barrel with a dot of dark green and put a tiny little dot of white opposite the half circle of green, which should now be more of a crescent shape with with dark spot in the center.
While the white is still in your pallet, you can also highlight the parts of the off white stripes on the mech most exposed to overhead light like the lower thigh, knee, and shoulder. Do the same thing with the red stripe using a light red as well.
At this point I also added unit numbering to the mech's shoulder. Basic numbers are a really good way to practice your fine control and I try to consistently add a couple to each of my projects. Use your off-white well thinned and a fine detail brush, lock your hand holding the model against your hand holding the brush just below the wrists, and then draw the paintbrush 'downwards' with a pulling motion. This should keep you your line relatively straight and fine.
While you can keep the jump jets on your mech dark I prefer to paint mine with some orange in them. Using the fleshy orange from earlier, paint most of the interior of each jump jet, then add a dot of yellow at the very deepest recess of each one.
Finally, let's add some hazard stripes to the mech. Pick out a few areas near joints or vents that seem like a bad place for an Astech's hand to go and paint in a thick 'edge highlight' of black. Then, going back to yellow find the center of the line and add a diagonal tickmark there. You may need to go over this more than twice to get a strong color depending on your yellow. Once your centerline is marked, work out towards the edges, painting another ticmark at regular intervals until you hit the ends of the Black.
#hobby#battletech#miniatures#mini painting#battlemech#mecha#mechwarrior#mech#light mech#spider#first davion guards#house davion#painting tutorial#tutorial#c&c pls
35 notes
·
View notes
Text
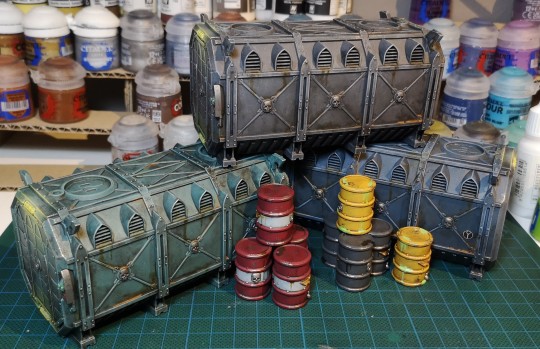
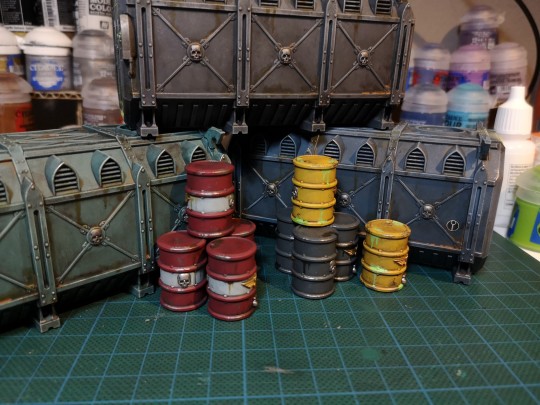
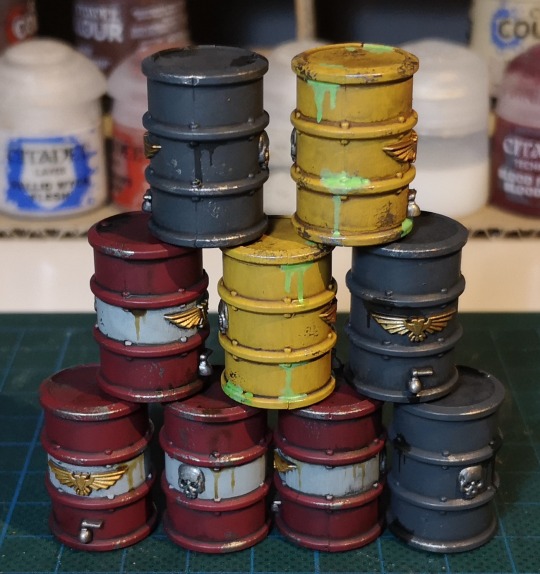
Painted some barrels!
Some said painting yellow is hard but for whatever reason the grey ones gave me much more trouble to look good. Primed them in Wraithbone then i used 2 coats of Averland Sunset and a extra tinned coat of Reikland Fleshshade and the yellow looked fine! The grey too 4 coats of Eshin Grey before i said you're gonna be Skavenblight Dinge instead and that did cover properly. Paints are weird mkay :)
Also an oil wash to grime them up like the containers had
the radioactive leakage is done with Moot Green with any white paint and then a layer or 2 of Vallejo green fluorescent paint.
#miniature painting#warhammer 40k#Idk what tags to even use lmao#Them be barrels yknow :)#Munitorum Armoured Containers#And armored barrels too I guess!#Leaky armored barrels#Wargaming terrain#Now that's a proper tag to use!#Have a nice day to whoever is still reading this rambling <3#And the rest who didn't read this too I guess *rolling eyes emoji*
29 notes
·
View notes
Text
Apothecary is done.


Now with the Biologis.
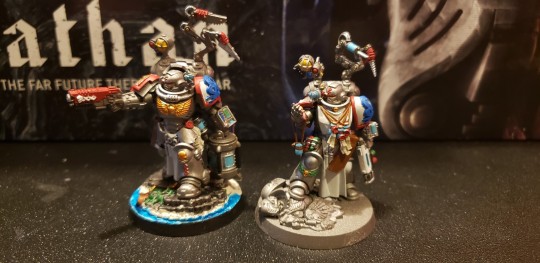
I'm especially pleased with how the geneseed in his hand came out. Painted it in ulthuan grey, did a one to one mix of white scar and mephiston red and made a very fleshy pink color, then dabbed some averland sunset. First time mixing colors too.

6 notes
·
View notes
Text
Idk if anyone's interested, but here's how I did my volcanic tyranids:
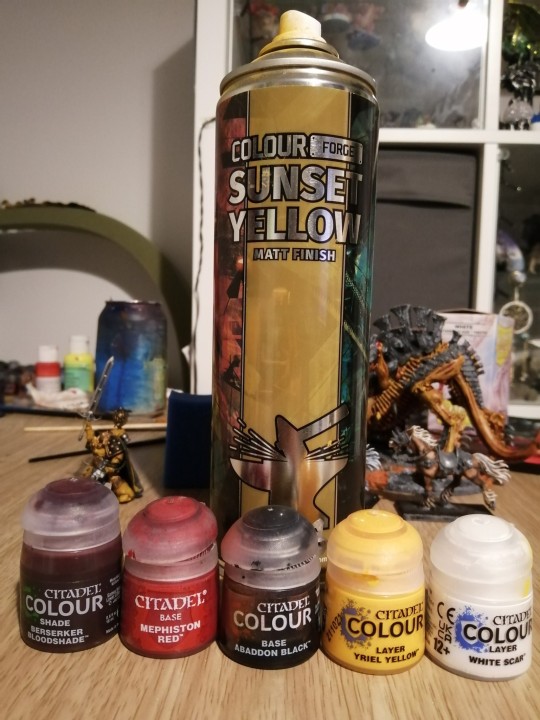

- base spray with colour forge sunset yellow (colour match of the citadel averland sunset)
- paint vents, joins, and all that with mephiston red
- apply texture paint to carapace/armour/chitin. And paint talons, claws, etc with black
- drybrush texture and black areas with white
- apply berserker bloodshade to all yellow/red areas
- highlight/drybrush flesh with yriel yellow
- paint eyes, teeth, and fix up any mistakes
For the texture paint: I make my own, inspired by MidWinter Minis
I simply get some sand (thankfully I live a 40 min walk from the seafront) and add some PVA, black acrylic, and white acrylic. Good texture! It takes ages to dry, I usually leave it overnight. Can have a tendincy to peel off, but I haven't had any major issues with it yet.
Ngl, MWM kinda inspired using the texture on models. Guy's vids also kickstarted my love for making bases.
#exkn jackal#one of jackal's many blog posts#warhammer#40k#warhammer 40k#wh 40k#tyranids#mini painting#minatures#mini#miniature painting
107 notes
·
View notes
Photo
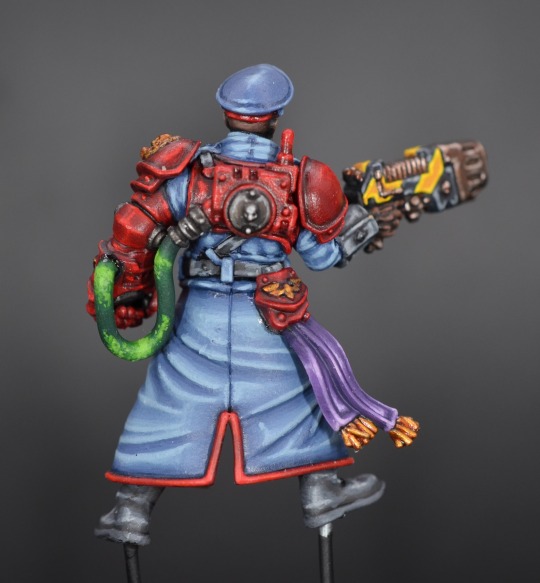

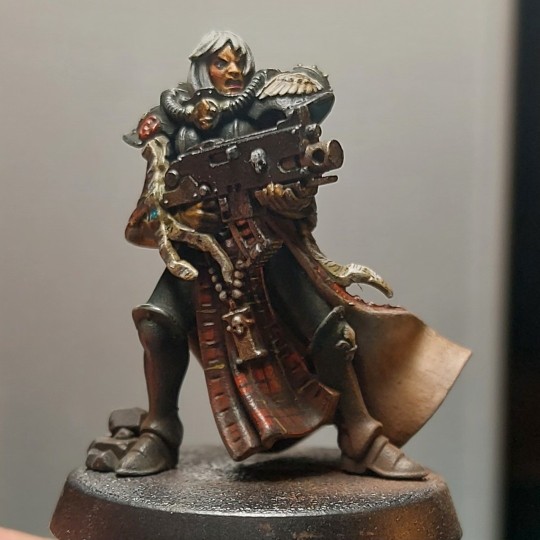
All paints are Citadel unless otherwise stated.
Uniform:
The Fang
Russ Grey
Fenrisian Grey
Leather (Straps/Boots/Wrist):
Mechanicus Standard Grey
Nuln Oil
Dawnstone
Administratum Grey
Armour:
Khorne Red
Incubi Darkness
Evil Sunz Scarlet
Wraithbone
Flesh Tearers Scarlet
Tubing:
Caliban Green
Warpstone Glow
Moot Green
Ice Yellow (Vallejo Model Colour) - this can be Dorn Yellow
Silver:
Leadbelcher
Nuln Oil
Thrash Metal (Scalecolor 75 Metal&Alchemy)
Gold:
Retributor Armour
Reikland Fleshshade
Yellow Gun Casing:
Averland Sunset
Flash Gitz Yellow
Phalanx Yellow
Black Gun Casing:
Corvus Black
Mechanicus Standard Grey
Adminisratum Grey
Skin:
Rhinox Hide
Nuln Oil
Mournfang Brown
Cadian Fleshtone
Purple:
Naggaroth Night
Xereus Purple
Genestealer Purple
Dechala Lilac
#paintingwarhammer#warhammercommunity#warhammer40k#warhammer#40k#astramilitarum#imperium of man#imperial guard#killteam
33 notes
·
View notes
Text
WIP WEDNESDAY
Put paint to plastic today.
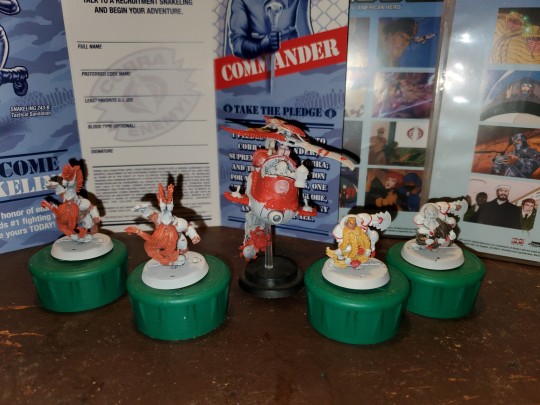
Colored in the skin on the Blitzers with Bugmans Glow. (Its the olny flesh tone i own)

Did the same for the Slayers, and I painted their Mohawks and Beards in a mix of Averland Sunset and Evil Sunz Scarlet

Then I slapped some Evil Sunz Scarlet on the Deathcopter.

Not much, but its progress.
#warhammer#warhammer fantasy#homebrew#warhammer the old world#blood bowl#Aleniheim Angel Shares#wip#art wip#wip wednesday#miniature painting
5 notes
·
View notes
Text

Ran out of Averland Sunset Air before I could finish the first coat on the second rhino… I need a trip to Element soon
20 notes
·
View notes
Text
Thinking on it, even though the Empire is basically the Holy Roman Empire in a fantasy world, there would be more of a presence of sallet helmets among their ranks than morion style helmets.
BUT it is said in the fluff that the southern Elector states, mainly Reikland and Averland, are influenced in styles by Tilea and Estelia, places where the morion was a bit more common, so it would work for Altdorf Company of Honour to have morion style helmets in their ranks.
5 notes
·
View notes
Text
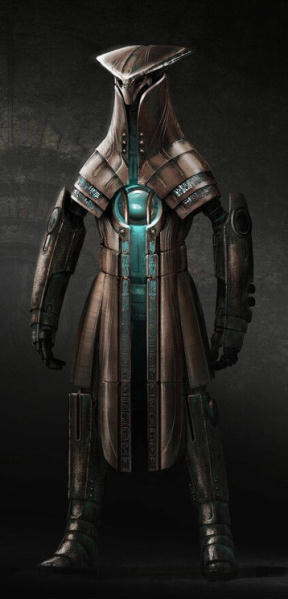
Zeffo Tomb Guardian
Ancient automaton Tomb Guardians protect the sacred tombs and crypts on the planet Zeffo from intruders.

Recipe:
3D print of a character designed in MakeHuman and articulated to 18 POA in Tinkercad
3D print of the head, forearms and lower legs of "Star wars Jedi Fallen order Zeffo Tomb Guard" by shaa3dens
material
3mm foam
Citadel "Balthazar Gold", "Ice Blue", "Averland Sunset", "Chaos Black", "Skull White" paints

2 notes
·
View notes
Last Seen Blogs
youngroyals-stuff
fanfic reader
inhum3n
MaDD Support

sagnit7-blog
Sin título

just-eula
Dance of the Shimmering Wave

kennldixon
Kenn Dixon