petesperlers
Pete's Perlers
Showcase of my Perler bead hobby. Message to order custom art!
19 posts
Last active 60 minutes ago
Don't wanna be here? Send us removal request.
Last Seen Blogs

akalei
Akalei

shadowofroses
Little Witch that Could

yeahimwiththeband
with the band

bvuchaki-blog
"BVU"

fantasienelcassetto
Fantasie nel Cassetto
Photo
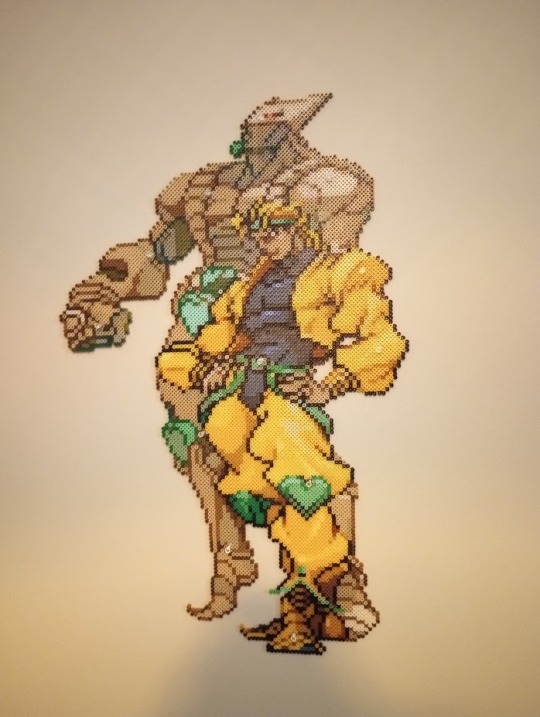
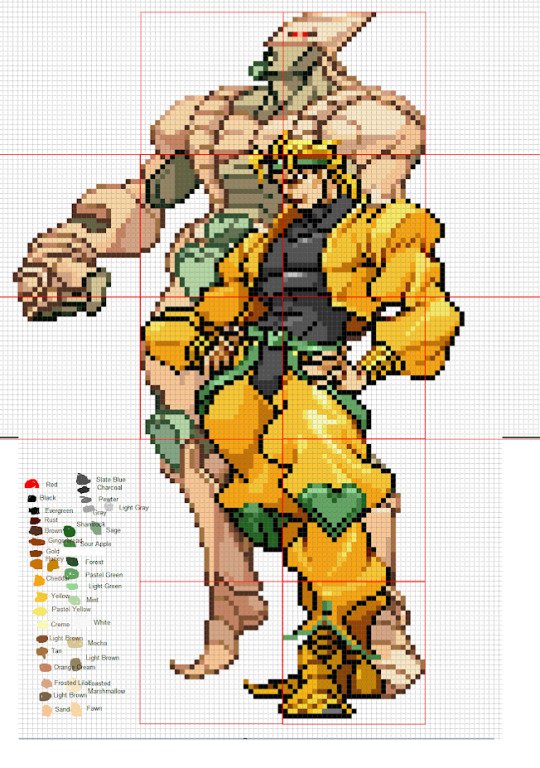

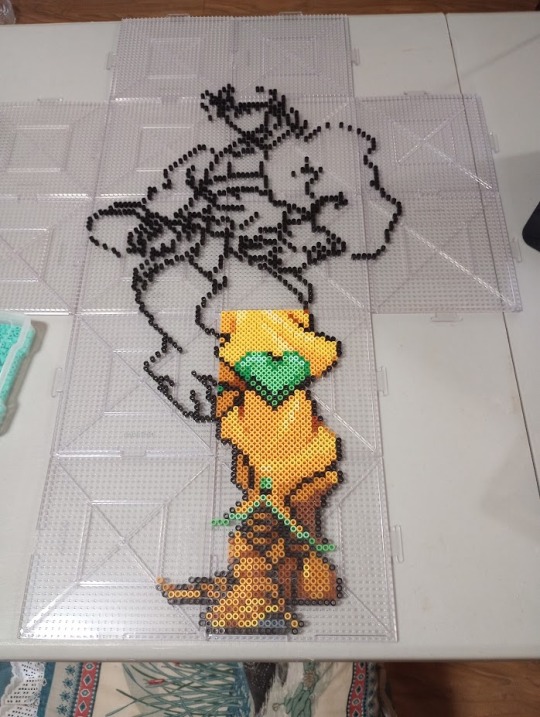

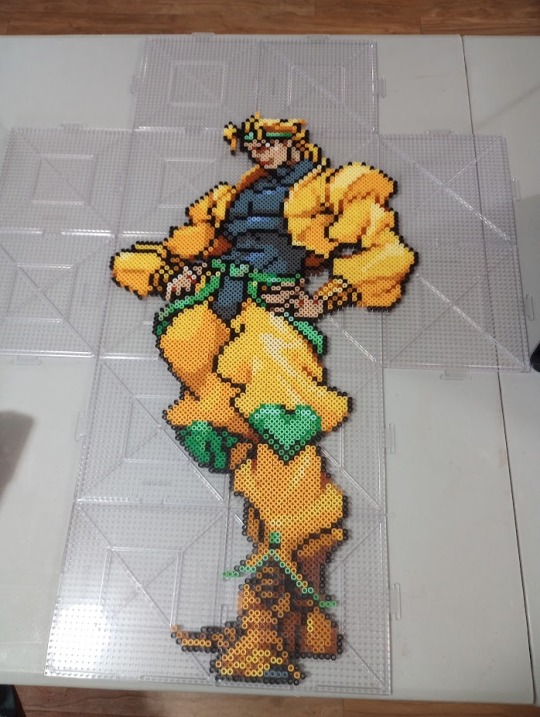

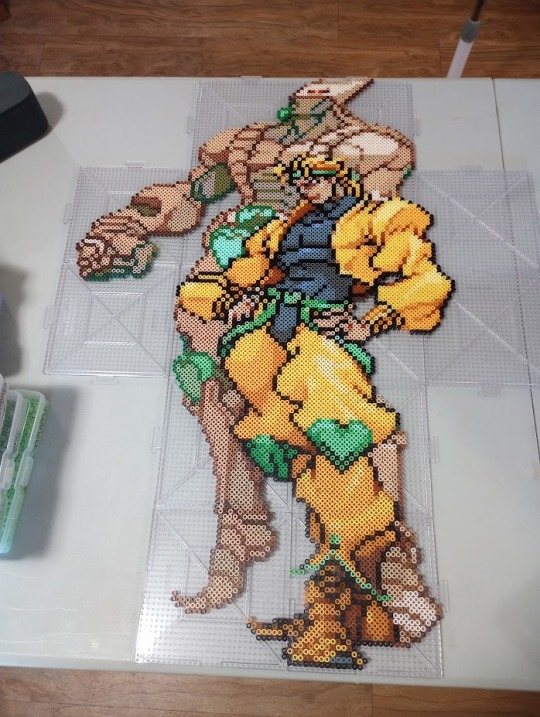
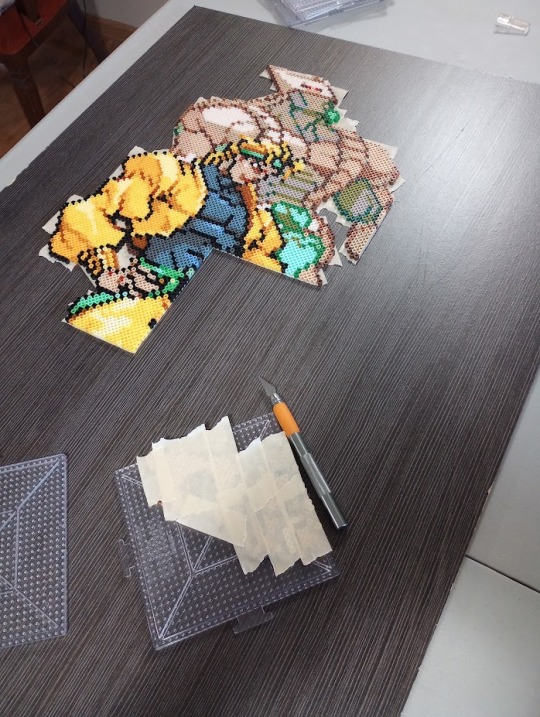
Here it is.... the biggest project so far! DIO and The World from JoJo’s Bizarre Adventure. The pixel art needed a lot of prepwork, and this is the first time I actually planned out where the pegboards would go. It’s a good thing I did, because I ended up with ONE BEAD of vertical clearance! I tried a new method for taping on this one by taking the pegboards apart, then taping and flipping one at a time. This saved a lot of headache, but added a new, unforeseen one! There are a few seams that didn’t like staying together when I was getting ready to iron. I also tried using hot glue to “spot fix” a few places after ironing, and I didn’t like the result of that. Other than that, I’m really happy with how it turned out!
27 notes
·
View notes
Photo


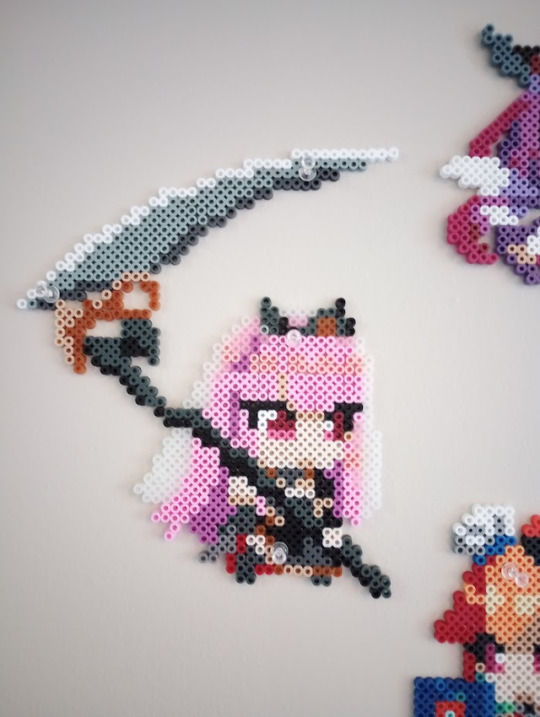
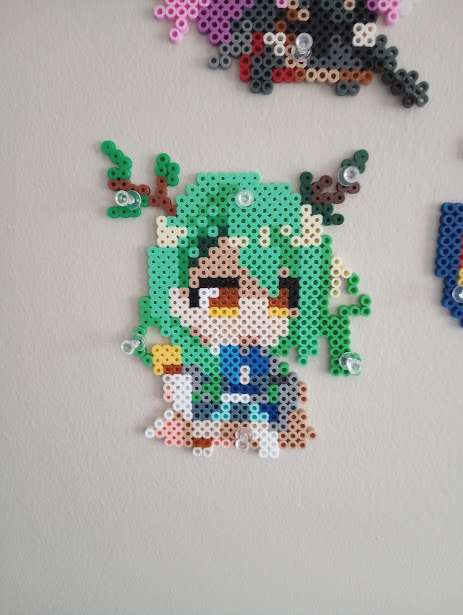
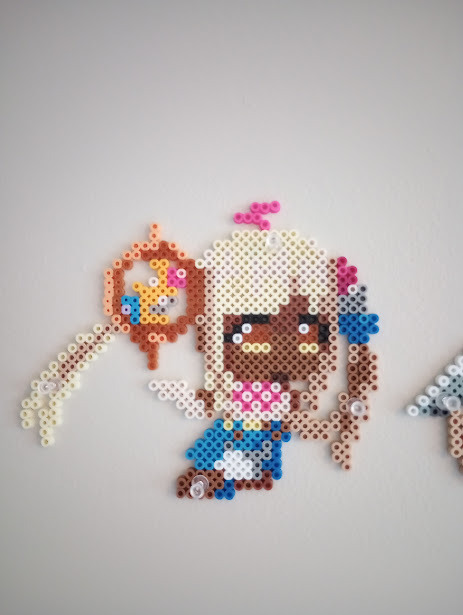
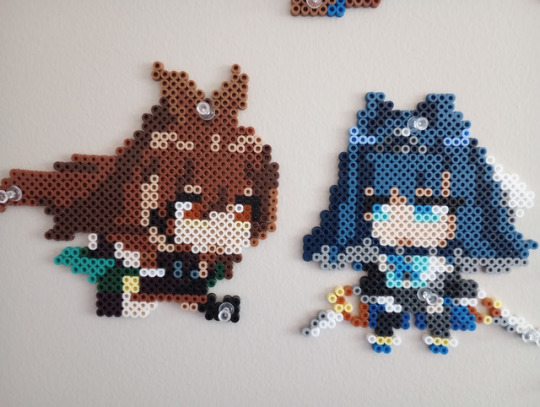
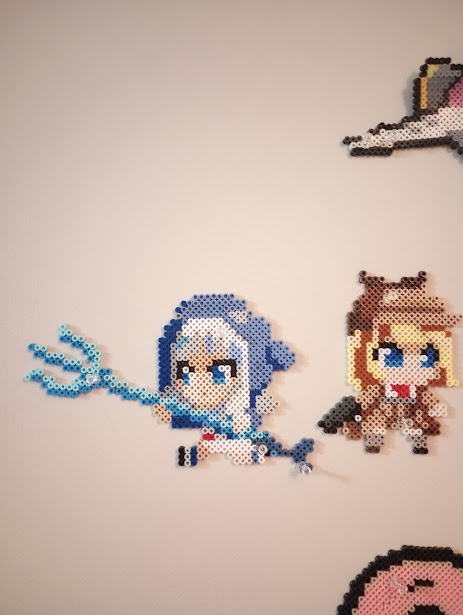
Here is the full set of the Hololive English vtubers! I didn’t even have to order extra beads for any of them, I’ve gotten to the point where my bead supply is broad enough to make most anything! Made June-July 2022.
#perler bead#perler art#pixel art#hololive#holocure#hololive en#holomyth#holocouncil#amelia watson#gawr gura#ninomae ina'nis#irys#hakos baelz#takanashi kiara#mori calliope#ceres fauna#tsukumo sana#nanashi mumei#ouro kronii
108 notes
·
View notes
Text
Just added another Hololive vtuber with Gawr Gura! Made in June 2022.
1 note
·
View note
Text

I’ve been having a lot of fun with the new HoloCure game, and I love the vtuber sprites in it! I’m going to try to make all of the characters in perler form, and I’m starting with Amelia Watson! Made in June 2022.
6 notes
·
View notes
Text
Perler Bead Commissions!
Hey, just a reminder that I can make Perler bead art for you! If pixel art exists for it, I can probably make it out of beads! I will ship for free within the USA, and I’ll split international shipping with you! I’m not really trying to have this be a major source of income, I mainly just want to be able to keep buying more beads and making things for people! I only have so much wall space...
Anyways, if you’re interested, check out my pricing here! (ps those are just rough pricing ideas if you want something custom I’ll do basically anything you want) You can email me at [email protected] or message me here on tumblr if you’re interested!
7 notes
·
View notes
Text
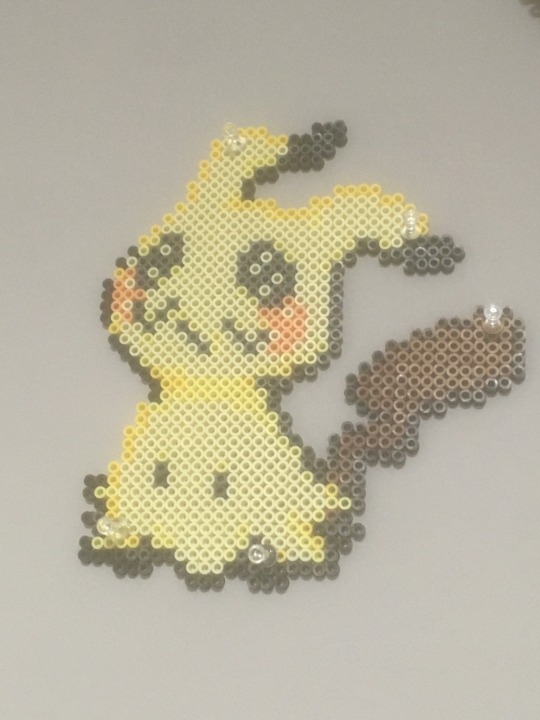
I was finally able to tear myself away from Elden Ring long enough to make another project! Mimikyu from Pokemon Gen 7! Made in March of 2022.
12 notes
·
View notes
Text


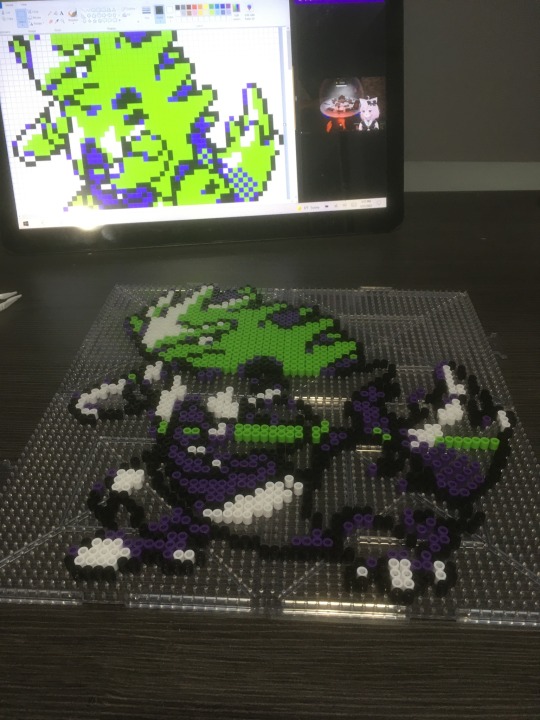


Here I’ll explain my process for a project this size.
1-3: The first few steps are easy, so I’ll group them together. I have a Pokemon sprite resource folder that I downloaded that contains basically everything from the game, and I just open it in Paint. Next, I turn grid lines on under the “view” tab, and then I resize the picture. If you have a small .png like this one, you should just be able to add a “0″ to the end of the pixel size and it will blow up perfectly so one pixel fits into one grid box. After this, I screenshot the sprite with the grid lines and blow that up, so I don’t have to strain my eyes so much to see what’s going on.
4-6: Next, I get to work beading. I do one color at a time, almost always starting with the black outline. Counting lines and positions of beads at this stage is super important to make sure everything lines up for filling colors in later on. I’m still getting the hang of the bead pen, but one I master it it’ll speed up beading by a lot. Instead of using a tweezers to individually place every bead one at a time, this could potentially let me get 10-15 without having to stop at all. I try to leave the biggest color until the end so I don’t have to worry about bead counting as much and can kind of just fill in the empty spots. (Also shoutout to Nyanners’ streams for being a good source of background noise during this part lol)
7: Next up is “mummifying” the art in masking tape. This is an optional step, but doing this means you’re not ironing directly on the pegboard, which will warp them. I know some artists just use a very low heat and leave them on the pegboards, but I want to keep mine nice.
8: However, this method doesn’t come without its drawbacks. I next need to flip the whole thing over, which is one of the more nerve-wracking processes. For this one, I picked it up like a pizza and quickly flipped it into my other hand, but some of the beads got jostled and I had to replace them without the help of a pegboard.
9: After this comes ironing. I use a regular hand iron, turned up to the “wool and synthetic” setting. This requires patience and a steady hand, because if you don’t thoroughly fuse all the beads together, when you peel the tape up some beads will come with it. I was a little impatient with this one and was trying to peel the tape away before the beads cooled, and this caused the beads to peel up at least 2 times, so I had to keep flipping and re-ironing different places. Sometimes I let the art cool totally before peeling up the tape, but letting it cool makes the tape a lot stickier.
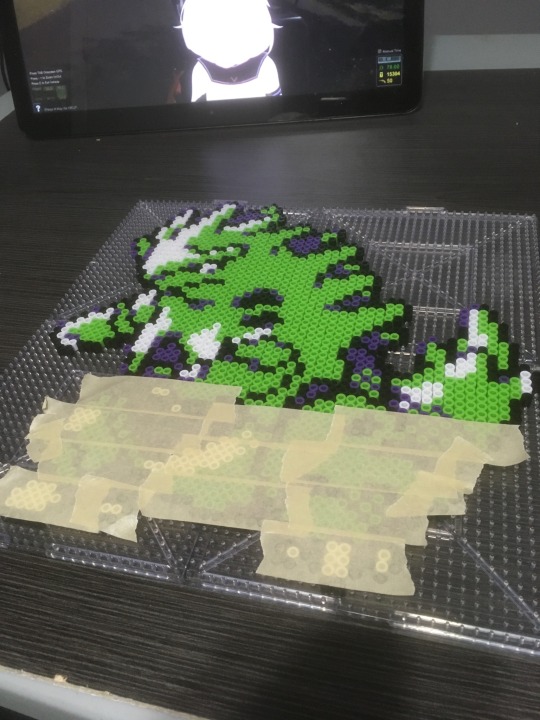
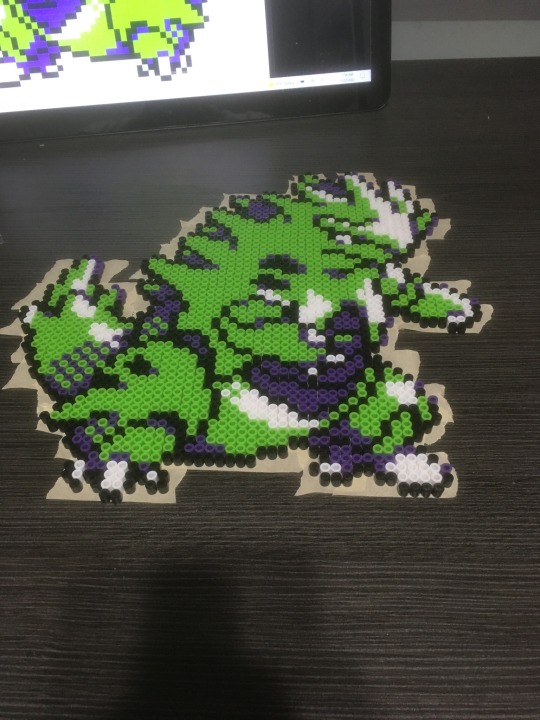
10: Finally, it was time to cool and flatten it. I use my Magic card box, which is big, flat, and very heavy. I also use heavy board game boxes for smaller projects. I let it sit overnight and when I came back Tyranitar was ready for the wall!
42 notes
·
View notes
Text

Tyranitar! I love the Gen 2 Pokemon sprites because they’re able to achieve so much with only 4 colors! Speaking of which, this project used almost an entire package of 1000 lime green beads! I’ll be posting a behind the scenes look at how I make these shortly. Made in January 2022.
23 notes
·
View notes
Text

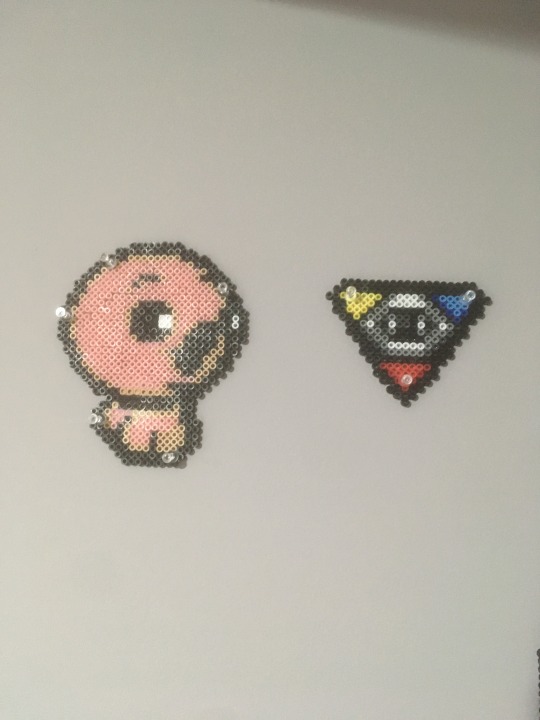
Poke Ball coasters! I picked up some cork from the craft store and used a hot glue gun to attach them to the back. As you can see, the poke ball one was a bit too big so I made the following cork circles smaller. Made in January 2022.
18 notes
·
View notes
Photo
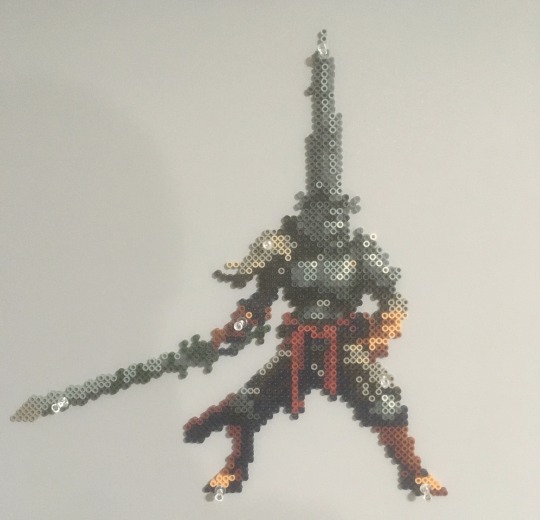
“Sorrowful be the heart, Penitent One...”
Here is the Penitent One from Blasphemous! This one was one of my more challenging builds, despite its smaller size. Lots of small, thin bits sticking out made it pretty nerve-wracking to tape, flip, iron, and flip again! Also my first time using the Perler bead pen. It was a bit clunky, but once I get the hang of it I think it’ll really speed up my projects! this one was done from setup to cleanup in about two and a half hours. Made in January 2022.
103 notes
·
View notes
Text
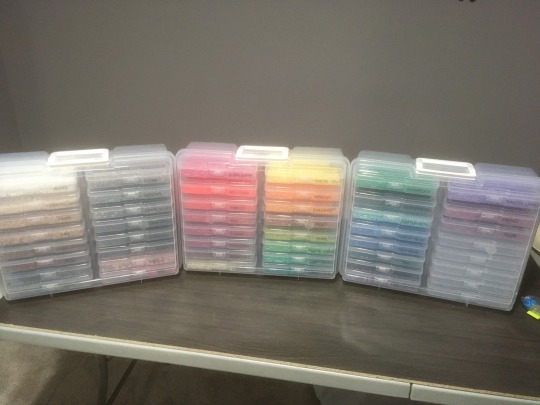
Got a fresh stock of beads to start working on a new project. Here’s my current organization setup. I don’t have a problem!!
6 notes
·
View notes
Text

Made a cycle of the ten Ravnica guilds, each one is its own little piece but put together the colors lead into each other. Made in January 2022.
#perler bead#pixel art#magic the gathering#mtg#ravnica#azorius#dimir#rakdos#gruul#selesnya#orzhov#golgari#simic#izzet#boros
77 notes
·
View notes
Text

Made a little Magneton. Done in January 2022.
24 notes
·
View notes
Text
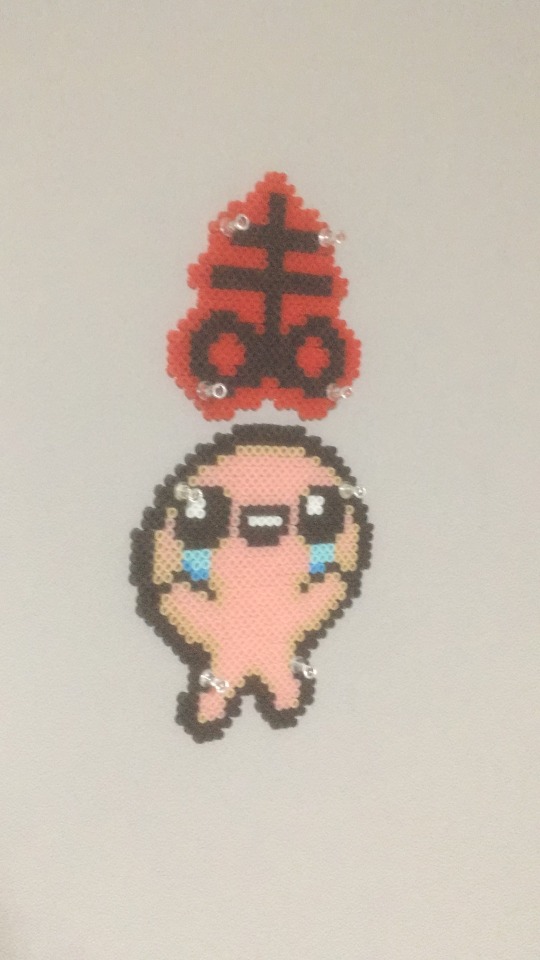
A fun and easy little Isaac that I whipped up one day. Made summer 2021.
13 notes
·
View notes
Text
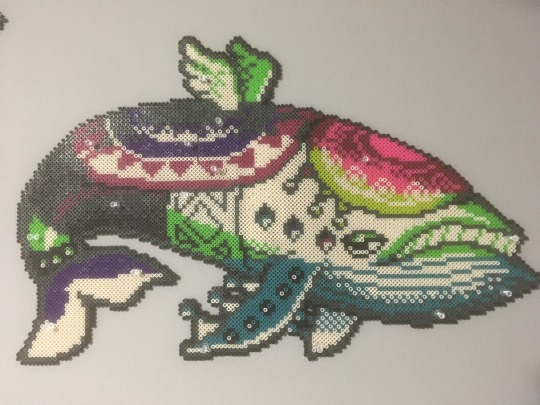
BIG. And so many colors! I ran out of gray halfway through and had to wait over a week for more! Made summer 2021.
20 notes
·
View notes
Text

This one took weeks upon weeks to finish, and at the time I was only working on a little coffee table that could barely hold the whole thing! Made in summer 2019.
12 notes
·
View notes
Text

My first really big challenge, and so many shades of gray! Made in spring of 2019.
23 notes
·
View notes