
audiohut
Audiohut
Song Writing and Audio Engineering
16 posts
Don't wanna be here? Send us removal request.
Last Seen Blogs

riseseason3fanproject
ROTTMNT: A New Age

iolite-moodboards
aesthetics and moodboards

wllng
"I'm A Dreamer"

rahfakreatif
Rahfa Kreatif

themarilynmonroefanatic
themarilynmonroefanatic
Photo
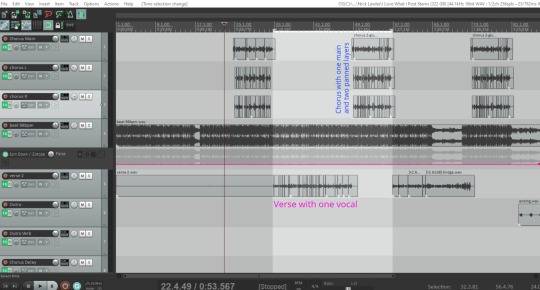
How to make your chorus POP!
Creating contrast from part to part is one way to keep your listeners invested and interested in your song. But there is one thing i have noticed among many many songs that i now implement in m production and personal writing.
Keeping your verse unified with one vocal (possible ad libs but do not overkill it) will keep the listener feeling intimate with this part. Lyrically this could vary depending on your subject matter. Try and keep it logical and along the lines of something relatable and chronologically if it is a story. Anyways, having this one vocal in your face is a great way to start the contrasting between the verse and chorus.
When you record your chorus, record layers that all come in on a half step after your main comes in, or all at once. Mess around with it to find what you like best but regardless all these layers (preferably with different pitches and harmonies) will blow your hook/chorus over the top. It will be much more interesting than if you left it as one vocal. Try and use the opportunity to provide the highest notes and most movement you can in this section at you want this to be the part that drills into peoples heads.
If this helps you with your next song comment a link below so i can hear it! If you want more song writing and engineering thoughts follow me to keep up! Happy creating!
-Andrew Giordanengo
-Audiohut
#singer#songwriter#musician#singersongwriter#artist#audioengineer#mixingengineer#recordingengineer#makinghitrecords#makingmusic#producer#rapper#vocalist#lyricist#hiphop#rnb#soundcloud#chorus#makingit#hitsongs#top40#top100#billboard
2 notes
·
View notes
Text
Thoughts for Engineers
Here is something for the engineers. I have been working as an engineer for almost a decade and have come to find a few elements the new found engineer can implement to get them started!
When you first have your mix, it might be hard to grasp but finding balance is key. Start your mix by simply adjusting the volume faders and panning knobs to 1. Create your stereo image and 2. Keep away from any un needed processing that might over saturate or damage your mix in the long run. When you do this, imagine that this is all you have to mix with and keep an eye on your master bus to see what is peaking above -6 dB and note it down as the first things you will approach along with anything else you see fit with dynamics, frequency or busing.
Once you have a balance go ahead and briefly solo out certain elements that you prefer to start with. For me, i solo my kick and snare and sweep for clashing frequencies within each. I always start with subtractive EQ before my compression to only compress the frequencies i see as needed or as “the good ones”. Once i have removed frequencies i do not like, i will throw them back into the mix and make minor adjustments without making arbitrary changes that suck up time and that could lead to a foggy direction for the mix eventually ruining it. I repeat this process with very minor removals until i feel i have a good foundation setup.
Side Note: Always focus on your subtractive EQ. You are more likely to find good results in removing bad frequencies which allow the positive ones to show themselves and breathe especially after compression. Boosting to much low, mid or high can result in a muddy, boxy and airy end point in your mix. While boosting is beneficial in many ways you want to boost with closure and know exactly what you want to bring out with said boost. A good example is with bass. I will dual process the bass which entails one low end track and one high end track containing the grit or clank. To really grasp the clank, i will either use a saturation plugin (Fab Filter Saturn) and boost the 2khz-3khz range or simply boost this region with a multi band EQ like Fab Filter Pro Q or SSL’s Channel. If i did not know what i had been looking for i would not have boosted to begin with but considering this range is the attack and grit and i want it brought out, i chose to boost it.
Once i have gotten a foundation, i will then apply Waves L2 on my master bus with a dB and LUFS level that is fitting for the time being. As i achieve certain milestones i will adjust my limiter to a commercial volume level to sort of guide the mix as i go. This helps me focus on sounds that need relief rather than crushing my mix with a limiter after my mix which could result in thinned out sounds especially when clipping elements like snares, kicks and vocals.
Side Note: With every single move i make and more specifically EQ i implement the LDFC method. Listen, Diagnose, Fix and Compare. This will keep you grounded to your moves and make them happen with the reassurance that they are there for a reason. When i first started mixing, i found myself making moves without knowing what i was doing. This is obviously a n00b move, but without starting and actually applying these tools like EQ, Compression etc i would not have gotten better.
After i have gotten my EQ some what out of the way, i move to compression. This is usually done by instrument for me but it never hurts to change up your work flow. If you have a good dB balance paired with a good frequency balance you will be able to hear which areas need tamed dynamics and or punch and attack. Depending on your instrument and what you want to pull from it, you will want to approach your compressor a little differently.
Side Note: I want you to know that a great place to start is to find a signal chain of your own that you are comfortable with tool wise and that is logical to your work flow and use this over and over again starting from scratch every time. You do not want to simply copy and paste the same chain on every vocal as every performance is different and every recording is as well. Doing this will help you grasp the tools and how they work together and become familiar with where they should be used and how heavily they should be worked next time. Remember this: There is no magic button, signal chain or piece of gear/plugins that just make it great. It requires time and effort and real work to learn how to get a colorful and punchy mix.
These two elements (EQ and Compression) once mastered will absolutely bring out what you want from your recordings. There is no simple way to achieve a good mix other than by starting and repeating a process that hones in the skills you desire to get a colorful and bright vocal, guitar or drum track.
If this helped you in anyway i am glad! I hope you the best in your mixing journey as i know it has been fun learning and advancing every mix for myself. If you are looking to produce, write or compose songs please follow and look back at my thoughts for song writers! These posts are all first hand from my experience and i love sharing the information with you and hope you learn from it!
-Andrew Giordanengo
-Audiohut
#audioengineer#mixingengineer#mixing#mastering#songwriting#writer#mixer#master#rapper#audio#edits#soundedit#producer#production#beatproducer#beatmaker#rap beats#rapartist#artist#soundcloud#singer#songwriter
4 notes
·
View notes
Photo


What do you think you need to produce and engineer your own music? SSL Mix Console? Teletronix LA2A? API 500 modules? The answer is none of thee above. Your skill in the craft is far more important than your equipment. While the gear you use does have an impact, if you do not know where and how these tools should be used, it will make no difference to the quality of your music nor the mix and master.
For the bedroom studio musicians, there are only a few elements you NEED to start up your learning process. With digital tools accurately replicating beautiful vintage pieces of outboard hardware you have more than what you need to get started. But the on a dime musician should start with: (And this entails all instruments digital and live)
Obviously you need a computer. Until you reach a specific point in power, most any desktop or laptop with 8GB’s of ram will suffice. You need decent processing power to stay away from latency as well as distortion and glitches within your project which will also translate to requiring latency in order to move past this until further power is required thus demanding more latency to allow your PC to process information from your wav and tools before it delivers the audio to your speakers or headphones.
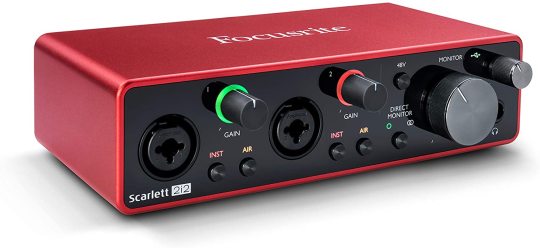
An audio interface. You can find great budget friendly interfaces made by Focusrite, Berhinger, Avid and many more that offer great digital amps and a small handful of recording parameters most of which including phantom power if need be per microphone. I recommend the Focusrite 2i2 for starters who want to capture that of both XLR microphones as well as 1/4″ DI or analog signals from bass, guitars, vocals, keyboards and really anything that is mono. For stereo there is a bit of routing you need to implement via your Digital Audio Workstation which will allow multiple inputs to be recorded at once. This can come in handy for things like Drum Rooms, Vocals, Drum Overheads and again, anything you see fit for stereo recording.
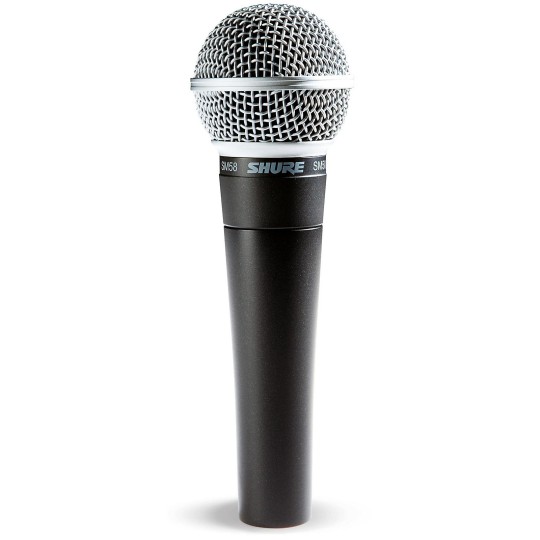
This one is a good one as i know most certainly you want the best recording at the source. You can only fix so much in the mix and there is nothing that beats the genuine quality of a great recording as well as one that mails the take rather than editing to compensate. Good microphones ranging from $100-$300 includes the Shure SM58, Rode NT1A, Aston Origin and the famous AKG Pr Audio C214. All of these microphones deliver a brilliant high end as well as capture very natural elements of the performance in detail. The Shure as well as the Rode are very quiet in ways that they eliminate outside noise thanks to the full grill surrounding the unit in case of live recording with other instruments like a full band or group of vocalists in a choir.
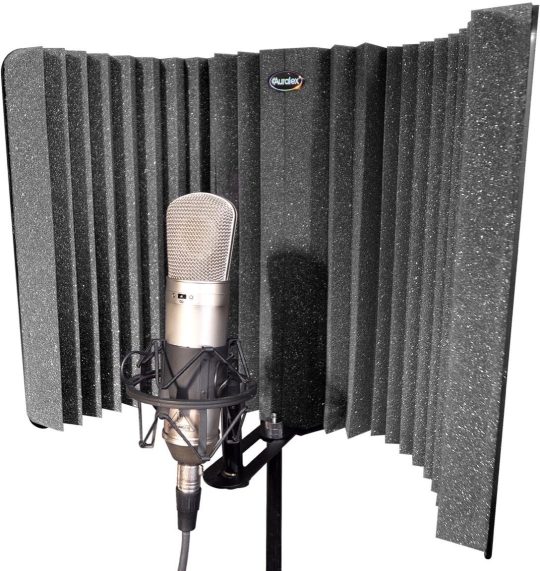
This one is optional, but you can never go wrong. You will want a acoustic treatment shield to surround your microphone to help eliminate any reverberation that might make its way back to your microphone. I have an Auralex shield that i swear by in my studio as the whole thing i solid wood leaving lots of room for unwanted reverberation and frequency bleed which can stunt the quality of your performance. There are lots of great products that offer the same kind of shield, but i highly recommend Auralex. (Not noted but obviously you will need a microphone stand to equip your gear upon.)
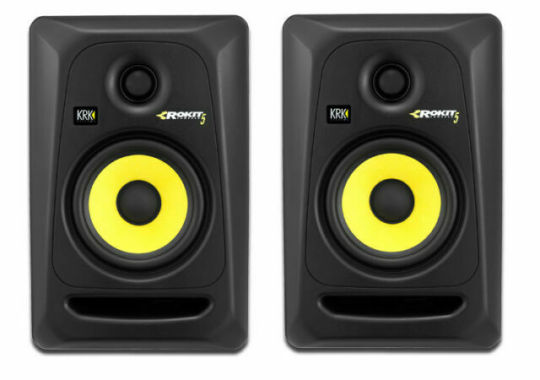
This one is also quite obvious, but you will need a method of playback and monitoring. I love the process between headphones to monitors as i will detail my mix on headphones for lows and mids and focus the high end to the monitors as well as see how it all translates on a separate pair. Budget monitors are kind of tough, which i why i DO recommend headphones. Sennehsier 589SE or any Sennheiser headphone with a closed back will deliver very honest referencing, but depending on your purchase point you might end up with a pair that emphasize areas of your mix you want heard more truthfully. It is important to remember to reference your mix in your car. This is where most music is enjoyed and will provide a great ground for your further mixing or mastering decisions as subconsciously we all know what pro productions sound like in our car from years of listening. For budget monitors, i highly recommend Yamaha’s HS8’s or HS5’s. These are very transparent speakers that have adjustable parameters for your room as well as low end boosting, mid boost and high end boosting which can all be reduced to best suit your mixing and referencing needs per your room or just flat out what you are comfortable with audibly. I also recommend KRK Rokits. These speakers define your mix in a clean and precise way that is honest for the price point. Standing at around $300 for the five inch monitor set you can not beat this price. I had been referencing on a set of Fostex RM900 eight inch monitors for about a year and added the KRK set to my system and was blown away by how well the high end worked in comparison. To define it by ‘you get what you pay for’ the Fostex monitors were over one thousand dollars as the KRK’s i found used for $175 for both making a set.
Finally, you will need an audio workstation of some sort. Unless you plan on recording to tape, a DAW (Digital Audio Workstation) will inherently make your work flow more ergonomic. With the ability to punch in, edit, sample, use amp sims to develop tone and recovers mixes and so much more without tape you save yourself an enormous amount of time in these processes. Depending on your styling of music there is a DAW for you! Sadly, not all of them are on a budget… For beat producers you can grab something like FL Studios from anywhere between $100 to $1000 dollars depending on the package you would like. Ableton is a great DAW as well, but does cost you a pretty penny of i believe a fat $800 for the full version. You can get a lite version which does not include some tools here and there for $100. You can find these tools among other companies to implement in your DAW of any kind to compensate as well but in some cases, you can not replicate the original tool. What i started with was Audacity because it was totally free. As i advanced in my needs, i found that Reaper was the best deal on the market as you can trial the FULL version for as long as you would like until you choose to purchase a license AND when you do purchase, it is only sixty dollars! You can download tools from various other aforementioned DAW’s and load them into Reaper to use as if though you were in the DAW of your choice. You get community based updates every thirty days or so which all do nothing but improve the quality and work flow for the people who pay into the company. But at the end of the day, there is no RIGHT DAW. Try the free versions of each one until you find something that pleases you in any way shape or form and really dive into it. I was told to get Logic but did not like how it felt for the price i had to pay. If you can afford it, i do recommend something that is industry standard along with the previously mentioned pieces of gear, but this is about a budget and the artist that is on a dime.
Edit: DO NOT FORGET YOUR CABLES.
And with that i bid thee happy mixing and creating. This small studio setup which should obviously include your instruments of choice (not mentioned for obvious reasons) will run you anywhere between $800-$1500 depending on your products of choice as well as what kind of computer you get with what kind of power. There is nothing cheap about audio and production but this is a killer setup that i spent years on to develop the skills needed to accurately apply those Teletronix LA2A Compressors, API 550’s and various other pieces of boutique gear we all seek. Once you learn the way your tools work you can present your talents among any genre as you will know what needs attention when and where. Do NOT let people tell you genre matters. As it does help to find a niche within your passion for listening, these skills work quite universally unless it is the physical beat, lyric or performance you are delivering. For mixing and engineering yes this applies about 15% from 100%. Stay strong with your setup and remember that practice makes perfect. If you can master your digital tools then you can master your outboard ones with an extra analog touch given by the actual electronics and tubes powering them.
I hope this helps you find the motivation to start recording and engineers your own music as i know hearing this helped the spark for me. For awesome digital tools check out VST4FREE as well as the product companies Waves and Fabfilter which all produce high quality tools for you mixing and writing. If you seek more song writing information or thoughts on music production follow my space and read back on my previous posts!
-Andrew Giordanengo
-Audiohut
3 notes
·
View notes
Photo
What do you think you need to produce and engineer your own music? SSL Mix Console? Teletronix LA2A? API 500 modules? The answer is none of thee above. Your skill in the craft is far more important than your equipment. While the gear you use does have an impact, if you do not know where and how these tools should be used, it will make no difference to the quality of your music nor the mix and master.
For the bedroom studio musicians, there are only a few elements you NEED to start up your learning process. With digital tools accurately replicating beautiful vintage pieces of outboard hardware you have more than what you need to get started. But the on a dime musician should start with: (And this entails all instruments digital and live)
Obviously you need a computer. Until you reach a specific point in power, most any desktop or laptop with 8GB’s of ram will suffice. You need decent processing power to stay away from latency as well as distortion and glitches within your project which will also translate to requiring latency in order to move past this until further power is required thus demanding more latency to allow your PC to process information from your wav and tools before it delivers the audio to your speakers or headphones.
An audio interface. You can find great budget friendly interfaces made by Focusrite, Berhinger, Avid and many more that offer great digital amps and a small handful of recording parameters most of which including phantom power if need be per microphone. I recommend the Focusrite 2i2 for starters who want to capture that of both XLR microphones as well as 1/4″ DI or analog signals from bass, guitars, vocals, keyboards and really anything that is mono. For stereo there is a bit of routing you need to implement via your Digital Audio Workstation which will allow multiple inputs to be recorded at once. This can come in handy for things like Drum Rooms, Vocals, Drum Overheads and again, anything you see fit for stereo recording.
This one is a good one as i know most certainly you want the best recording at the source. You can only fix so much in the mix and there is nothing that beats the genuine quality of a great recording as well as one that mails the take rather than editing to compensate. Good microphones ranging from $100-$300 includes the Shure SM58, Rode NT1A, Aston Origin and the famous AKG Pr Audio C214. All of these microphones deliver a brilliant high end as well as capture very natural elements of the performance in detail. The Shure as well as the Rode are very quiet in ways that they eliminate outside noise thanks to the full grill surrounding the unit in case of live recording with other instruments like a full band or group of vocalists in a choir.
This one is optional, but you can never go wrong. You will want a acoustic treatment shield to surround your microphone to help eliminate any reverberation that might make its way back to your microphone. I have an Auralex shield that i swear by in my studio as the whole thing i solid wood leaving lots of room for unwanted reverberation and frequency bleed which can stunt the quality of your performance. There are lots of great products that offer the same kind of shield, but i highly recommend Auralex. (Not noted but obviously you will need a microphone stand to equip your gear upon.)
This one is also quite obvious, but you will need a method of playback and monitoring. I love the process between headphones to monitors as i will detail my mix on headphones for lows and mids and focus the high end to the monitors as well as see how it all translates on a separate pair. Budget monitors are kind of tough, which i why i DO recommend headphones. Sennehsier 589SE or any Sennheiser headphone with a closed back will deliver very honest referencing, but depending on your purchase point you might end up with a pair that emphasize areas of your mix you want heard more truthfully. It is important to remember to reference your mix in your car. This is where most music is enjoyed and will provide a great ground for your further mixing or mastering decisions as subconsciously we all know what pro productions sound like in our car from years of listening. For budget monitors, i highly recommend Yamaha’s HS8’s or HS5’s. These are very transparent speakers that have adjustable parameters for your room as well as low end boosting, mid boost and high end boosting which can all be reduced to best suit your mixing and referencing needs per your room or just flat out what you are comfortable with audibly. I also recommend KRK Rokits. These speakers define your mix in a clean and precise way that is honest for the price point. Standing at around $300 for the five inch monitor set you can not beat this price. I had been referencing on a set of Fostex RM900 eight inch monitors for about a year and added the KRK set to my system and was blown away by how well the high end worked in comparison. To define it by ‘you get what you pay for’ the Fostex monitors were over one thousand dollars as the KRK’s i found used for $175 for both making a set.
Finally, you will need an audio workstation of some sort. Unless you plan on recording to tape, a DAW (Digital Audio Workstation) will inherently make your work flow more ergonomic. With the ability to punch in, edit, sample, use amp sims to develop tone and recovers mixes and so much more without tape you save yourself an enormous amount of time in these processes. Depending on your styling of music there is a DAW for you! Sadly, not all of them are on a budget… For beat producers you can grab something like FL Studios from anywhere between $100 to $1000 dollars depending on the package you would like. Ableton is a great DAW as well, but does cost you a pretty penny of i believe a fat $800 for the full version. You can get a lite version which does not include some tools here and there for $100. You can find these tools among other companies to implement in your DAW of any kind to compensate as well but in some cases, you can not replicate the original tool. What i started with was Audacity because it was totally free. As i advanced in my needs, i found that Reaper was the best deal on the market as you can trial the FULL version for as long as you would like until you choose to purchase a license AND when you do purchase, it is only sixty dollars! You can download tools from various other aforementioned DAW’s and load them into Reaper to use as if though you were in the DAW of your choice. You get community based updates every thirty days or so which all do nothing but improve the quality and work flow for the people who pay into the company. But at the end of the day, there is no RIGHT DAW. Try the free versions of each one until you find something that pleases you in any way shape or form and really dive into it. I was told to get Logic but did not like how it felt for the price i had to pay. If you can afford it, i do recommend something that is industry standard along with the previously mentioned pieces of gear, but this is about a budget and the artist that is on a dime.
Edit: DO NOT FORGET YOUR CABLES.
And with that i bid thee happy mixing and creating. This small studio setup which should obviously include your instruments of choice (not mentioned for obvious reasons) will run you anywhere between $800-$1500 depending on your products of choice as well as what kind of computer you get with what kind of power. There is nothing cheap about audio and production but this is a killer setup that i spent years on to develop the skills needed to accurately apply those Teletronix LA2A Compressors, API 550’s and various other pieces of boutique gear we all seek. Once you learn the way your tools work you can present your talents among any genre as you will know what needs attention when and where. Do NOT let people tell you genre matters. As it does help to find a niche within your passion for listening, these skills work quite universally unless it is the physical beat, lyric or performance you are delivering. For mixing and engineering yes this applies about 15% from 100%. Stay strong with your setup and remember that practice makes perfect. If you can master your digital tools then you can master your outboard ones with an extra analog touch given by the actual electronics and tubes powering them.
I hope this helps you find the motivation to start recording and engineers your own music as i know hearing this helped the spark for me. For awesome digital tools check out VST4FREE as well as the product companies Waves and Fabfilter which all produce high quality tools for you mixing and writing. If you seek more song writing information or thoughts on music production follow my space and read back on my previous posts!
-Andrew Giordanengo
-Audiohut
#producer#audioengineer#recording#recordingartist#musician#homestudio#budget#budgetstudio#mixing#mastering#mixingengineer#masteringengineer#soundcloud#rapper#singer#guitarist#bassist#drummer#midi#synth#audiohut#music#writer#lyricist#singersongwriter#jam#jamming#recordingengineer#DIY#learning
3 notes
·
View notes
Text
Real time road bumps and measures i take to overcome them.
Sorry for the delay, things have been hectic between Covid shutting down my plant and finding and working a new job. But i appreciate your reading!
I have been slowly running into some problems with my own song writing and interest skills when it comes to adding percussive elements that keep the beat filled out as well as using chord progressions and scales to enhance the experience of the song.
I have been referencing a lot of Shakewell and Oliver Tree to note take and utilize some of the tension and release tactics they use to create a more solid song as well as a more exciting and emotionally driven song. In Oliver Tree’s song Alien Boy he slowly builds his beat with each new section of the song that is presented giving the listener something new every time around until the song recedes back to its “standard” mode past the chorus delivering short term nostalgia in what it they just witness being built.
In the song i am currently having a hard time finding something that wraps this idea into the fold as my beat has some nice sampled piano, fun percs on the sides to fill it up as well as some pitch bent 808’s. But the deeper i get into the song the more it strikes me as boring. Using the knowledge from some of my last postings, i found that adapting to the flow of the song with pitch shifted or stretched string instruments helped bring out its color and added some interest for me.
Another cool things i learned is how the song is structured can allow new elements to brought in in different manners. Using one to three instruments throughout your verse and or intro section will display the mode of it while among the chorus you can have new instrument chime in to enhance its emotional movement and when bundled with appropriately choreographed lyricism and performance will really top the mood. Sadly my song has not gotten to that point, but in time it will be there! Until then, i am curating the main bulk of the song but attracting the mood with the instruments and sample i have chosen without it being to repetitive.
Something we touched on before was how your chord progressions can help develop your songs structure which can or maybe should be mapped before you write and adjusted as need be. But if you genuinely feel in your heart this verse should last more than eight bars say based on the mood and tension/release then by all means go for it, but one draw back if not experimented with is the boredom that can hit the listener. Like i mentioned above, Oliver Tree has a great sense of structure in how his songs are developed and his repetitious use of kick and snare along with 808’s gives the song a solid foundation which is a great place to start and the same as before, adjust as need be to fit the melodies and various instruments surrounding them.
As i continue to work my through these songs and digest new information i am confident this song will reach fruition and make it sway to the standard i have set for it. I hope this real time expression helped you think about ways to work around the road bumps in your production. As i continue to learn on my experiences i will continue to share my thoughts for you in hopes it will give perspective and educate the matter at hand.
Overview:
Song Structure is a must
Variation is important
Samples make a difference
Using percussion as ad libs fills out your song
Having material to reference and note take on will put you hours ahead of your own game
Research and willingness to learn
Anyways guys, thanks for reading this one! If you would like more information from first hand experience feel free to head to my previous posts! Happy writing!
-Andrew Giordanengo
-Audiohut
#songwriter#songwriting#writer#songs#musician#music#guitarist#producer#beatengineer#beatproducer#mixing#mastering#mixingengineer#masteringengineer#engineer#rapper#soundcloud#cloud#thoughts#foodforthought
1 note
·
View note
Text
Production thoughts for song writers. Less is more but always experiment.
Something new i have come to find out is the textural difference details in your mix can create more industry standard like feelings as your songs life is lived through your listener and can resemble something more professional if done correctly.
If you are not familiar with mixing or mastering you should absolutely practice this skill as the more you know the better your productions and songs will naturally come out. This process refines and eases the listeners experience and in most cases requires an over all skilled producer to make educated changes to your song that enhance the experience of the target audience and present itself in a more professional manner driving it in the direction it needs to when heard.
Something i have slowly been learning about the frequency balance between an entire production. How all these frequencies from your lows, mids and highs work together is what will keep your mix and master sounding natural, heavy and energetic. Applying some cool detailed effects in post or pre can make a song much more exciting and add a lot more depth and underlying excitement to the song that the listener almost expects to hear.
These FX can include but are absolutely NOT limited to:
Reverse Cymbals
Reverse Bass Drops
Swells
Glitched Vocals
Reversed Vocals
Distorted Delay Swells
These FX when placed with taste will bring the listener into your song even more so as it feels like more of an experience. And with your time and effort int he craft of building a banger of a song, you want it sound and feel like something that conveys the amount of passion you put into the writing. So make sure when you HIRE an engineer, an artist for your cover, PR or visual production to curate your project that thy are skilled and bring out what feel is the best for your music and that is up to par with the amount of passion you want to convey. There are plenty of examples of great music with awful production, art or visuals that do not help the track advance in ways that the natural standard has been set by the technological growth of the industry and you want to make sure that you meet that standard before you market.
IF you are capable of curating said content yourself then more power to you but i highly recommend you seek reference from those who are built into the niche you are developing within to get someone who has the sense of eye for your work that maybe you might not have. And if these resources are not readily available to you then do plenty of researching and referencing of your own on your work to ensure it is the best you can personally make it without spoiling it over the top with to much extra. In many cases, less is more.
In the photo below, i am using a Kramer Tape Emulation that offers a great tape delay and tape echo that old school tape decks delivered upon latency in recording. If you turn down your playback rate with the emulation it will dull the brightness of how your vocals information reacts to the plugin and will result, if desired a darker delay or echo when applied. You can subtly use this in place of your standard delay for experimentation with saturated delay that is more interesting and exciting in comparison to standard clean delay. Another good tool is Waves H-Delay. It offers a Ping Pong option which bounces the delay between your left and right speaker as well as the distortion and phaser applications which make for a more interesting delay as well. When it comes to your effects, yes less is more but when you have accomplished the writing phase and get into your production and mix, be sure to experiment with sounds before you call it done and like i said, reference every thirty minutes to get an ear for where you are standard wise. Take breaks and stay hydrated.
I hope this tid bit helps out as i know its been a slow burn for me over the years of writing and engineering. IF you want more information on audio, song writing and production contact me or read back on my prior postings for more thoughts on song writing!
-Andrew Giordanengo
-Audiohut
#audioengineer#masteringengineer#mastering#producer#beatproducer#beatmaker#rap beats#beatsdaily#mixing#audio#master#songwriter#delay#reverb#guitars#kramer#wavesplugins#ssl#fabfilter#plugin#soundcloudrapper#vocals#vocalist#soundcloud#rapper#Hiphop#rnb#productiontips#mixingtips#songwritingtips
2 notes
·
View notes
Text
Where do you start when writing a new song?
Creating a song, a hook or melody is about developing a relationship between your verbal thought process and the music. Any approach you take to begin the process is correct as long as you have made decisions leading to a satisfactory product. I usually will begin with my music first. I will write out guitars, then bass and by that time i have the percussive movement of the songs down to a T. After i know this is fact, i will jam out drums and fill in the gaps with any leads, synths or “filler” instruments i may see fit to round it out and add context to each individual part of my song. From there, i will find one of my connections (as i sound worse than a dying cat) and find an applicant that i know who’s skill set will really do the trick for the song creatively and lyrically. At the end of this article, i would love to hear YOUR writing process and where you like to end up!
Anyways, lets get to the beef. When you are creating a song title, it generally makes sense to have something relevant to the lyrical content of your song. Although many people and artists have used names not correspondent to the meat of the song, many have for example used a lyric from the hook, a verse or chorus as the title to bring the listener full circle in a sense.
One way to bring yourself into the hook phase and to get it done efficiently is to start with one great line. One from your hook, or one from your verse etc. Remember to be creative and open to change as your thought process may develop new connections via word to music as your process continues. BUT, grab the lyric with the most emotional impact and that has the intent of being the one that stands out. Like i have said before, you want the hook to retain high notes, powerful singing and of course power lyrics as it is the most intense portion of your song.
Develop a rhythm as you experiment with your lines. Try laying out four lines that contain four to six words each and mess with three or four different rhythms to see if anything strikes you as energetic, appealing or generally just good in your own opinion. It helps to add context from another instrument to your melody. Try this with a guitar, piano, synth or any melodic instrument that will help color your hook as your test things out. Remember that not every melody you come up with will succeed. In the word of Gary Vaynerchuck; “I recommend failing first”. Get the bad ideas out of the way but before you do so, perform them to actually hear it in itself and make a decision on WHY it is being tossed. It will help to write these down or if you are working in a Digital Audio Workstation, to record them in and attach notes to each test as to why it did or did not make it.
This can be a very time dealing process as your ideas will come and go and come and go again. Its important to continue through until you find yourself with something that you genuinely love. IF you find yourself with a good lyrical rhythm, remember your syllable placement and move words around if possible or apply the same rhythm to different lines in general. Depending on where your instrumental melodies will lie in key will determine where your hook can go note wise. Do not be afraid to change the key of where you are at if need be, just be sure to record a take prior in case you need to compare or need to remember it.
If you have a DAW in front of you, one thing i know that makes the world a difference in the sound as well as decision making would be add layers of your vocal performance for depth and potential. It could add something that sparks a new light lyrically, rhythmically or urge you to continue on scrapping and building more ideas for your hook. You can do the same with your synth work, keyboard playing and any element you think might be enhanced by a layer with a circle of fifths for example.
Question everything in your process. This will keep you engaged and give you more thoughts towards what might be a good replacement for that synth melody, or your vocal harmonies. If you find yourself in a tough spot with these routes, try and formulate a solution by working three new parts into its place and testing out sounds that may better suit the songs flow and context.
I know this one was a short one today, but i truly hope it helps give you some thoughts to work with on your next song! IF you would like to read more on thoughts from a songwriter, follow this space and look back at my page for more! Thanks for reading.
-Andrew Giordanengo
-Audiohut
#producer#songwriter#songwriting#writer#singersongwriter#lyricism#lyricalartist#lyrics#melodies#harmony#songcoach#musician#rapper#hiphop#rnb#rockmusic#metalmusic#top100#top40#newmusic#musical#guitar#bass#groove#jamming#creating#artist
3 notes
·
View notes
Text
Are you persistent in your craft? Here are some things that might inspire some ideas in your next session.
I’m going to continue to post these every other day as i have found myself with outside obligations relative to this. It gives me time to put my learning to work and come back with some hands on experience for you.
What do you find yourself writing when it comes to creating good lyrical themes? As i talked about before, there are a wide spread of topics you can chronologically lay out that appeal to many people and again, i want to talk about lyric production and song structure to help bring power to your song and meet your existing warm audience as well as cold audiences.
One thing i read about earlier this morning was creating timeless lyrics. Lyrics that are still captivating and interesting even over a long period of time. That time frame can be within the amount of time it takes to listen to your song, or lyrics that are simply unforgettable. One way you can help get these lyrics stuck in your head is by applying a catchy melody or series of harmonies within your song. Obviously this is the goal, but if you are approaching a hook/chorus you will want this to be the part that brings the listener in even more so and if done right, can be unforgettable or timeless in a sense.
For examples of timeless lyrics and incredible song writing, check out “Paint it Black” by The Rolling Stones, “Bohemian Rhapsody” by Queen. These bands wrote handfuls of timeless songs and had lyrics that are emotionally captivating and interesting even decades later.
When you are drafting your lyrics whether it be digitally composing or the classic pen to paper, lay your lyrics out on a staff if possible and ensure that each syllable is tied to a note. This is where you will be able to play with your melodies, skips and steps as we talked about a bit in the last posting. Even if you plan on assigning the same tones over eighth notes, sixteenth notes or single syllables it helps to make sure every one of your syllable is rhythmically and melodically established to your song. Otherwise the effect may sounds out of key or off tempo discerning the listening and could create a lack of interest. Although many applications of flats and sharps come into play, it helps to know a bit of theory to work around what might add a little extra color to your song.
One thing we have not talked about yet is bass lines. In artists like Tame Impala, Oliver Tree and say Yellow Days you will notice their bass lines are a huge player in the flow of the song as it drives the low end of the song providing more feeling and creates something more immersive than if you were to have the tones from only your kick/808’s delivering your low end tone. The bass line does not need to be anything technical, but should be found as the root or fundamental notes of the chords and keys your strings or synth instruments are being played in sort of grounding and gluing your song together. When your bass line as well as synth instruments or strings are all together it could bring more opportunities to your table melodically hen it comes to the production of your lyrics and where they fit in tone and melody.
One way to add texture to your melody in your song is add rise and fall in your tonal and note movement. This can again, be done with any instrument you choose to have laying over your bass line but in all dynamic changes in volume and velocity will add more character to your production. This is heavily noted in many Saxophone players who use velocity in hard how the notes are being played to contour the emotion and make it hit more effectively to the listener.
Another thing to note when writing is to use engaging major chords as these are more compelling and have been noted in top hits more than minor chords. Like i have said before, produce your progressions and harmonies with whatever taste is needed in your song. For example you have Tadow by Masego and FKJ. This song features a wide variety of Minors and Majors creating a very harmonious and archetype sound production. Good Major chords that are used very often are as follows: C – G – Am – F ; D – A – Bm – G ; A – E – F#m – D ; G – D – Em – C ; and E – B – C#m – A.
When it comes time to captivate, bring in new instruments or change the dynamics of already existing instruments in your production. Most songs derive from no more than seven instruments including vocals as it can become quickly muddied up and create incoherence when listening to it. Seven may seem like a small number but remember that each instrument can be used in different manners to bring in what could feel like a new environment with each section of your song i.e: Verse, Chorus, Pre Chorus etc.
Because music can be fickle especially when writing you may want to record your practice sessions or keep a note book handy when ideas pop up. You never know when a new idea will pop and you will never know how quickly you can lose until its gone. Be creative and experiment with new sounds. From personal experience i have ran into accidental melodies, harmonies and riffs that blow my own mind.
And finally, when you are creating you need to be persistent. Many song writers have an enormous pack of songs before they finally hit the billboard. You need to practice your writing skills to 1. Develop and ear for what it is you know you are good with and 2. Get the bad songs out the way. Not every single thing you write and produce is going to be good. It will take plenty of trial and error before you discover a sound that suits your skills set and is enjoyable by others. Again, most artists write for upwards to a decade before they create something that is incredible and even then, they write songs they would not put out into the world. patience and persistence will always be the bread winner.
I hope this thought was insightful and brings to light some new methods or ideas for you and your creative process. If you are in need of some more thoughts and tips, follow my space and look back on previous postings! Thanks for the read.
-Andrew Giordanengo
-Audiohut
#songwriter#songwriting#writing#singersongwriter#songstructure#song lyrics#new song#musician#musical#writingmusic#musicprojects#rap#rapper#hiphop#audioengineer#mixingengineer#beatproducer#sounddesign#collab#foodforthought#thought#tips#tricks#inspiration#consistency#patience
2 notes
·
View notes
Text
How detailed are you when writing? Have you implemented these thoughts yet?
Imagine someone scrolling through songs looking for their next favorite track and only being able to hear your first two lines. It only takes some ten seconds if not less to determine whether or not they are interested. So make sure you are up front about your story and display your intent to pull them in right out the gate.
Make sure each line you produce is just with prior and following lines. Take one of your lines that you might be iffy with and read it aloud including your prior and following line to ensure its high standing with as a whole. If it fails to make sense or does not seem just consider revisions to get it up to your standard.
Try and visualize your lyrics or create a visual on a sheet of paper. If your lines and phrases/bars are consistently meeting the same end point, your song may be monotonous and might bore your listeners. By keeping your lines ended and being performed in different lengths, rhythms and rhyme schemes it will keep your listener more interested in the broad variations of your lyricism and structure. Maintaining the want for more from each line is a good thought to keep in mind while you are writing your song. This ideology goes right back to telling a story from point A point B or in a chronologically constructed manner.
When you are creating a line based off of someones perspective, make sure you establish what is happening between characters or rolls within your song by applying your pronouns. Using “I” three times to display a vision from another character will quickly confuse your listener and demean the value and interest they have in your song. Essentially, be accurate with your statements as you are the author of what you want to see as a successfully written piece. This does require proof reading an what feels like gratuitous amounts of time but is well worth it as i am aware of many artists who do not put this effort into their music and lyrics and literally makes no sense. This comes in play with beat production and writing your instrumentals. Proof your work many many times to ensure you are satisfied with your product.
One tall tale successor is applying the song name to your chorus lyrics. Pulling a memorable lyric from your chorus and applying it as the name demonstrates a source of power and nostalgia in your song as soon as the listener hears it. With the chorus maintaining your highest key/sung melodies and most energy in your instrumentation, adding the cherry on top will boost interest significantly in your song. Check this accurate name placement by singing your song a cappella to find a good area to place it as well as critique your rhyme patterns and lyrical constructs. If it sounds boring with the same amount of length in bars and stagnant rhyme schemes you might want to change things up. The goal is to know in your gut in this phase that you are satisfied with your writing and to know that it passes your quality control process. This also goes for creating instrumentals as well as lyrics.
Depending on the taste of your song and your vision, adding chords to your vocal melodies can add tension and release to your song by part ie chorus, verse, bridge etc. Every key has a chord that can reflect a specific emotion when played. Be weary as to much on your song may result in an undesired effect and feel like to much is going on or on the other hand it may feel like you do not have enough given you lack chords that would fill out the empty gaps your song needs musically.
I hope this little bit helps! I tried to bring something effective as i missed yesterday due to some work i had on my table. If you would like more thoughts on song writing, check out my space and previous posts!
-Andrew Giordanengo
-Audiohut
#songwriter#musician#singersongwriter#rapper#hiphop#rnbmusic#soundcloudrapper#lyrical#lyricist#writing#writing music#beatproducer#beats#rap beats#beatsforsale#instrumental#rockmusic#punkrock#makingmusic#rapartist#audiohut#foodforthought
2 notes
·
View notes
Text
My little knowledge on creating Melodies
Here is part two of my thoughts for song writers for the day. If you are wondering about song structure and other relevant topics to creating an energetic song look back at my previous postings to get some more food for thought.
Today i’m talking about melodies. It seems like when we approach the writing process we should already know what we want before applying any decision making or critical thinking. But i find myself struggling to formulate and captivating melody even when i’m 100% certain i have something in mind.
This is where theory and knowledge on the topic therein can have an immense effect on how efficiently and intuitively we can make our next favorite melody. Regardless of you knowledge, creating a great melody is just hard as creating a chord progression and strumming up transitions to ease the flow of your song only with muddied up guidelines and less defined “rules” if you will.
Melodies are made up of intervals which help depict the way in which your song moves and flows from one part to the next. (check out my song structure topic within my last post) Having a good idea on your structure will help you formulate the manner of your melodies and how the chords within should move based on which part of the song you are approaching. Every interval will effect your melody but theorists and professionals break this up into two main parts: Steps and Skips.
Steps are when your notes follow one another without pause clearly defining the movement between them in your melody as if though it is expected by the listener. This leaves them feeling fairly restrained but keeps each note bound to the previous keeping you moving ahead. Keeping your steps in small range from one another will make things a lot easier as its difficult to move widely with such little space for transition. If you are using a digital based piece of equipment you can feel free to exercise that wide stepping with octave bound steps or even moving in circles of fifths for example. But for the most part, this wide movement will be classified as a skip.
Where steps define restraint, steps provide freedom in that you have a wider range to move around in from note to note. Skips would be best noted in choruses as they break the listener away from the bound verse and chorus which provided the steps up to that breakaway. Providing nuance in your melodies with things like static motion (Where you continue one repetitive note rhythmically) can help provide a balance between restraint as well as freedom. And when mixed within your skips giving more of a colorful range this technique can deliver a grounding point sonically that keeps the listener focused in.
I hope this little tid bit helps. I’m still grasping the function of melodic progression and how each chord and note provide a specific function but for now, i’m giving you this. As i continue to learn i will continue to share my knowledge with you! IF you have any other hungers for song writing or need some help getting over a hump, check out my previous postings for more on writing!
-Andrew Giordanengo
-Audiohut
#melodies#songwriting#songwriter#singersongwriter#guitarist#bassist#band#music#audioengineer#producer#beatproducer#hiphop#rapper#rnb#creatingmelodies#creating#creation#art#thoughts#foodforthought#audiohut
6 notes
·
View notes
Text
I’m loving my DW Custom Shop Snare. What snare do you enjoy?
#drummer#musician#songwriter#audioengineer#mixingengineer#metalmusic#heavy metal#rockandroll#dwdrums#drumset#samples#samplesession#country music#recording#recordingengineer
2 notes
·
View notes
Text
Thoughts for Song Writers
Yesterday was a pretty crazy day and i missed by third blog unfortunately… I will be making up for it today with two educated thoughts on writing songs that i have found coming up more often in industry leading songs in 2020. Here we go with thought number one!
Lets talk about more structure and how laying out your song “the right way” will help you gain more traction and engagement in your target audience.
What is the typical structure of a pop song? What are some variations elements you have noticed making their way back time and time again from artists across the board?
If you have not noticed yet, most songs follow a prime foundation that looks something like this:
Intro/Verse/(Pre)/Chorus/Verse/(Pre)/Chous/Bridge/Chorus
This keeps the song interesting and with the right melodic hooks and percussive influence creates a momentary nostalgic sense which the listener can attach to emotionally. IF you apply emotive lyrics such as Love, Death, Heartbreak etc it gives the listener the “he/she wrote this for me” vibe which can really help keep them invested into your music and possibly bring them from a cold fan, to a warm fan and eventually a die hard fan.
By following this structure not only do you know you can trust it, but it makes your process a bit easier as you now know you only need to write three sections. Verse, Chorus and your Bridge. Hopefully this mitigates some stress and allows you to focus on the music/creative aspects above this structure.
Its pretty standard to rely on a bar measurement system per part of your song. I believe this is true but have to say if you decide creatively that it is in your songs best interest to apply a doubled amount of bars say, then do it. But as for now, here is the duration by bar your sections should last to keep the listener from getting bored while allowing you to have room to play.
Intro: 4 Bars
Verse One: 16 Bars
Pre Chorus: 4 Bars
Chorus: 8 Bars
Verse Two: 8 Bars
Pre Chorus: 4 Bars
Chorus: 8 Bars
Bridge: 8 Bars
Chorus Three: 8 Bars
The overall presence of your song should be big. You want your hook and bars to be powerful and damn near addictive. But all in all, leave your verses smaller than your chorus and keep your chorus as the token section of the song. The bigger the difference between verse to chorus, the bigger the impact your song will have on your listener. As far as big and small go. IF you read back on my previous posting i talk about creating a momentous chorus with your highest notes and most emotive lyrics as well as the obvious instrumental intensity bringing out the climax of your song. While your verses should be softer spoken, lower register notes and not as much instrumental activity. This will paint the picture of big and small as you hear your song back and if need be, do not be afraid to tamper with what your song might need. There are no limits nor rules in the process.
Side Note: One way to make your chorus even bigger is to make your pre chorus smaller than the verse. This will help your chorus slam in with great impact and a very dynamic change. Plan your transitions well to where the parts can move into one another very smoothly but to taste with the way the parts should apply to one another.
I hope this helps you in your writing process as i know its been proven effective not only by what i hear in the industry leaders, but in producers and beat engineers all over the place. You might find yourself already in this position without knowing based on what you hear, and to that, i bid thee more power. Use this staple to help your songs stand out and stand up to what you know as successful.
Want some more thoughts on the writing process? Check out my previous postings as they talk more about structure and melodies that will make your song pop!
-Andrew Giordanengo
-Audiohut
#songwriter#lyricist#musician#guitarist#singer#singersongwriter#producer#rapper#hiphop#hottip#recordingengineer#mixingengineer#masteringengineer#soundcloud#industrystandard#top40#top100#radioready#audiohut
2 notes
·
View notes
Text
The RNC 1773 is colorful and powerful compressor on percussion as well as vocal takes and bass tracking with its extraordinarily fast attack and wide release parameters. What compressors are you guys running?
#mixingengineer#audioengineer#metal#musician#songwriter#hip hop#mastering#masteringengineer#sounddesign#compressor#rnc#bass#vocals#guitars#recording#mixing#country music#electronic#edm
1 note
·
View note
Text
More thoughts on song writing
Have you ever struggled to find the point behind a song is a the lyrics jump back and forth? Or pondered the story line and how it might bring you full circle from verse and bridge to chorus. This is something i encounter not often, but often enough to have developed an understanding on in the studio during recording sessions. These awkward moments are usually where i would take these few values and let the artist consider them in their flow.
Common Themes:
This is a method where you would correlate your real life experiences into your song via metaphor or analogy to create a more universal and relatable sound in your music and for your listener. Doing so can also develop an emotional investment from the listener to the music which provides more potential for conversion of cold audience to warm/fan. Some good examples of resonant topics are:
Love
Death
The Afterlife
Growing Experiences
2. The Development of Stories:
There are many avenues in which a story can begin. Personal experience, Ideology, Fact-Fiction and almost any outlet which displays media whether it be current or dated as after-all, they have or will have depicted a story which can or has struck someones emotional notes. I do not want the term emotional to be a pillar in this as it has become one. Your story does not have to convey lyrically a very emotive presence. These stories can come from everyday interactions you have with other people, experiences from your friends or anything that at the end of the day, can maintain Common Themes throughout. The next topic i find relevant to many of the recording artists i hear and work with that is not the most over looked as we all know it is important, but it is not the most focused on. This is:
3. Creating Diverse Rhyming Schemes:
Creating the scheme is as simple as mapping out the rhyming words you have from each phrase or every other phrase. The first rhyme being labeled A, second rhyme is B, the third C and so on. Here is an example of the scheme:
A. Many’s the time ive been mistaken
B. And many times confused
A. I’ve often felt forsaken
B. And certainly misused
Notice A has a scheme that is intertwined between B to broaden the attention span of your listener. This is a very common pattern that is heard in many genres of music as it holds a powerful effect on the listener and like i said, gives them something more to listen to. Imagine if the song had the same rhyme scheme at the end of every line. Not to exciting right?
4. Studying Song Structure
I have done this in the past with previous song where i would examine the structure of a song from start to end (WHILE NOTING IT) to implement it into my own music. The interesting thing is lyrically your structure provides more detail than the music does naturally. So be concise and reflect back on your common themes to move the listener from point A to B and to C and so on.
-Verses should tell the story. They hold a majority of your lyrical context which can:
Set your characters
Pulls the listener in with emphasized details or scenic exploits.
You can absolutely adapt your own information to your verse, but remember to move from left to right on a story line chronologically telling the story to your listener.
-Choruses should be infectious and really bring out the that fishing hook to grab the listener. You want this part to be the most emotional, to hold the higher notes and melodies on both your singing and instrumentals and be spoken conclusively with power. Lyrical concepts could flow in the same direction as the verse sections, but should be a cap on top inspiring the mood of the entire song in its most emotional phase and repeat two to three times.
-Bridges are a more creative territory that happen around the 3/4 mark around your song where you can implement different melodies, offer a unique progression change in chords and in general, renew the interest of the listener to your song. One of the easiest ways to create a bridge that still holds interest is to tear apart your chorus and build it from the bottom up every two, four or eight bars. This will develop suspense and keep the listener in a nostalgic state between remembering what they just heard and what they are about to hear. Applying a fresh chord progression within your key or lyrical pattern in the same tempo is another way to renew the interest in what might be a solo or chorus.
-Coda is a fancy word for outro. Its where the song releases the listener back to where they came from. These can be crafted by simply removing elements of your instrumental every two, four or eight bars as stated previously for a bridge but should entail phrases and lyrical elements from prior song sections that may repeat, echo out or swell in and out to imply that this in fact is, the end.
5. Tell a story:
I know i have probably hit this one on the head enough. But when it comes down to it, a good story teller will provide you with context and emotion without telling you where and what this context and emotion came from. Creating a lyric that metaphorically resonates with someones life experience can greatly affect the way the song is taken in and even more so if the lyrics are proposed in a chronological manner giving the listener more of a time line to relate to these topics on.
So this is my second set of tips here that i did some searching on as well as provided some of my own experience with! I hope these help you out and work well within your next writing session. Thanks for reading!
-Andrew Giordanengo
-Audiohut
#song lyrics#songwriter#musician#lyricism#lyrics#writing#songstructure#music#musicprojects#writingmusic#hiphop#rapper#rap#rnb#soundcloudrapper#themoreyouknowduh#singer#vocalist#rapartist
3 notes
·
View notes
Text
This a beautiful moment
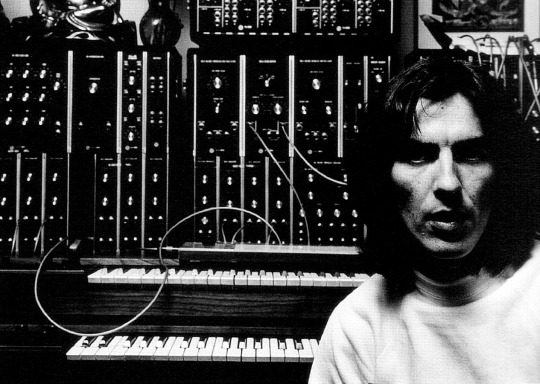
George Harrison with an early Moog synthesiser, which he used for his solo experimental electronic album, Electronic Sound, and for The Beatles' Abbey Road, 1969
326 notes
·
View notes
Text
Some thoughts on Song Writing
Have you ever listened to one of your favorite musicians records and found yourself thrilled and in love with one song but not so much the next? This is what i call your pallet or if you are in the process of creation: TRUSTING YOUR GUT. This is where you filter important aspects of the music like tempo, structure and melodies in and out to come to the conclusion of whether or not you like it. When composing your own piece of music, observing your work with this pallet will help you make important decisions relevant to your songs appeal to you as well as the listeners.
Aside from creating chords, beats or maybe even writing leads or bass lines there is one constant you will find yourself with that this pallet can greatly influence. This constant is choice making. You will make the CHOICE to place a chord in this progression or you will make the CHOICE to slow the tempo. When you are in the process, ask yourself if you are happy with your arrangement allowing your pallet to influence the choice of either keeping it, or removing it. As i continue to learn and become a better song writer, i have taken on this practice in each of my moves leading up to the engineering rather than pushing myself forward without consulting my pallet leading me to an unsatisfactory piece.
Side note: Upon playback when listening to your song in full, if you find ANY unjust decisions you had made do not leave it as a “well it sounds good enough” or a “ill get it better next time”. If you are AWARE that your pallet demands a change, take the time to do so. Music takes time, and this adjustment will in turn leave you more satisfied with your final product.
So now that we have the mindset on justifying your decisions, lets get into the crafting or a song. These next tips are some of the basics ive found throughout my audio career that i know have helped me and many others find success in the studio and in the market. The first one is:
Finding the key of your song
There are various different keys that can bring out a potential emotion in you and your listener that simply fits the lyrical content you have. If you haven't written your lyrics first, explore various keys and chords until you find something you think might fit your concept.
Side note: When you are writing your chorus or hook, make this part of the song the most emotive lyrically. This should be accompanied by a chord progression that pushes you vocally to reach the highest notes in your song conveying power and meaning to your words.
Writing your verse(s)
Your chorus or hook should be what is the main driver of your story. It should be spoken with the most emotion and be performed at the peak of your song to really give the listener the vibes behind your words. When you are crafting your verse, think about how your story is told throughout your song chronologically. Does it make sense as the song progresses forward? Does my verse(s) stay relevant to the chorus/hook before and after? Are my syllables well balanced and counted correctly? Remember that a lot of your chorus or hook energy comes from the amount of tension that is built up before hand. Try and envision your song like a sling shot. As the song progresses, your lyrics and instrumentation should have the power and nuance to pull back the sling shot building so much tension that when you finally hit your chorus, BOOM your lyrical and instrumental craft is being launched very powerfully.
Side note: Try and keep your lyricism on one topic to keep the lyrical movement of your song consistent and comprehensible.
These are just a few examples from experience that i have found useful and successful in various artist that i have worked with, as well as those you hear setting the industry standard. I will be putting up more tips and ideas on song writing for you among various other topics daily. If you enjoyed this, show some love. Thanks for reading!
-Andrew Giordanengo
-Audiohut
#songwriting#chordprogression#chordmelody#verse#chorus#hook#rapper#hiphop#rnb#beats#producer#beatproducer
14 notes
·
View notes