
ainsilcosplays
Ainsil's Cosplays Things
Header photo taken by the awesome Weaselkings
Ainsil's cosplay resource, WIPs, and tutorial blog.
CONVENTION SCHEDULE:
Anime North 2016
Otakuthon 2016
57 posts
Don't wanna be here? Send us removal request.
Last Seen Blogs
pink-heart-writes
i'm just a girl

alunasky-blog
Alunasky

zeejmalik
so fresh and so clean clean
123jyoti
👰🦋JYOTI🦋👰

ge-dankenrausch
idc / idk
Photo
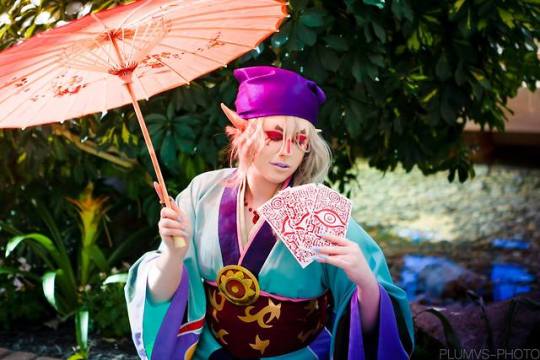
I just came back from Katsucon and I got a photo back of my Kusuriuri cosplay! I’m so happy with how it turned out and I can wait to see how the others came out!
Photographer: Plumvs
64 notes
·
View notes
Photo
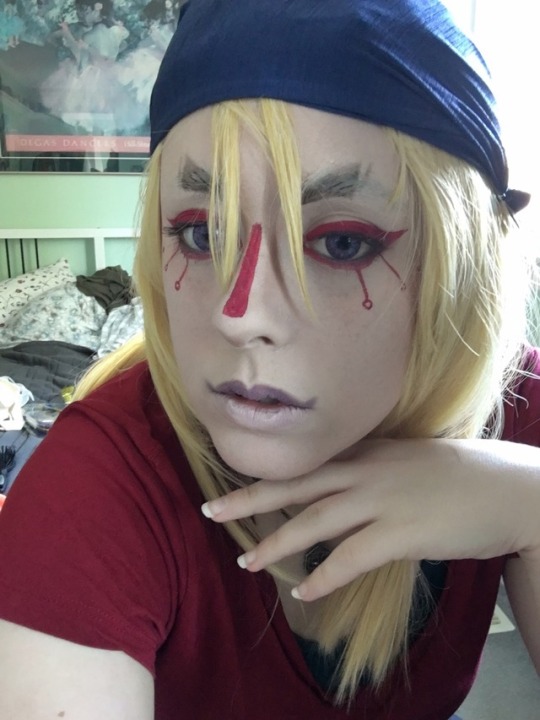
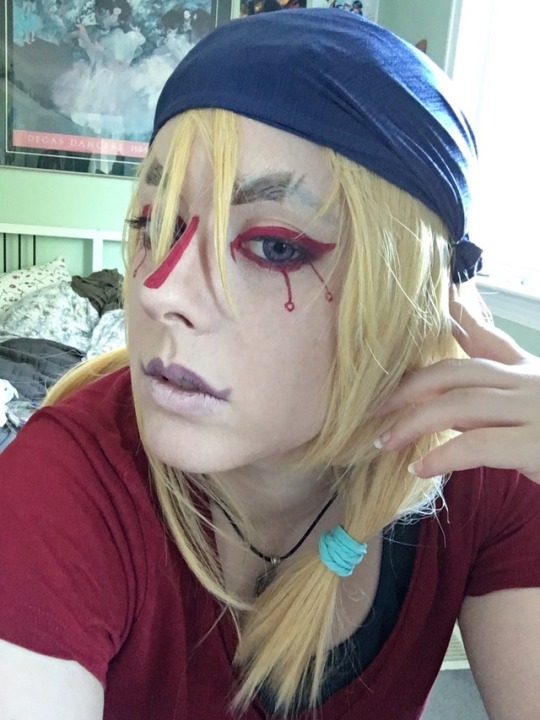
I did a makeup test for kusuriuri today to decide whether to cosplay him at katsucon. I have a lot of things I want to adjust with this, but overall, I'm really happy with how it came out!! Now I can actually buy the wig and start the cosplay lol.
14 notes
·
View notes
Text
thenameiscrowthenameiscrow replied to your photo
Josuke?
You’re correct!!! :’D
3 notes
·
View notes
Photo

If anyone can guess which character I'm cosplaying for Otakuthon, that'll be "just great". Pomps are hard man.
2 notes
·
View notes
Photo
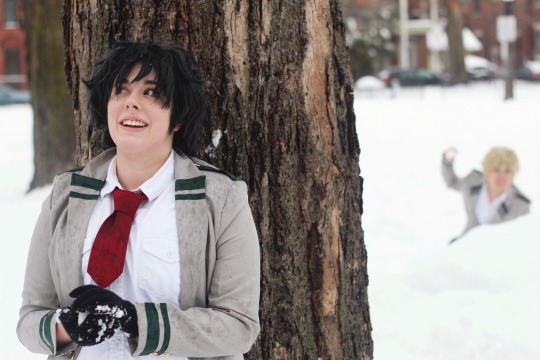
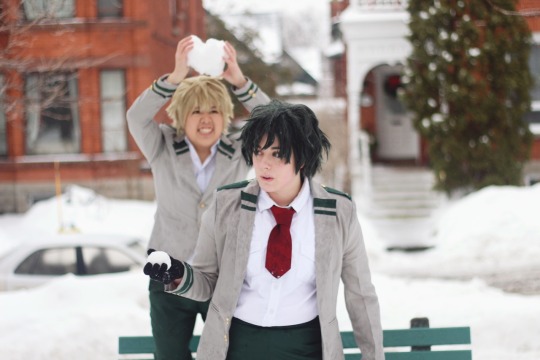
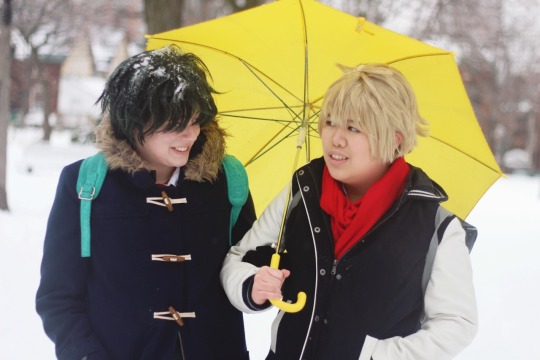
Wow, I haven’t posted anything in ages, apologies! I had a blast doing a super fun winter shoot with @weaselkings as Kacchan (there’s lots more shoots to come!). I’ve also got a facebook page for my cosplays which I will try to be more active on! You can check it out here!
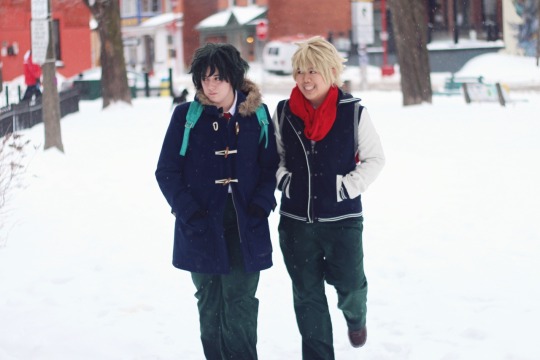


Did a really fun photoshoot last weekend for My Hero Academia! It was the first time I ever took a pictures of a snowball fight, and it was a blast!! Check out my blog for more pictures from this shoot, and don’t forget to like my Facebook page: facebook.com/luminettee
Deku - @ainsilcosplays
Kasuki - @weaselkings
Pictures taken by me.
11 notes
·
View notes
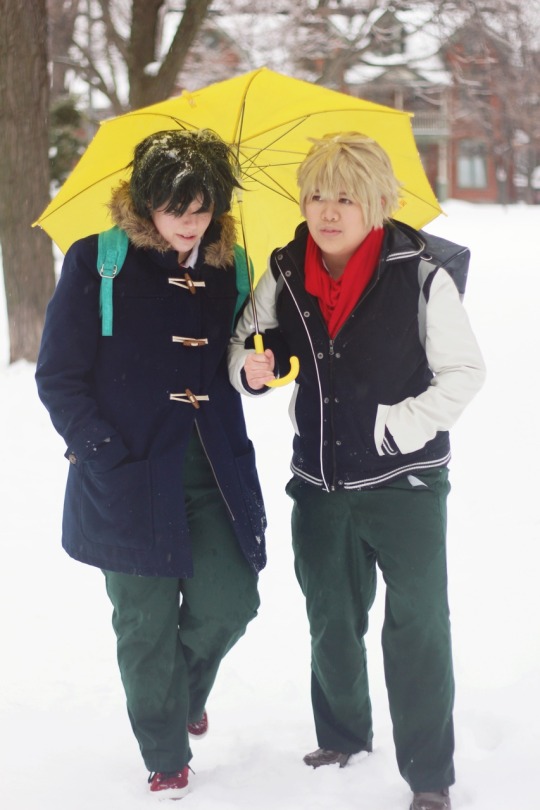
Photo
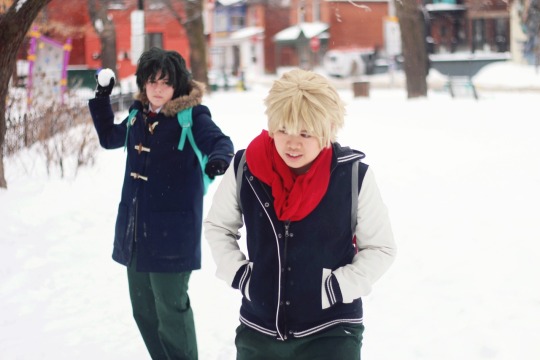
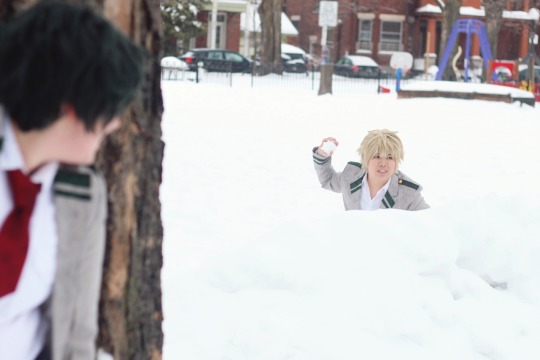
I’d just like everyone to know it look like two or three tries to get that last shot
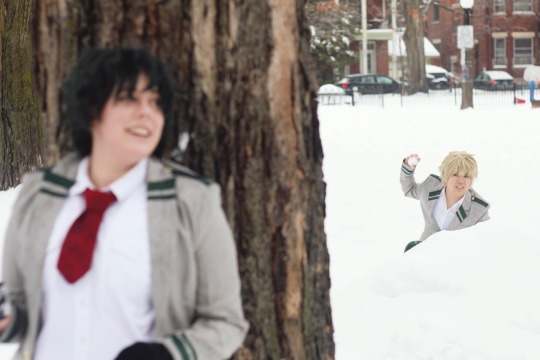
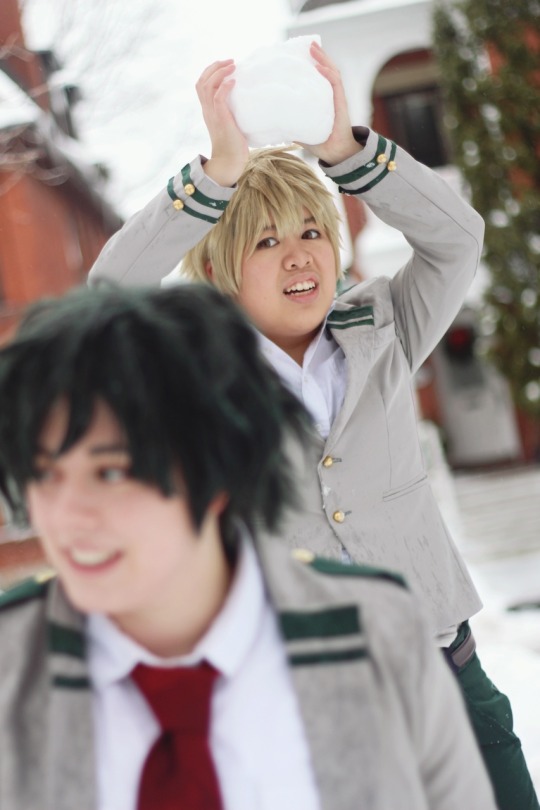
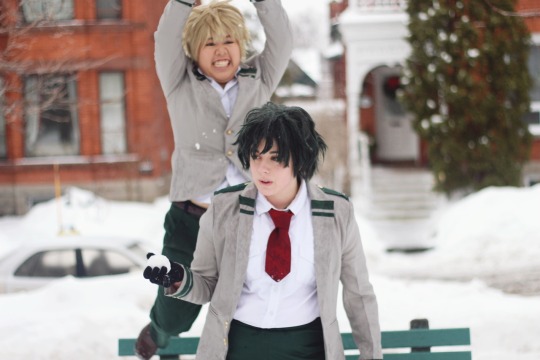

Part two of our My Hero Academia photoshoot! I think Deku lost this round.
Deku - @ainsilcosplays
Kasuki - @weaselkings
Pictures taken by me.
9 notes
·
View notes
Photo
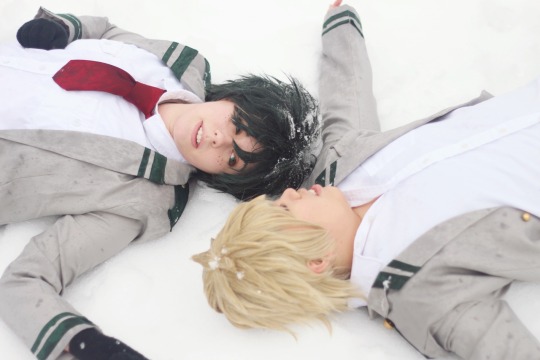
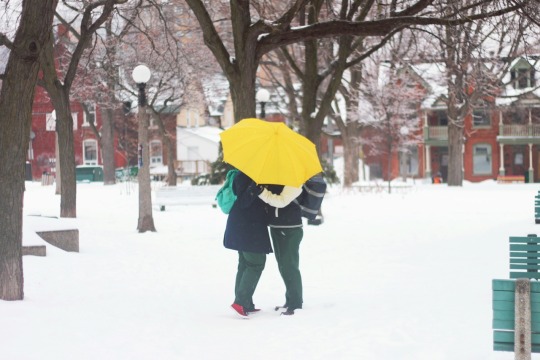
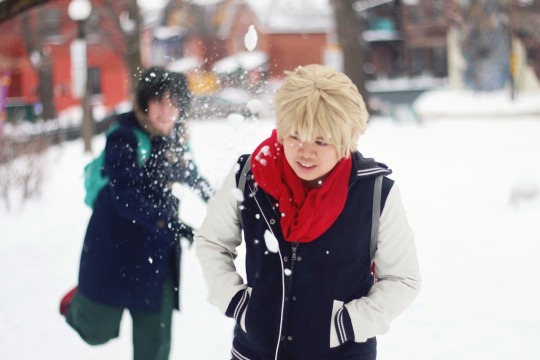
Part three of our My Hero Academia photoshoot!
Deku - @ainsilcosplays
Kasuki - @weaselkings
Pictures taken by me.
13 notes
·
View notes
Photo

what if noya gets lightning hair in his 3rd year to take the rolling thunder thing to the next level
35K notes
·
View notes
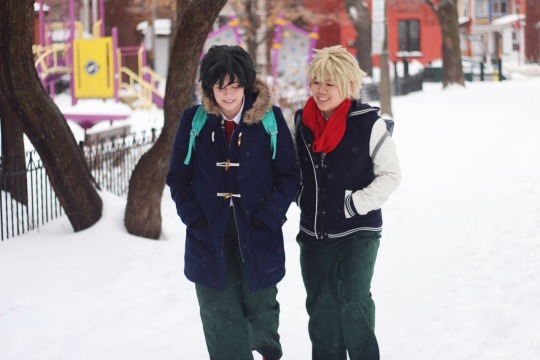
Photo
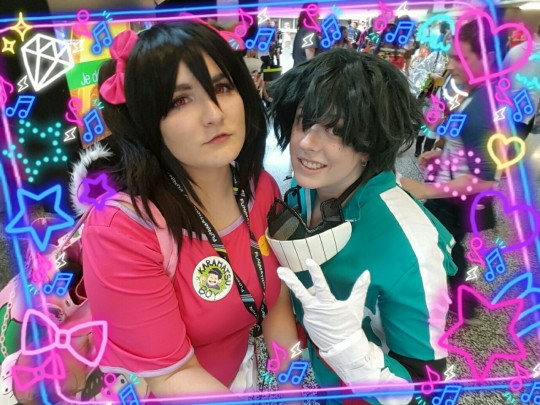
Some photos of me and @ainsil from the con!
22 notes
·
View notes
Text
Deku Hero Mask Tutorial (step-by-step with pictures)
I”ve gotten a few asks about how I made my Hero suit mask and I’ve finally gotten off my ass and made this tutorial for everyone. I’m going to put this under a read more, but here’s the end result:
So the mask cost me about $7 to make. It was only that cheap because I already had half the materials. Here’s what you will need:
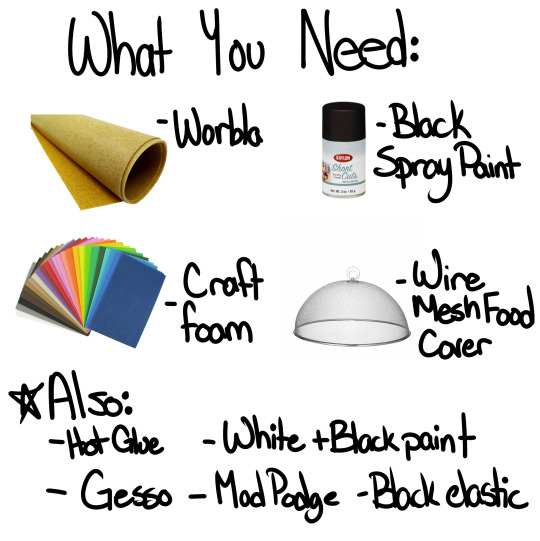
Materials Pictured:
- Worbla (11cm X 35 cm)
- Craft Foam
- Black Spray Paint
- Wire Mesh Food Cover (you can get it at the dollar store for like $2)
- Hot Glue
- White and Black Paint
- Mod Podge
- Gesso
- Painter’s tape
- Black Elastic
☆ A trick with the worbla is that you can use scraps. Just melt them together between sheets of wax paper and use a rolling pin to flatten and smooth them out. ☆
Step 1: Make your pattern. Use paper first!
Take the measurements of your face (plus some space for breathing room) and write it down. Measure the full width of what you to want it to look like. Here are the measurements of my mask.
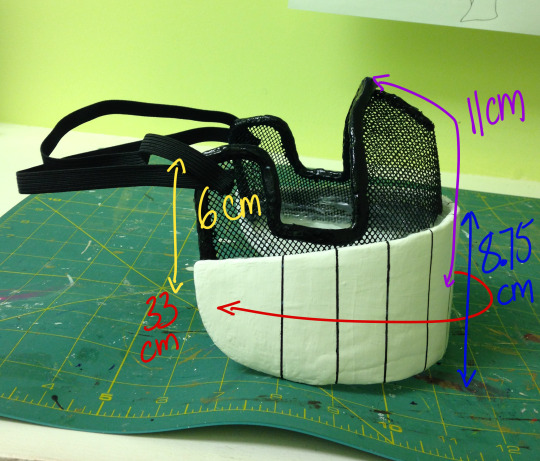
Here is what your pattern should look like:

Put your pattern together and hold it up to your face. Do you like it? If not, adjust your pattern until you are happy. Paper is easier to work with so it’s easy to adjust it. Remember to make your pattern a bit smaller (under half a centimetre smaller), because when you put the worbla over it, it will add some thickness!
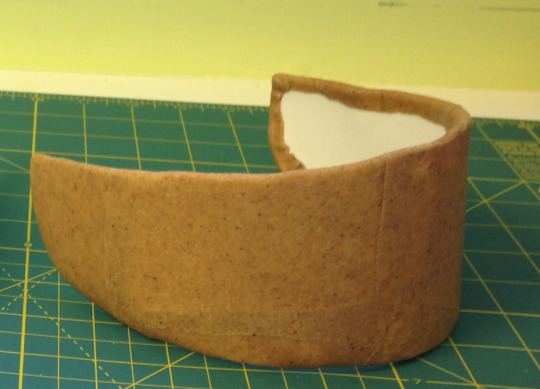
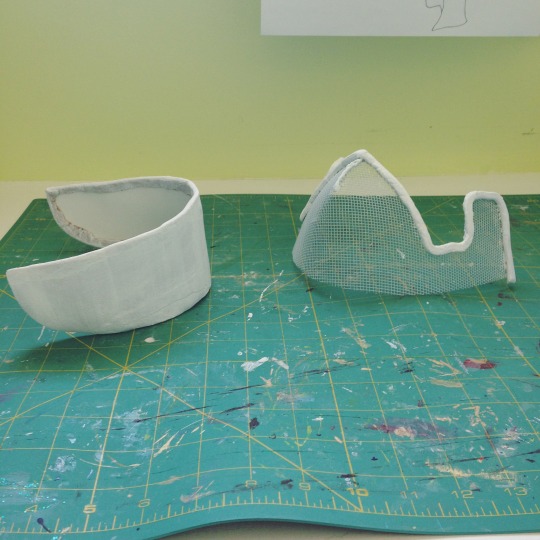
Step 2: Making the bottom half of the mask
Once you are happy with the shape bottom half of your mask, trace your shape onto your craft foam and cut it out. Use a heat gun or a heat source (stove, hair dryer, iron) to shape the foam into a curved shape, big enough for your face. While you let that cool, trace your paper pattern onto your worbla (add an inch to ALL the sides so you can fold it over).
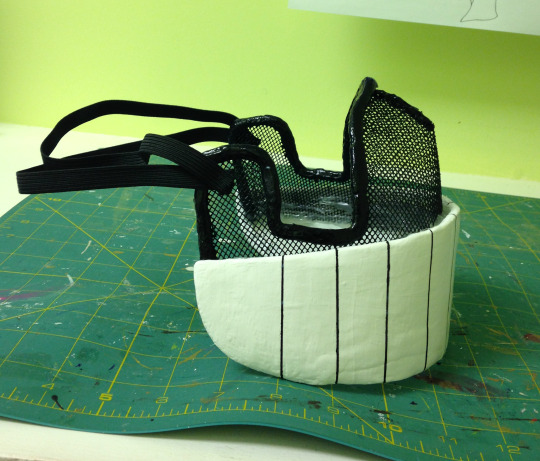
Using a heat gun or heat source (be careful!) mold the worbla to your foam base and wrap the excess worbla over the edges so it’s all covered. It should look like this:
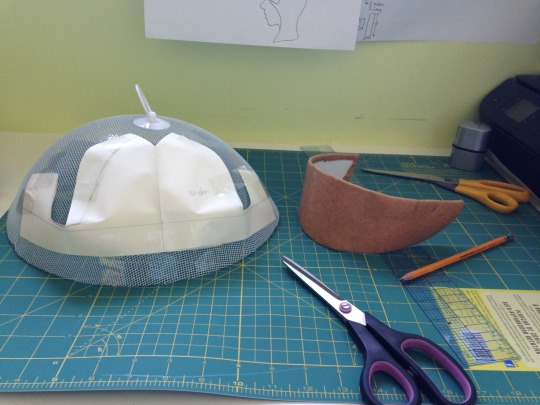
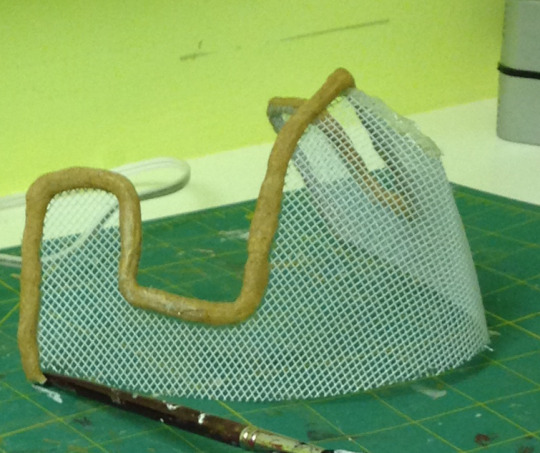
Step 3: Make the mesh wire half of the mask.
Using your paper pattern, tape the paper onto the mesh of your food cover and trace around it with a marker (Sharpie is best). It should look like this:
Now cut this out. Glue together the two points at the top to make a curved surface. When you’re gluing this, hold the mesh together until the glue is completely cooled. This way it won’t spring apart when you let go.
☆ You can use thread to bind the two sides together (like you’re sewing it together) for some added strength ☆
Your wire mesh form should now look like this:
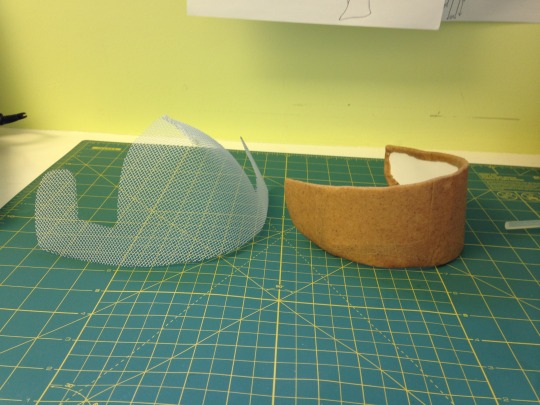
Step 3: Make the trim on the mask.
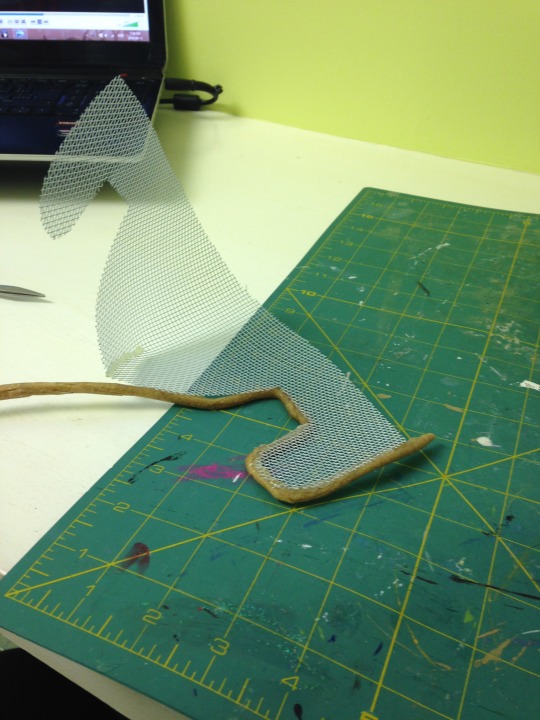
You’re going to need a trim around the mask so the wire mesh doesn’t cut you. I used some scrap worbla that I melted together and rolled out into a long string. You will need about 52+ cm of edging all together.
Heat the worbla and press it into the wire mesh edge and then seal it with hot glue. Only work about 2 inches at a time and give plenty of time for the glue to dry. The process looks like this:
When it’s done, it should look like this: (Make sure all the wire on the inside is covered with glue)
Step 4: Prime using Gesso
Cover the worbla with AT LEAST 5-6 coats of Gesso. This will prime the surface for painting and give a really smooth finish. Once you’ve painted on your last coat of gesso, you can sand the surface a bit to make it smoother. Make sure you can’t see any of the brown from the worbla showing. Before you sand, let the gesso fully set for about 4 hours, or leave it over night.
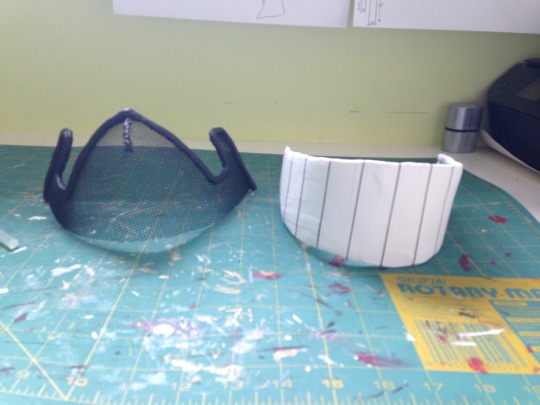
Step 5: Painting
Bring the top half of your mask outside and use the black spray paint and give it a few coats of that. Remember to spray paint outside and make sure you’ve covered your work surface (or floor) with either some painter’s cloth or news paper. You don’t want to get black paint everywhere.
Paint the bottom half of the mask with white paint. Use about 2-3 coats until it’s got a really nice and smooth finish. Once your paint is dry, use a pencil and make a small mark on the mask about every inch or so. Use some painter’s to make very thin lines around the marks vertically. Paint the inside of these lines black. Once dry, remove the painter’s tape. Everything should look like this:
Step 6: Put it together
We’re almost done! This part requires A LOT of hot glue, so be prepared (like 6 sticks of it). Play around with your mask and decide how you want it to look (how much of the front is shown and hidden, etc) and use hot glue to glue it in place. There will be a bit of a space at the front between the black part and the white part so fill it in with glue. Also make sure all of the wire mesh part not shown is covered in glue on the inside. The finished mask should look like this:

Step 7: Final touches
Put a protective layer or two on your mask to help keep it safe and to add some shine.
The final step is to add two straps on the mask. Place the mask to your face and measure out some elastic. Cut two strips and glue or sew them to the mesh.
Ta-Da! You’re now done! Your beautiful mask should look like this now! Happy Cosplaying!

#boku no hero academia#bnha#bnha cosplay#Cosplay Tutorial#deku#midoriya izuku#my hero academia#mha#ainsil explains things
289 notes
·
View notes
Text
august 1st is national girlfriend’s day who’s gonna bite the bullet nd date me
68K notes
·
View notes
Photo
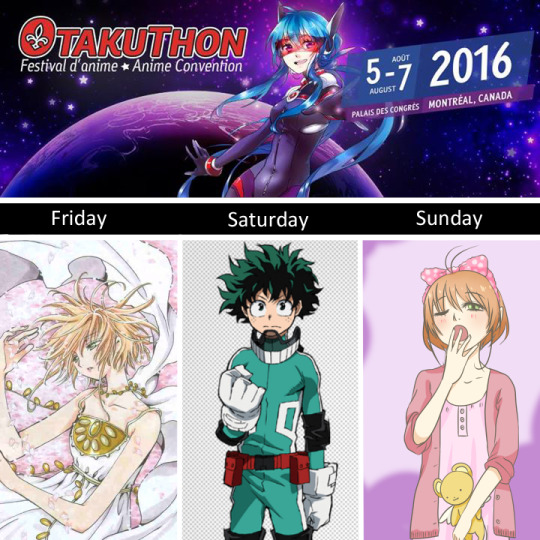
Here's my Otakuthon Lineup! Come say Hi! I might be switching into Deku on Friday to grab a pic with a friend. I also had the brilliant idea to do a pajama version of Sakura.
#bnha#mha#bnha cosplay#midoriya izuku#deku#sakura#sakura kinomoto#tsubasa reservoir chronicle#ainsil cosplays things
3 notes
·
View notes
Photo
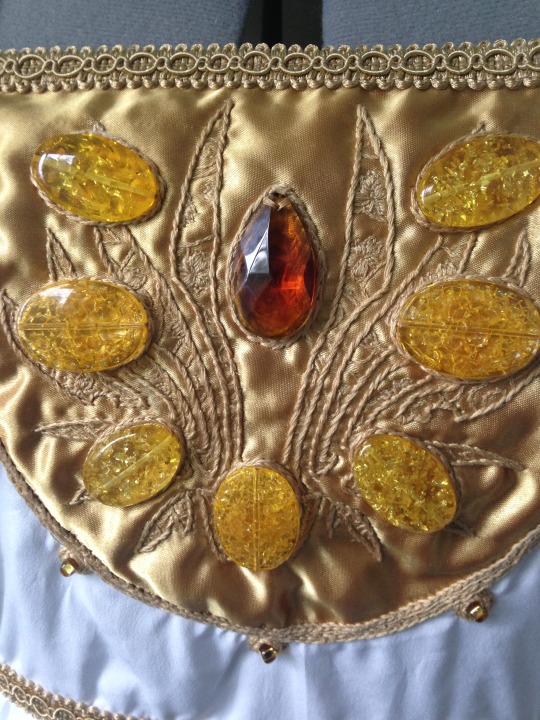


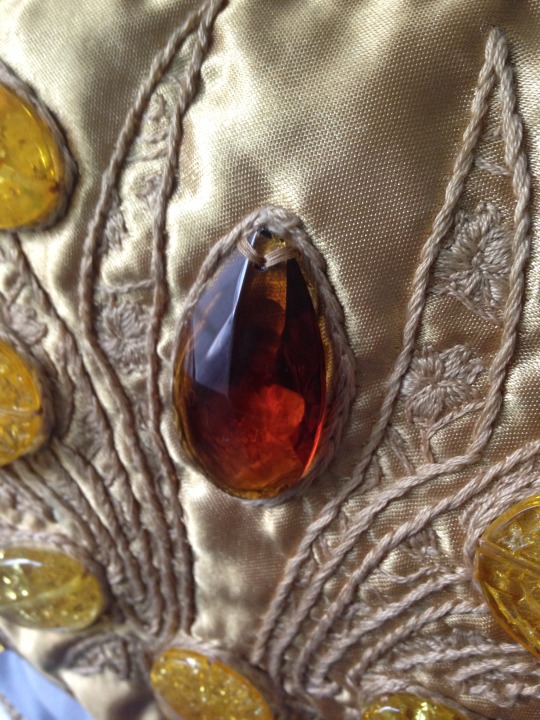
My little summer project was to do some embroidery on my Sakura dress. I wanted to embroider the Tsubasa wings into the gold chest piece and for an added detail I embroidered some small cherry blossoms inside the feathers. It was a bit challenging since I used stitches I was new to, but I'm pretty pleased with the results! I’ll be wearing this on the Friday of Otakuthon!
#tsubasa reservoir chronicle#sakura#sakura kinomoto#TRC#tsubasa cosplay#otakuthon#ainsil cosplays things
2 notes
·
View notes

Photo
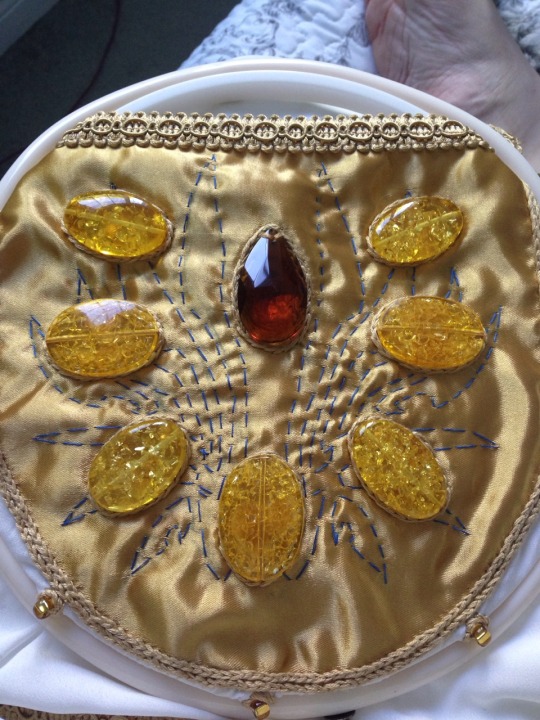
It's going to be a long night. Embroidery hell day 1. I'm adding on some details for my Sakura dress for Otakuthon.
3 notes
·
View notes
Text
Seeing someone slowly lose interest in you is probably one of the worst things ever
1M notes
·
View notes
Video
@kaccheon
22K notes
·
View notes