#the waffle had to be pre made so it was too dry to be tasty
Text


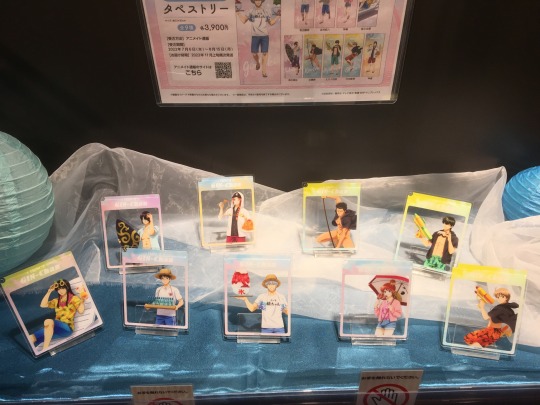
Some shots of the decor and the merch at the Gintama x animate cafe collab event.
#gintama#animate cafe#today was my second visit#the best meal: the yakisoba. the cold soba was okay (but I’m not a soba fan). the Shinsengumi plate was good but not enough mayo#I didn’t have the curry#the best drink: Katsura’s orange soda had bits of mango I couldn’t dig out from under all the ice#the strawberry milk was strawberry milk. takasugi’s shot was a weird combo of ugh and sweet#the best dessert? idk.#the waffle had to be pre made so it was too dry to be tasty#Elizabeth’s waffle cone was more like a parfait. the soba tea it came with was tasty#if I wasn’t so tired from the sweetness I would have gotten the Shinsengumi parfait as well probably#I have to go back to pick up the shirt and towel I prepaid for#because those sold out fast
9 notes
·
View notes
Text
How I Learned to Stop Worrying and Love My Freezer

hutchyb for Getty Images/iStockphoto
There’s a technique — even a flair — to freezing food successfully
My mother is what you might call a culinary cryogenicist. Long before the crew at the Noma Food Lab grew their first flavor spore, my mom was experimenting with the effects of age and temperature on all kinds of foodstuffs: the last two bites of some mac and cheese. Four shrimp. One-third of a pork chop. Three matzo balls. Half a bag of green beans tied shut with a trash bag twist-tie. An old joint. Eight slices of rye bread. Raisins. So. Much. Ham. And that’s just the first shelf of the freezer.
It was a talent she inherited. Her own mother was a master of the freezer arts, best exemplified by the very same “tray of frozen shrimp” offered to us on every grandparent visit for more than two decades; it became a running family joke. As a member of the next generation, however, my family’s faith in the preservation power of cold turned me into a devoted freezer snob. For most of my adult life, my freezer has remained a sacred space reserved for only the most cold-hardy ingredients — ice cream, popsicles, those giant cocktail ice spheres, and maybe the occasional box of toaster waffles or bag of frozen peas. Meat? God no. Fish? Please, back away and leave quietly.
In my mind, freezing things ruined their precious molecular integrity by turning them into rock-hard cubes. Meat is normally prized for its “freshness.” In the fields, crops are carefully covered to prevent freezing, so why put them under such duress in your own home? Having kids a few years ago loosened me up a bit — show me one child-rearing American household a without a frozen bag of dinosaur-shaped chicken blobs lurking somewhere. But overall, for the better part of the last decade, my freezer has remained as sleek and food-free as an after-hours Apple Store.
But when COVID-19 hit I admittedly went into full hoarder mode. My diet, like my fashion, is dictated by my mood (it’s also why I’m a chronic over-packer). With annual memberships to Instacart, Amazon Fresh, and a handful of specialty grocers down the street, I’d become accustomed to getting all the ingredients to sate any craving within an hour of it hitting. Maintaining that level of spontaneity in the time of supermarket lines and impossible delivery queues meant stocking up in ways I’d never fathomed before.
Even with a family of four eating three-plus meals a day, the kind of inventory I was sporting needed to be able to hang out a while. And so, it was with deep reservations that I finally began freezing things — though the real miracle didn’t occur until I began un-freezing them.
First I tried a pork tenderloin, one of three I had purchased at Costco a few weeks earlier. Following the advice of the pros, I took it out of the freezer and put it in my fridge overnight, cooked it as usual, and it was… fine. Good, even. Next I tried salmon — I’ve had terrible experiences with frozen seafood in the past, so my hopes were low for the three rosy-pink portions I defrosted and broiled. But again, the resulting fish was surprisingly moist, fatty, firm, delicious.
After that I started throwing everything in the freezer just to see: ground turkey, chicken thighs. All were fine. Then I moved into pizza dough, shredded cheese, blanched vegetables; then on to chili, tortillas, pancakes, whole loaves of bread, coffee (while dry coffee beans won’t technically “go bad,” their flavor and aroma suffer over time). Pretty much every single thing I froze — and later unfroze — emerged as relatively unharmed and tasty as the day I bought it. (Notable exceptions included skim milk and some poorly wrapped steaks, and it took some serious trial and error with fresh greens.)
Now, as we go into week five… or six? of “safer at home” measures, my freezer has transformed from a sterile ice-storage facility to a clutch partner in culinary crime. Today the once-barren shelves are buckling beneath the weight of dated and labeled baggies and bins with enough perfectly preserved food to more than bridge the gap between bi-weekly produce box deliveries and masked-up grocery runs.
But as it turns out, my mom and grandmother were, in fact, artists — there is a technique, even a flair to freezing food successfully. Wrap something improperly or defrost incorrectly and you might not just risk the integrity of your ingredients, but also your health. So after a month or so of embracing my familial fate and becoming a frozen food convert, here are a few lessons I’ve learned:
The Container Matters
I know, plastic is the enemy, but those fancy glass containers can crack in the freezer. According to the experts, the best way to freeze food is in a vacuum-seal bag that you suction yourself with one of those fancy machines to minimize air (air is your enemy in the great freezer wars). I don’t have one of those — though I’ve been eyeing this one on Amazon — so I use regular old freezer-grade zipper bags and press out as much air as possible before sealing. There’s also a trick where you mimic a vacuum sealer with a drinking straw, slipping it in the corner of the bag and sucking out as much air as you can before pulling the straw out at the last minute, but I felt weird inhaling all those funky meat fumes. My Instagram feed has been full of ads for these pricey silicone bags that I hear work well but I’ve yet to give them a test run.
Either way, you’re going for minimal air exposure and some thickness barrier — a little cushion between your food and the freezer air will help prevent that dreaded freezer burn, a damaging mix of oxidation and dehydration.
Prep Is Key
For meat and fish, you generally want to remove them from their original packaging and re-wrap in individual portions before freezing. Wrapping each cut in an extra layer of plastic before putting them in the zipper bag adds another degree of protection. Timing is key here. Freeze cuts of meat immediately after you get them home, or better yet, buy them pre-frozen. There are entire industries built around freezing fish in a way that sacrifices the least in the way of flavor and texture, so trust the pros — they know what they’re doing.
Vegetables, for the most part, should be quickly blanched before freezing. The drag here is that in the process of blanching, they absorb too much water to get any sort of good roasty char later, but it’s a small price to pay for having quality seasonal produce year-round. Before you blanch, prep the ingredients the way you plan to eat them, meaning separating broccoli and cauliflower into florets, snapping the ends off green beans, and chopping greens. Then boil a big pot of water and dunk the vegetables in for about a minute before plunging immediately into a big bowl of icy water. This will keep them from continuing to cook and turning to mush. The next part is key: Dry everything as best you can. The more water, the thicker the tectonic ice coating you’ll get on every piece. Then put everything into baggies and freeze.
Fruit freezing techniques vary — it all depends what you want to use them for. No amount of freezer skill will recreate the experience of biting into a fresh peach after it’s been frozen. But for smoothies, pie fillings, baking, or juice, most fruit will freeze just fine. Bananas freeze great, peel and all. Berries you’ll want to rinse, dry, then let freeze on a large flat surface like a cookie sheet before transferring to bags. If you want to use citrus just for zest or juice, go ahead and freeze them whole. They say you can freeze citrus in wedges individually, but I found the texture suffers greatly after defrosting, and honestly I can’t imagine what you’d want to use floppy, deflated tangerine wedges for. Juice is no problem — just squeeze, put the juice into an ice cube mold and freeze. You can pop them out later and transfer to a plastic bag for easier storage.
The above ice-cube tray technique works well for all kinds of liquids and purees. I actually bought these cool molds to freeze baby food for my second kid, and I use them now for smaller portions of stocks, lemon juice, pesto, pizza sauce. For larger batches, I pour a couple of cups into a zipper bag, get out as much air as possible, and freeze them flat so I can stack them later.
Breads freeze fantastically, but as a rule pre-sliced is best. I started buying giant loaves of my favorite rye bread from the farmers market and keep them in the freezer full-time, toasting off individual slices as needed; my mom perfected a technique with bagels that involves slicing them as soon as you get them home, wrapping each half separately, and then toasting them direct from the freezer. Pre-cooked tortillas and pita you can just wrap, freeze, and cook off one by one, but my most exciting recent discovery has been in the realm of pre-baked goods. It turns out most doughs recover well after freezing, and I just made a batch of biscuits using this technique that has you freezing the raw, cut biscuits ahead of time and baking them off as needed. It’s opened up a whole new world of frozen pastry projects for me.
I’m sure there’s some technique to freezing cheese but honestly I just put whole hunks and bags of the pre-shredded stuff straight into the freezer. I don’t really freeze milk but the wisdom is that the more fat content, the better it freezes, so half-and-half freezes great, skim milk not so much. Coffee I found out you can freeze and brew straight from frozen, which is excellent considering it is an absolute nonnegotiable in my house.
*If you’re curious about any other ingredient, there are countless guides to freezing food online that will steer you in the right direction.
Don’t Rush the Defrost
(Even Though Sometimes I Do, But It’s Really Risky, Okay?)
The basic rule of thumb for pretty much everything is low and slow. Put whatever you want to defrost in the refrigerator the night before you want to cook it — sometimes longer for big cuts of meat — and let it come to temperature gradually. I do this... most times. But there is a reason your microwave has a “defrost” setting, and it will definitely speed things along if also putting you at risk of prematurely cooking the edges of your chicken breast. I’ve successfully defrosted smaller cuts of fish and shrimp by running the bags under cold water in the sink for a few minutes until soft enough to handle, but this is not officially endorsed by the pros. What you’re definitely not supposed to do is let your ingredients hang out at room temp until they defrost. I have done this too, though it is a surefire recipe for a bacterial infection and this is not the time you want to be running to the ER for dehydration.
The point is, the freezer might be cold and dark, but it is not at all a thing to fear. Utilizing it well has helped me maintain the kind of spur-of-the-moment cooking style that feels normal to me — a valuable thing when pretty much everything else about my life right now does not feel normal. Now all I need is a bigger freezer.
from Eater - All https://ift.tt/3ctLE4P
https://ift.tt/3efkQXs
hutchyb for Getty Images/iStockphoto
There’s a technique — even a flair — to freezing food successfully
My mother is what you might call a culinary cryogenicist. Long before the crew at the Noma Food Lab grew their first flavor spore, my mom was experimenting with the effects of age and temperature on all kinds of foodstuffs: the last two bites of some mac and cheese. Four shrimp. One-third of a pork chop. Three matzo balls. Half a bag of green beans tied shut with a trash bag twist-tie. An old joint. Eight slices of rye bread. Raisins. So. Much. Ham. And that’s just the first shelf of the freezer.
It was a talent she inherited. Her own mother was a master of the freezer arts, best exemplified by the very same “tray of frozen shrimp” offered to us on every grandparent visit for more than two decades; it became a running family joke. As a member of the next generation, however, my family’s faith in the preservation power of cold turned me into a devoted freezer snob. For most of my adult life, my freezer has remained a sacred space reserved for only the most cold-hardy ingredients — ice cream, popsicles, those giant cocktail ice spheres, and maybe the occasional box of toaster waffles or bag of frozen peas. Meat? God no. Fish? Please, back away and leave quietly.
In my mind, freezing things ruined their precious molecular integrity by turning them into rock-hard cubes. Meat is normally prized for its “freshness.” In the fields, crops are carefully covered to prevent freezing, so why put them under such duress in your own home? Having kids a few years ago loosened me up a bit — show me one child-rearing American household a without a frozen bag of dinosaur-shaped chicken blobs lurking somewhere. But overall, for the better part of the last decade, my freezer has remained as sleek and food-free as an after-hours Apple Store.
But when COVID-19 hit I admittedly went into full hoarder mode. My diet, like my fashion, is dictated by my mood (it’s also why I’m a chronic over-packer). With annual memberships to Instacart, Amazon Fresh, and a handful of specialty grocers down the street, I’d become accustomed to getting all the ingredients to sate any craving within an hour of it hitting. Maintaining that level of spontaneity in the time of supermarket lines and impossible delivery queues meant stocking up in ways I’d never fathomed before.
Even with a family of four eating three-plus meals a day, the kind of inventory I was sporting needed to be able to hang out a while. And so, it was with deep reservations that I finally began freezing things — though the real miracle didn’t occur until I began un-freezing them.
First I tried a pork tenderloin, one of three I had purchased at Costco a few weeks earlier. Following the advice of the pros, I took it out of the freezer and put it in my fridge overnight, cooked it as usual, and it was… fine. Good, even. Next I tried salmon — I’ve had terrible experiences with frozen seafood in the past, so my hopes were low for the three rosy-pink portions I defrosted and broiled. But again, the resulting fish was surprisingly moist, fatty, firm, delicious.
After that I started throwing everything in the freezer just to see: ground turkey, chicken thighs. All were fine. Then I moved into pizza dough, shredded cheese, blanched vegetables; then on to chili, tortillas, pancakes, whole loaves of bread, coffee (while dry coffee beans won’t technically “go bad,” their flavor and aroma suffer over time). Pretty much every single thing I froze — and later unfroze — emerged as relatively unharmed and tasty as the day I bought it. (Notable exceptions included skim milk and some poorly wrapped steaks, and it took some serious trial and error with fresh greens.)
Now, as we go into week five… or six? of “safer at home” measures, my freezer has transformed from a sterile ice-storage facility to a clutch partner in culinary crime. Today the once-barren shelves are buckling beneath the weight of dated and labeled baggies and bins with enough perfectly preserved food to more than bridge the gap between bi-weekly produce box deliveries and masked-up grocery runs.
But as it turns out, my mom and grandmother were, in fact, artists — there is a technique, even a flair to freezing food successfully. Wrap something improperly or defrost incorrectly and you might not just risk the integrity of your ingredients, but also your health. So after a month or so of embracing my familial fate and becoming a frozen food convert, here are a few lessons I’ve learned:
The Container Matters
I know, plastic is the enemy, but those fancy glass containers can crack in the freezer. According to the experts, the best way to freeze food is in a vacuum-seal bag that you suction yourself with one of those fancy machines to minimize air (air is your enemy in the great freezer wars). I don’t have one of those — though I’ve been eyeing this one on Amazon — so I use regular old freezer-grade zipper bags and press out as much air as possible before sealing. There’s also a trick where you mimic a vacuum sealer with a drinking straw, slipping it in the corner of the bag and sucking out as much air as you can before pulling the straw out at the last minute, but I felt weird inhaling all those funky meat fumes. My Instagram feed has been full of ads for these pricey silicone bags that I hear work well but I’ve yet to give them a test run.
Either way, you’re going for minimal air exposure and some thickness barrier — a little cushion between your food and the freezer air will help prevent that dreaded freezer burn, a damaging mix of oxidation and dehydration.
Prep Is Key
For meat and fish, you generally want to remove them from their original packaging and re-wrap in individual portions before freezing. Wrapping each cut in an extra layer of plastic before putting them in the zipper bag adds another degree of protection. Timing is key here. Freeze cuts of meat immediately after you get them home, or better yet, buy them pre-frozen. There are entire industries built around freezing fish in a way that sacrifices the least in the way of flavor and texture, so trust the pros — they know what they’re doing.
Vegetables, for the most part, should be quickly blanched before freezing. The drag here is that in the process of blanching, they absorb too much water to get any sort of good roasty char later, but it’s a small price to pay for having quality seasonal produce year-round. Before you blanch, prep the ingredients the way you plan to eat them, meaning separating broccoli and cauliflower into florets, snapping the ends off green beans, and chopping greens. Then boil a big pot of water and dunk the vegetables in for about a minute before plunging immediately into a big bowl of icy water. This will keep them from continuing to cook and turning to mush. The next part is key: Dry everything as best you can. The more water, the thicker the tectonic ice coating you’ll get on every piece. Then put everything into baggies and freeze.
Fruit freezing techniques vary — it all depends what you want to use them for. No amount of freezer skill will recreate the experience of biting into a fresh peach after it’s been frozen. But for smoothies, pie fillings, baking, or juice, most fruit will freeze just fine. Bananas freeze great, peel and all. Berries you’ll want to rinse, dry, then let freeze on a large flat surface like a cookie sheet before transferring to bags. If you want to use citrus just for zest or juice, go ahead and freeze them whole. They say you can freeze citrus in wedges individually, but I found the texture suffers greatly after defrosting, and honestly I can’t imagine what you’d want to use floppy, deflated tangerine wedges for. Juice is no problem — just squeeze, put the juice into an ice cube mold and freeze. You can pop them out later and transfer to a plastic bag for easier storage.
The above ice-cube tray technique works well for all kinds of liquids and purees. I actually bought these cool molds to freeze baby food for my second kid, and I use them now for smaller portions of stocks, lemon juice, pesto, pizza sauce. For larger batches, I pour a couple of cups into a zipper bag, get out as much air as possible, and freeze them flat so I can stack them later.
Breads freeze fantastically, but as a rule pre-sliced is best. I started buying giant loaves of my favorite rye bread from the farmers market and keep them in the freezer full-time, toasting off individual slices as needed; my mom perfected a technique with bagels that involves slicing them as soon as you get them home, wrapping each half separately, and then toasting them direct from the freezer. Pre-cooked tortillas and pita you can just wrap, freeze, and cook off one by one, but my most exciting recent discovery has been in the realm of pre-baked goods. It turns out most doughs recover well after freezing, and I just made a batch of biscuits using this technique that has you freezing the raw, cut biscuits ahead of time and baking them off as needed. It’s opened up a whole new world of frozen pastry projects for me.
I’m sure there’s some technique to freezing cheese but honestly I just put whole hunks and bags of the pre-shredded stuff straight into the freezer. I don’t really freeze milk but the wisdom is that the more fat content, the better it freezes, so half-and-half freezes great, skim milk not so much. Coffee I found out you can freeze and brew straight from frozen, which is excellent considering it is an absolute nonnegotiable in my house.
*If you’re curious about any other ingredient, there are countless guides to freezing food online that will steer you in the right direction.
Don’t Rush the Defrost
(Even Though Sometimes I Do, But It’s Really Risky, Okay?)
The basic rule of thumb for pretty much everything is low and slow. Put whatever you want to defrost in the refrigerator the night before you want to cook it — sometimes longer for big cuts of meat — and let it come to temperature gradually. I do this... most times. But there is a reason your microwave has a “defrost” setting, and it will definitely speed things along if also putting you at risk of prematurely cooking the edges of your chicken breast. I’ve successfully defrosted smaller cuts of fish and shrimp by running the bags under cold water in the sink for a few minutes until soft enough to handle, but this is not officially endorsed by the pros. What you’re definitely not supposed to do is let your ingredients hang out at room temp until they defrost. I have done this too, though it is a surefire recipe for a bacterial infection and this is not the time you want to be running to the ER for dehydration.
The point is, the freezer might be cold and dark, but it is not at all a thing to fear. Utilizing it well has helped me maintain the kind of spur-of-the-moment cooking style that feels normal to me — a valuable thing when pretty much everything else about my life right now does not feel normal. Now all I need is a bigger freezer.
from Eater - All https://ift.tt/3ctLE4P
via Blogger https://ift.tt/2REXkcN
0 notes
Text
Hello all!
It’s been a long while since I’ve written up a proper blog post on here. I’m most active on my instagram these days, but I’m going to make an effort to post more regularly on my actual page as sometimes I find I cut recipes short to fit them all into the Instagram/Facebook format etc.
I was recently in New York and pretty much centered the entire trip around finding all the good foodie spots, so I figured it deserved a lengthy post! We tended to eat a late brunch and dinner most days, skipping lunch as our hotel had a free snack bar which was very handy. They had fresh fruit, lovely coffee & granola bars in the morning which were great to grab n’go. The options changed from lunch time and included savoury snacks and sweet treats with limitless soft drinks, fizzy water etc. We stayed in the Club Quarter Hotel Midtown near Times Square. It was a brilliant location, lovely room, great value, nice staff and the unlimited snack bar with filtered water on tap was such a bonus. They even gave little bottles to take your water with you! Hotel website linked here.
So, without further ado, here are all of the foodie places in New York during my trip. Hope anyone travelling to NY finds it useful! Thanks to everyone who recommended food spots to me before I went – you all helped to make my trip deliciously good and my foodie self is eternally grateful!

BRUNCH
Bubbys – Easily the single best brunch I have ever had and was the food highlight of the trip for me. We went to the one in Tribeca but they have a few locations. We got the Eggs Benedict and ‘Pancake Flight’. The Eggs benny was to die for, we opted for the version with bacon and added some avocado to it. The pancakes were also EPIC. Super fluffy & thick, they came with berries, nutella, blueberry compote, whipped cream, caramelised banana and toasted walnuts. They also came with maple syrup and butter on the side without even asking – it was a lovely touch. The total bill came to about $60 including a tip and we didn’t get coffees/drinks, only tap water. I honestly can’t wait to go back to NY to have Bubbys again, it was just that good. Bubbys is a definite must! Website here.
@bubbys
Sarabeths – This is super near to Central Park. We had seen on their instagram that they are famous for their french toast so that’s what we went with. For $50 we also got a caraffe of Bellini’s – it’s about 5-6 glasses which were $15 each so it’s good value really ;). I ordered the Almond crusted French toast and my friend went for the ‘Fluffy Fat’ french toast. We also ordered a side of bacon (additional $12). I will say I was quite disappointed with my almond version as when I cut into it, it was actually bone dry in the middle. The whole point of French toast is that it should be eggy/custardy having been soaked in an egg mixture but this was essentially dry almond toast. They were very good and immediately replaced it with the plain version that my friend had ordered. This was absolutely delicious and came with a side of butter and maple syrup. The service was great here and I would definitely recommend the Fluffy Fat french toast and skip the almond version! All in all the bill came to about $115 excl tip. Pricey but it is in a great location and overall the food and drink was lovely. Website here.
@sarabethsnyc
Fresh & Co – We definitely couldn’t leave New York without trying a cream cheese bagel! I had lots of places recommended to me, but we happened to be passing by here and were stuck for time so we just popped in. It wasn’t on the menu and breakfast had just finished, but they made these specially up for us which was really nice. We asked for 2 wholemeal bagels, filled with cream cheese, avocado, crispy bacon and a runny fried egg. We got freshly squeezed orange juice to go with. It was honestly *so* good and hit the spot. Great place to call into if you just want something quick to eat & go. I think it was roughly $12 for the two bagels, with orange juice about $5 extra incl taxes. They have quite a few locations. Website here.
@freshandconyc
DINNER
Ellens Stardust Diner – This place is pretty much as American as it gets. It’s a diner set in the heart of Times Square, waited by Broadway hopefuls who sing and perform throughout the entire meal. They are also famous for their brunch. We headed here our first night and ate dinner here. We went for the Mac n Cheese burger, served with waffle fries. We then shared a Brownie ‘Mudslide’ Sundae for dessert. It was typical American diner food, it was decent and hit the spot but you definitely more so go there for the surroundings than the food. Total bill was about $60 excl tips but be mindful, they send around a separate bucket for the tips for the singers too. Website here.
@ellensstardust
Ottos Tacos – We got these the night we went to Woodbury Common Shopping outlet. It was such a long day and we were absolutely shattered when we got back to our hotel, so we ordered Uber Eats. We opted for a ‘Beyond’ Vegan chorizo taco, chicken taco, chips & guac and rice and beans. The chorizo taco wasn’t great but all in all was a tasty meal and perfect for a late night nibble. Uber eats is super handy if you’re stuck on time/tired and they have no problem delivering to hotels, they had a huuuuge selection of foods available. Website here.
@ottostacos
Otto Pizzeria – We had a lovely dinner at otto pizzeria. We originally wanted to get to Joes pizza which I’d had lots of recommendations for or Scarrs… however otto was closer by and Joes had queues out the door! I opted for a delicious egg pizza washed down by blood orange cocktails. We actually arrived half an hour earlier than our booking and they were lovely about it and immediately seated us. We also got complimentary focaccia & olive oil to start! It did the trick but definitely still have Joes & Scarrs on the pizza list! Website here.
@ottopizzeria
BAKERIES
Levain Bakery – I went to the one just off central park. I had heard a lot of hype about this place. They are famous for their super thick gooey cookies and sweet jesus, they did not disappoint. Some of the best cookies I’ve ever had. All made better by eating them while strolling on lovely sunny day in central park. You wouldn’t even know the bakery is there – it is tiny and down these little steps, I had to ask a local where it was as I couldn’t find it! There was no queue when I was there thankfully, but be mindful of this as apparently there is usually a big wait. The cookies were $4 each and worth every bit and more! Their hot chocolate looked epic too so will definitely be paying here a visit the next time I’m in New york to get it! Definitely put this place on your list. Website here.
@levainbakery
Magnolia Bakery – If you are a fan of Sex in the City, you’ll be familiar with this place. It is just around the block from Carrie Bradshaw’s famous apartment and the bakery featured in the TV show a couple of times making it an instant hit. They are famous for their banana pudding – a creamy pudding filled with banana, sponge and graham crackers. I opted for the small pot (as I was stuffed but couldn’t not go to NY and not try it!). It was absolutely insanely good. I think it was about $5 incl tax and worth it for sure. Next time I’m going to try their cupcakes as I’ve heard they are amazing too. Website here.
@magnoliabakery
Carlos Bakery – If you’ve ever watched Cake Boss, here is a must visit! We went to the one near the Port Tunnel (where we got our bus from to Woodbury Common. We actually got a great deal for this on groupon, I’ve linked it here) The original one is in Hoboken and I believe is worth a visit too! The bakery itself was full of a mix of treats, a lot of artificially coloured american style cakes which wouldn’t be my thing, but their pastries, cookies etc all looked amazing. We were spoiled for choice. M\y friend got an M&M cookie which was really tasty and I got a chocolate hazelnut lobster tail pastry filled with delicious hazelnut creme patisserie and drizzled with nutella. So good. All in all they both came to about $11 dollars. The perfect breakfast to bring on board the 1 hour bus journey! Bakery linked here.
@carlosbakery
OTHER BITS…
Airport Lounge – 51st & Green in Dublin Airport terminal 2. We opted to pay into the lounge before our flight as we had a few hours to kill. It was definitely worth it in my opinion! It was located after pre clearance for the US so it was lovely to relax and unwind knowing you had that already done. It costed €39 to get in at the door, but you can book it online for €35. Our flight was in the morning, so they had a full buffet breakfast bar alongside a cocktail bar and coffee station. You can see the lounge by clicking here.
The Plaza Hotel – We were initially going to book ourselves in for afternoon tea here as we’ve heard rave reviews. It was booked out in the end, but we went their for a drink after our brunch in Sarabeths. We opted for 2 x champagne cocktails each $26 excl tax/tips. They were served with a lovely little snack plate of chilli pumpkin seed chocolate and roasted chickpeas. The cocktails were amazing and the setting was just fabulous. It is pricey, but 100% worth it. We sat in a window seat and watched the world go by, just taking in the surroundings for the afternoon. It was such an activity fulled break, it was lovely to just relax for a while and unwind. Would highly recommend it and I think I would definitely try the afternoon tea the next time I visit! Website here.

@theplazahotel
Tourist Attractions – I figured I may as well pop in the places we went while I’m at it. We pretty much ticked everything off the list except visiting the Brooklyn Bridge and the Highline… next time!
Statue of Liberty – We got a free ferry from Manhattan to Staten Island. You don’t need to pay for the tourist ones and they will try the hard sell to push it on you at the door of the terminal but stand your ground! You can get the commuter ferry for free from Whitehall which goes right past it and you get a very clear view. We just hopped off at the other side and got straight back on it. Took 20 mins – they go every half an hour. Would definitely recommend. Info link here.
Carrie Bradshaws Apartment – Quite near the Statue of Liberty area, about 20 mins in an Uber. It was so cool to see as a SATC fan. It was also just around the corner from Magnolia bakery. Be mindful people actually live in the Apt block when you’re taking photos. Location is here

Ground Zero – We went here en route to statue of liberty as it is quite close by. It was also quite close to Bubbys in Tribeca. We just went to see the memorial which is free but you can go into the museum too. There is a great shopping mall and discounted designer department store nearby called Century 21. Worth a visit too. There is also a target nearby if that’s something you wanted to browse!

Rockefeller Centre – Top of the Rock. We paid about $42 for the ticket to get up. We bought online but they have a ridiculous queue system where you need to validate your online ticket to get a physical one, so the queue was the same for those who didn’t buy online and it cost the exact same. Be prepared to queue, we waited almost an hour to get up but we were told it was unusually busy as it had been raining the 2 days previous. However, the views are absolutely spectacular when you get up, so it was well worth it in the end. You can go at sunset for an extra $10 per ticket which would also be pretty cool.
Woodbury Commons Shopping Outlet – This place is definitely well worth going to if you are in the market for discounted designer handbags / shoes. The clothes were good value too depending on what you’re looking for but the handbags we’re exceptionally cheap with 60%-80% some items depending on what coupons you had/how much you spent. As I mentioned above, we got the return bus from the port terminal near times square. It was $27 on groupon linked here or you can buy it there for $42 so it’s definitely worth getting it online. It took about an hour each way, with a pretty regular time table. It doesn’t open until 10am so we got the 8.30am coach which worked out great. You also get a free coupon book from the information desk when you arrive which is included in your bus ticket.The food was okay there, had a lot of fast food outlets and a Pret A Manger (they are everywhere in NY!) Definitely a must visit if you’re looking to do some shopping! Link for outlet is here.
Central Park – I was really taken with central park. It is so cool to stroll around (especially with some Levain cookies!). You can hire a horse drawn carriage for a pricy $100 per half an hour or a bike cart for $5 per minute. We were initially going to rent bikes but we didn’t bother in the end, instead walking around and taking it all in. Well worth a look. The plaza hotel and Sarabeths were super near here too.

So that’s a wrap! It’s pretty much all I can fit into this post. I hope it’s helpful for any trips you have planned to New York. Please tag me if you visit anywhere I’ve recommended so I can relive the memories… @littlemuffinblog
It was the most epic trip and I will definitely be back! Miss you already NYC.
New York – Foodie & Travel Guide Hello all! It's been a long while since I've written up a proper blog post on here.
0 notes
Text
Beginner’s Guide to Going Gluten Free
So, just discovered you have a sensitivity or allergy? Want to see if you might be gluten or wheat intolerant? Just found out you have a thyroid issue, or your doctor wants you to try going off gluten for the two-week test? Been there, and yeah, it’s super confusing and really intimidating.
My mom had a gluten sensitivity, so I was lucky to have lived a few years in a household that navigated the gluten-free world. It really helped me out when my wheat allergy developed, but I still had to learn a lot as I went, and you don’t need me to tell you that trial and error isn’t a good way to go when health is involved. So here are some basics and tips for if you need to go gluten free.
1. Don’t do it unless you need to. Not only does it make it harder for people who need gluten-free products, people who go gluten free as a fad generally have no health benefit from it, or, at worst, get malnourished from doing it wrong. Not only that, but it’s wicked expensive. (But seriously, it makes it so hard for those of us who need it, because then food service industries see it as just a fad and cut corners, which could literally kill some of us. I can’t tell you how many times I’ve seen something labeled “gluten free” and then also read a “made in a facility with wheat” warning. That’s kind of mutually exclusive.) If you are wondering if you have a sensitivity, by all means, try it out. But don’t think that gluten free is inherently healthier, because it’s not.
2. Basic Flour Blend. Yes, GF baking is really hard and it doesn’t taste the same, but I’ve found that a 2:2:1 blend of White Rice:Tapioca:Corn Starch works pretty well. 1tsp of xanthan gum per cup of blend and you’re good to go. (It’s all going to be dense, sorry, no getting around it. Dense and crumbly and dries out easily, but at least it’s a baked good. Makes a tasty pancake and crepe, tho.)
2.5, regarding flour: Don’t scoop directly from the flour into the measuring cup. Pour it (with another scoop if needed) into the measuring cup. GF flour, particularly ‘starch’ flours like tapioca and corn starch, pack down ridiculously, and it will ruin the dry/water ratio.
3. Do not knead bread made with gluten free flour. Kneading is to exercise the gluten and make it rise more. No gluten, no knead. You’ll make it turn into a dense brick.
4. Find a bulk food store and buy your flours there. Good stores for finding bulk barrels are places like WinCo or Sprouts. Pre-mixed flours are expensive, so make your own to save money. (Though if you want to splurge for a dedicated gf bread flour, go ahead, it’s worth it.) Make sure the barrels of gluten free flour are all near each other in one area. If they are spread out in and amongst gluteny flours, don’t touch it. Not everyone will use the proper scoops in the proper barrels. If your GF flours are near each other, who cares if a little rice gets in with a bit of garbanzo. On that note:
5. Don’t let anyone trick you into thinking garbanzo bean flour is a suitable substitute for wheat. You can taste the beans even after it’s cooked. It is an abomination and should only be used for things like falafel.
6. DO NOT EAT RAW GF DOUGHS OR BATTERS. It won’t hurt you or anything, they just nasty as all heck. They taste like feet, sand, and regret. That Betty Crocker GF Cookie Dough may look tempting, but it’s the actual devil in disguise.
7. Learn to read labels. Avoid Wheat (all varieties, including spelt, semolina, kamut, etc), Rye, Triticale, and Barley. Look for the bold warnings at the end of the ingredients list first. But don’t take it at face-value. Scan through that list, too. They don’t always list allergens. EX: Kit-Kat doesn’t list any allergens in bold at the bottom of the list, but a main listed ingredient is wheat flour.
7.5 ALWAYS read the label. Even if it says gluten free, scan that label. Even if you can’t see a way for gluten to be in there, scan that label. Twizzlers have wheat as a main ingredient, and idk about you, but I would never have guessed. A lot of canned foods have added wheat as filler. Not necessarily a bad thing, but bad if you can’t have it.
8. Do your research before eating out. Never trust a verbal statement in a restaurant without a dedicated menu or breakdown being shown to you, or having looked at it beforehand. Ask sit-down restaurants for an allergen menu, or ask if they have a gluten-free menu. As for fast-food, you can find allergen menus online. Personal recommendation: Chic-fil-a is a good, safe place to eat, as long as you let them know when ordering grilled chicken anything that it’s an allergy, not preference.
9. Udi’s Bagels are totally worth the cost. Treat yo self. Same with the muffins.
10. hmu for recipes if you’re stuck, but a generally good way to go is a protein, a veg, and a starch for each meal (except breakfast if you just want something like cereal or yogurt. I get it.). Frozen veggies are a amazing and easy. Beans and chicken are good, cheap protein. Rice, potatoes, and gluten free pastas are my go-to starches. Just mix and match for mealtimes until you find some good recipes. You’ll probably have to start cooking for yourself a lot more, so just buy up lots of veggies you enjoy and freeze the ones you don’t use immediately if you get fresh. Also, snack on fruit. I found when I went GF that I wasn’t as full between meals, so I gained weight at first from eating chips to fill the corners. Fruit has a lot of fiber and will help you stay full.
11. Take a multivitamin, if you don’t already. Wheat flour has a ton of added minerals and vitamins, which is great for keeping down rates of malnutrition. But it also means that if you’re not getting vitamins and minerals from the other parts of your food, you’re going to start getting low on them once you cut out wheat.
12. Eat more fiber. Not to be gross, but a lot of people get constipated when they first go gluten free. The American diet in particular relies heavily on wheat products, which also contain a lot of fiber, so cutting that out cuts out a lot of dietary fiber. Add something like Metamucil if you’re really having trouble, but adding more foods like carrots, leafy greens, corn, beans, and apples can usually get it taken care of.
13. Throw out everything that has gluten as soon as you know you’re going gluten free for good. Don’t learn the hard way that you can cross-contaminate yourself.
14. Get a new toaster. I know you can super-deep clean toasters, but it’s so difficult and you might still leave remnants behind.
15. If you live with anyone who isn’t gluten free, label everything. You do not want to be scrounging at 3am and grab the wrong toaster waffle.
16. Clean your oven and microwave, too. Spilled remnants can still get in the air and bake into your food. Plus it’s always good to have a clean oven.
17. Always ask somebody if you have questions. You can always come ask me, I’m more than happy to help! Seriously, you have no idea how much I love to cook.
45 notes
·
View notes
Text
Ricki’s Raves: Yes, This IS Healthy!
I’ve decided to start a little series called Ricki’s Raves, in which I share some of my favorite items (both food and non-food alike) that I truly love and use all the time. Today, I rave about the products I’ve discovered that provide healthier alternatives that still taste indulgent.
If you’re used to eating healthy food, you already know that healthy can easily equal “delicious.”
But what if we could make all that delicious, healthy food even. . . healthier? Without losing flavor or appeal?
In today’s edition of Ricki’s Raves, I’m talking about some new products and appliances I’ve discovered that help to enhance the health value of foods you are probably already eating. And who doesn’t want to eat even MORE yummy foods–entirely guilt-free?
1. Shantiva Copper Pitchers
What It Is
I have to admit, I wasn’t familiar with all the health benefits of using a copper pitcher before I was contacted by the folks at Shantiva Copper Pitchers. This beautiful and handcrafted pitcher looks more like an art piece than an functional tool that’s supportive of good health. Then I found out that the advantages of copper drinking vessels find their roots in Ayurveda, where they’ve been used for thousands of years.
More recently, these claims have been supported by modern health sources as well. By storing your water overnight in the pitcher and drinking it the next day, you’ll acquire all the health benefits of copper-infused water.
Why You’d Use It
Because copper is an essential mineral that is necessary for good health, you want to be sure you have enough in your body (though of course too much can be dangerous as well). When water is stored overnight in the copper pitcher, it’s gently infused with copper and can then be sipped throughout the day, used to create delicious drinks, or added as a beverage to meals to help you reach an optimum level in the body. This site recommends drinking two to three glasses a day to acquire the correct amount of copper.
Copper-infused water is not only highly alkaline (good for most of us in the modern world, as our bodies tend to be too acidic), it’s also known to have anti-inflammatory properties, support thyroid health, support clear skin and aid in digestion.
In addition, copper is known to be anti-bacterial, so water stored in a copper pitcher remains fresh longer and there’s much less chance of any unwanted microbes surviving in it.
What I Love About It
The copper pitcher is a gorgeous piece of handcrafted art as well as a health-supportive, functional tool.
I really love that each pitcher is created by hand, one at a time, so no two are exactly alike. The craftsmanship is clear and it’s put together exceptionally well; each pitcher is crafted from a single piece of copper, which makes it much more durable and long-lasting than inferior products (in fact, they company promises that they will last a lifetime).
The copper pitcher is also really easy to clean--simply wash the inside with regular dish soap and water, then dry right away. If you find that the pitcher develops a patina (dull spots), then just cut a lemon, sprinkle a little salt on it, and rub over the surface. I’ve done this a couple times already after we forgot to dry the pitcher immediately after washing and the copper acquired a few dull spots where the water dried; it brightened up immediately and looked good as new. (You’ll find full cleaning instructions with the pitcher or on the Shantiva website).
Plus, it’s breathtakingly beautiful just sitting on your table!
Cost
On the Shantiva site, the pitchers are selling for $39.50 US or $50.90 CAD. Plus, they ship worldwide!
How I Use It. . .
As suggested by Shantiva, I stored my water overnight (or 6-8 hours) in the copper pitcher before drinking. This allows the copper ions to dissolve in the water (a process called Oligodynamic effect, ‘‘which has the ability to destroy a wide range of harmful microbes, molds, fungi” and so on). [source].
It’s also important to ensure that your vessel is made of pure copper (the Shantiva copper pitcher is), and that you don’t overdo it. Having a drink in the morning and perhaps one in the evening is enough to acquire sufficient copper. Also, this site suggests taking a one month break from the copper-infused water after drinking it for 3 months, to allow our bodies to recalibrate and eliminate any excess.
After I first filled the pitcher, I simply drank the water straight up to see how I liked it. It was fresh tasting and somehow “lighter” than what I was used to. There was no metallic taste (though apparently some people do detect it a bit). Really lovely!
I also started making lemon-infused water once the weather got a bit warmer. You can add whatever fruits or flavorings you prefer, but please note: it’s very important that you not add anything except water to the pitcher! Acids can degrade the copper and allow too much to leech into the water. So be sure to mix any beverages separately, and drink them from regular glasses!
2. Breville’s Smart Oven Air
What It Is
So we’re all familiar with the air-frying craze these days, right? Air frying allows you to achieve similar results to deep frying with only a fraction of the oil used, so that the final product is just as tasty, but much better for you.
The new Breville Smart Oven Air is a one-stop countertop appliance for air frying, convection baking, roasting, dehydrating, reheating, proofing, pizza-making and more–and let’s not forget toasting! You’ll be able to replace a long list of other small appliances with this one amazing oven.
Why You’d Use It
We had had a toaster oven for decades, but always found that it was either too small for many tasks, and of course wasn’t capable of others (like dehydrating or air frying). The Smart Oven Air is now stationed firmly where our toaster oven used to be, and we use it several times a day most days.
Some of the most common functions we’ve used so far are the air fryer (for sweet potato fries and regular fries; I’m really keen to try some of the more exotic recipes you’d find in my friend JL’s book, The Vegan Air Fryer, too), the convection oven (so quick and evenly browned!), the regular oven (recipe testing), the reheat function (perfectly timed) and the warm function (when you have a stack of pancakes or waffles you want to keep warm while you cook more).
What I Love About It
Just take a look at this 15-second video:
As with all the Breville appliances I’ve tried so far, the Smart Oven Air makes it as easy as possible for you so you can achieve the best results with the least effort. This means separate dials for function, temperature and time, all of which come pre-set, but which you can also change as you like.
In addition, this oven is big enough to house a 9×13 inch (23 x 33 cm) roasting pan, 12-cup muffin cup or 9 pieces of toast, yet it’s quiet enough that you won’t really notice it as it runs in the background. It fits neatly on our countertop where our old toaster oven used to be, yet replaces about 5 other appliances in the kitchen.
Cost
The Smart Oven Air retails for $599.99 in Canada and $399.95 in the US.
How I Use It
We’ve been playing with all the features we can since we got the oven a couple of weeks ago. First up, of course, was some air-fried sweet potato fries (see video, below).
These were fantastic! They browned up really quickly (they were ready in about a quarter of the time that they normally would take) and were fully crisp on the outside in only 18 minutes. Because sweet potato fries tend to be softer than regular fries, it normally takes a lot longer to become crispy, but not these babies!
Next up were some of my Best Home Fries Ever, made in the air fryer instead of a frying pan. Another hit–and we loved that they were ready in about a quarter of the typical time.
I’ve also used the oven to reheat weekend brunch waffles (which, as it turns out, I made in my Breville Smart Waffle maker!). So convenient when you’ve got frozen waffles on hand!
Finally, I’ve been developing a grain-free brownie recipe and have tested it both in the conventional oven as well as with the convection setting. I love the oven’s ability to switch back and forth between the two! There’s also a “super-convection” setting for those hard-core convection fans. The brownie came out about the same in each case, but obviously baked up much faster with the convection setting.
[Baking up a perfect brownie in the Smart Oven Air!]
I’m looking forward to giving some of the other settings a try, particularly the “Dehydrate” setting. This recipe is one I’ve made for ages in the regular dehydrator–and now that machine may just be set aside, too.
3. GLOW Ball Sugar-Free Truffles
[Coconut Cream Pie (with pieces of coconut on top) and Brazil Nut Cream (with Brazil nut crumble) GLOWBalls.]
What It Is
If you’re looking for a rich, indulgent-tasting treat that contains NO sugar, NO dairy, NO caffeine and NO artificial or unhealthy ingredients, look no further! Julie Beyer’s GLOWBall Truffles Classic Collection (or GLOWBall Truffles Luxe Collection) are an entirely natural, organic sweet treat that allows you all the enjoyment of the most sinful-tasting truffles without any of the negative consequences.
GLOW Balls are made with carob (rather than cocoa or chocolate), for a no-caffeine alternative that’s good for just about any diet, including the anti-candida diet! (If you prefer naturally sweetened chocolate, you can peek at the GLOW Chocolate Collection).
The combination of carob, organic coconut and coconut oil, plus an array of superfood ingredients like maca, mesquite or lucuma, ensure these truffles are not only incredibly delicious, but also elegant enough to serve to guests at the most posh of dinner parties or events.
Why You’d Use It
[Some of the “Naked” Truffles. Mmm!]
If you’re steering clear of sugar or refined sweeteners like I am, GLOWBalls are a fantastic way to treat yourself to something low glycemic, naturally sweetened (with green stevia and, for some of the products, maple syrup) and utterly delectable. There was absolutely none of the typical “stevia aftertaste” that people mention when consuming stevia-sweetened products; only a subtle sweetness combined with rich, full flavor.
These treats are also suitable for just about every “free-from” diet out there. As Julie states on the site, “All the ingredients we use are certified organic, refined sugar-free, dairy-free, gluten free, soy-free, GMO free and we use no preservatives, soy, corn or dairy. Everything we make is real and nutritious.” But you wouldn’t know it from the heavenly taste and texture!
What I Love About It
First and foremost, I loved the taste of these truffles. No, they’re not chocolate, but they were chocolatey nonetheless, satiny smooth, creamy and rich, with a mouthfeel like the very best chocolate truffle filling, melting slowly and lovingly on the tongue. Truly a delightful experience that you will relish.
My sample contained two flavors from the GLOWBall LUXE Collection: Brazil Nut Coconut Cream and Coconut Cream Pie. The flavor of the Brazil Nut Cream was similar to delicate milk chocolate, impossibly creamy and rich. The Coconut Cream Pie, while firmer, provided an almost fudge-like taste that was fantastic as well.
These treats are definitely the best products I’ve tasted in the sugar-free chocolate/truffle category, and incredibly high quality. GLOWBalls are a treat for both your taste buds and your whole body.
Cost
The truffles’ price varies depending on the size of the package you purchase, and the price per truffle decreases with larger orders. They start at $2.00 (Canadian) per piece, down to $1.40 per piece for the largest package; shipping is extra (and they ship outside Canada, too!).
But GUESS WHAT? Julie has kindly offered a special discount just to RH readers! Use the discount code RickiGLOW10 upon purchase and you’ll get 10% off your entire order! Pretty sweet, right? 🙂
How I Use It
I have to admit it, after the first taste, I was hooked and basically enjoyed the GLOWBalls all on their own, savoring every single bite. It was only after my sample had disappeared (far too quickly, I may add), that I realized it could have been fun to combine them with some other treats.
If you have the willpower to set some aside after you try them, they’d be great:
chopped and/or crumbled over your morning smoothie bowl;
chopped and added as a layer in a yogurt or pudding parfait;
mixed into your favorite flavor of ice cream; or
stirred into whatever sweet treat you think would benefit from the addition!
4. Health Garden Low Glycemic Sweeteners
What It Is
Health Garden began selling low-glycemic natural sweeteners in 2010 and currently bills itself as “the leading brand of natural sweeteners in the USA with our products being sold in 750+ stores across the country.” Yet, I have to admit, even though low-glycemic sweeteners are all I ever use, I was entirely shocked that I’d never heard of them.
Why? Because, while you may not find them in every local health food store, they are readily available in retailers such as Shoprite, HomeGoods, and Sam’s Club, and online at amazon.com, Walmart, Urth Market, and Jet.com and others.
Health Garden offers a full range of lower and zero-glycemic natural sweeteners, such as stevia, xylitol (my favorite granular low glycemic sweetener), erythritol, monk fruit, agave nectar, and more. When my package arrived, I was overwhelmed by all the amazing goodies inside!
Why You’d Use It
If you’re on an anti-candida diet or cutting down on sugar consumption for any reason (diabetes, other blood sugar issues, Lyme disease, leaky gut or just to get away from too much sugar in the diet), you want to be using lower glycemic sweeteners like those from Health Garden.
With so many options these days that taste and function like sugar without actually spiking blood sugar, there’s no reason not to use this type of alternative, natural sweetener. Depending on what you’re looking for, you can opt for stevia (the leaves of which provide natural sweetness), xylitol (a sugar alcohol that does exist naturally, but in smaller quantities, and has been shown to have some anti-candida benefits), or monk fruit (a zero glycemic sweetener that provides all natural sweetness), for instance.
These sweeteners work wherever another, higher glycemic sweetener might also work. See below for some great ideas!
What I Love About It
The products are cleanly packaged, all natural, gluten-free, GMO-free and all taste great (note that the only one I didn’t try yet is the agave nectar, since I’m not using it as much these days). All the dry sweeteners I sampled were great. They taste just as good as the other ones I’ve tried and produced the same kinds of results in baked goods and other treats.
And, of course, these low glycemic sweeteners are so much better for your health than sugar!
Cost
Depending on which product you purchase, the costs varies from $9.99 US for the stevia packets to upwards of $36.00 US for the 3-pound Monkfruit bag.
How I Use It
If you follow this site, you know that I LOVE my low-glycemic sweeteners and use them all the time! Do a search for “xylitol” or “stevia” on the site and you’ll find hundreds of hits. So here are just a few of the most recent sweet experiments I’ve had:
The BEST Chocolate Avocado Pudding.
This pudding is a recipe I created for my Sweet Life Club members, and it’s been all the rage for the past month since it was introduced! Using the Health Garden Golden Monkfruit as the sweetener, it reminds me of the classic cooked chocolate pudding you had as a child, with absolutely no trace of bitterness whatsoever.
Here’s what one Sweet Life member said about it:
Carrot Cake Ice Cream.
How perfect is this Carrot Cake Ice Cream for the warm weather? Using xylitol as the primary sweetener, it results in a perfectly balanced, sweet and creamy dessert that you’d never know didn’t contain sugar.
Not-Ella Carob Butter.
This is a great substitute for nutella if you’re someone who’s concerned about all the sugar in the traditional spread–and it’s even nut-free. This recipe uses stevia as the primary sweetener.
I hope you’ve enjoyed this edition of Ricki’s Raves–and that you’ve got a new perspective on how fantastic healthy food can be!
Want to know what else I love? Find the entire collection of Ricki’s Raves posts here.
Disclosure: This post is sponsored by some or all of the companies featured here. As always, my opinions are my own. I never (ever) recommend items or products on the site that I don’t already use and love. If some links are affliate links and you choose to purchase using those links, at no cost to you, I will receive a small percentage of the sale.
Subscribe for recipes and more about living well without sugar, gluten, eggs or dairy! Click here to subscribe to RickiHeller.com via email. You’ll receive weekly emails sharing recipes and videos as soon as they’re posted, plus weekly updates and news about upcoming events and programs. You can unsubscribe at any time. Please see our Privacy Policy for more information. A healthy lifestyle CAN be sweet!

Source: https://www.rickiheller.com/2018/05/rickis-raves-yes-this-is-healthy/
0 notes
Text
Ricki’s Raves: Yes, This IS Healthy!
I’ve decided to start a little series called Ricki’s Raves, in which I share some of my favorite items (both food and non-food alike) that I truly love and use all the time. Today, I rave about the products I’ve discovered that provide healthier alternatives that still taste indulgent.
If you’re used to eating healthy food, you already know that healthy can easily equal “delicious.”
But what if we could make all that delicious, healthy food even. . . healthier? Without losing flavor or appeal?
In today’s edition of Ricki’s Raves, I’m talking about some new products and appliances I’ve discovered that help to enhance the health value of foods you are probably already eating. And who doesn’t want to eat even MORE yummy foods–entirely guilt-free?
1. Shantiva Copper Pitchers
What It Is
I have to admit, I wasn’t familiar with all the health benefits of using a copper pitcher before I was contacted by the folks at Shantiva Copper Pitchers. This beautiful and handcrafted pitcher looks more like an art piece than an functional tool that’s supportive of good health. Then I found out that the advantages of copper drinking vessels find their roots in Ayurveda, where they’ve been used for thousands of years.
More recently, these claims have been supported by modern health sources as well. By storing your water overnight in the pitcher and drinking it the next day, you’ll acquire all the health benefits of copper-infused water.
Why You’d Use It
Because copper is an essential mineral that is necessary for good health, you want to be sure you have enough in your body (though of course too much can be dangerous as well). When water is stored overnight in the copper pitcher, it’s gently infused with copper and can then be sipped throughout the day, used to create delicious drinks, or added as a beverage to meals to help you reach an optimum level in the body. This site recommends drinking two to three glasses a day to acquire the correct amount of copper.
Copper-infused water is not only highly alkaline (good for most of us in the modern world, as our bodies tend to be too acidic), it’s also known to have anti-inflammatory properties, support thyroid health, support clear skin and aid in digestion.
In addition, copper is known to be anti-bacterial, so water stored in a copper pitcher remains fresh longer and there’s much less chance of any unwanted microbes surviving in it.
What I Love About It
The copper pitcher is a gorgeous piece of handcrafted art as well as a health-supportive, functional tool.
I really love that each pitcher is created by hand, one at a time, so no two are exactly alike. The craftsmanship is clear and it’s put together exceptionally well; each pitcher is crafted from a single piece of copper, which makes it much more durable and long-lasting than inferior products (in fact, they company promises that they will last a lifetime).
The copper pitcher is also really easy to clean--simply wash the inside with regular dish soap and water, then dry right away. If you find that the pitcher develops a patina (dull spots), then just cut a lemon, sprinkle a little salt on it, and rub over the surface. I’ve done this a couple times already after we forgot to dry the pitcher immediately after washing and the copper acquired a few dull spots where the water dried; it brightened up immediately and looked good as new. (You’ll find full cleaning instructions with the pitcher or on the Shantiva website).
Plus, it’s breathtakingly beautiful just sitting on your table!
Cost
On the Shantiva site, the pitchers are selling for $39.50 US or $50.90 CAD. Plus, they ship worldwide!
How I Use It. . .
As suggested by Shantiva, I stored my water overnight (or 6-8 hours) in the copper pitcher before drinking. This allows the copper ions to dissolve in the water (a process called Oligodynamic effect, ‘‘which has the ability to destroy a wide range of harmful microbes, molds, fungi” and so on). [source].
It’s also important to ensure that your vessel is made of pure copper (the Shantiva copper pitcher is), and that you don’t overdo it. Having a drink in the morning and perhaps one in the evening is enough to acquire sufficient copper. Also, this site suggests taking a one month break from the copper-infused water after drinking it for 3 months, to allow our bodies to recalibrate and eliminate any excess.
After I first filled the pitcher, I simply drank the water straight up to see how I liked it. It was fresh tasting and somehow “lighter” than what I was used to. There was no metallic taste (though apparently some people do detect it a bit). Really lovely!
I also started making lemon-infused water once the weather got a bit warmer. You can add whatever fruits or flavorings you prefer, but please note: it’s very important that you not add anything except water to the pitcher! Acids can degrade the copper and allow too much to leech into the water. So be sure to mix any beverages separately, and drink them from regular glasses!
2. Breville’s Smart Oven Air
What It Is
So we’re all familiar with the air-frying craze these days, right? Air frying allows you to achieve similar results to deep frying with only a fraction of the oil used, so that the final product is just as tasty, but much better for you.
The new Breville Smart Oven Air is a one-stop countertop appliance for air frying, convection baking, roasting, dehydrating, reheating, proofing, pizza-making and more–and let’s not forget toasting! You’ll be able to replace a long list of other small appliances with this one amazing oven.
Why You’d Use It
We had had a toaster oven for decades, but always found that it was either too small for many tasks, and of course wasn’t capable of others (like dehydrating or air frying). The Smart Oven Air is now stationed firmly where our toaster oven used to be, and we use it several times a day most days.
Some of the most common functions we’ve used so far are the air fryer (for sweet potato fries and regular fries; I’m really keen to try some of the more exotic recipes you’d find in my friend JL’s book, The Vegan Air Fryer, too), the convection oven (so quick and evenly browned!), the regular oven (recipe testing), the reheat function (perfectly timed) and the warm function (when you have a stack of pancakes or waffles you want to keep warm while you cook more).
What I Love About It
Just take a look at this 15-second video:
As with all the Breville appliances I’ve tried so far, the Smart Oven Air makes it as easy as possible for you so you can achieve the best results with the least effort. This means separate dials for function, temperature and time, all of which come pre-set, but which you can also change as you like.
In addition, this oven is big enough to house a 9×13 inch (23 x 33 cm) roasting pan, 12-cup muffin cup or 9 pieces of toast, yet it’s quiet enough that you won’t really notice it as it runs in the background. It fits neatly on our countertop where our old toaster oven used to be, yet replaces about 5 other appliances in the kitchen.
Cost
The Smart Oven Air retails for $599.99 in Canada and $399.95 in the US.
How I Use It
We’ve been playing with all the features we can since we got the oven a couple of weeks ago. First up, of course, was some air-fried sweet potato fries (see video, below).
These were fantastic! They browned up really quickly (they were ready in about a quarter of the time that they normally would take) and were fully crisp on the outside in only 18 minutes. Because sweet potato fries tend to be softer than regular fries, it normally takes a lot longer to become crispy, but not these babies!
Next up were some of my Best Home Fries Ever, made in the air fryer instead of a frying pan. Another hit–and we loved that they were ready in about a quarter of the typical time.
I’ve also used the oven to reheat weekend brunch waffles (which, as it turns out, I made in my Breville Smart Waffle maker!). So convenient when you’ve got frozen waffles on hand!
Finally, I’ve been developing a grain-free brownie recipe and have tested it both in the conventional oven as well as with the convection setting. I love the oven’s ability to switch back and forth between the two! There’s also a “super-convection” setting for those hard-core convection fans. The brownie came out about the same in each case, but obviously baked up much faster with the convection setting.
[Baking up a perfect brownie in the Smart Oven Air!]
I’m looking forward to giving some of the other settings a try, particularly the “Dehydrate” setting. This recipe is one I’ve made for ages in the regular dehydrator–and now that machine may just be set aside, too.
3. GLOW Ball Sugar-Free Truffles
[Coconut Cream Pie (with pieces of coconut on top) and Brazil Nut Cream (with Brazil nut crumble) GLOWBalls.]
What It Is
If you’re looking for a rich, indulgent-tasting treat that contains NO sugar, NO dairy, NO caffeine and NO artificial or unhealthy ingredients, look no further! Julie Beyer’s GLOWBall Truffles Classic Collection (or GLOWBall Truffles Luxe Collection) are an entirely natural, organic sweet treat that allows you all the enjoyment of the most sinful-tasting truffles without any of the negative consequences.
GLOW Balls are made with carob (rather than cocoa or chocolate), for a no-caffeine alternative that’s good for just about any diet, including the anti-candida diet! (If you prefer naturally sweetened chocolate, you can peek at the GLOW Chocolate Collection).
The combination of carob, organic coconut and coconut oil, plus an array of superfood ingredients like maca, mesquite or lucuma, ensure these truffles are not only incredibly delicious, but also elegant enough to serve to guests at the most posh of dinner parties or events.
Why You’d Use It
[Some of the “Naked” Truffles. Mmm!]
If you’re steering clear of sugar or refined sweeteners like I am, GLOWBalls are a fantastic way to treat yourself to something low glycemic, naturally sweetened (with green stevia and, for some of the products, maple syrup) and utterly delectable. There was absolutely none of the typical “stevia aftertaste” that people mention when consuming stevia-sweetened products; only a subtle sweetness combined with rich, full flavor.
These treats are also suitable for just about every “free-from” diet out there. As Julie states on the site, “All the ingredients we use are certified organic, refined sugar-free, dairy-free, gluten free, soy-free, GMO free and we use no preservatives, soy, corn or dairy. Everything we make is real and nutritious.” But you wouldn’t know it from the heavenly taste and texture!
What I Love About It
First and foremost, I loved the taste of these truffles. No, they’re not chocolate, but they were chocolatey nonetheless, satiny smooth, creamy and rich, with a mouthfeel like the very best chocolate truffle filling, melting slowly and lovingly on the tongue. Truly a delightful experience that you will relish.
My sample contained two flavors from the GLOWBall LUXE Collection: Brazil Nut Coconut Cream and Coconut Cream Pie. The flavor of the Brazil Nut Cream was similar to delicate milk chocolate, impossibly creamy and rich. The Coconut Cream Pie, while firmer, provided an almost fudge-like taste that was fantastic as well.
These treats are definitely the best products I’ve tasted in the sugar-free chocolate/truffle category, and incredibly high quality. GLOWBalls are a treat for both your taste buds and your whole body.
Cost
The truffles’ price varies depending on the size of the package you purchase, and the price per truffle decreases with larger orders. They start at $2.00 (Canadian) per piece, down to $1.40 per piece for the largest package; shipping is extra (and they ship outside Canada, too!).
But GUESS WHAT? Julie has kindly offered a special discount just to RH readers! Use the discount code RickiGLOW10 upon purchase and you’ll get 10% off your entire order! Pretty sweet, right? 🙂
How I Use It
I have to admit it, after the first taste, I was hooked and basically enjoyed the GLOWBalls all on their own, savoring every single bite. It was only after my sample had disappeared (far too quickly, I may add), that I realized it could have been fun to combine them with some other treats.
If you have the willpower to set some aside after you try them, they’d be great:
chopped and/or crumbled over your morning smoothie bowl;
chopped and added as a layer in a yogurt or pudding parfait;
mixed into your favorite flavor of ice cream; or
stirred into whatever sweet treat you think would benefit from the addition!
4. Health Garden Low Glycemic Sweeteners
What It Is
Health Garden began selling low-glycemic natural sweeteners in 2010 and currently bills itself as “the leading brand of natural sweeteners in the USA with our products being sold in 750+ stores across the country.” Yet, I have to admit, even though low-glycemic sweeteners are all I ever use, I was entirely shocked that I’d never heard of them.
Why? Because, while you may not find them in every local health food store, they are readily available in retailers such as Shoprite, HomeGoods, and Sam’s Club, and online at amazon.com, Walmart, Urth Market, and Jet.com and others.
Health Garden offers a full range of lower and zero-glycemic natural sweeteners, such as stevia, xylitol (my favorite granular low glycemic sweetener), erythritol, monk fruit, agave nectar, and more. When my package arrived, I was overwhelmed by all the amazing goodies inside!
Why You’d Use It
If you’re on an anti-candida diet or cutting down on sugar consumption for any reason (diabetes, other blood sugar issues, Lyme disease, leaky gut or just to get away from too much sugar in the diet), you want to be using lower glycemic sweeteners like those from Health Garden.
With so many options these days that taste and function like sugar without actually spiking blood sugar, there’s no reason not to use this type of alternative, natural sweetener. Depending on what you’re looking for, you can opt for stevia (the leaves of which provide natural sweetness), xylitol (a sugar alcohol that does exist naturally, but in smaller quantities, and has been shown to have some anti-candida benefits), or monk fruit (a zero glycemic sweetener that provides all natural sweetness), for instance.
These sweeteners work wherever another, higher glycemic sweetener might also work. See below for some great ideas!
What I Love About It
The products are cleanly packaged, all natural, gluten-free, GMO-free and all taste great (note that the only one I didn’t try yet is the agave nectar, since I’m not using it as much these days). All the dry sweeteners I sampled were great. They taste just as good as the other ones I’ve tried and produced the same kinds of results in baked goods and other treats.
And, of course, these low glycemic sweeteners are so much better for your health than sugar!
Cost
Depending on which product you purchase, the costs varies from $9.99 US for the stevia packets to upwards of $36.00 US for the 3-pound Monkfruit bag.
How I Use It
If you follow this site, you know that I LOVE my low-glycemic sweeteners and use them all the time! Do a search for “xylitol” or “stevia” on the site and you’ll find hundreds of hits. So here are just a few of the most recent sweet experiments I’ve had:
The BEST Chocolate Avocado Pudding.
This pudding is a recipe I created for my Sweet Life Club members, and it’s been all the rage for the past month since it was introduced! Using the Health Garden Golden Monkfruit as the sweetener, it reminds me of the classic cooked chocolate pudding you had as a child, with absolutely no trace of bitterness whatsoever.
Here’s what one Sweet Life member said about it:
Carrot Cake Ice Cream.
How perfect is this Carrot Cake Ice Cream for the warm weather? Using xylitol as the primary sweetener, it results in a perfectly balanced, sweet and creamy dessert that you’d never know didn’t contain sugar.
Not-Ella Carob Butter.
This is a great substitute for nutella if you’re someone who’s concerned about all the sugar in the traditional spread–and it’s even nut-free. This recipe uses stevia as the primary sweetener.
I hope you’ve enjoyed this edition of Ricki’s Raves–and that you’ve got a new perspective on how fantastic healthy food can be!
Want to know what else I love? Find the entire collection of Ricki’s Raves posts here.
Disclosure: This post is sponsored by some or all of the companies featured here. As always, my opinions are my own. I never (ever) recommend items or products on the site that I don’t already use and love. If some links are affliate links and you choose to purchase using those links, at no cost to you, I will receive a small percentage of the sale.
Subscribe for recipes and more about living well without sugar, gluten, eggs or dairy! Click here to subscribe to RickiHeller.com via email. You’ll receive weekly emails sharing recipes and videos as soon as they’re posted, plus weekly updates and news about upcoming events and programs. You can unsubscribe at any time. Please see our Privacy Policy for more information. A healthy lifestyle CAN be sweet!
Source: https://www.rickiheller.com/2018/05/rickis-raves-yes-this-is-healthy/
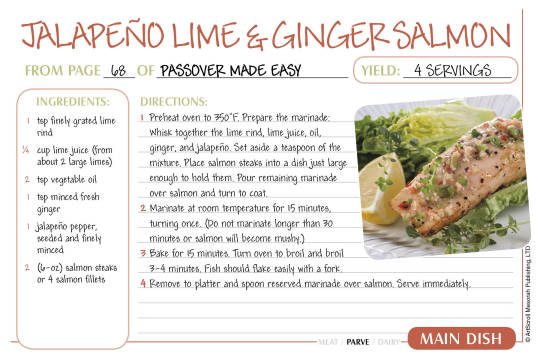
0 notes
Text
How I Learned to Stop Worrying and Love My Freezer added to Google Docs
How I Learned to Stop Worrying and Love My Freezer
hutchyb for Getty Images/iStockphoto
There’s a technique — even a flair — to freezing food successfully
My mother is what you might call a culinary cryogenicist. Long before the crew at the Noma Food Lab grew their first flavor spore, my mom was experimenting with the effects of age and temperature on all kinds of foodstuffs: the last two bites of some mac and cheese. Four shrimp. One-third of a pork chop. Three matzo balls. Half a bag of green beans tied shut with a trash bag twist-tie. An old joint. Eight slices of rye bread. Raisins. So. Much. Ham. And that’s just the first shelf of the freezer.
It was a talent she inherited. Her own mother was a master of the freezer arts, best exemplified by the very same “tray of frozen shrimp” offered to us on every grandparent visit for more than two decades; it became a running family joke. As a member of the next generation, however, my family’s faith in the preservation power of cold turned me into a devoted freezer snob. For most of my adult life, my freezer has remained a sacred space reserved for only the most cold-hardy ingredients — ice cream, popsicles, those giant cocktail ice spheres, and maybe the occasional box of toaster waffles or bag of frozen peas. Meat? God no. Fish? Please, back away and leave quietly.
In my mind, freezing things ruined their precious molecular integrity by turning them into rock-hard cubes. Meat is normally prized for its “freshness.” In the fields, crops are carefully covered to prevent freezing, so why put them under such duress in your own home? Having kids a few years ago loosened me up a bit — show me one child-rearing American household a without a frozen bag of dinosaur-shaped chicken blobs lurking somewhere. But overall, for the better part of the last decade, my freezer has remained as sleek and food-free as an after-hours Apple Store.
But when COVID-19 hit I admittedly went into full hoarder mode. My diet, like my fashion, is dictated by my mood (it’s also why I’m a chronic over-packer). With annual memberships to Instacart, Amazon Fresh, and a handful of specialty grocers down the street, I’d become accustomed to getting all the ingredients to sate any craving within an hour of it hitting. Maintaining that level of spontaneity in the time of supermarket lines and impossible delivery queues meant stocking up in ways I’d never fathomed before.
Even with a family of four eating three-plus meals a day, the kind of inventory I was sporting needed to be able to hang out a while. And so, it was with deep reservations that I finally began freezing things — though the real miracle didn’t occur until I began un-freezing them.
First I tried a pork tenderloin, one of three I had purchased at Costco a few weeks earlier. Following the advice of the pros, I took it out of the freezer and put it in my fridge overnight, cooked it as usual, and it was… fine. Good, even. Next I tried salmon — I’ve had terrible experiences with frozen seafood in the past, so my hopes were low for the three rosy-pink portions I defrosted and broiled. But again, the resulting fish was surprisingly moist, fatty, firm, delicious.
After that I started throwing everything in the freezer just to see: ground turkey, chicken thighs. All were fine. Then I moved into pizza dough, shredded cheese, blanched vegetables; then on to chili, tortillas, pancakes, whole loaves of bread, coffee (while dry coffee beans won’t technically “go bad,” their flavor and aroma suffer over time). Pretty much every single thing I froze — and later unfroze — emerged as relatively unharmed and tasty as the day I bought it. (Notable exceptions included skim milk and some poorly wrapped steaks, and it took some serious trial and error with fresh greens.)
Now, as we go into week five… or six? of “safer at home” measures, my freezer has transformed from a sterile ice-storage facility to a clutch partner in culinary crime. Today the once-barren shelves are buckling beneath the weight of dated and labeled baggies and bins with enough perfectly preserved food to more than bridge the gap between bi-weekly produce box deliveries and masked-up grocery runs.
But as it turns out, my mom and grandmother were, in fact, artists — there is a technique, even a flair to freezing food successfully. Wrap something improperly or defrost incorrectly and you might not just risk the integrity of your ingredients, but also your health. So after a month or so of embracing my familial fate and becoming a frozen food convert, here are a few lessons I’ve learned:
The Container Matters
I know, plastic is the enemy, but those fancy glass containers can crack in the freezer. According to the experts, the best way to freeze food is in a vacuum-seal bag that you suction yourself with one of those fancy machines to minimize air (air is your enemy in the great freezer wars). I don’t have one of those — though I’ve been eyeing this one on Amazon — so I use regular old freezer-grade zipper bags and press out as much air as possible before sealing. There’s also a trick where you mimic a vacuum sealer with a drinking straw, slipping it in the corner of the bag and sucking out as much air as you can before pulling the straw out at the last minute, but I felt weird inhaling all those funky meat fumes. My Instagram feed has been full of ads for these pricey silicone bags that I hear work well but I’ve yet to give them a test run.
Either way, you’re going for minimal air exposure and some thickness barrier — a little cushion between your food and the freezer air will help prevent that dreaded freezer burn, a damaging mix of oxidation and dehydration.
Prep Is Key
For meat and fish, you generally want to remove them from their original packaging and re-wrap in individual portions before freezing. Wrapping each cut in an extra layer of plastic before putting them in the zipper bag adds another degree of protection. Timing is key here. Freeze cuts of meat immediately after you get them home, or better yet, buy them pre-frozen. There are entire industries built around freezing fish in a way that sacrifices the least in the way of flavor and texture, so trust the pros — they know what they’re doing.
Vegetables, for the most part, should be quickly blanched before freezing. The drag here is that in the process of blanching, they absorb too much water to get any sort of good roasty char later, but it’s a small price to pay for having quality seasonal produce year-round. Before you blanch, prep the ingredients the way you plan to eat them, meaning separating broccoli and cauliflower into florets, snapping the ends off green beans, and chopping greens. Then boil a big pot of water and dunk the vegetables in for about a minute before plunging immediately into a big bowl of icy water. This will keep them from continuing to cook and turning to mush. The next part is key: Dry everything as best you can. The more water, the thicker the tectonic ice coating you’ll get on every piece. Then put everything into baggies and freeze.
Fruit freezing techniques vary — it all depends what you want to use them for. No amount of freezer skill will recreate the experience of biting into a fresh peach after it’s been frozen. But for smoothies, pie fillings, baking, or juice, most fruit will freeze just fine. Bananas freeze great, peel and all. Berries you’ll want to rinse, dry, then let freeze on a large flat surface like a cookie sheet before transferring to bags. If you want to use citrus just for zest or juice, go ahead and freeze them whole. They say you can freeze citrus in wedges individually, but I found the texture suffers greatly after defrosting, and honestly I can’t imagine what you’d want to use floppy, deflated tangerine wedges for. Juice is no problem — just squeeze, put the juice into an ice cube mold and freeze. You can pop them out later and transfer to a plastic bag for easier storage.
The above ice-cube tray technique works well for all kinds of liquids and purees. I actually bought these cool molds to freeze baby food for my second kid, and I use them now for smaller portions of stocks, lemon juice, pesto, pizza sauce. For larger batches, I pour a couple of cups into a zipper bag, get out as much air as possible, and freeze them flat so I can stack them later.
Breads freeze fantastically, but as a rule pre-sliced is best. I started buying giant loaves of my favorite rye bread from the farmers market and keep them in the freezer full-time, toasting off individual slices as needed; my mom perfected a technique with bagels that involves slicing them as soon as you get them home, wrapping each half separately, and then toasting them direct from the freezer. Pre-cooked tortillas and pita you can just wrap, freeze, and cook off one by one, but my most exciting recent discovery has been in the realm of pre-baked goods. It turns out most doughs recover well after freezing, and I just made a batch of biscuits using this technique that has you freezing the raw, cut biscuits ahead of time and baking them off as needed. It’s opened up a whole new world of frozen pastry projects for me.
I’m sure there’s some technique to freezing cheese but honestly I just put whole hunks and bags of the pre-shredded stuff straight into the freezer. I don’t really freeze milk but the wisdom is that the more fat content, the better it freezes, so half-and-half freezes great, skim milk not so much. Coffee I found out you can freeze and brew straight from frozen, which is excellent considering it is an absolute nonnegotiable in my house.
*If you’re curious about any other ingredient, there are countless guides to freezing food online that will steer you in the right direction.
Don’t Rush the Defrost
(Even Though Sometimes I Do, But It’s Really Risky, Okay?)
The basic rule of thumb for pretty much everything is low and slow. Put whatever you want to defrost in the refrigerator the night before you want to cook it — sometimes longer for big cuts of meat — and let it come to temperature gradually. I do this... most times. But there is a reason your microwave has a “defrost” setting, and it will definitely speed things along if also putting you at risk of prematurely cooking the edges of your chicken breast. I’ve successfully defrosted smaller cuts of fish and shrimp by running the bags under cold water in the sink for a few minutes until soft enough to handle, but this is not officially endorsed by the pros. What you’re definitely not supposed to do is let your ingredients hang out at room temp until they defrost. I have done this too, though it is a surefire recipe for a bacterial infection and this is not the time you want to be running to the ER for dehydration.
The point is, the freezer might be cold and dark, but it is not at all a thing to fear. Utilizing it well has helped me maintain the kind of spur-of-the-moment cooking style that feels normal to me — a valuable thing when pretty much everything else about my life right now does not feel normal. Now all I need is a bigger freezer.
via Eater - All https://www.eater.com/2020/4/14/21219885/freezer-defrosting-tips
Created April 14, 2020 at 11:05PM
/huong sen
View Google Doc Nhà hàng Hương Sen chuyên buffet hải sản cao cấp✅ Tổ chức tiệc cưới✅ Hội nghị, hội thảo✅ Tiệc lưu động✅ Sự kiện mang tầm cỡ quốc gia 52 Phố Miếu Đầm, Mễ Trì, Nam Từ Liêm, Hà Nội http://huongsen.vn/ 0904988999 http://huongsen.vn/to-chuc-tiec-hoi-nghi/ https://drive.google.com/drive/folders/1xa6sRugRZk4MDSyctcqusGYBv1lXYkrF
0 notes
Text
Good Morning Mush
Why do the things I hate end up being good for me? As much as I hate admitting my mother is right, I may truly have an oppositional disposition toward everything for the sake of being argumentative. That’s not what she really said. She actually would use the clinical term for the personality disorder that describes such a person. Then she would (overdramatically) ask the open air why I was being so difficult. I suppose she could have been asking God. Or attempting to guilt me into behaving via some variation of reverse psychology. Either way, it never worked.
Now that I’ve gotten that cynical view of my childhood out of the way, it wasn't until I hit my mid teens that I started to become food adventurous. Prior to that, there was a long list of “normal” foods I would not eat: eggs, butter, anything green except broccoli and green beans, rice, bananas, chocolate... I only throw that in because I was also the weird kid who liked falafels, lima beans, and an African inspired peanut soup my mom picked up from, well, the Africans. I grew out most disliking most things but not all. I’m still not fond of eggs, peas (aka the devil’s excrement), and at the top of the list, oatmeal.
I’m still unsure if the issue was with the frequency we would have it. We didn't have too many breakfast cereals in the house because of the sugar content and I refused to eat eggs (which my mom would scramble with butter so a double no). My choices were either off brand cheerios (which would get soggy at the mention of milk), shredded wheat (which I would only eat dry and almost always choke myself on) or oatmeal. Perhaps it was a texture thing, though it only took two or three times of her making cream of wheat for me to declare it to be the best breakfast food ever (second to even waffles). Maybe it was because that was my grandmother’s staple and I associated it with old people.

On this journey to better health overhaul, as I’ve been calling it for lack of a better term, I’ve have to pick up foods that I quite detest. Including eggs. Including avocados. Including oatmeal. All of these are “super foods” or nutrient dense foods. In the beginning, I just ate eggs and maybe a fruit smoothie in the morning. Well, as I already knew, the fruit metabolized first, usually just long enough to flip everyone on the highway off during the twenty minute drive to work. The protein would hold me for maybe an hour or so, less when I moved into a position that required more physical work. So by the time my break would roll around, usually between 3 and 3 1/2 hours after the time I ate breakfast so I was starving and making a lot of poor choices in front of a vending machine.
Cue my discovery of a new YouTube favorite, a young guy would underwent a major weight loss and was doing a blog on his decision not to get surgery for his excess of loose skin. He is quite relatable in his mannerisms and struggle with his own journey. Anyway, while watching a couple of his videos, I saw that his breakfast included oatmeal and he added peanut butter to it, I suppose to boost up his protein intake. I had not ever considered doing this. Peanut butter is relatively tasty (obviously it’s not apple butter but it tastes great on toast with sliced bananas), so I figured why not give it a go?
On a day where I had an opening, nine hour shift, I fixed a bowl with half the recommended serving of oatmeal, mashed half a banana, and a tablespoon peanut butter. Coupled with a boiled egg and a 20oz bottle of water, I found that not only was that just enough food, the oatmeal was more than palatable. The best part was how much energy I had a work though. Part of my new position included occasionally building furniture and that day was no exception. Normally, that would wipe me out (mostly the mental part of putting pieces in backwards, losing screws, just hammering everything together). Not only did it power me through this task, by the time my break came, I was only just in the beginning stages of hunger and still mentally sound enough to make a responsible post breakfast, pre lunch snack choice. Why I don't meal prep is another blog for another day.
Thinking it was a fluke, I tried it again prior to working out. To shorten this extremely long story, it is now my favorite breakfast and so simple to make.
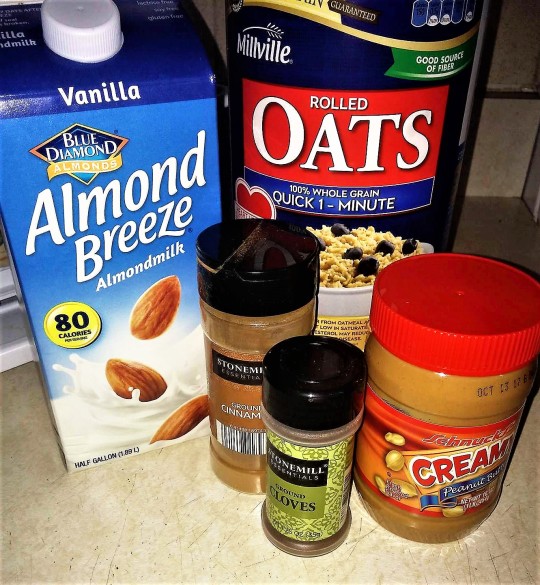
While the thought of oatmeal still repulses me, it has been beneficial in several ways. I feel full longer, my poops are better, and I’m actually getting up and eating breakfast. This is the base of what goes into every bowl. If I know I’ll be doing a lot of explosive physical activity, like working out, I’ll add sweetened yogurt for the extra energy boost of sugar (the probiotics are good too!). If I’m working a long shift or something that requires a long period of focus and alertness (also in another blog), I’ll add banana and have an egg on the side. I admit I do still add a teaspoon of brown sugar to it which is mostly for color. But it is becoming less and less as I’m working to phase added sugars out of my diet. Cinnamon has it’s own long list of health benefits and the ground clove? Well, I'm still not sure why I’m still adding that in.
I do have to say, in spite of all the good this new found dish is providing, it has not made me any less aggressive behind the wheel.
0 notes
Quote
hutchyb for Getty Images/iStockphoto
There’s a technique — even a flair — to freezing food successfully
My mother is what you might call a culinary cryogenicist. Long before the crew at the Noma Food Lab grew their first flavor spore, my mom was experimenting with the effects of age and temperature on all kinds of foodstuffs: the last two bites of some mac and cheese. Four shrimp. One-third of a pork chop. Three matzo balls. Half a bag of green beans tied shut with a trash bag twist-tie. An old joint. Eight slices of rye bread. Raisins. So. Much. Ham. And that’s just the first shelf of the freezer.
It was a talent she inherited. Her own mother was a master of the freezer arts, best exemplified by the very same “tray of frozen shrimp” offered to us on every grandparent visit for more than two decades; it became a running family joke. As a member of the next generation, however, my family’s faith in the preservation power of cold turned me into a devoted freezer snob. For most of my adult life, my freezer has remained a sacred space reserved for only the most cold-hardy ingredients — ice cream, popsicles, those giant cocktail ice spheres, and maybe the occasional box of toaster waffles or bag of frozen peas. Meat? God no. Fish? Please, back away and leave quietly.
In my mind, freezing things ruined their precious molecular integrity by turning them into rock-hard cubes. Meat is normally prized for its “freshness.” In the fields, crops are carefully covered to prevent freezing, so why put them under such duress in your own home? Having kids a few years ago loosened me up a bit — show me one child-rearing American household a without a frozen bag of dinosaur-shaped chicken blobs lurking somewhere. But overall, for the better part of the last decade, my freezer has remained as sleek and food-free as an after-hours Apple Store.
But when COVID-19 hit I admittedly went into full hoarder mode. My diet, like my fashion, is dictated by my mood (it’s also why I’m a chronic over-packer). With annual memberships to Instacart, Amazon Fresh, and a handful of specialty grocers down the street, I’d become accustomed to getting all the ingredients to sate any craving within an hour of it hitting. Maintaining that level of spontaneity in the time of supermarket lines and impossible delivery queues meant stocking up in ways I’d never fathomed before.
Even with a family of four eating three-plus meals a day, the kind of inventory I was sporting needed to be able to hang out a while. And so, it was with deep reservations that I finally began freezing things — though the real miracle didn’t occur until I began un-freezing them.
First I tried a pork tenderloin, one of three I had purchased at Costco a few weeks earlier. Following the advice of the pros, I took it out of the freezer and put it in my fridge overnight, cooked it as usual, and it was… fine. Good, even. Next I tried salmon — I’ve had terrible experiences with frozen seafood in the past, so my hopes were low for the three rosy-pink portions I defrosted and broiled. But again, the resulting fish was surprisingly moist, fatty, firm, delicious.
After that I started throwing everything in the freezer just to see: ground turkey, chicken thighs. All were fine. Then I moved into pizza dough, shredded cheese, blanched vegetables; then on to chili, tortillas, pancakes, whole loaves of bread, coffee (while dry coffee beans won’t technically “go bad,” their flavor and aroma suffer over time). Pretty much every single thing I froze — and later unfroze — emerged as relatively unharmed and tasty as the day I bought it. (Notable exceptions included skim milk and some poorly wrapped steaks, and it took some serious trial and error with fresh greens.)
Now, as we go into week five… or six? of “safer at home” measures, my freezer has transformed from a sterile ice-storage facility to a clutch partner in culinary crime. Today the once-barren shelves are buckling beneath the weight of dated and labeled baggies and bins with enough perfectly preserved food to more than bridge the gap between bi-weekly produce box deliveries and masked-up grocery runs.
But as it turns out, my mom and grandmother were, in fact, artists — there is a technique, even a flair to freezing food successfully. Wrap something improperly or defrost incorrectly and you might not just risk the integrity of your ingredients, but also your health. So after a month or so of embracing my familial fate and becoming a frozen food convert, here are a few lessons I’ve learned:
The Container Matters
I know, plastic is the enemy, but those fancy glass containers can crack in the freezer. According to the experts, the best way to freeze food is in a vacuum-seal bag that you suction yourself with one of those fancy machines to minimize air (air is your enemy in the great freezer wars). I don’t have one of those — though I’ve been eyeing this one on Amazon — so I use regular old freezer-grade zipper bags and press out as much air as possible before sealing. There’s also a trick where you mimic a vacuum sealer with a drinking straw, slipping it in the corner of the bag and sucking out as much air as you can before pulling the straw out at the last minute, but I felt weird inhaling all those funky meat fumes. My Instagram feed has been full of ads for these pricey silicone bags that I hear work well but I’ve yet to give them a test run.
Either way, you’re going for minimal air exposure and some thickness barrier — a little cushion between your food and the freezer air will help prevent that dreaded freezer burn, a damaging mix of oxidation and dehydration.
Prep Is Key
For meat and fish, you generally want to remove them from their original packaging and re-wrap in individual portions before freezing. Wrapping each cut in an extra layer of plastic before putting them in the zipper bag adds another degree of protection. Timing is key here. Freeze cuts of meat immediately after you get them home, or better yet, buy them pre-frozen. There are entire industries built around freezing fish in a way that sacrifices the least in the way of flavor and texture, so trust the pros — they know what they’re doing.
Vegetables, for the most part, should be quickly blanched before freezing. The drag here is that in the process of blanching, they absorb too much water to get any sort of good roasty char later, but it’s a small price to pay for having quality seasonal produce year-round. Before you blanch, prep the ingredients the way you plan to eat them, meaning separating broccoli and cauliflower into florets, snapping the ends off green beans, and chopping greens. Then boil a big pot of water and dunk the vegetables in for about a minute before plunging immediately into a big bowl of icy water. This will keep them from continuing to cook and turning to mush. The next part is key: Dry everything as best you can. The more water, the thicker the tectonic ice coating you’ll get on every piece. Then put everything into baggies and freeze.
Fruit freezing techniques vary — it all depends what you want to use them for. No amount of freezer skill will recreate the experience of biting into a fresh peach after it’s been frozen. But for smoothies, pie fillings, baking, or juice, most fruit will freeze just fine. Bananas freeze great, peel and all. Berries you’ll want to rinse, dry, then let freeze on a large flat surface like a cookie sheet before transferring to bags. If you want to use citrus just for zest or juice, go ahead and freeze them whole. They say you can freeze citrus in wedges individually, but I found the texture suffers greatly after defrosting, and honestly I can’t imagine what you’d want to use floppy, deflated tangerine wedges for. Juice is no problem — just squeeze, put the juice into an ice cube mold and freeze. You can pop them out later and transfer to a plastic bag for easier storage.
The above ice-cube tray technique works well for all kinds of liquids and purees. I actually bought these cool molds to freeze baby food for my second kid, and I use them now for smaller portions of stocks, lemon juice, pesto, pizza sauce. For larger batches, I pour a couple of cups into a zipper bag, get out as much air as possible, and freeze them flat so I can stack them later.
Breads freeze fantastically, but as a rule pre-sliced is best. I started buying giant loaves of my favorite rye bread from the farmers market and keep them in the freezer full-time, toasting off individual slices as needed; my mom perfected a technique with bagels that involves slicing them as soon as you get them home, wrapping each half separately, and then toasting them direct from the freezer. Pre-cooked tortillas and pita you can just wrap, freeze, and cook off one by one, but my most exciting recent discovery has been in the realm of pre-baked goods. It turns out most doughs recover well after freezing, and I just made a batch of biscuits using this technique that has you freezing the raw, cut biscuits ahead of time and baking them off as needed. It’s opened up a whole new world of frozen pastry projects for me.
I’m sure there’s some technique to freezing cheese but honestly I just put whole hunks and bags of the pre-shredded stuff straight into the freezer. I don’t really freeze milk but the wisdom is that the more fat content, the better it freezes, so half-and-half freezes great, skim milk not so much. Coffee I found out you can freeze and brew straight from frozen, which is excellent considering it is an absolute nonnegotiable in my house.
*If you’re curious about any other ingredient, there are countless guides to freezing food online that will steer you in the right direction.
Don’t Rush the Defrost
(Even Though Sometimes I Do, But It’s Really Risky, Okay?)
The basic rule of thumb for pretty much everything is low and slow. Put whatever you want to defrost in the refrigerator the night before you want to cook it — sometimes longer for big cuts of meat — and let it come to temperature gradually. I do this... most times. But there is a reason your microwave has a “defrost” setting, and it will definitely speed things along if also putting you at risk of prematurely cooking the edges of your chicken breast. I’ve successfully defrosted smaller cuts of fish and shrimp by running the bags under cold water in the sink for a few minutes until soft enough to handle, but this is not officially endorsed by the pros. What you’re definitely not supposed to do is let your ingredients hang out at room temp until they defrost. I have done this too, though it is a surefire recipe for a bacterial infection and this is not the time you want to be running to the ER for dehydration.
The point is, the freezer might be cold and dark, but it is not at all a thing to fear. Utilizing it well has helped me maintain the kind of spur-of-the-moment cooking style that feels normal to me — a valuable thing when pretty much everything else about my life right now does not feel normal. Now all I need is a bigger freezer.
from Eater - All https://ift.tt/3ctLE4P
http://easyfoodnetwork.blogspot.com/2020/04/how-i-learned-to-stop-worrying-and-love.html
0 notes
Last Seen Blogs

akanetto
The Lightbringer

21-twenty-one-21
Diary of a free spirit.

quadrantmodelquotes
Quadrant Model Quotes from 2013 Lectures

karenfordonte
Caring For Donte

caminhos-proibidos
Inferno Particular